Tag: photography

Travel Portrait Photography Tips

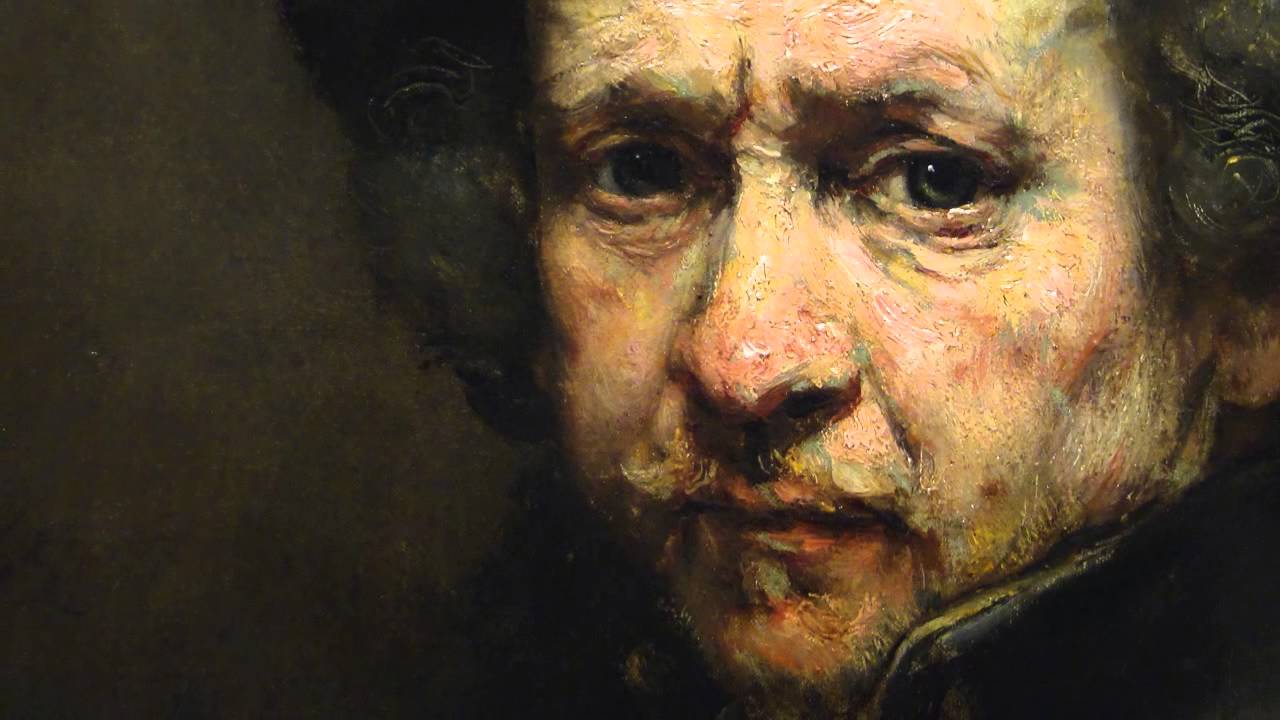
A great image tells a story. A great portrait can be one of the best story telling images you can take. We’ve all seen Steve McCurry’s “Afghan Girl“. What makes this image stand above the rest? I’ve broken down the key elements to creating a strong travel portrait, outlined below.

indian-1119236_1920

Do Some Research

Look at other travel photographer’s works and how they shoot portraits. This will give you an idea of how to compose the image, options for lenses and other gear, and how to look for the emotion. There is usually a fun story to go along about how the picture came to be. Make an inspiration board, whether at home or on Pinterest. Pull images you feel encompasses emotion, technical skill, and a story. Isolate the key elements to each and incorporate them when you shoot. This is especially helpful when traveling to a new place. You can simultaneously research portraiture and examples from this place.
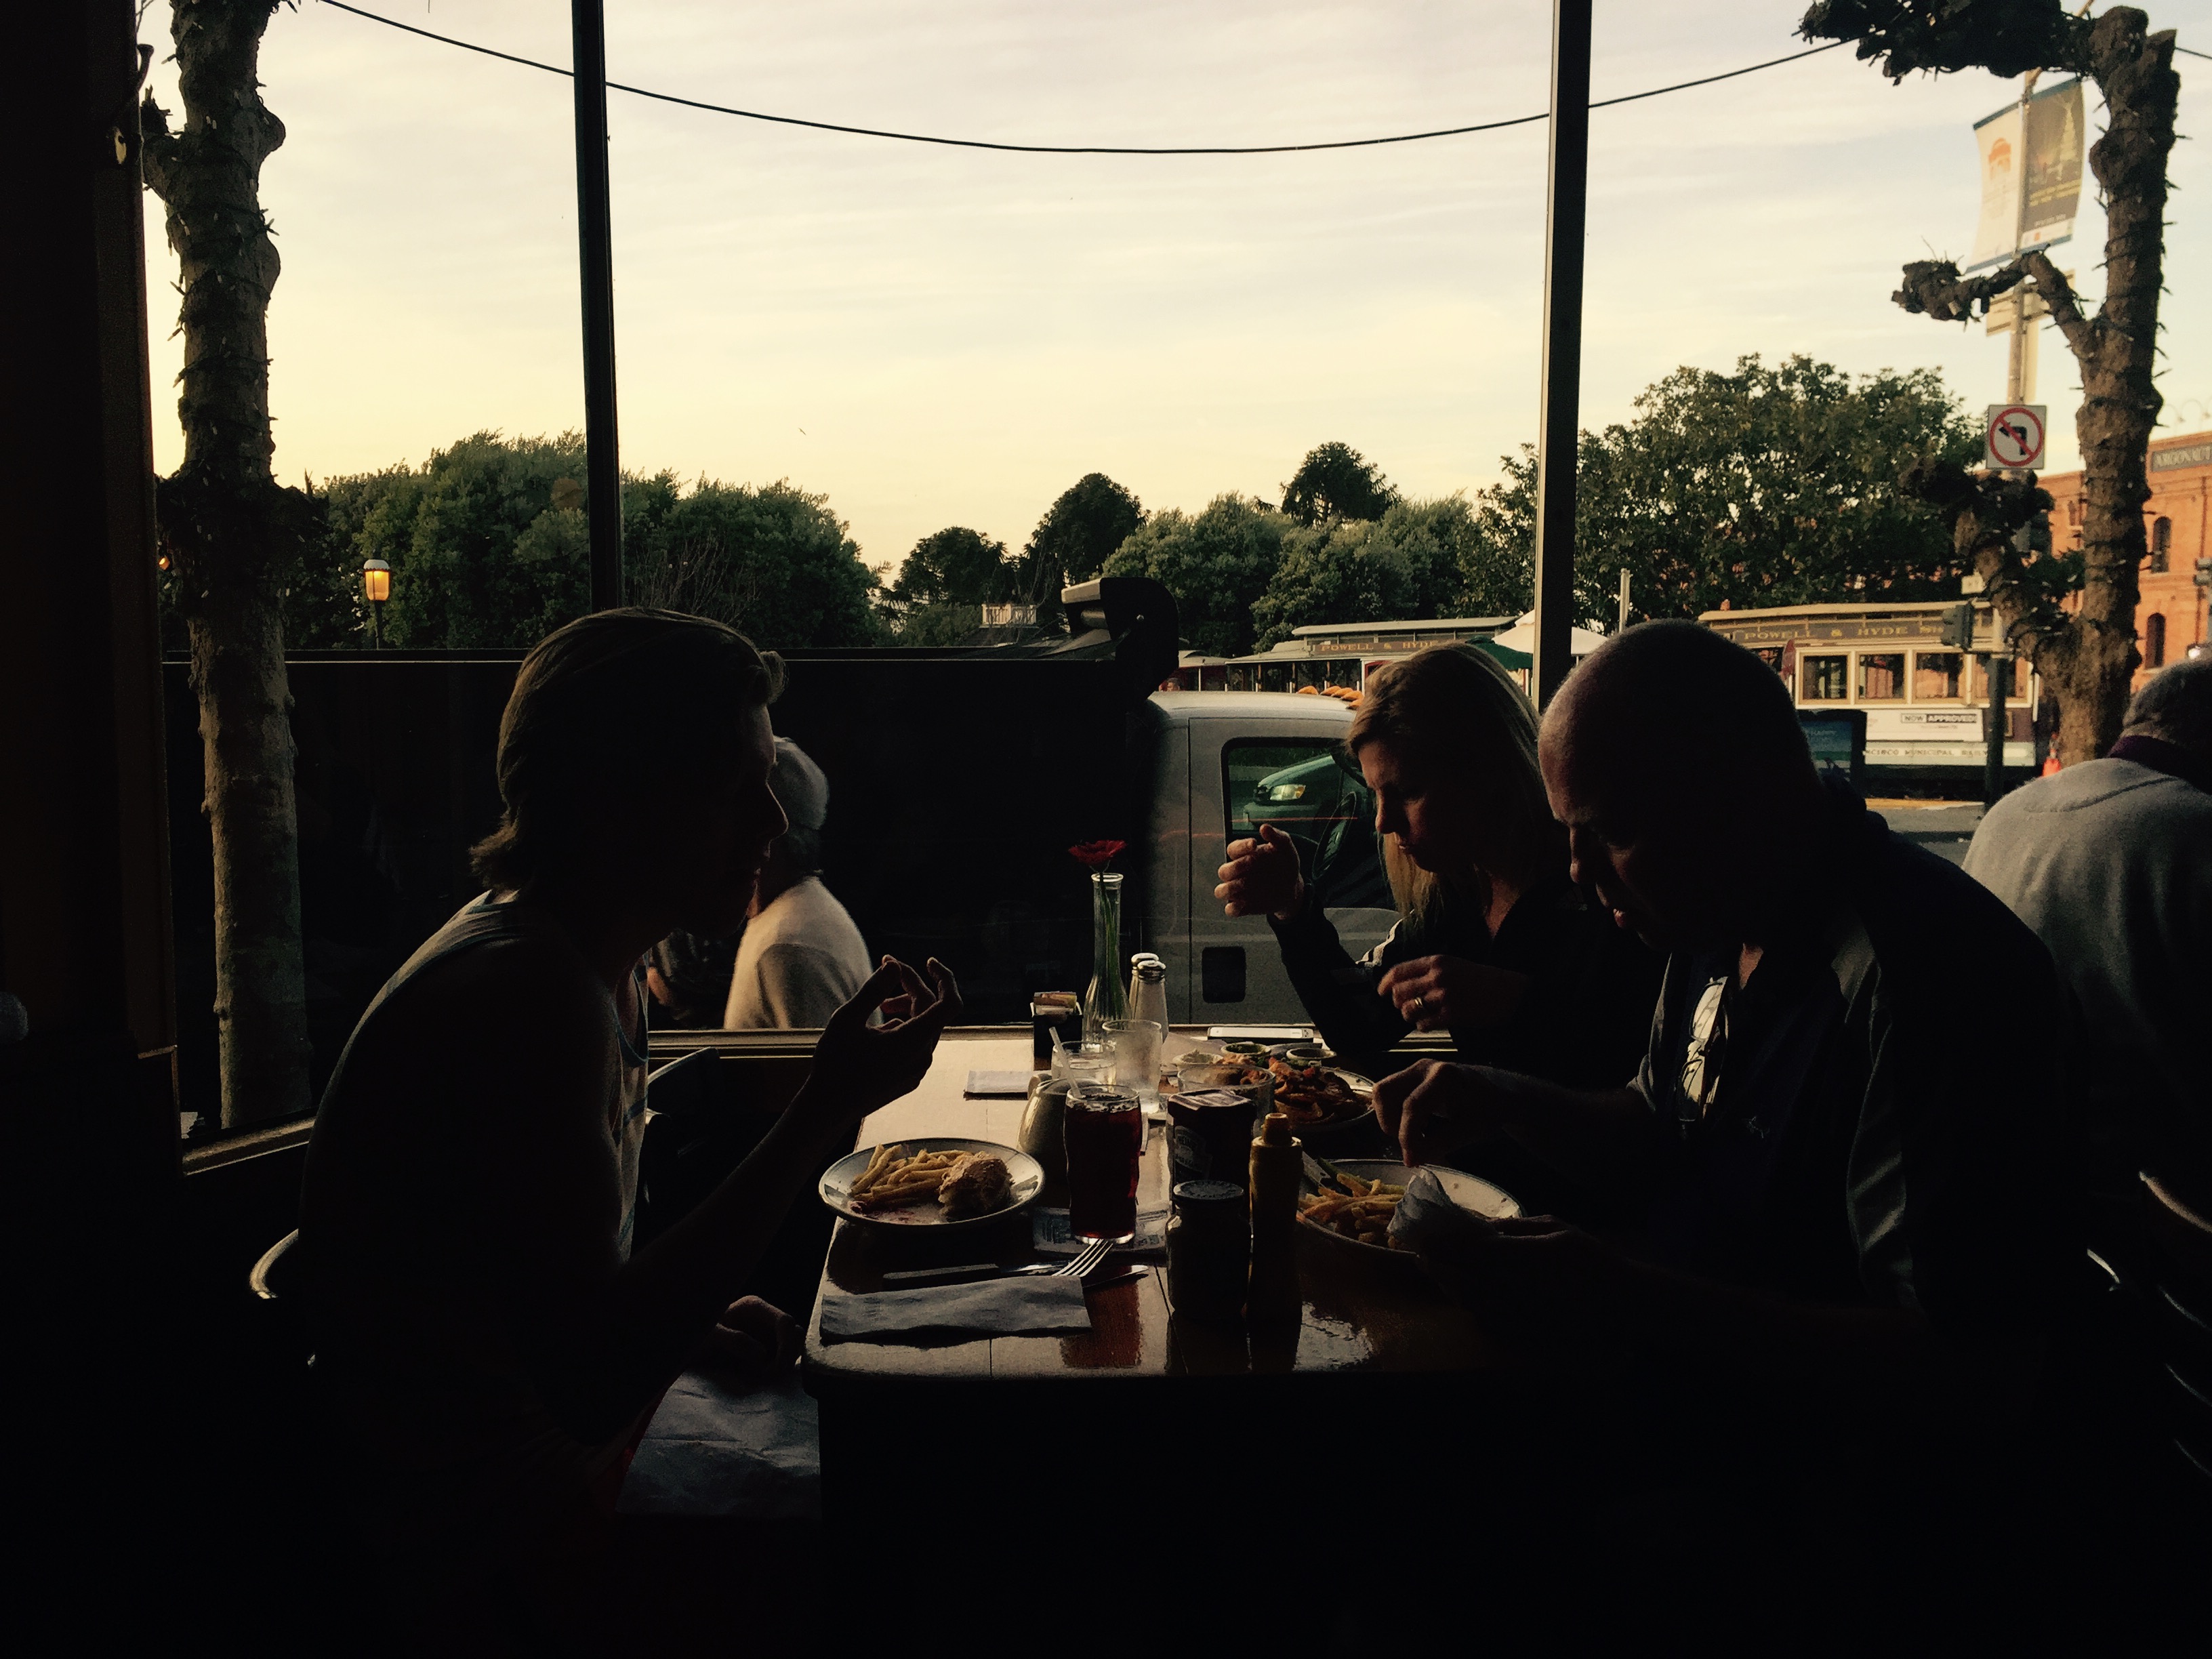
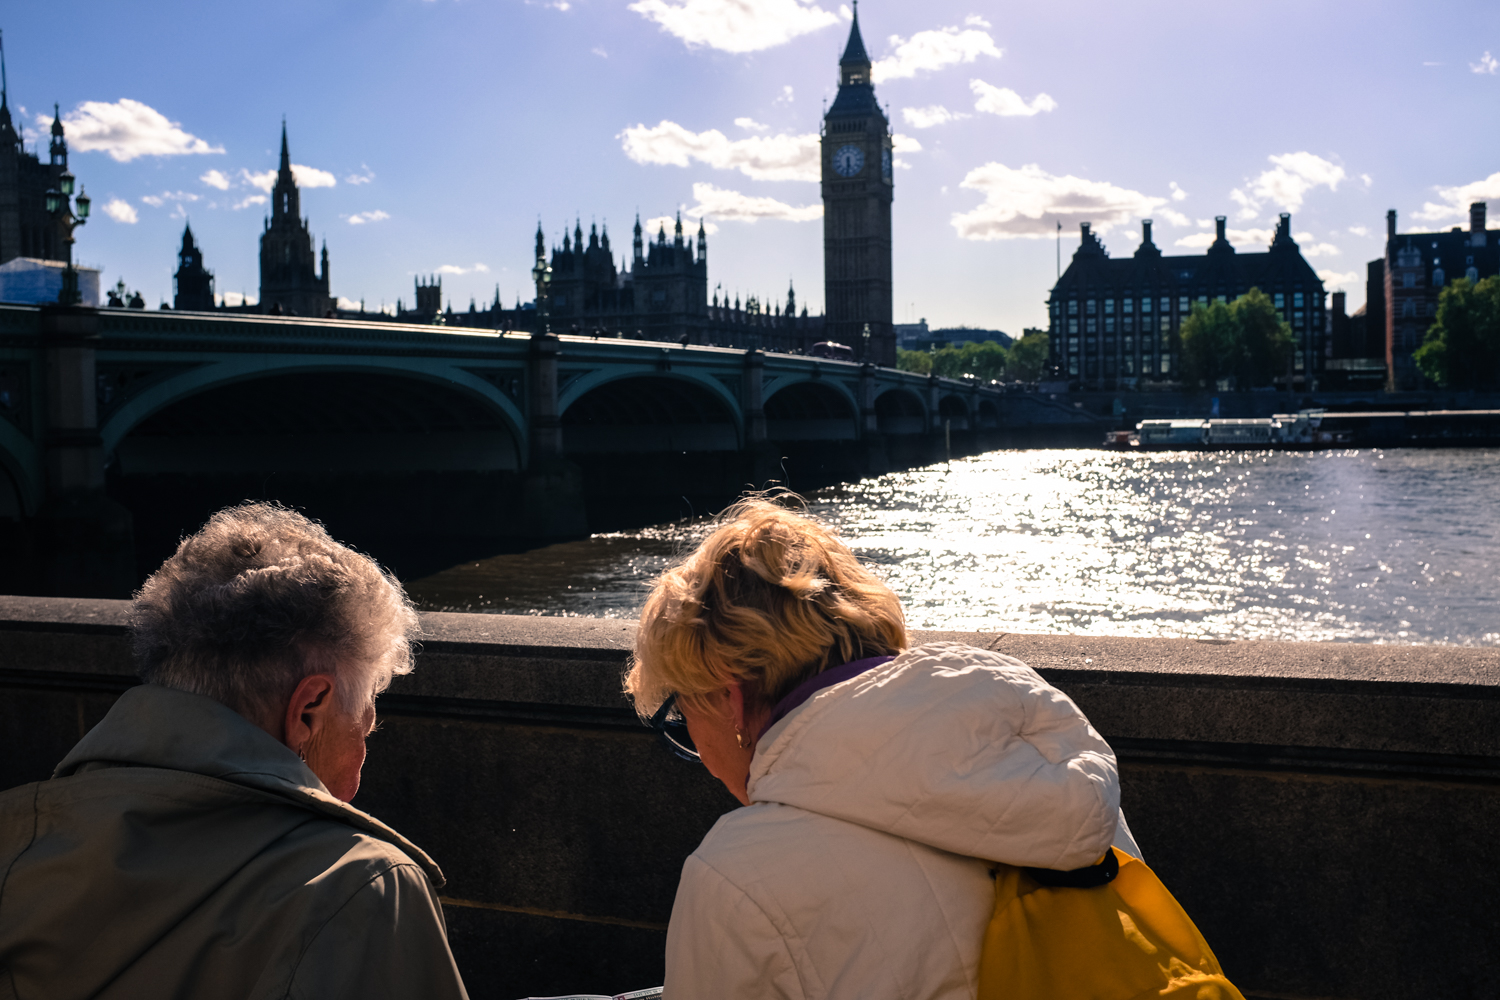
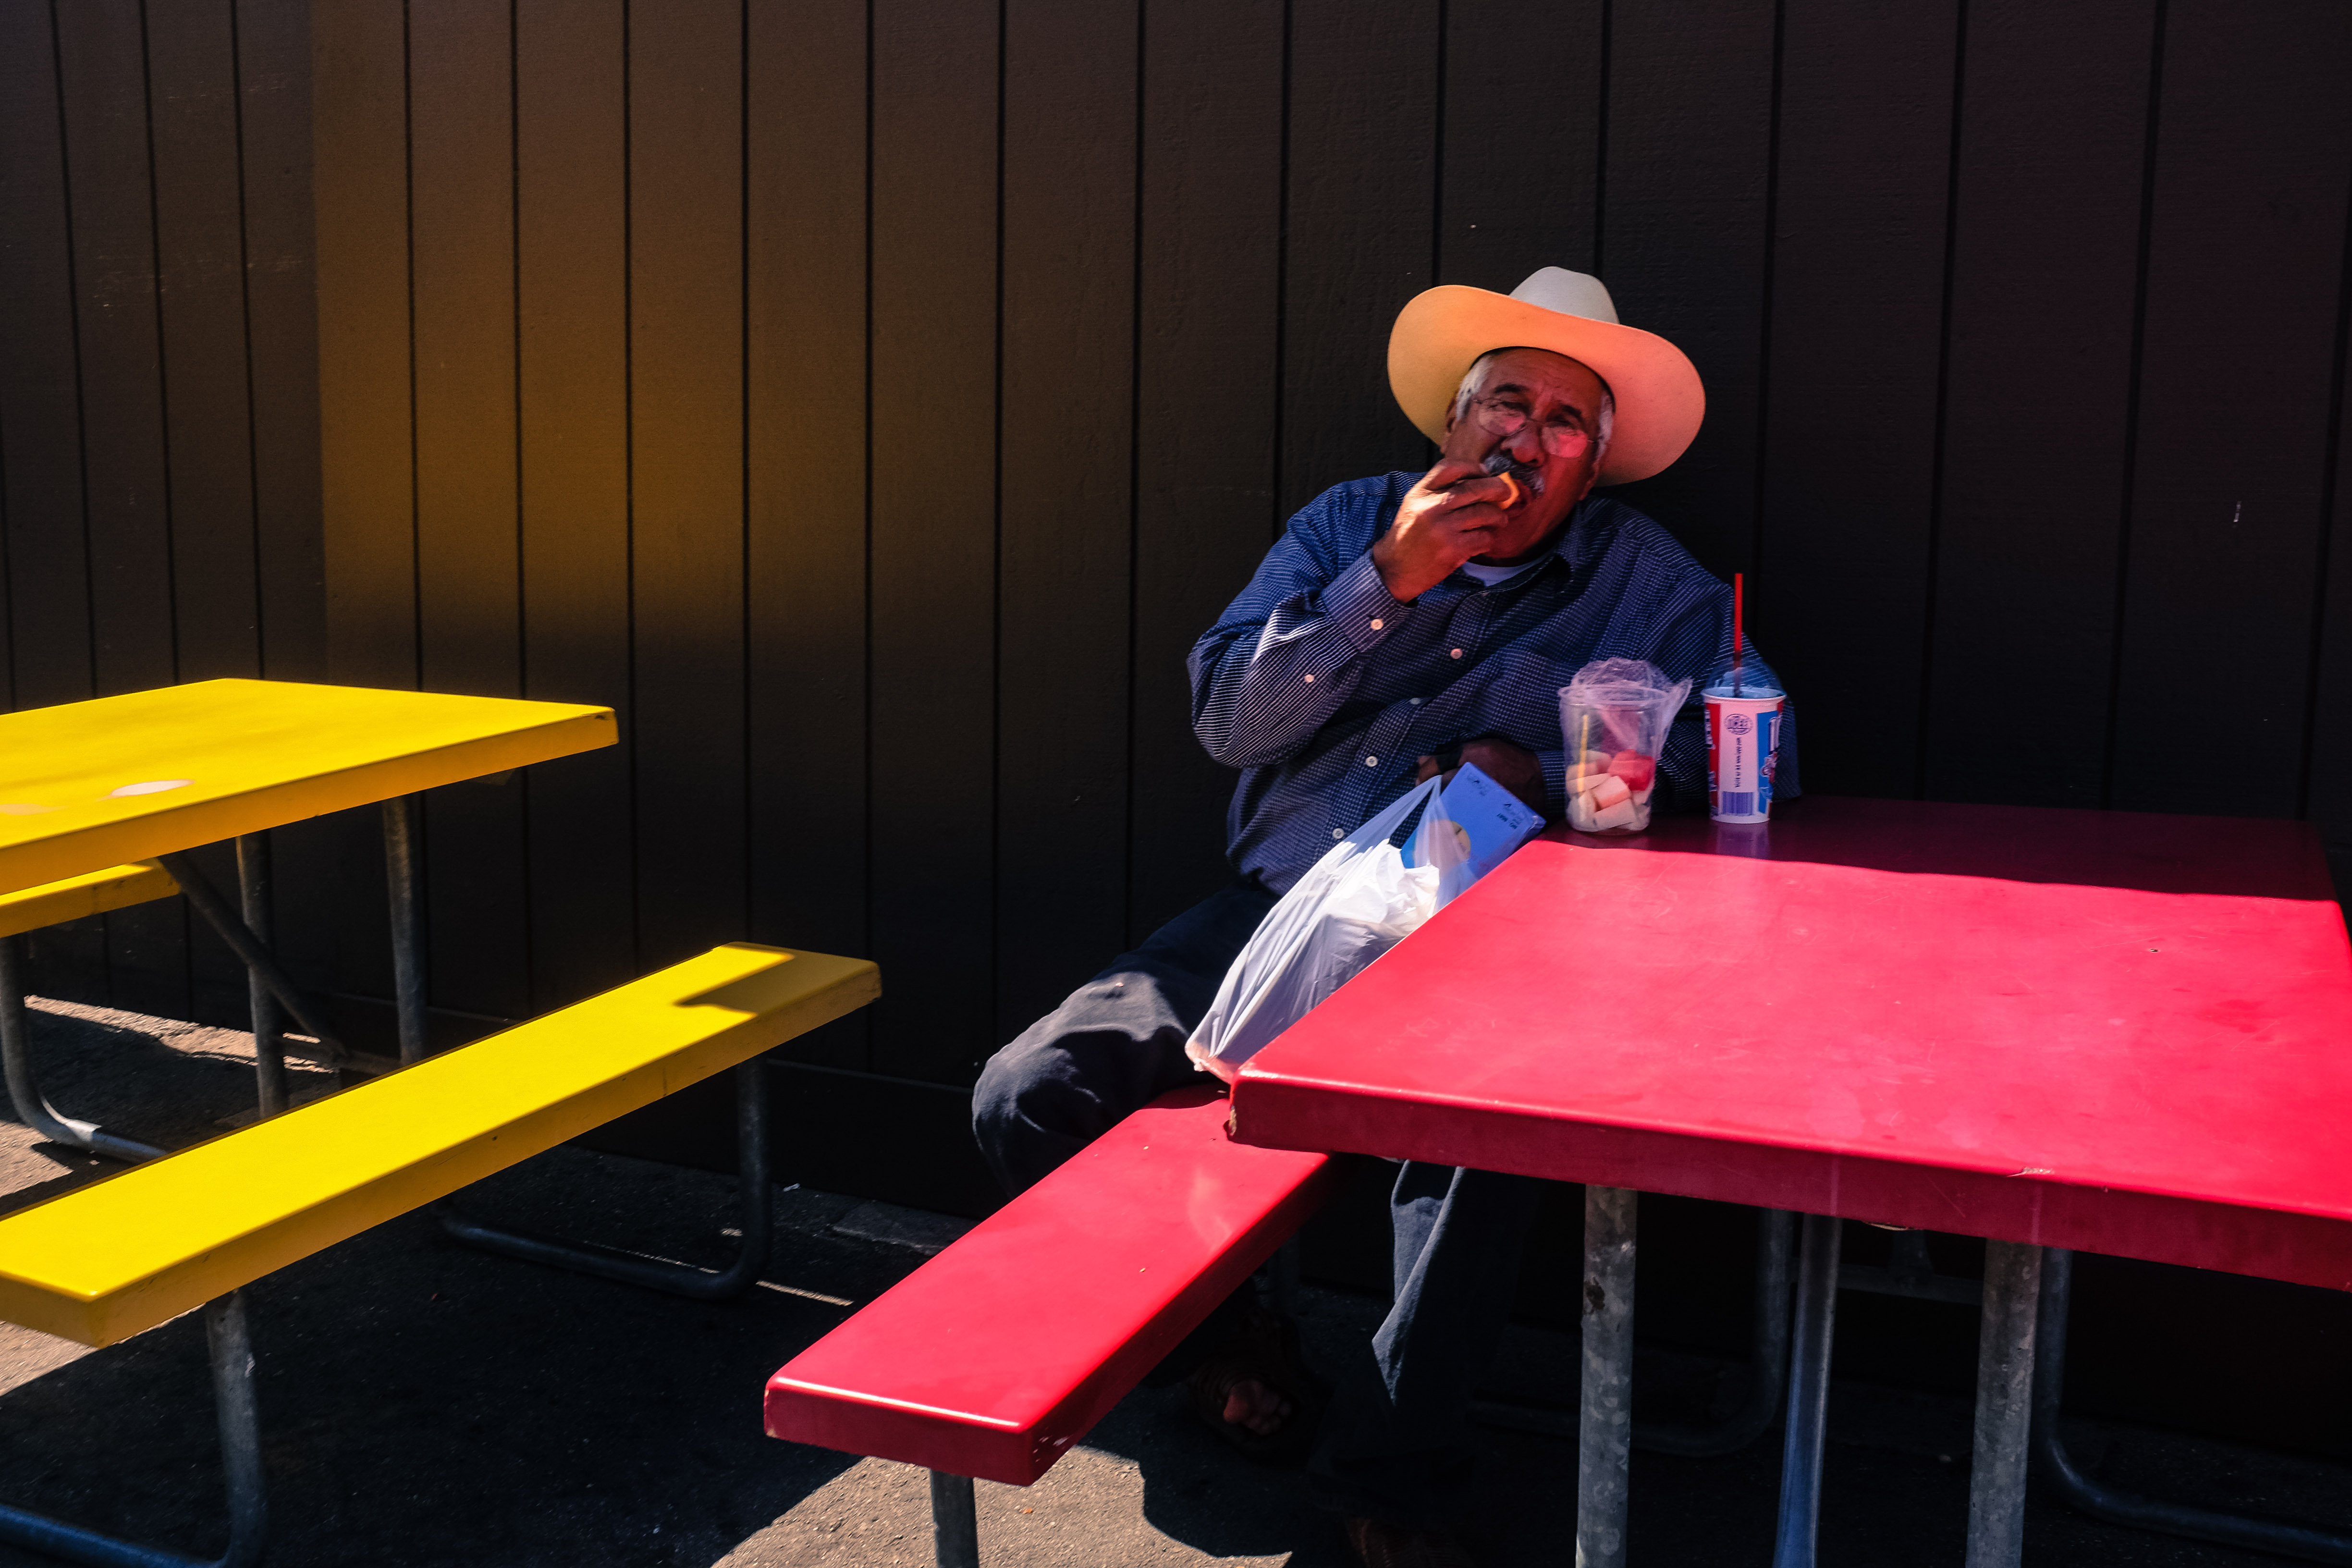
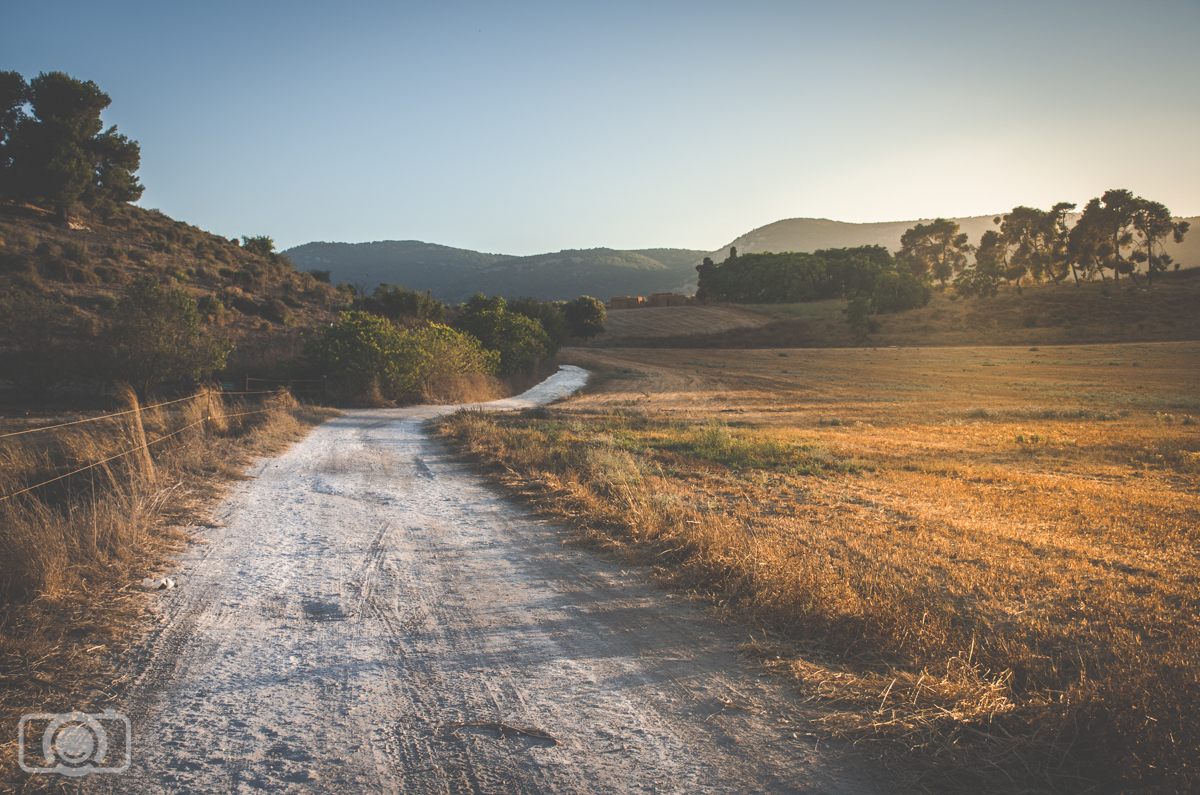
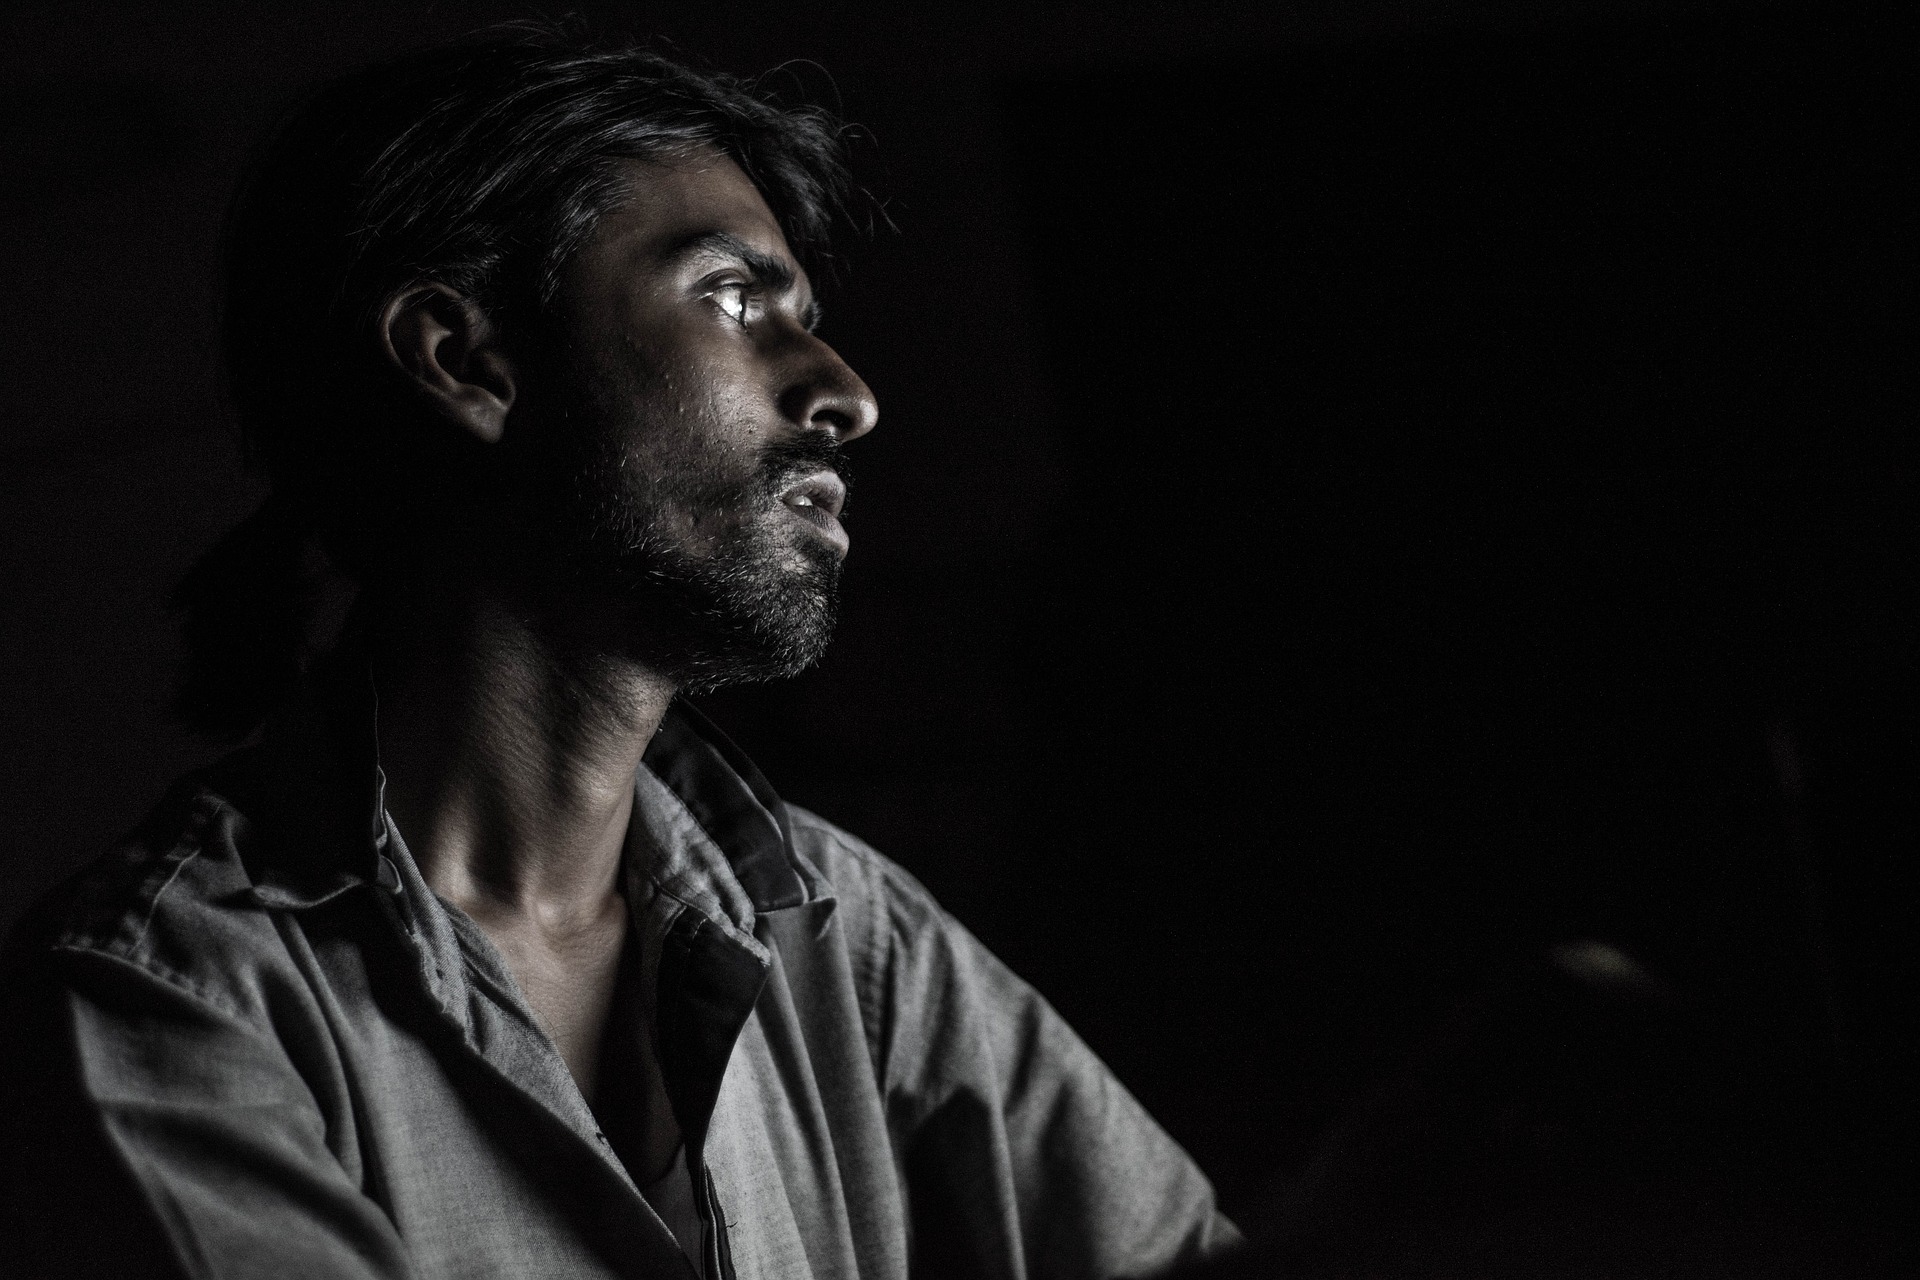
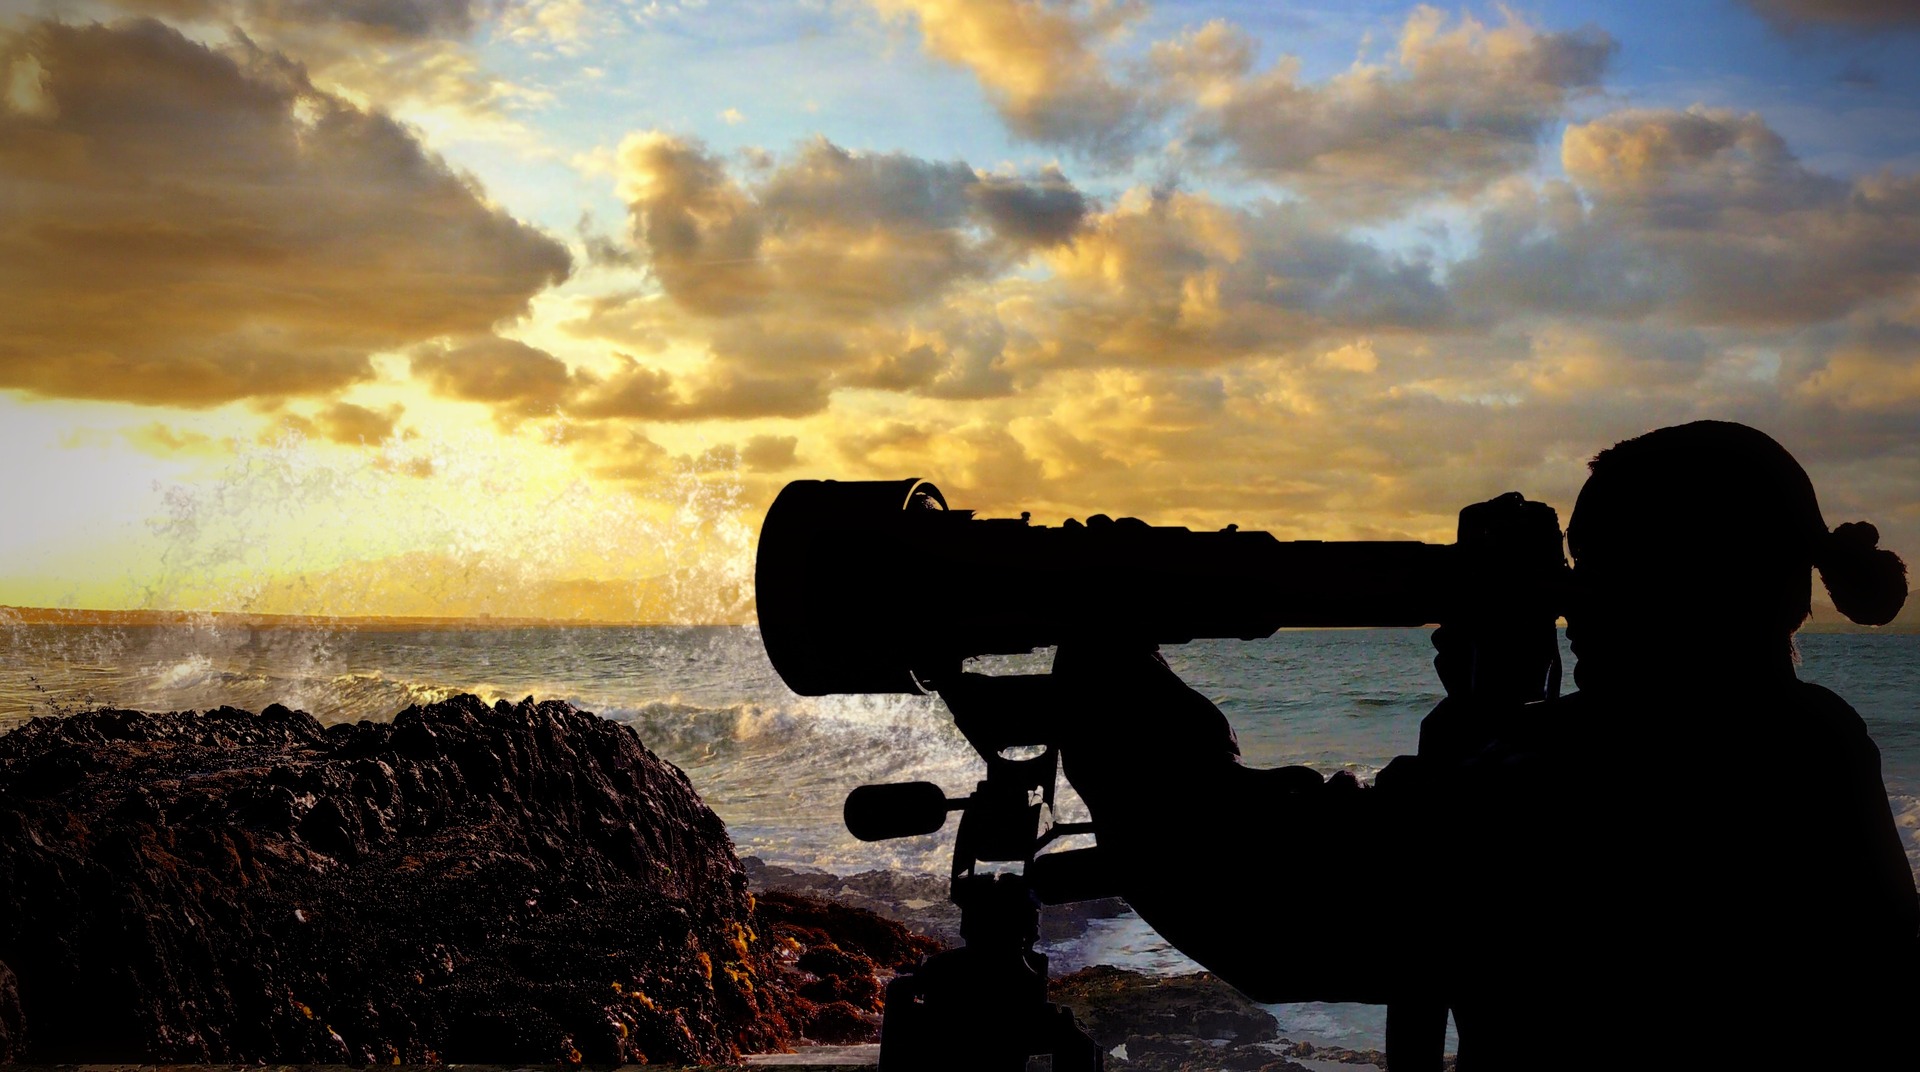
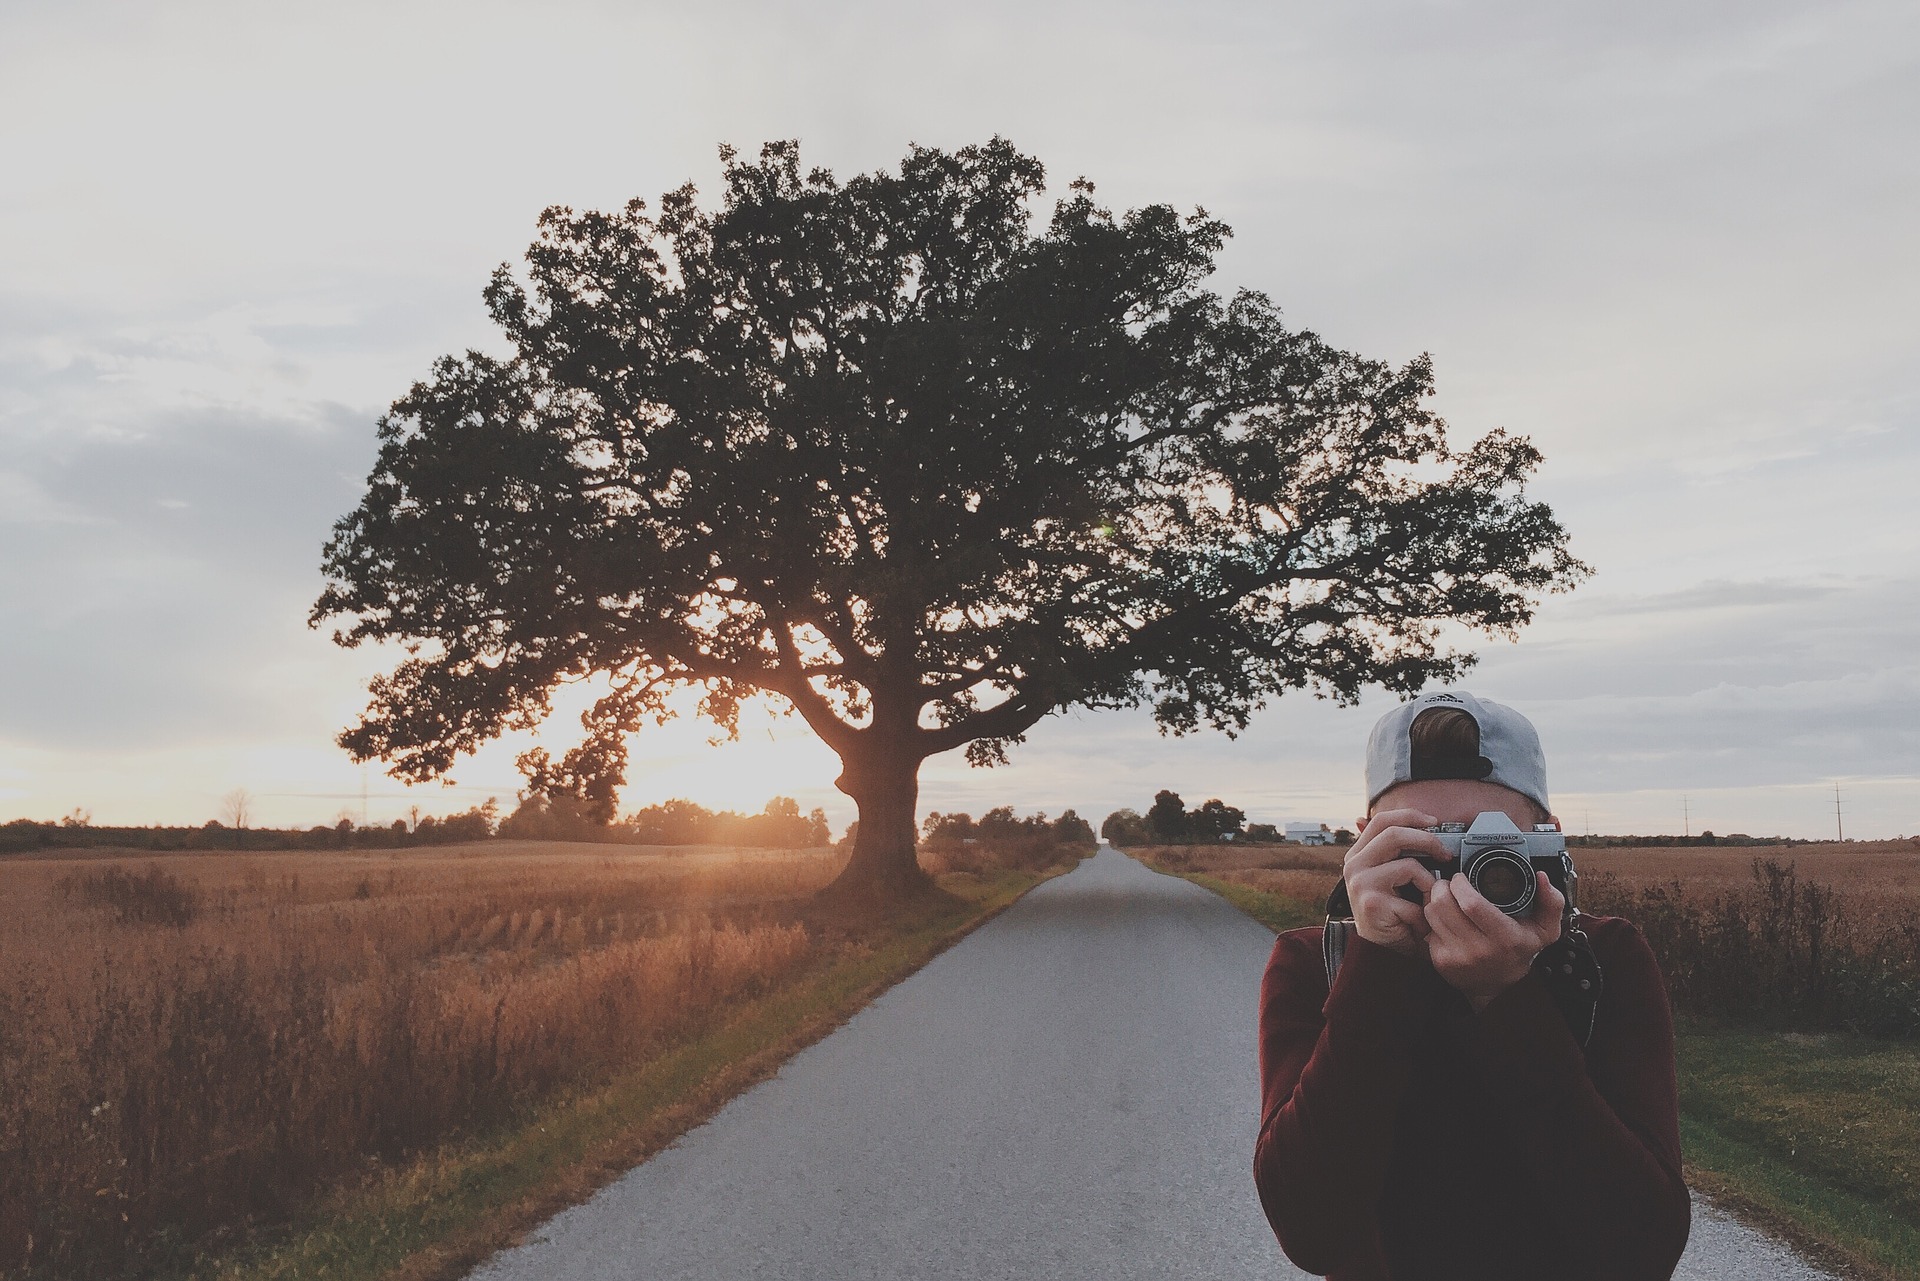
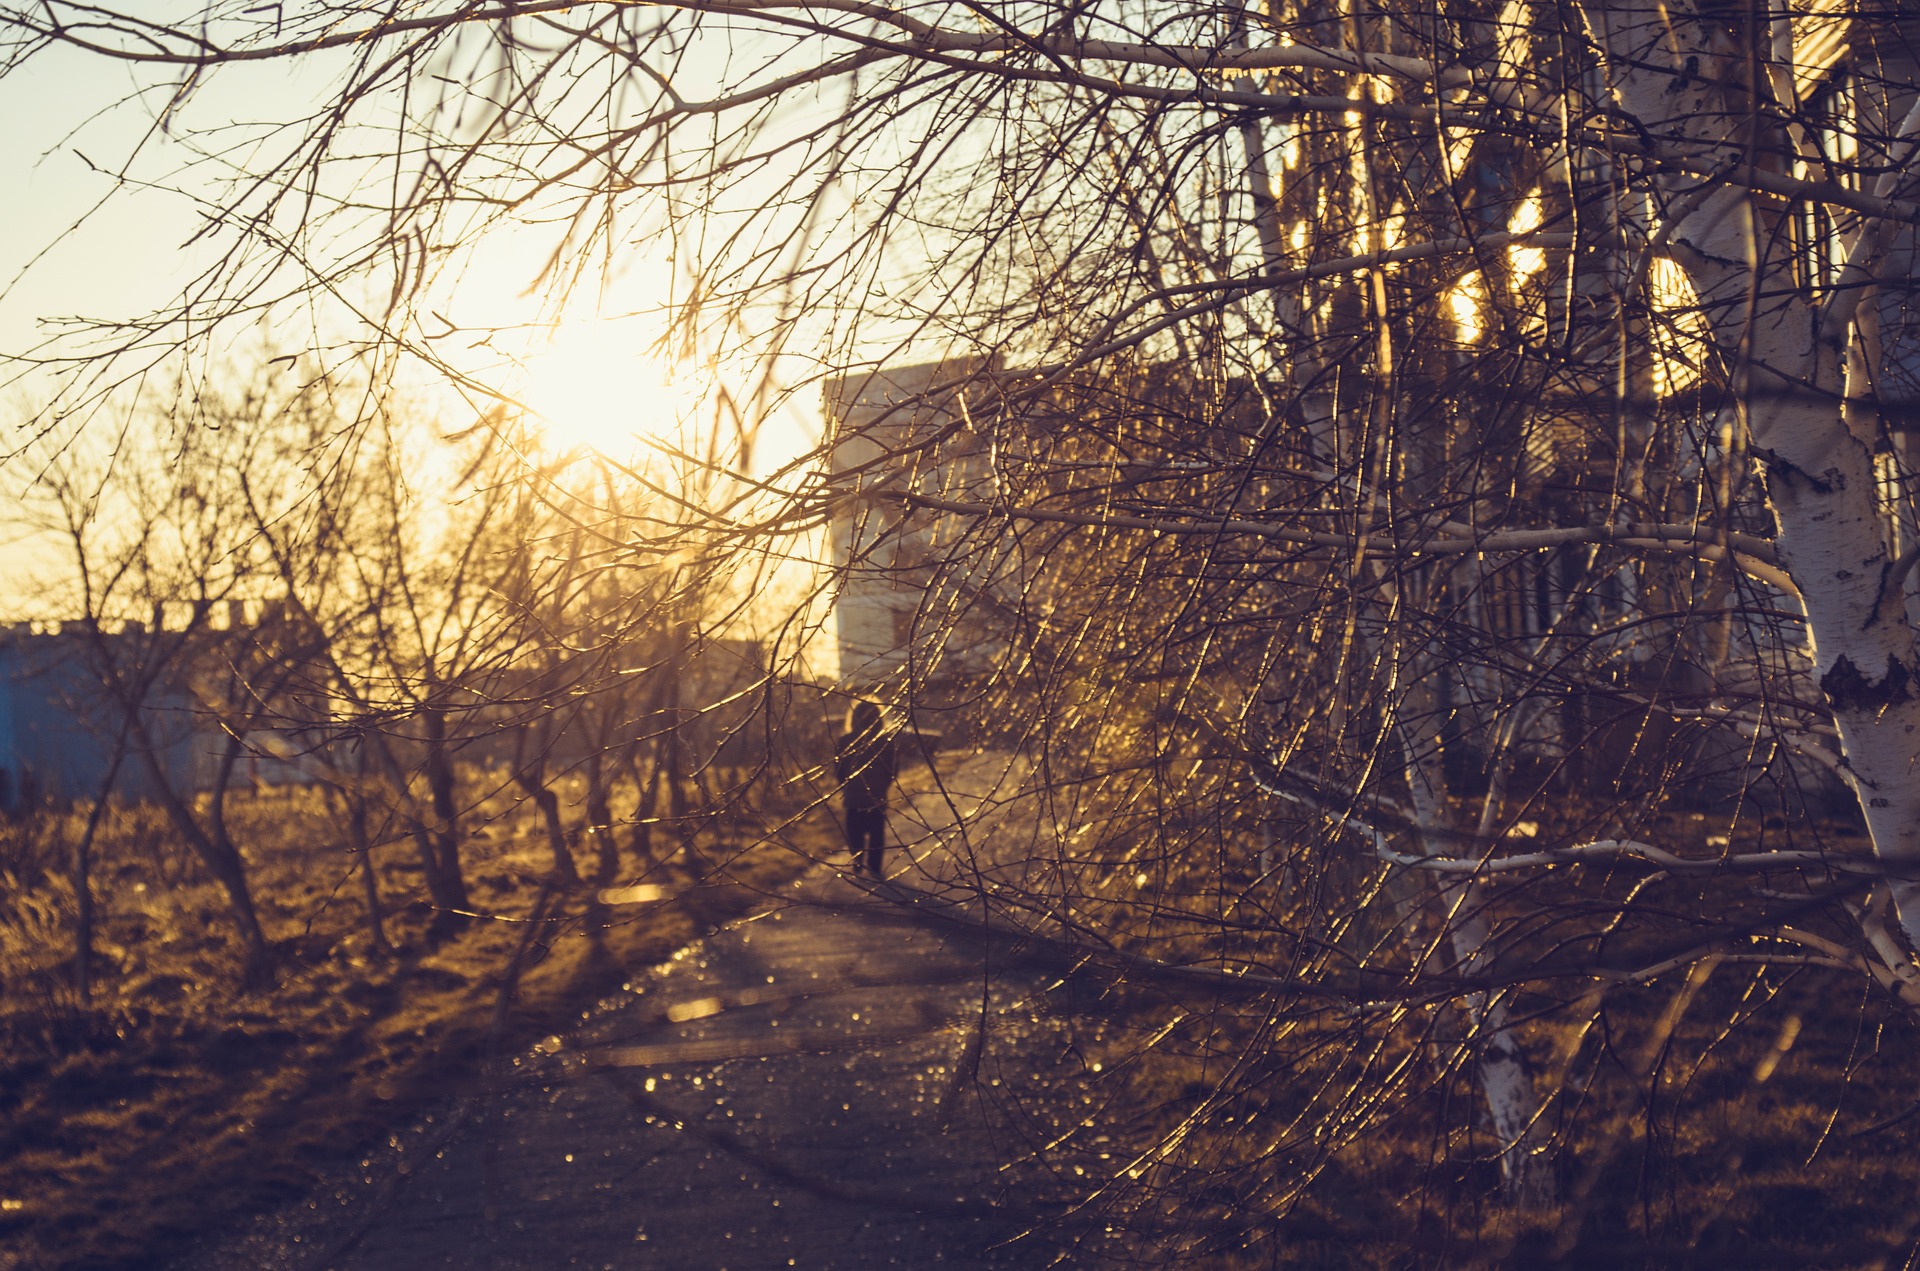
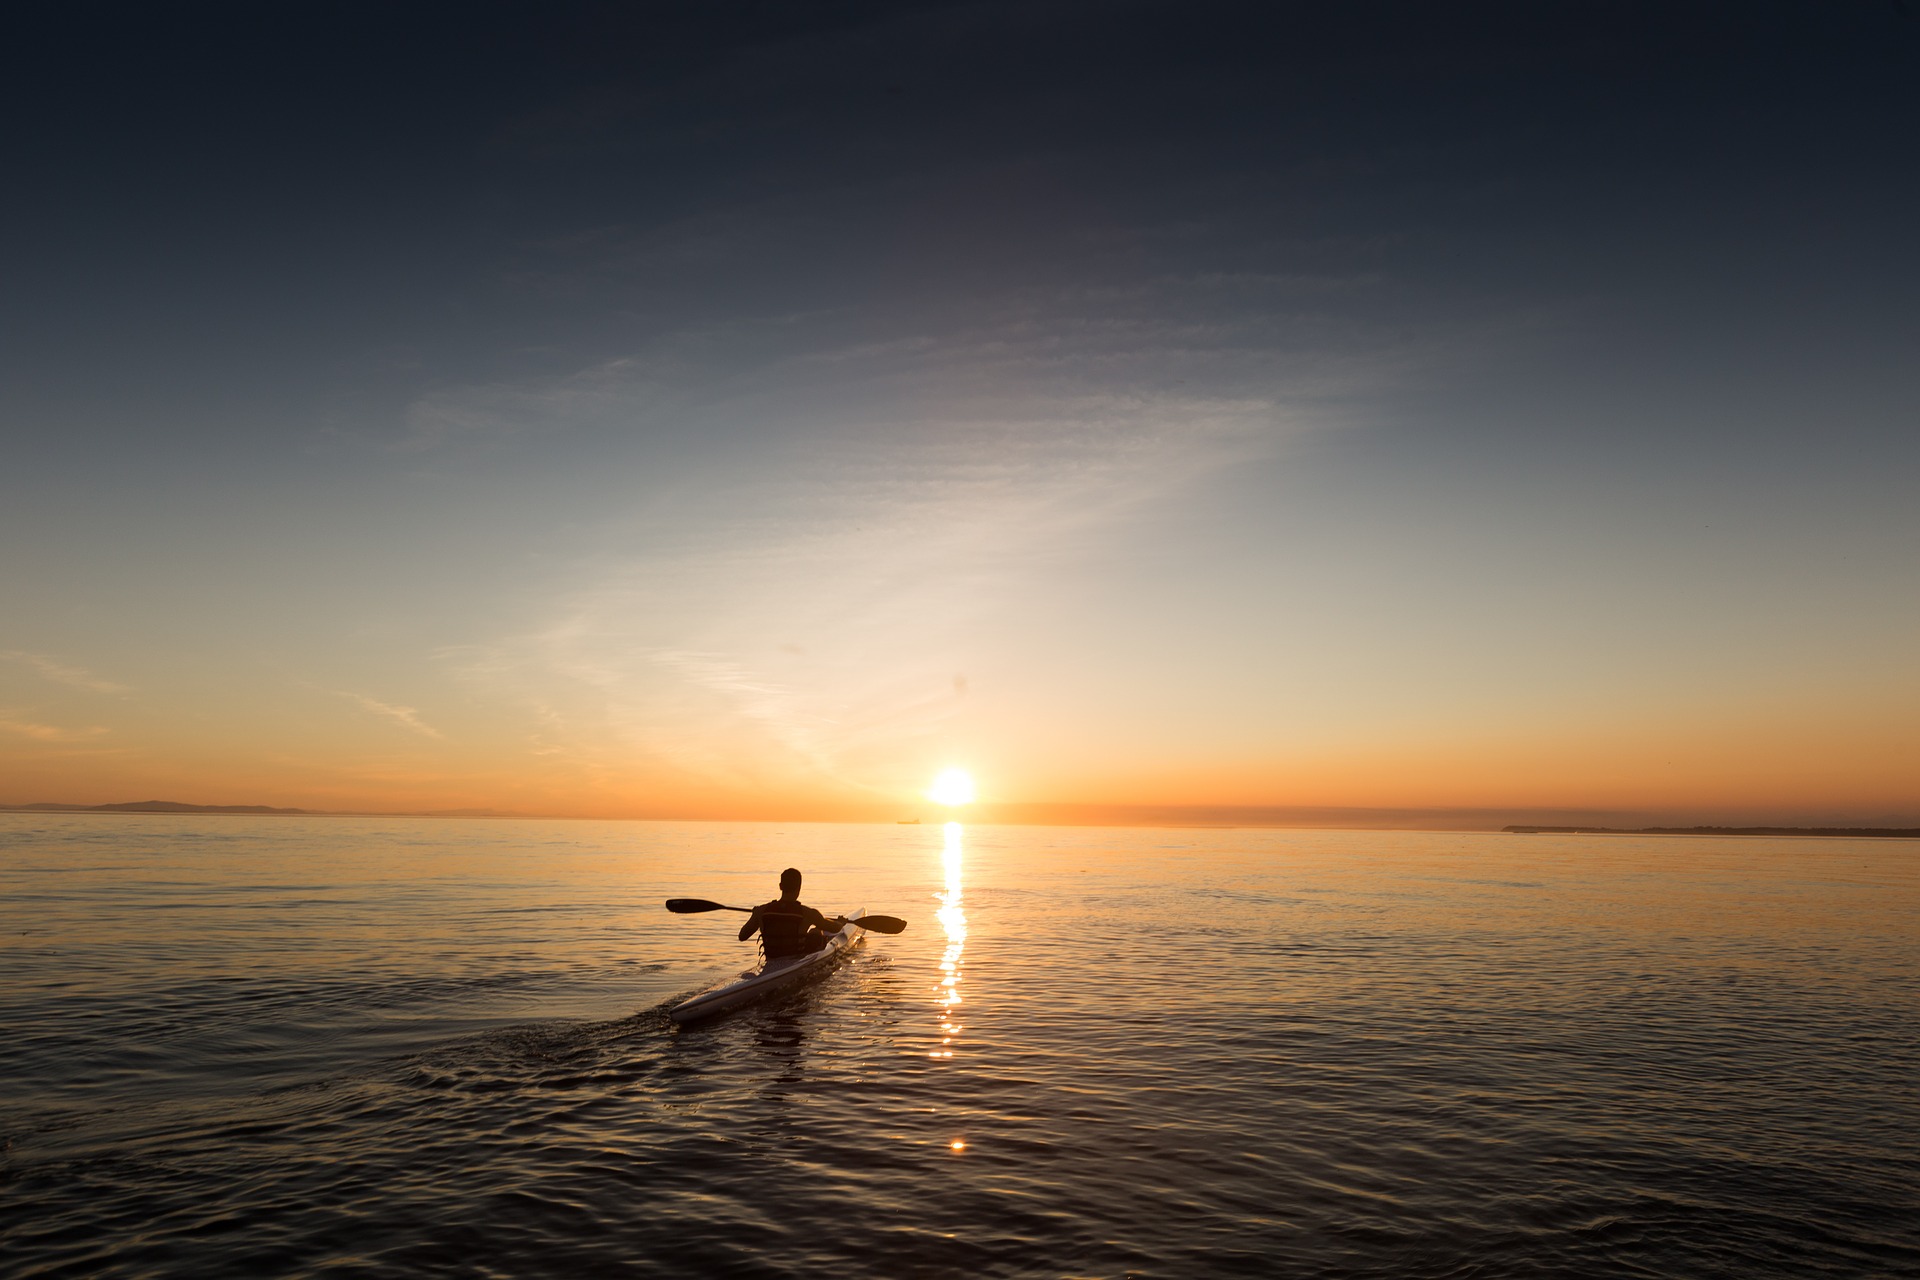
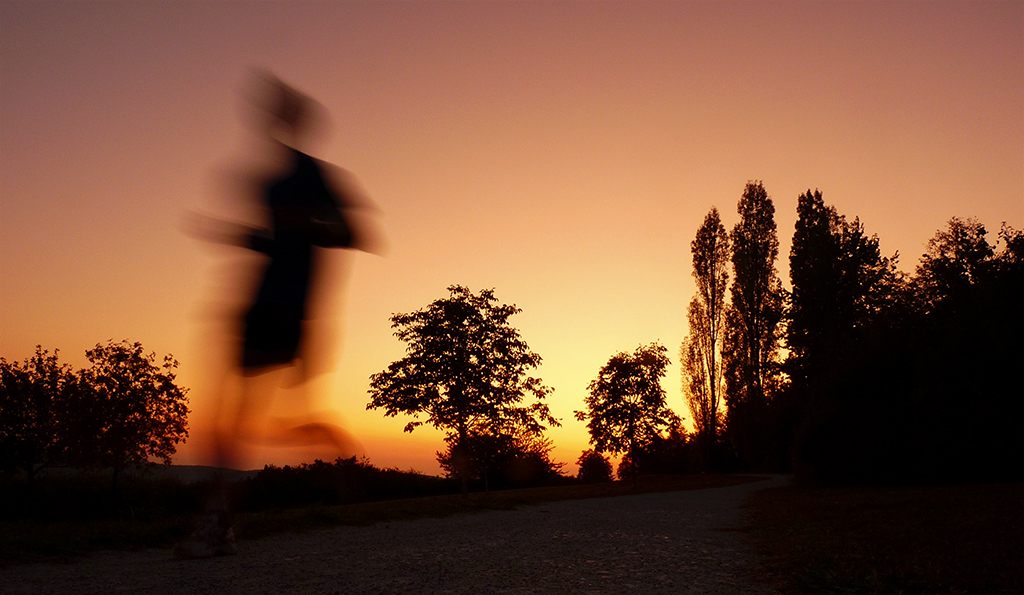
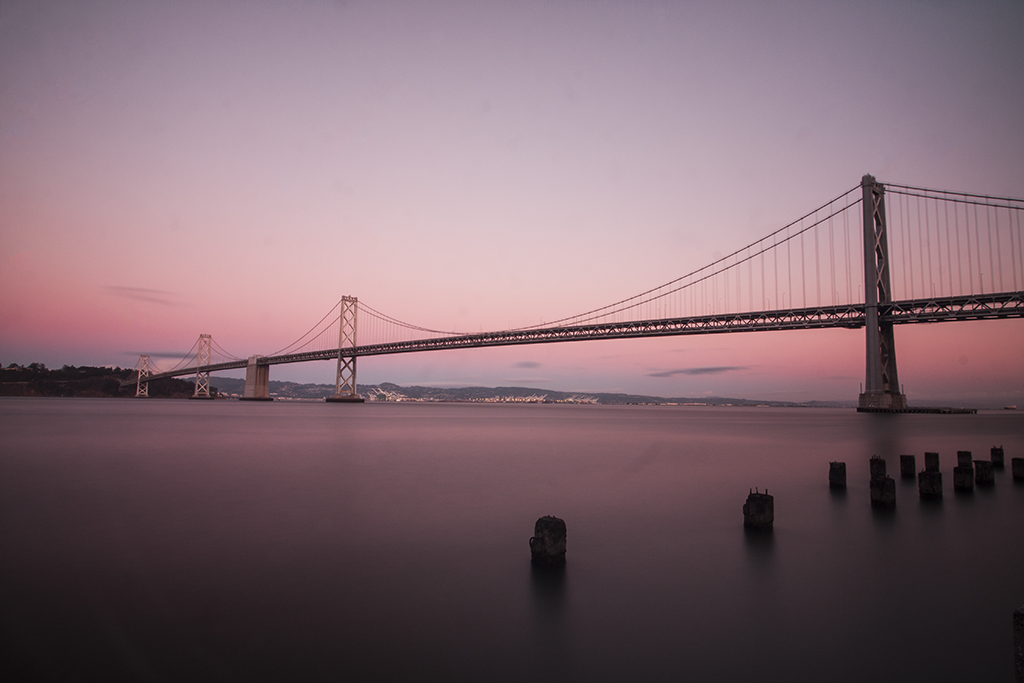
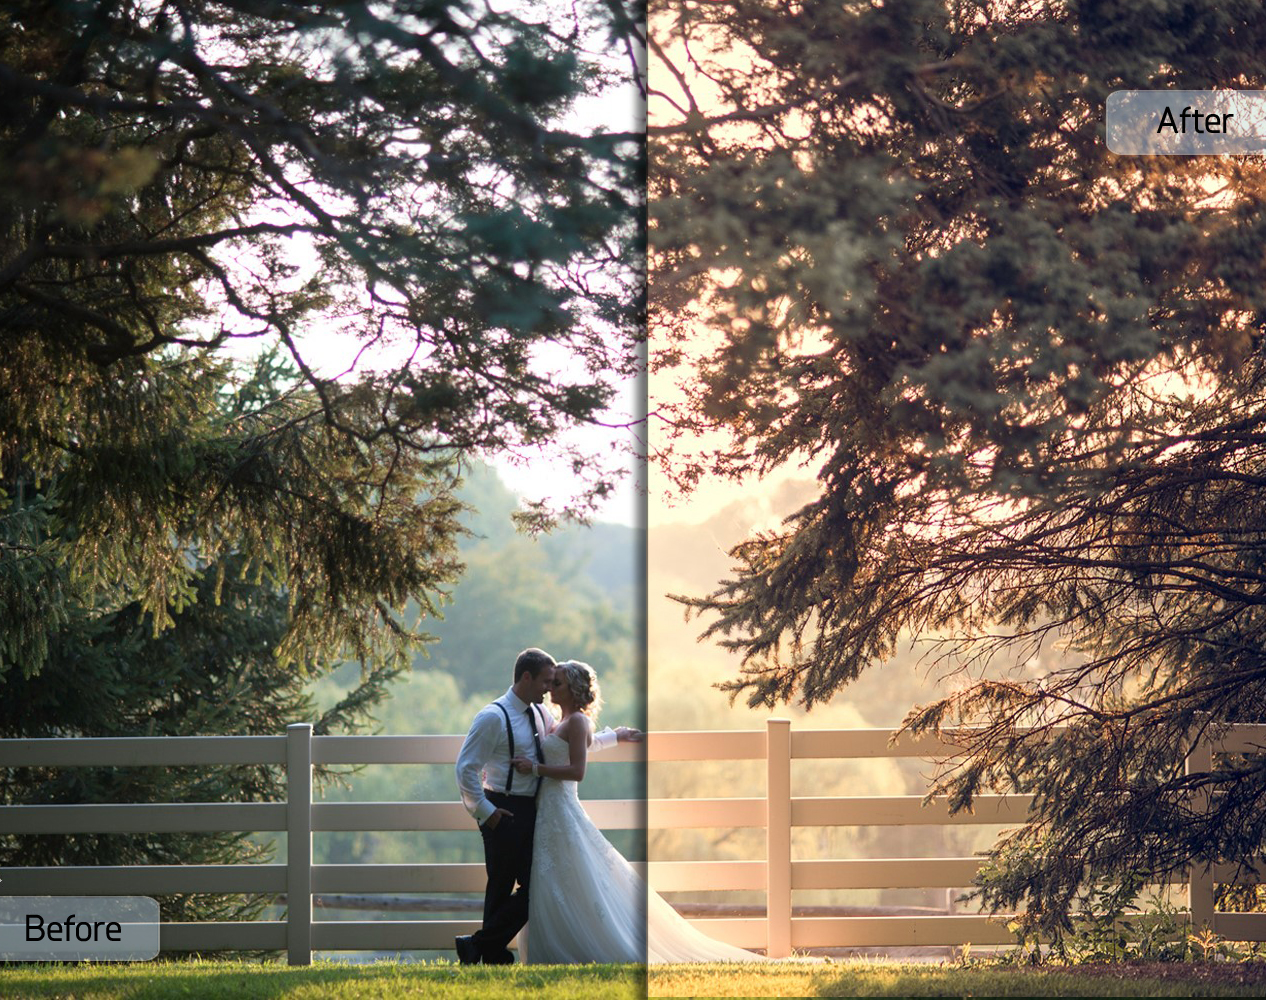
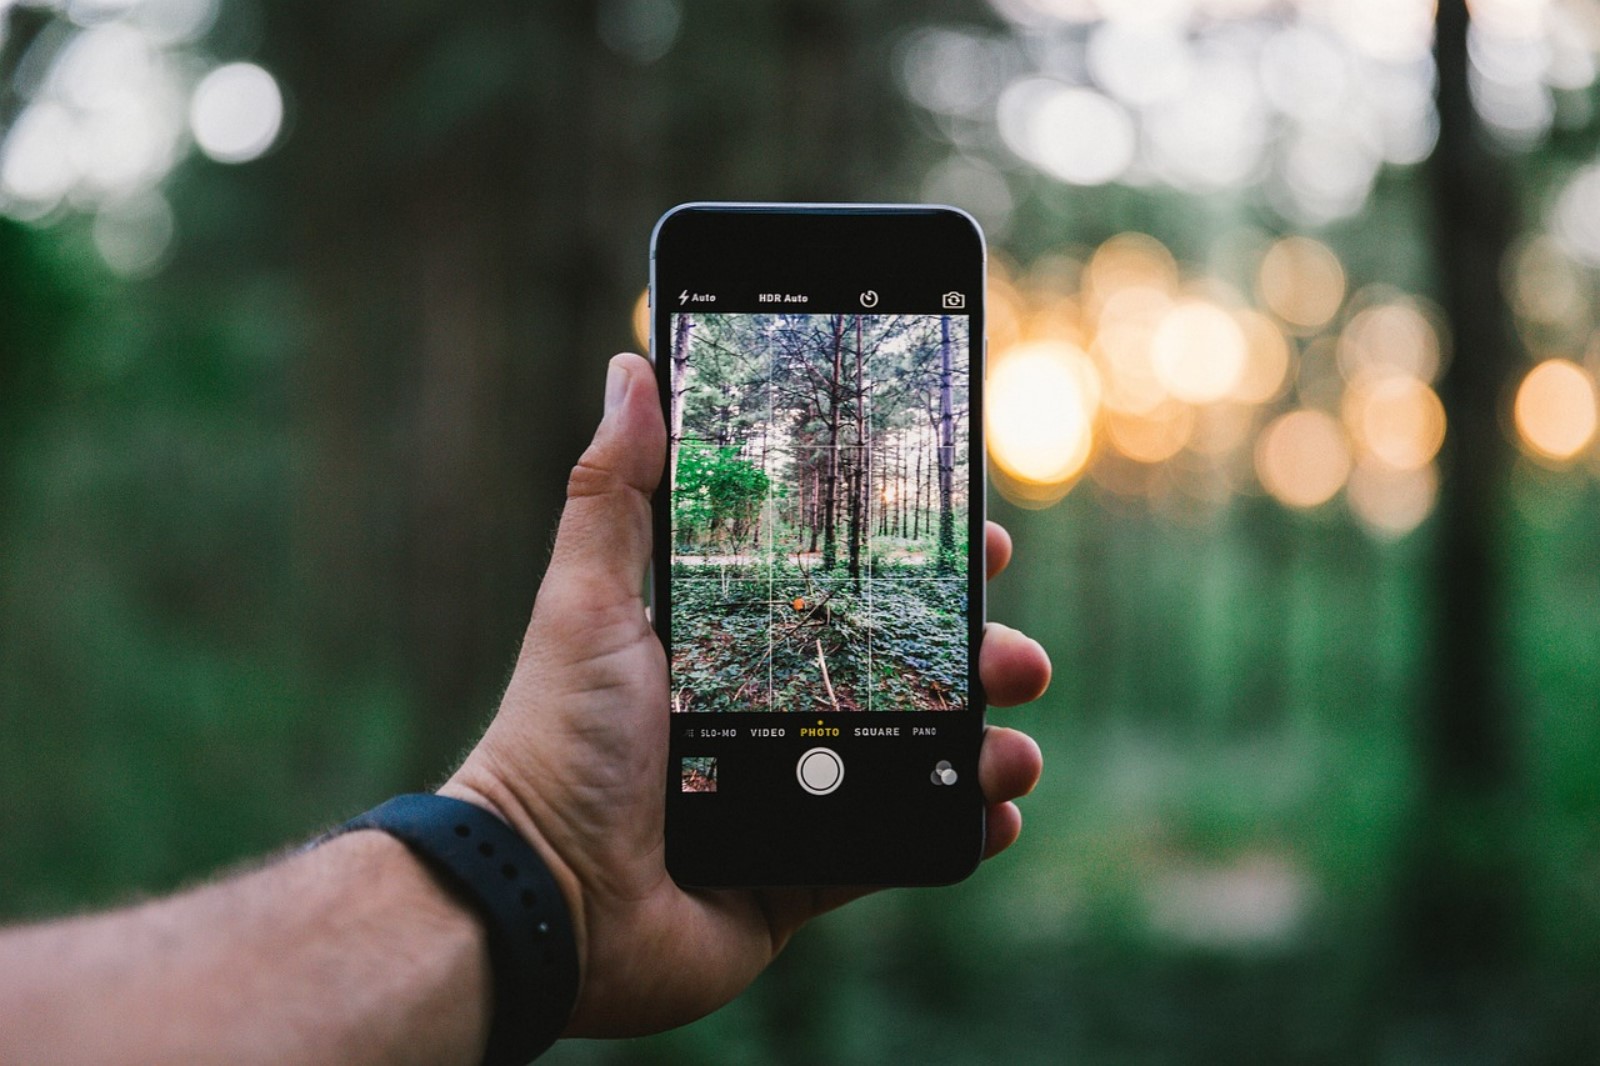
Look for the Light

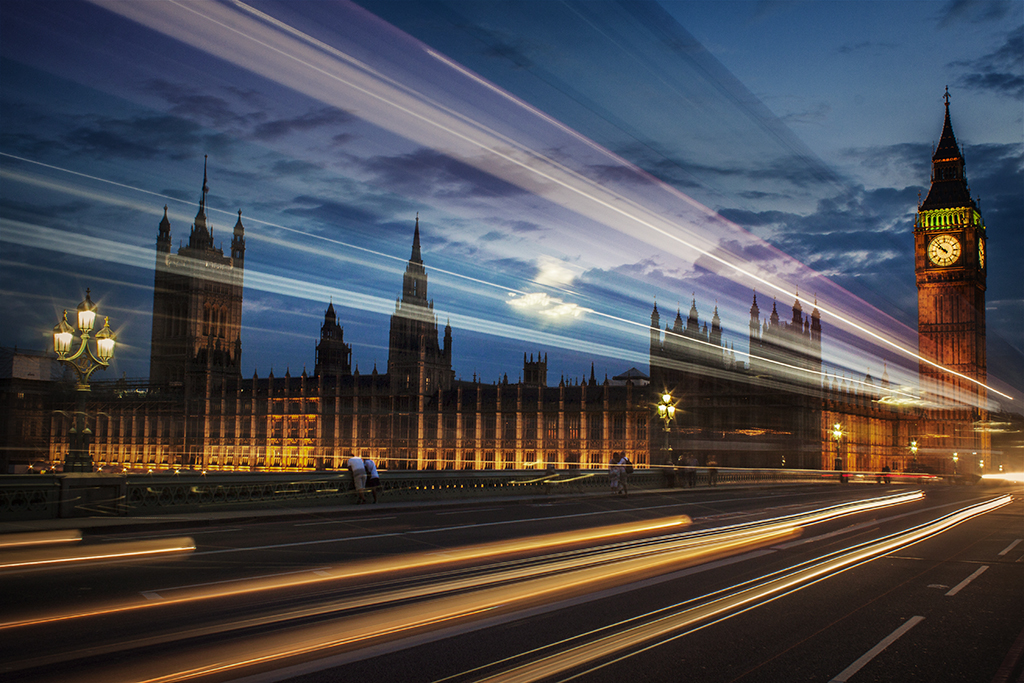
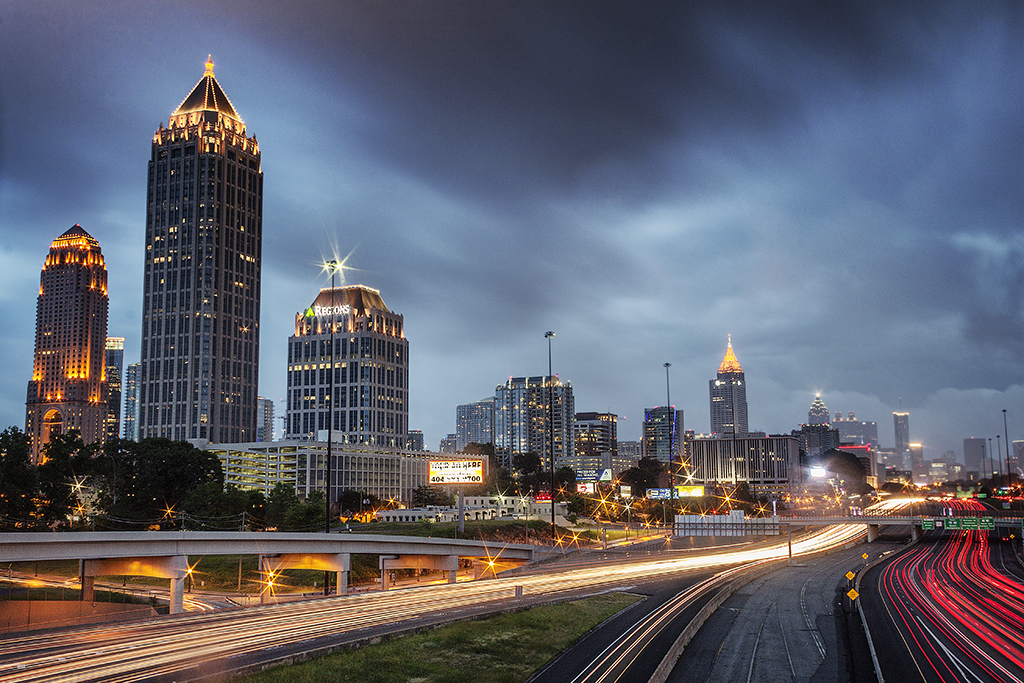
Time of day is so important while shooting outdoors and this also goes for travel portrait photography. We all know about Golden Hour, the hour after sunrise and the hour before sunset, as the best time of day to shoot. Follow this schedule when you are traveling as much as you can. Go for an early morning walk before breakfast. This is a great time to see daily life, locals getting ready to start their day. During the day when the sun is right overhead, focus more on shooting indoors or shaded areas. Still, have your camera on you at all times, just be aware of where the best light will be. In the evening before dinner, go out for another walk around town. This is my favorite time of day to shoot. The light is beautiful and there is so much energy. Shooting at night is possible with the right lens and lighting, be it natural or artificial. Using a flash can be invasive but possible when you ask for permission. Using an off camera flash is more versatile because you can change the location of the light source.
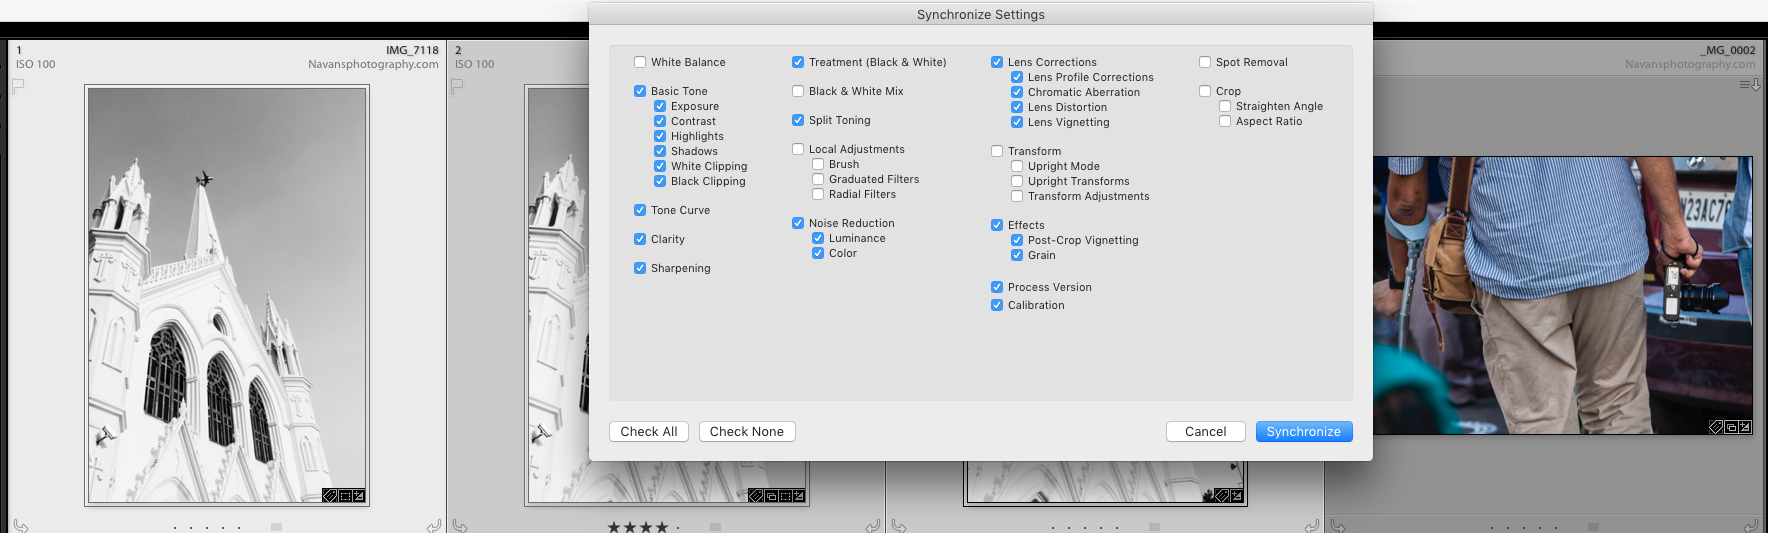
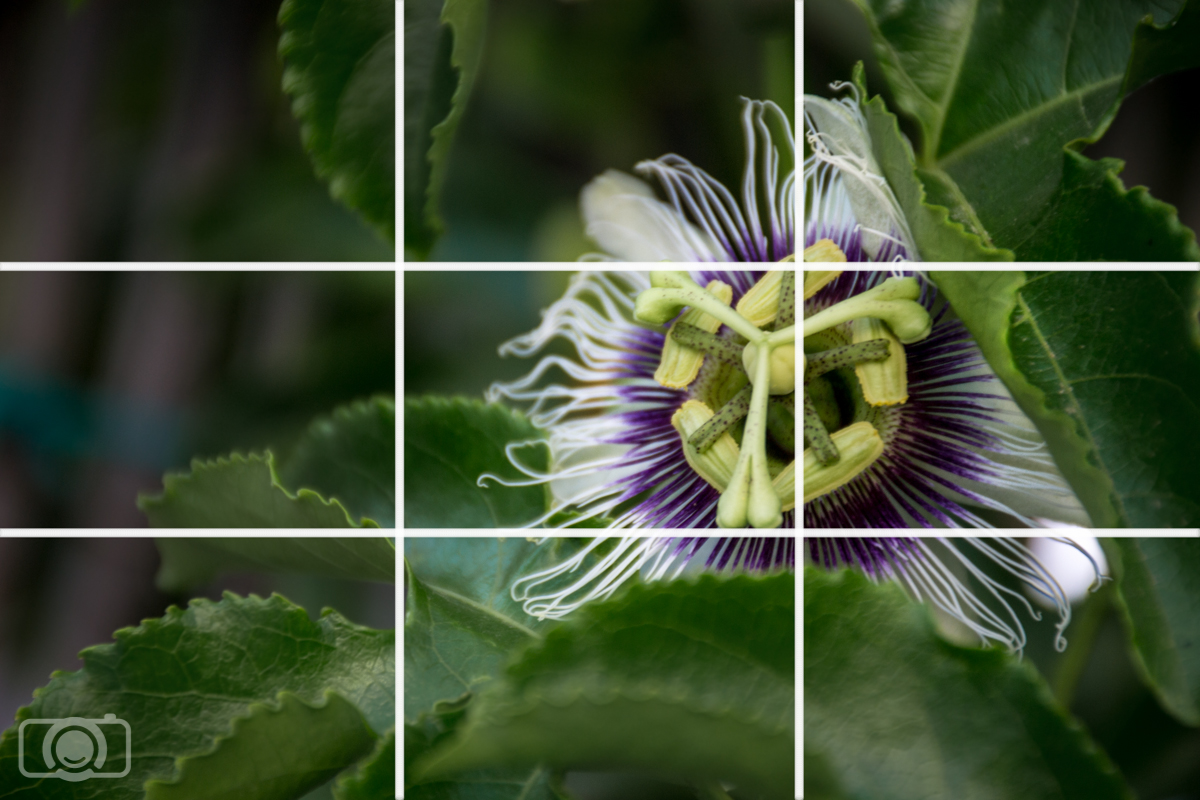
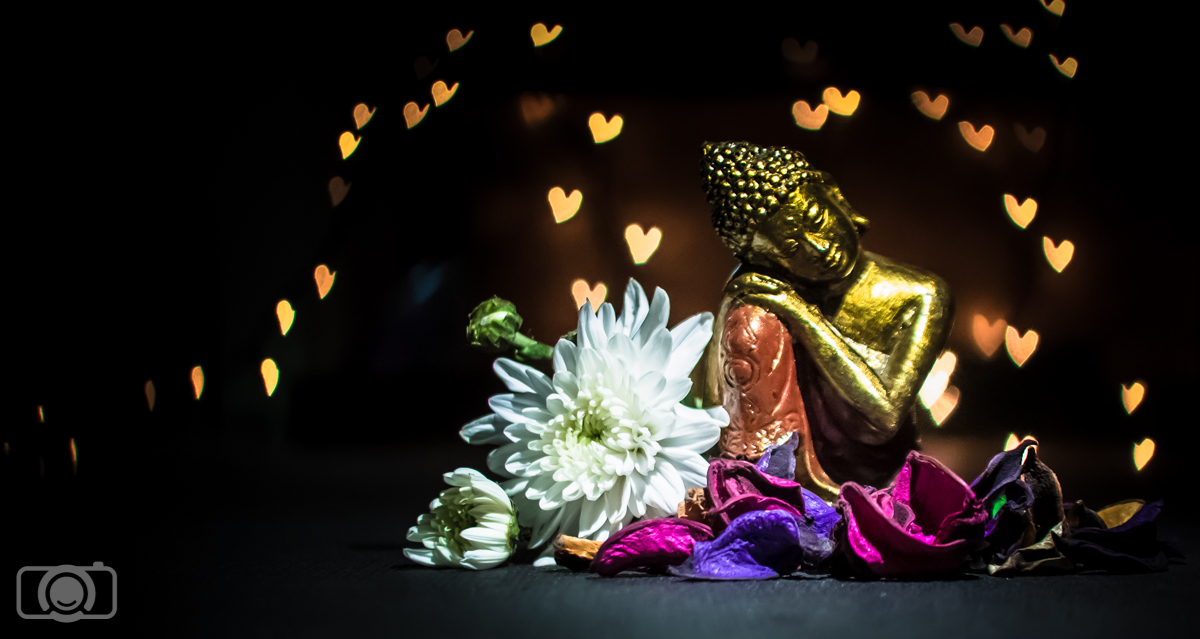
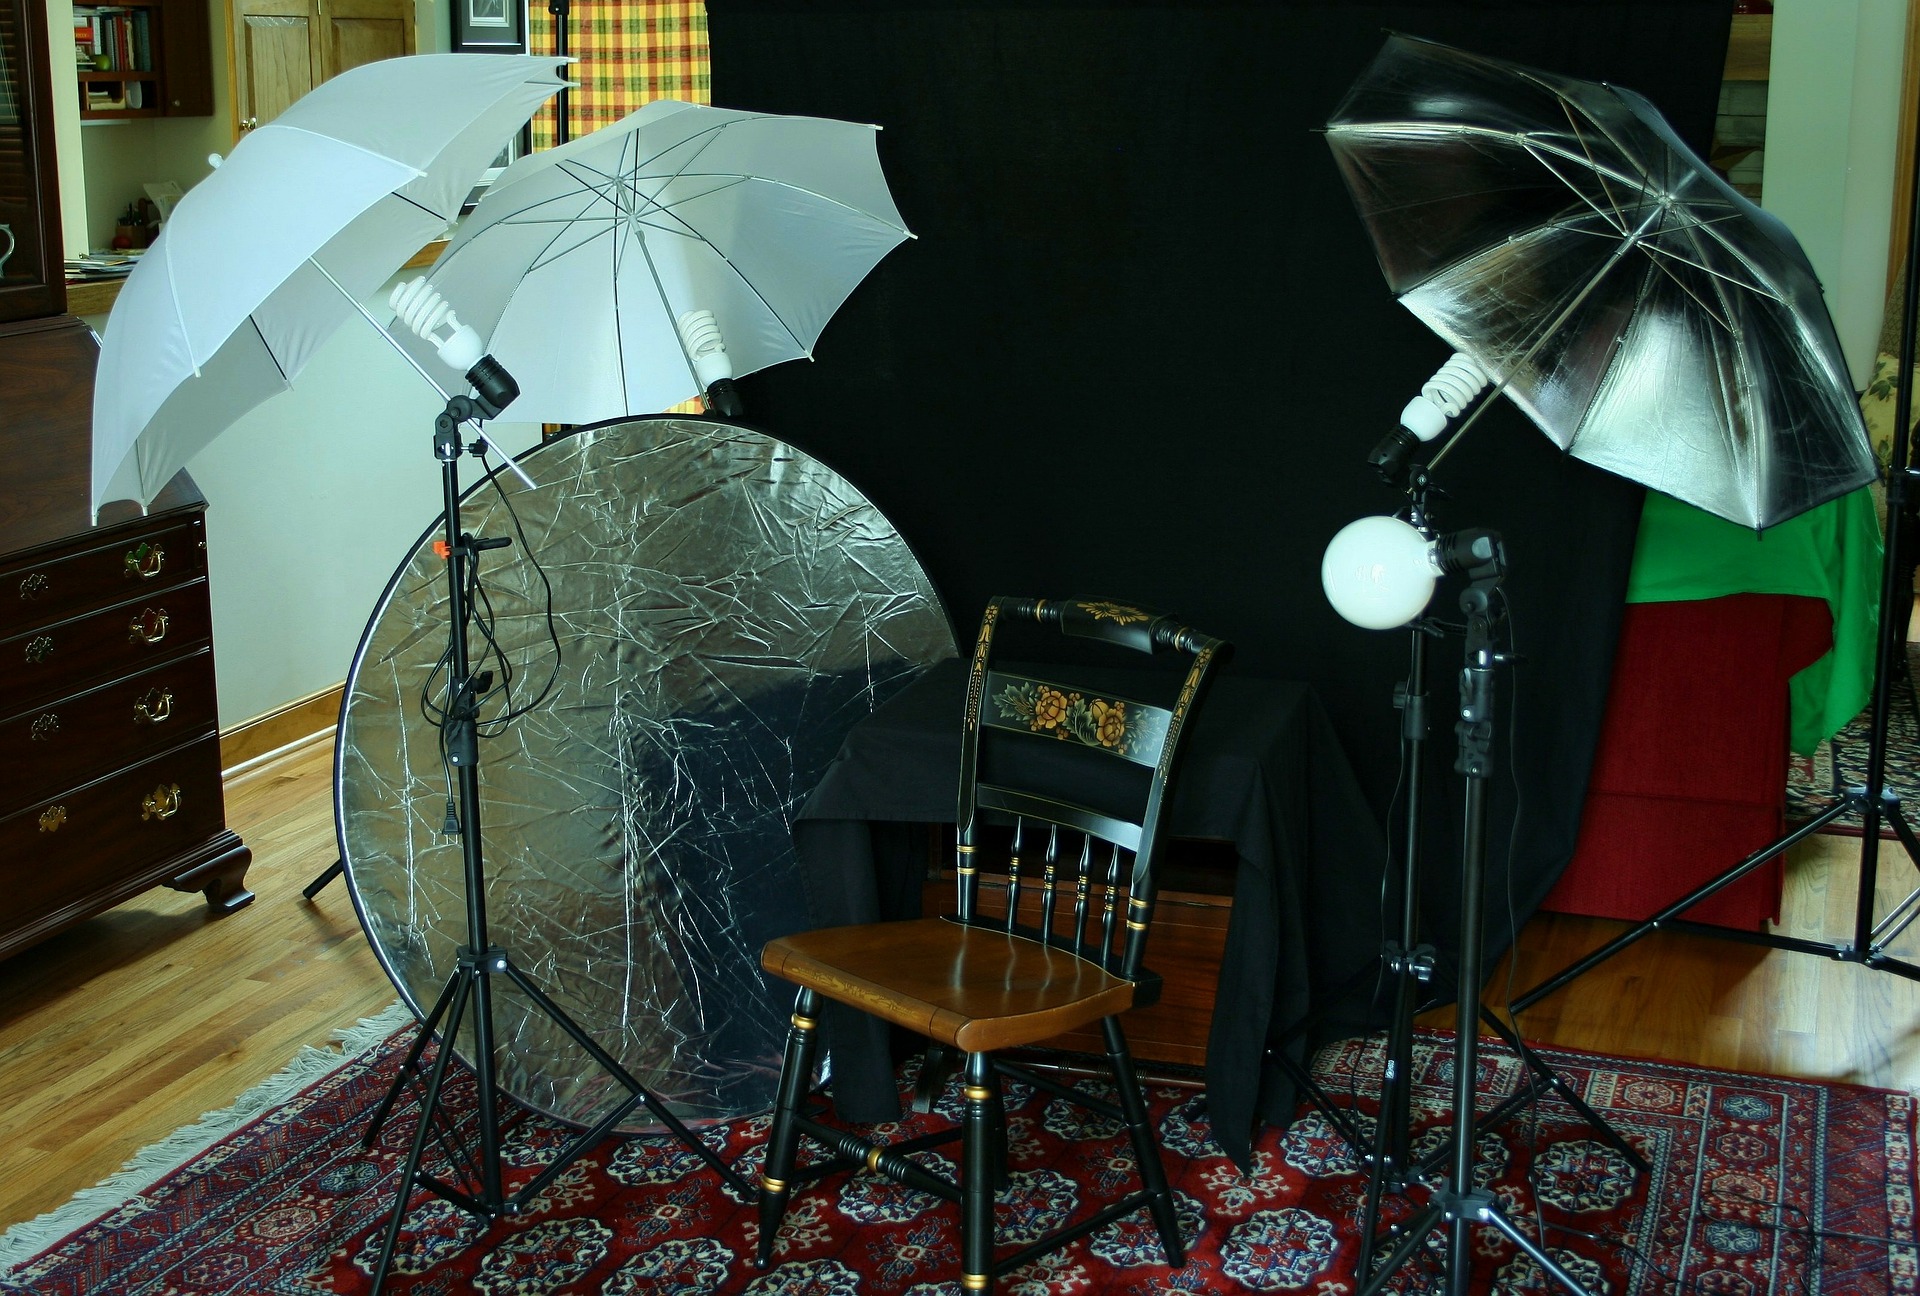
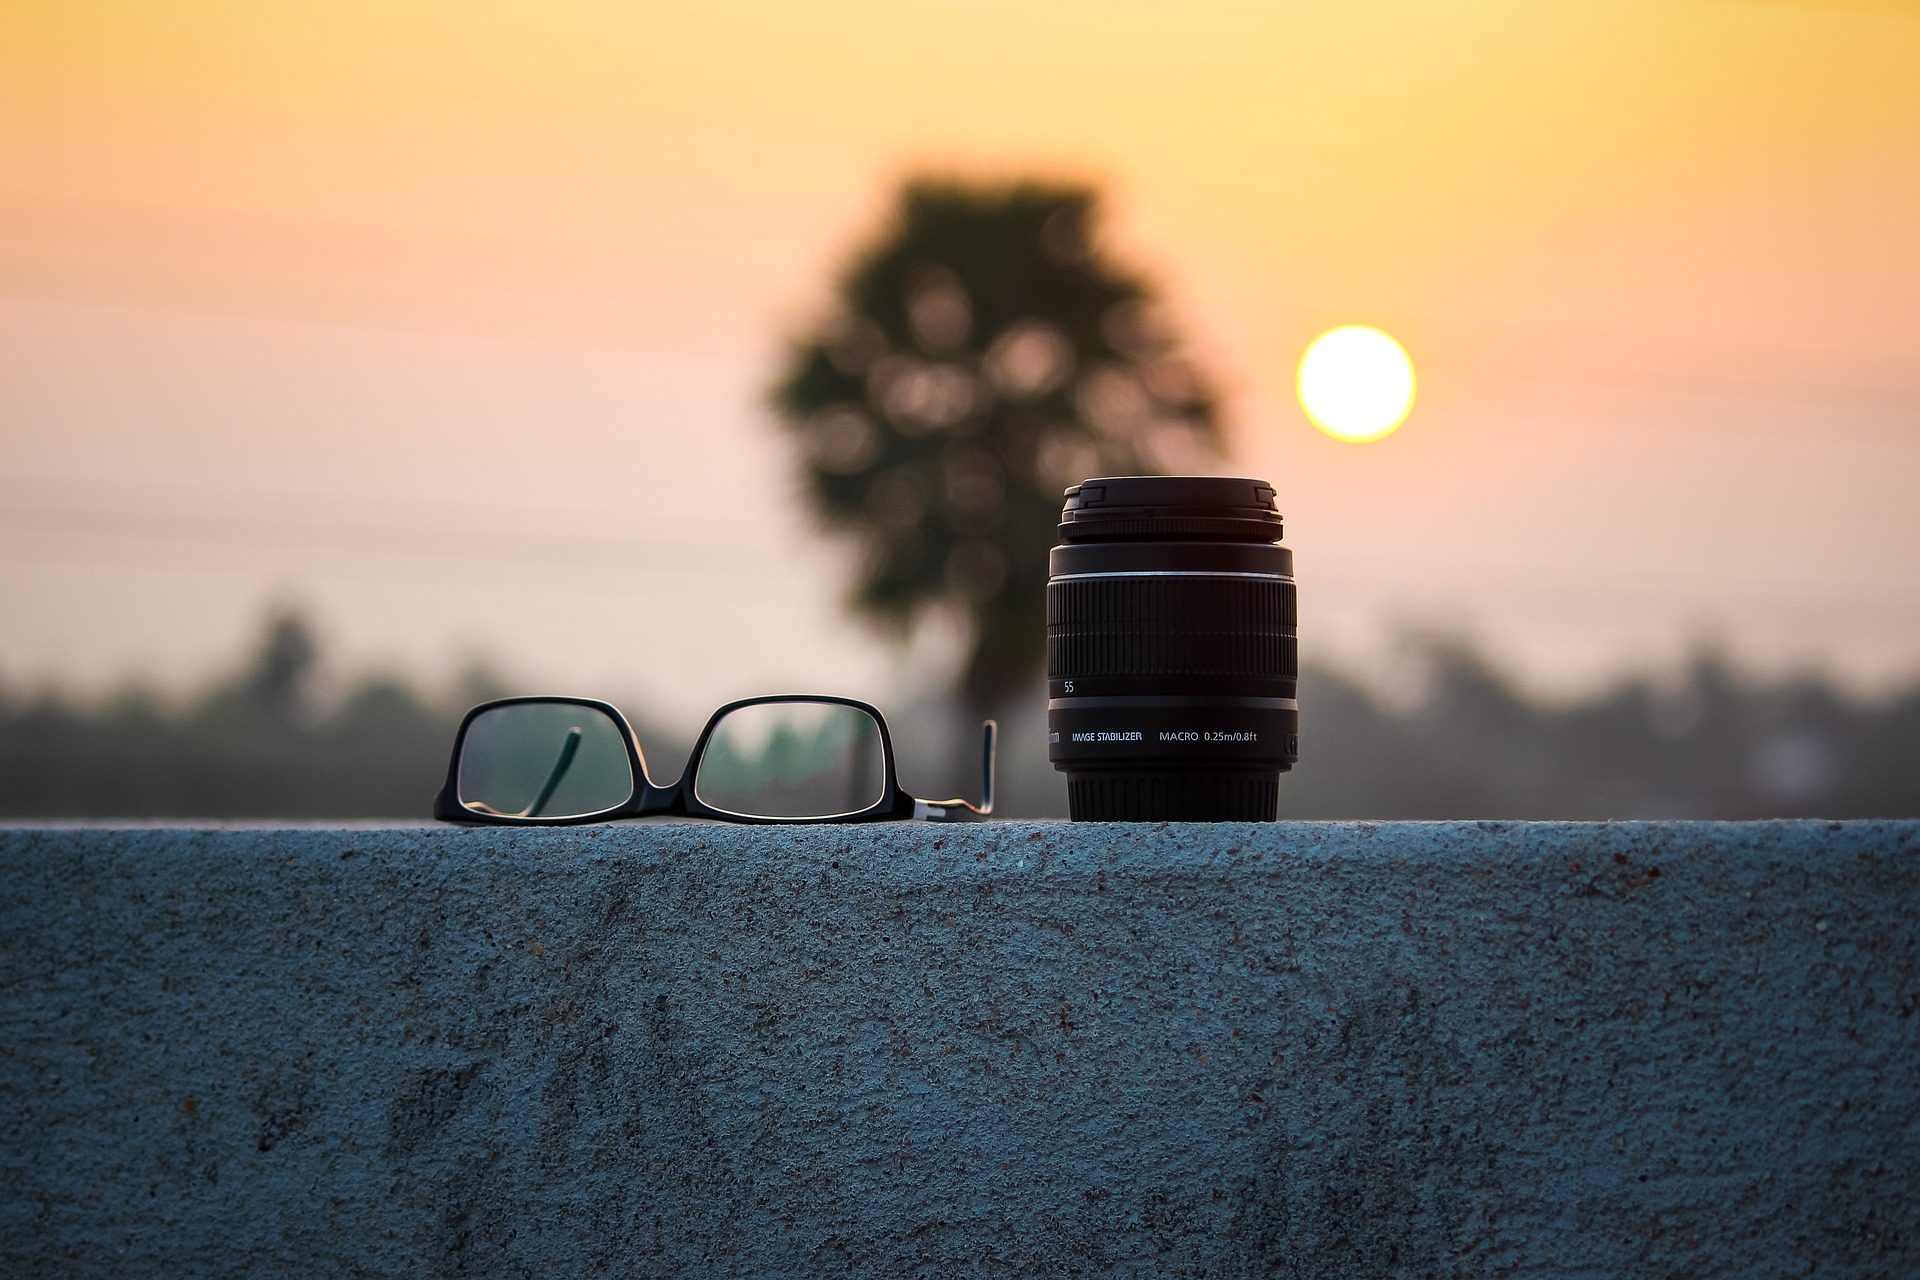
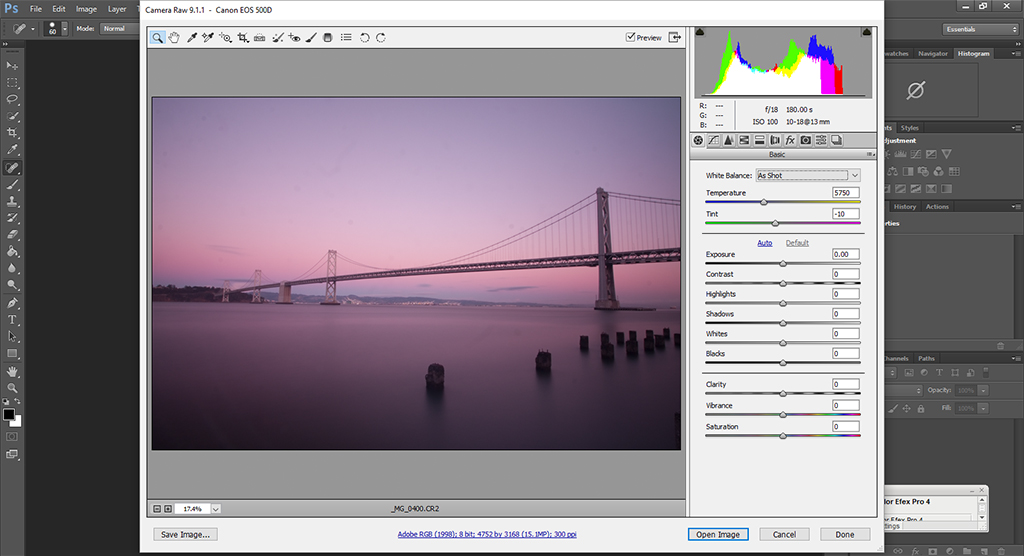
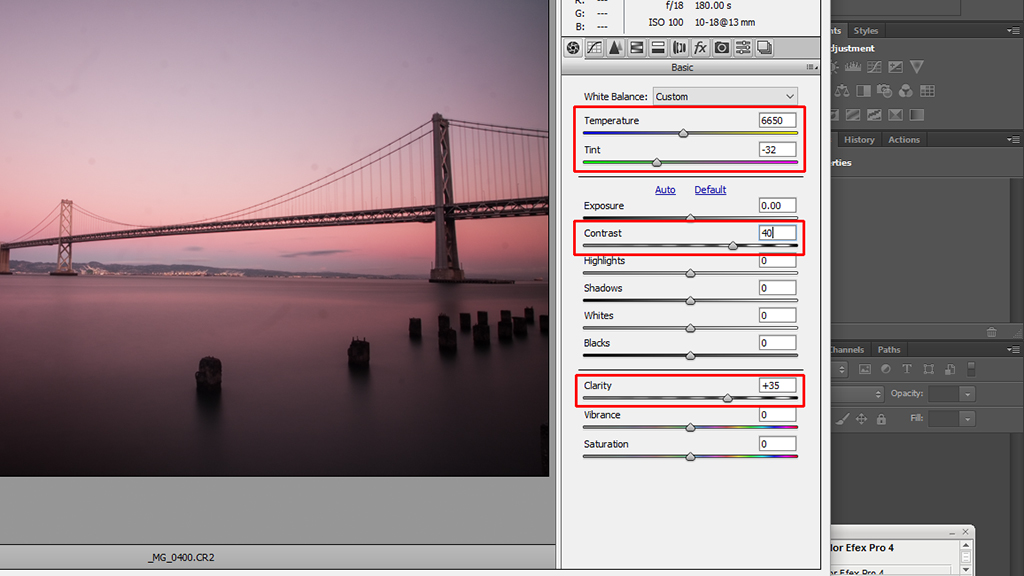
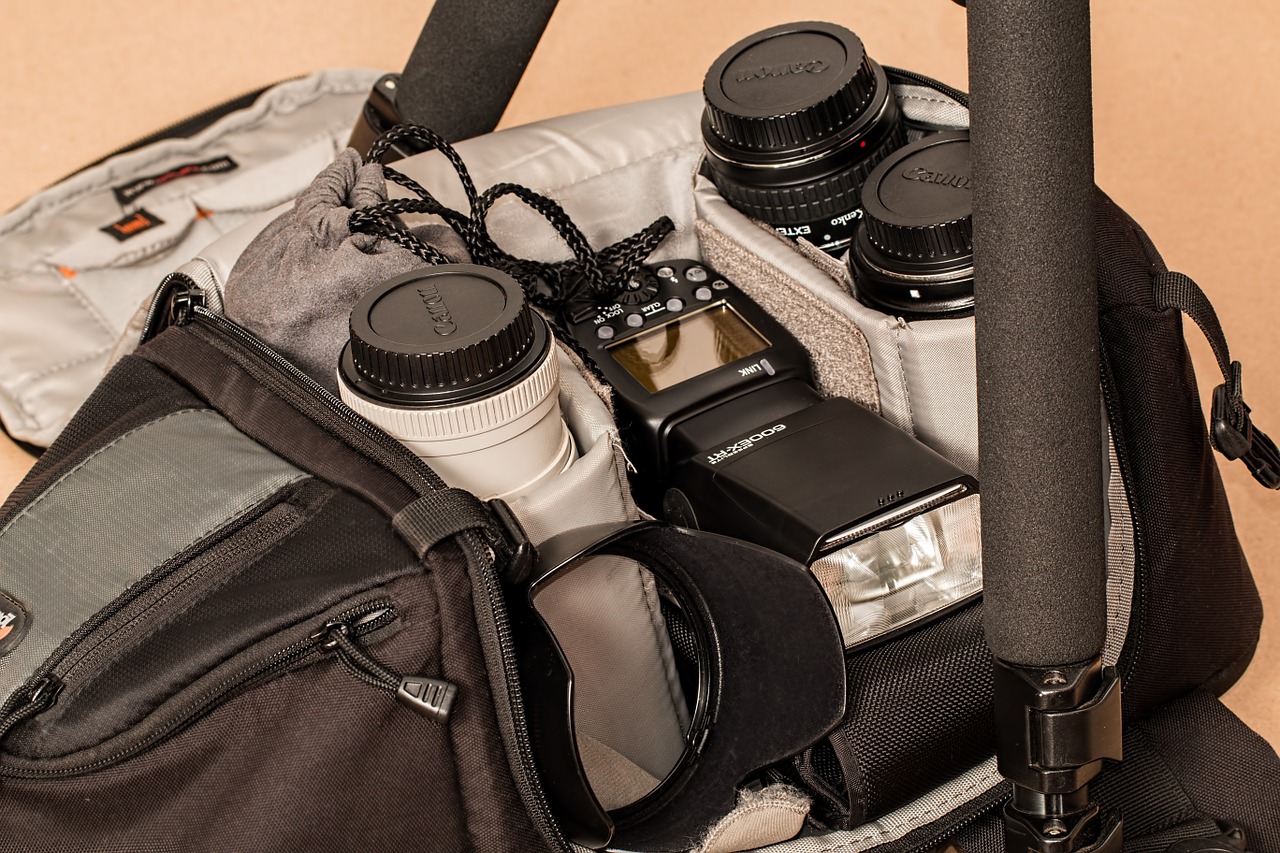
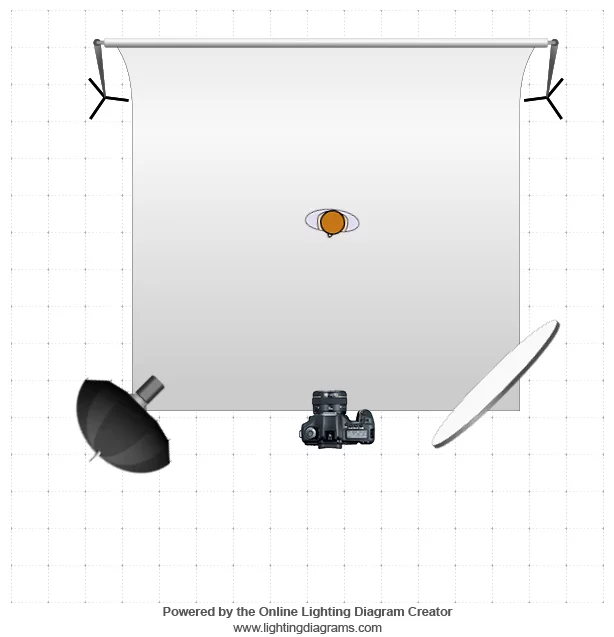
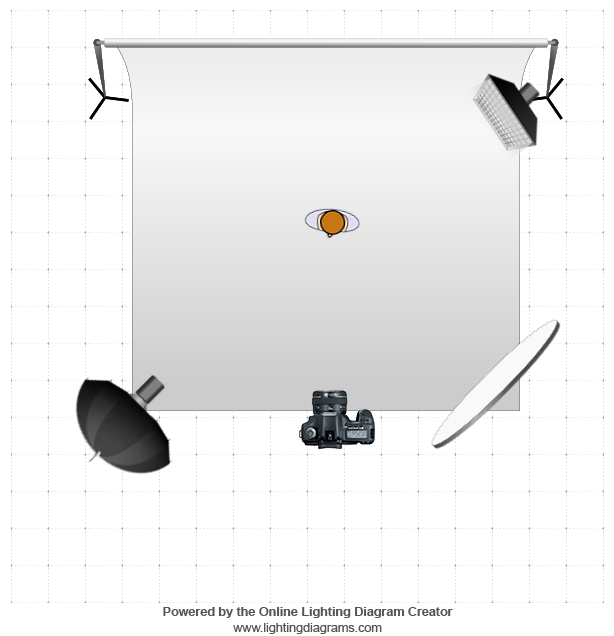
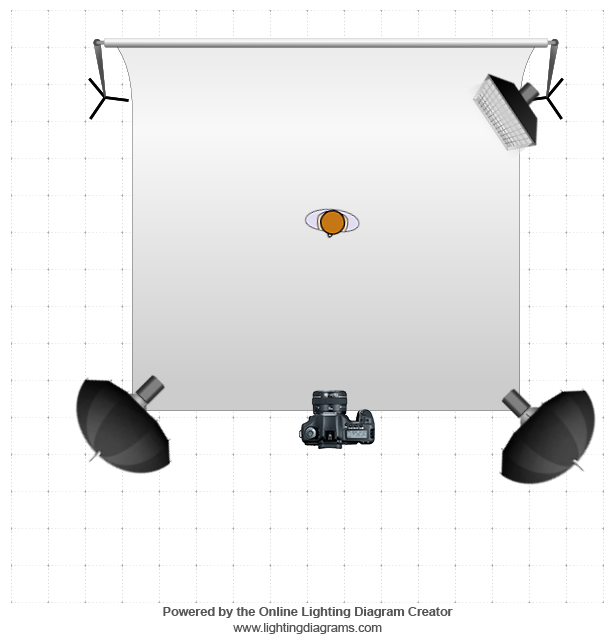
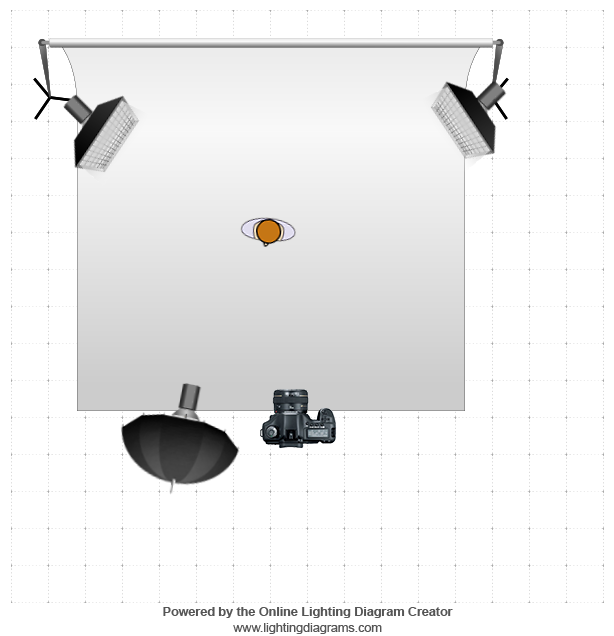
indians-1086437_1920

Use Tools

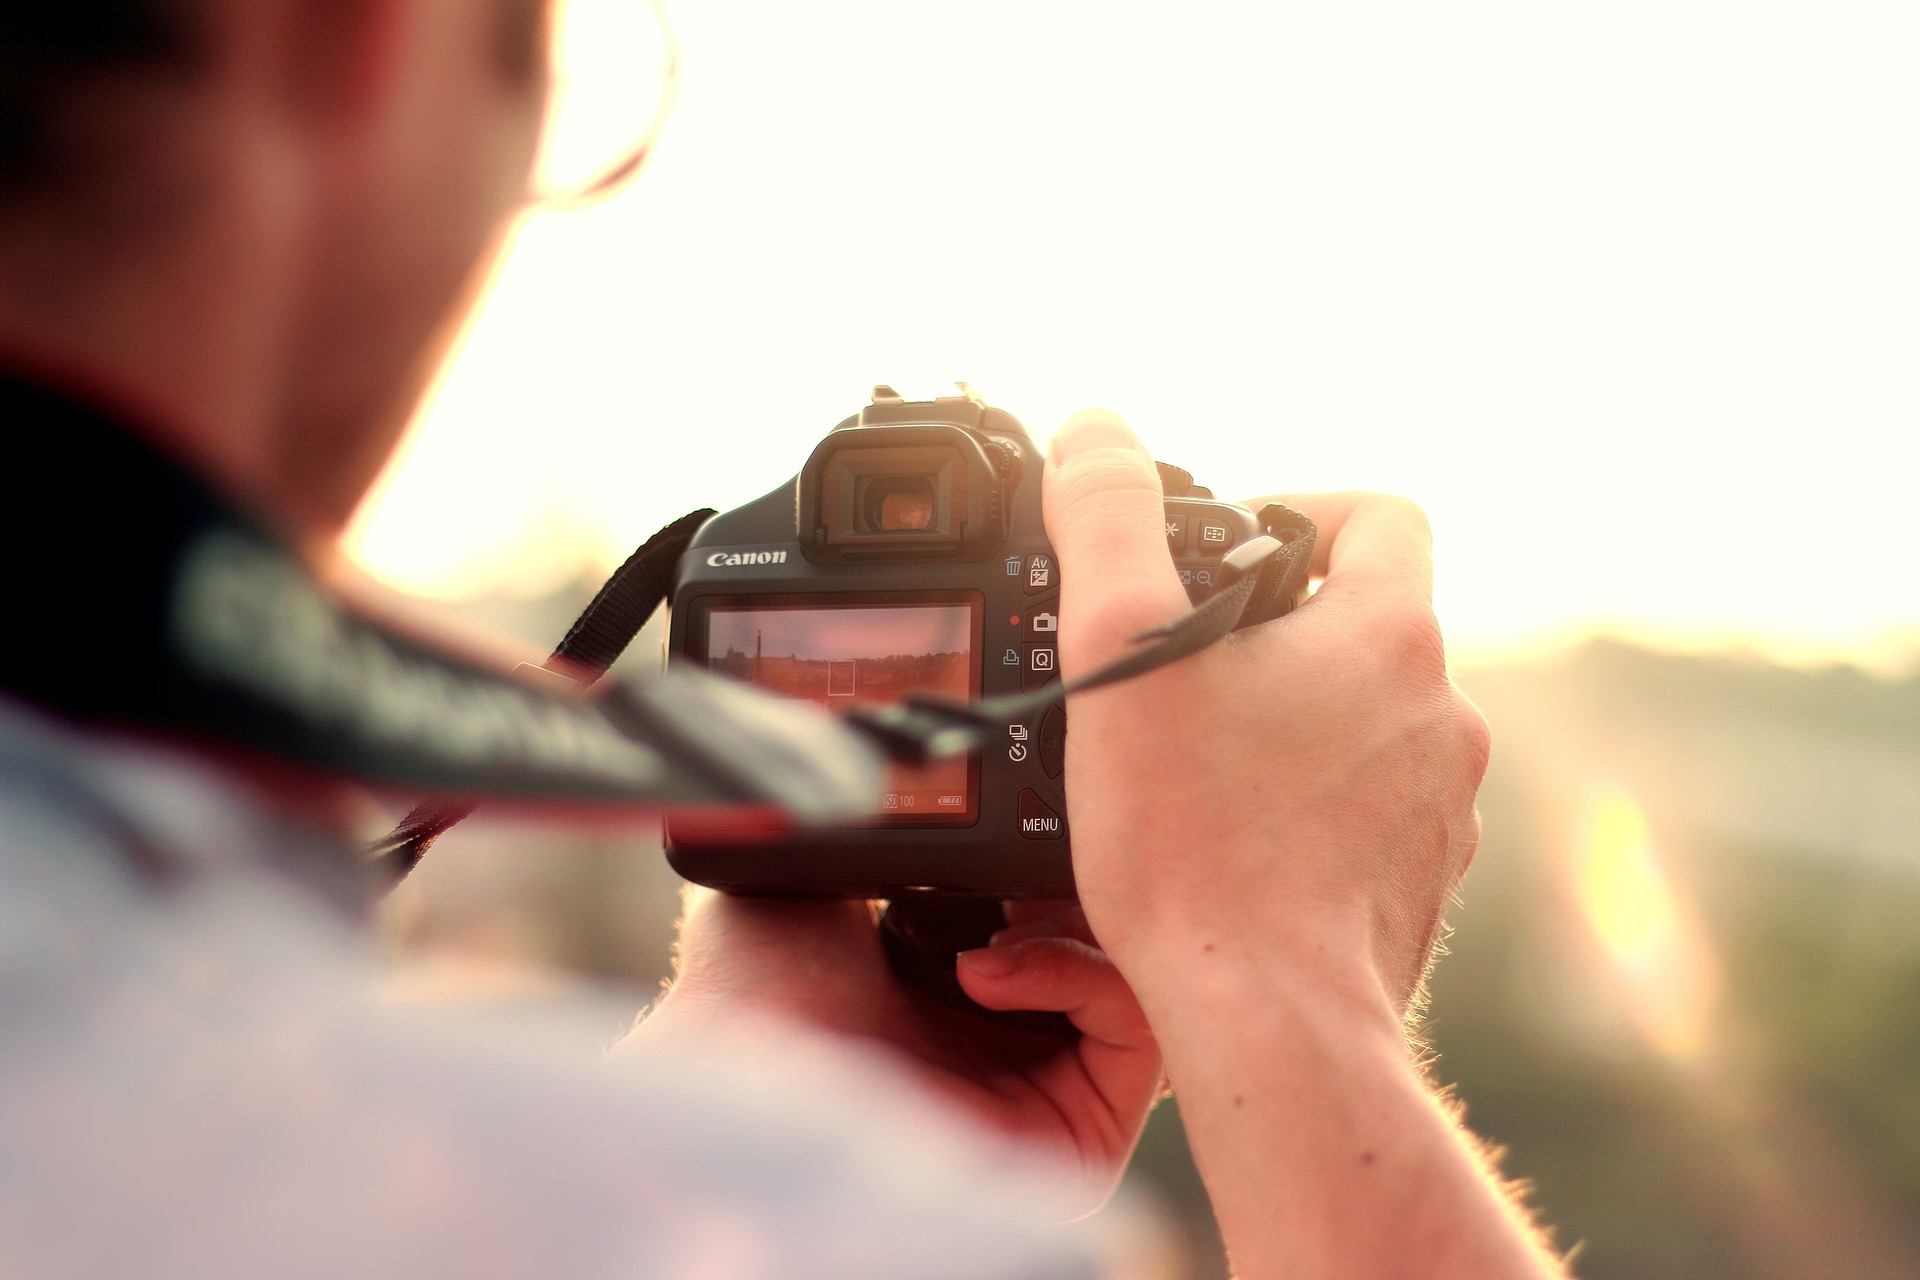
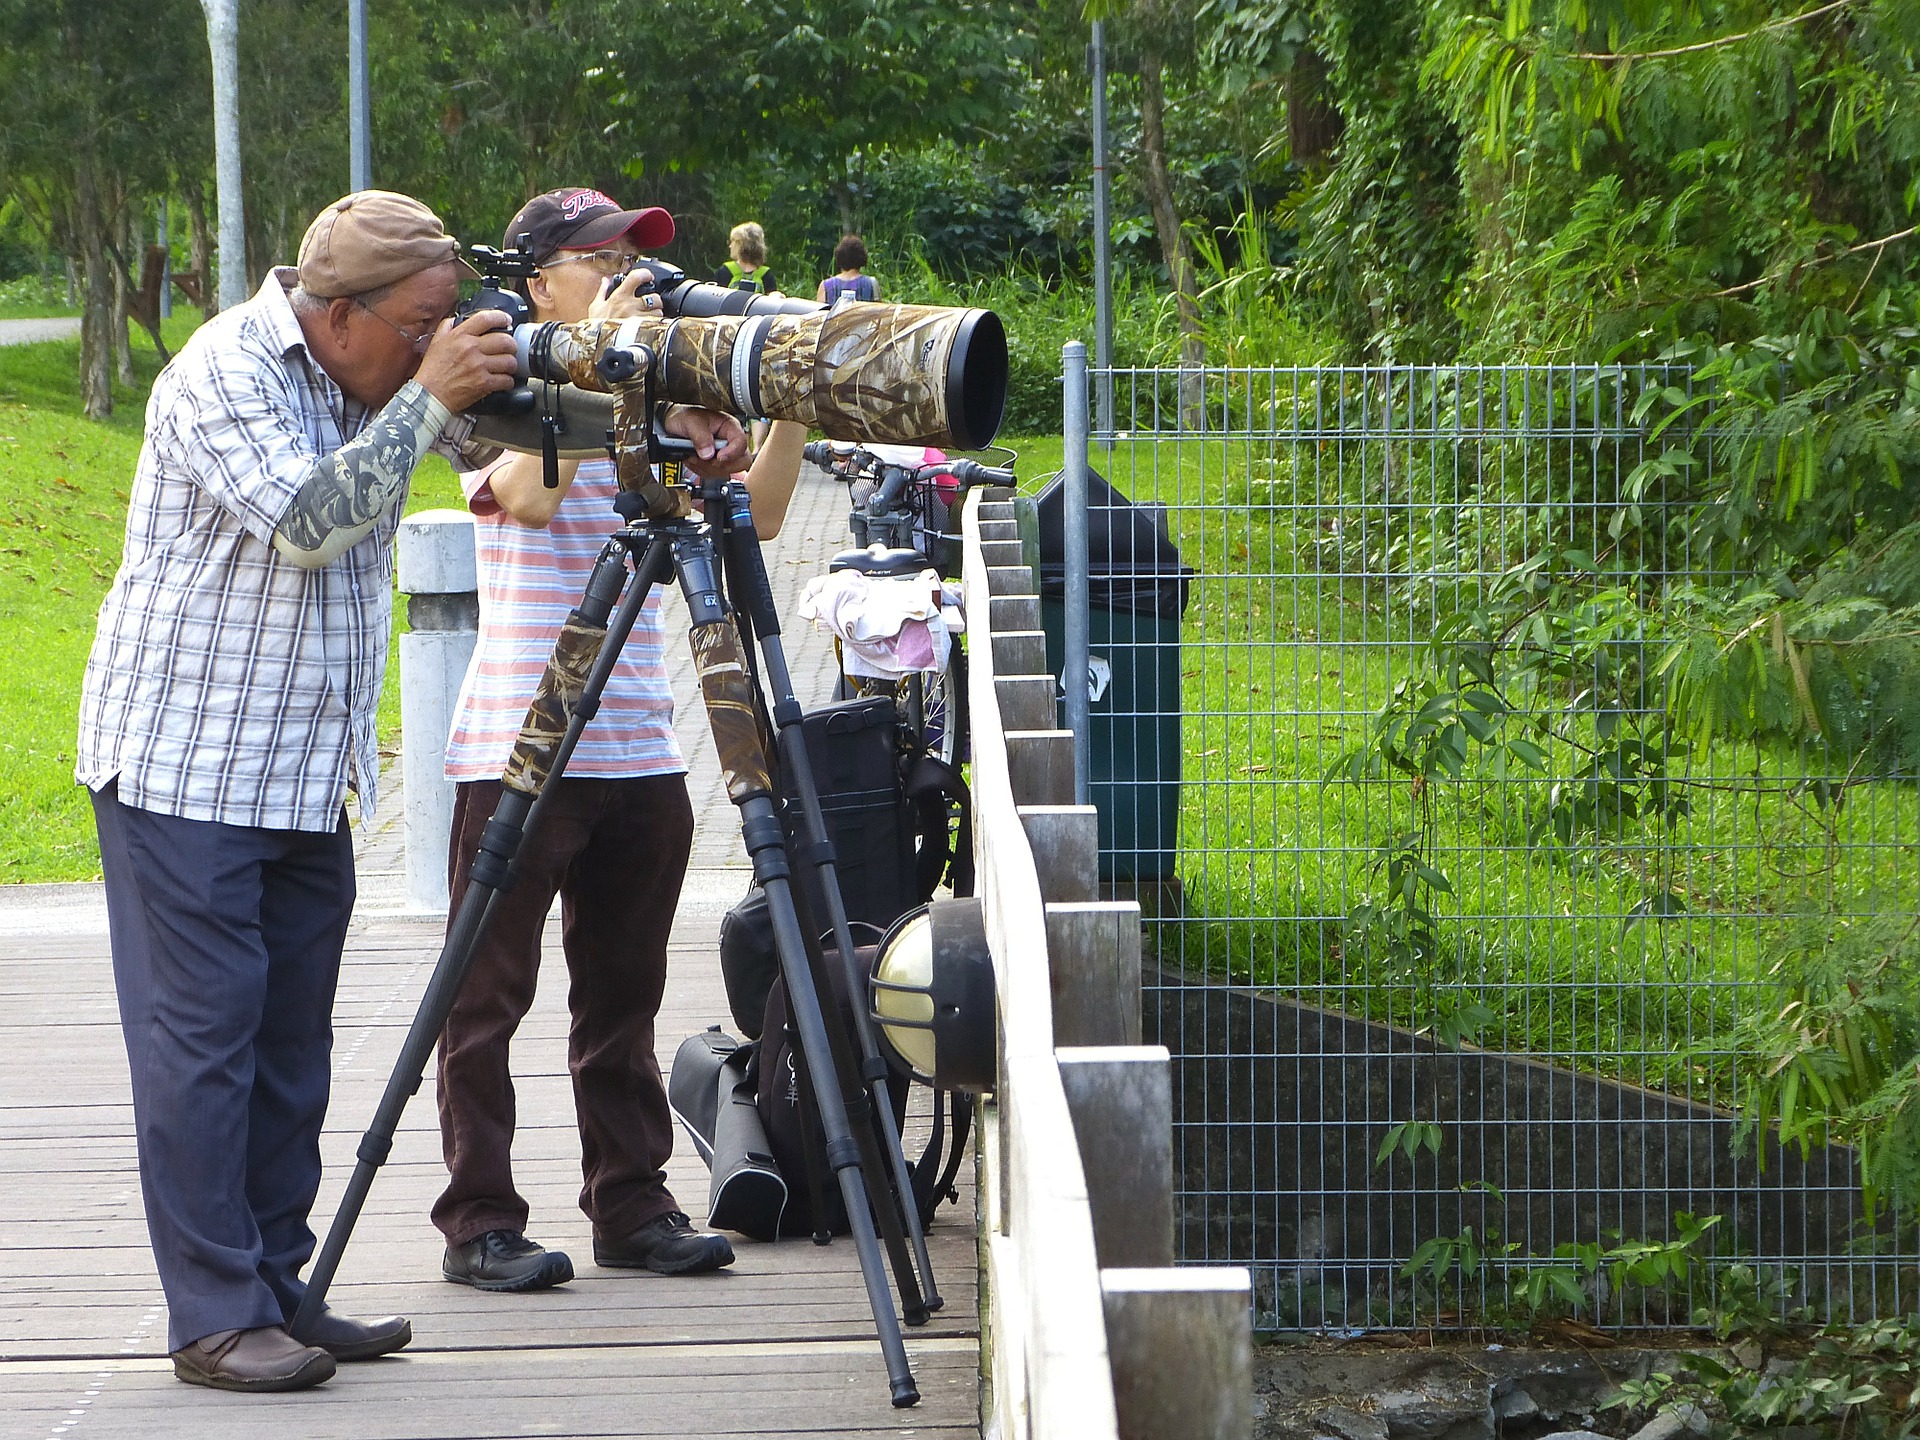
Being a natural light or minimal equipment photographer is great for travel portrait photography. You won’t have the opportunity to carry around a lot of equipment so you’ll need to be mindful of what you bring. A useful tool which takes up very little space is a reflector. Reflectors are called a photographer’s secret weapon for a reason. They are lightweight, versatile, and a can add dramatically and professional lighting to a portrait. A good size for ttravel portrait photography is 12″ because you can hold it yourself while you shoot. Smaller reflectors are stronger in their lighting, so be aware of distance placed from the subject. Off camera flashes, neutral density filters and a good tripod are other essential tools you may want to have on you at all times.

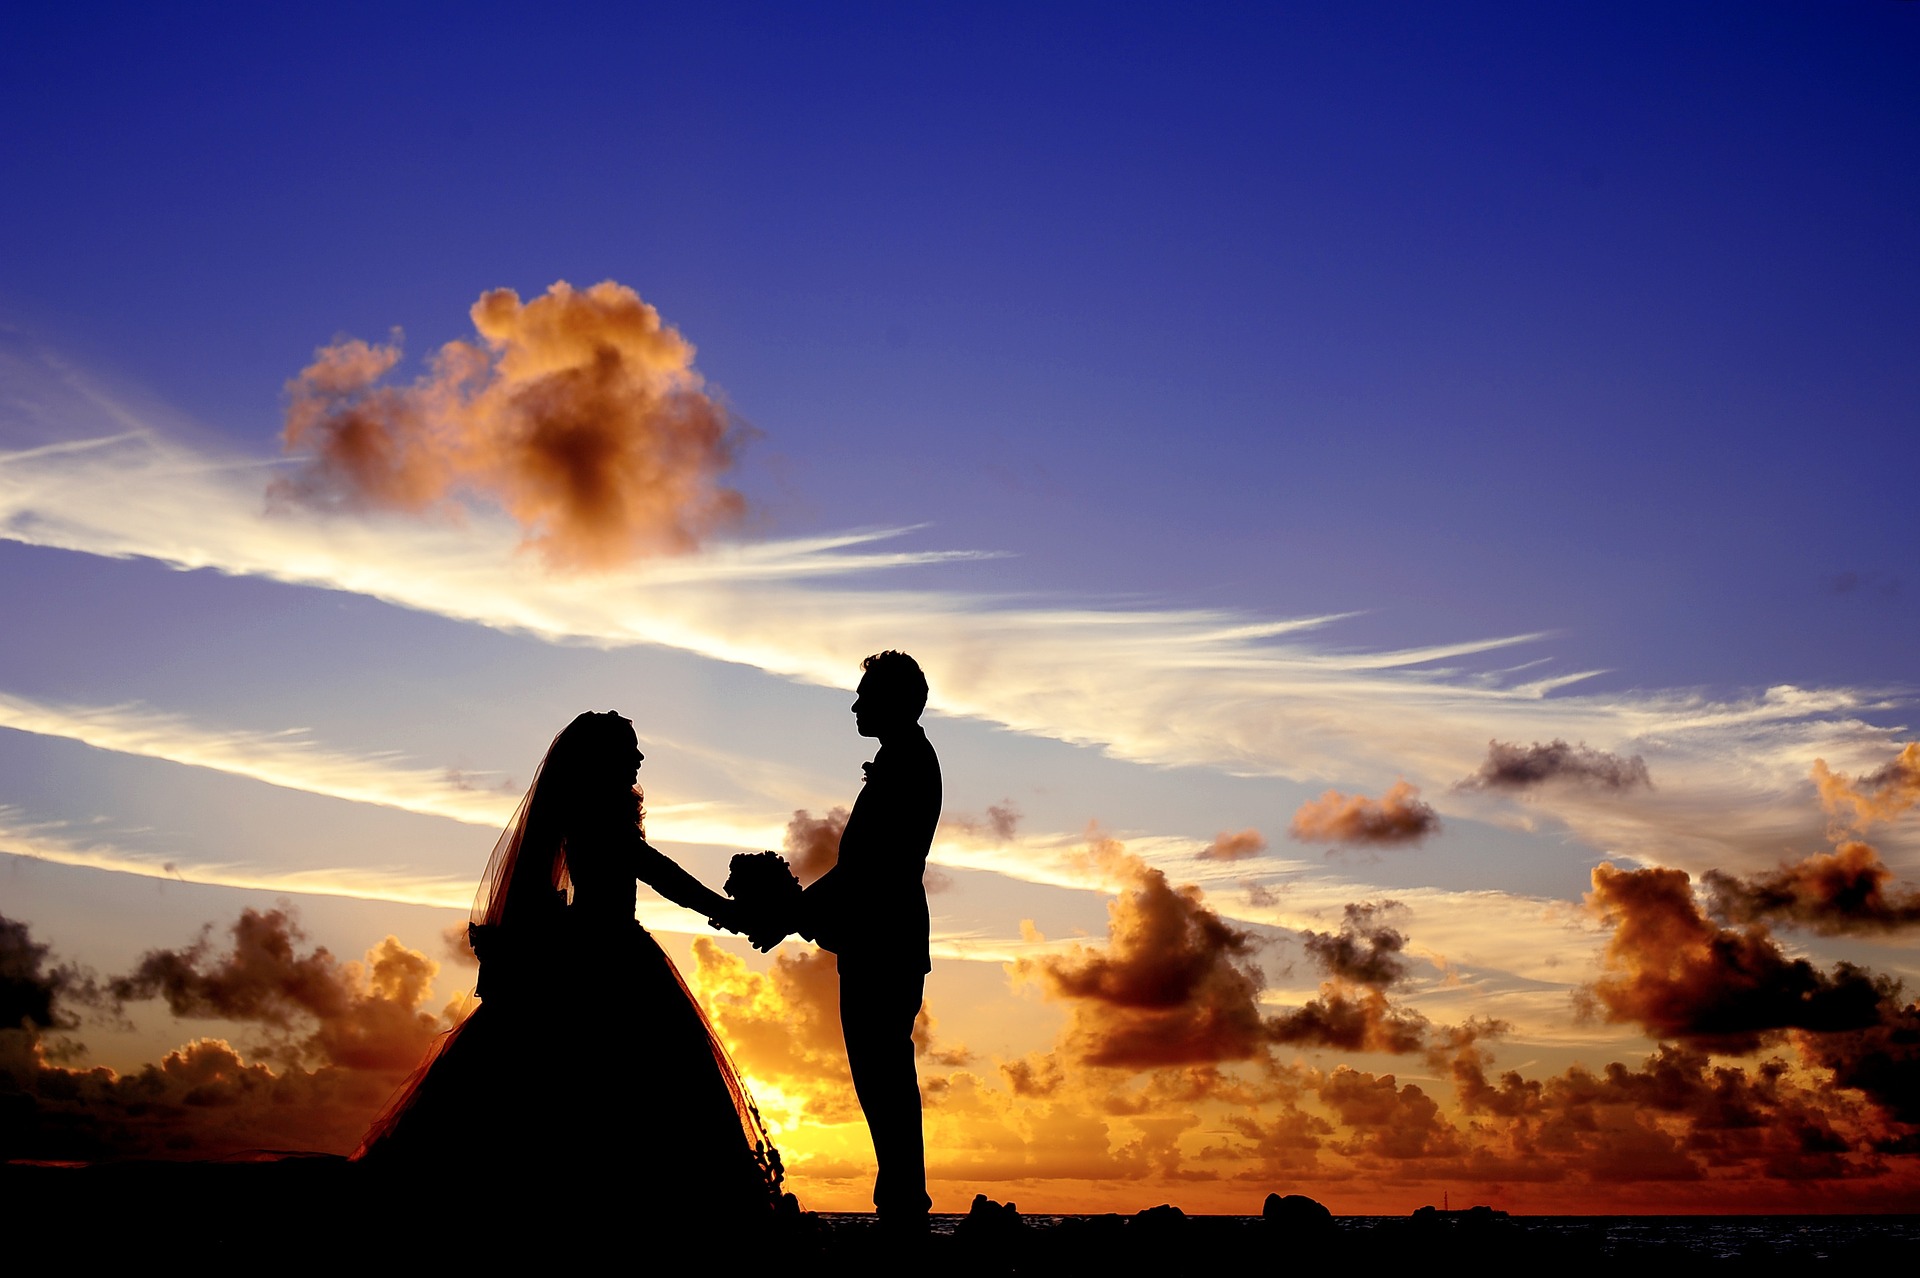
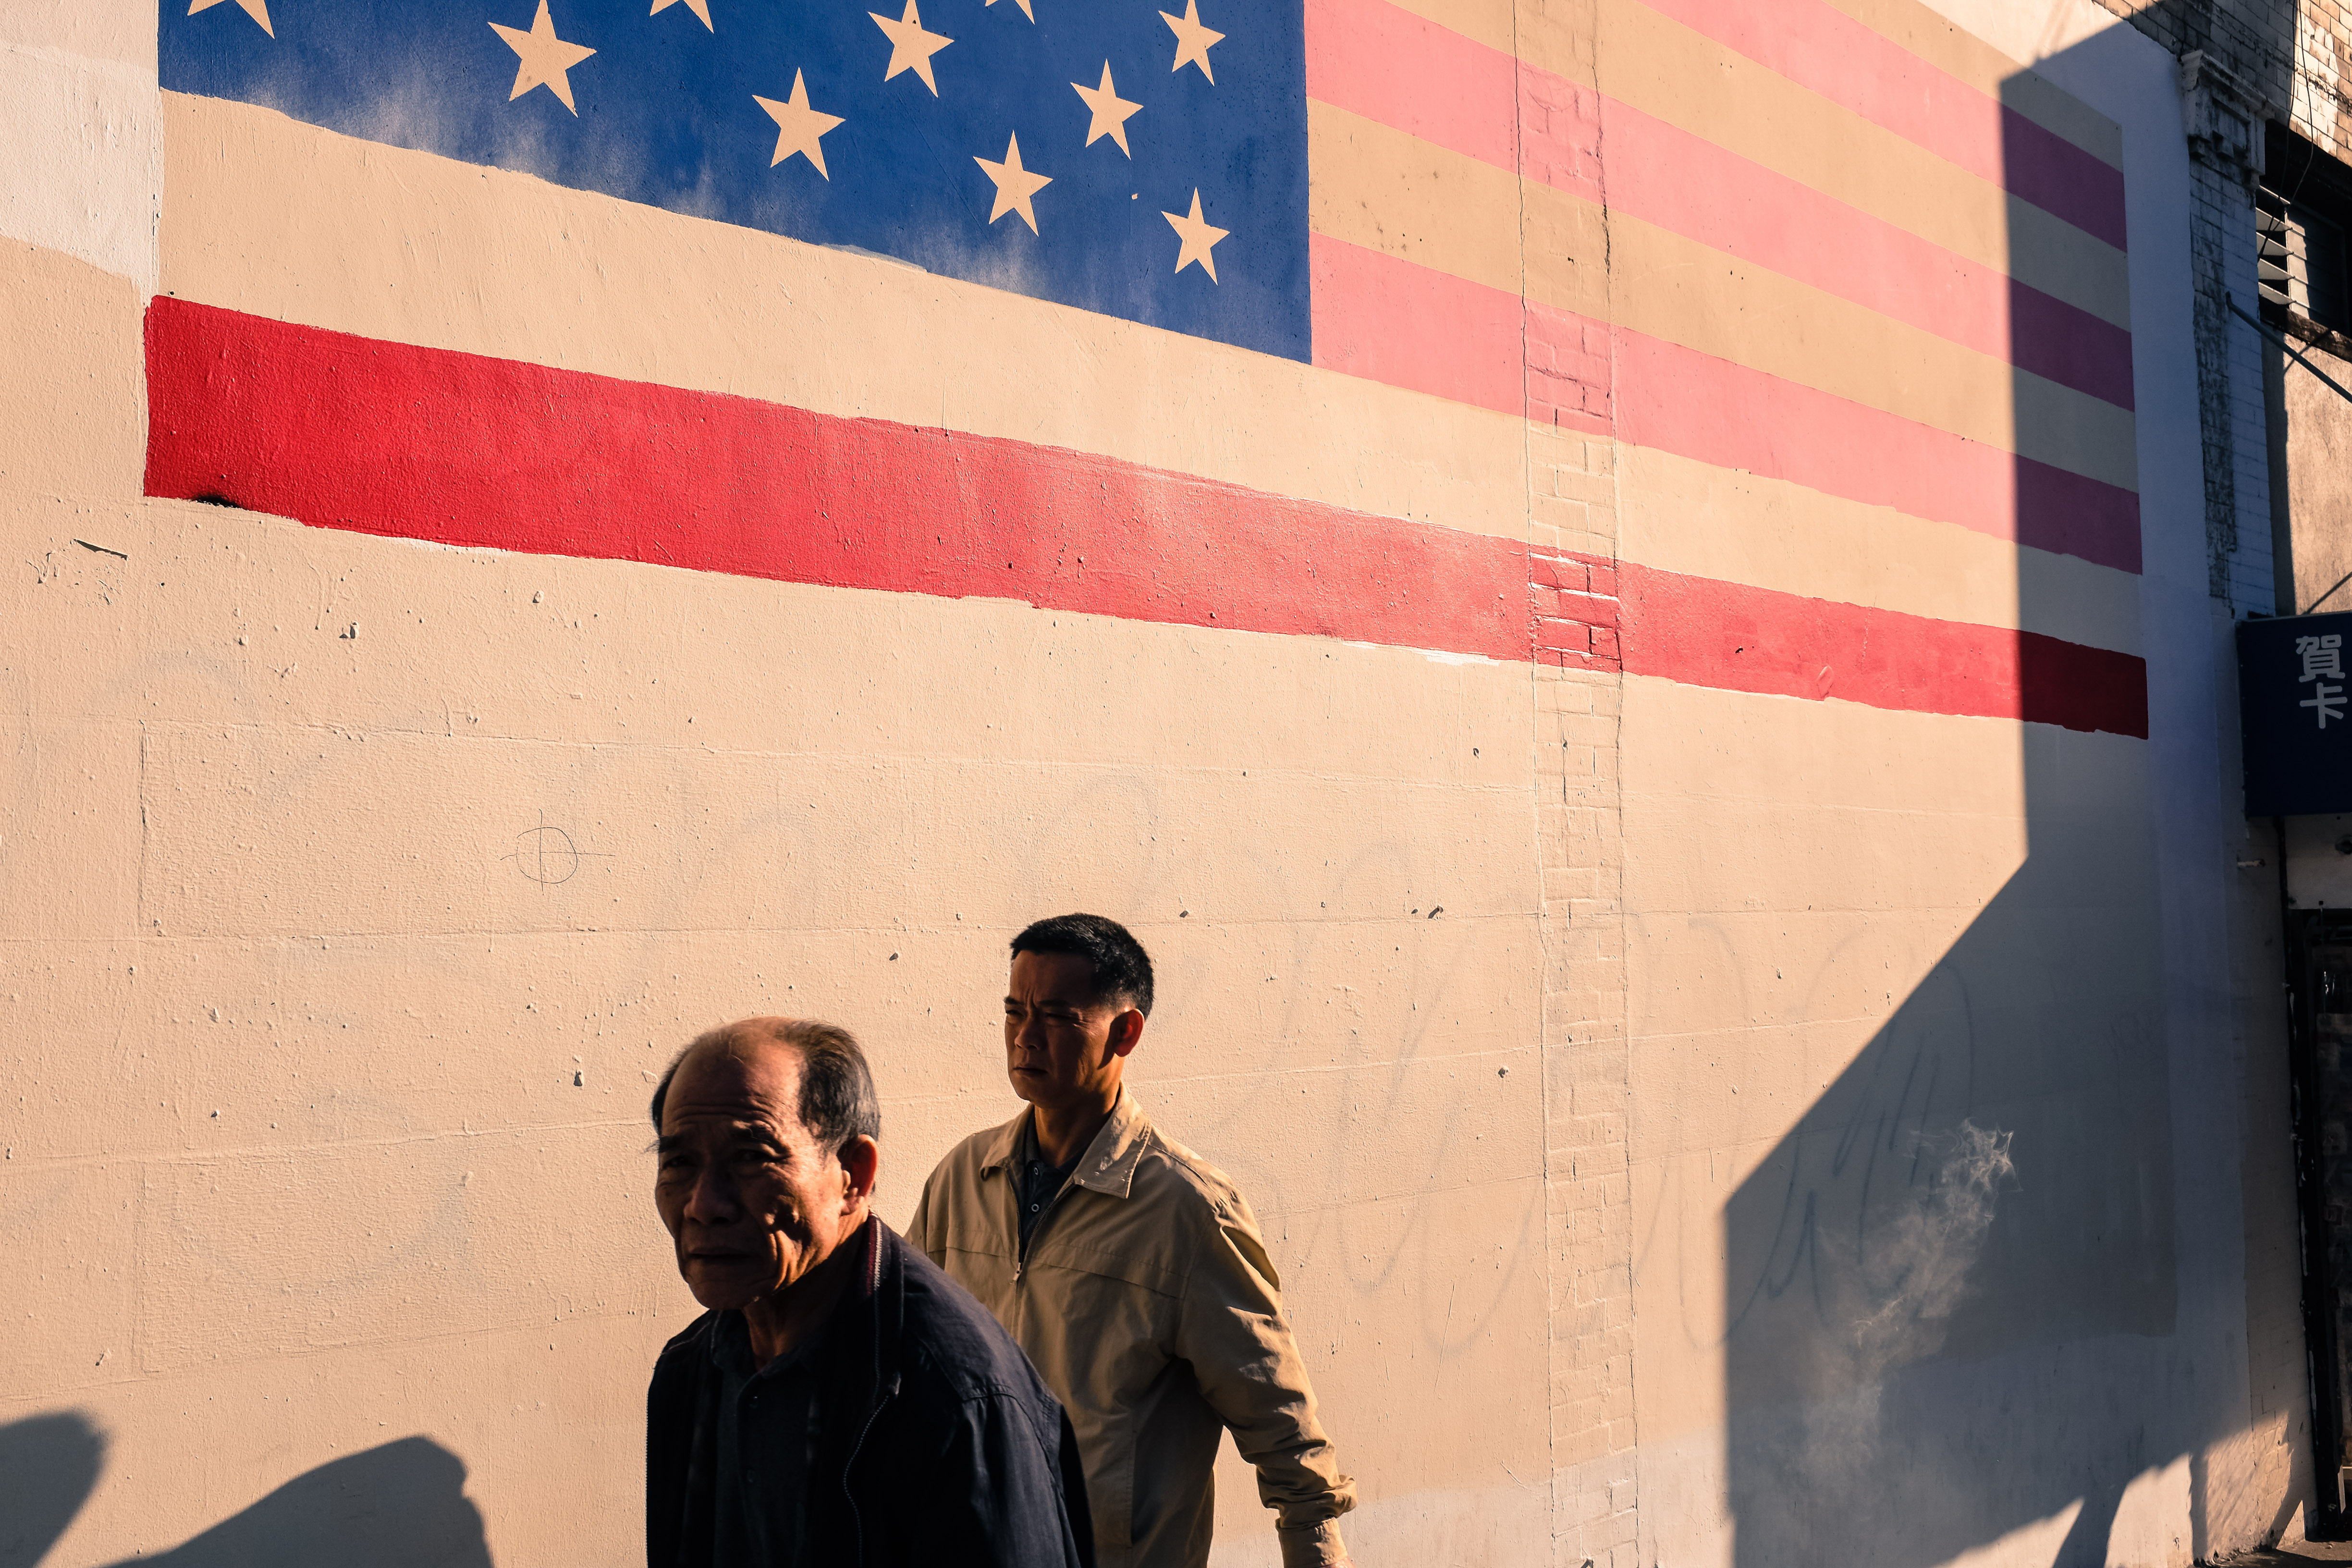
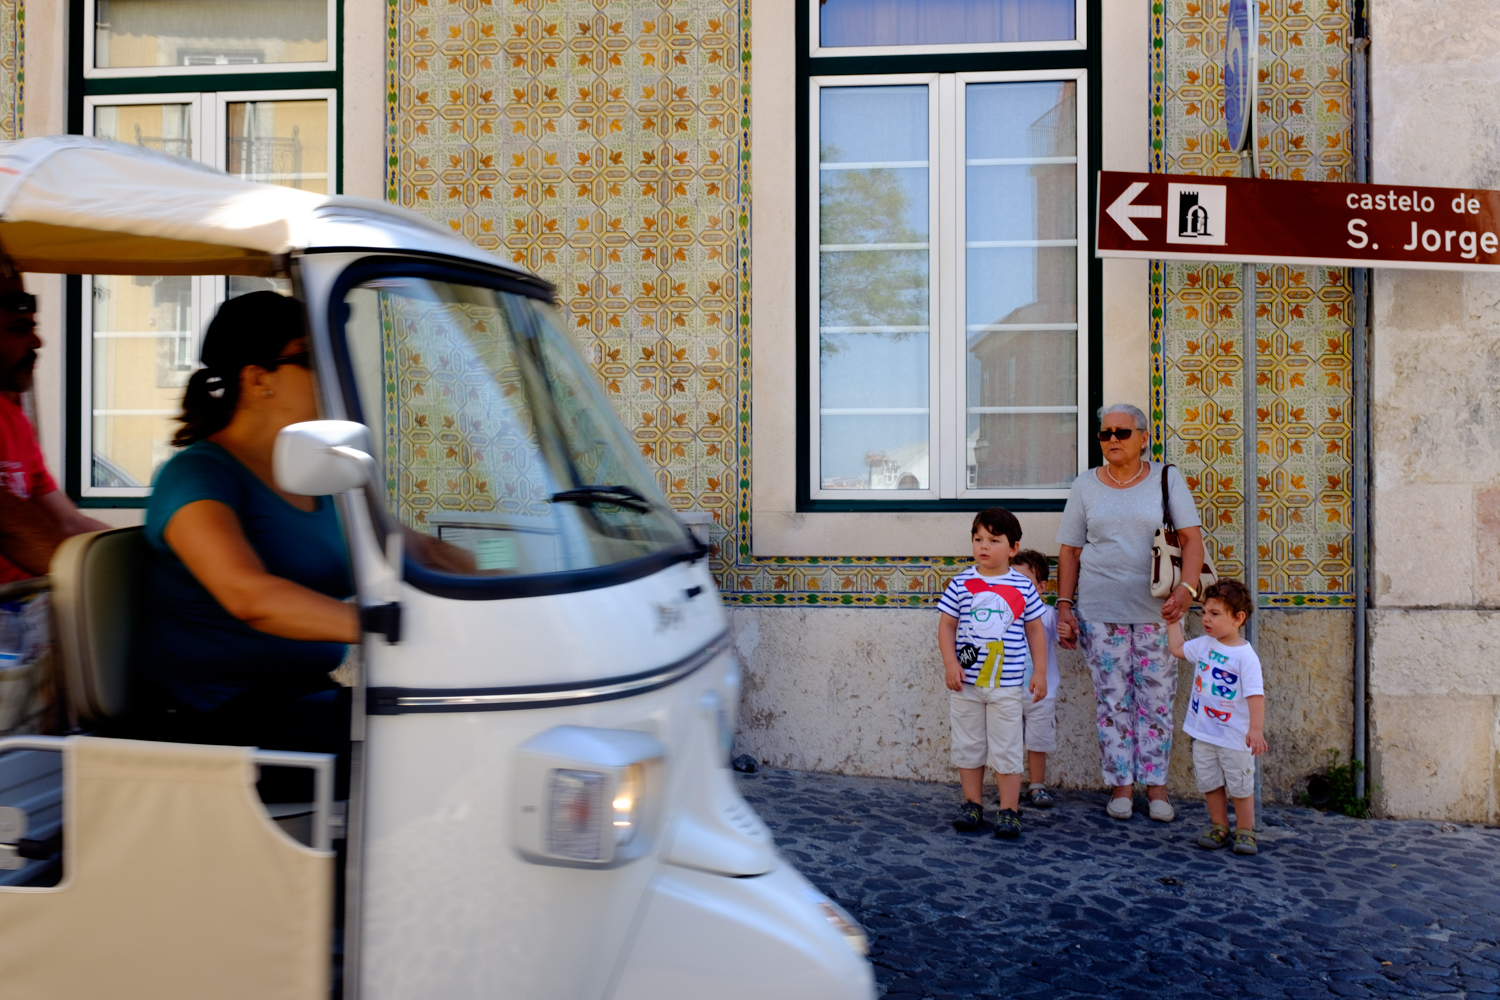
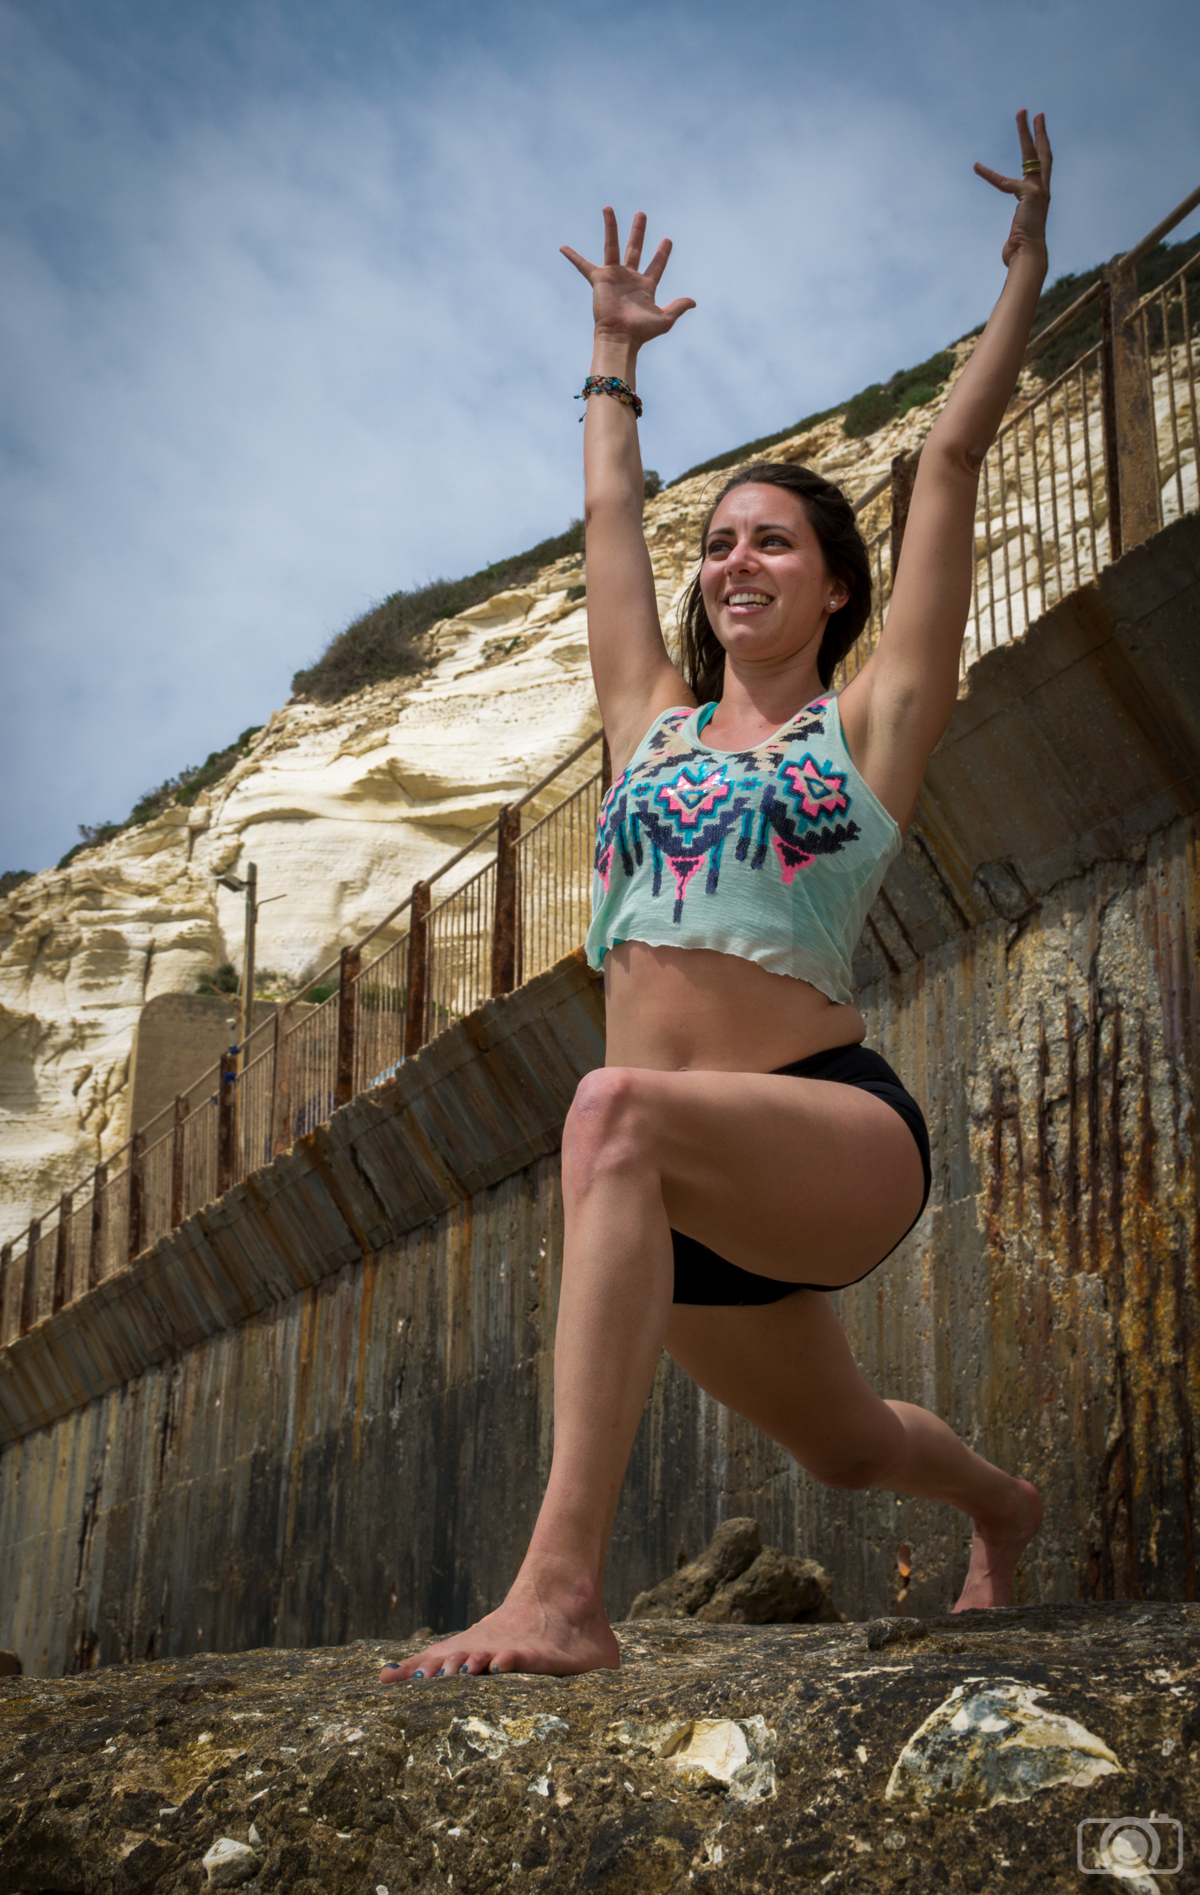
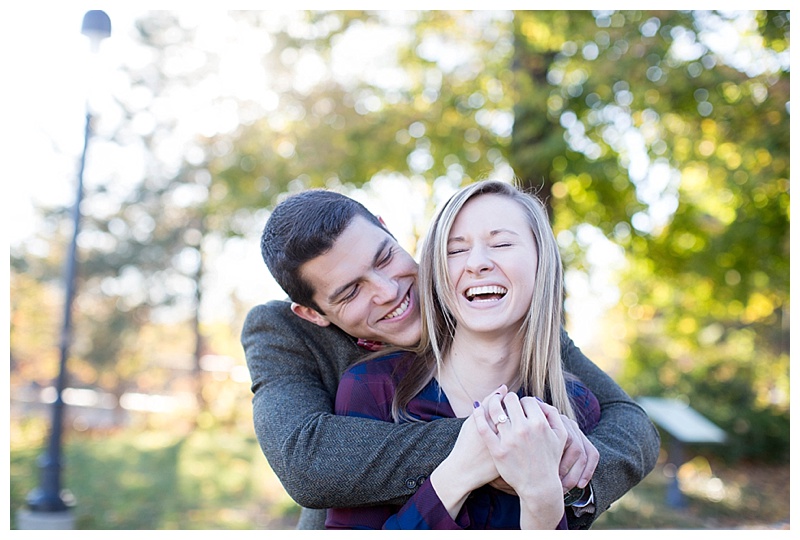
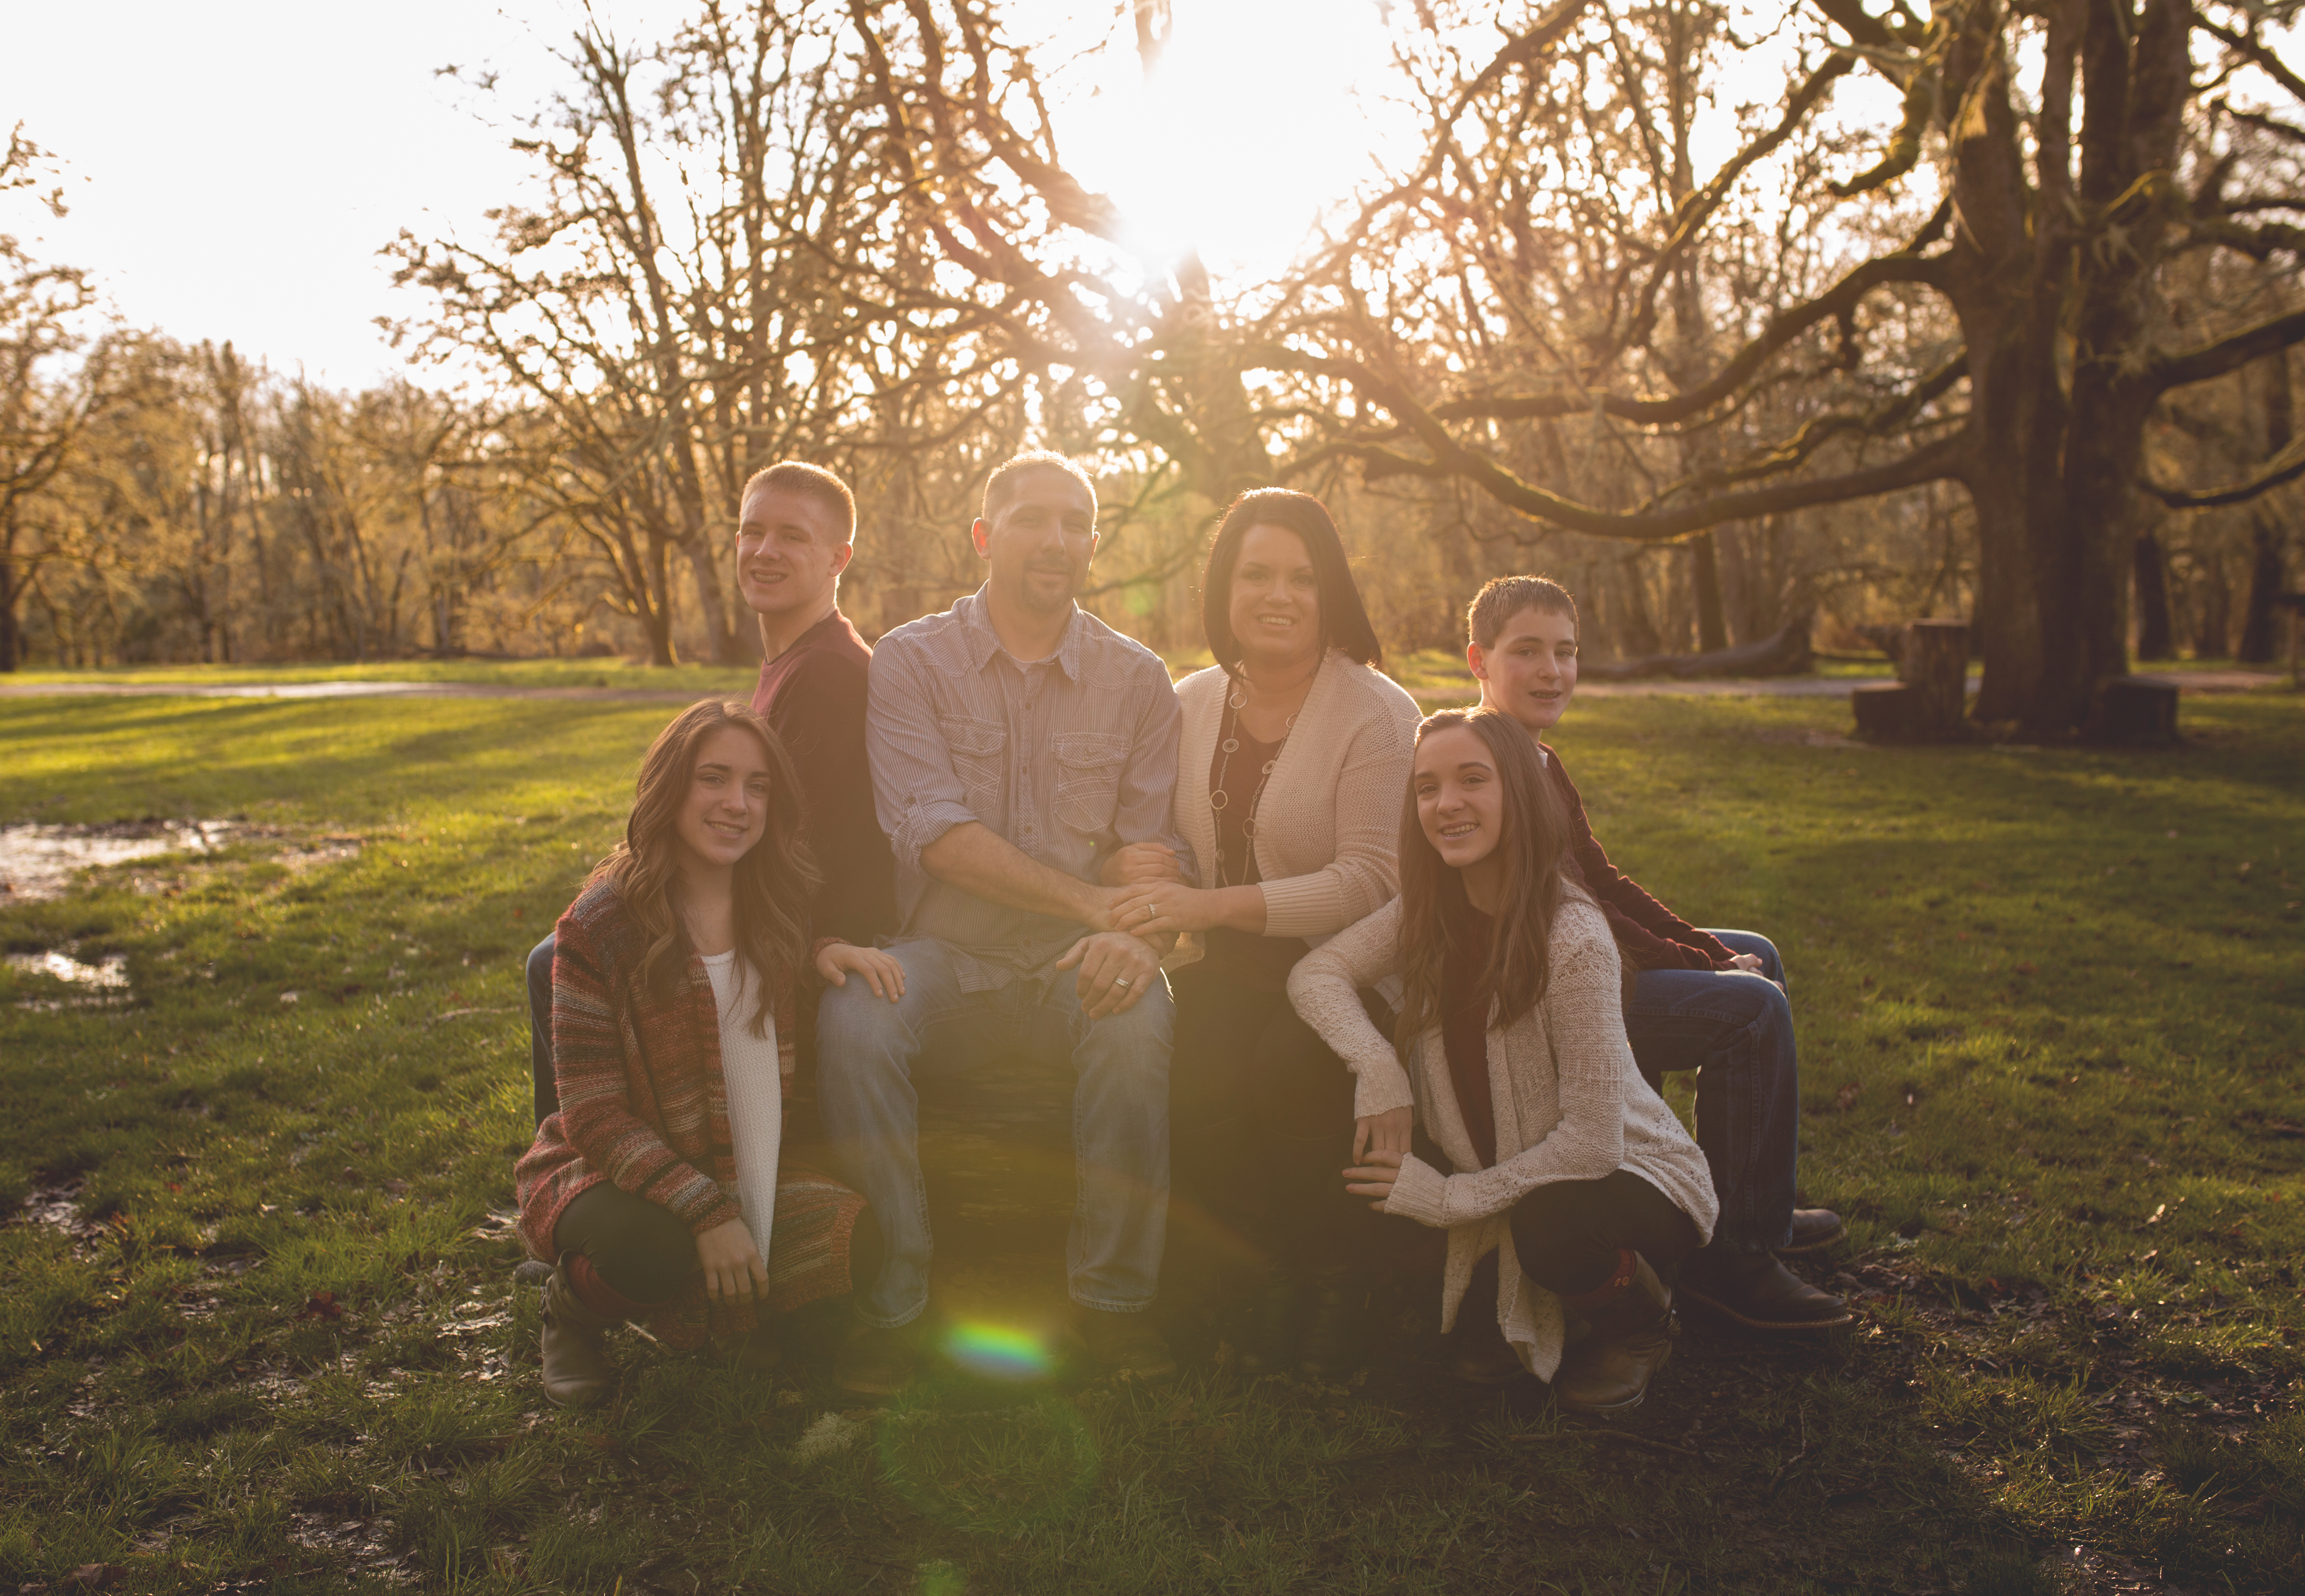
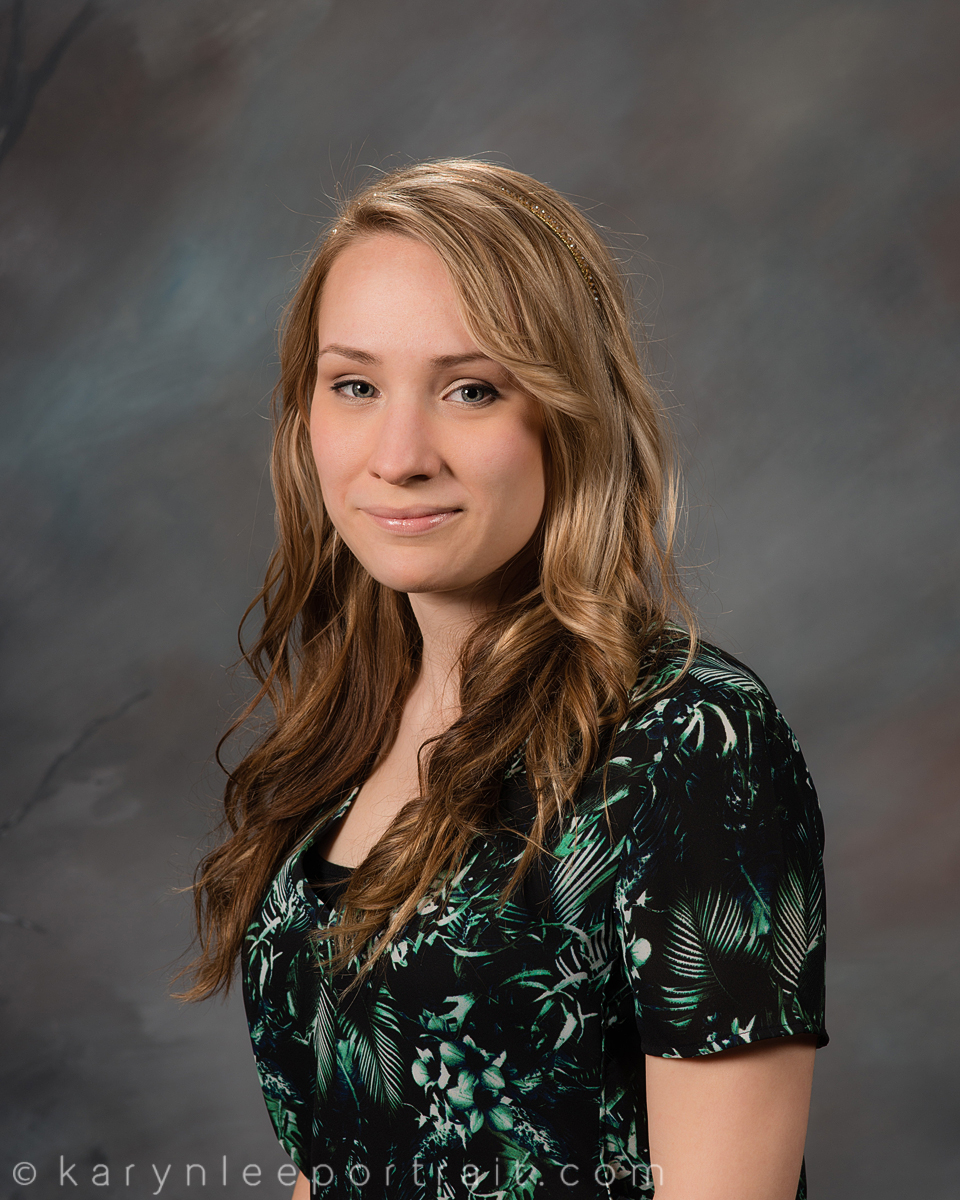
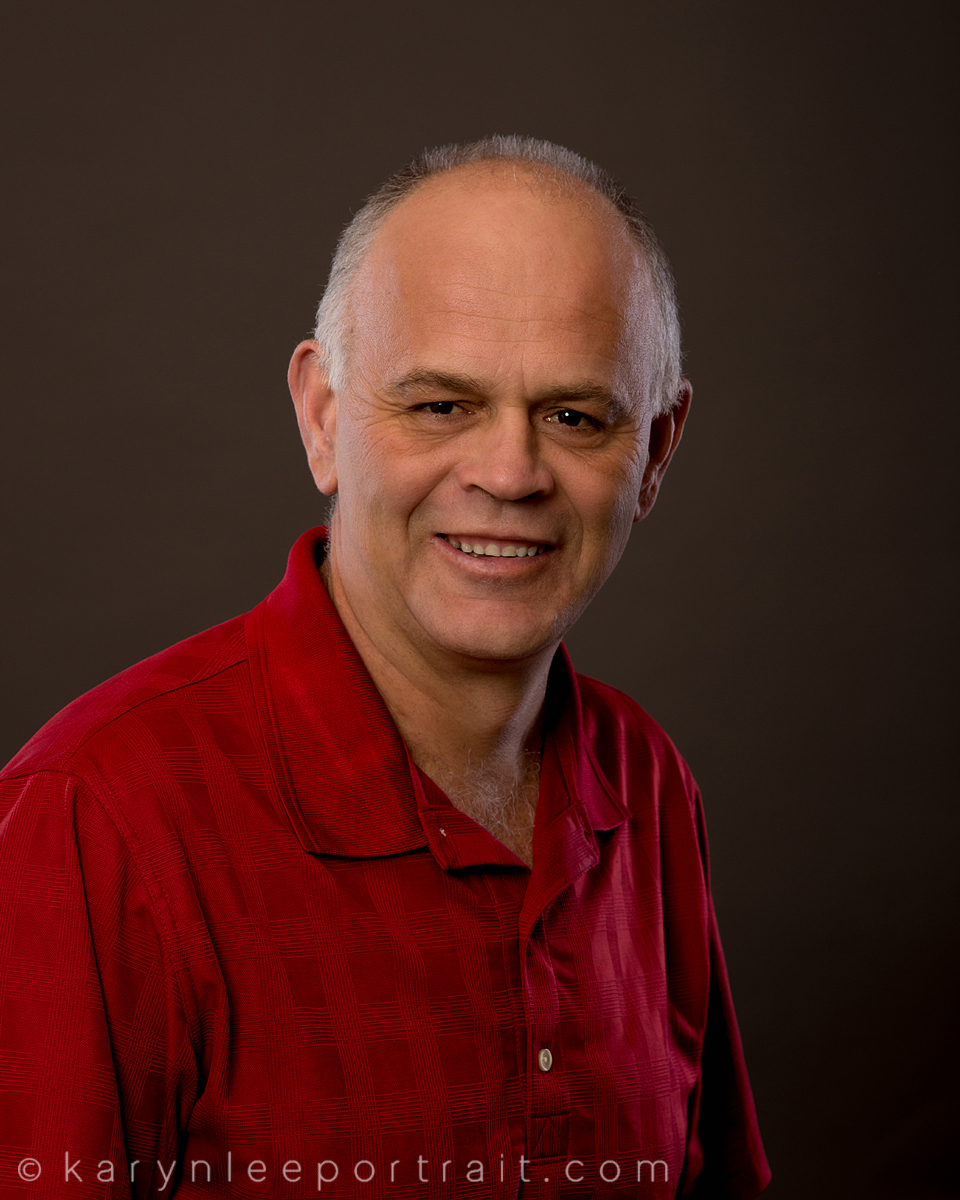
Engage/Look for Emotion

In a 2013 interview with Steve McCurry, he mentions the key to shooting strong travel portraits is to convey the story of the subject. You want the viewer to understand what life is like for this person. If you want to take stunning portraits, you need to be close to your subject. This means approaching them and starting a conversation. Be respectful of their culture and if they say no to a picture request, move on. There are plenty more people that are perfect for travel portrait photography. If they allow it, get close and frame the image. You should have already decided how to compose the image, so now you can just take the shot. Do take your time here. You’ve just asked for permission, so don’t rush the image now. Move around if you need to. Ask your subject to move if they can to better lighting if the lighting where you are is bad. This ties to the previous tip of finding the best light. You should have good light because of the time of day of your travel portrait photography. After you have the shot, thank them and show them the image. Offer to send it to them if there is a way.
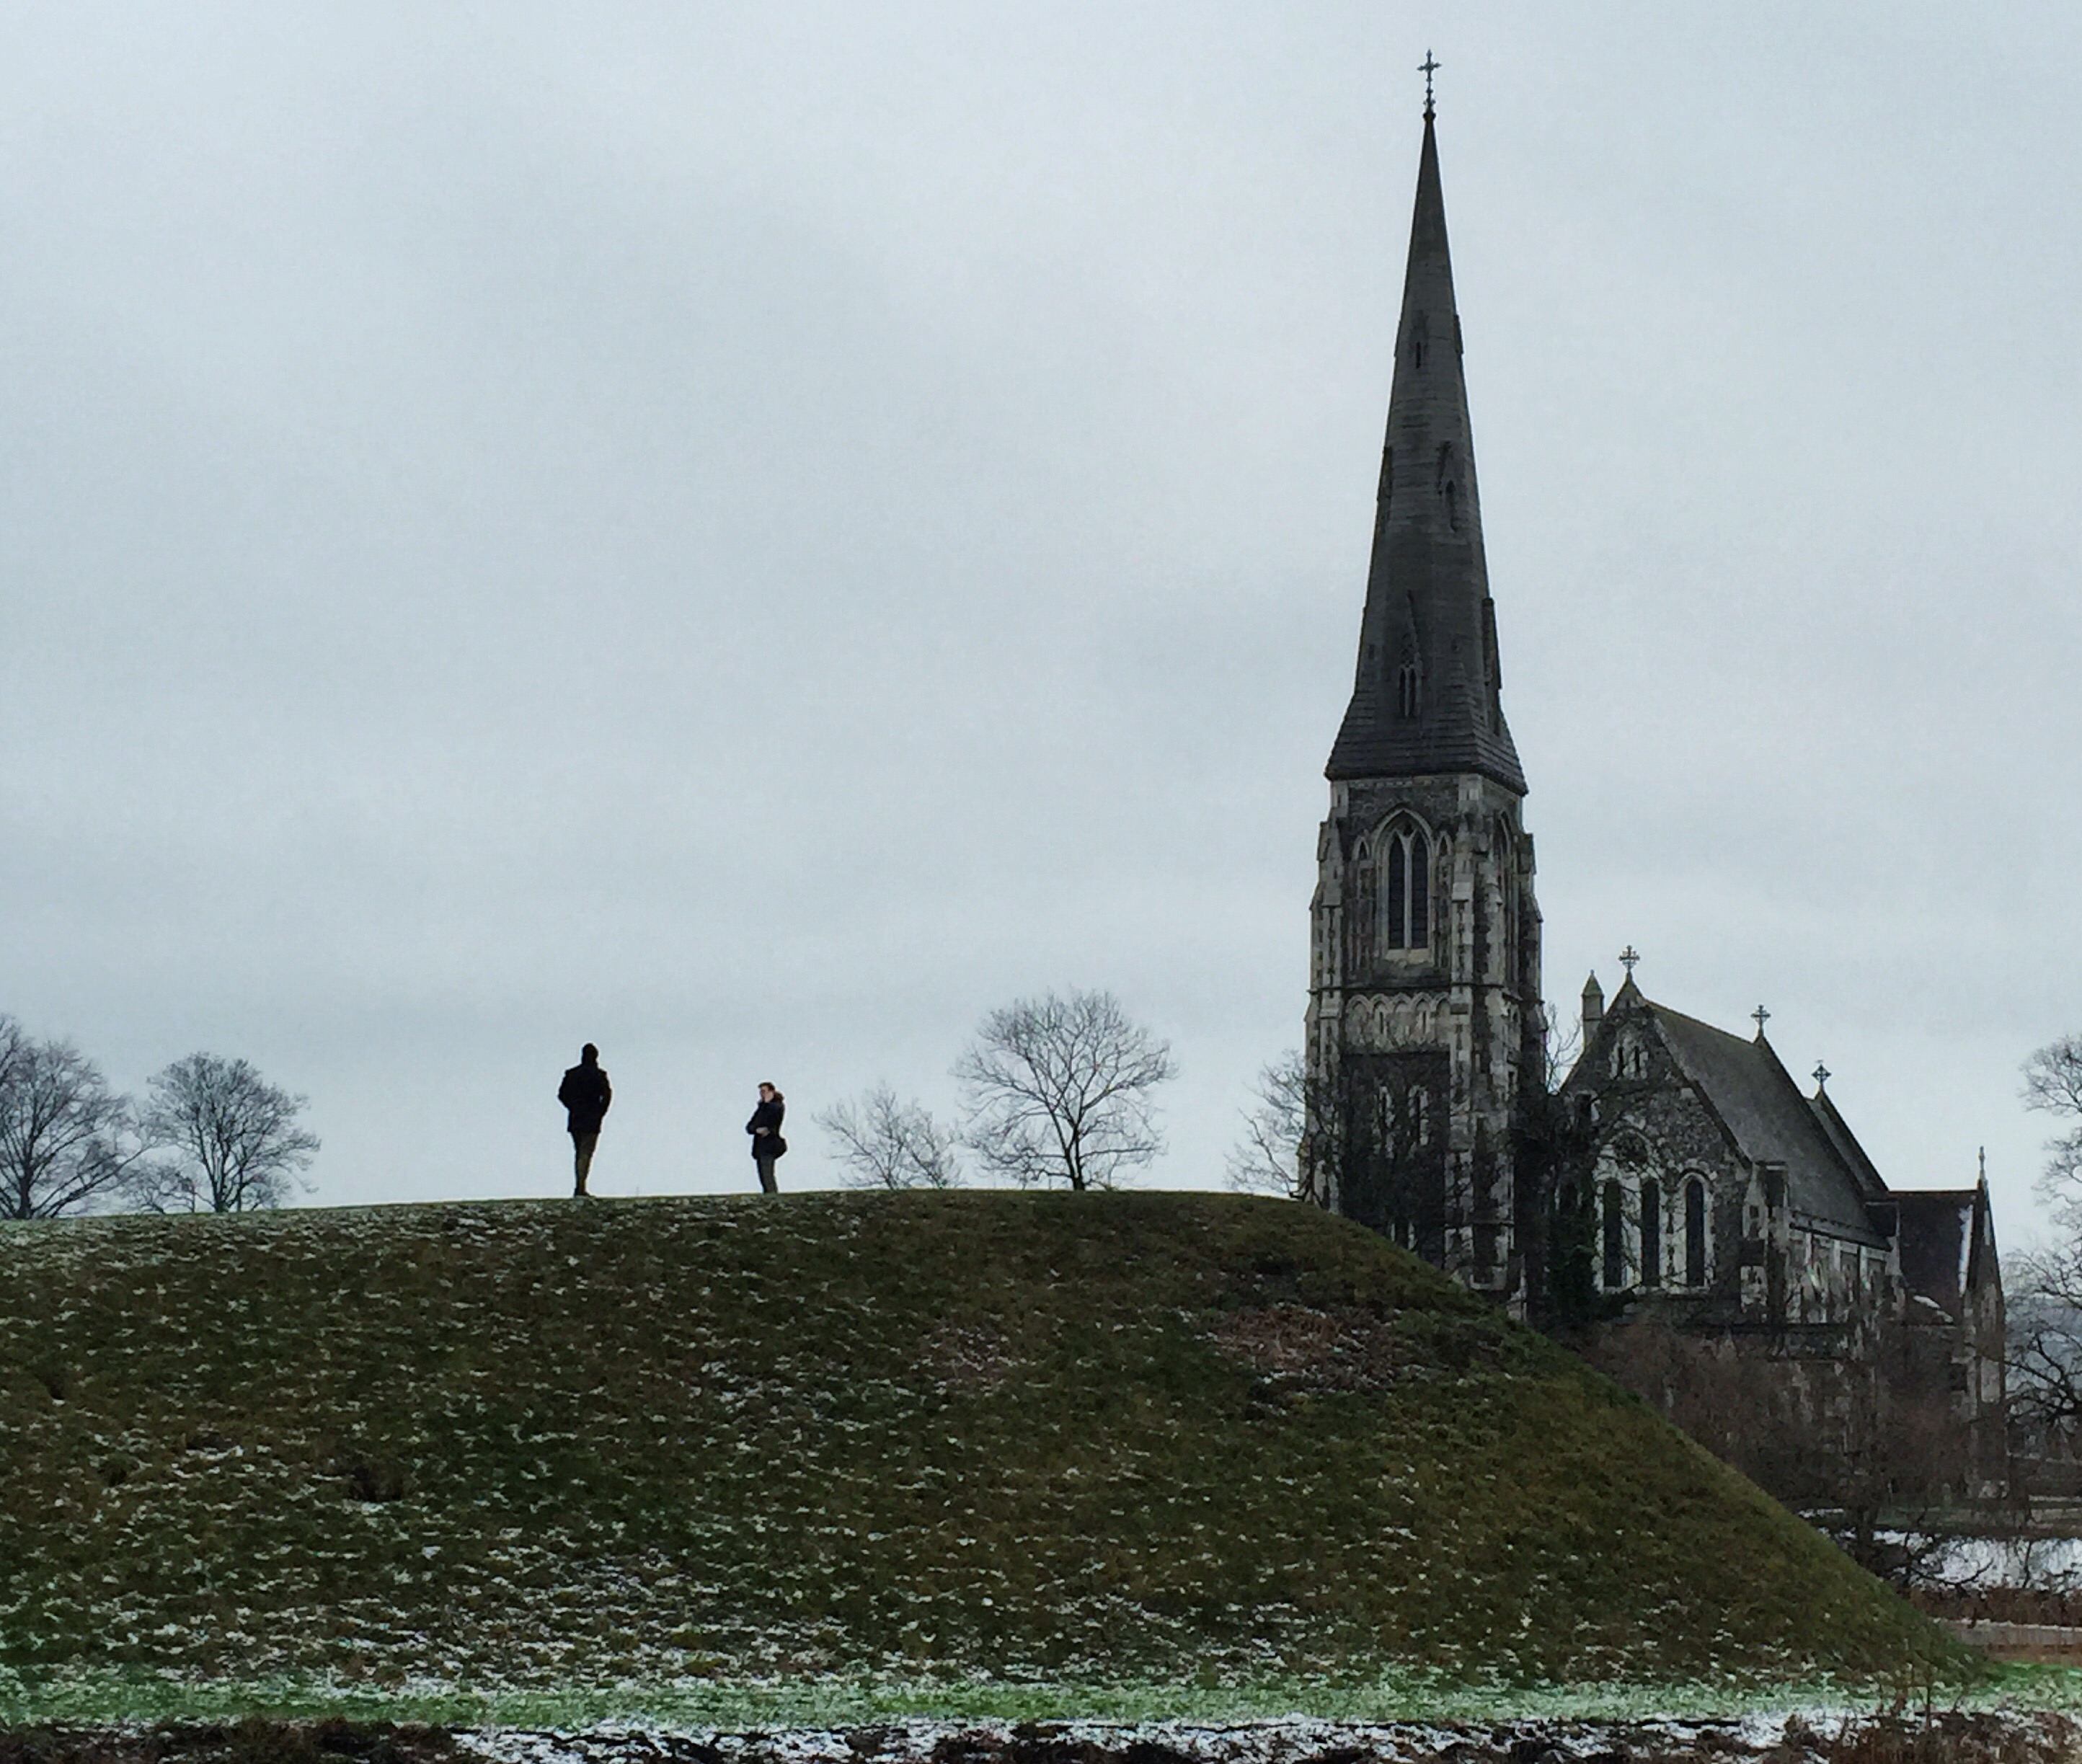
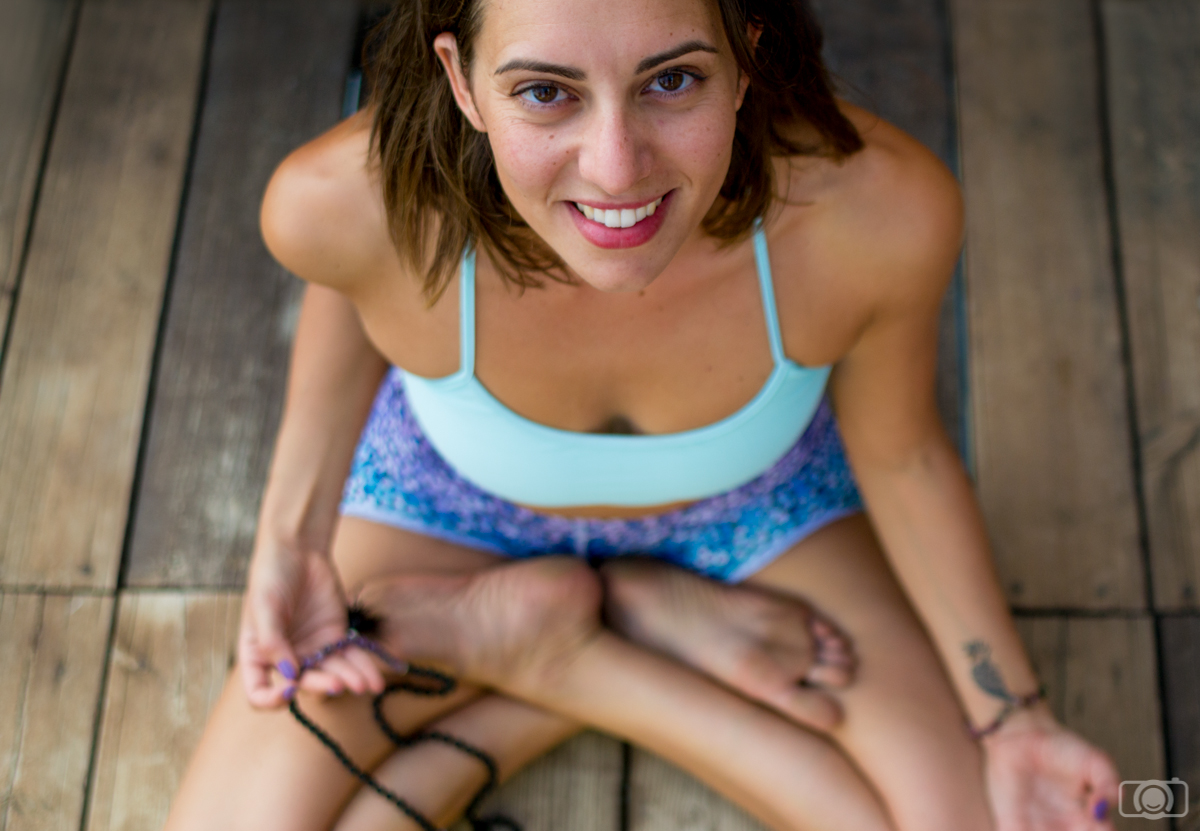
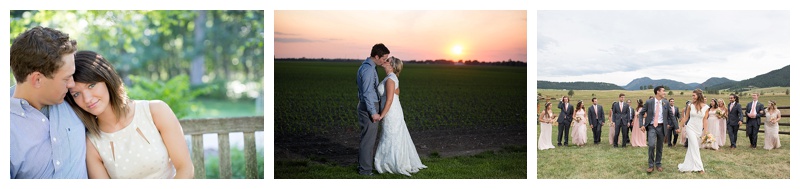
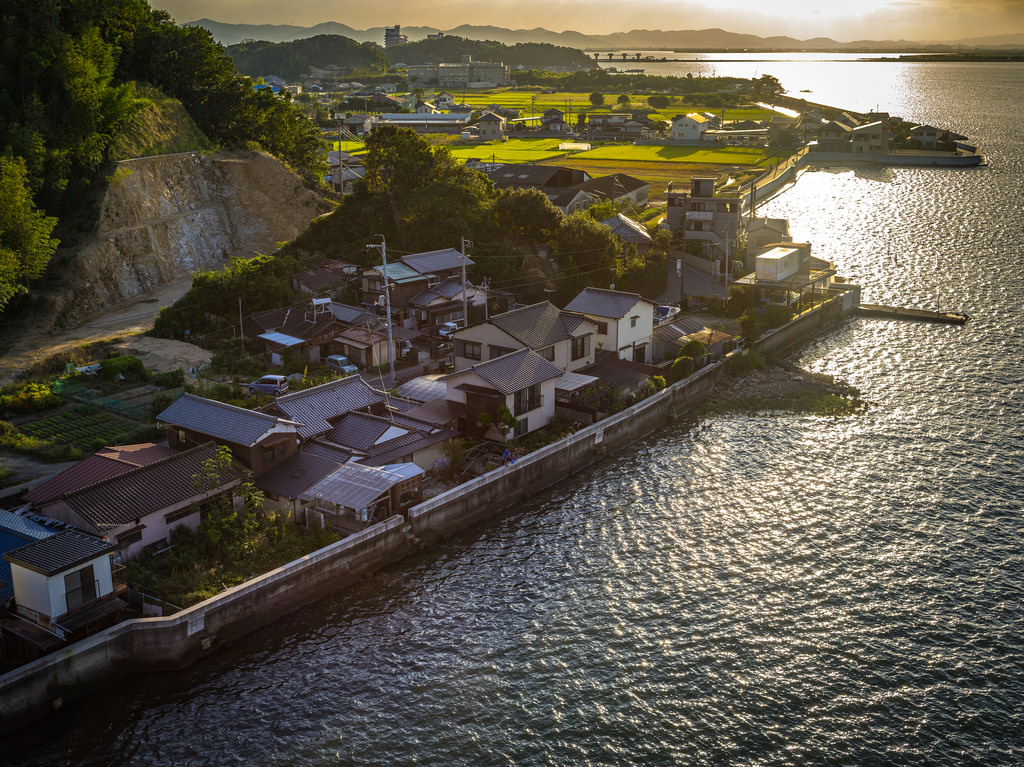
indians-642055_1920

Tell A Story

In a 2013 interview with Steve McCurry, he mentions the key to shooting strong travel portraits is to convey the story of the subject. You want the viewer to understand what life is like for this person. To do this, you’ll want to engage with the subject as mentioned above. Try and learn what their life is like, so you can better portray this through the portrait. If it benefits the image, include some background and make it an environmental portrait. Think about the overall story you are conveying with your trip to this place. You want your images to be strong enough to stand on their own but also think about a photo essay or even a book.

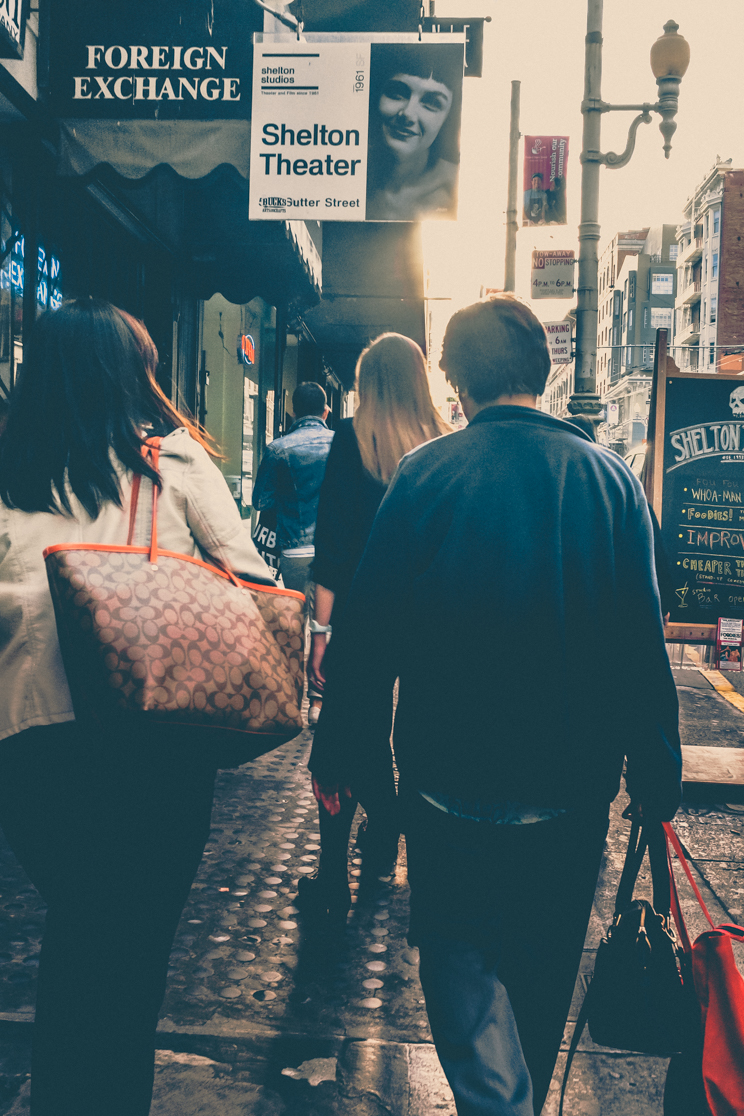
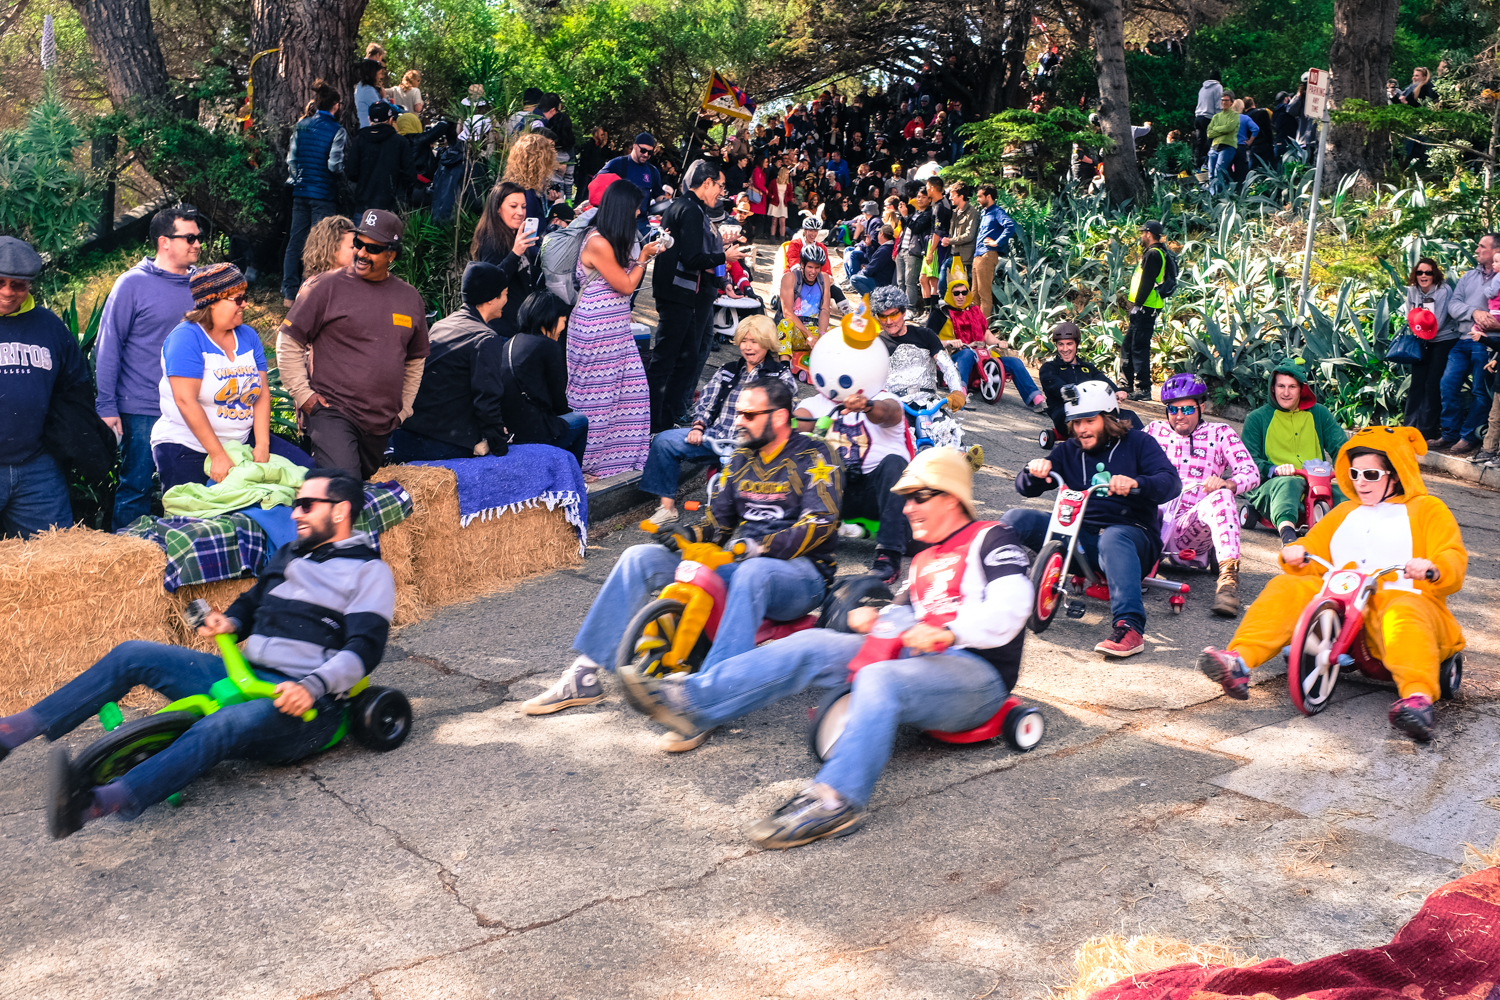
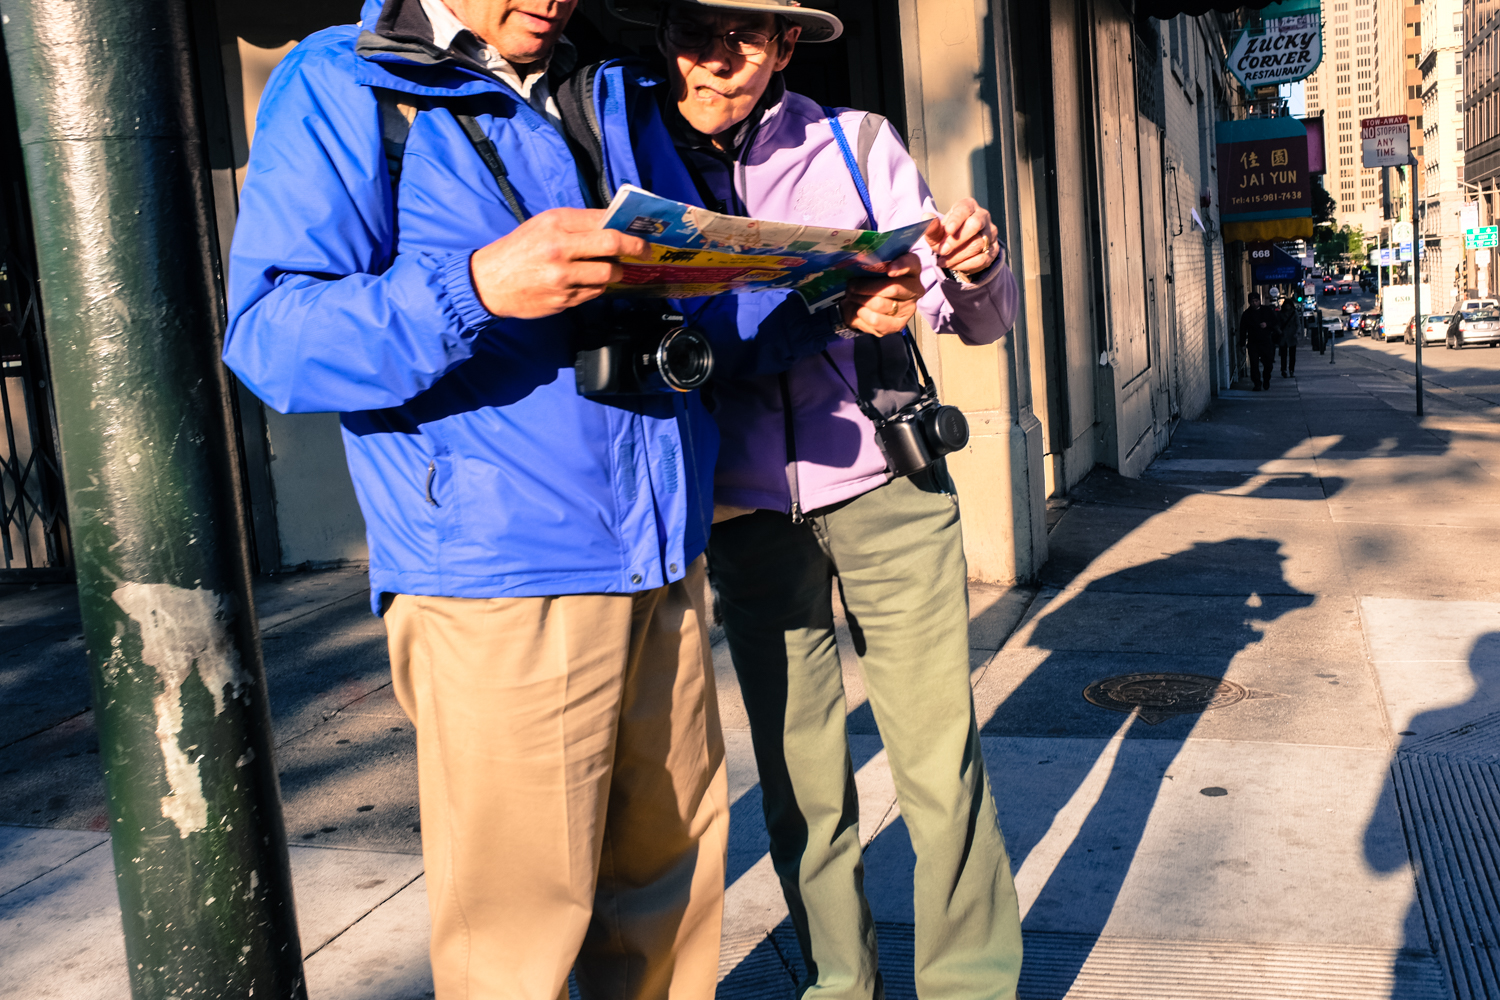
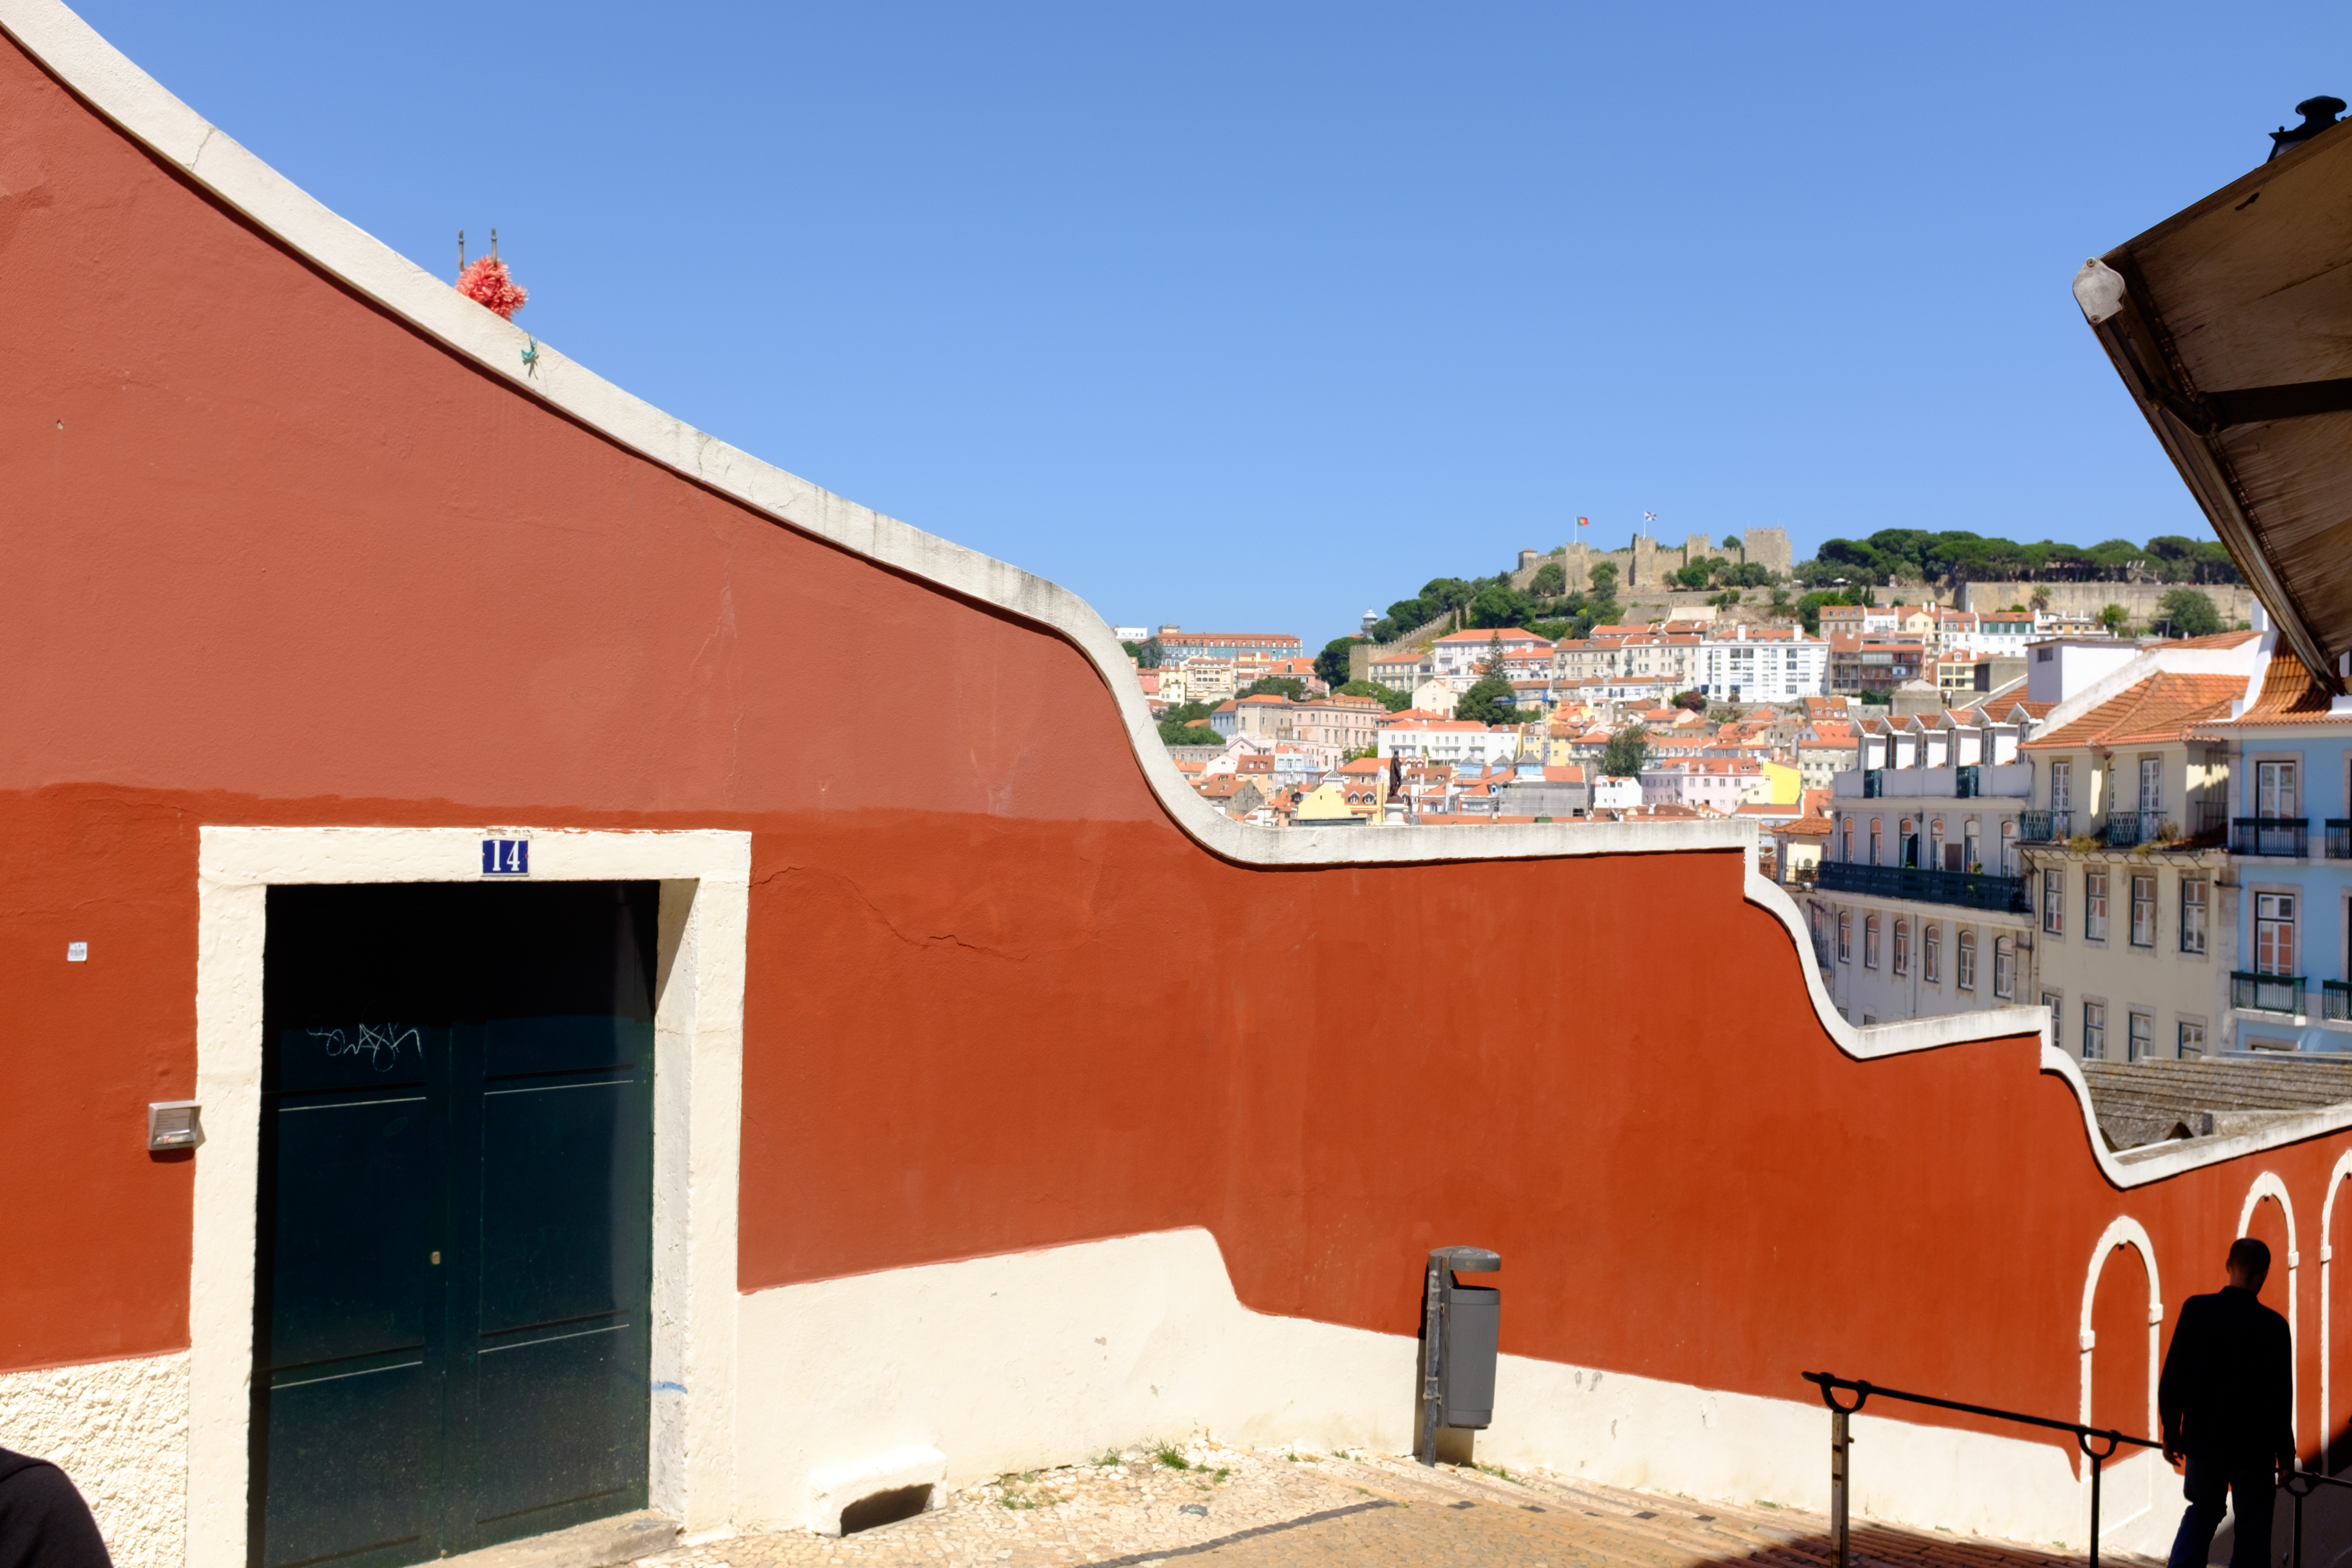
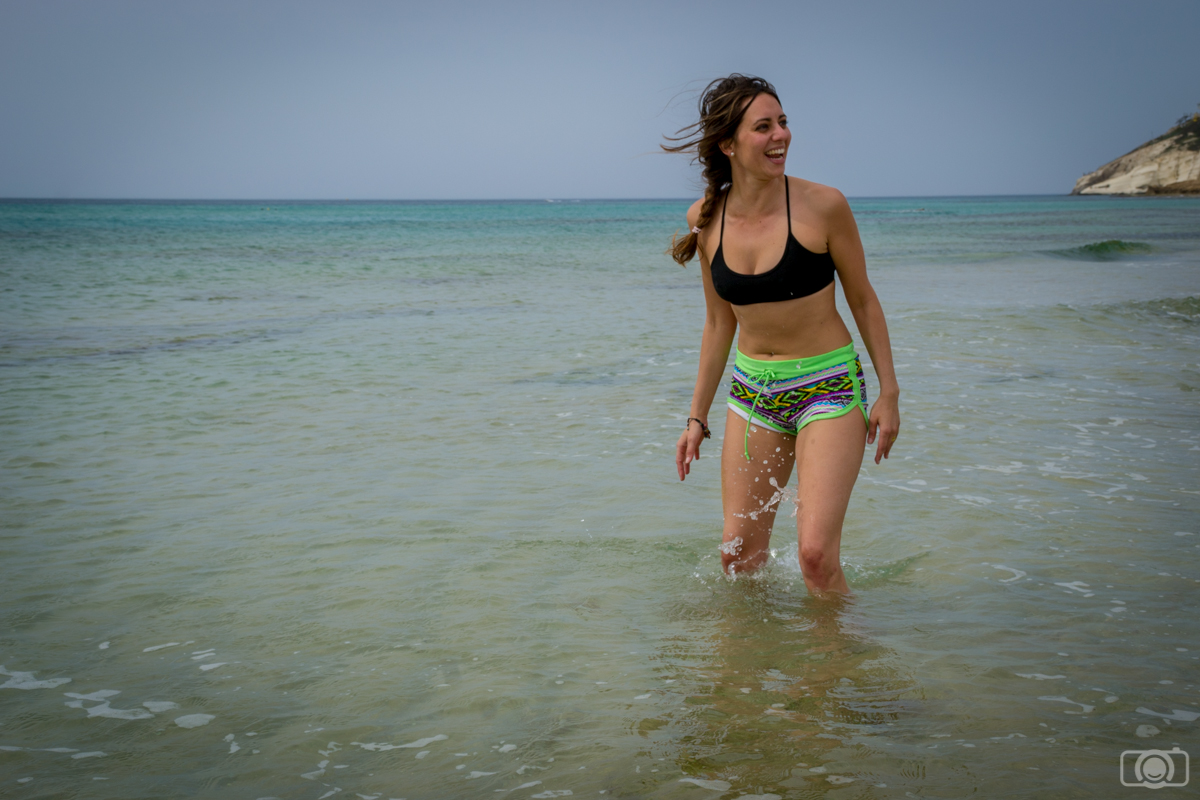
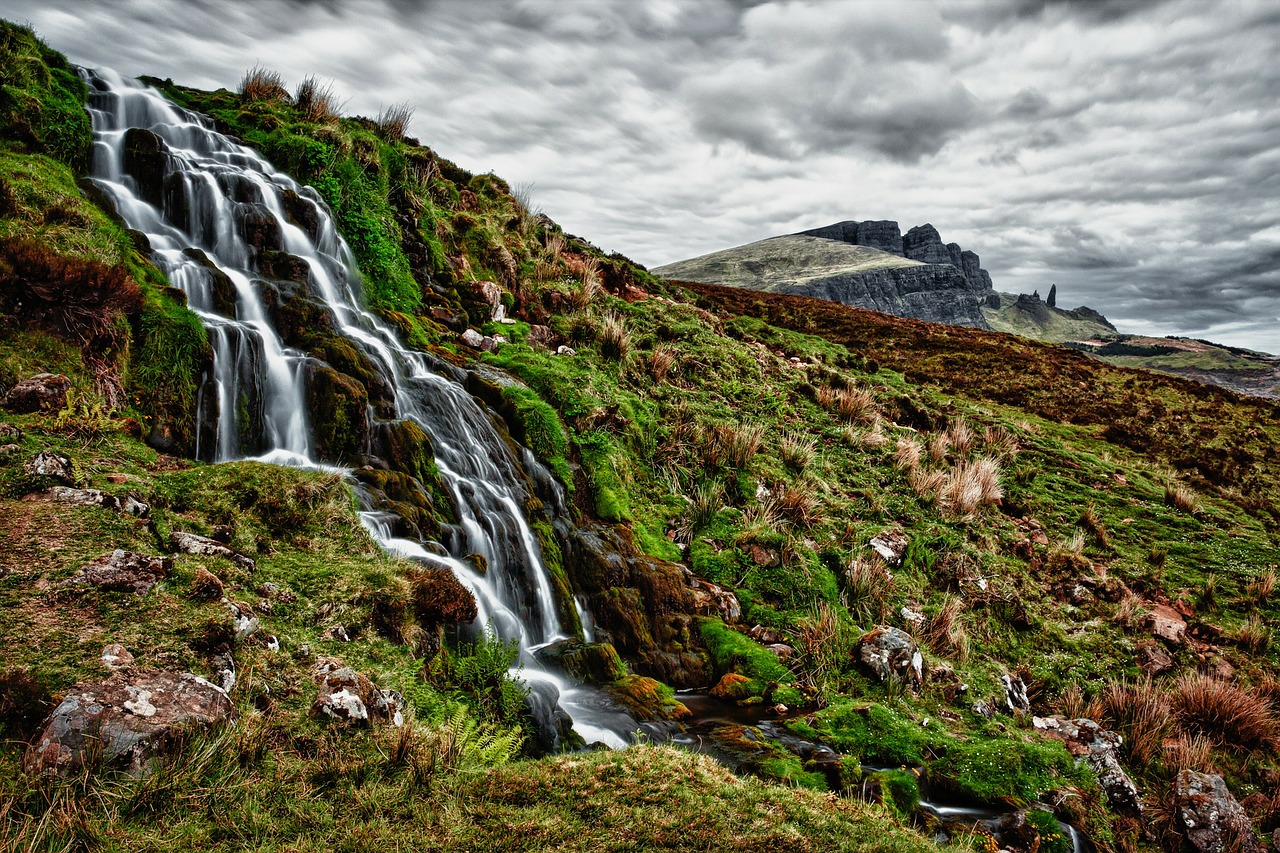
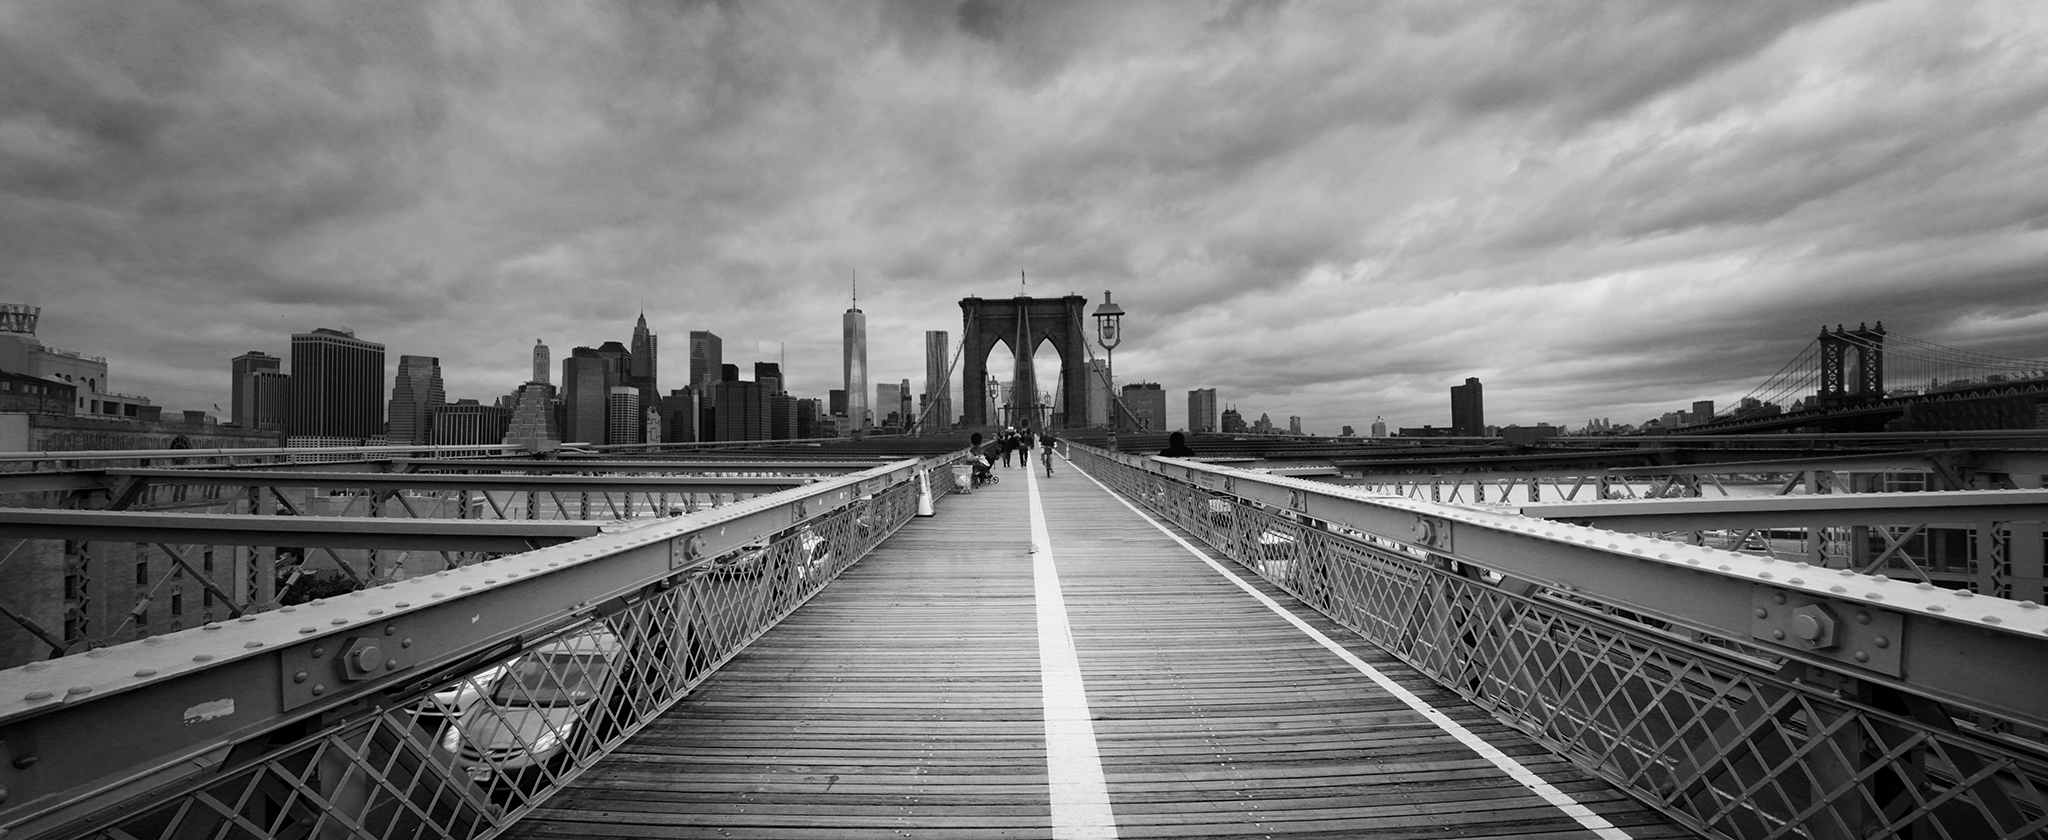
The Road Less Traveled

With the expanse of photography in the world, there are not many areas which are still untouched. However, you can venture off the beaten path to explore some less photographed towns during your trip. If needed, find a fixer or someone who can show you around and ensure you are safe. This is especially valid for solo travelers, you want someone on your side who speaks the language. While it could be challenging shooting in more remote areas, you will be sure to get a unique image showing the true emotion of the place. Make sure you smile, engage with the subjects and show them the images you’ve taken. People love to see a great photograph of themselves. If needed, it might also be a good idea to carry some small change with you to offer in exchange for a travel portrait photography.

human-613601_1920

While “Afghan Girl” portrays all of these qualities in one image, it is not easy to create a strong travel portrait. Use these tips as a guide and be sure to practice as much as possible before traveling to another country. You can walk around your hometown shooting portraits of the locals. Offer to send them the images. You’ll get some great practical experience and be able to nail down your accessories and settings before traveling. You don’t want to spend all that money just to be in another country practicing portraiture for the first time or you’ll be greatly disappointed.

Würzburg – Medieval Experience in the Heart of Germany

Europe is well known for its architecture and the preservation of historical places and monuments whose history span over several centuries. The tragic events of the two World Wars, specially the second one, led to the deaths of millions and the destruction of many of these places, something that had a significant impact in most German cities with over 100,000 inhabitants during the last years of the second war.

Würzburg is a city located in the northern part of Bavaria, in a region known as Franconia. On March 16, 1945, it took the Royal Air Force 20 minutes to destroy about 90% of the buildings, something that led the city to a long and difficult reconstruction process during the post-war years.

vineyards1

Nowadays, Würzburg is a small jewel in the heart of the country, surprisingly unknown to many foreigners. Being located at just over an hour on train from Frankfurt, it is a great place to experience the cultural background of the country.

The city is surrounded by vineyards and has a variety of buildings, churches, a fortress and a palace, making it a great destination for travel and architecture photographers.

The bridge

One particularly photogenic spot is the Alte Mainbrücke (old Main bridge). Main here does not refer to main as ‘principal’, but it is the name of the river, the same one that passes through Frankfurt (its full name is, in fact, Frankfurt am Main that would translate as something like Frankfurt next to the Main).

mainbruecke1

The bridge has some resemblance to the famous Charles Bridge in Prague, with 12 statues of religious and local Franconian figures that were placed on it during the 18th Century. While the original bridge was built in 1,120, it was destroyed due to floods in the region and, during the second war, the German army destroyed two of its arches. However, the bridge was re-built and it still remains as a great subject for photography from pretty much every possible angle.

Residenz

The so-called Würzburger Residenz is a baroque-style palace that was commissioned in 1720 by the Prince-Bishop of Würzburg Johann Philipp Franz von Schönborn. Both the exterior and the interior of the palace are considered master pieces of the architecture, even counting with the recognition of being one of the UNESCO World Heritage sites.

residenz4

The different facades offer different views, all of them with particular subjects that make the Residenz a place to keep coming back to. In the front (west side), a fountain (Frankoniabrunnen) from the end of the 19th Century serves as the perfect foreground, specially when using a wide-angle lens.

residenz3

The south and east sides face two gardens that provide countless points of view with different foreground subjects ranging from trees and flowers to small statues, always with the palace itself as a background.

In general, the palace is a great subject that should be visited at different times of the day and different seasons.

Marienberg Fortress and Vineyards

The Marienberg Fortress dominates the city from a hill located on the opposite bank of the river from the city center. Its history goes back to around 1,000 BC, when a Celtic castle was built in the current location. Its prominent position overlooking the whole city makes it a great subject when capturing the general view of the river bank and it also provides a great vantage point to capture the red roofs of the city from above.

marienberg1

To get to the fortress, one can walk up a series of trails that go through some of the vineyards that are located all around the city. Franconia is a popular area for wine production in Germany, with many cities and towns producing local wines, Würzburg being one of them.

If your interest lies in natural places, a forest called Steinbachtal provides different trails that can be explored with many different angles to make for interesting subjects as well. This is also a popular place for people to go jogging or biking, so you can easily combine the beauty of the forest with a human element.

steinbachtal

Finally, different possibilities for day trips are easily accessible by public transportation (mostly trains) from Würzburg. Two of the most popular ones are definitely Bamberg, a historical town located between Würzburg and Nürnberg, and Veitschöchheim, a municipality with a population of less than 10,000 located about 6 km north of Würzburg where the former summer palace of the Prince-Bishop can be visited.

Cat Photography: How To Take Street Cats Photos

I always thought that cats are fascinating animals. These little felines have such a strong personality that I can’t do anything else but admire them. However, I never had the chance of having a cat as a pet. I really wanted one when I was a little girl. My mom always said that cats are beautiful animals…from a far! So as you can guess, she was not inclined to share our place with one of them. Four years ago I moved to Israel. Even today I am still surprised by the amount of street cats that you can find here. There are some that even adopt you as “their human” and come every day to check on you and see if you can give them some food. I started to take photos of them.  I really love these little wild animals. Today I want to share with you some of the things I learned about street cat photography.

Have your camera always ready

Street cats are not going to wait for you to take the camera out of your bag and adjust the settings. I missed a lot of shots because I was not ready. Although you think you are fast, you won’t be faster than them. Remember that after all, these little guys are felines! Which are the best settings? You will usually need to use a fast shutter speed. So in order to get photos with enough light (not too dark) you will need to adjust the aperture and the ISO.

Cat photography
This little cat was next to our car. Luckily I had the camera with me and ready to shoot. If I had gone home to look for the camera, I would have missed him.

Don’t use the flash

I am almost certain that if you use the flash to take a photo of a cat he will be so scared that he will run away and maybe he won’t come close to you in a while.

Increase your ISO if needed

I prefer to take cat photos with low ISO (100-200) because then I avoid noise that can distract the viewer’s attention from the animal. However, if in order to take a photo I need to choose between increasing ISO and decreasing shutter speed, I don’t think twice: I increase the ISO. I have been working a lot of years with a camera that doesn’t handle well high ISOs, but even then it was better to have a picture with noise than a totally blurry photo. Good news for cat lovers: new cameras handle pretty well high ISO values. You can check at which ISO you start having noise with your camera. You can do it shooting at a black surface and comparing the results using different ISOs. Once you know your ISO threshold, try to keep under it. But I wouldn’t obsess with it. If you need it: increase the ISO. Also keep in mind that you can decrease some of the noise in post-processing.

Cat photography
In order to take a photo of this kitty I needed to increase the ISO. I still got his paw a bit blurry. In this case, I think that it adds to the image, but too much blurriness can make you lose the shoot.

Get to know them

After a while living in Israel I started recognizing all the street cats of the neighborhood. Cats are quite territorial, so they like to be inside the borders of what they consider “mine”. If you pay attention, after a couple of weeks you will realize that you always meet the same cats. From time to time you see a new one, but the main group keeps the same week after week. Each cat has his own personality. Knowing them well will help you to take decisions about the lenses you need or how to approach them.  For example, some of them are bossy. These guys are usually bigger than the others. They are quite self-confident so they don’t run away so easily. For them you don’t need a tele-lens, but you will need something more than 50mm because they won’t allow you to get too close (around 100mm should be fine). Remember, they think that you are a simple human under their mandate. They could attack you if you get too close. Others are fearful and the closest you can get to them is 50m. You will need a lens that will allow you to zoom from far because they will run away as soon as they see you. Others are a bit more naive and you can get really close to them. With them you can use a 50mm or even a 35mm.

Cat photography
This cat came every day to my place for the 4 years I was living there. He adopted me as his Human. He is the total boss of the neighborhood. We established a pretty convenient unspoken agreement: he was protecting my home from other cats and I was providing him milk. We understood each other. However, not even once I was able to touch him. Lucky me, I was allowed to get close enough to take photos of him.

Study their habits

The most part of the cats have habits. They have a favorite place to sleep, they visit a garden at certain time of the day, they go  to the house of that neighbor to eat second breakfast… when you recognize a pattern, you can anticipate there moves and be ready to shoot. You can even hide somewhere as if you were a National Geographic photographer (I love doing this, I always have a lot of fun!!)

Cat photography
This cat likes one of my garden’s chairs. He comes almost every day. I just needed to wait for him hiding behind a blind to take this photo.

Be patient and don’t get mad at them

You can’t tell cats to pose or do what you want, so be patient with them. You will probably need to take a lot of pictures before you get one you like. Keep your mind open. Maybe the cat is not doing what you expected, but probably it will do something good. Or maybe he will run away and leave you frustrated and wanting… If this happens, just accept it. Don’t get mad at the cat. You will have more chances in the future.

Cat photography
Cats rarely do what you want or expect from them. Be open minded and appreciate any chance they give you, even if they decide to look to the other side.

Take advantage of the fact that cats are curious

Cats are curious by nature. And this is good for photography. Some of them are already curious for the noise that the DSRL’s mirror does when you shoot. You take a photo of them and they just stare at you as if wondering “What is this noise?”. This is your chance to take a good picture. Other cats need a bit more. But usually if you play with something in front of them or if you make some subtle noise they will look at whatever you are doing.

Cat photography
This kitty was so curious about the noises coming from my camera that he was staring at me for several minutes (enough to take a photo)

Focus on their eyes  

When we are looking at a photo we usually pay attention to the eyes, so try to keep them sharp.

Cat photography
Cat’s eyes are quite impressive. Try to focus on them and keep them as sharp as you can.

Do you have any experience photographing street cats? Tell me how it was and if you tried some of these tips. I would love to know about your experiences! Have a happy shooting!!

5 Off-Camera Lighting Techniques for Wedding Photography

Wedding photography is something that has a great deal of power behind it because it is one of the most important days for two people. Doing things right can make your wedding photography stand out, and it can also give your clients something they will treasure for many years to come.

One great way to get that lasting look is to use off-camera lighting techniques to get things just the way you want them.

To that end, here are five tips to get the perfect lighting for your wedding photography, or even a bachelor party!

1. Use a Softbox

A softbox is a great way to shape the light that you want for the pictures. By using a softbox with a grid, you can have a 50-degree angle of light, which creates a soft look for certain parts of the ceremony, and a harsher look when you need it. In addition, it gives you a great deal of creativity with your wedding photography. Using a softbox can give you more detail in the pictures, and more color on the skin tones of the people you are taking a picture of.

off-camera-lighting-1

2. Ceremony Shooting

When you are shooting the ceremony, the lighting is incredibly important because you don’t want to use the flash in this regard unless you absolutely have to.

The only time you should ever use the flash is when the procession is walking down the aisle following the ceremony itself. In addition, the lighting of the flash should be incredibly low, so you don’t overexpose anyone or wash out the dress.

The best off-camera light to use here, if you need the flash, is to use speedlites. These will be set up in the corners of the room and it will allow for even light to bounce around. It will also give you sharp and detailed photos.

off-camera-lighting-2

3. Build a Studio

When you are at the wedding, don’t be afraid to build a studio on-site to get the right portraits that you want. There are several light options in this regard, including:

  1. Use a key light that can go up to 12 feet in the air. The key light should be an umbrella light, which will allow for a greater amount of soft light to be used.
  2. On the other side of the key light, have a fill light that will serve as a counter balance to the key light.
  3. Use at least one rim light to separate people from the background and have the couple stand out even more.

off-camera-lighting-3

4. Photographing a Group

If you are getting a photo of a large group of people, especially the wedding party, you want to keep drop shadows from happening. One person could end up causing a shadow over another person, and it can make the entire wedding photo look poor. You don’t want this.

You want your wedding party to have equal light and to have no one fade to the background. Yes, the bride and groom are important but everyone else should have an equal share of the light.

The best option is to have two key lights behind and to the side of the wedding party, umbrella lights if you prefer. Behind you, there should be two soft lights on either side.

That will create a nice soft light around everyone, and give you a great balance to the picture itself.

off-camera-lighting-4

5. Best Course of Action

When you are shooting a wedding, your photos need to be striking, and they need to really highlight the bride and the groom.

They are your focal point. Don’t be afraid to test things out beforehand to get the right light balance. You only get one chance at this, so you want to do it right.

Wedding photos that look poor will cause you to lose work and can even lead to a lawsuit. Don’t let that happen.

Your best course of action is to always plan ahead and make sure that you get the right off-camera lighting for your wedding photography.

off-camera-lighting-5

When you are taking wedding photos, there are a thousand things you have to contend with. You have to deal with the lighting of the church, or the lighting outside if it is an outdoor wedding. You have to deal with shadows, other people, even the color of the tuxedo and the dress itself. So many things can go wrong, but many things can go right when you use off-camera lighting.

There are many different setups you can try with off-camera lighting, so don’t be afraid to play around with it. See what you can create, and go with it. You should also detail your plans to the bride and groom so they know what you have planned, and so they can help you make the pictures look amazing.

Family Photography Activities To Enjoy Together

As a photographer, you can spend a lot of time learning about your craft, looking for perfect locations, setting all your gear, taking the shoots, editing the photos… it might seem like it is not compatible with a family life. I totally disagree! Family photography activities are perfect way of combining photography with having a good time with your family and friends. You just need to find activities that will be appropriate for all ages and that will be fun for everybody.  Besides, they can also be an educational tool. I collected some ideas that might help you to set up your first family photography activities. Soon you will be designing your own!

ABC photos/colors/numbers

For the ABC photo activity the whole family should look for objects that start by a certain letter. You can do several letters by day or just one letter by day/week. Once you have all the ABC letters you can build a collage. You can print it and hung it in your kids’ room or in a shared space at the house. A more advance project would be to take photos of objects that look like letters. In this last one you can build words combining the different photos.

Family photography activities
Apple, book, cup… the ABC activity is fun for the whole family and you can always get surprised from the ABC of the other family members.

In the same project style, you can take photos of colors and numbers too. I think that the most important thing in these type of projects is the collaboration of the family members in both taking photos and in designing things with the photos.

Family photography activities
Looking for a certain color can be a fun challenge too.

Family scavenger hunt

Set a list of objects to look for in the house and send all the family to take photos of all of them. The first person that photographs all the objects wins.  Or take as many photos of one thing as you can (flowers, cats, trees…).  The idea is to turn it into a challenge that will keep the whole family active.

Family photography activities
Scavenger hunts can have a high educative value. For example, you can do a scavenger hunt about flowers and then your family can get to know the names of the flowers and which ones are endemic to the area. Other nature related subjects can be trees, insects, just butterflies….

Create stories with daily objects

You can create a story with simple objects or toys and take photos of it. It doesn’t have to be a long or elaborated story. Here the fun is in being creative and let fly your imagination. Once you have the photos, you can put them together and add some text. You can also sit with your family and work together  in Photoshop or any other editing tool in order to make the photos look a bit more as like a cartoon.

Family photography activities
“Kiwi” is a foreign exchange student at Eggland High School. He is a nice guy, but he can’t control his strength so well. He just wanted a hug from their new friends, but…Upppps… he screwed up…
Family photography activities
You can also add some fun filters in Photoshop to make the photos look more like a paint/cartoon.

Document your traveling toy

Let your kids take photos of one of their toys in several locations: garden, park, at home, in your holidays… You can create postcards with them, make a collage or even to write a story about the adventures of the toy.

Family photography activities
We took our favorite Minion to visit the Yezreel Valley (North-Israel). We think he liked it! 🙂

Light painting

Light-painting is fun for all ages.  Using this technique you can draw with light: you can make shapes or even write something. You can also use light-painting to animate some objects. You just need to find a dark place to set all the equipment. You can do it both at home and outdoors (it is a perfect activity for camping nights). Light painting can go from simple settings to really elaborated ones. Make sure to choose the appropriate level for your family and have fun!!

Family photography activities
Light painting doesn’t always need a complicating setting. You can also have fun doing light painting at your home. Here we tried to animate our VW van piggy-bank.  We set the VW van, we put the camera in a tripod and we turned off all the lights of the room. We shoot using the bulb mode (this mode allows long exposure times. The shutter stays open as long as the shutter button remains depressed). With a simple flashlight we lighten the van (our flashlight was pointing to the van at that time, and not to the camera. It is like if you scanner the object with the light) and we “draw” the smoke and the sun pointing with the flashlights to the camera meanwhile we did it. We repeated the photo a lot of times until we got something we liked. Maybe it is not the best light painting photo ever. But we have tons of fun, and this was the most important thing for us!

Family selfie project

Family selfies are always fun. Grab a selfie stick and take family selfies at different moments of the day. You can also do longer projects and take one selfie by day for a month. Or even one by week for one year. See the option that suits better your family and go for it! For making it funnier, you can let all family members to participate in staging the selfie: with huts, clown noses, eating ice-cream… all the ideas can be good for making the selfie project outstanding. You can share your family selfies with other family members and friends. This project is also a great way of recording the changes of your family during the time that the project lasts.

One photography skill by month

If you want to develop the photography skills of your family, you can teach one thing by month and let them practice. At the end of the month you can sit all together and show to each other the photos. You can then celebrate that all of you learned something. How to celebrate it is up to you!

Family photography activities
One of the skills that you can teach them is how to use depth of field/aperture. Try to adapt the explanations in a way that everybody can understand them.

I just want to add one last thing. Photography projects are fun when everybody wants to participate. If some member of the family hates photography, this kind of activities will be a nightmare for him/her. As we are passionate about this craft, it might be hard for us to understand them. But it might happen. And it is OK. They don’t have to do it. We are all different and in consequence, we like different things.

Are you thinking in trying one of these activities? Do you have any other activity to add to these list? I would love to know about them!

Have a happy shooting!!

6 Tips to Become an Advertising Photographer

Advertising photography is a field that many photographers want to get in to. It has the allure of working with big name companies who can provide regular work and good pay. You may also find yourself working with well-known people on both sides of the camera, and potentially working in a variety of exotic locations.

Getting to this stage isn’t an easy task at all though, as marketing is a complex and demanding business that will only consider the very best of workers at its top levels. If you really are determined to do it, you’re going to need a lot of drive and hard work. With that said, let’s look at some tips that could help you on your way to achieving this dream position.

1. Build a Strong Portfolio

advertising-photography-2

Decide what type of area you want to get into and start by building a large, high quality portfolio of work centered around that area. It can be tempting to go wide in your early days and try to cover all types of subjects. This isn’t a bad idea for gaining experience and of course to keep work coming in.

phto1


Keep in mind though, it’s a lot harder to become a general advertising photographer than it is to become a specialized one. This is why you should build a portfolio based around one type of work and try to get into that first. From there it’s easier to expand to other areas if the opportunity arises.

2. Put in the Extra Work

You also need to make your work stand out from that of other photographers, so put in the extra time and effort that’s required to make your work better than that of the competition. This can involve getting to locations early to scout the best spots and decide how to integrate the location best into your shots, or putting in extra work on your own time to experiment with different settings, equipment and styles, finding those that work best for your chosen product or location.

phto2

3. Study the Best

advertising-photography-3Study those who are already highly successful in the fields you want to enter and see what they do well and how they add their own individuality to their work. This can act as a framework for you to learn from, and trying to emulate their work can give you a better understanding of how they achieve the quality they do.

phto3

Don’t just look at their work either, try to find interviews and articles explaining their methods and thought process so you can emulate it when you create your own. Sometimes these people may even be willing to give you some tips personally if you reach out to them, so don’t be afraid to try!

4. Research Your Products & Target Audiences

advertising-photography-4

All products are different and they target different markets. This information can be useful to you when you understand what makes a product unique and also what people are looking for in it, as well as why they buy it. Knowing these facts can help you understand what you need to highlight when you’re shooting and adjust your style accordingly.

phto4

An example would be using edgier angles and filters for items marketed to teenagers, especially those into alternative culture, while perhaps trying more minimalist styles for those items aimed at an older, more sophisticated crowd.

5. Expand Your Marketing Knowledge

advertising-photography-5

Marketing is a very large industry where photography is only one small area. Increasing your knowledge of this industry as a whole can help you to land work and become a more integral part of marketing efforts.

There’s a big difference between a photographer who can understand an overall marketing vision and add to it, and a photographer who simply supplies pictures they think are good.

phto5

Understanding the angles and techniques that will be used in all areas and being able to show this to a company can land you more work and make you more sought after by marketing teams.

6. Increase Your Professional Profile

advertising-photography-6

It isn’t always the best photographer that gets the job; instead it’s often the one that sells themselves best or who is considered ‘hot’. Apply what you learn about marketing to yourself, treat yourself as a company/product that needs to be ‘sold’ to your clients. Market yourself well to clients and be highly professional at all times.

phto6

Being easy to work with, friendly and going the extra mile can make a huge difference and could lead to big referrals down the line. Often a company will take the chance with a less experienced and proven photographer if they’ve heard a lot of good feedback and been told how easy you are to work with. Use this to your advantage and you can leapfrog more experienced workers.

Tips for iPhone Street Photography

“The best camera is the one that’s with you.” – Chase Jarvis

In today’s world, every camera is a compromise. They function in the same way, and all take great images for the most part. You can even get amazing images from the phone in your pocket. This is a great option if you happen to leave home without your camera, or just don’t feel like carrying it around. The image quality and selection of post-processing apps, make iPhones fantastic camera options. And the ease of direct to social media sharing makes sharing your photos painless.

Below, I will outline a few iPhone street photography tips I’ve picked up along the way for shooting street photography on your phone. I say iPhone because that’s what I use, but of course, this post is relevant for any cell phone with a camera. I know I’ve seen some Galaxy phones whose cameras blow iPhone cameras out of the water. It doesn’t matter what type of phone you use, as long as it has a camera.

IMG_2301

iPhone Street Photography Tips

#1 Get Close

As Robert Capa said, “If your pictures aren’t good enough, you’re not close enough.” Part of street photography that takes some getting used to is to be bold. You’ll need to get close to your subjects, especially with the 35mm focal length of the iPhone. There are a few techniques you can do. You can always ask your subject if you can take their picture. This is tougher than it sounds, as approaching strangers can be difficult. It can also result in a manipulated image, which you may or may not want. You could also shoot from the hip. This means taking a shot without looking, usually with your phone at your side. With an iPhone, you can also pretend you’re texting and get away with a close shot. Or, as popularized by Bruce Gilden, just go for it! Jump into someone’s face and take the shot. This is definitely not my method of choice, but for some, it is the best option. There is nothing against the law about this, though it will piss most people off.

Getting close can also isolate your subject from the background. In street photography, depending on your city, an image can get too full. This means it’s easy to oversaturate the image. I find interesting street photographs are those that feel isolated. To me, a street scene is always busy and overflowing. But that isolated subject in a big city backdrop is interesting for some reason. Play around with this idea, and see if you can isolate subjects in your frame.

16961904411_ba4c350954_k

#2 Follow the Light

This is another tip which is interchangeable between phone and camera. It’s always best to shoot when the light is best, called the Golden Hour. This is the hour just after the sun rises and just before the sun sets, and makes for beautiful lighting. This is a great option for those who shoot during their commute hours. When I lived in San Francisco and worked long hours at my day job, I was always out during Golden Hour commuting. This worked out great for my street photography. It’s not to say that you’ll get bad images during the day. I’ve seen some beautiful images taken during high noon when the sun is bright and right above. Just be aware of the light when shooting, and find a way to make it work in your image.

#3 Take Advantage of Apps

There are tons of apps for shooting, post-production and sharing photos. Some people swear by apps like VSCO and Camera+, while others hate them. You should experiment and find what’s right for you, but I’ve listed a few below:

Shooting:

Camera+
Pro Camera
Hipstamatic
Snapseed

Editing:

VSCO
CameraBag
AfterLight

FullSizeRender 2

#4 Accessories

Just as you would with your camera, you’ll want to make sure to have a spare battery or two for your phone. For iPhone’s, this is a portable battery, which is getting smaller and more powerful. I used to have a charging case on my phone, which was great, though a little bulky. These are pricey, but are convenient and take up less space than bringing a separate device.

You should also get a solid case which has a grip for easy handling. Something protective would be beneficial as well. There are also companies making lenses, such as Moment and Ollio, which can be useful. But not necessary. For street photography, all you need is a phone with a good case and an external battery

#5 Burst Mode

Shooting burst mode is always a good idea, and I have it on 95% of the time in any type of photography I shoot. You just don’t want to leave capturing the decisive moment up to one photo. It’s always better to have a few more images to get one solid image from. Especially in street photography, when capturing people walking.

IMG_2322

#6 Be Ready

The exciting aspect of street photography is that you never know what is going to happen. You have to be ready for anything and able to react before the moment happens. If you are out to shoot, you need to have your phone ready. This means out or in your pocket in camera mode, ready for the shot. You should be hyper aware of your surroundings, always looking around (not in a creepy way). If you are aware of your surroundings, you can better predict what could happen. It’s better to miss the moment because it didn’t happen rather than because your phone wasn’t out.

#7 Tell a Story

Here, you want to look for an interesting story to tell through your photo. Look for an emotion, something interesting about the scene. It’s so easy just to take a picture of someone on the street. The good ones evoke a feeling, a reaction from the viewer. This is what you should be looking for. This goes hand in hand with Be Ready above. If you are aware of what is going on, you can predict a moment which will lead to an interesting story. Try to capture the entire story in one image. If you capture many photos during an event, find the one that sums up what happened. This will be your strongest image.

IMG_2969

#8 Sharing

Of course, one of the major benefits of iPhone street photography is how easy it is to edit and share images. Using the iPhoto image editing can be a bit limiting. Use of the many apps listed above to do your edits, which should only take a minute or two. Keep your street photos consistent in editing. Uploading to Instagram, Flickr or any other social media platform is a breeze. You’ll be able to spend less time editing and sharing, and more time shooting.

Now for an assignment. Take these tips and your phone and shoot only iPhone street photography for a month. I bet you’ll realize after one month how much you’ve shot and how much you’ve learned. This knowledge will rollover to your camera, and you’ll have a whole new eye for photography.

Lighting and Posing Tips for Beautiful Wedding Photos

One of the most highly stressful photography jobs out there is the wedding photographer. You have to capture a person’s happiest day, and you only get one shot at it. If things don’t go well, there is no do-over. Making sure you get the lighting and posing right is crucial, but don’t despair or begin to worry, we have the tips you need right here to make the great pictures possible.

Create the Portrait

wedding-photography-tips-2

Sure, shooting the wedding details is super important and can make for some great photos, but the most important part of the wedding is the portrait. This is what is going to hang on the wall of the couple in their home. It is vital you capture the right image, and there are a few steps to getting the image that you want with the couple:

1. Posing is extremely important when it comes to the portrait. You want it to be fun, but also to show the couple in love. Make it a bit edgy, and even make it a bit sexy. Have fun with it. This is a happy day for them, so show it in the pose.

2. Before you take a picture, you make sure you got your exposure right. You don’t want to find out your exposure was off after 20 minutes of taking pictures.

3. Don’t be afraid to compose the scene. You may think it is better to have things natural, but composing the scene takes out the variables and the risk factors and allows you to create something truly memorable. Have fun with it.

4. Never, ever forget about your lighting. You want the lighting to be right, so make sure you have some portable lights and that you play with the lighting around you. Failure to do this can make a great looking photo look horrible.

5. In post-production, don’t be afraid to lighten things up just a bit as well.

What about Posing?

wedding-photography-tips-3

So, posing is one of the most important parts of any wedding portrait. What should you consider when you do this? There are a few factors that can really make your image pop. The biggest factor is the background. You don’t want it to be too busy, but you don’t want it to be too bland either. You want your background to incorporate itself into your photo. Use it to your advantage, don’t ignore it.

You should also pay attention to your curves. These are your C-curves and S-curves, and they will help to accentuate the bodies of your subjects, and it will help bring more of an interest to your photo. Never ignore these because they can be your best friend when it comes to getting an amazing photo.

The lighting once again is crucial. You can use natural light, or artificial light, but make it work to your advantage. Don’t leave things to chance. You make the light flatter the people you are taking, not take away from them. The importance of lighting cannot be understated, so make sure you get the lighting just right.

If you are shooting with artificial light, do it when things are dark because you can have more control with your studio lights than with the fluorescent lights above you. It is all about controlling the lights and making them work for you. Don’t be afraid about being a bit creative with the lighting as well.

wedding-photography-tips-4

Keys to Success

If you want to make the most of the posing and the lighting, and the wedding in general, then you need to keep these things in mind:

1. Be professional because that is incredibly important in a wedding setting.

2. Always be consistent with your subjects and what you want from them.

3. Educate your subjects on what you want so they know what you are doing as well.

4. If they’re camera shy, try a few things to make them comfortable. Take your time and provide lots of direction.

5. Look for inspiration around you.

6. Never be afraid to get ideas from your subjects. It is their day after all, so why not listen to them and find out what they might like out of the pictures. You won’t be sorry you did.

If you are going to be at a wedding, don’t be nervous, don’t be uptight. Have fun because if you do that the subjects around you are going to have fun. When you are taking portraits of the happy couple, work with them and have fun with them. Sometimes the best photos are the ones that happen spur of the moment, without planning, and sometimes you need to plan things out a bit more than you would have thought. The important thing is to be flexible and to adjust to the circumstances around you. You never know, you may get a portrait that gets you more business. The main thing is the couple’s happiness, and if you follow these tips, they will be very happy with the work you provide.

Are you Taking Photos Using your Brain or Your Heart?

Recently I discovered a comic called the “Awkward Yeti”. It has a compilation of cartoons by Nick Seluk explaining the daily experience of Lars, the yeti. But the yeti is not the only character on the series. In fact all of the yeti’s body organs have their own personality and they interact with each other (Nothing creepy here. They are really cool cartoons).  My two favorite organs are Heart and Brain. Brain is the one analyzing everything. He is practical, down to earth and even a bit cynical. Heart is optimistic, always dreaming. Although they are good friends, many times they disagree. I find this cartoon genius. There is so much truth in them! There are times that I totally relate with Brain and others that I am 100% like Heart. And as a photographer, I also have this duality. Is it better to leave the Brain in control of everything when we are taking photos? Or does Heart make a better job? Brain or Heart? Let’s see the advantages and disadvantages of being led by one or the other:

Advantages of working with your Brain

Brain stores a lot of information

We live in a world full of information: books, arts, blogs… everything can be a source of knowledge. Travelling or talking with other people can also be great ways of broadening our arsenal of technical skills. Brain is filtering the interesting stuff and it keeps it for future use.

Brain or Heart
I love visiting museums. When I was living in France, I was going a lot to the Louvre (mostly the first Sundays of the month between October and March because the entry is free). I spent hours just looking at any kind of art. I think I learnt a lot about composition at that time.

Brain allows us to understand the technicalities of photography

The word photography has Greek roots and literally means “drawing with light”. In our case, the brush is the camera. In order to use it properly we need to understand the technicalities of the craft: aperture, shutter speed, ISO, white balance… the list is long, but achievable.

Brain helps us to understand how to use our gear

Nowadays cameras can be pretty sophisticated devices. They have a lot of buttons that control tones of settings. The manual of my Nikon D7000 has around 300 pages. And there are several types of cameras that work different: DSRL, mirrorless, compact, film… And this is just about the camera itself. Then we have a huge spectrum of accessories: lenses, flash, reflectors, filters…. In order to be able to use all this gear correctly we need to invest time and get to learn which one to use at any particular situation, how they work and how to use them. This is a mission 100% for Brain.

Brain allows us to solve problems

I am not referring here to problems of our daily life; I am talking about things that need to be solved in order to take a photo: choosing a location, choosing the frame, composition, camera settings, using or not extra gear such as filters or flashes… Brain is the one analyzing the situation and choosing the best option in each step.

Advantages of working with the Heart

Heart is good in emotions

Showing our emotions and expressing our feelings are ways of communication. Joy, happiness, love, anger, sadness…. they are all universal emotions that unite us as humans. For that reason, a photograph full of emotion is a strong thing. As Ansel Adams said:

“A great photograph is a full expression of what one feels about what is being photographed in the deepest sense, and is, thereby, a true expression of what one feels about life in its entirety.”

Heart is a dreamer

Heart has no constraints because it is not in charge of analyzing and solving problems. So it allows itself to dream. And sometimes it can dream big. Dreams are a leading force and can keep your motivation awake and in shape.

Brain or Heart
Dreams can be the force that fuels your motivation

Heart is leading your photographic vision

There are important questions, the answers to which define your photographic vision. “Why do you do photography?” or “What do you want to express with your pictures?” You will find the answers to these questions by looking into your heart.

Brain or Heart
Part of my photographic vision is to express my appreciation for life and highlight the importance of being mindful. Almond flowers are beautiful and ephemeral. If you don’t pay attention to their blossom you can totally miss them. And just as we can miss the blossom of the almond flower, if we are not mindful, we might miss other things in life.

What happen when you use too much Brain?

You can get obsessed with gear

There is such a huge variety of gear that can help you to take better photos (technically speaking) that it is extremely easy to get carried away. You can spend tones of time looking for new gear, reading reviews and comparing prices. Don’t misunderstand me. Doing all these things is totally necessary sometimes. But when you find yourself obsessing over gear (which can cost you dearly in terms of both time and money) instead of taking pictures, you are in trouble.

Brain or Heart
You can end up spending too much money on gear if you don’t set limits.

Too much reading too little practice

Brain can get a bit greedy about knowledge. It is always interesting to learn new techniques or trends in photography. Learning is good, but if you are not careful, you can end up learning theories upon theories without practicing.

You can end up taking technically correct photos with an empty soul

As I said before, mastering the whole process of taking photos will lead us to “better” photos. But what is a better photo? One that is better technically? Or one that manage to express something even if it has some technical issues?

Brain or Heart
This was one of the first pictures in which I realized I had an intention. I wanted to show that even in the middle of a totally man-made scenario; life is still able to bloom. It is far from being technically perfect. The ISO was set too high, the composition was not the best, the edition can be better too. But I still like it because it speaks to me.

What happens when you use too much Heart?

You might end up unable to take the photo that  you have in your mind because you don’t know how

You could have a vision, and you may know what you want to express, but if you disregard the importance of the technicalities of photography and your gear, you will be unable to use your tools (or use them inefficiently) in order to achieve your visions. And let’s face it. If you can’t make your vision real, it is as if your vision doesn’t exist at all.

Brain or Heart
I wanted to express movement. For that reason I decided to do panning. I was able to do it because I spent some time learning this technique and practicing it. At the moment I needed it in order to express myself; I was able to do it.

You can get into an emotional roller coaster

Emotions are fundamental in order to express ourselves. But if you are a bit too emotional you can end up being unable to control them. Instead of being an instrument of communication they can easily be overwhelming and become a source of confusion.

You might lack the resources that will lead you to develop your own ideas

If you don’t invest time reading, enjoying art, travelling or doing other activities to broaden your ways of seeing the world, you will have less inspirational resources. These are the things that will help you to develop your own ideas. If you don’t have a good basis, you will suffer more creativity blocks.

Brain or Heart
Get in contact with other cultures or religions broaden your perspectives about life. All the experiences you have in life can have an influence on your photography.

So what is better? Heart or Brain?  I think that as photographers we should aim for a balance between both of them. We need to be able to understand the technicalities of the craft because these are our tools and we should keep learning (Brain). But we also need to listen to our hearts because this is what makes our photography a valuable tool to express our visions.

My personal experience was that along my first years as a photographer I have been too busy with the technique: how to use the camera, light, composition… I don’t mean that now I master them 100%. What I mean is that I reached a point of certain proficiency. I also understand that I will be always in a learning-state (feeding Brain). However, time has arrived for me to start working more on my photographic vision (Heart). Will I be able to balance Brain and Heart? I will work on it! What is your situation? Are you already a balanced photographer? Are you mostly Brain? Or are you mostly Heart? Feel free to share with me your thoughts and feelings about this subject.

Have a happy shooting!!

Lighting for Still Life Photography Tips

As a photographer, you know how important lighting is to any photo. It is incredibly important to ensuring that the image you get it crisp, sharp and truly stands out. It can take a bit of work to get it right, but when it works it usually always comes down to lighting.

There are several things to consider when you are using lighting for still life, to the backdrop, to the lights used, to how everything interacts. Just like a rug that ties the room together, the lighting needs to tie everything in the picture together.

Back in Black

When you are shooting black objects on black backdrops, it can be hard to know how to make them stand out from each other. This is where lighting comes in. A great tip is to use a silver panel to reflect the light and fill the image with that light but in a softer tone. You don’t want things so bright they wash everything out. A softbox is great for this type of lighting situation, so don’t be afraid to use one.

still-life-2

An important part of this is creating a sheen off the objects to give them definition off of the black background. That will help make the picture really stand out, and it will make the black on black juxtaposition something people immediately notice.

Think about the Shape

With still life, the shape of the object is one of the most important aspects of it. There are several ways to bring out a shape. One way is to have a clear rim of light that brings the shape out in the photo. This is especially true for shiny objects that are against a dark background.

still-life-3

A great tip is to cut out a piece of black paper in the shape of the object. You then place that under the object. This gives just a tiny bit of extra black around the object and it also helps to create a wonderful graduated lighting effect.

One thing to remember as well is the hotspot. This is the distance of the light. If you have a hotspot too far off the surface, you will get the object that has even lighting on it. If you move it closer to the surface, you get a strong hotspot, which creates more condensed light and sharper shadows.

Use the Lens Hood

We often use the lens hood for its intended purpose, blocking out the light to create more even tones of our subject matter. The great thing about the lens hood, or shade, is that it can be used in other ways as well. You block the amount of light from a flash going into the lens to create really clean images, especially of black objects on black backgrounds. It is a neat little trick that can really go a long way in making your images stand out.

Multi-Position

When you are using lighting, try using multi-position setups. This means that you have lights not just from one angle, but from many angles. You want light from the front, the sides and even above. This can create some really fantastic shadow art for your photo, but it can also give you a very clean look to your images. With the use of diffusers, you will prevent the subject from being washed out. Using a gold diffuser will also give your photos a nice hue that is calming and reminiscent of sunlight, something we all love.

still-life-4

Another tip is to use a room with a window. In this regard, you can have a couple of lamps set up but you also have the natural light coming in from the window. This will then give you a cool look to your photos where you combine the artificial and the natural to great effect.

The Best Still Life Backdrop

Lastly, you want to make sure you get the right backdrop. With still life you typically want a blank backdrop rather than a natural one that will be busy and cause your objects to blend in. Keep your backdrop nice and simple and you will have greater control over how the lighting impacts your subject.

still-life-5

That is all there is to creating great still life images with the proper lighting. Take some time, stage things right and you will have some excellent looks to your images that will really make things stand out and look awesome. Never be afraid to experiment with your images and your lighting to achieve some stellar results out of something as simple as still life.

Batch-Process Cleverly on Lightroom

So, remember all those times when you come back home from a shoot with a hundred shots with varied light set-ups? Remember, struggling and pushing to process all those beautiful shots one by one? Will I make your day better if I told you how to cleverly batch-process these images? Maybe, yes.

So, the easiest way to processes your images without consuming too much time would be to split them into batches. When you go for a wedding shoot, or some indoor event, you end up with over hundreds of images in varying light set-ups. So what you can do is split these images into batches of 5 or batches of 10 and apply a setting/edit common to all these selected photographs.

Ideally, a “shoot” indicates that you’ve used various lenses, applied different ISO speed settings, etc. And different images look different depending on the kind of light that got reflected in that moment or depending on the kind of colours that got captured in that particular moment. So how do you cleverly segregate these images into different batches? How do you figure out which ones to group together?

The fundamental idea is to choose a set of photographs where you can apply a group of similar settings. Follow the steps below to make your work progress a lot faster, easier, and a lot more efficient.

Step – 01

Choose a set of photographs (it can range from a set of 4 photographs to almost 20 photographs), this is what we call a “Batch”. Start correcting the first photograph in that set – adjusting Exposure, White Balance, Tint, Tone curve, Sharpness, etc. Remember, you’re going to apply all these settings later to the rest of the batch, so make sure that your corrections will apply similarly for the remaining images as well.

Screenshot 2016-07-19 13.37.35
The first three images are the ones I’ve combined into a batch for similar processing.

Tip: Do not make major adjustments with the local correction tools, as this might vary from one image to another. What you correct for one image might not apply to the next, even though you’ve grouped them all in the same batch.

Step – 02

The next step is to copy the develop settings from the first photograph, and paste them to the rest of the images in that particular batch. Or alternatively, select the first image, press and hold the ‘Shift’ key and select the remaining photographs. Then, click on the “Sync Settings” button that appears on the lower right bottom of the Library Module.

Batch Processing – Synchronize settings.

Tip: Shortcut to Sync settings is Command + Shift + S

Once you click the sync settings button, a dialog box will open asking about the settings which you would like to copy to the remaining photographs. Make sure that you deselect all the local corrections, and select everything else. Remember, local corrections vary from image to image. So it is advisable to work on the images individually for those changes.  

Step – 03

Repeat the above steps 1 and 2, until you are done with all the photographs in the batch. 

Step – 04

This is the stage that takes up considerable amount of time. True, it depends on the number of images we’re dealing with and the kind of correction it requires, but this stage also calls for some care and concentration so we don’t go wrong.  All the local correction tools namely Crop tool, Adjustment brush tool and Spot removal tool shall be applied manually to each and every photograph in that particular batch. And there we go, you’ve now learned how to speed up your work process while cleverly using the batch process method.Just like how you copy paste the settings from one image to another, you can copy paste noise correction settings as well. The trick is to filter out your images based on a particular ISO setting. Use the filter tool, and filter out images with similar ISO settings. Let’s look at an example. Say, I’m looking for images with an ISO of 1600. Use the filter tool, and filter out all the images in my collection with similar ISO settings. Let’s say Lightroom provides me with a set of 80 images. What do I do no? Pick one image, apply noise-correction changes to this one image, and sync these settings to the remaining 79 images. Tada!

So, use the batch process method effectively, and reduce stress, time-consumption and make your work a lot more fun. We hope this article helped you out, and if yes, let us know about our experience in the comments below.

How to Conquer the Creative Photography Slump Effectively

We all face it. One day you’re producing great work with ease. The next, completely gone. Poof! Now, just picking up your camera is a dreaded task. And the idea of shooting seems so daunting! What happened? Where did the excitement go? We can’t determine when this will happen or what triggers the descent. But we all have been here, more times than we’d like to admit. But it’s normal, and happens to everyone. Though there is no cure, you can prepare and set in place the proper treatment plan. Below I’ve outlined a few tips I’ve found have helped me when I feel a slump coming on.

DSCF4039

Study the Greats

I often find when I’m in a slump, I need to walk away from the camera. But, I still need to spark that desire to pick the camera back up. For this reason, my go-to spark generator is to watch videos on photography. Whether this is a documentary on a specific photographer or a general video on a type of photography. There are some great documentaries on Netflix. And endless inspiring videos on YouTube. I love the site CreativeLive. They offer live video classes ranging from basic settings to advanced post-processing.

This is also why I keep photography books in my creative space. If I’m having a slump moment, I’ll grab a book and just flip through it. After a quick flip through The Americans, I’m running for my camera.

Kim_Suarez_01

Change 1 Thing

Whether you plan for it or not, we all get into habits with our photography. It could be shooting the same locations or falling back to your go-to settings. Or even specific post-processing behaviors. An easy fix for a creative slump is to pinpoint one area to switch up. This may mean driving to another location to walk around with your camera. It could also mean adjusting a setting you usually set and forget. For example, if you shoot in Aperture Priority Mode, switch to Shutter Priority. Focus the afternoon on freezing or blurring your subjects. Or better yet, practice your Manual Mode skills and spend some time learning about manual ISO. I find a simple change, like shooting all day in f4, will result in some images I wouldn’t have otherwise taken.

DSCF2323-2

Get Involved in Your Local Community

Photography is everywhere. So chances are you live in a photography community. Even small towns seem to have photography groups or local classes available. Search sites like Craigslist or Meetup for these opportunities. It may surprise you how many there are around you. Take a class at your local community college. Or find a local store and check out their calendar dates. When I lived in San Francisco, I took a class on film photography and print-making at Rayko Photo Center. It got me in the darkroom every Wednesday night making prints with other photographers. I met so many great people and learned so much.

DSC00961-2

Explore Another Art Form

All forms of art share the same basic skeletal structure. We follow a similar series of events to arrive at the end destination, be it a photograph, painting, etc. What I’ve found to work for me is to explore other forms of art to get over a photographic slump. This may mean practicing or just observing. I may focus on writing for a few hours or do some sketching. I’ve found that going to a museum or gallery produces the best spark. Looking at paintings and sculpture, particularly Surrealist and Pop Art, are so inspiring. If you have a nearby museum, spend time there. Maybe even volunteer there to get free admission and behind the scenes access.

DSCF2130

Get Critiqued

I find this the best practice for beating a creative slump, and in general. Getting your work critiqued by a photographer you respect, can be so beneficial to your work. Even if you’re not in a creative slump, you should be doing this as often as possible. A good critique will be able to provide feedback, whether good or bad, you wouldn’t gather on your own. To be clear, a critique is not a “Nice Photo!” on Flickr or Facebook. Find a fellow photographer who can speak to structure and aesthetics of the photograph. You’re looking for the information you can act on to better your work.

DSCF2793

Start a Project

If you haven’t already, read through my previous post on starting a photography project. A project can be a great way to spark some motivation. Start small if you need to. Plan the logistics so you know the timeline as well as the desired outcome of the story you want to tell. A project will give you purpose when you go out shooting and will get you thinking long term.

DSCF1310

Travel

Travel does not have to mean hopping on a plane bound for Paris. Though how nice does that sound? Travel can mean driving a few hours away or even just exploring an unfamiliar part of town. When out walking, switch up your route. Drive 2 hours and see where you end up. Make a day of it with your family and turn it into a mini photo project. I did a mini photo project on an afternoon spent at a flea market I had never been to, it was great. As long as you’re in a new area, that creative spark will activate. I am fortunate to be able to travel for my day job around the world. So, I make sure to take few extra days to wander around with my camera. It’s great for my portfolio and is of little cost to me. If you are able to travel for work, take advantage. Spend as much free time as you can out with your camera.

DSCF3005-2

DON’T Buy Gear

We all know GAS (Gear Aquisition Syndrome) by many various naming conventions. As photographers, we love gear and gadgets. That sort of comes with the territory. But, it’s when we think that only more gear will make us better, that we need to be careful. When in a creative slump, it’s easy to say “Well, all I need is a new lens and that creativity will come racing back”. Or “If only I had the newer model, then I would be a better photographer”. Don’t fall for it! You’ll only realize once the excitement fades that you are right where you started. And poorer. So make sure to follow the above steps first. As long as you have a camera that can take a picture, you have all you need to get out of a creative slump.

Photographer, Does Your Perfectionism Help You or Block You?

Being a perfectionist seems like a good thing to be. What is wrong about aiming always for the best? Well, I am a perfectionist myself and along my life I learnt that perfectionism is a double-edged sword: it can either take you to greatness or it can paralyze you.

Being a perfectionist helped me to get good grades and finish my PhD in Biology. It pushed me to be a good worker because I care about everything a lot. It also helped me as a photographer because I always try to do things well. I even read my entire camera manual because I wanted to understand my new Nikon D7000 perfectly. Being a perfectionist is motivating. It pushes you you forward.

Perfectionist
Being a perfectionist can lead you to great things. When you achieve them, you feel like having fireworks inside your head. However, perfectionism can also paralyze you or make you dismiss your own work as “not good enough”.

However, trying to achieve perfection also increases my stress level. I always live with the slight fear of making a mistake or that I am not good enough. This is what I called “the perfectionist’s course”: you can do awesome things but you won’t appreciate them because you are too busy thinking that you were able to do it better.  Taking it to an extreme, perfectionism can even block your creativity. It happened to me. I have always been fascinated about composition. Now that I feel confident with some of the basics, I decided that it is time to try new things. I started reading about more complex composition techniques. I saw some tutorials. I wanted to understand everything perfectly because I wanted to create the perfectly-composed photo. I read everything once again and I re-watched the videos. I did it one more time, then another time, and again…. Time passed and I didn’t take a single photo. Perfectionism blocked me. I didn’t want to take photos because I was scared they will suck. I know it might seem silly, but this is how a perfectionist’s mind can work sometimes. You can feel so scared about failing that you don’t even try.

Perfectionist
The rule of thirds is one of the first things I learnt. It works really well in a lot of situations because it gives balance to the image. But composition is not synonym of  rule of thirds. You can achieve nice compositions following other approaches.

I understood that if I wanted to keep growing as a photographer I would need to handle my perfectionism issues better. If, like me, you get to the point that perfectionism is not helping you any more, keep reading, I have good news for you. With a bit of effort you can change this negative behavior. Totally worth it!

Work on the concept that perfection might not really exist outside your mind

What you can see as perfect might not be perfect for me or vice versa. Aiming to such a subjective concept is like building castles in the air. As Salvador Dali said: “Have no fear of perfection, you’ll never reach it”.

Perfectionist
I wanted to learn more things about composition because although the rule of thirds is useful, I didn’t want all my photos to be based on it. After reading and studying a lot about composition I got a bit paralyzed because I thought I will never be able to get the perfect composition. Result: I spent several weeks thinking about compositions instead of taking pictures and practicing what I learnt. How did I overcome my crisis? I decided to practice small things, like for example playing with lines. Well aware that my first photos are not going to be perfect, but at least I learn.

Accept that “the best I can do” is enough

This can be hard but it is important to work on. In the moment of taking/creating a photo there are a lot of things to consider: location, model, time of the day, using filters or not, tripod…. Then you have all the post processing decisions: enhancement, cloning out… If you are a perfectionist, all these factors become a long list of things to be worried about. This will slow you down so much that it will get tedious or you might even get blocked. If you see that this might happen, make the decision of aiming for the best you can do in that particular moment. Take the photo and learn from it. Remember that photography is a craft. Learning is what will make you better. You improve by taking photos not by worrying about everything all the time.

Perfectionist
When I was taking this photo I adjusted the aperture, shutter speed and ISO to get the best histogram I could. I used a tripod. I worked on the leading lines of the composition. I edited it thinking what I was feeling when I was there. I didn’t want to take a perfect photo. I wanted to take a photo about summer. And I think that I achieved what I aimed for. Practice is what moves you forward, not perfection.

Break down your progression in small steps

Letting go a bit of perfectionism doesn’t mean that you give up on improving on quality. It just means that you adapt to factors that are beyond your control. Do you want to become a landscape photographer? Great! Instead of just deciding that you need to take the best landscape photos ever, try to set a series of smaller goals. First you can learn about the best apertures for landscapes. After that you can learn about using a polarizer filter, then about ND filters…. This strategy works better because you can really reach the goals. This will make you feel much better than just aiming for a perfection that is impossible to reach.

Perfectionist
One of my little steps about improving my landscape photography is learning how to use a polarizer filter. I started practicing in the Dead Sea (Israel). The polarizer emphasizes the colors of both water and sky.

Give value to your effort

Nobody was born knowing everything about photography. You need to advance step by step. We are all a bit impatient these days. We compare ourselves with other photographers and we want to be like them, and we want to be like them NOW. We take pictures and we want them to be perfect NOW. But we forget about the learning curve. Stop thinking that you need to be perfect NOW and enjoy your learning process. You should be proud of all the efforts you are doing to improve.

Focus on the creation process and not on the result

When you are not so worried about the final results or thinking that you must be good in photography, then magic happens. You can enjoy the simple act of taking photos, just because it brings joy to your heart. You probably started photography just because you liked it. Try to keep this light-hearted spirit. It will do well to your health.

Perfectionist
I always wanted to try to do this shaped-bouquet effect. The process of getting the shapes was really fun, but it took A LOT of trials and errors. Totally worth it!

Let me know if you tried some of these tips. Do you have your own strategies for handling perfectionism? I would love you to share them with me.  Have a happy shooting!!

How to Start a Photography Project

A personal photography project is a series of images sequenced to tell a specific story. Usually, a story which the photographer has a great passion or emotion towards. The project can range in the number of images and amount of time. Or from simple subjects (Elias Weiss Friedman aka The Dogist) to complex, global initiatives (Sebastiao Salgado’s Genesis).

20150712-Lisbon July 2015-224

Why Start a Photography Project?

A personal project is a great way to expand beyond a single image into more complex story telling. You’ll learn to plan, shoot and edit a sequence of photos to convey a story. You can experiment with different styles, techniques, and gear. These may be outside of your normal shooting but might be what you enjoy rather than what would pay the bills.

Personal projects aim to be a creative break from your standard paid work. They allow the photographer to expand on a subject which they feel passionate about. Personal projects are also intended to be self-motivated and fun! They interest the photographer first, so shoot only for yourself. You have the ultimate creative control here.

20150712-Lisbon July 2015-172-2

How to Start?

Find a Subject

Start with a passion, whether large or small. You will always have a unique voice and story to tell, and keeping that story close will create a strong body of work. You might be a part-time musician or maybe you volunteer a few hours at a local non-profit. Great! Shoot their stories from an insider’s perspective. Or explore your neighborhood. You can do a story on a local business or business owner – shooting them at home, work, on days off, etc. There are ideas all around us, it is up to you to get out and find them.

20150712-Lisbon July 2015-324-2

Short or Long-Term

Short-term projects are good for starting out in photography projects.  You don’t need to commit long-term, but it will get you thinking about the process. This can span a few hours or days. Even a few months can be short compared with decade-long projects. Bruce Davidson shot his project Circus over 4 months and Brooklyn Gang over a summer. Long-term projects are more popular in photography because complex subject matters need time to develop. Yet, the time commitment and editing of images into a cohesive project can seem daunting. A great example of a long-term photography project is Josef Koudelka’s Gypsies. He spent 9 years traveling with a Roma community and photographing their society. His 9-year immersion in the project created beautiful images. Another great long term project example is Nicholas Nixon’s The Brown Sisters. A yearly portrait of his wife and her sisters, this ongoing project has spanned 40 years of their lives. Studying well-known photographers and their projects is helpful when beginning your own project.

It is important to understand how much time you plan on shooting this project. Whether 1 day or 10 years, it’s important to have a general idea of how long this project will take you. This can change as you go along depending on subject matter, but have a general timeline in place and be aware of it.

20150717-Porto July 2015-120

Equipment

First, you should nail down your subject matter before getting into equipment. You may need different lenses if you plan to shoot indoors  vs. outdoors. Or when shooting something generally close up or far away. Or even your expected lighting conditions when shooting. You may also need more portable equipment if your story takes you out away from civilization or on a long trip. This is for you to determine, there is no right or wrong answer here, only the vision of you the photographer.

Just make sure your equipment stays consistent throughout the duration of the project. It will help the images flow together and achieve a uniform sense. The focus here is the subject, not the variety of lenses you have and techniques you practice. If you want to showcase a specific piece of equipment or skill set, pick one and stick with it. You’ll have other opportunities in future projects to show different skill sets.

20150717-DSCF6651

Editing Your Work

Aside from post-processing, you’ll need to edit and sequence your photos. The goal here is ensuring you don’t present too many or too few images. You’ll want to find the least amount of images required to tell the full story. Most likely, you’ll take way more than necessary, which is fine. It’s better to shoot too many and spend longer sequencing, than realizing you have gaps in your story. Don’t limit yourself to a set number of images, just let that come with the process. Lay out physical prints, and begin arranging them in order, pulling out any excess images. You’ll find this process easier than it sounds.

If you find you have too many images and cannot edit further, walk away. Removing yourself from the process will ensure you come back with fresh eyes. Some photographers swear by this method of letting photos “marinate”.

Also, getting your project critiqued by a trusted photographer friend can also be beneficial. They don’t have the same connection to the project, and can give an unbiased opinion.

20150717-Porto July 2015-338

Publishing

When you’re finally ready to share your images, it’s time to publish your project.

There are many publishing options, and you’ll find one that works best for your project. Some options include printing a book, exhibiting in a gallery or posting to social media. A printed book is a great portfolio piece when meeting with potential clients. You can even send the book to publishers to get a book deal. As long as it is right for you and the project. You can also exhibit in a gallery. It could be challenging to find a gallery willing to showcase your work, but it could be great exposure. Social media is quick, easy and will reach the largest audience. But some may find it does not convey their story the right way. You need to ensure the publishing process you choose is right for the project and your vision.

There are no rules here, just stay true to your vision and tell a story you are passionate about. You have control of what you present to the world, make sure you enjoy the process as much as the final outcome.

Porto July 2015-302-Edit

Suggested Further Reading

Below are just a few of my favorite photography books for further inspiration. Keeping photo books around can help for inspiration and continued motivation.

Bruce Davidson Subway
Robert Frank The Americans
Josef Koudelka Exiles
Willaim Eggleston’s Guide
Trent Parke Minutes to Midnight
Martin Parr The Last Resort

Why Film Camera Photography is Making a Comeback

We may have all thought that film was dead with the advent of digital photography. Millions of people switched over to digital and many film companies went out of business. However, like vinyl records, there are those who still use film, and they swear by it. Now, more and more people are going back to analog because it has a unique style to it that they want. Call it a hipster trend if you want, but the truth is that film isn’t going anywhere.

Why Film?

Digital photography is a product of our instant oatmeal society. We take a picture and we delete it, put it in a folder and forget about it, or put it on Facebook. There is no reason to keep anything. You can take 1,000 pictures and choose one great one. The laws of averages dictate that is going to be the case. With analog, you have to be choosier. You have to really want that image because you only have so much film. There are no duck-faced selfies here, just planned out photos that are a step above the rest.

In addition, film just happens to feel better. Like a vinyl record, with the scratches serving as part of the experience, film is slow, it feels different, the cameras sound different and the lighting is captured differently. Like vinyl, there’s a real retro feel – not just in the image, but in the process. Sure, you can edit digital images now to create a retro look in post production, but there’s a romanticism with film.

It forces you to think of things in a whole new way. To shoot analog, you have to throw out everything you know about digital, and learn a new skillset that could make you a better photographer all around.

film-comeback-2

The Advantages of Film

There are many advantages that film has over digital cameras. For one thing, with digital, the sensor determines your resolution. The better the sensor, the better the image itself. With film, you don’t have pixels and you don’t have resolution. You have pure images captured in beautiful, crisp reality. Yes, the type of film and the camera will dictate the image quality, but overall what you capture is what you get. No pixels getting in the way. Depending on the film, you are going to get between four and 16 million pixels. One study found that medium format film – the kind most people use because it is middle-of-the-road – has 400 MP resolution. That is by far more than any digital camera on the market today.

Another advantage is that your analog image is going to be unique because of the film grain, which is the chemical particles that did not receive enough light. Unlike digital noise that looks awful, film grain can really add to the image and give it something unique, like a fingerprint.

The dynamic range of the film camera is another advantage over a digital camera, although less so now. Most film cameras have 13 stops of dynamic range, while most digital cameras are slightly below that.

film-comeback-3

Lastly, when you are shooting in low light conditions with a digital camera, you may get a great deal of digital noise. This can make the picture look simply awful. It is something that must be avoided, but it can be hard to if you don’t have a top of the line camera.

Old school, analog cameras tend to have better sensors for this type of scenario without sacrificing any of the movement speed you may need.

Should You Switch?

The short answer is that no, you should not. Digital cameras have many advantages and are really great machines to have at your disposal. When you need a lot of pictures and don’t want to waste a lot of time on them, go with digital. That being said, there is nothing wrong with having a film camera at your disposal. This can help you begin to appreciate how pictures were taken in the past, but it can also get you to think about new ways to get images. You will learn how to develop images, how to position things for the perfect setting. In many ways, film cameras are a great way to learn how to take pictures because everything needs to be right so you don’t end up wasting any film. In that regard, they are a training tool for the new photographer.

film-comeback-4

No, film is not going to overtake digital cameras. With every cell phone now having a camera inside, there is no chance of that happening. That being said, film is still holding on and it is not going to disappear completely. There are far too many people who want to use these retro-style cameras to capture unique images that will stand out and really make your images snap. Embrace the future of photography, but also don’t forget about the past. Take a turn with a film camera and you will be happy you did, because they are something truly unique and truly special to use.

Creative Photography Ideas for Cloudy Days

Weather is a crucial consideration in photography. Lighting and atmosphere may vary with the changes of weather conditions. You might have the experience that you grabbed your camera and wanted to shoot outdoor right away but you found that it was cloudy or even raining outside. Are you an adventurer who is willing to shoot regardless of unexpectedly poor weather? If yes, this article is for you. I will go through some workarounds of shooting during bad weather with you in the following paragraphs. Bad weather will never be an excuse again.

Shooting in Black and White

Black and white photography

are always one of the best ways out during the days of bad weather. As sunlight is heavily diffused by thick layers of clouds, everything looks flat during an overcast day. Scenery lost its vivid colors. Subjects look grayish. If you shoot in color, you might have a great trouble in manipulating the mood of the photo as dull colors are nothing more than a distraction to audiences. You may get rid of the distracting colors by shooting in black and white.

IMG_0633_v2_signed

While shooting in black and white, you will need to look for a scene with “rich” gradient. A smooth and rich gradient is appealing to viewers’ eyes. If the rich gradient is not in sight, you may look for a scene with great contrast. It is less likely for you to find one during a day with the bad weather, though. Therefore, you may stick to the former suggestion as far as possible.

Long-exposure Photography

This approach could be considered as a variant version of the aforementioned workaround because while you are shooting in black and white during a day with poor weather conditions, you may even take a step further by shooting with long exposures. Every moving subject found in the viewfinder will be blurred and it creates a sense of abstractness. Long-exposure photography usually works like a charm during cloudy and stormy days because the movement of the sea and clouds are often more rapid.

IMG_0649_signed

You will need a piece of nice ND filter, probably an ND 1000, to get the job done. Apart from the number of the stop of an ND filter, you will also need to consider the quality of its coating and color cast. In addition, I would recommend you to go for a fixed ND filter rather than a variable ND filter. The fixed ones usually perform better compared to the variable ones within the same price range.

Get Closer, Closer and Closer!

Soft light becomes ubiquitous when the sky is covered by tons of clouds. Overcast could be an unfavorable condition for landscape photography. On the other hand, it is the other way round for close-up photography. The details of subjects are nicely lit by the diffused natural light. Subjects for close-up photography could be found everywhere in nature. Rocks and pebbles are some of the ideal subjects. Each pebble shows unique texture and they are quite attractive to viewers. Besides, By shooting with this approach, the grayish and unappealing sky will be excluded from your photos.

Downtown in the Night

Shooting at night is always a good option due to the non-existence of natural light. As we are not relying on sunlight anymore, weather condition has less to do with us. You may head to the downtown at night and make use of the artificial lighting available on the streets such as neon light and street light. These artificial lights could form spectacular bokeh in the background.

IMG_1362_signed

There are unlimited possibilities for shooting photos in downtowns at night, regardless of the weather conditions. You may even be able to capture some decent photos during rainy nights in downtowns by making use of reflection of puddles and raindrops on your lens.

I hope you have enjoyed this article. Stay tuned for more tips on photography.

Using a Mini Softbox for Awesome Outdoor Portraits

Shooting portraits in a studio can be great, but outdoor portaiture with natural light is just better. The problem is that when you try and take photos outside, the light doesn’t always cooperate, and you need to take matters into your own hands. This is where something like a mini softbox can really help you out when you need it.

A softbox is just a small light, used primarily in studios, but which can be adapted for use outside. The mini variety tends to be best in this regard since it is easy to transport around.

When you can control the lighting of the outdoors with a mini softbox, you can drastically change how your photos look. Subjects can really stand out, while also getting the natural setting around them. It is the best of both worlds. You have the studio and the outdoors, together in perfect harmony.

outdoor-portrait-2

The Advantages

So, why use a mini softbox for this? Why not use some other type of lighting? Why not use umbrella lights? There are several reasons why a mini softbox is just best for this situation.

The biggest advantage is the fact that these boxes are small and highly portable. You don’t need to haul your studio around, you just need to take a small box with you and you will get all the light you need. You can also use a light shaping tool to get the lighting that you want in your portraits outside. You can add definition through the use of shadows, or remove shadows to create a clean and elegant look on the subject.

outdoor-portrait-3

Why Not Regular Softboxes?

You may be asking why you can’t just use a regular-sized softbox, the type you use in the studio. After all, it is not like they are huge or anything. Well, you get all the features of the regular softbox, in a mini softbox, but without the extra space. So, there is no reason to add extra work for yourself in lugging around a large softbox.

How to Do It

Now that you know you should use a mini softbox, how do you go about using it?  It is actually very easy to use. The main thing to remember is that as you move the subject around for the photos, you may have to change the lighting depending on cloud cover, the position of the sun and more. This will allow you to get the right light for your subject with the softbox.

Don’t be afraid to try out multiple locations for your shoot as well. The light is going to be different everywhere and you may find a great spot for your photos just by random. Most mini softboxes run on batteries since you won’t be located near an outlet. Make sure that you always have batteries on hand so you don’t lose your lighting opportunities with the softbox.

outdoor-portrait-4

Use the Attachments

When you are taking your mini softbox out, make sure you use your attachments to get the most out of the mini softbox. There are many attachments that will be useful to you depending on the lighting conditions outside, and the needs you have as a photographer. These attachments, like diffusers, can be carried around easily by you and often come as part of the mini softbox. These diffusers will create many lighting effects for you, from creating very soft light to compliment the sunlight, or sharper and more focused light to create the shadows that you want.

One of the best types of diffusers to keep in mind is the gold-banded diffuser. This diffuser attaches with Velcro to the softbox itself and creates really beautiful and warm images in the outdoors. It can work great if you want a natural look on the subject but don’t want to add too much light. It is also very effective at creating the golden hour light, where the sun is setting.

outdoor-portrait-5

As a photographer, you want to get the most out of your photos, your light, and your subjects. You can leave everything to chance and allow Mother Nature to dictate the lighting, but what if it is a cloudy day and you want golden light on the subject? If that is the case, then you need to take matters into your own hands and get a mini softbox. It is highly portable. It is easy to use, and it will ensure that you get the most out of your pictures.

For incredible portraits, you should always take things one extra step. Mother Nature can be great for her lighting, but there is nothing wrong with a bit of a helping hand from technology. The mini softbox can do that for you.

Umbrellas vs. Softboxes: Key Differences

Today we discus Softboxes vs Umbrellas. When you see a professional photographer setting up for a photo shoot, you probably see some weird looking lights. You may see some lights that look like they have an umbrella attached, and you may see some that look like big boxes of light. These are umbrellas and softboxes and they are vital parts of any photographer’s studio.

Studio lighting is very important and it comes down to the lighting. The question you have to ask yourself is whether or not you want softboxes or umbrellas for your lighting. They both have benefits and disadvantages, and it all depends on what exactly your needs are. Both are highly beneficial to your studio, so getting one or the other is going to improve things no matter what.

Why Choose Umbrellas?

umbrellas-softboxes-1

Let’s dive into umbrellas first.

An umbrella looks exactly like an umbrella, except it is often white or opaque, and it helps spread the light around. The umbrella is highly versatile and one of the biggest benefits of it is that it will create extra light when you need it, but also create more dimness and darkness when you need that as well. You can choose translucent umbrellas because they are easier to close on a subject, or back away from a subject to create unique looks and lighting moods for your photography. You can choose reflective umbrellas though, to create a more uniform amount of light in the studio.

One of the biggest advantages to using umbrellas is the fact that they are excellent for macro photography. When you force light onto a subject in a macro setting, with light at different angles, you can get many different effects that can aid the picture you are taking. It can define the features of a subject, even if that subject is very small. It can also create a gentle light over the subject, allowing you to literally show it in a new light with your photography. Regardless of how you use the umbrella light, you are going to get some real advantages from it when you are taking macro photos.

umbrellas-softboxes-2

Why Choose Softboxes?

One of the biggest advantages of something like a softbox is the fact that they are very easy to use. They can be used by nearly anyone and may be the best option if you are new to studio photography and want to learn more about lighting before you upgrade to something like an umbrella light.

Softboxes are great because they can allow you to change the direction of the light on the subject by moving the softbox around the studio. This will let you play with lighting angles, shadows and more. When using a softbox, always take test shots first to make sure you get the right lighting from the softbox when you are shooting the subject.

One advantage of the softbox is also the fact that you can take it and move it directly in front of the subject, without washing the subject out, if you want to create a softer light on the subject. If a softbox is at a distance, it can result in a strong amount of contrast on the subject, or the subject being in harsh light. That being said, if you are finding the subject’s lighting is very flat, you can move the softbox around to a different angle in order to give more definition on the subject through the use of the shadows.

umbrellas-softboxes-3

Which One?

So, which one should you choose? Which one should you decide is best for you when you are starting up your new studio? It can be hard to choose but really it all comes down to your personal taste and what you need the lighting for. Are you shooting portraits? Product photography? Macro?

If you want to do lighting with more definition and you are looking to challenge yourself a bit more, then you should consider umbrella lights. They do tend to be more expensive and there is a learning curve but it is by no means too difficult to use an umbrella light. If you want something a bit simpler, and you aren’t worried about how defined a subject is, or you’re not doing macro photography, then a softbox is going to be the best option for you.

umbrellas-softboxes-4

Play around with both options and see which one is going to work best for you. Test things out. You may find you like the softbox, or you may find you prefer the umbrella.

Whichever you prefer, make the lights work to your advantage, and know how to use them so that your pictures stand out with proper lighting, excellent definition and striking shadows that make people see your subject in an entirely new light. That is the power that comes from something as simple as studio lights and the filter that is in front of them.

7 Quick And Easy Hacks For Creative Effects

We all have to start somewhere when it comes to a new field, and photography is a little deceptive in how much equipment you might actually need to be successful. Cameras, lenses and tripods are the kind of things many people think of, though it’s still easy to undervalue these items as there are so many cheap versions around. At the other end we have monitors, editing software and other extras. After all, photography isn’t just about taking the picture, it’s about making it as good as possible with editing and touch-ups too.

For newcomers it’s best to start with a good quality camera and then look to add/upgrade their equipment as they develop. This also gives you a chance to understand equipment and the differences it can make before investing, since items like filters, lenses and tripods can easily run well over $100 a piece for good versions.

Thankfully there are some cheap and easy ways to start varying your effects and abilities before shelling out for the expensive gear:

1. Turn Your Window Into a Lightbox

creative-photography-2

Securing a piece of parchment paper to your window with a little tape is an easy and inexpensive way to create your own light box. The natural light is harnessed in a non-reflective way by the paper, giving you a perfect bright, light evenly lit backdrop to work against. This is a great trick for photographing smaller items, especially those with vibrant colors.

2. Use a Card to Bounce/Reflect Light

Attaching an angled piece of white card to your camera, right in front of the flash, can give you an effective light reflector. Average thickness card, like that used for business cards, will let enough light directly through to light up the front of your subject, while reflecting enough upwards to illuminate the subject evenly from above as well.

You may need to experiment a little with the angle and thickness of the card, though it is a next-to-free reflector.

3. Create Your Own Flash Diffuser

creative-photography-3

Any type of dish or container can be used to create a flash diffuser, though circular shapes are preferred by some photographers. One method is to use a dish/container and coat it with aluminum foil, giving you a more solid device. Another is to use a disposable aluminum dish, or even a Styrofoam cup which you can try with or without foil coating.

Often the plain, bright white surface is reflective enough without the foil. Remember to also create a reflective ‘plate’ (for which you could even use an actual plate if you go the Styrofoam route!) and place it a small distance in front of your flash, with the rest of your DIY diffuser slotted around the flash itself. This type of device is great for indoor shots where you’re trying to get even lighting or lighten shadowing.

4. Use Vaseline for a Blur or Vintage Effect

creative-photography-4

A touch of Vaseline carefully smeared around the edge of your lens can give you an excellent blur effect. This can be used for two purposes. One is to re-create a ‘vintage’ look from a time when cameras did not always capture the entire shot in perfect focus.

The second is to purposely blur out some of the background material and draw more attention to the central subject of your photograph.

5. Turn a Coffee Sleeve into a Lens Hood

Cardboard coffee sleeves and similar cardboard products can be used as a quick and easy lens hood, protecting your shots from lens flare and bright lighting. This technique is especially applicable to outdoor photography, where you might have to take shots with the sun shining down towards you.

6. Turn a Sandwich Bag into a Colorful Filter

creative-photography-5

This technique involves using a sandwich bag to create a variation of the Vaseline blur technique. Simply coloring the plastic in with a marker pen in the color of your choice can create a blurred and colorful effect around the edges of your shot instead though. Just color the plastic in and tear the bag open, placing it over your lens so that the edges just about overhang the edges, leaving the center clear to keep your photograph clear.

7. Eliminate Shaky Shots With Lentils & Old Clothes

You can create your own beanbag for use when you want to stabilize your camera. This is especially great for shooting low-down subjects and also if you have the availability of a solid surface to rest the camera on, like a ledge or table.

Cut your old clothing into a sizeable shape which you can fill with lentils and stitch up. This bean bag will now hold your camera steady whenever required and you can also make adjustments to it by pushing the lentils around and distorting its shape, giving you more maneuverability than the surface of a ledge/table or the ground would by itself.

How to Do Macro Photography: Magnification and Macro Photography

People often think that taking a picture is about pointing and shooting. That is part of it, but there is so much more. For example, do you know what a 2:1 ratio or 1:1 ratio is? If someone asks you about that, do you know what to say?

It comes all down to magnification ratios, and while you don’t need to know everything about them, having a basic understanding can make you a better photographer and make your pictures that much better.

Understanding macro photography is easy once you understand the ratios. Essentially, a magnification ratio is the size of the object on the camera sensor to the actual size of the object that you are taking a picture of.

The 1:1 ratio means that the image is the same size as the real size of the object. If it is a 1:2 ratio, that means that the image you have on your sensor is going to be half the size of the actual thing you are photographing. This ratio makes sense because the sensor image is half the size of the real object, or ½, and if you take the / and change it to a : you get 1:2.

Macro Lenses and Ratios

When you are choosing a lens, you need to understand magnification ratios. A macro lens will go to 1:1 magnification, but there are times when a manufacturer will attempt to make you think that their lens is a macro lens, but that doesn’t mean it actually is a macro lens.

If a manufacturer says that a lens is 70-300 with macro, it doesn’t mean much beyond the fact that the lens will focus closer than another typical lens. It is important to remember that the lens is not actually a true macro lens. A macro lens will not have any zoom, remember that.

magnification-2a

If you have a 50mm lens on your camera, and you shoot normally, you have a ratio of 1:10. If you put a 50mm extension on that lens, then you are shooting 1:1. This may seem odd, but when you focus on infinity, or straight out into the distance, with your 50mm, the glass is 50mm away from the film plane. If you attach a 100mm lens on, and focus on the distance, your glass is now 100mm away.

If you put two extension tubes onto your 50mm, then you get, for example, 68mm extension and that will give you some magnification. If you put that 68mm onto a 70-200mm that is at 70mm, you don’t get as much extension because you are only at 2mm extra.

We know, it is a bit odd how this works but understanding macro photography better will make your photography that much better.

magnification-2

Focus the Lens Closer

If you want to get that extra bit of magnification, there are several ways to do it, including:

  • Close-up filters: Essentially when you put on one of these close-up filters, you are putting a magnifying glass on the lens. These are great because they don’t cost much and they are very light. The trade-off is the fact that the pictures are not always high quality because of the glass over the lens. That being said, if you focus everything properly, the picture can be sharp in the center, but blurry on the edges. If you want more magnification, you need to put more filters on, which means more glass, which means a further degradation of the image itself.
  • Macro lenses: We have talked about these already but they are the best choice for macro shots. You will get amazing quality, and the convenience of having the lens on hand whenever you need it. That being said, it is also more expensive than any other type of magnification.
  • Extension tubes: These are barrels that extend the magnification. They are lightweight, but more expensive than the close-up filters. You get a better focus than with the filters, but more time consuming. Extension tubes also take a bit of work to get right as you try and focus on the image. You also get a bit of a curvature with your images, so the edges are not as sharp as the center.

magnification-4

When you are dealing with macro and magnification, sometimes it is best to go the extra mile and get a specific macro lens. It is quick and easy to change out with another lens, you can easily focus and be on your way. You don’t have to fine tune anything, or attempt to focus out of the blurriness like you would with a close-up filter.

If you are serious about macro photography, take the time to understand the ratios and get the proper lens for the task at hand to take your macro photography to the next level.

The Evolution of Mobile Photography

The term “Mobile Photography” has gained more popularity since the past 2-3 years as technology continues to advance in smartphone cameras. Back in time we held smartphones from Nokia/Siemens/Sony Ericson or may be Samsung that had VGA cameras or even basic cameras. In those times, having a camera in itself was a big deal for us. As it gave us the advantage of capturing moments and keeping those memories. Today, our cameras have advanced tremendously that we can even earn some money from Mobile Photography.

The term “Photography” was slightly restricted and specific to only Digital Cameras and DSLRs has now evolved into Mobile. Many photographers who are used to carrying their heavy DSLRs have started to use more and more of their iPhones or other smartphones to shoot.

India Gate - Nokia N97 India Gate – Nokia N97 Yellow Rose - iPhone 3GS Yellow Rose – iPhone 3GS

The quality seen in images today in comparison to olden days is huge. Sometime in April, an instagram account and app @doyouskrwt asked a question on Instagram “Mobile Photography is shifting – more and more people are going for a bigger camera. Do you think mobile photography will be a thing the next years or is it going to decrease drastically in near future?” Many people including myself agreed that it definitely will keep increasing considering, “technology advances – smartphones advances – camera in smartphone advances” (Jonathan @kennedyirl). The responses also discussed the quality of images. There is no denying that the DSLRs quality still reigns far superior to smartphones but, having a smartphone nowadays for those who enjoy photography is an asset. Like Florian @flori_anz_enk put it nicely saying “I guess it will be a combination of a great smartphone and an advanced camera. I am using two Sony Alpha 7/a7s for portraits, events, and weddings and for everything else my iPhone 6s. Smartphones are so versatile and you can go into stealth mode when it comes to discrete street photography. I love both and use it for completely different styles of photography.”

Hongkong - iPhone 3GS Hongkong – iPhone 3GS Flower Market Hongkong - iPhone3GS Flower Market Hongkong – iPhone3GS

Taking photos with our mobile phones has not just become a matter of passion but a trend. Although, many times our Instagram feeds are filled with unlimited and unnecessary selfies and a display of personal activities. Keeping aside the unnecessary, we come across many talents with wonderful feeds not forgetting the various hubs that have cropped up to expose Mobile Photography. Many of these photographers have started a business, gained partnerships with famous companies and achieved recognition. However, this creates a tough competition between Photographers using DSLRs. The popularity of mobile photographers can remain inconsistent as many times their interest in photography is only for a short time span or to gain fame.

Seattle - iPhone 4S Seattle – iPhone 4S by Bridgette Shima (@bridgette.xo)

Personally for me, having the iPhone handy to capture whenever I like has made me enjoy capturing moments even more. I do use a semi-pro-Canon camera which allows me to use manual controls and gives more satisfaction in terms of image quality. The availability of various apps with impressive editing features allows me to capture, create and instantly share on social media platforms. Some platforms like Eyeem allow us to sell our photos which are a great feature for budding photographers.

Fresh Vegetables - iPhone 5 Fresh Vegetables – iPhone 5 Landscape - iPhone 5 Landscape – iPhone 5

There is a vast difference in the quality of photos that can be seen through the Nokia N97 to iPhone 6S. You will notice with the Nokia N97, the image captured was pretty crisp and clear. The iPhone 3GS has improved the quality of images with more details in the capture. In some instances, the clarity depends on the lighting and exposure. For macro shots simply using iPhone 3GS, as you can see in the Yellow Rose above, it has a perfect composition defining the rose beautifully without needing any major edits. The image quality and composition balance continues to evolve with every iPhone (mobile phone). What I have noticed is from iPhone 3GS to iPhone 6S some of the elements in the camera are stable but, crisper and the noise is far lesser in the current iPhone 6S. Zooming was not encouraged in previous smartphones, however, as you see below, the zoom feature in the current iPhone 6S works well for a mobile phone as it doesn’t compromise the quality of the photo.

Museum Proklamasi Indonesia (Jakarta) - iPhone 6S Museum Proklamasi Indonesia (Jakarta) – iPhone 6S

Over the years, the pixels have increased to improve image quality and to allow larger size printing. The noise has been reduced to a greater extent enabling us to create spotless images. This allows photographers to be able to have the convenience of capturing without having to carry their heavy gears. Currently, smartphone companies are starting to create smartphone cameras with dual cameras whereby one camera would have higher specifications enabling to take even greater quality photos. Some mobile phone companies also use Carl Zeiss Lens like the Nokia Lumia. The Nokia Lumia is known to have a very good camera despite its limitations as far as editing apps are concerned. An article on Nokia Lumia was written by a good friend Bridgette Shima can be read here.

Raindrops - iPhone 6S Raindrops – iPhone 6S

In conclusion, I would say it has been quite interesting to see how mobile photography has progressed and continues to evolve. I wouldn’t say it can reach DSLR quality in a short span of time but having the option of using a smartphone is a big deal for all photographers. Photography is not just a passion or hobby but a profession for many people. Hopefully, mobile photographers can also walk hand in hand to learn from Professional Photographers and inspire all photographers everywhere to keep clicking.

Do you know your photo edit limits?

We are living awesome times regarding to technical advances. Our digital cameras improve every year, the optical of our lenses is high quality, and our photos have better resolution than ever. Also the software for photo editing is in continuum evolution. Photoshop, Lightroom… their editing capacities seem endless.  We can do easily some basic adjustments: hue, exposure, contrast, saturation, clarity or other similar features to improve the look of a photograph. It is what we call enhancement. But we can also clone out objects/persons from the frame; add interesting skies that were not there before, make eyes bigger, people slimmer… (manipulation). These software tools made us free to do as many things as we want. But the fact that we can do what we want means that we should do it? Is it ethical editing photos? Should be define our photo edit limits? The answer to this question is not as easy as it seems.

Photo edit limits
This is the Raw photo. Straight form the camera

Photo edit limits

This is the same photo after I did some enhancements in order to achieve the look I wanted (I darkened the background, I cropped and straightened the photo, adjust contrast, clarity and some other features). I also did some modifications because I deleted the two little bugs that were sitting on the flower and a lighter area next to the flower (lower right corner). I delete them because I found them distracting.

Do an internet search about ethics in photo editing or photo manipulation and you will find all sort of opinions about this subject. Some people think that photo editing is not right, especially when you are talking about photojournalism. Other people believe that photo editing is part of the photographic creative process. They say that photos have always being manipulated somehow. In the past photographers used the dark room to apply their manipulations. Now we do it in a computer. But there is has always been some kind of photo editing.

Photo edit limits

I enjoy editing my photos. In this one I played with Photoshop filters just to give a more painterly look to the photos.

The limits of how much photo edition is acceptable seem to be dependent on the photography field.  In case of photojournalism, there are ethical codes. Although excessive manipulations are not accepted, minor ones usually do. Unfortunately there are no clear standards that define the differences between minor and excessive photo manipulations. Oxford’s university’s Reuters Institute for the Study of Journalism in association with World Press Photo published a report on “The State of News Photography”. The report contains the results of a survey done to the photographers that entered the World Press Photo Competition of 2015.  1549 photographers completed the survey. They answered 63 questions about diverse subjects, including ethics. Almost 73% of the photographers said that they never manipulate their photos (meaning adding or removing elements). So it seems that manipulation is avoided for most of the photographers (notice that I said “most of”. The other 27% manipulate photos at some level sometimes). The answer about photo enhancement was more diverse. Just 9.4% of the photographers admitted never enhancing their photos. All the rest (90.6%) enhanced their photos sometimes (32.7%), half of the time (7.1%), often (21.8%) or even always (28.9%).  They also asked them if they follow ethical guidelines. The answer was interesting:  26% followed their company’s ethical codes and 58% their own standards. This means that more than half of the pictures are subjected to just individual ethical restrictions. Is this right? How do we know the type of editions that the photo we have in front has suffered? Just enhancement? A minor manipulation? What does minor manipulation means for the author of the photo? All these are difficult questions, aren’t they?

Photo edit limits

Did I edit this photo? Although it might seem a pretty simple photo (just a flower), it is also an edited photo. Here I enhanced the sky ad I increased the contrast and the saturation to make the photo more vibrant.

On the other side of the scale we have fine art photography. This field totally relies on photo editing. Fine art photographers use all the available tools to show their internal vision of reality. Fine art photographers are usually Photoshop masters too. However, things are not so clear in other fields. Fashion photography is not subjected to the photojournalism code of ethics. Does this mean that they can alter the image of a model to create an unrealistic view of beauty? How does this affect to the public? And what about nature photography? And landscape? Are the manipulations we do to enhance skies or to delete garbage acceptable?

Photo edit limits

Landscapes are also subjected to enhancements and modifications. I usually enhance the skies and I delete all the garbage I can.

After all this information, it is your turn: To edit, or not to edit: that is the question. You already saw how subjective this issue is. I will share with you my personal decisions about the subject.

My edition boundaries:

  • I do modify backgrounds in order to make them look cleaner: I delete garbage and objects that might distract from the main object of my photo.
  • I do enhance the general appearance of a background: I do basic adjustments and I apply presets if they can save me time or they can help me achieve my photographic vision.
  • I do enhance the look of my models: I keep my models natural and I just do light adjustments to add brightness to their eyes, skin and eyes. I delete pimples and red skin.
  • I do not change the body shape of my model or delete permanent marks (such as beauty marks). I do not change the color of their eyes or hair.
  • I do inform my clients of all the modifications and enhancements I will do to their pictures.
  • I do not hide the type of enhancements and modifications I do to my photos.
Photo edit limits
I do edit my portraits. I usually do basic enhancements and if I modify something, it is the background (to clean it) or some pimples or red skin. I do add brightness to the eyes, skin and hair. But I always keep my model as natural as possible.

Take into account that I am a portrait and nature photographer. I do not do photojournalism or fashion photography. I enjoy editing my photos and I consider it part of the creation of my photography. However, I try always to be respectful and think of the consequences of my editions. Might my editions be harmful to somebody? If the answer is yes, I won’t apply these editions. I hope my point of view will inspire you to define your own photo edition limits.

What’s Your Photography Style? – Discover Your Inspiration

Those of us who love photography often find ourselves taking pictures of anything and everything we can, at all times. On top of that, we often browse the work of other photographers, whether for inspiration, admiration or even to check out the competition.

And as you see more and more shots from others, and hone your own craft, you’re probably going to find that you prefer particular styles over others. It might be that you like the photos of certain types of subjects, say landscapes. It may also be that you like the work of a particular photographer, or work done in particular style. This is a good way to start figuring out what YOUR style is.

Different Photography Styles

A style is a hard thing to define, as the varieties are infinite. As mentioned above, you can categorize by subject matter, methods of shooting, and many other ways. The best photographers are known because they have their own styles; they might be good at capturing emotion in a picture, or they may specialize in landscapes or other subjects. The really cool thing about that is it can become possible to know who took a photograph simply by looking at the work.

photography-styles-2

If you have a particular subject you like to work with, it may be the beginnings of discovering your own style. Perhaps subjects aren’t so important to you, but other factors are, like bringing a striking contrast or unusual angles into your work. This again helps to define you as an individual and add your own unique style to your work.

Browsing the work of others helps here as you can single out those shots that you really enjoy and consider high quality, and pick out what specifically makes them unique for you. This can then be applied to your own work.

Developing Your Style

Once you have some inspiration to work from, you can then develop this into your own work. Don’t be too rigid with what you do, and don’t restrict yourself to either what is already being done, or what you intended to do. Sometimes we think something sounds like a great idea and works well for another photographer, then realize it doesn’t really work the same way for our own work. In this kind of situation adaptability is a must. You have to roll with it and be willing to discard ideas that you had considered great, if you aren’t satisfied with the final product.

photography-styles-3

The end goal is to come up with shots that have your own flavor and that satisfy you in terms of quality as well. Adding and taking away elements is something you should experiment with; after all, nobody wants you to just clone the methods used by an already successful photographer, since you’re unlikely to do it as well as they do.

Experimenting with a variety of methods, angles, techniques and subjects also helps to develop your overall game. This is a must for professional photographers as there will be times when your client wants you to work outside of your usual style and do things their way instead. Since these clients pay for your work, it’s best to keep them happy.

If you personally feel that there is a better way to do it, it’s a good idea to take shots in both the style they want and the style you feel is better, so you can show them both and try to persuade them on your style.

photography-styles-4

The Benefits of Style

The biggest benefit of creating and developing your own style goes back to our earlier point of recognizing work. Once you have an individual style developed, your work will be much easier to recognize and will also gain admiration for its uniqueness. This can lead to more exposure for you and make your work more sought after. This is a great advantage for professional photographers, as we are always looking to cross that threshold from looking for work, to where work looks for us.

Never Stop Experimenting!

photography-styles-5

Despite all these advantages to your own style, you should never stop trying to further develop your style. Don’t be afraid to experiment with different methods even once you are established. Further development can keep you ahead of the curve, and you never know when you’re going to make another breakthrough and find a way to make your work even better.

The best photographers are those who are never entirely satisfied, and who always want to find ways to improve. Use this as an example, and always strive for more. That way you’re sure to never become stagnant or ‘old news’.

70-200mm Lens – How to Avoid Blurring?

It’s very common among the professional Canon users to grab our 70-200mm lens for indoor as well as for outdoor shoots. The lens is one of the top choices for portraits and product photography due to its versatility and interesting zoom range.

Lens Overview

Speaking of this versatile and powerful Canon lens, we can start to say that it was launched in 2010 as an update of the EF 70 – 200 mm F2.8 L IS USM from 2001. With a gap of 9 years and considering the advances in the technology of DSLR cameras, Canon redesigns this powerhouse by improving both the stabilization and optics, as well as autofocus and its design.

Optics consists of 23 elements in 19 groups, including more than 5 of them with the Ultra-Low Dispersion technology (UD), plus one with Fluorite Coating. The reason? Reducing the Chromatic Aberration of the lens.

Canon_Zoom-Lens_EF_70-200_F2.8L_IS_II_USM-01a_

Built-in metal, we are not talking about a light lens; however, it compensates for the weight with its excellent image quality and enhanced protection in regards to dust that can enter our camera, in addition to being weather sealed.

The Autofocus motor belongs to the technology of Canon Ultrasonic Motor (USM), being extremely agile while maintaining a silent profile.

27358305815_713c7db69e_k

Photo courtesy of Eric Schaffer

The price is something to consider in this lens since we are talking about high-end equipment for what should not amaze us that its initial price is higher than $1500.

The only difficulty that photographers face while using the lens is its weight. A Canon 70-200mm [ f 2.8 IS II ] lens weighs approximately 1600 gms. So, this lens when mounted on a full-frame camera like Canon 5D Mark III weighs almost 2.5 kilograms.

When weight matters

So, how do you take a sharp photograph while holding so much weight in your hand? You might use a tripod to bring in the extra support, balance, and stability. But do tripods work during all circumstances? Not really. How far does ‘Image Stabilisation’ in your lens, help? Not very much. True, it provides the minor stabilization features that you need and but that’s not all.

canon-ef-70-200mm-f-2-8l-is-ii-usm-lens

The way you hold your lens plays a major role. It can sometimes be the ‘break-it’ or ‘make-it’ factor for your photographs.

We are assuming here that you will be using the kit (Canon 5D MK III + Canon 70-200mm f/2.8L IS II lens) handheld and not by tripod mounted. The first thing to do is to rotate the tripod collar from the bottom side of the lens(while mounted with the camera) towards the top side. This way, the tripod collar won’t obtrude and disturb your grip with the lens.

Kindly note: Indoor shoots are tripod-mounted most of the time. So this article may not be applicable to you. But for those who shoot by hand-held devices, this article might be helpful.

A quick but effective solution

So, like I mentioned earlier, the way you hold the lens while shooting may affect your photograph, for good or for worse. Most of the time, we tend to hold the lens somewhere on its collar ( really close to the body of the camera). I used to do this too in my earlier days as a photographer. This helps us control the zoom ring better while composing the photograph. True, but it also indirectly affects the balance in your focus. This sometimes results in blurred images and lesser sharpness. This is because of improper positioning of your palm by the lens. By supporting the lens at the collar location by your palm you are letting more weight towards the front side of the lens which leads to improper balance and with blurred photographs.photographer-1191562_1920This can be overcome by slightly shifting your palm position towards the front side of the lens, which means you need to place your palm almost on the zoom ring. As soon as you shift your palm towards the front end of the lens, you immediately feel the perfect balance of weight while holding. But this situation restricts the zooming ability immediately before you press the shutter button. You have to be prepared in advance, as you cannot zoom as you used to before. Get your frame right, compose what you need and then click away!27010607034_afe1fb94d0_k

Photo courtesy of Pengcheng Pi

We hope this article helped ease your discomfort while shooting using the 70-200mm lens.

Please leave your comments below and let us know about your experience. 🙂

Header photo courtesy of Francesca Pippi

A How-To Guide on Organizing a Portrait Photo Session

Do you need to organize a portrait photo session? If it is your first photo session or if you want to improve the organization of your photo shoots, keep reading. At first it might seem a bit overwhelming. But if you establish a good workflow, things will become easier. You will feel more confident organizing your portrait photo session and you will even enjoy the process!  Along the article, just for simplification purposes, I will refer to the model as “client”. You can apply these tips to friends or models. The photos I am sharing with you today are from two photo sessions that I did for my friend Nita. As she is a yoga teacher, all the photos in this article are somehow yoga related.  But these tips are good for any portrait session.

A How-To Guide on organizing a portrait photo session
This is Nita, my yogi friend. She needed photos mostly for her social media and blog so she became my client.

Talk with your client and discover for what does he/she wants the photos

This first tip is a general one and it might seem pretty obvious. However, what your clients want to get from the photos will determine the whole organization of your photo shoot. Deciding about poses or locations will be easier if you know what you want to achieve in the photo session. It is important that you talk with your clients before the photo session and you ask them a series of questions. Some of them will be quite practical and to the point: how many photos they need, if they need them in landscape or portrait orientation, do they need some negative space (empty space) to add text in the photos, if the photos are meant for printing or just for using on the internet, if they will need to change clothes and so on. Other questions are not so easy to answer but are extremely important: what do your clients want to express on the photos? Do they want to look serious? Friendly? Strong? You can talk face to face with your client, by phone or even send them a questionnaire. I strongly recommend you to keep record of everything your client answers.

A How-To Guide on organizing a portrait photo session
Nita wanted to look friendly and approachable, so we made sure to take pictures of her smiling.

Decide on location and session length

The information your clients would provide you is precious because it will help you to set the perfect photo session for him/her. I would start thinking on what the client wants to express. From this information you can have a first idea about the location of the photo session. Maybe your client has a location in mind, but as the photographer, I think you should offer your opinion regarding the choice of location. Offer your client a plan but also listen to what they have to say about it. For example, in our yoga photo session, Nita wanted to look friendly, approachable and strong. We decided to do the photo session in several outdoors locations, mostly in the beach. Beach portraits can convey this playful mood that would add to the friendly, approachable look. In addition, Nita loves being outdoors, so she feels comfortable in this type of locations. Think of the comfort of your clients. Happy and relaxed clients mean better photos and will increase the chance that they call on your services again!

A How-To Guide on organizing a portrait photo session
Beach photos have this playful atmosphere that can help in creating a friendly and approachable look

She also decided that she needed people to know that she is good doing asanas (asana is the name of the yoga postures) and that she also gives importance to meditation. We made sure to include pictures that show these two sides of Nita.

A How-To Guide on organizing a portrait photo session
By combining the right environment with the correct pose, you can emphasize different traits of your clients. This photo of Nita in a bridge pose shows us how flexible she is and in the same time reveals her sculpted muscles, indicating a combination of agility and strength, this effect is emphasized by the banana plants standing on either side of her, bringing out Nita’s image thanks to their symmetry, shape and color.

A How-To Guide on organizing a portrait photo session

The undisturbed sand that Nita sits on, together with the clear, blue sea and the wide horizon help to convey the tranquility and openness that Nita achieves through her meditation and breathing exercises.

Now that you know the location and the number of photos your client needs, you can do a better estimation of time you need to book for the photo session. Don’t forget to add some extra time if your client needs to change clothes.

Think about the poses

I found it really helpful to have a set of ready-to-use poses. I usually do some research online looking for poses that will help the client to express what they want: poses looking strong, or relaxed, or approachable…. You can ask the client to show you photos they like too. I even prepare a power point of photos that I will bring with me on the day of the photo session (I like to bring my tablet to the photo sessions, but you can also print them or show them on the phone). This doesn’t mean that I want to copy the poses I saw online. I just have them to give some inspiration to the client. I notice that when I show clients these power points, they feel more confident. I guess they feel like they can always have a look at the power point if they run out of ideas. I have to admit that many of my clients take only one or two looks in the power points I make for them. But even if they don’t use it a lot, just for the blast of confidence it provides, it is worth to have it. The photos I take usually don’t look at all like the ones in the power point.

A How-To Guide on organizing a portrait photo session
Here we had a moment where we ran out of ideas, we already did the bridge pose and with this vibrant and sporty outfit we wanted another photo that will scream “I’m strong!”, after a quick look to the power point Nita came up with this pose.

Check if you need to practice some techniques

Think about the techniques you will need in the photo session. Would you need to use a flash? Do you need a reflector? Or maybe you need to use a circular polarizing filter. Make sure to practice before the photo shoot. You don’t want to make any beginners mistakes in front of your client.

A How-To Guide on organizing a portrait photo session
: Here we needed to use a reflector to add some light to Nita’s face. It seems like a simple and straight forward tool (Just aim the beam of light and that’s all, right?), well, it is a bit more complicated than that. To start with, if you are not careful you can blind your client, another issue is the angle at which the light hits the model (for example, some angles can help to bring out features such as muscle lines). In short- practice with a reflector (or any other equipment) before the photo session.

Make a list of the equipment you need for the photo shoot

I love checklists. I have one made with all the equipment for the photo sessions: memory cards (formatted!), batteries (charged!!!), reflector, filters, lenses (clean!!!), camera (of course!)… The amount of equipment you need might be a lot, so having it listed will make your life easier. It is terrible to realize that you forgot something once you are in the photo session. I also add to the list things that might help the client: something to tie the hair with in case it is windy, make up, some water bottles…

Make a list with the kind of photos you need to take

Your client already gave you all this information. Just make sure you remember how many and the type of photos you need to take: portrait, landscape orientation, with a lot of negative space…

A How-To Guide on organizing a portrait photo session
Nita needed some photos with negative space so she could add some text to them if she wanted to. We used the beautiful Mediterranean Sea to add some interesting negative space to the photos.

Prepare the equipment

The photo shoot is approaching!! Take your equipment list and prepare everything you need. Do it the day before or at least with enough time to charge the batteries in case you need to replace them (even if you are certain you have enough power in the battery, it’s always good to have spares).

Meet with the client a bit in advance

I recommend meeting with the client a bit before the photo session to have time to relax, check your camera settings, prepare your equipment, talk a little and show them the power point with the photos. Starting a photo session in a rush is never a good thing.

Enjoy the photo session

You prepared a great photo session, so you’re gonna rock it! Now it is time to have fun with what you like the most: taking photos!

I have some specific tips for yoga/sports photo sessions: If your client needs to do some physical effort, think that she might need to warm up. These kind of sessions might be exhausting for your client. Talk with him/her and decide if you want to make the complicated and tiring photos at the beginning of the session or towards the end. Everybody is different, so it is important that you know how they prefer to organize these high demanding photos.

Last but not least… tell your clients to choose their clothes wisely, including their underwear!! If you don’t want to spend hours in Photoshop removing marks, folds and underwear that shows up… tell them to pick photo-session suitable clothes. And don’t hesitate in helping them to adjust their clothes during the photo shoot. It might seem like a joke, but believe me; you can save a lot of time and headaches here!

A How-To Guide on organizing a portrait photo session
Tell your client to choose their clothes wisely, especially if they are going to be upside down and underwear can show up easily.

Tell me if you find these tips useful or if you miss something. I would love to know.

Happy shooting and until next post!!

Sharing Your Work – 5 Photography Websites Reviewed

It is not uncommon to see two different things advance in parallel thanks to specific technology developments to meet at some point in time and benefit from each other. A good example of this casual relationship can be seen between photography and internet, with both experiencing extraordinary advances in the last couple of decades to finally get to a point where both influence each other as never before.

The impact of photography on the contents of internet is ubiquitous but I want to focus here on the impact that the development of internet and, more specifically so-called social networks, have had on photography in the recent past.

Although the concept of social network is quite broad, for some people, some of the sites I mention here might not fall precisely on that concept. However, the idea (not always the main idea!) behind all of them is to serve as platforms where to share your photography and get some feedback from the community. In addition, they also work as virtual galleries where people showcase their work with the hope to find potential clients. After all, whether your main purpose with photography is a commercial one or not, the feeling of knowing that someone is willing to pay for a picture you made is probably the most objective positive feedback you will get.

websites01

I will focus on five websites that can be used for the above mentioned purposes. The opinions stated here are only mine and the numbering of the list is completely random and has nothing to do with how much I like a given site. If the websites have paid options (like special types of memberships), I will not mention them since I am comparing here only the free features.

1. Flickr

Created in 2004 and acquired by Yahoo in 2005, Flickr was one of the first websites meant to share photos (and videos starting from 2008) on the internet. Also, with about 87 million registered users and more than 3.5 million photos uploaded each day, it is one of the most popular websites of this type.

Now, volume is not necessarily good. While your pictures will indeed gain quite a good exposure, 87 million users does not mean 87 million views for each one of your uploads, of course! In fact, 3.5 million uploads per day means that more than 40 photos are uploaded each second on average. In addition, the way Flickr works makes it quite difficult for users that are not in your contact list to see your photos, unless you share them in what Flickr calls ‘Groups’.

websites02

Groups are simply public galleries, created by a user, where people can share photos that fall within a specific category. This is probably the best way to reach more viewers, so if you use Flickr don’t neglect this feature.

One thing that you can pretty much neglect if you are in for becoming a better photographer is the favorites and comments on Flickr. With few exceptions, most of these will come from people wanting you to reciprocate and add their photos as favorites. That said, meaningful comments (more than the usual ‘Great photo!’) are somewhat more valuable but, on the other hand, if you usually get 10 or 15 favorites in your photos and one of them gets 100, then you can start drawing conclusions. Always keep in mind, though, that what people like depends as well on your public. After all, those over-processed HDRs that became so popular a few years ago do not precisely represent good photography and they still receive tons of favorites!

When it comes to selling your work, while Flickr does not offer this functionality per se, with such exposure it might happen that someone contacts you asking for a specific photo so keep your contact details up to date!

websites03

Another functionality of Flickr that can gain you exposure is the famous ‘Explore’. This is a gallery of ‘special’ photos that is constantly updated using some algorithm that seems to take into account the relative popularity of a given upload when compared to other uploads both from a given user and from other users during a specific period of time. The downside of this functionality is that, being an automatic algorithm, the results are somewhat random, meaning that the quality of the images in the gallery will not always be the best.

2. 500px

With about 6 million users, 500px might look like an option to neglect when compared to Flickr. However, this Canadian website, launched in 2009, has become probably the main choice for those who take photography more seriously. Because of this and the way that 500px works, it is possible, in general, to find photos of greater quality when compared to Flickr.

Instead of the ‘Explore’ functionality from Flickr, 500px has two main galleries to look for quality content. The ‘Popular’ gallery showcases those photos that get the most favorites among the community and the ‘Editors’ gallery is curated by the site’s editors. If you take into account that favorites on 500px tend to be more truthful than on Flickr (even though you also get people simply wanting you to check their profile), this means that both galleries are curated by real people and you can expect to find some amazing work on them.

websites04

In terms of commercializing your work, 500px allows you to sell your photos directly on the website for different uses and, in general, the rates they pay to the photographer are relatively good compared to large stock photography websites such as Getty. Also, and in contrast to Getty, you can always remove your work from the website, meaning that you are not obliged to sell with them if you don’t want to after a while.

3. Tumblr

While Tumblr is not a photography website as such, it is probably one of the best social networks to showcase your work. Defined as a microblogging platform, you can create your own website and personalize it to some extent where you can both post your images and also share your thoughts about photography or whatever you want with your followers.

As with any social networking site, your exposure will depend mostly on the amount of people you interact with, meaning that you have to spend some time building your connections. If you have a domain name, it is fairly straightforward to link your Tumblr webpage to your domain name, providing an easy and free option to create your own website.

websites05

Unless you add a store functionality, the possibility of selling your images will largely depend on the exposure you gain.

When it comes to feedback, I would say that you cannot really use Tumblr to improve as a photographer, except for the motivation factor that sharing your work has. In fact, comments are quite scarce and the amount of ‘Likes’ your photos will get largely depend on someone who has thousands of follower reblogging them (unless you have thousands of followers, of course!).

4. Facebook

While most people will be familiar with Facebook as the largest social networking website where you can see what your friends are up to, the capability of the site as a platform to share your photography from an artistic point of view is pretty useful, being actually the main choice of many photographers out there.

The only difference with a normal Facebook profile is that you need to create a ‘fan page’ where you can post your images and, once again depending on the amount of followers you reach, your exposure can be surprisingly large. This arises from the social networking features where people can share a picture they like with their followers so the amount of people actually seeing one of your photos can reach pretty high numbers in a relatively short time.

websites06

In terms of selling your work and feedback, Facebook is very similar to Tumblr. Now, with 1.65 billion active users per month (!), the potential is obviously immense.

5. Instagram

In the last few years, Instagram has become the main choice for many people wanting to showcase their photos. While it is hard to deny the potential that the site has to reach large audiences, with over 100 million active users per month, personally I find Instagram a bit too oriented to sharing photos of everyday life. Of course you can find many accounts of very talented photographers and the interface of the site makes it really easy to scroll down the virtually infinite gallery from your contacts so it is a nice place to spend some time looking at good images.

There are many other great websites where you can share your photos, so this small list is by no means a comprehensive one. A good thing about photography is that, at least to some extent, the website you choose is not as important as the quality of your images, so if you take the time to become a better photographer, you can be sure that your work will gain the attention it deserves!

Photography as a Stress Relieving Tool: 5 Tips to a Calm Mind

Go to work, take care of your family, go to the gym, pay the bills, attend social meetings, take care of the house, try to be healthy… the list of things we do every day is never-ending. We didn’t even realize and stress already took over us. Luckily there is something we can do about it. As photography-lovers we have a great stress management tool in our hands: our camera. We can use photography as a stress relieving tool.

We are all similar: we all suffer stress at certain degree.

Photographing sea landscapes always makes me feel calmer.

Stress is a normal reaction of our body to get adapted to changes. It allows us to react in dangerous situations preparing out body to react: faster heartbeat and breath, muscles get ready to action… our body is ready for everything. Certain levels of stress are OK because our body is able to handle it. In fact stress help us to wake up in the morning, prepare meetings, etc… But when the stress is kept for long time or it is too much, then it can have the negative consequences that we are all familiar with: depression, anxiety, hypertension…

Photography as a stress relieving tool

We are all similar: we all suffer stress at certain degree.

We all suffer stress at different intensity levels. There is a big diversity of behaviors in front of the same situation. We don’t need a really stressful situation to enter into anxiety mode. Our mind is able to make something not stressful for the most part of the people in something really stressful for us. This means that we are in great part responsible of our suffering.  This is a good new: if we are the responsible ones, avoiding stress is in our hands. Well, we all know it is not so easy. There are as many ways to handle stress: meditation, breathing techniques, do sports… and also photography!

Photography as a stress relieving tool

Differences in the way we react to a situation (as moving to another country) is what makes us to experience it as a negatively stressful period  or just as exciting times.

I use photography as a stress management tool because it helps me to focus my attention outside my mind and distract me from the stress and anxiety I might be feeling. It is a great way to stop negative thoughts. It helps me to relax. As you are reading this article, I understand that you like photography. If you have not use photography to relive stress, I recommend you to give it a try. Here you have some tips I hope will help you:

Don’t care so much about the final product

Remember that you took the camera to relieve stress, not to take the best shoot of your life. Take the photos just to have fun, for yourself. Don’t care so much about composition.  Leave the perfectionism and inner criticisms at home. Don’t hold expectations. It is all about enjoying the process.

Photography as a stress relieving tool

This is not my best composition but I still remember how much fun I had taking this photo. I was lying on the floor in that bed of leaves feeling happy.

Turn on the camera and turn off the phone

Phones can be a huge stress factor. They provide us with a lot of little tasks that divide our attention and distract us. If you want to relieve stress, try to turn off the phone (or allow just the entry calls) for the time you are taking photos. Forget about Whats App, email and other applications. If you are using the camera of your phone, try to ignore all the notifications for a while. It will help you to focus your attention in just one thing: taking photos. Give your brain a bit of resting time.

Do a photo-walk

Walk slow, breath deep, pay attention to the details, take photos. The idea is that you become mindful about your surroundings and that you enjoy everything you see.

Photography as a stress relieving tool

Paying attention to details helps me to focus my mind and find little hidden treasures.

Practice gratitude

We humans have a tendency to see easily all the bad things. This behavior is pretty negative and doesn’t help to relieve stress. Practicing gratitude can help us to switch our point of view. Try focusing on the good. You can start small: look for the good on the things you see. Take photos of them. Be grateful you can enjoy them. This will give your brain a positive input that will help you to handle negative situations in a better way.

Photography as a stress relieving tool

I found this extravagant leave close to my home. It made me feel grateful about nature.

Pick a photographic subject

If you feel so stressed that your brain jumps from one thing to other like a crazy monkey, you will need to help it to calm down. It can be useful to give your brain just one thing to focus: pick a restrictive project. You can make your brain to look after one shape or just one color: circles, squares, blue, red…  Or you can choose a location or a camera setting. Just pick one subject and take photos respecting the limitations. You will see like the crazy monkey starts to calm down after a while taking photos because you will need to use all your creativity skills. No room for anything else.

Photography as a stress relieving tool

I did a photo session about circles. I usually don’t restrict myself so much, but it was really useful to help my mind to stop wondering and focus in just one thing.

In conclusion, photography can be a great stress management tool. First of all, it is a way to treat yourself: enjoy some time doing something you love will bring a bit of  balance to all your responsibilities. Taking photos always helps to focus on what you have in front of your eyes NOW. This is especially important because a lot of us (meaning stressed people) are not living in the present moment. We are constantly thinking about the past or worrying about the future. But photography can slow you down and can bring you to a more peaceful mindset that will help you to deal better with all your obligations.

Comparing Photos without Becoming a Bitter Photographer

I am going to share something I am not proud of: comparing my photos with the ones taken by other photographers makes me a bitter person. Yes, I too, have these moments in which I hate all the photographers in the world. OK, I am exaggerating. I don’t hate them all. I just hate the ones that are better than me. When I come to this realization, I feel even worst. I will give you a real example.

The other day I went to take photos of a valley close to my home. It is one of my favorite landscapes. I know that sunsets are beautiful in this area. And now is already summer, so everything turns golden. I was feeling happy and inspired. I found the perfect spot, set the tripod and my camera and I was shooting until I got what at that point I considered the perfect picture. I ran home and first thing I did was to transfer the photos to my computer. I searched for “THE PHOTO” and I did some post-processing using my best photo edition skills and Lightroom tools.  When I saw the final picture I thought:  “This is a great landscape photo”. I felt happy and proud. Such a great moment!

Comparing photos
This place is right next to my home. I was feeling so happy when I took this photo! I emphasized the summer mood of the scene in post-processing and I was proud of the result. Until I started comparing myself with other photographers.

I decided to share it in a photography community to see if people like it. I usually post my photos in 500px. In case you don’t know it, 500px is an online community that encourage photographers to share their best work. It is a good place to connect with other photographers and get some inspiration. At that point I just needed to wait for the “likes” and the comments. I decided to have a look at what other photographers posted in the landscape category. I started comparing my photos with all the others. And so I entered into what I like to call the “negative criticism spiral”.  I am so familiar with it that I can even describe it by stages.

Stages of the negative criticism spiral

  • First 30 seconds: everything looks amazing. I like all the pictures. They are so BEAUTIFUL!! I love the colors, and the composition. Everything!!
  • From second 31 to 1 minute: Insecurity. Would I ever be able to take a photo like this? And I thought that my picture was good!! Next to these beautiful landscapes my photo looks so bad!!
  • Second minute: Hate. “I am sure that these photographers have a better camera and better lenses“. “I am sure they are  having fun all the time! They just travel to these wonderful places and they have all the time of the world for finding the perfect composition”. “I hate them!”
  • Third minute: Sadness. I go into a very negative mindset: “I am not good enough. I should quit photography”.
  • Fourth minute: Comfort. I feel desperate and I try to cheer myself up. “Let’s see the pictures of the beginners. I am sure there are going to be worse than mine” (recognizing that I can think in this way is kind of embarrassing)
  • Fifth minute: Deep sadness. I realized what just happened in the last minutes and I conclude that I am a bitter photographer.
Comparing photos
When I start comparing myself to others I am like a cactus: I put barriers between me and anything that can come from the outside.

Can you relate? In just five minutes I went from having a positive mindset (I was happy and enjoying my photography) to a deep sadness. I was either putting myself down or putting others down in order to feel better. Why do I do it? I guess that the answer is simple:

I compare myself with others because I am human.

I was not getting any benefit out of these comparisons. They were just making me sad and angry. I was losing my passion for photography too. These comparisons are destructive, so instead I decided to turn them into something constructive. I want to share with you my 3 ways not to become such a bitter photographer:

Put yourself in the shoes of the other photographer

For some reason I tend to think that these photographers are not making any effort. I just see their final photo and I forget that it is the result of their work. You can’t know just by looking at one photo how many books they read about composition or how many years it took them to find their photographic vision. They might be travelling all the time. But you can’t know what they left behind. Maybe they did a big sacrifice in life in order to become a landscape photographer. Maybe they feel lonely. Maybe they took 10000 photos that day in order to get this one outstanding photo. Maybe they also feel that other photographers are much better than them. Now when I see that I start hating some photographer, I take a deep breath and I imagine all the efforts that this person might have done for taking the photo. It also helps to appreciate the picture even more.

Comparing photos
I took this photo in Australia. You might think that I spent months travelling to the other side of the world and living great adventures. But the reality is totally different. I couldn’t afford travelling to Australia. I did it because they send me to a Biology conference (I am also a biologist. I spend most of my day working inside a laboratory). Instead of going to the good recommended hotels, I went to hostels. In that way I saved some money that I spent travelling around for just 2 weeks because I needed to come back to work in the lab. The stories behind the photos are not always what we thought.

Instead of comparing yourself with these photographers, use them as inspiration

Now every time I see a photo that I find great I add it to a gallery. This way I can come back to it at any time I want. I study them. I try to figure out what I like in them so much. Is it because of the composition? Or maybe it is the mood of the photo? When I focus on the photo and not on the photographer, I go into a positive mindset and I feel like I want to learn from the guy (or girl). I end up following them as a fan.

Comparing photos
I was never modifying my backgrounds. But I saw the awesome work of other nature photographers that were doing it. I decided to give it a try and in my next hike I took with me a black cardboard. The cardboard allowed me to isolate this gorgeous Gilboa Irus (Iris haynei) from the messy background.

Compare your pictures from now with the photos you took some time ago

If still feel like I need to compare myself with something, I do it with one of my old photos. That I can see how I evolved and improved. I would like to go over all the learning process and take awesome pictures NOW. But photography doesn’t work like that. You learn, you practice, you make mistakes, you keep learning… and you improve. Slowly but surely. Put a new and an old photo next to each other and feel proud of yourself. Then comparing your photos can become something positive.  Be aware of your strengths and keep learning to improve. Enjoy the journey. Love your photography. Appreciating yourself is the best way to keep motivated!

Comparing photos
I took this photo 5 years ago. I am not sure what I wanted to show here. The only thing I see is a flat sand landscape that doesn’t talks to me.
Comparing photos
I took this photo the last weekend. I wanted to show how summer looks like for me. It is not the best landscape photography ever. But if I compare it with the previous photo, I can see my progression. Now I put more of myself into each photo.

Each time you feel you are entering into a negative spiral of comparison, take a breath and apply one of the tips I told you. Think that it is all about mindset. My strategies are focused on promoting a positivity. When you’re looking at photos with a negative mood you close your mind, you don’t want to learn or to see any more good photos. On the other hand, a positive mindset will keep your mind open, You will learn from others and this will lead you to good places!

Get on the other side of the lens

It wasn’t until someone forced me to take photographs with my boyfriend John that I realized how nerve wracking it really is. As a wedding and engagement photographer, I am constantly telling couples to kiss, put your foreheads together, stare into each other’s eyes, etc.  For me, it has become the norm and prior to my experience on the other side of the camera, I had no idea what my clients were going through.  A couple of summers ago, I photographed a wedding in the Dominican Republic.  The bride was a photography major in college and loved taking photos.  When in the Dominican, she decided it was an absolute must to get my boyfriend and me in front of her camera. From this experience I gained so much insight from my clients perspective and as a result became a much more relatable photographer.

Insight #1 – It is AWKWARD!

I was so excited to get cute pics until I actually got there and she started directing me. You want me to do what?! You want us to kiss and hold the pose there while you rearrange your lighting? But it’s hot outside… this is so uncomfortable… I feel my nose sweating…

Those were just some of the thoughts going through my head in the first five minutes of our session.  John and I felt so uncomfortable and couldn’t help but nervously giggle. As the session went on, we gradually got more comfortable and settled into ourselves and really had a great time.

couple kissing

Ebby L Photography

Above, John and I had been holding that kiss for what felt like hours. The entire time, we tried not to laugh holding the pose and I am so glad we kept it together.  I mean, look at that wave behind us!

The important takeaway from the awkward insight – make sure your clients know it’s okay to be nervous in the beginning.  Make silly jokes or share your own experiences on the other side of the camera.  Tell them about other clients getting a beer before the session or staring in the mirror way too long to figure out their good side.

Insight #2 – Photos of yourself are important!

Being a photographer, I am constantly sharing photos of clients I take pictures of.  In the first 3-4 years of business, my Facebook profile and business page were cluttered with images of others.  It wasn’t until I saw another photographer post portfolio pictures of herself that I realized how important it was.  Your clients want to know who you are!  By showing them pretty pictures of yourself, not just iPhone selfies, you’re helping them identify you with your high-quality work. For an added bonus, hold a camera in your pictures to give them an even bigger reminder. For other social media branding tips, check out the article Official Portfolio vs. Instagram

The photo on the left is a step in the right direction but a poor quality image. You want the photos of yourself to be a representation of the images you will give your clients. For more insight on how to take better “selfies”, check out Bill’s article and learn to take super selfies.

portrait

Ebby L Photography

Insight #3 – Confidence booster

Yes… you read that right… after my nerve-wracking, giggly experience taking photos with John.. I actually felt more confident! I gained assurance in myself after seeing that even though we felt like the definition of awkward, we still got great pictures! I also became more certain in my ability to take pictures. After learning how my clients could be feeling, it made me realize that them getting back their beautiful images I took is even more exciting than I thought.  Now when I hear clients say, “I hope we weren’t too awkward!” or “ah does my hair look okay?” I feel confident showing them a sneak peek on my camera screen to reassure them that yes you guys look THIS GOOD and that you have nothing to worry about. 

couple hugging

Ebby L Photography Wedding Photography Ebby L Photography

So overall, get on the other side of the lens! Ask a photog buddy to take an afternoon and exchange headshots with you. Make a day of it with your significant other and teach them to use the camera while also getting pictures of yourself.  Learn how you feel in front of the camera.  Show off the photos of yourself and use them to represent your brand/business. If you’re just starting out as a photographer, make sure to read 8 Things I wish Somebody Told Me When I Was A Beginner Photographer.  

Introduction to Landscape Photography

Content

  • Introduction
  • Before you get started
  • Planning – Location and time
  • Technique – Camera settings (HDR, depth of field etc) and composition etc
  • Post-processing
  • Publishing

Introduction

Four years ago my passion for photography started and the main reason for this was that I explored the beauty of landscape photography. I wanted to get some wonderful wallpapers for my desktop but found myself astounded by the art that is landscape photography instead, I could browse landscape wallpapers for hours. My interest in landscape photography grew and getting my first camera I started doing it myself, today my landscape photography have progressed a lot and I hope to share some tips that will help anyone getting started with landscape photography.farsbooktober2014-10

Before You Get Started

There are of course no definite rules of what you need before you get started but there are some things that I recommend you have and some basic knowledge of photography. In terms of equipment, I recommend that you at least have a camera, lens(es), tripod and a computer with photo editing software (preferably Lightroom and/or Photoshop). That you need a camera is obvious, but what kind of camera? First of all, it needs to take good photos, but there are some other capabilities that are more or less a must. This includes the capability for interchangeable lenses, manual settings, and RAW-format. I recommend having a DSLR from one of the bigger brands since this will give you a wide array of lenses to choose from and a greater possibility to upgrade your equipment within the brand (so that you don’t need to buy new lenses when/if you decide to get a camera upgrade). Any newer DSLR will do just fine, but if you can afford it a full frame camera that is great (don’t be afraid to buy used cameras and lenses), there are also mirrorless cameras that would be suitable, but unless size and weight are important issues I would stick to a DSLR.      photographer-1031249_1920As with any type of photography the lenses are of great importance in landscape photography, and there are three types of lenses that will fill all your needs, these are the normal zoom lens (usually somewhere around 24-70mm equivalent to a full frame sensor, 18-55 on a cropped sensor), the ultra wide angle zoom lens (usually somewhere around 12-35mm equivalent) and the telephoto zoom lens (usually somewhere around 70-300mm). If you have all of these lenses you will be able to capture all types of landscape photography. I recommend that you buy lenses with a big aperture like f/2,8 if you can afford it, but there are cheaper alternatives that work great as well. Depending on your style of photography you will use different lenses more than others, personally, I use my normal zoom lens (24-70mm f/2,8) the most since I find it to be plenty wide for most situations and I also have the possibility to capture tighter images as well.dawn-1284235_1920I would also recommend that you use a tripod for landscape photography, and while it isn’t completely necessary I find that it makes you slow down and think more about the process, such as composition. A tripod will also help you eliminate blurry photos and is a must if you plan to take long exposures. Be sure to use a sturdy tripod that won’t wobble around too much. Another tip for when using a tripod is to also use a cable release so you won’t have to touch your camera, and in that way producing slightly blurred photos. You could also set a timer to eliminate this risk. There is various other equipment that you can use, primarily filters. If you want to achieve long exposures in the daytime you have to use a strong ND-filter, and a circular polarizer is great to have at hand to reduce glare and increase vibrance in photos.filter-1259839_1920For post-processing, you can use whatever software you like, but for some more advanced features, Adobe Photoshop is the way to go. I really like working with Lightroom as well, as it is easy to manage and very powerful.This guide will not be going over how the technical aspects of your camera work, like shutter speed, aperture, and ISO, so if you are not yet comfortable with these aspects of photography I recommend that you read about it. I would say it is essential to know these things if you want to achieve great landscape photography.

Planning a Landscape Shoot

Before you head out to capture amazing landscape photos you need to make some sort of plan, it can be very detailed but it is often good enough to make a general plan. There are three basics in planning a landscape shoot, these are location, time of day and look at the photo/composition. Before you go you should, of course, know the location you are heading to, maybe you have scouted the location the day before or earlier the same day, or maybe you have just found a certain spot through other photographers photos on the internet. Often you will be taking photos in locations that you have never been to before and if you don’t have time to come back to a location several times it can be a good idea to research the place beforehand through sites like 500px. By doing this you will get some inspiration for what photos you want to capture when you arrive at the location. If you are staying in the same place for a longer period I would recommend that you spend a bit more time on scouting locations that you can go to when the time is right, for example during golden hour.branches-325411_1920Time of day is crucial when it comes to landscape photography since we are dependent on the weather and light gave to us by mother nature. We simply have to adapt to mother nature. As a rule of thumb, you should try to capture landscapes during golden hour. That is the hour (give and take) during sunset and sunrise. At this time the light cast by the sun is the most beautiful, and since we are usually trying to take beautiful photos this is the best time for landscape photographers. But of course, you can capture landscapes at different times as well, for example, long exposures during the night or on cloudy days. At least you want to avoid broad daylight since it makes everything very flat and boring. Lastly, you have to plan how you want the photo to look, this is, of course, dependent on the time of day and location but it is good to have an idea about composition and subjects among other things before you arrive at the location. paddle-839814_1920   When I took the photo you can see below I was staying with some acquaintances for two nights, in a beautiful small village at Österlen, Sweden. When I first arrived in the evening I went down to the sea to scout for a location (I didn’t bother taking the photos I wanted at this time since I knew it would be much better at sunrise the next day) and I found two spots that I really liked. I used an app to find out in what direction the sun would rise the next day and decided to try to capture an image where the lines formed by the rocks in the foreground were leading the eye of the viewer towards the rising sun. So the next morning I woke up at about 04.00 (4 AM) to capture the photo I had envisioned the previous day. The sun rose approximately 04.30, but the things you do for great photos… My plan worked out great and I got this photo that I am very happy about.      ÖsterlenApril2014-113

Technique

A big part of photography is technique since we must know how to use our cameras and how to compose a photo to get the best results. I won’t go over in detail how to set up you camera and how the technical aspects of your camera work but rather focusing on the specifics for landscape photography. Some keywords in landscape photography are sharpness and correct exposure. To achieve sharpness you have to use the appropriate aperture, make sure you have focused your lens at the right distance and that there is no risk for blur. Since we want the entire landscape in focus most of the time we should use a smaller aperture. This will also depend on your focal length since the depth of field is smaller on lenses with longer focal lengths. I usually never go below f/8 for my landscape photos, unless it is very dark or I’m using a super wide angle lens (like 16mm equivalent or below). The aim is to have as much of the scene in focus as possible, without having a too small aperture (since that might lead to softer photos). Somewhere around f/8 to F/16 is usually suitable for landscape photography. You also want to make sure that you focus your lens somewhere a third into the frame, which usually is the foreground. If you focus too far back the foreground will be out of focus, but if you focus on the foreground the background will most likely be in focus if you are using a fairly small aperture.dog-190056_1280It is also important that you eliminate any risks of camera shake, by using either a shorter shutter speed (the shutter speed should be no less than the focal length of your lens, so if you are using a 24mm lens the shutter speed should at least be 1/24th of a second) or a tripod. If you are shooting hand-held it is recommended that you use vibration reduction if your lens (or camera) has it (keep in mind that it is called different names depending on the brand). Additionally, It is very important that you have a correct exposure, no matter if you are shooting JPEG or RAW (recommended). Something that really can ruin landscape photos is overexposure, usually meaning that there is no possibility to recover blown highlights in the sky. It is also horrible to have such underexposure that the colors are destroyed by noise when you try to recover the shadows. You should aim for an exposure were highlights are bright (but not blown) and shadows bright enough to increase them a little bit in post-process (if needed). You should rather have a bit darker shadows than to bright highlights. Another option is to use the technique HDR (High Dynamic Range) where you take several photos with different exposures and combine in post-processing, leading to an image with both no blown highlights and bright shadows.waterfall-192984_1280Another very important technical aspect of landscape photography is composition. This is such an important part that is impossible to cover thoroughly but there are some basic tips for landscape composition that you need to know.One important part of composing landscape photos is the rule of thirds. According to this rule, the horizon should be placed either at the top or bottom third, but absolutely not in the middle. This is to create a balanced photo, but of course, there are some exceptions, for example when there is reflection, then it can be nice to place the middle of the reflection in the middle of the frame.


Untitled-1

Another tip is to take advantage of leading lines. You can use lines in photos to lead the viewer to where you want them to look. Lines should be leading into the frame and not out from it since you want the viewer to look at the photo and not be distracted. For example, you can use a stream leading towards a mountain or a path leading the viewer from the foreground to the main subject as leading lines.

_D8A6277-PS-1

Post-Processing

When you are back after a landscape shoot the work is not done yet. What you do with the pictures after they have been taken is crucial to creating a fantastic image. I would almost say that it is in post-processing you turn the photograph from an image file to a piece of art. If you decide to shoot in RAW-format you will have much greater artistic freedom when you edit the photos, since RAW files have much more data in them, meaning you can change exposure and color to a greater extent. I use Lightroom for most of my editing and they use Photoshop for more advanced edits of my favorite photos.When I edit photos I usually try to enhance elements that are already in the picture. But first I create a base edit where I make sure that the exposure and contrast are what I want and then I go on to more in-depth editing, like modifying tones and details of the image. before-afterI highly recommend that you check out the different bundles for landscape photography that Sleeklens has to offer, they are a great and easy way to make your images look fantastic, and by combining different presets you can create completely unique looks.

Photoshop: Landscape Adventure Collection

Lightroom: Landscape Essentials Workflow

Conclusion

I hope you have found this short guide useful and that you will be comfortable to start exploring the wonderful field of landscape photography. This guide has just scratched on the top of an extensive subject and I recommend that you continue reading other guides that can help you get a better understanding for each part of the process, like the composition. Good luck with your landscape photography!

Sleeklens Rain and Snow Overlays: A Comprehensive User’s Guide

Introduction to Rain and Snow Overlays

By using rain and snow overlays you can make your photos more interesting and to a greater extent control the look of your photos. Maybe you wish to achieve a moody look but were afraid to get your camera wet in the rain, or you may wish to create the perfect ambiance in a winter scene but the snow is missing, then our overlays will come to great use.

The principle for applying rain and snow overlays are the same and this article will focus on how to apply and adjust the overlays to your liking.

Snow

Snow overlays

work best when there is snow already on the ground, but it will also work in situations when there might be fresh falling snow. The key here is that there shouldn’t be clear (too) clear skies and that there are no elements showing indications of another time of the year, for example, certain blossoms or the lushness of various vegetations. If there are no signs of snow on the ground it might be smart to use an overlay with less intensity, to really sell the effect.

BnA1

Rain

Rain overlays

can, of course, be used on photos from the entire year, but it is still important that there are no signs of very clear weather or similar. If the selected photo is pretty bright and vibrant an overlay with very heavy rainfall would not be a suitable choice. Generally speaking, you can use more heavy rainfall overlays as the photos get darker and moodier. There are of course exceptions to this guideline.

BnA2

How to Apply the Overlays

Here is the list of steps you need to take to apply the overlays:
1. Importing and resizing
2. Choose Blend Mode and Opacity
3. Colouring and Blurring (not always necessary)
4. Applying layer mask (if needed)

1. Importing and resizing

screenshot1

The first thing you have to do is to import the overlays you want to apply to an image, this is easily done by dragging the overlay from its folder onto your image in Photoshop. When you import the overlay you should be able to resize it directly and now you just have to make sure the overlay covers the entire image, or you can make it even bigger if you like. You can always change the size and position of overlays later using the Free Transform tool (Ctrl + T).

screenshot2

When you are satisfied with the size and position of the overlay just accept by clicking the checkbox icon at the top or press enter.

2. Choose Blend Mode and Opacity

What blend mode you choose is important for the look of the overlay, and you can also change the opacity to get the desired intensity of rain/snow. To choose blend mode you need to have the layer containing the overlay selected and then selecting the blend mode quick menu above the layer panel. The recommended blend modes are “Screen”, “Color Dodge” and “Linear Dodge”. These will make all the black parts disappear leaving just the rain or snow left.

screenshot3

screenshot4
Here you can see how the blend mode “Screen” has removed all the black and adding rain to the image beneath. You can also try “Color Dodge” and “Linear Dodge”, these will give you a brighter, almost glowing, look to the rain or snow.

Next, you can reduce the opacity if want a more subtle effect, simply type in the percentage you want or drag the slider.

screenshot5

3. Colouring and Blurring

This step is not necessary for many occasions, but sometimes it can make a big difference for the overlays. If you find that the rain or snow looks too harsh you should fix it using “Gaussian Blur“. Since the rain doesn’t really have any color in itself but can be “coloured“ by the light in a certain situation, for example, the rain can have a slightly warm tone during sunset. To mimic these situations you need to add some colour to your overlay using a Hue/Saturation filter. If you use the blend mode “Color Dodge“ you do not need to do this since it will pick up some of the ambient colour.

To add a colour tone to an overlay you need to open a Hue/Saturation adjustment layer while having the overlay layer selected. You then need to link it the layer below by clicking the “clip to layer“ icon, the icon furthest to the left in the icon row in the bottom of the Hue/Saturation panel. You also need to tick the box “Colorize“.

screenshot6

You can now change the hue, saturation and lightness sliders to set a fitting tone for your overlay. Keep in mind that it should make the overlay blend better with the rest of the image. In this case, we can see that the photo has a quite cool tone to it, so we need to set the hue to something blue, and we will also keep the saturation low because we do not want the rain to look too much coloured. The lightness should usually be around zero.

screenshot7
As you can see the difference is quite small, but it is important that the rain or snow fits in the picture.

If you want to make the rain or snow a bit softer you can apply a gaussian blur. Go to Filter/Blur/Gaussian Blur while still having the overlay layer selected. Type in a value somewhere around 1 to 4, depending on the size of rain/snow. In this case, I will choose 0,8 since the raindrops are small in this overlay.

screenshot8

Now the basic look of the overlay is finished.

4. Applying Layer Mask

If the snow or rain is covering an important element of your picture you can remove with help of a layer mask. In this case, the raindrops are covering the girl’s face and clothing, and since the overlays are made in such a way that displays depth this can look a bit weird on some occasions. Since rain falls at different distances from the camera it would be strange if the small raindrops, that should be further away, falls in front of a subject closer in the frame. This might completely ruin some pictures with a lot of depth, primarily portraits. For the same reason, we also need to make sure that the bottom of the frame is free from rain since the bottom is closer to the camera and that means that the smaller raindrops should not be visible.

First, you need to create a layer mask, by clicking on the layer mask icon in the bottom of the layers panel. This will create a layer mask in white, and everything that is white in the layer mask is visible, while everything black will be hidden.

screenshot9

Now you simply have to select the brush tool (B) and make sure the brush is soft and color set to black. By painting on the area of the overlay you want to remove you can get rid of rain/snow that is unwanted.

K20A0203-finished
Here is the finished photo

Conclusion

We hope you have found this guide useful and that you will be able to use these techniques in your own photos. When you have mastered these basic skills for applying overlays you can go on with experimenting with other ways to get the most out of our rain and snow overlays, or our starburst overlay. You may also try our sky overlay for PhotoShop. The possibilities are endless and just waiting for you to explore them.

How To Resize An Image In Photoshop

Resizing images in Photoshop can be tedious, especially if you’ve got an entire batch to go through. So, here’s a little trick I learned recently that’s saved me a lot of time and hopefully will benefit you too. In this tutorial I will teach you how to set up an Action, which once activated will re-size multiple images at once.

For those who doesn’t know what Actions are, they can be easily defined as Photoshop’s way of automatizing several tasks under the same process. They are crafted in a way for their usage to be universal – therefore you can apply them, regardless of the topic of your image.

It takes a while to set up, but if you follow these 10 steps carefully it will save you time in the long run. The great thing about this is that once you’ve mastered how to set an Action, you can set up Actions for all sorts of things in Photoshop.

Here’s how to do it:

1. First, you’ll need to create a folder for your resized images to move into. I created a file called ‘Resized Images’ on my desktop.

2. Next, open an image in Photoshop. Our next step is going to be geared towards the Action creation process.

3. Go to the Actions panel. If it doesn’t appear on the screen, go to Windows>Actions. My recommendation is to leave it as docked menu, right above of your layer panel.

1

4. At the bottom of Actions panel, there should be an icon which will allow you to create a new Action. It looks like a tiny dog-eared page. Click that.

5. Now choose a name for your Action.

6. Next, we have to record the Action. This process needs to be precise and well done because Photoshop will start tracking every single step you do within the software – My recommendation? Try to practice this process for a while before tracking it via Actions button.

So go to Image>Resize and fill in the field with your desired new size. For my Action, I have chosen to resize all images to 620 px in width.

2

7. Next, go File>Save As>Resized Images (the folder we created at the start). Then close the image.

8. Click stop in Actions panel (the small square at the bottom). The Action should now appear.

9. It’s a good idea to test out the Action before you put it to use, so open up an image and click play on the Actions panel. The image should resize of its own accord. You can check that the resized version has been saved in the Resized Images folder and then you’re good to go.

10. The next and final step is to resize multiple images using the Action we’ve just created. Open Photoshop. Go File>Automate>Batch. Select your Action. For ‘Source’ choose the folder where the images you want to resize are located. Check Destination says ‘Folder’ and that beneath it says ‘Resized Images’ – this will ensure the images will automatically save into the folder you created for them.

Click ‘OK’, sit back, and watch as Photoshop works its magic.

As you can see, a quick and effective process for resizing multiple images under the same step. Most users tend to believe that Batch adjustments can only be accomplished when using Adobe Lightroom or via Adobe Bridge, however, Photoshop does a fairly good job in cases like this one.

Please take into consideration that you can’t go over 10% of size increase on your image file, otherwise, you’re likely to experience undesired side effects such as pixelation (in the opposite case, you won’t have any problem at all).

You can increase the resolution of the image at any time of your editing process; which is advisable when your main goal is to print the final file. 72 px/inch resolution is meant for screen display, 150 px/inch is the minimum value to use when doing the print job and 300 px/inch is the advisable resolution to use. Remember to always set the size manually after increasing resolution values, as this tends to increase the image size in a far too notorious way as a side consequence of the resolution increase (creating noise in the same process).

Hope this guide on image resizing was helpful for you and see you next time!

You can also learn to make a photo look old in photoshop if you want to.

Shooting a portrait in 15 minutes – Gear Overview

A new beginning

The wonderful people at Sleeklens have invited me to share my thoughts and experiences as a freelance photographer working in London. I will endeavor to do this several times a month, and for my first correspondence, I thought I would introduce myself so you will hopefully get an idea of what I love about photography and how my life as a working photographer unfolds.

My name is Matt Writtle and I’ve been working professionally for over twenty years. I have been seen quite a lot of changes, from bulk loading Ilford HP5 film and shooting with an old Nikon FM2, to shooting most of my work now on a Leica M (240) digital. I prefer digital now, controversial I know, but I have never been the most patient of people and the majority of my work is to shoot portraits and features for newspapers such as the Daily Telegraph and London Evening Standard.

To describe my work succinctly: I have to produce a studio quality portrait on location, in a venue I have never been to before, in less than thirty minutes.

Portrait of actress Andrea Risborough at the Mayfair Hotel, Piccadilly, London. PHOTO MATT WRITTLE Picture commissioned exclusively for the London Evening Standard. Use in another publication will require a fee.

Ninja Turtle

Nearly all portrait shots are time allocated and controlled by the public relations officer or “PR” for the subject. Consequently, time is tight and closely monitored. I normally get fifteen minutes, thirty if I’m lucky, so preparation is key. The best way to prepare is to correspond with the PR in advance of the shoot, and then arrive early. Thirty to forty-five minutes before the shoot is a good amount of time to recce the venue, mostly hotel rooms, lobbies or a theater, and ascertain how much available light there is and what set up to use.

Budgets are tight, photographic assistants on newspaper shoots are rare, and as technology has advanced so has the demise of manpower, so, I have to travel alone with all my equipment on my back. I wheel it all around in Think Tank Airport Security V2.0 and additionally, I now carry a 22inch beauty dish in an extra large drum cymbals case on my back, very useful case and vastly cheaper than photographic equivalents. I look like a Teenage Mutant Ninja Turtle going on holiday!

My two main light attachments are the dish and a Photek Softlighter II 46 inch. Presently, I use the dish as my key light, and should I need any shadow fill I use the Softlighter II (brolly box). I have to be mindful not to have too much darkness and contrast in the image as newsprint doesn’t reproduce blacks very well. I also have to consider house style: newspapers don’t want their images to be too moody and gloomy.

Commission May0066291 Assigned Portrait of former X-Factor contestant and pop star Fleur East at Sony BMG, High Street Kensington, west London. MUST CREDIT PHOTO MATT WRITTLE © copyright Matt Writtle 2015. Picture commissioned exclusively by the Telegraph Media Group. Use in another publication will require a fee.

War and Peace

On most shoots, I walk around the location and try to imagine how the subject will look in a scenario befitting of the angle of the interview. I tend to ask the PR to stand in for a light test. Exposure and mood created, I wait. Many people don’t consider how different each individual will look in the same light, and often, I have to modify the light to accommodate the star.

This was the case when I photographed actor Tom Burke (BBC’s War and Peace) recently for the Daily Telegraph. The shoot was at London’s Hampstead Theatre he was performing in, so, stairwell and lift lobbies were my backdrops. Ten minutes recce and he appeared. I keep things simple. The more complicated you try to make things, the more time you waste.

Set up one was at the top of some stairs with framed posters of previous actors who’ve starred at the theatre. I was thinking hall of fame and he was being inducted. Beauty dish key light, with a basic backlight to add mood and light the framed pictures.

Commission May0068723 Assigned Portrait of Actor Tom Burke who is appearing in Reasons To Be Happy at Hampstead Theatre, Swiss Cottage, north London. MUST CREDIT PHOTO MATT WRITTLE © copyright Matt Writtle 2016. Picture commissioned exclusively by the Telegraph Media Group. Use in another publication will require a fee.

Set up two was in a darkened lift lobby, but as Tom Burke is known for his brooding characters, I thought this quite fitting. Again, beauty dish key light, with a gentle amount of fill for shadows with the brolley box, all of which shot on my Leica M (240) with a 35mm f1.4 and 50mm f1.4 aspherical.

Commission May0068723 Assigned Portrait of Actor Tom Burke who is appearing in Reasons To Be Happy at Hampstead Theatre, Swiss Cottage, north London. MUST CREDIT PHOTO MATT WRITTLE © copyright Matt Writtle 2016. Picture commissioned exclusively by the Telegraph Media Group. Use in another publication will require a fee.

‘Goodnight Mommy’

In addition to the technical, you have to get a famous or notorious person inside to produce the image you want. I would say it’s a challenging and tense situation. For those fifteen minutes, I channel my adrenaline, whilst being friendly and keeping the subject happy. At the same time, I make sure the image is focused, composed, exposed and the lighting suits the mood of the character, all while a PR is standing behind you counting down how much time you have left.

It can be frustrating, but only because you have unique access and often not enough time to do it justice. But when there is a connection, the shoot sparks into life and that’s when the magic happens.

This was apparent when I photographed the Austrian actress Susanne Wuest who starred in a horror film “Goodnight Mommy’ which has received critical acclaim. We met at her penthouse apartment at the old Arsenal FC football stadium, now flats. Having modelled before, I was optimistic the shoot would be successful. She was as enthusiastic as I and we connected on what we both wanted to achieve, which took place on her terrace against a beautiful blue early spring sky.

Set up one was just natural light shot on my Leica with a 35mm.

Portrait of Austrian actor Susanne Wuest at her apartment in Highbury, north London. MUST CREDIT PHOTO MATT WRITTLE © copyright Matt Writtle 2016. Picture commissioned exclusively by the London Evening Standard and ESL. Use in another publication will require a fee.

Set up two was on my Canon 5d mark III with a 24mm-70mm zoom. I metered for the natural light and then placed two Elinchrom Quadra heads, one with the beauty dish, one naked, at 45° angles to her and boom! I got my favourite shot.

Portrait of Austrian actor Susanne Wuest at her apartment in Highbury, north London. MUST CREDIT PHOTO MATT WRITTLE © copyright Matt Writtle 2016. Picture commissioned exclusively by the London Evening Standard and ESL. Use in another publication will require a fee.

Hope this guide has been useful for you as a brief panorama of how do we photographers suit our gear to match the different scenarios we may come across during our daily job. See you next time!

Essential Photography Equipment for Wildlife Photography

Wildlife photography is probably one of the most difficult fields in photography, not only that you need certain knowledge of the animal’s behavior, also you have to know which photography gear will be ideal for wildlife photography. So, in order to show impressive photos of animals the right choice of the camera and lens is really important.

Earlier it was almost impossible to get a high-quality photograph of a wild living animal because back in the days we only had slow cameras and slow lenses. But now we have the opportunity to take breathtaking images of animals because modern cameras allow us to use fast shutter speeds and also lenses with fast autofocus allow us to capture wildlife sceneries which can’t be seen by the naked eye.

For example, this image, which shows two wild living foxes having a fight, was captured with a really fast shutter speed (1/2500s).

IMG_6115fight

What’s the ideal camera body for wildlife photography?

When choosing a digital camera for wildlife photography, there are some important considerations. First thing you have to consider is, that you should choose a camera with a good AF performance and which at least has a continuous shooting rate of 7 frames per second, to capture fast movements of animals and therefore to get out the most of an action sequence, for example if you are shooting birds in flight or running/jumping mammals.

IMG_9335s8

Another thing you have to consider is to use a camera body which has a good high-ISO performance because almost every wildlife photographer shoots whether in the dusk or in the dawn because at this time you have the best light of the day. If you will buy a camera body with APS-C sensor you will have a really big advantage, because you will have much more focal length due to the crop-factor. So if you use a 300 mm telelens on a 1.6x crop camera, you will, therefore, get a focal length of 480mm.

IMG_3512_beaS (2)

Which lens should I use?

Well, to capture a wild living animal you will need a telelens of course, but there are different types of the lenses. On the one hand you have tele zooms and on the other hand, you have lenses with fixed focal length. The main reason for choosing a tele zoom lens is that you will become more flexible because you can easily zoom in and out depending on the focal length you need.

When you are using a prime lens, you have to move the camera back and forth physically, so this could be a problem if you are too close to an animal or too far away, because you would disturb the animal you want to photograph when you move a lot. Another important consideration is to choose a wide aperture lens because you will need a lot of light if you want to capture animal action shots and especially mammals are often active in the morning where the light conditions are very poor.

79ae3f06b1c8252b1630285c7f46175a-d9qgw2s

Wide aperture lenses are also helpful if you want to isolate your main subject from everything else, for blurring the background and if you want to get a smooth and clear background.

If your lens has an image stabilizer, you will get much sharper images, because it will help you to receive high-quality images, when you taking photos in situations where you don’t have enough light, or if you don’t use a tripod while you are photographing.When you are taking photos of wild living animals you have to mind that you protect your camera and lens with a waterproof coat to prevent water from damaging your camera or lens.

Eisvogel landung

To sum up, here a little list of photo gear before you start taking images in the wild:

DSLR (Like said before crop cameras will extend your focal length)

Tele Lens (chose a tele lens with an image stabilizer and wide aperture to be able to capture fast moving animals)

Tele-converter (A teleconverter will give you extra focal length)

Hiding Tent (using a hiding tent will maximize the chance to photograph timid animals)

Tripod (a tripod will help you get sharper images when you shoot at slow shutter speeds)

We hope you enjoyed this article !


All photos by Julian Rad.

Boosting Motivation – Discover How to Be a Succesful Artist

If you have been long enough in any hobby you might be familiar with the feeling, and photography is not an exception. You really enjoy making photos but for some reason you don’t find the motivation to go out and shoot.

This has many different causes. Humans feel a natural attraction towards challenges and a rejection to routine, so most probably you have been shooting similar subjects for too long or you simply mastered a specific technique that a while ago was a challenging and exciting one.

Of course, what motivates one person might not work for another but, in general, anything that introduces a change in your routine will help you find that original motivation again. I want to share a couple of ideas that have worked for me in those moments, just in case you are finding it hard to get back on track.

Gear

Probably the easy ways to get motivated are also the expensive ones, or so it may seem at first glance. One of those is getting new photographic gear.

Buying a new camera, lens, filter or whatever you can think of will not only help you by the simple fact of wanting to try out your new acquisition. What is more important, it will usually involve trying out new styles of photography or new techniques.

_MG_4367_1024_nob

For instance, if you buy a wide angle lens, you will find that the perspective of your photos will be completely different than before, allowing you to try out new compositions or subjects. In some ways, this will bring a feeling of re-discovering photography and your mind will start looking for different points of view of even the same places you encounter every day.

Something similar happens with filters. By getting new filters like for instance a neutral density filter, and by playing with them, you will find new ways to see at subjects that might feel already too familiar to you.

Travel around

Other, more obvious, change can come from going somewhere you’ve never been before. This one can be as expensive as you want it to be. If you like landscape photography, no doubt that a trip to the Himalayas will boost your motivation, but you don’t need to spend thousands of dollars. By even cycling to the outskirts of your city you will find locations that are completely new to you and if your mind is already used to finding compositions (something natural after some years making photos), in no time you will find interesting subjects.

_MG_1946_newestv_1024_nob

You can also use different free tools available on the internet such as Google maps to plan where to go by looking at terrain features. This way you will also have a better idea on what gear to take or at what time of the day to go.

Change your shooting times

This one is even easier. Most of use are used to making photos at a specific time. Call it daytime, nighttime, golden or blue hour, we tend to focus on a specific type of photography and thus we end up taking our camera out always at the same hour. Try making photos (even of the subjects you’ve made before) at a completely different time of the day.

P1030469_new_1024_nob

To get interesting results, you might have to wake up really early or even go out when rain is pouring down or during a snowstorm and more often than not, you will come back home surprised. Take your time to experiment and don’t give up after your first try. Different light conditions have particularities that will require some learning time.

Share your work

The reason why the whole social network concept is so successful is because we all enjoy some level of recognition from others. So, sharing your work with others can be very helpful. It does not have to be on the internet. You can simply show your work to your friends or family but certainly using some of the available platforms to showcase your photos (e.g. Flickr, 500px, Instagram, etc.) will help you get a feeling on how well you are doing. Unfortunately, the feedback from these sites tend to be rather empty with most people writing comments like ‘Great shot’ only to get a comment back but how much exposure your photos get is usually a good way of evaluating your own work and getting motivated to upload your next image.

Practice your post-processing skills

Even without leaving the comfort of your home, you can boost your motivation by revisiting your old photos. I tend to go through my old photos every couple of months and I always find some that I neglected back then simply because I lacked the Photoshop skills to get something out of them. From simple adjustments such as white balance or brightness to more advanced retouching such as adding elements to the original image or creating surreal images by combining several different shots, when you learn new post-processing techniques you can get final images that will keep surprising you long after capturing the original files. If you are relatively new to Photoshop, you can start by using actions and then look for tutorials on photography websites.

regoli_BBpanoramaB&W_2048

These are just some tips but in any case find what better works for you and don’t feel like there’s something wrong with your love for photography whenever you feel that lack of motivation. Just keep trying new thing and have fun!

Choosing the Sensor Size that’s Right for You: Bigger isn’t Always Better

Whether you’re a seasoned pro or an aspiring amateur, your choice of the camera goes a long way to defining and reflect who you are as a photographer. While a sports photographer will likely lust at the low-light, quick shooting behemoths, a street photographer will want a quiet, compact, one-handed companion. There are a ton of factors that go into choosing the camera that best fits your needs and style, and one of the first decisions that should be made is what sensor size to go for.

If you aren’t familiar with the concept of sensor size, it is literally the physical dimension of the electronic sensor that records the light and thereby makes the image. The sensor size is not only built into the camera but has a direct effect on the lenses and image characteristics as well. From the days of film, when the sensor size was simply the type of film the camera accepted (35mm, 120mm 4×5, etc.), this has been a key factor in choosing a camera and ultimately a shooting style that fits the photographer’s needs. Today, most camera companies offer at least two options through different camera lines, with some offering even more. It’s important to note that when choosing a camera and the sensor that’s in it, you’re also choosing what lenses and accessories that will be available to you, so do your research on the entire system that surrounds the camera as well.

1234526868_02ef3f04e7_o
A CCD sensor (© Matt Laskowski)

Before we dive in, a basic explanation of how sensor sizes relate to the actual photo is in order. It’s helpful to think of an image sensor as a water bucket and light as rain. A larger sensor (larger bucket) can collect more light (more rain) than a smaller sensor in the same situation. So a camera with a larger sensor will perform better than a camera with a smaller sensor in a low-light scenario because it can collect more of the light that’s available. This means faster shutter speeds, lower ISO, and overall nicer images. Another major factor of having a large sensor is the shallower depth-of-field (more background blurriness) it creates. Because of optical math, we needn’t worry about, a larger sensor produces a shallower depth-of-field than a smaller one shooting the exact same image. The last important element of a larger sensor is simply the advanced technology it requires. Because larger sensors are simply harder to make, they often come in overall better (and more expensive) cameras. Because companies put their best tech in their most expensive cameras, larger sensor sizes nearly always come with better and more recent technology. These three factors— low-light performance, shallow depth-of-field, and cutting-edge technology— are why most people assume bigger sensors are always better. However, amazing images can be made with any sensor size out there, it just depends on what you’re shooting and how you shoot it.

Here, we’ll go through the pros and cons of the four major size options available for interchangeable lens cameras, with some examples for each size mentioned.

Taken with Medium Format Camera (© Takuma Kimura)

Taken with a Medium Format camera (© Takuma Kimora)

1. Medium Format (~44x33mm to ~54x40mm)

These are super expensive, high-end studio cameras from companies most people have never even heard of such as Phase One, Mamiya, and Hasselblad. While they’re unwieldy, slow shooting, and a rental-only option for most people, they also produce the highest quality images available. With amazing dynamic range (range of brightness to the darkness that can be recorded in the same image), extremely fine detail (up to 100mp), and great bokeh (quality of the out-of-focus area), these cameras are perfect for many types of art, fashion, and archival photography. However, they are difficult and unnecessary for most other types of shooting and serve as a specialty option.

  • Pros:
    • Best Image quality available in favorable situations
    • Instantly gives any image a high-end look
    • The shooting experience is unlike anything else
  • Cons:
    • Extremely expensive
    • So difficult to manufacture that high ISO and other recent technology isn’t available
    • Large and clunky
  • Examples:
    • Pentax 645Z ($4,000, one of the best cameras ever made)
    • Hasselblad H5D series ($7,500-$45,000)
    • Phase One XF series (Up to 100mp for up to $55,000)

Taken with a Full Frame camera

Taken with a Full Frame camera

2. Full Frame (~36x24mm)

While in the days of film, this size was thought of as too small for any self-respecting professional photographer, digital cameras make this the go-to size for most professionals today. This is what the flagship cameras for many companies utilize, as it offers a great balance between superb performance and acceptable price. Many people believe that a 10-year-old camera with this sensor format (such as the Canon 5D Mark I) is still better than any new camera with a smaller sensor inside. However, with the improved high-ISO performance of modern cameras and tons of great lenses available for almost any mount, there’s not much supporting this way of thinking.

  • Pros:
    • Often sports the best technology available
    • Amazing low light performance and high-quality look
    • Best lenses and accessories available are for these professional-grade cameras
  • Cons:
    • Still pretty expensive
    • Fairly large bodies and lenses
    • The industry may start to favor smaller formats soon
  • Examples:
    • Canon 5DSR ($3,600, 50mp of raw power)
    • Sony a7R II ($3,200, mirrorless that’s fairly compact and critically acclaimed)
    • Pentax K-1 ($1,800, amazing quality for half the price of its competition)

Taken with an APS-C camera

Taken with an APS-C camera

3. APS-C (~23x15mm)

This is what you’ll find in most cameras that aren’t point-and-shoots, and for good reason. While for a long time this format has been aimed at amateurs, more and more pro-quality cameras are coming out with this size thanks in large part to the introduction of mirrorless cameras. If you’re not already invested in a camera system, you should strongly consider getting an entry-level APS-C mirrorless camera and going from there. While Canon and Nikon have been sticking with the same DSLR formula for over a decade, companies like Sony and Fujifilm have bet big on mirrorless APS-C cameras and it looks like it will pay off. The absolute best cameras that won’t break the bank are of this variety. Because recent technological advancements allow them to accommodate high-res sensors with clean images at high ISO— and there are now many amazing lenses built for this format— some APS-C cameras can go head-to-head with all but the best full-frame competition.

  • Pros:
    • Much more affordable options available
    • Some are both compact and still high-quality
    • Next generation of popular cameras will be APS-C Mirrorless
  • Cons:
    • Still, can’t match the performance of the best full-frame cameras in demanding situations
    • Some of the amateur options aren’t worth buying (looking at you Nikon and Canon)
    • Still thought of as unprofessional in some circles
  • Examples:
    • Canon Rebel series ($400+, better options available for similar prices)
    • Sony Alpha a6000 ($600, very compact with great image quality)
    • Fuji film X-Pro2 ($1,700, unique design with professional image and build quality)

Taken with a Micro Four Thirds camera

Taken with a Micro Four Thirds camera

4. Micro Four Thirds (17x13mm)

This is a very interesting option that deserves serious consideration from almost any photographer. About five years ago, many people believed this format to be the future of all photography. While it hasn’t yet lived up to that hype, it has quietly grown into a robust segment that can offer superb image quality for very low prices, but definitely, sacrifices some flexibility. Unlike all other image sensors, Micro Four Thirds (MFT) cameras are standardized across manufacturers. So a lens that fits a Panasonic MFT camera will also fit an Olympus MFT camera, which can be very helpful. Also unlike all other image sensors, this option is mirrorless only, no DSLRs here. But even the cheapest MFT cameras can offer image quality that often out-performs popular, entry-level DSLRs. While this sensor size is a little too small to work well in low-light settings, the bodies are so compact that it might be worth the sacrifice. One thing to note is that most if not all MFT cameras lack the premium build quality available in other formats.

  • Pros:
    • Cheapest option available
    • More nice lenses than you’d expect thanks to universal standards
    • Some extremely small options out there
  • Cons:
    • Poor low-light performance
    • Generally not acceptable for professionals
    • Not many studio accessories available
  • Examples:
    • Olympus PEN EPL7 ($450, extremely compact but toy-like body)
    • Panasonic GH4 ($1,300, professional-ish option with great 4K video)
    • Olympus EM-5 ($480, worth every penny)

There are amazing cameras made using every sensor-size, so choosing a size is really just a matter of taste. If you want to be able to take incredibly detailed images for large prints that are dripping with quality, then a Medium Format or Full Frame camera is probably your best bet. If you want a decent shooter that won’t be noticed when you’re taking close-up street portraits (or if you just want to save your wallet), then an MFT camera may be right for you. And if you’re looking for a jack of all trades that can create amazing images in favorable light and perfectly acceptable images in almost any situation, then maybe go for an APS-C sensor. Before deciding on a specific camera or even one brand, it’s best to weigh your options and consider what your expectations are, then you can find the camera best suited to capture the images you want.

Shooting Wedding Details: A Comprehensive Guide

Effectively capturing details is essential to communicating the atmosphere and emotions of your clients’ wedding day. Formal shots and group photos are essential, but often times it’s the little things that really bring back memories.

First, let’s clarify exactly what is meant by the word “detail.” In this case, “detail” refers to two things: smaller articles that are particularly valuable to the couple (wedding rings, especially), and things that do not necessarily carry any sentimentality, but aid in expressing the spirit of the celebration. Adequately documenting these particular elements requires that the photographer adheres to a few simple guidelines.

The Basics

Regardless of what you are shooting, it’s important to pay attention to angles and composition. When I’m working on details, I always shoot directly above or directly in front of my subject. Usually, any other angle detracts from the image and makes the photograph appear unbalanced.

bouquet-of-roses-1246490_1280

If you’re shooting small details, using a macro lens is imperative. It’s impossible to photograph a multifaceted diamond without one. Again, I’m emphasizing wedding rings, but this applies to any tiny object that would otherwise lose detail without a lens that lacks the ability to focus closely.

Furthermore, lighting plays an extremely important role in sufficiently enhancing smaller features. Position your subjects next to a window or another source of natural light. Artificial light typically comes from above and casts harsh shadows (just as if you were shooting outdoors at high noon).

Photographing Sentimental and Essential Details

Valuable objects directly related to the wedding must be captured clearly and thoughtfully. Jewelry, clothing, decorations, the cake, etc. are the unique accessories that showcase the couple’s personalities and will thus be some of their most treasured photos. The goal here is to highlight each item without complicating the image and detracting from the subject. I like to add outside elements that complement the subject. This is really a great way to augment shots of jewelry or other accessories that are very small. If you have the opportunity to work outdoors, you can use sticks, leaves, rocks, and so forth to give the image a rustic, nature-inspired vibe.

20151004-175926-2_mini

If you can’t go outside, simply find ways to add eye-catching textures or patterns to the shot, or incorporate something else that is special to your clients to add interest.

20150711-142947-478_mini

The bride’s dress is equally important. The same rules apply, but it can sometimes be difficult to get a creative shot of the gown. Again, incorporate textures and patterns when you can.

20150711-135407_mini

Creating a unique dress shot requires a little artistry and sometimes, improvisation. At one of the weddings I worked last summer, we had been having a tough time finding a nice place to photograph the dress. The hotel was beautiful, but the circumstances just weren’t quite right. We ended up taking the dress down to the lobby and asked the concierge if we could hang it from their chandelier. Surprisingly, they agreed, and it looked perfect. Then, as I stepped back through the automatic doors to get a wider shot, I ended up with this:

dress_mini

The point is, you can always find creative ways to work around seemingly impractical or unappealing situations. Keep in mind, too, that when you’re shooting wedding dresses, it is important to get wide shots of the entire dress as well as close-ups of the fabric and details.

dress2

Photographing Non-essentials

After you’ve covered the necessities, you can really get creative with the more obscure details. These are particularly important, though, because they really help convey the feel of the entire day. Not to mention, this is really a lot of fun during the reception or whenever you have some downtime. I also take a lot of pride in images like these because they sincerely express my unique photography style.

painting_mini

I try to choose things that will evoke strong feelings in the couple long after the wedding. They may forget little things like what they were eating while getting ready, details in the room where the bride prepared, and so forth. When they look back at these photos in years to come, all of the emotions of the day will come flooding back, and that is really the fundamental goal of quality wedding photography.

makeup_mini

chandelier_mini

To further enhance your wedding day details, Sleeklens offers a wide array of Lightroom presets and Photoshop actions.

Official Portfolio vs. Instagram

Some time ago, I was chatting with a fellow photographer of mine, Robert-Paul Jansen, and we were discussing why so many talented photographers tend to, in a way, migrate all of their work to social networks such as Instagram and Facebook. They still have their legit website portfolios but are always in haste to post it on Instagram first.

When I started photography, Flickr was my mothership. There, I could find inspiration, advice and overall a good community of photographers always willing to help and exchange ideas. Not to mention showcasing your work in quality, large formats. Same with the online portfolios which are obviously 100% photography centered. And then, a couple of years later, we got presented with Facebook and Instagram. (Keep in mind, as an avid user of both, this will be written from an objective point of view.)

iperkovic2_mini

The reason why so many photographers suddenly choose Instagram as their main sharing post is probably because of the site’s popularity and the reach they might get. At first, Instagram was a place for smartphone photography; capturing moments as they happen. But, more and more, we see profiles (on Facebook, too) filled with good quality DSLR work. Even film. It is a well-known fact Instagram and Facebook decrease the upload quality and, from my own personal experience, it never looks as good as on my own website/blog. Then, why do we continue to use it as our main upload site?

The Pros of Having an Instagram Portfolio

Instagram is accessible and simple to use. Most people don’t like to browse through official portfolios; going back and forth through different categories. I have a decent amount of visitors to my official site and, I can honestly say, only a small amount of them scrolls through the portfolio.
phone-1235721_1920
With Instagram, everything is already there. People find it easy to use, like and comment. Of course, there is that personal side of Instagram and Facebook which most official portfolios lack of; direct interaction with the artist. Everything is instant. You might say it is a chill out zone where you are justified to post any random photo you want.

The Cons of Having an Instagram Portfolio

On the negative side, Instagram simply wasn’t made for showcasing your glorious 30mpx photos. For me, it is a neat site to interact with my followers and people I follow but, to keep it as my only upload post, is out of the question. The main problem is that most people don’t go beyond your Instagram profile, to actually click the website link in your profile. And that is what I thrive to use it for – a jumping board to my official blog. Only, a fistful of people would visit my website through Instagram. We all love the praise we get and I’m so thankful for it but, I cry a little inside when people don’t get to see the real extent of someone’s art. And, it’s only getting worse.

photo-634069_1920

Instagram’s lack of linking capacity (and by this I mean the possibility of clicking on a link to open it up on your device’s web browser) remains a to-do for developers since several companies have strong marketing campaigns running via Instagram.

(In) the End

No matter how proud you are of your official portfolio, the infamous “Do you have an Instagram account?” question is more and more in style. We might as well roll with it but, it’s important to keep our full-size portfolios as a priority, as well. In the end, official websites will still remain to be visited mostly by fellow photographers and art lovers. As for Instagram, we are going to use it until the end of Time.

Also keep in mind that in order to upload those precious photographs you happen to take with your DSLR camera, you actually need to use third-party apps such as Latergram, as Instagram itself doesn’t allow you to upload images that aren’t loaded on your mobile device. For such procedure, there is a 1 MB limit for the file to be uploaded, but we gain the ability of scheduling posts (immensely handy!).

london-eye-810302_1920

If you want to keep your options open even further, you can take a go with apps such as 500px, a community that has been growing quite steady between photography community, and it’s mostly meant for keen photographers (therefore you won’t find those overly common selfies that tend to spam Instagram lately).

Hope this guide was useful for you and see you next time!

Finding the Right Spot – Planning Before Your Trip

For people who enjoy travel photography, one of the most difficult challenges is to find original compositions that help you show the city you want to show in a special way that leaves your signature on the final image, so to speak. With millions of people (literally) visiting a touristic city each year (for instance, more than 32 million people visited Paris in 2013!), probably all the famous landmarks have already been photographed from every possible angle so the only choice you have to produce a special travel image is to include changing subjects like local people that add something to the scene or if you are lucky enough to be there while some dynamic component is happening, like a specially beautiful sunrise/sunset or some special event.

That said, most of us will anyway try to come back from our trip with our own versions of emblematic landmarks like the Eiffel Tower in Paris, the Tower Bridge in London, or the Empire State in New York, to name just a few.

_MG_0518 copy_newvf_nob

While many of these photos will lack originality, I still enjoy taking them for different reasons. On the one hand, I just like having them in my portfolio; there is a reason for those points of view being so famous after all! On the other hand, taking your own version of famous shots is a great way of practicing and judging yourself since you have many other pictures to compare yours to and you can easily find things that you prefer in those of others, giving you a hint on what you need to improve in your own workflow.

Now, while the job of deciding which spot we want to capture our photo from has partially been made by others, it is quite common that finding where a specific photo has been captured from is not as easy. Today I want to share some tips about finding the right spot in order to prepare for your trips so that you can make sure you don’t miss any of the photos you want to make.

Planning for time

The first thing you have to decide is when you want to make your photo. The best times of the day to take photos with natural light are the golden hour (right after sunrise) and the blue hour (right before sunset). This is particularly true for cityscapes and, even though this does not mean that you should not take your camera out during the rest of the day, given the short duration of these particular times, you will end up with the possibility of capturing only two good pictures per day (and that if the weather plays along, which is not often the case). For this reason, it is important to plan ahead and know where you are going even before starting the trip.

_MG_4953_newv_1024_nob

Now, even during the golden and the blue hour, the angle from which the light is coming is important when planning for your photo. The effect that you can get from capturing your subject when the Sun is behind it is completely different than the one you can get when the Sun is illuminating it. For this reason, the time of the day you want to take your picture is closely related to the location you will take the picture from.

Planning for location

The first thing you have to do is, of course, choose the photo you want to take. Take, for instance, this photo of the Golden Gate Bridge in San Francisco, USA.

_MG_0137_1024_nob

The photo was taken before sunrise to sunrise using an ND filter to capture the motion of the water and the clouds. Now, if you were planning to take your own version of this same image and no information regarding the time of day and location were given to you, there are a couple of things you would need to consider.

First, wherever this was taken from, the Sun was illuminating the bridge directly, which means it was located behind the photographer. This by itself does not give us information on the time of day (morning or afternoon) so we need to find out where the photo was taken from. For this, any map service will help (I personally use Google Maps). So the first thing you need to do is search for your subject. This is a screen capture of the Golden Gate Bridge in Google Maps.

goldengate1

From the perspective (unless the photo was mirrored which is unlikely), there are only two locations where the photo could have been taken from: the wide region denoted as Bake Beach at the southwest of the bridge or close to Fort Baker at the northeast. The best way to discern between both spots is looking at the ‘Earth’ view. This presents satellite images that help distinguish characteristic features. The next two images show satellite photos of the Baker Beach and the Fort Baker areas respectively.

goldengate2

goldengate3

If you look carefully to both images, you can see that all the area surrounding Fort Baker is mostly covered in concrete, whereas the area surrounding Baker Beach is, well, a beach. This latter matches what can be seen on the original picture we want to reproduce, giving an unambiguous hint on the location where the photo was taken from.

Once the location has been determined, knowing that the Sun rises at the East and sets at the West, it is easy to determine as well that the photo was taken before sunset since, as we said before, the Sun was located behind the photographer.

Some spots might be a bit more difficult to establish. It might be necessary, for instance, to look closer at the satellite images to find specific features such as rocks on the water or crossing streets. The workflow, however, is always the same. So don’t forget to plan ahead so you can make the most out of your trip!

Action Sports Photography: Tips to Improve Your Action Photos

Shooting sports can be a costly proposition. Those big lenses you see on the sidelines of professional games can cost upwards of $10,000.  Yikes.  But you don’t necessarily need them to improve your action photos, although a 400mm f/2.8 lens can’t hurt. When starting out shooting action, there are a few small things you can do to make a big impact on your photos. The best part about these tips is that you don’t need to buy more gear for them!  The first tip is to shoot in RAW. Check out this previous post about the benefits of shooting in RAW.

3C4A1853_mini

Shutter Speed

The first tip is to use a fast shutter speed. To capture the action you must freeze the action. To freeze action I try to use a shutter speed of at least 1/500 of a second for youth sports, but 1/1000 or above whenever I can. If you are shooting a night game or indoors this means you’ll need to use a high ISO. You can’t use the photo if it’s blurry so you may as well crank up the ISO and deal with the noise it creates.

3C4A5354_mini

Of course, rules are made to be broken and it can be fun to use a slower shutter speed, but if you are going to do this then you should use something like 1/15 or slower. You won’t get many useful photos, but if you do it’ll be interesting and different from a standard peak action shot.

K85A7627_mini

Perspective

Next up is changing perspectives. Get low, get high, find a place no one else has shot from. Everybody watches games through their own eyeballs and are used to seeing sports from a standing height. If you take photos while standing it won’t look different than watching the game yourself without a camera. Getting low will make your subjects look bigger in the frame and you get a different perspective than people are used to seeing. A different perspective is a key to making a nice action shot. Give the people something they can’t get from their seats. I also try to get up high and shoot down on my subject. This helps clean up the background and can give you a perspective some people don’t have.

All_Star_Tour_FRI_07312015_PMR284_mini

1006676469 MA_MA_wres097_0120-Edit_mini

Background

When photographing you want to have as clean of a background as possible, so the viewer can focus on your subject. As you start out you most likely will not be shooting in big arenas, but places with cars, fences, and other distractions. You’ll never see a great sports photo with a porta-potty in the background. You can do this by positioning yourself at a good location around a field or in a stadium, based on what the background will be. It also helps to have your background far away from your subject because they will become blurred and you won’t be able to make out the distraction. As I said earlier it can also help to get up above your subject and shoot down. This way of shooting uses the playing surface as the background with tends to have very few distractions.  I sometimes use a small step ladder to get on the field and shoot down. A hill or grandstand can provide the same effect.

Sunday Action at the Colorado Cup in Aurora, CO. (c) Paul Rutherford for Ultiphotos.

Risk vs. Reward

I often lay down on the ground or floor to take photos during a game. You definitely get a lower percentage of keepers, but a more impressive image overall. The best time to be risky is when you don’t need to safe shots. I try to get a lot of safe shots in the first half of a game and then start experimenting with the riskier shots. Try using slow shutter speeds, lay on the ground, hold the camera up above your head, focus on an individual and wait for the play to happen. When being risky don’t follow the action, try to anticipate what’s going to happen next. Find a great background or frame and wait for the action to come to you. Once you become ok with missing a few photos, you can be liberated to try new things and improve the shots that you do get.

K85A7470_mini

Telling the Story

Don’t get stuck only capturing the action. If you look at some of the greatest sports photos you’ll see it’s because of the moment it captured, not the athletic play but reaction to it. Celebrations, tears, and other reactions show the emotion of the game and help tell the story. Follow the player after a goal, look to the bench, find the coach and you’ll be sure to make some emotional photos. Even better is when you get the winning and losing emotion in one photo. Don’t forget the smaller moments in games. You can find some great shots in the details of the game as well as the peak action.

3C4A1251_mini

K85A5413_mini

3C4A6558-Edit-Edit_mini

3C4A7069_mini

Knacks of Shooting in Black and White and Conversion of Black and White Images

In the early days, there was only black and white photography due to technical limitations. We could say black and white photography is the most original form of photography. Although color photography is now a mainstream, there are still numerous photographers who are passionate about black and white. I used to believe it was the dullest style I could think of until I truly understood the spirit of it. Black and white photography are, in my opinion, the purest yet the most challenging form of photography. The purity of it captivates my heart. Since then, I have become a big fan of black and white photography. Sometimes, colors can be a distraction for the viewers. Without the disturbance of colors, viewers could focus on the beauty of the composition, lighting, and shape of the subject.

But, black and white photography is not as simple as the majority think. It is not a simple conversion of a color image into grayscale image. As some of the scenes are not suitable to be presented in black and white, we will have to consider whether a photo should be shot in black and white or color beforehand. In this article, I would like to offer some tips on shooting black and white images. In addition, I will include a brief introduction to the methods of black and white image conversion.

How to Take Good Black and White Photos?

First, you can search for a scene where strong contrast in lighting or rich gradient exists. It is essential to capture the spectacular light while shooting in black and white as there are no colors in the photograph. It becomes the stage of lighting. The following two photos are some examples of black and white photos with notable brightness contrasts. In the first photo, I waited for the man to walk into the ‘bright triangle’ before clicking the shutter. This composition highlights the subject in the photograph. Imagine if I pressed the shutter before the pedestrian entered the ‘triangle’, viewers could hardly see the subject.

Secondly, you can seek the points, lines, and planes in the surroundings. These are the basic elements that construct a picture. You have to figure out the relationships between them in a scene and a suitable composition to capture what you see. This is also applicable to architectural photography as planes and lines are commonly found in modern buildings. The photo below demonstrates how we can apply during a photo shoot. The triangle is the dominant shape, which is a ‘plane’ element, in this image. In addition, there is also an invisible guiding line which starts from the bottom right-hand corner extending to the upper left-hand corner.

Thirdly, you can consider shooting black and white photos with long exposure. If it is done appropriately, it will add a fine-art feel to your photo. The moving objects in a long-exposure photo will be blurred. Such blurring effect could make your work looks more abstract. The following image is an example of long-exposure photography in black and white.

How to Make Photos Black and White in Photoshop

In this section, we would go through different skills and methods of the conversion of black and white images. Undoubtedly, each method has its own pros and cons. You may choose the most suitable one according to the circumstances.

1. Desaturation

This is the quickest and easiest method. You simply suppress the saturation value of your color photo to -100 and you will have a black and white photo. But, desaturation is not an optimal way out. It has the least flexibility during the conversion process. You have no control on how it desaturates the image. The photo usually turns out with undesired results.

2. Black and White Adjustment

I usually convert my photos into black and white with this method. It gives you tons of control over the conversion process. You may adjust the lightness of each color separately until it fulfills your expectation. For instance, if you move the slider of Red to the left, the parts of the photo with red color will turn into dark gray or even black or vice versa.

3. Lab Color

Lab color, which is pronounced as ‘L-a-b’, is a color space. It has nothing to do with the abbreviation of Laboratory. This color space is named after the channels it includes, which are namely Lightness, a and b. It is a good choice for conversion of the black and white image as it separates the lightness value from the color of the photo.

First, you need to go to Image> Mode> Lab Color to convert the photo into the Lab color space.

bw3

You can notice that the channels are changed into Lightness, a and b which were originally Red, Green, and Blue if your photo was in RGB color space.

You may proceed to delete the a and b channel and keep the lightness channel untouched. Then you will get a black and white image.

After that, convert it into Grayscale so as to ensure all the remaining color information is completely eliminated. That’s all.

bw6

Hope this guide was helpful for you guys and see you in the next guide!

Daylight long exposure – Using ND filters

In a recent post, we talked about getting things right when playing with long exposure photography. Today I want to focus on how to get the nice effects that come with long exposure without having to wait until the Sun is already below the horizon. In this article I will be showing you how to get effects like moving clouds or soft-looking water during the day, by means of a specific type of filter called Neutral Density (ND).

Light as we perceive it is formed by a continuum of wavelengths that go from the red to the violet colors, as demonstrated by Isaac Newton back in 1666. If we filter out only one wavelength, we would be left with a picture lacking that specific color. ND filters are designed to equally reduce the intensity of all the wavelengths leaving us, in theory, with a darker version of the original image, without any kind of color cast.

camera-635792_1920

I say ‘in theory’ because so far I haven’t seen any ND filter that does not alter the white balance of the final image. It is true that I might not own the best filter in market, but many people reading this will probably not as well. In any case, the color cast introduced by ND filters is easily removable during post-processing, so don’t get discouraged.

Types of ND filters

ND filters are classified according to the amount of light they block. There are two main scales used and you might find either of them when buying one. One refers directly to the amount of light being blocked (or the inverse of the amount of light that is allowed to reach the sensor of the camera). The other refers to the f-stop numbers that one would have to compensate for in order to get the same final exposure. These two scales are linearly related, so which one will you use is basically a matter of personal taste.

accessories-19827_1920

Apart from the classification just mentioned, there are other types of ND filters that differ in nature and have other uses, the most common one being the graduated ND, which is basically what the name says. The ND effect is gradually increased (or decrease, depending on what you choose) in one direction. These filters are usually square and are normally used to correctly expose scenes where the sky is much brighter than the ground (high dynamic range). These were very popular in the times of film photography but nowadays, with the help of post-processing, it is fairly straightforward to deal with this problem, so it is not so common to see someone using on of these anymore.

When and how to use them

As with anything in photography, this is a subjective matter. The obvious answer is: whenever you want to add dynamism to your images. However, there needs to be a dynamic element in order to capture it. For instance, if you are on a cloudless day, no matter how hard you try, you will not get moving clouds in your picture, unless you add them with Photoshop afterwards! So try to think what can be captured moving relatively faster than your subject: clouds, water, passing cars/people, smoke from chimneys, etc.

_MG_0047_1024_nob

In terms of how to use them, as with any other filter, you basically stack it in front of your lens and that’s pretty much it. There are two types of filters: screw-on and square filters. Screw-on filters are more comfortable to use and usually produce better images since there is no possibility of reflections coming in from the back of the filter. They are, however, a bit more difficult to deal with when stacking several filters on top of each other.

Another important thing to keep in mind, especially with really dark NDs (e.g. ND1000) is that once you screw it on your lens you will not be able to see anything through the viewfinder. If the scene is not dark yet, you will be able to focus using the Live View mode of your camera but if it is already dark, it will be impossible to focus with the filter on so be prepared to focus before screwing the filter on. For this, you have to be very careful when attaching the filter so that you don’t move the focus ring (unless you are using the newer lenses with the focus ring moved back). Square filters are easier in this sense (it is usually easier to keep the focus while stacking the filters on the holder).

_MG_4071_1024_nob

Now that you’ve attached the filter to the lens, you are all set up to take your photo. Apart from what I already said, using a tripod is a must and, as I mentioned in the long exposure post, using the time delay function of your camera (2 s should be enough) is always a good idea to avoid any shake of the camera while taking the photo.

Post-processing

As I mentioned before, most of the times when using ND filters you will notice a color cast towards the red when you open the files on Lightroom or Photoshop. This effect, more prominent for darker filters, is easily corrected if you shoot RAW (always shoot RAW!).

Take, for instance, this image of the Bay Area bridge in San Francisco. The photo was taken at sunset with an ND1000 filter to get a smooth effect on the water.

_MG_0400_1024_noproc

Right from the beginning, it is evident that a color cast is present, especially on the water. That is where the purple color comes from. Also, if you look more closely, this photo also shows some other problems that arise with the use of ND filters. Since you are exposing for a long time (180 s for this one), some of the problems of your camera that are usually not noticeable will now be. This includes dust in the lens or sensor (small dark spots visible in the sky and the water) as well as damaged pixels in the sensor (visible as very small white or red points visible here on the bottom right corner). Removing them is fairly easy in Photoshop, but we leave that for a future post. For now, let’s take a look at how to get rid of the color cast.

This is also a very straightforward task and the only thing you need to do is open your RAW file in Photoshop.

ndfilters_1

And this is where you see one of the big advantages of shooting RAW. By playing with the ‘Temperature’ and ‘Tint’ sliders, you will be able to get a more natural look of your scene. That said, sometimes the color cast introduced by the ND filters give a weird but still appealing look so, as usual, it is up to you how much you want to correct for it. What I did for this particular image was to increase the temperature, move the tint slider towards the green (to get rid of the purple on the water) and I additionally increased the contrast and the clarity. This last one provides an extra increase in small scale contrast, something like adding structure to the image.

ndfilters_2

After doing this and removing the dark and light spots mentioned before, I have my final image. This one has no further post-processing, but you can always enhance different aspects with the versatile tools that Lightroom and Photoshop provide.

_MG_0400_1024_poc

And that’s it. If you enjoy long exposure photography, I strongly suggest you give this a try. The simple addition of an ND filter will give your images a completely different mood and I am sure you will enjoy the whole process. If you have any question, please contact me and I will do my best to help you.

Photo Master Class: Finding the light

A beautiful atmospheric glow; a sense of depth and dimension; a reduced color contrast that flatters a subject’s natural beauty…Artists have long sought to capture the magic that nature provides in the golden hour. It’s what can set a photograph apart and make it truly special.

What is the golden hour?

Simply put, it is that time of day (whether exactly an hour more or less, depends on the season and how far away from the equator you are) in which the sun has just crossed the horizon at sunrise or will soon pass over the horizon at sunset. At these hours, the sun’s angle creates an indirect light, traveling at a greater depth of atmosphere which makes it appear soft. Shadows are longer, so interesting dimension is created. There is a concentration of the warmer yellow/red wavelengths as the blue ones are more scattered, creating a beautiful glow and background color that flatters people’s skin tones and makes landscapes pop. In short, it is the preferred natural lighting for photography and the one I use almost exclusively to create meaningful and beautiful images.

image

When finding the light, it’s always best to be prepared ahead of time. Go out location scouting around the time of day you want to shoot. It’s best to do this, so you can get a better idea of where the sun will sit in the sky during the golden hour. If you are shooting in an urban location, remember the light and the direction of your light source. Whether you are next to a building or out under some trees, you always want to direct your subject towards the light. Not only will you create some beautiful catchlights, you will have beautiful fallen light in all the right places on your subject. The creative possibilities are endless and definitely not limited to just portrait photography. It’s a wonderful time to explore landscapes too. For stunning effects use a wide aperture and make sure you don’t overexpose your photos.

image

Rim lighting

This involves a thin line of light outlining your subject. In this case…the little girl in this photo was enhanced using rim lighting while the background is darkened. This illuminates and pops your subject. When using a light source such as the sun, you must be at a low angle at either mid-morning or late afternoon. This allows the light to evenly distribute the light around the hair. Place your subject right in front of the sun or just a little off center. The sun must be in the same direction as your dark background.

image


image

Sun Flare

This is beautiful and there’s really no wrong way of doing it. When the sun hits your lens it produces different effects. These effects are really cool techniques that are really easy to achieve without any special processing. It’s important to remember to use a narrow aperture, which means bigger number settings. Starting out in AV or A mode while setting your aperture to f22 and your ISO around 100-200. Your camera will choose a proper shutter speed for you.   Just remember. This is a good start. If you aren’t happy with your results, switch over to M mode, dial in your same settings then slightly increase or decrease your shutter speed depending on the look you are going for.

image

Silhouette photography

This is one of the best times of the evening to create those gorgeous photos. When your subject becomes the shadow, throwing all textures aside…you are left with an outline of what you are shooting. When a person is your subject, remember to angle them to accentuate their shape rather than shooting them head-on. Remember to have your light source in front of you. It doesn’t necessarily need to be behind the subject, just the best angles to outline your subject properly. In the photo below, I chose a few different subjects with a prop. I set my camera in M mode and dialed my aperture to around f8. I wanted the US flag to be lit enough so people could see it

I hope you enjoyed this article and this helped you to find the light! Photography is all about creating art and having fun doing it!

Professional Photography: How Much Should You Charge?

Its really hard to ask yourself how much you should charge. It seems like a really loose question without many guidelines but below are a few helpful tips.

A good thing for all professional photographers to know: once you enter the world of professionalism, part of your job will include doing things that are not exactly related to your job title such as figuring out your rates! Although boring, its a very important decision to make. Because of this, its good to have some small understanding of the duties of a professional photographer.

photographer-455747

Firstly, you should always expect reimbursement when performing a service. Professional photography is a service that people seek out and request. Respect yourself as an artist and professionl in knowing and acknowledging your worth. Therefore, your work, your service, and your time is worth getting paid for.

Establishing monetary compensation says that you are good enough to get paid. While we certainly do not always agree that this is the case for everyone, make sure you keep that in mind when brainstorming ideas for yourself! Stay realistic and know that everyone has to start somewhere.

However, being a good photographer means you are constantly willing to evolve and learn, so most likely the very first paid shoot you do will not resemble the 89th shoot. As your skill level goes up, so should your rates.

model-956676

But now comes the question of how high do I go? That is certainly a difficult question and varies for everyone. Personally, I want to charge enough to sustain myself but also maintain accessibility so a wide range of people can hire me. Because as your price range goes up, your clientele changes.

If you know anyone in the business, consult them! You can learn from their experience/

For example; weddings. A low budget wedding versus a higher budget wedding will be different in the areas of venue, dress,flowers, etc. and we all have our preferences of what styles we like best.

Be mindful of this as higher rates cater to those who can afford you which does impact who you work with and where.

dining-table-465372

Get to know the other photographers in your area as their rates determine the range you should be in. With this in mind, you want to start low but enough so that you could still enter the market and create competition. Careful not to price too low as that can make you seem cheap and turn you off from clients.

Our association with low cost and inexpensive services are not very good. Often time we think of cheap services synonymous with inexperienced or not good. When it comes to photography, your rates reflect your level almost.

Now comes the waiting part. This is the part where you wait until you reach a level of consistency and satisfaction that raising your rates seems like the logical next step. This can take months or maybe a year or two. Do this by assigning a percentage that you would like to see your income rise by every year!

I say this as someone who used this techniques which is by no means the only way or even right way. Shooting primarily weddings, I decided to start rising their increasing my wedding rates by 15% each year.

If you feel like the process is becoming arduous or that you’re just not getting it, consult a business adviser. They’ll be able to answer your questions and help you come up with strategies.

graph-163509

Its hard to start a business. Do not get discouraged. Remember how many people around you probably had to do the same thing and take comfort in it! There is zero shame in asking for help

Hope this helps. Happy shooting, y’all!

How To Be Productive As A Freelancer

There are several perks that make freelancing an enticing option: the freedom to work from home, to choose your own hours, to work independently and even the option to accept or decline a project. However, these same benefits can easily become catalysts to idleness and inaction.

Perhaps the most important factor in maintaining productivity as a freelancer is self-discipline. It’s very easy to get distracted without a supervisor checking in or having set work hours to adhere to. With that said, one must exert a good amount of willpower; freelancing is by no means “easier” than any other work.

Time management, then, is one of the most crucial aspects of successful freelancing. One of the simplest ways to ensure a productive workday is to allocate a specific amount of time to each task. Set a timer for X amount of minutes and work on a set assignment until it goes off, then move on to the next project. For every hour of work, give yourself a fifteen-minute break. On a larger scale, keeping a calendar is crucial. It is important to be aware of what needs to be done well in advance. Nothing slows down progress like an unexpected project. If you have a smartphone, it may be beneficial to link a digital calendar to all of your devices. That way, you’ll always know what needs to be done—even when you’re away from your workspace—and can plan accordingly. Apple products make this especially easy, but Google also offers a digital calendar to anyone with an account. Additionally, iPhone users can take advantage of the Reminders feature or the wide array of to-do list apps available. Of course, an old-fashioned to-do list scrawled on notepad works just as well.

watch-1149597_960_720_mini

If you find it difficult to stay focused at home, you may benefit from working elsewhere. Take your laptop to a coffee shop or head to the library and utilize one of the study rooms. For projects that require a bigger setup (editing on a large monitor, scanning and printing photos, etc.) it may be worth investing in a small office space further from home. For some this is not financially feasible, in which case, designate a specific area of your home to work only.

dictionary-1149723_960_720_mini

Unfortunately, as photographers in this day in age, we can’t avoid working with our computers. And as we all know, the Internet can be a dangerous place–especially when there is work to be done. Luckily, there are a handful of apps designed to squelch procrastination by blocking certain websites for a specified period of time. Windows users can download FocalFilter; SelfControl is available to Mac users. If you must browse the web, at least use it as an opportunity to improve your work: learn how to recover blown out images, improve your bokeh, or perfect your white balance.

laptop-1149412_960_720_mini

Finally, taking care of your health is one of the most straightforward ways you can improve your performance. While it seems obvious, it is worth reiterating that diet and exercise are imperative for optimal efficiency. If you find yourself skipping meals or avoiding the gym, you’re bound to get groggy, cranky, or otherwise unable to focus. Many of us immediately grab a cup of coffee when we start to crash, but there are a number of other (and sometimes healthier) ways to recharge. For instance, tea is an excellent alternative to coffee and comes with many additional health benefits. Peppermint tea is a good choice because even the scent alone is energizing. As far as foods are concerned, some are better than others when it comes to providing the necessary concentration and energy to get work done. Foods known for improving focus and concentration include avocado, salmon, dark chocolate, and nuts. Supplements are another easy way to boost your health and thus improve your work. Ginkgo biloba is a supplement that helps with memory and concentration. (It also comes in tea form.) B vitamins are another group of highly advantageous supplements. B vitamins help your body to convert food into energy, making you that much more alert!

In any case, discipline and self-care are crucial to a successful freelance career. As long as you make the necessary adjustments to improve your work habits and take care of your body, you are that much more likely to increase your productivity.

Long exposure photography – Step by Step Guide

This entry is about long exposure photography: How to capture light trails, motion in clouds or water and basically any other factor that adds dynamism to a picture.

When capturing a striking landscape or cityscape, if we carefully choose the point of view, the static scene itself will have enough elements to capture the viewer’s attention. However, we can always add some extra appeal by including some dynamic element.

There are some techniques in Photoshop to mimic some of these effects, but I certainly prefer to capture those with the camera. This way not only makes the post-processing simpler, but it also remains more truthful to the original scene we tried to catch. It is for this reason that I will not talk about artificial long exposure on this post.

firework-828652_1920

As a general rule (one that I would say will become obsolete relatively soon), long exposure usually works better with DSLR cameras. I know that technology is evolving quite fast nowadays. In fact, if I am not making justice to mirrorless cameras here, please forgive me; it’s been a while since the last time I used one! However, the main issue right now with compact cameras (including cell phones) is that they do not always allow the user to play with all the settings the way it is needed and the signal to noise ratio under low light conditions tends to be rather low when compared to DSLRs, especially with full frame ones.

But to be fair, let’s say that if your camera has a manual mode, then you will be able to follow everything I say here, so here we go.

Capturing light trails

Given that the workflow is the same for whatever moving subject you want to capture, I will describe, step-by-step, how to capture light trails.

Basically, light trails are just that. Trails left by moving light sources that could include passing cars, trains, planes, artificial satellites or even stars. The basic principle to create interesting images with all of them is the same: find a nice location with an interesting background or foreground (depending on what’s on your mind) and correctly configuring the settings on your camera, which of course will include leaving the shutter open for a relatively long time (the time will actually depend on the motion we are trying to capture).

Camera settings

So let’s consider the settings that we need to take into account when dealing with long exposure photography. These are:

  • Light sensitivity (ISO).
  • Exposure time.
  • Aperture (f-number).

Light sensitivity refers to exactly that. How sensitive to light your sensor is going to be while capturing an image. The name ISO (International Standards Organization) comes from the distant times when film photography was the norm. Back then, different films had different sensitivity based on the way they were produced. Now, without getting into technical details, your camera is able to capture almost as much light as desired, but unfortunately at a given price. When you choose a large ISO number, the camera applies some sort of multiplication factor to increase the captured number of photons (after all, that is what light is about, photons!). That sounds like a clever thing to do. However, camera sensors have an intrinsic level of noise that will also be multiplied by that same factor, thus producing noisy (a.k.a. grainy) images. For this reason, I would suggest always leave the ISO as low as possible (100 is a good value to start with).

camera-1067853_1920

Exposure time, as briefly mentioned above, is the time during which the shutter of your camera will be left open, allowing light to get into the sensor. This is usually given in seconds but beware: for short exposure times (shorter than a second), the number you see is the fraction of a second; for instance, if you see a 500 (could also be 1/500 depending on the camera), that means that the shutter will be left open a 500th of a second. When you go to longer exposure times, then the number shown will be seconds. Most DSLR cameras get down to 30 s and if you want to get even longer exposures, a so-called “bulb” mode is offered. In this mode, the shutter will be open as long as you press the shutter button (for this you should get a remote shutter release!).

Finally, the aperture is how much will the diaphragm of your camera will open. This has nothing to do with time, but rather with the physical area through which the light will go through. Now, to make things even more complicated, the way the aperture is defined makes it that the larger the f-number, the smaller the aperture, but I will explain a bit more later on.

So now we know what to take into account but, how do we capture the image we want?

In terms of exposure time, anything between a couple of seconds and a couple of minutes might work depending on the scene. If you are after a photo of a landmark with trails from passing cars like the already famous capture of London buses passing in front of the Houses of Parliament, then a couple of seconds are enough. This one, for instance, was captured with an exposure time of 1.6 s:

longexposure_london

If what we are trying to capture is the light trails left by cars on a busy street, then it might make sense to push the exposure time a bit further, basically because that way the density of lights will increase, making the final result more interesting. The following one of Atlanta’s skyline at sunset was captured with an exposure time of 13 s:

longexposure_atlanta

Notice that here we can increase the number of light trails without loosing information on the image simply because, in contrast to the image from London, the subject of the photo are not behind the passing cars. Also notice the motion of the clouds, another interesting element that can be captured with long exposure.

So enough for exposure time. What is the role of the other element, namely the f-number? Well, for our purpose here, it has two main functions. One, compensate the exposure to get the exposure time we want to work well. In order to capture a well-balanced picture, the right amount of light needs to reach the sensor. Now, simply put, the right amount of light will be defined as a balance between the exposure time and the aperture you choose. It is quite an intuitive thing: if the aperture is large (small f-number), we will need a certain amount of time (relatively short) to get the desired light to reach the sensor. If the aperture is small (large f-number), then we will need to increase the time to get the same amount of light to get in!

photographer-410326_1920

Fortunately, we don’t need to calculate that since the camera already does that for us. What we need to look at is a small sequence of lines in the viewfinder or camera screen (called a photometer) that indicates how much light will reach the sensor with the current settings.

The other purpose is to create the star-like appearance on light sources and that you can see on the street lights in the two images above. Some people prefer not to get this, but I personally like it. To get this effect, you need to keep the f-number as large as possible. I would say above 16, as a general rule.

photographers-238565_1920

To the things described above, I need to add a couple of important things. First, use your tripod! It does not have to be a $500 tripod. A relatively basic one will do the job, but if you want to capture anything that moves without getting a blurred image, you will definitely need a tripod. And second, set a waiting time for the shutter of your camera to be released. Most cameras offer a 2 s or a 10 s option. The 2 s option is enough. The idea is to give a delay between the moment when you press the button and when the shutter is released to avoid the shaking produced by you pressing the button to blur the image.

And as a final step, you can process your images with Lightroom or Photoshop to enhance the information and details that are hard to capture at those times where the natural light is starting to fade.

Summary

So to summarize in a way easier to remember, if you want to capture light trails:

  1. Find a location with a nice subject that is behind a street.
  2. Wait until the time is right; you want the cars to have the lights on!
  3. Set your tripod.
  4. Set your camera to manual mode.
  5. Set the ISO to 100.
  6. Start setting your exposure time at around 5 s.
  7. Set the f-number accordingly to get a good reading in your photometer.
  8. Take the picture.
  9. Play with the exposure time to get the desired effect.
  10. Get that final look you are after by processing your files.

That’s it. Go out there and try this. Even when it might look a bit complicated in the beginning, you will get it in no time and capturing light trails can be a really fun experience and once you master these techniques, try combining them with other great ideas for night photography such as bokeh.


Color or black and white? – A contemporary approach

Already in the last decades of the 19th century, some people were working on the development of color photography, amongst them James Clerk Maxwell. After that, during most of the 20th Century, the love for photography grew and people started taking more and more photos while using either color or black and white films to capture the image they had in mind.

With the invention of the first modern digital camera based on CCD (Charge-Coupled Device) chips in 1975 by Steven Sasson, an electrical engineering working at Eastman Kodak, and the further popularization of digital photography at the beginning of the current century, people started to have the option of choosing between color and black and white without the need to plan ahead as before.

Digital cameras give the user the option to choose whether they want to get the final processed image (e.g. .jpg file) in color or B&W right out of the camera but, more importantly, with post-processing software as Photoshop or Lightroom, this choice can be made during the final stages of preparing the image.

So today, after more than a hundred years since the invention of color photography, we are many times faced with the question whether we think our final image will look better in color or in B&W.

The truth is that, as with many things in photography or any form of art, what looks better is a very subjective matter but, at the same time, and by the way our brains process information, there are certain aspects that are at least slightly more objective. On this small article, I would like to share my ideas on when it might be a good idea to think about converting our color images to B&W. I will not go into any details on converting the images, since you can find some great tutorials about the topic on our blog.

But before beginning, a small advice that you might have read somewhere else already: always shoot in RAW mode; even if you are still not processing RAW files, at some point in the future you probably will, and you will regret not having them for your old photos! Also, the RAW file will always keep the color information, something very handy if we originally planned for a B&W image but in the end we change our mind.

Contrast

One could define contrast as the difference in brightness between the brightest and the darkest pixel in a given image. In a more practical way, I would say that an image with high contrast will have a relatively large amount of very bright and very dark pixels (one could hardly say an image has high contrast if all the pixels but one have the same brightness!).

But why is contrast important here? Well, because one of the things to keep in mind when thinking about B&W photography is that images with very low contrast tend to look rather boring in B&W. Having said this, however, it is important to notice that we can always increase the contrast of an image in post-processing to make it look better in B&W but as a general rule, if there are no bright and dark areas (shadows) in an image, it might be a good idea to keep going with the color version.

b&w_lofoten

Overcast days

Due to the way the brain processes color information, we are generally attracted by images that have some specific colors like some red, yellow and blue. This last one is especially important when capturing parts of the sky. It is for this reason that, unless we have a cloud covered with clouds with a lot of structure (contrast!), having a plain gray sky during an overcast day most of the time calls for a conversion to B&W. This will help merge the sky with the captured scene.

b&w_lindau

Portraits

This one is a less general rule. Portraits tend to benefit from some aspects specifically thought to bring all the attention to the face being captured, but I would say that a well accomplished portrait can always benefit from the special mood transmitted by B&W so, even if you are happy with the final color result, give it a try and convert it to B&W before you make your final decision on this one.

b&w_kiruna

Long exposure

This type of photography is mostly associated with landscapes or cityscapes so, at least for me, the first choice for the final image is usually color. Nevertheless, if the image complies with one of the already mentioned characteristics (e.g. high contrast), the effect given by for instance the motion of clouds or water can give a dramatic effect worth exploring.

b&w_london

The creative process behind the art of photography will always remain a subjective one but I certainly hope that this post was somehow helpful by giving different points of view to think about the use (or removal) of color. So go ahead and play with your images. Convert some of your old images that you have always seen in color to B&W and even try adding interesting effects like HDR and I guarantee you will be surprised by some of the results.

How to Work with Forgotten Postcards: Creating Light Leaks in Lightroom

Welcome back!

Today we have a short tutorial on creating light leaks, using our “Forgotten Postcards” workflow.

In the old days of film cameras, sometimes you would have an issue with light leak where for one reason or another light would get in and expose the film when it wasn’t supposed to, but that can sometimes make a really neat effect. Since modern digital cameras don’t really have light leaks, so we are going to show you how to add them to your digital photos, using the “Forgotten Postcards” workflow.

With my photograph pulled up, we will get started by going into our “Forgotten Postcards” presets and applying Color Correct – Reduce Greens, which will help us with that washed out, desaturated vintage look.

Scrolling down we will find 15 light leaks preset to choose from, which recreate effects that would be seen with an old camera that would have had a light leak.

For this photograph We are going to use Light Leak 13, which adds a nice golden hue. However, for me, there is a little too much yellow. We can fix that by going over to the panel and making adjustments like turning the Saturation down, or you could do it by applying another preset, which is the way we will do it now.

So, going back over to the presets, we’ll apply the Tone/Tint – Less Saturation preset. Once applied, it toned down the gold color a bit.

The next thing that we’ll do is add a vignette. We will go with Subtle Black.

The effects that we have made to this photograph are pretty subtle with more muted tones. It does have some vintage attributes, but very subtly.

Let’s go to our next photograph now. With this photo we are going to use a more traditional light leak effect, but first we will start by applying a Matte preset. For this we will use Vintage – Matte Watermelon.

Then, we will go to the Light Leak presets and select Light Leak 3, which gives us the light leak effect all around the edges.

Once applied, I’m going to adjust this a little and change the colors through the panel. The color that I want to tone down is the red one, so I will click on that and turn the Saturation down just a bit, then actually change the red to more of an orange tone.

Now we want to bring a little more light to the subject, so for that we will open up our “Forgotten Postcards” brushes and scroll down to the Light – Brighten brush. Turning up the Exposure a little, we will run this brush over the little girl, who is the subject in this photograph.

Looking at our after effect, we didn’t really change too much. We did give the photo an analog feel with that light leak effect. We have also added a really rich tone to it as well.

Let’s move along to our third photograph.

We will start this one with one of our “Forgotten Postcards” Nostalgic Effect presets, using Vintage 10, which will give the photo a muted sepia tone and wash the color out.

Next we will apply Light Leak 13, which adds a reddish tone. This isn’t exactly what we were going for, so we’ll click the filter button and adjust it by moving the effect back and rotating it a little. Also, we will change the color by moving it down to a lighter tone.

Now that we have that the way we want it, let’s go ahead and apply a vignette to give it more of an antique feel. Scrolling down through our “Forgotten Postcards” presets we are going to apply Vignette – Subtle Black.

That was a really quick edit, but we made quite a difference to this photograph. The effects that you’ll get from the Light Leaks aren’t necessarily realistic effects, but you will the aesthetic that you may be looking for in that old fashioned, vintage look. In certain situations, that may be exactly what you are looking for.

I hope you enjoyed this tutorial and found it helpful. Try our “Forgotten Postcards” workflow for yourself and see what you can create!

Using Photoshop to Make Light Rays

Today with Photoshop we’re going to be looking at a really cool technique to create light ray effects for your images. These are awesome and I really enjoy using them to add some real drama.

These will also simulate what expensive lenses can do so, you are not paying crazy money to get shots like we’re going to create.

For this tutorial I have chosen an image from the Sleeklens gallery, which I think will work really well.

Light Rays

So in assessing this image to start with, you’ll want to look at where your light source is coming from.

lr1

Once you have figured that out and are happy with that, then we will move on by creating a new layer.

You do this by opening up your Layer panel on the right hand side, then clicking on the New Layer icon at the bottom, second from the right.

You can also use the Shortcut Ctrl+Shift+N

Then click on OK.

Now there are two ways you can do this, you can use just white or you can click on the Eye Dropper Tool

Then, click the Eye Dropper on the Light Source to give you the actual colour of the Light.

I prefer to use the actual colour of the light, though you can just use white if you wish, and experiment with which one makes you happiest.

lr3

Now that we’re in our new layer, you’ll want to click on the Polygonal Lasso Tool

The keyboard shortcut for this is (L).

Or, you will find it 3rd down on the Right hand Tool bar.

lr4

Now, use this by clicking from the light source out. Using the selection tool, you’ll want to draw the broad and basic shape of the light rays coming out of the sun.

This is where your creativity can take over! Draw as many or as few as you want, make them as big or as small, it is totally up to you.

Once you have drawn your shape, make sure to click the point where you started before closing the selection.

lr5lr6

Next step is to click on your Brush Tool (keyboard shortcut B).

Then, paint over the selection with an opacity of around 40% with a hard or soft brush, it really doesn’t matter, so don’t worry if you don’t know what that is yet. Perhaps save those words in your head for future reference.

The opacity is indicated at the top of the picture below under View.

lr7

 Now Deselect.

lr8

Once you have Deselected go to Filter – Blur – Gaussian Blur.

Set the Blur to around 13, you’ll want the Blur to blend in, but also want it to still remain as a stream of light with its own shape.

Then, set your Layer opacity to about 75.

lr9lr10

Now it’s time to resurface what we talked about a short while ago, remember how I was talking about Soft and Hard Brushes?

Now, I’ll show you what those are.

Click on your Eraser Tool (E) Set the Opacity to 25% as indicated in the Diagram below.

lr11

You will also notice the Brush drop down in the diagram.

This is where you will find all of the different types of brushes.

The first brush indicated is a Soft Brush and the one right beside that is a Hard Brush.

There are literally thousands of brush types out there, probably a lot more. We have our own range for Lightroom and I’m sure similar Photoshop products will be added, so keep an eye out for those, if you’re interested.

Make sure you choose a Soft Brush for this.

You may also need to drop the opacity as you see fit.

What I now want to start doing is going over and erasing the outer areas of the light, weakening the beams to give them a gradient effect, so they will be stronger at the suns end and weaker further out.

Then repeat all the steps on new Layers once or twice more, but each time less and less Blur will be used, right up until the point where a strong beam will be visible.

I recommend you keep the Strong Beams at a very low number, one or two well placed ones will make all the difference.

As a finishing touch, I will go through my layers and on one side of the Girl erase out some of the light to darken the shadow side.

lr12

Your final image should be subtle, that’s the key.

lr13

Best locations for Selfies: 2021 Edition

A fad that came to stay: the selfies. And what is so special in these pictures that, until a few years ago was nothing more than the simple habit of some travellers to auto – portray themselves if they were alone? Maybe you can say it is something related to newer generations and the heavy exposure of Social Media networks; others may say it’s due to the changing trends of famous people…

Regardless of its origins, selfies are fun, easy to take and the best of all: you don’t need to be an expert or have a high-end camera to take one – just grab your smartphone and enjoy a nice photo session! Nevertheless, taking a selfie at a cool place can sum up the whole selfie experience, mostly if your aim is to rank up higher in Social Media or if you die for the thrill of adventure. Let’s go through some of the best locations for taking a selfie in 2021!

Recommended Accessories

One point that can make the difference in the overall quality of your selfies is the usage of certain gear and post-production tools to enhance the quality of your images. You don’t need to make hefty investments as many of these tools are quite cheap, so let’s get on with the list:

  • Smartphone Gimbal: There are plenty of options to explore, though DJI leads the market with their Osmo Mobile line, the latest release of the DJI OM4. A gimbal works by stabilizing your image with a three-axis system, which not only avoids blurry shots but also protects your phone in case of risky shots. A word of advice: be mindful about the total weight of your phone – as not all gimbals can support the same weight (they usually drop the phone rather abruptly when that happens), and on this same page of security tips keep in mind battery life, and be sure to test your gimbal with a cushioned surface first (like above your bed) – just to avoid costly accidents in case of faulty gear.
  • Smartphone apps: If there’s something greater than the variety of smartphones we see these days is the variety of apps meant to enhance photos. You can check a tailored list of the ones we consider useful for photographers – as some apps simply apply filters instead of letting you control the scene.
  • Lenses for Smartphones: Finally, accessory lenses give free rein to our imagination as they push us closer to the DSLR experience. For the best price/quality relationship we recommend you to check either the OlloClip Multi-Device Clip Lenses or the mindblowing, professional Moment Lenses – one of the finest products for smartphones available in the market.

1. Burj Khalifa, UAE

burj khalifa sleeklens selfies locations

The preferred place for welcoming a new year in the world by many tourists, is there a better place to take a selfie than on top of the world? You will find this fine piece of architecture as taken out from your wildest fantasies. 828 metres tall and with two sky observation decks – floors 124th and 148th floors respectively – you can take staggering shots at some meters above 555m from the highest sky deck. There’s a tiny possibility to access the highest spots of this building, although that’s not something we recommend, nor we encourage.

In case you’re wondering what to do if you suffer from fear of heights – well, let me tell you that this writer here endures the same issue so no sky-high pictures for me. A floor-level selfie from the very entrance of the Burj Khalifa or its nearby entourage is more than enough.

2. The Maldives

Picture this: crystal clear water, kilometres of beach shore, lovely villas, island climate plus some exotic cocktails while enjoying a sunset lying on a chaise – sounds like paradise right? An archipelago of 1,192 coral islands grouped into 26 coral atolls in the Indian Ocean, it’s widely known as one of the best places in the world to indulge yourself with guilt-free leisure time. And, if you happen to be adventure-driven, be sure to pack an underwater camera as The Maldives is the ideal place for an underwater selfie, with its many variations of sea life: corals and over 2000 species of fish.

3. Cinque Terre, Italy

cinque terre sleeklens selfie

One of the most beautiful sights in Italy is the northeastern coast seaside town known as Cinque Terre. It’s often mistaken for the Amalfi Coast – which is located in the southern region of Italy – so for giving you some references: Cinque Terre is a 3-hour drive from Milano, whereas the Amalfi Coast is easily accessible if travelling from Rome or Naples (1-hour drive). They also variate on climate, as Cinque Terre is significantly colder given its proximity to the Alps; the Amalfi Coast is considered – alongside with Malta – one of the most beautiful places in the Mediterranean landscape to visit and vacation.

So why should you visit Cinque Terre instead? For starters, it’s a place meant for hiking, so you can spot variated sights while discovering the local culture. Its less posh atmosphere, in contrast with the Amalfi Coast that’s filled with 5-stars resorts, will also boost your creativity by letting you fully relax. Pack your camera, keep your smartphone in hand, and enjoy one of the most breathtaking views Italy has to offer to the world.

4. Tower Bridge, London

02_tower_bridge

The most popular bridge in the world for taking selfies, thousands of tourists choose this particular place filled with historical anecdotes for a selfie on-the-go. This suspension bridge that crosses the River Thames, and close to the Tower of London has become an iconic symbol of the city. Whenever there is a special event in London, like the 2012 Olympics and Paralympic Games, this Victorian-styled bridge will take an active part in publicity campaigns as the most vivid demonstration of Londoner pride.

5. Corcovado – Rio de Janeiro, Brazil

03_rio

A tourist city par excellence, in Rio de Janeiro you can find a vast sum of landscapes worthy of being photographed – but it says nothing more “Rio de Janeiro” than a selfie at Corcovado mountain. The place of classic postcards of the city, enjoy a selfie next to the monument of Christ the Redeemer, one of the 7 World Wonders.

6. Empire State Building – New York, USA

04_empire_state

The 102-story Art Deco skyscraper located in Midtown Manhattan features two observation decks: the well known 86th floor observation deck, with one of the most beautiful, breathtaking sights of New York City or, for those who don’t experience vertigo, the 102th floor one, where you can sightsee the entire city, although at a completely indoor place – you can even travel back in time by getting there in an old-fashioned manual Otis elevator.

7. Eiffel Tower – Paris, France

05_eiffel

A classic for couples and those romantic without remedy, the Eiffel Tower in Paris is one of those places in the world that do not require a prior introduction. Leave the Parisian charm to inspire you to get a selfie of quality – and as everyone has already said, only in Paris can you enjoy “la vie en rose”.

8. Santorini, Grece

06_santorini

Envisioning a paradise in the Aegean Sea? There is no better definition for Santorini. This Greek island will make you feel that even sky sports another tonality with just exploring its charming alleys, while you enjoy the aroma of the local cuisine. A selfie in Santorini, with an attractive sunset in the background, and you’ll have the perfect picture!

9. Marina Bay, Singapore

07_singapore

One of the most amazing places in the world is located in the heart of Asia. Marina Bay, tourist city par excellence of Singapore, not only hosts events from the level of a Formula 1 GP, but also a vast amount of scenarios with contemporary architecture for every taste and style. If you are planning to go to Singapore, don’t forget your selfie stick.

10. Kathmandu, Nepal

08_nepal

If you are looking for a place filled with spirituality, Kathmandu is should be your destination!. Landscapes worth to be framed, stories of ancient times and an endless number of Buddhist symbolism within our reach. On your next exotic trip to Asia do not miss the chance of a Nepal tour, with a spiritual-inspired selfie experience.

11. Bosphorus Bridge – Istambul, Turkey

09_istanbul

Where Europe and Asia meet… This particular bridge in Turkey is known as the Bosphorus Bridge, which crosses the Bosphorus strait, links more than two continents; two completely different cultures. A unique place in the world, worthy to be remembered forever with a maritime selfie.

12. Kruger National Park – South Africa

10_south_africa

If you are one of those people who enjoy the great plains and exotic destinations, you should not miss the chance to get an interesting selfie in this reserve of natural wildlife located in South Africa. With guided tours and the opportunity to see magnificent specimens in their natural habitat, which would undoubtedly be an unforgettable destination; and who knows, you may be lucky enough to get a selfie with a cute Meerkat.

Do you have any other places in mind you want to share with us? The most important thing you have to remember is that a selfie is all about being yourself – be careless and enjoy life through your camera!

Wedding Photography: A Look Inside Your Gear Bag

Wedding photography has become its own breed. It calls for efficiency, preparedness, and flexibility. All of this starts in your camera bag.

Bag: A good day’s work starts with your bag. There are many different options out there from backpacks, rolling bags, shoulder bags, etc. I personally have a big shoulder bag, as it allows me quick access and a secure place to store everything I need. While size is certainly a factor with a bag, I recommend looking for something with Velcro adjustable compartments that allow you to create a space big or small to house everything you need.

Your bag should also be weatherproof. You never know when you might get caught in a storm or have a couple that requests shooting in the rain or snow, so you want to have something that you know will survive and keep your gear dry. Promaster is a great company. Their bags are durable, well padded and super versatile for all needs and budgets.

01_wedding_bag

Camera: If you’re going to shoot weddings you need a full frame DSLR. Being a Canon shooter I recommend starting with the Canon EOS 6D. It is a full frame with all the manual capabilities you’ll need to successfully shoot a wedding. Canon has many full frame cameras, but the 6D is its entry into that realm of DSLR’s.

02_wedding_bag

Lenses: A timeless debate. Every photographer has their own style that calls for different lenses. Below are my staples, which also make for a good foundation. I believe you should have a good, prime lens on hand. They allow you to capture all the special details like flowers and shoes with a focused crispness, but also make for great portraits, which your bride will surely want.

My pick is the EF 50mm f/1.2L USM. Its huge aperture allows for a very narrow depth of field which creates that blurred background everyone loves. Additionally, in your arsenal, you’re going to want something with a range.

You don’t want to be too intrusive during the ceremony or intimate parts of the reception, so it’s good to have something with strong telephoto capabilities. My personal favorite is the EF 70-200mm f/2.8L IS II USM. As long as you’re moving around, this lens can be used for anything.

I have taken some nice group shots on super sunny days with it, using the lens hood. It’s a very versatile lens and definitely worth the investment. And lastly, I recommend owning the EF 24-70mm f/2.8L II USM. It is a standard zoom lens but with its wide angle range and close focusing distance, it makes a great lens to have during the reception. With its quick focus, it’s ideal for dancing, action and fast paced environments.

03_wedding_bag

Lighting: To start with, you must be equipped with and familiar with an attached camera flash. You will be using your flash throughout the entire day – to fill in shadows, illuminate dark environments or simply give your subject more dimension.

I recommend investing in a good flash for the lower budget weddings that might not allow you to hire a second shooter or an assistant, which will cause you to fall back on your own flash capabilities. Have no fear, the Canon Speedlite 600EX-RT is perfect for the job. It has an expanded zoom range as well as many more customization options over its predecessor.

Its wireless capabilities make it a fantastic option for off camera flashes and can additionally be used with up to five other flashes at once. While it does have good recycling time, the batteries will not be able to last you through four or five-hour reception without having to change them, so investing in a good external battery is equally as essential.

The Canon Compact Battery Pack CP-E4 is a great option. It slips right onto your belt and doubles the battery life of your flash allowing for super speedy recycling time.

04_wedding_bag

Essentials to keep in your bag: It’s always good to have extra cleaning clothes for lenses on hand as well as business cards to hand out to guests who are interested in your work.

Extra memory cards are also super important. I like to keep some on me and in my bag just in case. I usually bring six 16GB SD cards for a full wedding day.

It is always good to be prepared. On that note, I recommend having a little bag of goodies just for you! It’s important to stay hydrated and energetic throughout the day, so I like to keep a small camera bag with water bottles and snacks on hand too. In there I also have bobby pins, oil blotting sheets, tiny bottles of hairspray and tissues. You will be spending all day with the bride and it speaks volumes when you have something she or someone else in the bridal party may need.

Offer help when you can because as you shoot more and more weddings, you’re going to have a lot of experience that your brides don’t necessarily have, but could definitely use.

That is a good foundation for a wedding gear bag. I highly recommend digging around on KEH, B&H or Adorama for good deals on these items. If you’re unsure about buying without trying, renting equipment might be a great option for you!

Some final notes: With every aspect covered on what to carry on your next shooting session, you need to focus on improving the quality of your wedding photographs with a quality product – As you’re likely to experience a lot of situations where you need to be quick in order to capture the moment, sometimes we can end up feeling disappointed by the outcome of the photograph itself when issues such as underexposure, overexposure, flat tones, not enough details become the most noticeable element in our composition.

Because of that, we thought in an efficient way to solve such drama, with our newest bundle “Forever Thine Workflow“, for enhancing wedding photographs in an easy and effective way. Take a look at what a good quality edit can bring out from the work you have accomplished – and without even requiring you to be a professional Lightroom user.

Before-After 1

Hope this helps and happy shooting!

How to work with Strike a Pose Workflow: Facial Details

Hello! Today we will go over how to use our “Strike a Pose Workflow”, specifically, how to enhance your subject’s facial features and make up. I have already applied an all in one preset and a vignette to the photograph that I am using today. So, let’s jump right in and get started with her face.

Once you are in the “Strike a Pose Workflow“, and you have your image selected that you want to work with, start by focusing on the face. After you have zoomed in on the area that you want to enhance, go into the brushes, as our “Strike a Pose Workflow” comes with 69 Brushes, there is quite a bit to choose from.

For the image that I am working with today, I will first go to the Rosy Lips brush and I am going to use this brush to enhance the color around her lips. When I click on her lips, You will see a light pink in the color box, when it opens in the bottom right of the panel. I will just go ahead and paint that color around her lips. Then I will turn the saturation up just a little bit more color. Then, I will click New, because I want to go over her lips again, but I want to give it a darker color. We are still using the Rosy Lips brush, but now I will go down to the bottom and open up the colors, choose a color that is slightly darker and then, go over her lips one more time.

Once I have applied the color to her lips, I can then use the sliders to the right to make changes if necessary. For now, I am going to leave it a little darker and turn the contrast up a bit.

The next thing that I am going to do is to work on her eyes. Now, she has her eyes closed, but that doesn’t mean we can’t enhance the make up around them.

So, now we are going to open our brushes again. Going down to my “Strike a Pose” brushes, I am going to use the Add Eyeliner brush. We can use it and go along her eye line and eyelashes, to darken them and add a little more definition. Once I have applied the brush, I am going turn down the exposure a bit, so it will be just a little darker.

The next thing that I am going to do is go back into the “Strike a Pose” brushes and choose Darken, located in the Light brushes. Using this brush in a general “brushing” motion in the crease and around the bottom of her eyelid, just to add some more definition to her eyes. You can use the panel to make any extra adjustments such contrast, exposure and so on.

Next, I am going to add a little blush, we can do that with the Blush brush. So, we will go back to our brushes, for blush you will see that two choices, Add Blush and Add Blush 2. For the image that I’m working with, I will use Add Blush. I will make my brush a little bit bigger, apply it to the cheeks, then turn up the saturation just a bit. Then, I will click on New and apply the brush once more, I feel like there could be a little more color there.

Now we are going to add some contrast to the face, using the Light and Darken brushes. The first thing that I’ll start with, is the highlight, so I will go to the “Strike a Pose” Light – Brighten brush. Use this brush in all of the typical place where you would want to add highlights, such as the middle of the forehead, down the bridge of the nose, right under the eyes, the chin and the “cupids bow” between the nose and the lips. You can also add some highlight to the area between the cheekbone and the jaw line, if needed. Next, I will go back to my brushes and click on the Light – Darken brush, which I will use to add contour to the face. You would normally apply this to right under the cheek bone, around the temples near the eyes, the edges of the forehead and around the jaw line. Then, I will click on New, select the  Light – Darken brush again, this time making your brush really small. I will use this to add a bit of contrast to the side of her nose, but not too much.

The last thing that I will do to enhance the facial features is to sharpen the face. Going back into my brushes, I will select the “Strike a Pose” Sharpen Face brush. I am going to apply this brush around the eyes and mouth. In my finished image, you can see that we have basically contoured her face and added a little color to it. The changes weren’t huge, but it does make a difference in the photo.

So, Now I am going to open another photograph to work with. Like above, we are just going to work with the face and enhancing the facial features, using the “Strike a Pose” brushes.

With this photograph, the first thing that I will work on is her lips. So again, I will open my brushes, selecting the Rosy Lips brush once more, but this time I will go into the color box and change the color, going for a really deep pink. I want to add a lot of color to her lips, applying to the lips as if I was changing her lip gloss or lipstick color. Once applied, I will turn the saturation down a little and make it a bit brighter by slightly increasing the exposure and contrast.

Now, I will move up and work on the eyes. I will start by going back to my brushes and choosing the “Strike a Pose” Whiten Eyes brush. Like the name of the brush suggests, it applied to the whites of the eyes to enhance and brighten. I am just going around, brushing over any of the dark or red areas. Once I’ve applied the brush, I will adjust it a bit by turning up the exposure, making it a little brighter.

Next, I will start with a new brush, this time the “Strike a Pose” Light – Brighten brush. I will apply this brush around the eyes, just to add a little bit of light. After I have brightened the eyes, I am going to click on New and start with a new brush. Now I want to enhance her eyes, so I will have two brush options. I can choose from Enhance Blue Eyes or Enhance Blue Eyes 2, for this one I will go with Enhance Blue Eyes 2. Now I will go into colors and move my color up, to make it a tiny bit darker. I will go ahead and use that color around the iris of the eyes, then turn the saturation up a bit and add a little more light to the exposure.

Alright, The next that I will do is enhance her eye makeup and to do that, all I will need is to start a new brush and use the “Strike a Pose” Darken brush. I am going to use this brush to go along the eyes and make her eye shadow just a bit darker.

Going back to my brushes, this time the next brush that I’m going to use, will be the Add Eyeliner brush. I am using this brush right along the eye line, just to darken it some. Darkening the eye line will actually make the iris stand out.

Now that I’ve gone ahead and changed her eye makeup, her lips and changed her eyes, now what I am going to do is add contours to her face. To do that, I am going to use the Light brushes again. The “Strike a Pose” work flow comes with Light – Darken and Light – Brighten brushes, which are going to be used a lot. So for now, I’m going to go for the Light – Brighten and add highlights to the face. Highlights can where they would naturally go, which would be around the middle of the forehead, down the bridge of the nose, under the eyes in an inverted triangle, the chin and last, the “cupids bow” between the nose and the upper lip. Occasionally, I add a little bit of highlight just to the bottom lip. Another optional place that you may want to highlight is right under the brow bone, between the eyebrow and the eyelid. It will really make the eyebrows and eye make up stand out.

Now I am going to go with a dark brush, so I will select the Light – Darken brush and add contours with this. Your contours will normally go on the cheek bones, around the sides of the face and temples, the sides of the forehead and along the jaw line. Then, click New to start a new one brush. I am still using the Light – Darken brush, but now I have made my brush really small. I am going to use it to run a line down the side of her nose, just because this helps thin out the nose a little bit. The line doesn’t need to be that dark, so I am going to use the exposure slider to turn it up a bit.

So far we have changed the skin color, the make up and the contours. This has made for an overall, more polished look to the image.

I hope you guys enjoyed this tutorial on how to enhance facial features and make up, Hopefully you will try it out for yourself!

Adding Light Leaks In Lightroom

It can be fun to shoot in the summer or when it is sunny outside. Capturing light flares and light leaks add a little extra to your photos, improve dull photos in Lightroom, and creating more interest.

In both situations it takes light hitting your camera to create the effect. So what happens when you do not the right light or you are not in the right position to create these effects, which are sometimes looked as mistakes. Well, what you do is you create your own effect on location or in post processing. Today we are going to create a light leak using the Forgotten Postcards Vintage preset and the brush from the Chasing Light Workflow bundle. Know more about Lightroom presets here.

1 – What is a light leak?

A light leak is when there is a gap or hole in the camera body where light can get in and expose the sensor to unintended light. This is often seen as a problem or unintended mistake that happens, but it can look great and be used as an artistic choice in certain images. Now that we know what a light leak is let’s look at the starting point of the image for this tutorial. And if you want to know more about presets, click here.

Arnel Hasanovic Creating Light Leak in Lightroom

2 – Color Editing

I first start out with editing the colors of the image. I had a lot of the sky that was blown out because of the light I was facing. I was indoors where the subjects back were facing a dark area with not much light hitting it. In order to get a good exposure on the back of the hair and the subject, I have to expose enough which in turn gave me some blown out highlights. Losing the highlights was not that big of a concern for me as the subject is what I was really focusing on. You can see that I wanted the colors of the shorts to pop against the white shirt. I also cropped the image to get rid of some of the distracting elements and to get a little tighter crop.

Arnel Hasanovic Creating Light Leak in Lightroom Tutorial

3 – Adding the Preset

After I had the colors I wanted I then went into the Forgotten Postcards Bundle and used the Light Leak 9 Preset. What this did is add a preset of color on left and right sides of my image. You can achieve a similar and more customized leak using the Adjustment Brush panel which is in the next step.

Arnel Hasanovic Creating Light Leak in Lightroom Tutorial

4 – Using Adjustment Brush

To achieve a customized light leak you can use the Adjustment Brush to add your desired color, size and shape of the leak. After installing the brush set from the Chasing Light Workflow I chose the “Add Golden Sun” brush and brushed the bottom right corner of the image to fill in more of that light leak effect to the image that the preset did not cover.

Arnel Hasanovic Creating Light Leak in Lightroom Tutorial

5 – Conclusion

If you look on the bottom right you can see the area I used the brush to add more own desired light leak. You can use this technique for the whole image and create all of the light leaks or you can start with a preset and fine tune it using the Adjustment Brush. To mimic it better or to match the light in the image you can sample a color and use that color for your brush if the red/orange in the presets does not fit the color you want to achieve. If you need a refresher on how to import brushes and presets then check out our tutorial.

Arnel Hasanovic Creating Light Leak in Lightroom Tutorial

The Lighting Technique That Always Sells

It seems these days that photographers are always looking for the next, new and interesting way to set up their studio lights. While I respect the experimentation, it adds an awful lot of confusion. Just exactly, how should you be setting up your lights for a typical family portrait session?

There is one lighting method that I fall back on for nearly every session. Look at any artificially-lit family portrait, corporate headshot or school portrait and you’ll see the same lighting technique every time.

Why? Because it sells. Every time.

How?

Let’s talk about natural light for a moment. If you could plan to shoot outside at a perfect time of day, what time of day is it? Sunrise or sunset, naturally. The angle of the sun to your subject is about 45 degrees, and it’s simply perfect. Rembrandt caught on to this in the 1600s and started lighting subjects the same way in their portraits. Hence, this lighting style is called Rembrandt Lighting. Rembrandt studied light and how it affected faces and determined that the most flattering light for people is this 45-degree angle of light, just like the sun would provide, at the perfect time of day.

Here, a sample of Rembrandt’s work:

maxresdefault

Observe, particularly, the shadows. A lot of photographers mistake flat light for good light, but this isn’t the case. Flat light always works, but it’s always boring. The shadows are extremely important – the shadows give the depth and detail to a face.

All we are going to do is emulate that in your studio.

The other note I want to make is that, in all of the diagrams below, the main source of light is a strobe with an umbrella. You can also use a softbox, but in terms of emulating the sun, an umbrella does a slightly better job. Think about how the two devices work.

A softbox allows you to shoot through several layers of fabric, and direct the light exactly where you want it to go. However, an umbrella takes hard light from an uncovered strobe and shoots it in several directions at once – which is much more like the sun.

This can be done with one light, and up to three.

One Light

Take a look at the diagram below.

lighting-diagram-OneLight

This is a simple, one light setup. The light is set at a 45-degree angle to the subject, who is turned very slightly towards the light. On the opposite side, you’ll see a white reflector. The reflector is necessary because, while it leaves the shadows on the sides of the face, it fills them in a little bit so that the details are not lost.

The result of this lighting setup is shown in the image below.

DSC_5126-WEB

Two Lights

Take a look at the diagram below.

lighting-diagram-TwoLights

This is a basic two-light setup. Again, the primary light is left exactly where it was in the first diagram. I have even left the reflector opposite to the primary strobe. The best place for this second light is as a kicker light, behind the subject. This adds separation of the subject from the background.

This light setup results in this:

ABVMA-HoDesiree

As you can see, around her head and some on her shoulders, there is a light that sets her off from the background.

Three Lights

The natural instinct with three lights would be to remove the reflector, and replace it with your third strobe, as shown below:

lighting-diagram-ThreeLights1

However, I would actually suggest you turn the third light into an additional kicker to add some drama. Further, I can eliminate the use of the reflector, simply by adjusting the light more to the front of the subject. The angle is still 45 degrees on the subject.

lighting-diagram-ThreeLights2

Here is the result:

DSC_4598-EditWEB

Using that 45-degree angle is the real trick to photography that sells. Keep in mind, you don’t want to eliminate shadows entirely – just fill them enough, so you can see the details.

Shadows are what give your face character, and what looks most natural. Families are always more likely to purchase images where the people they love, actually look like the people they love.

All diagrams in this image provided by LightingDiagrams.com

How to work with Lightroom Mobile

With smartphones and tablets getting better by the day, it is crucial that software developers provide users with solutions that are suitable for the day-to-day activities of photographers, regardless of their skill levels.

Adobe has moved one step ahead of many of their competitors in this business by creating mobile versions of Adobe Photoshop and Adobe Lightroom, among many other mobile apps. However, what does this mean for us, when we can work with Lightroom Presets in mobile, rather than with Adobe Lightroom’s desktop version?

01_lr_mobile

Fortunately, this is not a matter of “either or”, rather we get to use “both and” – Adobe Lightroom Mobile was created to help photographers be able to perform quick edits with their smartphones or even sync data to their desktop (or laptop) PCs without needing a USB connection. This only translates into better performance by photographers, who are now able to edit photos “on the go”.

Through this guide, we will review the main advantages and learn how dedicated photographers can get the most of Lightroom Mobile if we install Lightroom presets on our mobile.

Setting up user account

After downloading Lightroom Mobile on your device, it will ask you either to log into the system or to create an account.

02_lr_mobile

You can enter and explore LR Mobile without having an account, but you won’t be able to discover the application’s full potential. After creating an account, LR Mobile will start a 30-day trial period, until you purchase one of the subscriptions packs by Adobe (Creative Cloud Photography being the cheapest one at about $10 a month.)

03_lr_mobile

If you don’t purchase a valid license within the trial period, you will no longer be able to use Lightroom mobile, instead you will only be able to look at previously edited work (same criteria as with PC versions)

Importing pictures

LR Mobile will sync your files with your PC’s Lightroom Catalog, if you sync the accounts by logging in with your Adobe ID. This is an extremely handy feature, as it enables you to explore your catalog on the go, as well as sharing your pictures with other people.

If you want to import pictures from your mobile phone or tablet, all you need to do is click the folder “Lightroom Photos” and import them from the internal media storage on your device.

04_lr_mobile

Then, just like the Desktop version, you open up the image you want to work with and it will display the whole image in full-screen with editing options.

Editing pictures

Just like Lightroom’s desktop version, the “Develop Module” will feature presets as well as tools and sliders for editing your images , although they will differ considerably form Desktop version.

06_lr_mobile

First, you will notice that tools, such as Graduated Filter, Radial Filter, and Adjustment Brush, are gone – You can either crop, add presets, or manually fine tune your images to apply a “postproduction” process with your mobile device.

This new reality may put off some users, who thought they would do these kinds of adjustments organically and intuitively, just by using their fingers or a stylus.

The Presets panel provides the traditional presets featured in apps like Instagram, and unlike the desktop version, it is not possible to install extras in this app.

07_lr_mobile

Adjustments can be achieved in a very similar way to the PC version, even with the lack of many of the tools or panels. There is no possibility for users who would like to tune in the files for getting ready to go, since you won’t be able to use tools like Split Toning, Lens Correction and much more.

Output format

After editing your images, LR Mobile provides you with several options intended to increase the reach of your performance. Depending on your smartphone/tablet operating system, LR Mobile will show sharing options like message, e-mail, Facebook, and many more. Not to mention, saving the processed file as an image, uploading it to the Adobe Creative Cloud service, or storing it inside Lightroom’s Catalog.

09_lr_mobile

Another advantage of this app is the fact that we can take pictures while using the software, meaning they will be automatically stored inside Lightroom’s Catalog. Therefore, there is no need to export the files in any way, if you plan to edit them on the desktop version of Lightroom.

Interaction with other apps

Lightroom Mobile doesn’t just do minor tweaks and upload the photo to Cloud storage – you can create your own workflow by combining its use with other apps, especially Social Media apps like Facebook, Twitter, etc., or even community apps for Photographers, such as Instagram, 500px, VSCO, etc.

The advantage of this interactive process is the fact that your mobile device stops being merely a point-and-shoot camera and turns into a mobile workstation for uploading post-production work that can solidify your credentials, if you take photographs professionally instead of just as a hobby.

Another great thing, is the fact that Lightroom Mobile can import pictures from the media storage on your smart device and post-produce it. This means that pictures made by an app, such as one that cartoonizes images or creates special effects like selective toning, can also be post-produced in a matter of seconds.

Lightroom Mobile lends itself to a new kind of workflow that not only pleases the everyday user, but also is perfect for the travel photographer on the go. This is a lightweight app, which can be incorporated very easily into your everyday life.

If you need to see interesting topic, you may read our post about comparing differences in the basic and tone curve panel in Lightroom.

How to Achieve Awesome Winter Scenes with Lightroom

Hi All,

 As we are coming into that winter cold weather that many of us get around Christmas time, I thought I would go with a picture that suits the mood.

Today we’re going to turn our not so greatly exposed winter scene into an awesome one.

So, as you can see from this photo, I have dropped the exposure on it to simulate a photo taken on a dull day and not getting the exposure quite right.

The original photo was a gorgeous image from freebigpictures.com, so I’d like to give a shout out to them for the use of this photo. I’m going to try to recreate that or better using Lightroom. Maybe a guide to color management in Lightroom would help.

win1

 With winter scenes, you will find you will have challenges right off the bat with White Balance and Exposure.

The reason this happens is because of the amount of White reflecting light, causing you to end up with a very Grey tone to your image, looking very under Exposed.

We’ll start with exposure first.

You will find that in the Develop Module – Basic.

win2

If your shot is under exposed you will want to move the slider to the right. (Under Exposed images will appear dull)

If the image is over exposed, move your slider to the left. (Over Exposed images will appear very bright, so much so that you will lose details in objects with lighter colours such as white)

The Key to this is to make it bright, but not to the point where you start to lose details. Play with it back and forth, so your eyes become adjusted to the subtle changes and go with what you think is best.


White Balance is our next concern.

Click on the Eye Dropper shown below, or you can press (W) on your keyboard.

win3

Move your cursor over to the sky and find and area that has some light gray and click on it. You will see a significantly warmer shift in the colour.

win4win5

 To improve this image further, take a deeper look into our Effects panel.

Go to Post Crop Vignetting and slide the amount just a little to the left until you are happy with the effect.

win6

This will send the viewer’s focus more towards the center path and off into the vanishing point.

Now, click on your Basic Panel, where you were when you changed the Exposure.

Decrease your Highlights and increase your Shadows. You will have to use your own judgement with this, but that will be good training for your eye, so play around and find the right effect.

win7

Then move to your Whites and Blacks just below the Highlights and Shadows.

Now with these, hold Alt and then slide. You will see with the whites, the Screen will turn black and with the blacks, the Screen will turn white.

Sounds complicated and maybe even confusing, but it really isn’t and after the first go, you’ll have it down.

So, for example, with the whites you will see a screen that has a lot of little pixels, once you move the slider to the right.

You want to adjust it to the point where it has a full black screen, right on the edge. That way you will have the perfect balance in your image.

You do the exact same thing for the blacks, but you are allowed a little bit more margin for error with that.

win8 In the same panel at the bottom, below where you just worked to add a bit more life to your image you can adjust the clarity, vibrance and saturation until you are happy with the levels, don’t go too crazy with these, a rule of thumb I would use is, I’d think does that look like real life? if the colours are too strong then reduce.

win9

Last but not least, click on your HSL Panel.

 Increase Orange, Green and Yellow, as this will strengthen the colour in the Trees and Foliage. As an experiment you can also check out the other sliders to see if they make any positive changes also.

There are three options to pick from, Hue, Saturation and Luminance.

I did basically the same adjustments with all three, but you may not have to. Saturation may do the trick by it’s self, but no harm giving it a try.

win10

And that’s it, by now you should have an image that has been massively changed from the one you started with. I hope you got something out of this, to help with your Winter shots.:)

win11

But, what if you think that these adjustments are not enough to bring out the best of your images; is there another way to speed up this whole process? Fortunately for us, yes. With the help of Lightroom Presets and Brushes, read here. We can enhance our postproduction workflow by over 200%.

Imagine you want to capture a blizzard for your winter scene, but you have one of the following problems:

  1. Your camera is not weather sealed
  2. You don’t have as much skill as you wished you have
  3. You can’t get out of your house in the middle of a snowstorm

Lightroom can make our daily job as photographers an easier task, while having fun in the process. If you’ve ever heard of Photoshop overlays, those are layers with special effects applied on them to enhance your photographs by adding elements that didn’t take part in the original scene. Most commonly, overlays are the ones labeled as “season overlays”, and could be a snow/rain/tone-tint overlay – Lightroom has its own way of creating these overlays, which can be managed with a combination of presets and brushes.

Our latest bundle “A Winter’s Tale” has everything you could ever dream of and more for enhancing winter photography. Do you want to post produce a winter photograph in only a few steps? No problem, you can manage it in a one-click fashion with “A Winter’s Tale” Workflow and its wide variety of presets.

winter1

The ‘Let it snow’ presets are able to create amazing effects such as this snow blizzard, that truly looks like it was of the real shot.

winter2

Or you can work your way through the stackable presets available in this bundle, While combining them with a variety of 27 brushes for applying local adjustments to your presets.

winter3

Hope you found this guide to be useful and see you next time! To know more about lightroom, tick this.  You may also be interested in color management, see and know about it here.

Using Lightroom’s Crop Tool to tell your story

In this tutorial, we find ourselves in a construction like an area! I know that as photographers we are always scouting locations, looking to add places to our repository for later use. I found myself wanting to take advantage of the amazing color I knew I would get using this old shipping container. I knew this was not going to stay here forever so I took my photos in many different ways to ensure I had something to work with later. We are going to start with a photo that has too much going on and by using the crop tool select a crop that tells our story better. Obviously being around a construction area there are a lot of things that get in the way and make the photo not as polished as it could be. I like to keep my photos minimal and eliminating everything that is distracting will keep the subject the focus of the photo. So, let’s look at how we can use the crop tool to our advantage.

1 – Starting Point

This is what I was staring at when I looked at this location. I knew that everything around the shipping container was things I did not want. It was all too distracting. I could not shoot on the side of the container because there were things preventing me from being able to back up far enough to get everything I wanted.  I was not sure how long these containers were going to be there so I took a ton of different wide shots like this to give myself full-length options. I wanted full-length options, but later when I got into post-production I ended up liking this pose, but not in full length.

Arnel Hasanovic Cropping Tutorial

2 – Cropping

This is what I plan on using as the crop for my image. I am using the angle to even out the picture, as the original ground was uneven and giving me a weird horizon line. I kept my aspect ratio the same as the original but if you wanted a different ratio then this is the time and tool to achieve that. A nice thing to know is that with the crop tool you can set a crop, work on the image and then if you change your mind or need to make changes, you still will have the rest of the photo there with all of the edits on it. Arnel Hasanovic Cropping Tutorial

3 – Rule of Thirds

Using the rule of thirds

(as you can see in the previous image) I placed my subject to one side, allowing all that empty space for her to look towards. I liked the white letters on the container so I included that in the frame. At this point, I did my color editing. This is not as important in this tutorial as we are looking at cropping. If you are interested in color editing then a great place would be to check out the rest of the Sleeklens blog to get more tutorials.

Arnel Hasanovic Crop Tutorial

4 – Additional Tools Used

Now that I have my crop in place and the color editing I want to bring your attention to the Lens Corrections module. In this photo, it was pretty important that I made sure Enable Profile Corrections was on (I always keep it selected). I was shooting with a 50mm and was getting slight distortion on the lines of the container. Turning on the enabled profile helped me make those lines straight.

Tip: If you go into the profile section of the Lens Correction module, you will find the ability to further manipulate the amount of distortion correction that is applied.

Arnel Hasanovic Crop Tutorial

5 – Telling your story

Here is a look at the whole scene and then an overlay of where I cropped the image. I obviously would have gotten a lot of distracting elements if I had kept the photo as I shot it. Its always great practice to frame your shot in the camera when you can. Using the crop tool should be used in situations where you must. Sometimes a great expression or movement comes at unexpected times and so we have to make a photo work for us. Framing or in this case cropping helps you focus on the story you want to tell by eliminating everything that is not essential.

Arnel Hasanovic Crop Tutorial

6 – Conclusion

Checking how other photographers frame subjects or brushing up on things like the rule of thirds will help you start to think in a way that when you look at a scene your eye is already framing the essentials to your shots.

Converting your Images into Great Black and White Edits in Lightroom

Hello again,

In this tutorial, I am going to show you how to create some really great Black and White edits for your images and give them that Artistic, Professional feel that you get in Fine Art Photography.

This will give your images that classy feel and will look great anywhere from your wall at home to your social media profiles.

We will start with this beautiful image created by using the Out of the Shadows HDR Preset

20150715-_D8A86251

The first step I take, is to move the Highlights up full to +100 to further brighten my image and the Shadows down to -100 to Darken and really bring those out. That is my preference for this particular image, but I suggest playing around with the settings a little yourself and see what you like best.

Black&White1

Next, I bring the Whites up a little and Blacks down a little just like in the previous step, just giving these a little nudge as they are very sensitive. They aren’t really all that necessary, but I want to just get a little bit more range out of my image.

Black&White2

You can also play around with Exposure, Contrast and Clarity. I don’t have to do too much with this image as my Presets have done a great job, but with Raw images you will have to work a little more on them. We will leave that for another tutorial.

Here I haven’t needed to use Exposure much, but I did Sharpen a little with Contrast and Clarity, again feel free to play around and if you think you’re getting lost, you can simply move your sliders back to zero.

Black&White3

Now go to the HSL panel and click on Black and White.

Black&White4

Black&White5

You will now see that the image has been converted to Black and White.

On the left you will see colour sliders just under the B & W tab.

This will allow you to pick out individual colours that are in your original image and strengthen or weaken them, by sliding back and forth as in the previous paragraphs.

Quick note, double clicking on the slider will set that back to zero.

In the next image below, you will see that my image is a lot sharper, while playing around with the Black and White Mix I decided to go back to my original settings and play around a little more. I wanted to go for a real HDR feel, so I pretty much set everything else back to zero and upped my Clarity 100.

This left my image with an almost illustrated appearance that I really liked, combined with the Black and White Mixer.

This shows that you can play around, go back and forth and do pretty much what feels good to you.

Black&White6

Another setting you can apply is the use of Tone Curve located just about the HSL panel.

If you are familiar with Photoshop and the Curve tools, then this will not be new for you as it is very similar, if not, it doesn’t matter as it’s very easy to use.

Black&White7

Click the point indicated with a red circle and move it up or down to change the effects, this will then move in correspondence to the Region Panel below. You can also move the sliders, whichever you like best.

Using this, you will see dramatic changes in the lighting effects from neutral, to light and to dark.

So now that we’re this far, I want to show you the Brush Tool.

Sometimes in your image you would like some areas to be more clear than others, or darker or lighter.

That’s when the Brush Tool comes in super handy.

So, press (K) and you will see a Panel open up with lots of little settings.

Black&White K

Quick note: if you ever want to reset the settings, hover over Effect, which has been highlighted with a small red box, press Alt and Effect will change to Reset, click on that and everything will be back to default.

In my brush settings, I click on the Triangle below edit as indicated in the below image and your settings will appear.

I want to Feather my brush for this image, so I put that to 1oo and I have Auto mask on, so it doesn’t bleed as much into other parts of the image.

At any stage I can hit [ or ] to quickly increase or decrease the size of my brush.

Black&White9

Black&White10

While using the Brush if you want to erase something that you did just and are unhappy with, you can hold down the Alt key and paint back to erase.

Black&White11

Clicking on Custom will bring you to your different settings, again I would suggest playing around and getting Familiar here as there are a lot of settings to go through. I used a lot of Contrast and Clarity in my image to pick out Shadows and more Details. When you are done with one edit, click New to start another and follow the process just described.

NewBlackandWhite

You can turn your progress on and off by clicking on the highlighted area shown below.

Black and White on and off

Another good way to check your progress and edit, is to use the Show Selected Mask Overlay option. This way you can go back in and edit more finer details, erasing the mask.

Once I’m happy I press Done 🙂

Black&White12

Check out my before and after.

Before and After

Top ten reasons for using Adobe Lightroom

An essential part of the photography process is the treatment we apply to the images we took with our cameras. Old time methods for achieving this result ended up with the term “post-processing”, mostly because it was quite a complex process, involving chemicals as well as good equipment in order to bring to life the pictures we had in the camera. As some terms tend to stick, digital methods for developing pictures are also known as “post-processing”, with the difference of only requiring one element in order to complete the task: a computer.

Even if we can say we only need a computer for digital post-processing, that is partially true, as we also require specifically designed software in order to “process” the pictures taken; in short words: we need an image editor for processing the pictures but that image editor must be focused on photography, not vector graphics (which are the most common type of image editors). Then, by reducing the range of software to the ones capable of performing such tasks, we end up with two popular possible options: Adobe Photoshop and its half-brother, Adobe Lightroom.

There is way too much to speak about regarding Photoshop; even non-designers know about it since Photoshop became part of our daily life in almost everything we see: magazines, brochures, advertisement, visual effects on pictures, etc. But what about Lightroom?

Born in 2006 as a spin-off project from the Adobe Photoshop creators, this amazing software has pushed its way up until becoming the standard of photography post-production; only facing software like old Apple Apperture (now Apple Photos) as potential competitors. So, I would like to invite you into the journey of discovering the top ten reasons for using Adobe Lightroom as our main partner in digital photography.

Reason #1 – Is created by and for photographers

Unlike other software we may encounter through the process of finding a good one, Adobe Lightroom was created with the aim of helping photographers, not for any other task. Therefore, Lightroom has a good bunch of tools only meant for digital post-processing, so we don’t need to search all throughout the internet in order to check if the tools in the software we are testing fit our needs, Lightroom makes sure of that even before you install the software.

nikon mirrorless

Reason #2 – Neat interface means no secrets

Everything is right there for you to try: split into modules, each module tells the functionality of the tools contained in it even before we try them. We all know now that Library module is meant for storing pictures as well as importing them into the software, that Develop module is where we manage the post-process of our images, the Print module is for printing our pictures and so on. Inside each module, you will find panels stacked as tabs, where sliders and tools make possible almost everything you can imagine that Lightroom is capable of.

lightroom develop

Reason #3 – RAW compatibility

Say goodbye to the old days of shooting in JPEG. Adobe Lightroom, as well as Photoshop, both work as a RAW development application; a format that normally can’t be opened with most image editors, as is not processed. Get the most from your images by working with RAW: only your skills as a photographer will tell how stunning the picture is going to become while you process it.

nikon cameras

Reason #4 – Friendly for the user

You will find yourself quickly knowing where to go as long as you practice your skills with Lightroom. The software will adapt to your needs, meaning you won’t need over 50 hours of training with video tutorials in order to learn how it works; Lightroom is intuitive, therefore you will love to work with it.

dslr reflex

Reason #5 – Presets

We can spend a whole evening talking about presets and yet there would be plenty to talk about. Presets are everything in Lightroom: the only extra “tool” we need, the very core of Lightroom’s Develop module. Let yourself fall in love with such a wide offering of presets and be sure to check out our products.

sleeklens presets

Reason #6 – Non-destructive workflow

Even if we don’t have layers like Photoshop does, Lightroom works in a non-destructive way, meaning that after we import the picture and apply all the adjustments needed, you will have to export the file in order to access to the developed version of it; the original file will remain as such. When you are not sure about which adjustment you should apply to your image you can always work with Virtual Copies, creating as many as you need for the task you aim to complete. And if all else fails, don’t panic! With a right-click you can always reset the image to its default values.

lightroom library

Reason #7 – Export your job to almost every kind of media

Lightroom features several modules focused on post-development work. After you finished with the adjustments of your image you can either export it for digital use, print the photo, make it part of a slideshow, design a book with it or even submit the image as part of a media gallery for a website. As you can see, every single application of the processed image is available in only a few clicks.

lightroom print module

Reason #8 – On-image editing

Do you want to apply the Selective Coloring effect to your image? And what if I tell you this can be achieved in Lightroom without extra software? This stunning application provides a feature called On-Image editing that can be found in the HSL/Color/B&W panel. A small circle on top of that panel switches Lightroom to targeting only selected areas of your image, where you will later on apply adjustments to it.

lightroom food edit

Reason #9 – Before/After live views

A client is not sure of the work you did with their image? No problem, Lightroom can save the day with Before/After view mode. With several display modes for these kind of views, Lightroom will display both the original file and the current version with all the adjustments applied. The good thing is that you can always use this mode, regardless of the stage of adjustment you’re working on.

lightroom food edit

Reason #10 – Because it makes you a better photographer

Lightroom not only works for editing pictures, but also for teaching users where they may need to improve. As you can quickly adjust Exposure, Highlights, Shadows, Whites and Blacks, that also reflects on the Exposure you apply to the camera, the Shutter Speed, Aperture and ISO values for the image. You’ll then find yourself not needing to develop your image that much regarding the Basic Adjustments, but doing it for further enhancements.

photographer