Tag: introduction

Batch-Process Cleverly on Lightroom

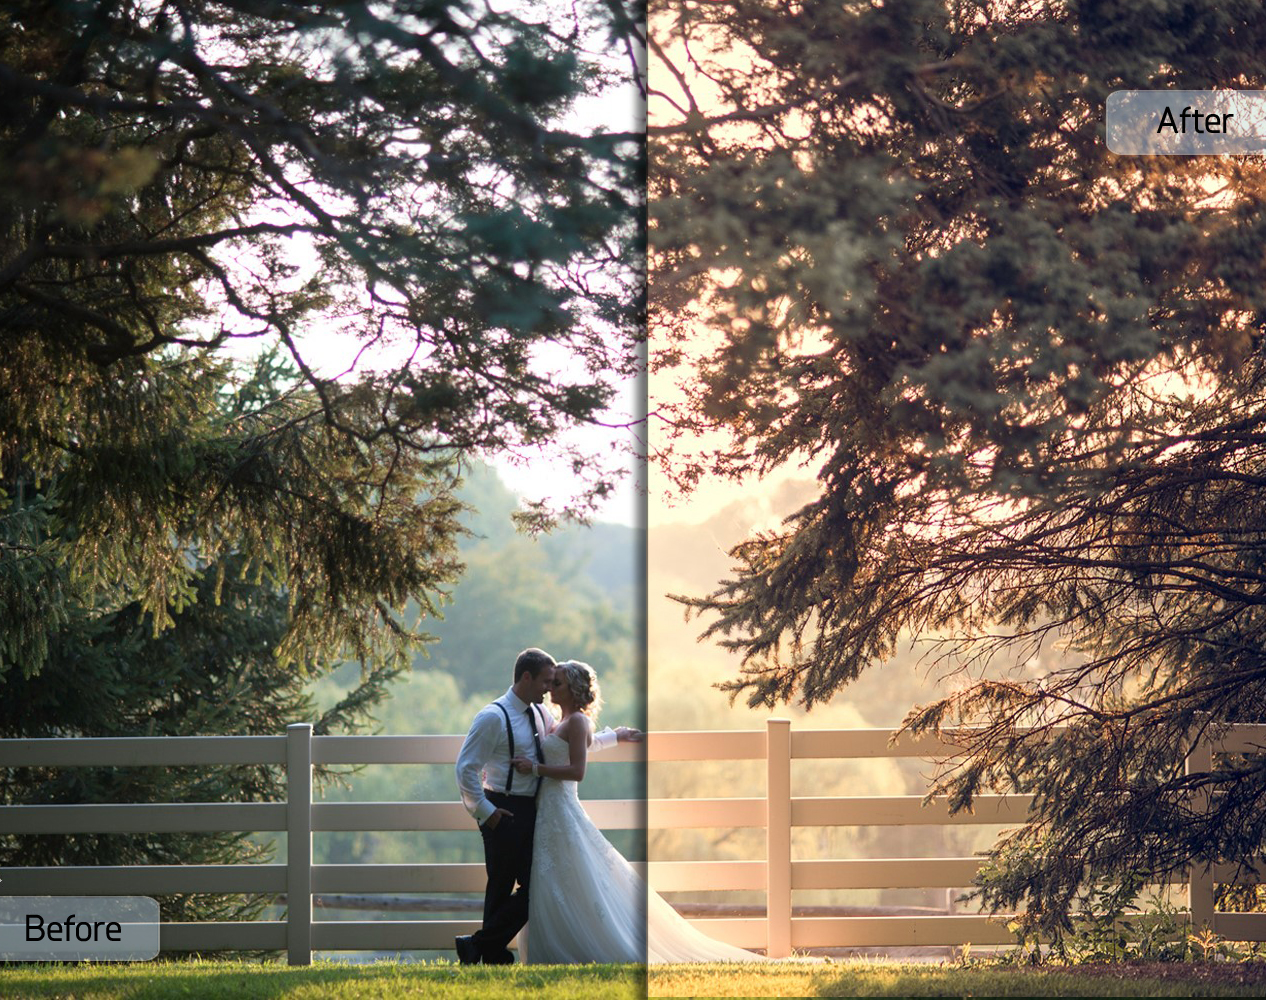
So, remember all those times when you come back home from a shoot with a hundred shots with varied light set-ups? Remember, struggling and pushing to process all those beautiful shots one by one? Will I make your day better if I told you how to cleverly batch-process these images? Maybe, yes.

So, the easiest way to processes your images without consuming too much time would be to split them into batches. When you go for a wedding shoot, or some indoor event, you end up with over hundreds of images in varying light set-ups. So what you can do is split these images into batches of 5 or batches of 10 and apply a setting/edit common to all these selected photographs.

Ideally, a “shoot” indicates that you’ve used various lenses, applied different ISO speed settings, etc. And different images look different depending on the kind of light that got reflected in that moment or depending on the kind of colours that got captured in that particular moment. So how do you cleverly segregate these images into different batches? How do you figure out which ones to group together?

The fundamental idea is to choose a set of photographs where you can apply a group of similar settings. Follow the steps below to make your work progress a lot faster, easier, and a lot more efficient.

Step – 01

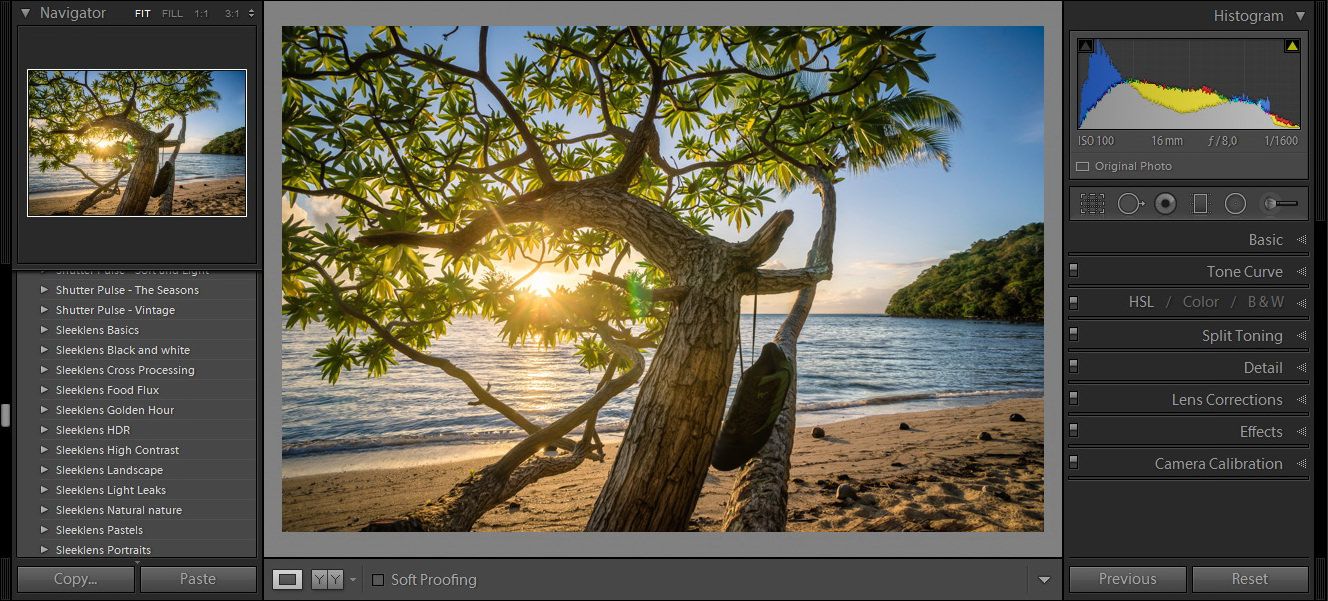
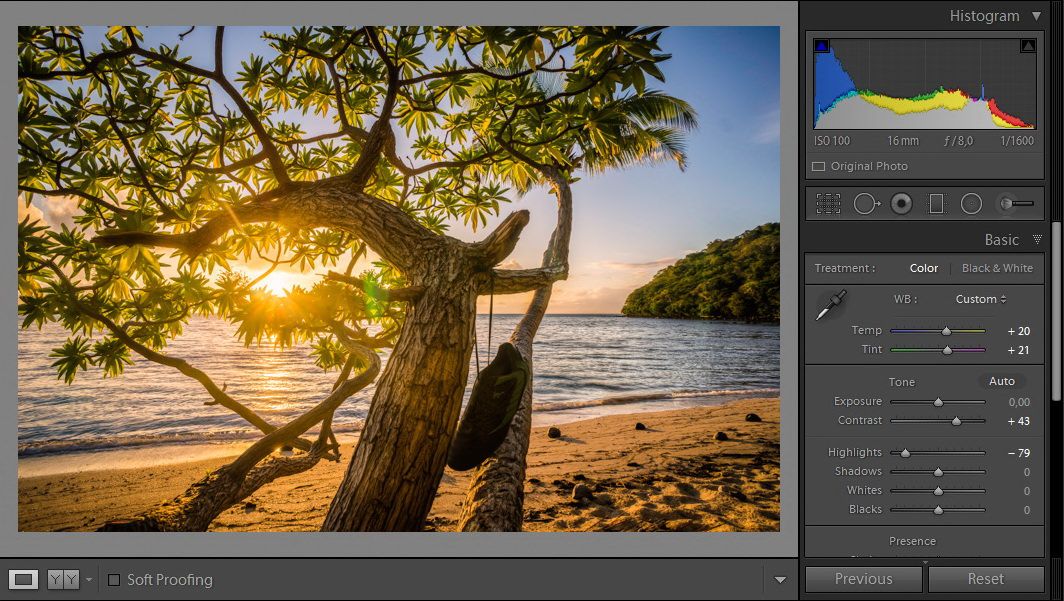
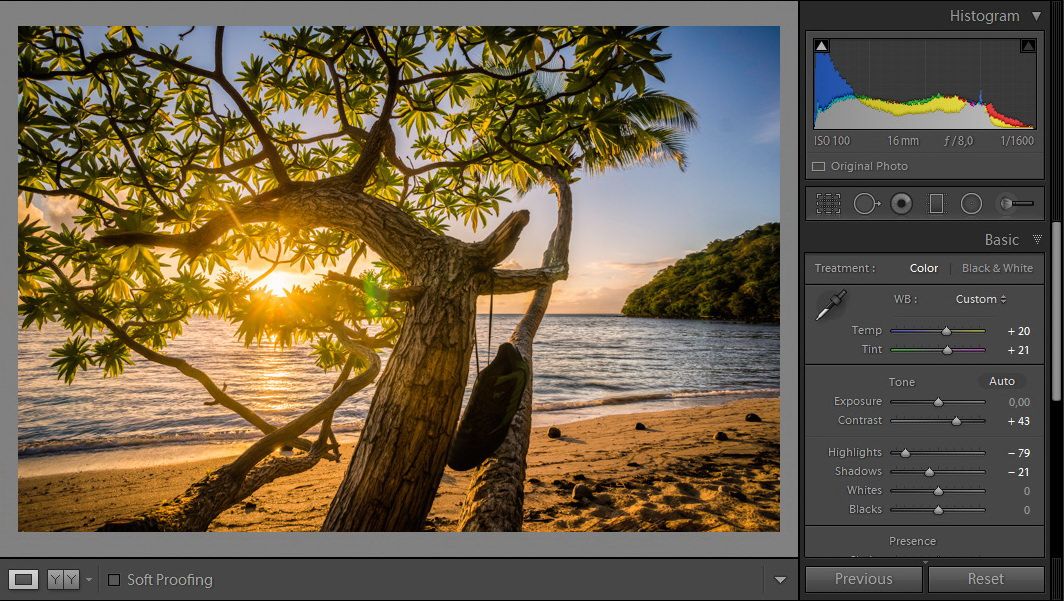
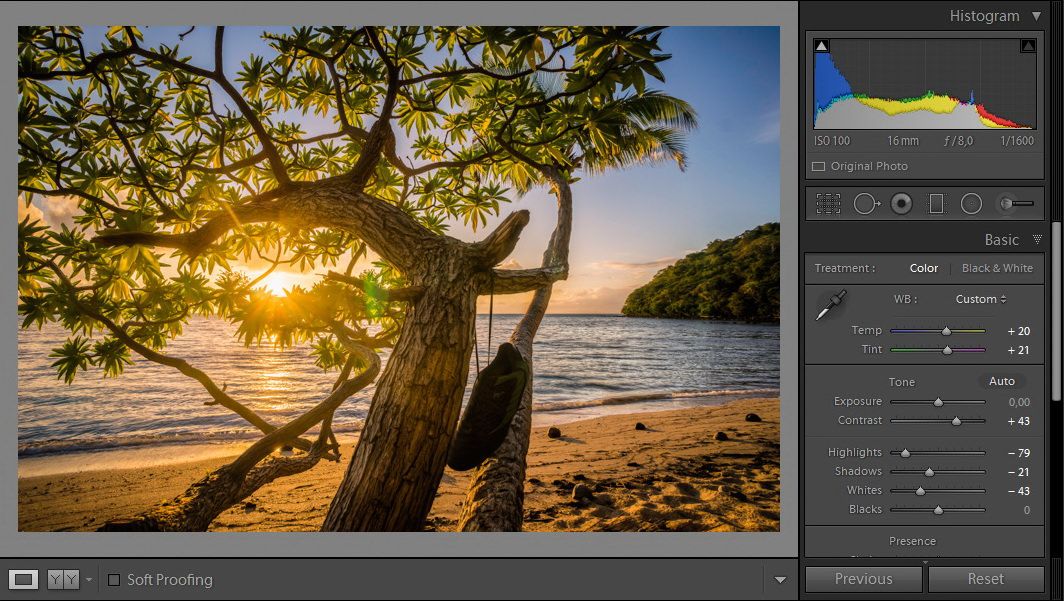
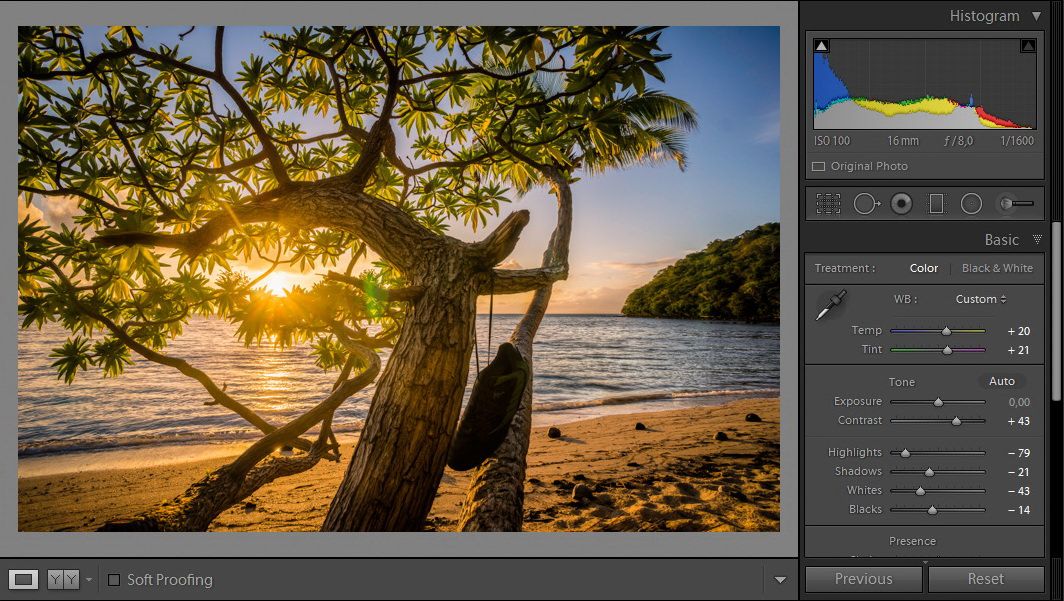
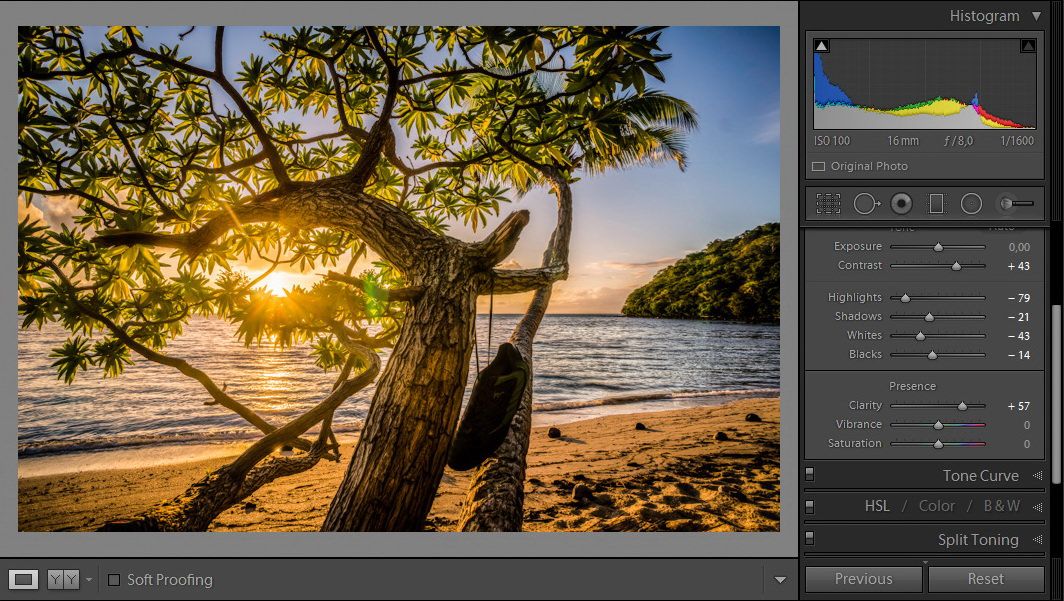
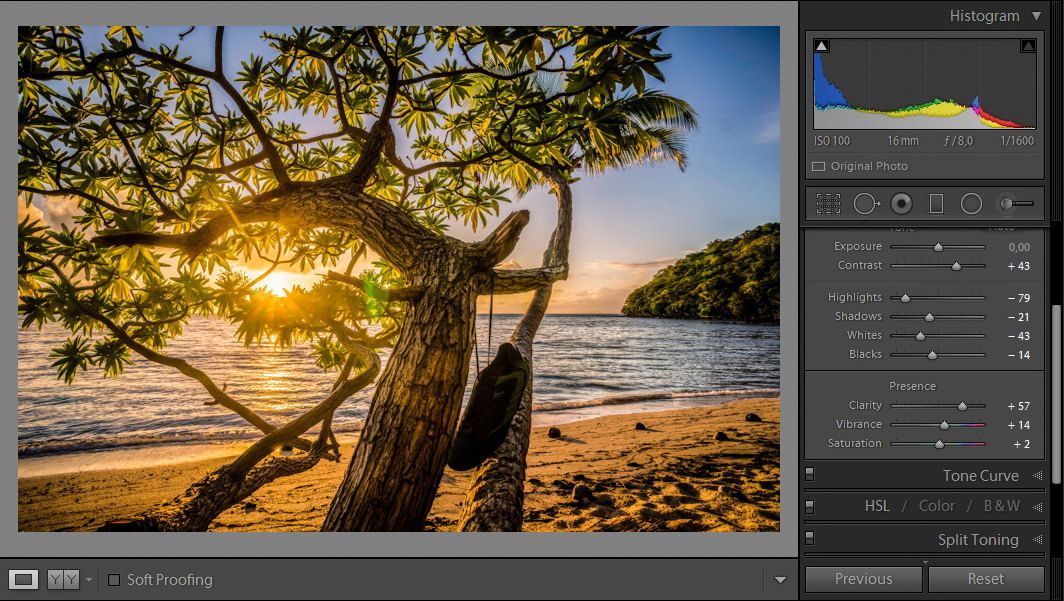
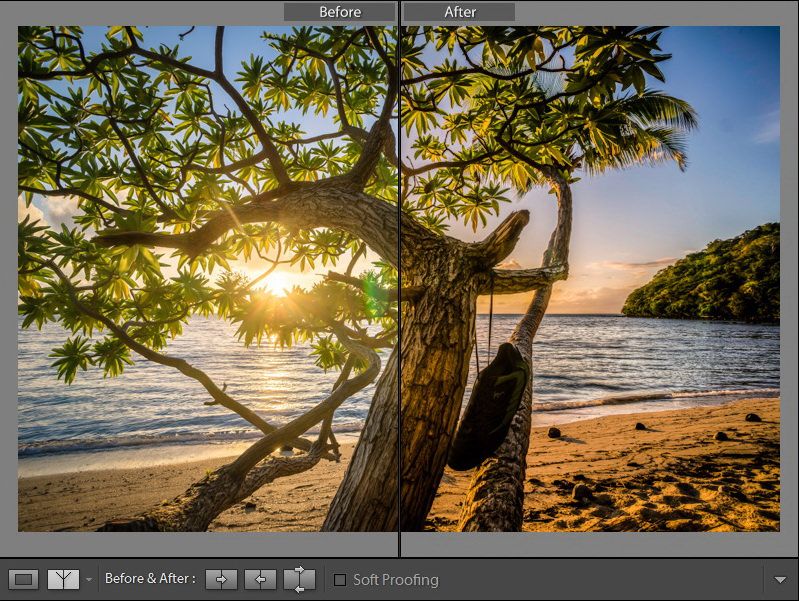
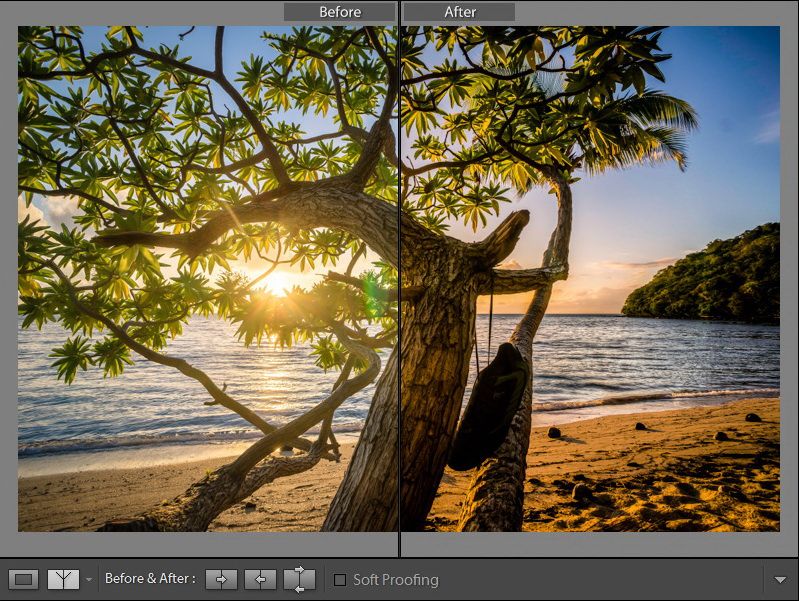
Choose a set of photographs (it can range from a set of 4 photographs to almost 20 photographs), this is what we call a “Batch”. Start correcting the first photograph in that set – adjusting Exposure, White Balance, Tint, Tone curve, Sharpness, etc. Remember, you’re going to apply all these settings later to the rest of the batch, so make sure that your corrections will apply similarly for the remaining images as well.

Screenshot 2016-07-19 13.37.35
The first three images are the ones I’ve combined into a batch for similar processing.

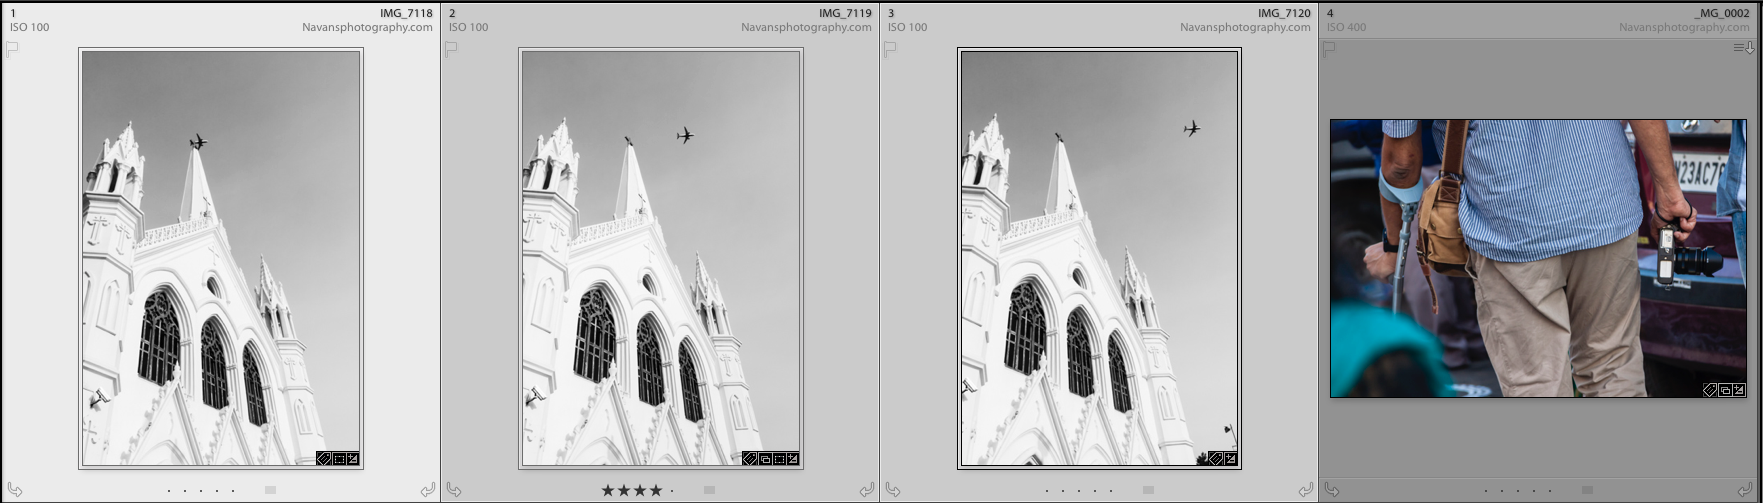
Tip: Do not make major adjustments with the local correction tools, as this might vary from one image to another. What you correct for one image might not apply to the next, even though you’ve grouped them all in the same batch.

Step – 02

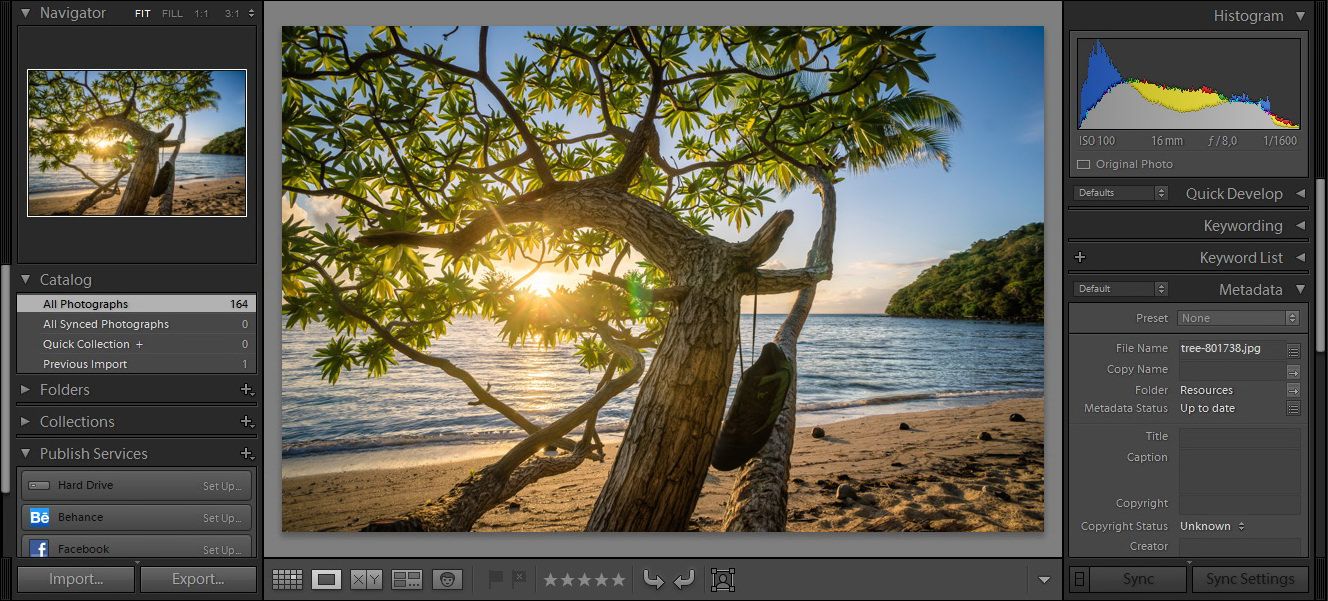
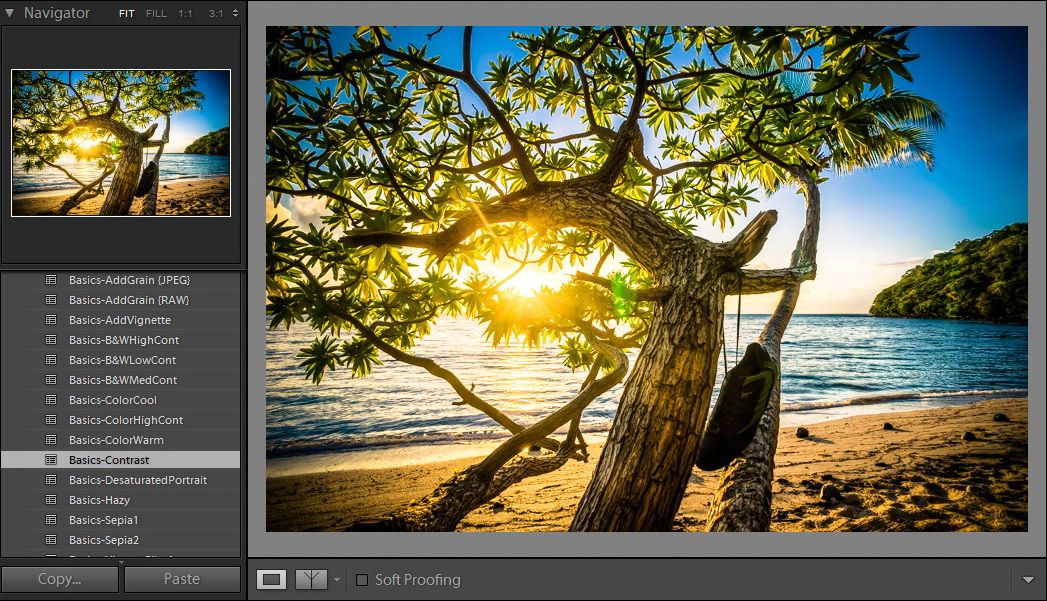
The next step is to copy the develop settings from the first photograph, and paste them to the rest of the images in that particular batch. Or alternatively, select the first image, press and hold the ‘Shift’ key and select the remaining photographs. Then, click on the “Sync Settings” button that appears on the lower right bottom of the Library Module.

Batch Processing – Synchronize settings.

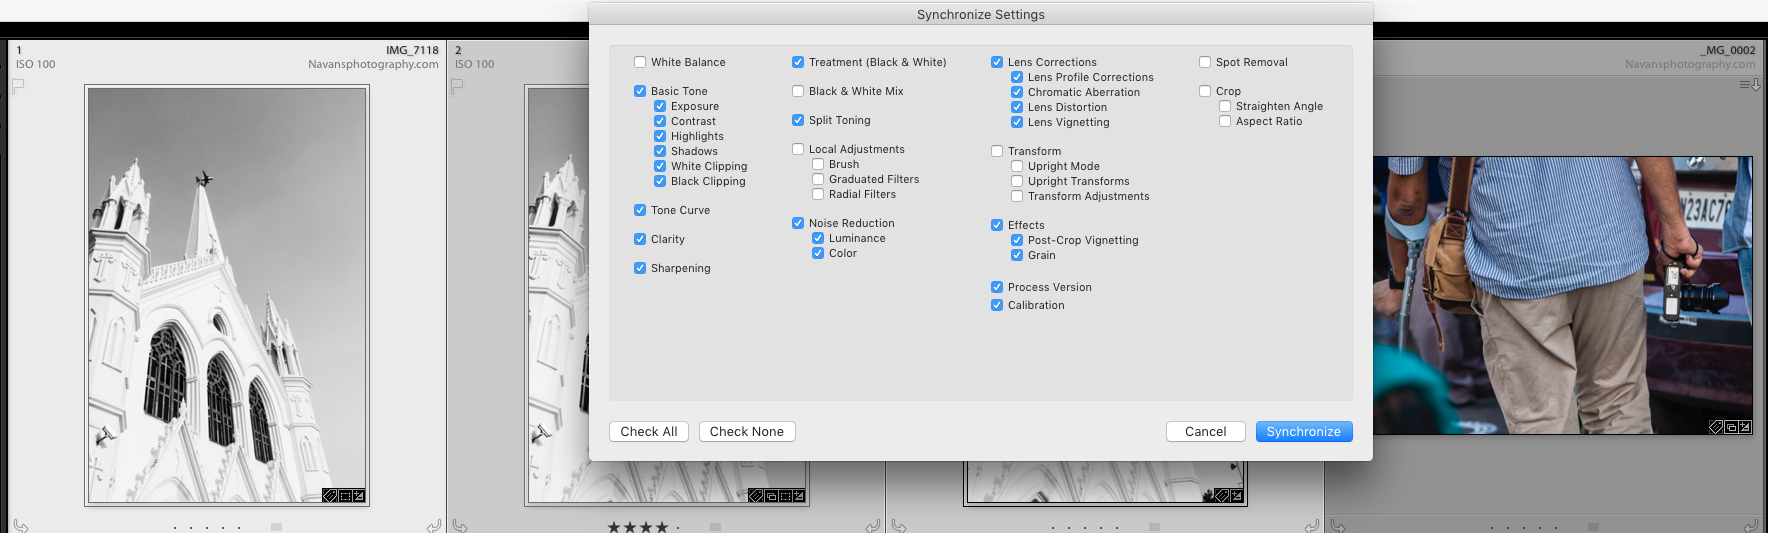
Tip: Shortcut to Sync settings is Command + Shift + S

Once you click the sync settings button, a dialog box will open asking about the settings which you would like to copy to the remaining photographs. Make sure that you deselect all the local corrections, and select everything else. Remember, local corrections vary from image to image. So it is advisable to work on the images individually for those changes.  

Step – 03

Repeat the above steps 1 and 2, until you are done with all the photographs in the batch. 

Step – 04

This is the stage that takes up considerable amount of time. True, it depends on the number of images we’re dealing with and the kind of correction it requires, but this stage also calls for some care and concentration so we don’t go wrong.  All the local correction tools namely Crop tool, Adjustment brush tool and Spot removal tool shall be applied manually to each and every photograph in that particular batch. And there we go, you’ve now learned how to speed up your work process while cleverly using the batch process method.Just like how you copy paste the settings from one image to another, you can copy paste noise correction settings as well. The trick is to filter out your images based on a particular ISO setting. Use the filter tool, and filter out images with similar ISO settings. Let’s look at an example. Say, I’m looking for images with an ISO of 1600. Use the filter tool, and filter out all the images in my collection with similar ISO settings. Let’s say Lightroom provides me with a set of 80 images. What do I do no? Pick one image, apply noise-correction changes to this one image, and sync these settings to the remaining 79 images. Tada!

So, use the batch process method effectively, and reduce stress, time-consumption and make your work a lot more fun. We hope this article helped you out, and if yes, let us know about our experience in the comments below.

Introduction to Landscape Photography

Content

  • Introduction
  • Before you get started
  • Planning – Location and time
  • Technique – Camera settings (HDR, depth of field etc) and composition etc
  • Post-processing
  • Publishing

Introduction

Four years ago my passion for photography started and the main reason for this was that I explored the beauty of landscape photography. I wanted to get some wonderful wallpapers for my desktop but found myself astounded by the art that is landscape photography instead, I could browse landscape wallpapers for hours. My interest in landscape photography grew and getting my first camera I started doing it myself, today my landscape photography have progressed a lot and I hope to share some tips that will help anyone getting started with landscape photography.farsbooktober2014-10

Before You Get Started

There are of course no definite rules of what you need before you get started but there are some things that I recommend you have and some basic knowledge of photography. In terms of equipment, I recommend that you at least have a camera, lens(es), tripod and a computer with photo editing software (preferably Lightroom and/or Photoshop). That you need a camera is obvious, but what kind of camera? First of all, it needs to take good photos, but there are some other capabilities that are more or less a must. This includes the capability for interchangeable lenses, manual settings, and RAW-format. I recommend having a DSLR from one of the bigger brands since this will give you a wide array of lenses to choose from and a greater possibility to upgrade your equipment within the brand (so that you don’t need to buy new lenses when/if you decide to get a camera upgrade). Any newer DSLR will do just fine, but if you can afford it a full frame camera that is great (don’t be afraid to buy used cameras and lenses), there are also mirrorless cameras that would be suitable, but unless size and weight are important issues I would stick to a DSLR.      photographer-1031249_1920As with any type of photography the lenses are of great importance in landscape photography, and there are three types of lenses that will fill all your needs, these are the normal zoom lens (usually somewhere around 24-70mm equivalent to a full frame sensor, 18-55 on a cropped sensor), the ultra wide angle zoom lens (usually somewhere around 12-35mm equivalent) and the telephoto zoom lens (usually somewhere around 70-300mm). If you have all of these lenses you will be able to capture all types of landscape photography. I recommend that you buy lenses with a big aperture like f/2,8 if you can afford it, but there are cheaper alternatives that work great as well. Depending on your style of photography you will use different lenses more than others, personally, I use my normal zoom lens (24-70mm f/2,8) the most since I find it to be plenty wide for most situations and I also have the possibility to capture tighter images as well.dawn-1284235_1920I would also recommend that you use a tripod for landscape photography, and while it isn’t completely necessary I find that it makes you slow down and think more about the process, such as composition. A tripod will also help you eliminate blurry photos and is a must if you plan to take long exposures. Be sure to use a sturdy tripod that won’t wobble around too much. Another tip for when using a tripod is to also use a cable release so you won’t have to touch your camera, and in that way producing slightly blurred photos. You could also set a timer to eliminate this risk. There is various other equipment that you can use, primarily filters. If you want to achieve long exposures in the daytime you have to use a strong ND-filter, and a circular polarizer is great to have at hand to reduce glare and increase vibrance in photos.filter-1259839_1920For post-processing, you can use whatever software you like, but for some more advanced features, Adobe Photoshop is the way to go. I really like working with Lightroom as well, as it is easy to manage and very powerful.This guide will not be going over how the technical aspects of your camera work, like shutter speed, aperture, and ISO, so if you are not yet comfortable with these aspects of photography I recommend that you read about it. I would say it is essential to know these things if you want to achieve great landscape photography.

Planning a Landscape Shoot

Before you head out to capture amazing landscape photos you need to make some sort of plan, it can be very detailed but it is often good enough to make a general plan. There are three basics in planning a landscape shoot, these are location, time of day and look at the photo/composition. Before you go you should, of course, know the location you are heading to, maybe you have scouted the location the day before or earlier the same day, or maybe you have just found a certain spot through other photographers photos on the internet. Often you will be taking photos in locations that you have never been to before and if you don’t have time to come back to a location several times it can be a good idea to research the place beforehand through sites like 500px. By doing this you will get some inspiration for what photos you want to capture when you arrive at the location. If you are staying in the same place for a longer period I would recommend that you spend a bit more time on scouting locations that you can go to when the time is right, for example during golden hour.branches-325411_1920Time of day is crucial when it comes to landscape photography since we are dependent on the weather and light gave to us by mother nature. We simply have to adapt to mother nature. As a rule of thumb, you should try to capture landscapes during golden hour. That is the hour (give and take) during sunset and sunrise. At this time the light cast by the sun is the most beautiful, and since we are usually trying to take beautiful photos this is the best time for landscape photographers. But of course, you can capture landscapes at different times as well, for example, long exposures during the night or on cloudy days. At least you want to avoid broad daylight since it makes everything very flat and boring. Lastly, you have to plan how you want the photo to look, this is, of course, dependent on the time of day and location but it is good to have an idea about composition and subjects among other things before you arrive at the location. paddle-839814_1920   When I took the photo you can see below I was staying with some acquaintances for two nights, in a beautiful small village at Österlen, Sweden. When I first arrived in the evening I went down to the sea to scout for a location (I didn’t bother taking the photos I wanted at this time since I knew it would be much better at sunrise the next day) and I found two spots that I really liked. I used an app to find out in what direction the sun would rise the next day and decided to try to capture an image where the lines formed by the rocks in the foreground were leading the eye of the viewer towards the rising sun. So the next morning I woke up at about 04.00 (4 AM) to capture the photo I had envisioned the previous day. The sun rose approximately 04.30, but the things you do for great photos… My plan worked out great and I got this photo that I am very happy about.      ÖsterlenApril2014-113

Technique

A big part of photography is technique since we must know how to use our cameras and how to compose a photo to get the best results. I won’t go over in detail how to set up you camera and how the technical aspects of your camera work but rather focusing on the specifics for landscape photography. Some keywords in landscape photography are sharpness and correct exposure. To achieve sharpness you have to use the appropriate aperture, make sure you have focused your lens at the right distance and that there is no risk for blur. Since we want the entire landscape in focus most of the time we should use a smaller aperture. This will also depend on your focal length since the depth of field is smaller on lenses with longer focal lengths. I usually never go below f/8 for my landscape photos, unless it is very dark or I’m using a super wide angle lens (like 16mm equivalent or below). The aim is to have as much of the scene in focus as possible, without having a too small aperture (since that might lead to softer photos). Somewhere around f/8 to F/16 is usually suitable for landscape photography. You also want to make sure that you focus your lens somewhere a third into the frame, which usually is the foreground. If you focus too far back the foreground will be out of focus, but if you focus on the foreground the background will most likely be in focus if you are using a fairly small aperture.dog-190056_1280It is also important that you eliminate any risks of camera shake, by using either a shorter shutter speed (the shutter speed should be no less than the focal length of your lens, so if you are using a 24mm lens the shutter speed should at least be 1/24th of a second) or a tripod. If you are shooting hand-held it is recommended that you use vibration reduction if your lens (or camera) has it (keep in mind that it is called different names depending on the brand). Additionally, It is very important that you have a correct exposure, no matter if you are shooting JPEG or RAW (recommended). Something that really can ruin landscape photos is overexposure, usually meaning that there is no possibility to recover blown highlights in the sky. It is also horrible to have such underexposure that the colors are destroyed by noise when you try to recover the shadows. You should aim for an exposure were highlights are bright (but not blown) and shadows bright enough to increase them a little bit in post-process (if needed). You should rather have a bit darker shadows than to bright highlights. Another option is to use the technique HDR (High Dynamic Range) where you take several photos with different exposures and combine in post-processing, leading to an image with both no blown highlights and bright shadows.waterfall-192984_1280Another very important technical aspect of landscape photography is composition. This is such an important part that is impossible to cover thoroughly but there are some basic tips for landscape composition that you need to know.One important part of composing landscape photos is the rule of thirds. According to this rule, the horizon should be placed either at the top or bottom third, but absolutely not in the middle. This is to create a balanced photo, but of course, there are some exceptions, for example when there is reflection, then it can be nice to place the middle of the reflection in the middle of the frame.


Untitled-1

Another tip is to take advantage of leading lines. You can use lines in photos to lead the viewer to where you want them to look. Lines should be leading into the frame and not out from it since you want the viewer to look at the photo and not be distracted. For example, you can use a stream leading towards a mountain or a path leading the viewer from the foreground to the main subject as leading lines.

_D8A6277-PS-1

Post-Processing

When you are back after a landscape shoot the work is not done yet. What you do with the pictures after they have been taken is crucial to creating a fantastic image. I would almost say that it is in post-processing you turn the photograph from an image file to a piece of art. If you decide to shoot in RAW-format you will have much greater artistic freedom when you edit the photos, since RAW files have much more data in them, meaning you can change exposure and color to a greater extent. I use Lightroom for most of my editing and they use Photoshop for more advanced edits of my favorite photos.When I edit photos I usually try to enhance elements that are already in the picture. But first I create a base edit where I make sure that the exposure and contrast are what I want and then I go on to more in-depth editing, like modifying tones and details of the image. before-afterI highly recommend that you check out the different bundles for landscape photography that Sleeklens has to offer, they are a great and easy way to make your images look fantastic, and by combining different presets you can create completely unique looks.

Photoshop: Landscape Adventure Collection

Lightroom: Landscape Essentials Workflow

Conclusion

I hope you have found this short guide useful and that you will be comfortable to start exploring the wonderful field of landscape photography. This guide has just scratched on the top of an extensive subject and I recommend that you continue reading other guides that can help you get a better understanding for each part of the process, like the composition. Good luck with your landscape photography!

Choosing the Sensor Size that’s Right for You: Bigger isn’t Always Better

Whether you’re a seasoned pro or an aspiring amateur, your choice of the camera goes a long way to defining and reflect who you are as a photographer. While a sports photographer will likely lust at the low-light, quick shooting behemoths, a street photographer will want a quiet, compact, one-handed companion. There are a ton of factors that go into choosing the camera that best fits your needs and style, and one of the first decisions that should be made is what sensor size to go for.

If you aren’t familiar with the concept of sensor size, it is literally the physical dimension of the electronic sensor that records the light and thereby makes the image. The sensor size is not only built into the camera but has a direct effect on the lenses and image characteristics as well. From the days of film, when the sensor size was simply the type of film the camera accepted (35mm, 120mm 4×5, etc.), this has been a key factor in choosing a camera and ultimately a shooting style that fits the photographer’s needs. Today, most camera companies offer at least two options through different camera lines, with some offering even more. It’s important to note that when choosing a camera and the sensor that’s in it, you’re also choosing what lenses and accessories that will be available to you, so do your research on the entire system that surrounds the camera as well.

1234526868_02ef3f04e7_o
A CCD sensor (© Matt Laskowski)

Before we dive in, a basic explanation of how sensor sizes relate to the actual photo is in order. It’s helpful to think of an image sensor as a water bucket and light as rain. A larger sensor (larger bucket) can collect more light (more rain) than a smaller sensor in the same situation. So a camera with a larger sensor will perform better than a camera with a smaller sensor in a low-light scenario because it can collect more of the light that’s available. This means faster shutter speeds, lower ISO, and overall nicer images. Another major factor of having a large sensor is the shallower depth-of-field (more background blurriness) it creates. Because of optical math, we needn’t worry about, a larger sensor produces a shallower depth-of-field than a smaller one shooting the exact same image. The last important element of a larger sensor is simply the advanced technology it requires. Because larger sensors are simply harder to make, they often come in overall better (and more expensive) cameras. Because companies put their best tech in their most expensive cameras, larger sensor sizes nearly always come with better and more recent technology. These three factors— low-light performance, shallow depth-of-field, and cutting-edge technology— are why most people assume bigger sensors are always better. However, amazing images can be made with any sensor size out there, it just depends on what you’re shooting and how you shoot it.

Here, we’ll go through the pros and cons of the four major size options available for interchangeable lens cameras, with some examples for each size mentioned.

Taken with Medium Format Camera (© Takuma Kimura)

Taken with a Medium Format camera (© Takuma Kimora)

1. Medium Format (~44x33mm to ~54x40mm)

These are super expensive, high-end studio cameras from companies most people have never even heard of such as Phase One, Mamiya, and Hasselblad. While they’re unwieldy, slow shooting, and a rental-only option for most people, they also produce the highest quality images available. With amazing dynamic range (range of brightness to the darkness that can be recorded in the same image), extremely fine detail (up to 100mp), and great bokeh (quality of the out-of-focus area), these cameras are perfect for many types of art, fashion, and archival photography. However, they are difficult and unnecessary for most other types of shooting and serve as a specialty option.

  • Pros:
    • Best Image quality available in favorable situations
    • Instantly gives any image a high-end look
    • The shooting experience is unlike anything else
  • Cons:
    • Extremely expensive
    • So difficult to manufacture that high ISO and other recent technology isn’t available
    • Large and clunky
  • Examples:
    • Pentax 645Z ($4,000, one of the best cameras ever made)
    • Hasselblad H5D series ($7,500-$45,000)
    • Phase One XF series (Up to 100mp for up to $55,000)

Taken with a Full Frame camera

Taken with a Full Frame camera

2. Full Frame (~36x24mm)

While in the days of film, this size was thought of as too small for any self-respecting professional photographer, digital cameras make this the go-to size for most professionals today. This is what the flagship cameras for many companies utilize, as it offers a great balance between superb performance and acceptable price. Many people believe that a 10-year-old camera with this sensor format (such as the Canon 5D Mark I) is still better than any new camera with a smaller sensor inside. However, with the improved high-ISO performance of modern cameras and tons of great lenses available for almost any mount, there’s not much supporting this way of thinking.

  • Pros:
    • Often sports the best technology available
    • Amazing low light performance and high-quality look
    • Best lenses and accessories available are for these professional-grade cameras
  • Cons:
    • Still pretty expensive
    • Fairly large bodies and lenses
    • The industry may start to favor smaller formats soon
  • Examples:
    • Canon 5DSR ($3,600, 50mp of raw power)
    • Sony a7R II ($3,200, mirrorless that’s fairly compact and critically acclaimed)
    • Pentax K-1 ($1,800, amazing quality for half the price of its competition)

Taken with an APS-C camera

Taken with an APS-C camera

3. APS-C (~23x15mm)

This is what you’ll find in most cameras that aren’t point-and-shoots, and for good reason. While for a long time this format has been aimed at amateurs, more and more pro-quality cameras are coming out with this size thanks in large part to the introduction of mirrorless cameras. If you’re not already invested in a camera system, you should strongly consider getting an entry-level APS-C mirrorless camera and going from there. While Canon and Nikon have been sticking with the same DSLR formula for over a decade, companies like Sony and Fujifilm have bet big on mirrorless APS-C cameras and it looks like it will pay off. The absolute best cameras that won’t break the bank are of this variety. Because recent technological advancements allow them to accommodate high-res sensors with clean images at high ISO— and there are now many amazing lenses built for this format— some APS-C cameras can go head-to-head with all but the best full-frame competition.

  • Pros:
    • Much more affordable options available
    • Some are both compact and still high-quality
    • Next generation of popular cameras will be APS-C Mirrorless
  • Cons:
    • Still, can’t match the performance of the best full-frame cameras in demanding situations
    • Some of the amateur options aren’t worth buying (looking at you Nikon and Canon)
    • Still thought of as unprofessional in some circles
  • Examples:
    • Canon Rebel series ($400+, better options available for similar prices)
    • Sony Alpha a6000 ($600, very compact with great image quality)
    • Fuji film X-Pro2 ($1,700, unique design with professional image and build quality)

Taken with a Micro Four Thirds camera

Taken with a Micro Four Thirds camera

4. Micro Four Thirds (17x13mm)

This is a very interesting option that deserves serious consideration from almost any photographer. About five years ago, many people believed this format to be the future of all photography. While it hasn’t yet lived up to that hype, it has quietly grown into a robust segment that can offer superb image quality for very low prices, but definitely, sacrifices some flexibility. Unlike all other image sensors, Micro Four Thirds (MFT) cameras are standardized across manufacturers. So a lens that fits a Panasonic MFT camera will also fit an Olympus MFT camera, which can be very helpful. Also unlike all other image sensors, this option is mirrorless only, no DSLRs here. But even the cheapest MFT cameras can offer image quality that often out-performs popular, entry-level DSLRs. While this sensor size is a little too small to work well in low-light settings, the bodies are so compact that it might be worth the sacrifice. One thing to note is that most if not all MFT cameras lack the premium build quality available in other formats.

  • Pros:
    • Cheapest option available
    • More nice lenses than you’d expect thanks to universal standards
    • Some extremely small options out there
  • Cons:
    • Poor low-light performance
    • Generally not acceptable for professionals
    • Not many studio accessories available
  • Examples:
    • Olympus PEN EPL7 ($450, extremely compact but toy-like body)
    • Panasonic GH4 ($1,300, professional-ish option with great 4K video)
    • Olympus EM-5 ($480, worth every penny)

There are amazing cameras made using every sensor-size, so choosing a size is really just a matter of taste. If you want to be able to take incredibly detailed images for large prints that are dripping with quality, then a Medium Format or Full Frame camera is probably your best bet. If you want a decent shooter that won’t be noticed when you’re taking close-up street portraits (or if you just want to save your wallet), then an MFT camera may be right for you. And if you’re looking for a jack of all trades that can create amazing images in favorable light and perfectly acceptable images in almost any situation, then maybe go for an APS-C sensor. Before deciding on a specific camera or even one brand, it’s best to weigh your options and consider what your expectations are, then you can find the camera best suited to capture the images you want.

Wedding Photography: A Look Inside Your Gear Bag

Wedding photography has become its own breed. It calls for efficiency, preparedness, and flexibility. All of this starts in your camera bag.

Bag: A good day’s work starts with your bag. There are many different options out there from backpacks, rolling bags, shoulder bags, etc. I personally have a big shoulder bag, as it allows me quick access and a secure place to store everything I need. While size is certainly a factor with a bag, I recommend looking for something with Velcro adjustable compartments that allow you to create a space big or small to house everything you need.

Your bag should also be weatherproof. You never know when you might get caught in a storm or have a couple that requests shooting in the rain or snow, so you want to have something that you know will survive and keep your gear dry. Promaster is a great company. Their bags are durable, well padded and super versatile for all needs and budgets.

01_wedding_bag

Camera: If you’re going to shoot weddings you need a full frame DSLR. Being a Canon shooter I recommend starting with the Canon EOS 6D. It is a full frame with all the manual capabilities you’ll need to successfully shoot a wedding. Canon has many full frame cameras, but the 6D is its entry into that realm of DSLR’s.

02_wedding_bag

Lenses: A timeless debate. Every photographer has their own style that calls for different lenses. Below are my staples, which also make for a good foundation. I believe you should have a good, prime lens on hand. They allow you to capture all the special details like flowers and shoes with a focused crispness, but also make for great portraits, which your bride will surely want.

My pick is the EF 50mm f/1.2L USM. Its huge aperture allows for a very narrow depth of field which creates that blurred background everyone loves. Additionally, in your arsenal, you’re going to want something with a range.

You don’t want to be too intrusive during the ceremony or intimate parts of the reception, so it’s good to have something with strong telephoto capabilities. My personal favorite is the EF 70-200mm f/2.8L IS II USM. As long as you’re moving around, this lens can be used for anything.

I have taken some nice group shots on super sunny days with it, using the lens hood. It’s a very versatile lens and definitely worth the investment. And lastly, I recommend owning the EF 24-70mm f/2.8L II USM. It is a standard zoom lens but with its wide angle range and close focusing distance, it makes a great lens to have during the reception. With its quick focus, it’s ideal for dancing, action and fast paced environments.

03_wedding_bag

Lighting: To start with, you must be equipped with and familiar with an attached camera flash. You will be using your flash throughout the entire day – to fill in shadows, illuminate dark environments or simply give your subject more dimension.

I recommend investing in a good flash for the lower budget weddings that might not allow you to hire a second shooter or an assistant, which will cause you to fall back on your own flash capabilities. Have no fear, the Canon Speedlite 600EX-RT is perfect for the job. It has an expanded zoom range as well as many more customization options over its predecessor.

Its wireless capabilities make it a fantastic option for off camera flashes and can additionally be used with up to five other flashes at once. While it does have good recycling time, the batteries will not be able to last you through four or five-hour reception without having to change them, so investing in a good external battery is equally as essential.

The Canon Compact Battery Pack CP-E4 is a great option. It slips right onto your belt and doubles the battery life of your flash allowing for super speedy recycling time.

04_wedding_bag

Essentials to keep in your bag: It’s always good to have extra cleaning clothes for lenses on hand as well as business cards to hand out to guests who are interested in your work.

Extra memory cards are also super important. I like to keep some on me and in my bag just in case. I usually bring six 16GB SD cards for a full wedding day.

It is always good to be prepared. On that note, I recommend having a little bag of goodies just for you! It’s important to stay hydrated and energetic throughout the day, so I like to keep a small camera bag with water bottles and snacks on hand too. In there I also have bobby pins, oil blotting sheets, tiny bottles of hairspray and tissues. You will be spending all day with the bride and it speaks volumes when you have something she or someone else in the bridal party may need.

Offer help when you can because as you shoot more and more weddings, you’re going to have a lot of experience that your brides don’t necessarily have, but could definitely use.

That is a good foundation for a wedding gear bag. I highly recommend digging around on KEH, B&H or Adorama for good deals on these items. If you’re unsure about buying without trying, renting equipment might be a great option for you!

Some final notes: With every aspect covered on what to carry on your next shooting session, you need to focus on improving the quality of your wedding photographs with a quality product – As you’re likely to experience a lot of situations where you need to be quick in order to capture the moment, sometimes we can end up feeling disappointed by the outcome of the photograph itself when issues such as underexposure, overexposure, flat tones, not enough details become the most noticeable element in our composition.

Because of that, we thought in an efficient way to solve such drama, with our newest bundle “Forever Thine Workflow“, for enhancing wedding photographs in an easy and effective way. Take a look at what a good quality edit can bring out from the work you have accomplished – and without even requiring you to be a professional Lightroom user.

Before-After 1

Hope this helps and happy shooting!

Adobe Lightroom for Digital Postproduction

Many articles, books, and guides have covered the topic of professional post-production in digital photography. However, when the time comes to pinpoint the most appropriate software for this task, Adobe Lightroom stands out from the crowd.

01_graphics_lightroom

Created almost a decade ago as an independent project by the creators of Adobe Photoshop, today it has reached the peak within the photography community, being a common topic in most digital photography courses being taught these days.

Lightroom surprises its potential users by featuring a friendly-looking interface without any hidden tools. Not only professionals can use it, but beginners as well, taking a step ahead of many other applications in the industry by not only post-producing professional looking pictures, but also teaching users where they failed through the shooting process and how to become better as time goes by.

Lightroom will fully adapt to your needs, enhancing your shots in quick succession. All you need to have is enough confidence in becoming a professional user. Your skills will start to improve without you even noticing.

Considering all of these factors, today we are going to learn what makes Adobe Lightroom such a versatile tool for photographers.

Thinking about Plugins? Not anymore: meet Lightroom Presets

Despite being related with Adobe Photoshop, Lightroom doesn’t share the same interface structure. Adobe Photoshop is meant to work with plugins, enhancing the capacity of performance, adjusting images with them, whereas Lightroom despite being able to work with plugins, is not really meant for that.

Presets are, in short words, sets of instructions defined on Lightroom native tools. These presets can be created either by professional designers such as Sleeklens or even by you (if you have enough knowledge about how the software works as well as a keen eye for photography), which can later on be exported/imported if needed (for example when we reinstall the software on our machine, or if we want to share a nice looking preset with our friends).

ultimate lightroom presets previews 3

Step-by-step developing process with Lightroom

Now it’s time to start working with Lightroom. When we open Lightroom for the very first time we will find ourselves inside the Library module; Lightroom’s interface is meant to have a neat workflow split into modules, where each module contains all the tools needed for each specific task such as Importing Pictures (Library Module), Development (Develop Module), Printing (Print Module) and so on. Also each module is divided into panels, where each panel contains a set of tools for achieving the task needed by the user.

02_graphics_lightroom

Access the Import window and browse from your media source to find the images you want to work with. Lightroom will recognize almost any format, even though it is best if you work with RAW files, since they don’t suffer compression adjustments the way JPEG files do.

In case you were in a hurry, Lightroom allows you to process great bulks of pictures in only a few seconds by using presets: the Quick Develop panel on the Library Module works with our installed presets, applying the adjustments set at the preset at all the pictures we select inside the Library Module. Such feature comes handy for example when processing party/wedding pictures that feature similar lighting conditions, speeding up the development process by over 200%.

Leaving behind the Library Module, select the picture you want to work with and switch to the Develop Module.

03_graphics_lightroom

In here you will notice that Lightroom has very few features that can be labeled as tools, and which are meant for advanced adjustments that can’t be achieved only by working with sliders:

  • Crop tool: For cropping areas of our image
  • Spot removal: Pretty similar to the Healing Spot tool of Photoshop. All you need to do is to sample a certain area and then apply corrections where needed
  • Red Eye correction: For correcting Red-Eye effect in portraits
  • Graduated filter: Creates a gradient area where adjustments made by you are distributed according to their position in the gradient area
  • Radial filter: Works exactly the same way as Graduated Filter, but according to a radius rather than a gradient area
  • Adjustment brush: Works with exactly the same parameters as the previous tools, but allows you to apply the adjustments where needed

For this tutorial purpose, we are going to develop a picture fully inside Lightroom both with the traditional native tools from Lightroom and by using Sleeklens’ free bundle of presets.

Traditional method

First of all, start correcting the White Balance values, as this will alter the hue values of the whole image. For this task, we can either use the Dropper tool (trying to sample at a neutral grey area) or we can use the Sliders (which is what I will be doing in this case, as I don’t have a neutral grey) for Temp and Tint. Work on it until you are pleased with the result.

04_graphics_lightroom

I am going to leave Exposure as it is and increase the Contrast for a more vivid look.

05_graphics_lightroom

Since the sun is facing directly towards us, we need to reduce Highlights in order to avoid having such intense lighting conditions. Notice that by doing so, you are also gaining details in the sky (such as clouds) in the background plane.

06_graphics_lightroom

Increase the Shadows by moving the Shadows slider towards the negative values.

07_graphics_lightroom

Decrease the Whites by moving the Whites towards the negative values; this way we are also reducing annoying excessive light present in our scene.

08_graphics_lightroom

Increase Blacks the very same way we did with Shadows, and the image will start looking quite pleasant to the eye.

09_graphics_lightroom

By adding Clarity, we are increasing the amount of detail present at the scene as well as clarifying certain tints. Values over 60 should be kept only for HDR effects.

10_graphics_lightroom

Increase Vibrance in order to give life to the softer hues available in the image.

11_graphics_lightroom

Next, do the same with Saturation in order to determine how much tint is available at the scene. Apply this slider with extreme caution, otherwise it won’t look realistic.

12_graphics_lightroom

Now, let’s do a Before/After shot to compare what we have done up until this point.

13_graphics_lightroom

In my opinion, the result is very convincing on its own, and if we plan to increase the Contrast a bit more, the image will turn out like this.

14_graphics_lightroom

The traditional method is always reliable, but takes time and the knowledge of Lightroom tools in order to get the most out of them.

Preset method

Return to the original image before changes (unless you were wise enough to create a Virtual Copy of it), and now we are going to emulate the effect we created with traditional tools, only we will be using our set of Sleeklens presets.

First, I am going to apply a ColorWarm preset for approximating the White Balance condition we created before.

15_graphics_lightroom

Then apply a Contrast preset in order to bring life to the image.

16_graphics_lightroom

Use the AddClarity preset to bring more detail to the picture. At this point, the image will look very similar to the image we were working on before, if not better, and this in just a few seconds.

17_graphics_lightroom

Finally, add the AddVignette preset as this always look quite appealing.

18_graphics_lightroom

With the Before/After shot we can compare the results.

19_graphics_lightroom

As you can see, unlike Photoshop there are no secret tricks inside Lightroom. It just takes a lot of practice and a good library of Presets in order to be able to create fantastic effects. This also makes Lightroom such a stunning software, as it constantly encourages users to keep improving their skills in order to achieve advanced adjustments with their pictures.

So I will ask you: what are you waiting for? Now is the time to ace Lightroom and become a better photographer by taking your pictures to the next level.