Tag: nature

Beginner’s guide to long exposure nature photography

Long exposure photography

is a technique that makes slow-moving elements (such as waves or the light trail of cars) appear in the photo mist like, blurry or elongated, while still, objects remain sharp and defined. The key factors for achieving this effect are low shutter speed and having the camera extremely stable. Using long exposure photography you can give a totally new dimension to your nature photos. I think you will love this technique and the photos you will achieve by using it. In today’s article, we will show you how.
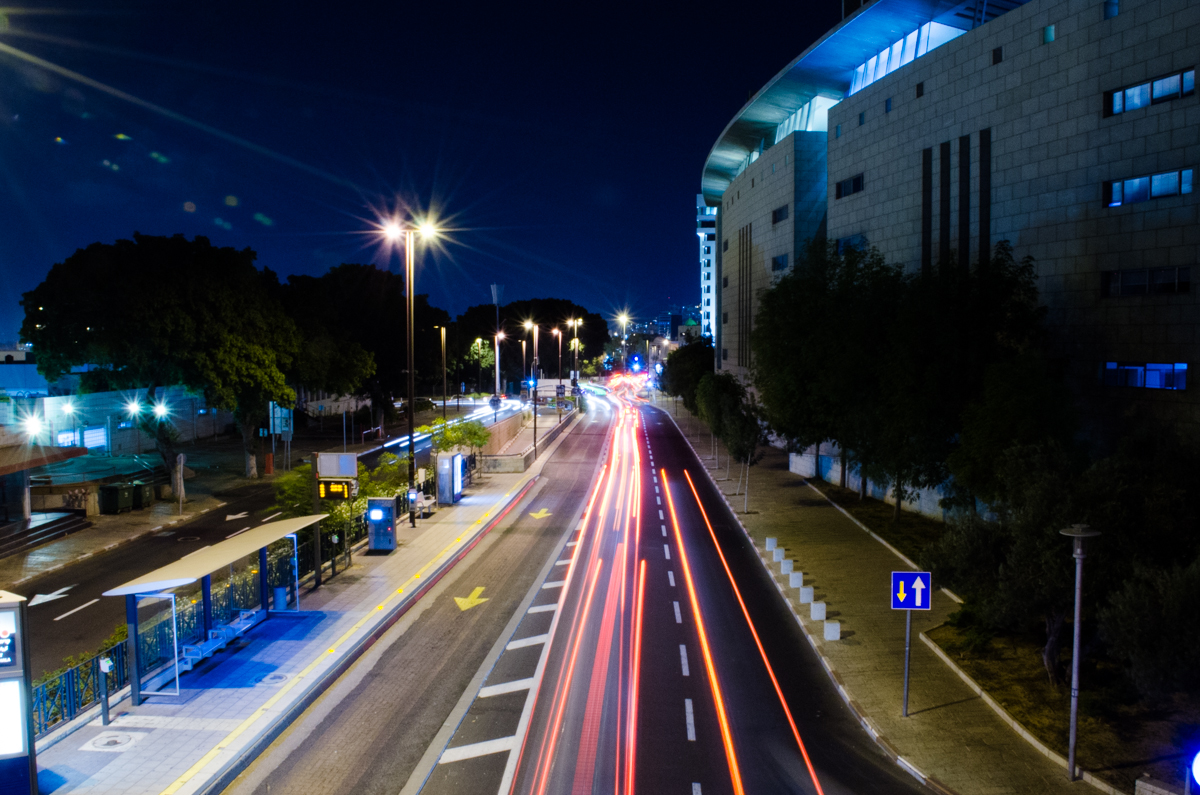
Long exposure trails
This photo was taken at night using long exposure. The moving cars were too fast to be captured by the camera, but their bright lights were captured as light trails, giving a nice effect to the image.

#1. Use long exposure photography when you have moving elements in the frame

The effects achieved by long exposure are created because the moving object is captured by the camera many times during the time the shutter is open. We can achieve different effects depending on the amount of light the object is giving and its manner of movement, For example, a passing car at night is giving off light from its headlights and is moving relatively fast in a specific direction, so the effect we get is that we see the headlights as streaks of light outlining the path of the car the car drove through. On the other hand, waves, which do not give off the light, move back and forth on the shore and so they would make the water at the beach look like mist or a thick fog.
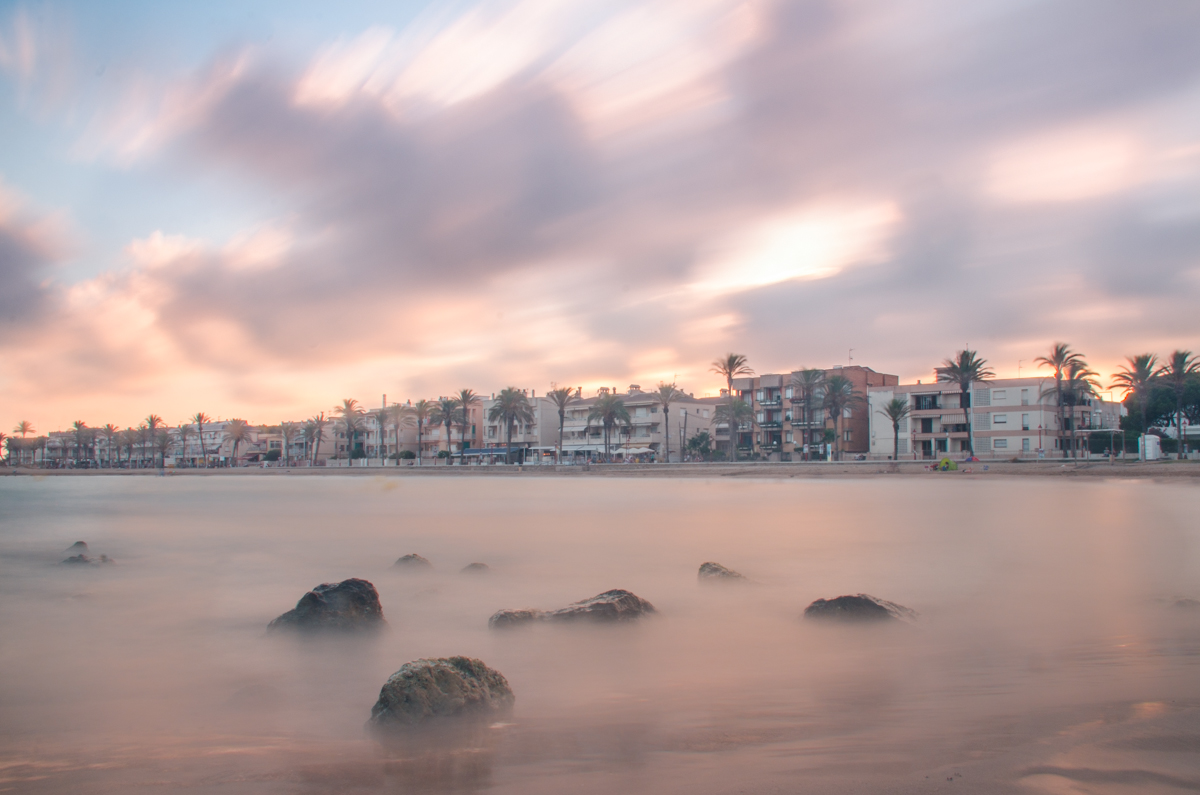
Long exposure_Clouds and water
In this photo, both the water and the sky were moving, but the buildings were static.

#2. To get a well-balanced image, add static elements in your composition

If everything in the frame is moving, you can end up producing photos with a dizzying effect. Unless you want this effect for creative purposes, I recommend you to include in the composition of the image at least one static element that will provide the viewers a point to rest their eyes. The contrast can also enhance the effect and make the image more balanced. A static object can be a rock, a tree, a house, a path… anything that does not move when you are pressing the shutter.
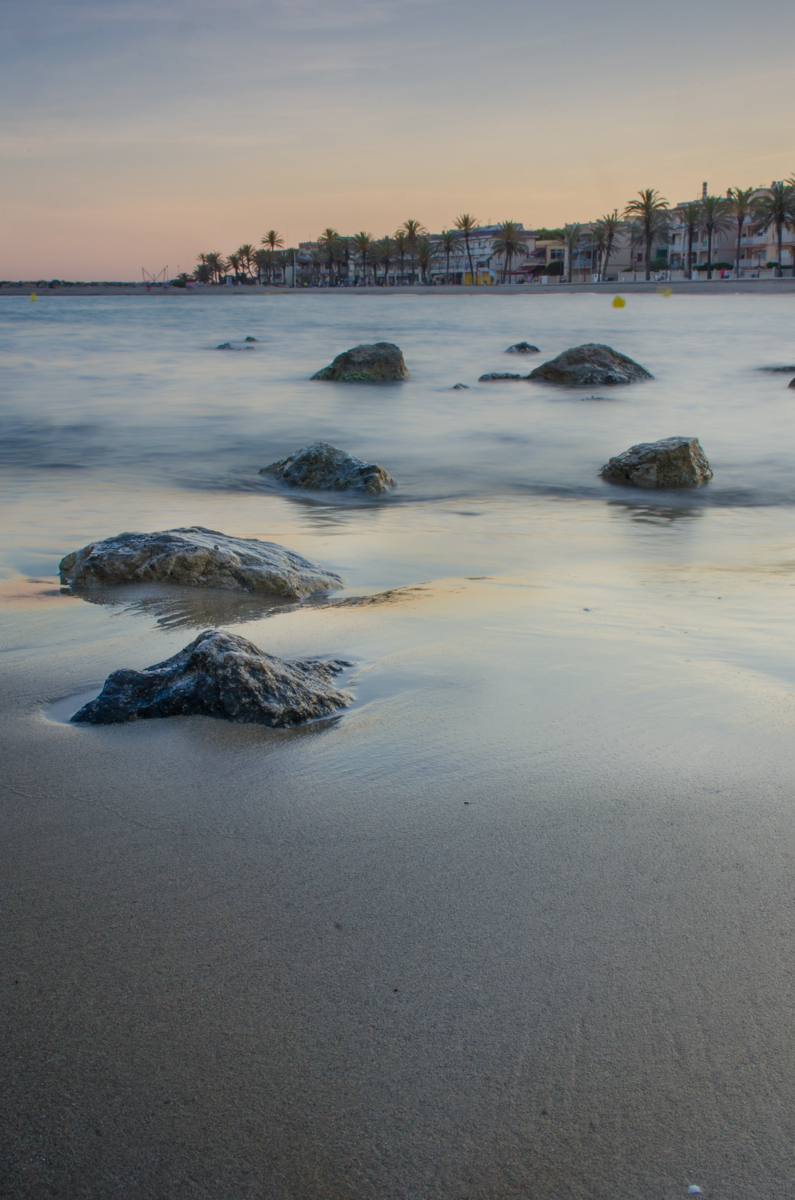
Long exposure_ Rocks and water
The combination of the static rocks and the buildings and the movement of the waves create a balance in this photo.

#3. You will need a tripod to avoid camera shake

As you will be shooting with low shutter speed, you will need to stabilize your camera somehow. One of the best option is to use a tripod. There are a lot of tripod models in the market. I recommend you to get a stable one which will fit your budget.

The tripod by itself won´t give you 100% stability. If you have a lens with image stabilization (also known as vibration reduction), it will be better than you turn it off when you have the camera on the tripod.  I know this last tip might seem contradictory, but these stabilization systems are meant for hand-holding situations and if you are using a tripod, they might cause shaking instead. Another tip is to avoid touching the camera or tripod while you take the photo. I recommend using the timer delay options of your camera to avoid the shaking due to the pressing of the shutter release. You can also use a remote control and avoid touching the camera altogether.

#4. Use filters to avoid overexposure

Nature photography many times takes place during daylight. If you want to take a long exposure photo, the first problem you will face is the overexposure. Sometimes even with the aperture closed as much as it can be and the ISO set to the lowest value, you might still have burnt photos. How to solve this problem? By using filters to reduce the light that gets into your camera.
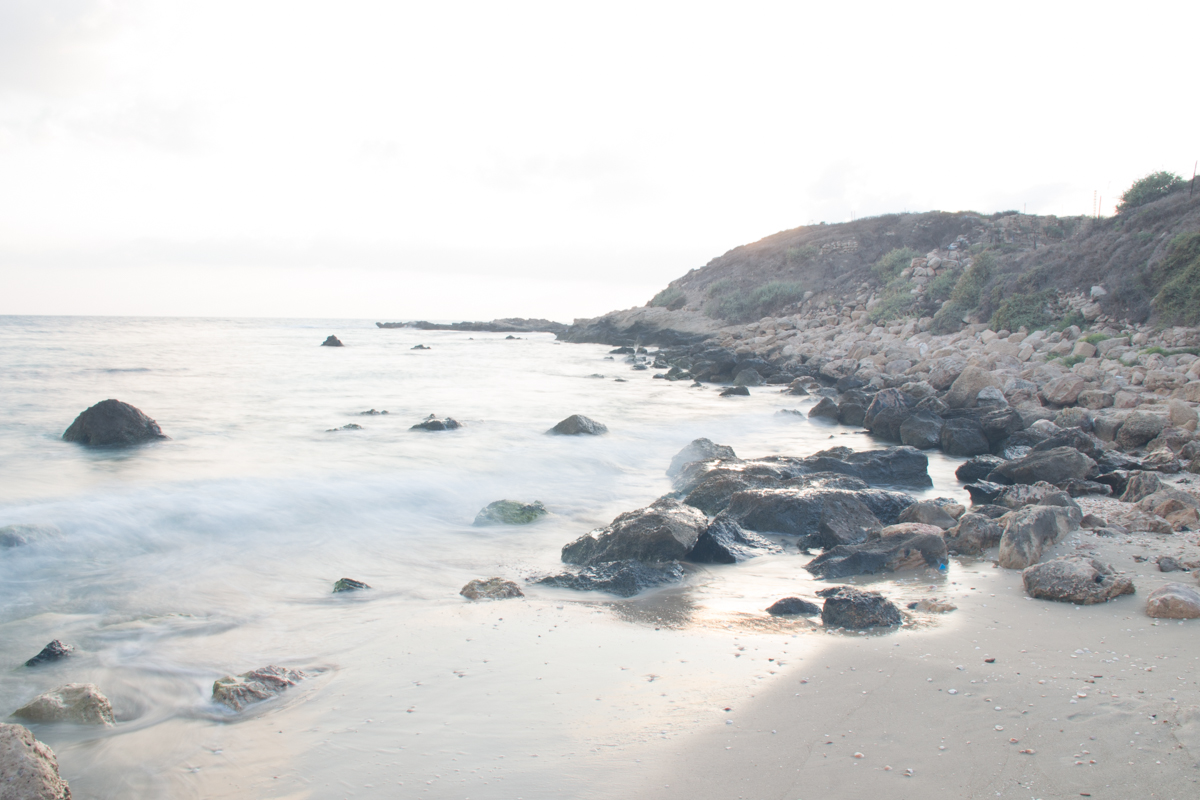
Long exposure_ Overexposed

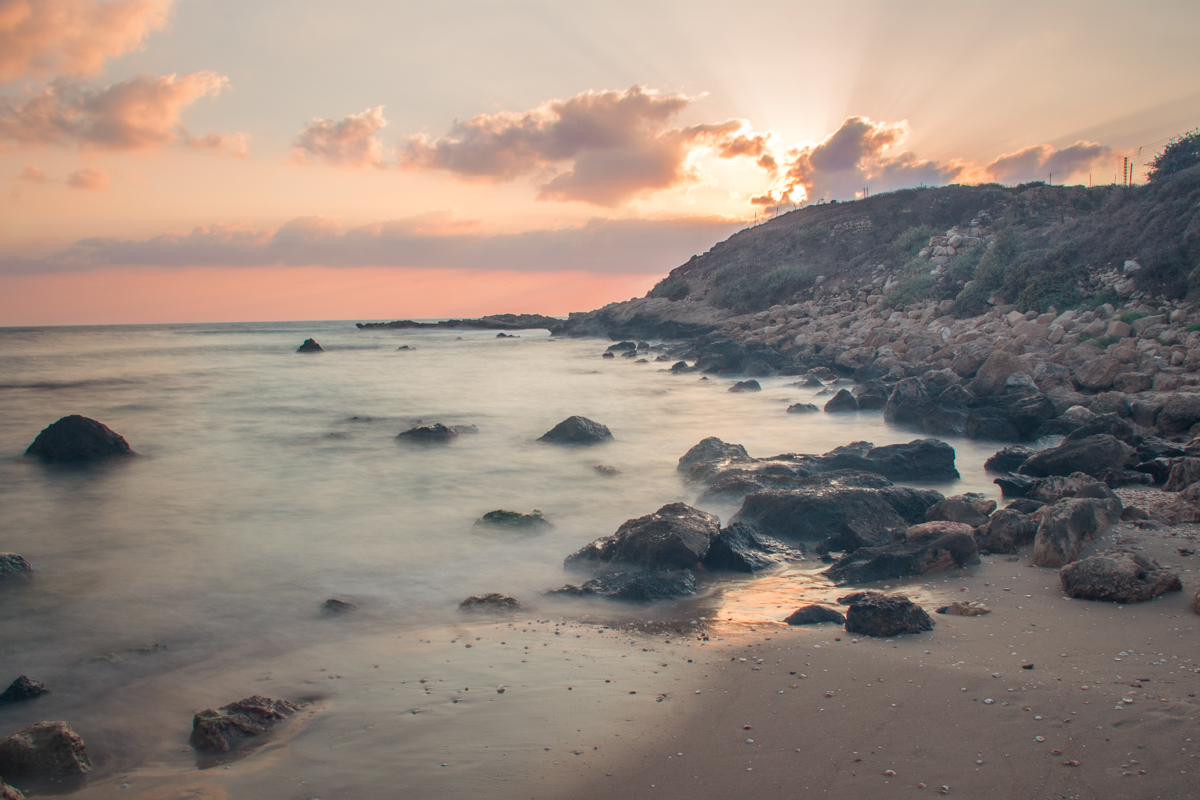
Long exposure_Beach sunset
The upper long exposure photo was taken without using any filter. As the sun was bright at that moment and the shutter speed was low, the image ended up being overexposed (burnt). The photo below was taken using an ND filter. As it stops light from coming into the sensor of the camera, the resulting photo is better exposed.

There are many different filters, but two types are especially interesting for long exposure photography: Neutral density (ND) and graduated filters. The first one is basically a uniform dark filter. There are different dark intensities. The more intense is the light in your frame, the darker your filter should be. The darkness of a filter is measured by the stops of light that they don´t get into your camera. The highest its stop number, the darker the filter is. Graduated filters are a variation of the ND filters. Their darkness is not uniform but increases progressively in a gradient.
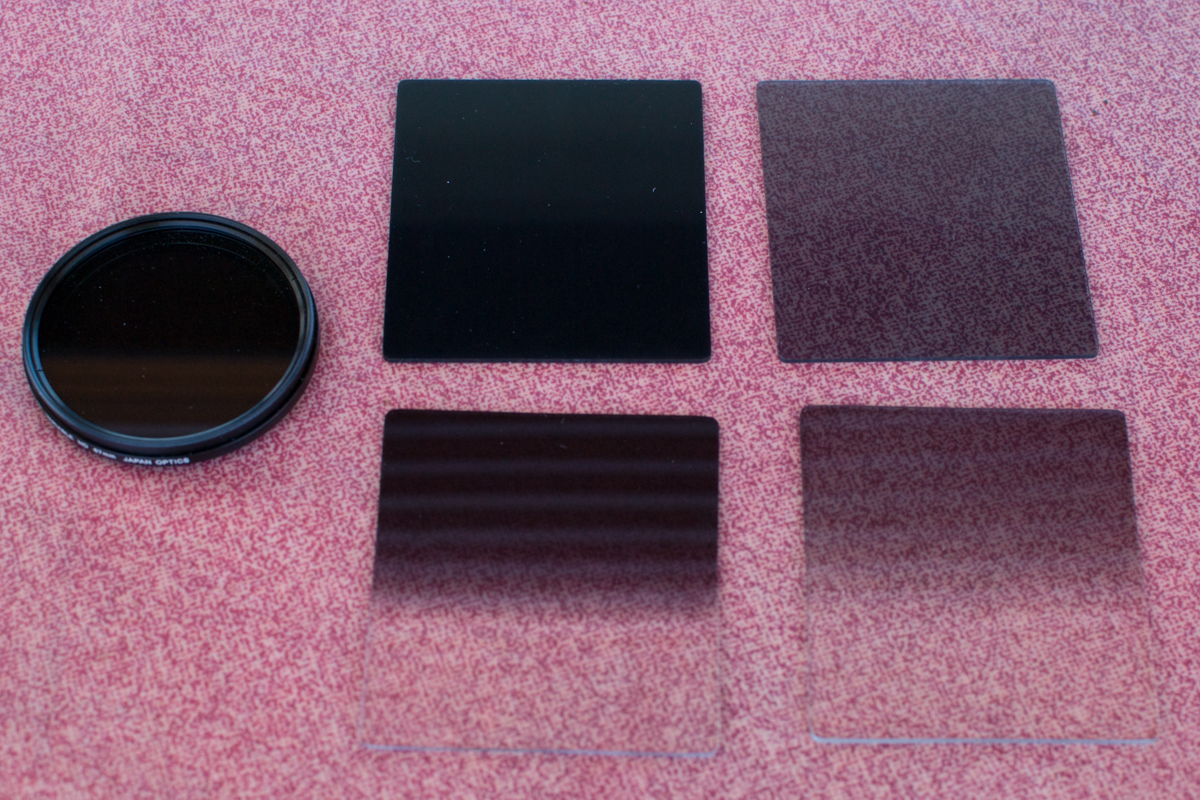
Filters ND for long exposure
Filters can come in various shapes and types. Here you can see the left a circular ND filter, To the right at the top are 2 ND filters with 2 different stops (degree of light they can block) and in the bottom 2 graduated ND filters also with different stops.


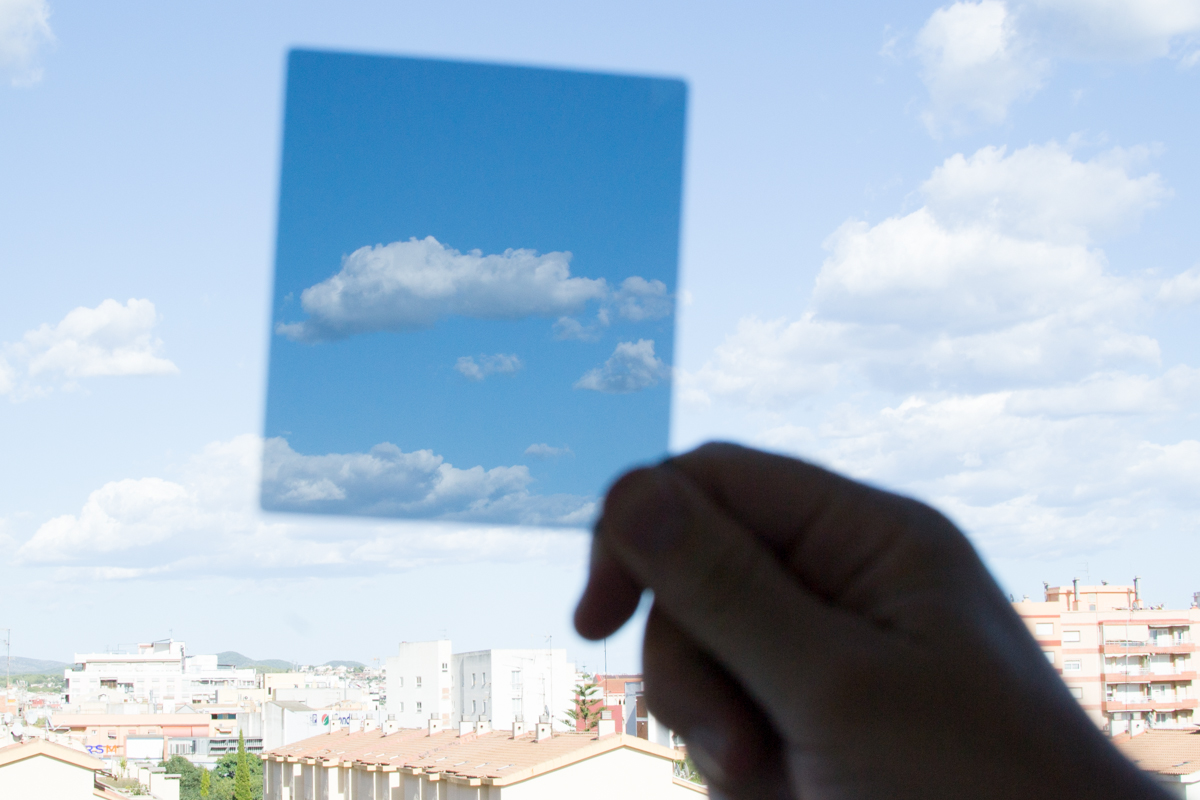
ND filter example
The effect of ND filters is blocking light. As you can see in this overexposed photo., the area covered by the filter was corrected by it.

You can use one filter or stack several ones on top of the other. For example, you can use several rectangular filters in the filter holder or you can use one round filter on your lens and then add one or more rectangular filters using a filter holder.
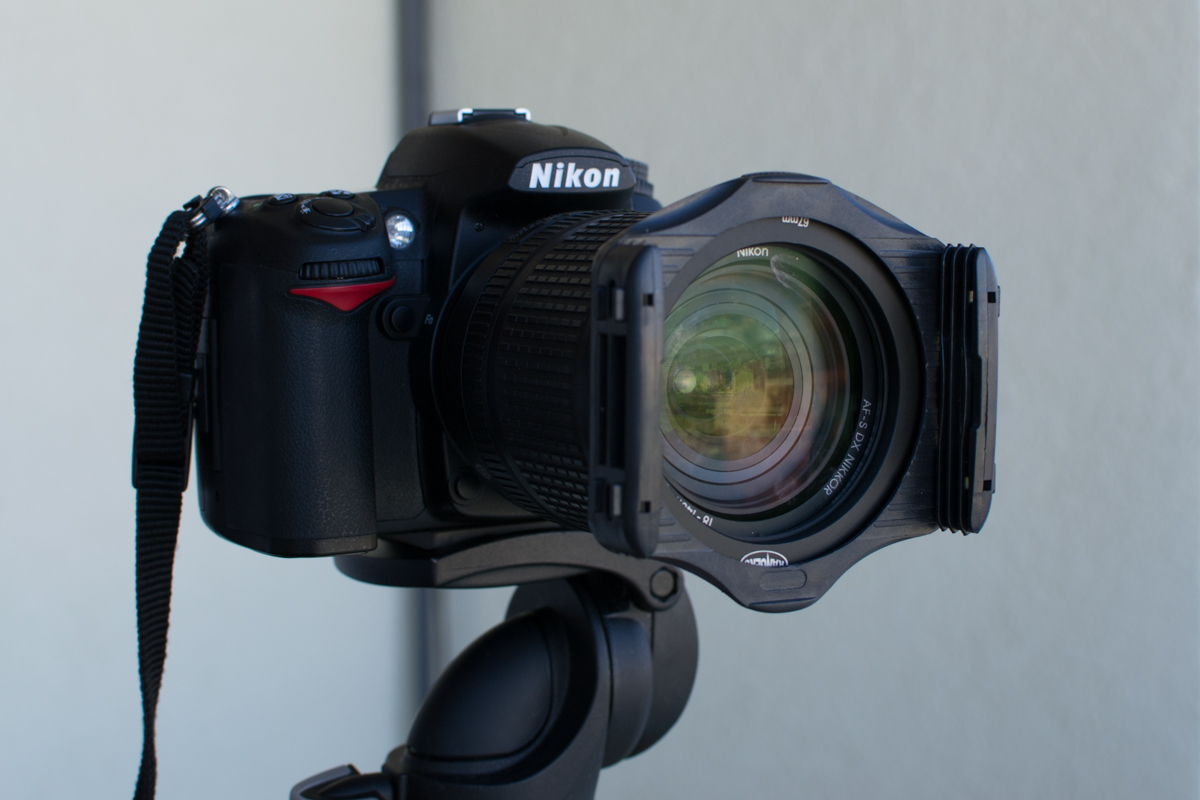
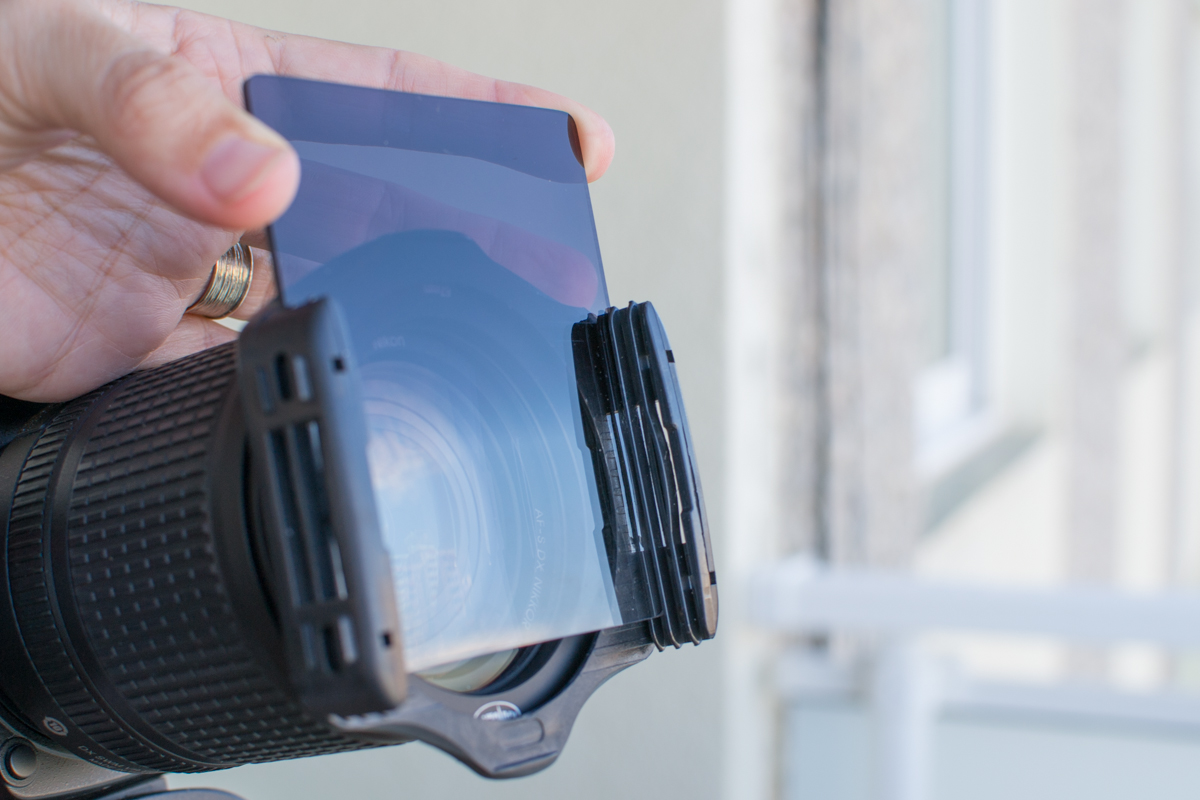
Filter holder for long exposure
Rectangular filters are usually placed in a filter holder mounted on the lens.
How to place a filter for long exposure
The filter holders have slots into which the filters can be fitted easily.

Once in the field, I set the camera to the shutter speed I want in order to get the desired effect. Then I set the ISO to 100 and the Aperture that will give me the Depth of Field I want. I usually go with Apertures 8.0 or higher. To decide the filter or filters I need, I have to admit I do it by trial and error. I believe there is a formula, but when I am in the field, trying filters comes to me much more naturally. I start with the least dark filters and I progressively move to darker ones.
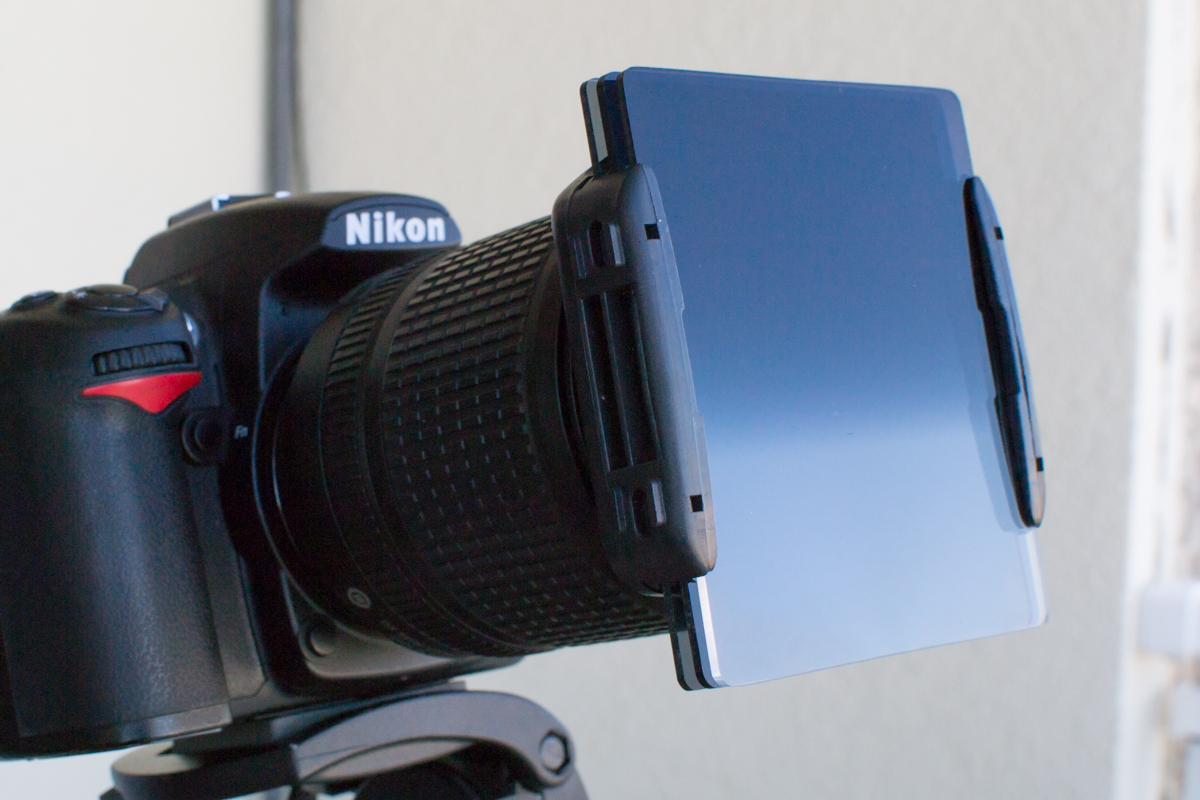
More than one filter long exposure
Filter holders have two or three slots that enable you to stack several filters on it.

#5. You might need to crop your image a little in order to delete the filters borders

When you use filters, and especially when you use several filters stacked, black halos or shadows it might appear in the corners of the photo. This is more evident if you are using a wide-angle lens or low numbers of mm. This can be solved easily. Just plan ahead and take a photo knowing that you will need to crop it afterward. I recommend you to how a look to Navanee Viswa´s tutorial to learn how to crop a photo using Lightroom.
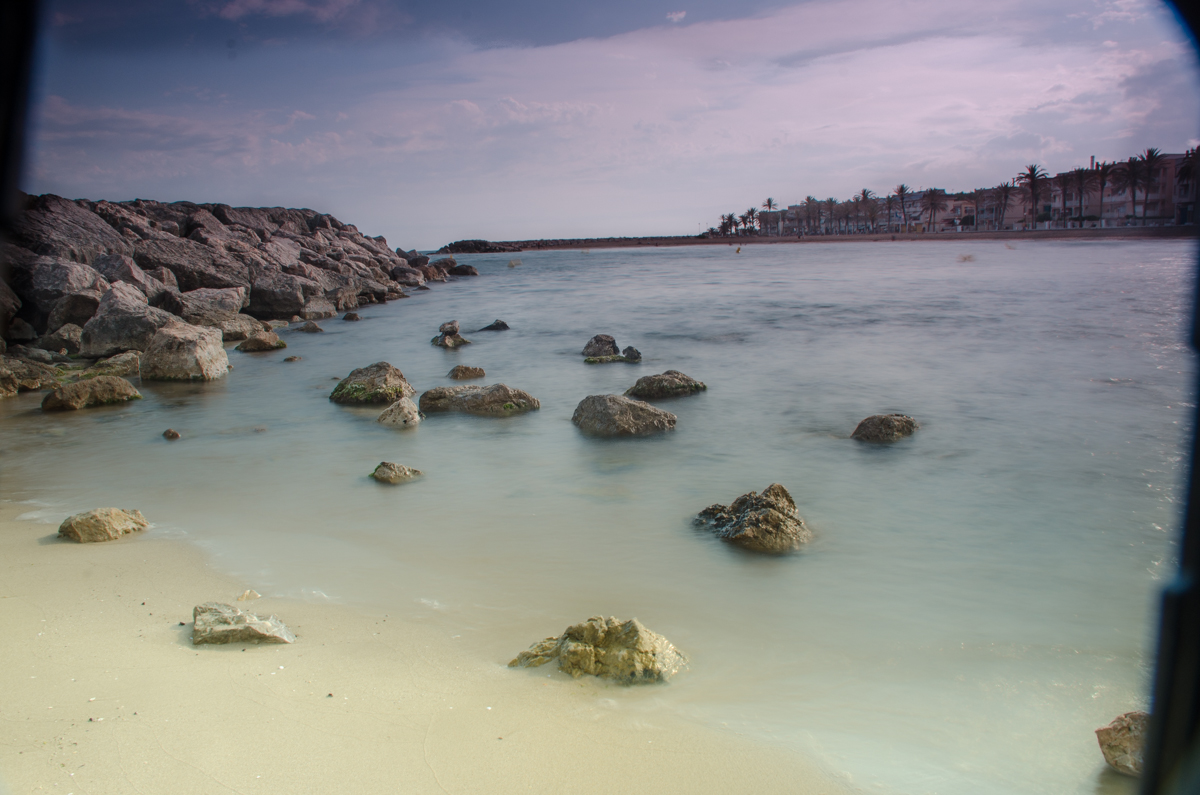
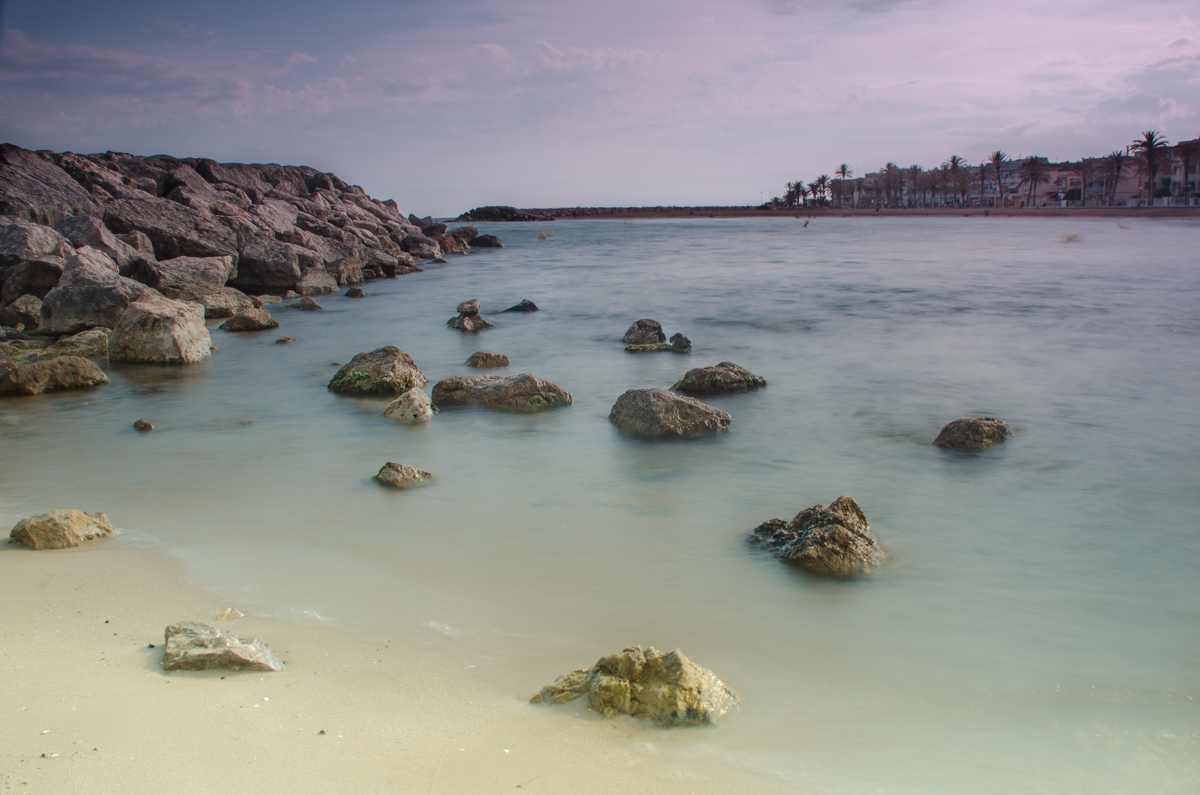
Cubelles long exposure

Cropping long exposure
In the upper image, you can see black areas that are in fact the filter holder. The lower photo is the same one, after cropping it a little using Lightroom.

#6. You might need to deal with some color cast correction

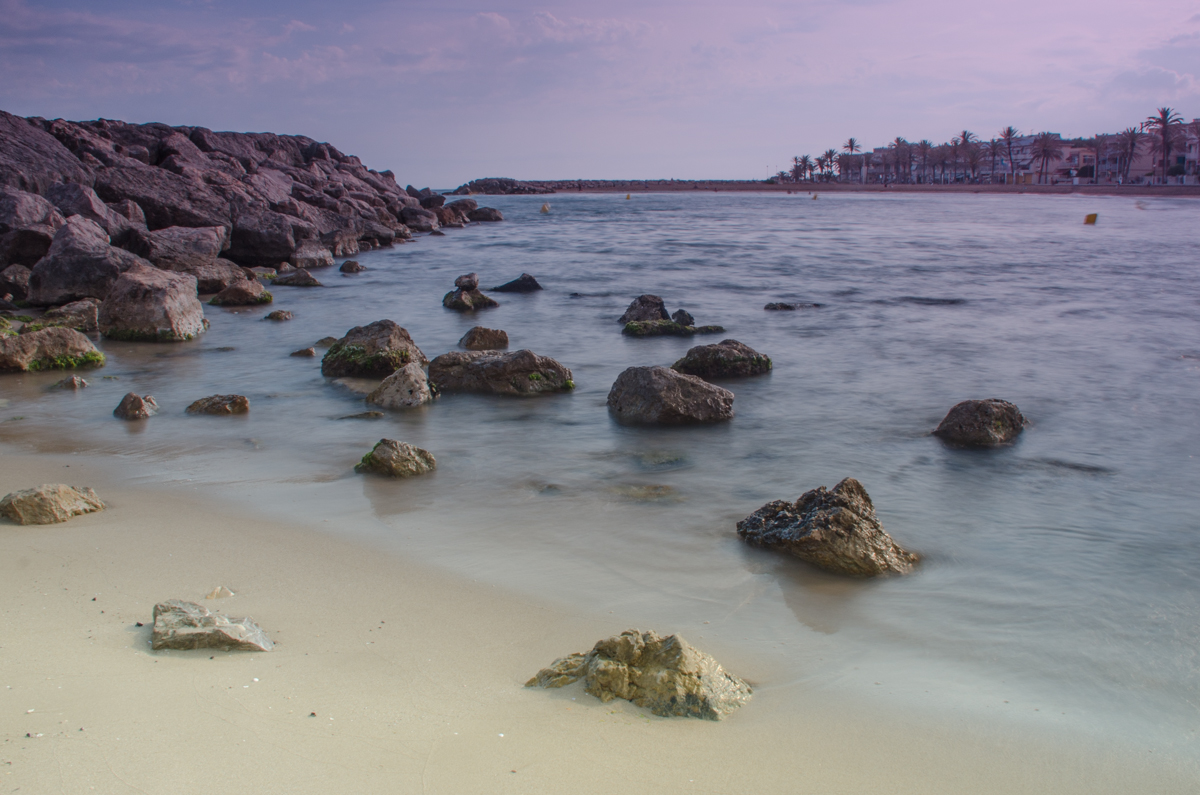
Depending on the quality of your filters, they might add a color cast to your photo.
Color cast long exposure
This image has a purple tint due to the filter I used to take it. You can find better quality filters that don’t produce any color cast, but they are usually more expensive.

I am quite new to long exposure photography. When I decided to give it a try, I was not sure about spending a lot of money on my first filters. I got a filter kit that included a wide variety of filters in a really good price. Of course, they are not of the highest quality, but they still allowed me to experiment and discover that I do like this type of photography. As I use them quite a lot, I can think about investing in better ones in the future. For now, however, I stay with my cheap filters and I solve the color cast issue using Lightroom.
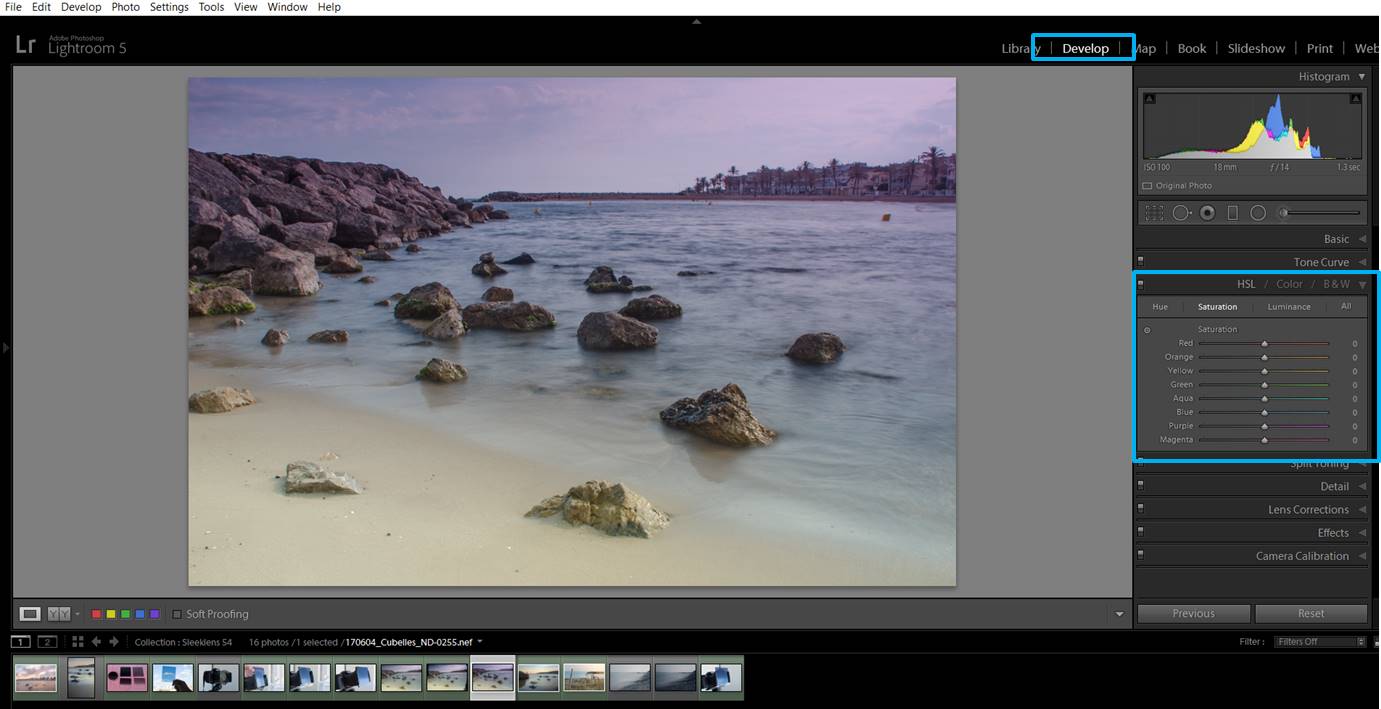
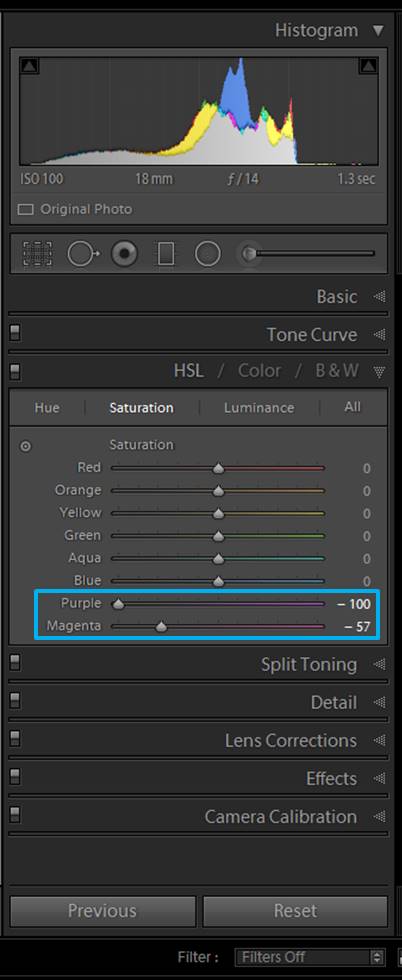
Long exposure edition
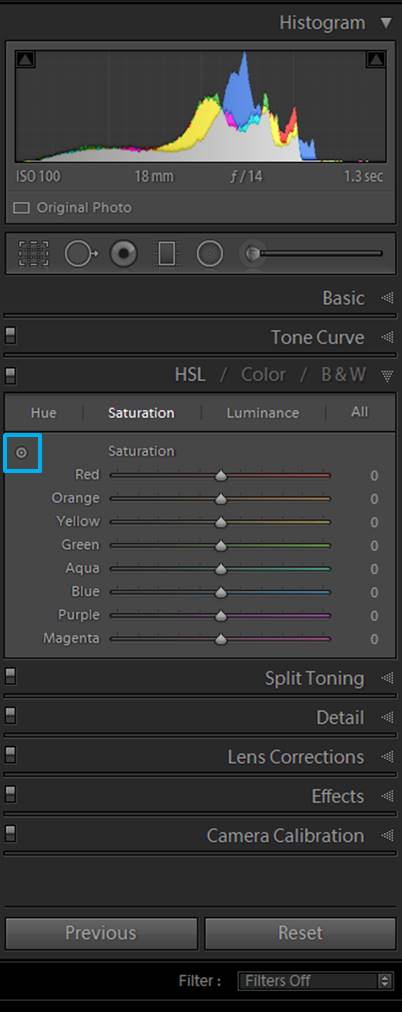
In the Develop module, look for the HSL/Color/B&W section and select Saturation.


Long exposure edition
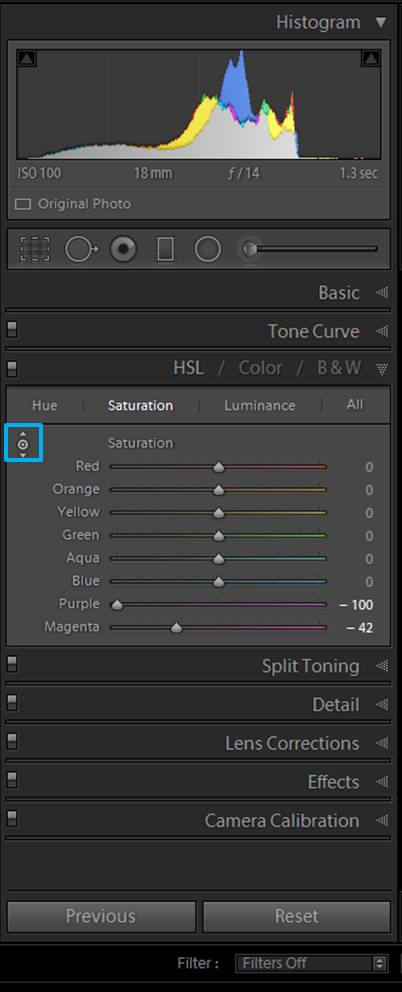
Play around with the sliders of the colors that are giving you the color cast. In my case, I put down the purple and the magenta.


Long exposure edition
If you don’t like playing around with the sliders, there is another way you can correct the color cast. Press in the little icon marked with a blue rectangle.


Long exposure edition
This icon changed shape. This shape is also in your cursor.


Long exposure edition
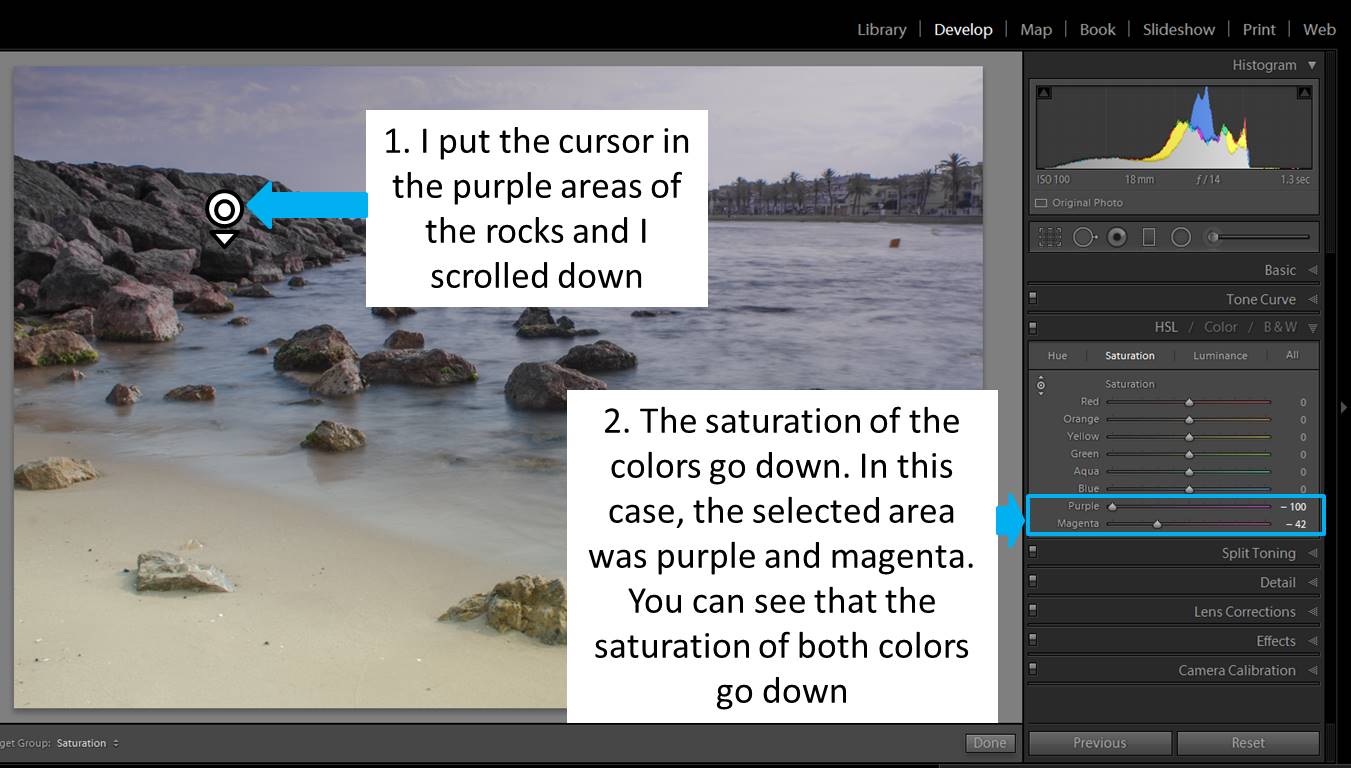
Click in the area of the photo you want to correct and scroll down (because you want to decrease the color saturation. To increase it, you need to scroll up).


Cropping long exposure
Here you have the final corrected image!

If you prefer Photoshop, you can also use it to remove the color cast. Julian H explains how to do it in his article “How to remove color cast using Photoshop”.

#7. Keep your filters clean if you don’t want to spend a lot of time removing spots

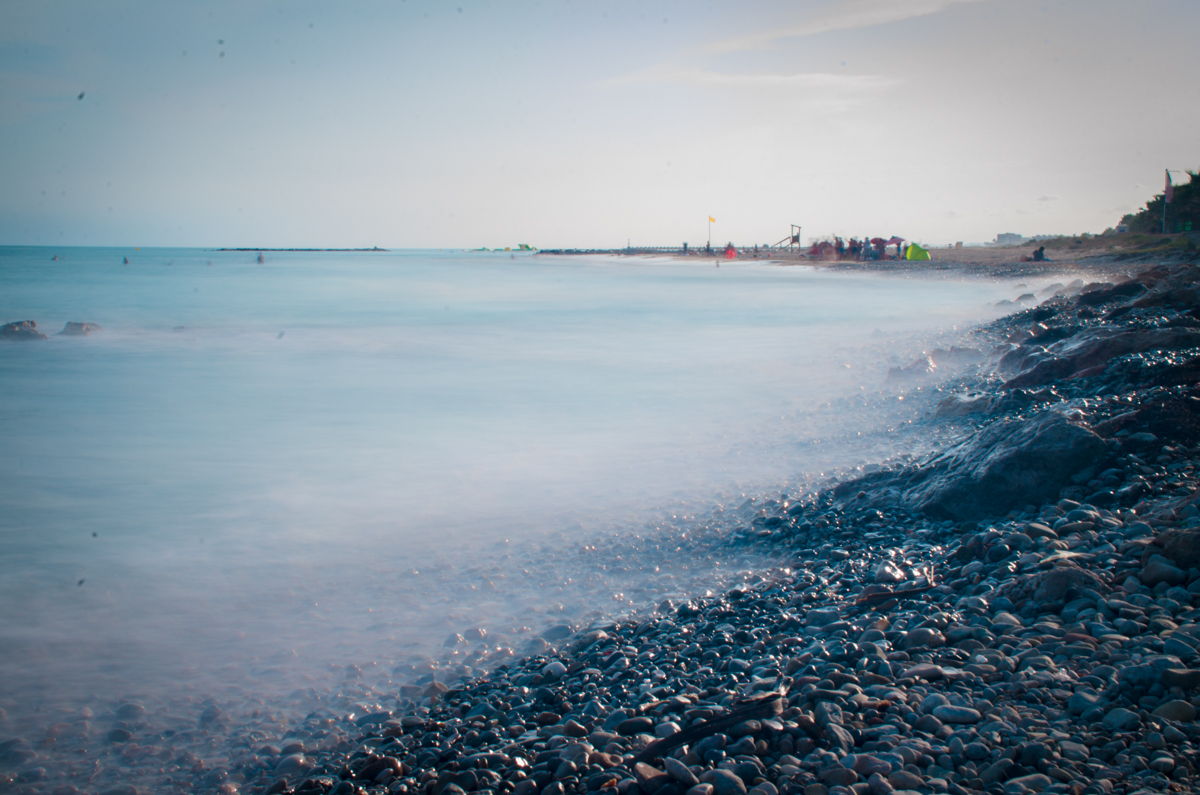
Your filters might seem clean,but when you see the photo on your computer you might discover it is full of spots of dust or drops…
Dust in filter long exposure
That day I didn’t clean the filters and I ended up with a lot of ugly spots in my photos.

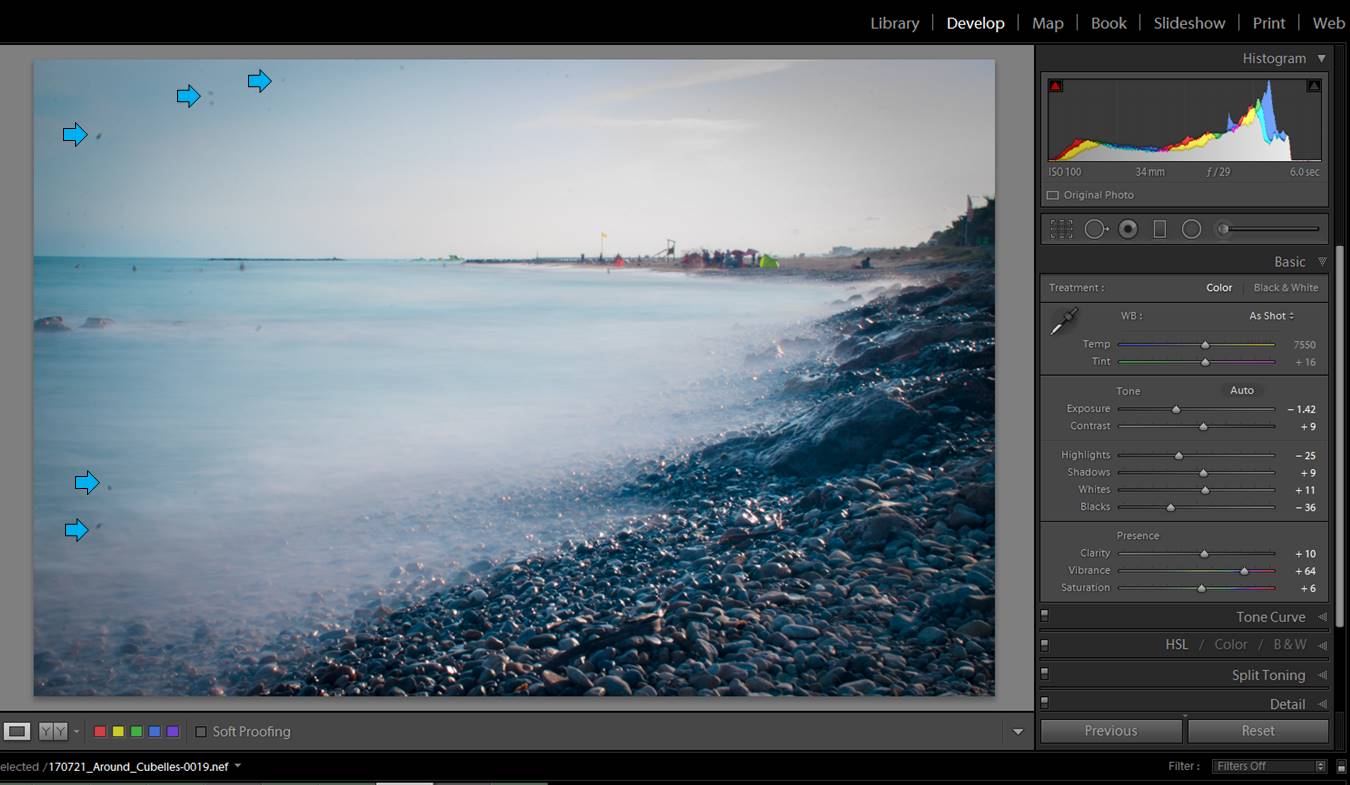
I remove them with Lightroom using the spot removal tool.
Long exposure edition
There are few dust spots that are quite visible in this photo.


Long exposure edition
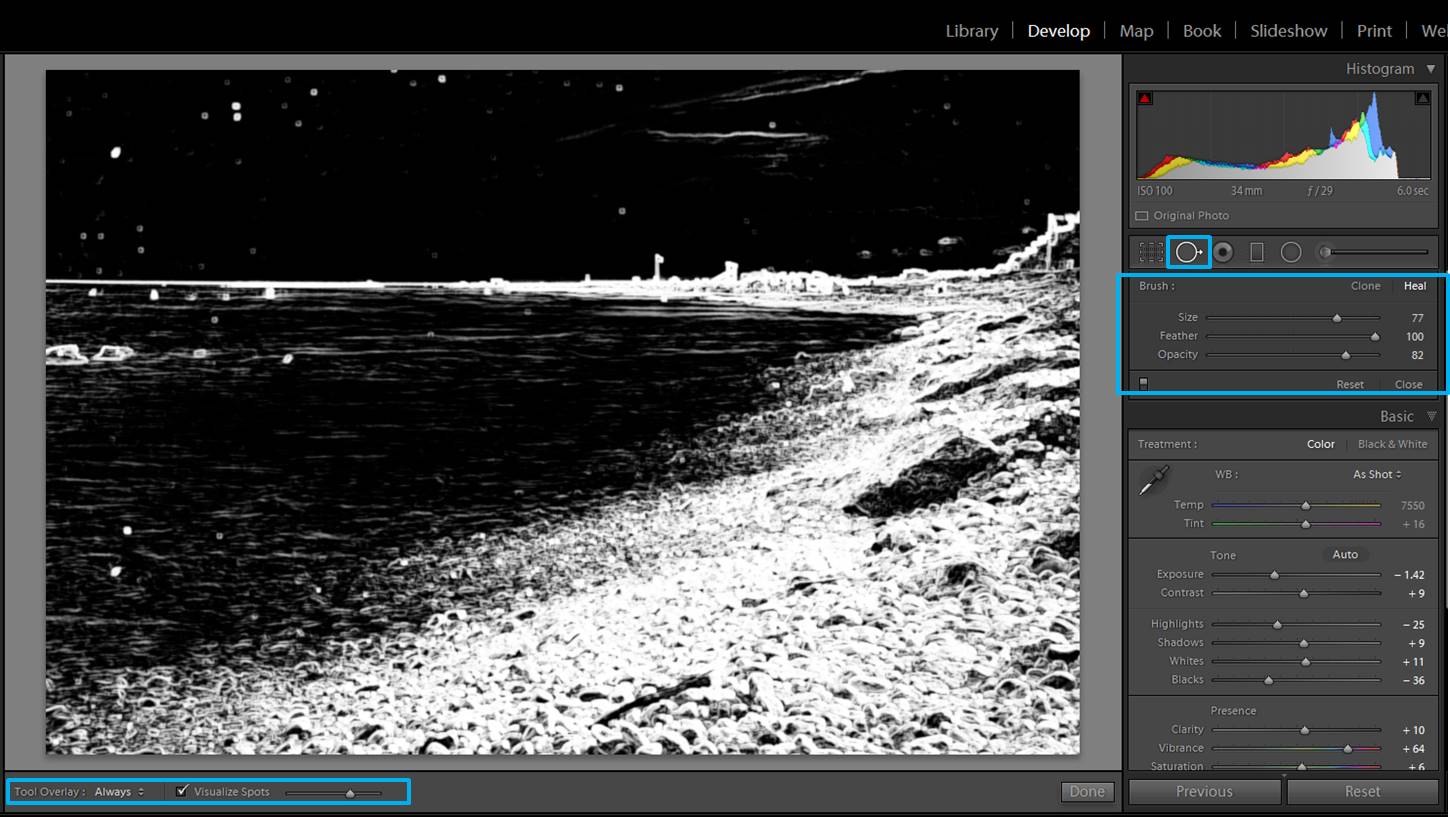
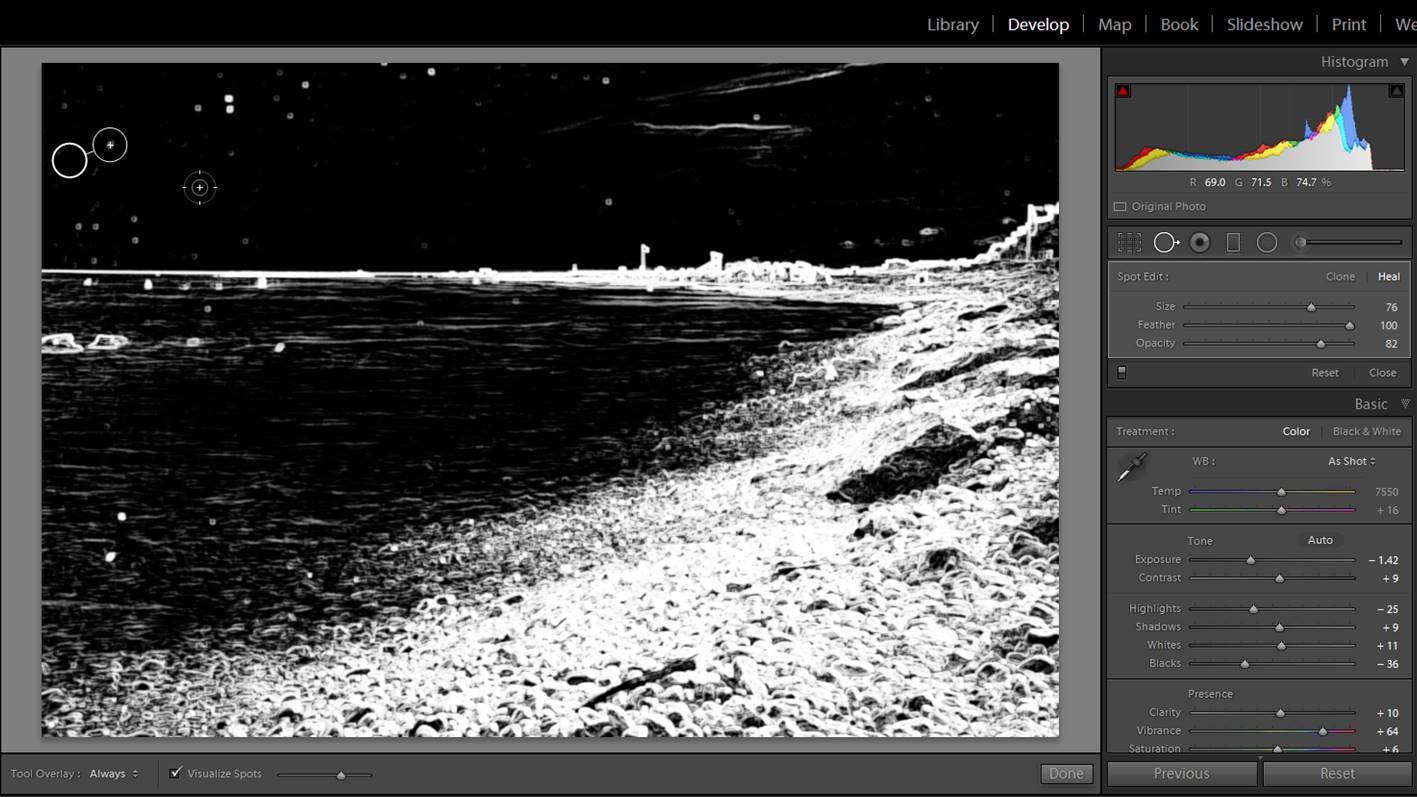
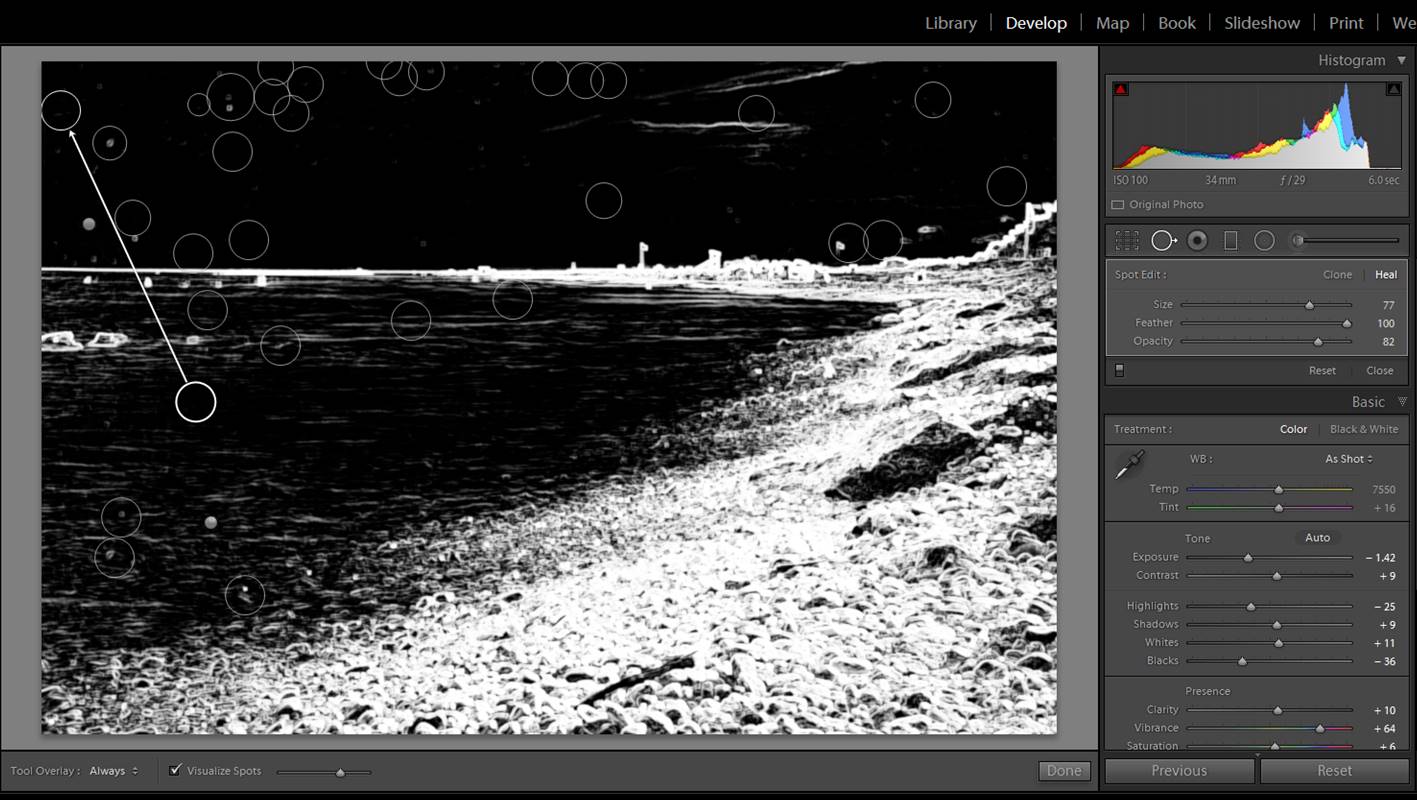
But there is a way to see the dust spots even better! Select the Spot removal tool (blue square), click on “Heal” and in the lower part of the screen click on “Visualize Spots”. You will see your photo in black with white contours. The dust spots are the little round white spots. There are a lot in this photo!


Long exposure edition
With the Spot Removal Tool, select one dust spot. You will see that Lightroom selects an area from which it is copying the content. Repeat for each dust spot.

Believe me, if you have a lot of them, it can get really tedious. Look how crazy it can get!:
Long exposure edition

I have learn that it is better to keep a cleaning cloth with your filters and spend some time cleaning them before using (even when they seem quite clean). A minute of cleaning in the field could save you hours later (depending on how many photos you have) in front of the computer.
Long exposure cleaned from dust
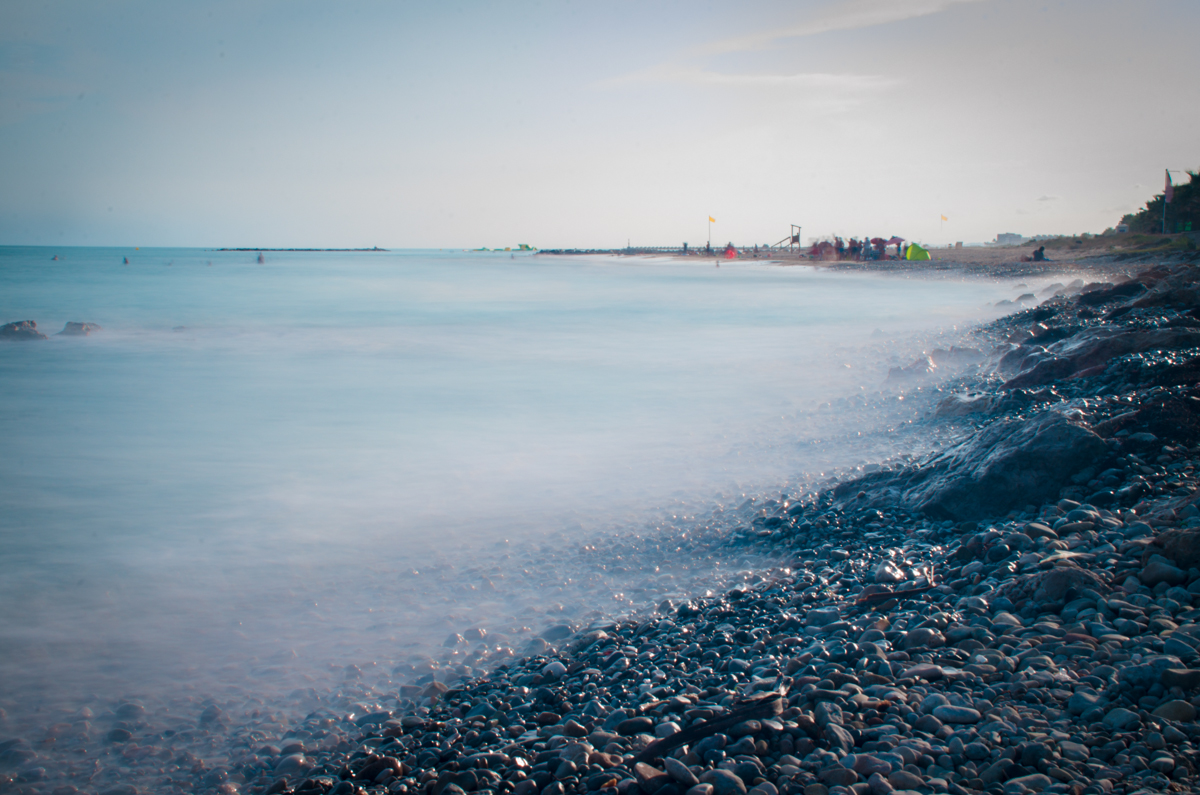
Here the dust-free version of the photo.

#8.Take your time and enjoy nature

Long exposure photography is not fast photography. You need to set your tripod, choose filters (clean them), experiment different settings… I recommend you to take it as an opportunity to relax and enjoy nature. Sit down, bring something nice to eat and/or drink and have fun!

I hope you liked this article, please write me any questions or comments and have a happy shooting!

 

How to take emotional and meaningful self-portraits

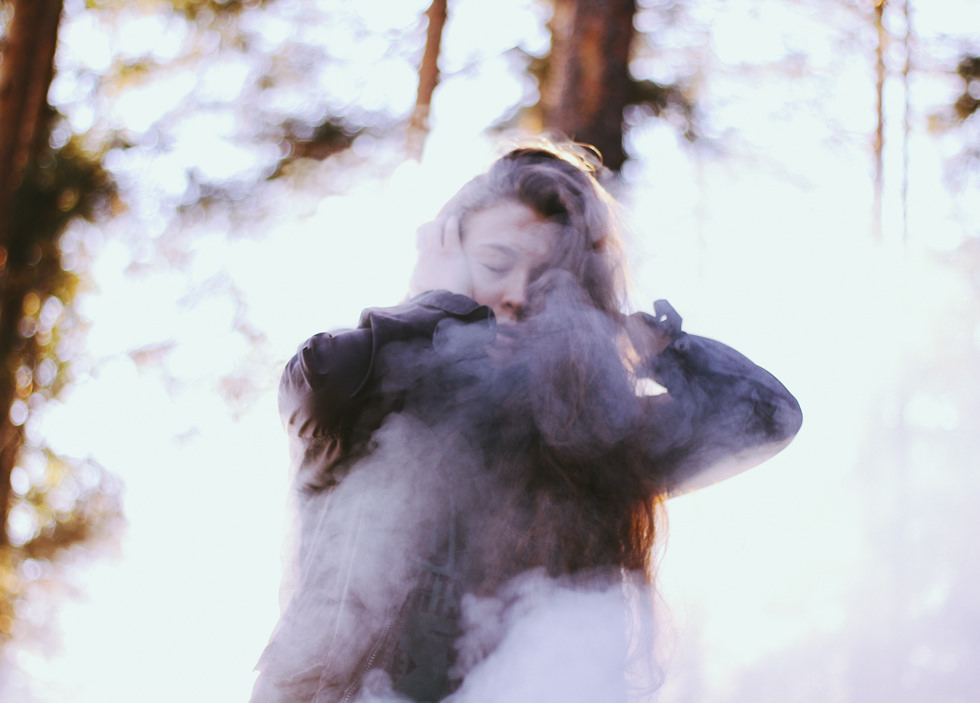
In today’s technologically advanced world, selfies exist everywhere. With the desire to take a photo of oneself comes the desire to look visually appealing. Subconsciously, many of us seek to look acceptable because we wish to feel accepted and welcome. I myself can relate to this desire, one that has often turned into an obstacle in my creative endeavors. Though this need, which is often desperate, makes many people feel like outcasts because of their insecurities, it mustn’t be chastised. A need for acceptance through photos of yourself doesn’t mean you should ditch the mirrors in your home, abandon the art of self-portraiture, and never look at yourself again. Rather than neglecting your appearance, embrace it in an honest way, finding inspiration in the things you often avoid thinking about. Self-portraiture, in its rawest form, is both honest and gentle, revealing the photographer’s strengths and weaknesses simultaneously. Here’s are tips on how to add more emotions and depth to your self-portraits:

Understand and embrace yourself

It can be very challenging to pick out an emotion and label it accurately. Instead of trying to chase and organize your feelings, remember a movie that really touched you. The movie may not have directly explained the actors’ troubles or joys, but what it did was present you with scenes which flipped a switch in your heart. Photography, like any meaningful film, possesses a similar kind of power. Use this to your creative advantage. Read books, watch films, and listen to stories. As you do these things, your mind will get filled with fascinating ideas and the knowledge that you’re not alone, no matter strange your emotions might seem to you. Storytelling will give you the necessary confidence to take self-portraits, and the heart of a creature belonging to someone else will fill you with inspiration. Watching an incredible film right before a shoot will be especially helpful, as your inspiration will eagerly wait to be used by you.

//

Use nature and objects to intensify your emotions

Weather, colors, movements, and light will all help you reflect your emotions better.
Though facial expressions can often speak for themselves, their effect can be enhanced using things in your home or out in nature. Weather, for instance, can be used either as a dramatic contrast or a direct reflection of the emotion you wish to convey. A self-portrait of a dancing silhouette against a daunting, stormy background has the power to express passion, perseverance, or an inner struggle. No matter how moody or sunny it is in your area, use it to your advantage – if the weather doesn’t match your desired mood, challenge yourself by finding ways to use the current conditions to your artistic advantage.

Other elements that can further highlight an emotion are colors, movements, and light. Colors are especially useful in the editing process, where they can be altered even more to perfectly elevate the image’s atmosphere. Movement can be used to express things like haste, impatience, longing, and fear; a portrait of a person looking frightened in a room filled with falling feathers could express the subject’s fear of moving forward in life. To complement all of these elements, light must be used wisely. Experiment with it as much as you can, even on a daily basis – soon enough you’ll naturally understand what kinds of shadows and highlights would look good in a certain composition. Once you befriend light, things like colors and movements will be bonuses, instead of hindrances, in your work.

//

//

Find yourself in other people

Oftentimes, the people and things we photograph are a direct reflection of ourselves. The famous portrait photographer Richard Avedon once stated, “Sometimes I think all my pictures are just pictures of me.” When we photograph others, we usually capture them in moments we ourselves can relate to. The angles and poses we prefer are often very much our own; even the editing process is a quietly personal one.

Since self-portraiture isn’t all about human faces, take photographs of the people or things you cherish most. If you do want to include yourself in the image, place a mirror next to your subject(s) to get an interesting reflection of yourself. Whatever you do, find details, objects, and colors which speak to you and use them during your shoot. Though the results may not necessarily feature you, they’ll contain the very heart of who you are, and that can certainly be considered a self-portrait.

There are countless ways to take photographs of yourself without prioritizing perfection; photography of all types can be celebrated no matter who or what the subject is. Accepting yourself in spite of your insecurities and worries through art will make you an endlessly empathetic individual. Again, this doesn’t mean that your entire portfolio must consist of very raw photographs; what it means is that when you do feel insecure, dare to embrace it, not conceal it.

//
Happy shooting!
Life in the mountains of Cyprus

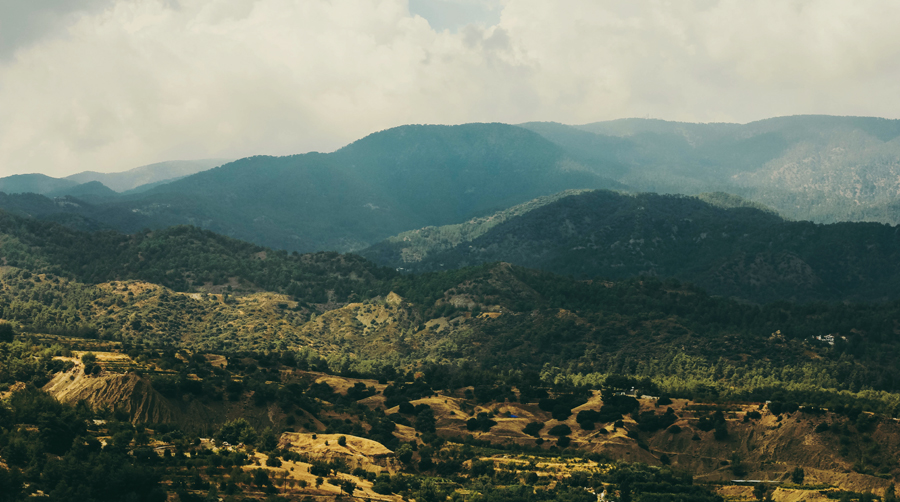
Cyprus – an island neatly located in the Mediterranean Sea – is filled with scrumptious food, fresh air, and a welcoming mountain range known as Troodos. The mountains peacefully reside in the center of the island, distancing themselves enough from surrounding cities to be considered a land of their own. Throughout balmy summer months, this distance serves as a haven of sorts, providing desperate tourists with fresh springs, pleasant hiking trails, and welcoming cafés. This combination of delights creates an indescribable calmness in the heart.

//

In addition to being picturesque, the mountain range is barely inhabited. More often than not, it’s very possible to find secret, harmless corners after hours of hiking. Picnic spots are scattered all over the mountains; simple yet charming benches and tables wait for friendly visitors each day. The intimacy of such hidden spots makes its discoverers feel very welcome, giving them the idea that the place has been patiently waiting just for them. Such places are usually accompanied by an incredible view of the surrounding area. Since intimidating constructions aren’t a common sight in the mountains of Cyprus, stunning views are rarely blocked.

//

//

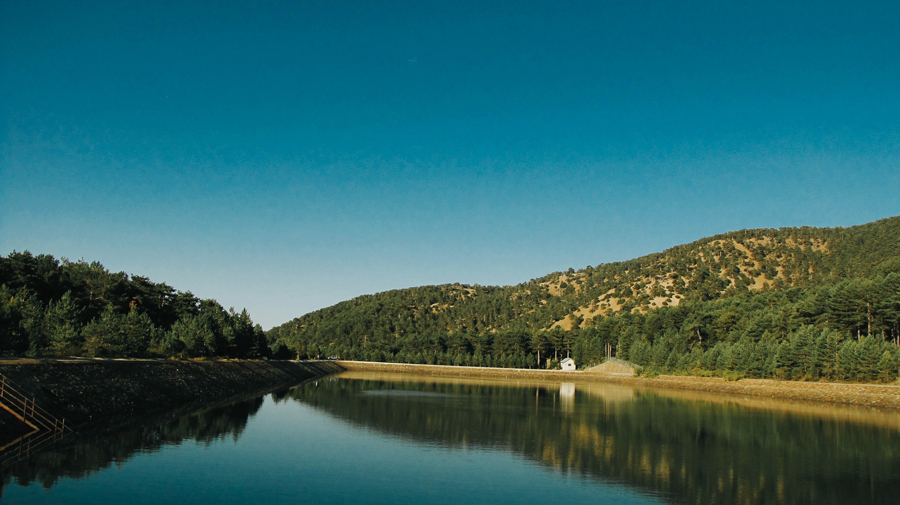
Amongst the many hidden corners smartly placed in the mountains, the calmest one is a dam. To reach it, one has to take a sudden left turn after driving for around an hour from Limassol, Cyprus’ southern city. Though the road is slightly precarious and very muddy, the destination erases any discomfort that may have emerged during the journey. The dam, a deep blue on cheerful days, is a pleasant introduction to the view that is to come. Walking past it will reveal an almost untouched forest filled with wooden picnic spots. Here, photographers can rest and take incredible pictures, an experience which won’t leave them exhausted and hungry. The picnic spots are both photogenic and sturdy, allowing for great shots and pleasant meals.

The forest itself is fairly large and inviting, a place ideal for group hikes. Reaching the top of the hill will provide you with an incredible view of the dam and the mountains beyond. For those who own wide-angle lenses and love panoramas, this view is guaranteed to be a portfolio-filling treasure. Those who have other kinds of cameras and lenses will also benefit greatly from this location. The beauty of Cyprus’ mountains lies in the consistency of nature; no matter where you go, you can expect an encounter with a breathtaking place.

//

//

Nature thrives in the mountains. Since winters aren’t harsh (a light sprinkling of snow represents the colder months), everything appears beautifully fresh. It’s not uncommon for an exotic butterfly to land on your finger or for a hedgehog to busily cross the road (don’t worry, they rarely get hurt.) The lack of people provides visitors with a unique opportunity to familiarize themselves with nature in its rawest form. This experience might be particularly fascinating to photographers coming from big cities, though wildlife-loving artists will perhaps benefit from this most.

Those who call the mountains their home have found a way to live in peace with nature. There’s much land that hasn’t been touched in years, though the earth that does get used produces incredibly delectable fruits and vegetables as if it’s grateful for a chance to be productive. All of this can be witnessed during the journey to the mountains; in the summer and spring, one can experience the indescribable beauty of fields filled with watermelons, grapes, and apple trees. Many locals happily welcome curious tourists and share their endless gardens with them. After such a trip, every visitor leaves a local’s home with appetizing fruit.

//

//

If visitors wish, they can either stay at a hotel or sleep in their cars. While the latter might sound unappealing, nothing beats the opportunity to watch a blindingly breathtaking night sky. There are special camping grounds for those who enjoy a deep sense of adventure; visiting these parts before the summer begins will help you enter a completely new world.  Since summers attract an abundance of tourists, the weeks before its beginning are ideal for those who dream of a little more solitude. Paying a few euros will give you access to a night in a peaceful location completely surrounded by nature. In the morning, the adventurous possibilities are unlimited: hiking, eating at a humble little café, searching for mushrooms, and most importantly, taking photos of everything in the process. This, you’ll discover, is the definition of bliss.

Shooting Angles – What to Look to Click?

“You may find that the picture you want to do can only be made from a certain place, and you’re not there, so you have to physically go there. And that participation may spur you on to work harder on the thing, because in the physical change of position you start seeing a whole different relationship.” – Jay Maisel

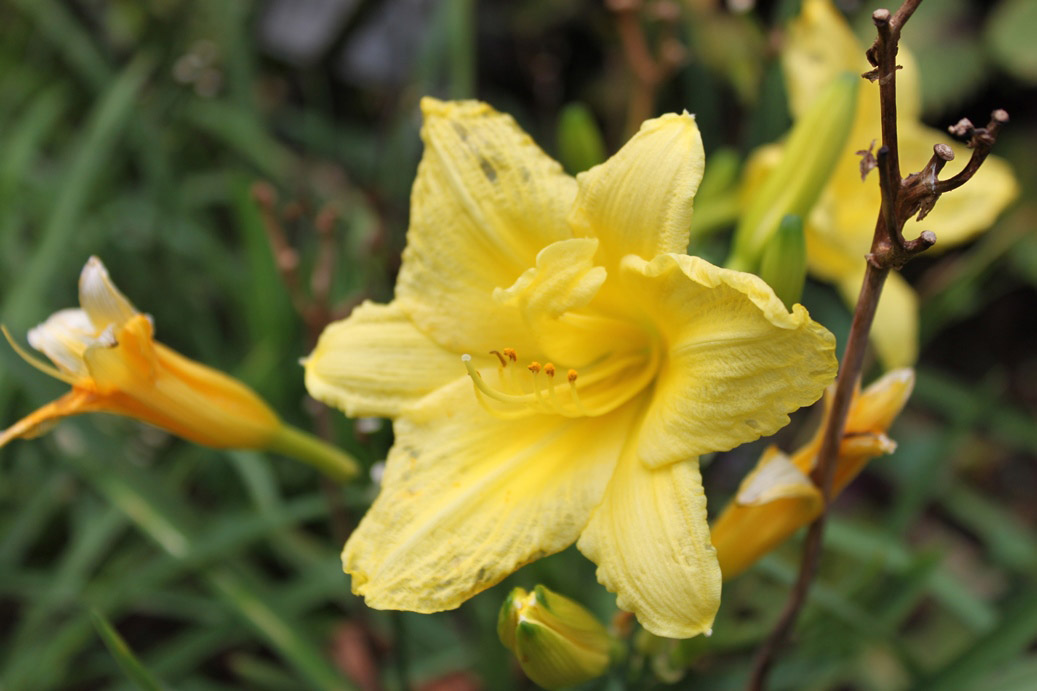
yellow
yellow

The quote above by Jay Maisel perfectly expresses how interesting and challenging it can be to capture angles. Through my captures, I have somehow always had the tendency on shooting angles. I can’t recall when it all began but there is just something about it. It could be through looking up at buildings, or an exquisite architecture of a building, or lines and structure, or an alley, or even looking down or just simply whilst capturing macro shots of flowers. Photography is an expression of how we envision moments or things around us. Perspective and angles are a unique way to express the vistas of everything around us creating an impression and imprint in our minds.

It isn’t something that can be planned as it requires observation and experimenting as well. As always, letting it come naturally to you is the best way to capture angles. There may be times when nothing motivates you to do an angled shot and that is completely okay. The moment will instantaneously present itself to you and all you will need to do is “click”.

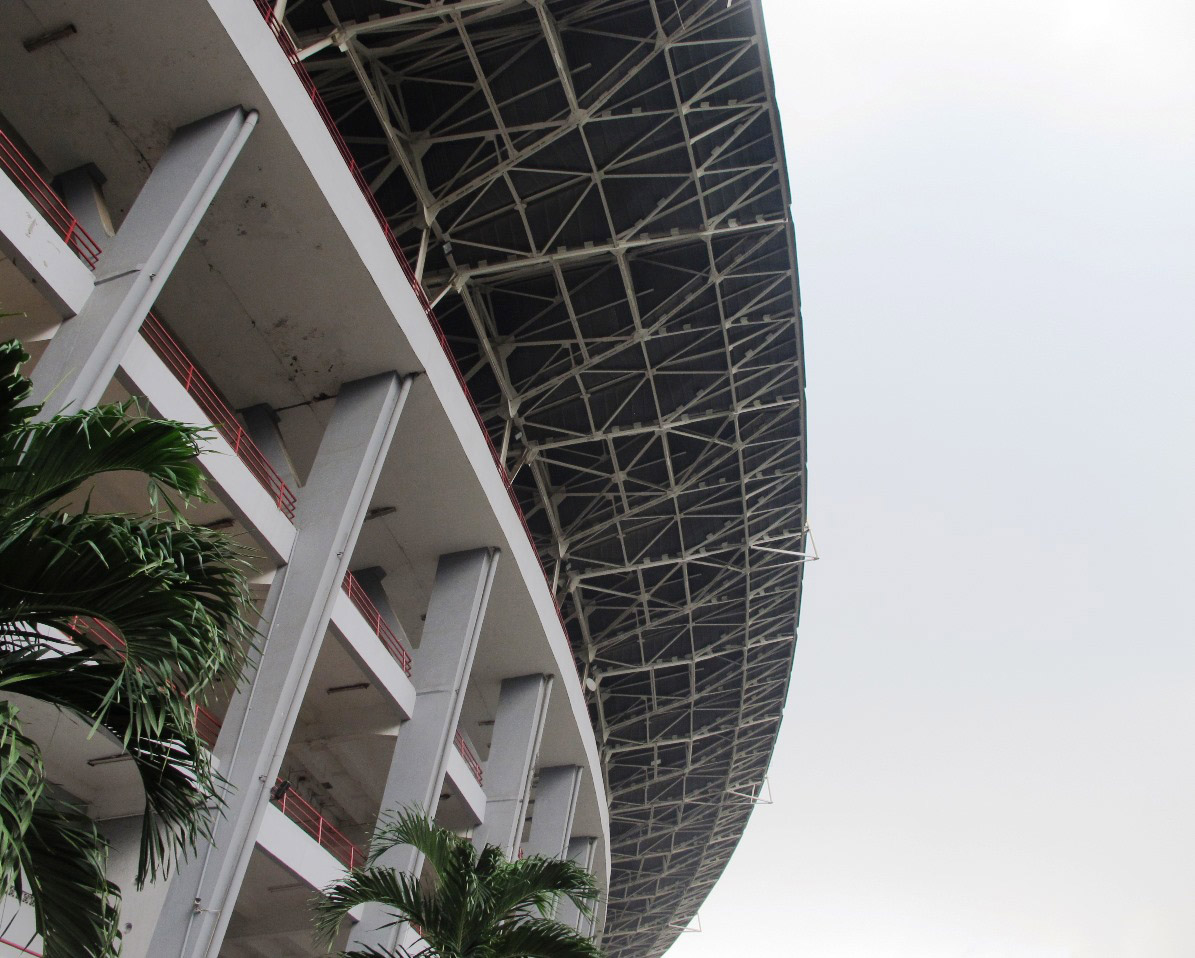
structure
structure

This outward structure of the National Stadium spoke to me. I began by looking up, clicking and experimenting the numerous aspects of the building. Experimenting would be by pointing and shifting your camera in various directions to frame the shot. It took a number of clicks to get the above results. To frame this shot, I wanted it to also have a minimalist touch so as to not completely focus on only the structure but leaving the blank space as well.

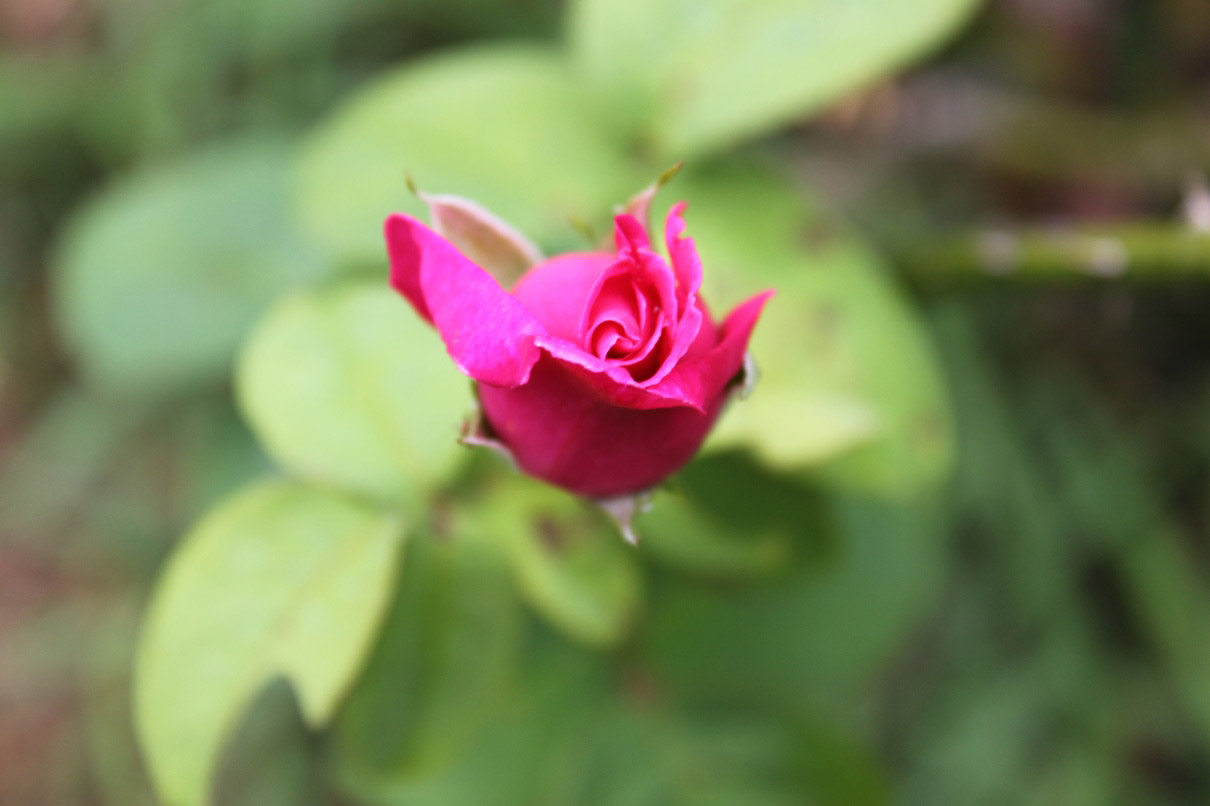
flower macro
flower macro

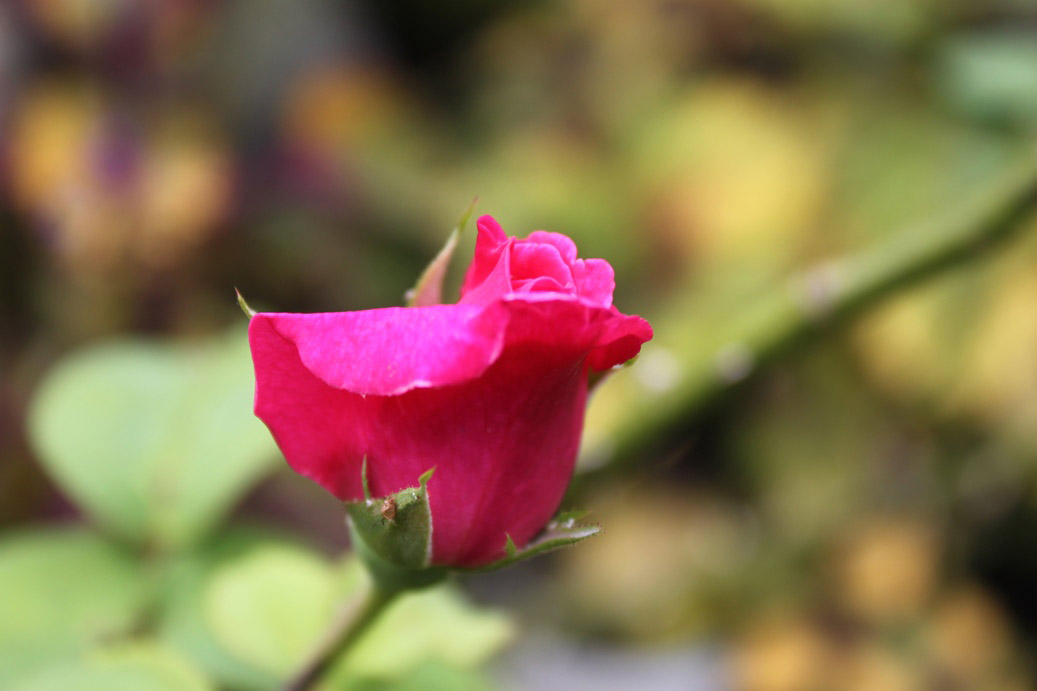
Nature and flowers are one of the easiest ways to try out various angles. This lovely pink half budding rose fascinated me. I wanted to try to get a specific viewpoint to portray as if the rose was looking at you. Balancing between getting close to the rose, composing the image properly and getting the right proportion was as interesting as much as a challenge.

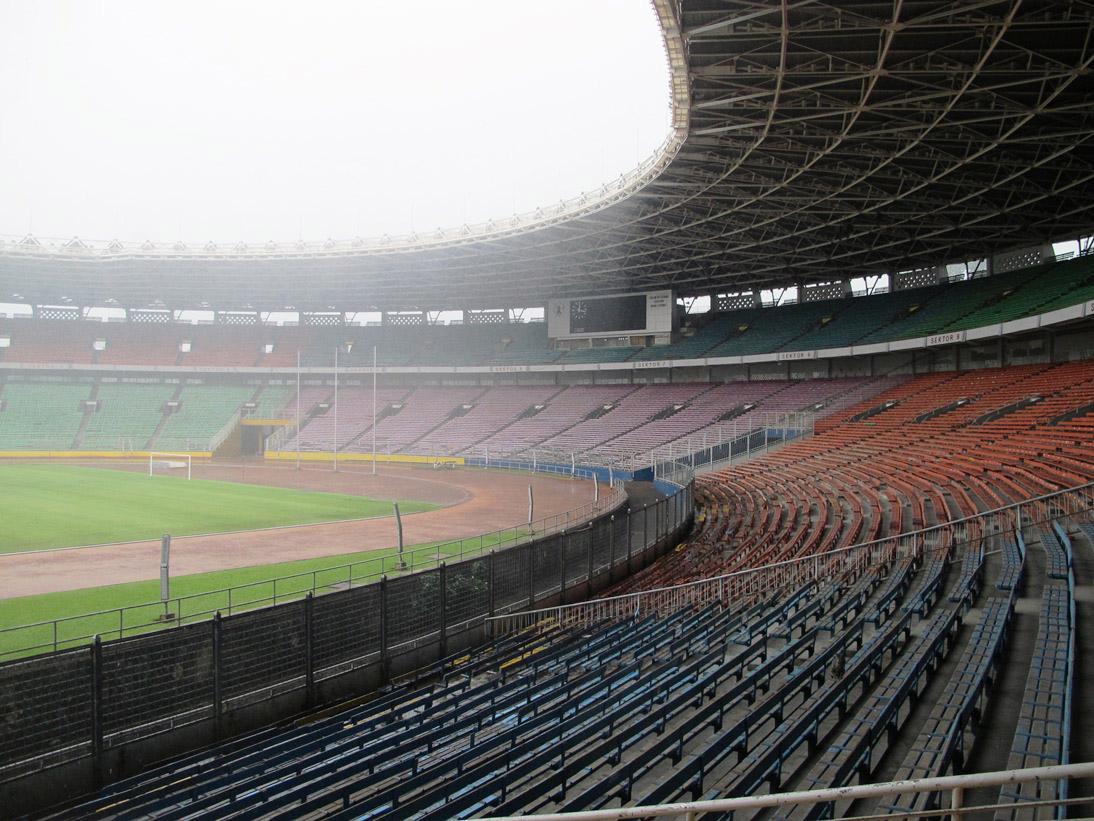
curves of Stadium
curves of Stadium

“As people, we love pattern. But interrupted pattern is more interesting.” – Jay Maisel

Jay Maisel nailed it again with the above quote to describe the way I felt when capturing the image above. Standing in front of the National Stadium seeing all these patterns, lines, colours and structure was spectacular. It’s like all these elements came together for me to venture and shoot.

Check - Mate
Check – Mate

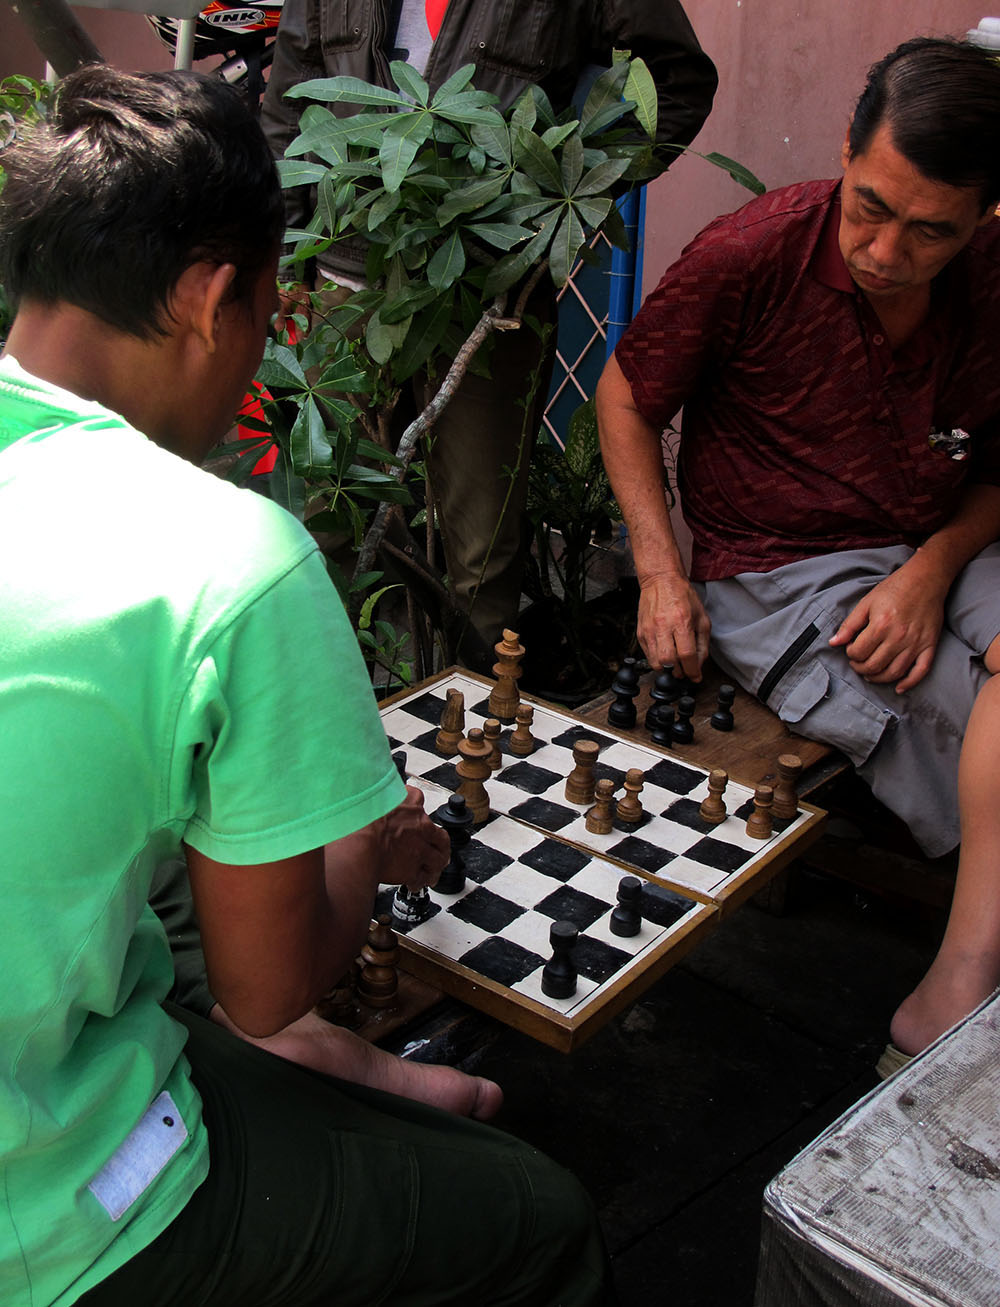
Street photography can also be a perfect place to try and play out various outlooks. On a walking tour, I found two men playing chess and it intrigued me to explore a particular angle to capture the shot. So, I tried the side way peeking approach for a change, to focus more on the people and the chess board as a whole.

crowd
crowd

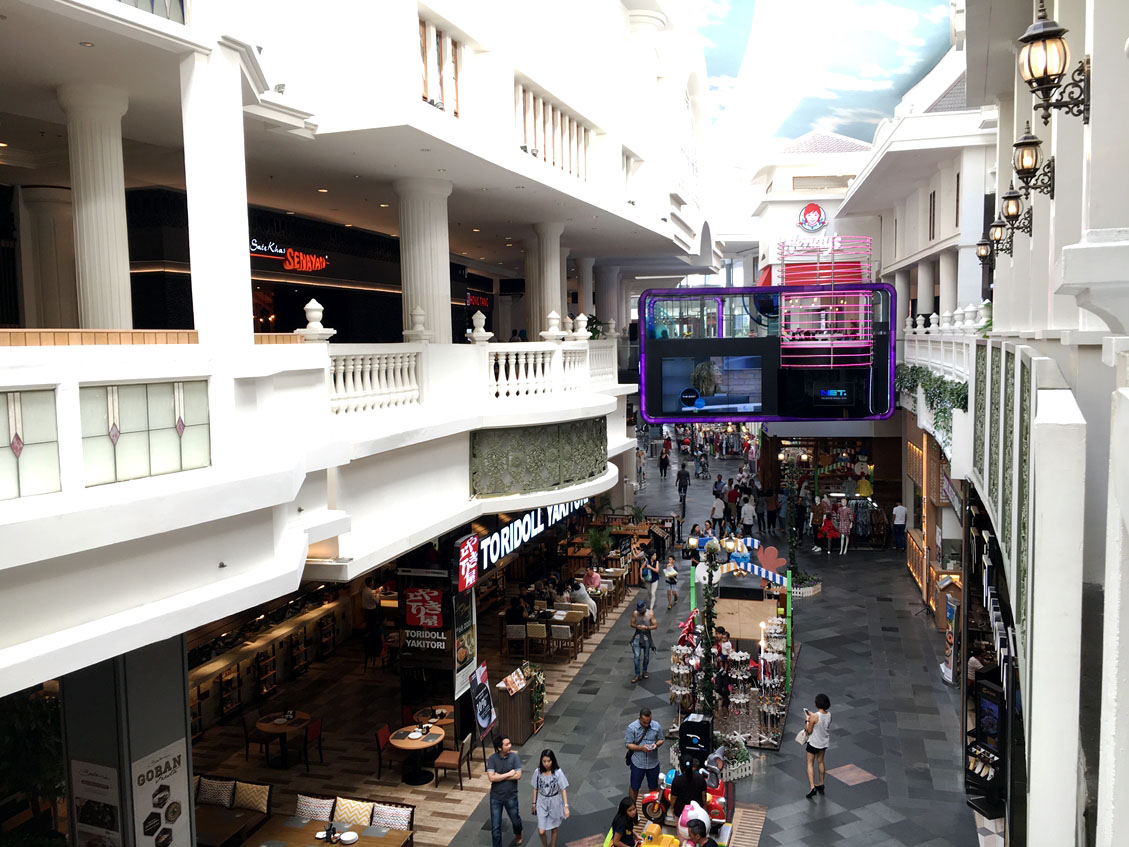
This particular mall has a unique architecture giving one a nostalgic feeling transporting you back in time. Whilst looking down, I wanted to capture the curved aspect with the lamps and lines in frame. Thus, a combination of colours, people and structure into one framed picture.

look
look

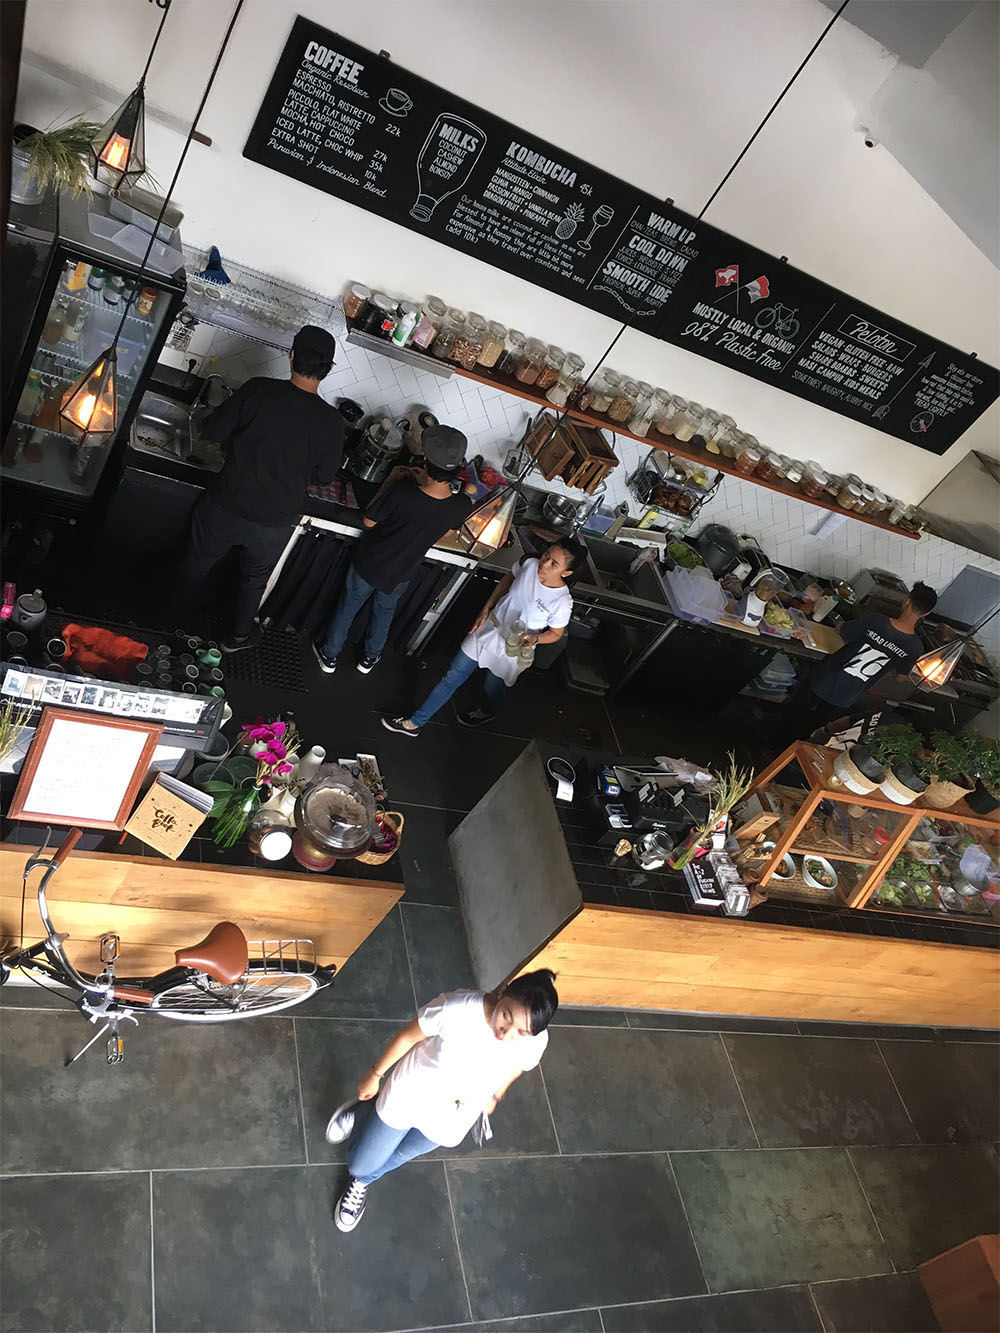
And here is the instantaneous moment that nature presents itself to you. Sitting at the restaurant, I randomly looked down, played with my iPhone by framing angles and hit the shutter. The whole scene filled with pretty wood interiors and layout was quite delightful to build into a moment.

crisp
crisp

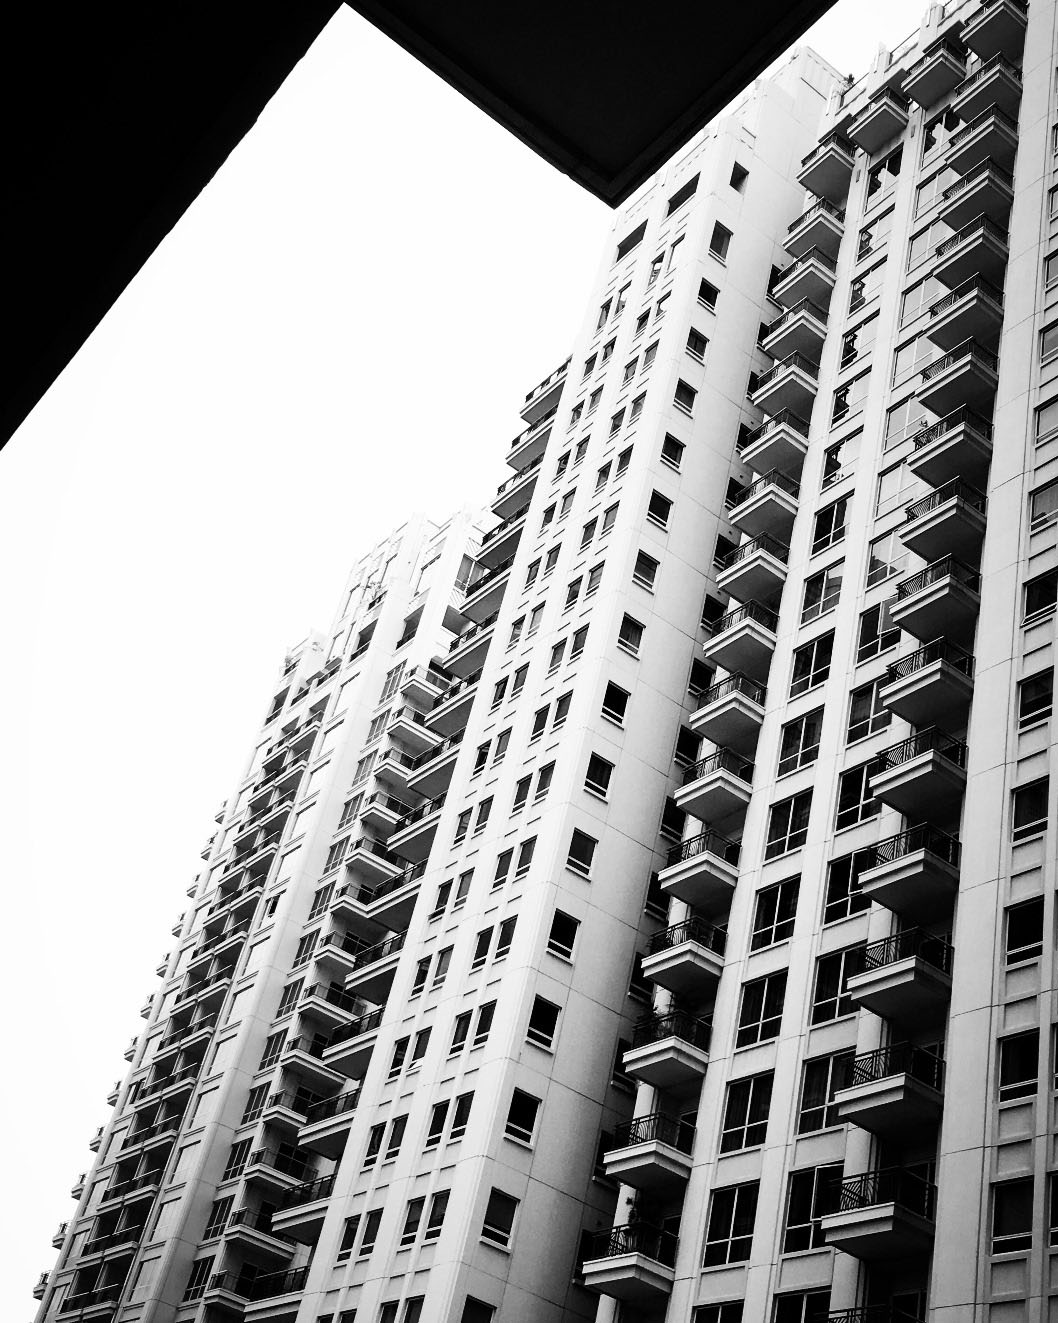
Looking up through the details of a building has never been more fun if you can capture it in a completely distinct way. The idea behind this capture was to have the symmetrical shape on top, which is part of the top portion of the building I was in, look like it forms a cover of the other building. I tilted my phone so this captured moment directs your eyes upwards.

stand tall
stand tall

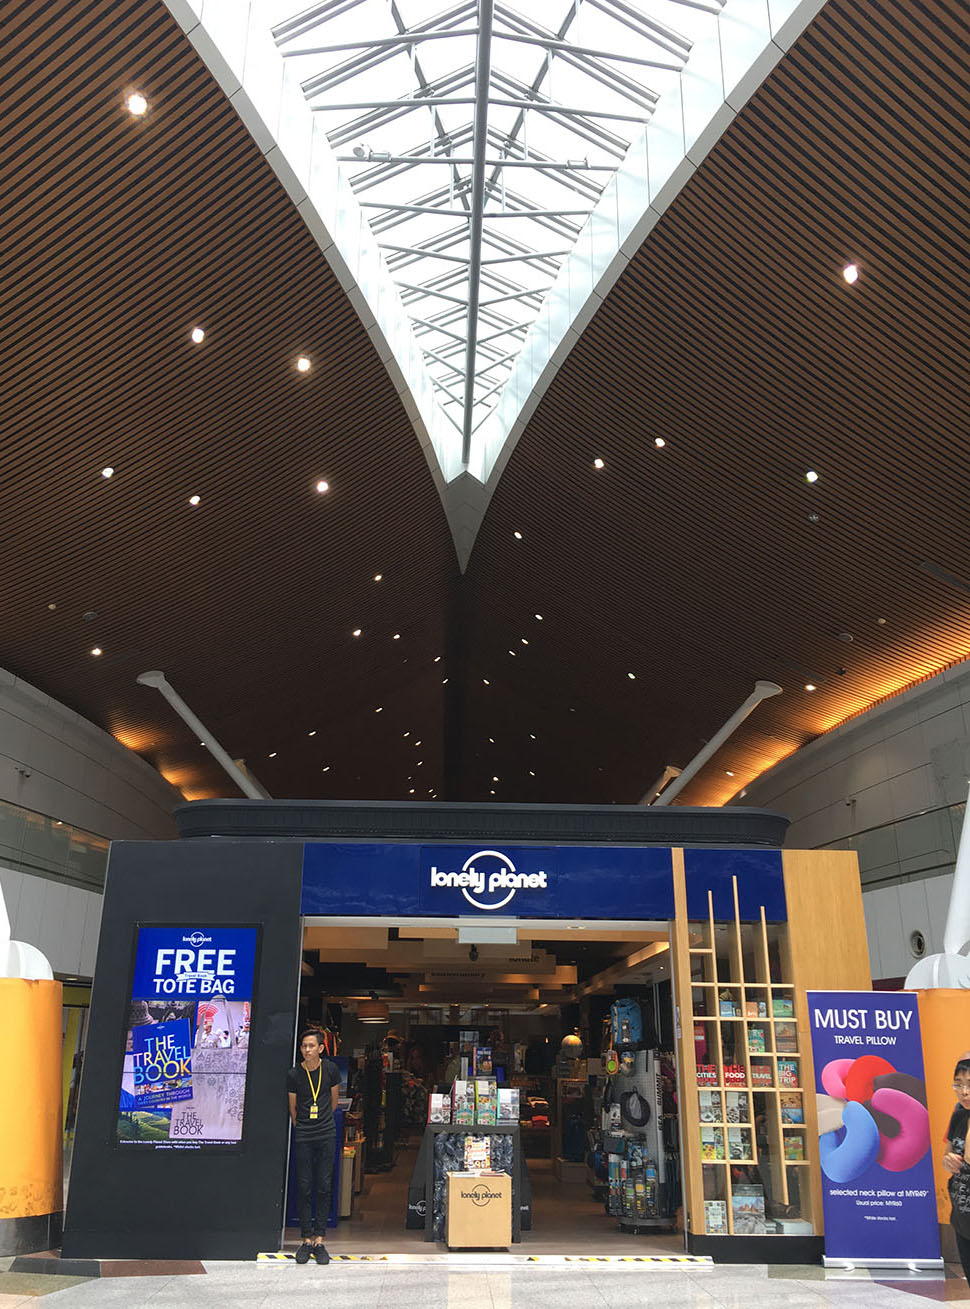
Awed by the architecture of this airport in Kuala Lumpur, I wanted to snap this whole scene but focusing more on the lines and architecture. Yet, another spontaneous shot.

alley
alley

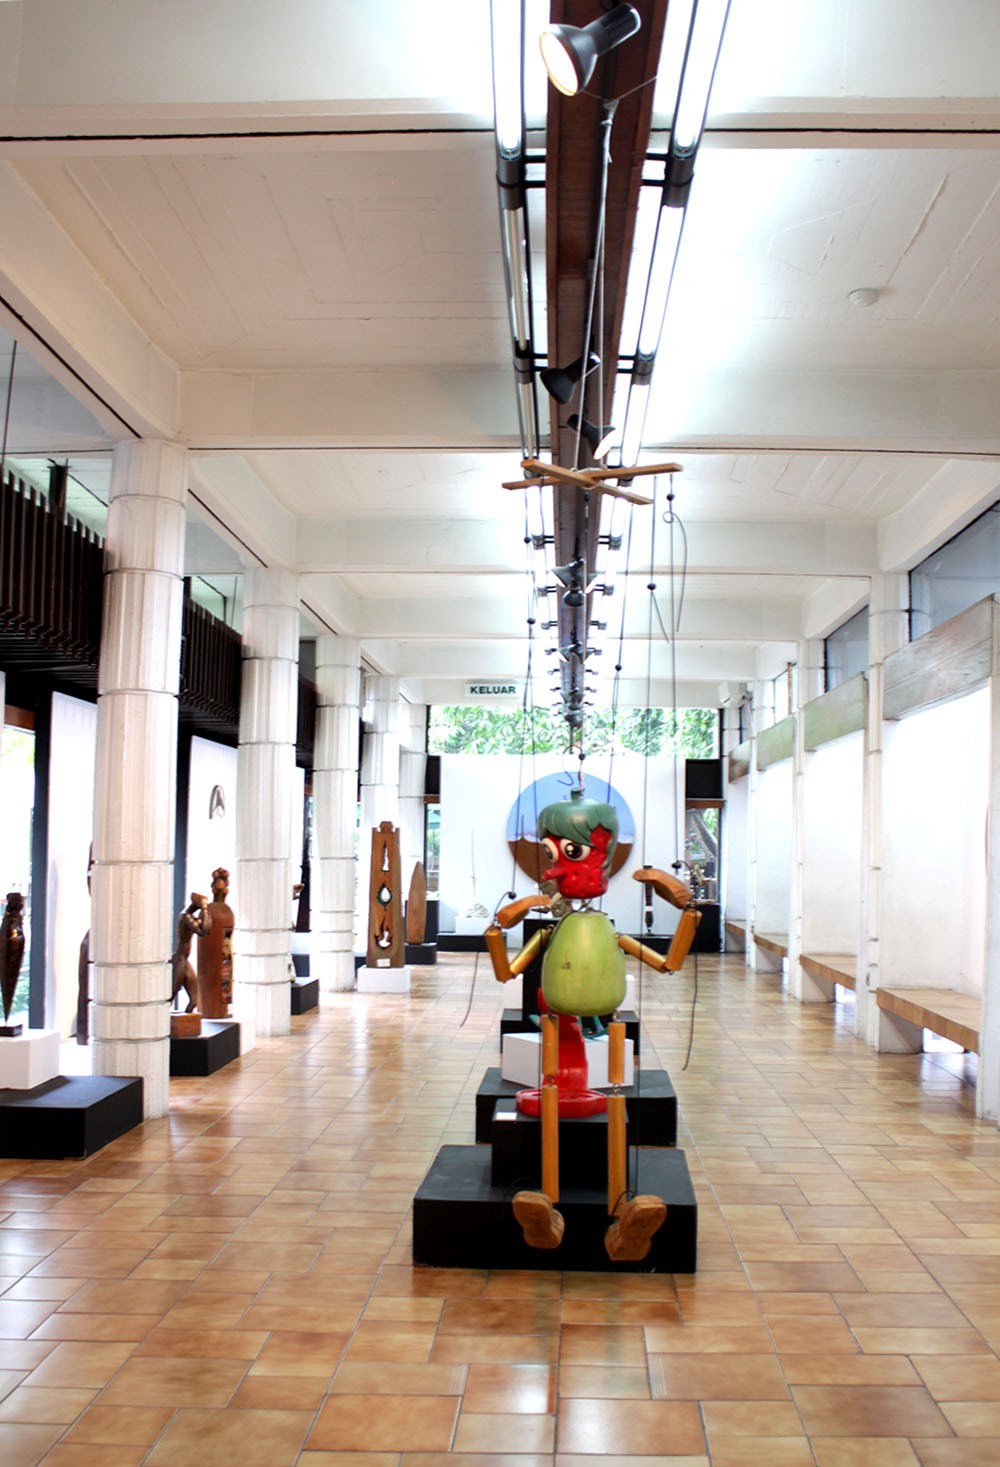
Something about this exhibition and the rows making it seem like an alley, motivated me to point and shoot. Just to have a glimpse of what the exhibition was about and have a sort of symmetry was my main aim when framing the shot.

open
open

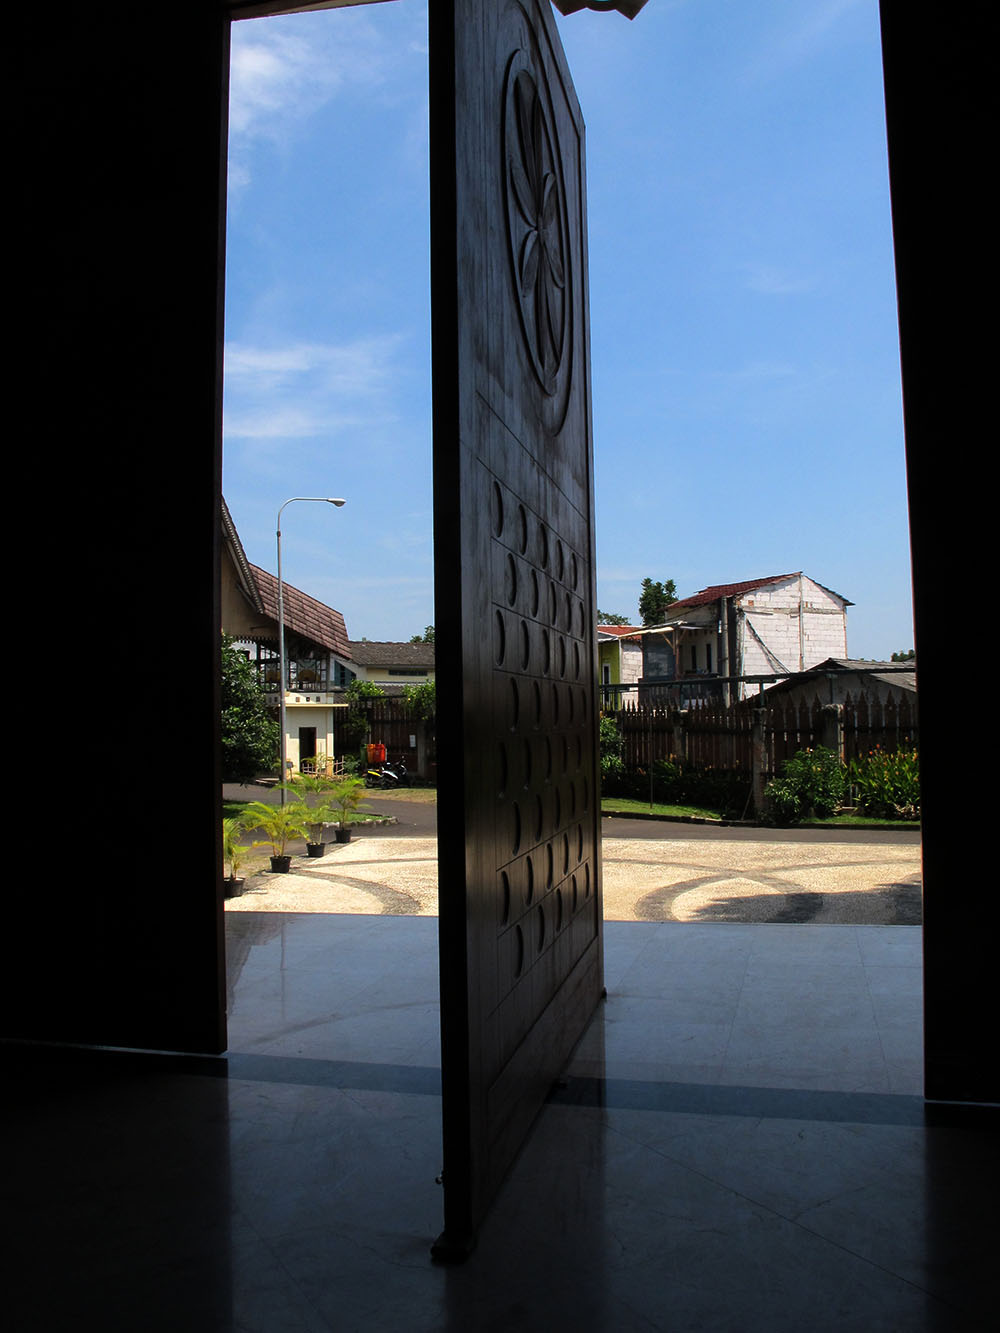
Lastly, standing inside the building I casually looked out and noticed the door ajar in the middle and the lovely blue on the outside. It definitely was a moment not to miss capturing. Angling from a few places and with a few clicks, voila this moment was created.

pink bud
pink bud

Every angled shot makes you think outside the box bringing the image a new flavor. Playing with perspectives has allowed me to explore a new side and style to photography. It is like allowing nature to speak to you and at the same time being creative to make an image stand out. There are no set rules to achieve it but simply being alert and listening to the moment. Let’s continue to enjoy the various points of view and keep clicking!
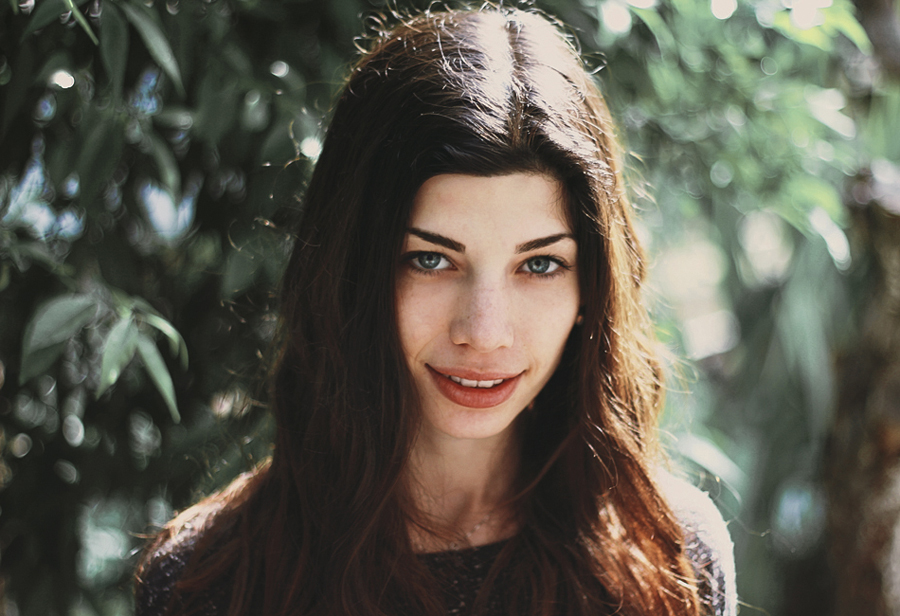
Tips for Winter photography in a warm weather area

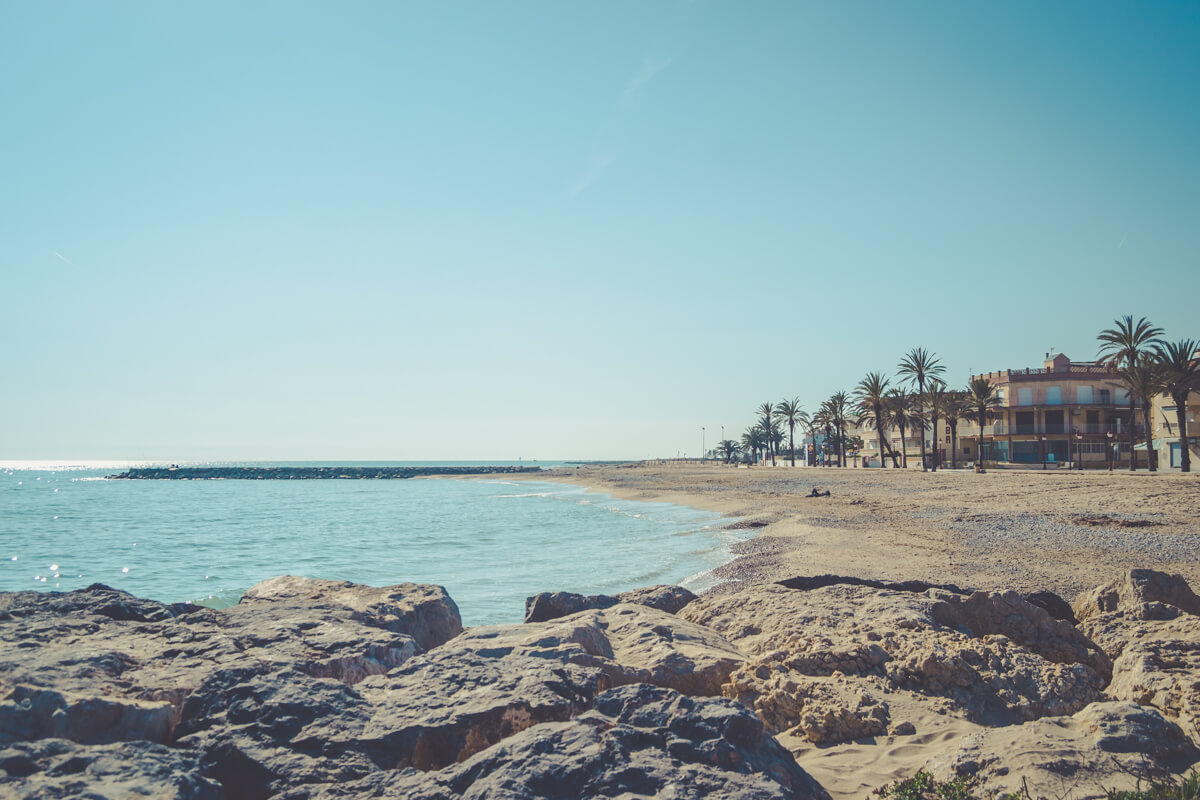
I love winter photos. There is something special in landscapes full of snow, people covered in several layers of winter clothes, animals with white fur… Unfortunately, I do not get many chances to take such photos because I live close to Barcelona, in a warm Mediterranean area. For me snow is something extremely unusual. It snows here once in 20 years and when it happens Barcelona just shuts down.

winter in Barcelona

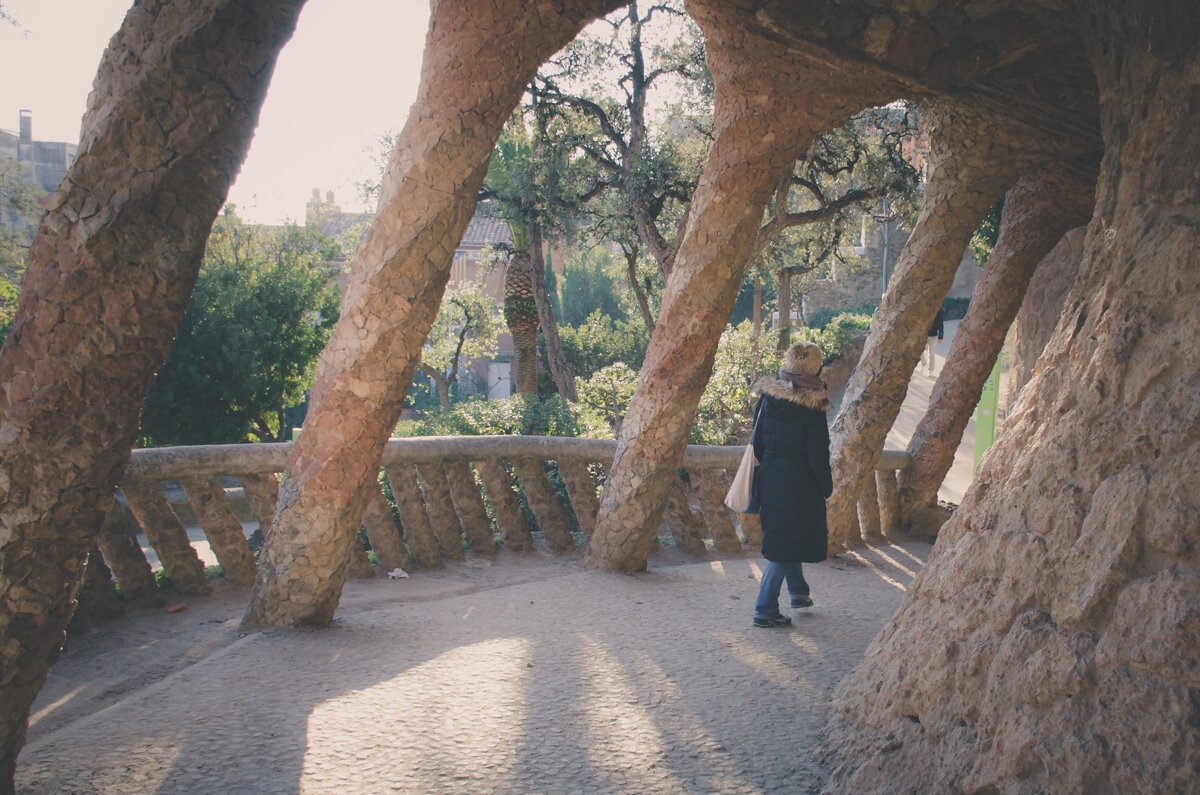
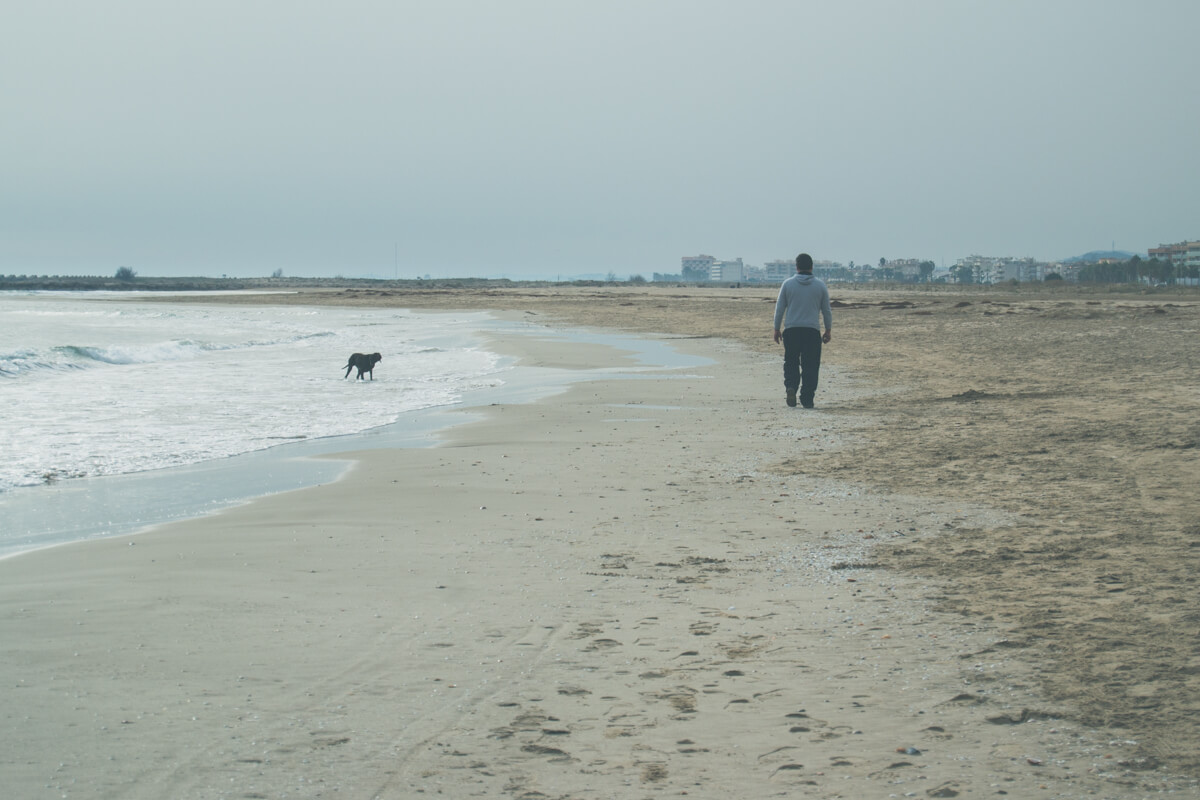
Although our winter doesn’t look so wintery we still have it!! It is just different and not so hard as in other parts of the world. But we still notice a big difference between our summer and our winter: we have rains and cloudy days, temperatures are lower and it can get really windy. However, we still have quite a lot sunny days even in winter.
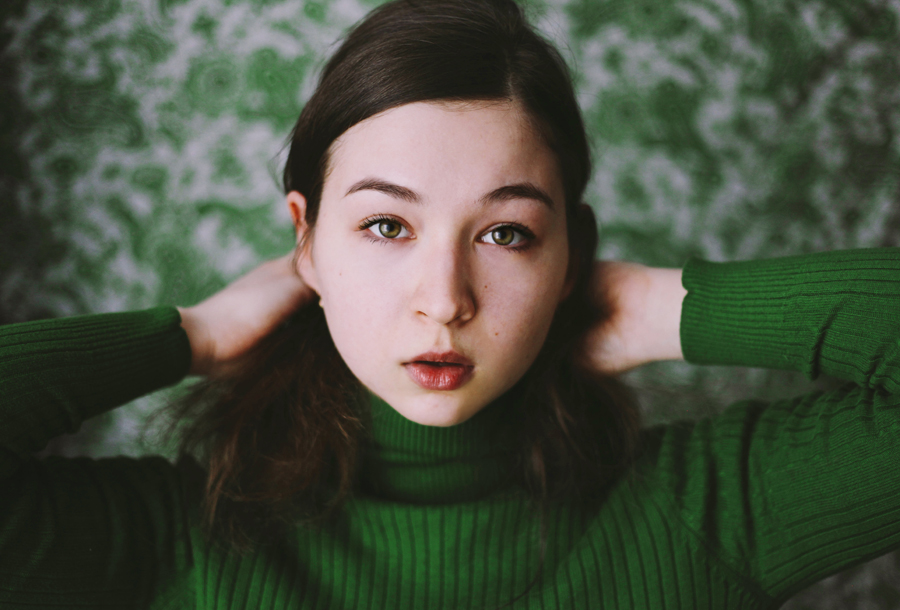
sunny winter

Winter photography tips are a bit different for areas with Mediterranean or any other warm weather. Unless we travel to some mountain, we won’t need special protection for our gear from low temperature or snow and even rain can be handled quite easily.On the other hand, we don’t have the typical image of the white winter people usually think of. Today I am coming with winter tips adapted to warm weather areas. Let’s check them out!

#1 Focus your photos in weather elements that represent winter in your area

Observe your winter weather, look for weather elements that represent it. It might be the wind, the rain or a gray sky. Try to include weather elements in your photos to give them a more wintery look. Trees moving billowing in the wind, heavy clouds, rain puddles in the streets…

winter storms

#2 Include nature elements in your frame

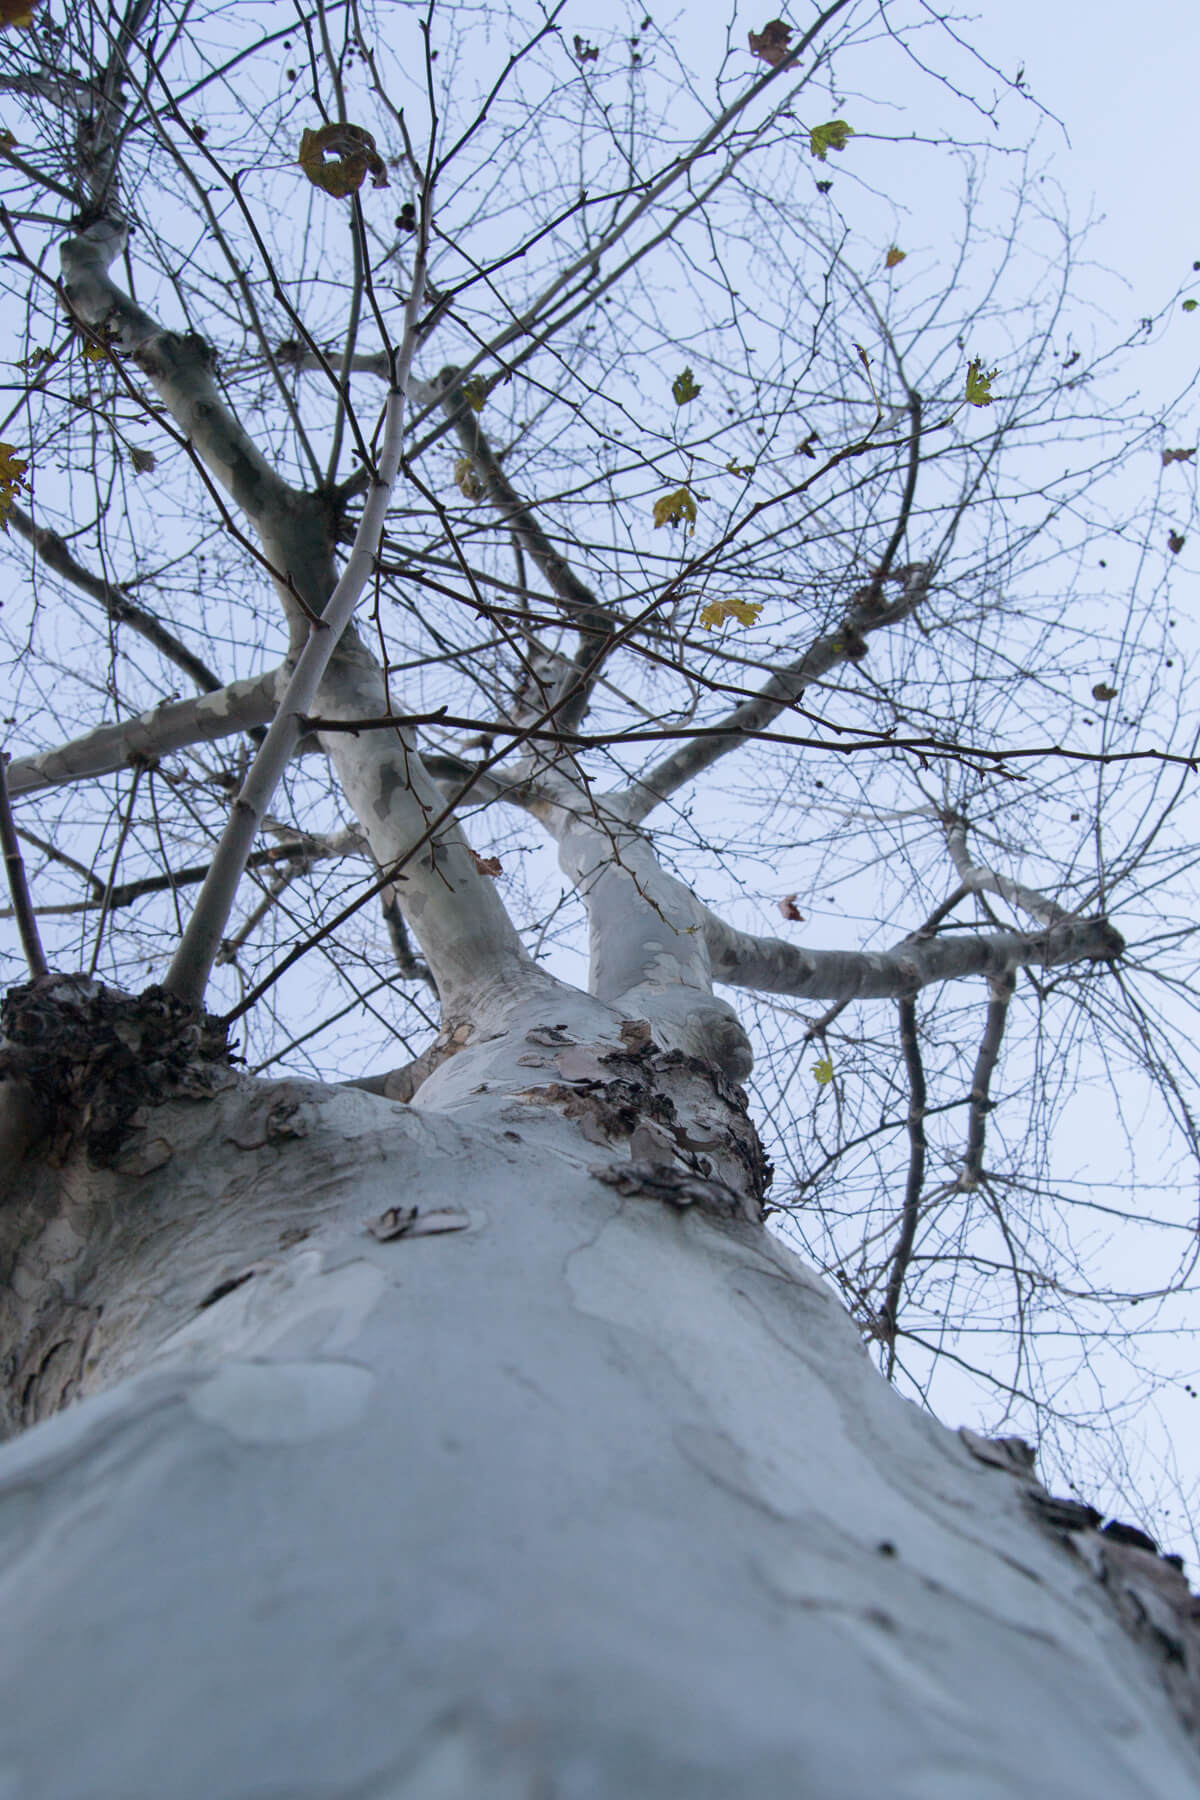
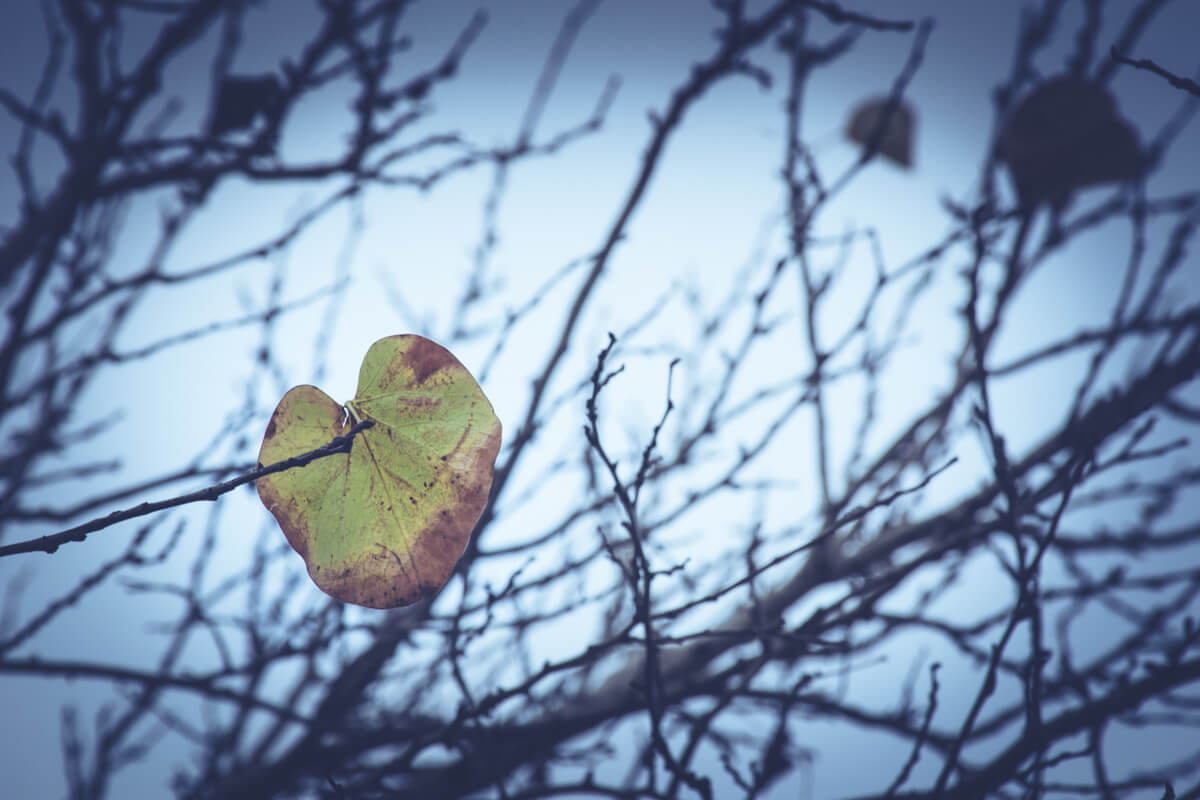
Nature has strong seasonal patterns, so you can take advantage of it! Trees without leaves, plants that are typically from winter, birds or other animals that are typical for winter.

tree in winter

#3 Take photos of winter events

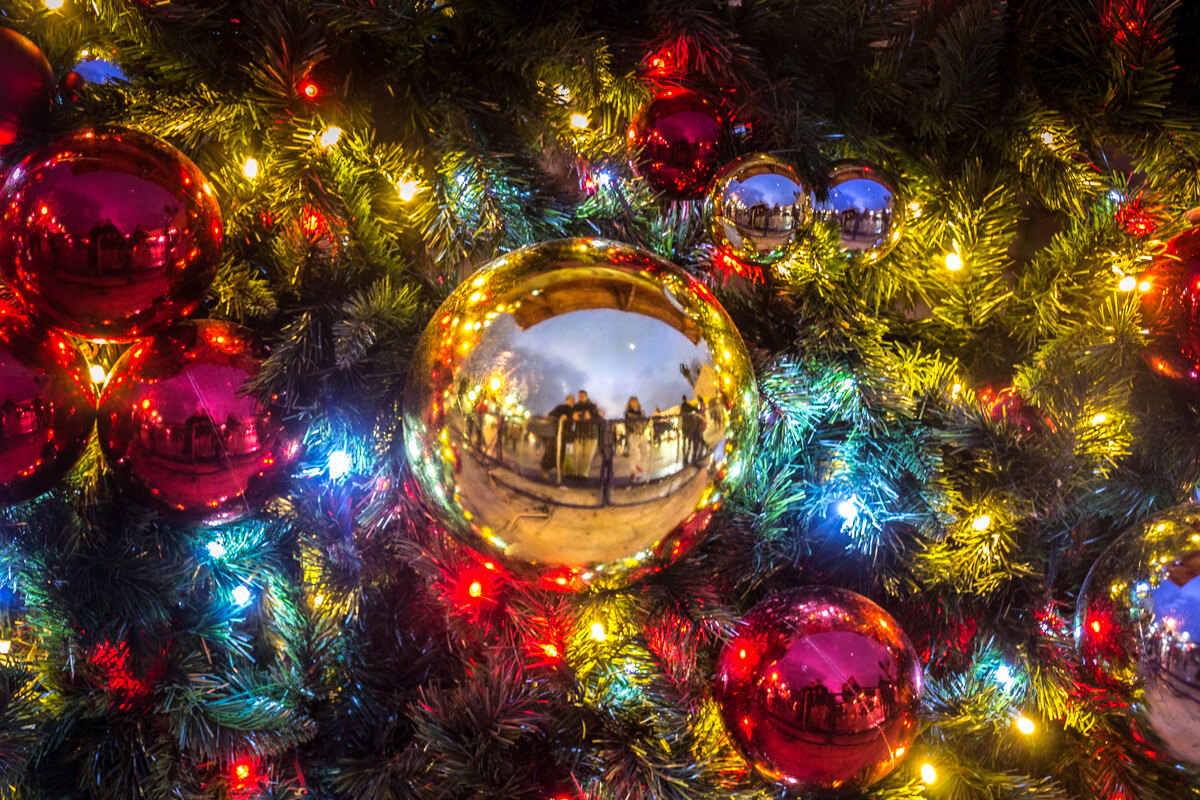
There are things that happen only in winter in winter. Well, known holidays such Christmas also got quite universal, so including Christmas decorations might also have a connection with winter ( if you are in the North hemisphere).

winter decorations

But there are a lot of other local events related with “winter”. For example, in some catalonian comarques such as  Garraf and Penedes,  we celebrate the “Xato Days”. The Xato is a typical dish that we eat just in winter. During the Xato Days, experts in xato meet for contests that will determine who is cooking the best Xato. These contests are held in the different municipalities, in a street event.  Here, we heard “Xato” and we think: Winter food! You can find local events around the world that are related to winter. Maybe not a lot of people knows about them outside your region. However, I think that sharing your local events through your photography is a great way to show a different and unique aspect of this season and to spread your local activities and traditions.

winter gastronomy

#4 Look for universal elements that we all associate with “cold”

In the last tip, I told you to go local. Another totally different strategy is to look for elements that everybody associates with winter. Photos of people with coats, wood hats, scarves billowing in the wind, cups with hot steamy beverages, burning fireplaces, all are associated with winter.

winter clothes

#5 Emphasize the wintery look of your photos in Lightroom

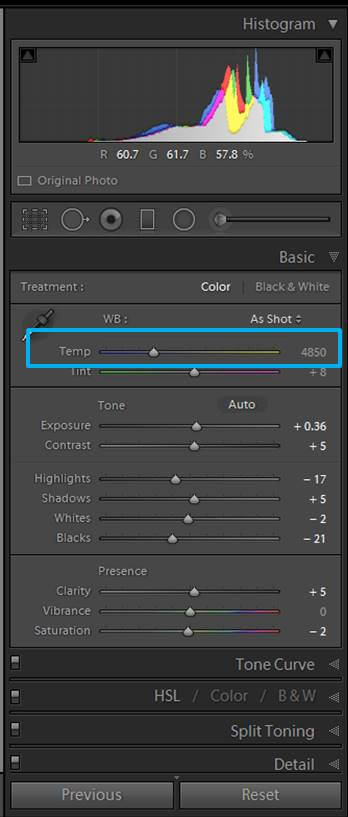
You can emphasize the wintery look of your photos using Lightroom or any other editing program. Color has a big association with the mood of your images. Increasing the blue colors by using the Temperature slider in Lightroom (Develop module) will give it a cooler look.

Cold temperature winter

You can check this article about Color and mood to learn in more detail how to modify the color of your photos.

nature in winter

Decreasing the saturation of your photos or using a matte effect might also help you to get a more wintery look. You can check the Masterclass about saturation to learn how the Saturation slide work. For winter look, the saturation should decrease (moving the saturation slider towards the left) because you want to lessen the colors instead of enhancing them. The matte effect is also a good resource for winter. I explained how to get this effect in Lightroom in my article about “Tips for post-processing forest images in Lightroom”. Scroll down to the “Add a dreamy look” for detailed explanations.

matte effect winter

Winter presets are also really helpful. Besides saving a lot of time in post-processing, presets provides you with a lot of new creative approaches.

winter presets

Experimenting with backgrounds for portraits

Backgrounds have the spectacular ability to transform a seemingly uninteresting portrait into an eye-catching work of art

. Their strength lies in patterns, symmetry, and colors; elements often accidentally neglected in portraiture. Though it’s possible to take photos which possess both simplicity and outstanding beauty at the same time, experimenting with backgrounds will give you a chance to greatly boost your portfolio’s visual appearance. The more you practice noticing the uniqueness of backgrounds and the more you include them in your work, the quicker you’ll thrive both as a photographer and as an observer of the world.

Outdoor backgrounds

Making the most of your natural surroundings outdoors will sharpen your creative eye and provide you with endless photo opportunities. Nature, especially, is ideal for photos of any kind thanks to its wonderful patience – it’s always waiting to add something incredible to your images. Its endless presence and perpetual flawlessness give everyone a chance to make the most of its natural beauty. Even better, nature constantly changes, giving us new worlds to work with every season.

Flowers, bushes, leaves, branches, landscapes, etc., can all become important elements in your images if you take the time to include them in your compositions. Sharp mountains could complement your subject’s sharp facial features or, instead, serve as a dramatic contrast to the softness of their expressions. Blurred autumn leaves in the background could work in harmony with your subject’s autumnal clothing. When it comes to backgrounds and what they can contribute to any image, the possibilities are endless.

//

Nature could also be used to create powerful diptychs (a “collage” consisting of two images), stunning resources to use in future shoots, and anything you could possibly image. Similarly, cityscapes have the ability to transform your outdoor photos into truly impressive creations. Be it a crowded street or a lonely spot in a nearby park, anything can serve as an appealing background.

The key to great outdoor portrait backgrounds is making sure that your mind and eyes are constantly open, especially when you’re not taking photos. This doesn’t mean you should forcefully notice details around you all the time. Instead, find short, calm moments throughout your day when you can choose to pay attention to your surroundings instead of your phone. If you’re someone who loves adventures, spend a day looking for new and photo-worthy places. Take the time to find interesting locations, no matter how small, if you enjoy running. Eventually, these details will turn into amazing backgrounds for your images, ones that will make you proud of your work and eager to discover more.

//

//

Indoor backgrounds

The colder months often force us to sit at home with our cameras, desperately attempting to come up with creative shooting methods. Many artists don’t own professional studio gear, so the notion of giving up on shooting indoors is an understandable one. However, simple indoor images can be enhanced with the help of “handmade” backgrounds, creations which will inevitably lead you to amazing photo opportunities and unique ideas.

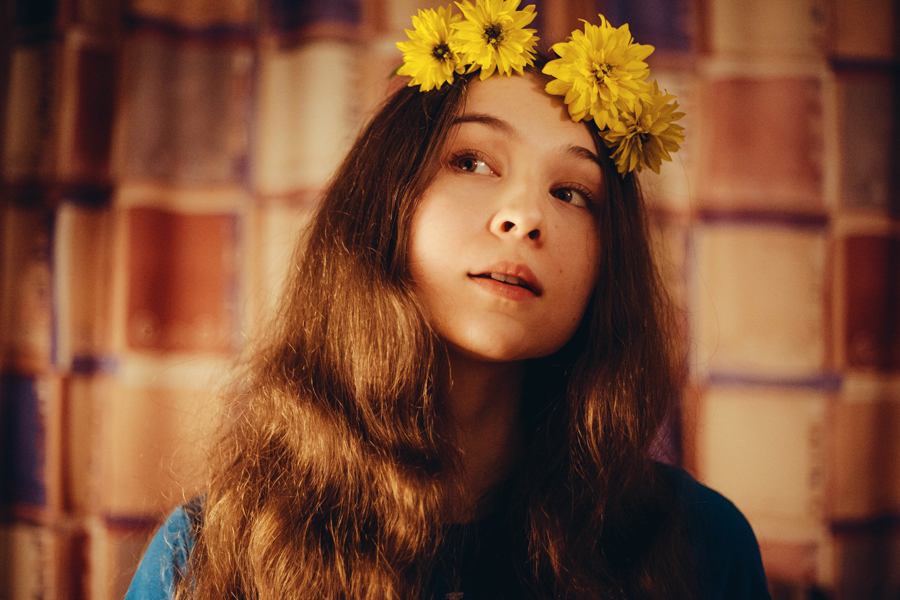
If painting is one of your interests, create your own backgrounds and temporarily hang them on a wall – your very own little studio. Alternatively, you can use other people’s paintings as striking additions to your portraits. If neither of these appeal to you, use wallpapers since they often consist of intricate, symmetrical patterns. Blankets and curtains are also fantastic backgrounds, especially ones that are beautifully decorated. You could even create your own forts out of them and no one would be able to tell. 😉

//

//

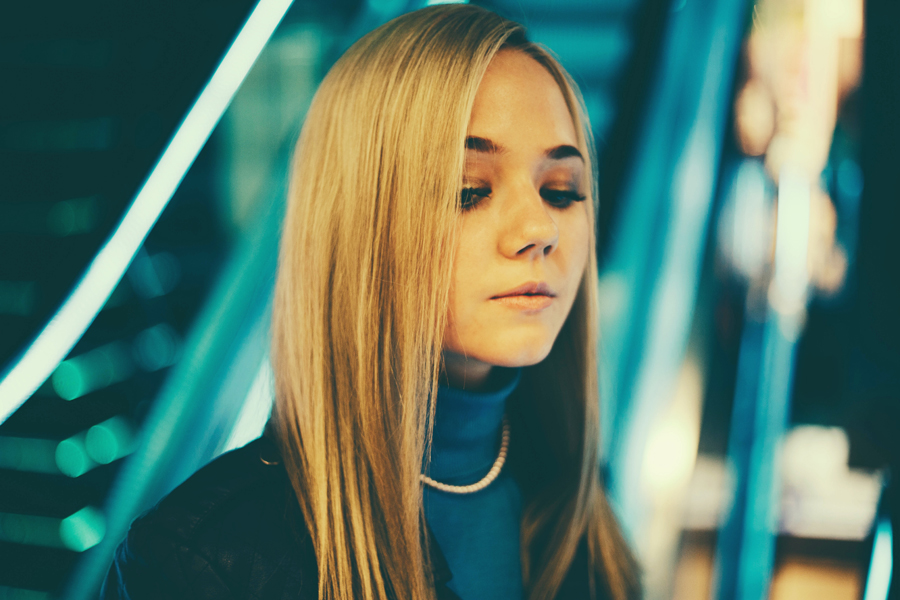
The beauty of shooting in your own home is having easy access to your wardrobe – experiment with various color combinations and find ones which enhance both your background and your subject’s attire. If you’re planning to shoot elsewhere, choose several outfits to use in case you come across an unusual (yet original) background. Use rental costumes and wigs to give your portfolio a fresh spark if you have the chance. If you’re shooting in a store, let artificial light be your background. Oftentimes, beautifully decorated light in shops will add an otherworldly atmosphere to your images. It’s also possible to create your own backgrounds in an editing program using other artists’ photo resources and overlays. Whatever you do, remember to use your backgrounds to the fullest and not let your fears bring you down.

No matter where you are or what time of day it is, remember to keep your mind and your eyes open. Before you know it, your images will be appreciated for their beautiful compositions and most importantly, for their eye-catching backgrounds.

Good luck!

//

//


Capture Daily Life with Style: Framing lifestyle with a camera

How does one capture daily moments?

We walk about our daily lives and pass by every minute without realizing how quickly time flies. Try slowing down our pace, observing every moment that goes by, feeling it and then capturing a snapshot.

When capturing what’s the first thought that crosses your mind? How amazing the sunset is, or how beautiful the flower is?. What about how simple the moment is or how in harmony with nature everything is? The idea of beauty differs from person to person. But, paying attention to simplicity and nature is what everyday life photography is all about. We are continuously looking at daily happenings and finding the inspiration to snap a shot; the thought should only be to do that. Staying in that moment where the eye can reflect it into a picturesque moment. It’s not about when I capture this; the first thing would be posting it on social media but, it’s about the moment itself.

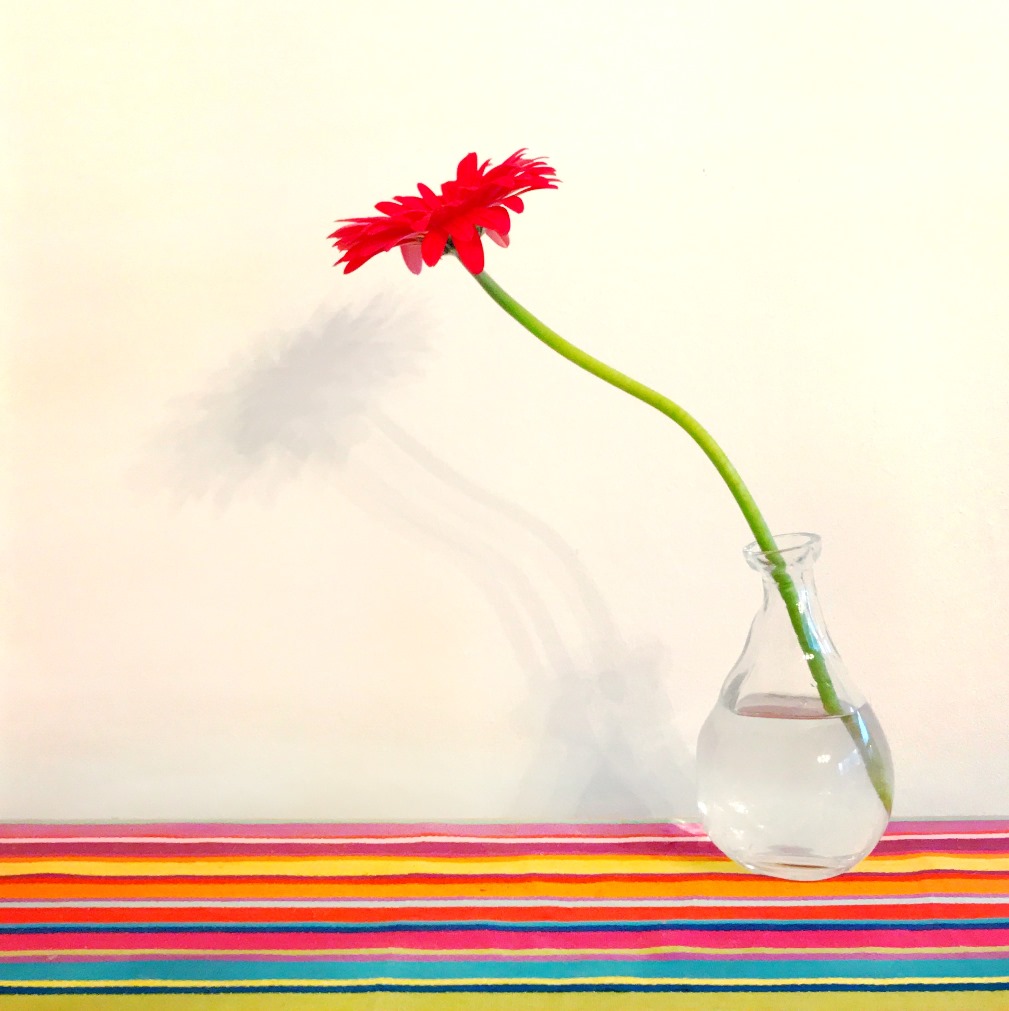
Red Flower by Elaine Taylor

Technology and social media, as good as it is, if we don’t use it productively, takes the taste of true photography out of our lives. We have “forgotten” what it is to capture the moment for what it truly is. There are 365 days photography challenges everywhere, only to challenge us to click simple moments without planning. These challenges are only to motivate the photographer, so we don’t lose touch with photography.

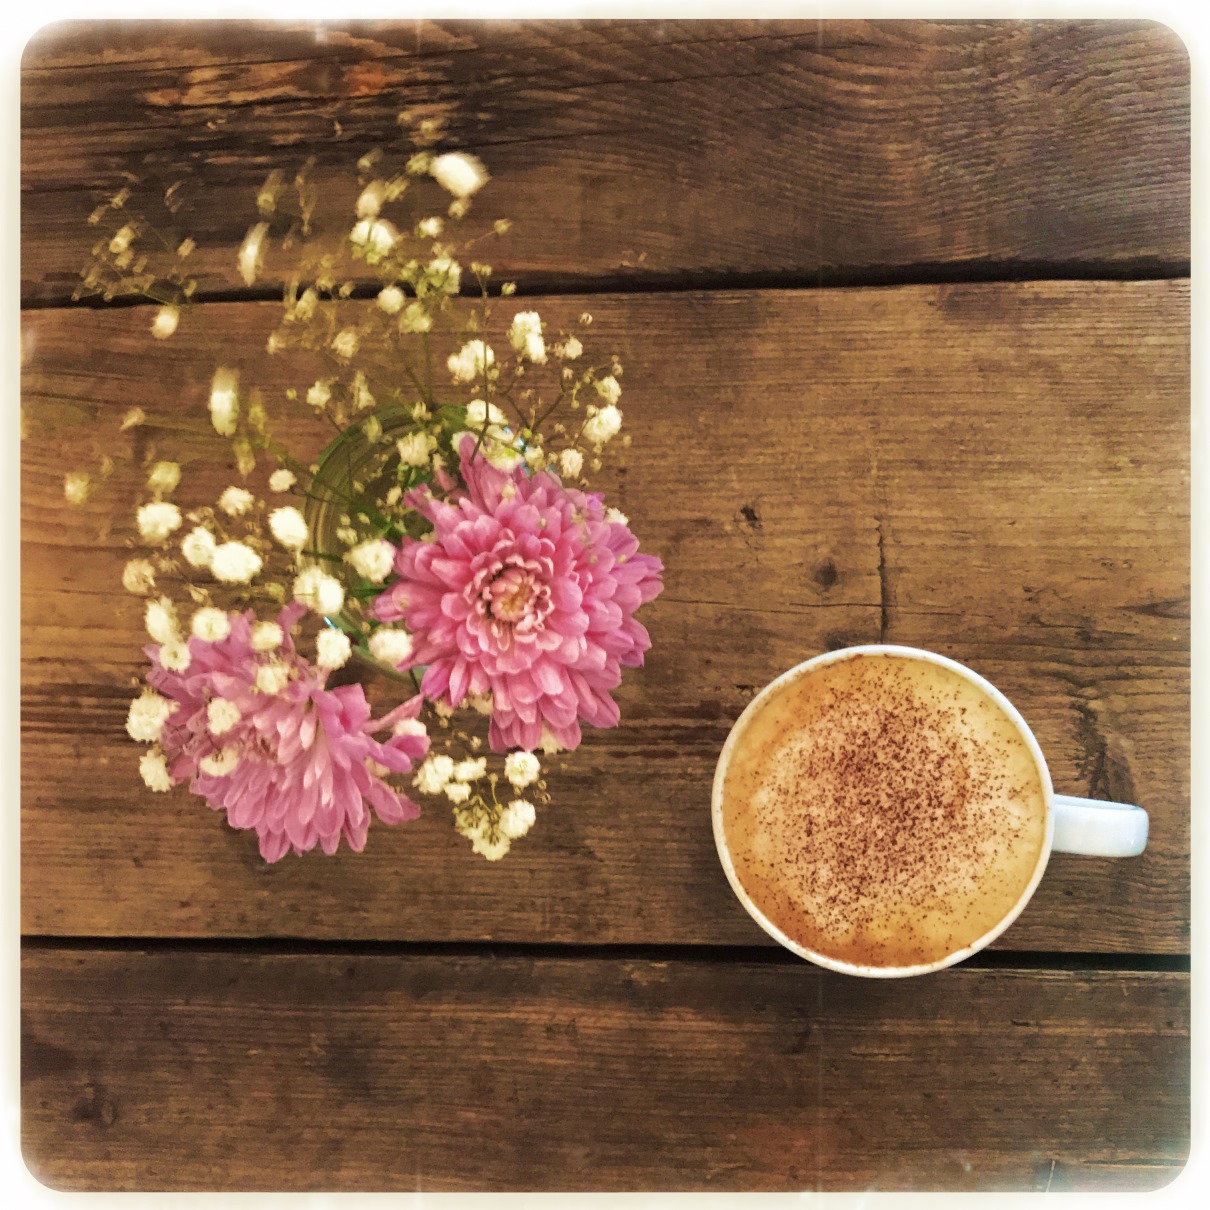
There is no technique necessary when clicking every day, but it’s more about paying attention to everything around us, feeling it and then transmitting it into a moment. It could be as simple as a cup of coffee on a table. You see, you like how it looked, and you clicked.

Cup of Coffee by Elaine Taylor

The image above has been captured by a good friend Elaine Taylor for her Project 365, and the image ultimately reflects the spontaneity yet the subtlety of the moment.

Here are some words from Elaine on why she wanted to try the 365 days Project and how the experience has been so far:

There were three things I wanted to do this year in relation to my mobile photography.

The first was to share more of what I shoot. I take shots every day but share just one or two images per week via my Instagram profile. I have thousands of images in my camera roll that are unlikely to be seen by anyone but me.  The second was to take more pure Hipstamatic shots. I adore Hipstamatic. It’s the first app I installed on my phone and the thing that kickstarted my mobile photography passion. The third was to print more of my images.

I’d seen a post on Facebook by Eric Rozen, Founder of Hipstography.com. He was planning to do a 365 project this year. It inspired me to do the same. I thought it would be a great way to achieve all the things I’d mentioned above.  So I set out to record a pure hipstamatic shot every day and intend to create (and print!) a book or calendar at the end of the process.

I’m really enjoying it so far. It’s a great way to document my every day life and will be a reminder of key dates/events, but much more than that, a reminder of the little important stuff that happens daily. I’m trying to focus on capturing an image that is a good reflection of that particular day without worrying about what I posted the day before. I’m aware that I won’t be sharing an amazing photo every day, but I hope each one will be meaningful and together provide a good reflection of 2017 when I look back on them.

A few of her images from her project:

Top it Off by Elaine Taylor
Colours and Flower by Elaine Taylor
Colors and Flower by Elaine Taylor
Play by Elaine Taylor

Her images portray the moment in its purest and simplest time captured straight from the heart. And that is what photography is all about.

Sharing some of my everyday moments captured instantly and the stories behind it:

Blue Skies at Monas
Blue Skies at Monas

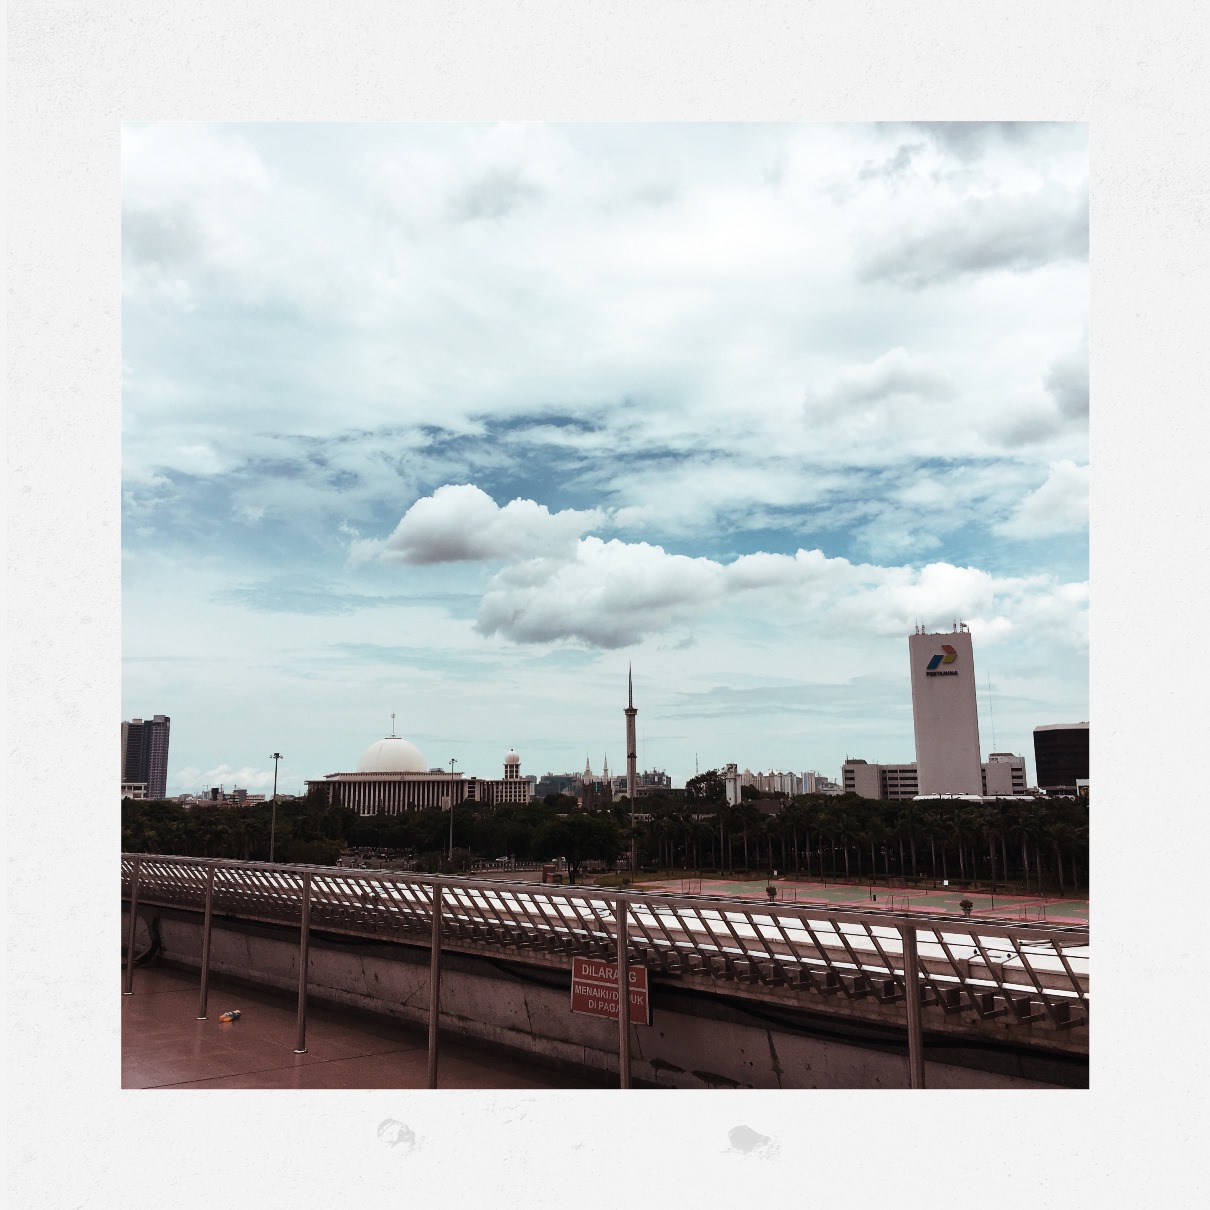
It was a clear day when we started our walking tour to the National Monument (Jakarta), and as we were about to finish the tour, the skies were starting to turn gray and gloomy. You can see our National Mosque in the distance, and I wanted to capture this image with the angle pointing towards the skies and mosque. There was not much contemplation to the capture but more of feeling and clicking.

Rain On
Rain On

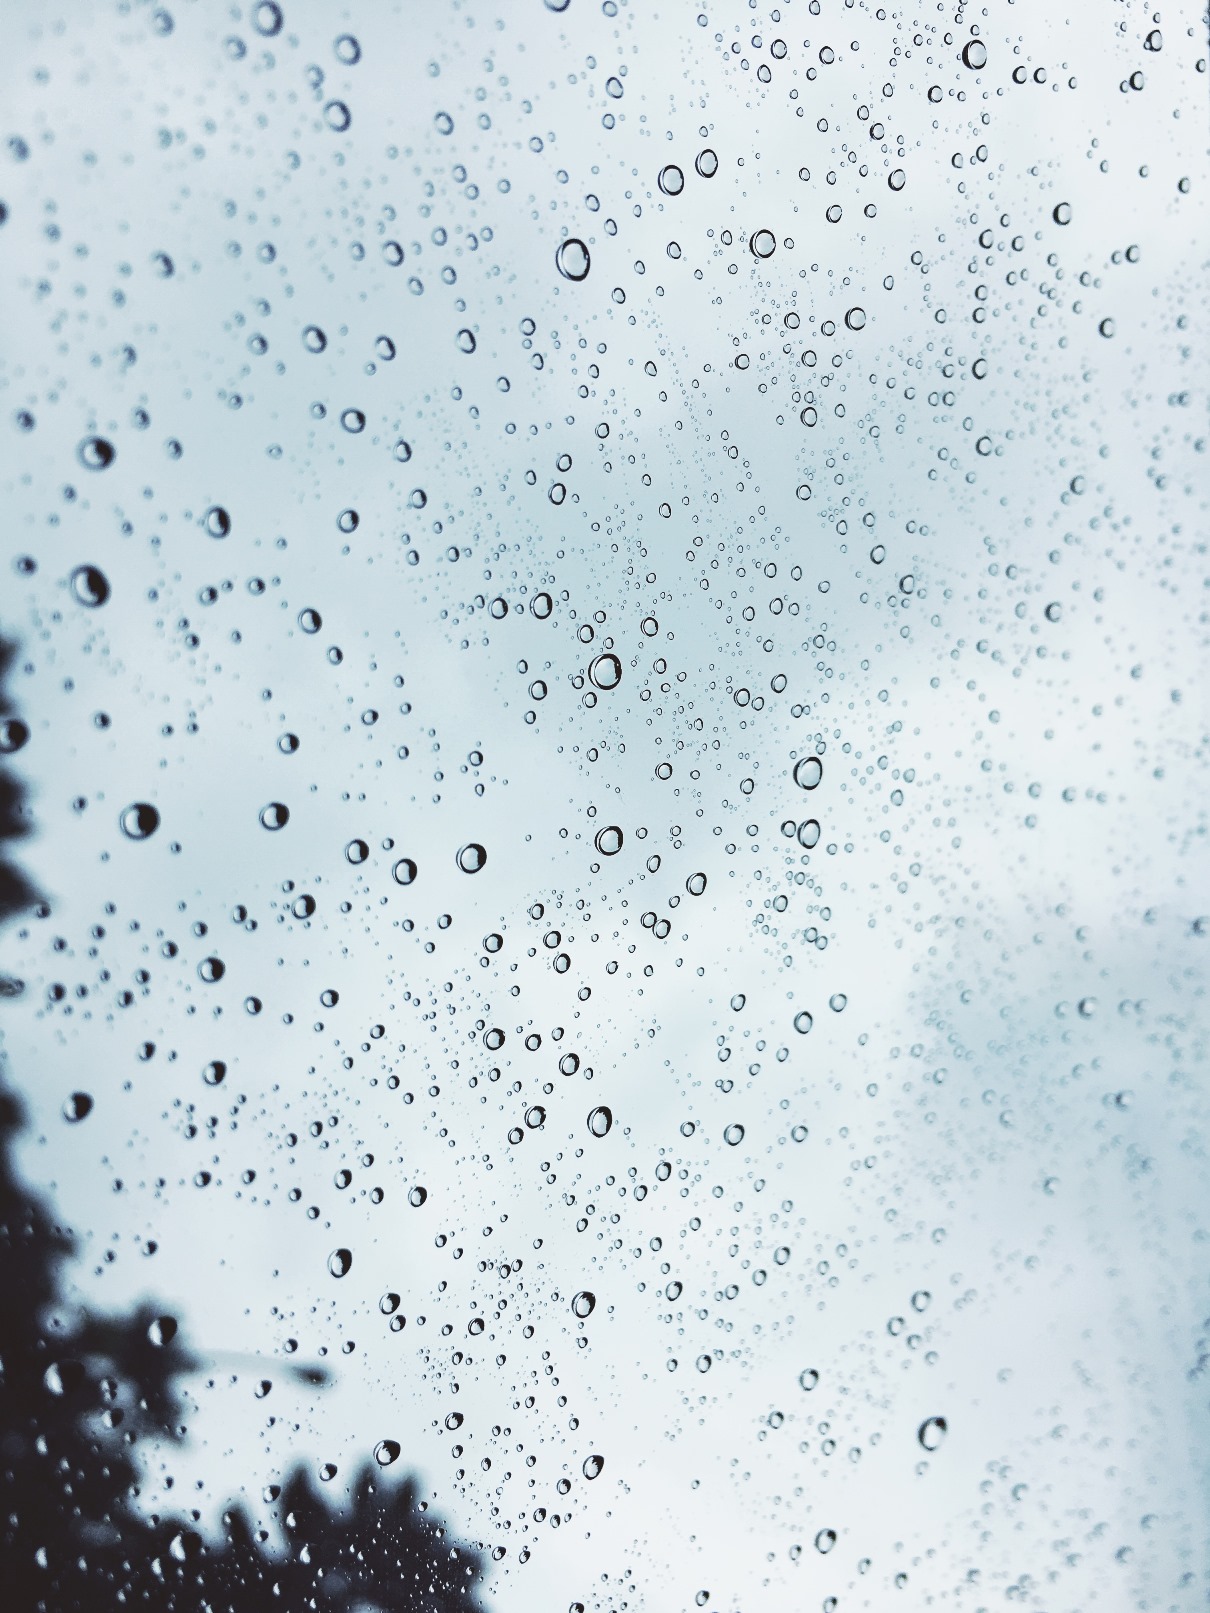
Raindrops have always caught my attention for the longest time, not sure why but it’s probably the way the round drops beautifully form on the window. It is amazing how nature creates such intense, lovely moments precisely. It can be a challenge to capture raindrops especially to get the shot you have in your mind, but with a few clicks, I was able to click this image.

Coffee and Yellow
Coffee and Yellow

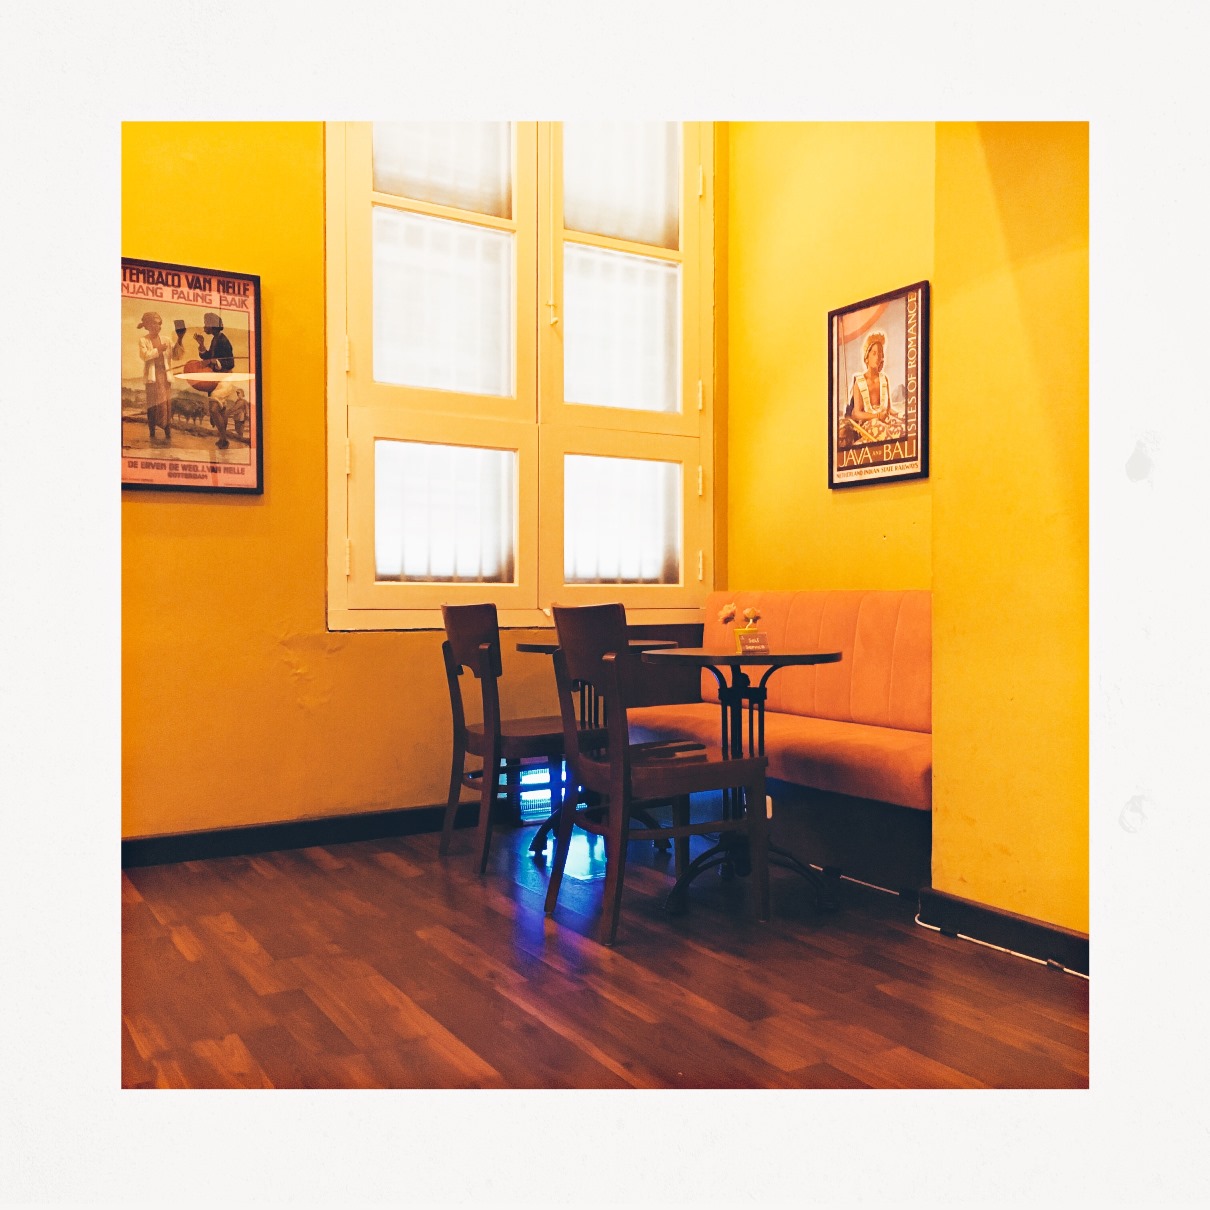
Sitting at the National Museum (Jakarta) coffee shop, I noticed this scene and instantly captured it. The classic windows, with the posters in frames and the bright yellow, transports you to a nostalgic era.

Chinese Lanterns
Chinese Lanterns

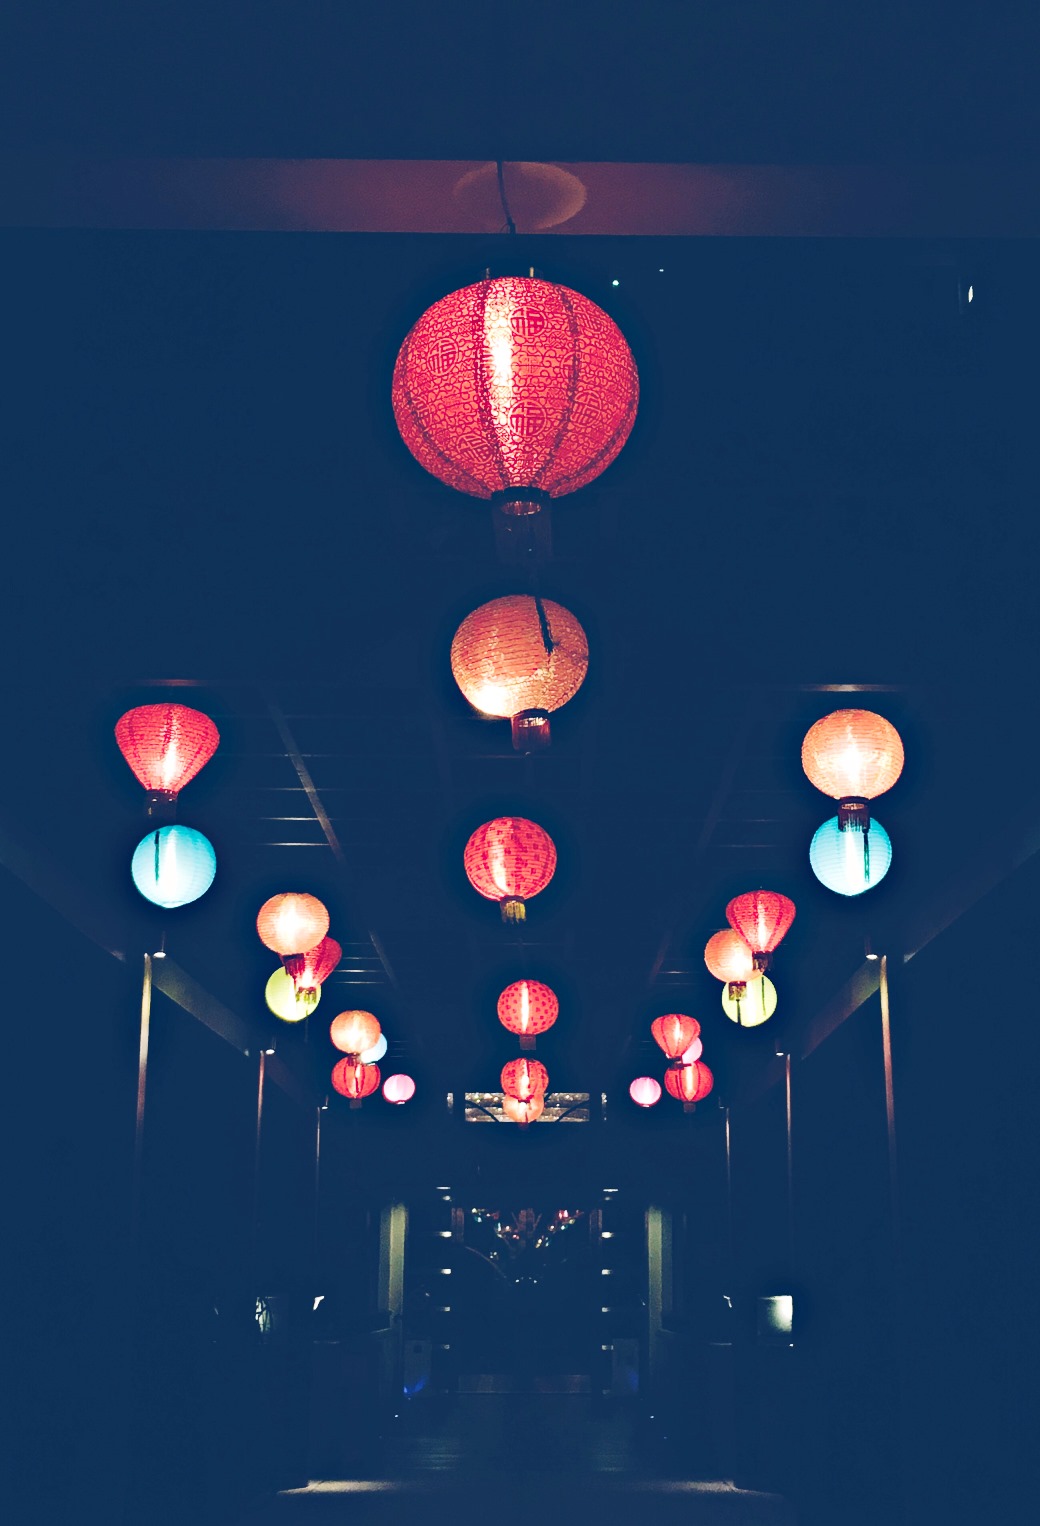
During Chinese New Year, I came across this lovely lantern decorations in an alley, and as always, the colors attracted my attention. The ambiance of the night filled with colors intensified my motivation to click simply.

Graphical Collition
Graphical Collision

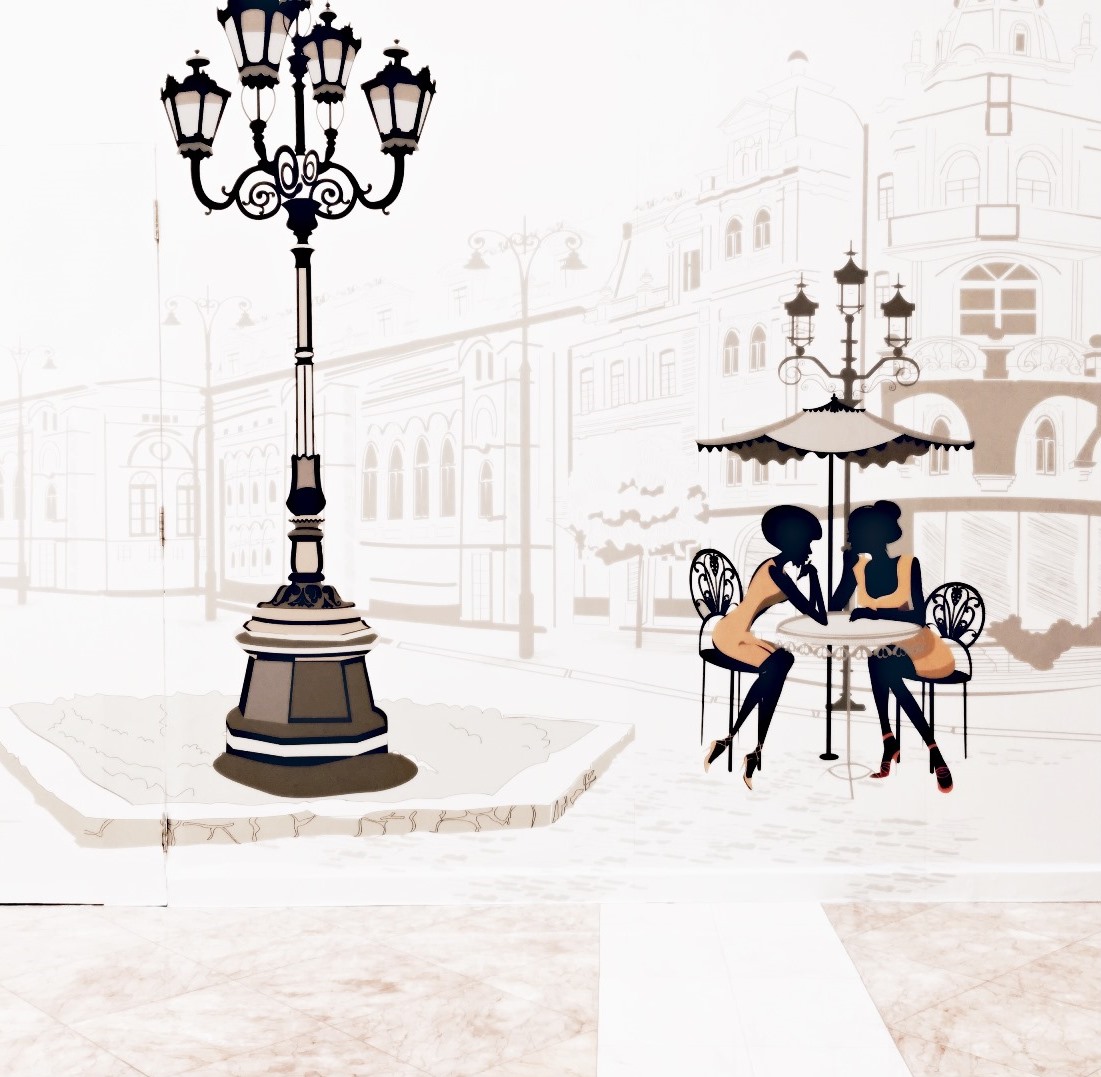
This was a graphical poster I found at a mall in front of a renovated store. Something about the illustration transported me to Paris or Europe even and I wanted to try to create a picture with the graphics in the background.

Backdrop Sunlight
Backdrop Sunlight

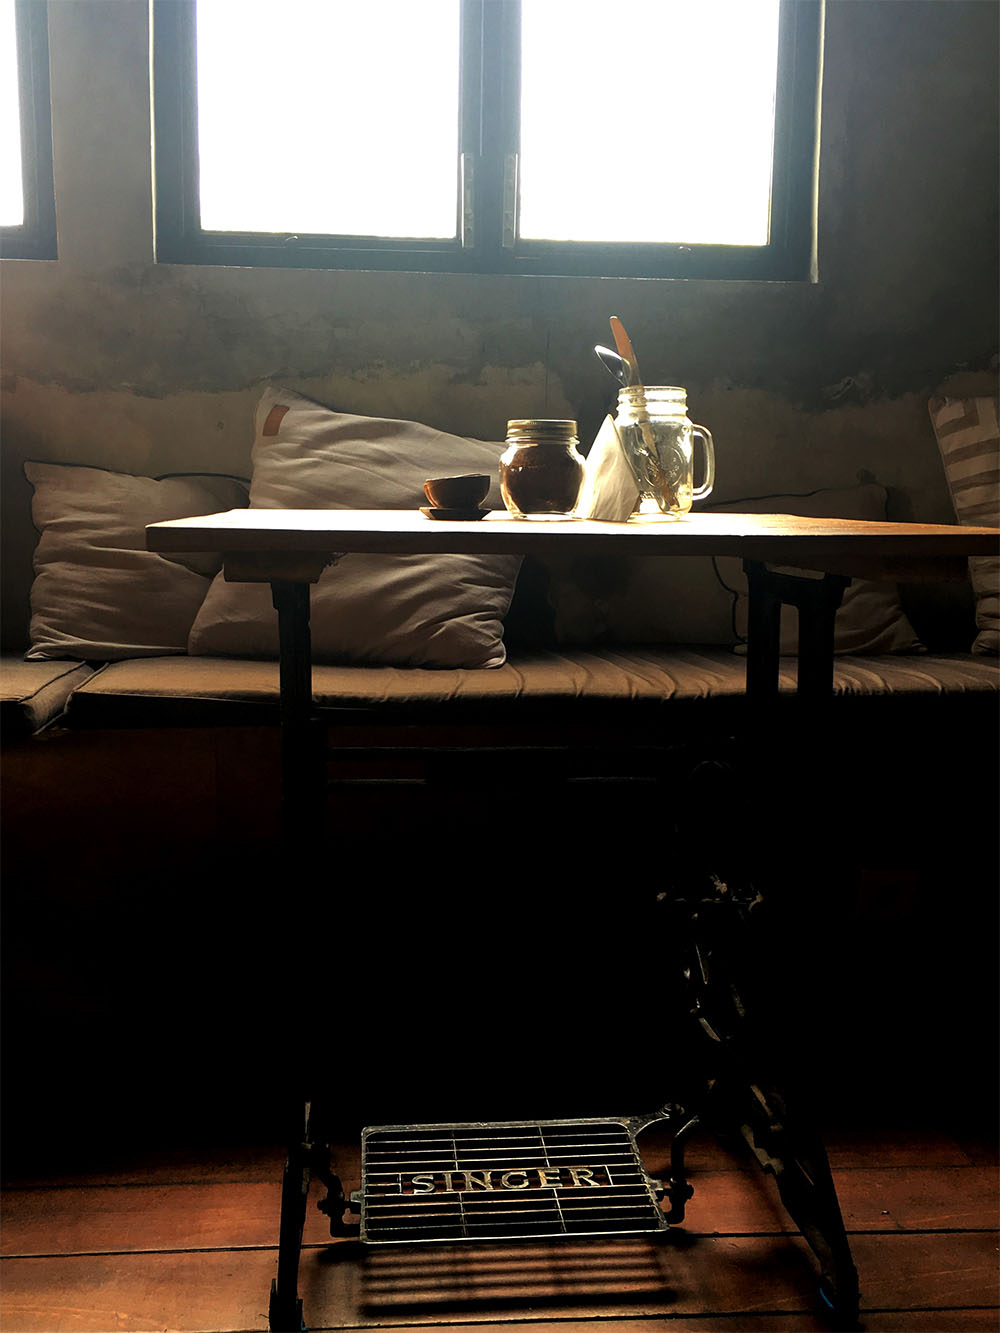
This was captured last year at a restaurant during a trip to Bali. The table with a blend of the Singer Sewing Machine reminded me of the olden days. It was fascinating how creative the combination was. The sunlight in the backdrop reflecting on the table created an image in my mind.

Through all the images, you can see that eventually what sets everyday life images apart is they are unplanned. It is a moment that stands as it is and has been captured through the heart spontaneously. There has to be a blend of two things: what you feel during the moment and clicking it once you’ve felt it. Many times when I have done so, the images created turn out far better than the ones I planned.

We must not forget that very first feeling we felt when seeing the moment and transmit it into a scene so that as we look back, it will only make us Smile. Beautiful treasured moments do not come from planning rather from the willingness to take the leap of faith and taking a shot that has come from your heart.

Taking Creative Photos Through Windows

A lonely figure sits in a coffee shop, observing passing cars with a ghost of a smile. Next, to the figure, a girl speedily takes notes, her hand a messy blur of movement. The scene is a delightful one, enhanced by the ever-changing window reflections: loneliness and busyness placed together, one giving in to the world it doesn’t fully know, the other creating one of its own. It feels like a film – or better yet, a cinematograph – a moment that seems to possess an indestructible eternity. If you were a witness to this fleeting moment, would you photograph it? If you would, your image’s atmosphere would stand out partly due to the aforementioned window reflections. Had you shot the scene in the coffee shop itself, the effect would’ve been vastly different?

Windows do not simply serve as passages to a person’s soul, as the famous quote says. Windows are also a brilliant way to enter the world different to your own, a way to empathize and reflect. Photographing through windows provides viewers with a personal look into someone else’s realm of thoughts, teaching them the importance of compassion and open-mindedness. Even nature, when photographed through a window, gains a quality unlike any other. Photos of this sort seem to be whispering a story as if listening closely could teach you spectacular things. And indeed, such stories do teach fascinating and eye-opening things.

//

It wouldn’t surprise me if you’d call window photos cliché. In fact, had you mentioned this even a year ago, I would be tempted to agree with your musing. However, in the very depths of failed shoots and impatience, I have discovered a beauty and originality in what many of us often render cliché. The world cliché, by definition, is something that is mindlessly repeated over and over again until its very existence is officially deemed useless. Approaching useless objects from new angles might reveal to you a helpful piece that was ignored by everyone else, a piece that is perhaps helpful to you only. Using this in your art will enable you to add your own usefulness to the techniques and projects that seem to have lost their value long ago. Thus, windows can be approached in ways unique to you and your creativity.

Here are a few tips on how to take compelling photos of people and nature through windows.

Portraits

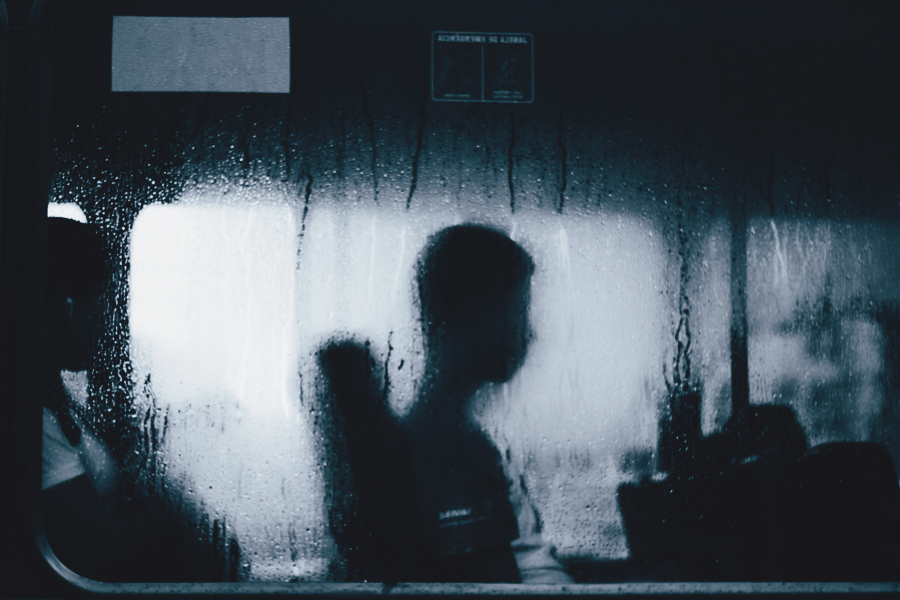
Taking photos of people through windows is a fun process as it gives the photographer unpredictable reflections on working with. If it’s a rainy day, the effects will be impressively abstract, since blurred foregrounds often make for stunning photo elements. Spraying water on a window could also work. In fact, the contrast between a droplet-stained window and a summery backdrop will give your photos uniqueness unlike any other. Covering parts of a window with paint or fabric could also work in your favor.

//

//

Some of the best photos taken through windows are spontaneous ones. A subject lost in their own thoughts combined with a reflection of a field tells a captivating, yet peaceful, story. Even a couple of silhouettes observing a cityscape could work. Don’t be afraid of including abstract shapes and lights in your images – these will enhance your style and make your images stand out. Literally reflecting your subject’s emotions and thoughts with the help of a window will strengthen the impact your work has on others. Your photographic courage will push other artists to reassess their own work and find new ways to challenge themselves.

Nature

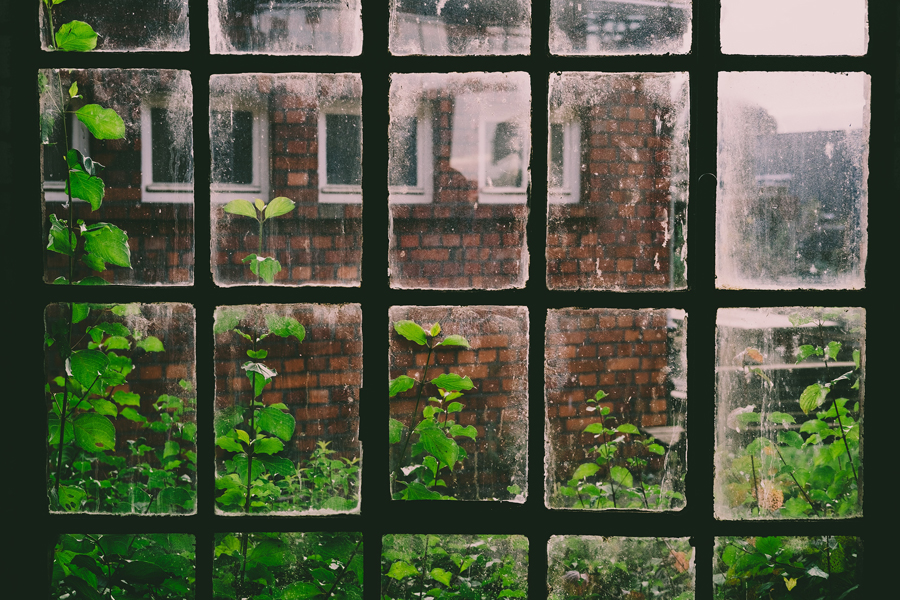
Working with nature is almost effortless because it’s always around, it’s always waiting to be found. If you don’t have anyone to photograph when your inspiration is at its highest, use your surroundings instead. Look out of your window and try to find something you’ve ignored before – perhaps an exquisite little flower is growing right next to your window, waiting to be documented by you. Look near and far and find a story you could tell using everything that’s right in front of you. You could even document the view out of your window during various times of day, or throughout the year.

//

//

Working with emotional storytelling techniques will give you a brand new world to use in your art. Writing stories before a shoot might also boost your creativity and present you with an abundance of artistic possibilities. Regardless of the potential absurdity of your ideas, experiment with them and see where the results take you. It’s the unpredictable shots that end up becoming the most spectacular pieces of art.

There are a plethora of journeys you could take as a photographer. All you need is a window and a willingness to keep your eyes open, no matter what.

Good luck!

//

Do you know your photo edit limits?

We are living awesome times regarding to technical advances. Our digital cameras improve every year, the optical of our lenses is high quality, and our photos have better resolution than ever. Also the software for photo editing is in continuum evolution. Photoshop, Lightroom… their editing capacities seem endless.  We can do easily some basic adjustments: hue, exposure, contrast, saturation, clarity or other similar features to improve the look of a photograph. It is what we call enhancement. But we can also clone out objects/persons from the frame; add interesting skies that were not there before, make eyes bigger, people slimmer… (manipulation). These software tools made us free to do as many things as we want. But the fact that we can do what we want means that we should do it? Is it ethical editing photos? Should be define our photo edit limits? The answer to this question is not as easy as it seems.

Photo edit limits
This is the Raw photo. Straight form the camera

Photo edit limits

This is the same photo after I did some enhancements in order to achieve the look I wanted (I darkened the background, I cropped and straightened the photo, adjust contrast, clarity and some other features). I also did some modifications because I deleted the two little bugs that were sitting on the flower and a lighter area next to the flower (lower right corner). I delete them because I found them distracting.

Do an internet search about ethics in photo editing or photo manipulation and you will find all sort of opinions about this subject. Some people think that photo editing is not right, especially when you are talking about photojournalism. Other people believe that photo editing is part of the photographic creative process. They say that photos have always being manipulated somehow. In the past photographers used the dark room to apply their manipulations. Now we do it in a computer. But there is has always been some kind of photo editing.

Photo edit limits

I enjoy editing my photos. In this one I played with Photoshop filters just to give a more painterly look to the photos.

The limits of how much photo edition is acceptable seem to be dependent on the photography field.  In case of photojournalism, there are ethical codes. Although excessive manipulations are not accepted, minor ones usually do. Unfortunately there are no clear standards that define the differences between minor and excessive photo manipulations. Oxford’s university’s Reuters Institute for the Study of Journalism in association with World Press Photo published a report on “The State of News Photography”. The report contains the results of a survey done to the photographers that entered the World Press Photo Competition of 2015.  1549 photographers completed the survey. They answered 63 questions about diverse subjects, including ethics. Almost 73% of the photographers said that they never manipulate their photos (meaning adding or removing elements). So it seems that manipulation is avoided for most of the photographers (notice that I said “most of”. The other 27% manipulate photos at some level sometimes). The answer about photo enhancement was more diverse. Just 9.4% of the photographers admitted never enhancing their photos. All the rest (90.6%) enhanced their photos sometimes (32.7%), half of the time (7.1%), often (21.8%) or even always (28.9%).  They also asked them if they follow ethical guidelines. The answer was interesting:  26% followed their company’s ethical codes and 58% their own standards. This means that more than half of the pictures are subjected to just individual ethical restrictions. Is this right? How do we know the type of editions that the photo we have in front has suffered? Just enhancement? A minor manipulation? What does minor manipulation means for the author of the photo? All these are difficult questions, aren’t they?

Photo edit limits

Did I edit this photo? Although it might seem a pretty simple photo (just a flower), it is also an edited photo. Here I enhanced the sky ad I increased the contrast and the saturation to make the photo more vibrant.

On the other side of the scale we have fine art photography. This field totally relies on photo editing. Fine art photographers use all the available tools to show their internal vision of reality. Fine art photographers are usually Photoshop masters too. However, things are not so clear in other fields. Fashion photography is not subjected to the photojournalism code of ethics. Does this mean that they can alter the image of a model to create an unrealistic view of beauty? How does this affect to the public? And what about nature photography? And landscape? Are the manipulations we do to enhance skies or to delete garbage acceptable?

Photo edit limits

Landscapes are also subjected to enhancements and modifications. I usually enhance the skies and I delete all the garbage I can.

After all this information, it is your turn: To edit, or not to edit: that is the question. You already saw how subjective this issue is. I will share with you my personal decisions about the subject.

My edition boundaries:

  • I do modify backgrounds in order to make them look cleaner: I delete garbage and objects that might distract from the main object of my photo.
  • I do enhance the general appearance of a background: I do basic adjustments and I apply presets if they can save me time or they can help me achieve my photographic vision.
  • I do enhance the look of my models: I keep my models natural and I just do light adjustments to add brightness to their eyes, skin and eyes. I delete pimples and red skin.
  • I do not change the body shape of my model or delete permanent marks (such as beauty marks). I do not change the color of their eyes or hair.
  • I do inform my clients of all the modifications and enhancements I will do to their pictures.
  • I do not hide the type of enhancements and modifications I do to my photos.
Photo edit limits
I do edit my portraits. I usually do basic enhancements and if I modify something, it is the background (to clean it) or some pimples or red skin. I do add brightness to the eyes, skin and hair. But I always keep my model as natural as possible.

Take into account that I am a portrait and nature photographer. I do not do photojournalism or fashion photography. I enjoy editing my photos and I consider it part of the creation of my photography. However, I try always to be respectful and think of the consequences of my editions. Might my editions be harmful to somebody? If the answer is yes, I won’t apply these editions. I hope my point of view will inspire you to define your own photo edition limits.

Introduction to Landscape Photography

Content

  • Introduction
  • Before you get started
  • Planning – Location and time
  • Technique – Camera settings (HDR, depth of field etc) and composition etc
  • Post-processing
  • Publishing

Introduction

Four years ago my passion for photography started and the main reason for this was that I explored the beauty of landscape photography. I wanted to get some wonderful wallpapers for my desktop but found myself astounded by the art that is landscape photography instead, I could browse landscape wallpapers for hours. My interest in landscape photography grew and getting my first camera I started doing it myself, today my landscape photography have progressed a lot and I hope to share some tips that will help anyone getting started with landscape photography.farsbooktober2014-10

Before You Get Started

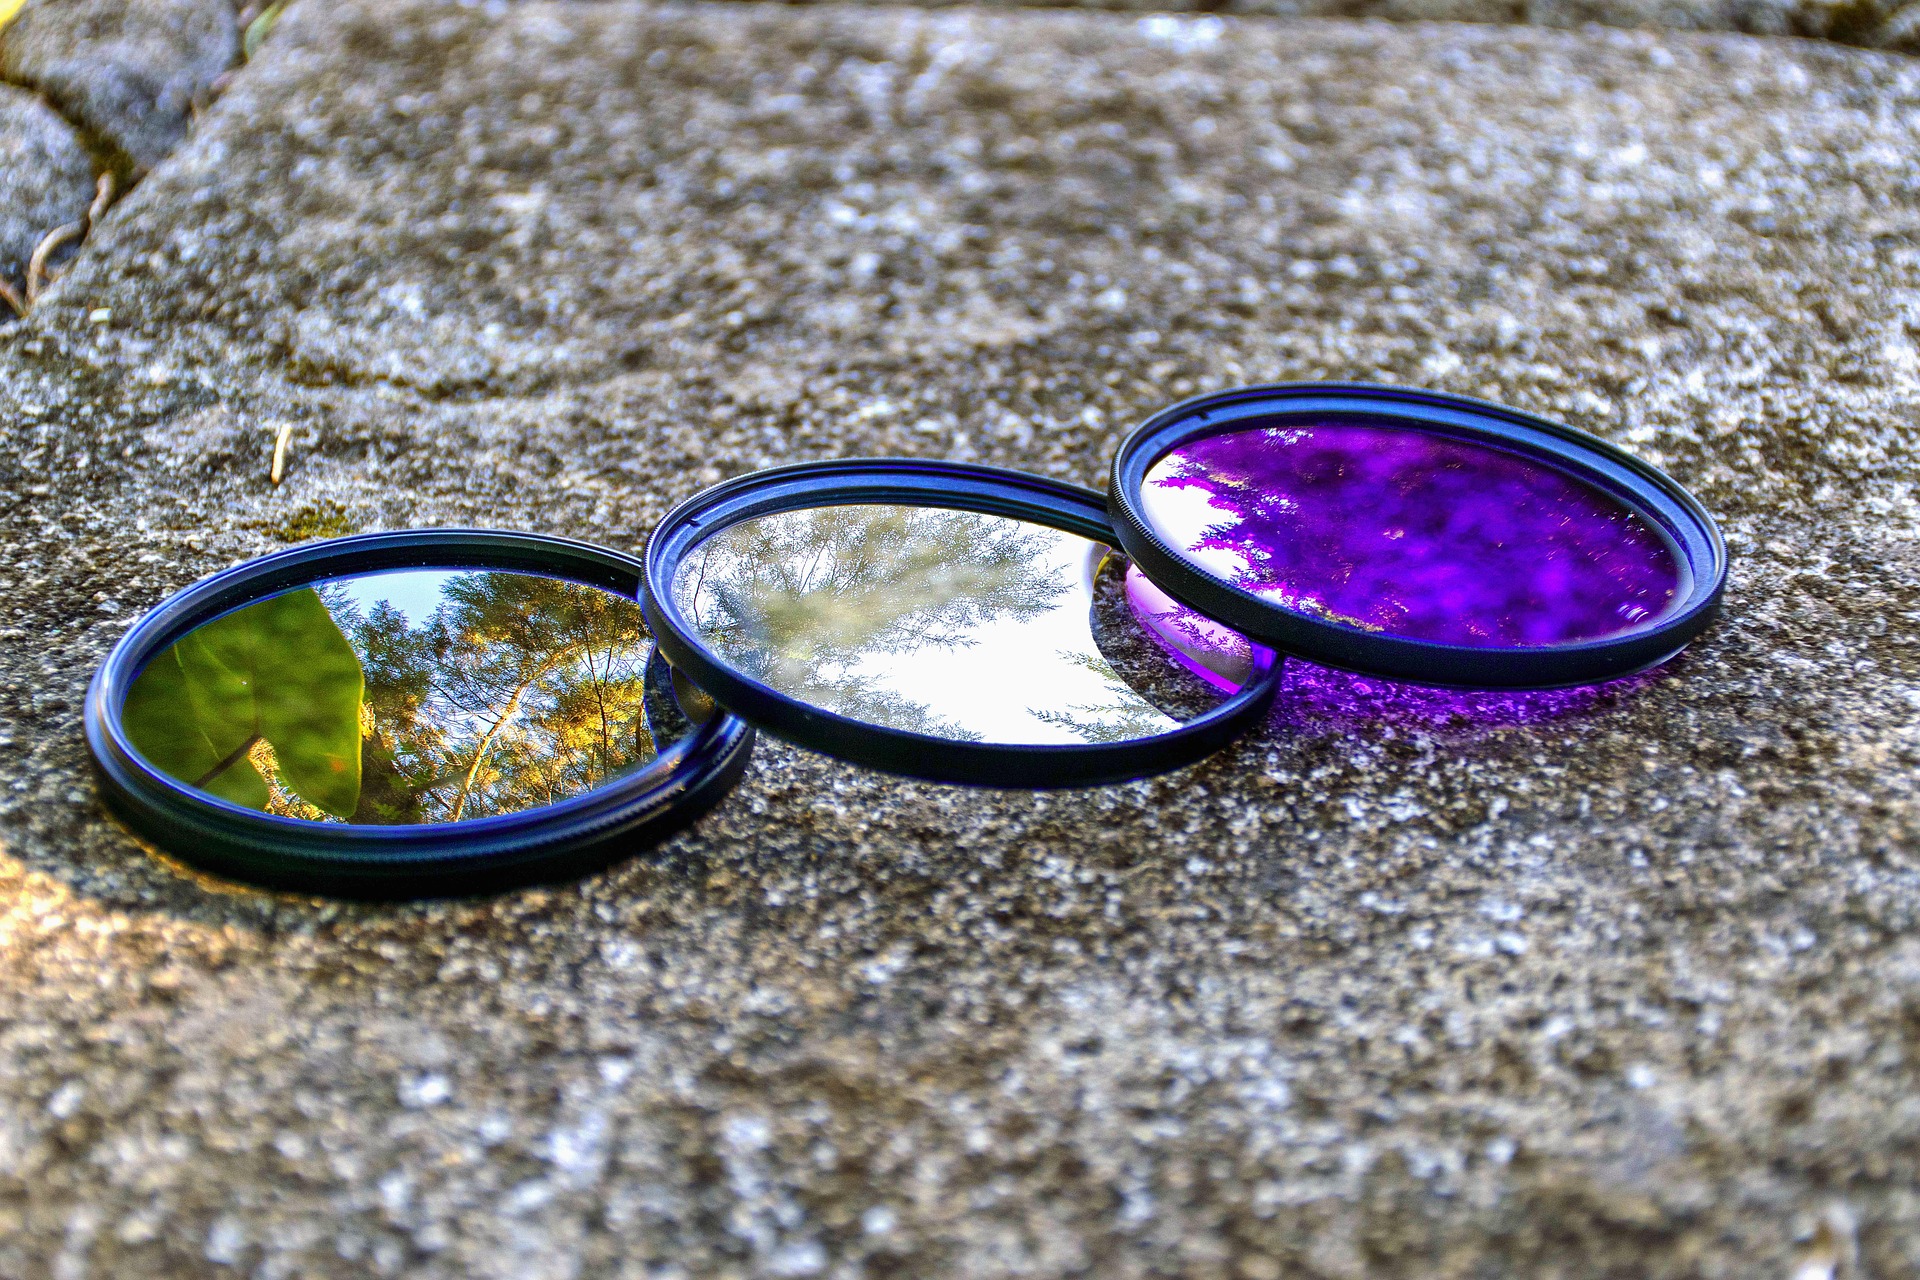
There are of course no definite rules of what you need before you get started but there are some things that I recommend you have and some basic knowledge of photography. In terms of equipment, I recommend that you at least have a camera, lens(es), tripod and a computer with photo editing software (preferably Lightroom and/or Photoshop). That you need a camera is obvious, but what kind of camera? First of all, it needs to take good photos, but there are some other capabilities that are more or less a must. This includes the capability for interchangeable lenses, manual settings, and RAW-format. I recommend having a DSLR from one of the bigger brands since this will give you a wide array of lenses to choose from and a greater possibility to upgrade your equipment within the brand (so that you don’t need to buy new lenses when/if you decide to get a camera upgrade). Any newer DSLR will do just fine, but if you can afford it a full frame camera that is great (don’t be afraid to buy used cameras and lenses), there are also mirrorless cameras that would be suitable, but unless size and weight are important issues I would stick to a DSLR.      photographer-1031249_1920As with any type of photography the lenses are of great importance in landscape photography, and there are three types of lenses that will fill all your needs, these are the normal zoom lens (usually somewhere around 24-70mm equivalent to a full frame sensor, 18-55 on a cropped sensor), the ultra wide angle zoom lens (usually somewhere around 12-35mm equivalent) and the telephoto zoom lens (usually somewhere around 70-300mm). If you have all of these lenses you will be able to capture all types of landscape photography. I recommend that you buy lenses with a big aperture like f/2,8 if you can afford it, but there are cheaper alternatives that work great as well. Depending on your style of photography you will use different lenses more than others, personally, I use my normal zoom lens (24-70mm f/2,8) the most since I find it to be plenty wide for most situations and I also have the possibility to capture tighter images as well.dawn-1284235_1920I would also recommend that you use a tripod for landscape photography, and while it isn’t completely necessary I find that it makes you slow down and think more about the process, such as composition. A tripod will also help you eliminate blurry photos and is a must if you plan to take long exposures. Be sure to use a sturdy tripod that won’t wobble around too much. Another tip for when using a tripod is to also use a cable release so you won’t have to touch your camera, and in that way producing slightly blurred photos. You could also set a timer to eliminate this risk. There is various other equipment that you can use, primarily filters. If you want to achieve long exposures in the daytime you have to use a strong ND-filter, and a circular polarizer is great to have at hand to reduce glare and increase vibrance in photos.filter-1259839_1920For post-processing, you can use whatever software you like, but for some more advanced features, Adobe Photoshop is the way to go. I really like working with Lightroom as well, as it is easy to manage and very powerful.This guide will not be going over how the technical aspects of your camera work, like shutter speed, aperture, and ISO, so if you are not yet comfortable with these aspects of photography I recommend that you read about it. I would say it is essential to know these things if you want to achieve great landscape photography.

Planning a Landscape Shoot

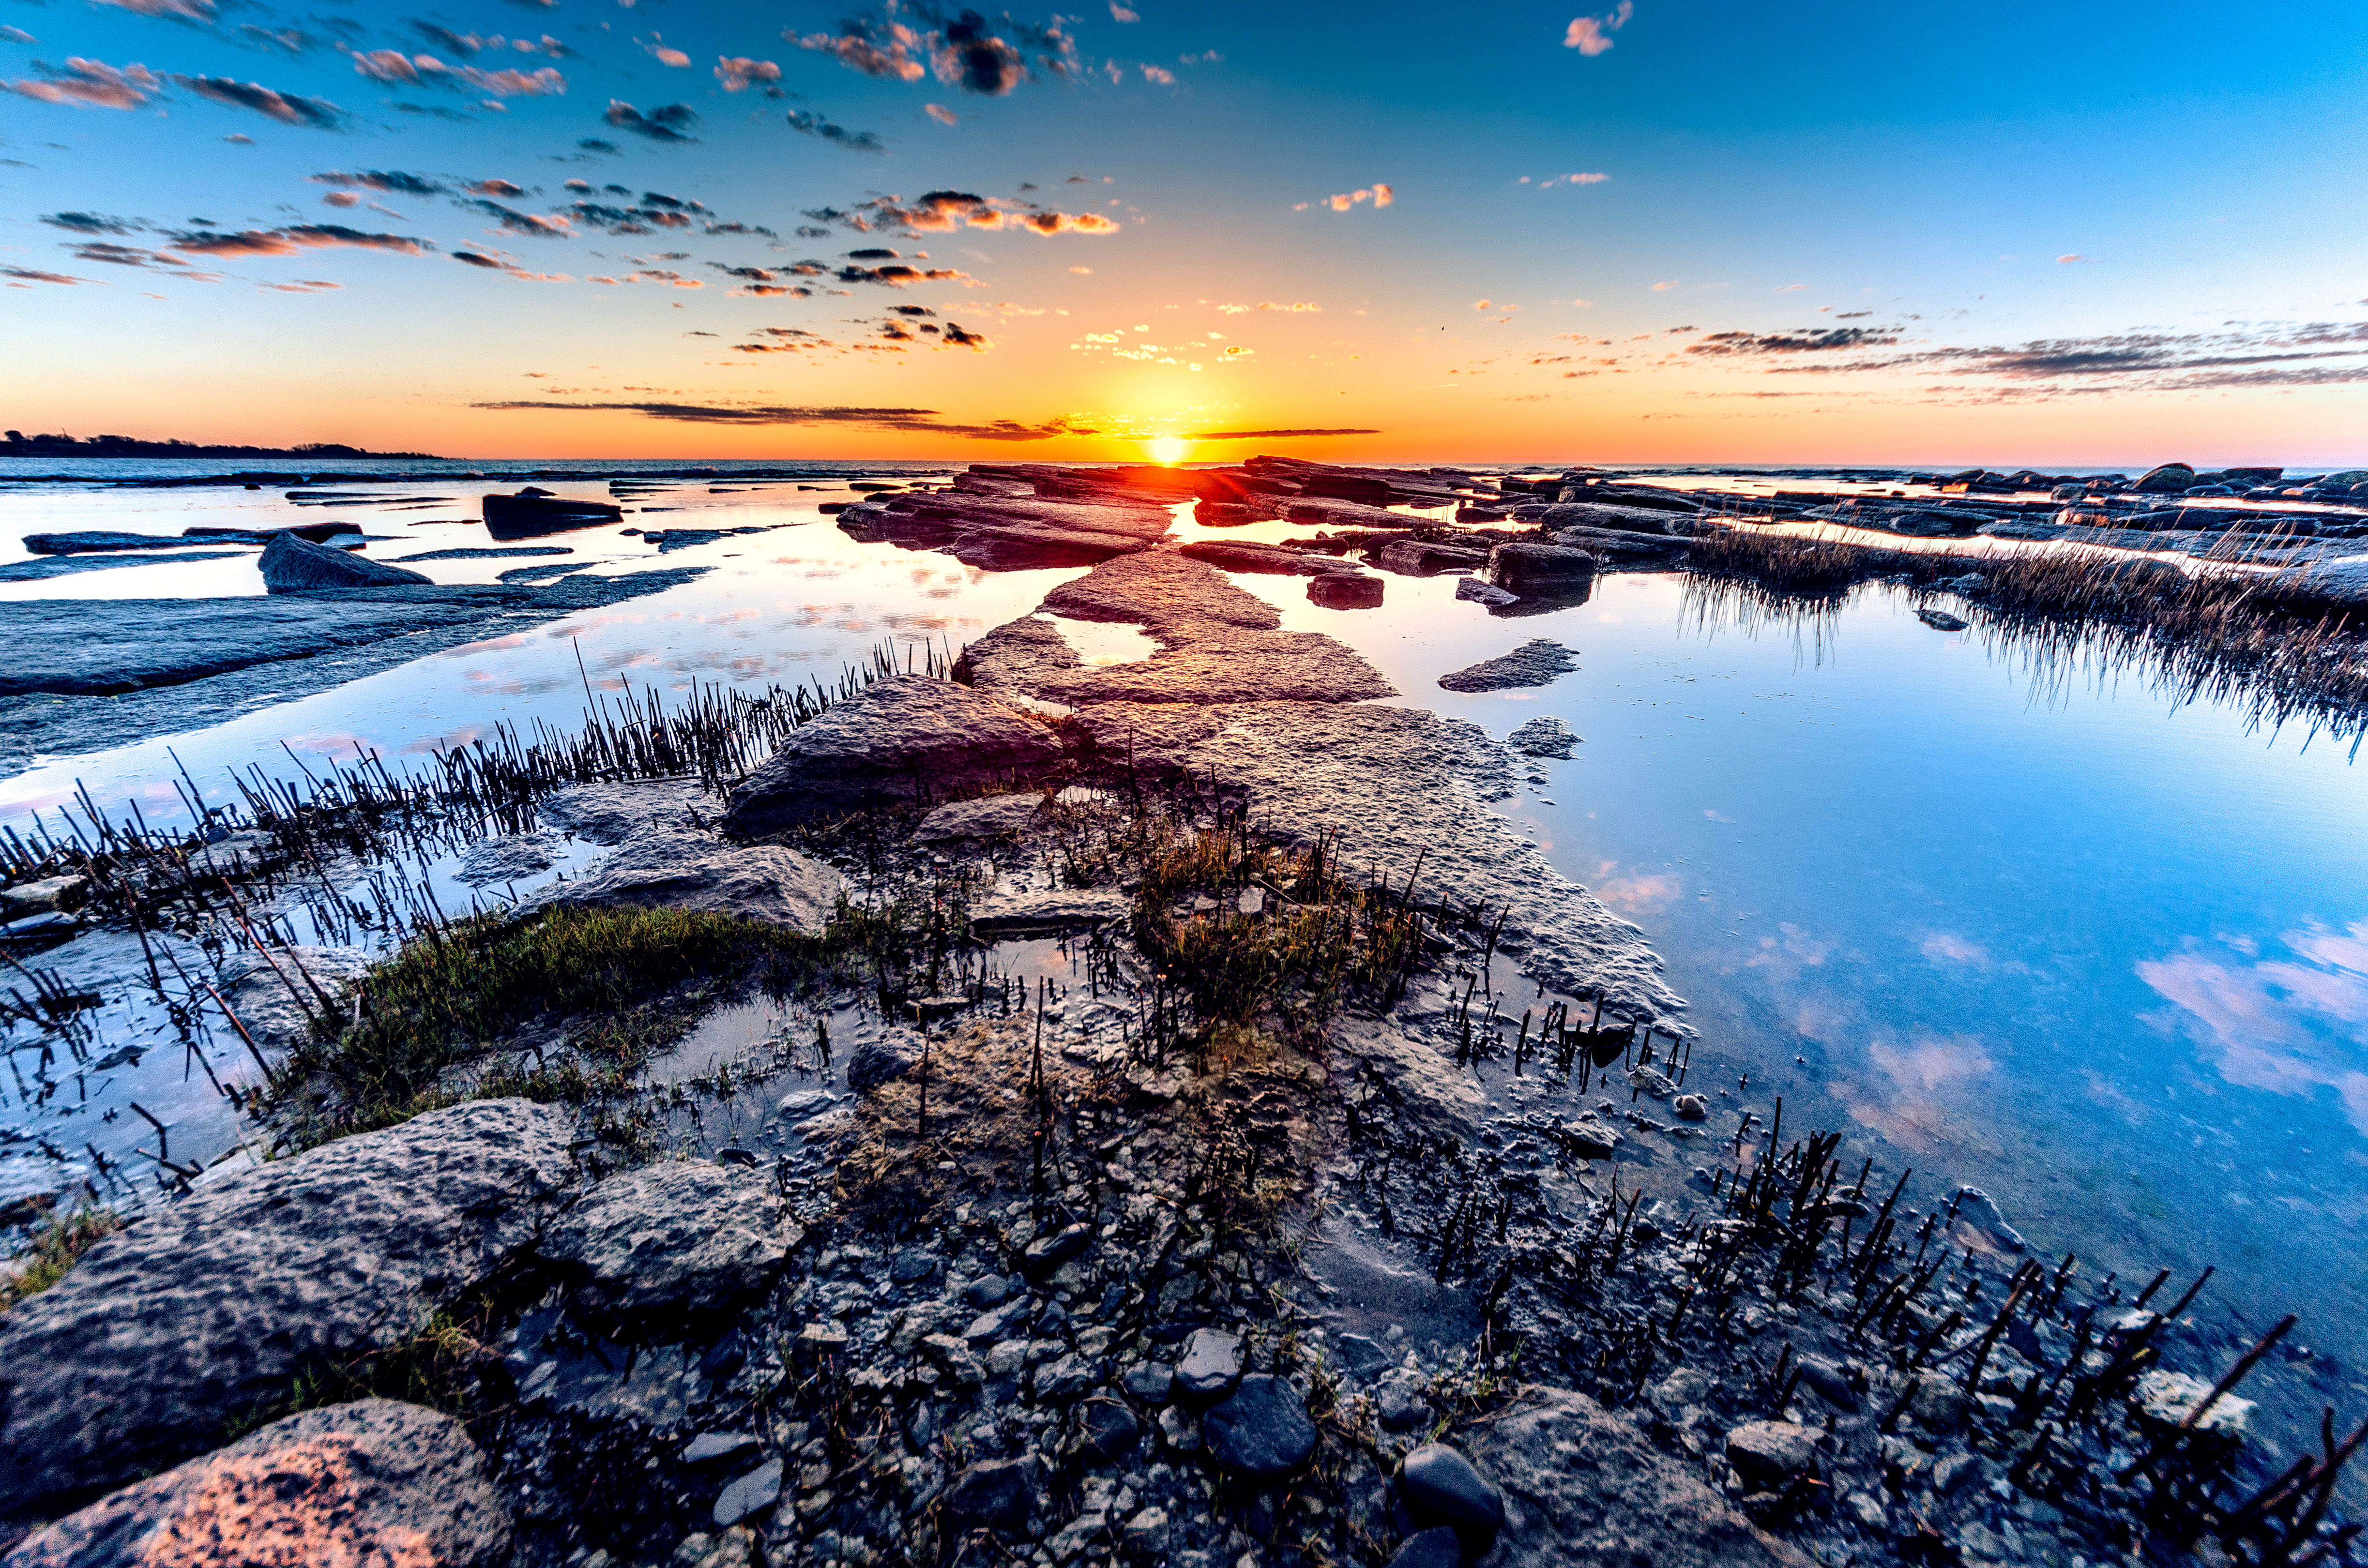
Before you head out to capture amazing landscape photos you need to make some sort of plan, it can be very detailed but it is often good enough to make a general plan. There are three basics in planning a landscape shoot, these are location, time of day and look at the photo/composition. Before you go you should, of course, know the location you are heading to, maybe you have scouted the location the day before or earlier the same day, or maybe you have just found a certain spot through other photographers photos on the internet. Often you will be taking photos in locations that you have never been to before and if you don’t have time to come back to a location several times it can be a good idea to research the place beforehand through sites like 500px. By doing this you will get some inspiration for what photos you want to capture when you arrive at the location. If you are staying in the same place for a longer period I would recommend that you spend a bit more time on scouting locations that you can go to when the time is right, for example during golden hour.branches-325411_1920Time of day is crucial when it comes to landscape photography since we are dependent on the weather and light gave to us by mother nature. We simply have to adapt to mother nature. As a rule of thumb, you should try to capture landscapes during golden hour. That is the hour (give and take) during sunset and sunrise. At this time the light cast by the sun is the most beautiful, and since we are usually trying to take beautiful photos this is the best time for landscape photographers. But of course, you can capture landscapes at different times as well, for example, long exposures during the night or on cloudy days. At least you want to avoid broad daylight since it makes everything very flat and boring. Lastly, you have to plan how you want the photo to look, this is, of course, dependent on the time of day and location but it is good to have an idea about composition and subjects among other things before you arrive at the location. paddle-839814_1920   When I took the photo you can see below I was staying with some acquaintances for two nights, in a beautiful small village at Österlen, Sweden. When I first arrived in the evening I went down to the sea to scout for a location (I didn’t bother taking the photos I wanted at this time since I knew it would be much better at sunrise the next day) and I found two spots that I really liked. I used an app to find out in what direction the sun would rise the next day and decided to try to capture an image where the lines formed by the rocks in the foreground were leading the eye of the viewer towards the rising sun. So the next morning I woke up at about 04.00 (4 AM) to capture the photo I had envisioned the previous day. The sun rose approximately 04.30, but the things you do for great photos… My plan worked out great and I got this photo that I am very happy about.      ÖsterlenApril2014-113

Technique

A big part of photography is technique since we must know how to use our cameras and how to compose a photo to get the best results. I won’t go over in detail how to set up you camera and how the technical aspects of your camera work but rather focusing on the specifics for landscape photography. Some keywords in landscape photography are sharpness and correct exposure. To achieve sharpness you have to use the appropriate aperture, make sure you have focused your lens at the right distance and that there is no risk for blur. Since we want the entire landscape in focus most of the time we should use a smaller aperture. This will also depend on your focal length since the depth of field is smaller on lenses with longer focal lengths. I usually never go below f/8 for my landscape photos, unless it is very dark or I’m using a super wide angle lens (like 16mm equivalent or below). The aim is to have as much of the scene in focus as possible, without having a too small aperture (since that might lead to softer photos). Somewhere around f/8 to F/16 is usually suitable for landscape photography. You also want to make sure that you focus your lens somewhere a third into the frame, which usually is the foreground. If you focus too far back the foreground will be out of focus, but if you focus on the foreground the background will most likely be in focus if you are using a fairly small aperture.dog-190056_1280It is also important that you eliminate any risks of camera shake, by using either a shorter shutter speed (the shutter speed should be no less than the focal length of your lens, so if you are using a 24mm lens the shutter speed should at least be 1/24th of a second) or a tripod. If you are shooting hand-held it is recommended that you use vibration reduction if your lens (or camera) has it (keep in mind that it is called different names depending on the brand). Additionally, It is very important that you have a correct exposure, no matter if you are shooting JPEG or RAW (recommended). Something that really can ruin landscape photos is overexposure, usually meaning that there is no possibility to recover blown highlights in the sky. It is also horrible to have such underexposure that the colors are destroyed by noise when you try to recover the shadows. You should aim for an exposure were highlights are bright (but not blown) and shadows bright enough to increase them a little bit in post-process (if needed). You should rather have a bit darker shadows than to bright highlights. Another option is to use the technique HDR (High Dynamic Range) where you take several photos with different exposures and combine in post-processing, leading to an image with both no blown highlights and bright shadows.waterfall-192984_1280Another very important technical aspect of landscape photography is composition. This is such an important part that is impossible to cover thoroughly but there are some basic tips for landscape composition that you need to know.One important part of composing landscape photos is the rule of thirds. According to this rule, the horizon should be placed either at the top or bottom third, but absolutely not in the middle. This is to create a balanced photo, but of course, there are some exceptions, for example when there is reflection, then it can be nice to place the middle of the reflection in the middle of the frame.


Untitled-1

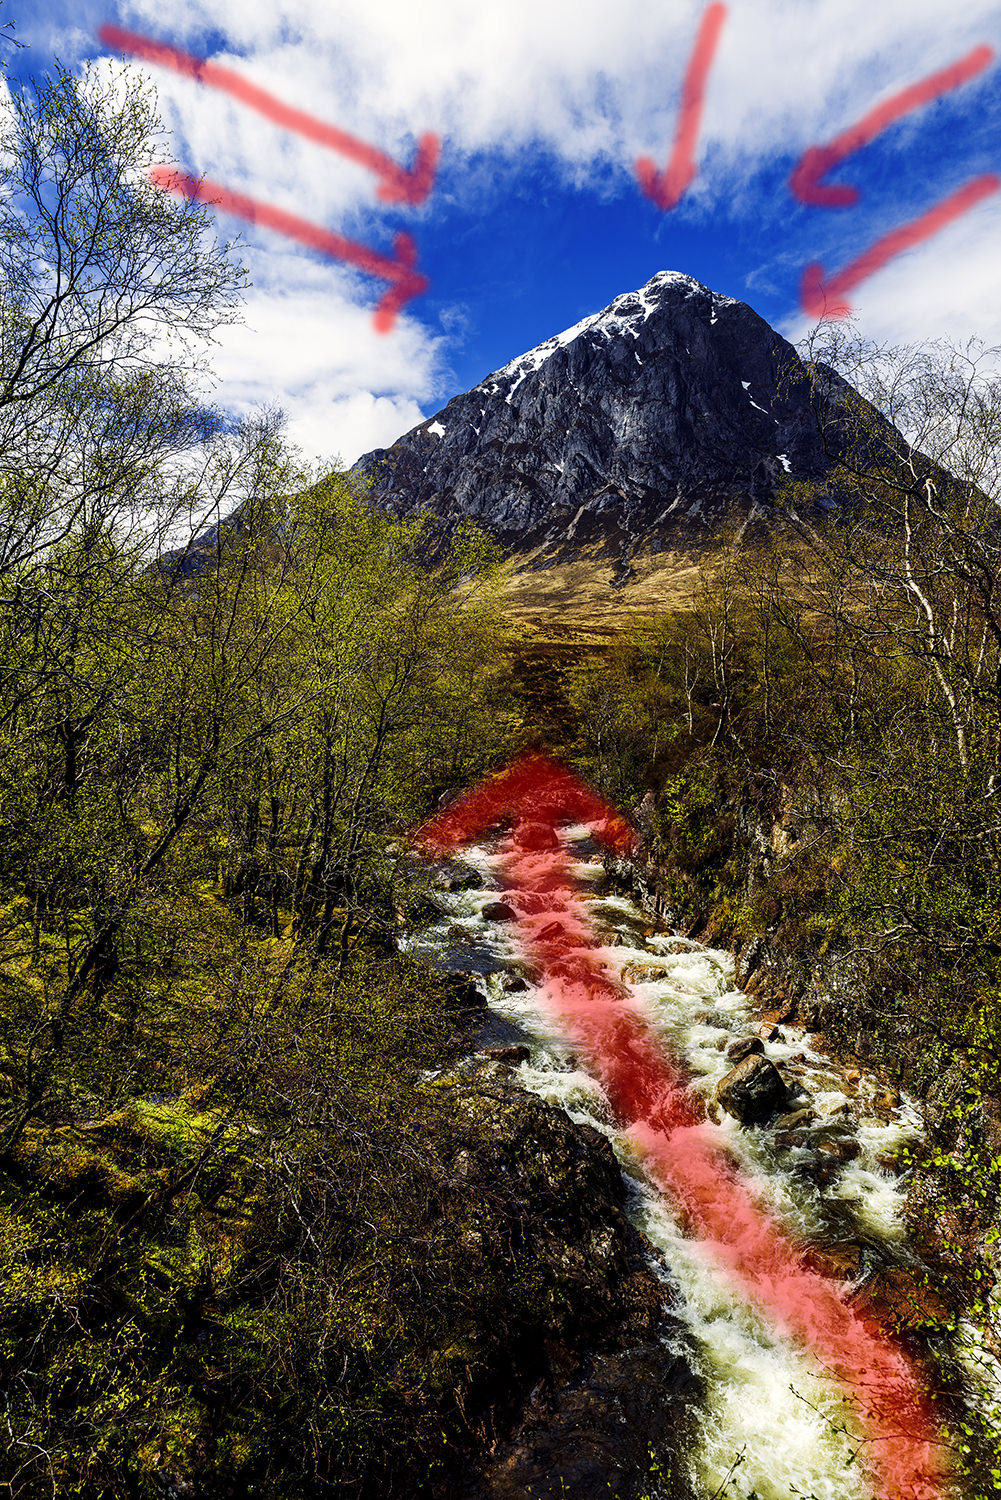
Another tip is to take advantage of leading lines. You can use lines in photos to lead the viewer to where you want them to look. Lines should be leading into the frame and not out from it since you want the viewer to look at the photo and not be distracted. For example, you can use a stream leading towards a mountain or a path leading the viewer from the foreground to the main subject as leading lines.

_D8A6277-PS-1

Post-Processing

When you are back after a landscape shoot the work is not done yet. What you do with the pictures after they have been taken is crucial to creating a fantastic image. I would almost say that it is in post-processing you turn the photograph from an image file to a piece of art. If you decide to shoot in RAW-format you will have much greater artistic freedom when you edit the photos, since RAW files have much more data in them, meaning you can change exposure and color to a greater extent. I use Lightroom for most of my editing and they use Photoshop for more advanced edits of my favorite photos.When I edit photos I usually try to enhance elements that are already in the picture. But first I create a base edit where I make sure that the exposure and contrast are what I want and then I go on to more in-depth editing, like modifying tones and details of the image. before-afterI highly recommend that you check out the different bundles for landscape photography that Sleeklens has to offer, they are a great and easy way to make your images look fantastic, and by combining different presets you can create completely unique looks.

Photoshop: Landscape Adventure Collection

Lightroom: Landscape Essentials Workflow

Conclusion

I hope you have found this short guide useful and that you will be comfortable to start exploring the wonderful field of landscape photography. This guide has just scratched on the top of an extensive subject and I recommend that you continue reading other guides that can help you get a better understanding for each part of the process, like the composition. Good luck with your landscape photography!

How and Where to photograph Songbirds

Today we will focus on techniques for successful songbird-photography.

Songbirds actually can be found in almost every forest, where they can breed and find enough food, such as insects, berries or seeds. If you are lucky enough to own a garden, you will be able to spot many bird species. All you have to do is to create a songbird-friendly atmosphere. Creating a songbird habitat in your backyard you have to consider just four things:

Food, Water, Shelter and Nestboxes.

The best time to photograph songbirds is in the winter, when there are fewer insects and other food resources for songbirds because then you have the opportunity to build up a bird feeder for the songbirds.
A bird feeder is the best and most effective way to attract songbirds to your planned shooting spots.

Bird feeders can be bought in every pet supply store, or if you are endowed with manual skills you can build up your own bird feeder. After you got your bird feeder, the next step will be to buy sunflower seeds and suet cakes, suet cakes contain nuts, fruits, oat flakes, mealworms and other insects – for them, it’s like enjoying a well-served food banquet.

It will not take much time till the first birds appear, probably after a week or so you have many bird species around your bird feeder such as blue tit, robin, coal tit, blackbird, woodpecker, jay, sparrow, nuthatches and many other songbird species. Maybe even a squirrel will also appear to get some seeds!

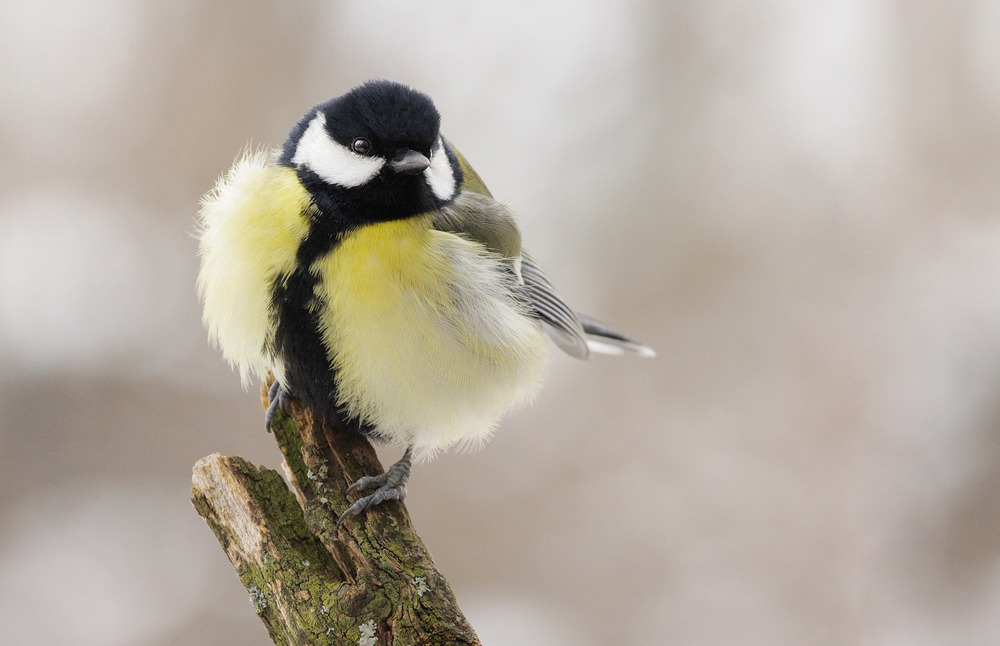
Kohlmeise

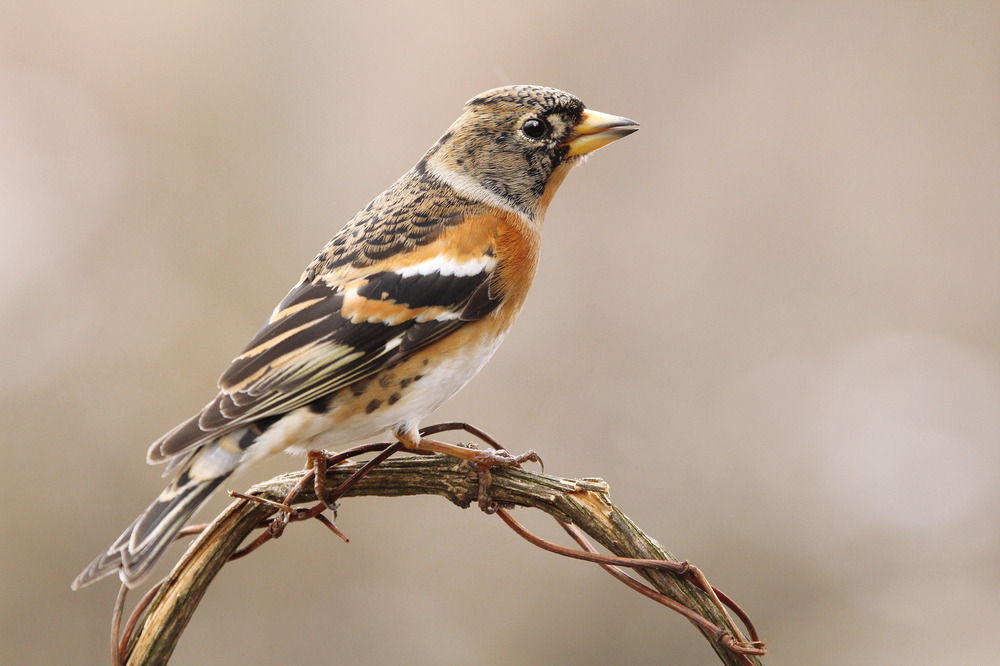
Bergfink
If you don’t own a backyard, you can look for a park or forest near your area and also just mount a bird feeder on a tree and wait for some days till the birds get used to the feeder. You will see, the songbirds will appear every day, just make sure you fill up the bird feeder when it’s empty.

If you are not sure how to build up a bird feeder or a nest box, this site gives you some ideas and instructions.

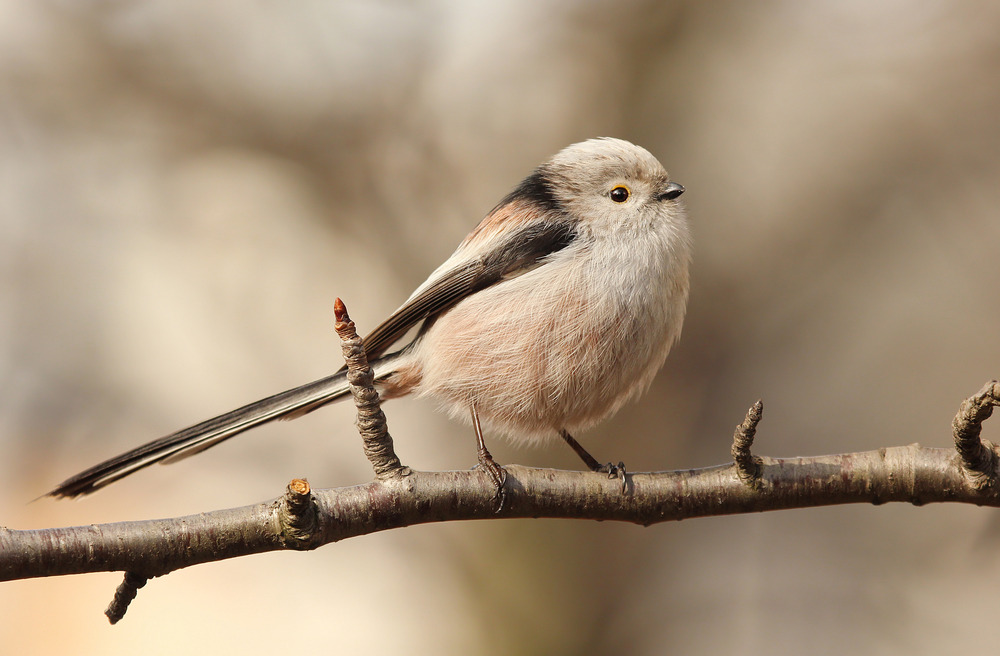
Schwanzmeise
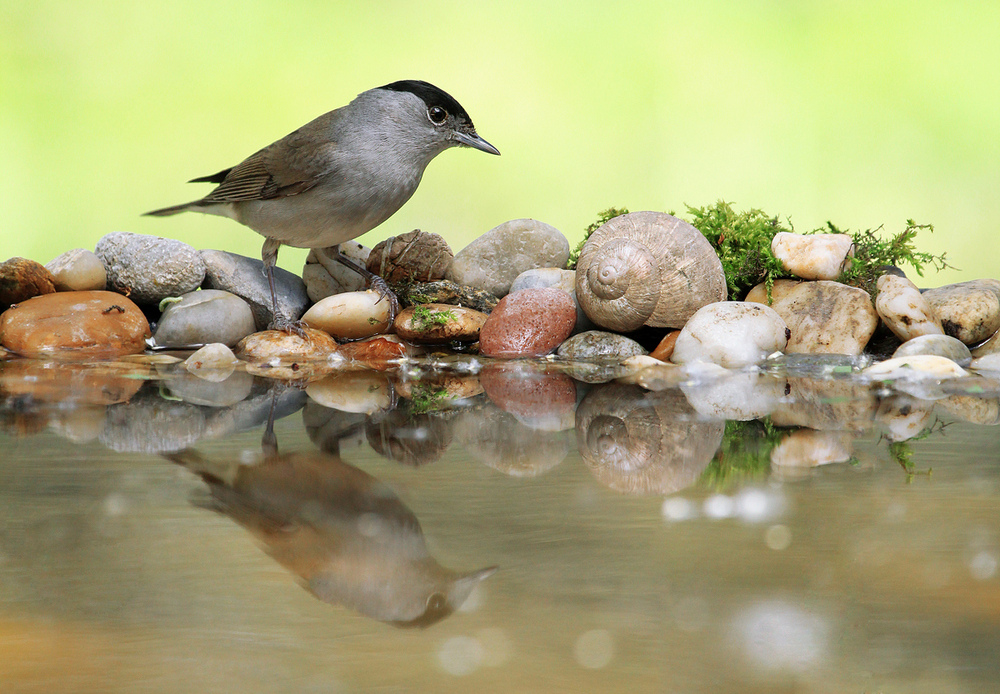
Besides the food you provide, another great way to attract birds is to build up a bird bath. Bird baths will be used not only in winter, also in summer on hot days, because birds need to drink and to cool themselves. Don’t forget to put some stones in your bird bath to provide the birds a surface to sit, bird baths should be only an inch or two deep; but for such purposes, any kind of tupper can be used.

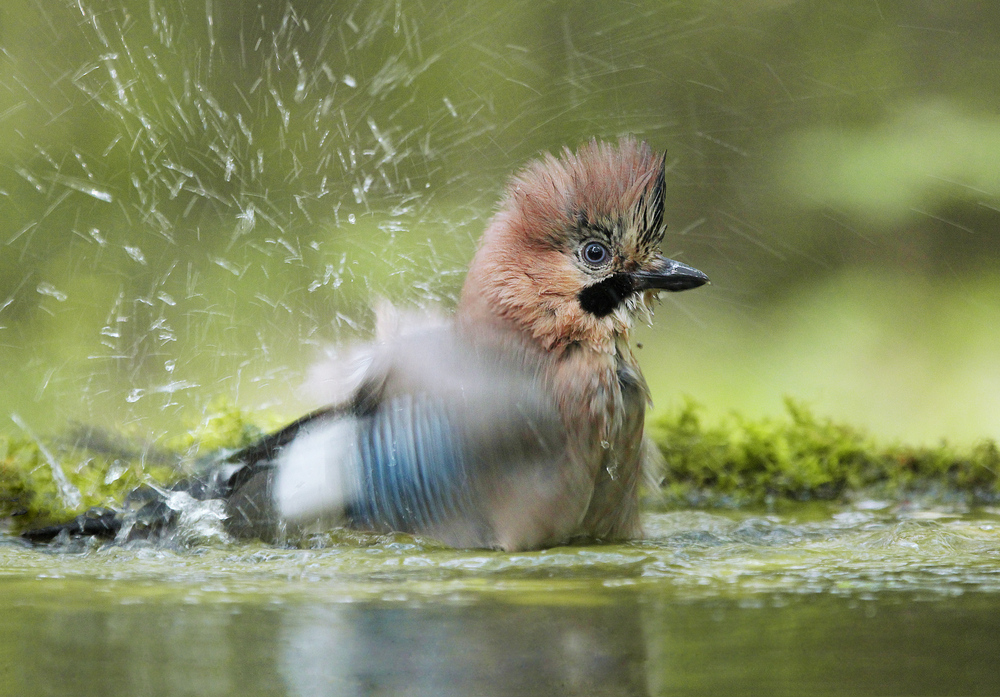
Photographing birds while they bath will give you excellent action shots, the water droplets fly in all directions, the birds show their wings and if you are lucky, you maybe can even catch 2 birds on the same photo. It might also happen that not only songbirds will appear to take a bath, also sparrowhawks maybe visit your bird bath to have a drink.

Check out following youtube video to see how it looks like when songbirds take a bath.

Eichelhäher

moenchsgrasmuecke-842b2bae-50ba-4e70-8c34-71fcec2dad91

When everything is set up for the birds, you have to make sure you use the right equipment.

So in order to get impressive songbird shots there are some essential things you will need for sure:

  • Hiding Tent (songbirds are usually very timid, so a hiding tent is a must)
  • – DSLR (use a crop camera, in order to get CLOSER to the small songbirds)
  • – Tele Lens (300 mm to 600 mm lenses with an image stabilizer work best)
  • – Tripod (use a tripod with a ball head in order to be flexible)
  • – Warm Clothes (if you decide to stay some hours in your hide, be sure to wear warm clothes, especially during winter time)
  • – Branches (prepare some beautiful branches where the birds can sit on)

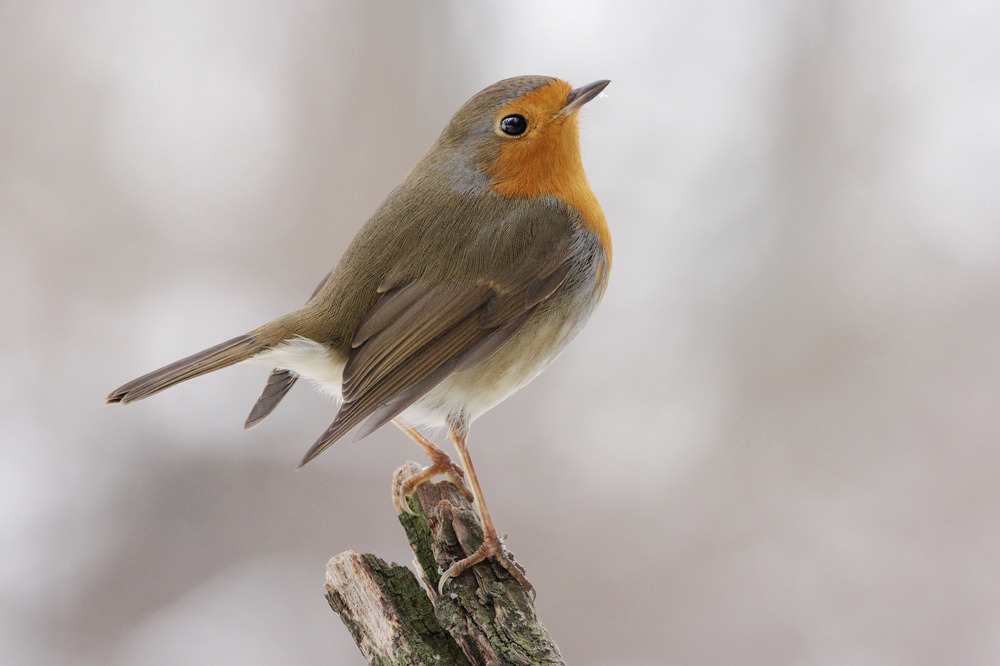
Rotkehlchen (3)

One more important note you have to consider before you prepare everything to start photographing songbirds:
Cats kill about 1 BILLION birds each year, they are considered the most serious threat to songbird, so keep feeders, bird baths and nesting boxes out of their reach.

All in all, bird photography is really simple, it’s fun, and extremely rewarding if you do everything right. You can easily build up a portfolio after some sessions for advertising your work or either for your own personal delight.

Good luck & we hope you enjoyed this article!


All images by Julian Rad

How to make Extreme Macro Photos

Today we want to explain to you how extreme macros are made.

Macro photography is one of the most interesting fields in photography, not only because it’s giving you an insight of the small things we can’t see, also because you will develop a knowledge of how important camera settings are when you are working with low light conditions or moving subjects such as insects, in which the details can’t be seen with the naked eye.

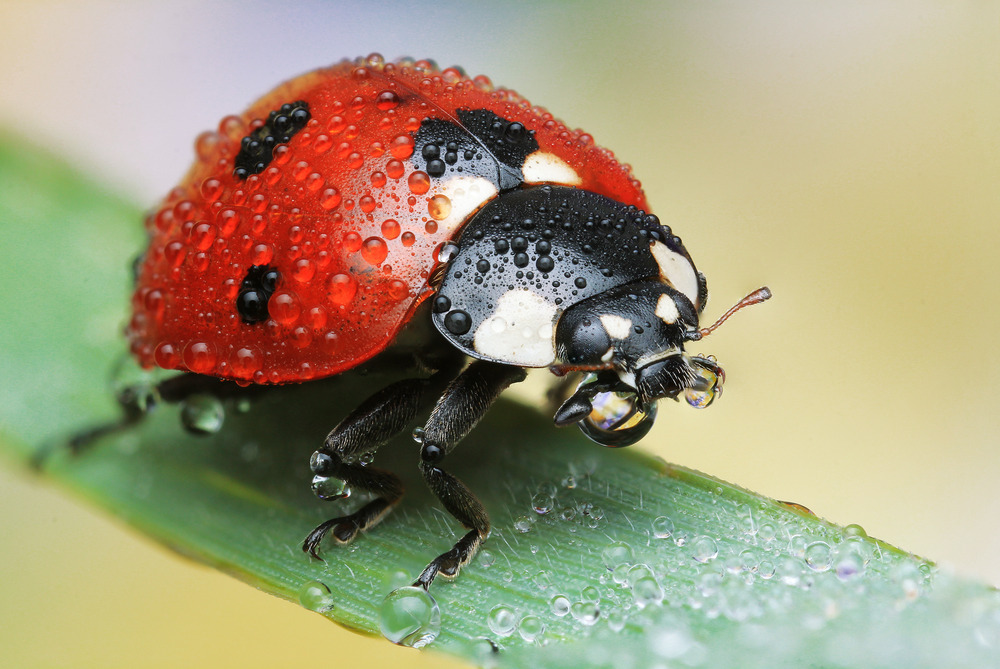
Especially insects offer spectacular colors and structures and many insects actually can be found easily everywhere. The best time to photograph insects is in the morning when the temperatures are low and the insects are still asleep and less active, so they will not move and you can make the best possible photo of that insect. After a cold night in the summer, you will find thousands of dew-drops on the insects, this will add a nice extra to your macro shot. Furthermore, the light in the morning is probably the best light you can have during the whole day.

Fliege Tautropfen 3

If you want to achieve some great results, there are some essential things you will need for sure:

  • Tripod
  • DSLR (with Image Stabilizer)
  • A Macro Lens (different types of lenses for extreme macros are described down under)
  • Remote Shutter Release (to avoid camera shake caused by the exposure)
  • Focus Rack/Slider (slider allows you to slide forward/back to take a lot of pictures at different focus points, which will be stacked afterward in Photoshop)

Optional

:

  • Angle Finder (makes a low-position shooting easier)
  • Diffusor (to get the best light and the most out of your macro shot)
  • Flash (use a macro ring flash or a standard flash combined with a small softbox)

am-laufsteg-bf42861e-ef95-42dc-b218-f2b12b07c2fe

For increasing magnification to get extreme macro shots, there are some options:

Canon Mp-E

If you are using a Canon camera, the best lens for extreme macros is the Canon “Mp-E” Lens. It is extremely sharp and its maximum aperture is f/2.8, so it’s perfect for low light conditions and to receive a smooth & clear background. The only disadvantage is that this lens is pretty expensive, as it costs around $1,000, but quality has its price as we know.
More info about this special lens

Macro Snap-On Lens Adapter

Snap-On Lenses are used as an adapter which can be mounted on your actual macro lens. Using a Snap-On Lens such as the “Raynox DCR-250” will be the right choice if you prefer low budget macro photography. It will for sure produce rich and razor sharp macro images. Furthermore, it has a low weight, small enough to fit in any photo bag and works perfectly with any macro lens.
More info about the Raynox DCR-250

Extension Tubes

Extension Tubes goes in between macro lens and camera. The more tubes you use your camera and lens, the closer you will get to your object. A disadvantage of using extension tubes is, that you will not be able to focus automatically, but focusing automatically isn’t advisable anyway if you want to get a macro photo.

Reversed Lens

This is probably the easiest and most inexpensive way to get an extreme macro shot. The reversed lens technique is what the name says: You just mount your lens backward on your camera. All you need is to get an adapter to mount your lens on your camera body.
A 50mm standard lens will become a great macro lens and will let you explore all the details you want to photograph.
If you want to learn more about the reverse lens technique check out following Youtube Link.

Kleinlibelle Frontal

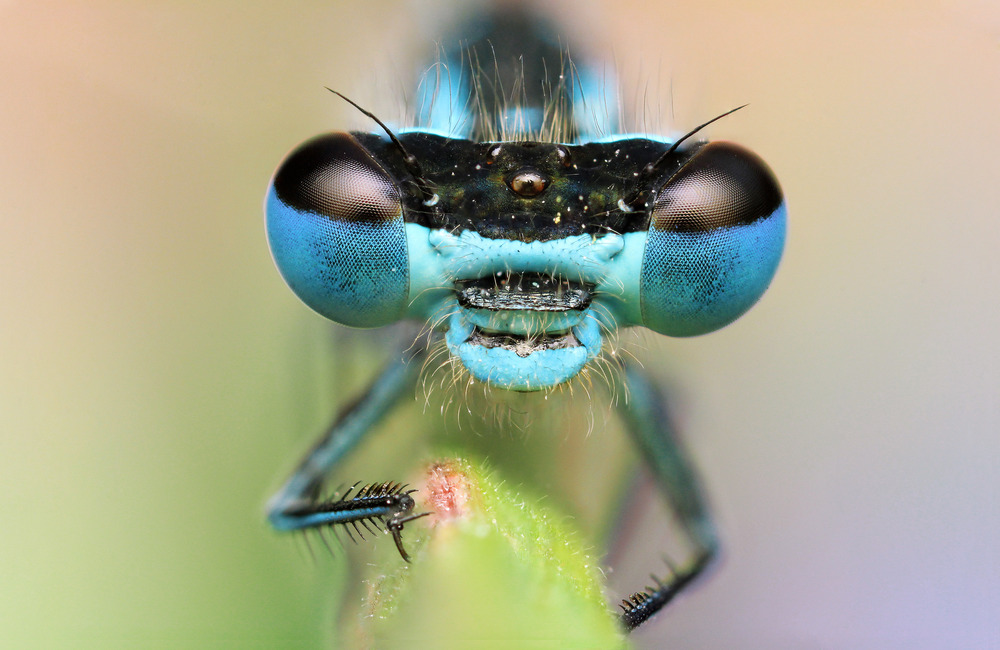
One important note when doing macro photos is, that I would not recommend using autofocus, this will not work if you want to get an extreme macro, making extreme macros is all about manual focus. Especially live-view will help you to get the right focus point. If you want to photograph insects, one thing that has to be in focus must be the eyes.
So, make sure you get the right equipment before you start shooting small things and if you decide to photograph insects, bring along much patience, as successful shots sometimes depend on a great deal of patience.


We hope you enjoyed this article!

Quick-fix Your Pictures with Lightroom in 5 Easy Steps

Hi everybody, my name is Eduardo and this is my first Lightroom tutorial here in Sleeklens. For this first tutorial, I would like to show you a little trick I use when I’m in a hurry and want to do a quick-fix on a preview image for a project I’m working on, or for a set of pictures for a client to choose from. It’s very simple and only takes 5 easy steps. I recommend you check out the Lightroom Presets and brushes that Sleeklens sells if you want to create more professional edits.

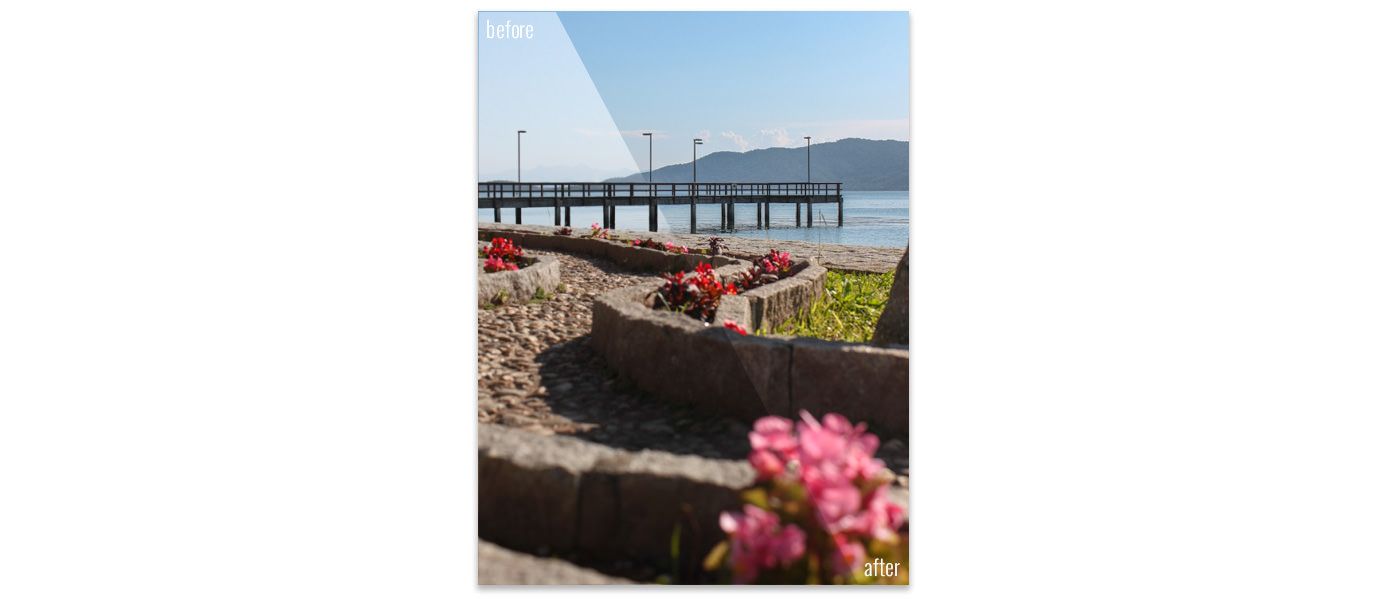
Before and after

I’m going to use an image that I took a while back that unfortunately, was with too much highlight with the sky, clouds, and background blown out. So, I’m gonna tweak the tone control and bring those highlighted areas to life, increasing the details and washing the shadows a little bit. Above is the before and after, so you can see the difference. Let’s get started!

Step 1) The first step is to import the image into Lightroom, select it and go to develop mode. (in case you have no idea how to do this step, you can start with THIS tutorial)

Entering Develop Mode

Step 2) What we’ll basically do is make some adjustments in the tone controls, decreasing the shadows and highlights levels:

Basic Panel

In the basic panel, under the tone control tab, we’ll tweak the highlight levels until we can clearly see the details of the highlighted area coming to life (in my case, the mountains in the background). Also, we’ll increase the value of the shadows, that way we can soften the shadows a little bit, and the ending result will get closer to the ambient lighting at the very moment we’ve taken the picture, almost like an HDR picture. (you can check a great tutorial on how to add an HDR look to your BW photos HERE )

Adjusting Tone control

Step 3) To increase even more of the details in the highlight areas, we can also tweak the contrast and clarity controls, but it may vary from image to image. In my case I’ve used the values below:
Tewaking Contrast and Clarity

Step 4) The next thing we can do is to adjust the vibrance, located in the presence control tab, bringing the original colors back to the image. In these steps, you can work with different values depending on your style of post-processing and/or subject you´re shooting.

Vibrance control

Step 5) The final step is totally optional, but I like to tweak with the sharpening tool, located in the detail tab, so that way you can improve the quality of the image and sharpen some details in the foreground or background, that may get a little blurred when you took the picture.

Final Sharpening

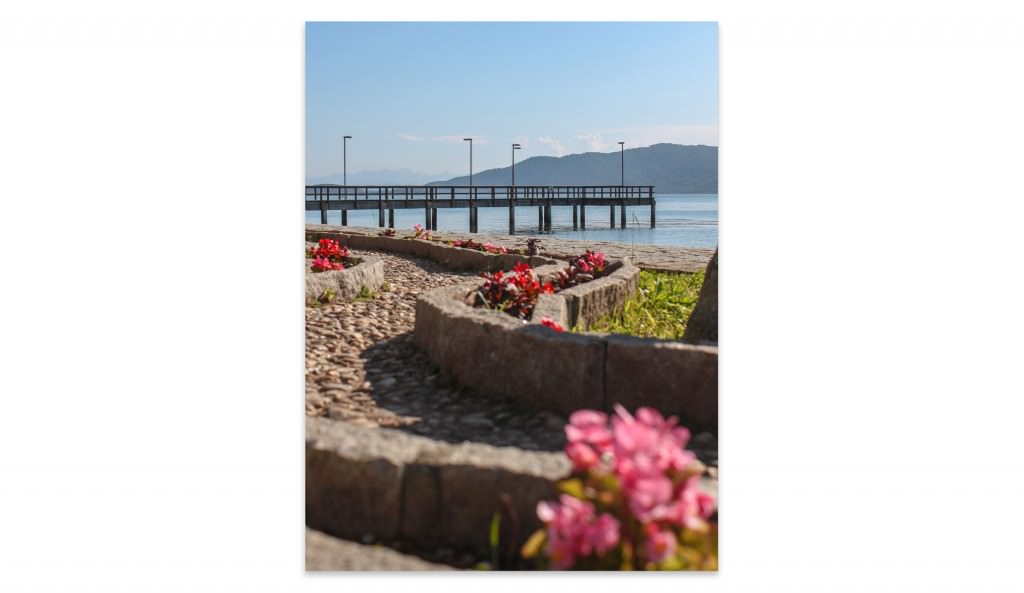
This is the final result and we can note how really simple it is to improve your images, using only small tweaks and adjustments, and the final result is great!

Final Result

Hope you guys liked my first tutorial, and I’ve got plenty more to come. If you have any suggestions or doubts you can write a comment below or contact me directly. See you next time!