Based in Ningbo, Haida is a company established in 2007, specializing in researching particularly the filters used on the photographic lens, and also other camera accessories.
Haida filters are among the best on the market and one of their best features is the great price-quality evaluation.
And as I’ve tried the new nano-coated products for months, and they survived many travels and extreme environments (like iced rocky beaches, deserts, salted water) I’ve been even more satisfied with the new stuff of the industry from Ningbo.
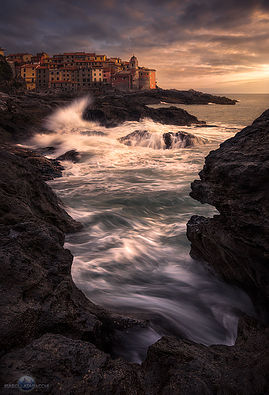
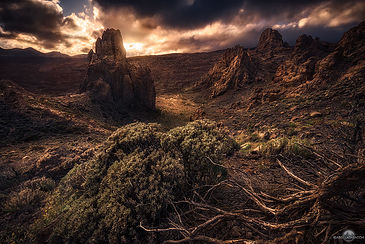
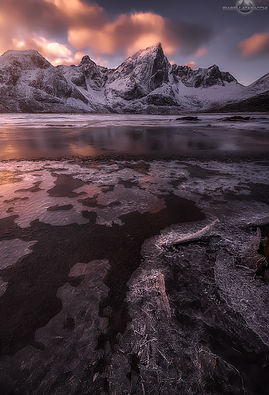
Here is some image I took with the new Haida filters.
Now to the main characteristics of the products I tested: Nano Pro MC ND 3.0 (1000x) 150×150 and Nano Pro MC Soft GND 0.9 150×170 filters.
The Nano coat
What does “Nano Pro” mean? Well, it’s the extremely thin, nano, a coat which covers the glass surface of the filter.
This is the great innovation of this new product line that makes the difference in comparison to the previous series. It gives resistance to dirt, reflections, and scratches.
Thanks to this coat, my filters fantastically survived sandy, earthy, rocky, icy places.
Furthermore, as a landscaper, I often take shots to waterfalls and rocky beaches where the waves move on the reefs and splash some water on the filter. Thanks to this coat I have just to clean lightly with a towel cause the drops come away very easily.
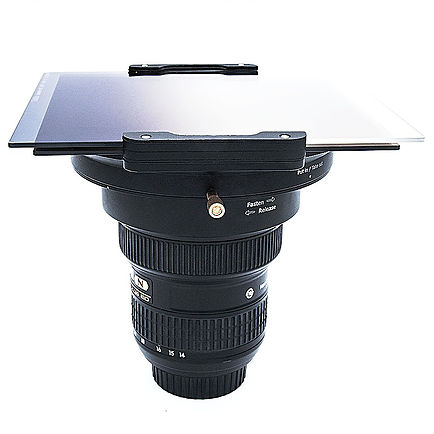
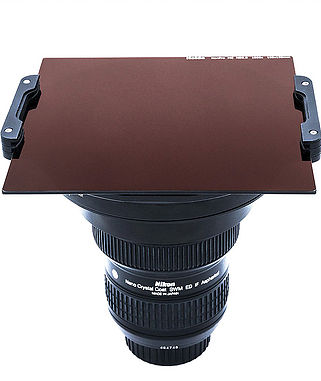
The holder
You have to put the filters in the grooves of the holder to use them. I own the 150 series holder for my Nikon 14-24mm f/2.8G ED wide-angle lens.
The support system is steel and very steady and resistant. It consists of the universal holder that supports the filters, the front adapter ring and the rear adapter ring that sustain and connect the holder to the lens.
A little gold nut enables to remove or rotate the holder on the rings to position better the filter, especially if it’s a GND.
There are also two rubber plates (superior and inferior) on the holder surface, near the grooves; they prevent the light to come into the space between the lens and the holder, so the nuisance reflections don’t appear on our shots. You can find also some replacement rubber plates in the holder pack.
I also took many very long exposure shots with ND, GND and both filters and I never saw that horrible reflection (similar to crowns) that appear every time the light goes under the filter; so I’m really satisfied with this holder.
The filters
The glass filters are stacked in the grooves of the holder that I described previously.
The sharpness of these filters is excellent and also by the absence of color dominant even if they appear colored at the first sight.
Also, the management of phenomenon like flares and vignetting is great, also because my wide angle already creates some of those.
I also tried to take pictures with GND and ND both mounted and the results are great. But remember to insert the ND always on the first groove nearer the lens to avoid strange light reflections.
Comparisons
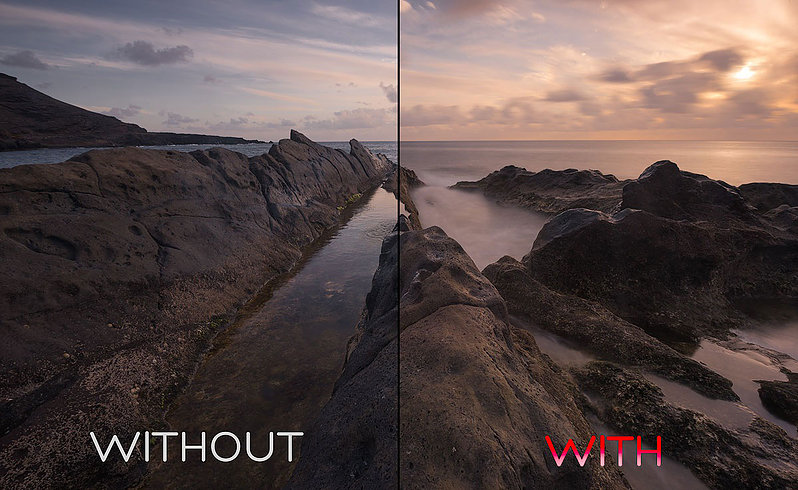
Here are following two “with-without” images that consist of not post-processed shots.
In the first, taken in Lanzarote, I used the Nano Pro ND 3.0 (1000x) filter.
You will notice how, in the “WITH” half, the sea water looks like a thick fog and seems velvety. Besides, the clouds are blurred.
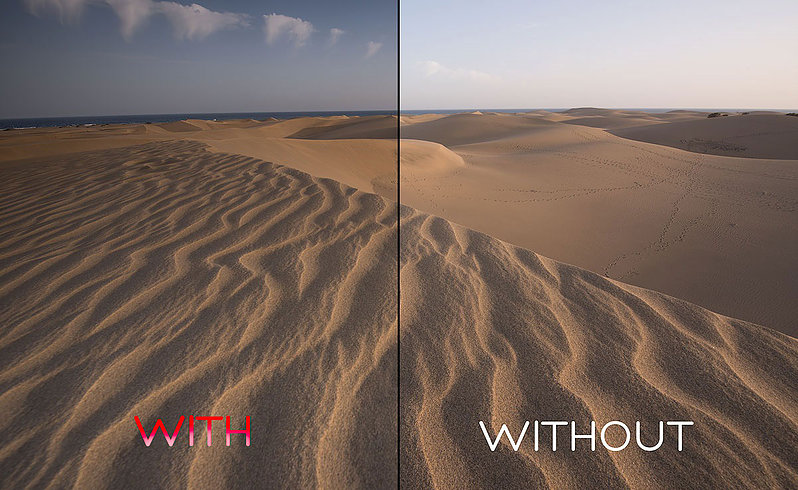
In the second, taken in Gran Canaria, I used the Nano Pro Soft GND 0.9 filter.
You will notice how the sky and the upper part of the image are darker, even if the foreground has almost the same brightness and contrast in both the halves. This allows a better managing in postprocessing.
Where can you buy them?
The new Nano Pro filters will be soon buyable in Amazon distributed from Pro-photoshop.
If you live in U.S.A you can visit the HaidaUSA online store.
If you are a Swiss customer, you can also visit the official distributor in Switzerland Fotichaestli.com.
In conclusion…
The quality of the Haida Nano Pro filters is excellent. The strength and the stability of the holder impressed and helped me during my adventures. Even if I often explore extreme and wild locations, my filters are already intact and not damaged.
For instance, I went, as you read, in the desert; there is a lot of sand there; if the glass would be of poor quality, would have a lot of scratches now.
But thanks also to nano coat on it, I was able to clean it without stress.
Many photographers could have some hassles taking shots, for example, to waterfalls. Indeed the water goes frequently splash on the ND filter used on these kinds of shots. But the nano coat permits to clean the glass very easily.
is a technique that makes slow-moving elements (such as waves or the light trail of cars) appear in the photo mist like, blurry or elongated, while still, objects remain sharp and defined. The key factors for achieving this effect are low shutter speed and having the camera extremely stable. Using long exposure photography you can give a totally new dimension to your nature photos. I think you will love this technique and the photos you will achieve by using it. In today’s article, we will show you how.
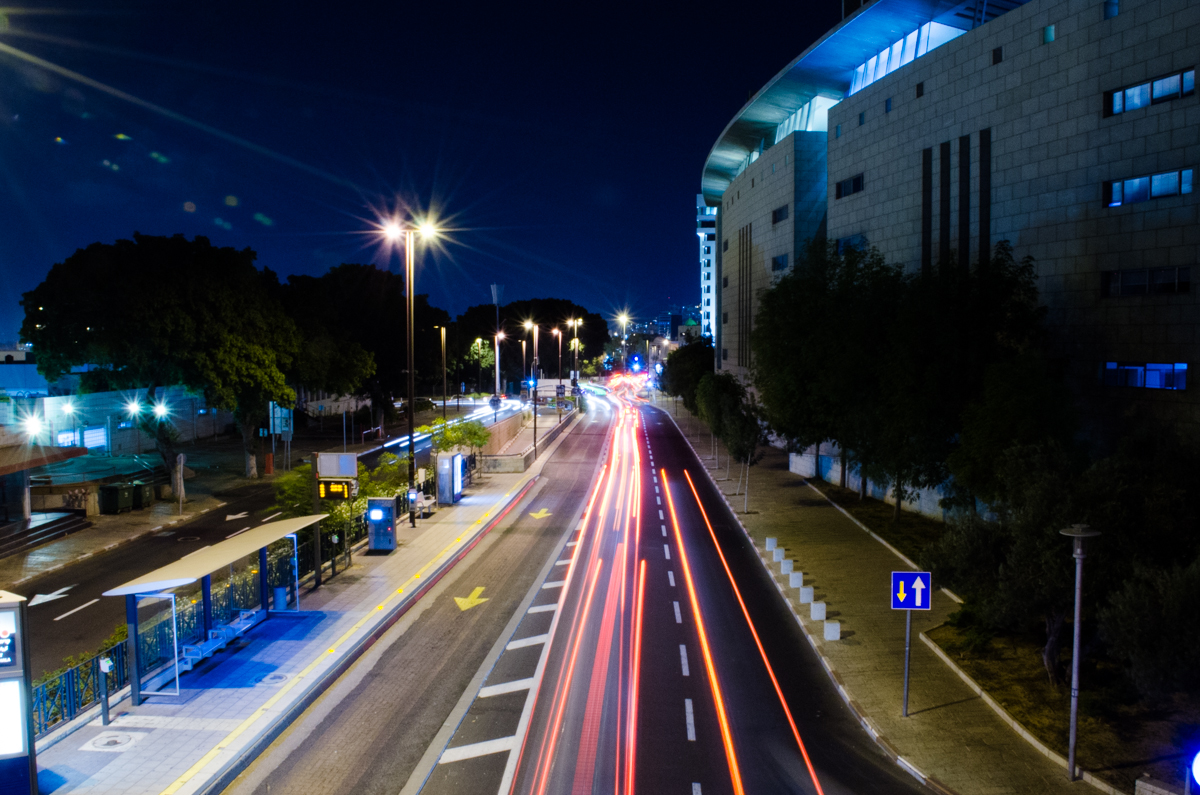
This photo was taken at night using long exposure. The moving cars were too fast to be captured by the camera, but their bright lights were captured as light trails, giving a nice effect to the image.
#1. Use long exposure photography when you have moving elements in the frame
The effects achieved by long exposure are created because the moving object is captured by the camera many times during the time the shutter is open. We can achieve different effects depending on the amount of light the object is giving and its manner of movement, For example, a passing car at night is giving off light from its headlights and is moving relatively fast in a specific direction, so the effect we get is that we see the headlights as streaks of light outlining the path of the car the car drove through. On the other hand, waves, which do not give off the light, move back and forth on the shore and so they would make the water at the beach look like mist or a thick fog.
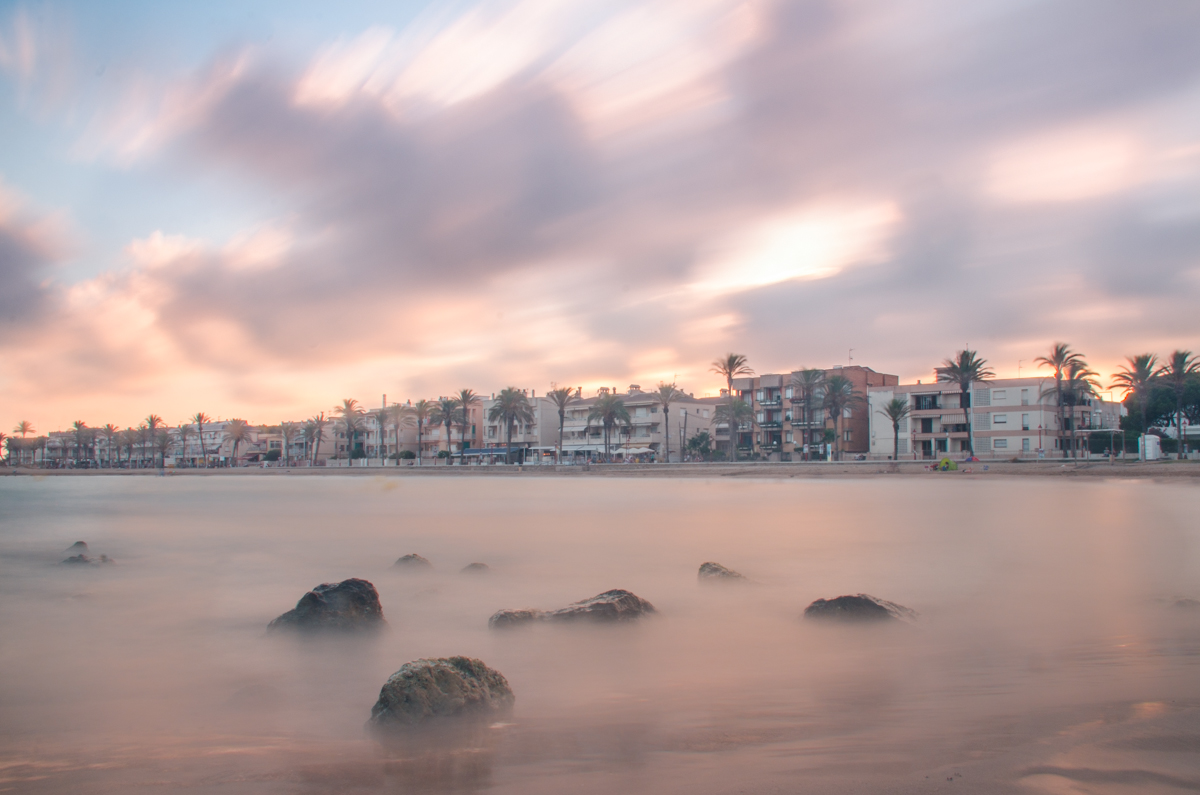
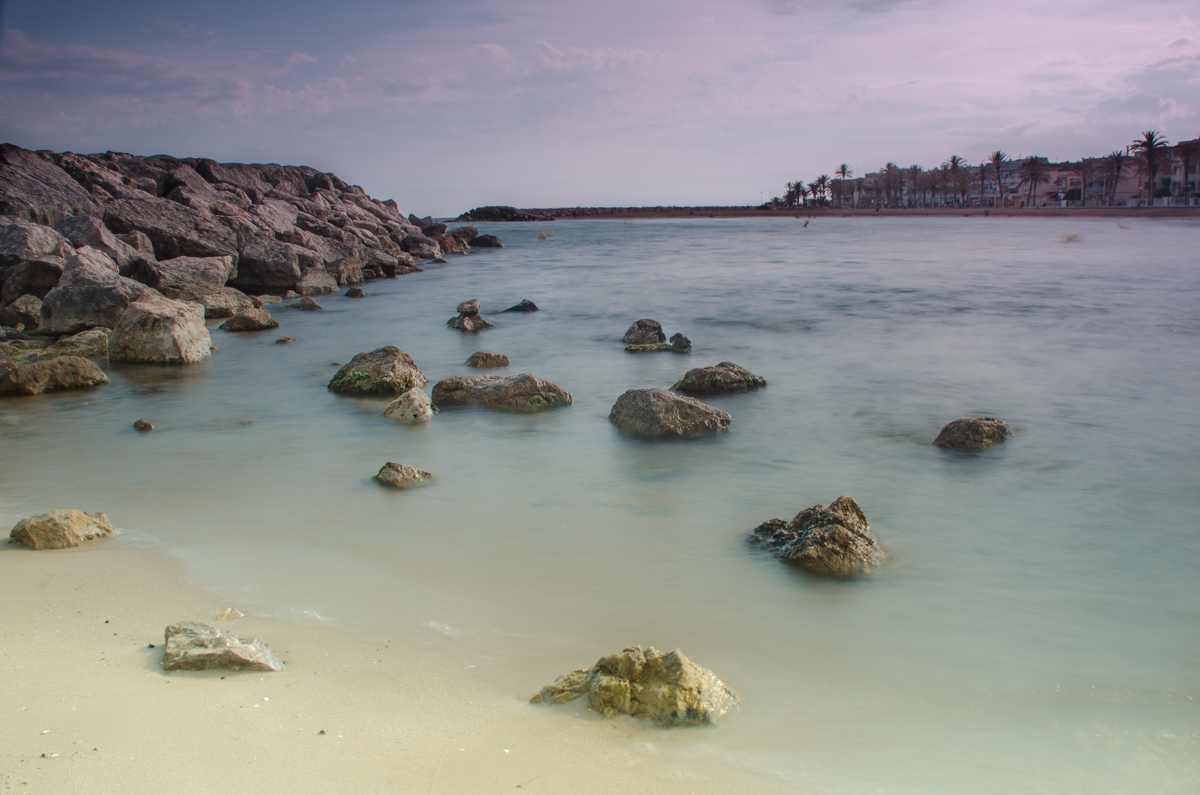
In this photo, both the water and the sky were moving, but the buildings were static.
#2. To get a well-balanced image, add static elements in your composition
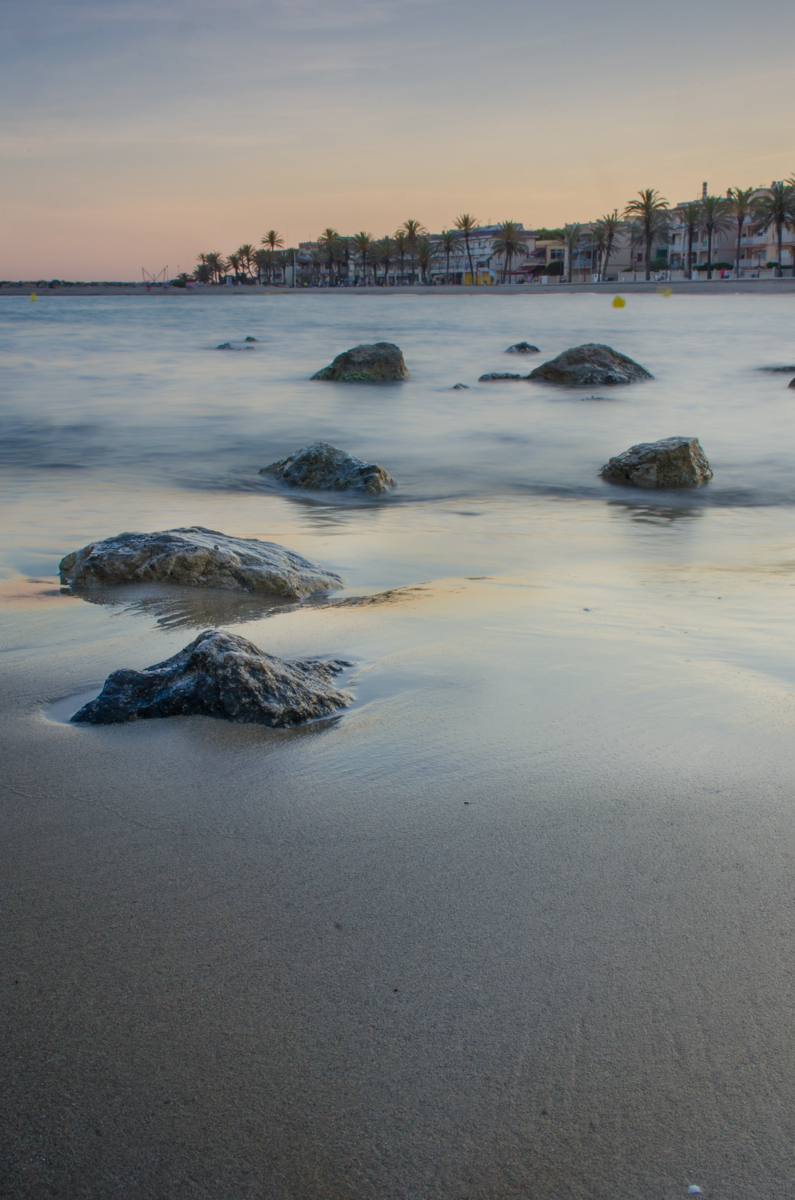
If everything in the frame is moving, you can end up producing photos with a dizzying effect. Unless you want this effect for creative purposes, I recommend you to include in the composition of the image at least one static element that will provide the viewers a point to rest their eyes. The contrast can also enhance the effect and make the image more balanced. A static object can be a rock, a tree, a house, a path… anything that does not move when you are pressing the shutter.
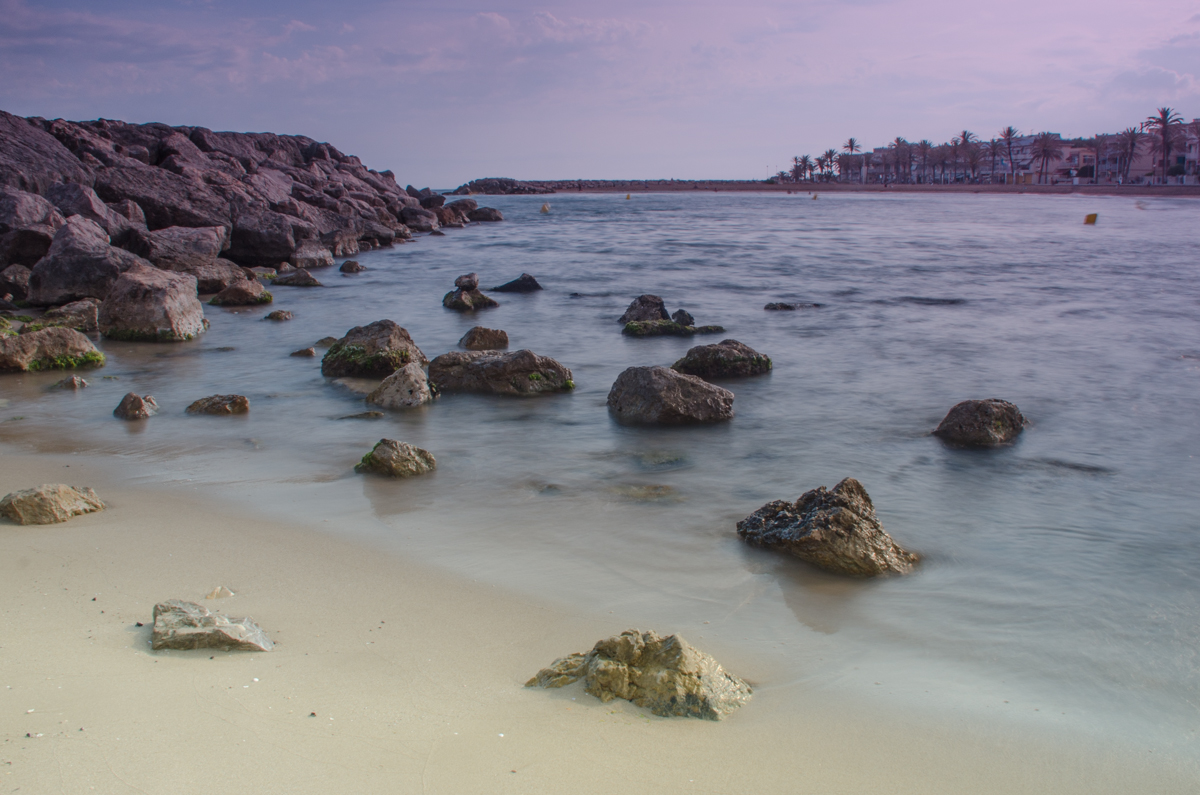
The combination of the static rocks and the buildings and the movement of the waves create a balance in this photo.
#3. You will need a tripod to avoid camera shake
As you will be shooting with low shutter speed, you will need to stabilize your camera somehow. One of the best option is to use a tripod. There are a lot of tripod models in the market. I recommend you to get a stable one which will fit your budget.
The tripod by itself won´t give you 100% stability. If you have a lens with image stabilization (also known as vibration reduction), it will be better than you turn it off when you have the camera on the tripod. I know this last tip might seem contradictory, but these stabilization systems are meant for hand-holding situations and if you are using a tripod, they might cause shaking instead. Another tip is to avoid touching the camera or tripod while you take the photo. I recommend using the timer delay options of your camera to avoid the shaking due to the pressing of the shutter release. You can also use a remote control and avoid touching the camera altogether.
#4. Use filters to avoid overexposure
Nature photography many times takes place during daylight. If you want to take a long exposure photo, the first problem you will face is the overexposure. Sometimes even with the aperture closed as much as it can be and the ISO set to the lowest value, you might still have burnt photos. How to solve this problem? By using filters to reduce the light that gets into your camera.
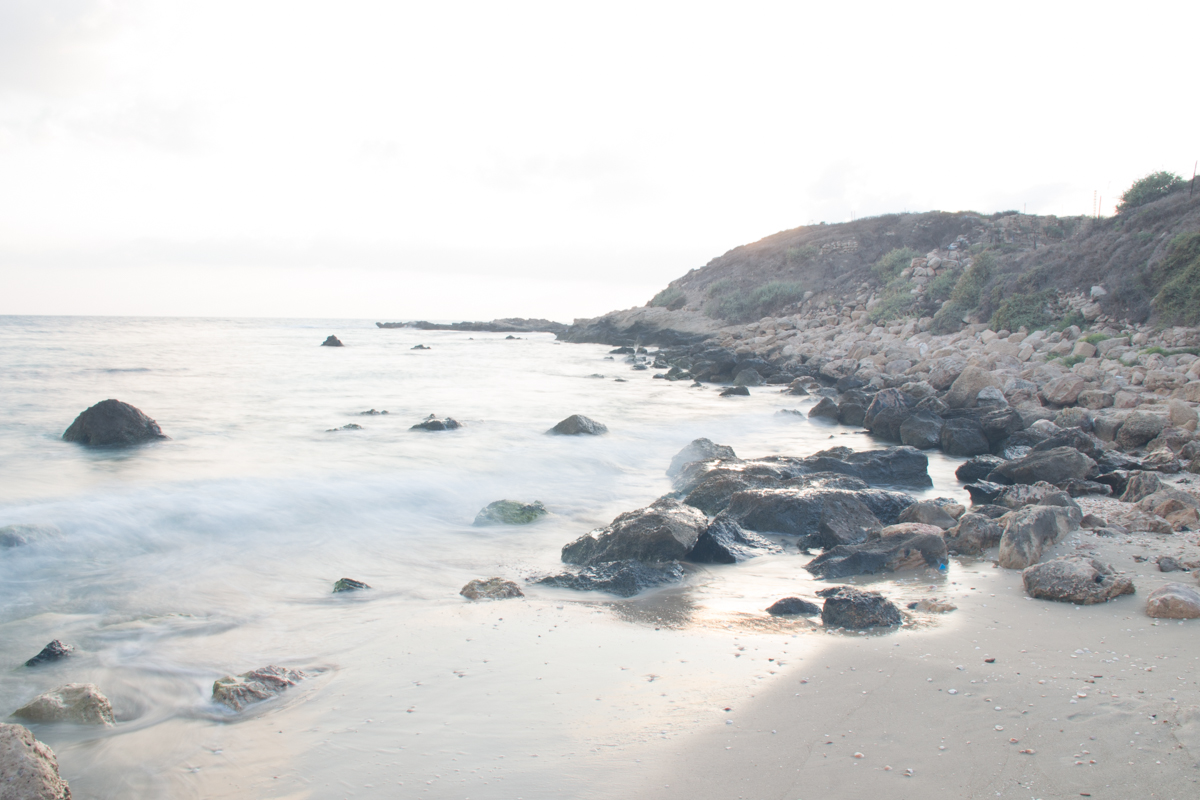
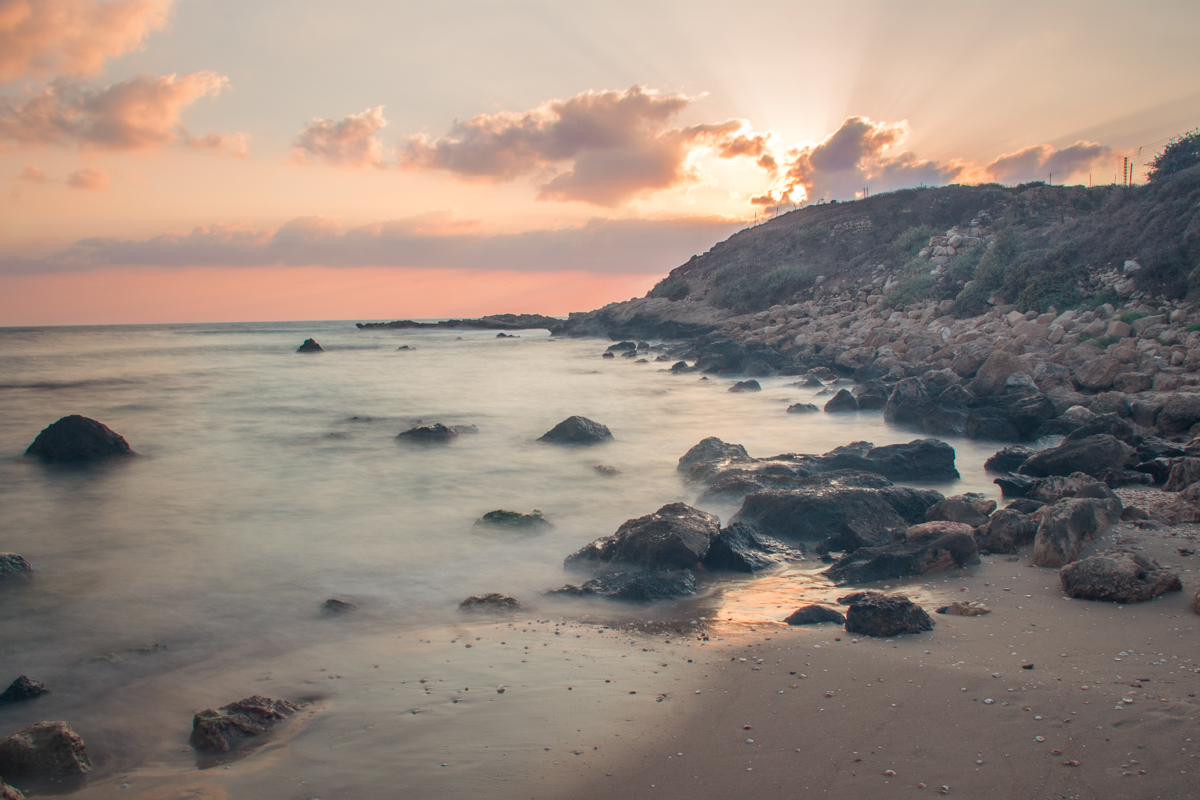
The upper long exposure photo was taken without using any filter. As the sun was bright at that moment and the shutter speed was low, the image ended up being overexposed (burnt). The photo below was taken using an ND filter. As it stops light from coming into the sensor of the camera, the resulting photo is better exposed.
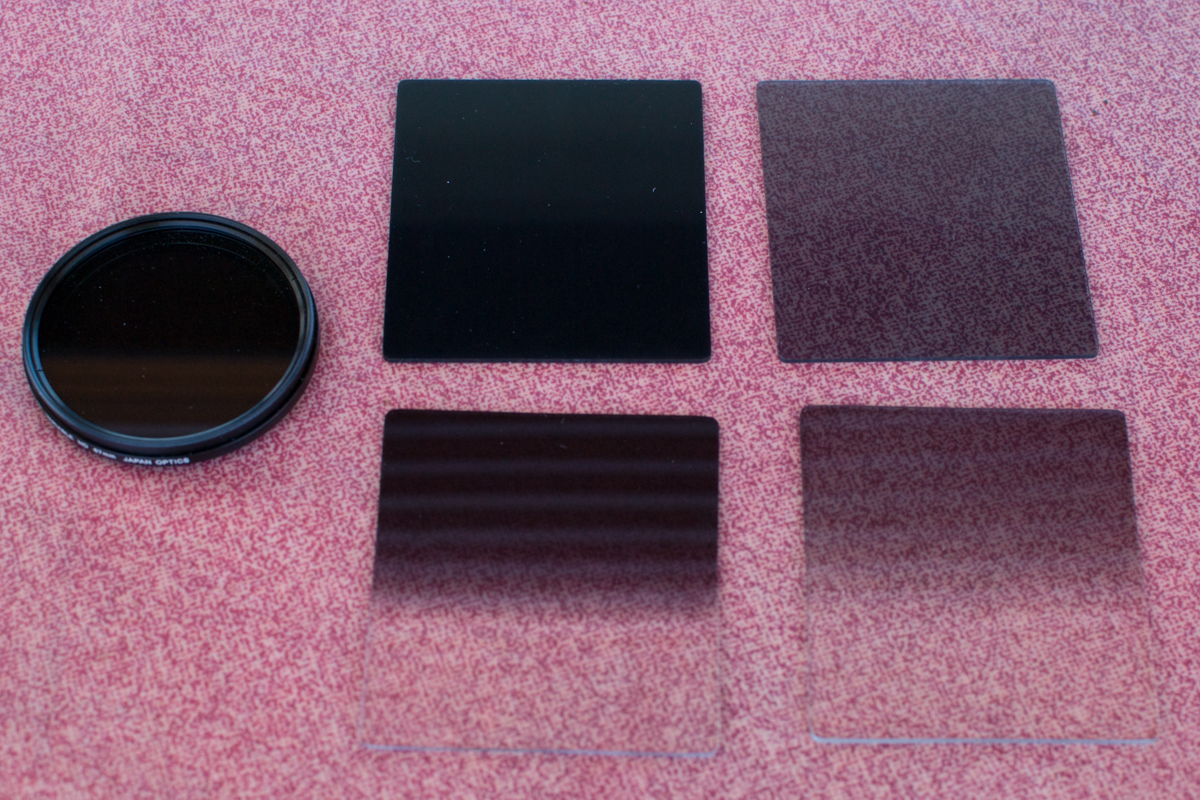
There are many different filters, but two types are especially interesting for long exposure photography: Neutral density (ND) and graduated filters. The first one is basically a uniform dark filter. There are different dark intensities. The more intense is the light in your frame, the darker your filter should be. The darkness of a filter is measured by the stops of light that they don´t get into your camera. The highest its stop number, the darker the filter is. Graduated filters are a variation of the ND filters. Their darkness is not uniform but increases progressively in a gradient.
Filters can come in various shapes and types. Here you can see the left a circular ND filter, To the right at the top are 2 ND filters with 2 different stops (degree of light they can block) and in the bottom 2 graduated ND filters also with different stops.
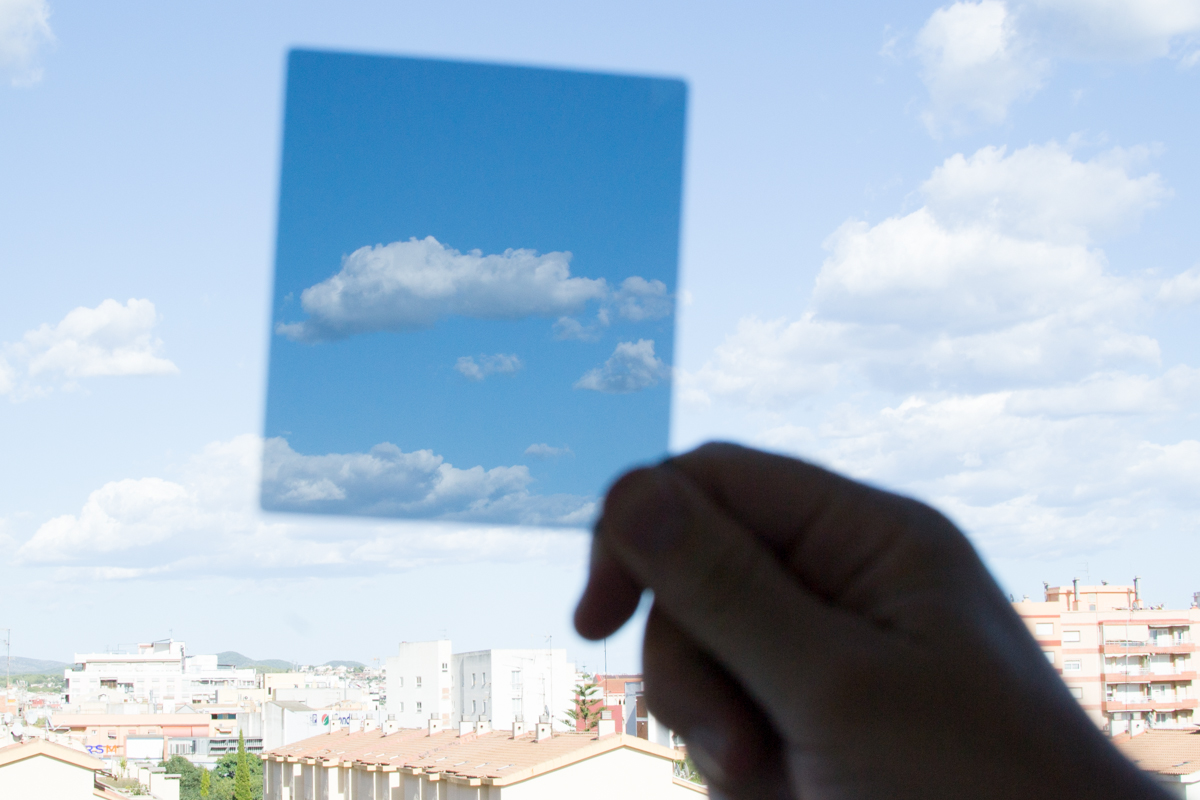
The effect of ND filters is blocking light. As you can see in this overexposed photo., the area covered by the filter was corrected by it.
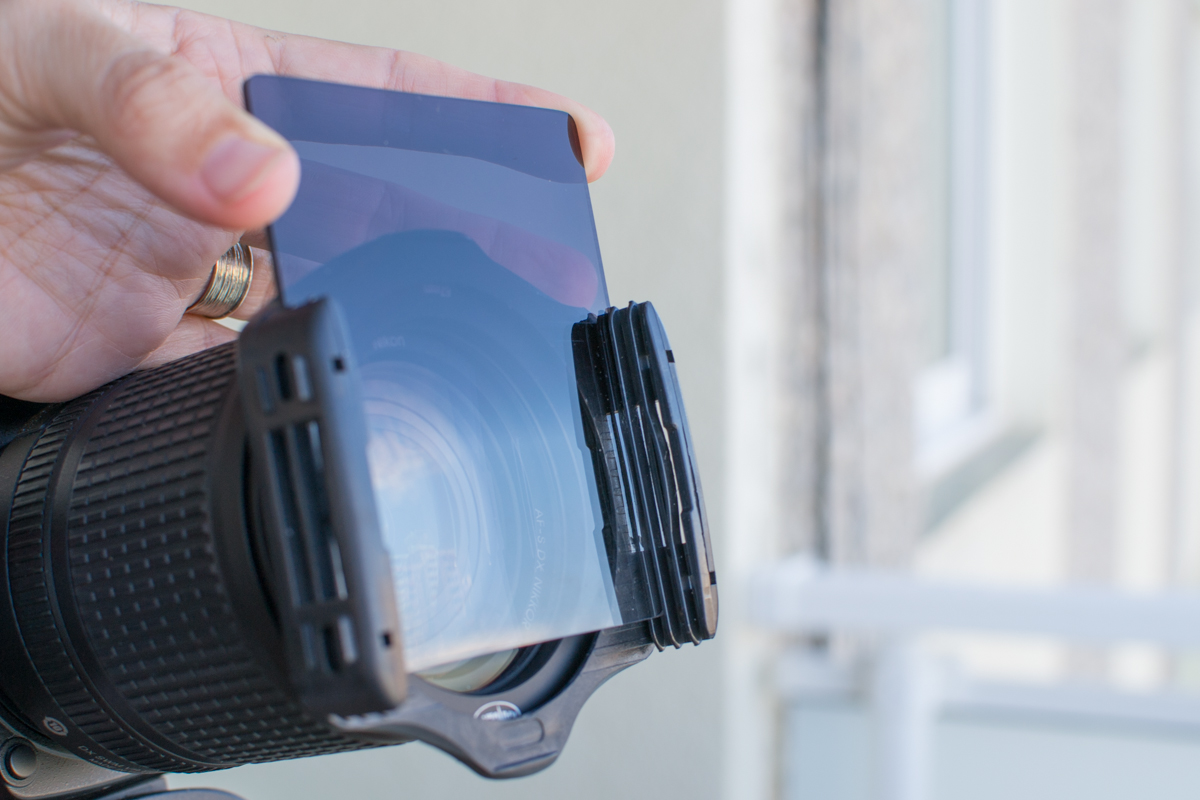
You can use one filter or stack several ones on top of the other. For example, you can use several rectangular filters in the filter holder or you can use one round filter on your lens and then add one or more rectangular filters using a filter holder.
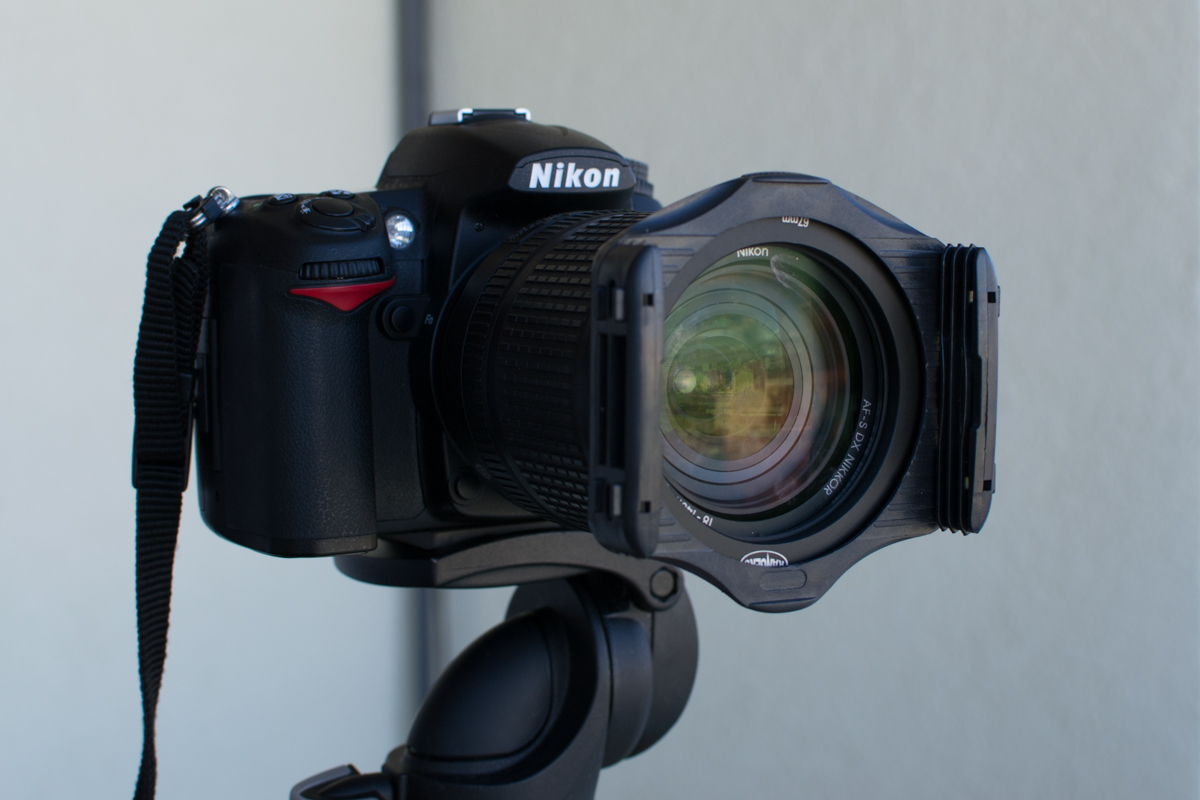
Rectangular filters are usually placed in a filter holder mounted on the lens.The filter holders have slots into which the filters can be fitted easily.
Once in the field, I set the camera to the shutter speed I want in order to get the desired effect. Then I set the ISO to 100 and the Aperture that will give me the Depth of Field I want. I usually go with Apertures 8.0 or higher. To decide the filter or filters I need, I have to admit I do it by trial and error. I believe there is a formula, but when I am in the field, trying filters comes to me much more naturally. I start with the least dark filters and I progressively move to darker ones.
Filter holders have two or three slots that enable you to stack several filters on it.
#5. You might need to crop your image a little in order to delete the filters borders
When you use filters, and especially when you use several filters stacked, black halos or shadows it might appear in the corners of the photo. This is more evident if you are using a wide-angle lens or low numbers of mm. This can be solved easily. Just plan ahead and take a photo knowing that you will need to crop it afterward. I recommend you to how a look to Navanee Viswa´s tutorial to learn how to crop a photo using Lightroom.
In the upper image, you can see black areas that are in fact the filter holder. The lower photo is the same one, after cropping it a little using Lightroom.
#6. You might need to deal with some color cast correction
Depending on the quality of your filters, they might add a color cast to your photo.
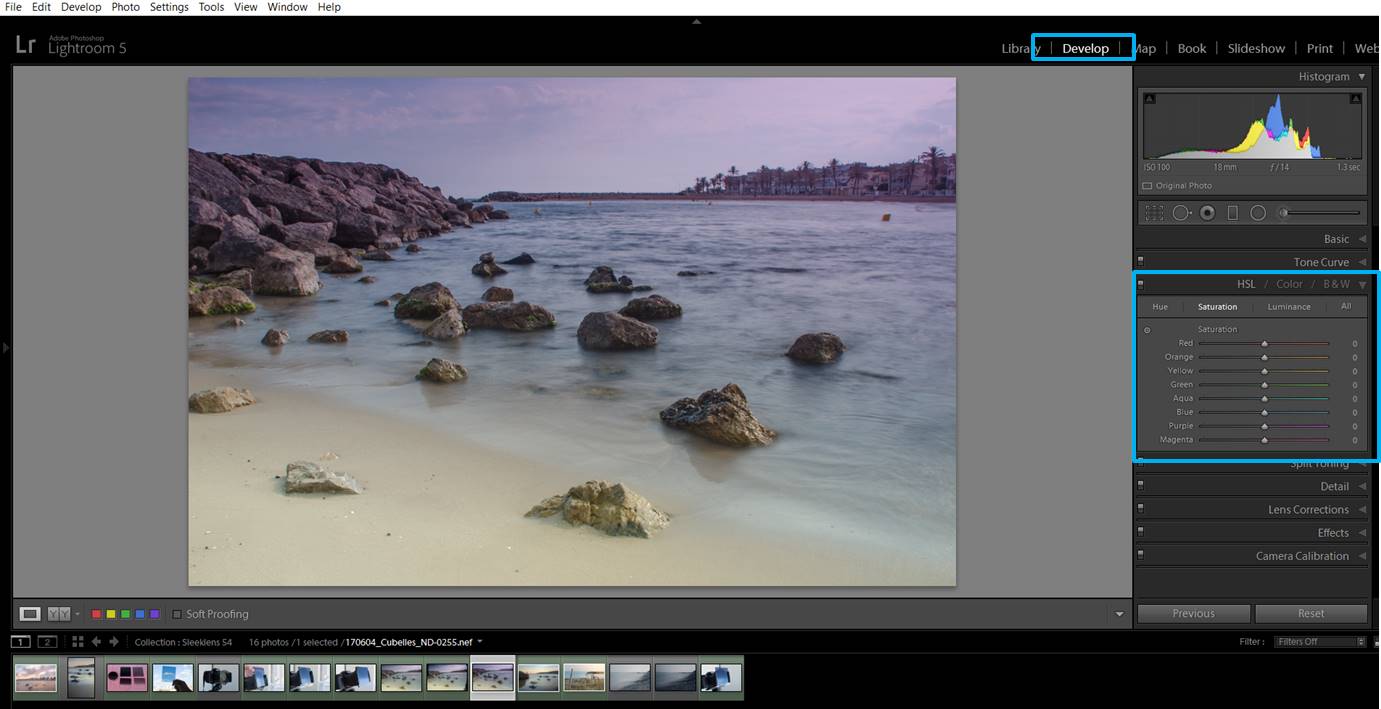
This image has a purple tint due to the filter I used to take it. You can find better quality filters that don’t produce any color cast, but they are usually more expensive.
I am quite new to long exposure photography. When I decided to give it a try, I was not sure about spending a lot of money on my first filters. I got a filter kit that included a wide variety of filters in a really good price. Of course, they are not of the highest quality, but they still allowed me to experiment and discover that I do like this type of photography. As I use them quite a lot, I can think about investing in better ones in the future. For now, however, I stay with my cheap filters and I solve the color cast issue using Lightroom.
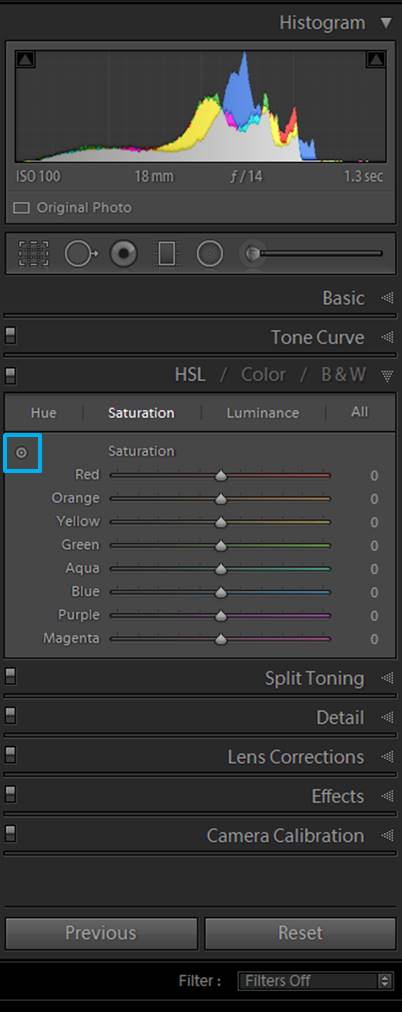
In the Develop module, look for the HSL/Color/B&W section and select Saturation.
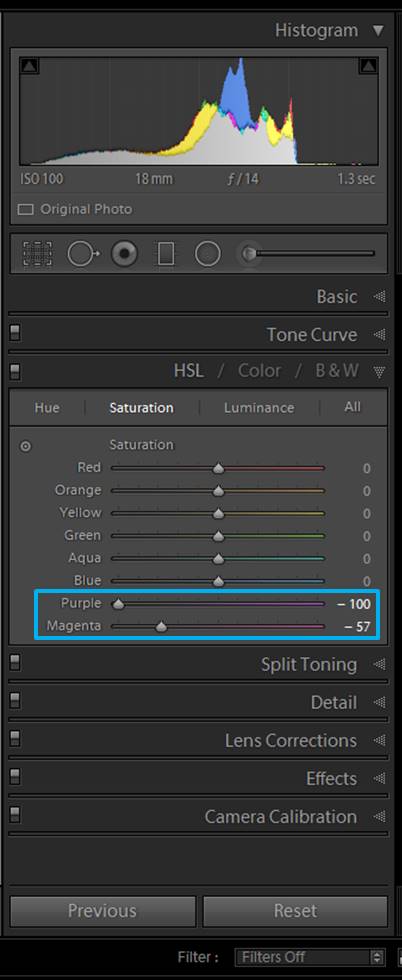
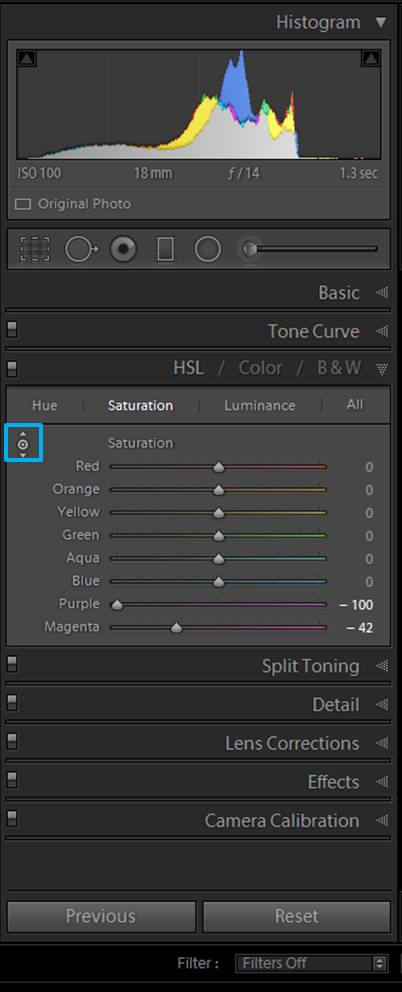
Play around with the sliders of the colors that are giving you the color cast. In my case, I put down the purple and the magenta.
If you don’t like playing around with the sliders, there is another way you can correct the color cast. Press in the little icon marked with a blue rectangle.
This icon changed shape. This shape is also in your cursor.
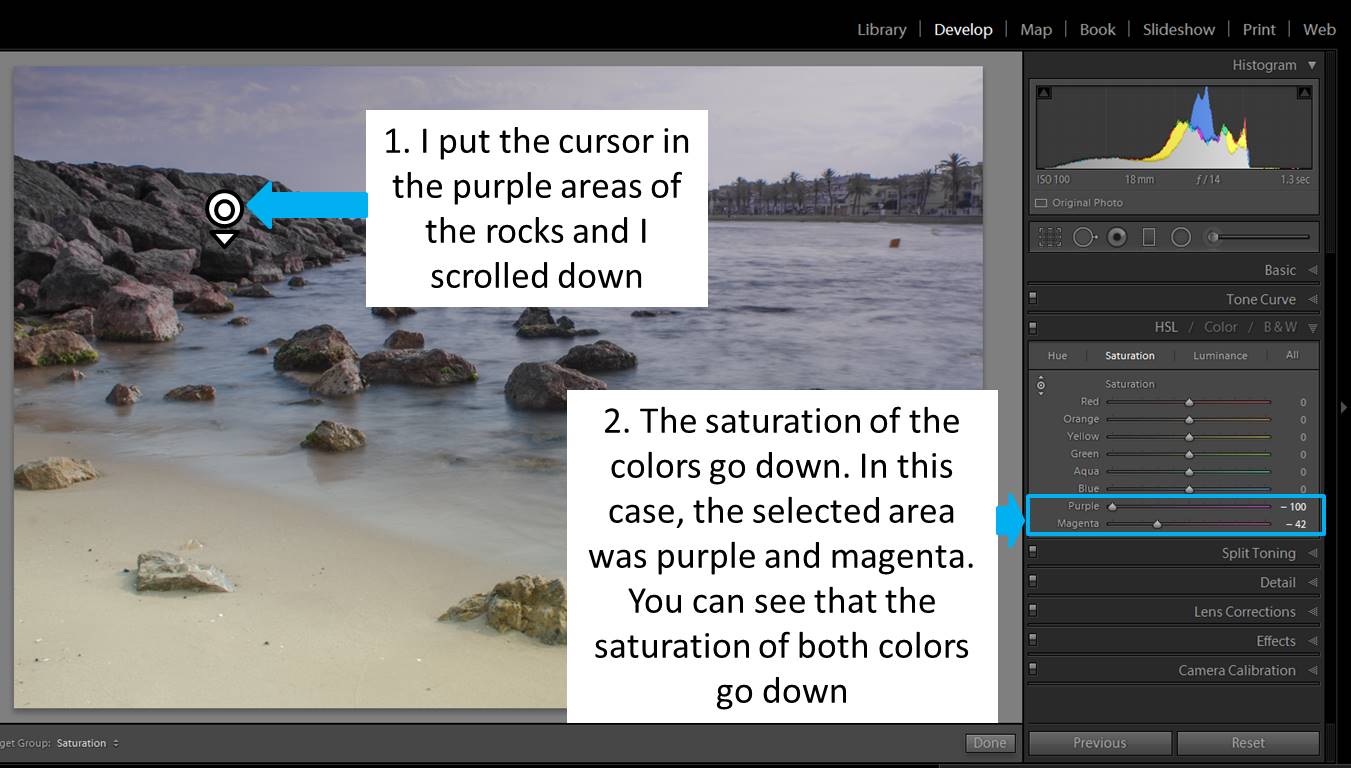
Click in the area of the photo you want to correct and scroll down (because you want to decrease the color saturation. To increase it, you need to scroll up).
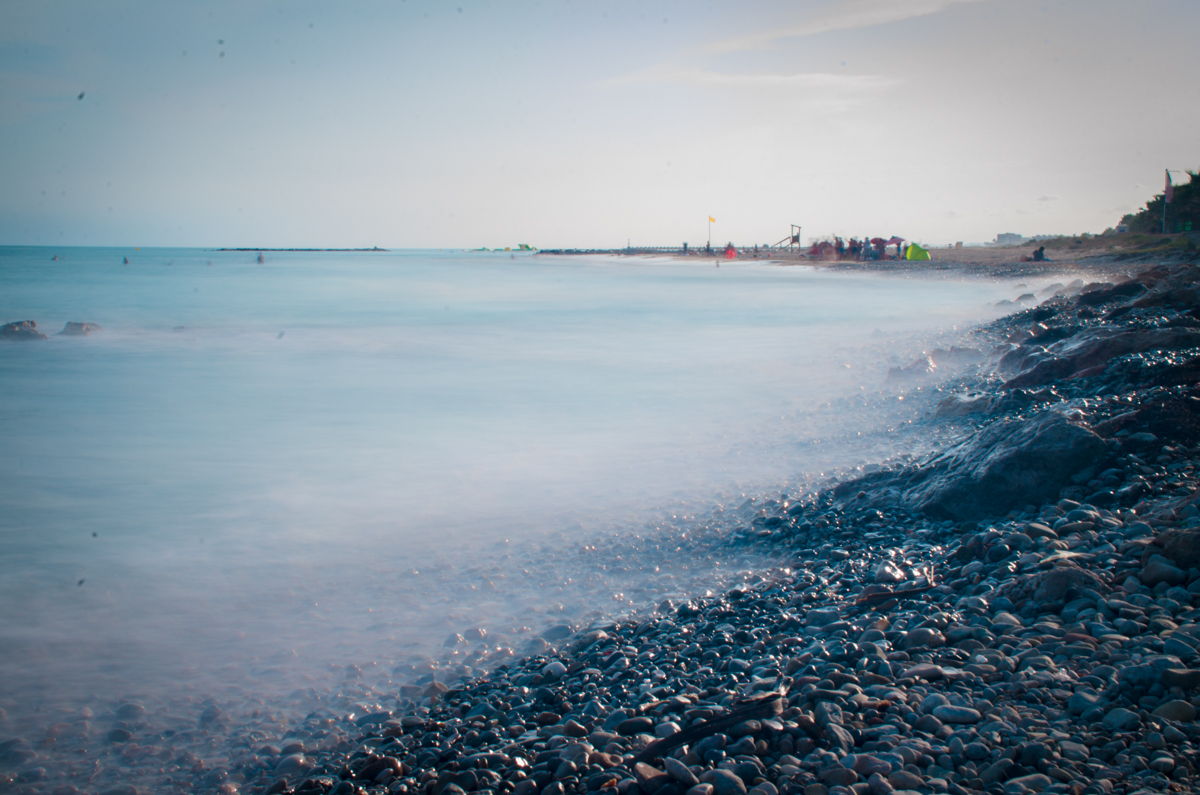
Here you have the final corrected image!
If you prefer Photoshop, you can also use it to remove the color cast. Julian H explains how to do it in his article “How to remove color cast using Photoshop”.
#7. Keep your filters clean if you don’t want to spend a lot of time removing spots
Your filters might seem clean,but when you see the photo on your computer you might discover it is full of spots of dust or drops…
That day I didn’t clean the filters and I ended up with a lot of ugly spots in my photos.
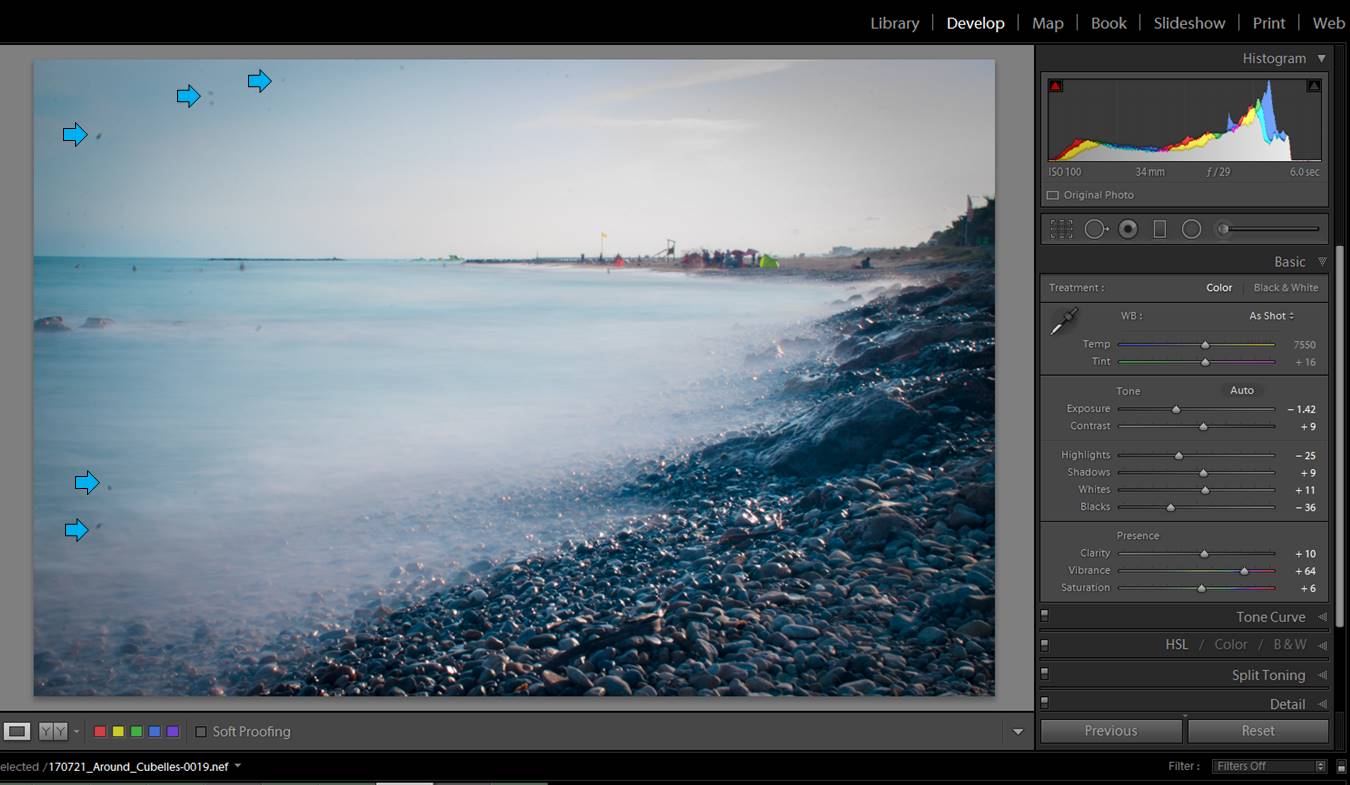
I remove them with Lightroom using the spot removal tool.
There are few dust spots that are quite visible in this photo.
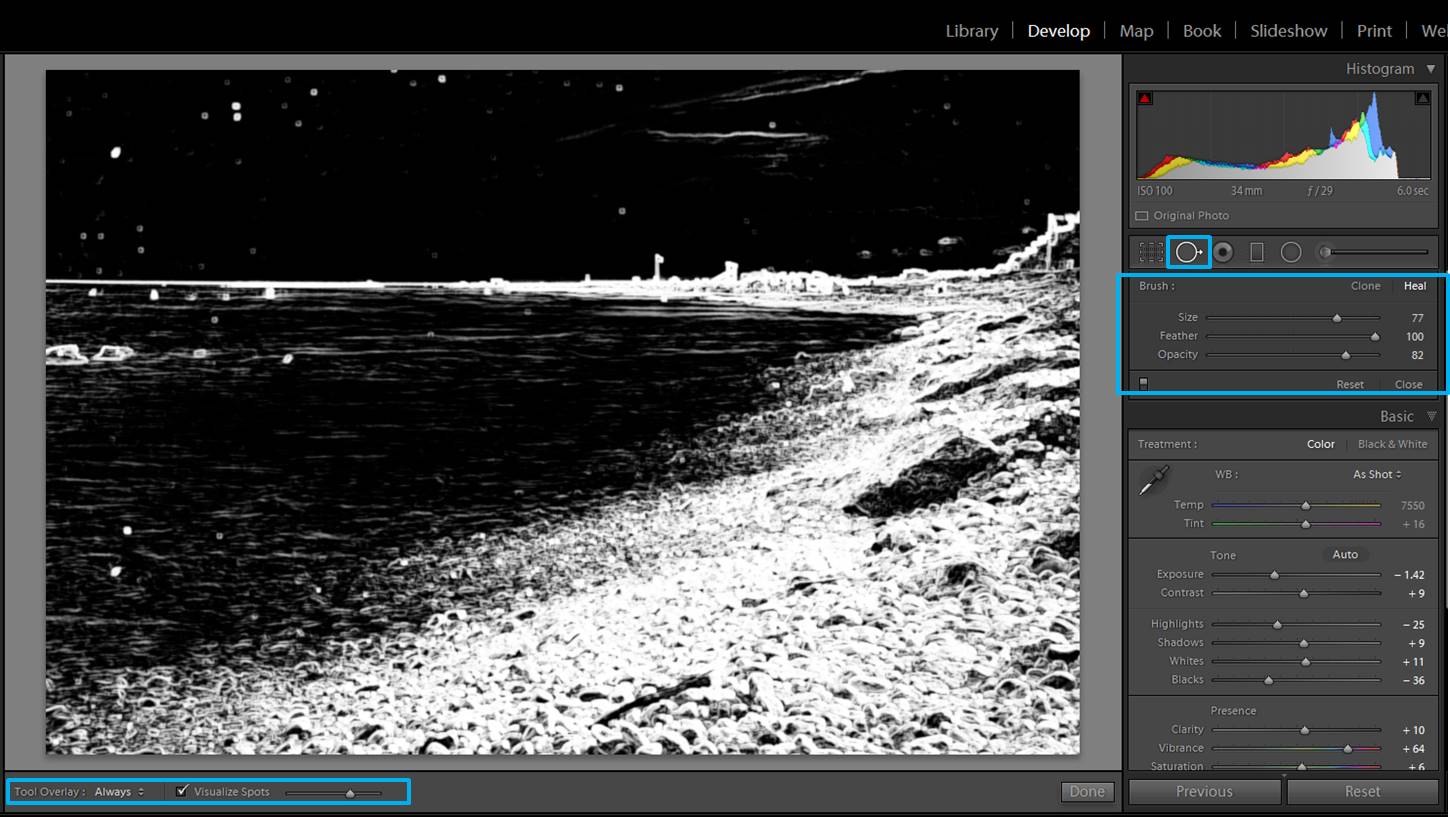
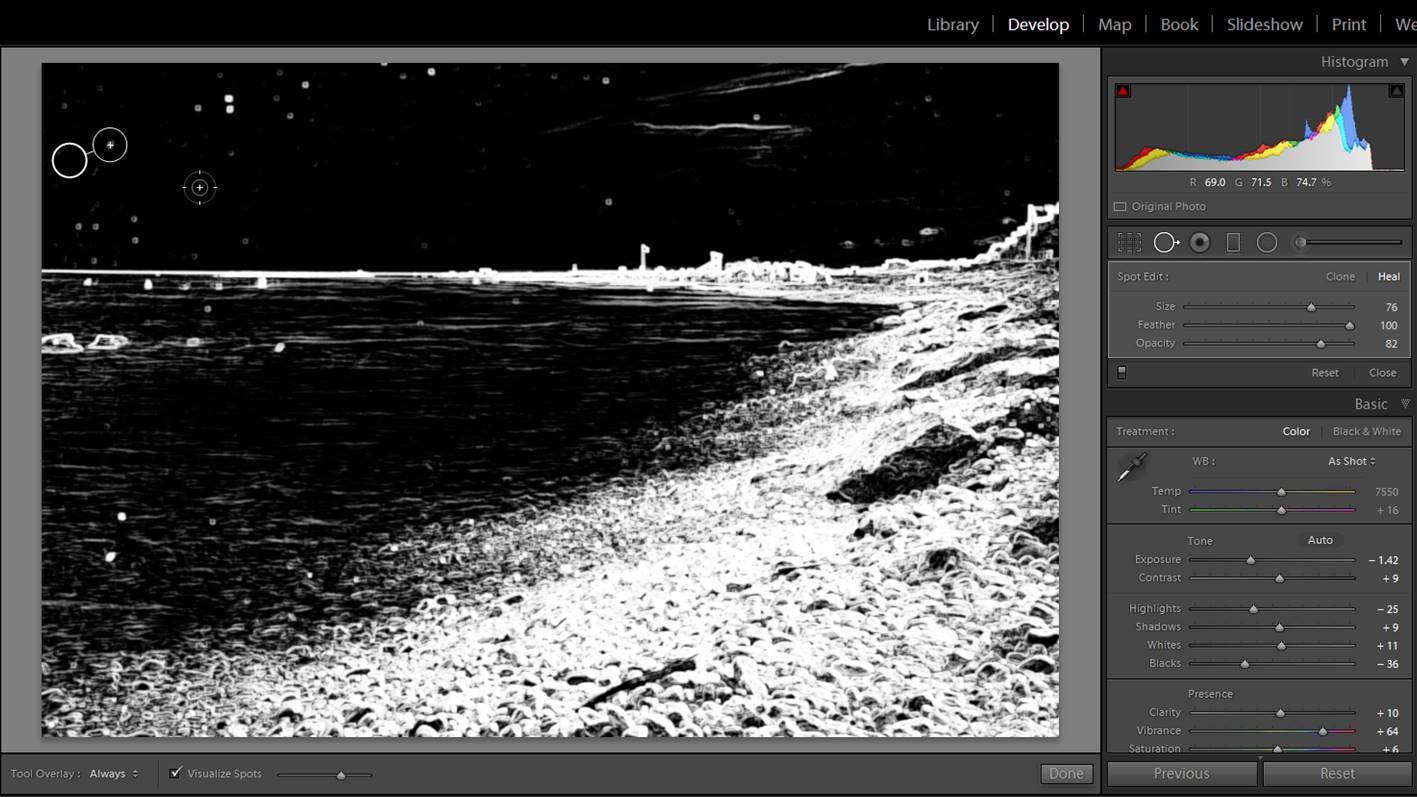
But there is a way to see the dust spots even better! Select the Spot removal tool (blue square), click on “Heal” and in the lower part of the screen click on “Visualize Spots”. You will see your photo in black with white contours. The dust spots are the little round white spots. There are a lot in this photo!
With the Spot Removal Tool, select one dust spot. You will see that Lightroom selects an area from which it is copying the content. Repeat for each dust spot.
Believe me, if you have a lot of them, it can get really tedious. Look how crazy it can get!:
I have learn that it is better to keep a cleaning cloth with your filters and spend some time cleaning them before using (even when they seem quite clean). A minute of cleaning in the field could save you hours later (depending on how many photos you have) in front of the computer.
Here the dust-free version of the photo.
#8.Take your time and enjoy nature
Long exposure photography is not fast photography. You need to set your tripod, choose filters (clean them), experiment different settings… I recommend you to take it as an opportunity to relax and enjoy nature. Sit down, bring something nice to eat and/or drink and have fun!
I hope you liked this article, please write me any questions or comments and have a happy shooting!


 Facebook
 Google +