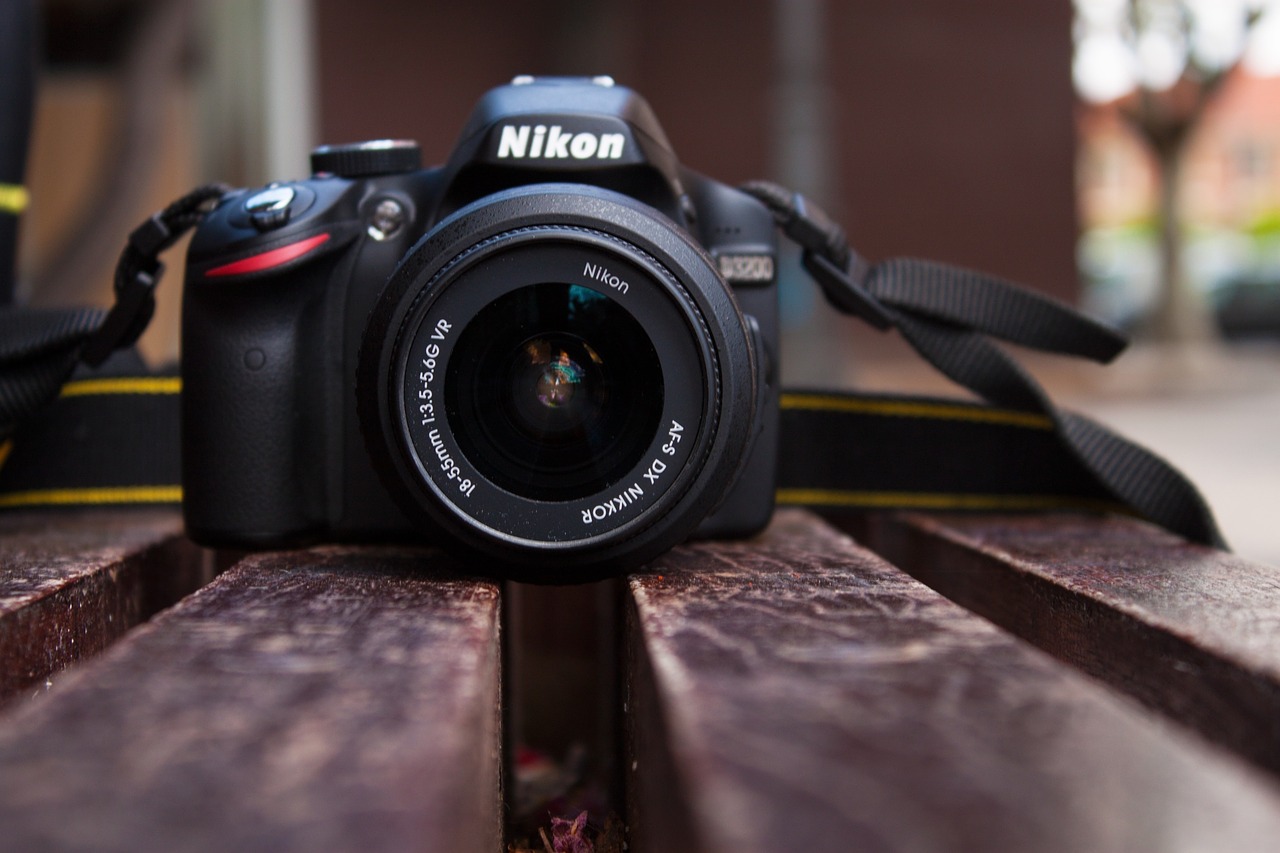
Tag: gear

Haida Clear Night filter. A solution to the light pollution

As one of the leading industries in photo filters production, Haida always has new ideas to improve the quality of our shots.

A good instance is the new nano Haida Clear Night filter. It was so useful to contrast the yellow light pollution in some places where I created some of my images!

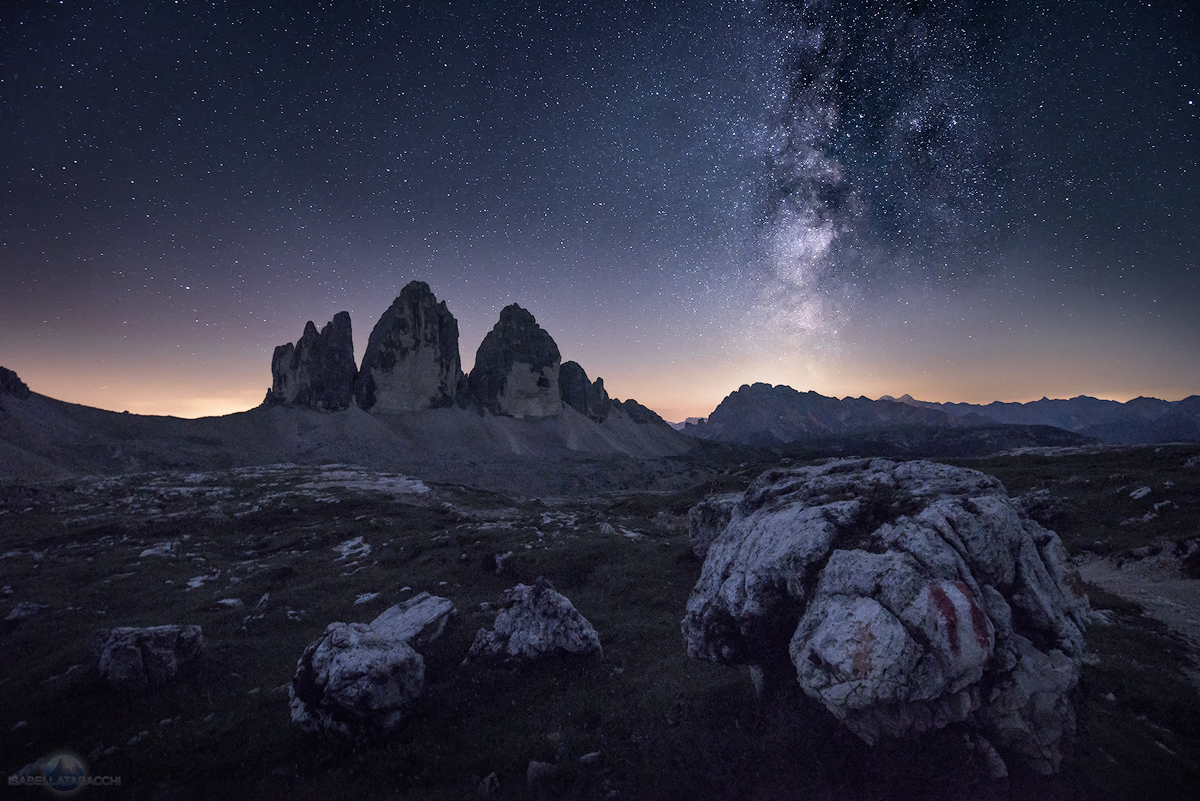
This is, for example, the final result (post-processing included) of a shot taken with that filter in the Swiss Alps.

see filter isabella tabacchi

You’ll think that it’s very easy to have such uniform color of a nightscape with Adobe Photoshop and that the light pollution tint is removable also with some features in Adobe Camera Raw.

That could be true, but the following image shows as my editing work was very short thanks to the Haida Clear Night filter.

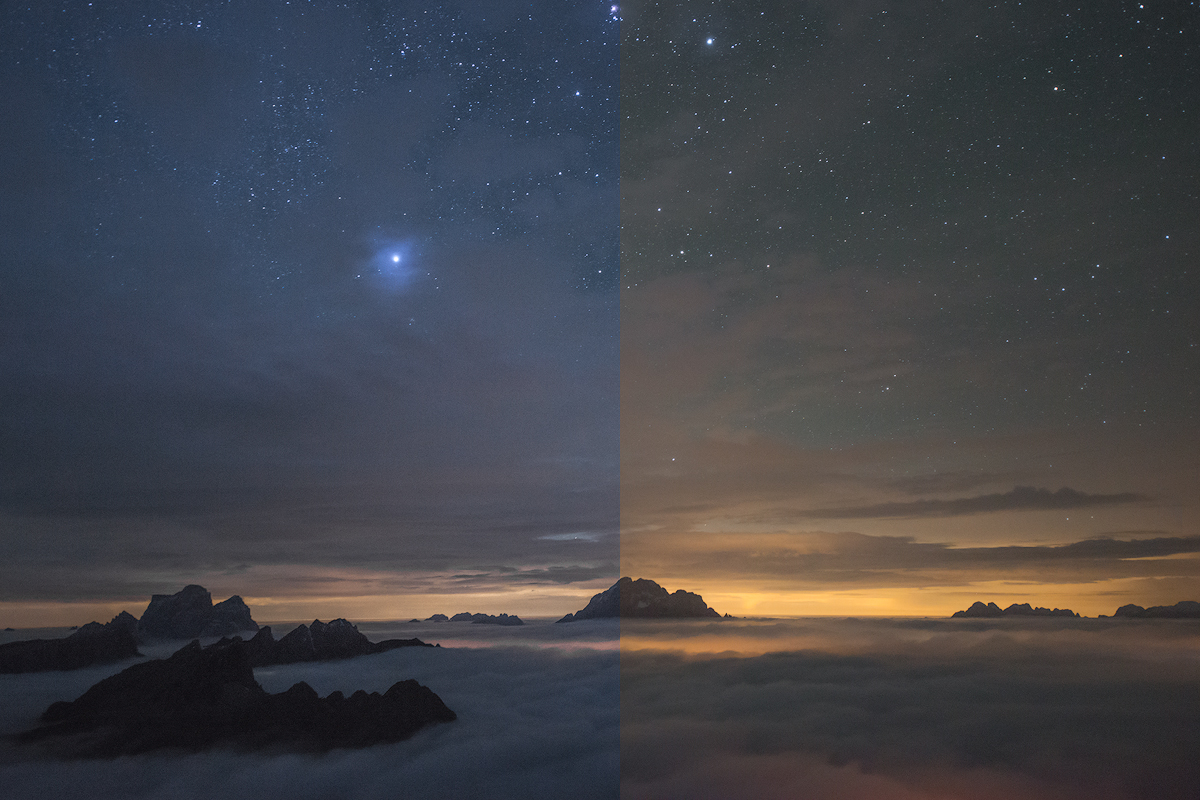
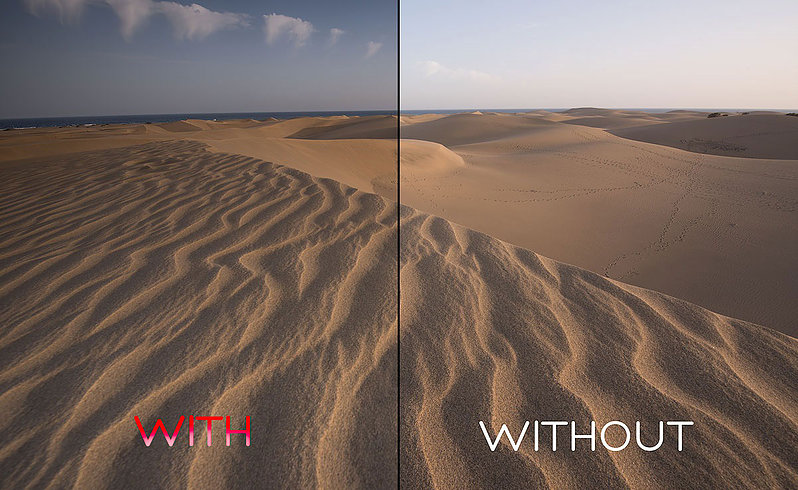
clear night with without

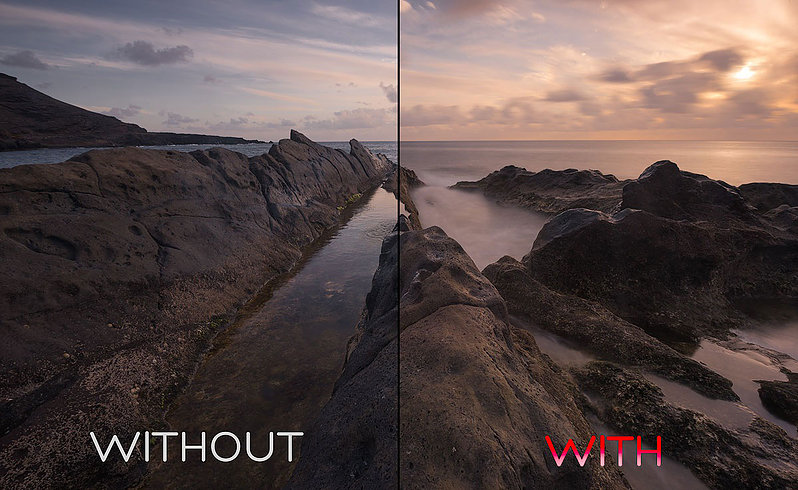
This image is composed of two not post-processed shots as Adobe Camera Raw shows them. I took the RAW files with the same white balance of 3700 K (Kelvin).

In the “WITHOUT” part, we can notice how the light on the horizon is strong, yellowish and has its impact on the rest of the sky, even in the mountains.

In the “WITH” half of this demonstrative picture, the light is not only white but even more restricted on the horizon area. Therefore, the stars are also more evident, outlined.

clear night filter haida

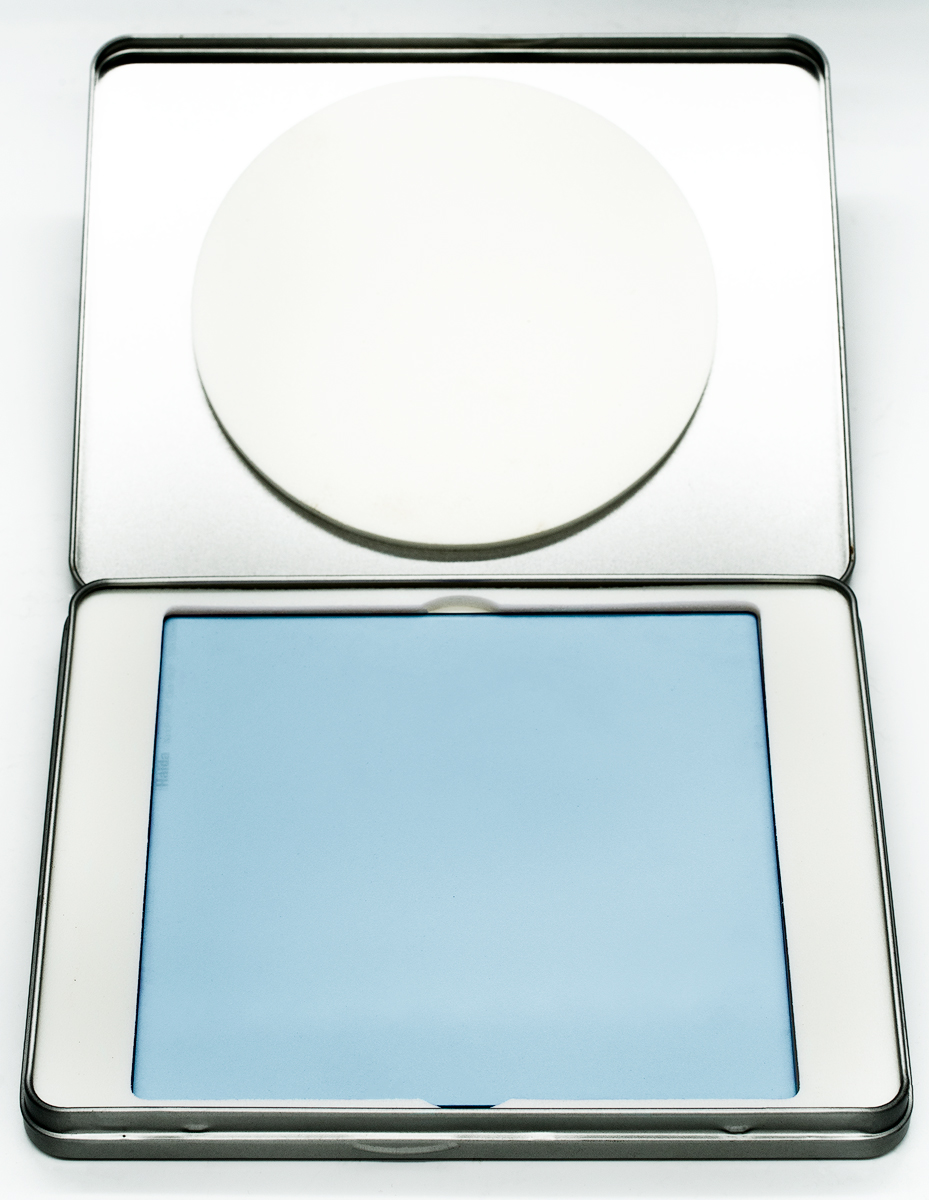
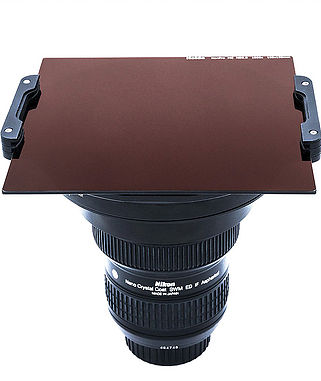
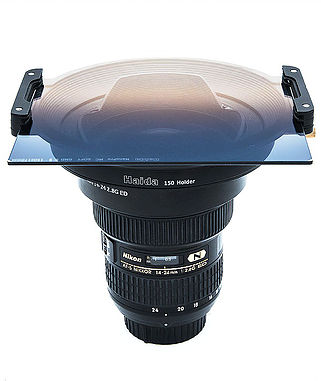
This is how the Clear Night filter looks in its original Haida Filter case.

You can notice the light blue color of the glass: this is why the yellowish pollution is contrasted!

The filter contains also a polarizing capability: it defuses light coming into the camera; so, the luminosity and brightness of the pollution will be confined at the horizon, the stars and astro magic like Milky Way will be more evident.

A parenthesis about the nano-coat meaning

The nano coat couldn’t miss in this product.

But, what does “Nano Pro” mean? Well, it’s the extremely thin, nano, a coat which covers the glass surface of the filter.

This is the great innovation of this new product line that makes the difference in comparison to the previous series. It gives resistance to dirt, reflections, and scratches.

Thanks to this coat, my filters fantastically survived sandy, earthy, rocky, icy places.

Furthermore, as a landscaper, I often take shots to waterfalls and rocky beaches where the waves move on the reefs and splash some water on the filter. Thanks to this coat I have just to clean lightly with a towel cause the drops come away very easily.

Another comparison: when the light pollution is very strong

CLEAR NIGHT

This is another “WITH-WITHOUT” image composed of two shots I took during my workshop at Lagazuoi hut, in the Italian Dolomites.

My students and I had the opportunity to immortalize this view of the highest peaks in the Dolomites of Ampezzo coming out from a “sea” of clouds.

Unfortunately, the light pollution of the valleys was reflected in the clouds and at the horizon; but the shot with the Haida Clear Night filter, with the same white balance, is completely different.

All these features help so much the post-processing phase cause we need to do fewer actions in order to delete the light pollution and that yellowish cast.

Where can you buy it?

You can purchase Haida Clear Night filter at Amazon.com.

But are also available on fotichaestli.ch , the Swiss distributor website.

They are available in every size:

  1. Square Glass Insert filter systems. 75×75, 100×100 and the 150 super wide angle systems (you need the holder to mount the filters on the lens).


Round filter sizes: 52, 55, 58, 62, 67, 72, 77, 82 m

A little parenthesis about the Haida holder

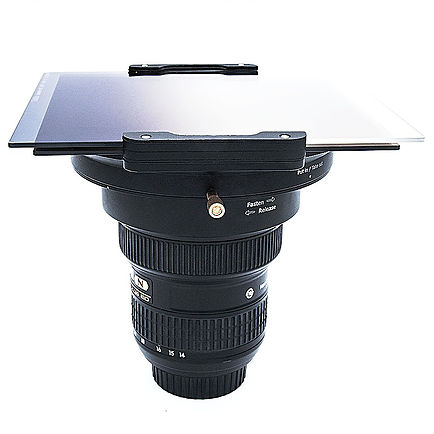
You have to put the filters in the grooves of the holder to use them. I own the 150 series holder for my Nikon 14-24mm f/2.8G ED wide-angle lens.

The support system is steel and very steady and resistant. It consists of the universal holder that supports the filters, the front adapter ring and the rear adapter ring that sustain and connect the holder to the lens.
A little gold nut enables to remove or rotate the holder on the rings to position better the filter, especially if it’s a GND.

There are also two rubber plates (superior and inferior) on the holder surface, near the grooves; they prevent the light to come into the space between the lens and the holder, so the nuisance reflections don’t appear on our shots. You can find also some replacement rubber plates in the holder pack.
I also took many very long exposure shots with ND, GND and both filters; I never saw that horrible reflection (similar to crowns) that appear every time the light goes through the filter.

And of course there are not this kind of problems about the Clear Night filter; in the night the light is very weak, especially when the moon is not visible (except cityscapes).

Conclusion

Haida Clear Night filter is a great choice for a nightscape.

I like the color cast on the glass, cause it eliminates yellowish and orange pollution, even if I know that is a matter of taste (I love cold nightscapes).

The quality is great and the price also. I have to tell you that this idea met my expectations.

SaveSave

Haida nano pro: a review about the new GND and ND filters

Based in Ningbo, Haida is a company established in 2007, specializing in researching particularly the filters used on the photographic lens, and also other camera accessories.

Haida filters are among the best on the market and one of their best features is the great price-quality evaluation.

And as I’ve tried the new nano-coated products for months, and they survived many travels and extreme environments (like iced rocky beaches, deserts, salted water) I’ve been even more satisfied with the new stuff of the industry from Ningbo.

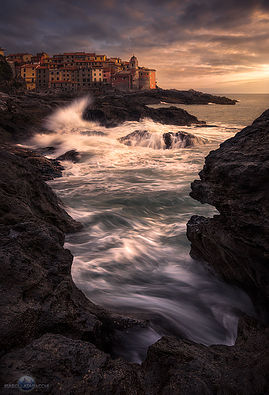
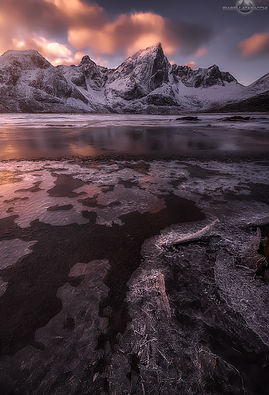
Here is some image I took with the new Haida filters.

tellaro isabella tabacchi

tenerife isabella tabacchi

norway isabella tabacchi

Now to the main characteristics of the products I tested:  Nano Pro MC ND 3.0 (1000x) 150×150 and Nano Pro MC Soft GND 0.9 150×170 filters.

The Nano coat

What does “Nano Pro” mean? Well, it’s the extremely thin, nano, a coat which covers the glass surface of the filter.

This is the great innovation of this new product line that makes the difference in comparison to the previous series. It gives resistance to dirt, reflections, and scratches.

Thanks to this coat, my filters fantastically survived sandy, earthy, rocky, icy places. 

Furthermore, as a landscaper, I often take shots to waterfalls and rocky beaches where the waves move on the reefs and splash some water on the filter. Thanks to this coat I have just to clean lightly with a towel cause the drops come away very easily.

The holder

holder Haida

SaveSave

Six Dolomitic Destinations a Landscaper Couldn’t (And Shouldn’t) Miss

For who don’t know, Dolomites are a group of many mountains located in Italy, between the regions of Veneto and Trentino-Alto Adige.These peaks are known for their bizarre shapes, formed millions of years ago because of many erosions.Over the years The Dolomites became among the most visited mountains in the World and many tourists from different countries go for miles on foot to admire the magnitude of that peaks or enjoy atomic sunsets.As that places are so peculiar and full of drama, many landscapes photographers search inspiration there and the business of photo workshops is greatly fruitful.  seceda dolomitesThis is why, as I explored The Dolomites for years, many foreign photographers asked me a lot of information about spots and places to visit there.Of course, every angle of this area should be explored, and there are wonderful locations are not included in this article cause I should write a book about all the places to visit in the Dolomites… this is why I’ve chosen the six most powerful locations where I tried the strongest feelings as a photographer and as human.

1. Mount Seceda 

Seceda is part of the Odle group, in Val Gardena, in the province of Bozen. You can reach the summit of the mountain with a cable car from Ortisei and be at about 2500 min 15 minutes. There you can admire the imperiousness of the inclined Seceda peak turned towards the valleys and other mountains of South Tyrol, until the Austrian peaks like mount Großglockner. Behind your sight, you will recognize some of the most famous mountains and massifs in the Dolomites, like Langkofel, Plattkofel, and Sella group. As a photographer you can use many different kinds of lenses there; I think the best focal length to immortalize Seceda is 24mm even if telephoto lenses are necessary to create images of the far peaks, that are very fascinating, especially in a misty nightfall.  According to my photographic tastes, I think that the best time to take great shots of Seceda is in the foggy days, especially when fast clouds, lower than the summit of the mountain, move against this one; this kind of weather can be present in every season, particularly in Autumn and Spring.

 2. Seiser Alm

Coming up by car from Kastelruth you will arrive in a little town of hotels named Compatsch. If you park and proceed by a walk on a restricted traffic route, you’ll discover a little and pacific rural environment at the foot of the majestic Langkofel and Plattkofel mounts.During your shooting time you can play with the curves of hills, and little details of them, like trees and little alpine lodges. I recommend focal lengths from 24mm to 70mm even if also telephoto lenses could be used to capture details of the valley and far mountains.A foggy weather is perfect to take pictures in Seiser Alm; I really love when the light of the sun or the moon creates visible oblique rays that illuminate the fog and are contrasted by the shadows of the elements in the valley. My award-winning picture “The magic of the night” is an example of the disarming beauty of Seiser Alm bounded by the mist at the moonlight.The best months of the year to visit this fairy location are May, June, July, during the flowering of the meadows, October, November and in the wintertime (but only if the hills are covered by the snow).seiser alm dolomites

3. Lagazuoi hut   

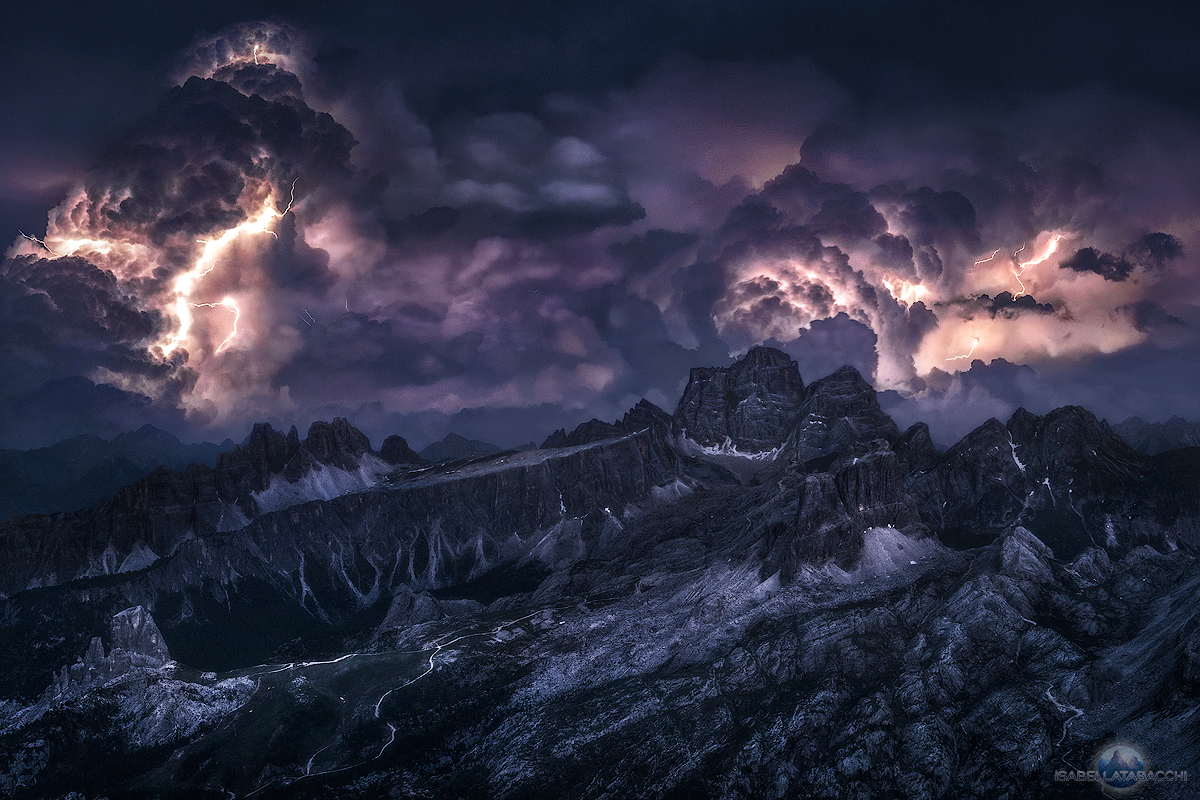
Lagazuoi is a mount located in the Dolomites near Cortina D’Ampezzo, lying at an altitude of 2835 m. It contains a mountain hut, accessible by cable car in few minutes, which has one of the best panoramic views in the Dolomites.   This is why I consider it a landscaper friendly location: every kind of lens, especially from a focal length of 24mm to higher, is addicted thanks to a view rich of peaks, valleys, trees and every kind of detail.Every month of the year is great to visit Lagazuoi hut, above all, when low clouds form a kind of “sea” and only the highest peaks come out from them. The funniest thing is that, at that altitude, the weather changes very fastly! This is why you can take shots of a red sunset and immediately after of some lightning.lagazuoi pelmo croda da lago cortina sorapiss sorapis

4. Lake Sorapiss

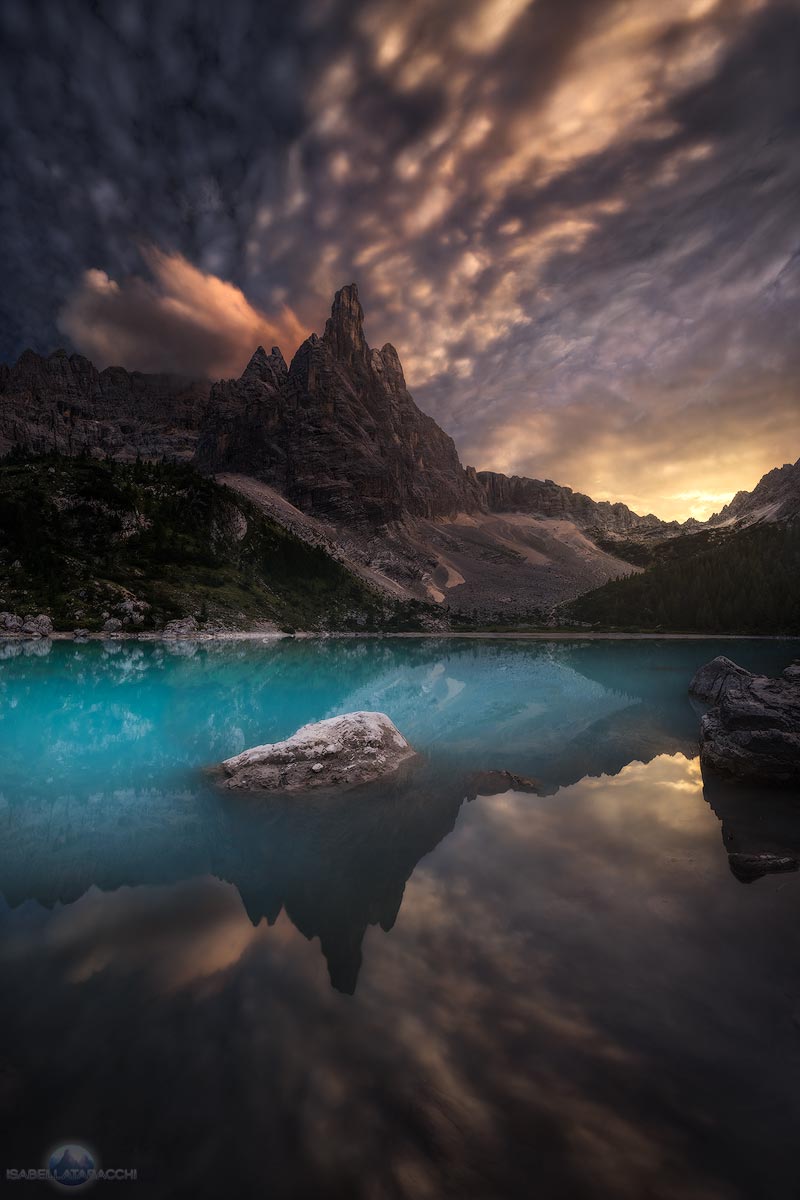
At the foot of the Dito di Dio (God Finger) peak is located the most colorful body of water in the Alps. Sorapiss is characterized by an intense turquoise water, given by the rocks at the bottom of the lake.You can arrive at this fairy place from Passo Tre Croci, near Misurina (district of Auronzo di Cadore), in about two hours and it’s possible to book at the Vandelli hut, near the lake.A colored sunset or a shiny sunrise can help you to take a memorable capture of this location, even if the totality of the lake makes the most of the “wow effect”.I recommend a wide-angle lens to get a large visual of the mountains and the water, with some rocks in the foreground.You can visit Sorapiss lake from the thaw in May until the first ices at the beginning of November.

  5. Vajolet Towers

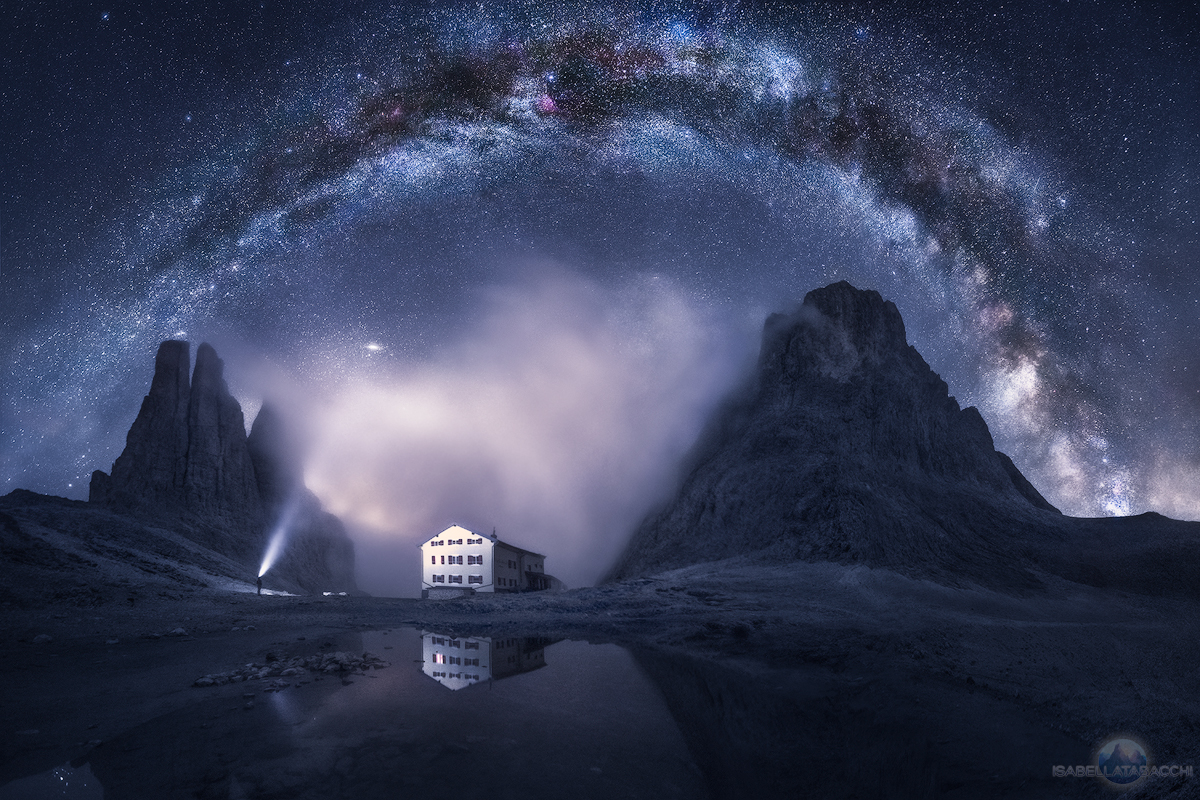
When you reach the “Gartl” hollow after a sloping rocky trail, you may think to be in another lonely world; and on your right, there are three majestic bastions called Vajolet Towers. On your left, there is a yellow house which is the Re Alberto I hut and in front of it is placed a little pluvial lake. The rocky garden of the “Gartl” hollow is located at 2621 m between the Fassa valley and the municipality of Tires, in South Tyrol. Photographers can take shots from many points of view like the lake and use some rocks as foreground.The best lens for this location is a wide angle, that’s especially addicted to the nightscapes lovers, cause the sky at that altitude is very clear and deep.The way to reach Re Alberto I hut from Pera di Fassa is long but you can get really warm hospitality and discover the taste of Italian and Tyrolean food at the hut; I will never forget the polenta with cheese before my shooting time.Re Alberto I hut is open from the end of June to the end of September and the best weather is, of course, a red cloudy sunset but if a dark night follows it.stars vajolet towers milky way

6. Tre Cime di Lavaredo

I couldn’t avoid writing about Tre Cime (Three Peaks), a place that every tourist knows, a classic postcard of the Italian Alps. You can reach the Locatelli hut from Auronzo hut by a more than one hour walk. The trail is boring, but when you are in front of the Three Peaks can’t stop to admire their majesty.I suggest you take a look also at lakes of Piani, two bodies of water behind the Locatelli hut.I recommend you to use a wide angle lens and a telephoto lens only to take shots at far peaks like Cadini di Misurina or Dreischusterspitze. Tre Cime di Lavaredo are fascinating in every period of the year, with every weather (even if I personally prefer a partially cloudy sky in the daytime and a clear night). Be sure that in Winter the trail is walkable and there isn’t ice on it.tre cime

Canon Lens Review – A Look At The 10 Best Lenses For Canon

If you have a Canon DSLR, congratulations! You have access to quite possibly the greatest collection of lenses on Earth. While it’s more than possible to find some remarkable lenses for any DSLR — and I personally recommend checking out Sigma’s excellent Art line for any camera brand — Canon lenses are generally considered the best in the world. Sure, Leica and Zeiss offer some truly astounding glass, such as the Leica Noctilux-M 50mm f/0.95, that arguably outperform the very best from Canon. But if you want a huge selection of dozens of lenses with focal lengths ranging from 8mm to 800mm, look no further than Canon EF lenses.

But with such a massive selection to choose from, picking the lenses that are right for you can be a daunting task. If you’re into a specialized form of photography that requires a specific kind of lens, such as a fisheye, macro, tilt-shift, or super telephoto, then you likely already know what you need. However, if you’re just starting out with your Canon camera, a narrowed down selection of the best Canon has to offer may be helpful.

best cheap lenses for canon

There are three noteworthy nuances to the Canon lineup we should go through before we begin:

#1 The first thing to note is if your camera is full-frame or APS-C, already assuming it is an EF mount camera. This will determine what lenses are available to you, and you should always triple check that you’re buying a full-frame lens if you have a full-frame camera. If you have an APS-C camera, you can use any EF-mount lens, but be sure to note that the “equivalent focal length” of a full frame lens on a crop-sensor Canon is 1.6x the listed focal length. So if a full-frame lens is 35mm, on APS-C it would be 35mm x 1.6, or 56mm. APS-C only lenses are denoted as EF-S and shouldn’t be purchased for use with a full-frame camera.

#2 Another important element of the Canon lens system is the division of quality into three distinct tiers:

Silver: These are the everyday lenses that come in camera kits and are generally not the best Canon can make, with a flimsy, plastic build. Though they work fine, these lenses should generally be avoided if you want good image quality, though there are a few exceptions noted on this list. I almost always recommend buying a camera body only and choosing your lenses for yourself, since a kit lens won’t give you results that are much better than a point-and-shoot. These budget lenses have silver rings or no rings at all painted on the barrel.

Gold: The middle tier is essentially just a nicer version of the Silver series, often sporting similar optical design with higher quality glass or coating and a metal construction. some of these lenses are actually pretty good, and you can spot them by their gold ring on the barrel.

Luxury: Then, there is the L series. These are expensive, amazing lenses that pretty much every photographer lusts after. They are easily recognizable by the red ring painted at the end of the barrel, and by their high price tags. Though they have top-end optical and build quality, they are usually big and heavy regardless of the focal length. But if you’re going to take your Canon system seriously, you should save up and focus mostly on L lenses.

best lens for canon 6d

#3 There are a few acronyms that get tacked onto the beginning or end of a lens’s name (which is made up of the focal length and minimum selectable aperture, like 50mm f/1.8). Each denotes a special feature of that lens, which is helpful for quick comparisons. While there are a number of more obscure acronyms that are only found on a few lenses, all you really need to know are the common ones listed below:

EF: Canon’s designation for full-frame lenses, placed before the lens name

EF-S: Canon’s designation for APS-C lenses, placed before the lens name

IS: Image Stabilization, especially important in telephoto lenses

L: Luxury, this simply tells you it’s a top-of-the-line L series lens

STM: Stepper Motor, a low-vibration focusing motor that’s good for video, with non-mechanical manual focus. It’s generally not as fast or accurate as an UltraSonic Motor and comes in cheaper lenses.

USM/Micro USM: UltraSonic Motor, a fast, quiet, accurate autofocusing motor

I, II, III: These numerals denote if the lens is Mark I, Mark II, or Mark III, or how recent the design is. If a lens is updated it will usually receive a newer Mark in its name. No Mark designation means the lens is a Mark I, which is the case for most of the lenses in the list below. While newer mark lenses are typically a bit better, the improvement isn’t always worth the higher price.

My advice to any new photographer is to allocate about 2/3 of your total photography budget on getting two or three quality lenses. The lens you use will have a far greater impact on your images than the camera you use, and your lenses can stay with you your entire life while you will likely replace your camera every five years or so. If you want proof that the lens is far more important than the camera body, check out this great comparison video by the venerable DigitalRev TV. So if you can, save up and get one L lens instead of two or three non-L lenses and thank me later.

Okay, let’s dive into the list of the best Canon lenses out there. Since this is aimed at photographers who are new to the Canon lens lineup, we’ll go in order from the least expensive to the most expensive. But if you get multiple lenses, make sure they actually serve different purposes by having different focal lengths, physical sizes, or minimum apertures.

10 Best Canon Lenses 


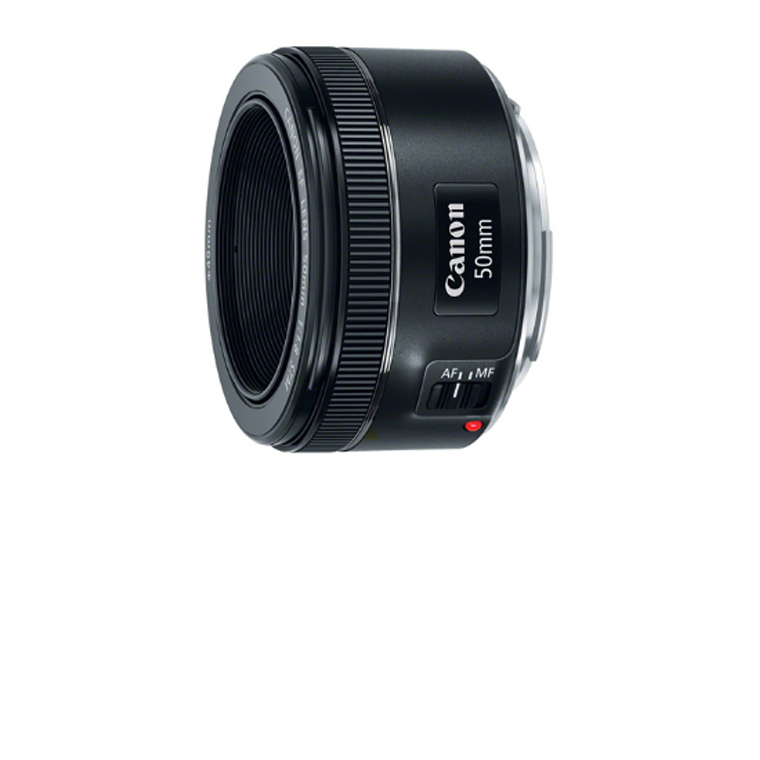
EF 50mm f/1.8 STMGo to Amazon
The nifty fifty! Every photographer needs a compact 50mm prime, and Canon has you covered with an excellent lens at an amazing price.
Watch video review
Overall rating:
46
Lightweight:
0
95
100
Zoom Range:
0
30
100
Stabilization:
0
20
100
Focus Speed:
0
40
100
Pros
  • Lightweight (Weight: 158g)
  • AF Capable
  • Silent
  • Smooth video focus
  • Cheap
Cons
  • Modest barrel distortion
  • Slower focus
  • Does not include stabilization
  • Narrower field of view on APS-C cameras.
Click to read the full Review
Considering the popularity of its predecesor, Canon decided to celebrate the 25th anniversary of its EF 50mm f/1.8 II Lens with a power upgrade; something that was amazingly valued by Canon's loyal customers.

It covers full-frame cameras and is an 80mm equivalent lens on APS-C. It's small and has a Stepper autofocus motor (Also known as Smooth Transitions for Motion or STM) that is equally suited for stills and video, something Canon is know for. While it's in the lowest, Silver tier of Canon lenses, it's still a no-brainer purchase because of the price point, fast minimum aperture, and sharp performance. A clear number 1 in this Canon lens review post.

Ideal for those situations were we're shooting at poor lit conditions, for portraits and also for our daily life photographs - in a few words: a lifelong companion.

(Sample photo courtesy of Canon.es)
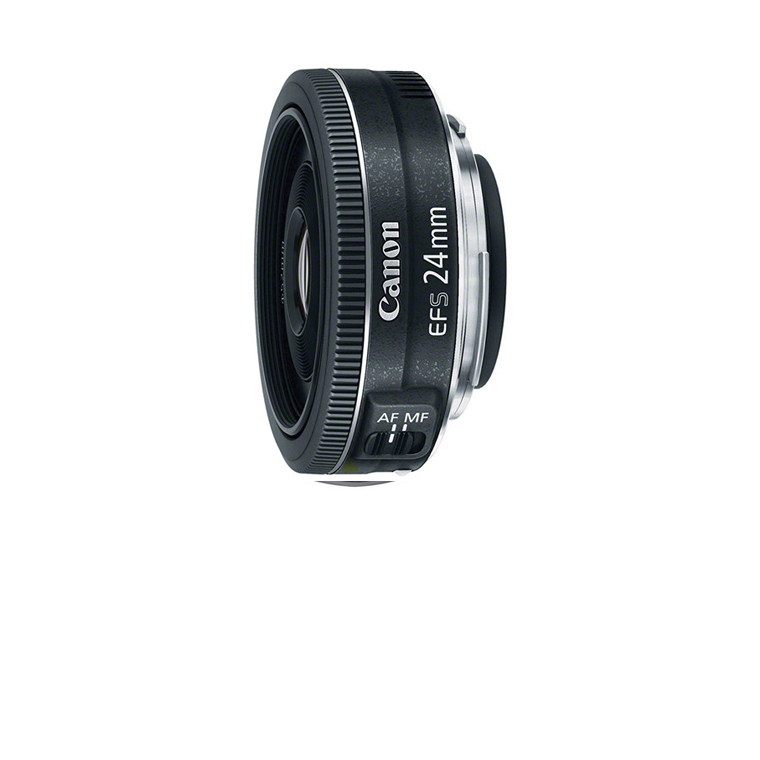
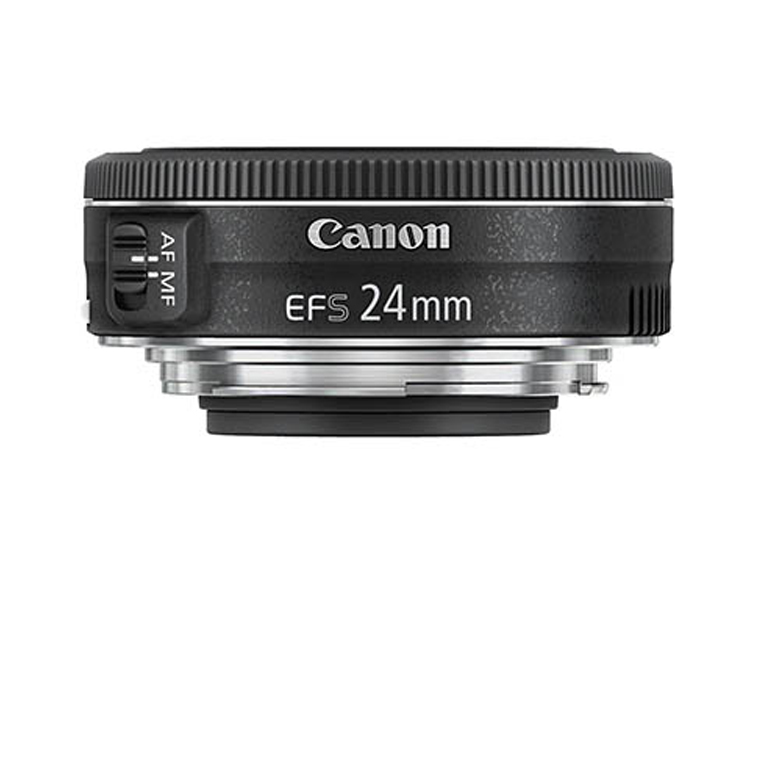
EF-S 24mm f/2.8 STMGo to Amazon
While not at all necessary, having a pancake lens is always kinda fun. As you can see, it's called a pancake lens because it's... shaped like a pancake. While the downside is that it has a relatively simple optical design that lacks a bit of sharpness, the upside is that it's just so darn flat!
Watch video review
Overall rating:
48
Lightweight:
0
97
100
Zoom Range:
0
30
100
Stabilization:
0
20
100
Focus Speed:
0
46
100
Pros
  • Lightweight (Weight: 127 g)
  • AF Capable
  • Real Sharp
  • Very Compact
  • Classic wide-angle field of view
  • Silent STM focus motor
Cons
  • Doesn't feature image stabilization
  • May show vignette effect
  • Not too accurate manual focus
Click to read the full Review
One of the main advantages of this lens is its focal length of 24 mm, which paired with an EOS APS-C camera, will get the same angle of view as with a target of 38 mm and a full frame camera. These conditions are similar to the way in which the human eye perceives images, so these photos will have a nice, natural look for your viewers.

This lens will make your camera feel much smaller and lighter and is great for street photography, since it's not very noticeable or intimidating. Though its optical quality isn't the absolute best, it still can take some great images and is a bargain for a useful wide angle lens.

This lens is also ideal for those DOF effects, as well as for night photography due to its big aperture value - as a great amount of light can be caught by the sensor without even requiring to use a Flash.

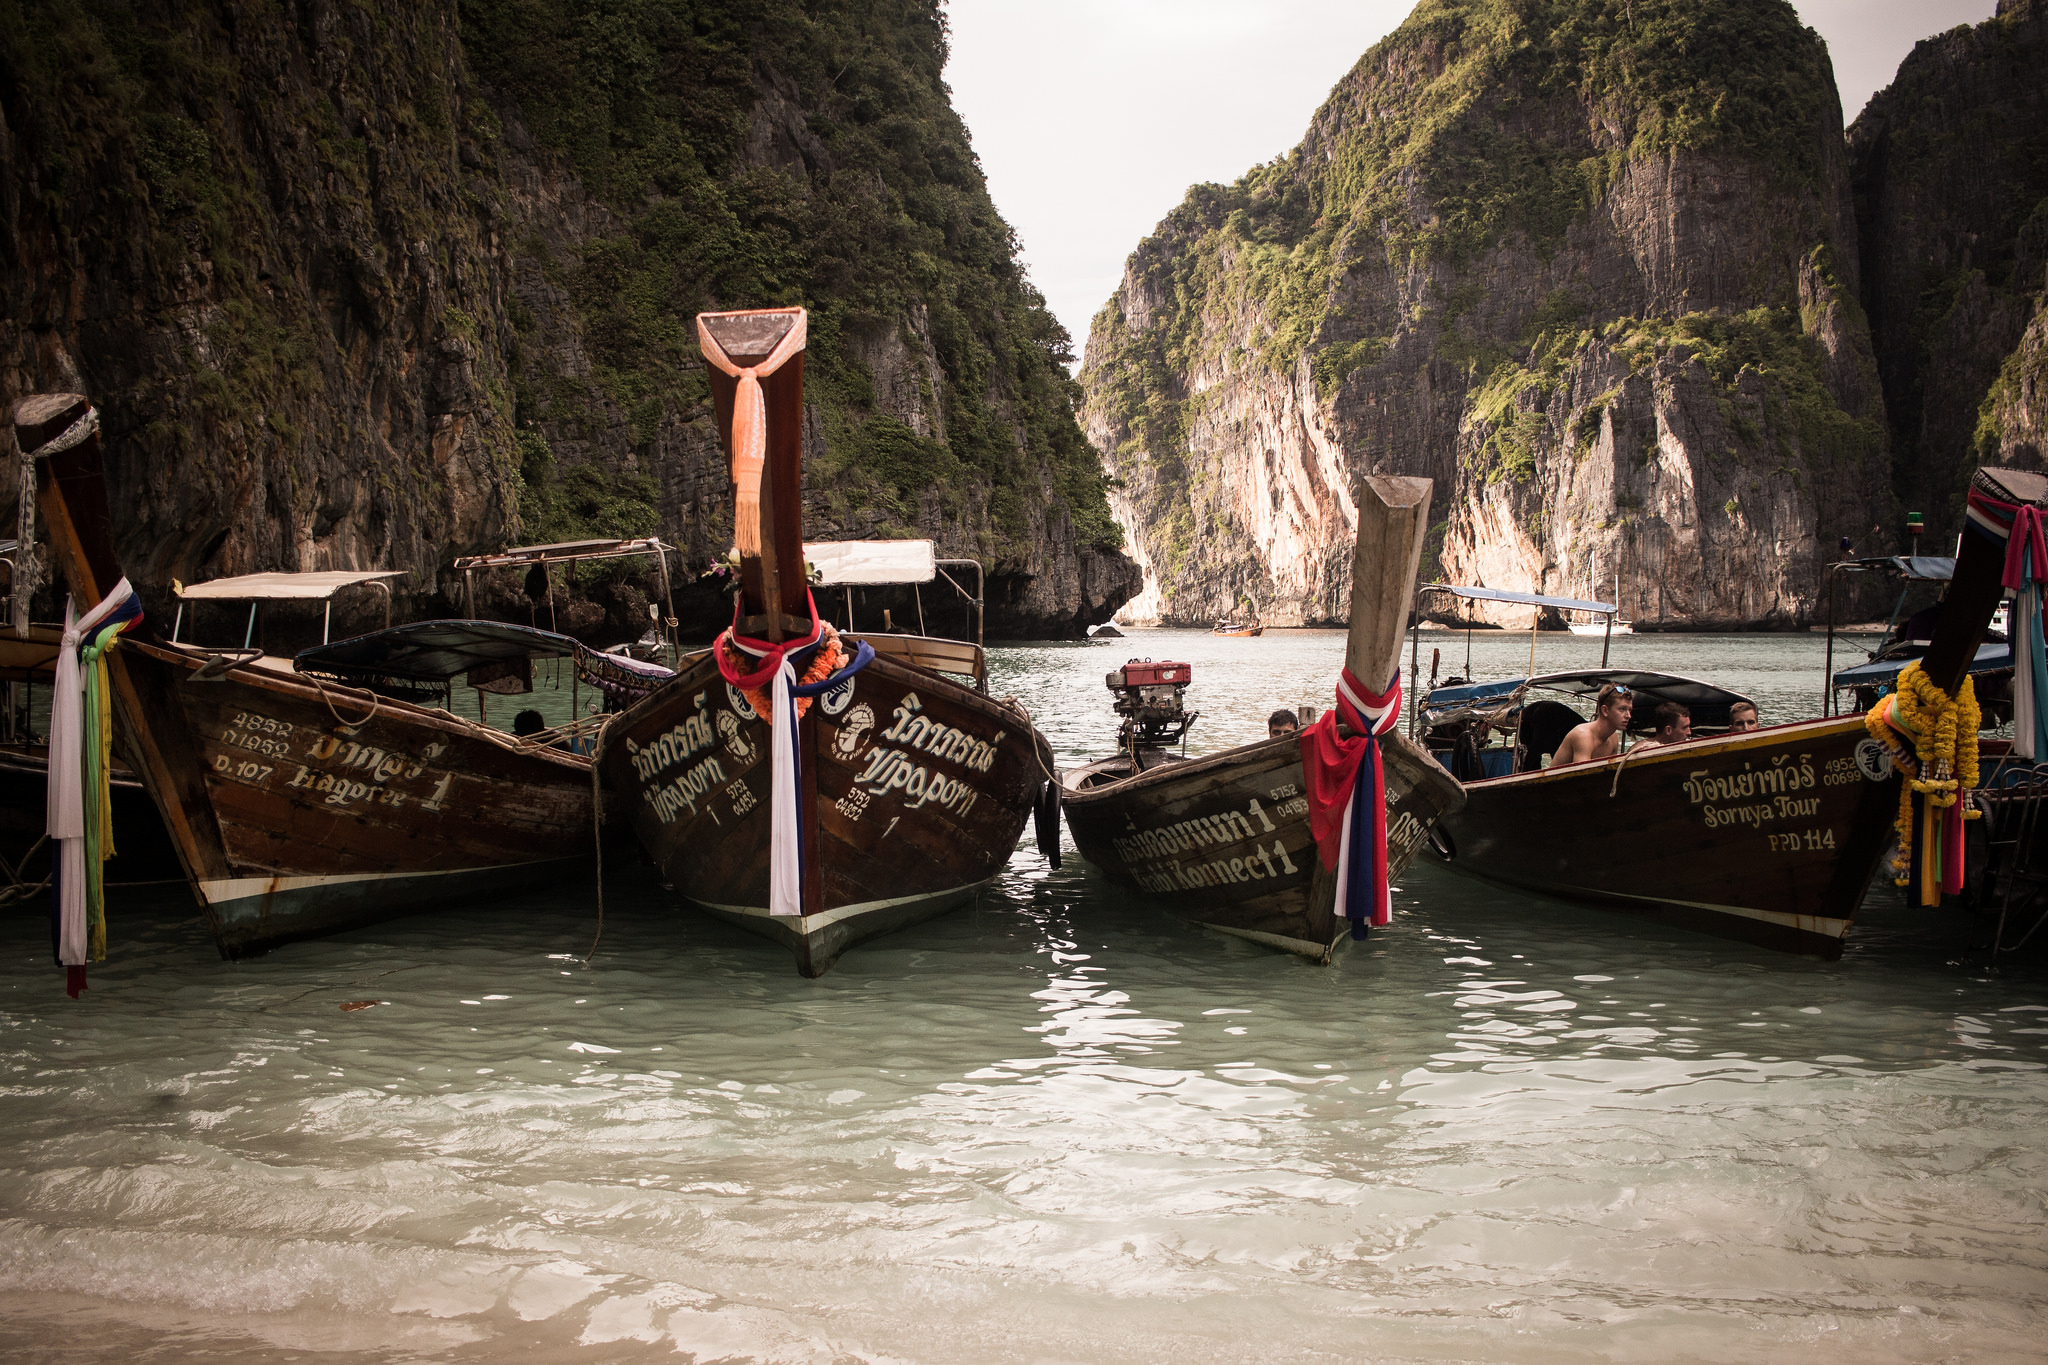
(Sample photo courtesy of Thomas Kraus)
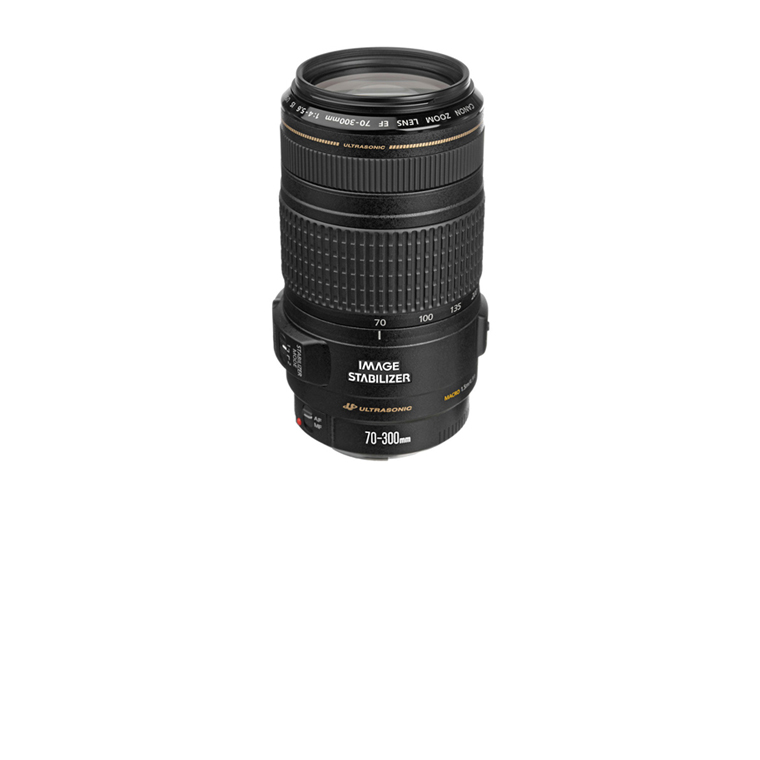
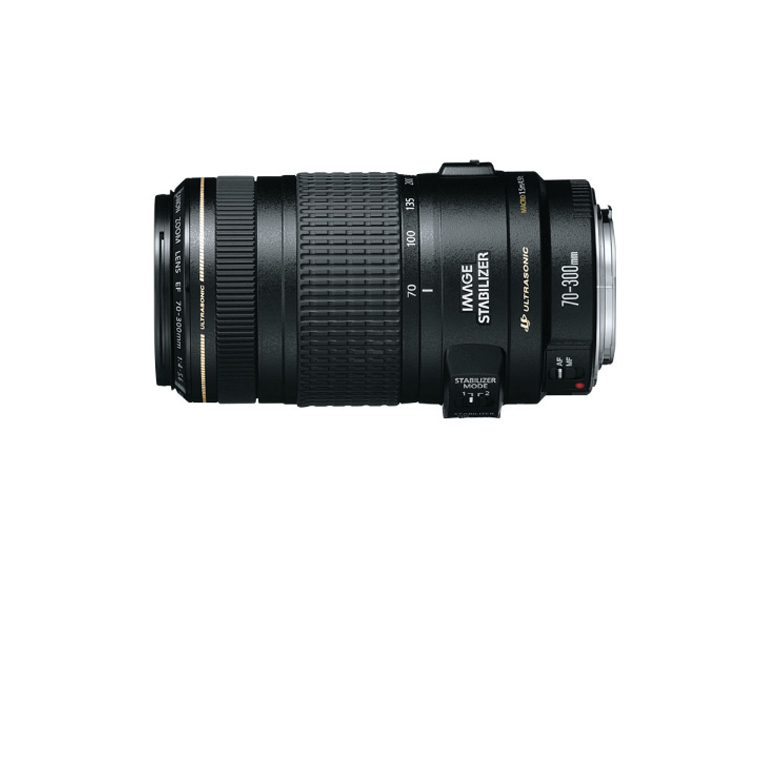
EF 70-300mm f/4-5.6 IS USMGo to Amazon
This baby has quite a bit of zoom range, and it's the first Gold lens on the list. Because of its super long reach, it doesn't have a great minimum aperture range, but that's the price you pay. It does, however, have optical image stabilization, which is something to look for in a telephoto lens.
Watch video review
Overall rating:
71
Lightweight:
0
30
100
Zoom Range:
0
90
100
Stabilization:
0
85
100
Focus Speed:
0
80
100
Pros
  • AF Capable
  • Ultrasonic Autofocus Motor
  • Zoom Ring Lock Lever
  • Optical Image Stabilization
Cons
  • Bulkier (Weight: 0.63 kg)
Click to read the full Review
The lens EF 70-300 mm f/5-5 6 IS USM is equipped with a three steps (IS) image stabilizer, which makes it ideal for working without a tripod. It is possible to use slower shutter speeds values, up to three steps more than would be possible in other cases, without decreasing the sharpness feeling of the image itself.

An element of the objective of UD glass (ultra low dispersion) corrects chromatic aberrations as well as offering resolution and contrasts elevated throughout the zoom range.

Its focus motor is virtually silent, very fast speed for a precise focus even in the most demanding situations.

A budget solution for those who desire to take a step further on travel/landscape/action photography.

(Sample photo courtesy of Fabio Scalabrini)
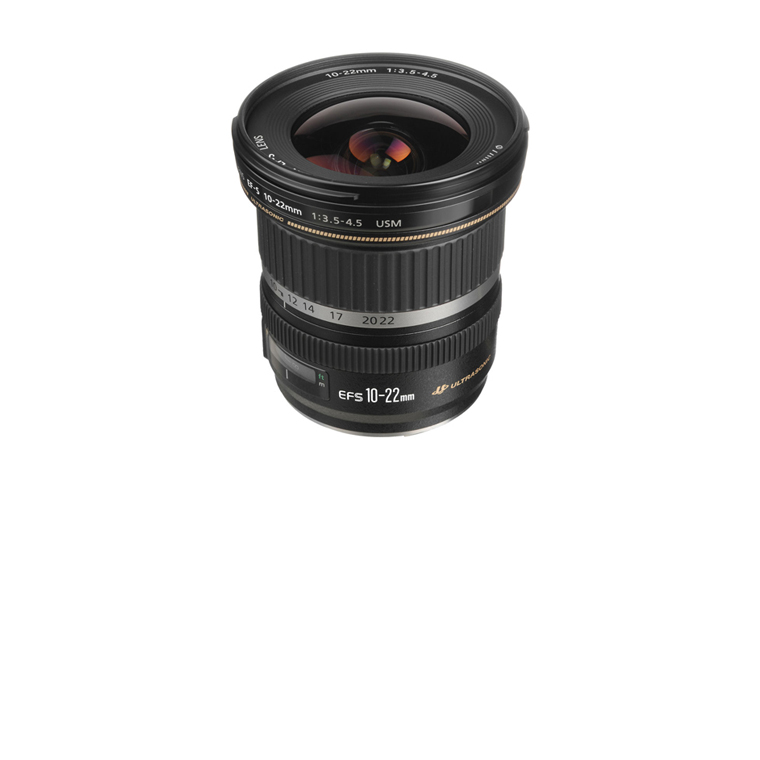
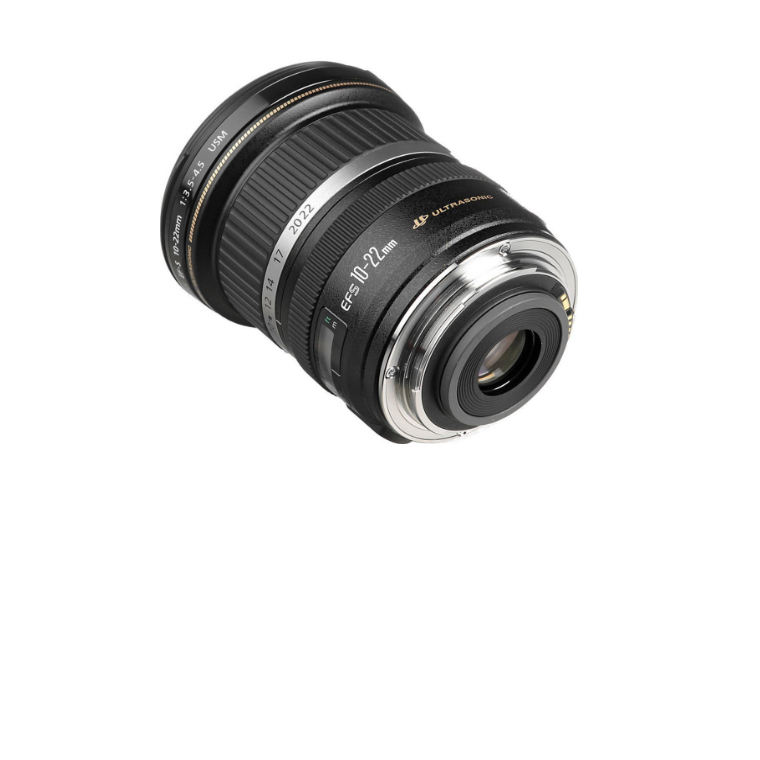
EF-S 10-22mm f/3.5-4.5 USMGo to Amazon
For creative photographers, this is your lens to go - It is capable of altering the perspective of the image in such a way to get incredible dynamic effects.
Watch video review
Overall rating:
61
Lightweight:
0
50
100
Zoom Range:
0
40
100
Stabilization:
0
80
100
Focus Speed:
0
75
100
Pros
  • AF Capable
  • Extreme wide angle coverage
  • Low geometric distortion
  • Ultrasonic Autofocus Motor
Cons
  • Weight: 0.35 kg
  • Lens hood not supplied as standard
  • Modest macro capabilities
  • Incompatible with full-frame bodies
Click to read the full Review
Before you get too excited, remember that this is another APS-C lens, meaning the equivalent focal length is 16-35mm. This is, however, still a very wide angle lens that's right on the border of being a fisheye. This is a great budget option for those looking for a wide angle zoom since it covers basically the entire range you would want. It's also another Gold lens, so you know the build quality will be pretty good too.

Another advantage of this lens relies on its ability to separate the background plane from the plane of the  subject to portray, reinforcing the feeling of presence while keeping an excellent sharpness value in both planes.

(Sample photo courtesy of Dave)
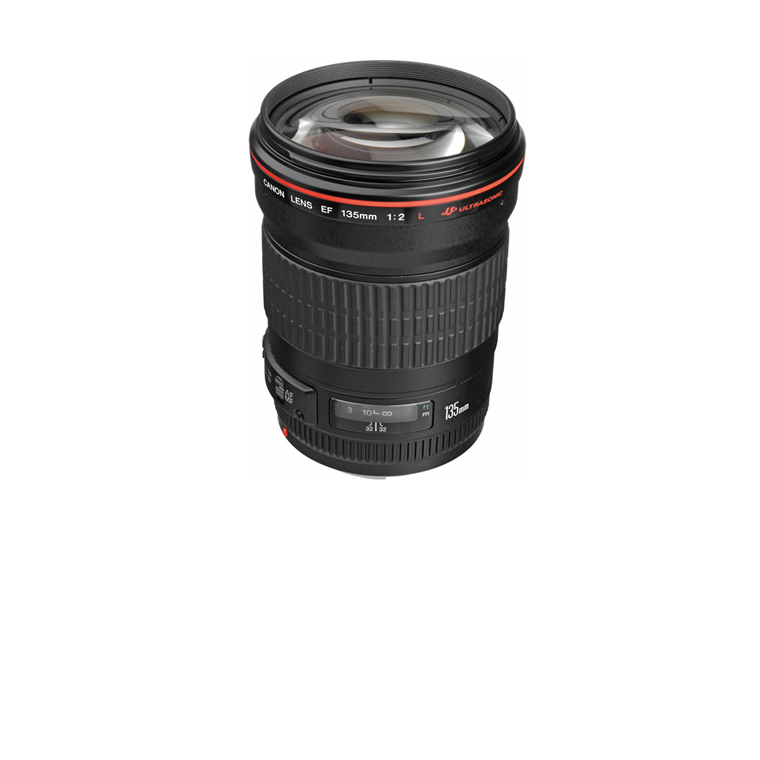
EF 135mm f/2L USMGo to Amazon
It is considered to be a lightweight option for a telephoto lens if you compare it to other similar models - comfortable enough for not requiring a tripod on your common daily-shooting sessions.
Watch video review
Overall rating:
68
Lightweight:
0
60
100
Zoom Range:
0
85
100
Stabilization:
0
50
100
Focus Speed:
0
75
100
Pros
  • AF capable
  • Medium weight (750g)
  • Focusing Range Limiter
  • Depth of Field Scale
  • Ultrasonic Focus Motor
  • Rear Focusing System
Cons
  • No optical stabilization
Click to read the full Review
The first L lens on the list, and it's a real beauty. 135mm is an awesome prime length for nature photography and probably the longest prime you'll want. This is perhaps the largest aperture available in a 135mm lens and it can make for some dramatic images of wildlife. The f/2 aperture is also helpful for nature photography because it can let in lots of light at dusk or dawn, when nature is at its best. You could even use this as a studio portrait lens, though you'll need a decent amount of space between you and your subject because of the longer than ideal focal length.

This lens model also features integration with E-TTL II flash metering, as well as featuring a circular aperture to create a smooth bokeh effect.

Keep in mind that this lens is supplied with a flexible case and lens hood.

(Sample photo courtesy of Marina Plevako)
EF 35mm f/1.4L USMGo to Amazon
If you're a street photographer new to Canon, this is probably the lens you want. 35mm is, in my opinion, the best focal length you can have for street photography and really for photography in general. It's a very similar focal length to the human eye, more so than 50mm, and therefore the resulting images look very natural.
Watch video review
Overall rating:
75
Lightweight:
0
60
100
Zoom Range:
0
60
100
Stabilization:
0
85
100
Focus Speed:
0
95
100
Pros
  • AF Capable
  • Optically stabilized
  • Clear sharp lens
Cons
  • Heavy (Weight: 580 g)
  • Some distortion
  • Hood not included
Click to read the full Review
The large f/1.4 maximum aperture allows a broader passage of light in comparison with the optical lens, f/2.8, which makes it ideal for photography without a tripod with low light.
When doing photos with large aperture values, photographers can play with limiting the depth of field value. Through these effects of shallow approach can highlight a reason of the merits and is particularly effective when combined with great visual field wide-angle lens.

As well as with the EF 70-300mm f/4-5.6 IS USM, the Ultra-low dispersion (UD) optics and two aspherical lens elements provide incredible on all frame sharpness, even when the lens is used in its more angular opening.

Basically, if you can afford only one L lens you should seriously consider choosing this one.

(Sample photo courtesy of Michall Yantsen)
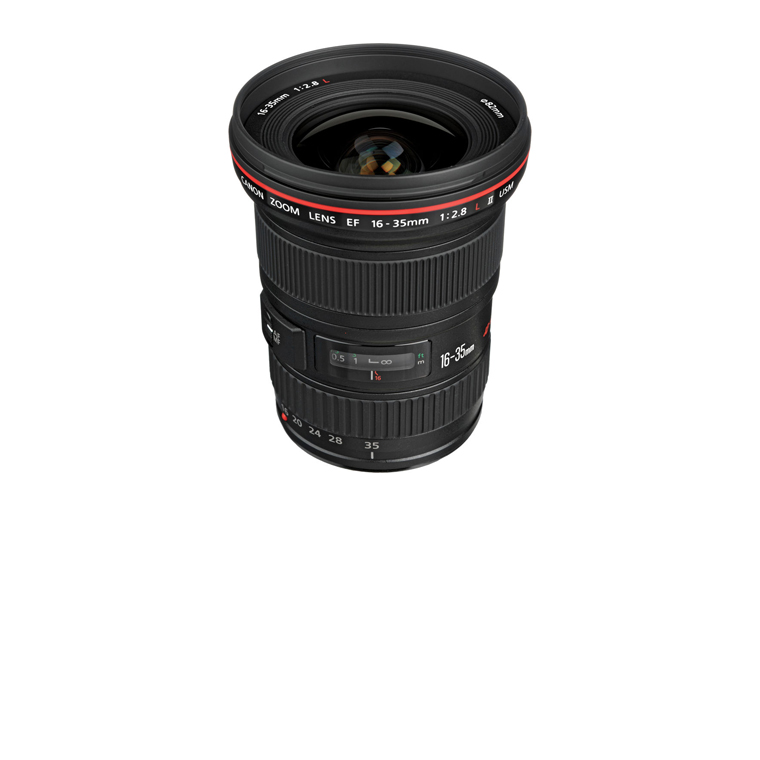
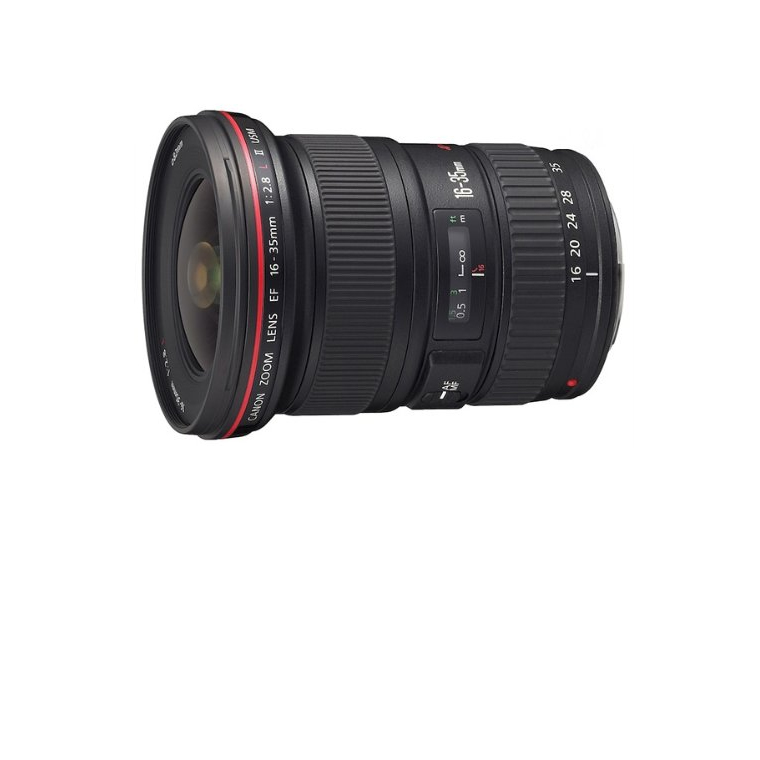
EF 16-35mm f/2.8L II USMGo to Amazon
This is essentially the big-boy (full-frame) equivalent of the EF-S 10-22mm listed above. It has an impressive f/2.8 aperture throughout its zoom range, which is generally the smallest aperture you can use to get pleasingly low depth of field when not shooting macro.
Watch video review
Overall rating:
56
Lightweight:
0
50
100
Zoom Range:
0
20
100
Stabilization:
0
75
100
Focus Speed:
0
80
100
Pros
  • Ultra-wide field of view
  • Fixed f/2.8 aperture
  • Really sharp
Cons
  • Heavy (Weight: 635 g)
  • Limited zoom range
Click to read the full Review
The USM (Ultrasonic Motor) ring controls the fast auto focus system with a nearly silent operation. Mechanical manual focusing can be cancelled without disconnecting the AF system. The lens offers a minimum focus distance of 0.28 m over the entire zoom range.

It also proves itself to be another cool option for getting Bokeh effects; as well as including a flexible case and lens hood, just as we previously seen with the EF 135mm f/2L USM.

This is a great lens for landscapes and should be preferred over its older, Mark I sibling.

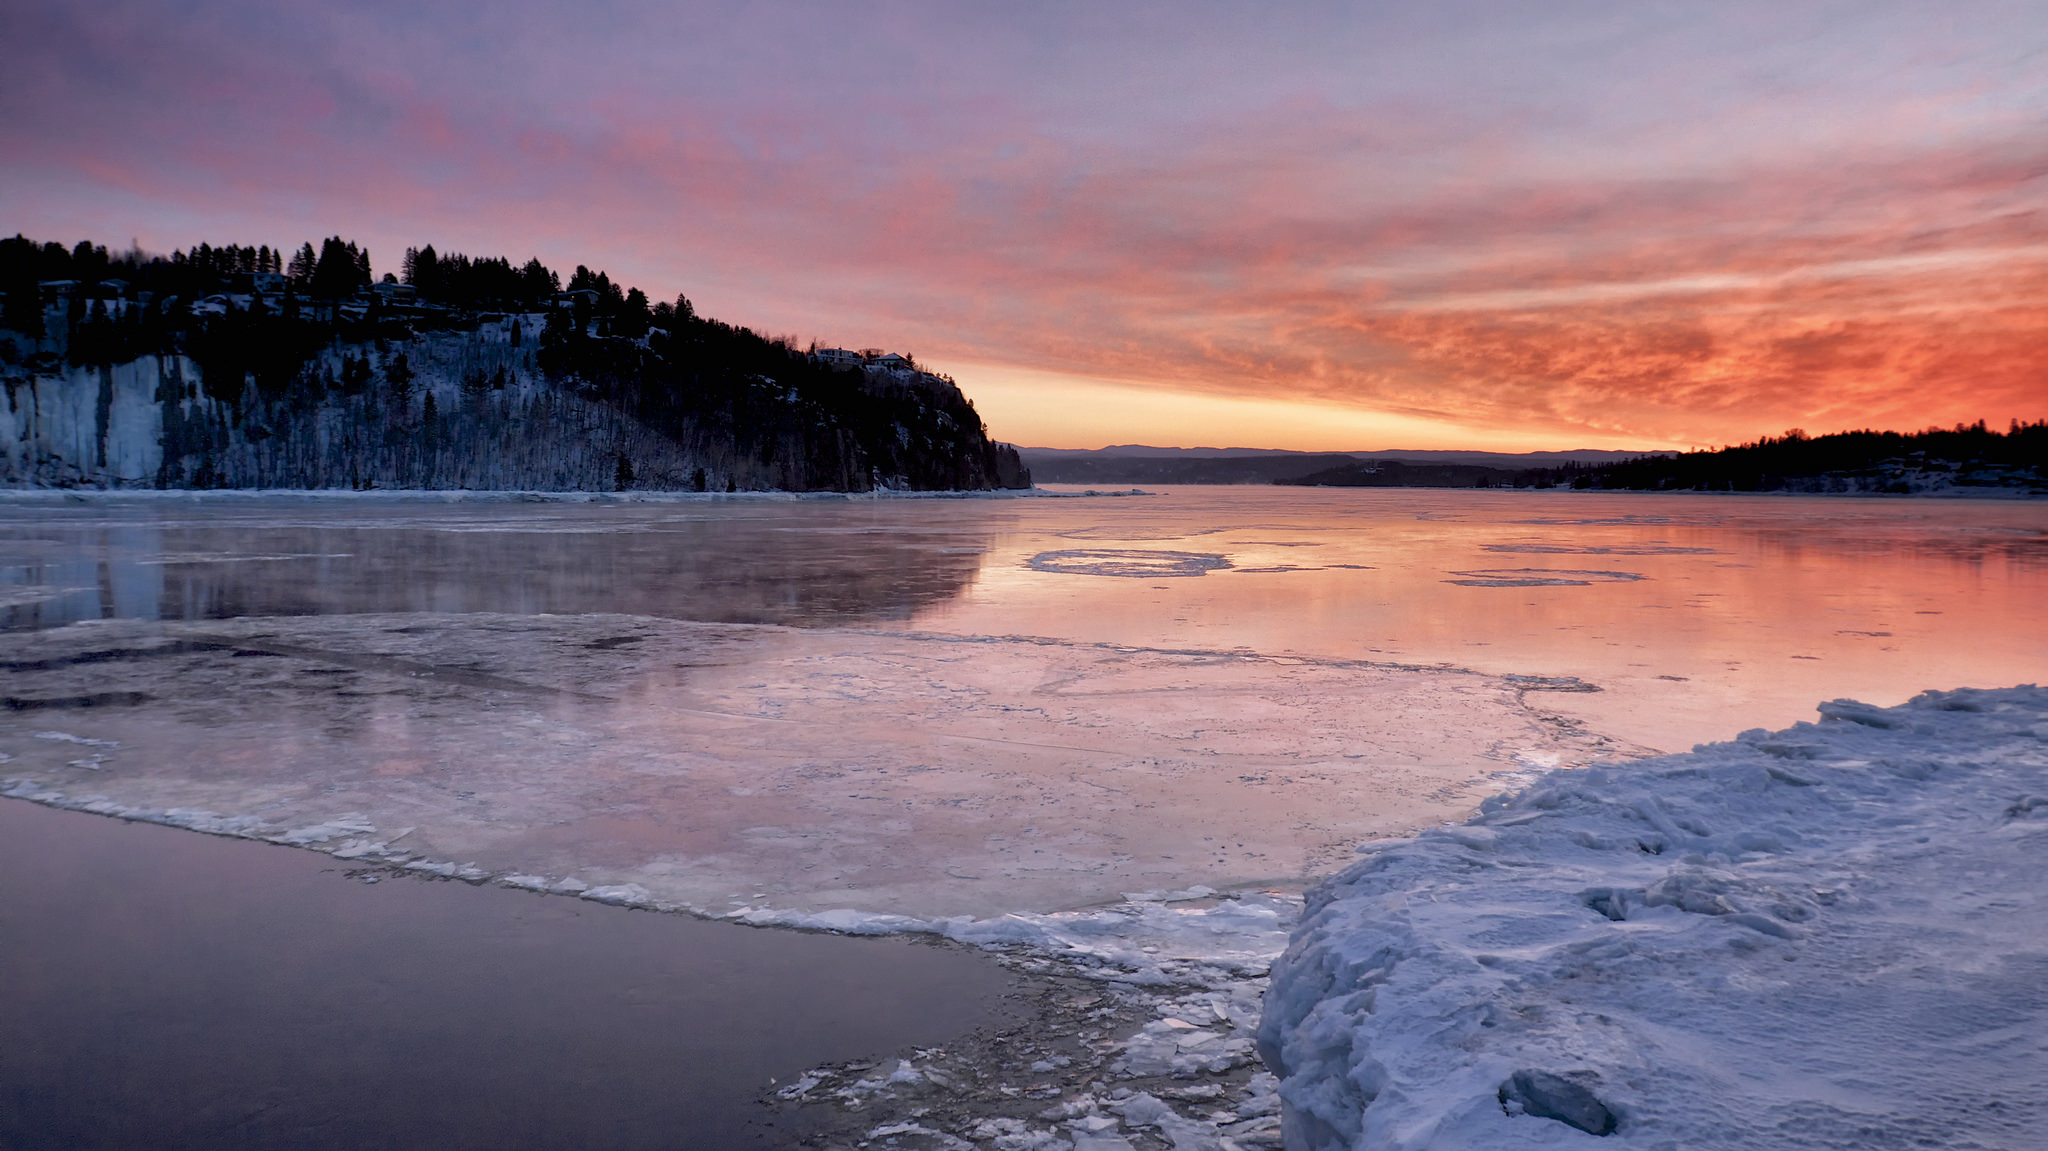
(Sample photo courtesy of Normand Gaudreault)
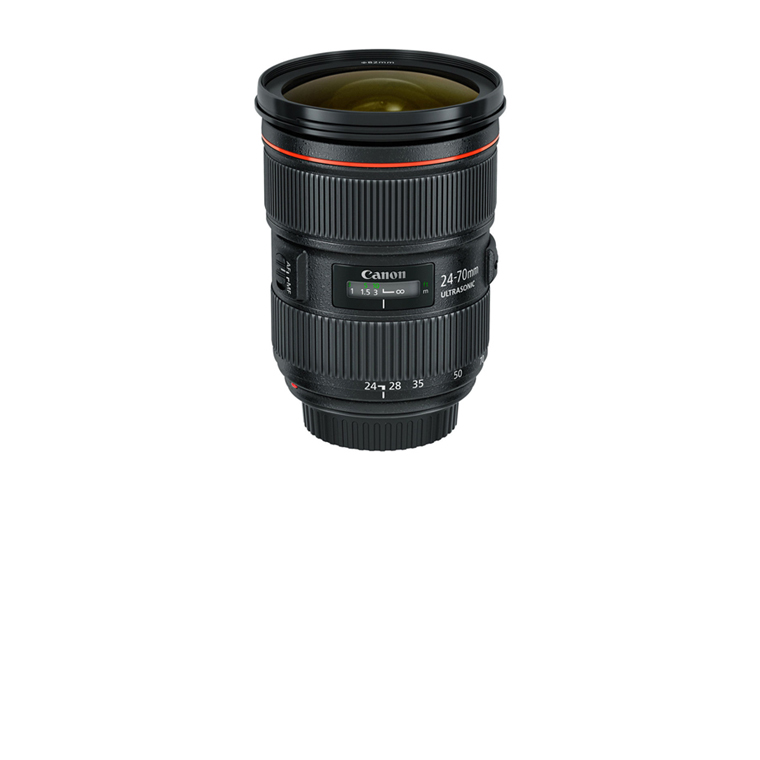
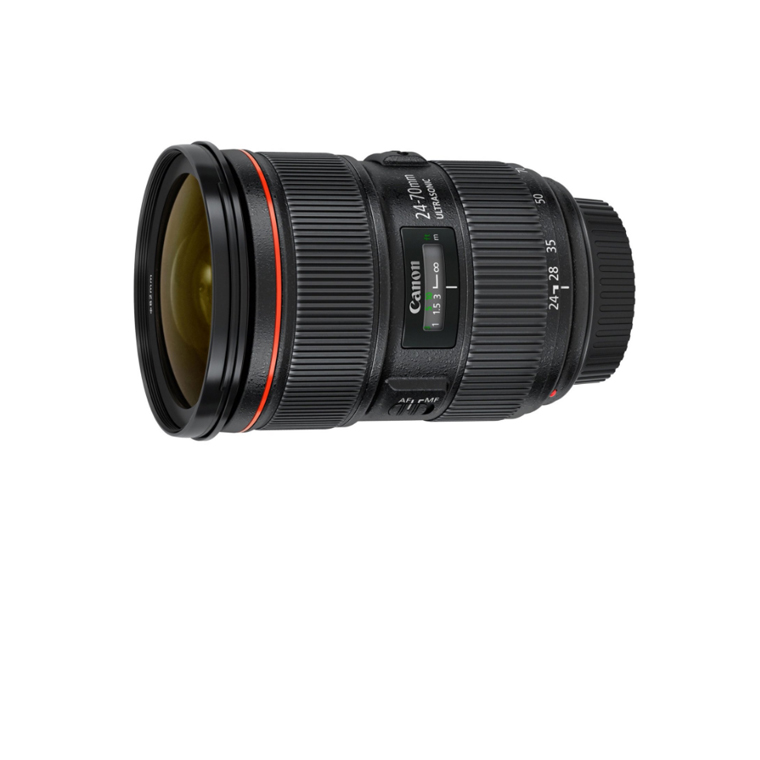
EF 24-70mm f/2.8L II USMGo to Amazon
In the photography gear version of the "Desert Island Game," this is the one lens to bring with you. It covers basically every focal length you could need with excellent quality and a bright/shallow aperture. Many street photographers prefer to use this as their go-to lens over a 35mm or 50mm prime, because it can shoot both of those focal lengths and more.
Watch video review
Overall rating:
55
Lightweight:
0
30
100
Zoom Range:
0
80
100
Stabilization:
0
20
100
Focus Speed:
0
90
100
Pros
  • Sharp Focus
  • AF Capable
  • Ultrasonic Focus Motor
Cons
  • Not Stabilized
  • Pricey: Heavy (Weight: 0.8kg)
Click to read the full Review
The sacrifice you make for tons of versatility is a smaller but still good f/2.8 aperture as compared to an f/1.4, and the lens is also fairly big and heavy.

It's famous for its unique, "reverse zoom" design that actually makes the lens physically longest at 24mm and physically shortest at 70mm.  A minimum distance of 0.38 m focus increases the versatility of the EF 24 - 70 mm f/2 8 L II USM, because that brings up 0. 21 x increase.

This is one of the, if not the, best all-arounders in photography and every Canon owner should try to own it at some point.

(Sample photo courtesy of Mikel L de Arregi)
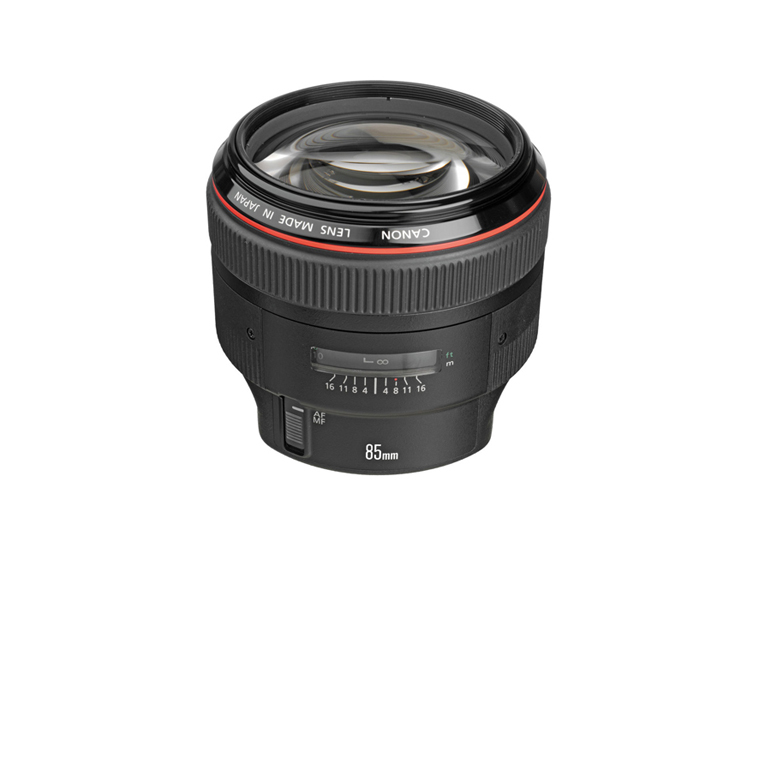
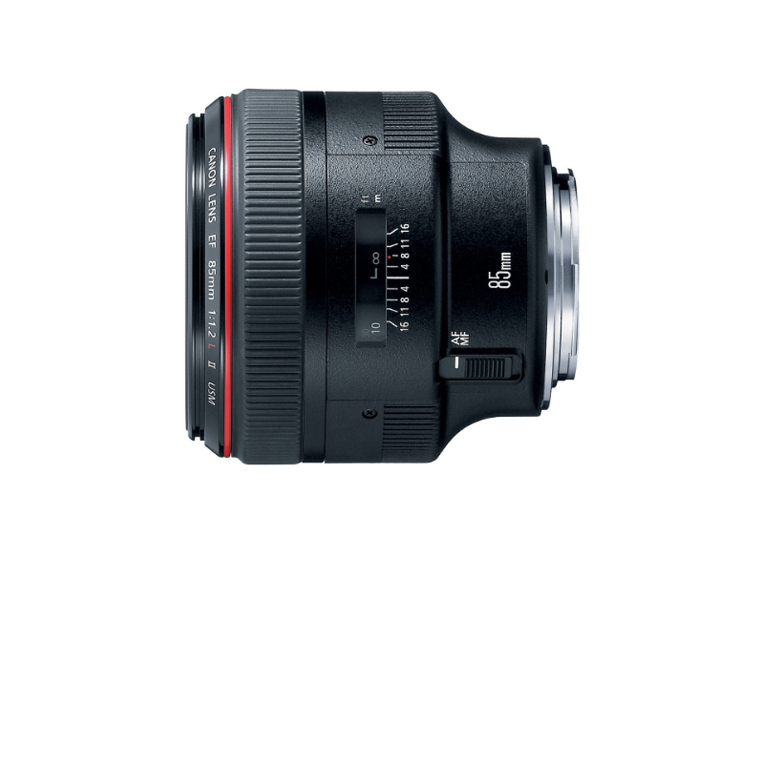
EF 85mm f/1.2L II USMGo to Amazon
One portrait lens to rule them all. This is the ideal focal length for gorgeous portraits, with an impressive f/1.2 aperture that can soften your background beyond recognition without a problem. But be warned, if you get this lens you may find yourself only shooting at f/1.2 and feeling disappointed and frustrated with the rest of your lenses for lacking this extreme aperture.
Watch video review
Overall rating:
55
Lightweight:
0
40
100
Zoom Range:
0
65
100
Stabilization:
0
30
100
Focus Speed:
0
85
100
Pros
  • Very shallow DOF capability
  • Best light-gathering lens
  • Amazingly sharp
Cons
  • Heavy (Weight: 1 kg)
  • Not AF Capable
  • No Stabilization, Expensive
Click to read the full Review
You can see just by looking at the shape of this lens the lengths Canon went to in order to accomplish this massive aperture, opening up the barrel diameter to accommodate an aperture that physically can't fit inside a typical Canon lens barrel.

Ultrasonic autofocus system as we have seen on other previous lenses, get ready to experiment its large f/1.2 maximum aperture, with in combination with the fast focus motor, it provides a remarkable speed to shoot in "low-light without flash" situations. The large aperture also provides precise control over depth of field to capture striking portraits.

If you're a fashion photographer, you need this lens. Anything else just isn't going to match the results you can get from this marvel of design.

(Sample photo courtesy of Bakabon Syorin)
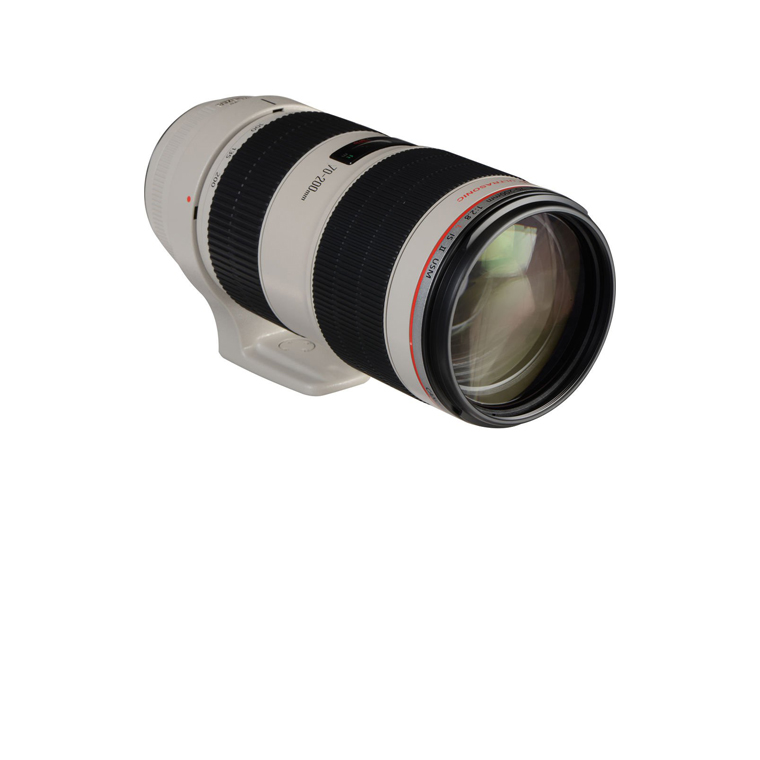
EF 70-200mm f/2.8L IS II USMGo to Amazon
This is another great lens for nature photographers, though it's very popular with sports photographers as well. Price must probably be its only downside, however it can be considered a sort of lifetime investment if you pair it with a Full-Frame camera.
Watch video review
Overall rating:
79
Lightweight:
0
20
100
Zoom Range:
0
100
100
Stabilization:
0
95
100
Focus Speed:
0
100
100
Pros
  • AF Capable
  • Optically stabilized
  • Extremely sharp lens
  • Includes hood and tripod collar
Cons
  • Heavy (Weight: 1 kg)
  • Expensive
  • Some distortion at 70mm
Click to read the full Review
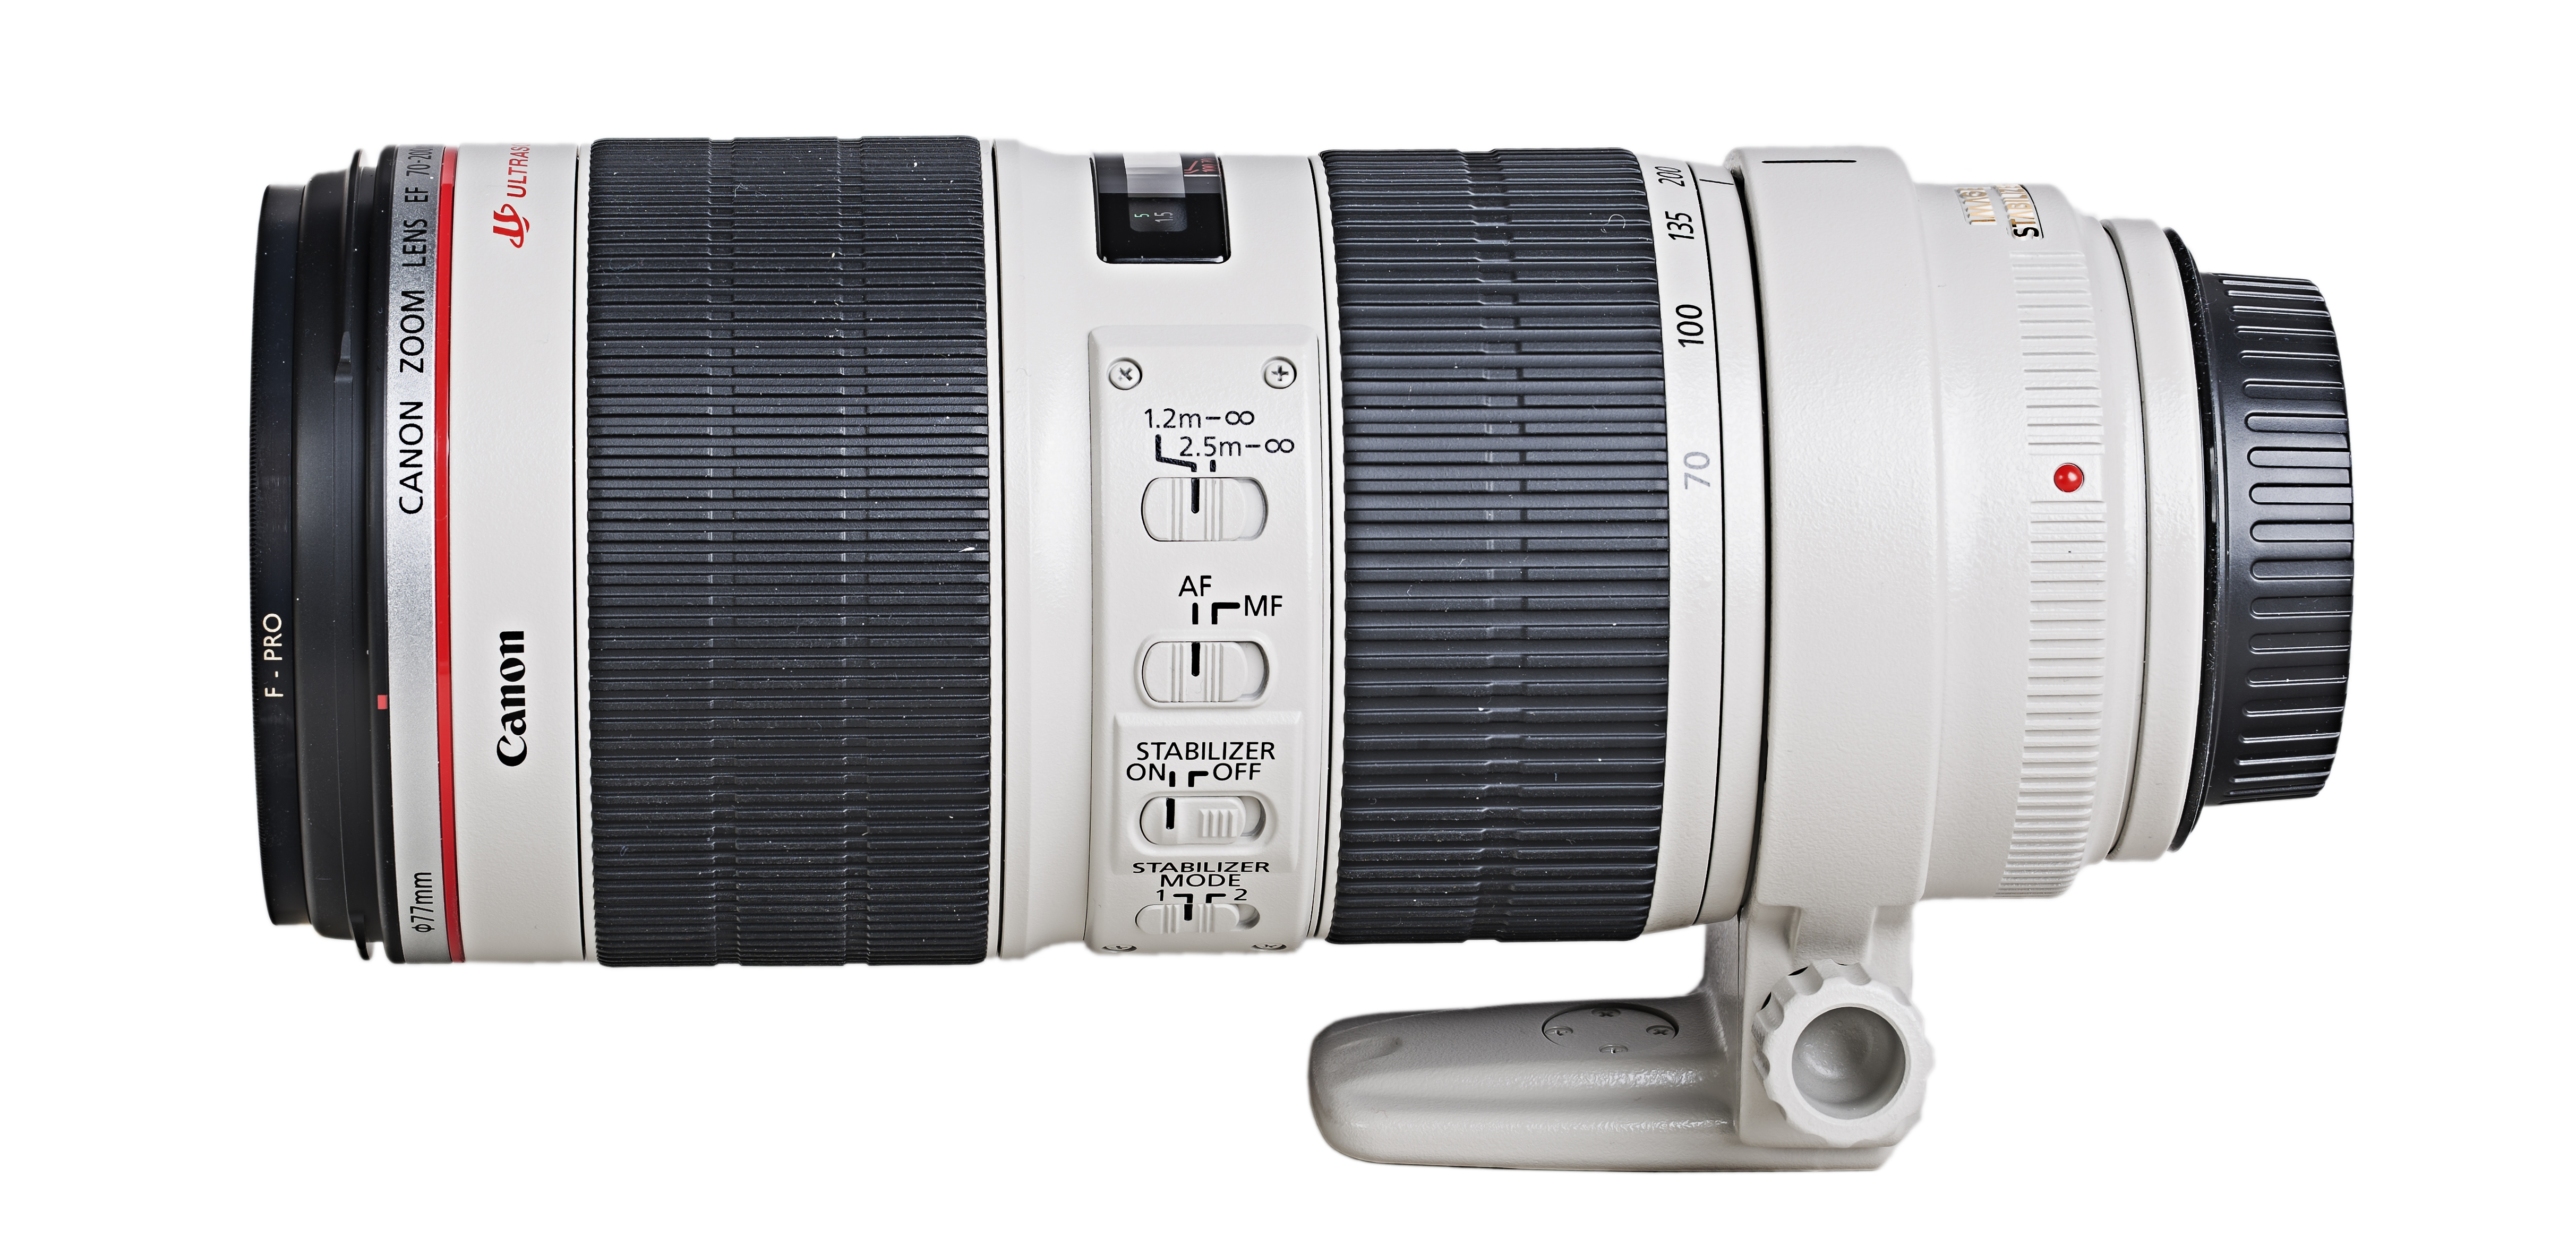
The grey barrel and tripod mount are common signs that it's designed for specialty use where extreme zoom and speed is of the utmost importance, and massive size really isn't a concern.

With no less than 23 pieces of glass, this behemoth ways about 3.2 pounds and is not fun to carry. But if you need a lens like this then you're probably pretty serious about getting the shot, and you likely won't mind the extra work.

Thanks to the circular aperture of 8 sheets, it is possible to create a magnificent background bokeh effect, isolating subjects when using large aperture values.

(Sample photo courtesy of Martin Billard)

So there you have it, all the lenses you need to consider. Okay, it probably won’t hurt to look at just about every lens in Canon’s lineup if you’re so inclined, but when you get totally lost in your selection just come back here and know any of these lenses is an excellent choice.

Be sure to plan your lens purchases for the long term, not to patch a focal length range you need right now. For example, if you have no lenses at all, it may be tempting to fill out your bag right now with the EF 50mm f/1.8 STM, the EF 70-300mm f/4-5.6 IS USM and the EF-S 10-22mm f/3.5-4.5 USM for a total of about $1,225. However, if you eventually purchase an L lens you will likely make one or two of these lenses useless. Instead, it would be wise to perhaps choose the EF 135mm f/2L USM and the EF 50mm f/1.8 STM for about $1,125, then fill in the range with the EF 24-70mm f/2.8L II USM whenever you get the chance.

Whatever you choose, make sure to plan for a diverse and quality set of lenses that can last you a lifetime. Once you have the right lenses for your Canon, the rest of your gear will fall into place.

SaveSave

SaveSave

Gear review – Canon EF-S 10-18 mm

One of the main advantages of DLSR cameras over compact cameras is the ability to exchange lenses. No matter how wide the range of a zoom lens incorporated in a compact camera, the versatility that comes at hand with the possibility of choosing the lens of your preference is hard to match.

That said, apart from the obvious downside of having to carry bulky bags, lenses tend to be expensive, even more expensive than cameras. And there is no way around here. Since the price of the lens is in direct relation to the quality of the optics inside and the manufacturing process, if you want to achieve the best possible result, you will have to make important investments in your lenses.

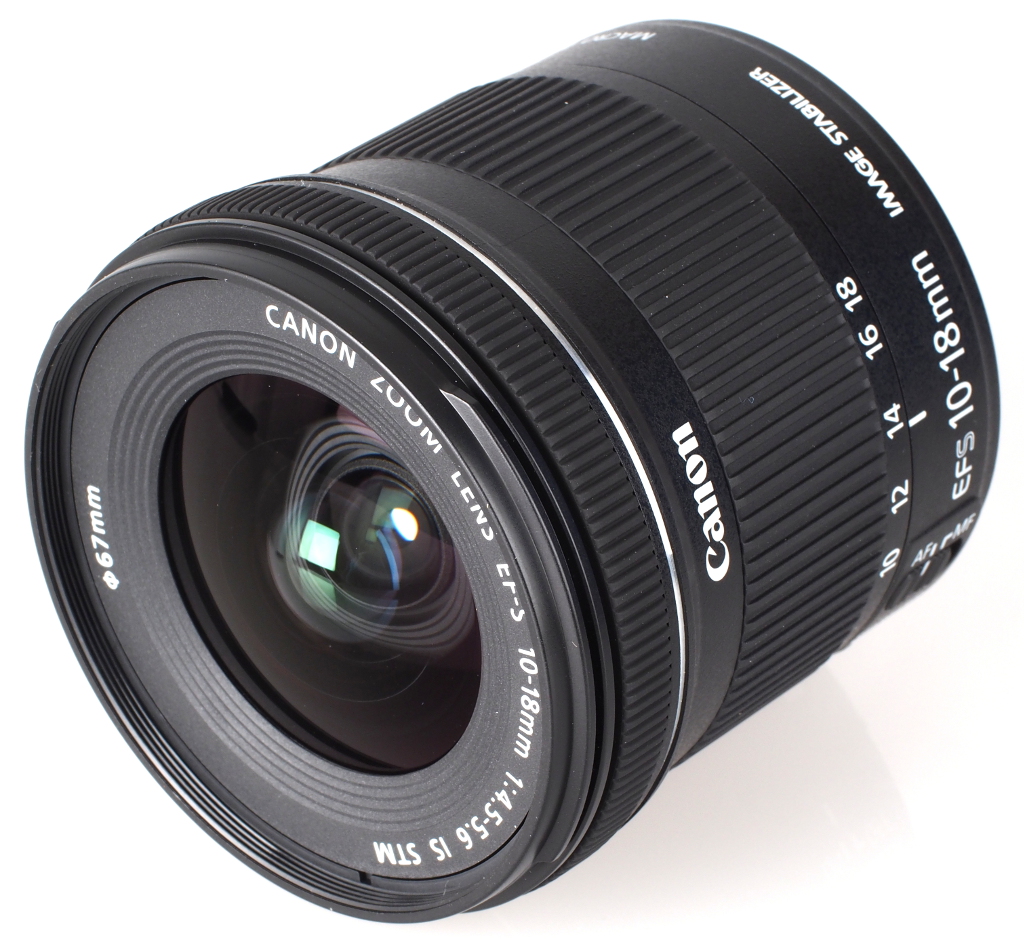
However, from time to time, manufacturers manage to pull out incredible quality with relatively low retail prices, and that is what Canon achieved with the 10-18 mm. This wide angle lens has not-so-great aperture (probably the weakest point of all) at 4.5 – 5.6 but being fair, a wider aperture is one of the most difficult features to achieve and, given the overall quality and at a retail price of about $300 (compare this with $650 for its predecessor, the 10-22 mm), I feel there is not much to complain about.

Focusing

I am showing how outdated my lenses are here, but one of the improvements from some of my other lenses that I truly love in the 10-18 mm is the focus. First of all, by moving the focusing ring backwards, it is now much easier to get sharply focused images under specific conditions such as when using ND filters. If you ever tried to take a photo using a ND1000 filter and a lens with the focusing ring attached to the filter thread, you know what I mean. Dark ND filters do not let enough light in as to do the manual focusing with the filter on, meaning that one has to first focus and then attach the filter trying not to rotate the focusing ring in the process. By simply moving the focusing ring a few centimeters back, life became much easier than before!

sf1

In terms of auto-focus, the lens has the STM system. STM stands for stepping motor, which are a type of electronic motors capable of moving very small steps in a controlled fashion and they are very quiet. In general, if you have already used STM or USM lenses before, you might not be that surprised, but if your previous experience is with the old standard auto-focus for budget lenses such as the 18-55 mm kit lens (old version), you will be amazed. Also, even though it is not supposed to be as fast as the USM system, for normal purposes such as travel or landscape photography, the auto-focusing is pretty fast.

Focal length

But of course, if you are thinking about buying a wide angle lens, your main concern is probably the focal length. First of all, keep in mind that this is a lens that was designed for so-called APS-C sensors. The difference between full frame and crop sensors is beyond the scope of this review, but in general, a focal length of 10 mm on a crop sensor will be equivalent to a focal length of 10 x 1.6 = 16 mm in a full frame sensor, or in a 35 mm film. And, more importantly, do not try to attach a lens designed for a crop sensor to a full frame camera, or you will damage your sensor!

The following image shows the difference between the two extremes of the focal length (18 mm on the left and 10 mm on the right). The wide-angle provided by the 10 mm is great to capture indoor architecture shots. Notice, however, the distortion at the borders of the image, especially on the bottom left corner, where the white round table looks like an oval. This needs to be taken into account during post-processing.

18_10_mm

That said, the focal length range is a great complement to the kit lens, especially if your interest lies in travel, architecture, landscape or something more specific such as climbing photography, or any type of photography where you want to capture a subject and still be able to get a good portion of background on your frame.

Distortion

Something inevitable when dealing with wide angle lenses is the optical distortion. This is a consequence of how light rays are guided through the lens towards the camera sensor/film and, even though a careful manufacture can help in that sense, completely getting rid of it is an impossible task.

sf2

The 10-18 mm lens does a pretty decent job in this sense as well. Also, thanks to the many options for post-processing readily available nowadays, getting rid of the remaining distortion is an easy task. Still, the fact that some distortion will be present is something that you should keep in mind when taking photos with any wide angle lens so that you can plan your composition so that when you post-process your images no important information is lost.

Overall construction

Apart from some useful features such as having the focusing ring detached from the filter thread, the lens feels quite robust. Being part of the cheapest line of Canon lenses, the 10-18 mm is mainly constructed of plastic which can make it less resistant in the long term, but at the same time, it allowed Canon to build a very lightweight lens that makes it really easy to carry around.

Summary

In general, I would say that, even though the 10-22 mm is a faster lens than the 10-18 mm, for those amateur photographers that are either on a budget or just starting out and willing to try out different focal lengths without having to get a hole in the bank account, the 10-18 mm is definitely a great choice as a second lens.

SaveSave

Tips and Tricks for Using a Light Meter

Light meters might seem like an intimidating piece of equipment, but they can be one of the most important tools a photographer has at their disposal. The information provided by a light meter can help you set your exposure properly to achieve the mood you’re looking to capture in your image. By using the reading from a light meter, you can set your camera to shoot the image correctly exposed, or under or overexposed to suit your artistic style.

Cameras have a limit to the level of brightness they can capture, called dynamic range. A good light meter gives you an idea of where these areas of brightness fall. It shows you which areas will be either too light or too dark to contain any details.

measure exposure

That way, you can adjust your camera’s exposure to capture the most important parts of the image. You can also see if you need to expand the dynamic range of the scene by switching to a high dynamic range technique.

However, your camera can often produce inaccurate light readings. This happens especially often if you’re shooting a scene with a lot of black or a lot of white, to influence the perceived brightness. This confuses the computerized meter, and if you trust your camera to adjust the exposure for you, you’ll end up with a disappointing result.

Types of Light Metering

Built-in light meters aren’t capable of measuring incident, or ambient, light. This is the light that falls directly onto your subject and is measured through the meter’s lumisphere, which looks like a white dome. With an incident light meter, you can correct exposure errors that can occur when your subject is backlit.

exposing backlit photo

Reflective light metering picks up the brightness of the light bouncing off your subject and can be set to measure the light using several different patterns. Evaluative metering uses a precise algorithm to measure the exposure in several zones within the frame. Center-weighted metering will prioritize the middle of the frame when judging exposure. Finally, spot metering reads the light in just a small part of the frame.

By measuring the intensity of both ambient light and reflective light, a hand-held light meter can give you a much more accurate reading. Once you’ve input your ISO, and your shutter speed in certain instances, the meter tells you what f-stop setting to use on your camera to achieve the perfect exposure.

Shooting Landscapes

You probably only need an incident meter reading to accurately set your exposure for capturing landscapes. Hold out your meter and check to see that the light hitting your lumisphere is the same light falling on the scene you hope to shoot. Make sure you don’t have the lumisphere in direct sunlight – you want to measure the incident light in the shadowy parts of the scene, to retain as much detail as possible in your image. Once you’ve pressed the meter button to see the f-stop reading, set your camera’s shutter and aperture and get shooting.

landscape exposure tips

A reflective meter reading will be more accurate if you use your meter’s memory button to capture readings from a number of areas with differing brightness. Use the average button to get an appropriate exposure value, and use that average reading to set your camera.

Shooting Portraits

Using an incident light meter when shooting portraits helps you to retain the details and tones of your subject’s skin and face, creating a more accurate and interesting portrait. Use the lumisphere to get a reading of the light falling on your subject’s face and adjust your camera’s settings accordingly. Portraits are generally more flattering when they are shot slightly overexposed. Once you’ve got your reading, bump your camera up one more stop for a bright, attractive head shot.

light metering portrait tips

Again, take several readings from important parts of your subject – highlights on their cheeks, shadows in their hair and clothes. Press the average button to see the final exposure value to input on your camera.

Shooting Still Life

A light meter is a very valuable tool for shooting professional quality still life product photos. Capture a reading of the light hitting your subject by using your meter’s lumisphere, no matter how bright or dark your subject is. The reading from your meter will give you a good base exposure to set your camera, but feel free to bump it up or drop it down a few steps to achieve the effect you’re looking for.

still life exposure settings

By now, you should have an idea of which areas are most important to get a good reading with a reflective spot meter. The average of these readings will give you a solid exposure value, but again, adjust it however you like to capture the mood you hope to achieve.

Using a light meter will take a bit of practice, but the more you use it, the more you’ll understand how helpful this tool can be for any kind of photography. Save yourself tons of post-processing work and retain the important details in every shot by investing in a professional light meter to shoot properly exposed images every single time.

Winter Photography: Part One – Gear And Weather

Photographing during winter periods is quite challenging. Every aspect of the photography workflow gets slightly more difficult, and when you add everything up it ends up being significantly harder. However, if you are like me, harder equals better. Even if I produce the best pictures without much hassle, they don’t hold the same value to me as pictures for which I’d have to work for. Winter shots are almost always hard shots.

But first and foremost, before venturing into the sub zero degrees you should know some stuff about your gear. You don’t want to end up with damaged or broken gear due to the elements.

Taking Care Of Your Gear

Temperature

The working temperature of most electronics ranges from 0 to 40 degrees Celsius. This means that when you are above or below those values you risk damaging your gear. When you are above, there are risks, but they aren’t that big because the only issue is overheating. However, when you go below 0 degrees Celsius, you risk several things: freezing, condensation, materials becoming brittle and easily broken, and so forth. Thus, you’ll have to protect your gear from the temperature as much as you can.

Acclimatization

When going out from a warm room to the freezing winter, don’t bring out the camera straight out of the bag. Instead open the zipper slightly and give it some time to acclimate. Usually, 10-15 minutes should do it. The same goes for the reverse – when heading back into warm areas, don’t open the bag just yet. Allow for 10-15 minutes so the gear can acclimate. In case there is condensation visible (in the lens, viewfinder and so forth), remove the battery, dismount the lens, put the lens cap and lens mount cap on the camera, and hope for the best. Do not, under any circumstances, power the camera back on until it is completely dry. You don’t want to short anything out.

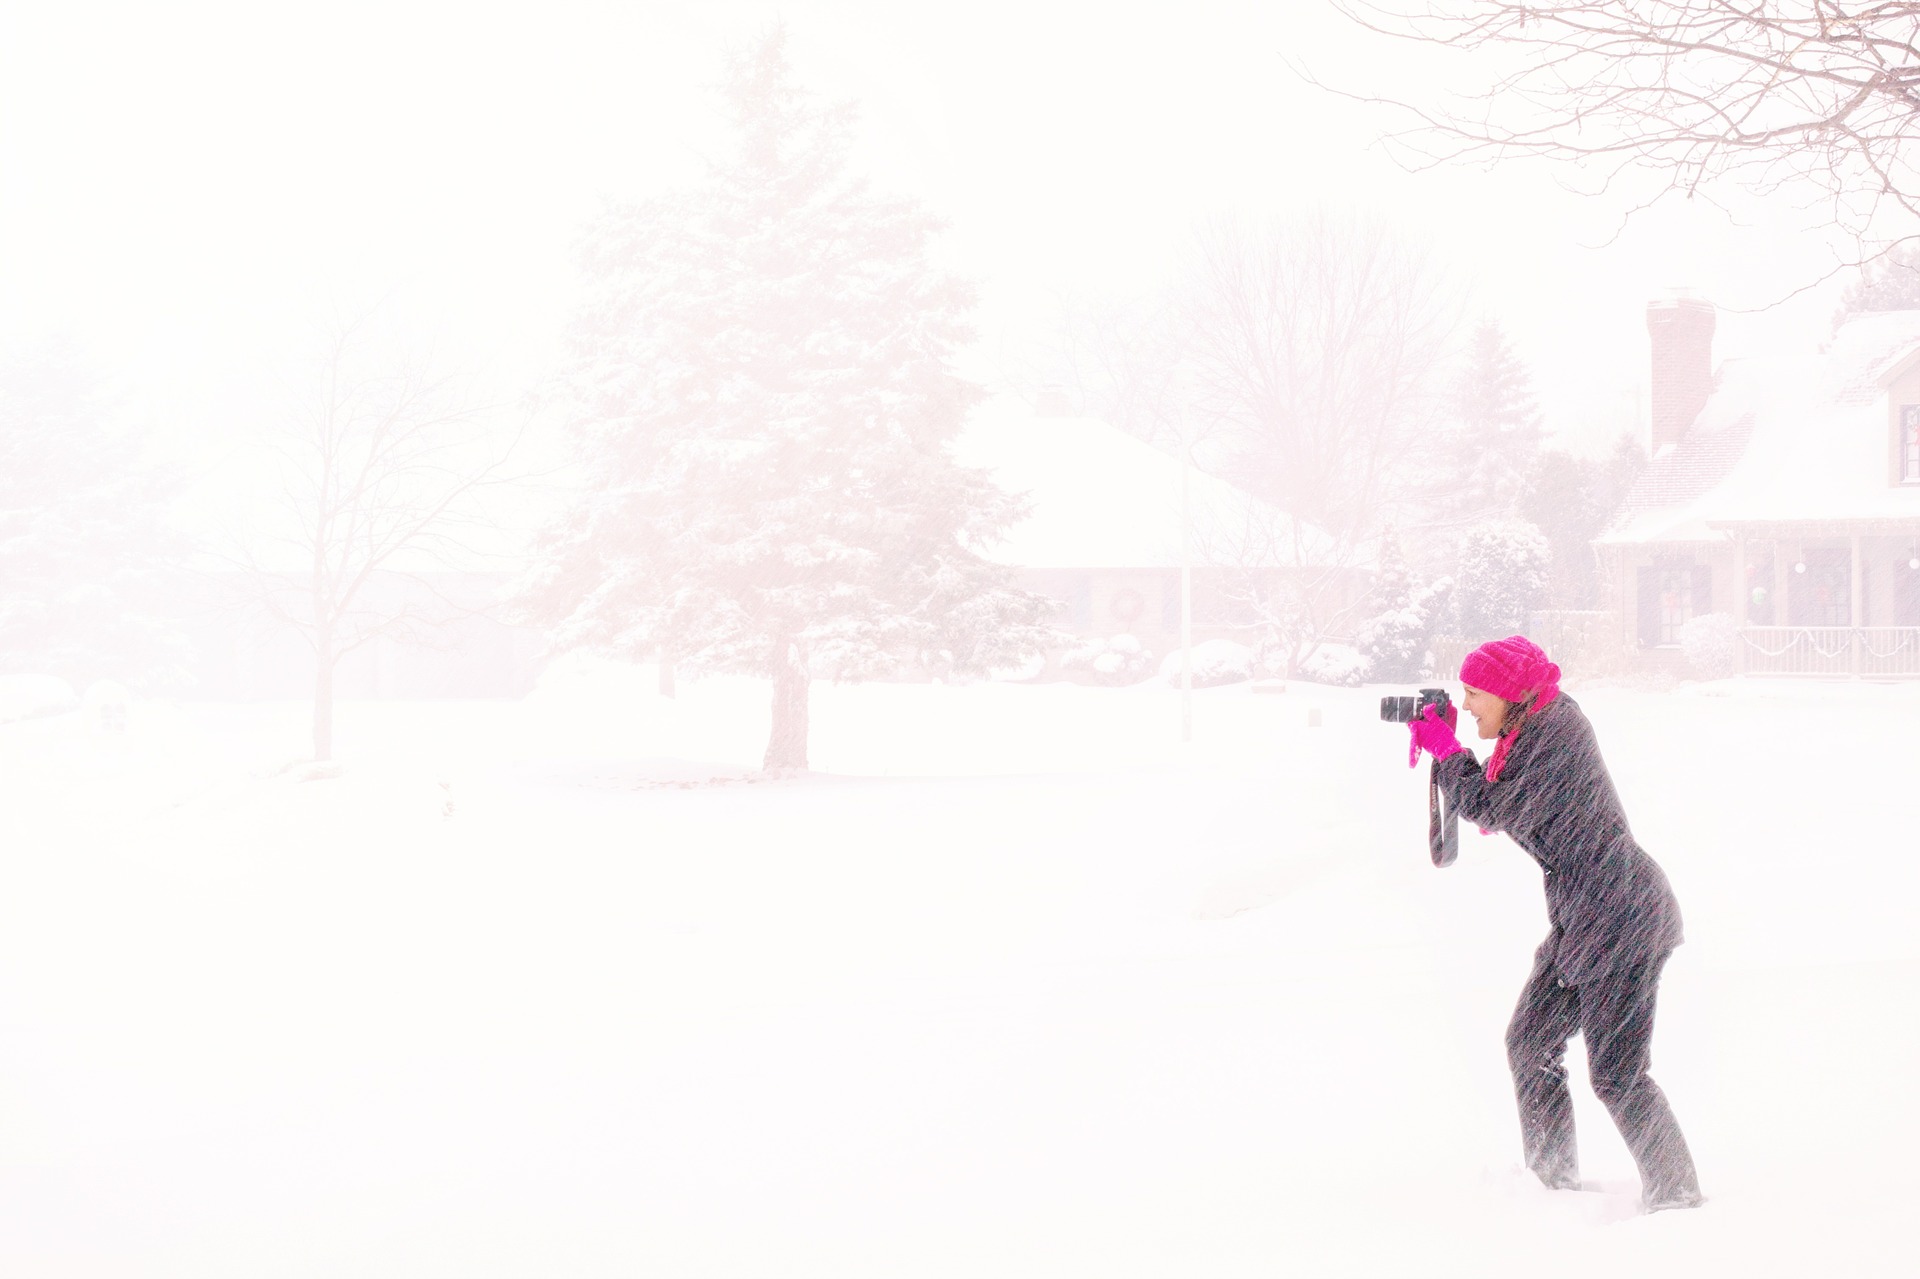
camera-550937_1920

Battery

The batteries don’t like cold weather. In fact, the colder they get, the more charge they lose. There is nothing you can do about this, except keep spare batteries warm. Keeping them in the inside pocket of your photographer vest, or in an insulated pouch of the bag should do. Also, avoid charging the batteries in rooms that are really cold.

Keep It Working

Cameras produce heat. That heat will keep the insides of the camera from freezing over. Therefore shoot more, in order to produce heat from the camera to keep it healthy. It is also good for the gears in your shutter mechanism: the friction they produce will keep them warm enough so they don’t become brittle and break.

Sweater Weather

There are many products on the market that will protect your camera from rain and snow. Some are better than others, but most of them do the job. Yes, the camera can be weather sealed, and the lens can be weather sealed, but there is no guarantee that it will be enough. Some lenses are partially sealed, others are completely sealed. You wouldn’t want to risk it now, would you?

photographer-562309_1920

Environment

If you are up in the mountains in the winter, snow and everything, I don’t have to stress the point that you should keep yourself safe first. Do your homework, research the area, ask around, and inform yourself if it is safe to venture there in the first place.

Length Of Day

The day during winter is significantly shorter. The Sun rises later in the day, and it sets quite earlier. Use tools like “The Photographer’s Ephemeris” or weather applications to know when the Sun rises and sets, in order to be able to plan your activities accordingly. Bear in mind that Golden and Blue Hours last quite shorter in the winter.

Eiswälder
Photo by Olli Henze, on Flickr.

Having that in mind, it is wise to scout beforehand and get familiar with your locations, and in doing so be more efficient – you will be able to take more shots during the shorter period of nice light available.

Weather

Winter weather can be quite dull, and it can change quite quickly. Thus, make sure that you avoid overcast weather during winter for most of the photography since it is just gray on gray, and it doesn’t provide contrast nor point of interest.

winter-1127201_1920

However, that weather is perfect for high-key portraiture. The snow will act as a reflective surface for fill light, and the light will be soft and envelop the subject quite nicely.

Snow

Snow

is basically water. It is funny that most of the time we perceive snow as a different matter – we don’t bring umbrellas when it starts snowing, because, well it is snow, it is fun! That is true, snow is almost always fun, except for your gear. Your gear hates snow. The snowflakes turn to water, and water and electronics are never a good combo. However, if your gear is protected while it is snowing, you can take some excellent shots. It will provide a great atmospheric and foreground element. Just make sure that the shutter speed is not too fast so you end up with dots, instead of nice soft streaks.

Summary

The biggest challenge during winter is predicting the weather and protecting the gear, and that is what was this article focused on. However, in the second part of this article, we will tackle the challenge of shooting in certain scenarios in winter, some tips and tricks for better shots and so forth. Remember, winter can be harsh on your gear – you can get it damaged quite faster than you expected, therefore it is imperative that you’re extremely careful with it. Stay safe, and stay tuned for the second part.

70-200mm Lens – How to Avoid Blurring?

It’s very common among the professional Canon users to grab our 70-200mm lens for indoor as well as for outdoor shoots. The lens is one of the top choices for portraits and product photography due to its versatility and interesting zoom range.

Lens Overview

Speaking of this versatile and powerful Canon lens, we can start to say that it was launched in 2010 as an update of the EF 70 – 200 mm F2.8 L IS USM from 2001. With a gap of 9 years and considering the advances in the technology of DSLR cameras, Canon redesigns this powerhouse by improving both the stabilization and optics, as well as autofocus and its design.

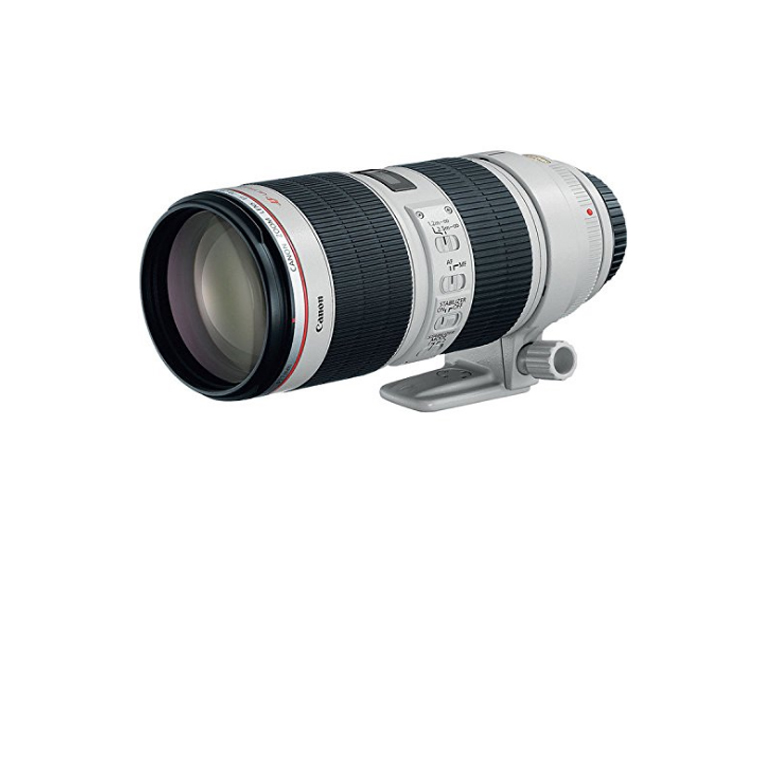
Optics consists of 23 elements in 19 groups, including more than 5 of them with the Ultra-Low Dispersion technology (UD), plus one with Fluorite Coating. The reason? Reducing the Chromatic Aberration of the lens.

Canon_Zoom-Lens_EF_70-200_F2.8L_IS_II_USM-01a_

Built-in metal, we are not talking about a light lens; however, it compensates for the weight with its excellent image quality and enhanced protection in regards to dust that can enter our camera, in addition to being weather sealed.

The Autofocus motor belongs to the technology of Canon Ultrasonic Motor (USM), being extremely agile while maintaining a silent profile.

27358305815_713c7db69e_k

Photo courtesy of Eric Schaffer

The price is something to consider in this lens since we are talking about high-end equipment for what should not amaze us that its initial price is higher than $1500.

The only difficulty that photographers face while using the lens is its weight. A Canon 70-200mm [ f 2.8 IS II ] lens weighs approximately 1600 gms. So, this lens when mounted on a full-frame camera like Canon 5D Mark III weighs almost 2.5 kilograms.

When weight matters

So, how do you take a sharp photograph while holding so much weight in your hand? You might use a tripod to bring in the extra support, balance, and stability. But do tripods work during all circumstances? Not really. How far does ‘Image Stabilisation’ in your lens, help? Not very much. True, it provides the minor stabilization features that you need and but that’s not all.

canon-ef-70-200mm-f-2-8l-is-ii-usm-lens

The way you hold your lens plays a major role. It can sometimes be the ‘break-it’ or ‘make-it’ factor for your photographs.

We are assuming here that you will be using the kit (Canon 5D MK III + Canon 70-200mm f/2.8L IS II lens) handheld and not by tripod mounted. The first thing to do is to rotate the tripod collar from the bottom side of the lens(while mounted with the camera) towards the top side. This way, the tripod collar won’t obtrude and disturb your grip with the lens.

Kindly note: Indoor shoots are tripod-mounted most of the time. So this article may not be applicable to you. But for those who shoot by hand-held devices, this article might be helpful.

A quick but effective solution

So, like I mentioned earlier, the way you hold the lens while shooting may affect your photograph, for good or for worse. Most of the time, we tend to hold the lens somewhere on its collar ( really close to the body of the camera). I used to do this too in my earlier days as a photographer. This helps us control the zoom ring better while composing the photograph. True, but it also indirectly affects the balance in your focus. This sometimes results in blurred images and lesser sharpness. This is because of improper positioning of your palm by the lens. By supporting the lens at the collar location by your palm you are letting more weight towards the front side of the lens which leads to improper balance and with blurred photographs.photographer-1191562_1920This can be overcome by slightly shifting your palm position towards the front side of the lens, which means you need to place your palm almost on the zoom ring. As soon as you shift your palm towards the front end of the lens, you immediately feel the perfect balance of weight while holding. But this situation restricts the zooming ability immediately before you press the shutter button. You have to be prepared in advance, as you cannot zoom as you used to before. Get your frame right, compose what you need and then click away!27010607034_afe1fb94d0_k

Photo courtesy of Pengcheng Pi

We hope this article helped ease your discomfort while shooting using the 70-200mm lens.

Please leave your comments below and let us know about your experience. 🙂

Header photo courtesy of Francesca Pippi

Fujifilm X-Pro2 In-Depth Review of the Mirrorless Camera

Fujifilm X-Pro2Go to Amazon
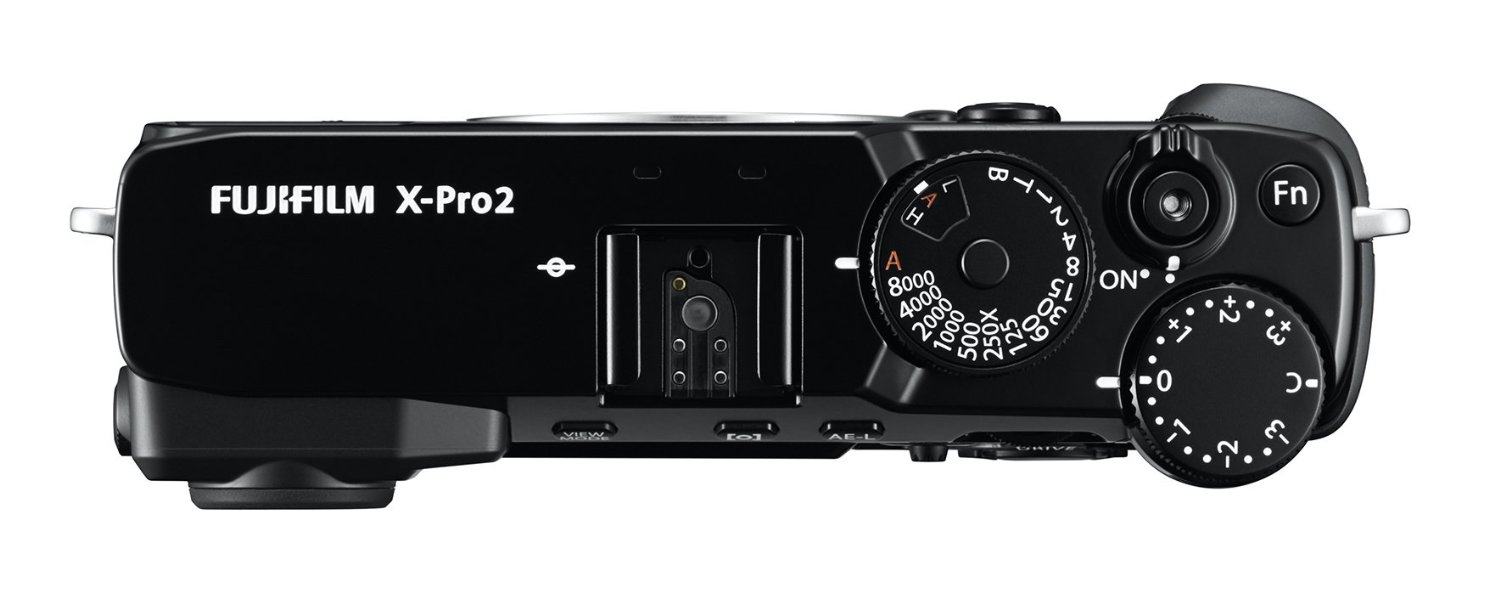
If there’s one adage that reigns supreme in user interface design, it’s “don’t mess with success.” In other words, if a design works well, it’s far better to keep it consistent and familiar than change it up simply to create the illusion of improvement. This is where Fujifilm truly goes above and beyond any other camera brand. The Fujifilm X-Pro2 not only draws heavily on previous Fuji camera designs, but all of those designs are based on the tried-and-true layout of classic film cameras. The X-Pro2 keeps the same rangefinder look and layout as the X-Pro1, but with improvements across the board, making it one of the best performing and best designed cameras to date.

Here, we’ll give you a thorough review of the $1,699 X-Pro2, divided into Hardware Design, Software Design, Shooting Experience, Image Quality, and Lens Options, with ratings out of 10 for each category. We’ll also add in some other, non-rated sections to give you a better feel for the camera overall, including some pros and cons and suggestions for similar cameras.
Overall rating:
91
Hardware Design:
0
97
100
Software Design :
0
88
100
Shooting Experience:
0
98
100
Image Quality:
0
94
100
Lens Option:
0
79
100
Final Score:
0
91
100
Pros
  • Best shooting experience I’ve had
  • Brilliant rangefinder layout
  • Wonderful look and feel
  • Weather resistant (with WR lenses)
  • Tons of customization options and Fn buttons
  • Intriguing OVF/EVF viewfinder
  • Wireless shooting for incognito street photography
  • Great color rendering and film simulations
  • High-ISO noise actually looks good
  • Quality, inexpensive prime lenses
Cons
  • Poor battery life compared to DSLRs (about 180 shots per charge)
  • Occasionally wonky menu system
  • Smartphone app needs work
  • Small lineup of lenses
  • No 4K video
  • Expensive for a mirrorless/APS-C camera
Click to read the full Review
KEY STATS

- 24.3MP APS-C X-Trans CMOS III Sensor
- X-Processor Pro Engine
- Advanced Hybrid Multi Viewfinder
- 3.0" 1.62m-Dot LCD Monitor
- Full HD 1080p Video Recording at 60 fps
- Built-In Wi-Fi, SHARE Printer Compatible
- 273-Point AF with 77 Phase-Detect Points
- Up to 8 fps Shooting and ISO 51200
- Weather-Sealed Design, 2x SD Card Slots
- Film Simulation and Grain Effect Modes

ALTERNATE PICKS

- Fujifilm X-T1/X-T10
- Sony a6300
- Canon 80D
- Pentax K-1

Initial Impressions

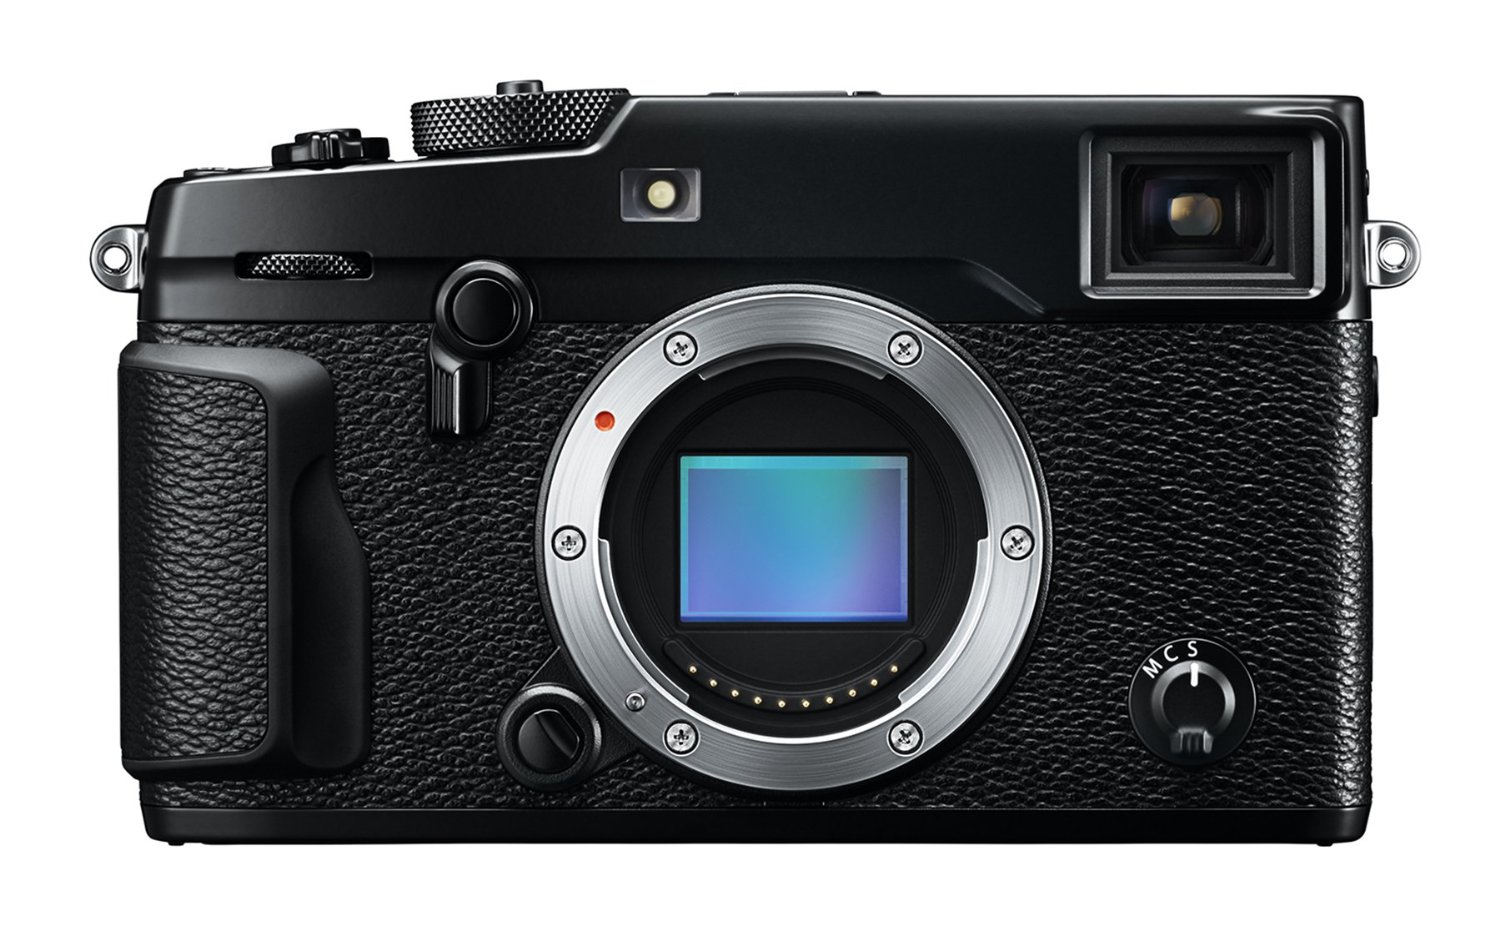
There’s no getting around it, one of the strongest appeals of the X-Pro2 is the retro charm. Though this camera doesn’t hide its modern technology, it borrows heavily from the rangefinder design made popular by Leica in the 1960’s and 70’s. Luckily, it doesn’t wear a layer of faux leather around its midsection, but gives a similar visual affect with a rippled metal body. The optical viewfinder window and rectangular body are clear indications that its not an DSLR, which is a simply brilliant move for not only Fuji but mirrorless cameras in general. Just as SLRs and rangefinders had their own, unique areas of expertise in the days of film, Fujifilm is saying that a mirrorless camera can also live alongside current DSLRs in harmony, serving different functions. While a (D)SLR is the ideal option for studio and otherwise contrived work, a mirrorless/rangefinder camera is far better for spontaneous, real-world shooting. Fujifilm also makes DSLR-inspired mirrorless cameras (like the X-T1), but for the most part they function like rangefinders.

Holding the X-Pro2 is almost as beautiful as seeing it. The thumb grip is beefy yet slim, the weight is significant enough to evoke quality without being cumbersome, and the button layout gives all but the largest and smallest hands the perfect amount of room. It just feels right.
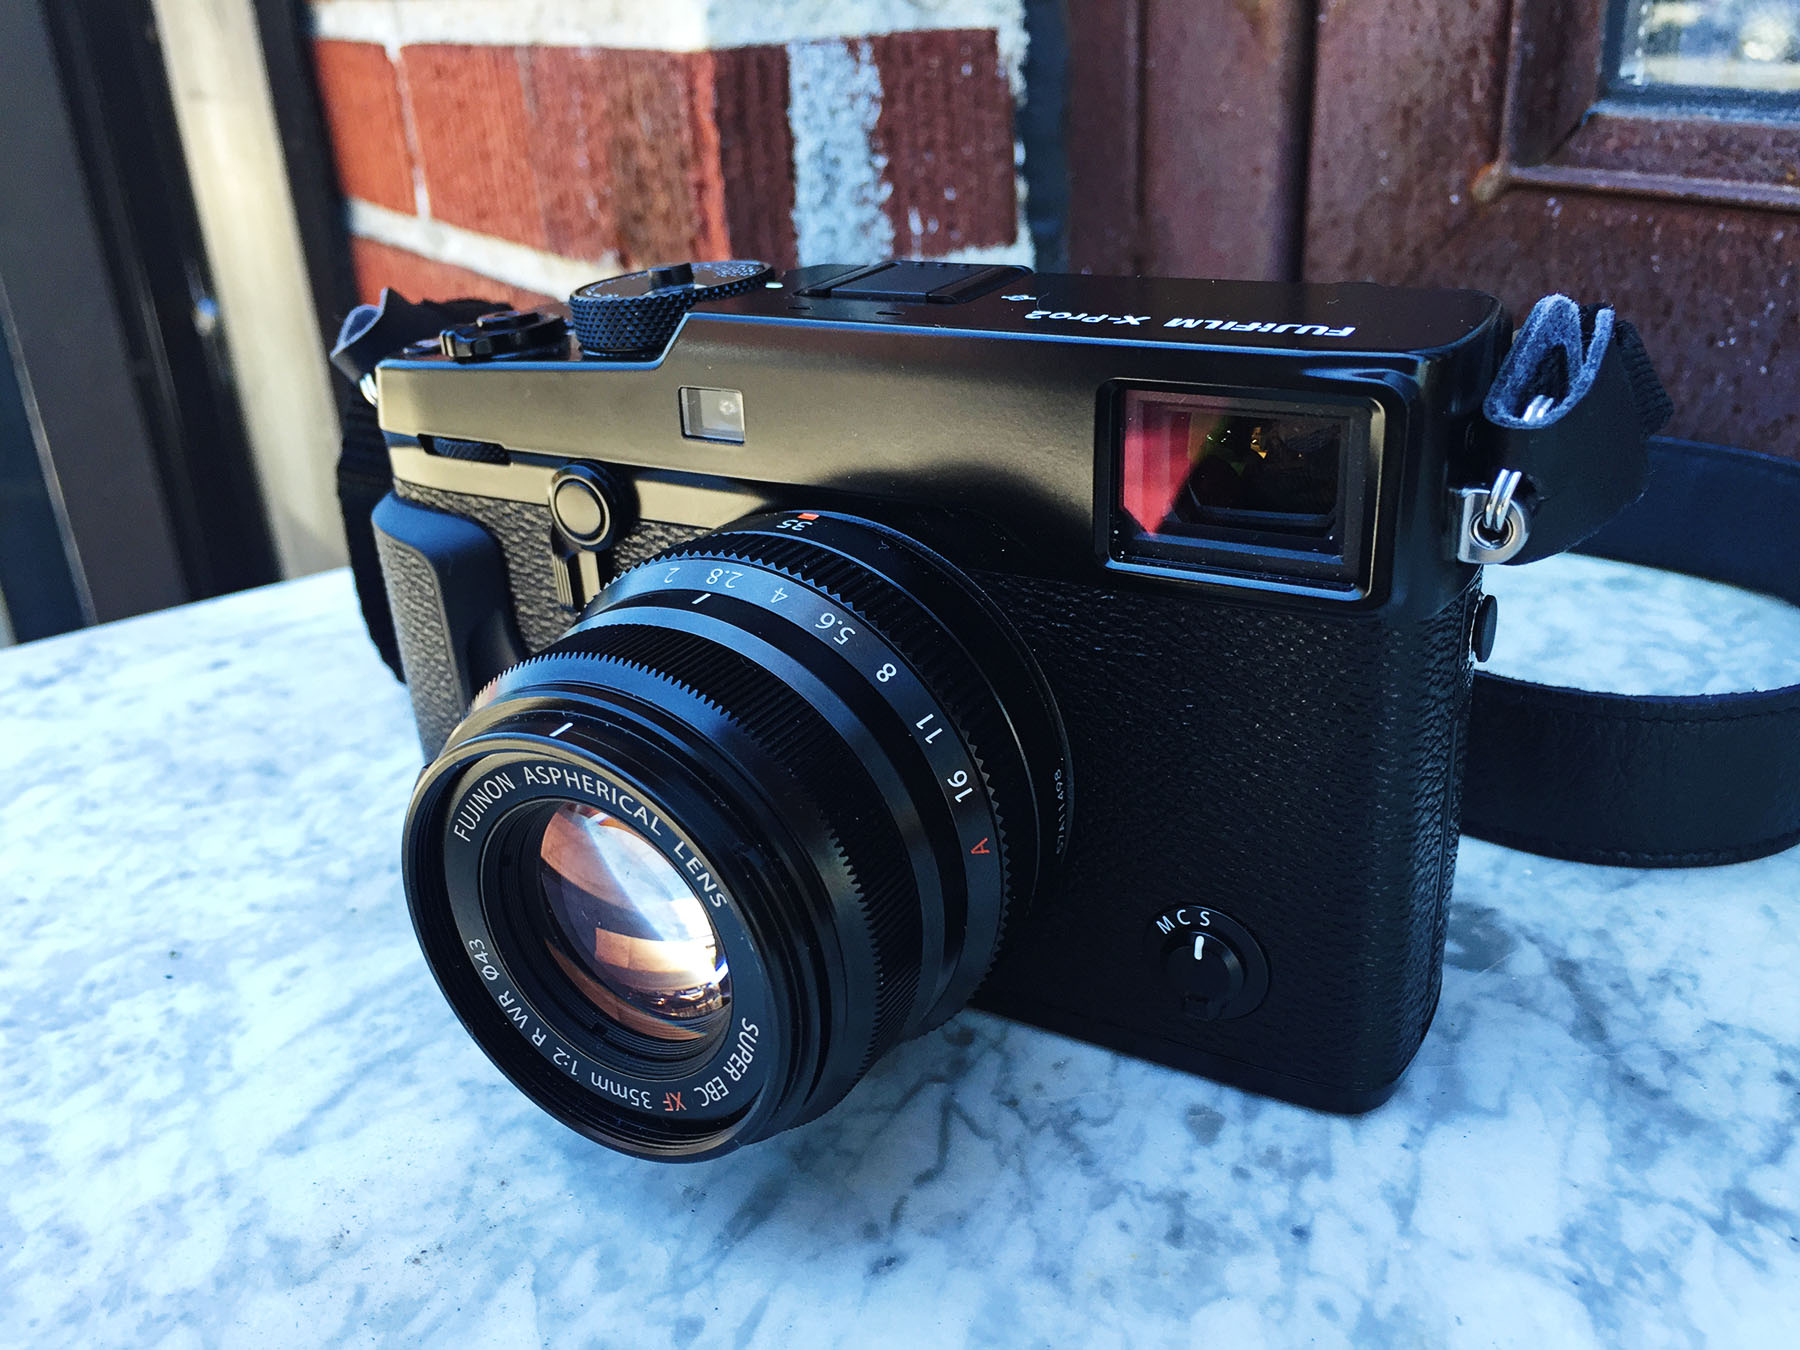
Fujifilm X-Pro2 Review HERO

Hardware Design – 9.7/10

If you haven’t noticed yet, I love the design of this camera. It centers on what is possibly the greatest feature of the X-Pro2: the shutter speed/aperture/ISO dial layout. This may seem like an oddly non-technical feature to call “the greatest,” but it’s what separates the X-Pro2 from the crowd and informs the design and functionality of the entire camera. You see, film cameras got it right. Most of them had a shutter speed dial on top, an aperture control ring around the base of the lens, and an ISO dial within the shutter speed dial (or separated out like on the X-T1). This allowed you to hold a camera naturally and have all the most important settings right at your fingertips, controlled by both hands. The X-Pro2 utilizes this old-fashioned design rather than the thumb and forefinger digital dials and menu-accessible ISO of basically every other modern camera. Once you go back to the on-lens aperture ring, you’ll never want to give it up.

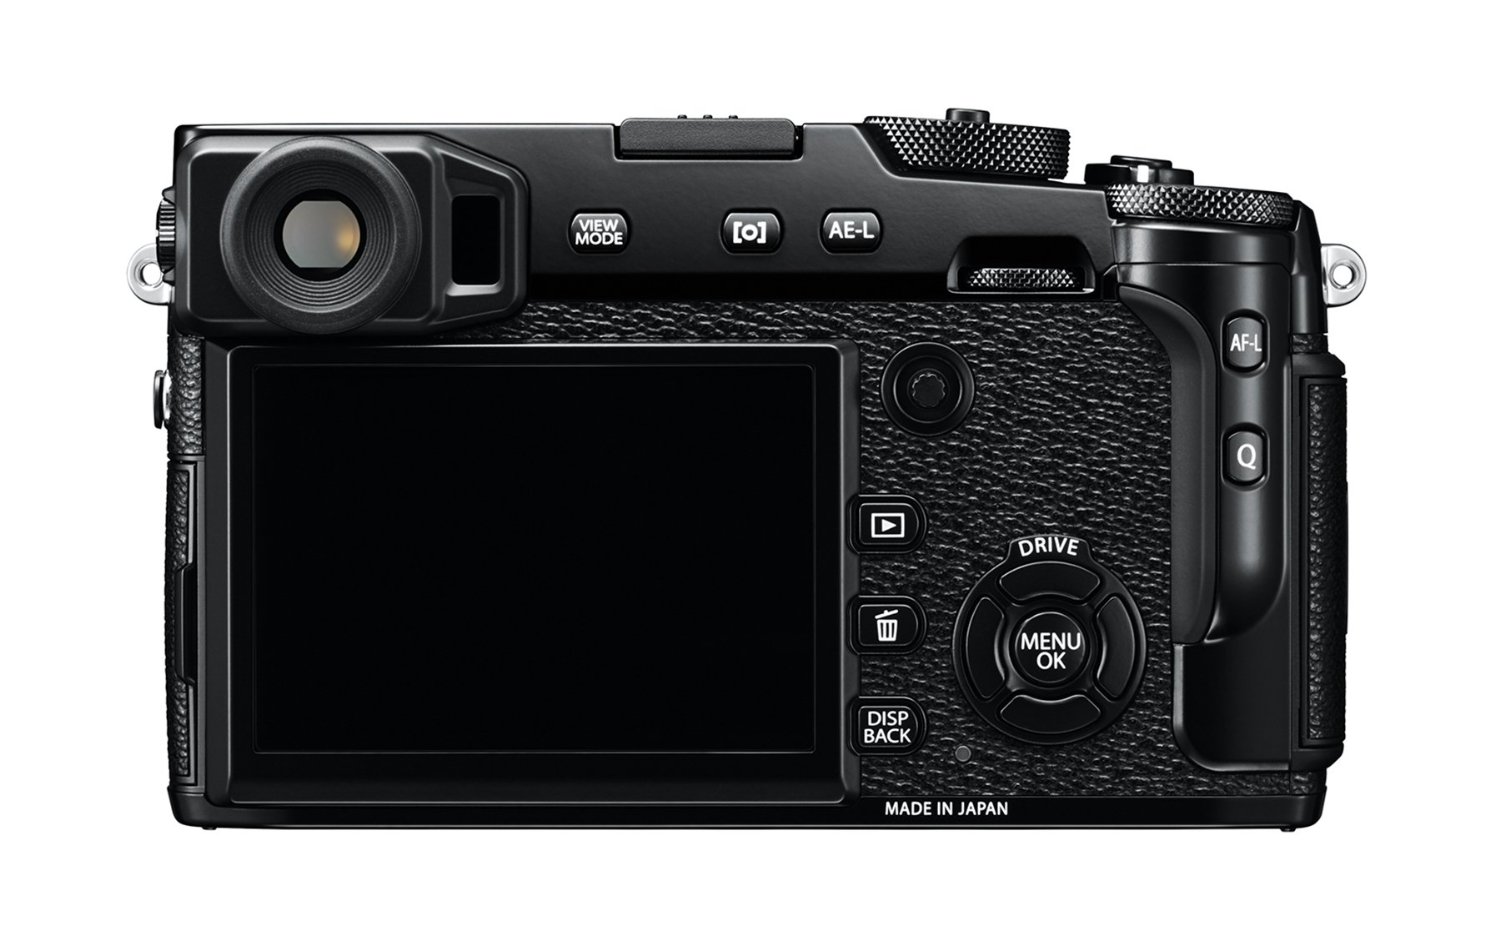
While it has a classic layout for the most important settings, the X-Pro2 takes elements of a modern day DSLR for a large portion of its body. It has no less than 3 levers, 6 dials, and 18 buttons (6 of them customizable). Given how much negative space is on this fairly small camera, it’s astounding how many control mechanisms they’ve crammed in there. On the back alone, you have a quick menu, regular menu, a D-pad, playback, trash, display, view mode, AE-lock, AF-lock, and even an AF selection joystick. That joystick is new to the X-Pro line, and boy is it helpful. Previously, you had to sacrifice the quick-functions of the D-pad to enable AF point selection, but now the joystick makes everything easier. I found myself using the joystick basically wherever I could, especially in the menu systems.
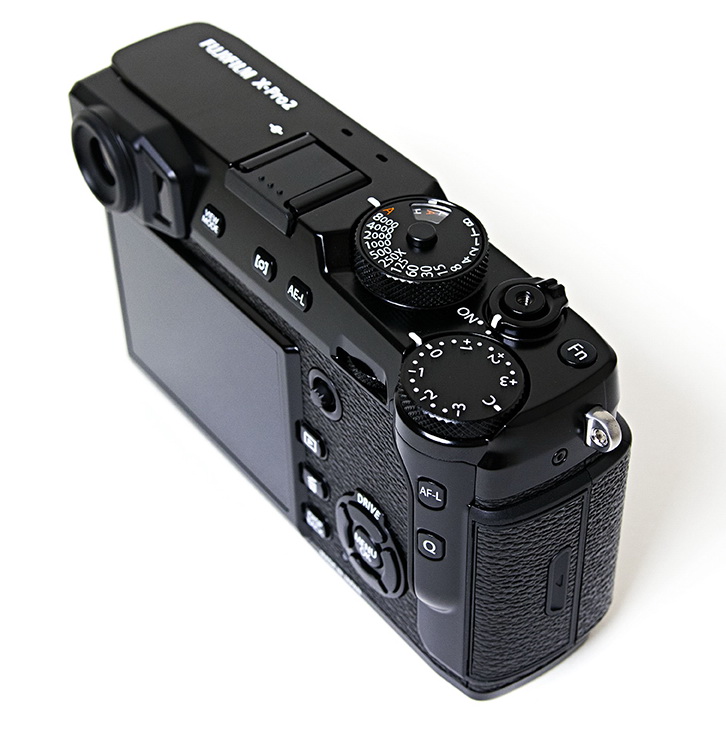
Fuji-X-Pro2-2


The top of the camera has a beautifully refined shutter speed dial, with full stop increments from 1 second to 1/8000 of a second, including an auto setting. By lifting the outer ring, you can turn the inner ISO dial to reveal the desired setting through a small window – just like on the film cameras of old – with an extended range from ISO 100 to 51,200 available, along with an auto setting. Some people find this dial within a dial to be a slow and cumbersome method of ISO selection, but I disagree. While it does take two fingers to change this setting, I still find it easier than hitting a button or two and digitally selecting the ISO, which is the standard method these days. The top also features a dedicated exposure compensation dial, which I rarely use but Fujifilm insists is quite important, a Fn button that is best used for video recording, the shutter release (complete with a retro thread-style cable attachment), and the on/off switch. In addition to these dials, you also get the standard thumb and forefinger ones (which are themselves pressable buttons), which control shutter speed or aperture in 1/3 stop increments.

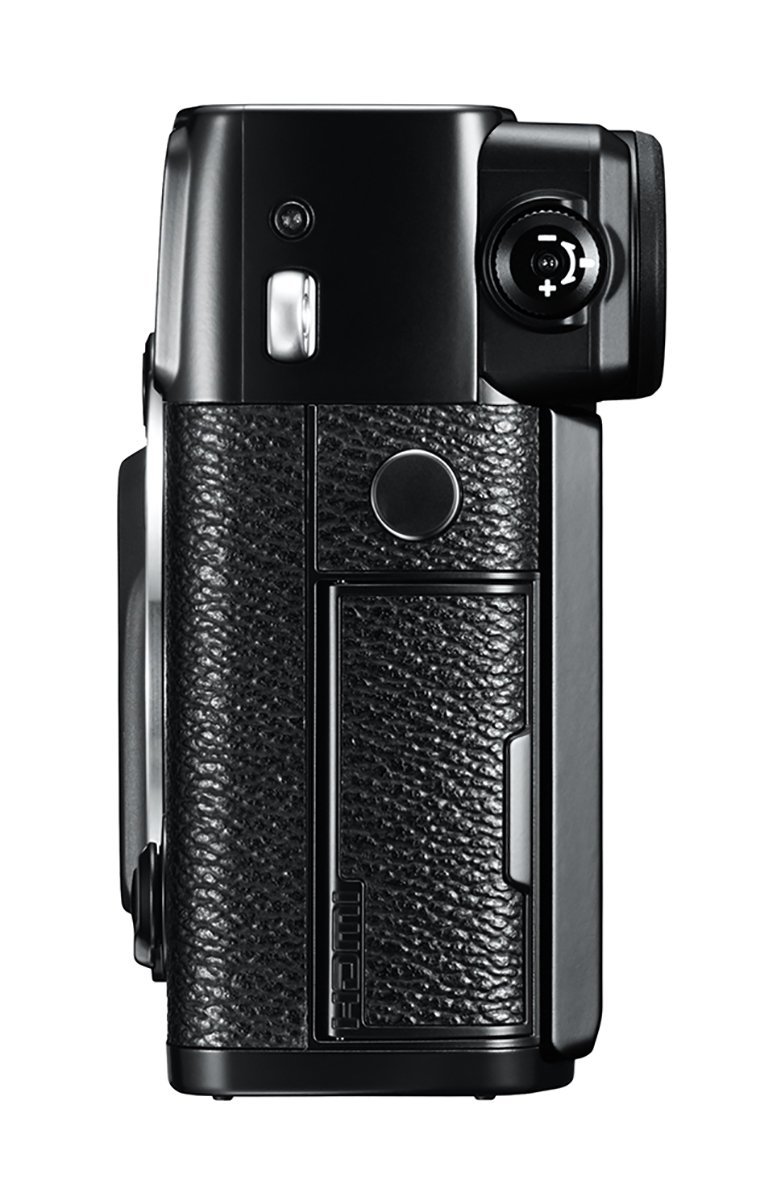
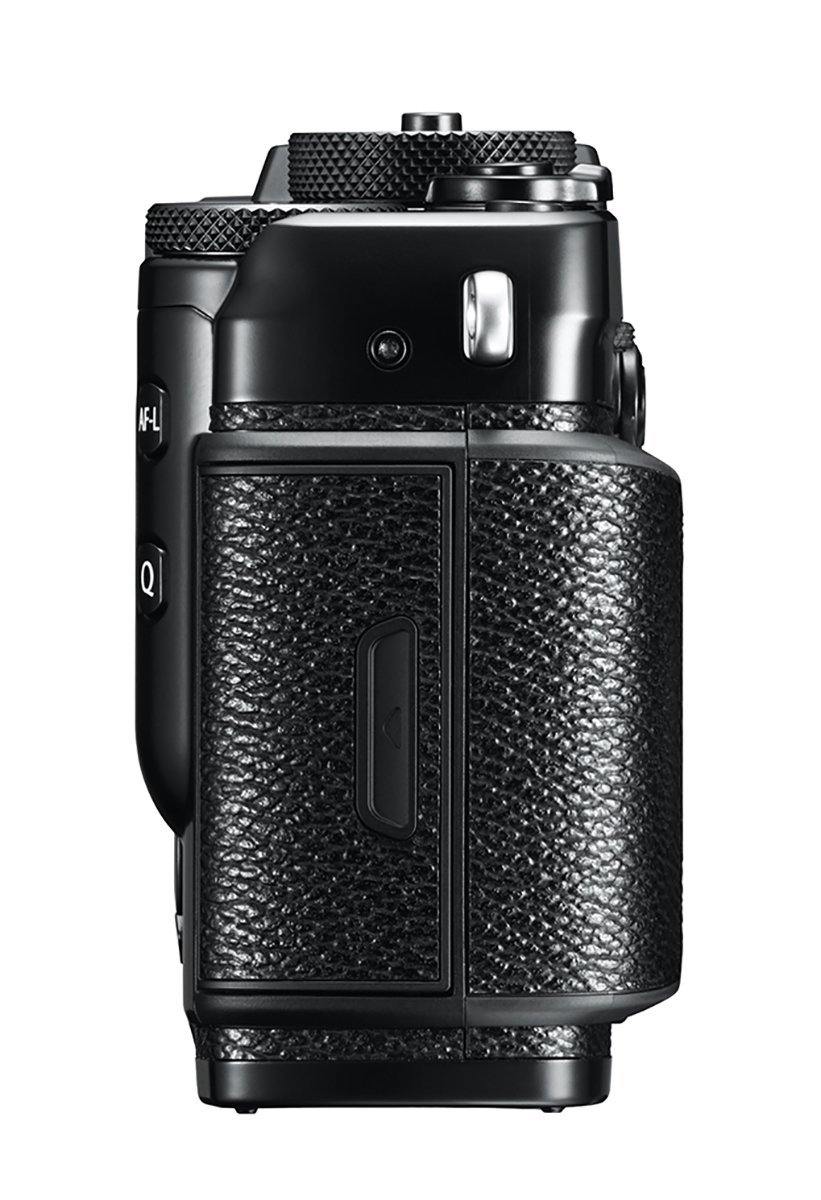
The front of the camera sports a lever that switches between the optical viewfinder (OVF) and the electronic viewfinder (EVF), with another customizable button imbedded in it. We also get a lens release and a focusing method selection lever (with manual, continuous, and single options) right where your left hand wants them. Depending on the lens you get, you’ll likely have aperture control on the lens itself in 1/3 stop increments. If your lens doesn’t have this, the camera will know and allow you to completely control the aperture through either right-hand dial, your choice. There are also dual SD-card slots on the right, a battery slot on the bottom, and an HDMI, micro-USB, and mic/remote inputs on the left. Those dual SD slots have a helpful feature that lets you save JPGs on one card and lossless compressed RAW copies on the other, which can really come in handy.
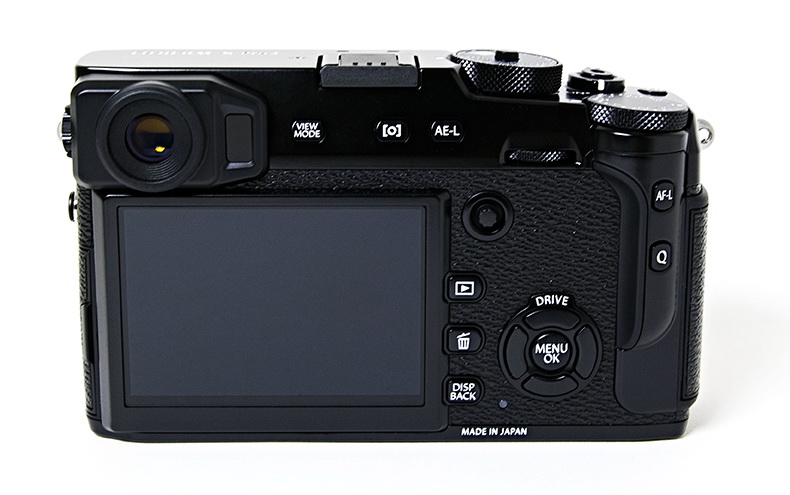
Fuji-X-Pro2-1

And did I mention that this is all weather sealed? Like I said, the X-Pro2 is truly a modern design marvel.

This camera is tough. Its magnesium alloy body gives the rock solid feel you’d expect from a pro-level camera, and the textured finish gives it a sense of quality. Some parts are smooth, some parts are bumpy, but all parts are metal, which is truly refreshing. There’s no way a photographer wouldn’t feel confident holding this camera.

My only design complaint, aside from the pointlessly over-sized exposure compensation dial, is the screen. While it looks crystal clear at 1.62 million dots, it’s fixed. I’ve come to expect an articulated LCD these days, especially on mirrorless cameras that perform equally well with the viewfinder or screen engaged. I’ve found a lot of unique shots by framing an image with an oddly titled screen, and it’s a shame I can’t do that with the X-Pro2. I assume they didn’t include this feature because it lacks a certain premium/retro finish, but it’s a disappointing exclusion.

X-Pro2 Menu

Software Design – 8.8/10

Remember how I said Fujifilm doesn’t mess with successful design? Well luckily, they also understand the flip side of this philosophy, and do mess with unsuccessful design. The most common complaint on the X-Pro1 was the wonky menu system, so the X-Pro2 has a completely new menu. It’s divided into 6 fairly logical categories – Image Quality, Focusing, Shooting, Flash, Movie, and Setup – plus a clever My Menu section that allows you to gather your favorite settings into one place. While the structure of the menu is sound, some of the actual option are in slightly confusing places. The worst culprit is the My Menu Setup, which is found in the User Settings menu, which is itself found in the Setup menu. This means that to add, remove, or order the options in your My Menu, you have to dig through a completely different settings tab, which just doesn’t make sense. It’s a small thing, but it’s indicative of the frustration some users feel with Fujifilm menus in general.

However, once you find your way around, the sheer number of customization options you have is on par with any camera of this price, which is to say there are a lot. The 6 function (Fn) buttons can each be set to any of 25 options, or nothing at all. The thumb and forefinger dials can be set to control shutter speed or aperture, levers can be turned on or off, the focusing ring can be set to turn in either direction… there’s simply a lot that you can do to make this camera your own. I’d suggest using the camera for a day or two, then thinking long and hard about all of your options as you do your initial customization, then leaving everything the same for at least a month. The key is learning which setting is where, and only changing it up in small doses so that you don’t have to constantly look at your camera and fumble with the controls while the perfect shot passes you by.
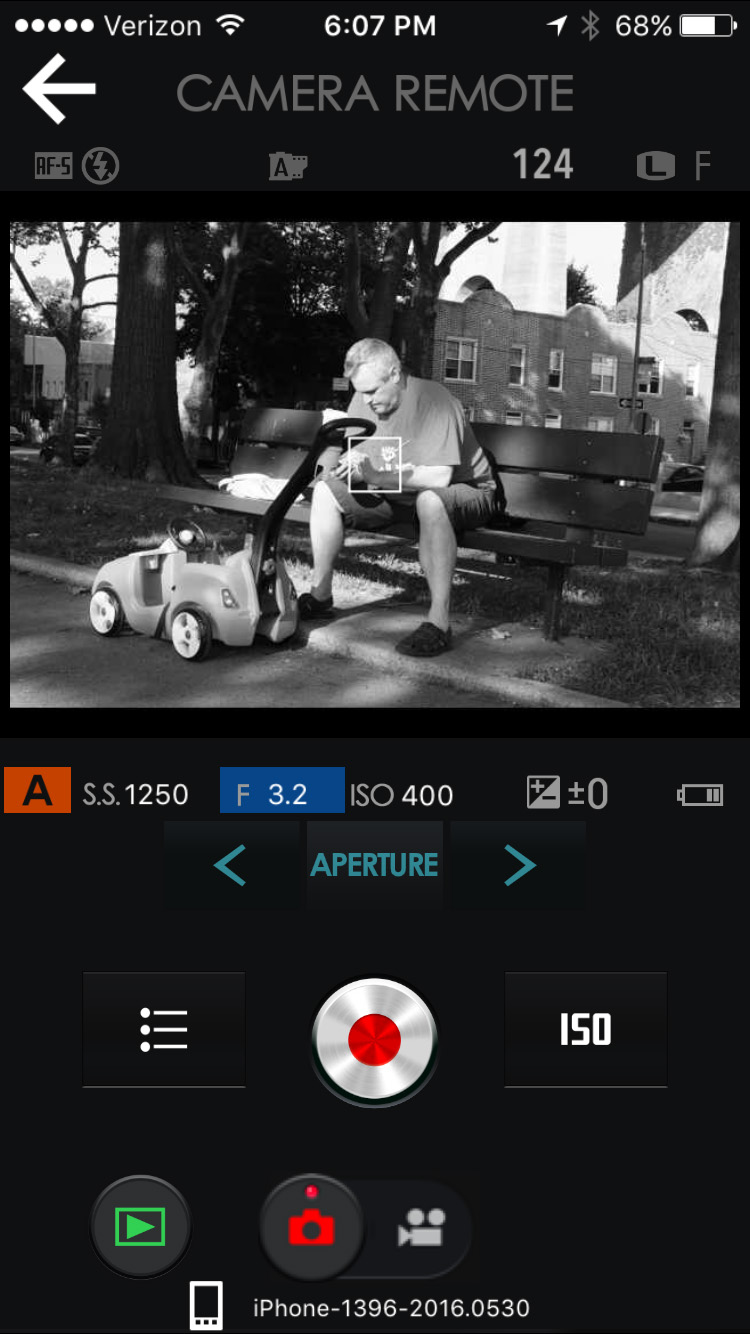
X-Pro2 WiFi App

While the menus and options are generally good, the X-Pro2’s wireless connectivity leaves something to be desired. It’s certainly nice that it has WiFi at all, since this feature gives you some great modern options like wireless shooting and mobile photo transfer, but basically every mirrorless camera has this tech. The  X-Pro2’s WiFi allows you to automatically move your photos to your PC via your home router, but I unfortunately couldn’t get this function to work. Granted, I wasn’t too interested in using this transfer method so it’s possible some further troubleshooting would have solved my issues, but the process is definitely not intuitive. Additionally, the Fujifilm app (above) that links to the camera for all things mobile is just bad. It looks out-of-date and it creates connectivity issues that I don’t believe come from the camera itself, but from poor app design. But there’s always hope that the mobile app will be updated and fixed, so this isn’t a big deal, just an annoyance. While the WiFi options are only so-so, geotagging works exactly as it should, so no complaints there.

When Shooting with the X-Pro2, the software generally gets out of your way and lets the hardware bring you back to the act of photographing. You can display exactly the information you want in the EVF, OVF, and back screen, and even have the ability to see different info shown in each viewing mode. This setup keeps your experience distraction-free, but it can also make it hard to find info that isn’t set to display on the current screen. For example, I set one of my Fn buttons to change between the audible mechanical shutter and the silent electronic shutter, but there was zero indication of which shutter mode was selected or even that I had changed from one to the other. This forced me to take a test shot, then hit the Fn button and take another test shot to hear if the shutter mode was actually changed. Every other Fn setting I tested had a visual indication of its use, but the shutter mode is another example of occasional oversights in Fuji’s software design.
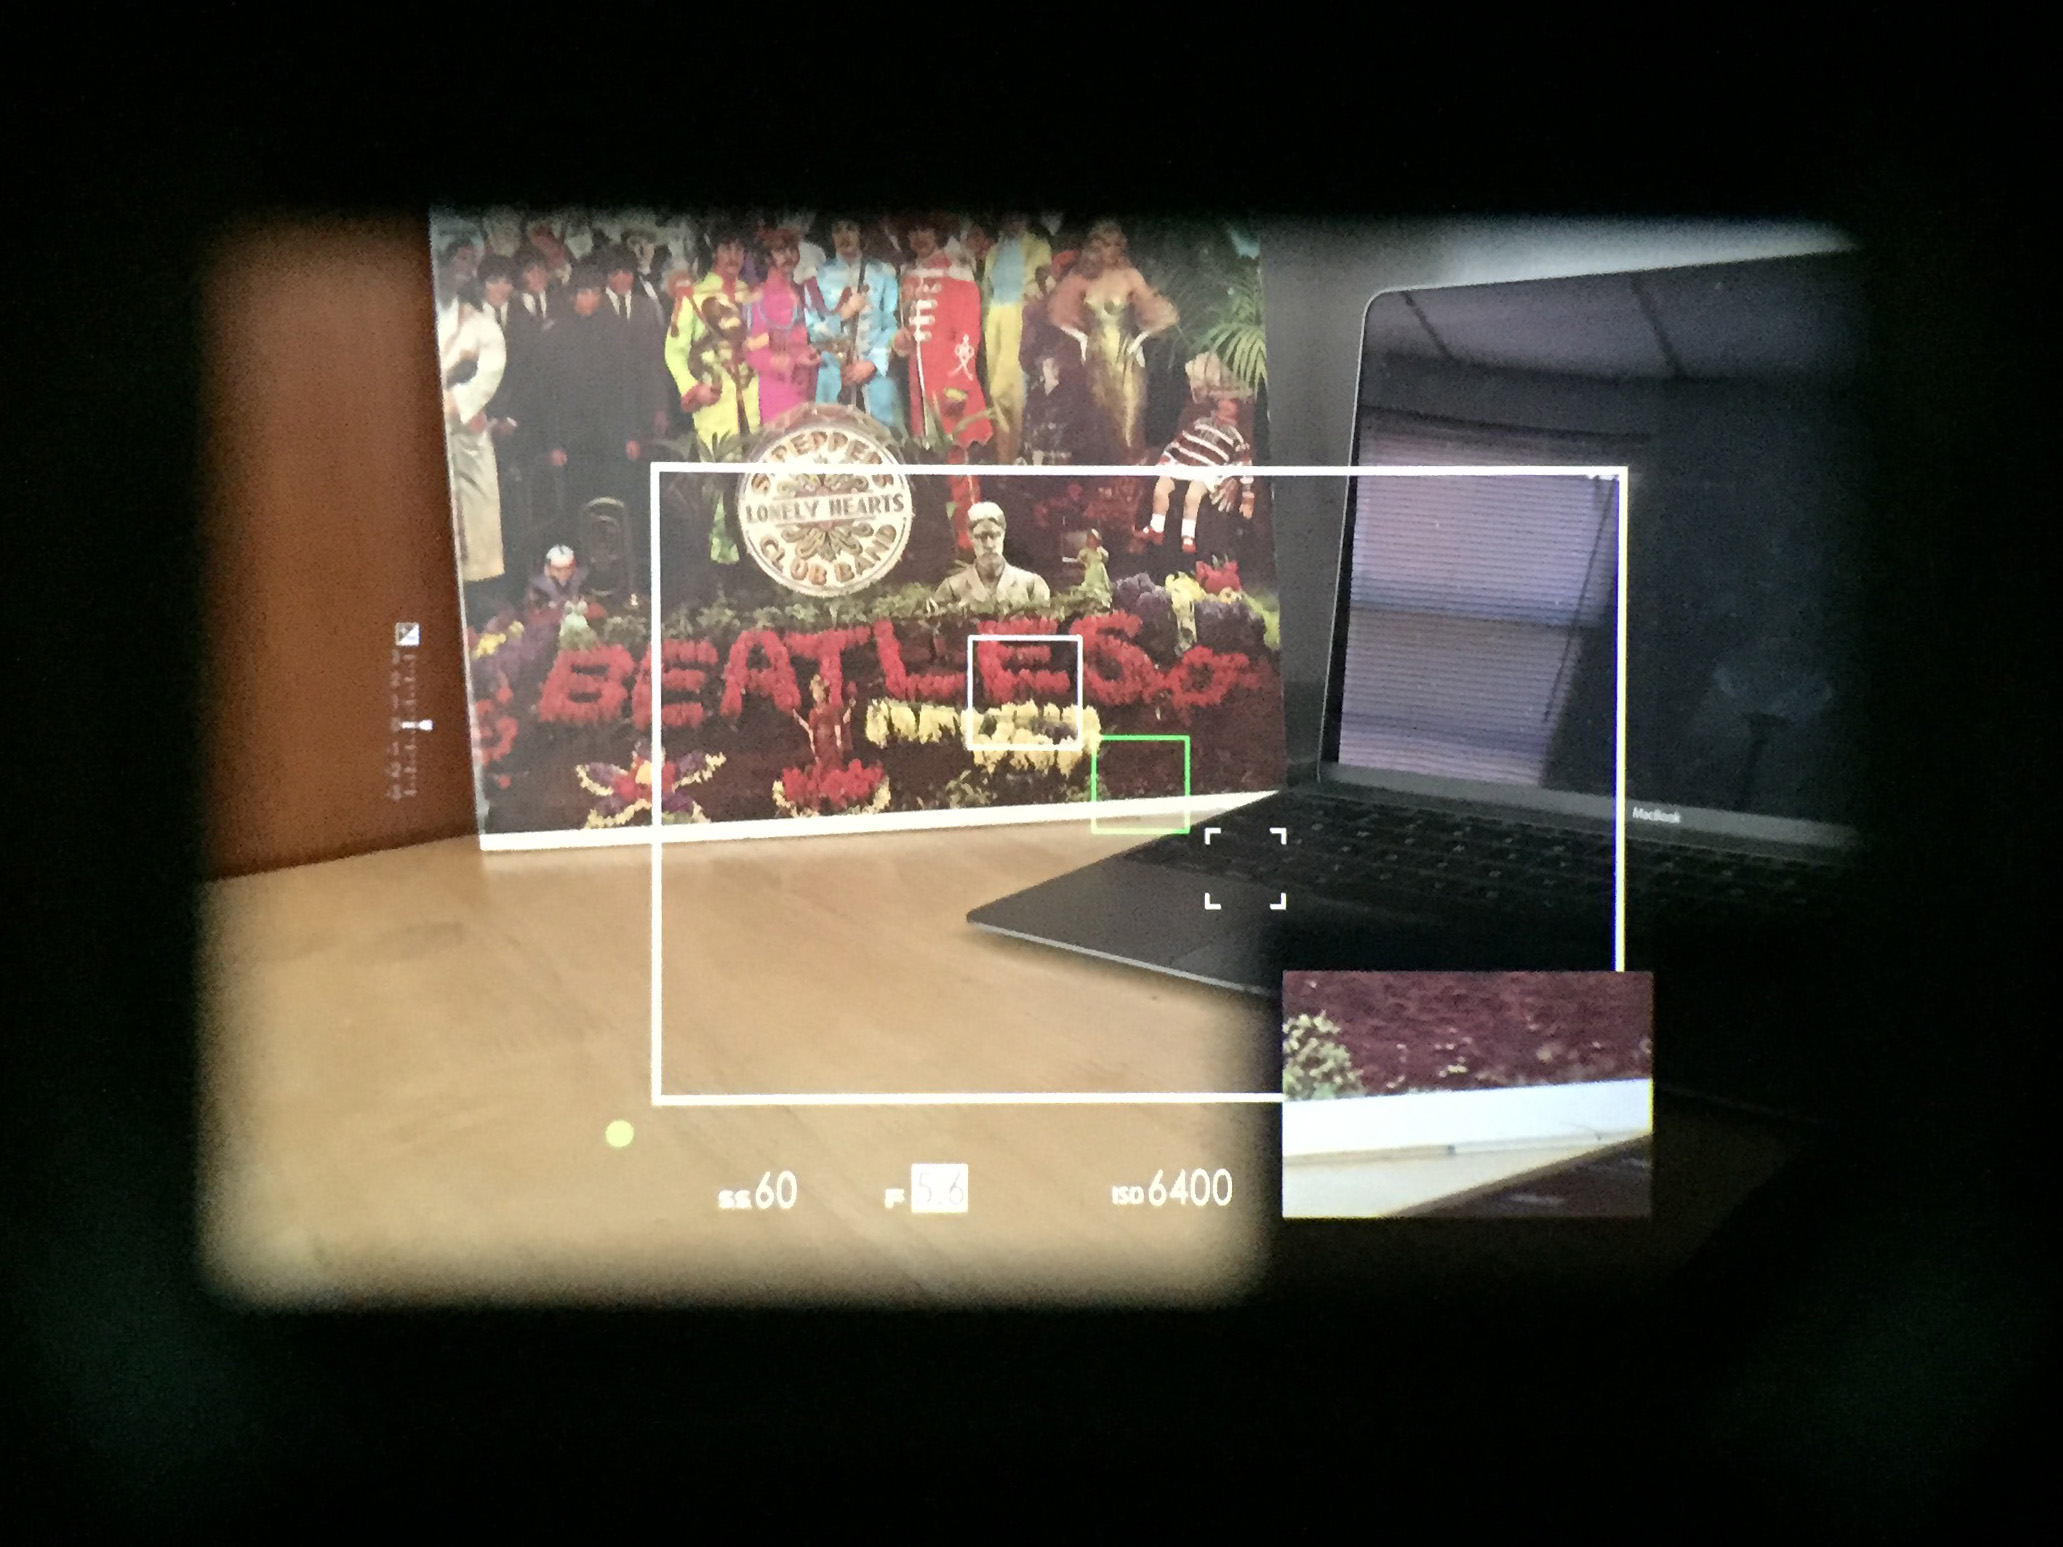
X-Pro2 OVF

Shooting Experience – 9.8/10

As soon as you bring this camera to your eye, you’ll know if it’s for you. I’m guessing that most people will instantly fall in love, since the X-Pro2’s clever design is all based on the actual act of shooting. The shutter speed/aperature/ISO layout allows Fuji to completely eliminate the shooting mode selection dial that’s found on every DSLR. Instead, if you want to shoot in fully automatic mode, you just put the ISO, shutter speed, and aperture to Auto. For full manual, just select the settings you want instead of Auto. Basically, you can set any dial to any setting and the camera will simply be in the shooting mode you want by nature of your selection. For example, I generally select my ISO and aperture and let my shutter speed stay on Auto, but if I want to select a specific shutter speed I can just do it, without worrying about what mode I’m in. It’s the most natural shooting experience I can think of, and it reinforces why the shutter speed/aperature/ISO layout is this camera’s best feature.

While the button layout – including the highly customizable Fn buttons – will be appreciated by every photographer, the dual viewfinder is definitely a polarizing feature. The X-Pro2 has a combination OVF and EVF that can quickly and easily be switched back and forth with a lever on the front of the body. The OVF (pictured above) keeps with the rangefinder style, completely skipping the lens and acting as a simple window to frame the image. However, there’s a plethora of lines and settings that get magically projected onto the natural field of view, overlaying the scene with most of the information you would want. You’ll see a white, rectangular box that approximates the final frame with a fair degree of accuracy, but it’s not always spot-on. You can also add a pop-up window that will project a digital feed of the focus area (shown in the image above), allowing you to more accurately judge your focus accuracy, which is otherwise impossible in this setup. Though I rarely found myself using the OVF, there are two main advantages to this setting: better battery life and constant availability. Because the OVF doesn’t need to keep an high-res screen on, you’ll get slightly improved battery life over the EVF. And because the OVF is essentially just a window, you don’t have to wait for the camera to turn on to start framing your image. I often found myself whipping the camera up to my eye and roughly framing a shot before even turning the camera on, and if I liked what I saw I would simply flip the switch and click. Overall, the OVF is certainly interesting and a great option for someone who hates EVFs but still wants a mirrorless camera, but most photographers will favor the EVF.
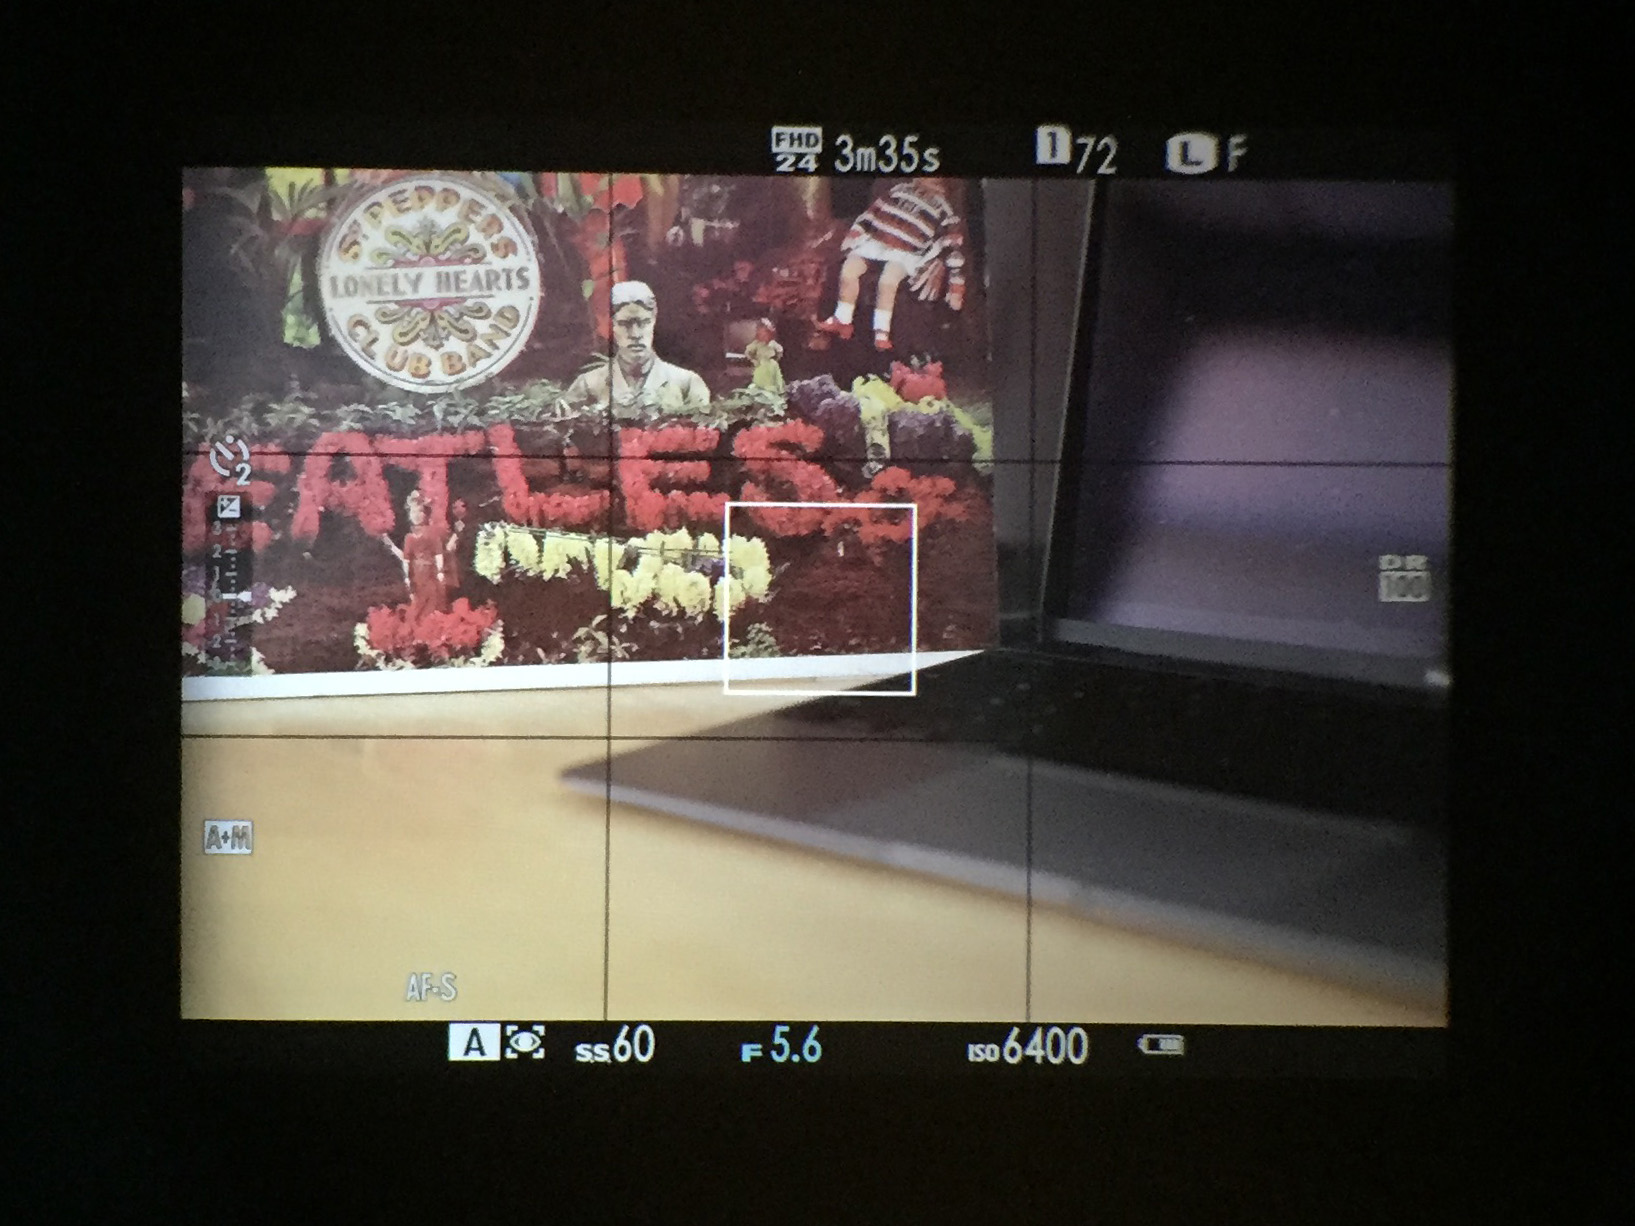
X-Pro2 EVF

The EVF (above) functions essentially like any EVF out there, offering a completely accurate preview of the final image. This is ultimately why I favored the EVF; I just want to know what I’m actually shooting and an EVF is even better than a DSLR’s viewfinder in this regard. The most common complaint with most EVFs is that they introduce a visual lag that’s unsightly or even nauseating. The EVF on the X-Pro2, however, has a refresh rate of 85 frames per second, so there’s almost no lag at all. I even kept my camera set to Economy Mode in an attempt to save battery life, which lowers the refresh rate to 54 frames per second, and I still had no trouble with lag. Granted, the EFV isn’t as large or bright as that on the X-T1, but you’ll almost certainly prefer the EVF’s accurate preview and display options over the OVF. Still, it’s nice to have an optical option to complete the rangefinder experience.

While the X-Pro2 can perform admirably in almost any shooting situations, it has a clear slant towards candid street photography, which is unfortunately not my personal strong suit. However, in my experience testing the X-Pro2 on the streets of New York and the countryside of Connecticut, I quickly saw the benefits a camera like this could lend a street photographer. Its un-intimidating, simple, black form makes it easy to go unnoticed compared to a large DSLR with a zoom lens attached.  Add to that the ability for a completely silent electronic shutter and you can take some fairly incognito shots if you’re up for it. However, I was particularly drawn to using the camera remote through the app and WiFi while the X-Pro2 was still slung around my shoulder. This setup let me see a live feed and adjust all the settings on my phone while I framed the shot from my hip, hands-free. Using this system, I could go completely unnoticed and still maintain plenty of control, though the regular lags and hiccups from the app made me miss some crucial moments, which got very frustrating very quickly.

Fuji X-Pro2 Review-038 small_mini

Adding to the street photography appeal is the ability to select various film simulations that each imitate a specific type of actual Fujifilm brand film. These are easy to adjust on the fly, but I mostly stuck to Provia/Standard, Velvia/Vivid, and Acros/B&W, though others may enjoy some of the more stylized options. There are even helpful descriptions next to each film simulation that tell you what it does to the image and when it should be used, with many film types geared towards better skin tones than the standard setting. The only reason these film simulations actually work instead of looking like cheap Instagram filters is because Fuji knows what it’s doing. The sensor in this camera has a random color filter array that looks a lot more film-like and natural than the grid layout from every other brand. Combine this unique sensor design with Fuji’s long history and prowess in color rendering and you get extremely effective Film Simulations that essentially act as high-end scene select modes, giving your photos that desirable Fuji look.

Even if you aren’t a street photographer, you’ll likely find this camera great all around, though there are some niche drawbacks to its design. While focusing is extremely quick and accurate in single shot mode, it’s a bit too slow in the 8fps burst mode for sports or action, though still good enough for casual sports photography. It’s also not the standard option for studio and portrait shoots and will therefore have less accessories available for this type of work, which may or may not be an issue depending on your studio setup. It also takes 1080p video at up to 60fps, which isn’t on par with the 4K video of many mirrorless cameras from Sony and Panasonic, but again, it will work in a pinch and is much improved over the rest of Fuji’s line. This camera can do nearly everything well enough, but it’s certainly best as an everyday shooter.

Fuji X-Pro2 Review-066 small_mini

Image Quality – 9.4/10

This is the category that most people skip to when reading a camera review, but it really shouldn’t be. That’s because basically every camera these days has astounding image quality that is all but indistinguishable from every other camera. Seriously, if you hold up two 8×10 prints of the same scene shot with the same lens and the same settings, one of them with a $6,000 pro camera and one of them with a $400 entry-level camera, you’d be hard pressed to find any difference, let alone a difference that actually matters. A camera you’re comfortable with and enjoy shooting will enables you to take better photographs than a camera with slightly higher resolution or dynamic range. But still, everyone wants to know if a camera’s IQ is up to snuff, so here we are.

In short, yes. The X-Pro2’s IQ is easily up to the standards of the industry and perhaps even better. Its 24.3MP APS-C sensor (the first of its kind from Fuji) offers plenty of resolution for all but the largest prints, and the sharpness will be far more defined by the lens you attach than the camera itself. The color rendition and noise control, however, are all native to the actual camera.

Fuji X-Pro2 Review-010 small_mini

As mentioned above, Fuji is known for their gorgeous colors thanks in part to years of research with analog film. While other brands may claim to have more accurate colors, the X-Pro2 is able to make better use of its colors. This camera has come closer to getting the “full-frame look” than any other APS-C camera I’ve used, thanks in large part to its amazing color rendition. Look, for example, at the photo above (which is completely unedited). Fuji has this way of finding those soft yet vibrant pastel colors that instantly give a photo a luscious, tactile appeal. That photo was take in mid-afternoon sun, yet it almost has a golden hour glow to it. It’s not that the X-Pro 2 has inaccurate colors either, they just give their colors a slight Fuji spin that lends itself to beautiful imagery. Certainly, you’ll find almost no color difference in a raw file that is processed the same from the X-Pro2 and, say, a Canon D80; they’ll both give you accurate colors. But the way Fujifilm balances the scene in-camera outputs far more satisfying results than any other brand, though this is obviously a matter of personal taste.

Noise control on the X-Pro2 is also excellent, with completely unnoticeable noise up until ISO 6400. Here’s a comparison of various ISOs (though not all of them, since the X-Pro2 has ISO settings in 1/3 stop increments):

Fujifilm X-Pro2 ISO 1600-002 smallFujifilm X-Pro2 ISO 3200-003 smallFujifilm X-Pro2 ISO 6400-004 small Fujifilm X-Pro2 ISO 12800-005 small

Here are a few 100% crops to give you a better idea of the noise control:
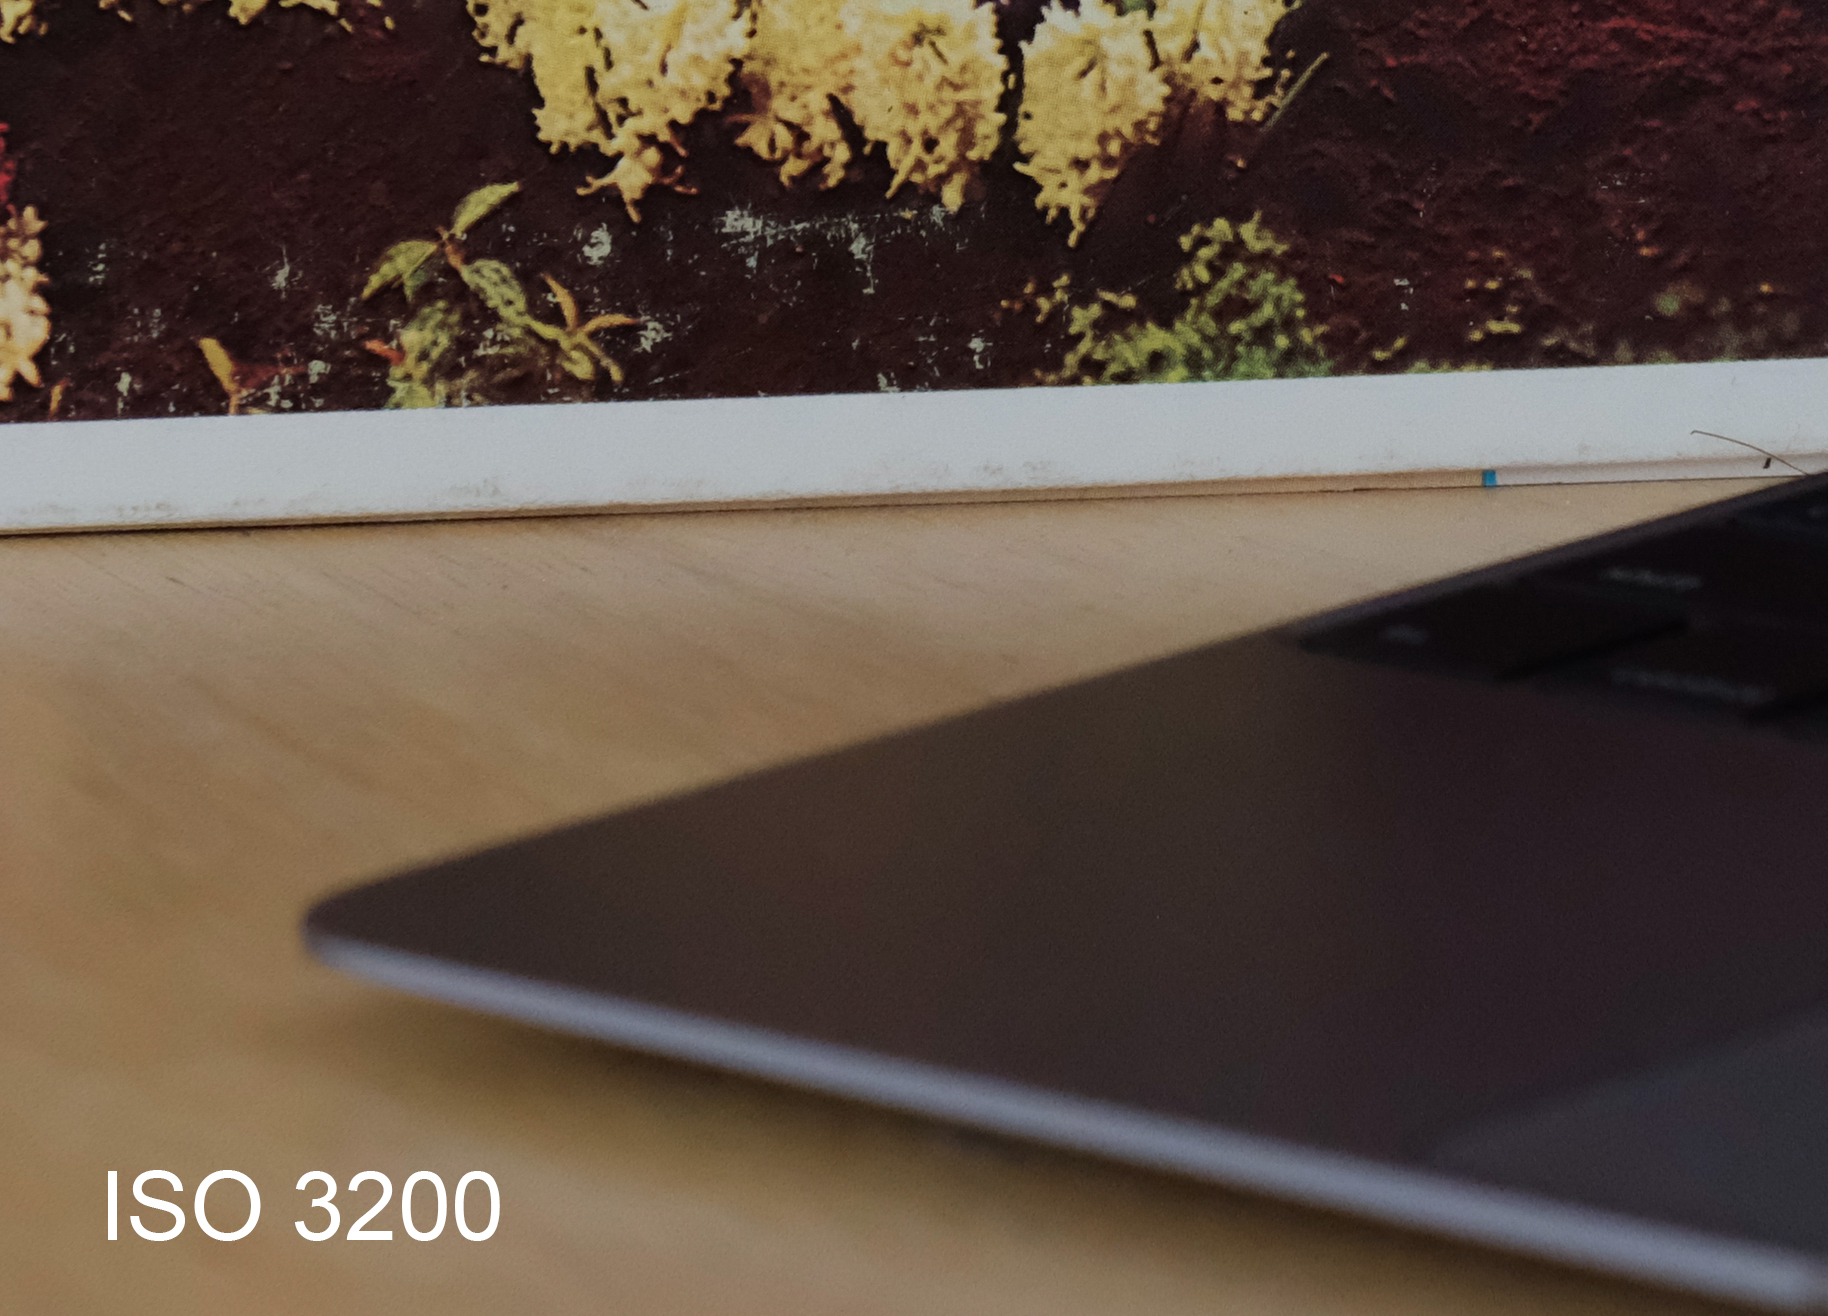
ISO 3200 crop ISO 6400 crop ISO 12800 crop

As you can see, noise is almost non-existent up until ISO 6400, where it starts to become slightly noticeable. However, Fuji cameras have this unique quality of fairly pleasing noise that looks an awful lot like natural film grain, thanks yet again to the sensor’s random color filter array. You even have the option to set the Grain Level to Strong, Weak, or Off, and I kept it off for these test images. Below is a comparison of these grain settings at ISO 6400:

Fujifilm X-Pro2 Week Grain-007 small Fujifilm X-Pro2 Strong Grain-008 small

I personally am comfortable with the noise present in all native ISO settings, since the grain effect gives an image a low-light rather than low-quality feel. Again, this is a matter of taste, but even if you want to avoid noise all together, the X-Pro2 performs admirably for an APS-C camera.

Overall, the X-Pro2 has very good image quality, as good as any other APS-C camera on the market. Personally, I consider it’s IQ to be better than any such camera, since I’m such a fan of its color and noise rendition when compared to the more sterile look from the competition. I can also say that the X-Pro2 has excellent dynamic range, especially when implementing their unique DR extension. This setting essentially sets the ISO to different values for different portions of the image, adding an impressive amount of detail to shadowy and bright sections alike, without even hinting at the ISO transition lines. Of course, a higher resolution camera will give you higher resolution images, and a full-frame camera will give you better low light and noise performance, so the X-Pro2 isn’t the best on the market by any means. However, for a high-end APS-C mirrorless camera, it’s images are of the upmost quality.

Fuji X-Pro2 Review-142 small_mini

Lens Options – 7.9/10

This may seem like an odd category for a camera body review, since the lenses aren’t what we’re discussing. However, experienced photographers know that the lens is far more important to the quality and look of the final image than the body itself, so having good lenses to choose from is an important factor in any camera body purchase. Like all X-Series cameras, the X-Pro2 basically only takes lenses made by Fuji, which is unfortunate.

There are two major factors to lens selection: quality and quantity. While Fuji exceeds in the quality of their lenses, they lag far behind in the quantity. Not many people realize that Fuji has been researching and manufacturing super-high precision lenses for the U.S. military, broadcast and cinema camera systems, and even NASA space shuttles for the past half century. This has put them in a position where they can make excellent camera lenses for excellent prices. Image quality is almost a non-factor for Fuji lenses, if the stats are what you’re looking for you can be confident the lens will perform well. However, as of June 2016 there are only 20 lenses available for the Fuji X-Series line of cameras. Compare that to the literal hundreds that fit a Canon or Nikon DSLR and the X-Pro2 is at an obvious disadvantage. However, all mirrorless cameras suffer from lens scarcity to some degree.

Fuji X-Pro2 Review-100 small_mini

On top of offering less lenses, Fuji also focuses largely on prime lenses. While some people love the quality, large aperture, and compact stature of a prime lens, others love the versatility of a zoom lens. If you’re in the latter category, I’d suggest you skip any X-Series camera, because there are only nine zoom lenses available, and only three with f/2.8. Granted, you don’t really need more than the top-of-the-line 16-55mm and 50-145mm “red badge” lenses, but most photographers want way more options. Additionally, the one macro lens Fujifilm makes is their least impressive, so macro photographers should also steer clear.

While the Fuji selection isn’t great, individual lenses are. I shot every photo here with the same 35mm f/2 R WR lens, which has amazing image and build quality, is weather resistant, and costs less than $400 (and is often on sale for under $300). It’s a truly unbeatable lens at this price-point, however, I would have preferred a shorter focal length than the roughly 50mm equivalent of this lens. If I had the 16mm f/1.4 R WR and the 56mm f/1.2 R APD in my bag as well, I’d have been a very happy camper.

Fuji X-Pro2 Review-076 small_mini

Conclusion

There’s a lot to love about the X-Pro2, and it’s undeniably one of the most sought-after cameras of 2016. While there are many small elements that add up to make this camera great, almost every bit of its success can be traced back to its firm roots in rangefinder design. From the button layout to the viewfinder to the film simulations, this camera is meant to be the solution to a DSLR’s drawbacks. In truth, there’s only one thing the X-Pro2 can do that a similar DSLR can’t, and that’s make photography fun.

Ok, so photography is already fun, but the X-Pro2 makes it funner. Shooting with the X-Pro2 is fun like a modern day DSLR is fun – by taking super high-res, instant feedback, top-notch quality images tuned exactly how you like them; but it’s also fun like a retro film rangefinder is fun – by being stylish and spontaneous, gorgeously nostalgic, and oh-so-good to the touch. The X-Pro2 is truly the perfect blend of old school and new school, combining the best of retro design with the best of modern technology to make a camera unlike any other.

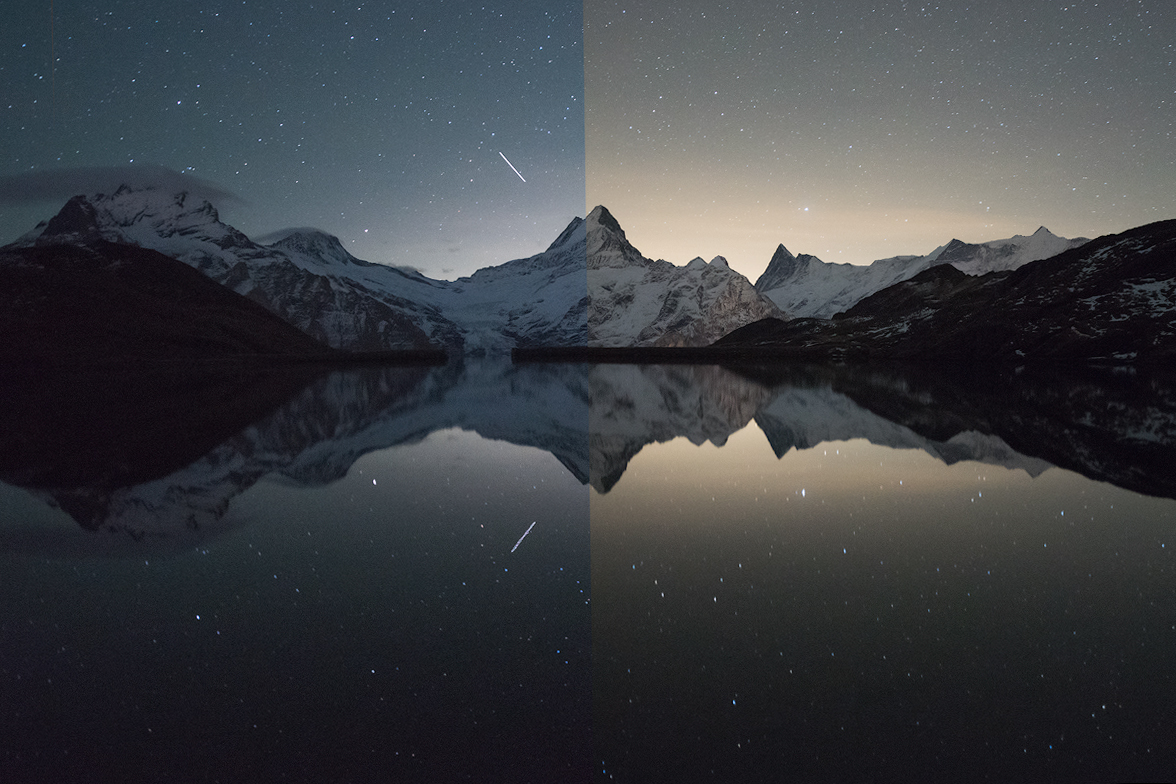
Lightbulb Moments – Bright Ideas for Budget Photography Lighting

Lighting is such a critical element of great photography that many opportunities can be missed if you don’t have the budget for a proper lighting setup, or just happen to be in a dark place at the right time. With a little bit of imagination and creativity though you can make those darker moments shine and sometimes create new and unexpected effects.

Below are a few tips on how to make the most of the light available to you and use your imagination to create new light without having to break the bank or go over your budget.

Search for the Sun

The first thing you can do if you’re struggling to light a scene properly is make the most of the natural light around you – remember the sun’s always shining somewhere, it’s just the clouds that get in the way. Open every curtain, every blind, every door, and move closer to any available windows if you’re not getting the shutter speeds you want.

Sleeklens - Lightbulb Moments_013_mini

If you have time to plan your shoot, for example if you’re taking portraits, think about quiet and well-lit public places where you can capture your subject. Locations like universities out of term time are great because they tend to have loads of buildings with lots of big windows and large open spaces. For more information on shooting in natural light check out Damon’s beginner’s guide.

If the light is too strong, or not in the right place, consider using a reflector to create a more diffuse glow and move the light. Reflectors can be purchased quite cheaply anyway, but a simple home-made solution is to cover a large sheet of cardboard in tin foil. Aluminium foil has a shiny side and dull side which can be used to create different levels of diffusion, and can also be crumpled to change the quality of the reflected light.

Low-cost Spotlights

Over the years I’ve had varied success searching for a cheap alternative to a proper spotlight. Any torch that comes close to the brightness of a low-end spotlight is likely to cost just as much if not more than one, and the batteries will run out quickly. The best thing I’ve found is a basic clip-on lamp that plugs into the mains, combined with a regular lightbulb and lampshade.

Sleeklens - Lightbulb Moments_001_mini

For less than £10 the adapted work lamp works a treat, offering a good level of light – it can easily light up a room – and flexibility in terms of positioning. The lightbulbs can be switched to provide a better colour temperature, and it can be easily raised up by clipping it onto a tripod (or any convenient high place like a curtain rail). The setup below cost me just £8.50 in total (not including the tripod) and is something I’ll be using a lot.

Sleeklens - Lightbulb Moments_008_mini

Another option is to use any bright light or lamp to hand. Turning on a ceiling light generally doesn’t help because the light isn’t being directed anywhere, but table lamps and especially bendy desklamps can make great impromptu spotlights.

Fun with Flashguns

Although approaching the same price as a proper spotlight a cheap third-party flashgun can make a great portable solution which can work great as a basic flashgun or a way to fine-tune the lighting in a scene. For less than £30 you can pick up a cheap flash gun, which although not as advanced as the more expensive models gets the job done in terms of generating light.

Sleeklens - Lightbulb Moments_011_mini

You can also have great fun creating different lighting effects with flashguns, by adjusting their brightness but also by adding different coloured gels (as I will describe below). I once had to turn a dull meeting room into something that looked a bit more romantic, so added a red gel to my flashgun to turn the wall behind the subject a nice shade of pink.

Gel Power

If you want to add some colour to a scene, or set a particular mood, combining gels with your budget lights can create some interesting effects. Making the gels is simple and cheap. All you need is a few strips of cardboard from something like a cereal box, some transparent materials, and a stapler.

Sleeklens - Lightbulb Moments_010_mini

While trying things out for this article I went to my local stationers and picked up a packet of colourful document wallets for £1 and was able to create a Red, Yellow, Blue, and Green, gel for my flashgun. I had enough material left over to make one for my desk lamp as well and also experimented with a rainbow-coloured pencil case.

Sleeklens - Lightbulb Moments_012_mini

With a little bit of outside-the-box thinking there are plenty of ways you can improve the lighting of your setups for little or no money, depending on the materials you have lying around your home. From simply being more aware of your surroundings to being inspired by the lighting department at your local hardware store, you just need to get creative to make your budget go further. Why not trying creating your own lighting solution and see what bright ideas you can come up with? For more inspiration for cheap lighting see Julian Rad’s guide to making a DIY light tent for under $5.

3 Rules for Budgeting Your Photography Gear

So, you’re either looking to get into photography or you’re looking to upgrade your equipment. Or you’re like me and you’re a little obsessed with scouting out the gear you want to get but will probably never pull the trigger and actually buy it. Fair enough.

Whether you’re an Instagram loving amateur looking to bump the quality of your posts or a seasoned fashion photographer who needs the latest gear to keep up with the crowd, there are some basic rules to budgeting your photography purchases. The guidelines below will help you get the most bang for your buck.

Copyright An Mai
Copyright An Mai

1. Actually have a budget (or two)

Regardless of your situation, you’re gonna need a budget (even if it’s a hypothetical one). It’s all too easy to purchase one camera and get roped into buying tons of supporting gear to match your fancy new shooter, and before you know it you’ve sunk thousand of dollars that you didn’t want to spend into your setup. Do not do this. Instead, come up with two numbers, one that is the best case scenario low budget you’d love to get away with, and the other being the high budget total that you’d still be comfortable spending on all of your gear, then aim for the low one and you’ll probably end up at the high one.

Depending on your situation and photographic needs, your numbers will probably range anywhere between $500 to $10,000 or more, only you can figure that out for yourself. But keep in mind that the gear doesn’t make the image, the photographer does. No camera and lens, no matter how expensive, will make you a good photographer, and the best photographers can make amazing photos using just about anything.

Copyright Peter Zuco

 2. Keep what you can

If you’ve already invested $3,000 in Canon lenses, don’t switch to Nikon. This should be obvious but many people jump to whichever system has the best looking gear at the moment and completely abandon the often significant financial investment they’ve already made in another system. But guess what, no camera company makes anything significantly better than all the other camera companies. Every camera on the market takes good photos, some take great photos, basically none of them take mediocre photos. The difference between a $400 camera and a $4,000 camera is minuscule at best, and the difference between Sony’s latest offering and Panasonic’s best gear is even less significant. You are far better off keeping your budget down by utilizing as much of your current gear as you can than selling it for a loss just to get into a different (but rarely better) camera system.

If you don’t have any gear yet, then this rule is even more important for you. THINK LONG TERM. For all the reasons listed above, whatever photo equipment you get first will likely decide what type of equipment you buy from then on. So if you buy a Canon Rebel body and a couple Canon lenses right now (a great long-term choice) then you probably won’t want to buy a Fujifilm camera next because then your Canon lenses will be useless (don’t expect to rely on converters). Before you know it, you’re entirely entrenched in the Canon system and it will cost thousands of dollars to get out of it. You can read up on which camera brand is right for you in this helpful Sleeklens guide.

Copyright Kieth Williamson
Copyright Keith Williamson

3. Trust the 2-1-1 rule

This is easily the biggest mistake any new photographer makes when buying photography gear. Most people spend all of their money, or close to it, on the camera. WRONG. If your budget is $1,000 don’t spend it on a Canon 70D with a kit lens, in fact, you should almost never buy a kit lens at all. (For those who don’t know, a “kit lens” is the zoom lens included with a camera body that usually covers a large focal range, like 18-105mm, but is almost always very low quality.) So what exactly is the 2-1-1 rule? It’s a ratio: 2 parts of your budget on lenses, 1 part on the camera, 1 part on everything else.

This may seem crazy to new photographers, but you should be concentrating on the lenses you’re getting, not the camera body. Why? Most camera companies use the exact same Sony sensors. While there are other factors that go into the quality of a camera body, the sensor is easily the most important one. Even companies that don’t use Sony sensors (like Fujifilm) use the same technology and produce almost the same images. The camera body really doesn’t matter that much, it’s mostly a personal preference. The only truly important elements of a camera body that affect the final image are the sensor size, technology, and megapixel count. Even then, there are pros and cons to all possibilities and they don’t have a huge affect on the final photograph.

3479553798_01312d8f52_b-2
Copyright G M

Lenses, on the other hand, all but decide the quality of your images. Camera companies make their own lenses, all of which have some stellar options, and many third part companies like Sigma make some great lenses too. While, like cameras, there is little difference from one brand to the next, there is a significant difference from one “tier” to the next. It’s really difficult to get those stunning photos with micro-contrast, a low depth of field, and beautiful color and tonal gradations with a cheapo zoom lens. It might be impossible. Compare that to a Canon L lens, for example, which can make virtually any snap look decent, and you’ll see why the lens is the key.

The last 25% of you budget should be reserved for supporting gear like bags, UV filters, strobe lights if you need them, that kind of thing. If you already have equipment you’re planning on keeping (which you’d be wise to do) then you should follow the 2-1-1 rule for your total set of equipment, not what you’re buying right now.

Finding the right photo gear may seem like an impossible task, but as long as you keep those three rules in mind (especially the 2-1-1 rule) you’ll end up with a kit you can be proud to call your own.

Essential Photography Equipment for Wildlife Photography

Wildlife photography is probably one of the most difficult fields in photography, not only that you need certain knowledge of the animal’s behavior, also you have to know which photography gear will be ideal for wildlife photography. So, in order to show impressive photos of animals the right choice of the camera and lens is really important.

Earlier it was almost impossible to get a high-quality photograph of a wild living animal because back in the days we only had slow cameras and slow lenses. But now we have the opportunity to take breathtaking images of animals because modern cameras allow us to use fast shutter speeds and also lenses with fast autofocus allow us to capture wildlife sceneries which can’t be seen by the naked eye.

For example, this image, which shows two wild living foxes having a fight, was captured with a really fast shutter speed (1/2500s).

IMG_6115fight

What’s the ideal camera body for wildlife photography?

When choosing a digital camera for wildlife photography, there are some important considerations. First thing you have to consider is, that you should choose a camera with a good AF performance and which at least has a continuous shooting rate of 7 frames per second, to capture fast movements of animals and therefore to get out the most of an action sequence, for example if you are shooting birds in flight or running/jumping mammals.

IMG_9335s8

Another thing you have to consider is to use a camera body which has a good high-ISO performance because almost every wildlife photographer shoots whether in the dusk or in the dawn because at this time you have the best light of the day. If you will buy a camera body with APS-C sensor you will have a really big advantage, because you will have much more focal length due to the crop-factor. So if you use a 300 mm telelens on a 1.6x crop camera, you will, therefore, get a focal length of 480mm.

IMG_3512_beaS (2)

Which lens should I use?

Well, to capture a wild living animal you will need a telelens of course, but there are different types of the lenses. On the one hand you have tele zooms and on the other hand, you have lenses with fixed focal length. The main reason for choosing a tele zoom lens is that you will become more flexible because you can easily zoom in and out depending on the focal length you need.

When you are using a prime lens, you have to move the camera back and forth physically, so this could be a problem if you are too close to an animal or too far away, because you would disturb the animal you want to photograph when you move a lot. Another important consideration is to choose a wide aperture lens because you will need a lot of light if you want to capture animal action shots and especially mammals are often active in the morning where the light conditions are very poor.

79ae3f06b1c8252b1630285c7f46175a-d9qgw2s

Wide aperture lenses are also helpful if you want to isolate your main subject from everything else, for blurring the background and if you want to get a smooth and clear background.

If your lens has an image stabilizer, you will get much sharper images, because it will help you to receive high-quality images, when you taking photos in situations where you don’t have enough light, or if you don’t use a tripod while you are photographing.When you are taking photos of wild living animals you have to mind that you protect your camera and lens with a waterproof coat to prevent water from damaging your camera or lens.

Eisvogel landung

To sum up, here a little list of photo gear before you start taking images in the wild:

DSLR (Like said before crop cameras will extend your focal length)

Tele Lens (chose a tele lens with an image stabilizer and wide aperture to be able to capture fast moving animals)

Tele-converter (A teleconverter will give you extra focal length)

Hiding Tent (using a hiding tent will maximize the chance to photograph timid animals)

Tripod (a tripod will help you get sharper images when you shoot at slow shutter speeds)

We hope you enjoyed this article !


All photos by Julian Rad.

Finding the Goldilocks Zone of Megapixel Count

This one’s too big. This one’s too small. This one’s just right. Photographers constantly make compromises in everything we do. Whether it’s choosing an ISO that will allow fast enough shutter speeds without introducing unpleasant noise; setting sharpness to give clarity without a fake look; or simply setting the size of your JPEGs, there’s something gained and something lost in each decision.

Deciding how many megapixels you need is no different. While most of the choices above can be made by simply looking at your image, megapixel counts take a bit of technical knowledge and foresight. Ultimately, your ideal sensor resolution is a matter of choice like any other, but knowing what’s at stake and what options are available can make this important decision much easier. Before we begin, you may find it helpful to read our article on choosing the sensor size that’s right for you, which is a separate issue to consider altogether.
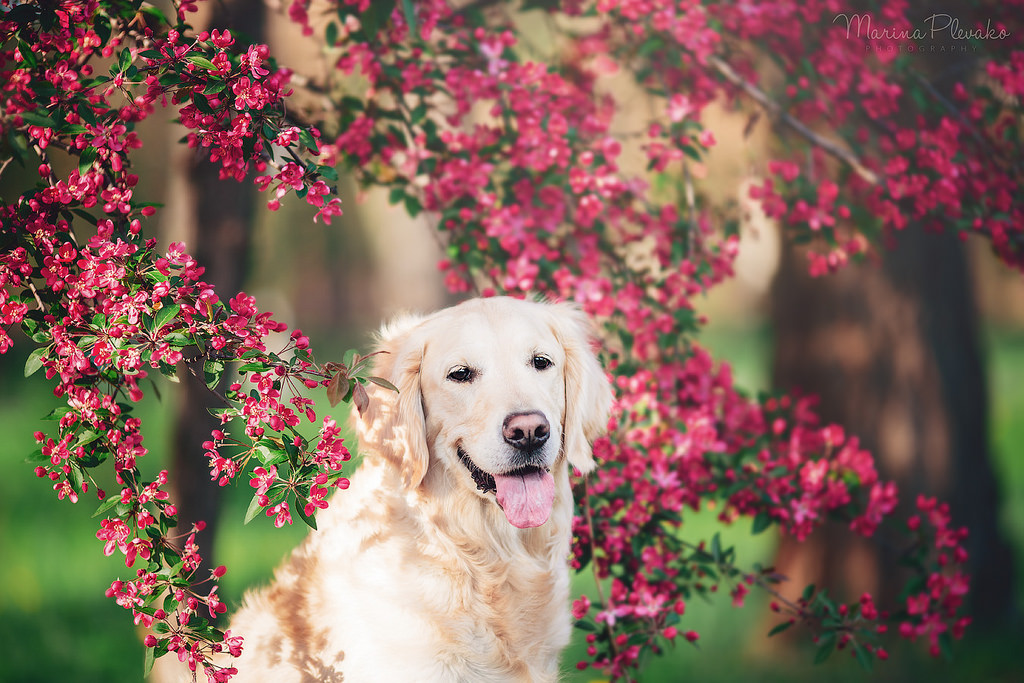
3 Bears
Momma Bear, Papa Bear, and Baby Bear

The name of the game is image size versus file size. While there are many other consequences to consider, this balance is the heart of what’s at stake when choosing a megapixel count. More megapixels means higher resolution, but much larger files. But what exactly is necessary when it comes to resolution and what is superfluous? The answer to that question depends on your needs. For example, a good quality physical print is usually 300 dpi (dots per inch), meaning if you wanted to print an image 8 inches wide and 6 inches high, you would need a resolution of 2,400 x 1,800 pixels or 4.32 megapixels. So if you use every pixel of a camera, you only need a 4.32-megapixel camera to make a good quality image of this size. However, if you know your photo will be viewed on the web, where resolution is locked at 72 PPI (pixels per inch), then the same 4.32mp camera could be viewed on a screen that’s 33.3 inches wide by 25 inches high. That’s a pretty big computer screen.

But some high-end cameras have resolutions of 50mp or higher. While this seems completely ridiculous at first, it’s not as crazy as you’d think. Because the number of pixels needed to make a larger print increases exponentially, a 50.3mp image is actually a resolution of 8,688 x 5,792 pixels. That yields a 300 dpi print of 29 inches wide and 19.3 inches high, a lovely size to the frame on a wall. But with an increased print size comes and exponentially increased files size as well. If you’re taking photos in high-quality RAW format (which you usually should), each of these 50.3mp files is up to a whopping 75.5 MB (megabytes) as compared to the 6.5 MB of the 4.32mp camera. To put the high-res file size into perspective, if you spent an afternoon shooting  200 photos, you’d have 15.1 GB (gigabytes) of images. That kind of data builds up fast. Most people never consider the cost and difficulty of storing large files when buying a camera, but it’s definitely important to keep in mind. If you’d like to see what file, print, and web size results from different image resolutions, I’d suggest using this megapixel calculator tool.
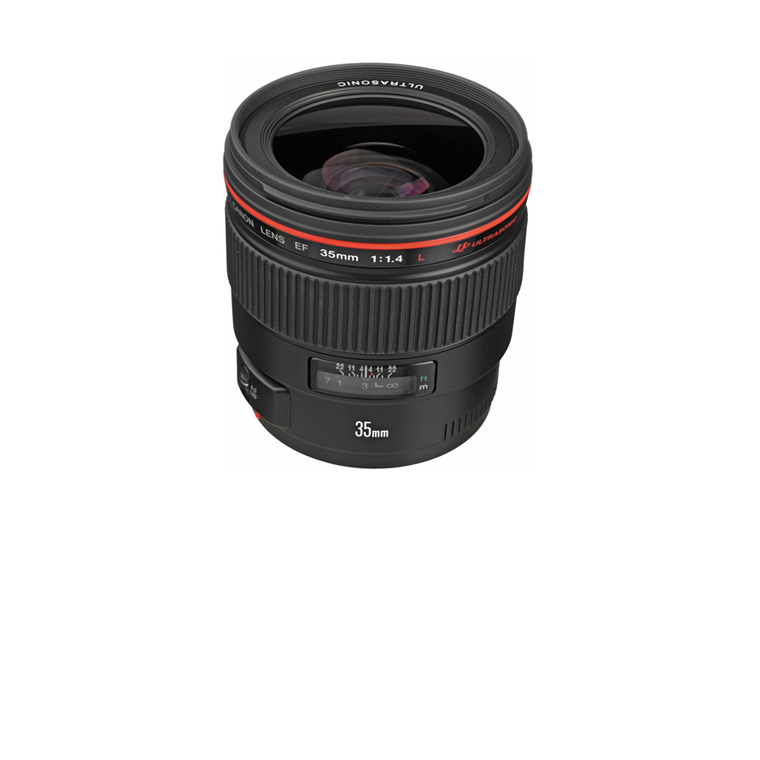
computer-767781_1280

Some other considerations to make when picking a resolution size is how this impacts the camera overall. A camera’s megapixel count interacts with its sensor size. More megapixels in a smaller sensor means each individual pixel is smaller and therefore absorbs less light for any given photo. This tradeoff will typically result in a noisier image, though modern camera software goes a long way to resolving this. So if low light performance is important to you, you may want to stick with not only a larger sensor size, but also a lower megapixel count. It may be counterintuitive, but in many cases having fewer megapixels creates better images. There are of course other factors that relate to a camera’s mp stat, such as battery life, price, and ISO range, but the print/web dimensions, file sizes, and low light performance are the most direct results of any given megapixel count.

To wrap things up, we’ll briefly look at three major megapixel groups, discuss their capabilities and limitations, and give some example cameras.

Canon 5d Mark I, 12mp

1. Low-Res (Less than 16mp)

Typically, cameras in this range are 12mp, which not too long ago was very impressive. If your photos are only ever going to be seen online, then this is plenty big enough. However, if you want to have decent sized, decent quality prints then you’ll want more than this, but honestly, this is more than enough resolution for most people. Cameras in this category include the full-frame Canon 5D Mark I, the full-frame, mirrorless Sony a7s II, and the iPhone 6s.

12mp camera yields:

  • 300 dpi prints of 13.3 x 10 inches
  • RAW files up to 18 MB
  • JPEGs up to 2.5 MB

Nikon D3200, 24mpNikon D3200, 24.2mp2. Medium-Res (16-30mp)

While there are many excellent Micro Four Thirds cameras that have 16mp sensors, the staple size in this segment is 24mp, though 20mp is also common. These offer plenty of detail to meet almost anyone’s needs without going overboard or being too expensive, which is probably why it’s such a popular resolution. Some medium-res cameras include the Sony Alpha a6300, the Canon Rebel T6i, and the Olympus EM-5.

24mp camera yields:

  • 300 dpi prints of 20 x 13.3 inches
  • RAW files up to 36 MB
  • JPEGs up to 3.6 MB

Sony a7R II, 42mp © Dongheon ShinSony a7R II

, 42mp © Dongheon Shin

3. High-Res (30-50mp)

These are professional grade. There aren’t too many different cameras sold at this level of resolution, though the ones that offer it are extremely popular. This amount of detail is only necessary for pros who need to make large prints (or sometimes just impress clients) and who have the equipment and know-how to manage large files. Cameras like this include the Canon 5D SR, the Sony a7R II, and the Pentax K-1.
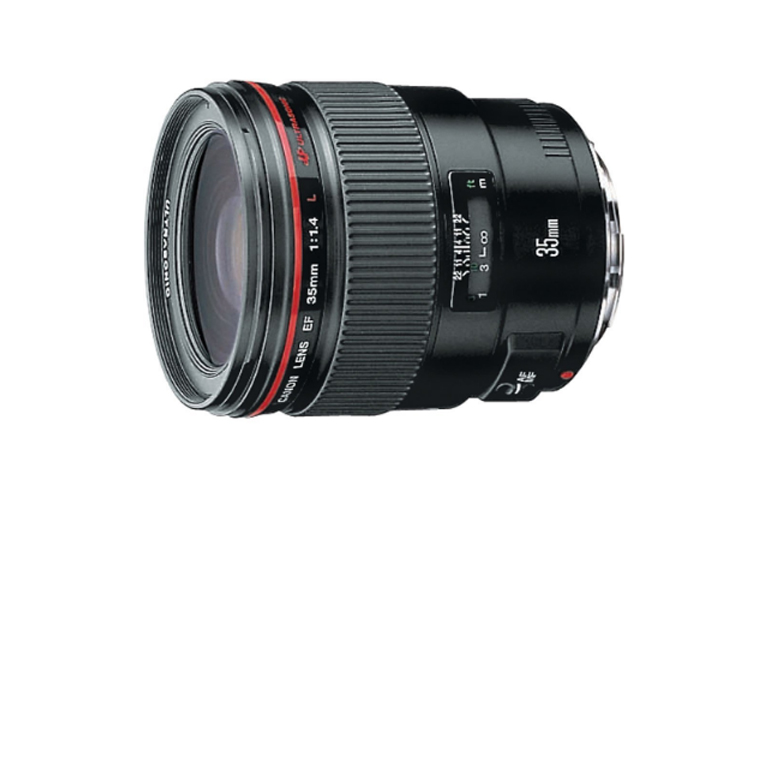
42mp camera yields:

  • 300 dpi prints of 26.5 x 17.7 inches
  • Raw files up to 63.3 MB
  • JPEGs up to 4.4 MB

Anything above high-res is considered ultra-high-res and is only available in medium format cameras. That kind of resolving power is only necessary for the rarest of occasions, but it can certainly make for some amazing shots. While these cameras can easily make prints over 3 feet wide, they can also take raw photos over 150 MB in size. Like every other camera decision, the megapixel count you choose is a matter of taste and should be decided based on your individual needs. But if you keep in mind the tradeoffs between maximum image dimensions, files sizes, and the rest of the camera’s performance, you’ll be able to find the resolution that’s just right.