Tag: equipment

How To Get Into Concert Photography

Whether you are hired by the performer or event organizers, tackling concert photography is not an easy job. But if photography was an easy job, everybody would be a professional photographer.

Most concerts have a few things in common, including low light, lots of motion, little to no access, and a quick timeframe. So how does one manage all of that?

13 Concert Photography Tips

Do Your Homework

In order to get access, you’ll need to do your homework. Find out whether the performers allow concert photographers inside in the first place. What are their policies? Can the music photographer shoot the whole concert or just the first few songs? Do the performers allow photographers to shoot backstage? Do they require photographers to have a photo pass? How do they move on stage? Do they have some prominent habits on stage that would look cool in a photo? Will there be guest performers? These all are questions that you’ll need to be answered before you enter the venue.

Саф и Легијата [24.04.2015] Photo by Dzvonko Petrovski.

Get Access

There are two types of access needed to photograph a concert successfully. Mainly, you need to be able to get into the concert as a press photographer or get a photo pass. In other words, you need access to be able to get backstage, in between the stage, and into the photo pit.

Secondly, you’ll need access in terms of angles. If the stage is too high, and you are just in front of it, you won’t see a thing. Therefore you’ll need access to the areas from which can actually shoot the performers properly.

Manage The Light

Since 99% of the time you’ll have a strong light hitting your camera directly (since the stage lights will actually be in the background), make sure that you aren’t using a lens that is prone to flaring, since you’ll end up with a bunch of images with lens flares. Those stage lights will create atmospheric light and rim light on your subjects (the performers in this case), so your job is to provide the fill light in order to avoid silhouettes. I usually use the on camera flash modified with a 20x30cm softbox.

Саф и Легијата [24.04.2015] Photo by Dzvonko Petrovski

Focusing

Direct light could pose problems for the focusing system on some cameras, and the best way to manage that is to set the camera to center point focusing. Then block the lights with your hand, focus, and recompose. Do all that without releasing the focus button—using a back button focus for this might be easier.

ISO

Саф и Легијата [24.04.2015]

Photo by Dzvonko Petrovski.

Usually, the first thing people do in scenarios like this is bump up the ISO camera settings in order to gain more detail in the shadows of the image. In most scenarios, that would be the smartest thing to do. However, in this case, you are using flash, and have very bright stage lights. You don’t need a high ISO because you can let the flash take care of the fill light while the stage lights take care of the highlights. This way you end up with cleaner shots.

For the purpose of proving this, all of the shots that you see in this article have been taken with a Canon 1000D (a camera that has a maximum of 1600 ISO, and most of them are shot on 800), with 18-35mm f/1.8 Sigma Art lens.

Don’t Forget To Move

I see many photographers anchoring themselves to one spot and staying there for the whole concert. That is a  huge mistake to make. Performers move around, they dance, they jump, they do stuff. Standing in one place will result in you missing most of the shots.

One rule of thumb that I have when shooting concerts, especially rockers and rappers (since they hug the microphone in a specific manner), is that I move to the opposite direction of the microphone. That way the microphone and the hand holding it isn’t covering the whole face of the performer, and it provides a good photographic element, in addition to the portrait and light.

Have Your Equipment Ready

Concerts are demanding on your equipment, especially in regards to battery life and storage. Be prepared for around 2,000 shots, sometimes more. That means that you’ll need to provide enough juice to the flash batteries (since they are the first ones to die) to get around 2,500 shots, then enough storage space in cards for that amount as well.

Keep in mind that while at the concert there is usually no way to charge batteries, dump SD/CF card content on a laptop or other things that you would be able to do in other types of settings. You’ll need to be prepared to shoot continuously for the whole concert. So, if you don’t already have them, get yourself some spare batteries and memory cards—you’ll definitely need them.

Isolate the Subject
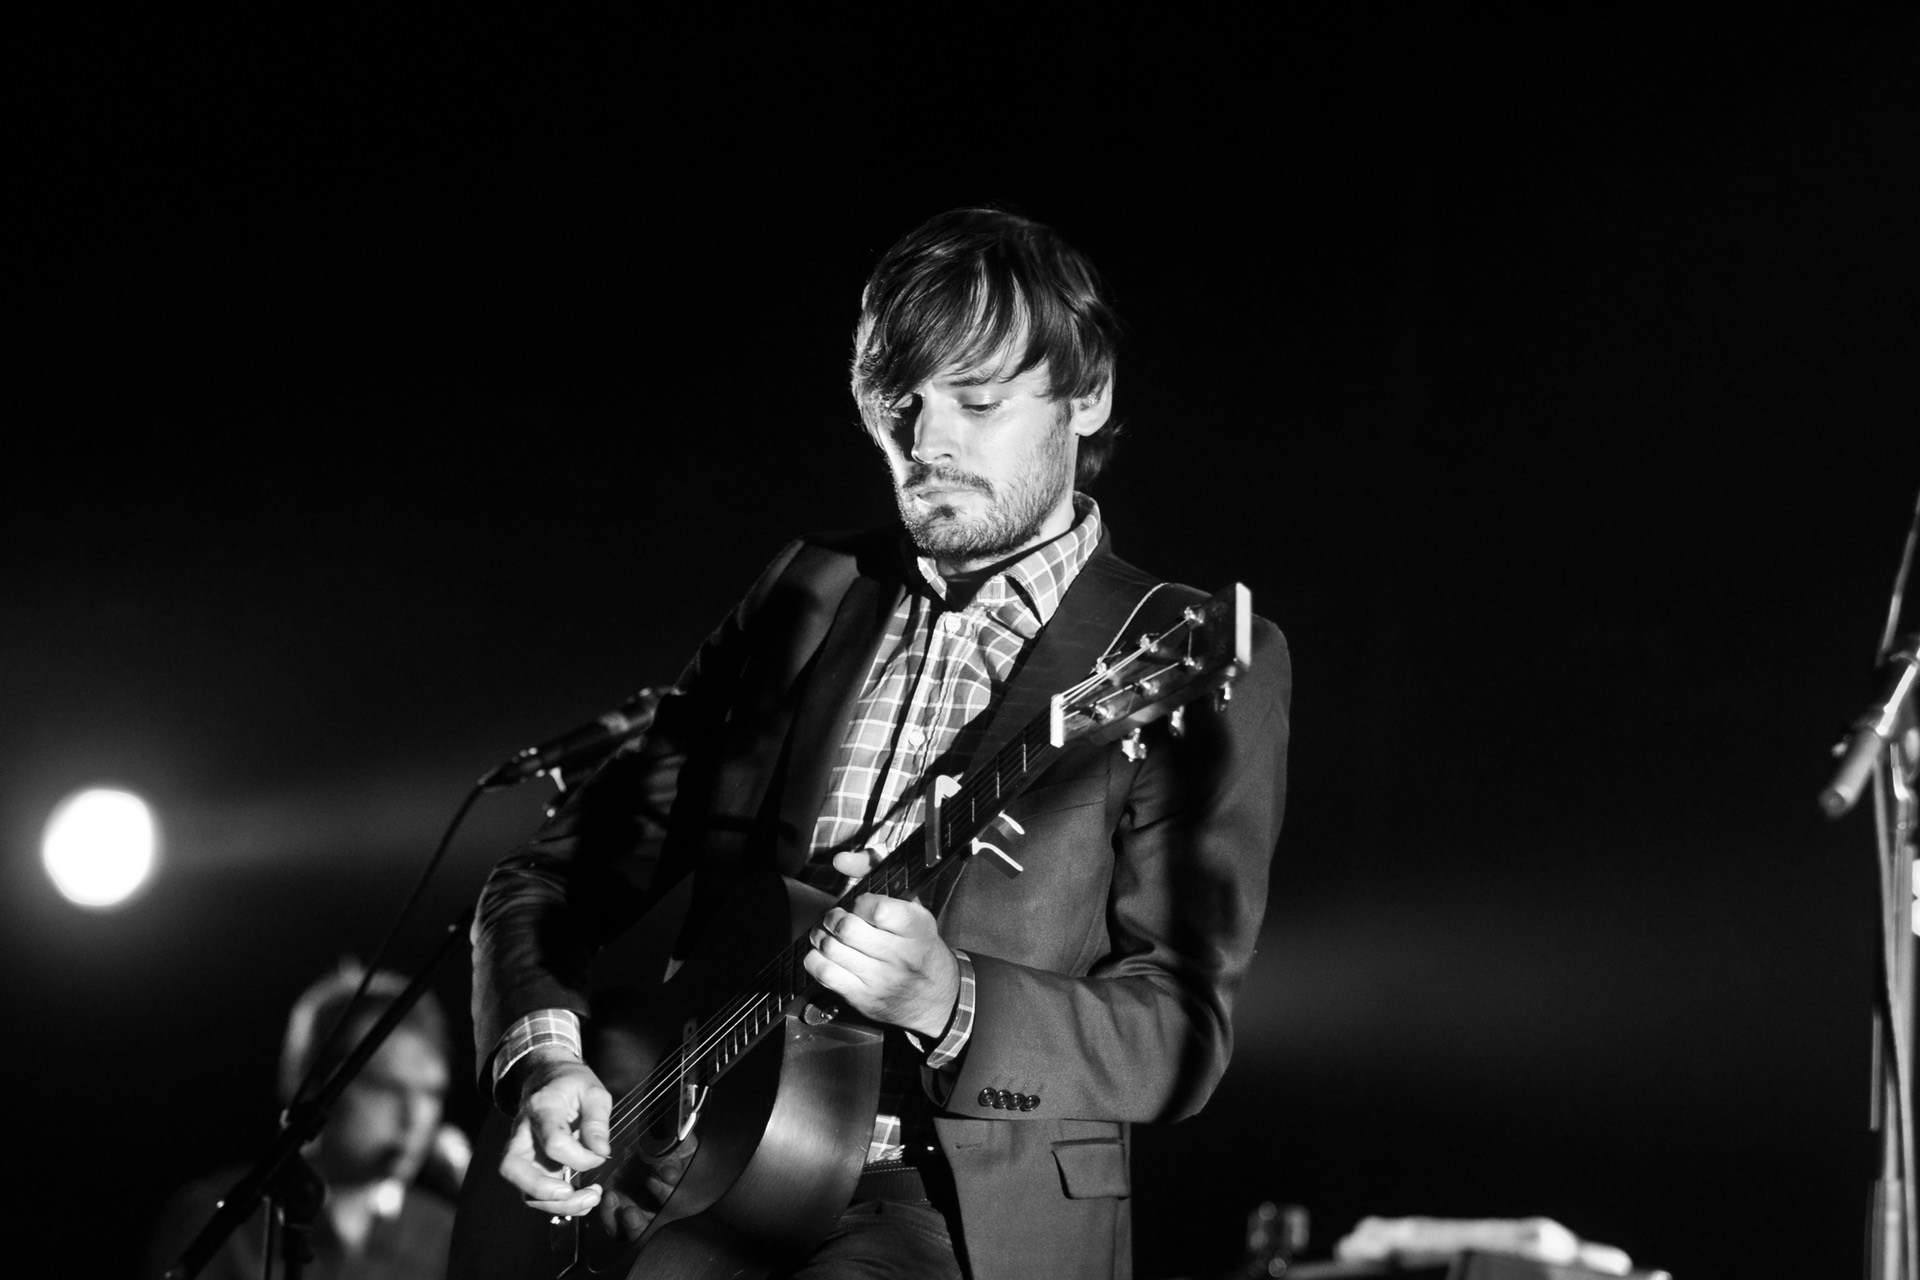
black and white

One of the best reason to get into live music photography is to see your favorite bands and artists in person! Needless to say, many of us are in love with artists like Taylor Swift, Bruno Mars, Justin Timberlake, Elton John, etc. Being a concert photographer means you’ll be coming home with amazing photos of these musical artists!

As seen in the photo above, one great composition in concert photography is using a long telephoto lens or zoom lens to isolate the band member. This separates the subject from all other surrounding elements and highlights the artist along with their instrument.

Pro Tip: if you generally buy general admission tickets, ARRIVE EARLY in order to get as close as possible to the subject. The limiting factor in concert photography is oftentimes not being close enough to the subject to isolate them when framing your photo.
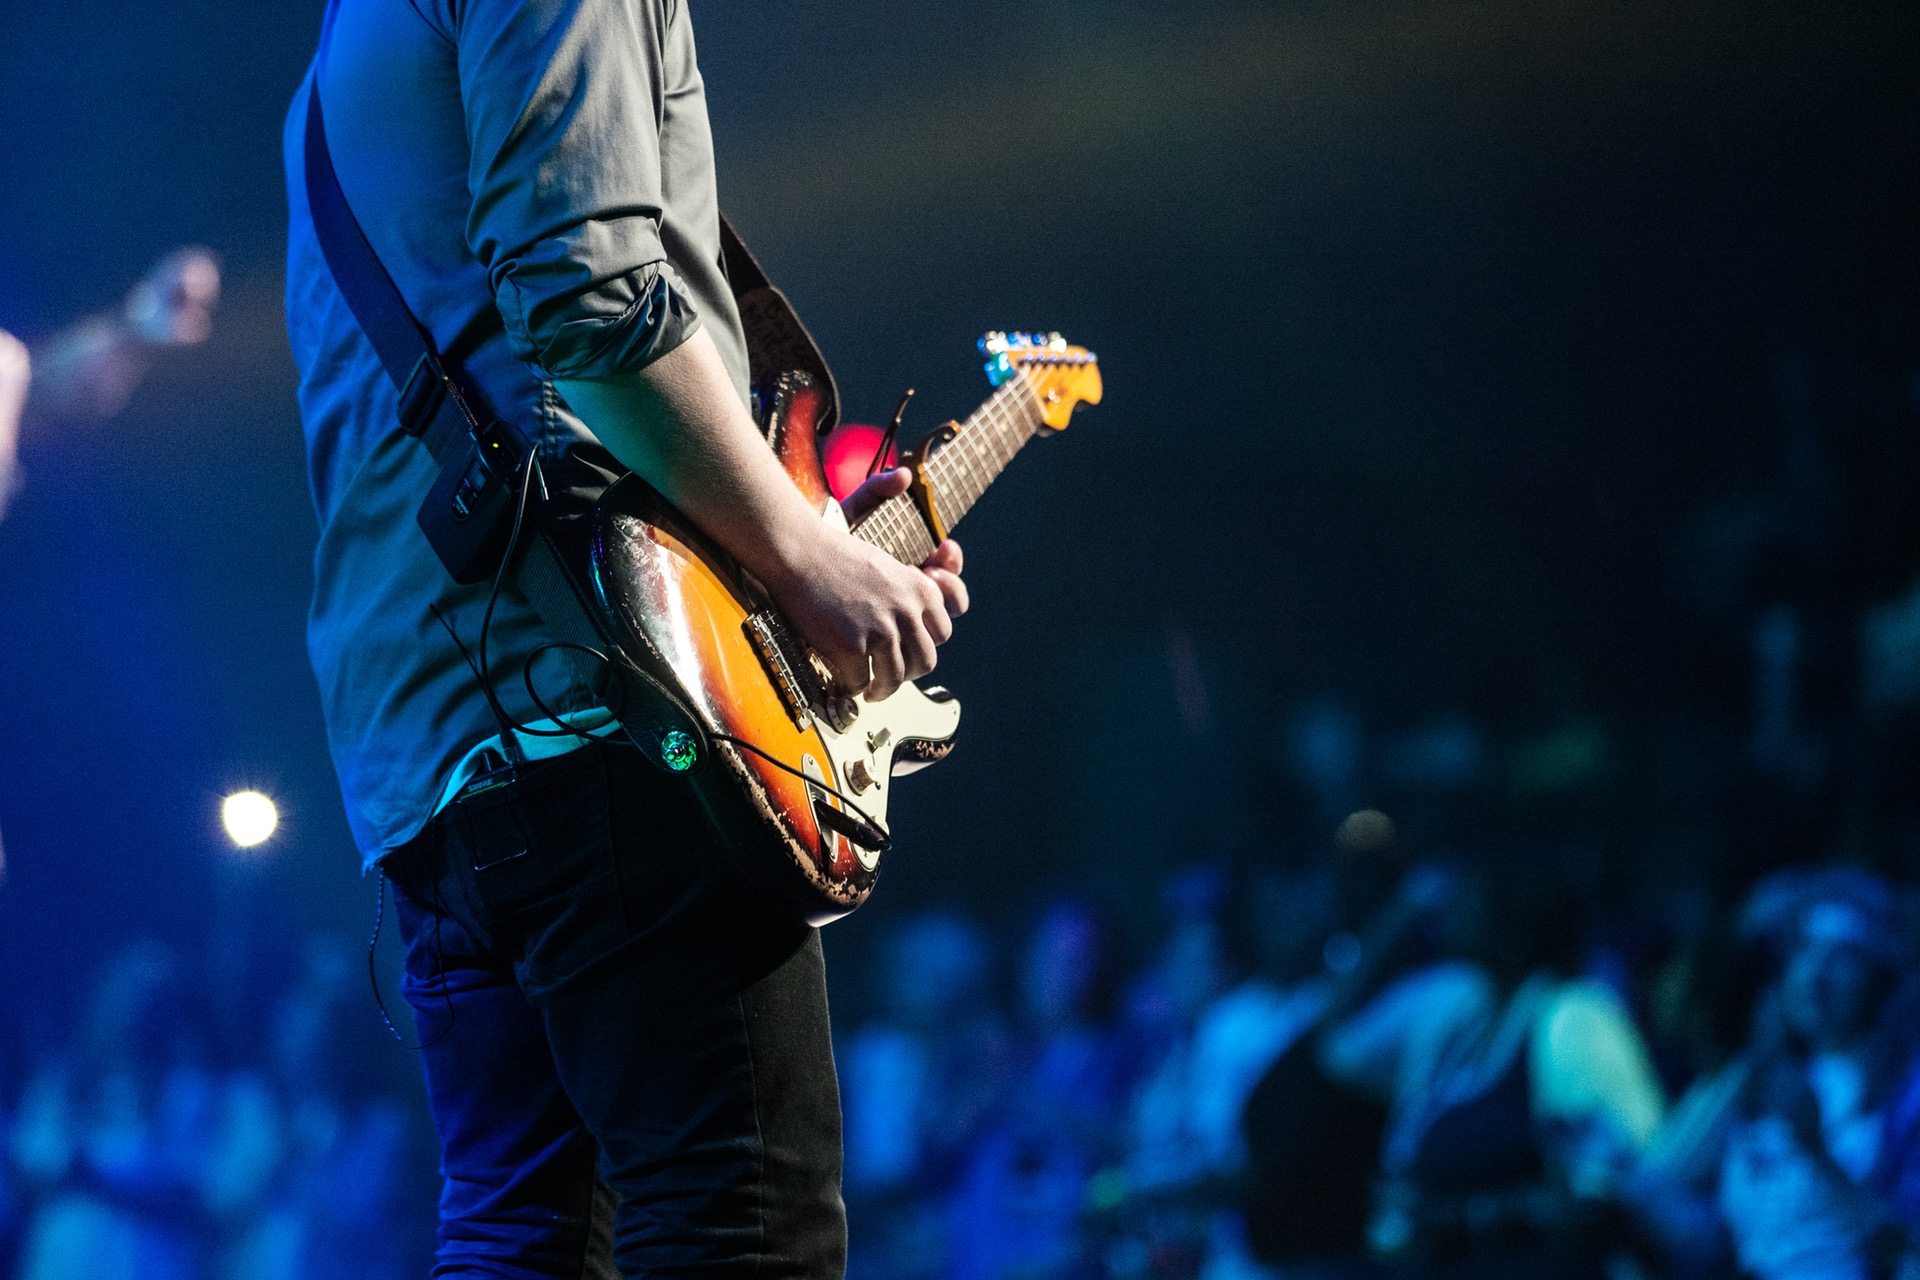
guitarist

Another option when isolating the subject is to choose an instrument to be the subject. An artist’s instrument is an extension of themselves. It’s how they to express themselves. Bonus points if you can include some background context in the photo—either the audience or other important elements of the stage.

Include Background Context
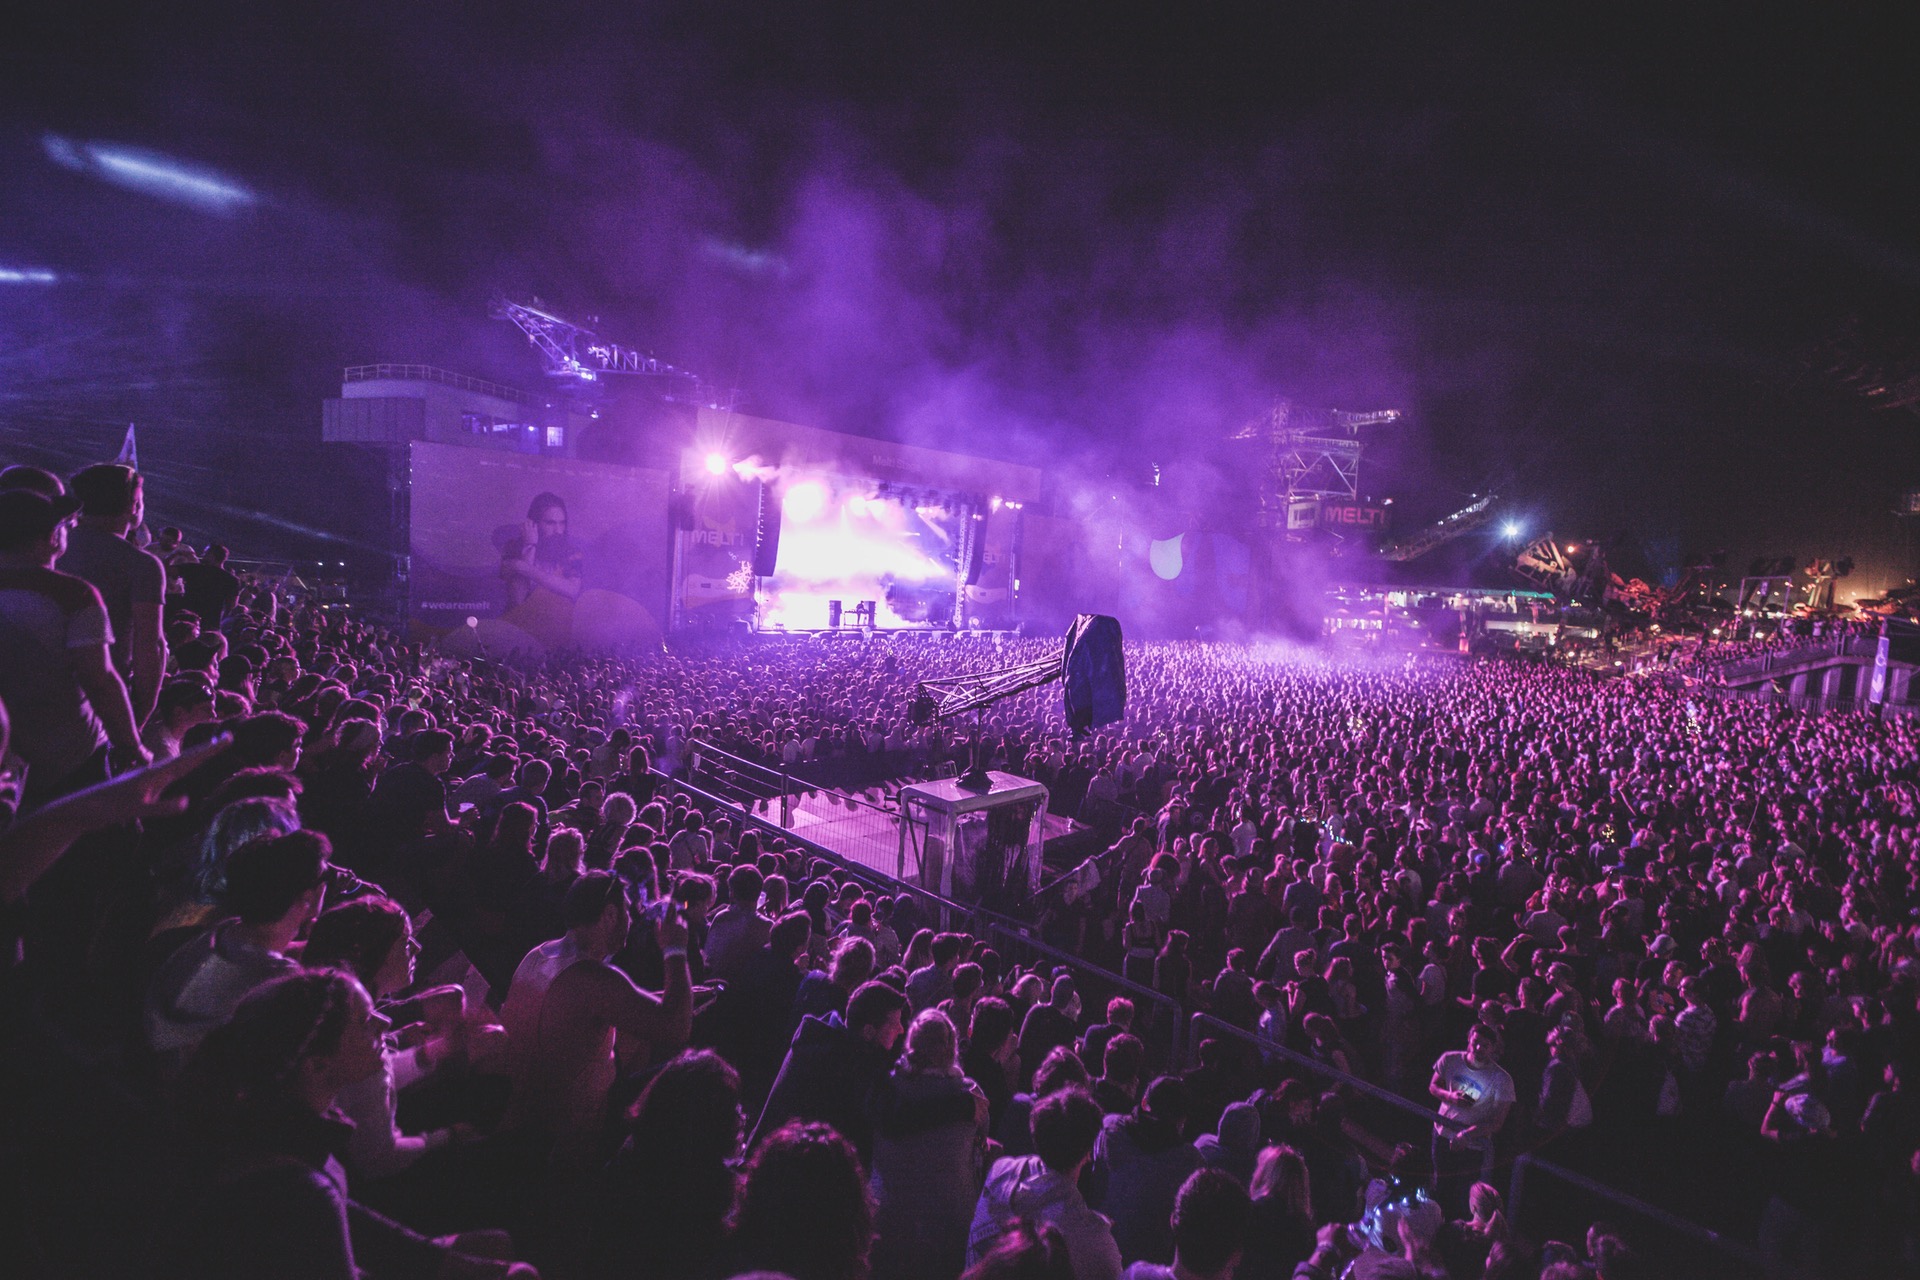
purple

On the other side of the spectrum, bringing a wide-angle lens in order to capture the audience along with the stage can also result in an awe-inspiring photo. By providing background context to the photo, the photographer helps the viewer understand how large the audience is and get a feel for the atmosphere.

Not to be overlooked is the significance of the lights, smoke, and other decorations that are part of the visual elements at a large concert.

Isolate the Subject & Include Background Context
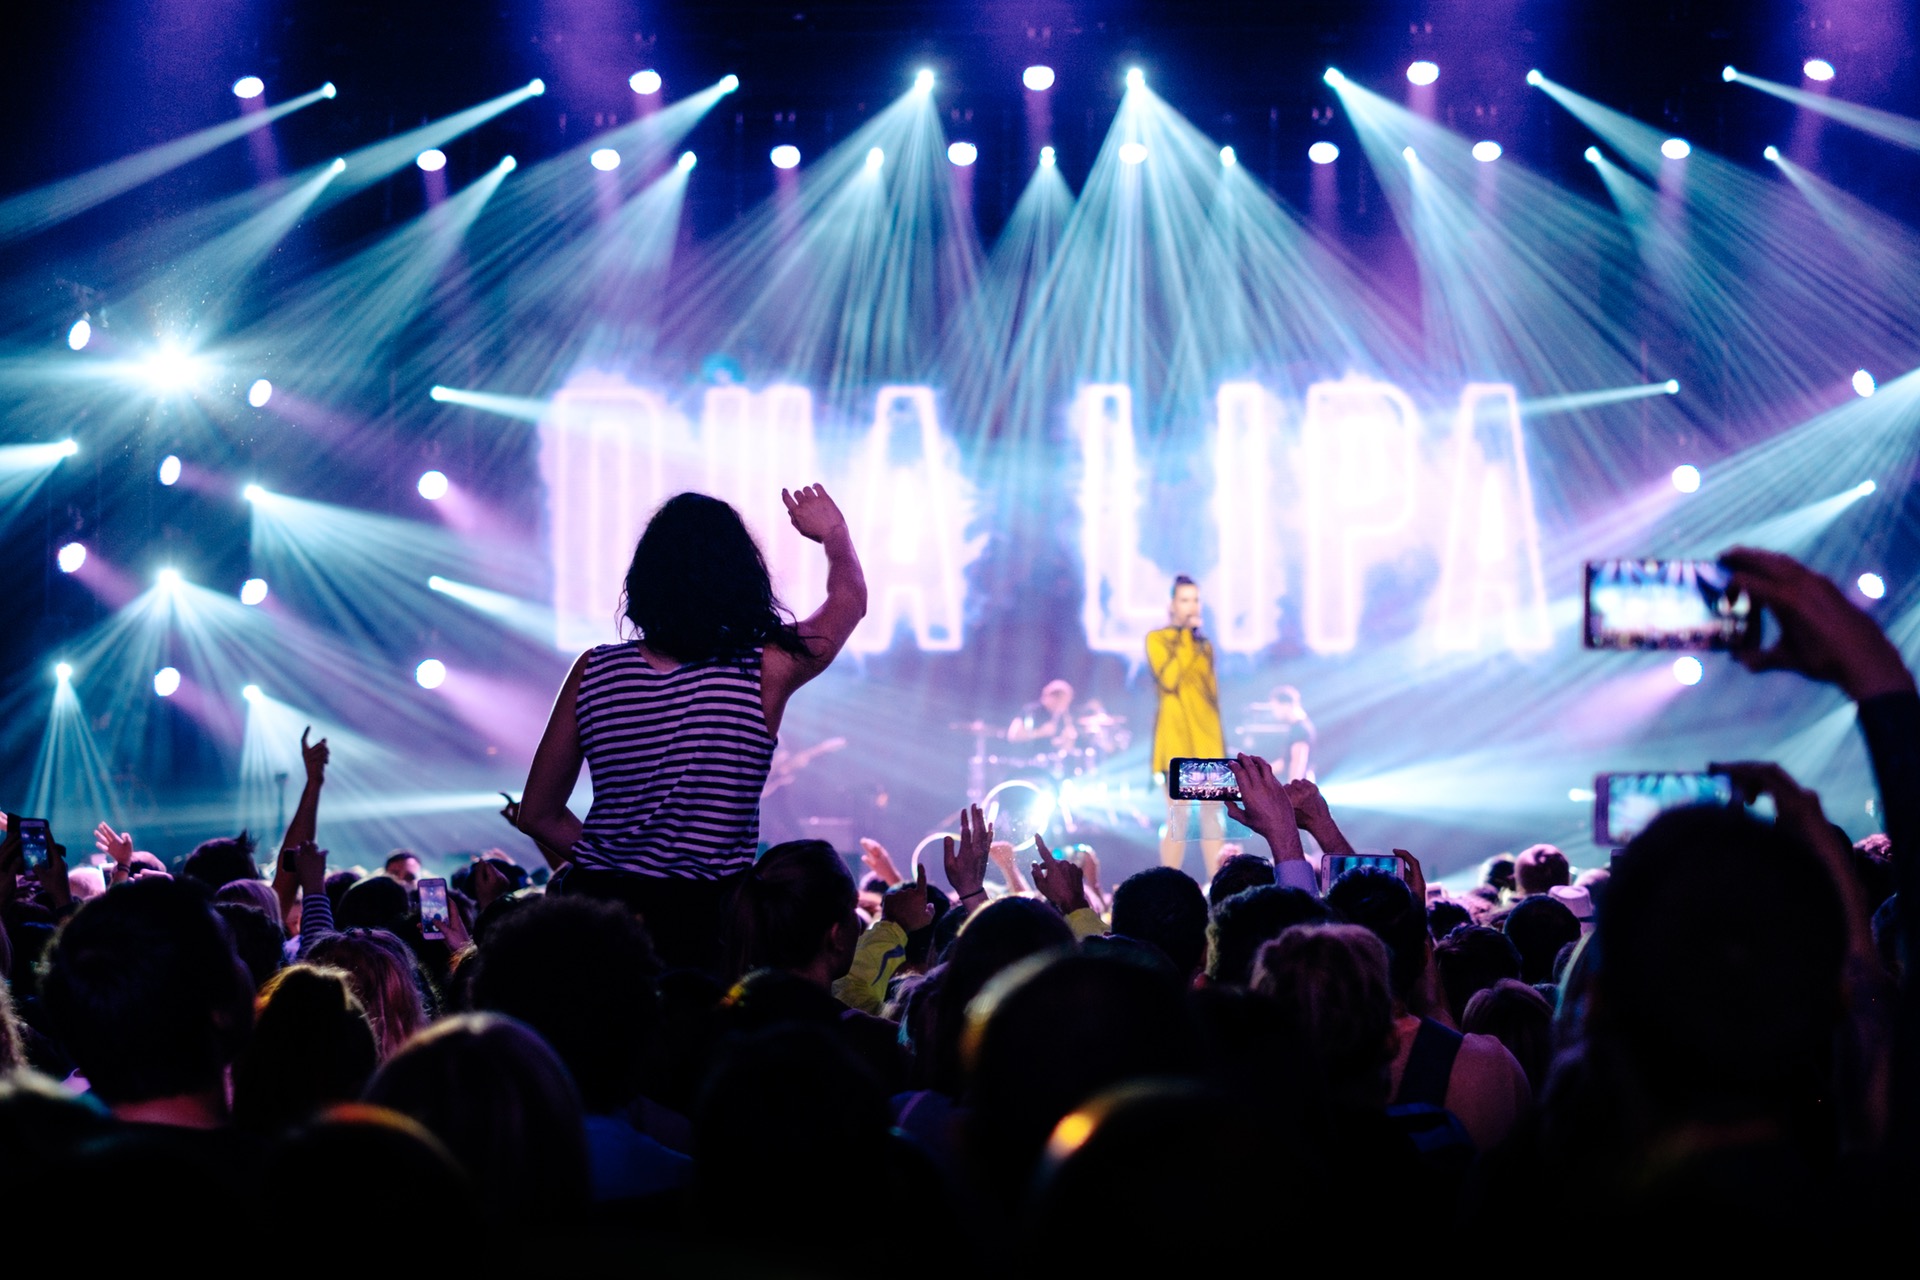
stage lights

A mixture of the two compositional techniques above, this photo has two main subjects. The crowd-surfing girl on the left, along with the musical artist on the right. By including the crowd-surfer, this helps guide the viewer to look between her and the main musical artist on stage. The viewer’s eyes do not have to roam to through the audience because there is someone that already stands out from the rest.

Take a Picture of the Captivated Audience
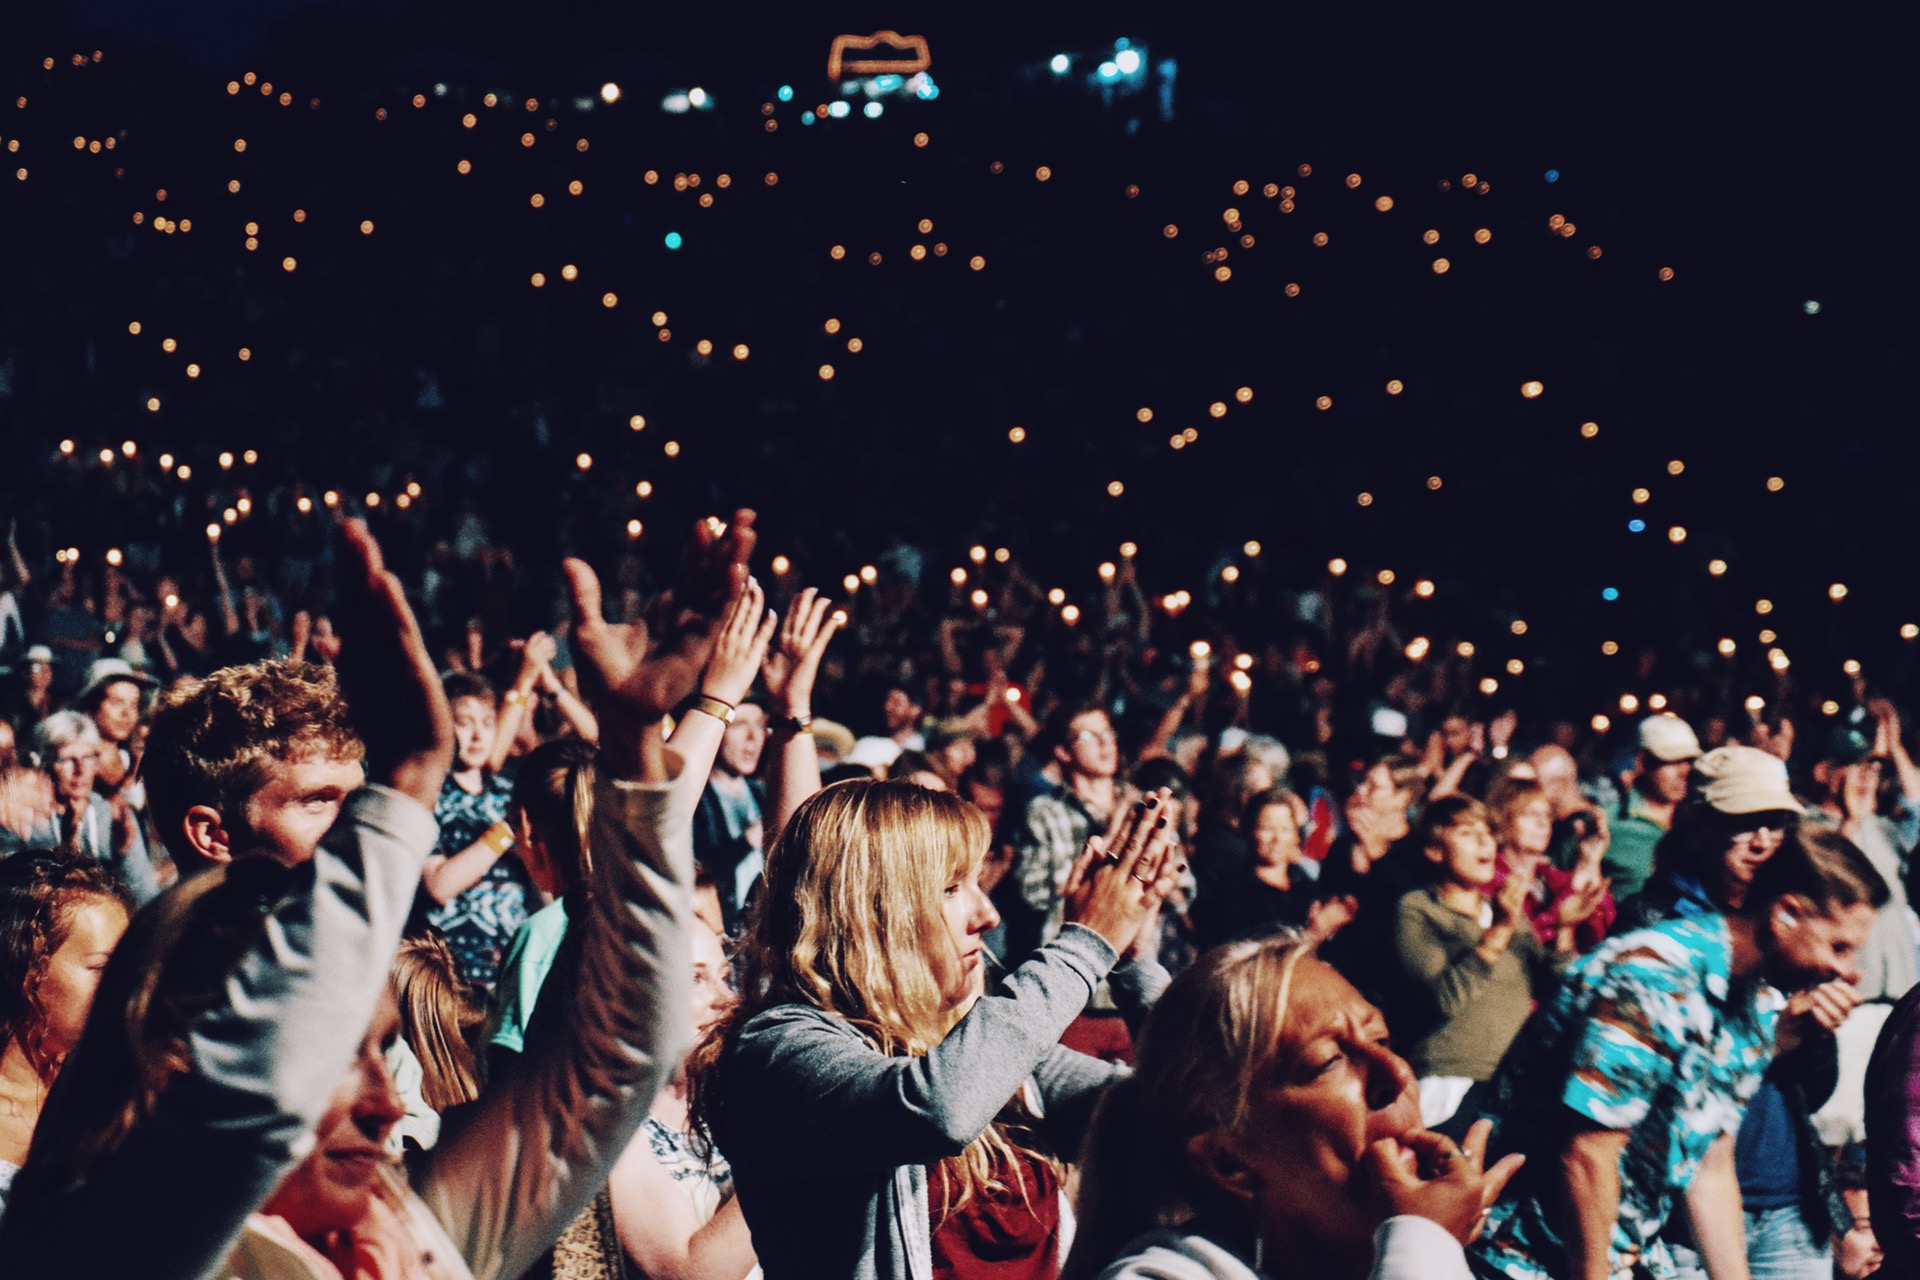
crowd

Being at a concert is a magical feeling. This is especially true when it is close to the climax of the event, as the musical artists ramp up toward their biggest hits and popular songs. During this special period, it’s a good idea to turn around and take a picture of the audience behind you.

A great signal that you should turn around is when the artist(s) ask the audience to clap along with them, or when the audience is waving their phones in harmony with the live music.

Take Lots of Pictures
musician

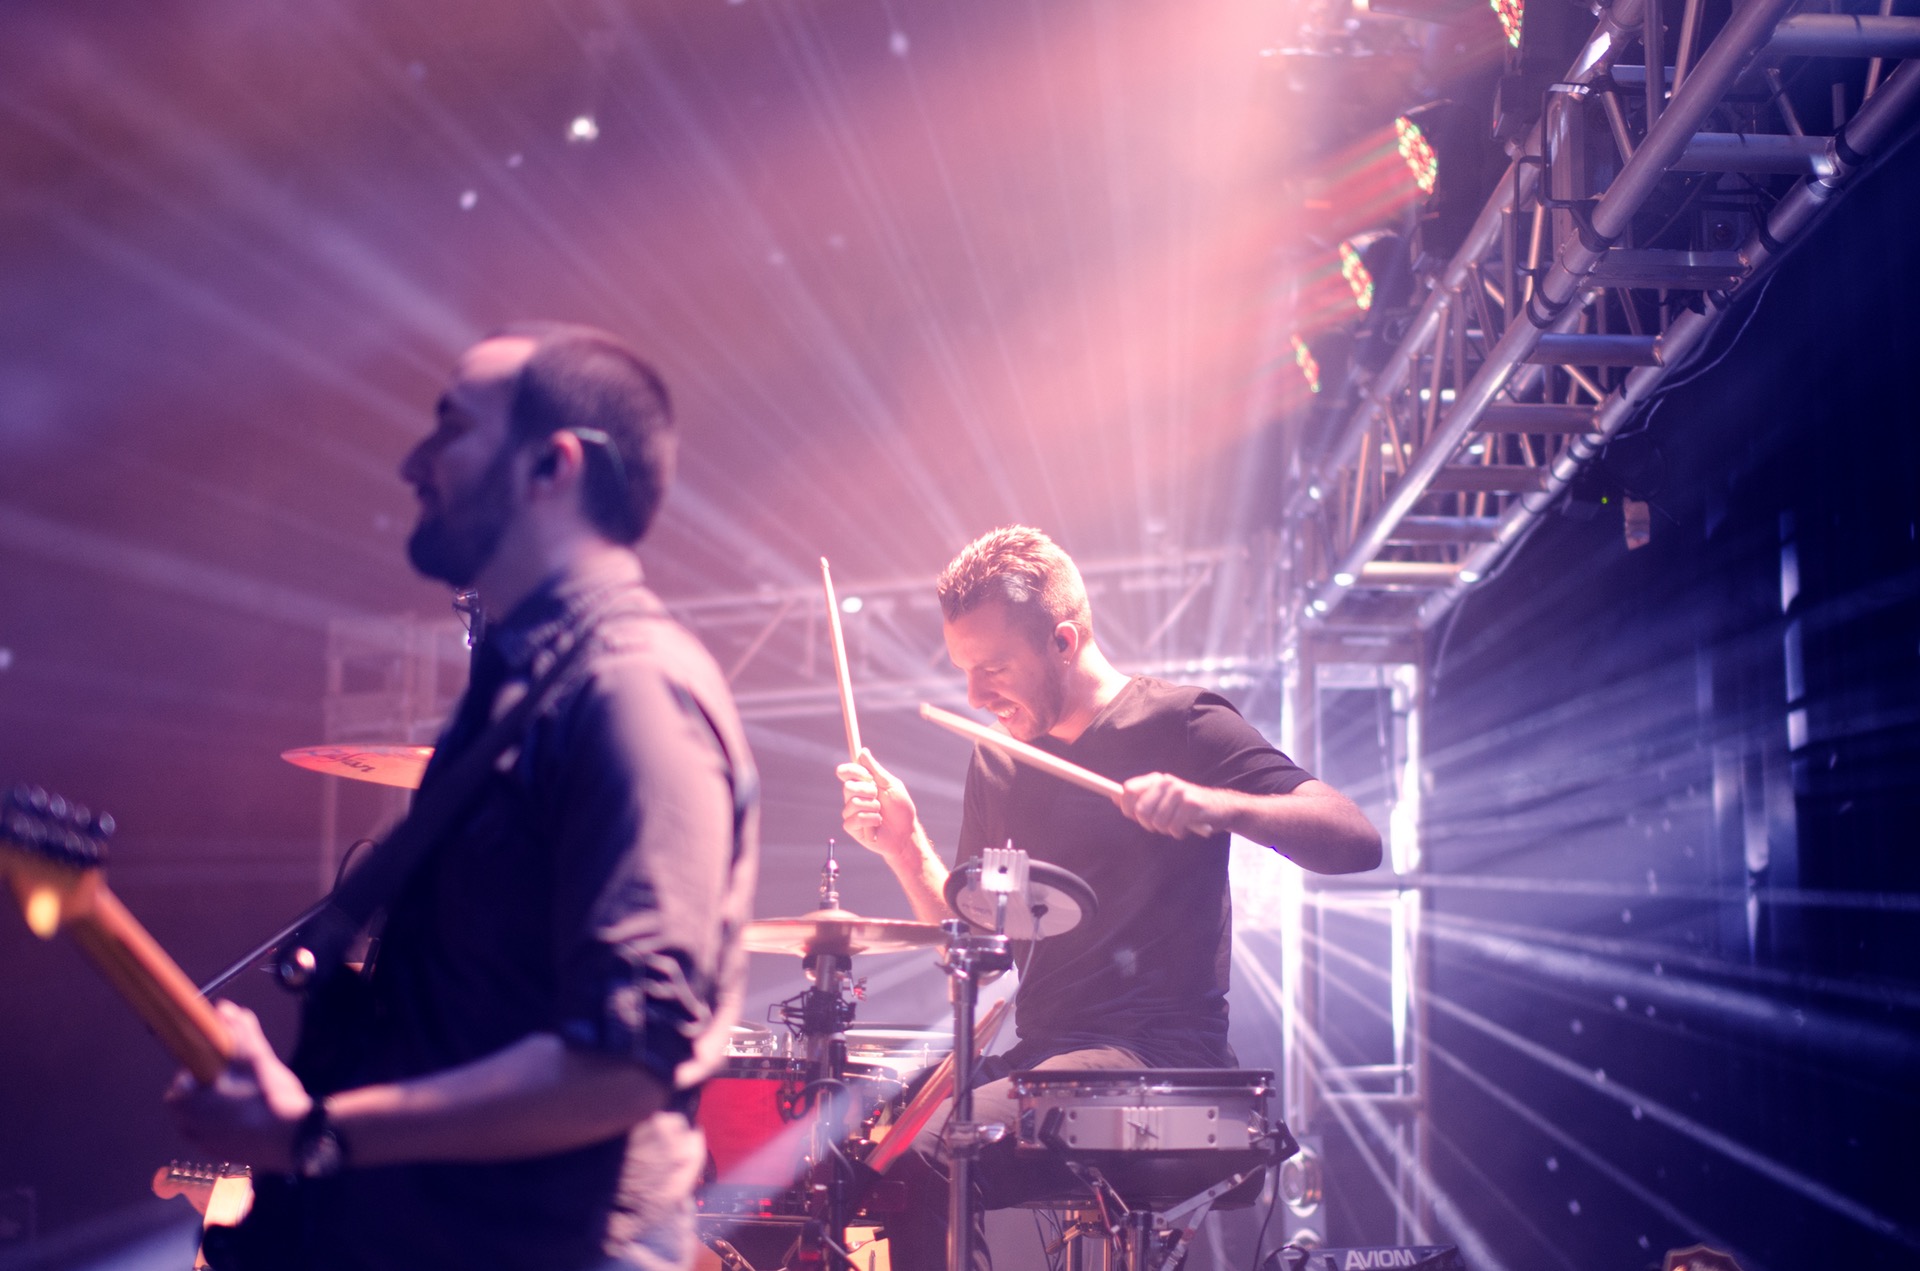
Snap, snap, and snap away! Concert photography has a tough learning curve, especially for beginner photographers. Understanding the low light condition, moving subjects, a limited time to take pictures, and constantly changing stage lighting are all very tough for any photographer to deal with. The result is that the number of “keepers” from any music photography session will likely be lower than what you are used to.

But don’t give up! The “keepers” that you do end up with are one-of-a-kind, and usually very unique. Timing plays a big role in whether you capture an image. This means that the more photos you take, the more “keepers” you’ll end up with.
cell phone

Don’t Be Afraid to Use Your Phone

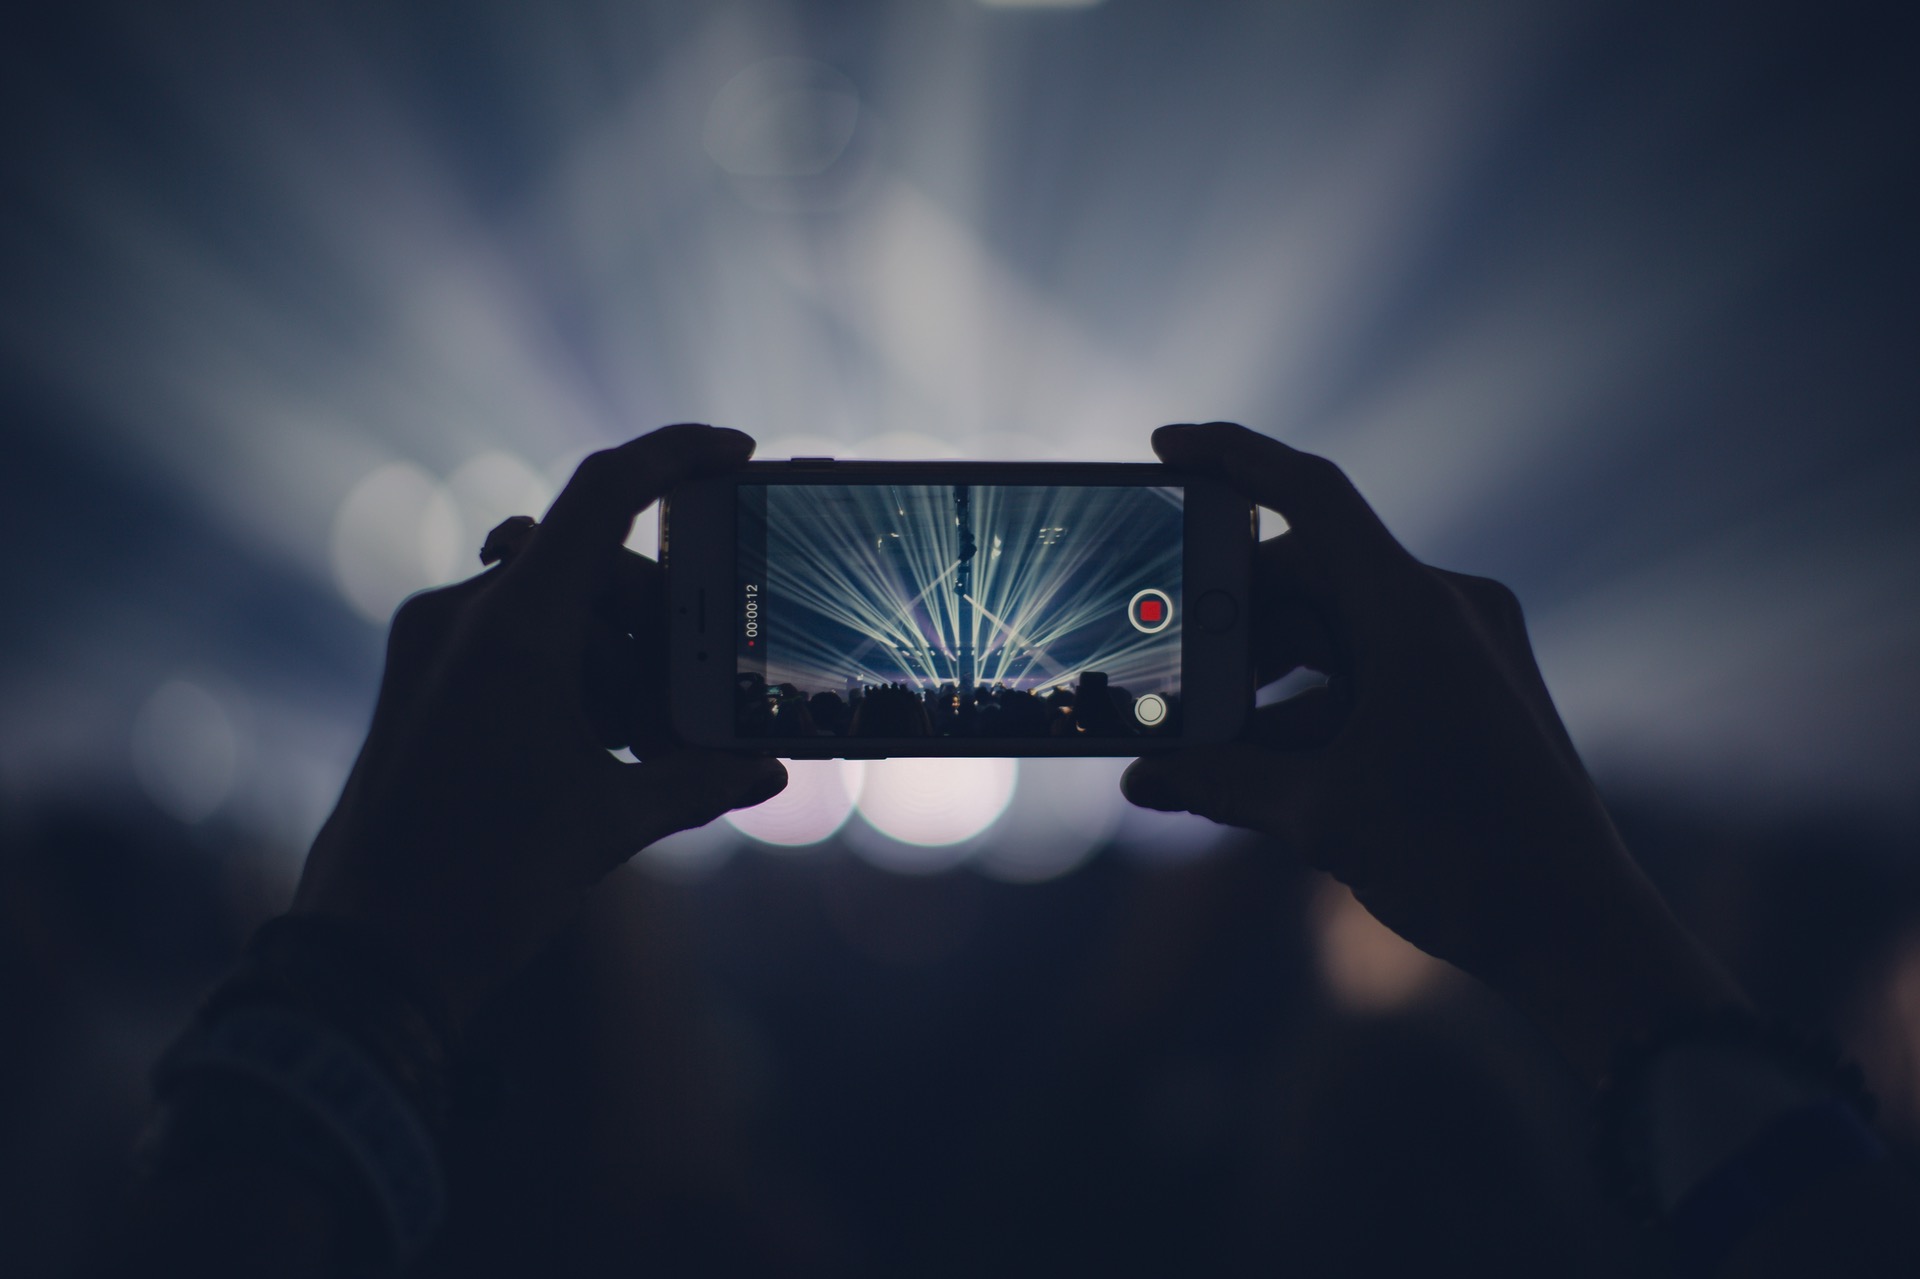
Remember that you do not have to have an SLR in order to take pictures! If you have a decent camera lens on your phone, that can also be a great way to document your experience at a concert. The concert venue may request that you do not bring professional cameras, but they will usually allow cell phones!

How to Edit Concert Photography in Adobe Lightroom

We all know the challenges of concert photography: the low light, the fast movement, the crowd, your distance from the stage—and so much more. Just getting the camera settings right to get a properly exposed, focused image is challenging enough, but once you have that, what do you do? Is your image washed in blue light? Or worse, the dreaded red light?

Getting the image is only the first part of nailing killer concert photography. Now you need to edit the image and balance the colors to your liking.

Below are some great steps for editing concert photographs in Adobe Lightroom. A couple requirements: the image must be in the RAW format, and the color wash needs to be somewhat minimal. In essence, if the red wash is too extreme, you can’t do much. The white balance dropper just won’t be able to find the appropriate blues and greens.

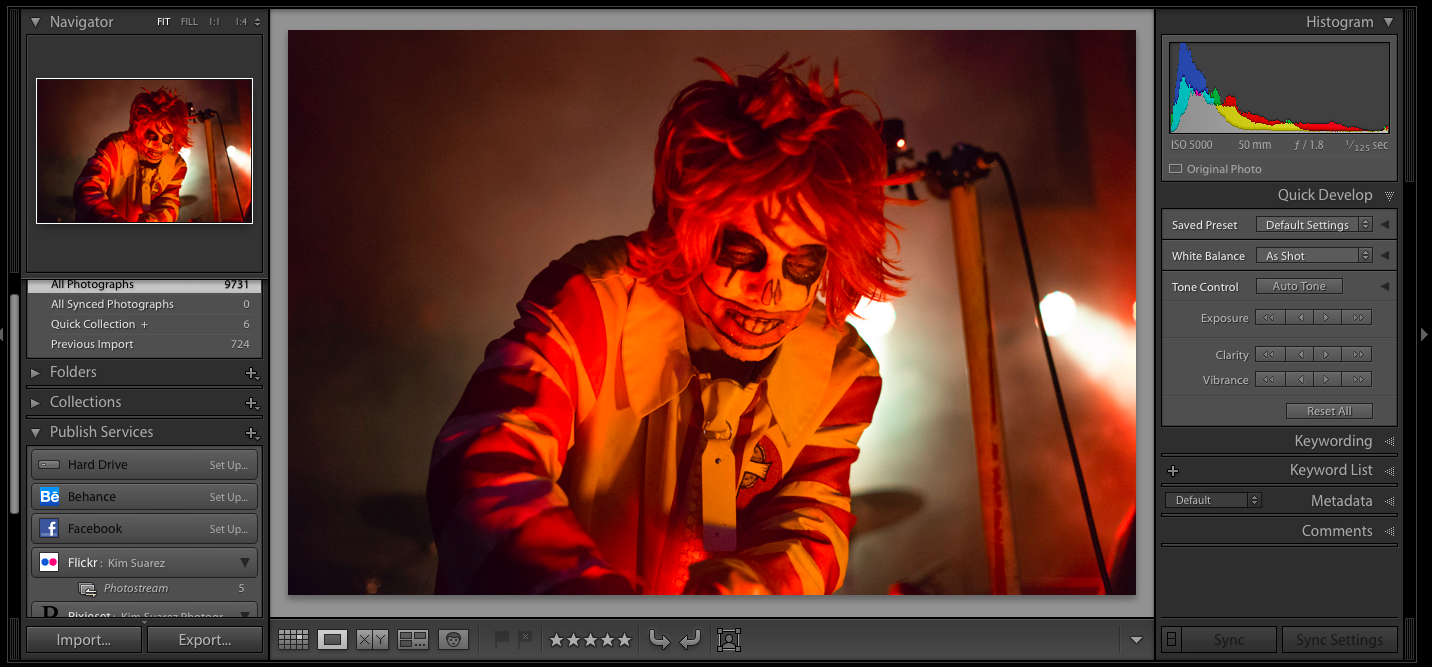
For this tutorial, we’ll be using this concert photo as our starting image:

Screen Shot 2016-07-21 at 10.18.46 PM

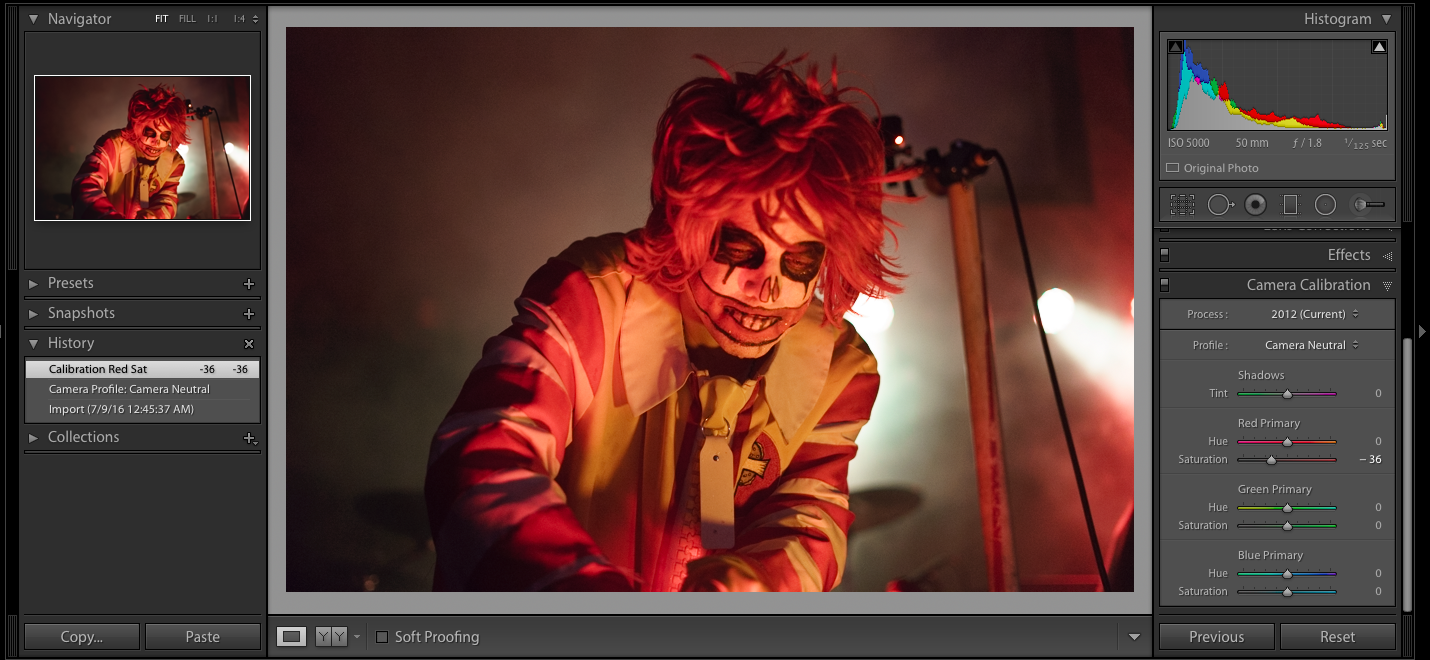
Camera Calibration

When you bring your RAW image into Adobe Lightroom, you’ll want to first adjust the camera calibration. Play around with settings, because it will depend on the image. From experience, I’ve found camera neutral works best for me. Play with the sliders once you’ve found an option that works.

You may also want to adjust lens corrections here as well. Go to the lens corrections tabs and check the first two boxes in the basic subgroup. These are enable profile corrections and remove chromatic aberration. This will fix any lens distortion you may experience. I recommend always checking them because it can be surprising how much of a difference this makes.

Screen Shot 2016-07-21 at 10.19.11 PM

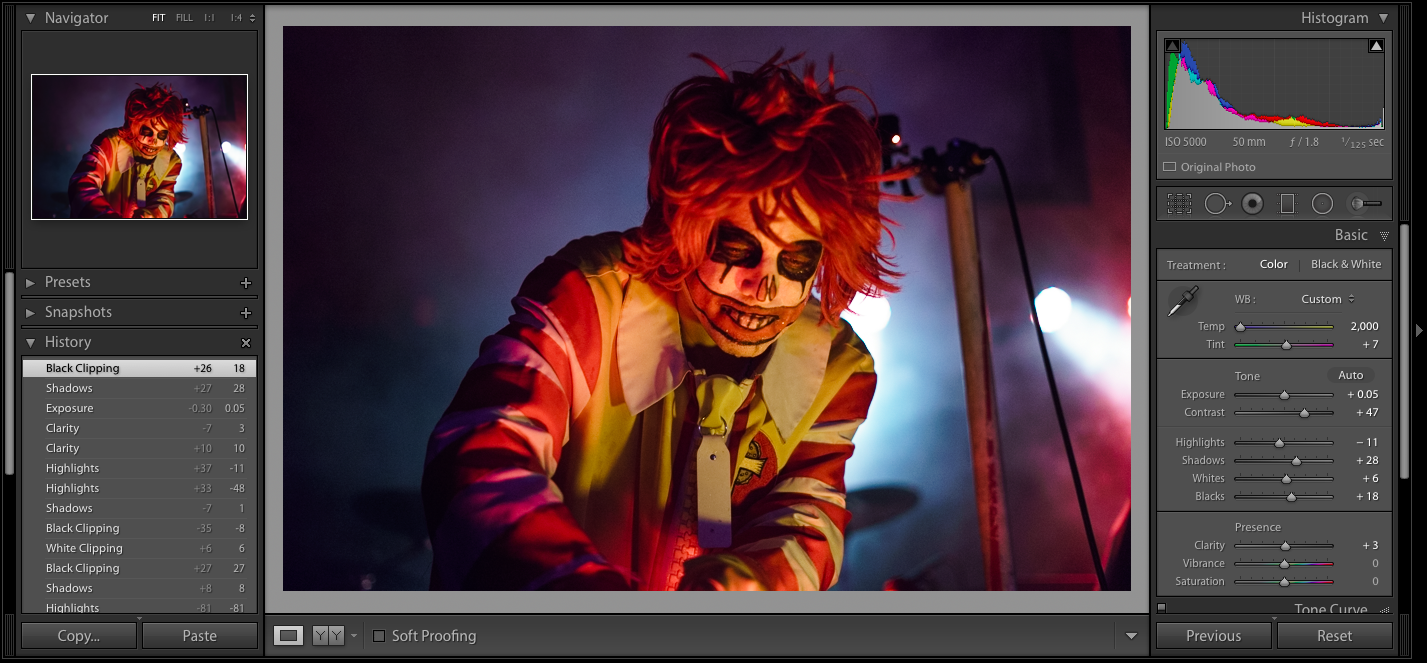
White Balance

Next, head to the basics panel and find the white balance dropper tool. Click onto an area of the photo that should be white. This can be the eyes, teeth, clothing, etc. Here is where you’ll likely be able to tell if this option will work for your image. Sometimes it just won’t. But if it does, it is amazing how much the tones will balance out. You can also play with temp and tint, but I usually leave them as is.

Screen Shot 2016-07-21 at 10.19.25 PM

Basic Settings

Here is where I’ll do my basic setting adjustments. This would be exposure, contrast, whites and blacks. I usually find my images tend to be on the darker, more contrasted side, so I’ll adjust to that style.

In this image, I wanted to convey a dark, moody feeling because that is the band’s image. The band being the McDonald’s-themed Black Sabbath cover band, Mac Sabbath. If you haven’t heard of them (as I hadn’t until this night), check them out or go to a show. They are amazing performers, and you can’t get a bad photo of them.

Back to settings. Play around and see what works for the image and your style. It’s important to maintain a style when editing photographs. You want people to immediately recognize that they are your photos, if possible.

Screen Shot 2016-07-21 at 10.21.20 PM

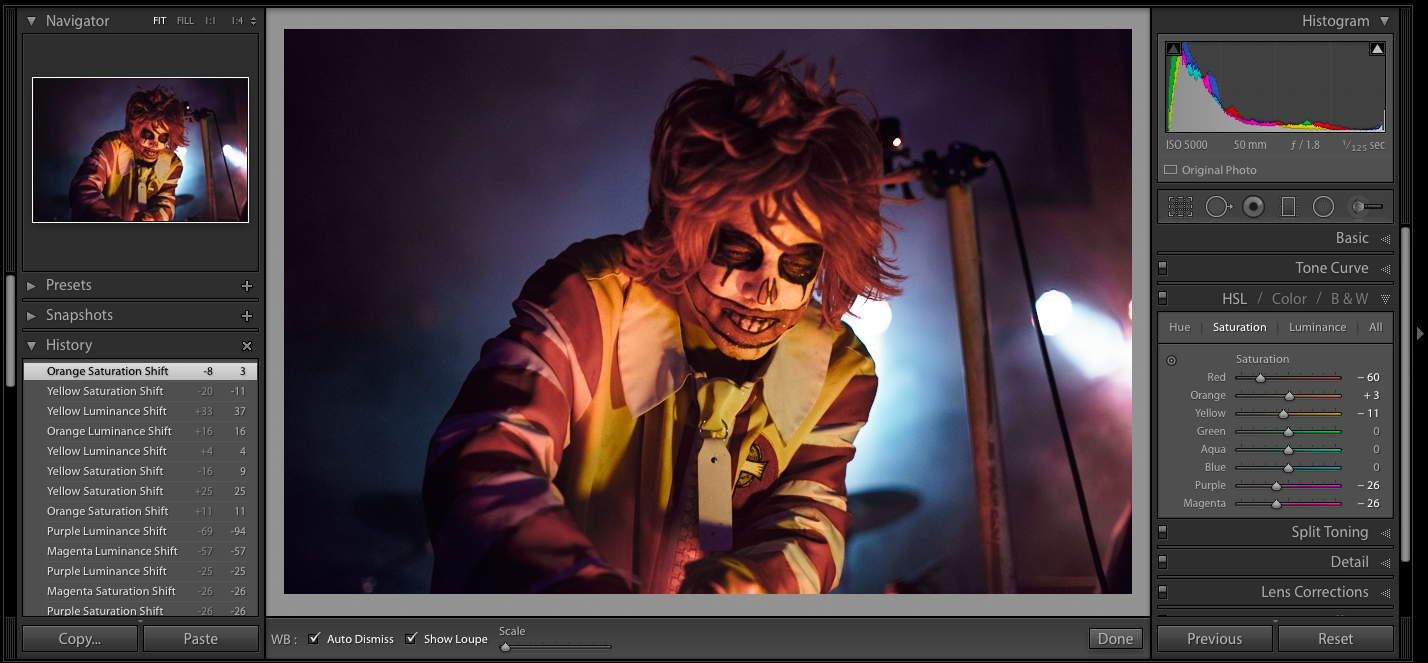
Color Saturation

If you still find lingering color tones you don’t like, go to the HSL tab. You’ll want to desaturate any colors you don’t want and then adjust luminance. See what I’ve done below and played around with the sliders. There is a chance you may not need this step, but experiment and see how your image can change.

Screen Shot 2016-07-21 at 10.28.51 PM

If you want to salvage less-than-ideal concert photographs, you may need to convert to black and white. Some might consider this a cop out method, but if the image is strong and well captured, it is worth the edit. Experiment with your settings and see what works for your image. To me, converting to black and white is a no-brainer, but there is no formula here for perfect editing. Each image is different, and should be representative of your style—not someone else’s opinion (unless it is a respected music photographer offering valid advice).

A final word on editing concert photography—just go with the flow. If there is an extreme red or blue wash, but otherwise the photo is strong, leave it as is. Adjust what you can, but this type of lighting is somewhat expected. Also, most venues are good about flowing through different stage lighting during shows. So, you’ll likely see red, blue, neutral, and other types of lighting. Because you are using burst mode when shooting concerts, you’ll have tons of options at the end of the night. You may not even need any of those images shot during the red lighting.

Concert Photography is a Worthwhile Endeavor for Any Live Music Lover

Concerts are challenging, since they are a type of scenario where you don’t have any control over the scene, you have limited  angles, and you’ll need to shoot more than a thousand photos, just to have 10-20 keepers. It is an utterly dynamic scenario where there is no “one setting does it all” solution. You’ll have to continuously adapt to the changing lights and formations.

However, concerts are the perfect place to practice photography too. They put every photographer to the test, pushing them to their absolute limits. We hope this tutorial gave you a few ideas on how to improve your concert photography skills, and we can’t wait to see what pictures you capture!

Hahnel PROCUBE2 – Great Addition To Any Photographers Kit Bag

Multiple Cameras Plus Multiple Batteries Means Tripping Over Multiple Battery Chargers!

As a Freelance Photographer, I regularly venture outside during the early hours of the morning in case of those lovely sunrise colors. And as I am often away on location for the day,  I am rarely near a power source. This can be quite problematic for me. I have several cameras each with several spare batteries that I constantly need power in. Long exposures, time-lapse, recording video and using the Live View functions on my cameras can drain the batteries rather quickly. Especially so during the colder months in winter.  Because of this, before heading away on location, I am always trying to ensure that I have charged all of my batteries sufficiently. As there is nothing worse than arriving on location only to discover that you have flat or low batteries! So to set the scene correctly in your mind’s eye, when I am heading out shooting it is normally dark, way too early, I have not had enough sleep and so I often find myself tripping over the complex array of battery chargers that lay on my office floor. Thankfully the Hahnel PROCUBE2 resolves this problem very nicely for me.

Hahnel PROCUBE2 Product

Hahnel PROCUBE2 – Providing The Power To Charge Your Batteries On The Go

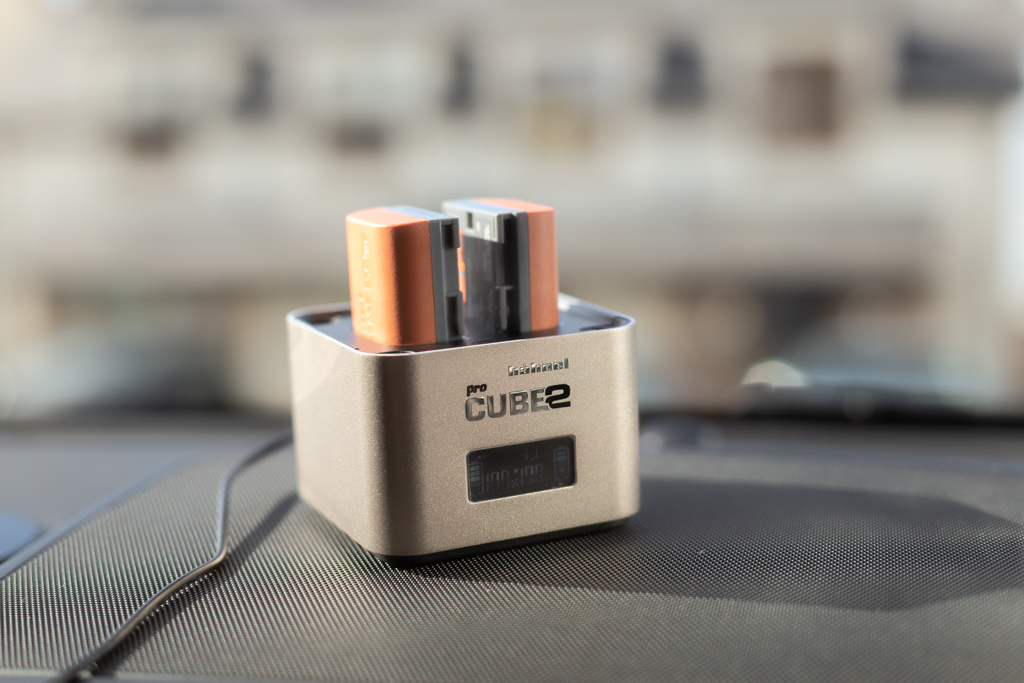
The Hahnel PROCUBE2 caters for charging two batteries while at home plus it also comes with car charging abilities. The team at Hahnel were nice enough to provide a 12v charger within the PROCUBE2 box. Now, I know what you are thinking. What is so great about a car charger you ask? Well, a car charger in and of itself is nothing to write home about. However, this lovely unit allows for the charging of two batteries at a time. And not just that. The Hahnel PROCUBE2 also comes with additional charging trays for charging different battery models for a given camera vendor.

For example, the Hahnel PROCUBE2 for Canon provides trays for the main LP-E6 battery model as well as trays for the LP-E8 and LP-E17 models. As an added bonus, it also has a tray for charging four Ni-MH AA batteries and even a USB port for charging your phone! The Canon model has proved very useful for me as I have several LP-E6 and LP-E17 batteries. The LP-E6 battery model is used in most of the Canon Full Frame and even Semi-Pro/Higher-End Enthusiast camera models, such as the Canon 6D, 5DII, 5DIII, 7D, 7DII, etc.. The LP-E17 is used in the Canon M6, M3, M5 mirrorless bodies.

Hahnel PROCUBE2 Product

The Different Flavors Of The Hahnel PROCUBE2

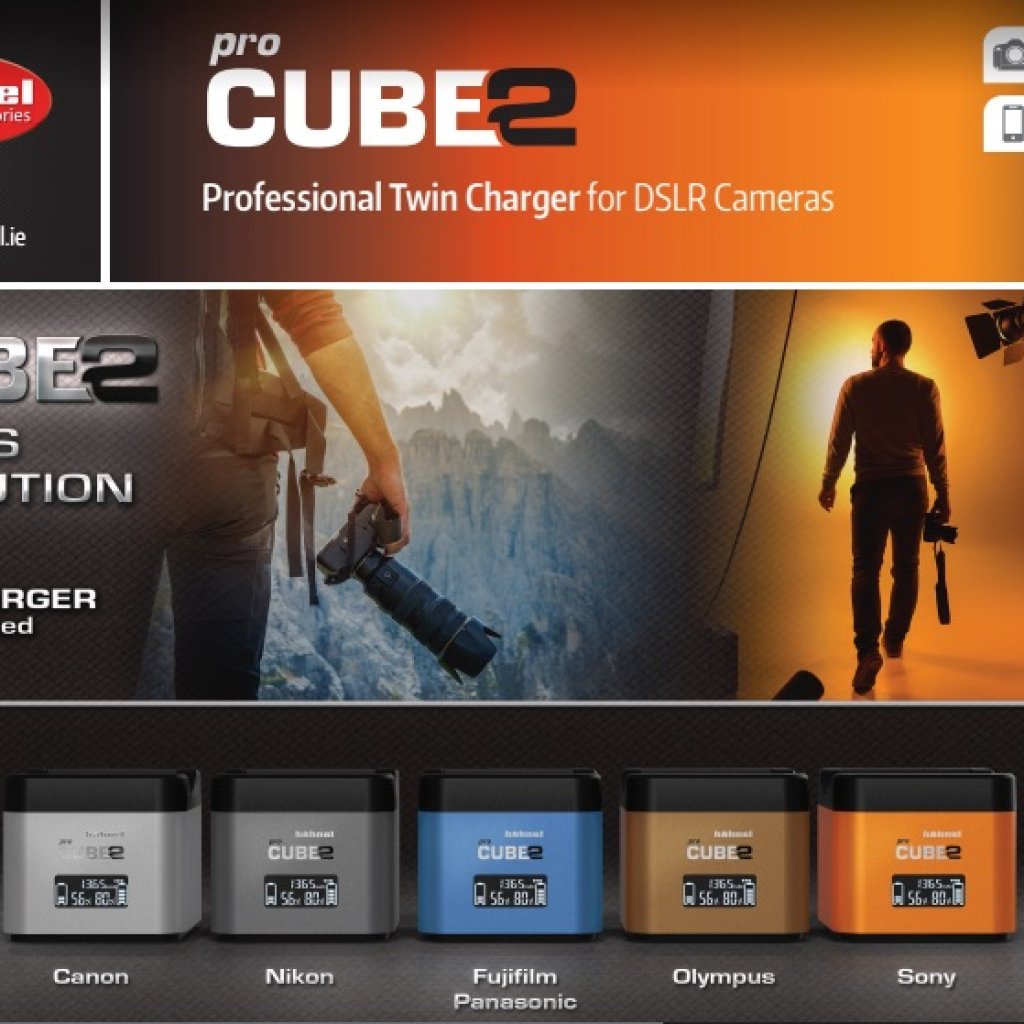
Like ice cream, the Hahnel PROCUBE2 comes in a variety of different flavors. There are five different models, each with its own unique color. The Canon model is a Light Grey and the Nikon version is a Dark Grey. The Sony model is Orange. The Olympus is Brown and the Fujifilm/Panasonic version sports a Blue color scheme.

Screenshot of Hahnel PROCUBE2 Product Brochure

The following list outlines which batteries are supported by each version:

  • (Canon) Hahnel PROCUBE2 = LP-E6 | LP-E8 | LP-E17
  • (Nikon) Hahnel PROCUBE2 = EN-EL14 | EN-EL15
  • (Panasonic/Fujifilm) Hahnel PROCUBE2 = DMW-PLC12 | BLF19 | BLG10 & NP-W126
  • (Olympus) Hahnel PROCUBE2 = BLN-1 | BLS-5 | BLH-1
  • (Sony) Hahnel PROCUBE2 = NP-BX1 | NP-FW50 | NP-FZ100

Seeing as I just recently got a second hand Sony A7, with eats quickly through the 6 batteries that I have for it, I think the Sony version will be added to my arsenal in the not too distant future.

My First Impressions Of The Hahnel PROCUBE2

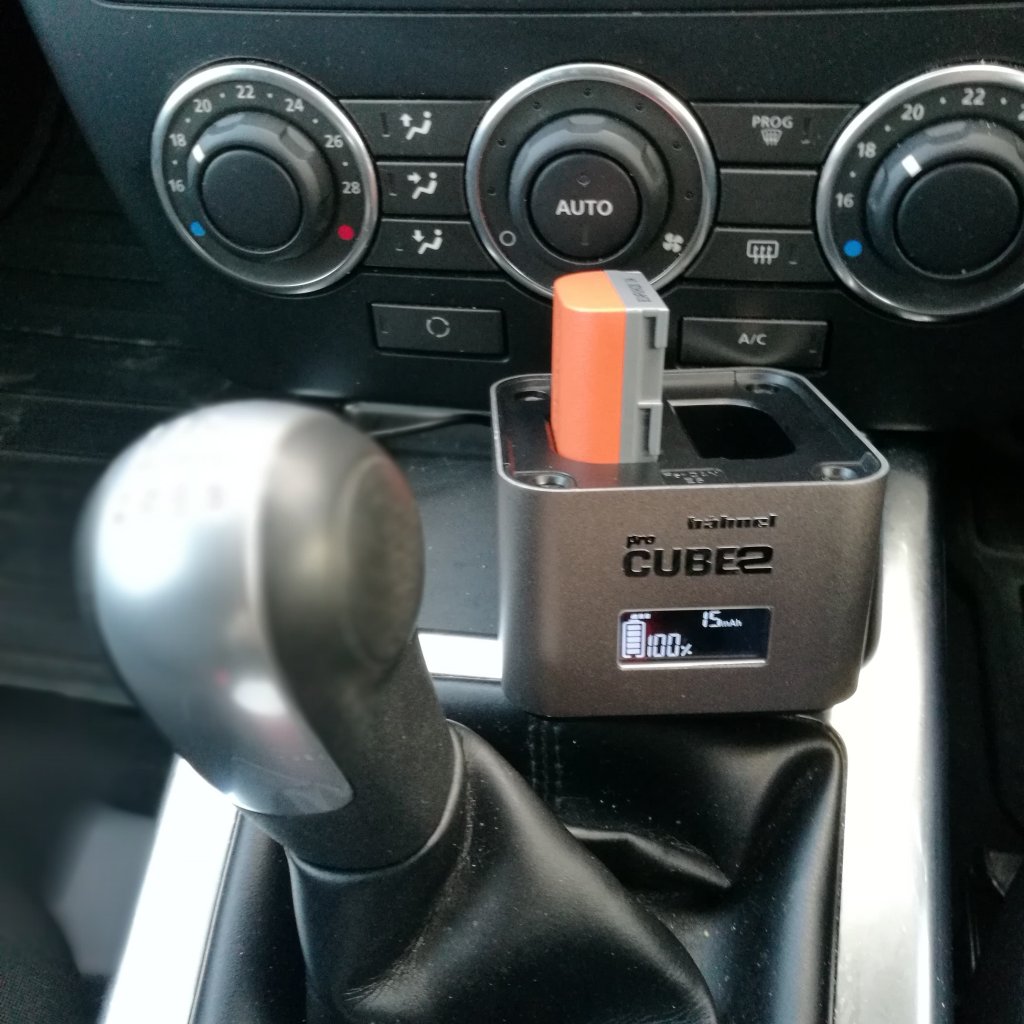
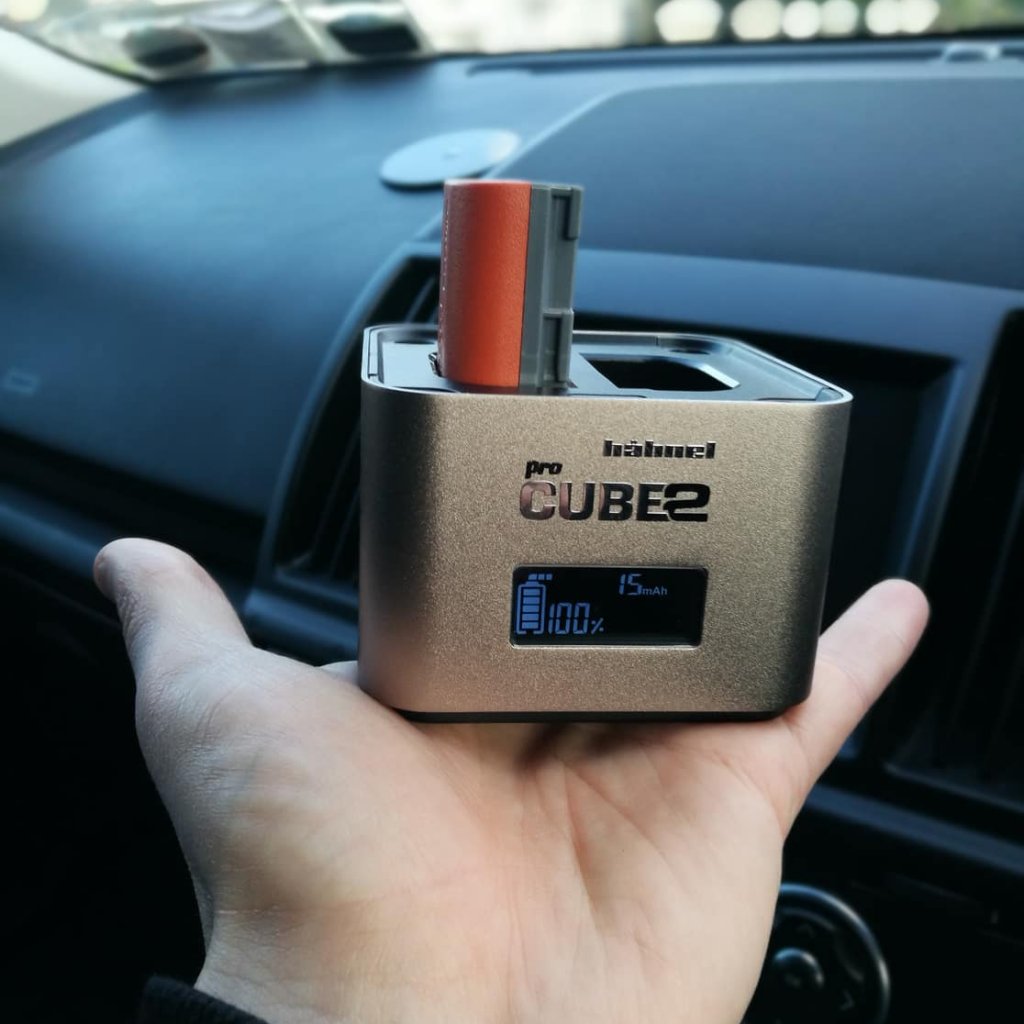
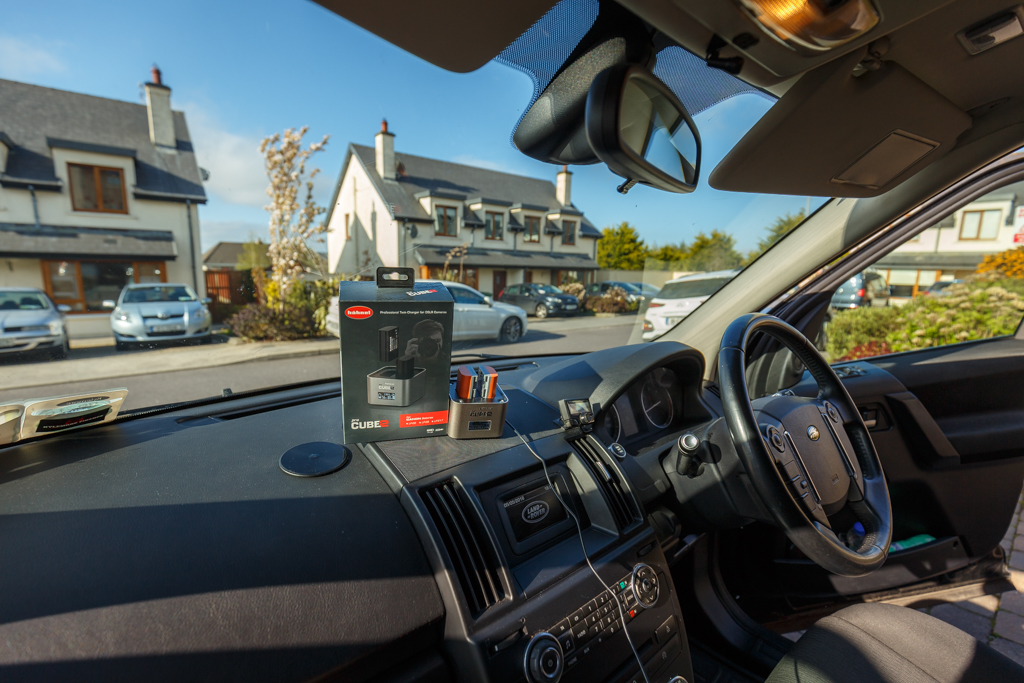
Firstly, the packaging is great. I think it really stands out. The unit is also so small and light. It really takes up no real estate within my office, my Land Rover or in my camera bag. The unit literately fits in the palm of my hand!

Hahnel PROCUBE2 Product

As mentioned earlier, I opted for the Canon version first and was impressed that it was able to charge both of my main Canon batteries. The USB and AA charging capabilities proved to be a nice added bonus. I have several rechargeable AA batteries in my bag at all times on account of the various head torches and my wireless remote shutter systems. Walking around in the dark when out shooting stars and the Milky Way can really drain the AA batteries. So it is nice to be able to charge them up in my Land Rover while I am getting warm!

The USB charging is also a really neat feature. Phone batteries seem to die rather quickly on account of all of the smartphone features. WiFi, GPS, Mobile Data, Bluetooth, Facebook, Instagram, Large Screen, etc… These phones are not too smart if you ask me, considering all those features are useless if the phone battery dies! Remember the good old days of the Nokia 3210?

How The Hahnel PROCUBE2 Helps My Photography Business

Hahnel PROCUBE2 Product

Delays can occur when waiting around for several batteries to charge. Instead of waiting for all of my batteries to fully charge, the PROCUBE2 allows me to charge the batteries while I drive between shoots and locations. I have four 12v charging points in my commercial Land Rover and so I can have four PROCUBE2 units running at the same time. This has been an absolute game changer for me. If driving on the road for even 60 minutes, the batteries will be charged upon arrival at the destination. That is just pure awesome sauce!

Reasons Why I love The Hahnel PROCUBE2 And Why I Strongly Recommend It

  • Charge on the go – no need to be near a power supply!
  • Small and tidy units – takes up no space in my bag/car/office
  • Color coded for each camera vendor/version
  • Saves time waiting around at home for batteries to charge
  • No need to drag the camera OEM chargers around – they only charge one battery at a time anyway!
  • Charges batteries for all of my Canon DSLRs and Canon Mirrorless bodies
  • Better than the OEM charger – (in my opinion!)

The ability to charge batteries to go while driving around is really fantastic. I am normally fairly diligent with ensuring that my batteries are charged before and after each shoot. However, if I happen to forget, I know that the PROCUBE2 will solve that problem for me.  It is much better to be out shooting, rather than waiting around indoors for batteries to charge!

Haida Clear Night filter. A solution to the light pollution

As one of the leading industries in photo filters production, Haida always has new ideas to improve the quality of our shots.

A good instance is the new nano Haida Clear Night filter. It was so useful to contrast the yellow light pollution in some places where I created some of my images!

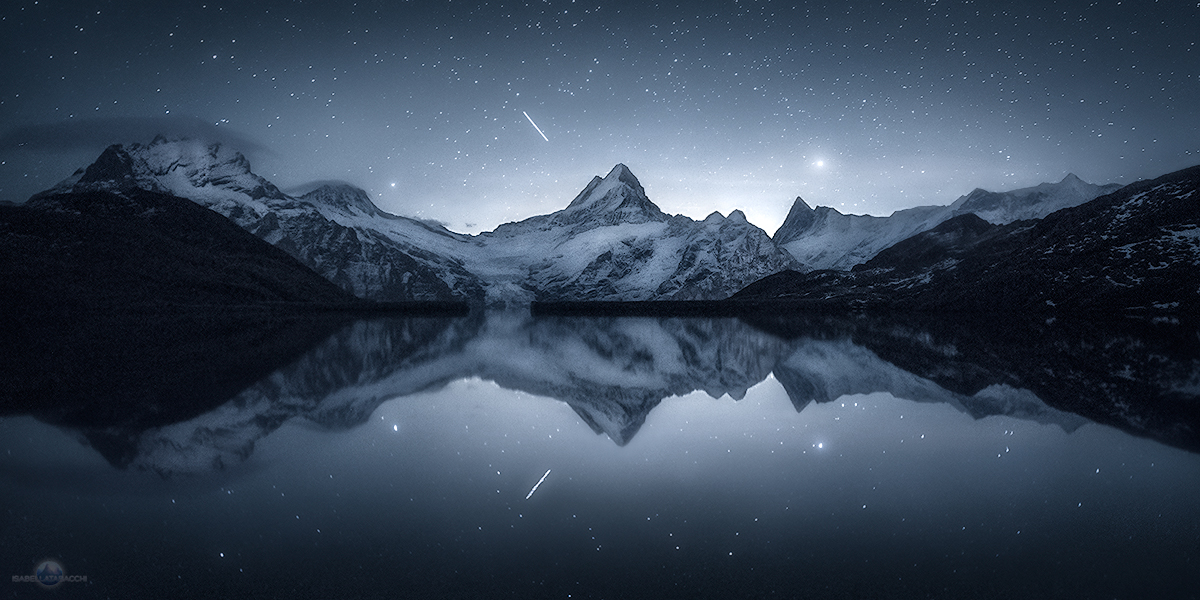
This is, for example, the final result (post-processing included) of a shot taken with that filter in the Swiss Alps.

see filter isabella tabacchi

You’ll think that it’s very easy to have such uniform color of a nightscape with Adobe Photoshop and that the light pollution tint is removable also with some features in Adobe Camera Raw.

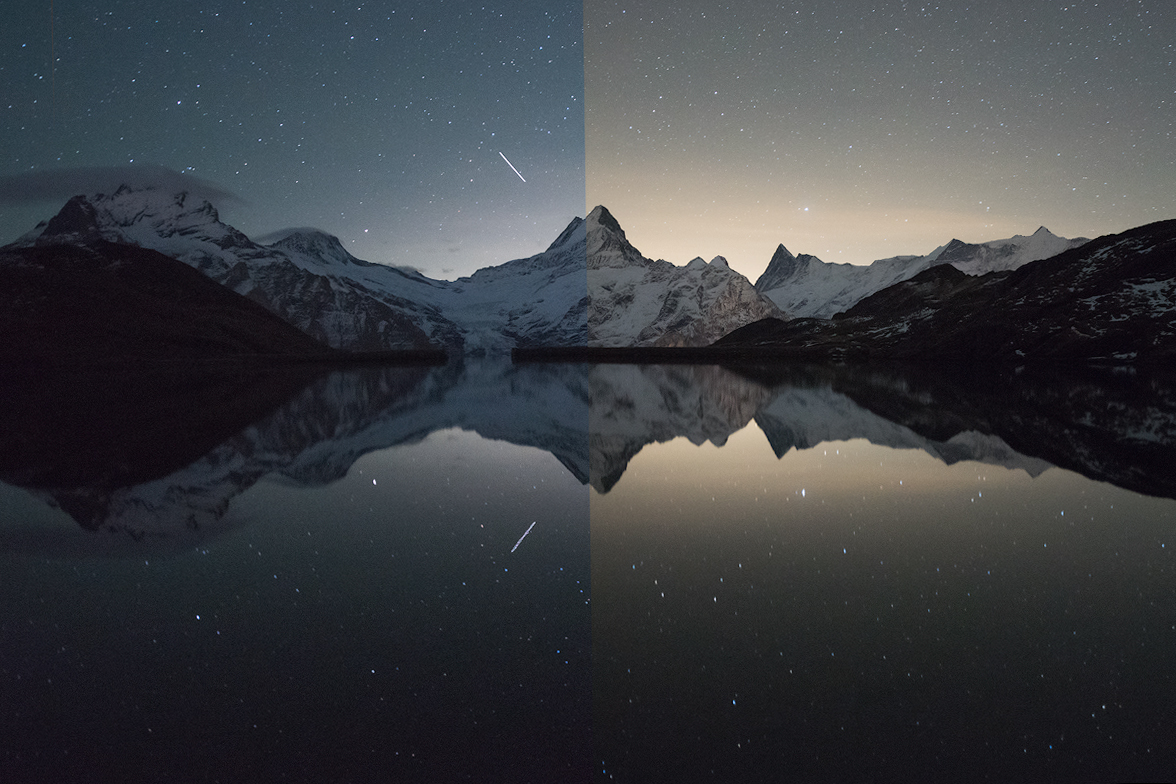
That could be true, but the following image shows as my editing work was very short thanks to the Haida Clear Night filter.

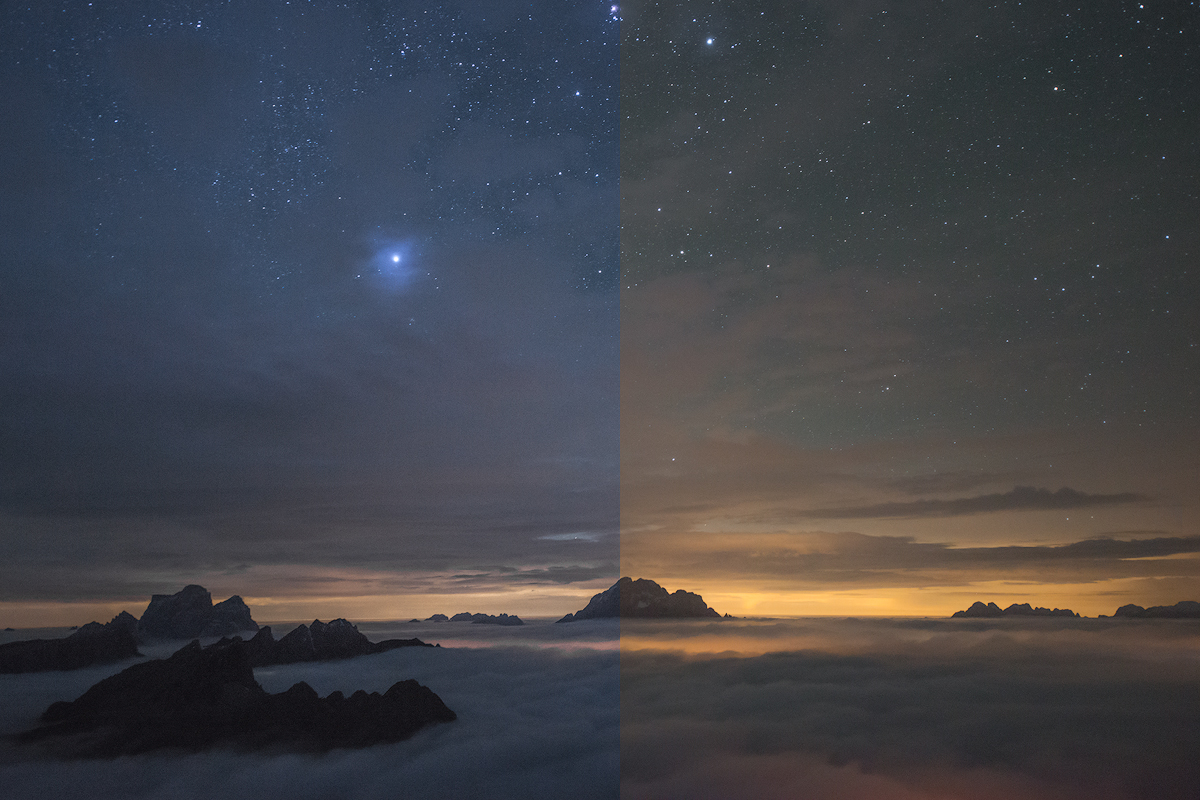
clear night with without

This image is composed of two not post-processed shots as Adobe Camera Raw shows them. I took the RAW files with the same white balance of 3700 K (Kelvin).

In the “WITHOUT” part, we can notice how the light on the horizon is strong, yellowish and has its impact on the rest of the sky, even in the mountains.

In the “WITH” half of this demonstrative picture, the light is not only white but even more restricted on the horizon area. Therefore, the stars are also more evident, outlined.

clear night filter haida

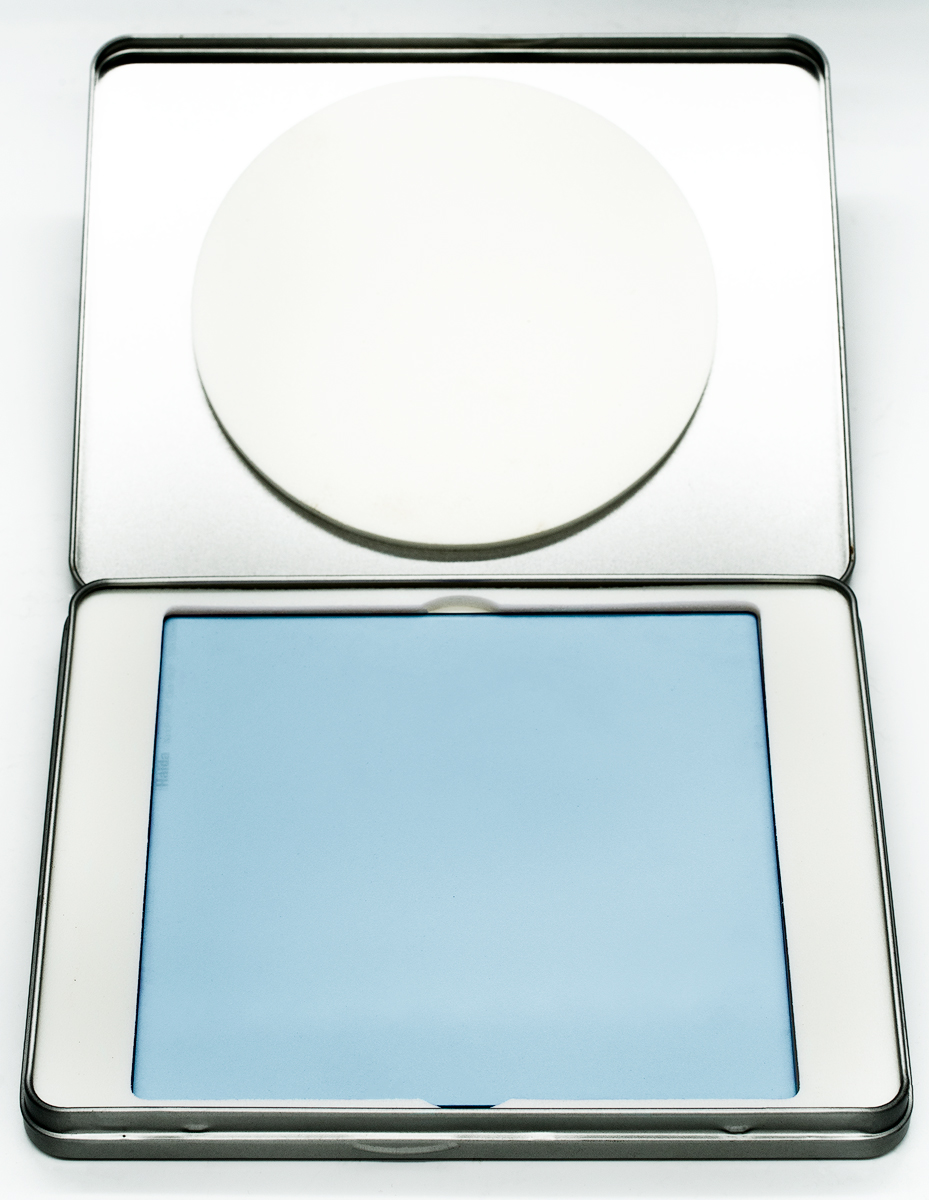
This is how the Clear Night filter looks in its original Haida Filter case.

You can notice the light blue color of the glass: this is why the yellowish pollution is contrasted!

The filter contains also a polarizing capability: it defuses light coming into the camera; so, the luminosity and brightness of the pollution will be confined at the horizon, the stars and astro magic like Milky Way will be more evident.

A parenthesis about the nano-coat meaning

The nano coat couldn’t miss in this product.

But, what does “Nano Pro” mean? Well, it’s the extremely thin, nano, a coat which covers the glass surface of the filter.

This is the great innovation of this new product line that makes the difference in comparison to the previous series. It gives resistance to dirt, reflections, and scratches.

Thanks to this coat, my filters fantastically survived sandy, earthy, rocky, icy places.

Furthermore, as a landscaper, I often take shots to waterfalls and rocky beaches where the waves move on the reefs and splash some water on the filter. Thanks to this coat I have just to clean lightly with a towel cause the drops come away very easily.

Another comparison: when the light pollution is very strong

CLEAR NIGHT

This is another “WITH-WITHOUT” image composed of two shots I took during my workshop at Lagazuoi hut, in the Italian Dolomites.

My students and I had the opportunity to immortalize this view of the highest peaks in the Dolomites of Ampezzo coming out from a “sea” of clouds.

Unfortunately, the light pollution of the valleys was reflected in the clouds and at the horizon; but the shot with the Haida Clear Night filter, with the same white balance, is completely different.

All these features help so much the post-processing phase cause we need to do fewer actions in order to delete the light pollution and that yellowish cast.

Where can you buy it?

You can purchase Haida Clear Night filter at Amazon.com.

But are also available on fotichaestli.ch , the Swiss distributor website.

They are available in every size:

  1. Square Glass Insert filter systems. 75×75, 100×100 and the 150 super wide angle systems (you need the holder to mount the filters on the lens).


Round filter sizes: 52, 55, 58, 62, 67, 72, 77, 82 m

A little parenthesis about the Haida holder

You have to put the filters in the grooves of the holder to use them. I own the 150 series holder for my Nikon 14-24mm f/2.8G ED wide-angle lens.

The support system is steel and very steady and resistant. It consists of the universal holder that supports the filters, the front adapter ring and the rear adapter ring that sustain and connect the holder to the lens.
A little gold nut enables to remove or rotate the holder on the rings to position better the filter, especially if it’s a GND.

There are also two rubber plates (superior and inferior) on the holder surface, near the grooves; they prevent the light to come into the space between the lens and the holder, so the nuisance reflections don’t appear on our shots. You can find also some replacement rubber plates in the holder pack.
I also took many very long exposure shots with ND, GND and both filters; I never saw that horrible reflection (similar to crowns) that appear every time the light goes through the filter.

And of course there are not this kind of problems about the Clear Night filter; in the night the light is very weak, especially when the moon is not visible (except cityscapes).

Conclusion

Haida Clear Night filter is a great choice for a nightscape.

I like the color cast on the glass, cause it eliminates yellowish and orange pollution, even if I know that is a matter of taste (I love cold nightscapes).

The quality is great and the price also. I have to tell you that this idea met my expectations.

SaveSave

5 Tips for Photographing in the Heat

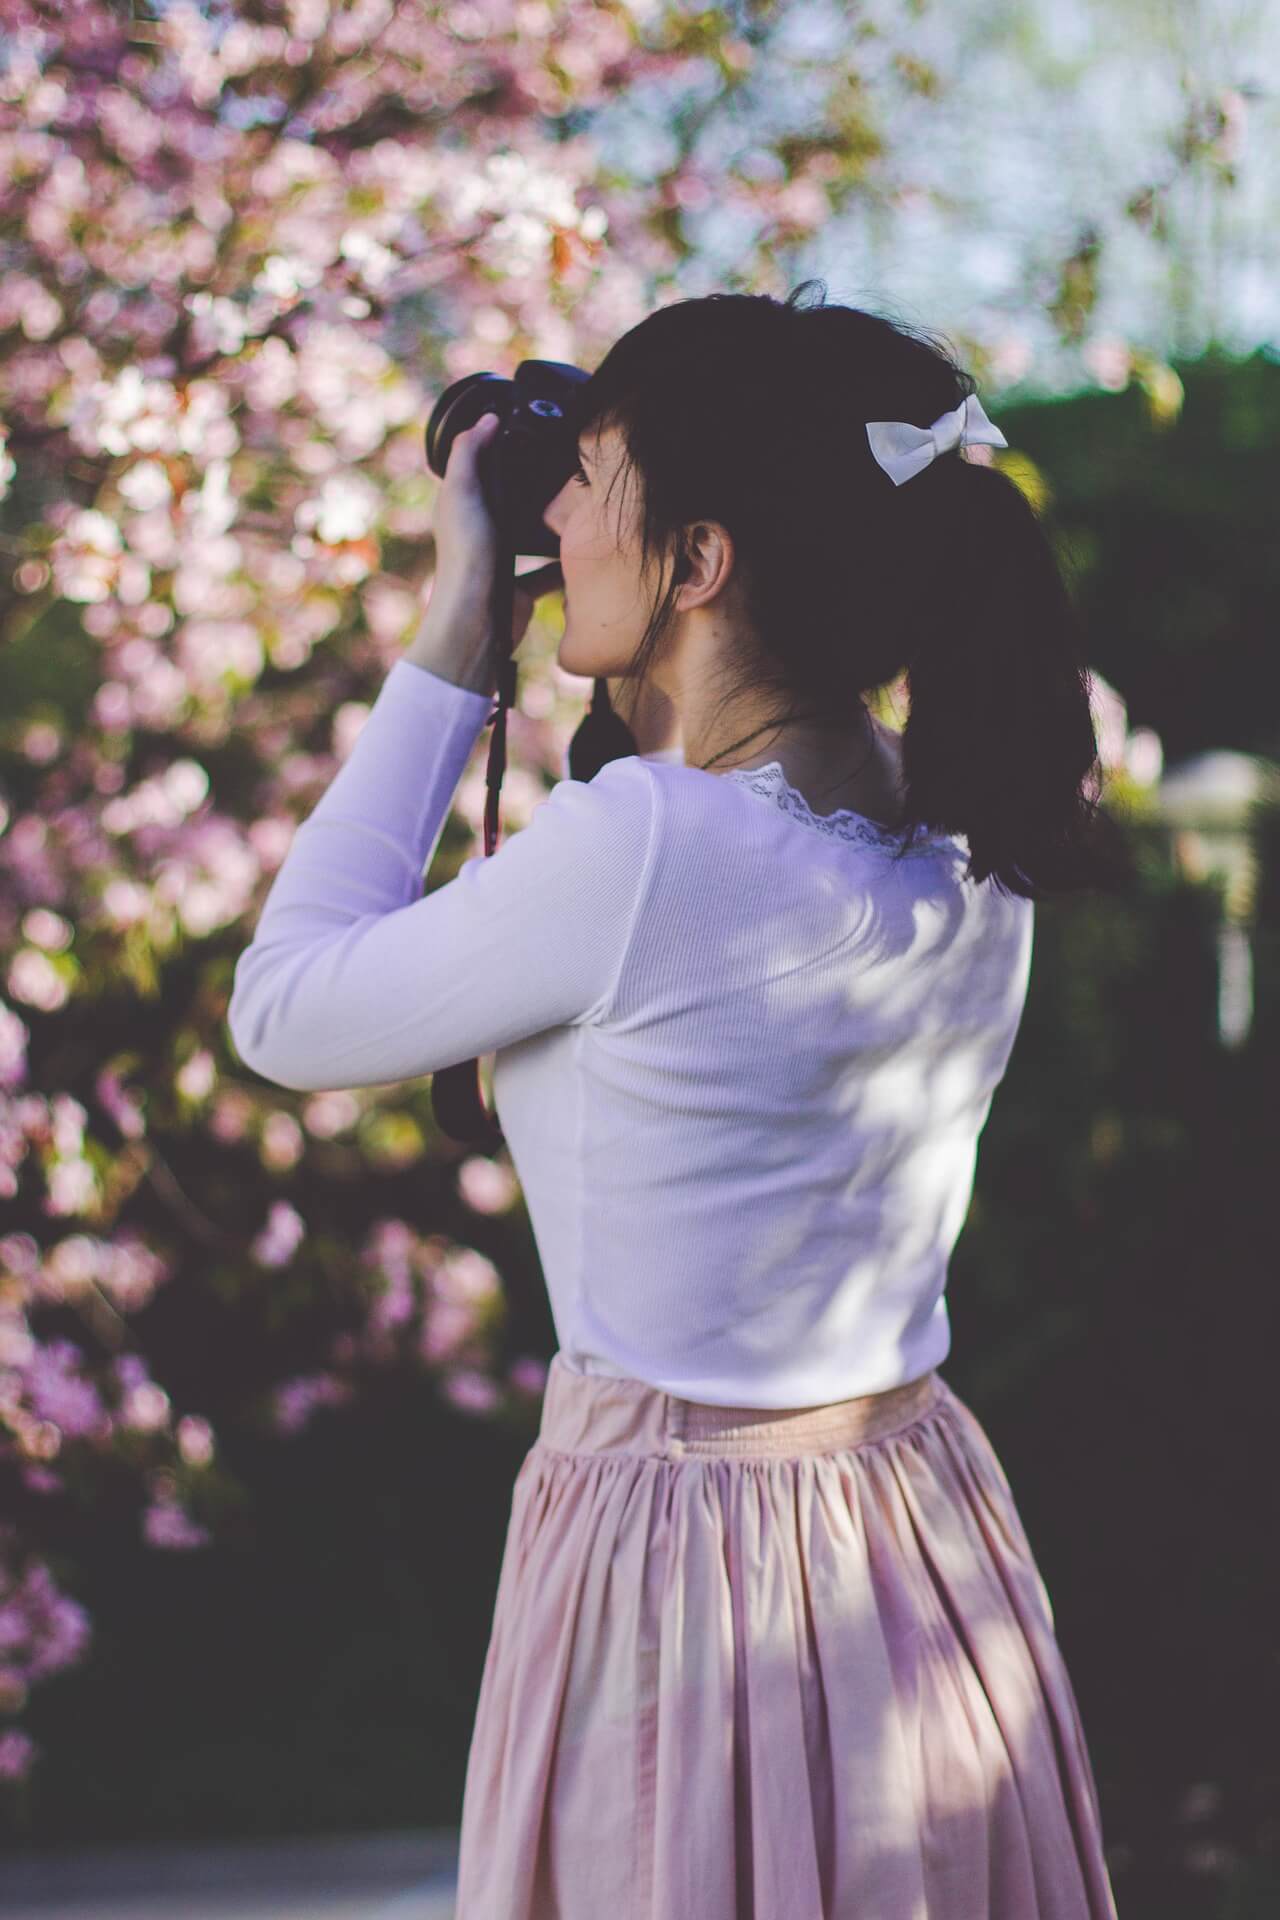
Sometimes weather doesn’t agree with our camera gear. The heat and the cold, the wet and the dry, can always wreak havoc on cameras. They are, after all, electronic equipment. So then what do you do when you need to photograph in the extreme heat? Maybe it’s a really hot summer day. Maybe you’ve got an assignment to shoot in the jungle or the desert. Either way, you need to keep your gear working even in extreme heat conditions. Here are some tips that will help you protect your equipment as your work.

1. Find Some Shade

One of the easiest ways to keep your camera safe is to shoot from the shade. Finding a tree or building that will cast a large enough shadow is the first step you should take. The shade will help keep both the air and your camera cooler. The less heat that’s on your camera, the better it is overall.

shoot from shade

Of course, shade doesn’t always play with your artistic vision. If you need to step out while you’re taking your picture, that’s okay. Just be sure to return to your shady refuge in-between shots.

2. Cover Your Gear

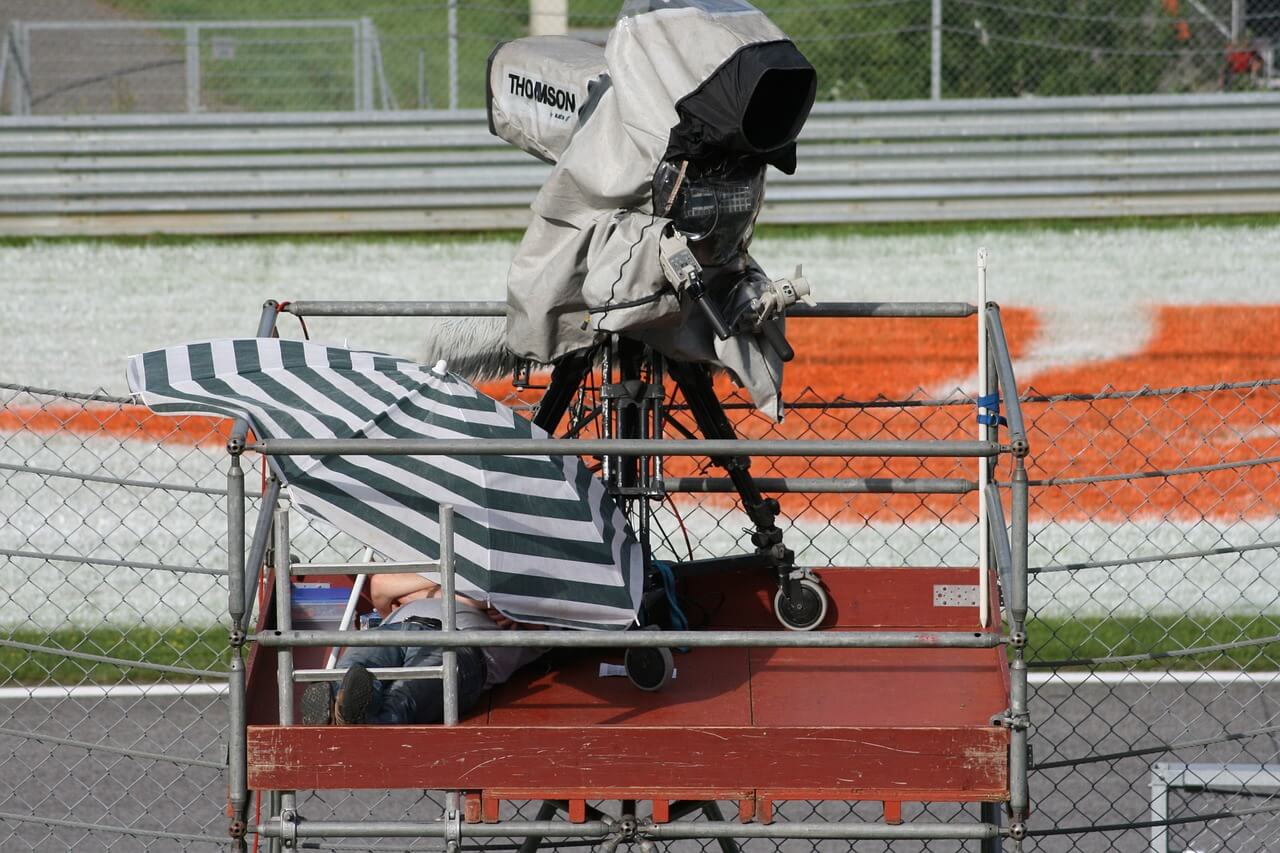
Even if you have a shady spot, you need to cover your gear when not directly shooting. Your camera, mostly made out of some kind of metal, easily absorbs the heat from the sun. By being in the shade, you greatly reduce the heat your camera absorbs. However, if your environment doesn’t contain any shade you’ll need some other way to protect your equipment. The next best way to protect your camera is to cover it.

camera cover

A simple cloth will do, preferably one that is darker in color. It’s a good idea to cover your gear even if it’s already in the shade, every bit helps.

3. Remember Gradual Change

If you’ve got a climate controlled home or hotel you’re keeping your camera in, you don’t want to just suddenly take it out into the heat. A sudden change in temperature can shock your equipment just as it can shock your body. The best way to control the temperature change is to use an insulated camera bag. Place all of your gear into your bag and then take it outside. Set your bag down, preferably in the shade if you can, and let it sit for a while. The insulation in the bag will slow the speed at which your camera heats up. After a while, your equipment will be the temperature of the air and you can safely remove it from its case.

4. Keep it Dry

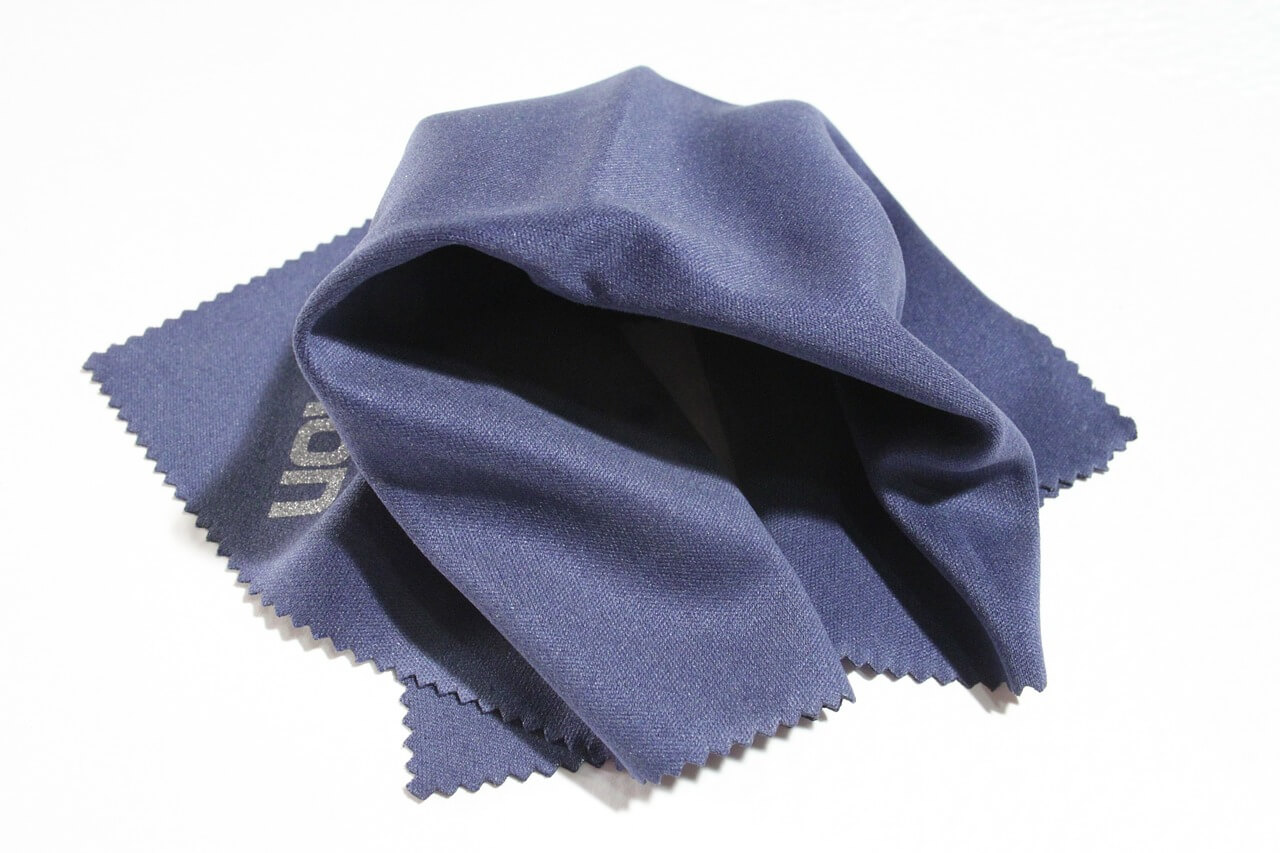
One of the most damaging things to your camera is water. However, the threat of liquid doesn’t just come from rivers and other bodies of water. Sweat and condensation are just as big of an issue, especially in the hot weather. Your lens can quickly fog up in the heat. The sweat from your face can easily get onto your camera. And any amount of liquid will mess with your gear and might even break your camera. Keep a lens cloth with you to keep your equipment dry.

lens cloth

To prevent sweat, wear an athletic headband or hat and be sure to bring a towel with you to dry off. Being in the shade will greatly reduce your own sweat content. Keeping yourself cool is as important for your equipment as it is for your comfort.

5. Avoid the Car

Using your car to get around from place to place is very convenient. If you’re running errands before or after a photo shoot in the heat, you want to avoid leaving your camera in your car. Without the air on, cars become exceptionally hot in the heat, more so than simply being outside in direct sunlight. Because the glass traps the heat inside, the car can be the most dangerous place for your camera and its gear. If you’re going to leave your car for any reason, even if it’s something short and simple, take your camera with you. Leaving your camera alone in the car for any amount of time can prove disastrous to your equipment. Keeping your camera in an insulated bag and taking it with you will greatly reduce the hard done to your gear.

The best way to keep your camera protected is to avoid extreme temperature conditions. Of course, this can’t always be the case. If you need to do a photo shoot in the heat, you need to prepare to keep your camera safe. By using an insulated bag you can control how fast your camera heats up. By keeping your camera out of direct sunlight, either in the shade or by covering it with a cloth, you can reduce the amount of direct heat your camera absorbs. And by keeping yourself and your camera dry, you can ensure a safe and harmless shoot for your equipment.

How to use a reflector to enhance your photography: a beginner’s guide

One of the most important elements of photography is, of course, light. If you like taking photos outdoors, one of the challenges you will face is that you can’t adjust the light sources so much. The sun and street lights can’t be moved, so you need to find the way to make their light work for you. Sunlight is also influenced by the time. For example, if it is high noon our light is coming from right above us and it is a very hard light. But if we are taking a photo at sunrise or sunset, the light will come at an angle. Light intensity also varies between sunny days and when the sky is hazy, foggy or cloudy.

Light variance allows us to take spectacular and diverse photos. However, sometimes we want to have a bit more control over the lighting. One of the simplest and most efficient means to do it is by using a reflector.

What is a reflector?

In my opinion, the best photography equipment that I ever got is my reflector. It took me several years into photography to get one. I guess that I always saw reflectors as something that only professionals use. In fact, reflectors are one of the most affordable pieces of equipment a photographer can have. Mine have cost me around 14 euros in Amazon.

reflector
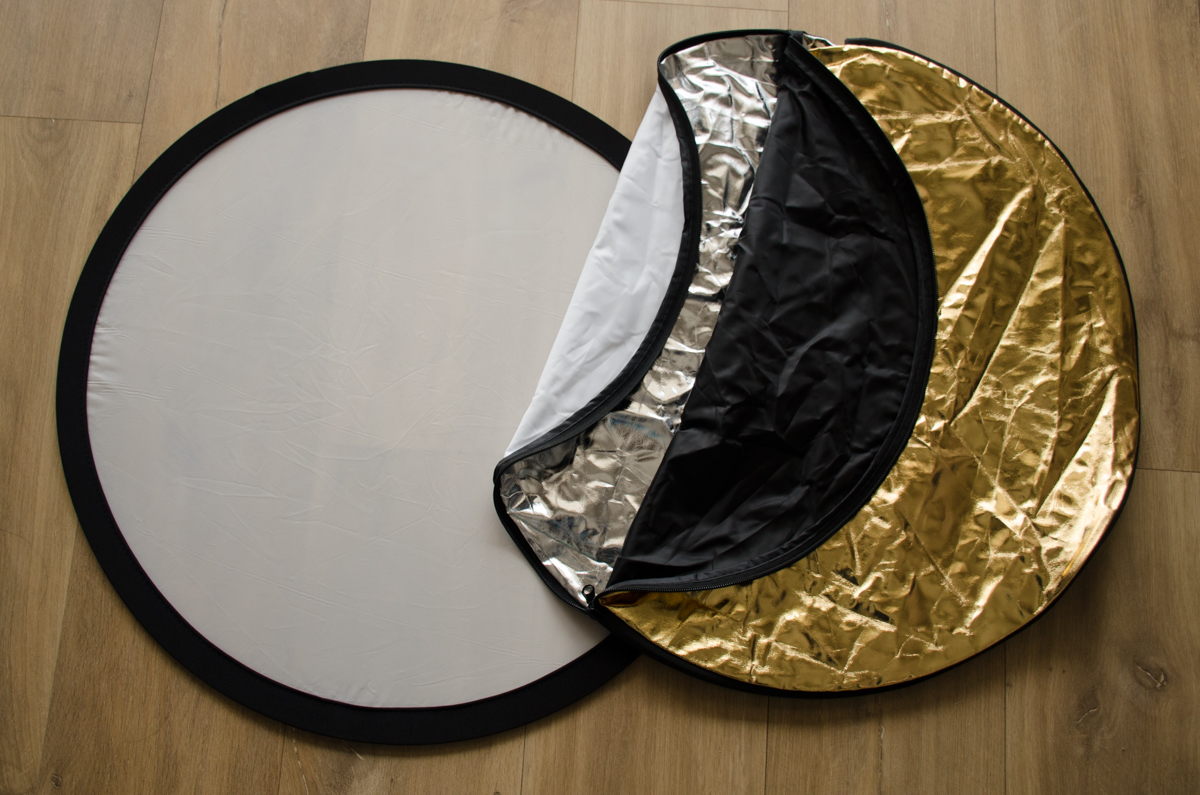
The reflector I’m using. The envelope is made up of four pieces, the gold and the black are sewn together back to back, and so are the white and silver. A zipper connects the two pairs. this enables one frame to have 4 different colors. Together with the diffuser, it really is a 5 in 1!

A reflector is basically a surface which redirects the light towards a desired subject. You can even make one yourself with a cardboard and aluminum foil. There are many variations and kinds of reflectors available on the market. The most common and affordable ones are the collapsible round reflectors with multiple colors. They consist of a foldable frame with a translucent cloth stretched over them. These frames come with a reversible envelope which offers four different surfaces (usually white, silver, gold and black). Don’t repeat my mistake, get (or make) yourself a reflector soon. You will see how easily your images improve.

How to use a reflector

Using a reflector, you can bring in light from additional angles and lighten shadows. In other words, you use them to change the direction of the light sources in order to add light to dark areas that make your image look bad. Using a reflector is very similar to what we did when we were kids and we played with the light beams from mirrors, but in a more delicate way.

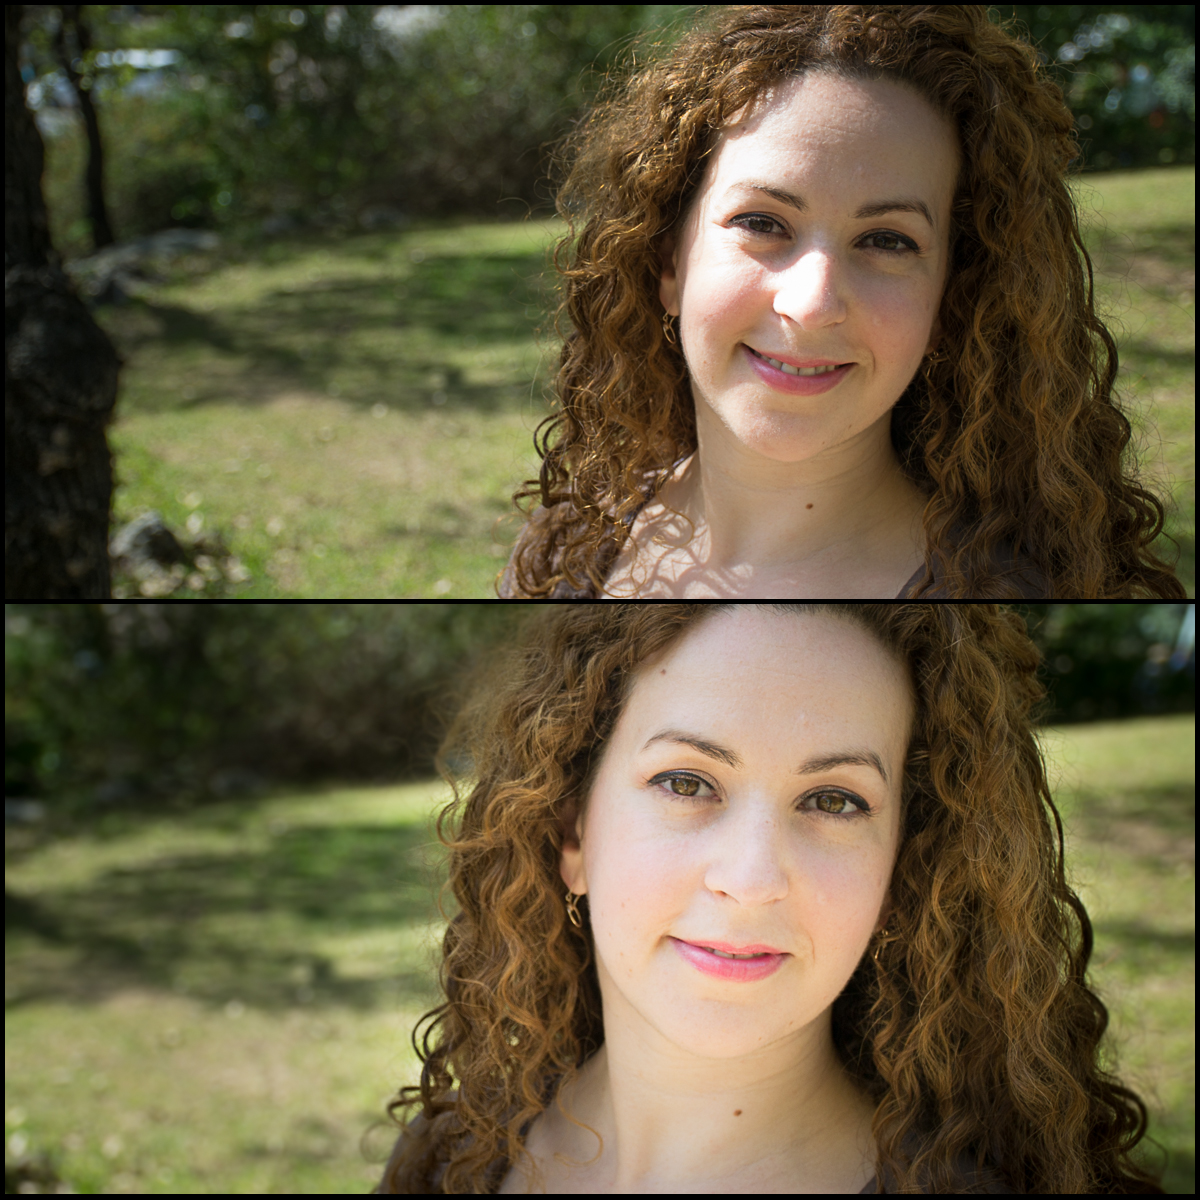
A common use of the reflector is for portrait photography in the middle of the day, when the light is coming from above the model’s head. In this situation, the model’s face will be full of shadows and hard lights. In addition, the eyebrows cast a shadow under the eyes, making him/her look a bit like a raccoon. By using our reflector, we can bring light from a lower angle and lighten the model’s face, this way we avoid the “raccoon effect”.

You can set the reflector on a stand or hold by yourself. However if you are holding the camera it can get really complicated. You can also ask an assistant or a friend to hold it. Another option is that your model holds it. A good option is to let your model sit and put the reflector on top of his/her knees. In some situations you might need to use your imagination and have the reflector standing on walls, cars, columns or even lying on the floor. Don’t be shy and try different options until you get the results you want. This is part of the fun of a photo session!!

Gold and silver sides of the reflector

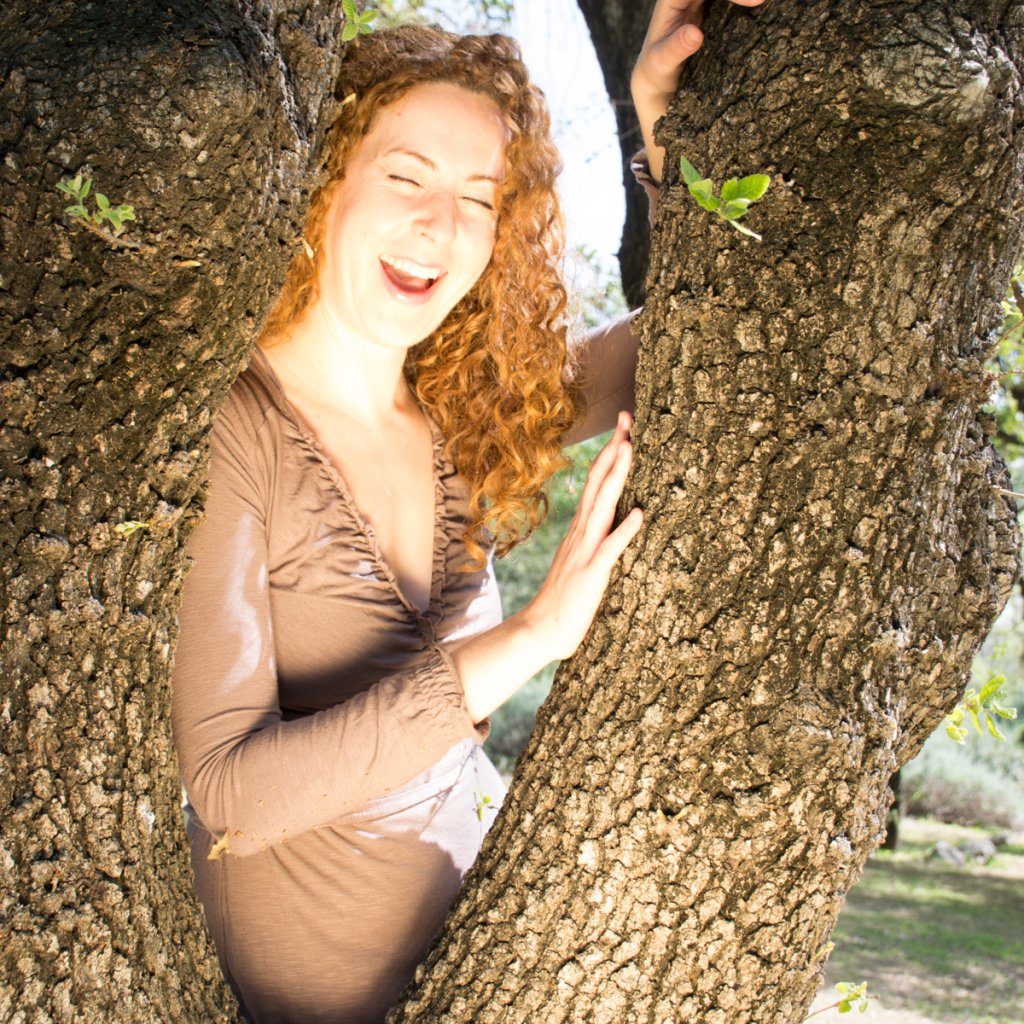
Keep in mind that both the silver and the gold colors are metallic and reflect a lot of light. For that reason they should be used from a certain distance (that will vary according to light conditions). If you are using it to reflect light on a person or animal, it might be even blinding. Take care and if you need it, ask the model to close the eyes until you adjust the light reflection to an intensity that will be comfortable for him/her.

sleeklens-43-4
The metallic colors reflect the light almost like a mirror, be careful when you aim it at people.

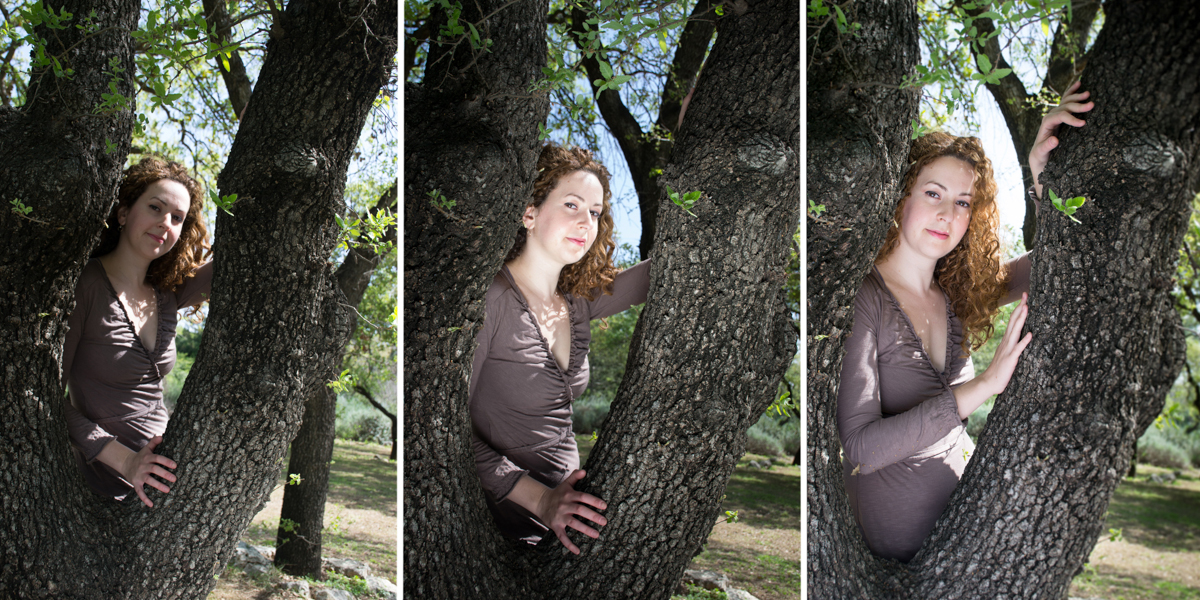
As the silver side reflects the light without softening it, besides being a good option for greater distances, it is also great for weaker lighting conditions. Silver is also a good one to start getting used to reflectors because you can see the effect very vividly, making your life easier at the beginning.

sleeklens-43-13
In the first photo I didn’t use the reflector, the middle one was taken with the reflector too close to the model, the last one was taken with the reflector set at a greater distance. See how the light is much more delicate in the last photo in comparison with the others

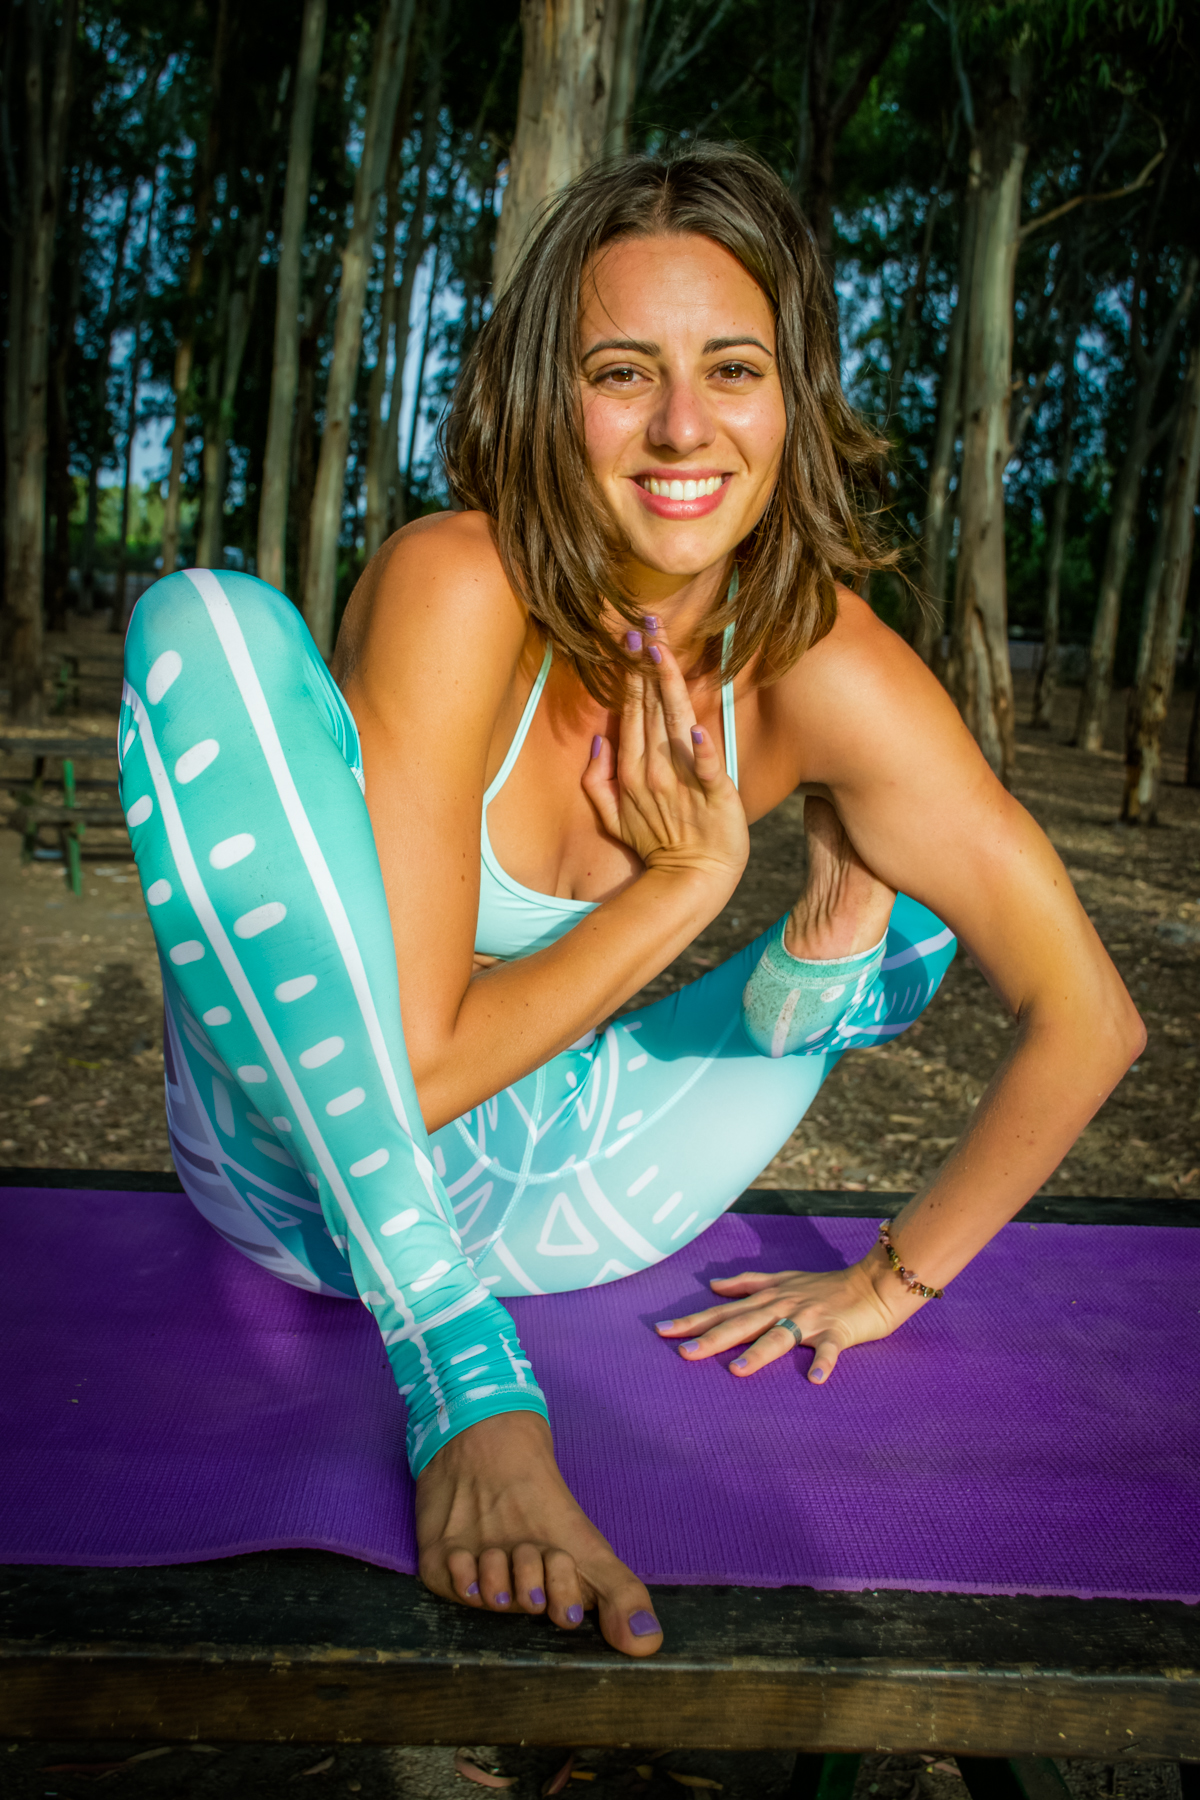
The gold is very much like the silver except that it is giving the reflected light a warm yellow shade, similar to the golden hour light. It can be great for emphasizing sun tan, or if you want to bring out a certain color in the photo. But take care, because the yellow light can be overpowering.

sleeklens-43-6
In this photo you can see how the golden-yellow light reflected from the gold emphasizes my friend Nita’s sun tan. you can also see how the shadows articulate her muscles

White side of the reflector

The white side reflects a very soft and delicate light, you need to place it very close to your subject in order for it to have an effect and it won’t work if the lighting is bad (like at dusk, or if it is cloudy), but the result will be a very warm and soft photo, which is great for portraits (family, children, pregnancy photos, flowers).

reflector
Here you can see how the different colors affect the photo: in the top left I didn’t use the reflector, in the top right I used the silver and you see that the illumination is almost equal on both sides of Porky, the bottom left photo was taken using the white and you can see how the light on Porky is softer, the bottom right photo was taken with the golden reflector and you can see Porky has here a much warmer light.

Black side of the reflector

Finally, a reflector can be used as a light blocker too. If you have a light coming from an undesired direction. For example, if you have light reflecting from a window,  you can reduce the reflecting light by placing the reflector with the black side towards your subject.

refector
Here you can see the effect of the black side of the reflector, on the left I didn’t use a reflector and on the left photo I used the black. Do you see the difference?

Using the reflector’s frame as diffuser

Besides reflecting the light, the reflector’s frame (the one with a semi opaque cloth) can be used as a diffuser. Diffusers soften the light coming directly from a light source and make the shadows less hard..

sleeklens-43-14
These two photos were taken in the same spot moment one after the other. In the upper photo I took the photo when Inna was subjected to the hard mid day light, in the lower photo Inna was “sheltered” from the harshest light by the diffusing inner frame of the reflector.

I want to thank my friends Inna and Nita for being my models and also my nephew for letting me use Porky to illustrate this article. Now that you have the basic information about reflectors, it is time to grab yours and start experimenting with it!

Enjoy and have a happy shooting!!

Tips To Photograph A Splashing Wine Glass

There is something beautiful about getting a picture of something frozen in time. Whether it is a glass shattering, or a dog sneezing, it is a glimpse of something that happens too fast for us to really see. It gives us a new perspective on the world.

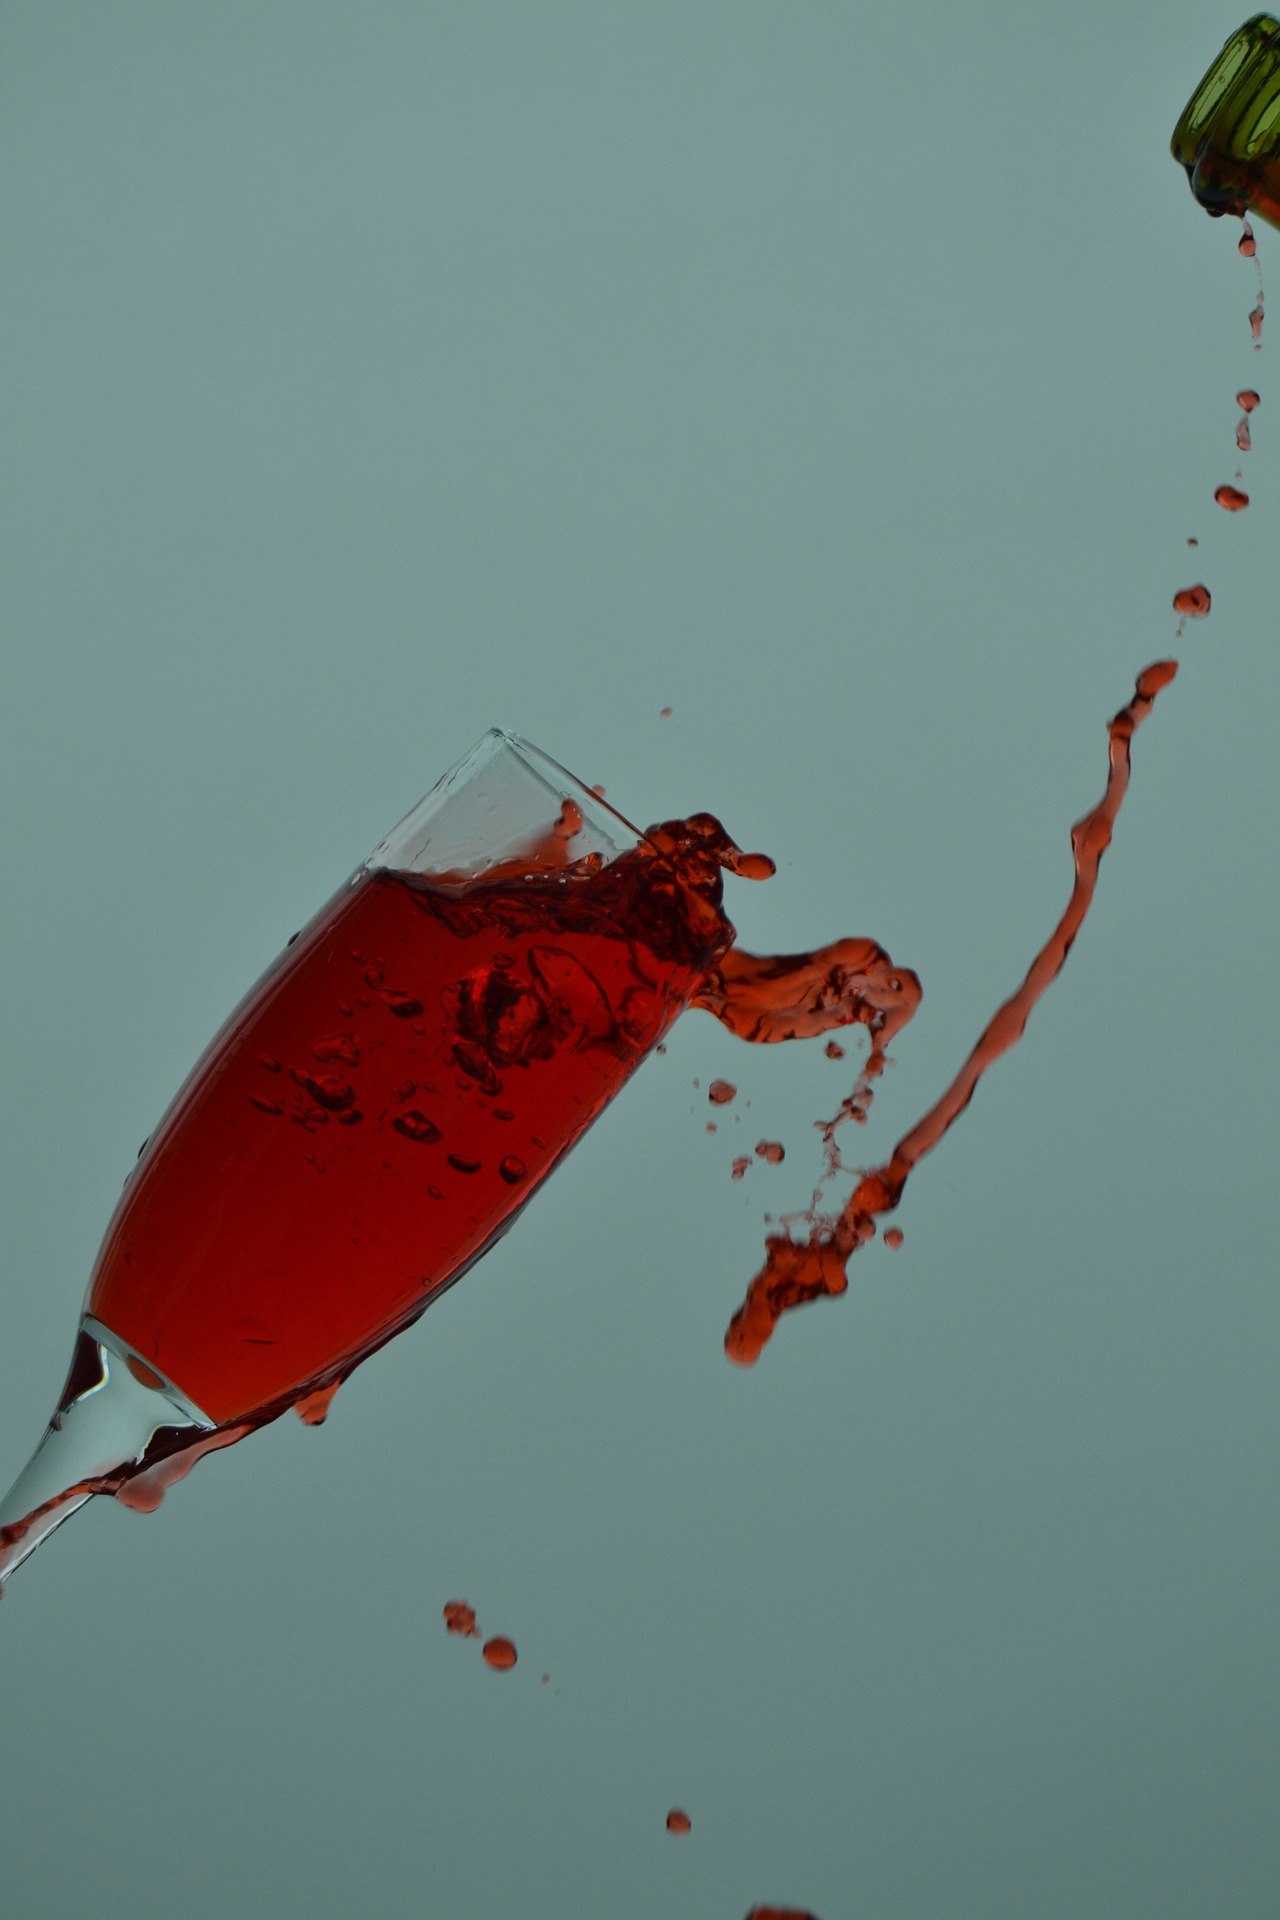
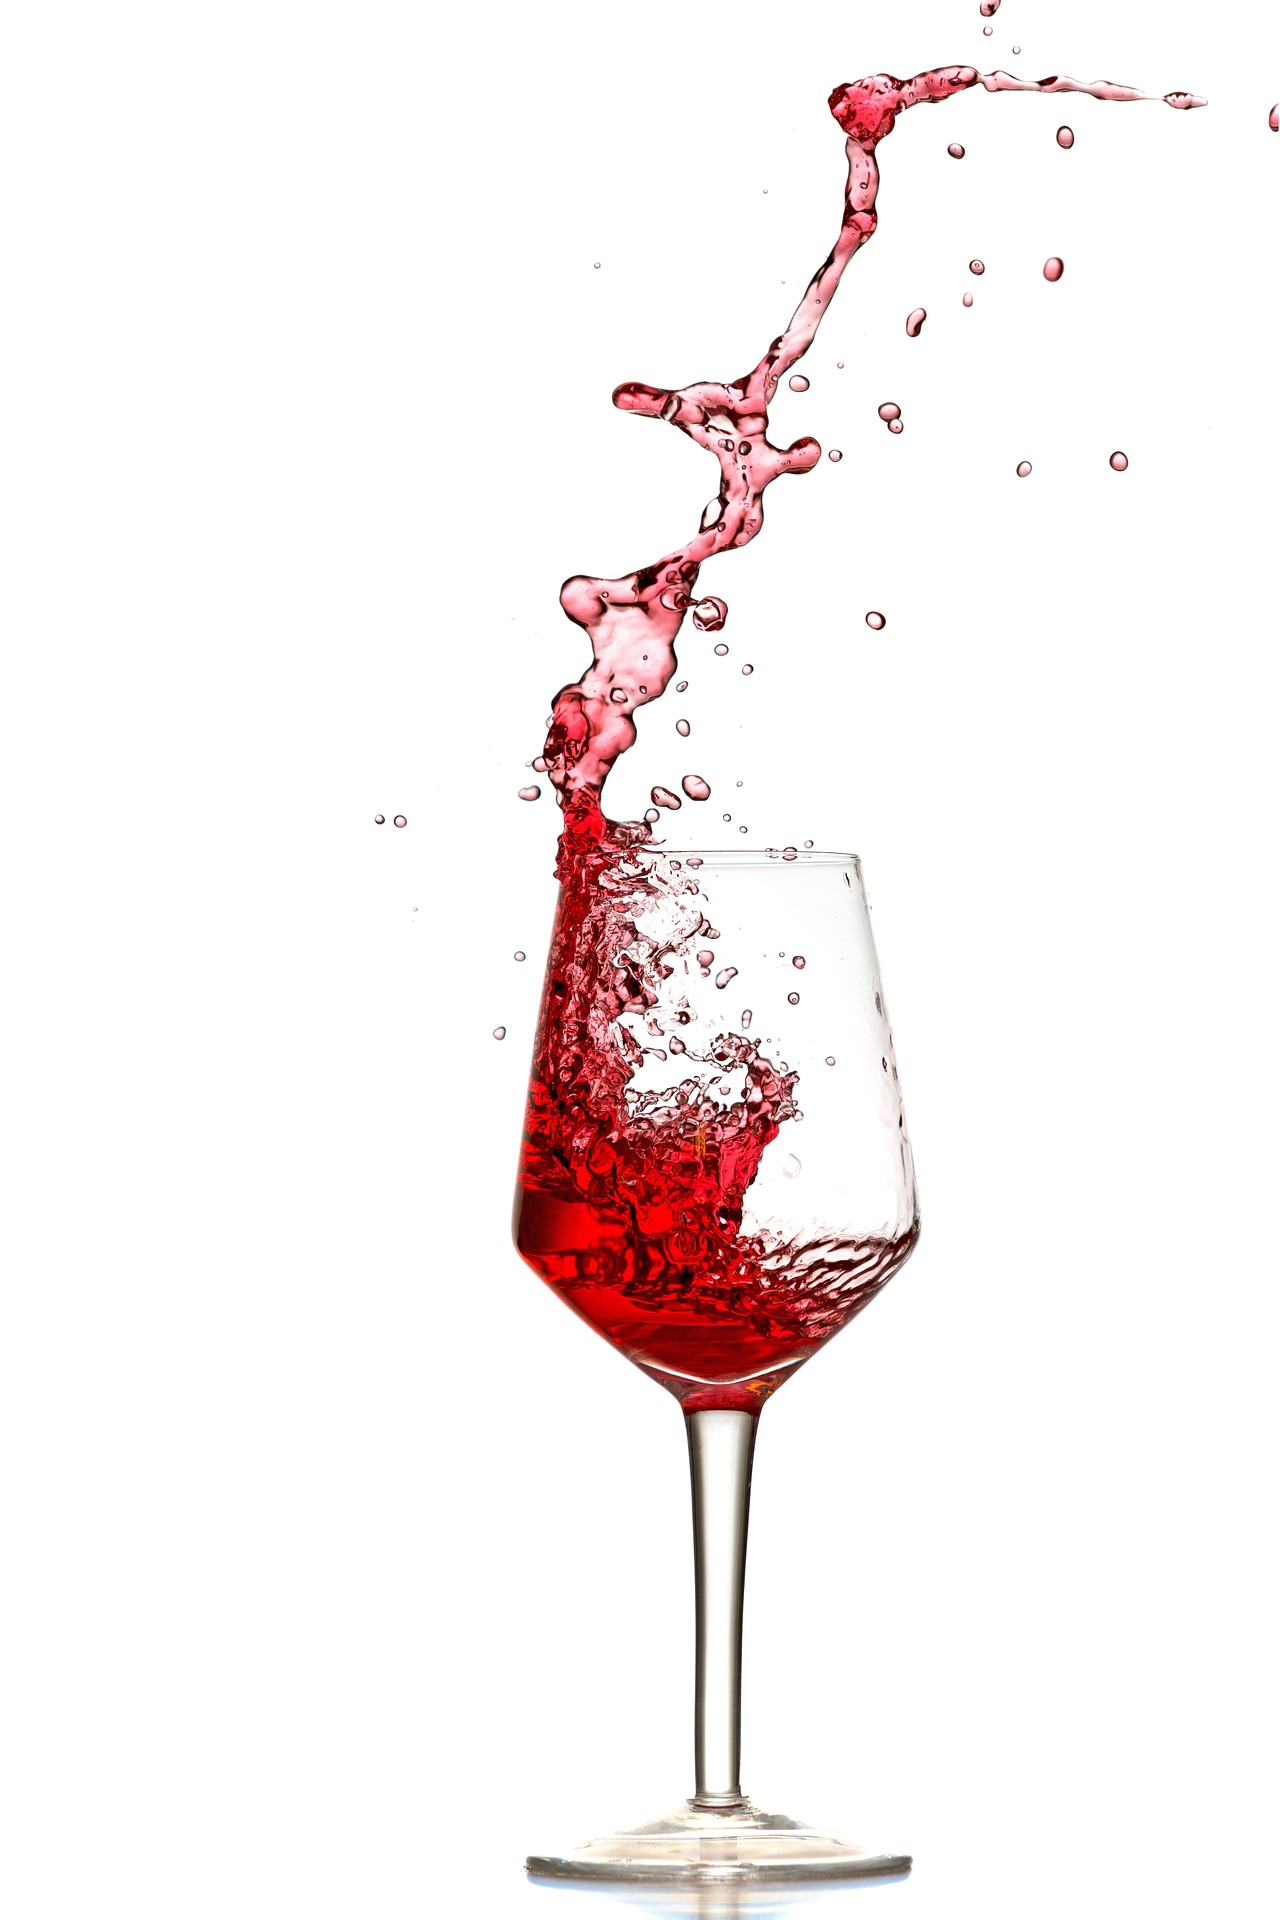
One of the most common, and most interesting, freeze frames to get is a splashing wine glass. We have all had a wine glass splash its liquid on us, or on our new carpet, but how many of us have actually seen that moment frozen in time? How many of us have wanted to capture that?

It may seem like it is a very complicated thing to do, getting that photo without a blur, but it is actually relatively easy for you to capture that brief moment in time. Here’s how.

splashing-wine-glass-1

What You Need

First, you are going to need some very good equipment to pull this off. A simple point and shoot camera is not going to capture this moment in time clearly, so you are going to need a good DSLR to get the clear photo that you want. In addition, you will need some excellent accessories to get a great photo of that wine splashing out of the glass.

  • The Nikon D800 is an excellent bet, using a 70-200mm lens.
  • A strobe, or any light modifier, is very important. Using a strobe with a seven-inch cone reflector and a soft box attached will ensure that you get enough light when the moment happens.
  • PocketWizard Mini TT1 + AC3 Zone Controller for Nikon (Canon versions are available too) attached to the camera’s hotshoe to trigger the flash.
  • A receiver plugged into the strobe light to receive wireless signal from the Mini TT1.
  • A wirelesss shutter release to allow you to take pictures from any position in the room.

splashing-wine-glass-2

Your Background

For your background, black is usually the best bet because it can create the best contrast for you with the photo. It will also help everything stand out a lot more. You can also place a blue gel over your strobe light, and use another strobe with a blue gel to get a bit of a blue tint on your black background.

All of these things together will create a great balance to your spilling wine glass photo, while at the same time giving you a sharp picture that will capture every drop of water, and every bit of splash across the screen.

splashing-wine-glass-3

Affordable Alternatives

Obviously, we can’t all afford to pay the amount of money needed to get the super sharp picture of the wine glass spilling. There are plenty of great budget lighting alternatives. You can use an LP180 Speedlight instead of a more expensive strobe, and other triggers. You can also just use a cheap light stand with an umbrella on it to get the light you need.

How to Get the Picture

Now that you have the equipment itself, how are you going to get that picture? You can’t just throw a glass and hope you get the picture. Things need to be planned out and be shot perfectly to get that shot that you need. Luckily, there are some very easy steps to remember to get that perfect photo.

  1. You will need to line the glass up to one side to allow the splash and the glass itself to line up within the frame perfectly.
  2. On a table, make sure you mark where the glass should be because you don’t want to lose that spot or have to keep trying over and over to get that spot right.
  3. Toss the glass up and down, side-to-side, and get some pictures with you holding the top of the glass so you can get a clear image of the stem itself. This is important for later.
  4. Make sure you take some photos of the top of the glass as well, with you holding the stem. Again, this will be important for later.

splashing-wine-glass-4

Photoshop it All

Once you have your pictures, you open the RAW files in Photoshop as separate documents.

  1. Choose all the pictures that are the clearest.
  2. Copy each image you choose into the same Photoshop file that you have.
  3. Select an image of the wine glass stem that does not show your hand it in and you will move this to a layer where your hand is on the stem.
  4. Move the stem over to where it needs to be, click the layer mask and erase the part you don’t need.

Getting that perfect wine glass photo, with splashing liquid, is not as difficult as you would imagine. By following these tips, you can get that excellent picture, and you will impress others with your skill in making two photos look seamlessly like one. Just make sure that you get a lot of pictures to work with, so you have plenty of options for your finished picture.