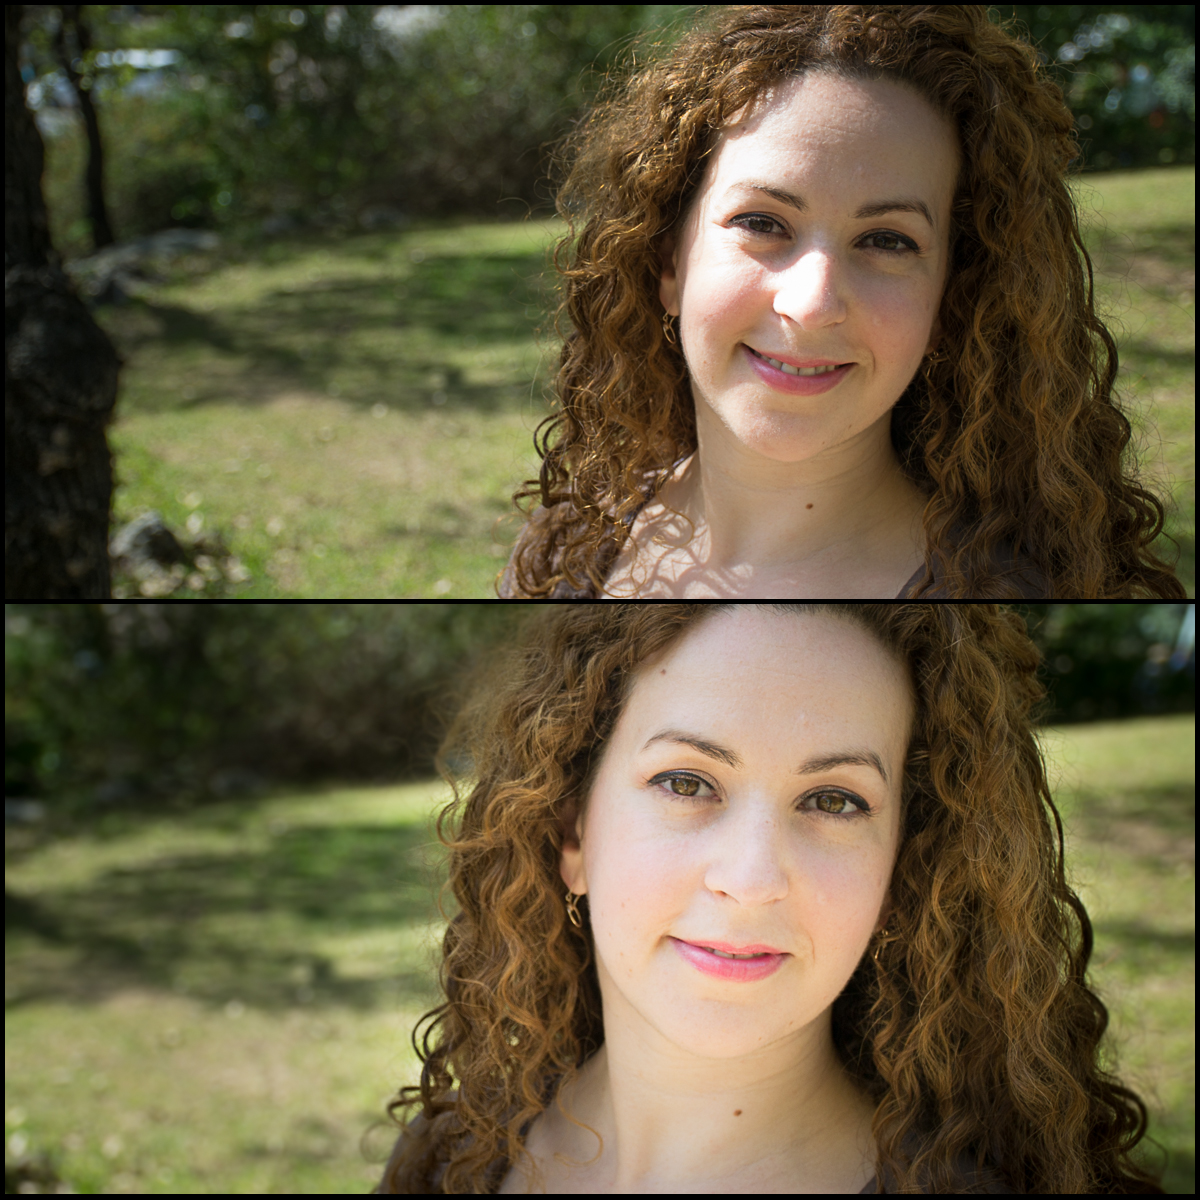
Tag: light

How to Use Flash Photography

For new photographers, using flash can be something that is relied upon far too heavily. Many amateur photographers will use it when they shouldn’t, and that can lead to pictures that don’t reach their full potential. Don’t get me wrong, there is always a time for a fill flash, but you also have to know when not to use it. Knowing when and how to use flash is important for becoming a better photographer.

Flash photography has the potential to create beautiful light and alter the color of the image on the camera screen, but it also has the potential to wash people out, focus on the wrong thing, and ruin what could have been a wonderful image.

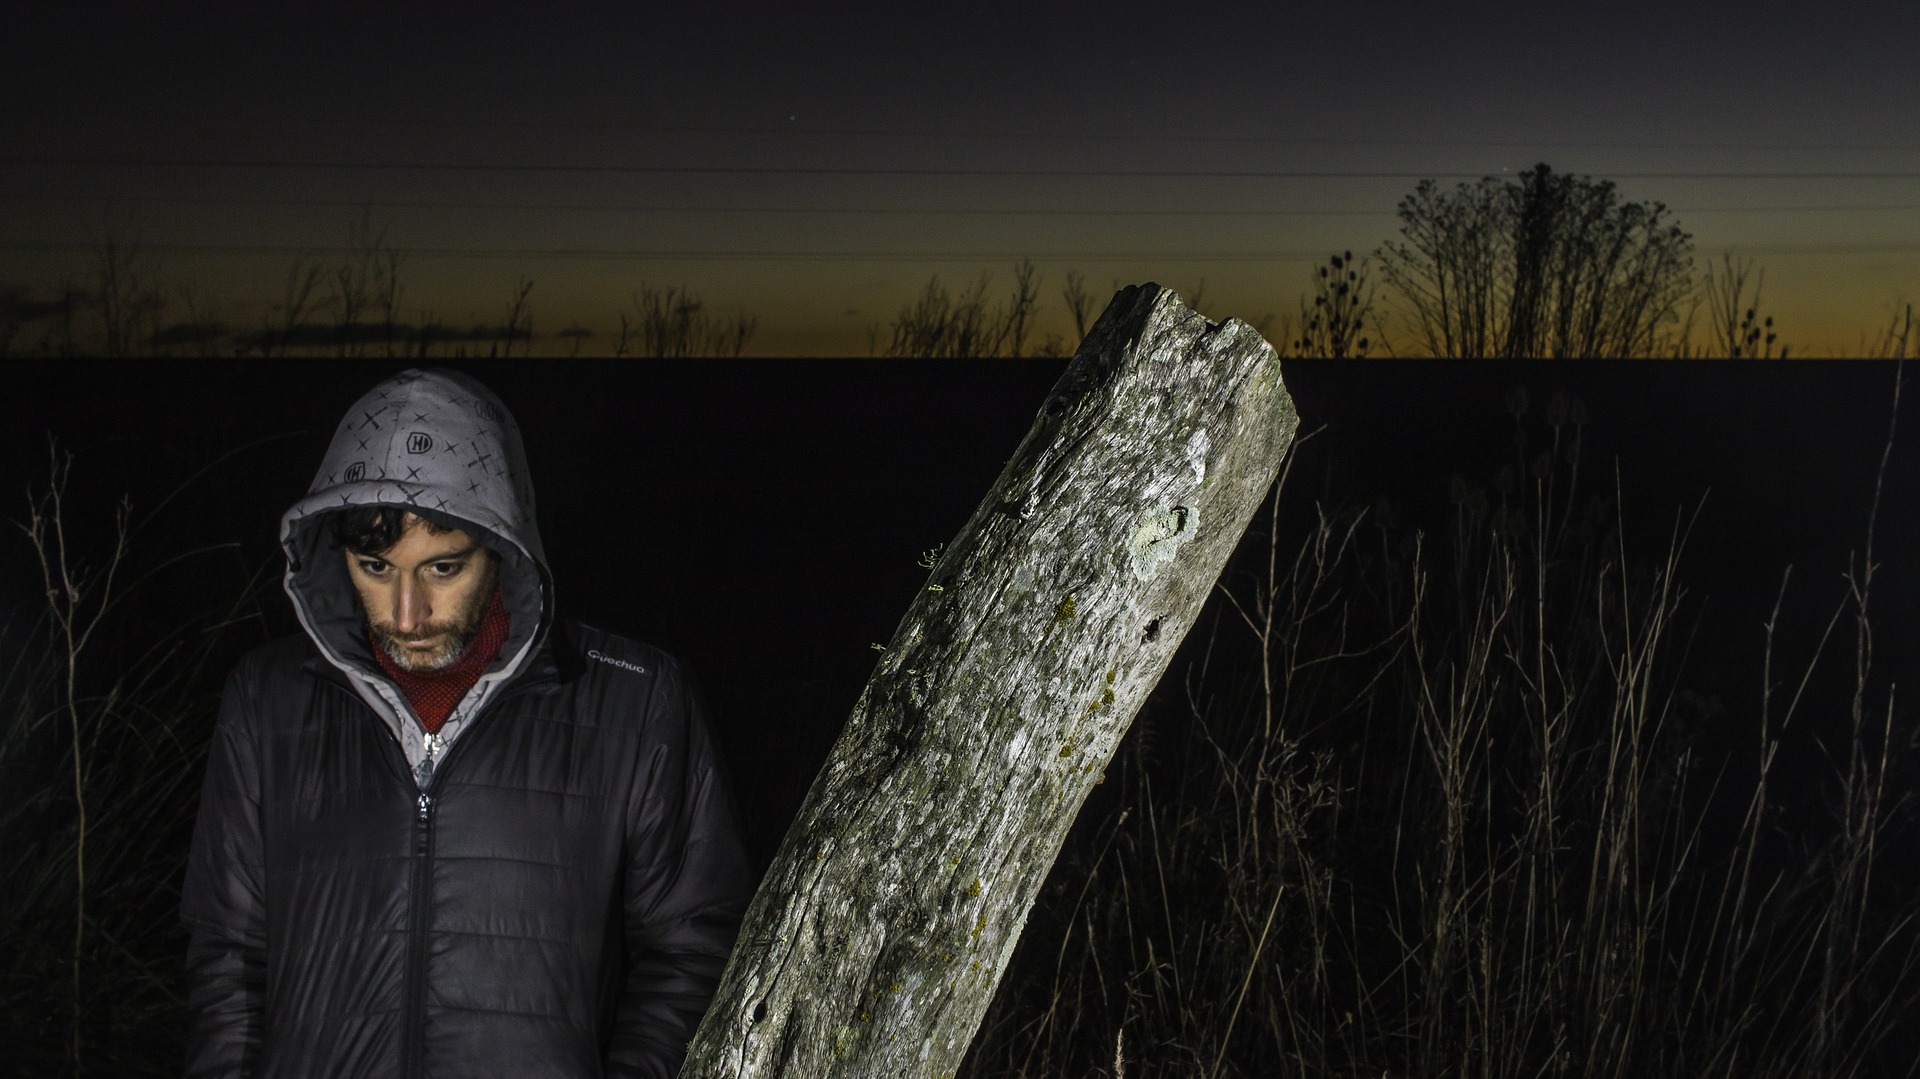
flash-photography-1

What is Flash Photography

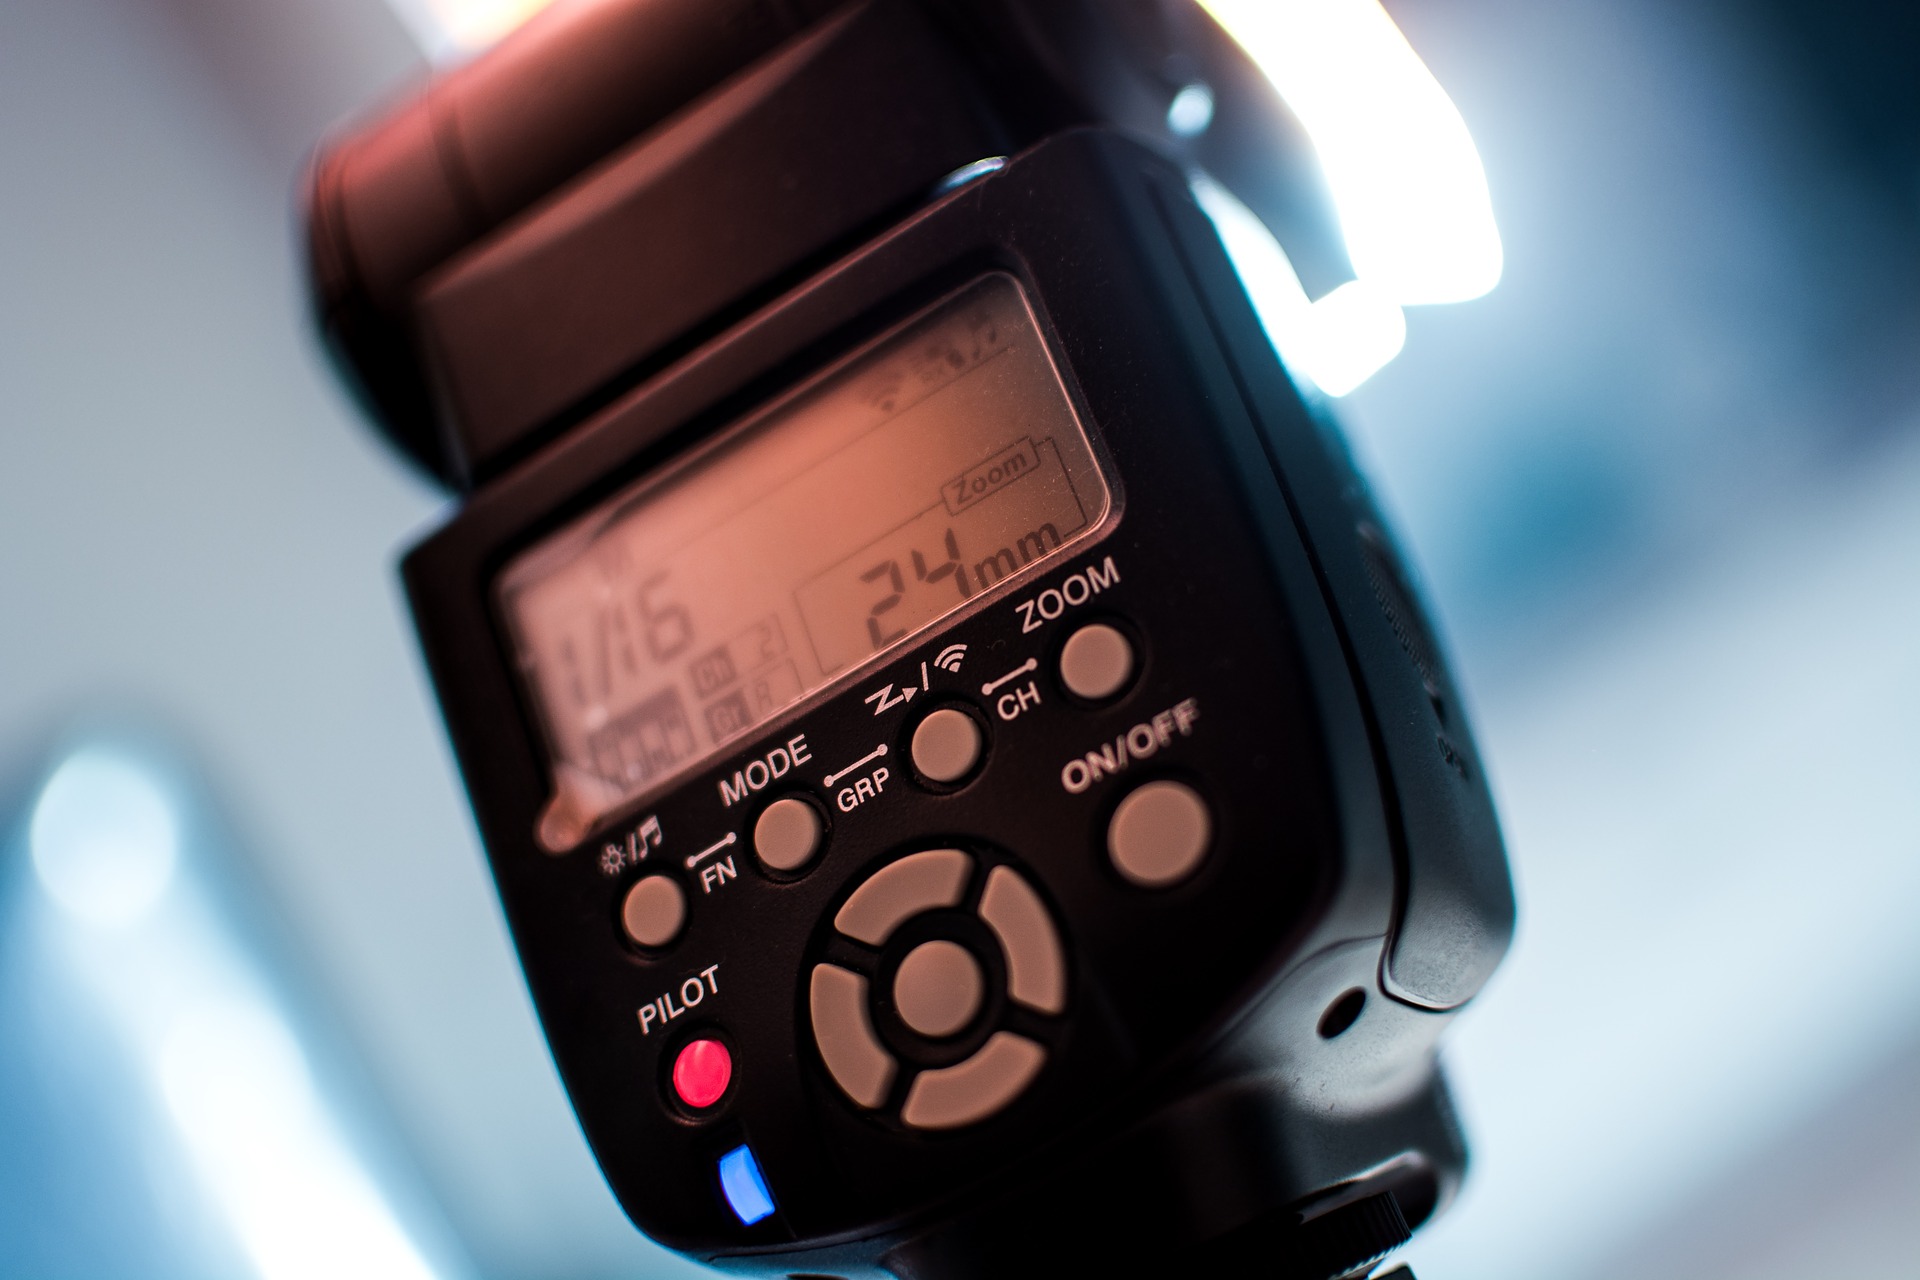
Flash photography refers to a technique where the photographer uses an external flash to improve the lighting of the photograph. Many cameras come with an internal flash light that can be turned on in the camera settings, but you can also buy an external flash, also known as flashguns, that connect to the hot shoe of the camera. Flashguns can also be used when they are disconnected from the camera to for more flash control.

Flash photography is helpful for low light situations or when harsh shadows are present. It’s also useful for achieving the right exposure, so that there is less to fix during post processing.

When to Use Flash Photography

In order to learn how to use flash photography, you need to learn which situations are most appropriate for using it. Here are five times when you’ll want to use a fill flash when taking photos:

To Add Light

Use a camera flash when you need to control the lighting in a low light situation. You want to get that extra flash control to ensure that the picture is not too dark and that the subject can be clearly seen.

To Bring in the Right Amount of Light

When you are taking a picture, you need to control the amount of light you have. You will want to fill the existing light, or enhance the existing light to add a little ambient light. You may also need to expose only the subject in a dark scene to provide extra contrast, or you may want to overpower other light sources—whether it is a lamp or the sun itself.

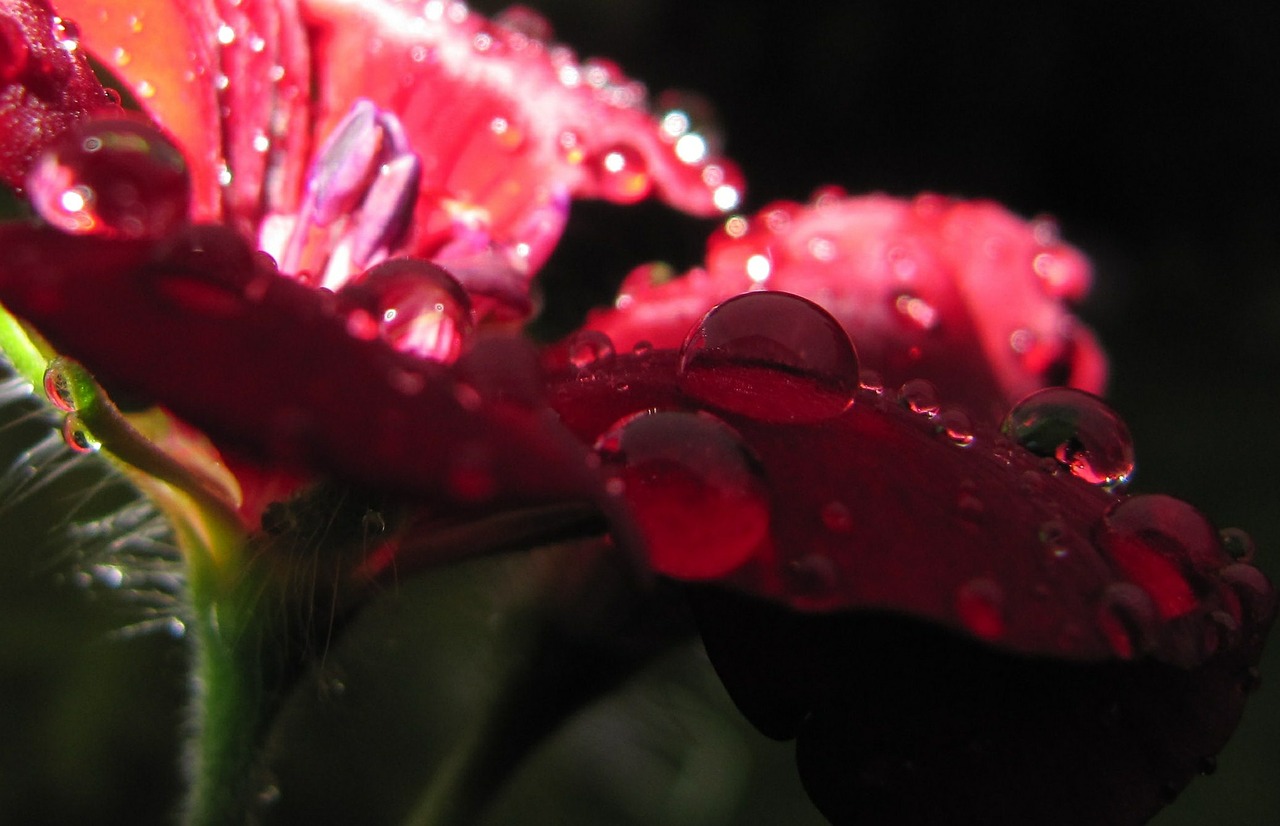
flash-photography-2

To Control the Direction

When you have your subject exposed to the light, that light may not be enough or it may not be flattering to your subject. When that is the case, you will want to control the direction of the light. Poor light direction can lead to not enough light on your subject and a flash with a reflector can add that extra bit of light to give a more natural light to the image. In addition, if the light direction does not flatter your subject, you can add flat light direction by changing the light direction with the camera flash.

flash-photography-3

Improve Light Quality

The available light is not always quality light. There are times when the natural light that is in a scene is just not working with the person or subject you are photographing. With a flash, you can do a great deal to create really wonderful photos, including:

– Creating a hard flash for portraits and other effects

– Creating ambient light for amazing effects and style

– Creating diffused light to improve the natural light that is already in the scene

– Creating soft light and reducing harsh shadows for better portraits

These are just some of the things that an external flash can do for you when you want to improve the light quality of the scene.

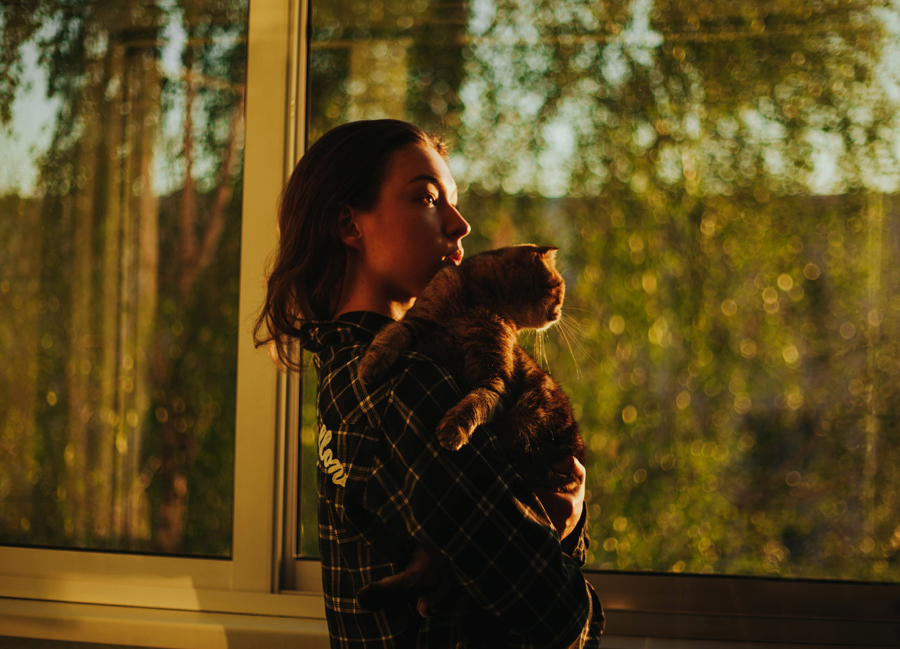
flash-photography-4

Controlling the Light Color

With getting those perfect images, sometimes you have to actually play with the color of the light itself. A little ambient illumination can take a scene and make it dreamlike, but it can also take a scene and give it a soft and earthy glow. There is so much you can do with colors and flash—the sky truly is the limit.

Every light source is going to provide a different color, from fluorescent lighting to lamps to the sun itself. Every light source produces its own color, and that color can impact your picture in ways you may not want.

flash-photography-5

A good flash will help you modify the color temperature of the light. This will create very creative and stylized photographs. You can actually fix the color of the photos with the flash as well.

When you are using a flash, it can be your best friend, but also your worst enemy. The trick is knowing when and why you should use the flash. By having this firm understanding, you can ensure that the image you capture is going to look great, and it is going to show that you are a professional who knows how to use the flash properly.

How to Learn Flash Photography

There are always different aspects of photography that some of us shy away from, especially if it seems a bit difficult. This is common among all photographers, as there is always at least one aspect of photography that we don’t  feel completely confident doing.

Flash photography is one of the most difficult aspects of photography to master. If I’m being completely honest, I was once scared of flash photography as well. It seems so complex and technical, and I was just getting comfortable with my camera as a beginner.

However, I had a project coming up that would require me to use a flash unit, and boy, I was panicking. But after doing a few trial and errors photoshoots, I became more familiar with how the flash head works, and how it can be used to enhance my photographs.

Learn at Your Own Pace

Learning flash photography as a beginner is not very difficult, but I would recommend taking your time and doing some research on the tools and settings that will help improve your flash photography. One can describe flash photography almost like riding a bike, if that’s not to cliche. You can’t always get flash photography right on the first try, but once you master it, it will become an important tool in your

Light travels in a straight direction and as a result, can be manipulated in many ways. You learn about the different ways as you get more familiar with the flash you have. There’s no rush unless you’re trying to meet a deadline to complete a project but apart from that take your time. I promise you won’t get a headache but will be more amazed as to what you can do with a flash light.

Get the Tools You Need

Once you’ve learned the foundation of flash photography, you can begin to research and expand your knowledge on the topic. Flash photography will become more intricate and interesting as you grow to understand the techniques and more. These tricks come with the help of some very special tools that can be used in the field or in a studio.
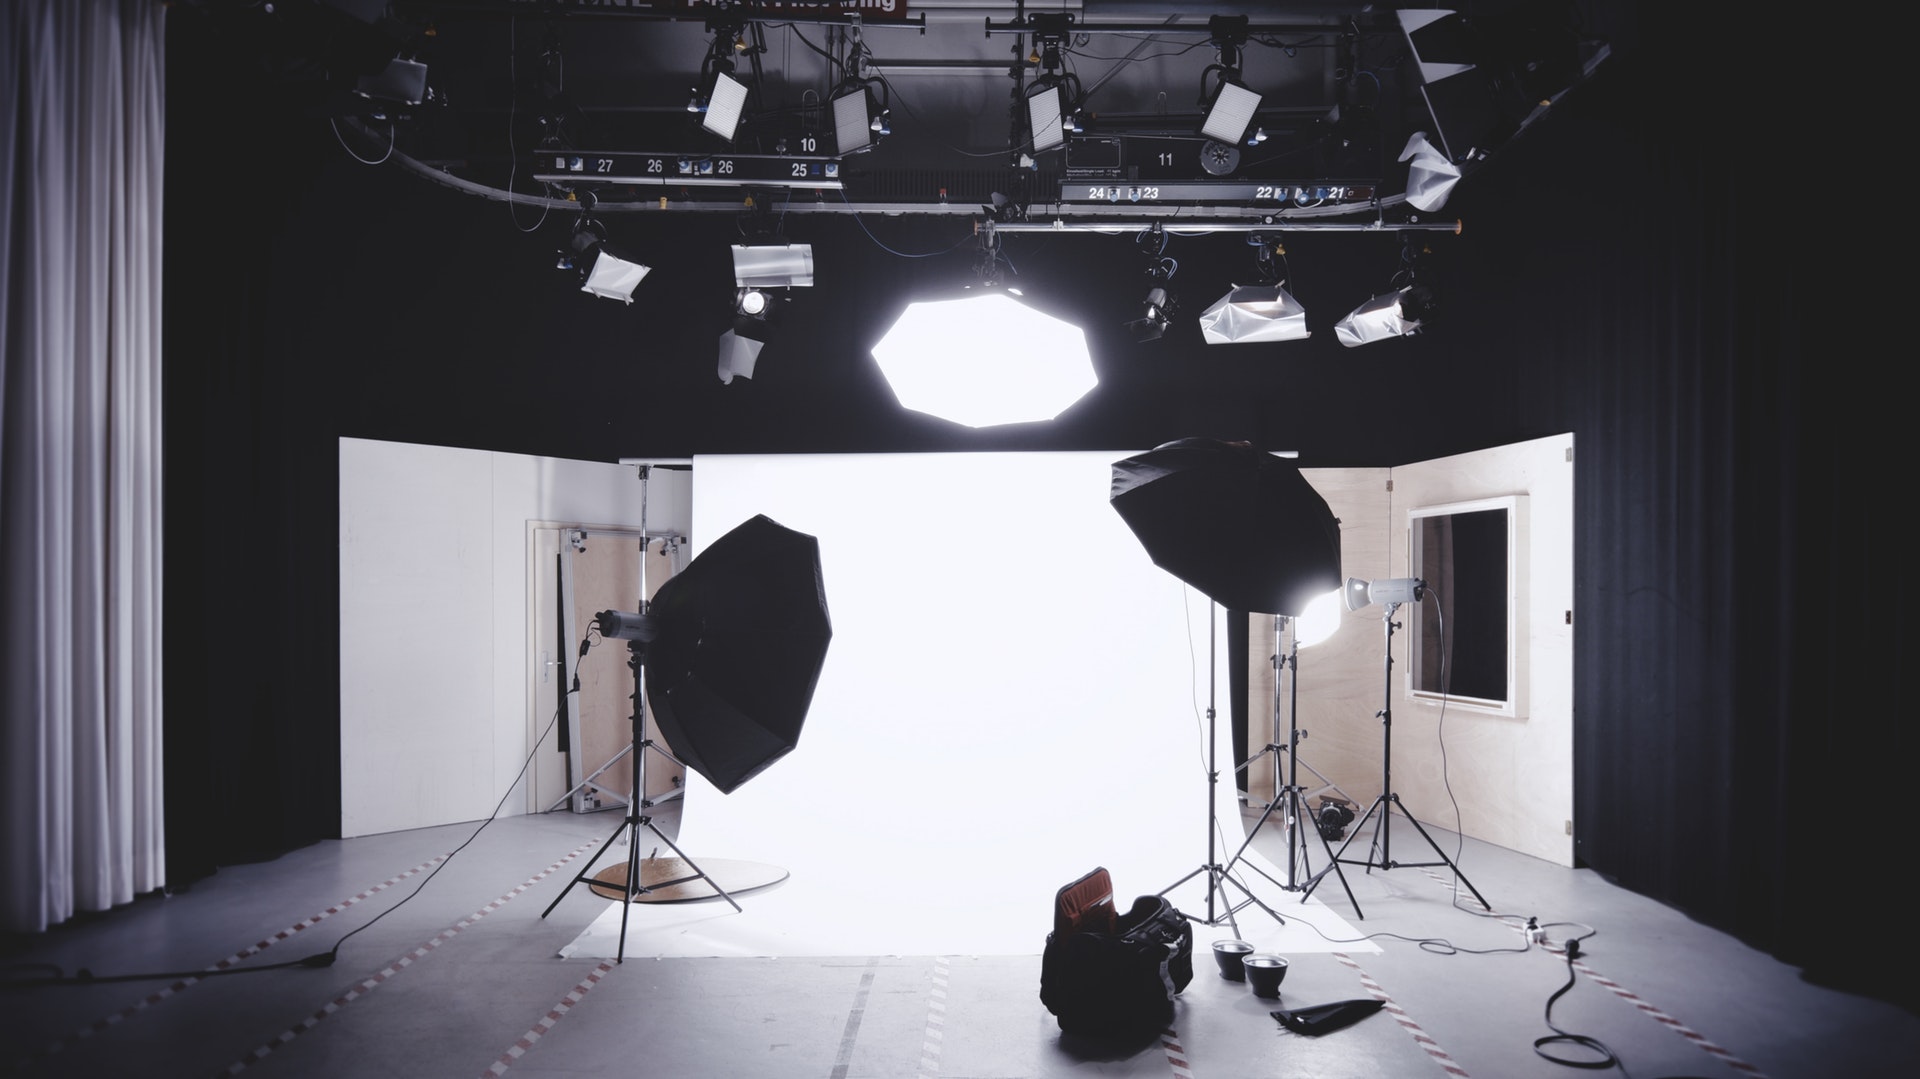
studio

Studio photography, in regards to flash, is a much more controlled and predictable environment than being in the field. For example, during a studio portrait photography session, you can position your lights and direct them in such a way that the result is always the same and there is no external force or natural elements to disturb it. In the field, you often have to shoot and adjust depending on the natural light around you. You might not always end up with the same result for all your images, but depending on the consistency of the natural light, you will get a majority looking the same. These tools will help you improve your flash photography game.

Sometimes it can be hard to gauge the flash output, especially while working in situations with varying light. Investing in a TTL flash (also known as a through the lens flash) can help in these situations, as a TTL flash uses the camera’s light meter to automatically determine the correct flash exposure needed for the situation. Once you start to master the TTL flash, you can start experimenting with manual flash settings to hone in on the exact flash intensity, flash power, and flash duration that you need.

Get Confident

Now that you’ve learned the foundation of flash photography,  along with finding the tools you need, it’s time for you to play around and try some new things. You now know how flash works and how the tools surrounding flash photography can help enhance your images, so what are you waiting for?

I would always tell my friends and fellow photographers that nothing tried, nothing done. So, don’t scared now to pack up some equipment and hit the road to create something that will blow your next viewer or client away. Photography is an art that can be seen as fragile and personal for many reasons. It is a channel through which as a photographer we can express themselves. If you lack confidence in your work, this can present itself on your images. Be confident in what you’re doing, and never be scared to fail. It is through failure that we realize how great we actually are.
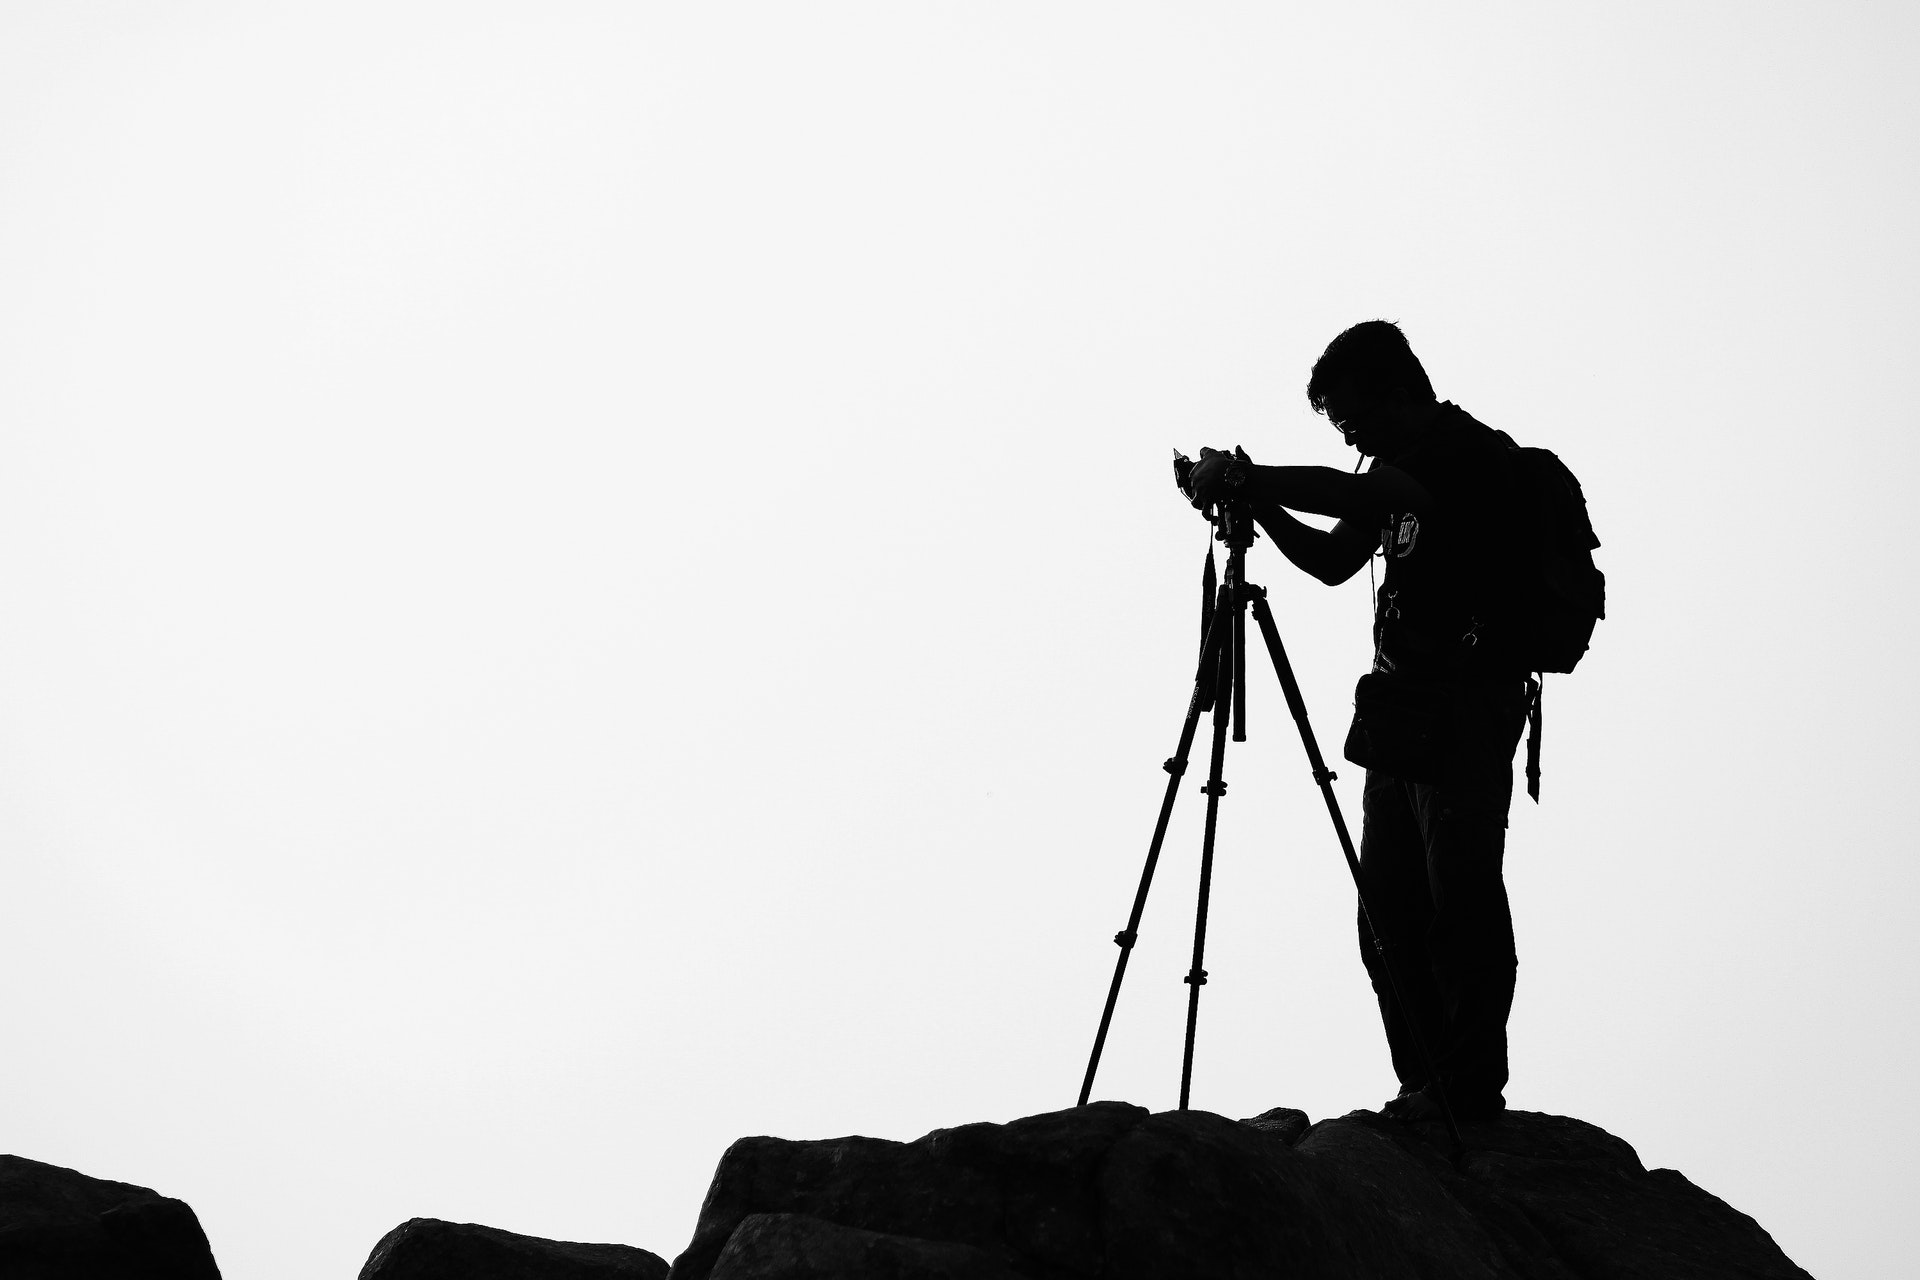
photographer

I hope this article has helped you to overcome your fear of flash photography in ways more than one. We never really know everything so learning something new or looking to make improvements is never a bad thing. With that said, I hope you guys create some magic with flash photography and thank you for stopping by!

Experiencing Belarus in the Spring: The Magic of Eastern Europe

Somewhere at the beginning of spring, a humble little country known as Belarus becomes adept at revealing the most heavenly parts of nature. Cities, towns, and villages alike come together to celebrate the beauty and value of spring’s precious gifts. These gifts can be found in both obvious and hidden places; those who find them are blessed with breathtakingly photogenic subjects. For photographers, this time of year in Belarus is pure bliss.

//

Those who enjoy peace and quiet will find tranquility in smaller towns and in friendly villages. The inhabitants of these places never mean any harm – in fact, they rarely notice passing tourists. Everybody is quietly welcome, especially artists who desire to photograph life’s endlessly uplifting sides. Though there are many things worth cherishing during a Belarusian spring, here are the top 3 things which are guaranteed to bring a smile to any photographer’s face:

Fields

Thanks to the bountiful supply of fields scattered all over the country, there isn’t a spot where photographers won’t find creative potential. Since the countryside is an exceedingly harmless place, these fields provide both privacy and inspiration, giving all kinds of artists a chance to express themselves freely. The fields are most breathtaking before the day begins; soft morning light compels flowers to glow, giving them an otherworldly look. This is absolutely ideal for portrait, family, and couple shoots. Since these fields are experts at catching the light, you’re guaranteed to get brilliant results. If you’re not a fan of trespassing, you have no reason to worry. Many of these fields are open to visitors, so don’t let the fear of getting in trouble haunt you.

In addition to being indescribably gorgeous, these fields are safe. Insect-fearing folks needn’t worry about protecting themselves from buzzing wasps or clumsy spiders. Though insects can’t help but exist in these places (there are many friendly bumblebees out there), they usually avoid attacking harmless people, especially artists who only wish to photograph their charming little homes without destroying them. 🙂

//

//

The golden hour

I often mention the magic hour in my articles because I find endless potential in it. No matter how many golden hours you’ve experienced, you’ll always find something fresh to document using that incredibly soft and warm light. The spring treats golden hour like royalty, allowing it to soak the day in honey-like colors. The entire experience leaves behind warm feelings and even warmer photographs.

The magic hour is perfect for portrait, animal, and landscape photographers. Since the light during this time evenly spreads out and banishes overexposure, portraits are guaranteed to look visually appealing and portfolio-worthy. Most importantly, the spring allows the golden hour to visit almost every day. Since the days are longer, there are many opportunities to find unusual, eye-catching light for all kinds of shoots. Combined with Belarusian nature, this creates perfection.

//

//

Details

When it comes to the period of stunning florals and striking lighting conditions, it’s all in the details. Whether you’re photographing a travel buddy in a pleasant village or taking a walk with your pet on a hill, you’ll find photo-worthy details in every crevice. Exotic flowers, twisted branches, etc., can all be used in your shots. In addition to being marvelous subjects on their own, these gifts of nature can serve as useful backgrounds, foregrounds, and accessories. Something as simple as a foreground of branches sprinkled with blossoms can add mystery, beauty, and vibrancy to a composition. If you never underestimate the power of details, your photographs will improve and glow in ways you can’t even imagine!
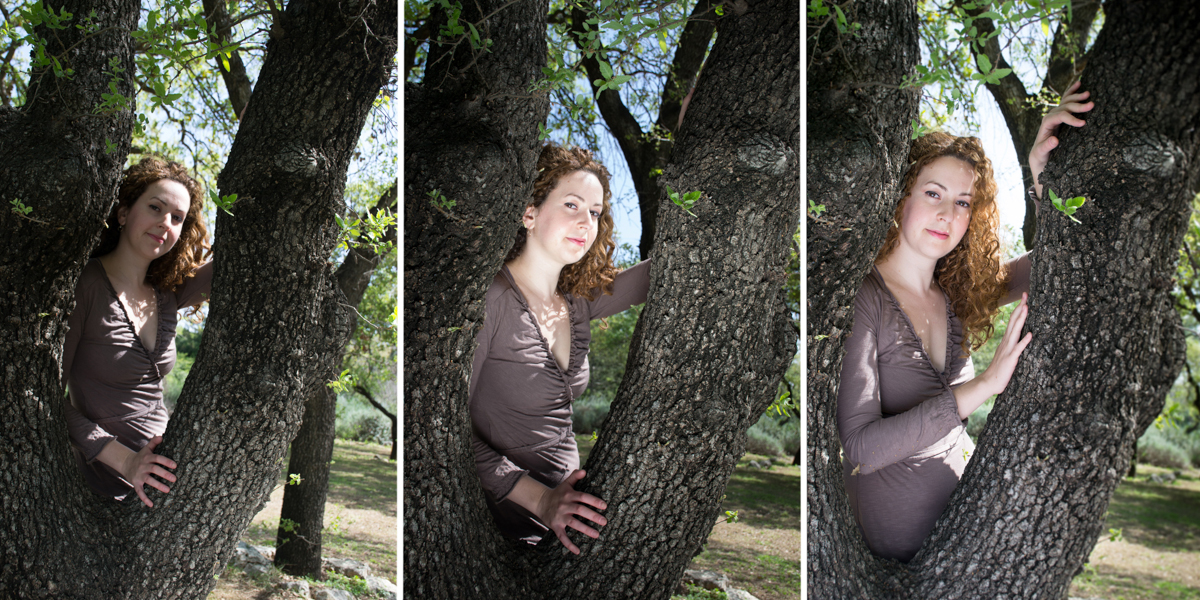
Even if you’re not shooting for a campaign, you can still find wonderful artistic opportunities in places like parks, fields, bushes, and even in the middle of a bustling city. These minuscule yet significant joys exist everywhere, providing photographers of all kinds with sweet moments of creative happiness. Though you may not use them as individual pieces in your portfolio, they’ll inevitably come in handy when you create double exposures, photo manipulations, and more. Collecting photo resources for various art experiments will make you an observant and detail-oriented individual, something that clients value greatly.

//

//

Spring is a blissful time for photographers who enjoy working with cheerful portraits and conceptual works of art. Thanks to the seemingly endless amount of nature in Belarus, photographers can shoot almost anywhere and produce unique results. Best of all, shooting in these locations will provide artists with valuable, timeless memories worth keeping forever.

Happy shooting!

The importance of lighting and why you shouldn’t be afraid to experiment with it

The importance of lighting in photography is a well-known topic that’s been discussed for ages, by both professionals and amateurs. We can easily define light as endless, ever-changing, and infinitely majestic. Light can soak a location with heartwarming golden colors or simply dance with mist in a dark room. Because of its versatility, light is often feared.

Experimenting with light seems to be an intimidating idea; first attempts to master light are often met with failed results, which might discourage many artists. After all, it’s still possible to take visually stunning photos when there’s a plentiful supply of light available. Though unsuccessful shots are inevitable in any photographer’s life (regardless of their level of experience), befriending the many sides of light is highly important. Several failed shots are worth experiencing if the ultimate goal is a strong understanding of light.

The importance of lighting in limited light situations

Creative potential and light go hand in hand; if there’s even a small source of light somewhere, there’s a chance you’ll be able to use it to create fascinating shots. Dark rooms with limited light, for example, can be used to take mysteriously inspiring portraits. If you prefer to decrease your ISO number as often as possible, encourage yourself to get out of your comfort zone and use a high ISO number. In most cameras nowadays, a high ISO isn’t extremely damaging to a photograph, especially if you shoot in RAW mode. A combination of RAW, a high ISO, and a sturdy tripod will allow you to take photographs that would lose their mystery if more light were available.
Limited light is also a great opportunity to take abstract photographs. Unclear portraits of people whose faces are slightly concealed often have the power to tell a deep story. Silhouettes or shadowed faces are great examples of photos that could instantly catch a viewer’s eye. If storytelling is something you’re interested in, limited light could help your stories come to life.

//

The manipulation of light

Light can be manipulated to make your photographs look like carefully crafted works of art. Find beautiful fabrics in your home (curtains are a great resource) to create intricate shadows on sunny days. If you’re a portrait photographer, this shadow play will help you take unique photos of people, photos that both you and the model will be proud to have. Interesting shadows can also be created using hands, trees, hair, grass, and more. Your imagination is the most important part of the equation, so make sure you nurture it whenever you have the chance. A big imagination will constantly give you peculiar and brilliant ideas, which will help you to continuously grow as a photographer. The more ideas you’ll acquire, the harder it’ll be to not make great progress.

//

/

Artificial lighting and its role in Photography

Though natural light isn’t accessible 24/7, artificial light is always there to help you take better images. This kind of light can be altered more easily than natural outdoor light, making it possible for you to have more control over everything. Artificial light can be moved, decreased, and covered in an endless amount of ways. Even everyday objects as simple as torches, desk lamps, and phone light can be used to take stunning portraits. That’s why it’s crucial to acknowledge the importance of lighting early on.

You might be repelled by the unflattering colors that artificial lights tend to create – yellowish or blue hues that alter skin tones dramatically. This, however, can be fixed by altering a camera’s white balance. If your camera’s white balance doesn’t fix the issue, don’t refrain from continuing to take photographs. Editing programs such as Lightroom can decrease an image’s temperature and gracefully fix any unwanted colors.

//

Confront your fears

Any creative fear can be changed by directly confronting the fear itself. If you’ve always avoided darkness for fear of getting blurred results, learn the power of high ISO numbers and strong tripods. If you’ve never been a fan of artificial light, research the works of talented studio photographers like Sue Bryce and give artificial light another chance. If you think your home is boring, notice the way light enters your room or the way your lamp makes your table shine. If you find too much natural light distasteful, dare to experiment with shadows. Open your mind to the beauty of light, no matter where you are, and you’ll get brilliant photographs in return.

Happy shooting!

//

Using backlight to create ethereal portraits

You’ve probably come across dreamy-looking portraits, ones which possess a warm glow without appearing too harsh. It seems that the photographers behind these shots mysteriously conjured up the perfect light, creating a composition so striking that you can’t imagine recreating something equally beautiful. The secret, however, doesn’t lie in light that requires an elaborate spell – the key to taking great backlit portraits is the right kind of light and the ideal location to complement that light. Though this might sound like a tough (or vague) challenge, don’t be discouraged. If you find yourself visualizing photographs even when your camera isn’t nearby, mastering the art of backlit photography will come easily to you. Below are a few important basics to get you started:

Finding a great location

If you’d like to experiment with backlight, find a location where light roams freely. (Open spaces like fields are ideal for this.) If you live in a busy city filled with structures that block the sun, find a roof where you can safely photograph yourself or your subject. These locations will give you plenty of light to work with. (If you don’t have access to such places, shooting in front of a window on a sunny day will suffice.)
The backlight will light up not only your subject but everything surrounding your model. This is why shooting backlit portraits in a field of flowers, for example, will yield breathtaking results. If you’re shooting in a more urban location, add your own flowers and plants to enhance the composition. Challenge your imagination. When surrounded by objects which are beautifully lit, your subject will glow all the more. Furthermore, such small decorations will make the overall composition absolutely stunning.

//

//

The benefits of shooting during golden hour

Before we get into the best ways to position a camera for backlit photography, let’s focus on every portrait photographer’s favorite time of day: golden hour. The magic hour comes into being shortly after sunrise or before sunset. This is a time when the light is, as most people agree, at its best. Everything takes on a soft and warm glow during the golden hour, creating an almost nostalgic feeling wherever you look. If you’re an absolute beginner, experimenting in an open space during golden hour will inevitably provide you with the best possible lighting conditions for a successful shoot. For expert photographers, shooting in all kinds of spaces during the magic hour will add a pleasant touch of warmth to their work. If you’d like to learn more about the golden hour, read this article.

Choosing the best time to shoot

To make the most of a backlit shot, you must control the amount of light that enters your lens. Direct sunlight will ruin your shot, while completely blocking it by placing an obstacle in front of it will make your results very dark (unless you’re shooting silhouettes, this method won’t work.) For visually appealing results, make sure light enters your lens from one side. This will create a pleasant light leak which will not only brighten your composition but add a beautiful texture to it.

//

Unlike golden hour, a backlight is rarely available in limited quantities. It can be found even on overcast days when soft light is present. If you find the light is too dull on a day when the weather conditions aren’t ideal, use a reflector; this will significantly enhance any available light and make your subject’s face stand out in a flattering way. If you don’t own a professional reflector, it’s very likely that you can find one in your home: a mirror, a white sheet of paper, kitchen foil, or a Tupperware lid.

Experiment persistently

Most importantly, experiment. Break the rules: create dark silhouettes, work with overexposed shots, and photograph whatever you desire during the magical hour. Enjoy the warmth of golden hour and the softness of duller days. If portrait photography is your niche, experiment with other genres using the same methods. Try out taking photos of flowers, buildings, and objects. Broaden your creative horizons. This will be very evident in your results; additionally, it will transform you into a better photographer and observer of the world.
Whatever you do, don’t stop shooting, and you will thrive in the most surprising of ways. Just remember to embrace spontaneity, listen to your imagination (no matter how bizarre it may seem at times), and find potential in seemingly insignificant details.

Happy shooting!

//

//

Finding spellbinding inspiration in films

Films can be thought of as the equivalent of moving photographs. Seemingly endless, these timeless images reveal an array of interesting emotions, places, and people within just a few hours. The stories they tell often touch our hearts and remain with us for a long time, teaching us more about ourselves, the world, and what it really means to be alive. It’s not surprising, then, that the basic blocks of filmmaking – millions of stunning images – have the power to provide us with inspiration. Using movies as an opportunity to take more effective and meaningful photographs will lead you to a future filled with far more creative potential than you can imagine.

But how can you be inspired by films? Any story, whether it resides in the azure skies of a painting or in the mind-boggling plot twist of your favorite TV show, can serve as a source of valuable ideas. If you feel you’ve reached a creative block, or if you simply want to explore other ways of photographing people and places, here’s a list of things to look out for when you’re enjoying your favorite film:

//

Darkness and light

Since an indescribable amount of effort is put into the making of a film, each scene is guaranteed to have hints that will allow viewers to understand the story on a deeper level. Symbolism – which can be both obvious and subtle throughout a film – can be found in the way light hits the character’s face, for instance. Films revolving around mystery often include characters who are barely lit by car headlights, or who are overshadowed by a mess of clothing in a dark room. Heartwarming scenes in movies are often accompanied by light that reflects the characters’ sunny dispositions – golden light that makes their eyes glow and their hair shine.

Even if you’re not planning to take cinematic photographs, it would greatly help to understand the importance and beauty of light. The more you look at visually stunning compositions (of which there is an abundance in films), the easier it’ll be to find similar compositions during your own shoots. With time, you’ll be so accustomed to finding both unusual and striking light that you’ll find potential everywhere, even if you live in a tiny apartment in a city that barely gets any light. Even shadows and darkness will cease to intimidate you – they, too, will become your artistic tools.

Films and shows with breathtaking visuals:
The Light Between Oceans
Carol
Riverdale
Her
An Education

//

//

Angles and movements

Characters often do much more than speaking in a film. Bits and pieces of an entire story can be found in expressions, postures, angles, and more. To create a photograph with a deeper story, pay attention to your subject’s movements during a shoot. If you want to get even more creative, come up with a story beforehand to intensify the emotional aspect of your shot. This will make the shooting process fruitful in numerous ways; you’ll get brilliantly emotive results, and you’ll find your path to becoming a more advanced storyteller. The more you practice, the incredible your results will be.

If you’d like to work with more than posed photographs, go on a trip with someone, even if it’s a short walk to the local bookstore. Photograph their movements as they observe the world around them. There will be moments of oblivion – fleeting seconds when they’ll forget there’s someone photographing them – which, if captured, will result in honest and unique portraits. If you’d like to experiment with raw emotions and poses, be spontaneous during your next shoot.

//

Details

Close-ups are common in films. They reveal parts of a character that the viewer would’ve ignored in more distant scenes. In the movie Carol, the main character’s (Therese) love interest is often shown up close to reveal exactly how much Therese admires her. As you explore locations with or without your model, find details that catch your eye. If you go out for a morning walk, notice the way light hits a leaf, for example. Find potential everywhere, and the ideas will gracefully swim to you.

So take advantage of the many brilliant films that exist today. Take notes as you observe movements, emotions, light, and details. Inspiration could be hiding in the least likely places; it’s your job to find it and use it. Using this inspiration, you’ll be able to add an abundance of light into your portfolio and improve significantly as a photographer.

Happy shooting!

//

//

Moscow Throughout the Seasons: An Inviting Adventure to Photography

Moscow, though often associated with endless coldness, goes through a variety of unique seasons. Every month possesses an air of mysteriousness; however, despite the unreliability of the weather, a creative opportunity is always waiting to be found and cherished. In this article, you’ll be introduced to the unpredictable seasons of Moscow, from freezing winter months to welcoming spring days. I hope this gives you a better idea of what this grand city is like throughout the year.

Moscow’s Winter

Winters are unrelenting in Moscow’s more rural areas. The city is treated kinder than surrounding villages, providing visitors with warm stores and outdoor food stands. Exploring the city’s streets often feels like observing everything through fogged up glass. The snow, often reminiscent of the violent storms one sees in documentaries, seems to speak of endless cold days and silence (save for the endless traffic, which is at its busiest). This time of year in Moscow is perfect for cozy indoor shoots. Those who have the time and desire to experiment with studio photography will find themselves thriving during this time. The brave individuals who do step outside are often provided with outstanding photo opportunities. Whichever option you choose if you ever visit the city, remember to dress warmly and have a thermos (or two) with you at all times!

//

//

In villages, the silencing atmosphere can be either comforting or intimidating, depending on how much of a city person you are. Village homes are covered in thin layers of frost. It’s not uncommon to see chickens huddling and clucking busily, completely familiar with the season’s harshness. The sight is so unique that one can’t help but take photos of everything, even if the temperature threatens to freeze any exposed skin. Though this time of year is considered the most discouraging, it holds uplifting treasures for those who listen, observe, and create.

Moscow’s Spring

In the spring, magic resides in details. Winter’s ice cold hands finally begin to thaw, leaving behind signs of exhilarating life. This is a hopeful and tender time of year filled with long days and sweet-smelling parks. Colors slowly begin to bleed into the picture; though they’re not as intense as summer’s bursts of color, their presence is strong enough to lift even the heaviest of spirits. This, of course, is necessary after months of dullness. Spring, unlike winter, is ideal for outdoor shoots. The floral additions, rejuvenating golden hours, and energizing mornings promise gorgeous wedding, portrait, and nature shots. Those who love anything flower related in the creative world will find joy in the middle of the month when the flowers lose their shyness and confidently step into the world.

//

Moscow’s Summer

Summer enters the scene grandly, like a relative you can always rely on. It lazily walks around, each step a day full of hazy thoughts and memories. The heat in Moscow isn’t unbearable, much to everyone’s relief. There may be days when the very center of the city seeks to burn your skin, but that is often impossible to predict beforehand. (This is why it’s always handy to have access to suncream and a hat.) It’s during this time of year that photographers of all sorts can thrive. Golden hours and longer days generously spend their time with people, promising endless creativity. The endlessness is so comforting and believable that for a moment, it’s possible to forget that the colder months are just around the corner. However, summer has a way of removing that fear and we almost, almost, don’t mind it when autumn knocks on the door with a suitcase full of leaves.

//

//

Moscow’s Autumn

This is a product of summer and winter, a realm between two very different worlds. Autumns in Moscow are crisp morning air, dry hands, and the foretelling of a renewed cycle. This is a time of preparation, of finding warmth before the winter calls the city’s name. Autumns are perhaps the most wonderful time of year for fashion and portrait photographers. Before the leaves depart, Moscow is a golden nest ideal for portraiture, landscapes, and everything in between. The lack of intense coldness allows for relatively comfortable shoots; at the same time, the chilly weather makes coming home all the more pleasant.

//

//

And just like that, the cycle begins all over again, each season waiting for an artist to capture its best and worst sides.

How to use a reflector to enhance your photography: a beginner’s guide

One of the most important elements of photography is, of course, light. If you like taking photos outdoors, one of the challenges you will face is that you can’t adjust the light sources so much. The sun and street lights can’t be moved, so you need to find the way to make their light work for you. Sunlight is also influenced by the time. For example, if it is high noon our light is coming from right above us and it is a very hard light. But if we are taking a photo at sunrise or sunset, the light will come at an angle. Light intensity also varies between sunny days and when the sky is hazy, foggy or cloudy.

Light variance allows us to take spectacular and diverse photos. However, sometimes we want to have a bit more control over the lighting. One of the simplest and most efficient means to do it is by using a reflector.

What is a reflector?

In my opinion, the best photography equipment that I ever got is my reflector. It took me several years into photography to get one. I guess that I always saw reflectors as something that only professionals use. In fact, reflectors are one of the most affordable pieces of equipment a photographer can have. Mine have cost me around 14 euros in Amazon.

reflector
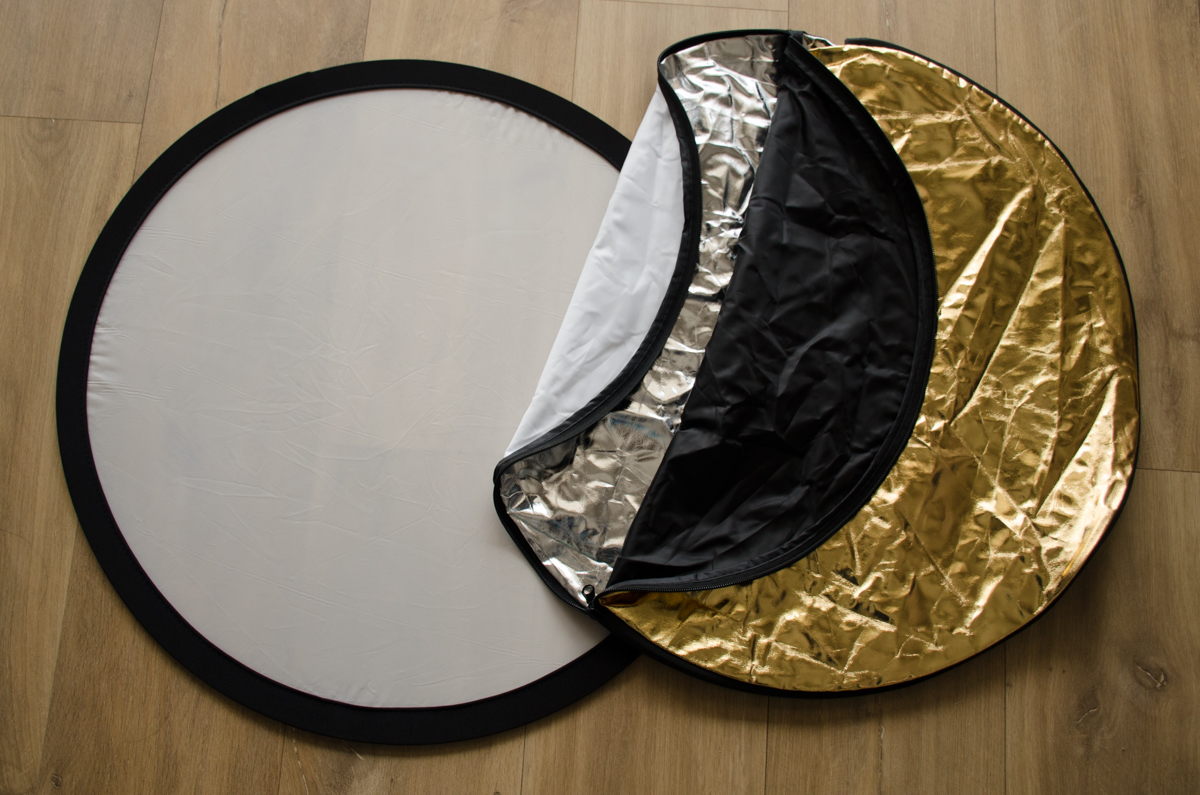
The reflector I’m using. The envelope is made up of four pieces, the gold and the black are sewn together back to back, and so are the white and silver. A zipper connects the two pairs. this enables one frame to have 4 different colors. Together with the diffuser, it really is a 5 in 1!

A reflector is basically a surface which redirects the light towards a desired subject. You can even make one yourself with a cardboard and aluminum foil. There are many variations and kinds of reflectors available on the market. The most common and affordable ones are the collapsible round reflectors with multiple colors. They consist of a foldable frame with a translucent cloth stretched over them. These frames come with a reversible envelope which offers four different surfaces (usually white, silver, gold and black). Don’t repeat my mistake, get (or make) yourself a reflector soon. You will see how easily your images improve.

How to use a reflector

Using a reflector, you can bring in light from additional angles and lighten shadows. In other words, you use them to change the direction of the light sources in order to add light to dark areas that make your image look bad. Using a reflector is very similar to what we did when we were kids and we played with the light beams from mirrors, but in a more delicate way.

A common use of the reflector is for portrait photography in the middle of the day, when the light is coming from above the model’s head. In this situation, the model’s face will be full of shadows and hard lights. In addition, the eyebrows cast a shadow under the eyes, making him/her look a bit like a raccoon. By using our reflector, we can bring light from a lower angle and lighten the model’s face, this way we avoid the “raccoon effect”.

You can set the reflector on a stand or hold by yourself. However if you are holding the camera it can get really complicated. You can also ask an assistant or a friend to hold it. Another option is that your model holds it. A good option is to let your model sit and put the reflector on top of his/her knees. In some situations you might need to use your imagination and have the reflector standing on walls, cars, columns or even lying on the floor. Don’t be shy and try different options until you get the results you want. This is part of the fun of a photo session!!

Gold and silver sides of the reflector

Keep in mind that both the silver and the gold colors are metallic and reflect a lot of light. For that reason they should be used from a certain distance (that will vary according to light conditions). If you are using it to reflect light on a person or animal, it might be even blinding. Take care and if you need it, ask the model to close the eyes until you adjust the light reflection to an intensity that will be comfortable for him/her.

sleeklens-43-4
The metallic colors reflect the light almost like a mirror, be careful when you aim it at people.

As the silver side reflects the light without softening it, besides being a good option for greater distances, it is also great for weaker lighting conditions. Silver is also a good one to start getting used to reflectors because you can see the effect very vividly, making your life easier at the beginning.

sleeklens-43-13
In the first photo I didn’t use the reflector, the middle one was taken with the reflector too close to the model, the last one was taken with the reflector set at a greater distance. See how the light is much more delicate in the last photo in comparison with the others

The gold is very much like the silver except that it is giving the reflected light a warm yellow shade, similar to the golden hour light. It can be great for emphasizing sun tan, or if you want to bring out a certain color in the photo. But take care, because the yellow light can be overpowering.

sleeklens-43-6
In this photo you can see how the golden-yellow light reflected from the gold emphasizes my friend Nita’s sun tan. you can also see how the shadows articulate her muscles

White side of the reflector

The white side reflects a very soft and delicate light, you need to place it very close to your subject in order for it to have an effect and it won’t work if the lighting is bad (like at dusk, or if it is cloudy), but the result will be a very warm and soft photo, which is great for portraits (family, children, pregnancy photos, flowers).

reflector
Here you can see how the different colors affect the photo: in the top left I didn’t use the reflector, in the top right I used the silver and you see that the illumination is almost equal on both sides of Porky, the bottom left photo was taken using the white and you can see how the light on Porky is softer, the bottom right photo was taken with the golden reflector and you can see Porky has here a much warmer light.

Black side of the reflector

Finally, a reflector can be used as a light blocker too. If you have a light coming from an undesired direction. For example, if you have light reflecting from a window,  you can reduce the reflecting light by placing the reflector with the black side towards your subject.

refector
Here you can see the effect of the black side of the reflector, on the left I didn’t use a reflector and on the left photo I used the black. Do you see the difference?

Using the reflector’s frame as diffuser

Besides reflecting the light, the reflector’s frame (the one with a semi opaque cloth) can be used as a diffuser. Diffusers soften the light coming directly from a light source and make the shadows less hard..

sleeklens-43-14
These two photos were taken in the same spot moment one after the other. In the upper photo I took the photo when Inna was subjected to the hard mid day light, in the lower photo Inna was “sheltered” from the harshest light by the diffusing inner frame of the reflector.

I want to thank my friends Inna and Nita for being my models and also my nephew for letting me use Porky to illustrate this article. Now that you have the basic information about reflectors, it is time to grab yours and start experimenting with it!

Enjoy and have a happy shooting!!

Wait For It: Improving Your Photos With a Little Patience

Along with being an art, photography can also be a matter of patience.

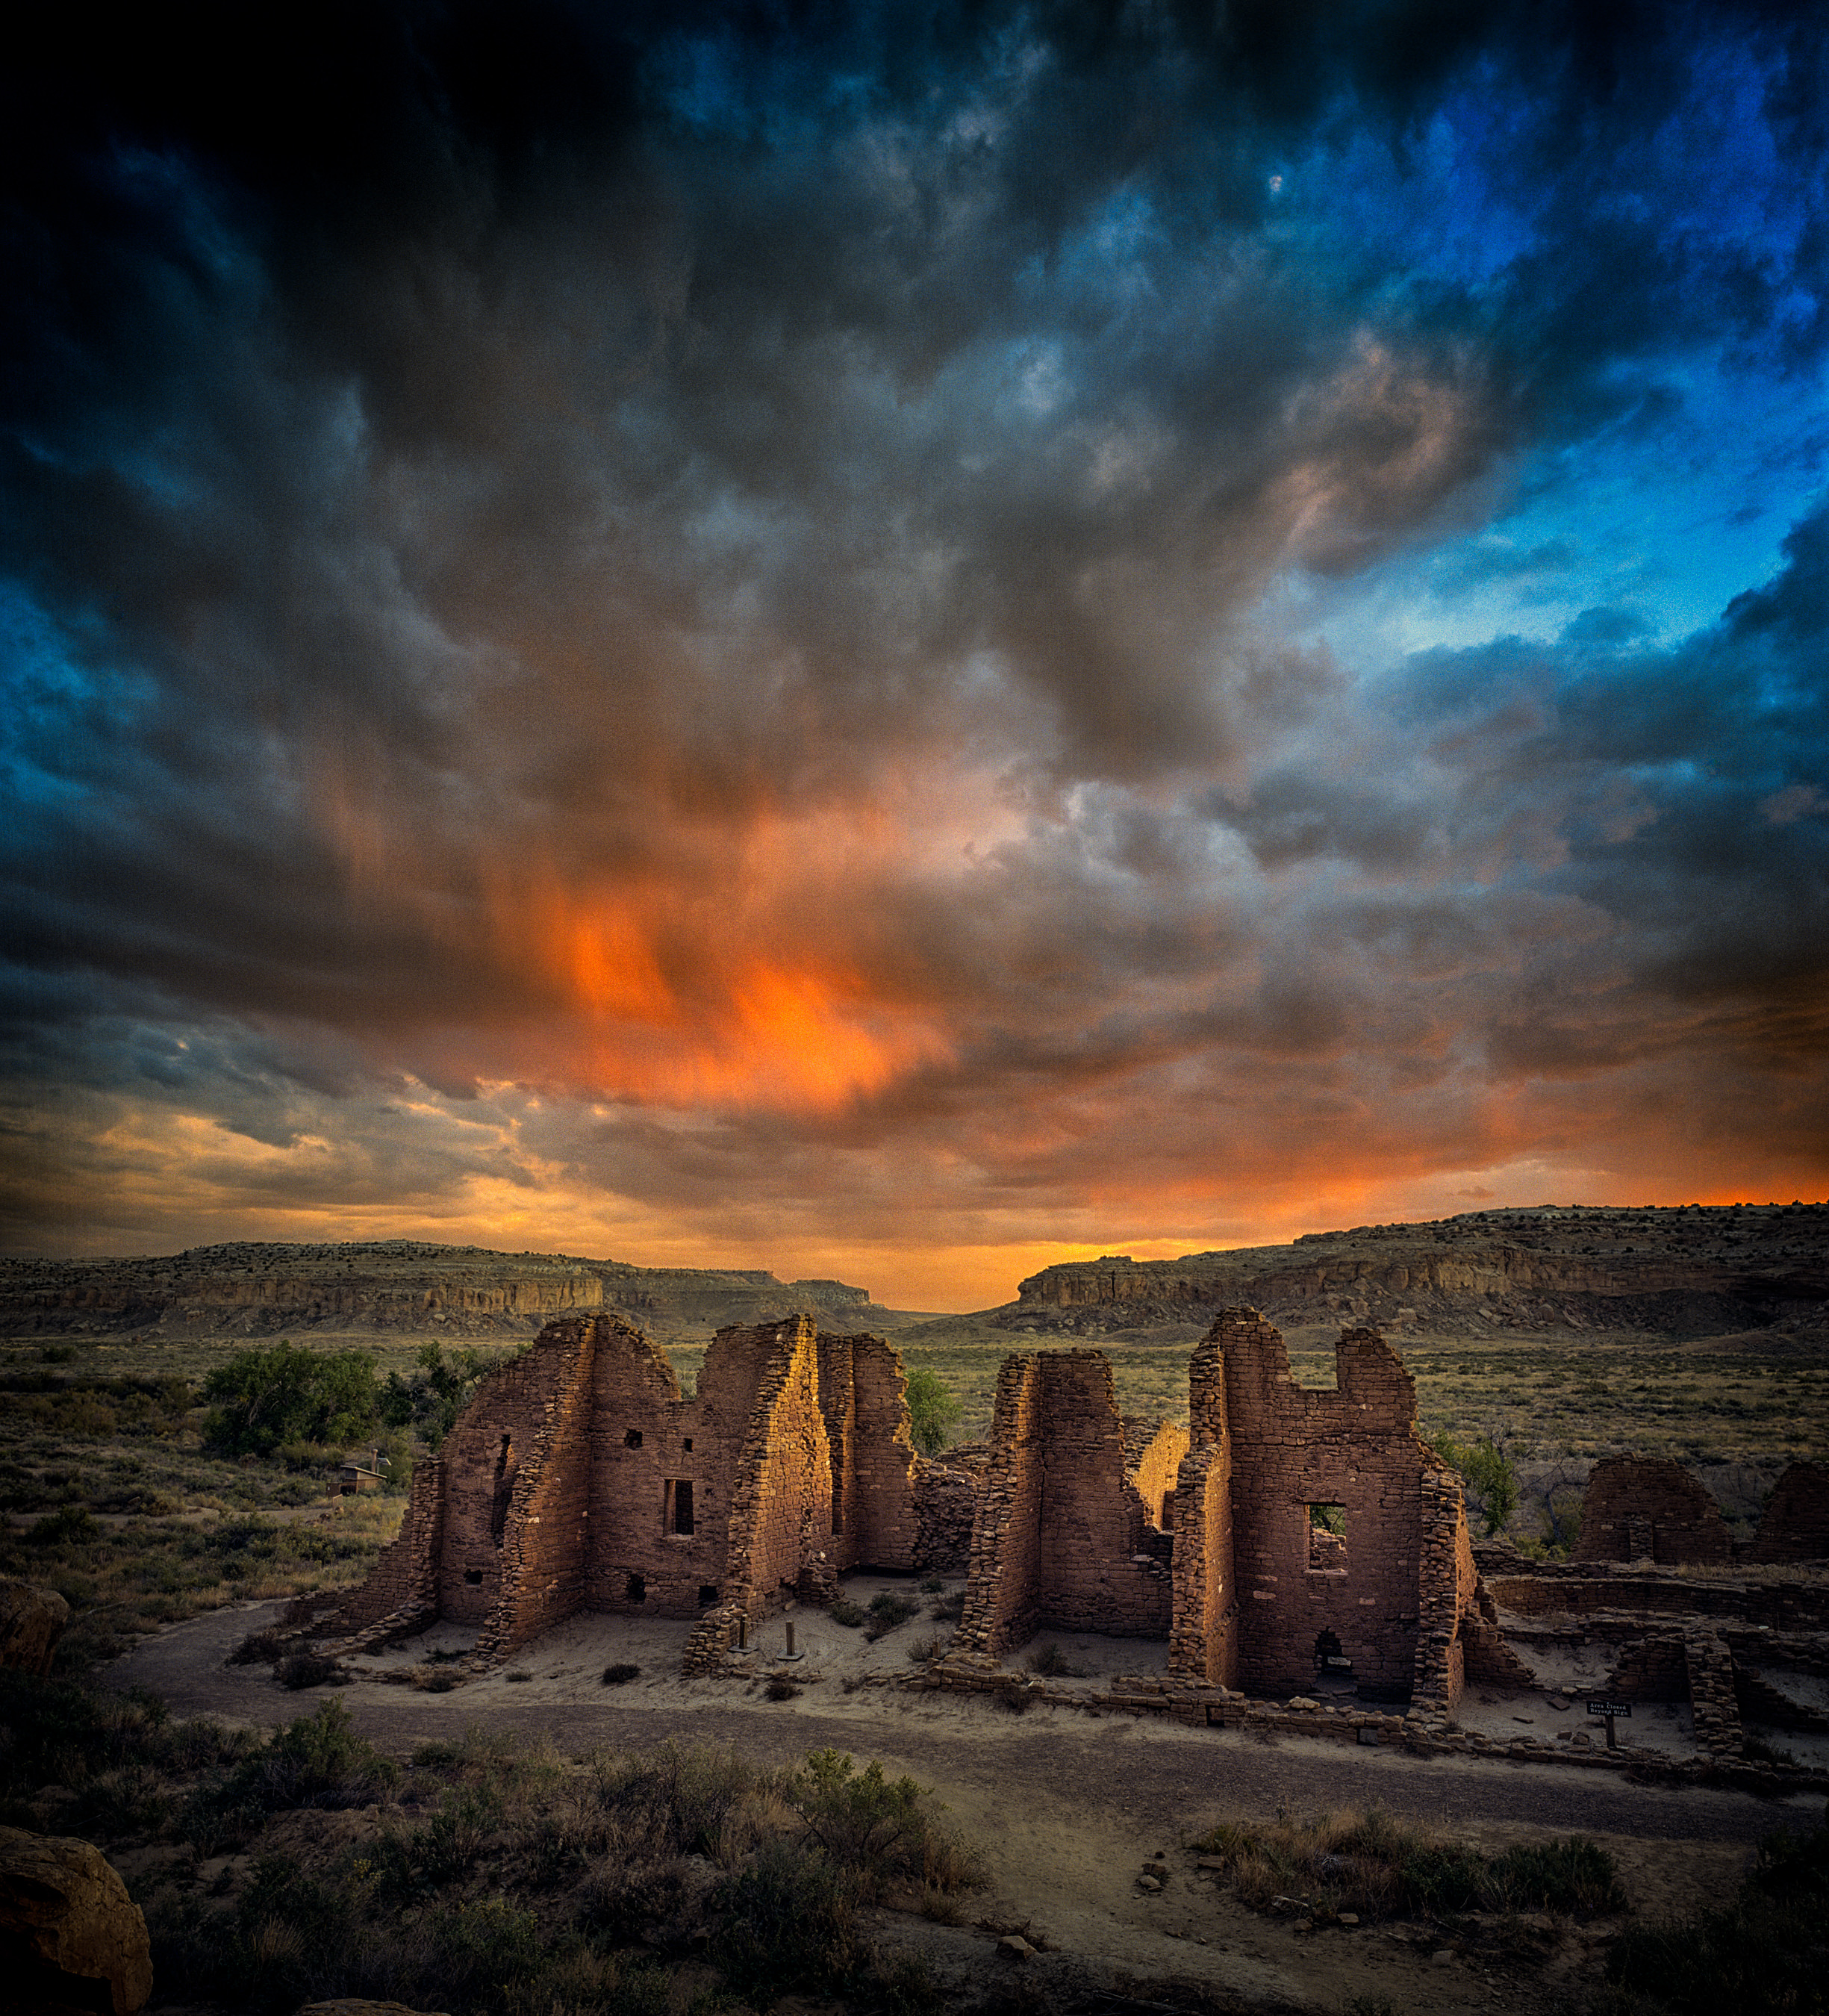
So there I was, sitting on a rock ledge above a cluster of ancient buildings in Chaco Canyon, New Mexico, waiting for the sun to set. The stormy clouds started to burst with color. Click. If nothing else, I thought, I’ve got a decent shot. And then the sunset kicked in with more drama in the clouds. Click. Okay, forget that first photo. This is one is the winner. The light started to fade a bit and I thought, well, maybe it’s time to pack up. After all, the park rules were pretty clear about exiting at sunset.

But then you can never trust the light at the end of the day to be a linear event. It doesn’t always just fade into nighttime. Some unseen cloud could blow one way or the other and suddenly there’s a burst of sunlight more spectacular than anything that happened a minute before. There’s also alpenlight, that somewhat mysterious (at least to me) post-sunset light that magically appears usually just as you toss your gear into the car.

sunset-chaco-canyon_mini

So I waited. Let the rangers yell at me for being a little late. I was going to give the scene a chance to be absolutely amazing. I sat for another few minutes and then boom! there was an explosion of light and color that added incredible dimension to the clouds. Click. Best shot of the bunch.

Never Turn Your Back on a Great Scene

Sometimes good images are sneaky things. They first tiptoe in front of you with hardly inspiring light, and then just as you decide your time could be better spent doing something else—and you’ve put away your camera—they spring out as if to say, Ha! Fooled you again!

So invest a little more time and patience at sunset and just wait a few more minutes. Those photons bouncing around in the sky and reflecting off the ground might just do something wonderful you couldn’t predict. At the very worst, you’ll be packing up in the twilight with a flashlight to guide you to your car or camp. But there’s often a good chance you’ll also record magic.

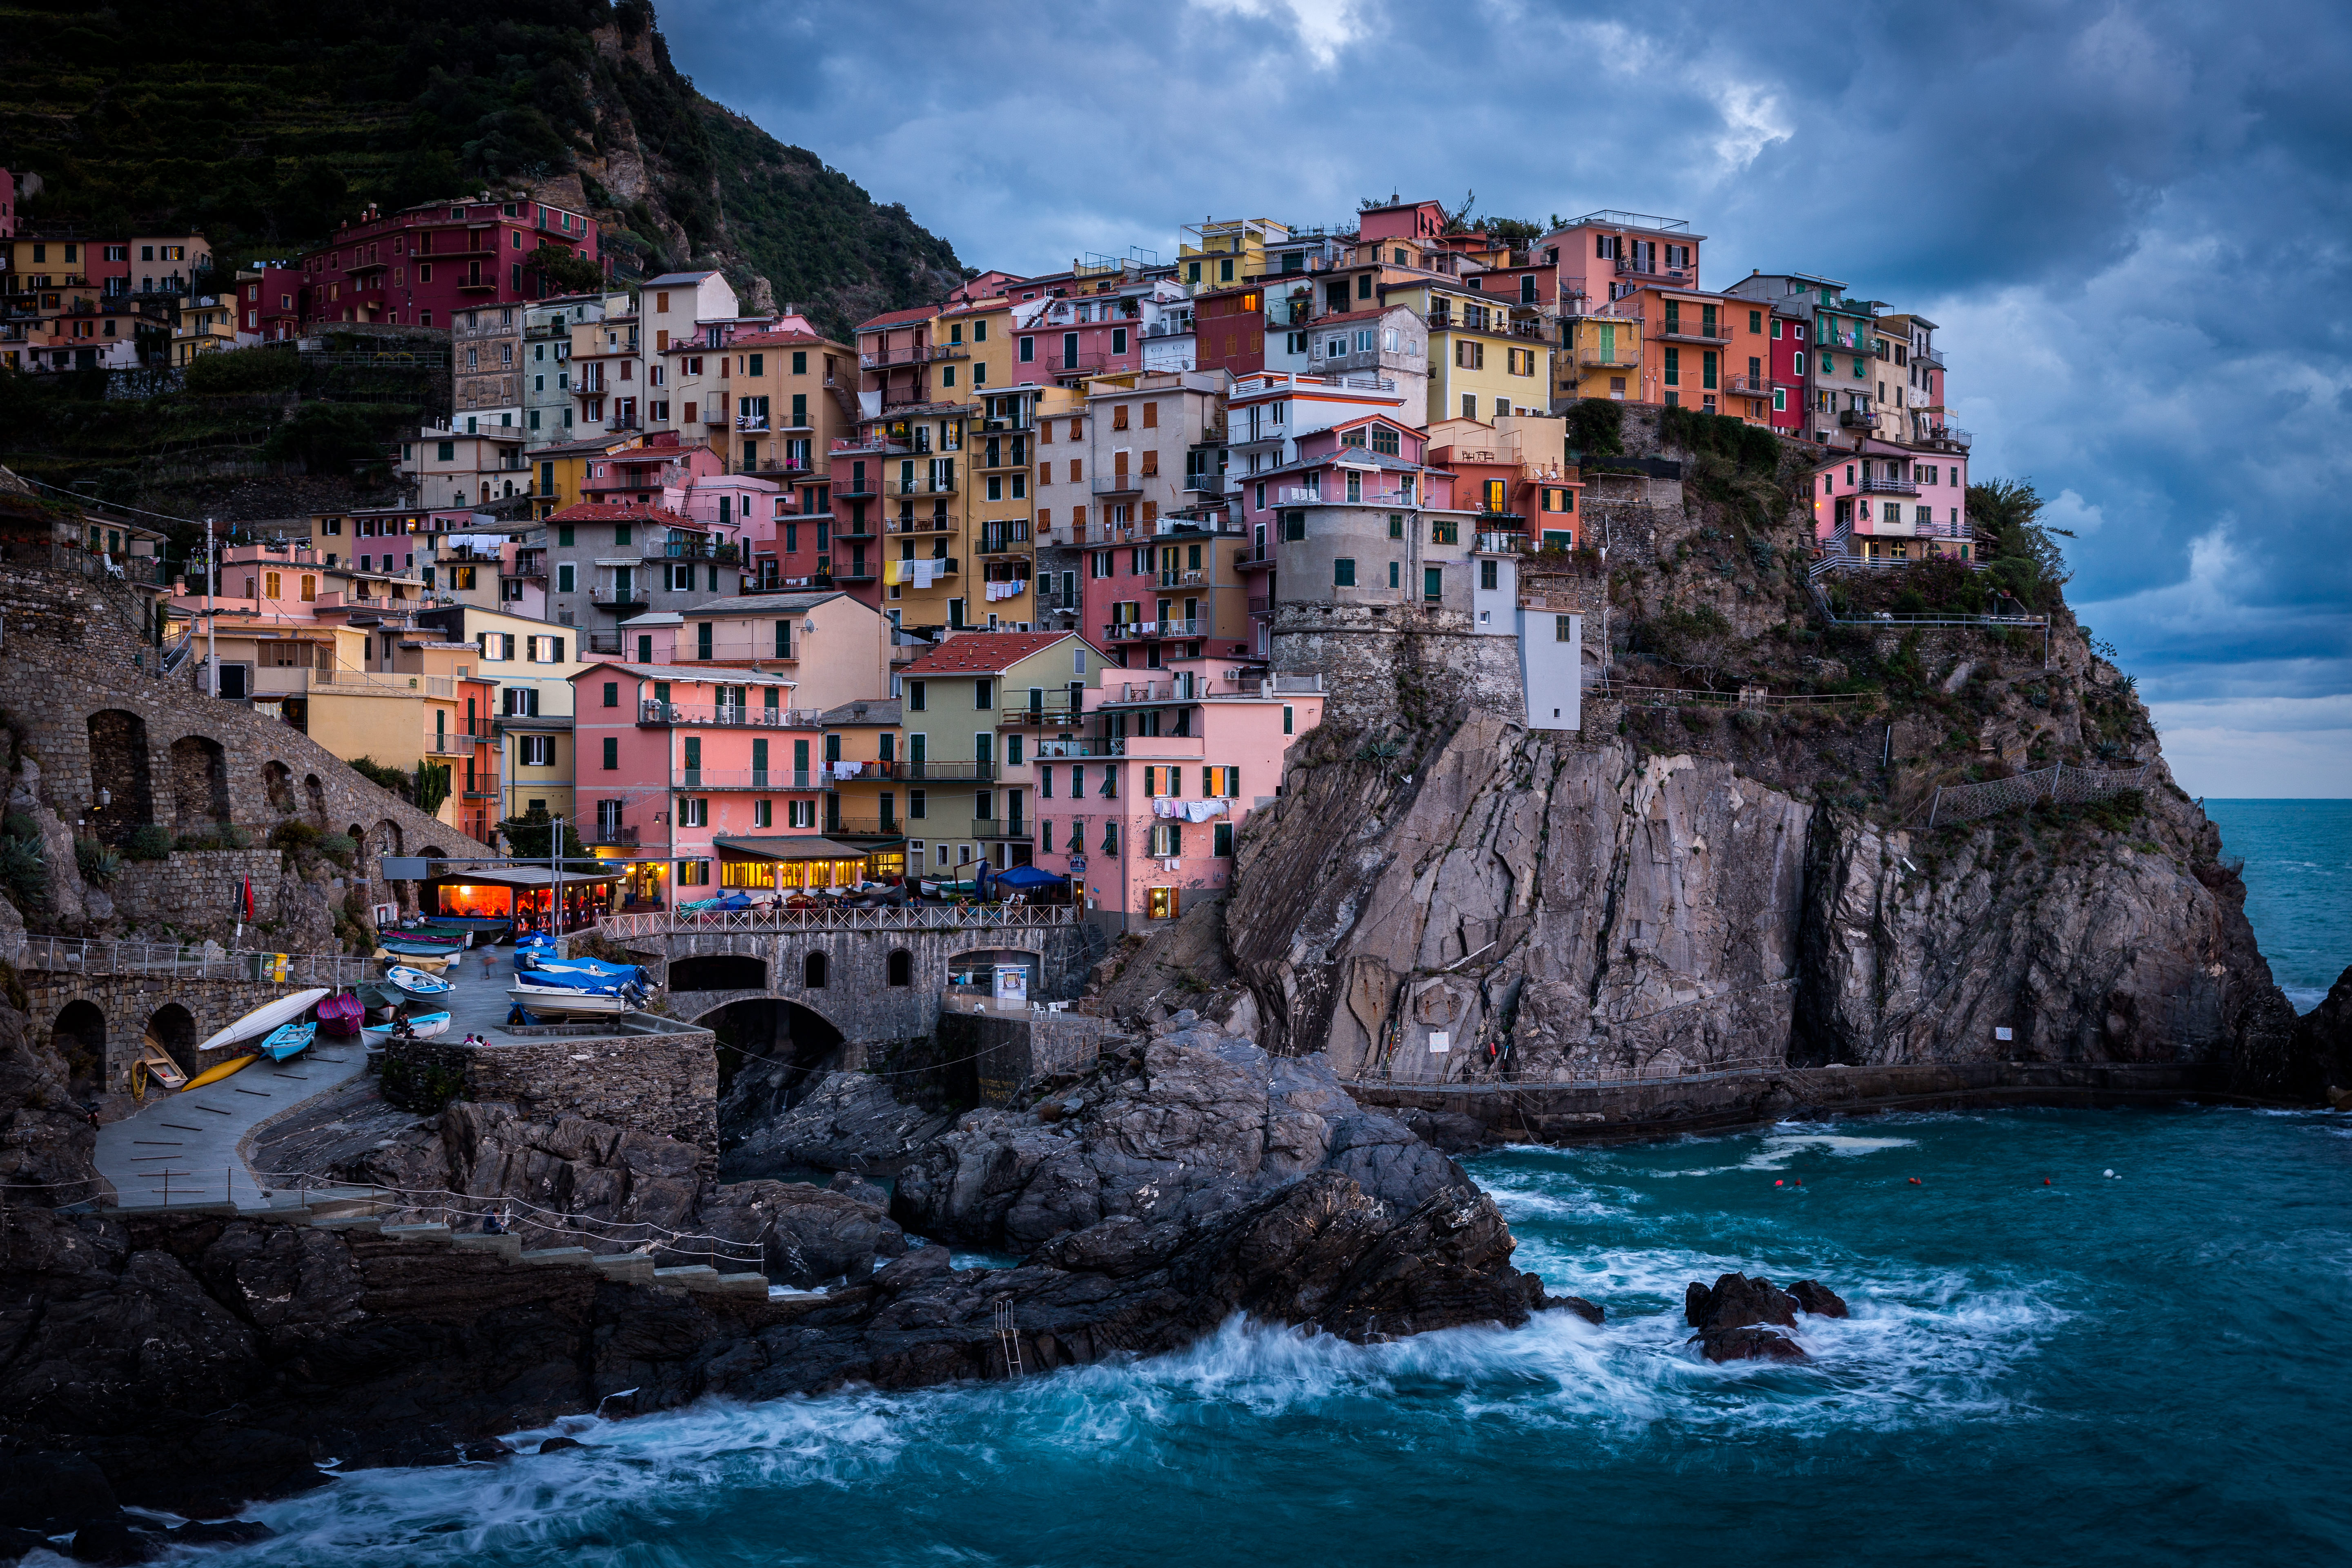
Monarola, Italy. This was taken after the sun had set and I waited a few minutes more while all the other photographers started packing up. Suddenly, a wonderful soft alpenlight bathed the buildings and made for a wonderful scene.
Monarola, Italy, part of Cinque Terre, a national park. This was taken after the sun had set and I waited a few minutes more while all the other photographers started packing up. Suddenly, a wonderful soft alpenlight bathed the buildings and made for a wonderful scene.

The Wonders of Alpenlight

There’s this kind of lingering light following sunset called alpenlight that every landscape photographer should wait for. You can’t predict it. Sometimes it’s about 15 minutes following sunset, sometimes it doesn’t happen at all. Sometimes it lasts 10 seconds, sometimes a few minutes. The effect is special, a soft glow bouncing off the sky, clouds and land that’s dreamlike and truly mystical. Just stand there and look all around you because the alpenlight can scatter across the sky.

Bring a tripod for alpenlight. You’re going to need it. Exposures will be long, in the seconds or even minutes. And bracket like crazy just to make sure you get a good exposure for both sky and foreground. And, oh, yeah, be sure you have a headlamp or flashlight with you, because once the alpenlight fades, so does any other light and you’ll be stuck in the dark trying to find your way out.

The Dull Light Gamble

I’m probably one of the most guilty people when it comes to walking away from a scene if the sky is overcast making the overall photography pretty blah. But it behooves one to sit tight for awhile and see what happens. Just like alpenlight, the sun—especially just after sunrise—has a way of sneaking into the landscape in magical ways, but you have take the gamble you’ll be wasting your time. And I admit it’s usually a longshot that anything photographically wonderful will happen. Mostly, that bald sky will stay bald. Then again . . .

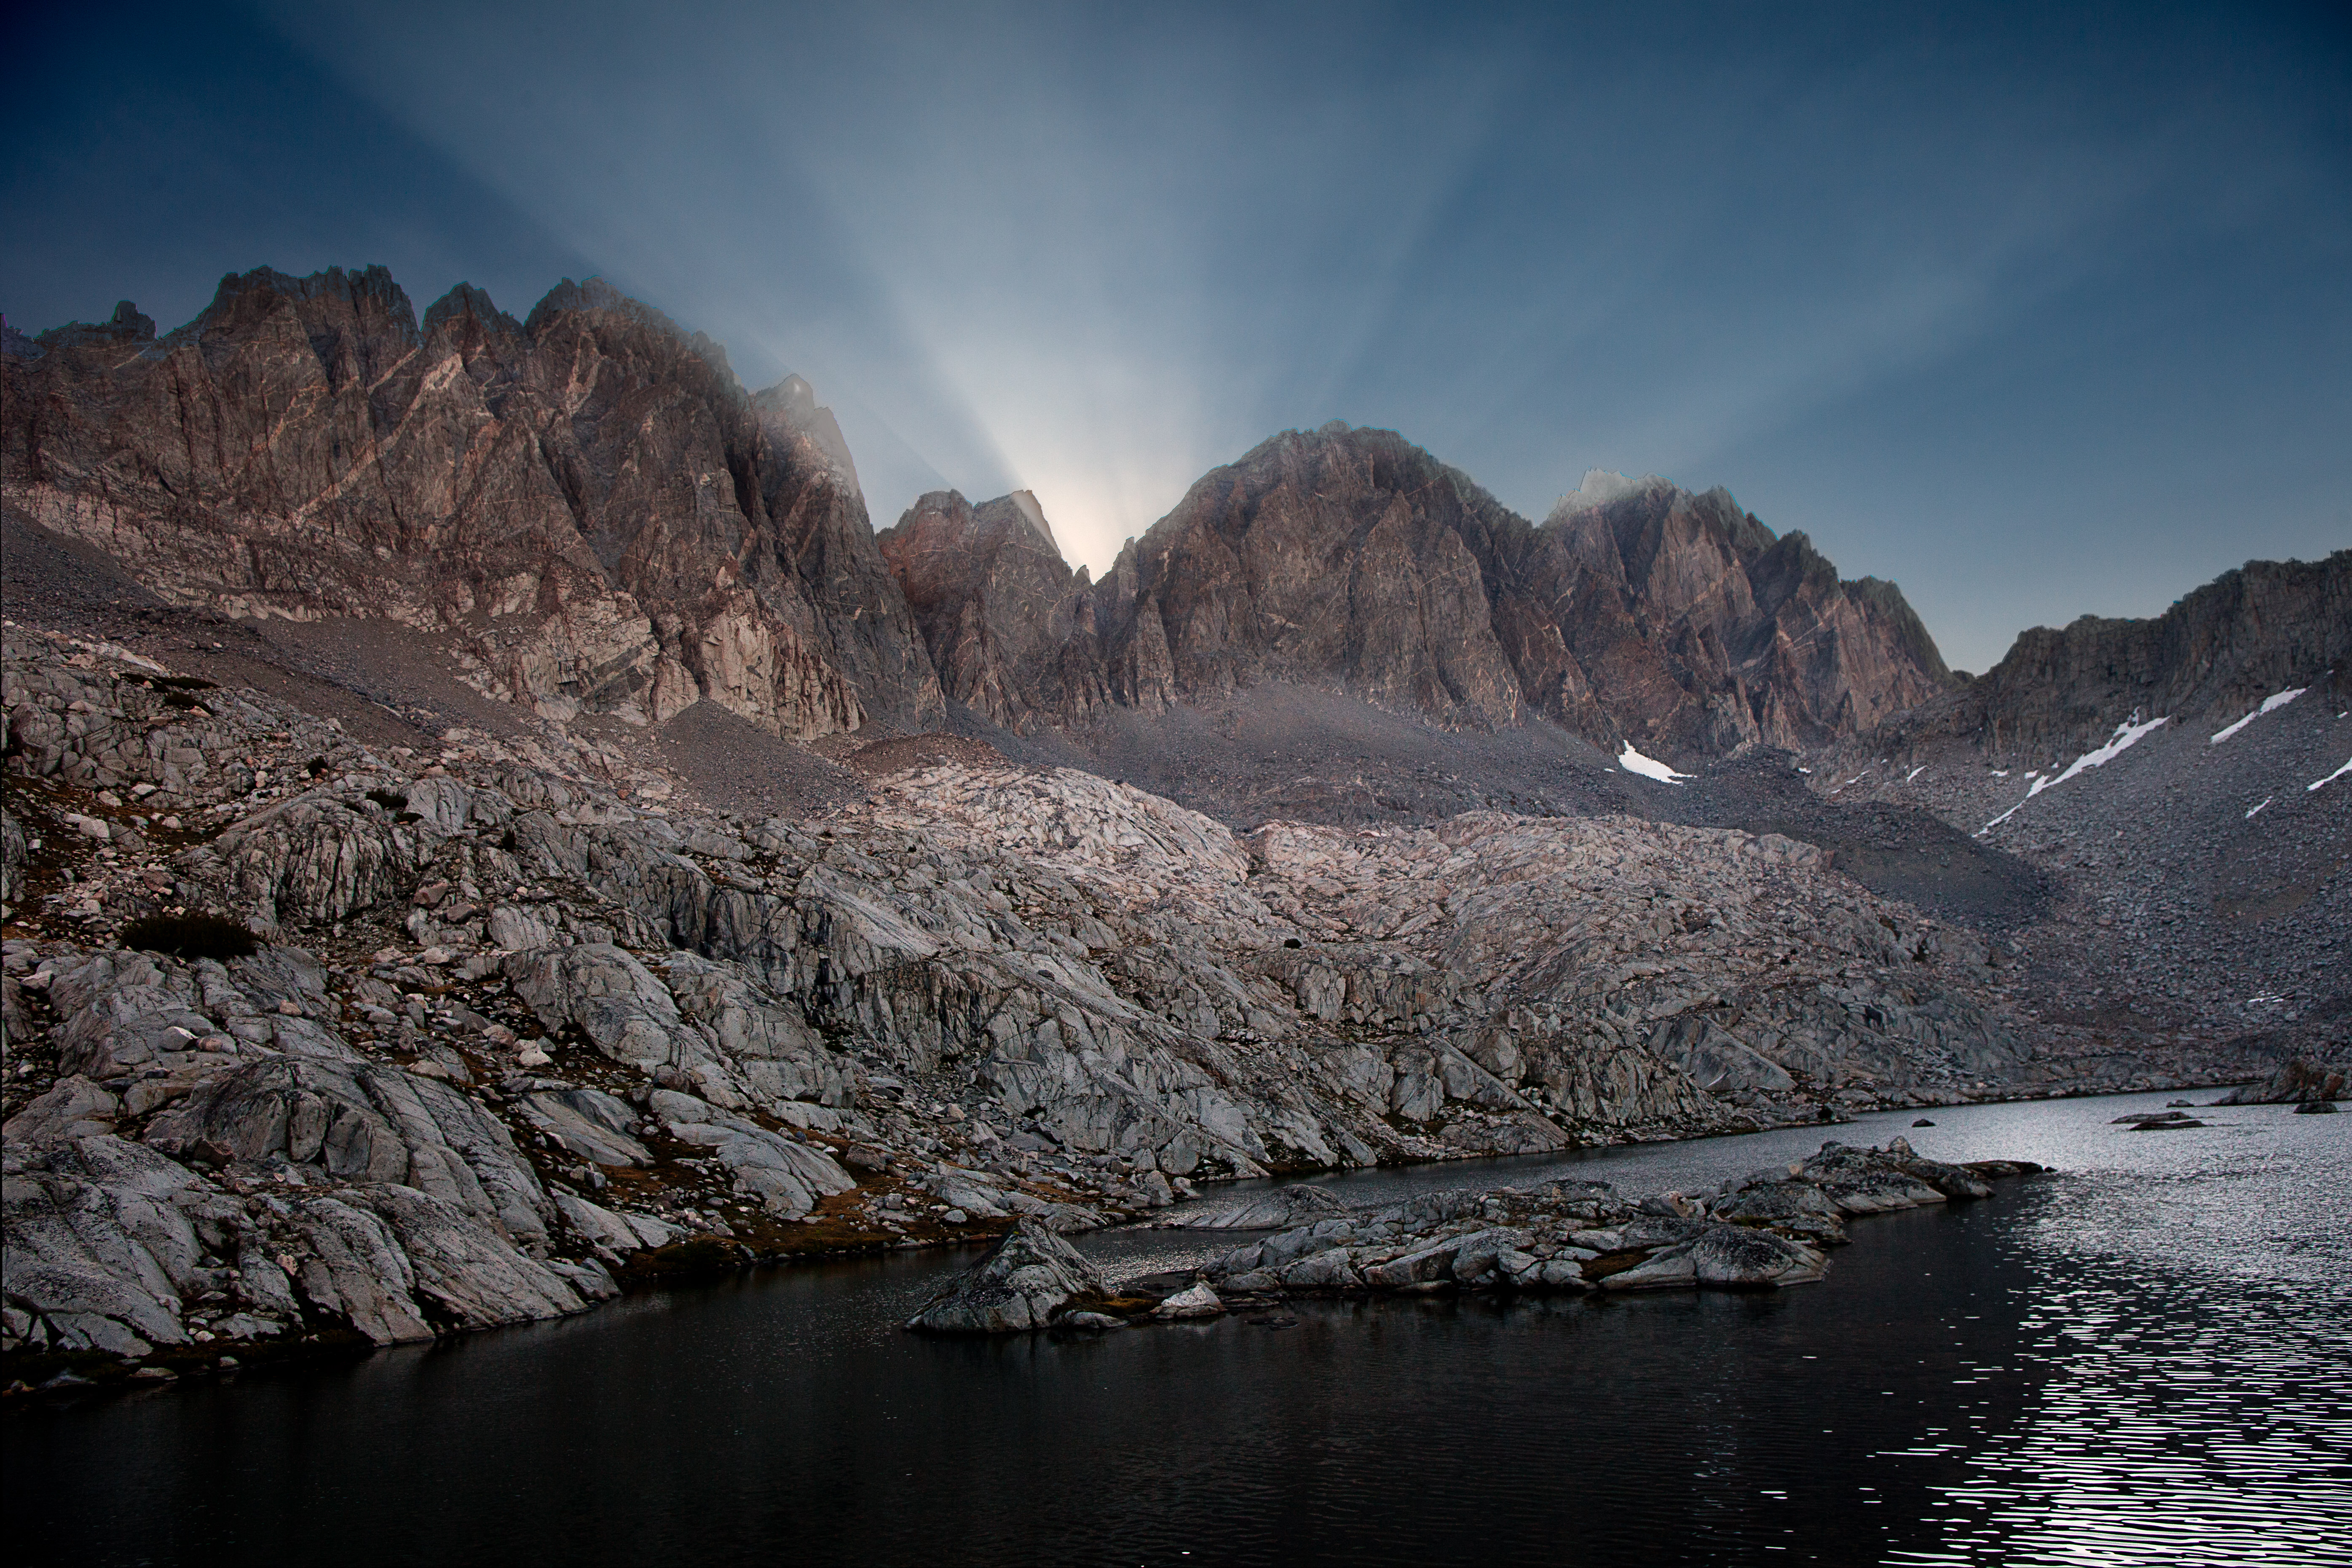
Dusy Basin sunrise.
Dusy Basin sunrise.

Take the above shot from Dusy Basin in Kings Canyon National Park. The sky at sunrise was clear and uninteresting leaving me with a dull light over what is often an incredible landscape of rugged rocks and scattered lakes. I kept my camera on the tripod and decided to simply drink in the solitude for a moment. Sometimes, you have to do that, by the way. Not everything is about getting a great picture!

Suddenly, some clouds above the 12,000’ ridgeline slid into place right where the sun was rising. And then a few seconds later, sun rays poured through. This lasted just long enough for me to set up a decent composition and knock out a few bracketed exposures before it disappeared again. If I had turned my back to start packing, I would have missed it.

My point is simple: The patient photographer gets the magical image.

[The opening photograph was taken of the Alaska Range from the Denali Highway in central Alaska, about a half hour after sunset with alpenlight transforming the scene.]

Painting with light: A step forward to creative photographs

You might have probably heard that photography is an analog to painting, only that photographers use light instead of paint. While the title of this post can bring that to your mind, what I want to talk about here is about ways to manipulate light sources, or your camera, in order to alter the static nature of photography.

When you press the shutter button of your camera, you are basically letting light from different sources reach your sensor and that light is transformed into images by means of something called the photoelectric effect. Without getting into many details, if you alter the relative position or the intensity of the light sources while the shutter remains open, these changes will have a noticeable effect on your final image.

That said, there are different ways to achieve that alteration. In broad terms, you can either alter the location or intensity of the light source or you can alter the location of your camera. Let’s take a look at some examples of each case.

Changing your light source

In photography, you can have two types of light source, namely natural and artificial. Natural light sources can include the Sun, the Moon, the stars, fires or reflection of any of them from objects in your scene. Artificial light can include pretty much anything else like car lights, street lights, torches, etc.

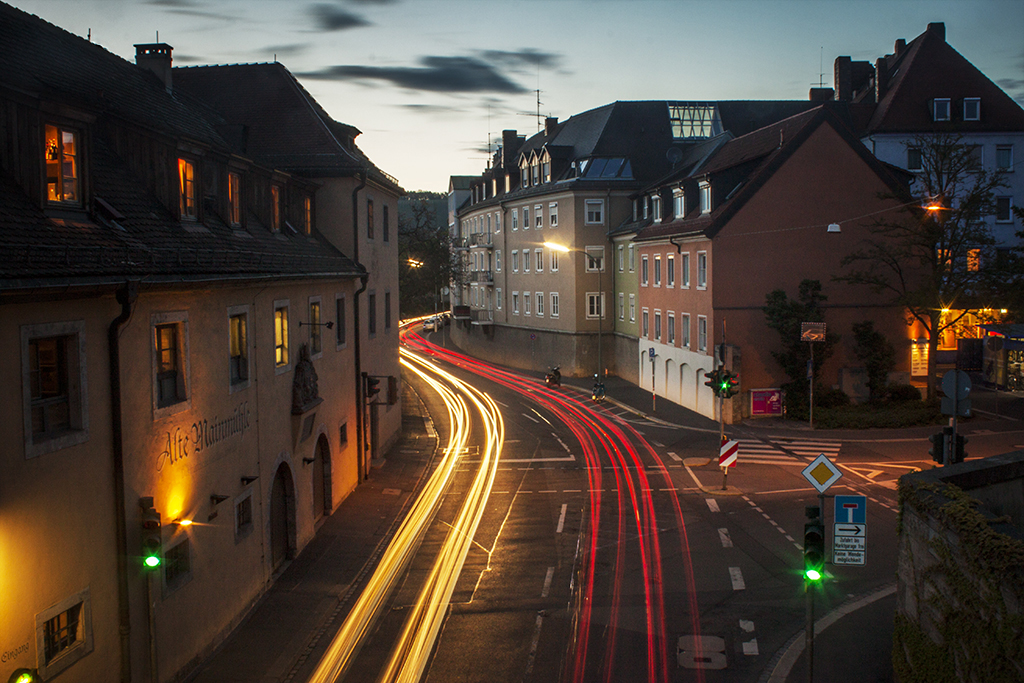
So moving your light sources can include, for instance, capturing light trails from moving objects like cars, bicycles, planes, boats or even artificial satellites. For this, of course, you need to set your camera on a tripod and set the shutter speed of your camera to a low value, usually on the order of seconds. The rest is just about composition.

paintinglight2

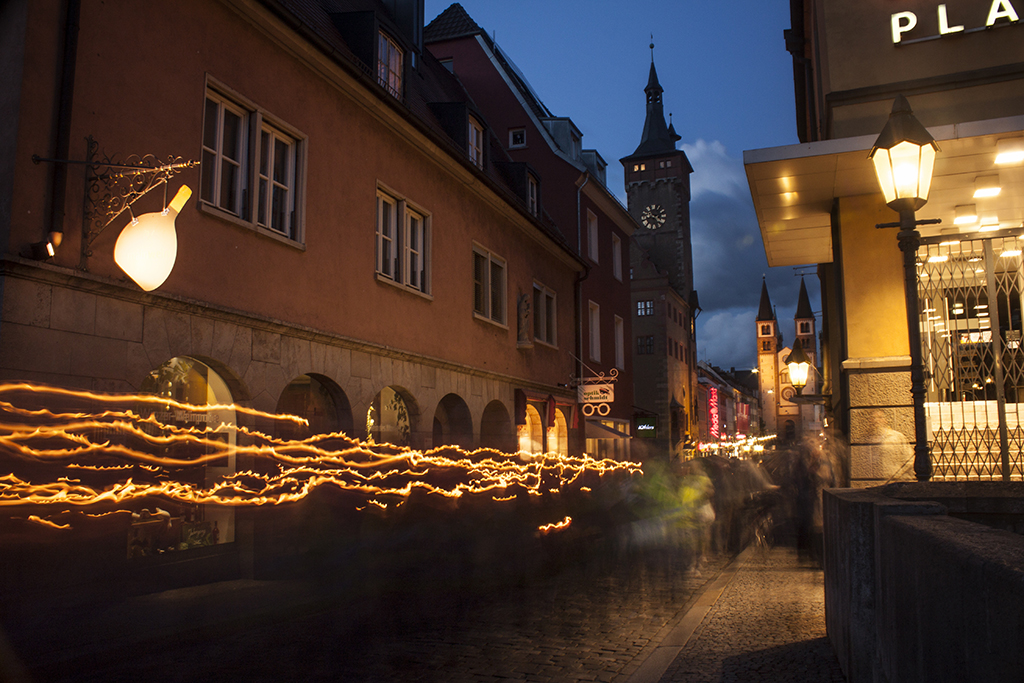
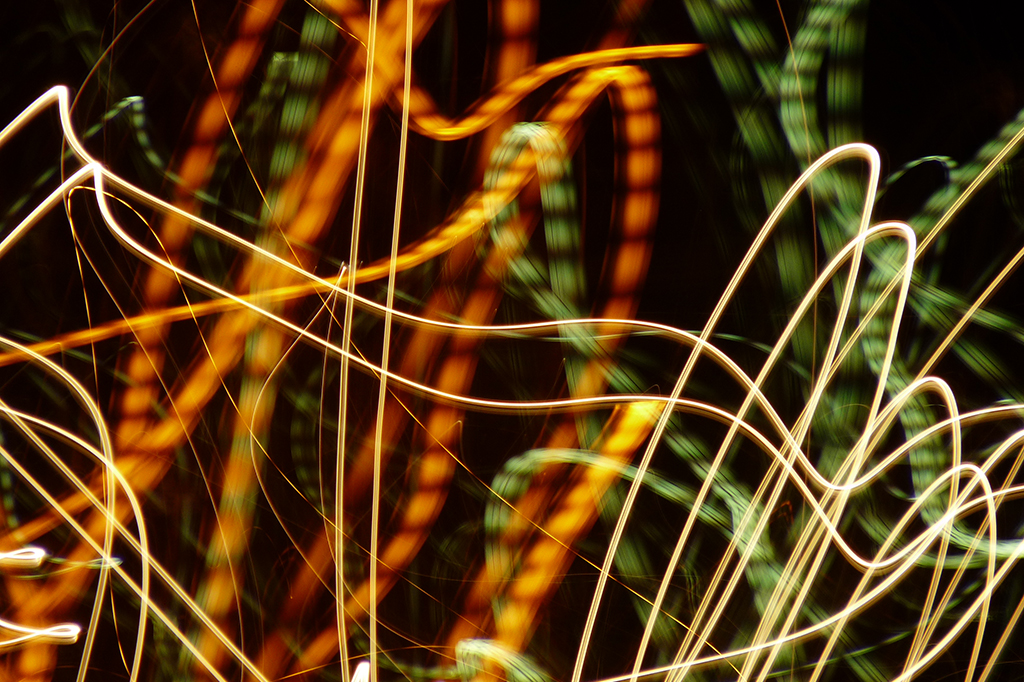
Other classical moving subjects include different rides on amusement parks, fireworks and small objects like torches or cell phones (with these you can actually draw things in front of your camera). Basically, anything that moves and can be included within a composition you like will completely change the nature of the final image so try many different things. Most of the times (not always) you will like the rest of your scene to be illuminated, so it usually is a good idea to take these photos during the so-called blue hour (about an hour after sunset or one hour before sunrise), while there still is some ambient light available.

paintinglight3
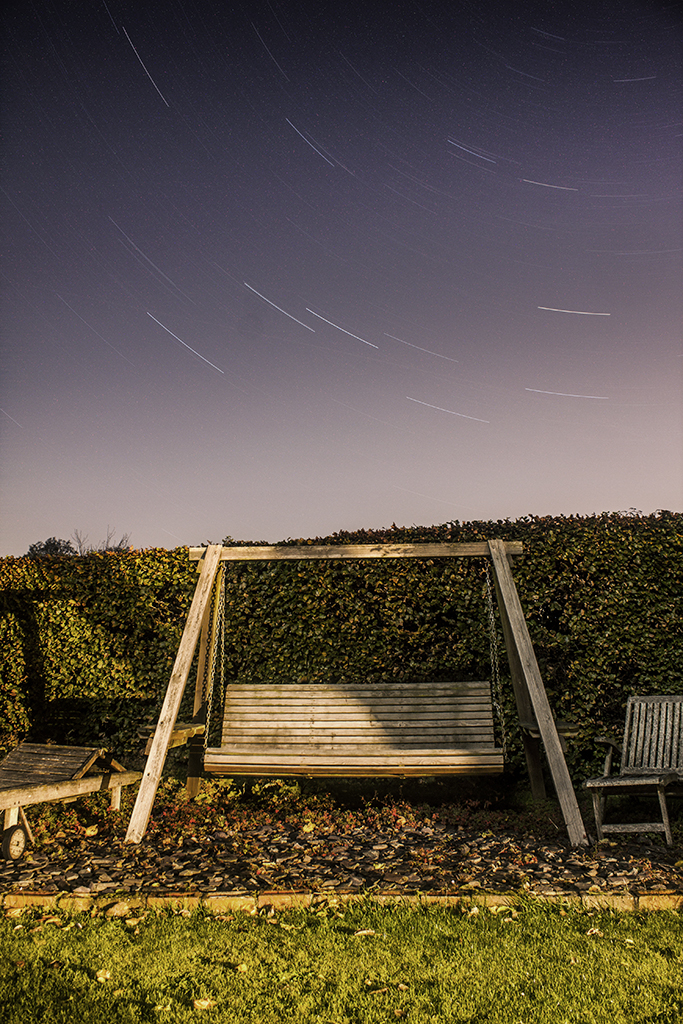
When talking about natural light sources, with some few exceptions, capturing the motion of the light sources will require significantly longer exposure times. Unless you are taking photos of short-lived events such as a falling meteorite, to capture the motion of any celestial body you will need to set the exposure time to at least about 15 seconds. If you want to capture star trails, you will have to take either one single photo with very long exposure time (about 3 or 4 hours) or take several shorter exposures (about 1 minute) for 3 or 4 hours and combine them afterward during post-processing.

paintinglight5

Moving your camera

A usually much less explored option is to move your camera while taking the photo. The reason why this is a less common approach is simply because it is much harder to get good results. While completely blurred subjects can be an interesting approach to explore, for an image to work in the sense of capturing the viewer’s attention, it usually is important for it to contain an easily identifiable subject. With the exception of abstract photography, you want your image to show something that the viewer can relate to and, if you move your camera while the shutter is open, this can be hard to achieve.

paintinglight4

So you basically need a way to get your camera to move with respect to the environment while being able to decently track at least parts of it. The most common way to achieve this is by mounting your camera on a fixed position of a moving object (car, train, etc.) or also by using a timelapse slider, although these will usually provide a rather slow movement, making it harder to come up with a nice composition.

paintinglight6

Another way of using the motion of the camera to capture dynamism is by using the panning technique. This involves capturing a photo of a moving subject following it with the camera as it passes by, with a shutter speed slow enough so that the background appears blurred. This is a very common technique in sports photography, especially in motor sports.

Using Lines In Your Compositions – Photography for Beginners

Given the inherent optical nature of photography as an art, geometrical shapes are ubiquitous. However, using some shapes intentionally in your compositions can greatly improve your final results. In this post I want to talk about lines and how to use them on your favor.

First of all, when I say lines I mean both straight and curved ones. There are different situations where you can benefit from either of them and when and where to use them will depend on the specific elements present in the photo you are trying to take.

Guiding the viewer’s eye

One of the most useful, abstract and at the same time common ways of using lines is in such a way that they guide the viewer’s eye to a given spot in your composition. Even if you don’t actively try, chances are that you have a couple of photos in your personal collection where you actually made good use of lines that were present at the location for this purpose. The reason is simple. They not only work once the photo is produced, but also when you look at the scene in real life. Having those lines there will actually help catch your attention and decide to make a photo in the first place.

lines01

The human brain has a natural tendency to find patterns and follow edges. In fact, if you think about how we actually follow any moving object, what we basically do is follow the shape given by a closed line forming the edge of that given object. This way, when we are presented with an image where strong lines are present, our eyes will naturally tend to follow those lines and, if your main subject (or an important one at least) is located at the end of those lines, the viewer will automatically pay special attention to that subject, making it easy for you to declutter your image.

Natural frames

Another appealing use of geometrical shapes is to frame a photo. It is obvious that we humans like frames. Otherwise, most of the art in museums and photos hanging on our walls would not have different types of frames. It actually is pretty common to find photos posted on the internet with some sort of digitally created frame around.

lines02

Nature and man-made structures can provide very appealing frames as well. Be it the arches of a bridge, a natural rock formation or even the frame of a window, using lines to frame the main part of your image can provide a completely new point of view and drastically change your original composition, sometimes for better but sometimes for worse.

Architecture

Architecture photography, by definition, is full of geometric elements. While older styles like Gothic (e.g. Cologne cathedral in Germany) are more cluttered, modern architecture tends towards a more minimalist approach and straight lines are present everywhere. This allows you as a photographer to create interesting compositions where you can used those lines again to guide the viewer’s eye towards a specific point, or simply produce abstract images that sometimes are classified as fine art (these work especially good in black and white). Some styles like the Baroque (e.g. St. Peter’s Basilica) contain arches and large columns that can also help you achieve interesting effects both in terms of including the lines formed within your composition or using them as frames.

lines03

Another type of structures that are definitely worth looking at are bridges. Once again, modern and older bridges present completely different shapes and lines that can help you create images out of the ordinary. As with everything in photography, one of the most important (and frequently overlooked) aspects is looking at things from non-conventional points of view. This will help you both develop your own style and train your eye to get interesting compositions faster as you practice more and more.

Light trails

A great option to create dynamism and lines in any image is by using light trails. Depending on the path followed by the light source (cars, bikes, planes, etc.), the lines left behind can be straight or curved and they have the power of capturing the attention not only due to their shape but also because of their bright nature.

lines04

In general, while lines will always be present in your images in some way or another, actively thinking about how to use them when composing an image will provide you with new ways of looking at your subjects, so next time you are out making photos, remember to look for them and have fun!

Long exposure photography – Step by Step Guide

This entry is about long exposure photography: How to capture light trails, motion in clouds or water and basically any other factor that adds dynamism to a picture.

When capturing a striking landscape or cityscape, if we carefully choose the point of view, the static scene itself will have enough elements to capture the viewer’s attention. However, we can always add some extra appeal by including some dynamic element.

There are some techniques in Photoshop to mimic some of these effects, but I certainly prefer to capture those with the camera. This way not only makes the post-processing simpler, but it also remains more truthful to the original scene we tried to catch. It is for this reason that I will not talk about artificial long exposure on this post.

firework-828652_1920

As a general rule (one that I would say will become obsolete relatively soon), long exposure usually works better with DSLR cameras. I know that technology is evolving quite fast nowadays. In fact, if I am not making justice to mirrorless cameras here, please forgive me; it’s been a while since the last time I used one! However, the main issue right now with compact cameras (including cell phones) is that they do not always allow the user to play with all the settings the way it is needed and the signal to noise ratio under low light conditions tends to be rather low when compared to DSLRs, especially with full frame ones.

But to be fair, let’s say that if your camera has a manual mode, then you will be able to follow everything I say here, so here we go.

Capturing light trails

Given that the workflow is the same for whatever moving subject you want to capture, I will describe, step-by-step, how to capture light trails.

Basically, light trails are just that. Trails left by moving light sources that could include passing cars, trains, planes, artificial satellites or even stars. The basic principle to create interesting images with all of them is the same: find a nice location with an interesting background or foreground (depending on what’s on your mind) and correctly configuring the settings on your camera, which of course will include leaving the shutter open for a relatively long time (the time will actually depend on the motion we are trying to capture).

Camera settings

So let’s consider the settings that we need to take into account when dealing with long exposure photography. These are:

  • Light sensitivity (ISO).
  • Exposure time.
  • Aperture (f-number).

Light sensitivity refers to exactly that. How sensitive to light your sensor is going to be while capturing an image. The name ISO (International Standards Organization) comes from the distant times when film photography was the norm. Back then, different films had different sensitivity based on the way they were produced. Now, without getting into technical details, your camera is able to capture almost as much light as desired, but unfortunately at a given price. When you choose a large ISO number, the camera applies some sort of multiplication factor to increase the captured number of photons (after all, that is what light is about, photons!). That sounds like a clever thing to do. However, camera sensors have an intrinsic level of noise that will also be multiplied by that same factor, thus producing noisy (a.k.a. grainy) images. For this reason, I would suggest always leave the ISO as low as possible (100 is a good value to start with).

camera-1067853_1920

Exposure time, as briefly mentioned above, is the time during which the shutter of your camera will be left open, allowing light to get into the sensor. This is usually given in seconds but beware: for short exposure times (shorter than a second), the number you see is the fraction of a second; for instance, if you see a 500 (could also be 1/500 depending on the camera), that means that the shutter will be left open a 500th of a second. When you go to longer exposure times, then the number shown will be seconds. Most DSLR cameras get down to 30 s and if you want to get even longer exposures, a so-called “bulb” mode is offered. In this mode, the shutter will be open as long as you press the shutter button (for this you should get a remote shutter release!).

Finally, the aperture is how much will the diaphragm of your camera will open. This has nothing to do with time, but rather with the physical area through which the light will go through. Now, to make things even more complicated, the way the aperture is defined makes it that the larger the f-number, the smaller the aperture, but I will explain a bit more later on.

So now we know what to take into account but, how do we capture the image we want?

In terms of exposure time, anything between a couple of seconds and a couple of minutes might work depending on the scene. If you are after a photo of a landmark with trails from passing cars like the already famous capture of London buses passing in front of the Houses of Parliament, then a couple of seconds are enough. This one, for instance, was captured with an exposure time of 1.6 s:

longexposure_london

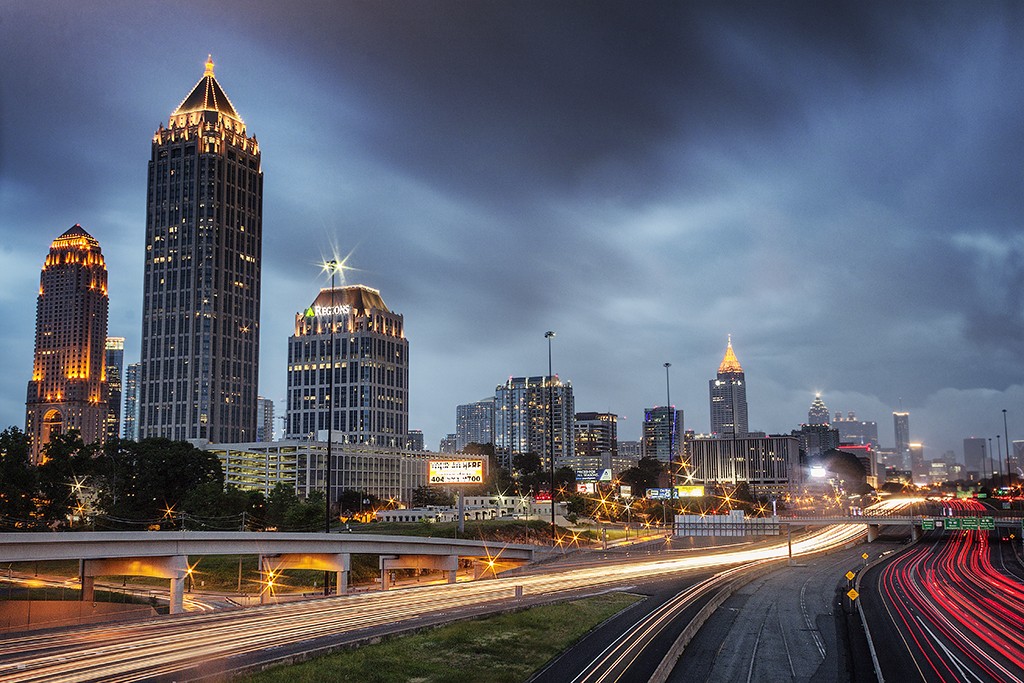
If what we are trying to capture is the light trails left by cars on a busy street, then it might make sense to push the exposure time a bit further, basically because that way the density of lights will increase, making the final result more interesting. The following one of Atlanta’s skyline at sunset was captured with an exposure time of 13 s:

longexposure_atlanta

Notice that here we can increase the number of light trails without loosing information on the image simply because, in contrast to the image from London, the subject of the photo are not behind the passing cars. Also notice the motion of the clouds, another interesting element that can be captured with long exposure.

So enough for exposure time. What is the role of the other element, namely the f-number? Well, for our purpose here, it has two main functions. One, compensate the exposure to get the exposure time we want to work well. In order to capture a well-balanced picture, the right amount of light needs to reach the sensor. Now, simply put, the right amount of light will be defined as a balance between the exposure time and the aperture you choose. It is quite an intuitive thing: if the aperture is large (small f-number), we will need a certain amount of time (relatively short) to get the desired light to reach the sensor. If the aperture is small (large f-number), then we will need to increase the time to get the same amount of light to get in!

photographer-410326_1920

Fortunately, we don’t need to calculate that since the camera already does that for us. What we need to look at is a small sequence of lines in the viewfinder or camera screen (called a photometer) that indicates how much light will reach the sensor with the current settings.

The other purpose is to create the star-like appearance on light sources and that you can see on the street lights in the two images above. Some people prefer not to get this, but I personally like it. To get this effect, you need to keep the f-number as large as possible. I would say above 16, as a general rule.

photographers-238565_1920

To the things described above, I need to add a couple of important things. First, use your tripod! It does not have to be a $500 tripod. A relatively basic one will do the job, but if you want to capture anything that moves without getting a blurred image, you will definitely need a tripod. And second, set a waiting time for the shutter of your camera to be released. Most cameras offer a 2 s or a 10 s option. The 2 s option is enough. The idea is to give a delay between the moment when you press the button and when the shutter is released to avoid the shaking produced by you pressing the button to blur the image.

And as a final step, you can process your images with Lightroom or Photoshop to enhance the information and details that are hard to capture at those times where the natural light is starting to fade.

Summary

So to summarize in a way easier to remember, if you want to capture light trails:

  1. Find a location with a nice subject that is behind a street.
  2. Wait until the time is right; you want the cars to have the lights on!
  3. Set your tripod.
  4. Set your camera to manual mode.
  5. Set the ISO to 100.
  6. Start setting your exposure time at around 5 s.
  7. Set the f-number accordingly to get a good reading in your photometer.
  8. Take the picture.
  9. Play with the exposure time to get the desired effect.
  10. Get that final look you are after by processing your files.

That’s it. Go out there and try this. Even when it might look a bit complicated in the beginning, you will get it in no time and capturing light trails can be a really fun experience and once you master these techniques, try combining them with other great ideas for night photography such as bokeh.


Using Photoshop to Make Light Rays

Today with Photoshop we’re going to be looking at a really cool technique to create light ray effects for your images. These are awesome and I really enjoy using them to add some real drama.

These will also simulate what expensive lenses can do so, you are not paying crazy money to get shots like we’re going to create.

For this tutorial I have chosen an image from the Sleeklens gallery, which I think will work really well.

Light Rays

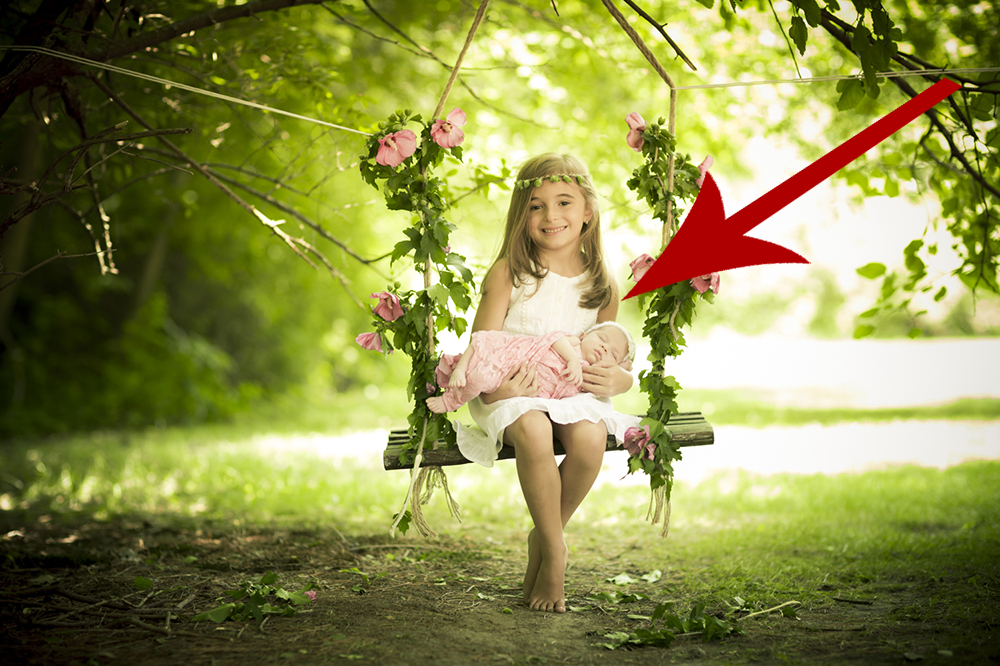
So in assessing this image to start with, you’ll want to look at where your light source is coming from.

lr1

Once you have figured that out and are happy with that, then we will move on by creating a new layer.

You do this by opening up your Layer panel on the right hand side, then clicking on the New Layer icon at the bottom, second from the right.

You can also use the Shortcut Ctrl+Shift+N

Then click on OK.

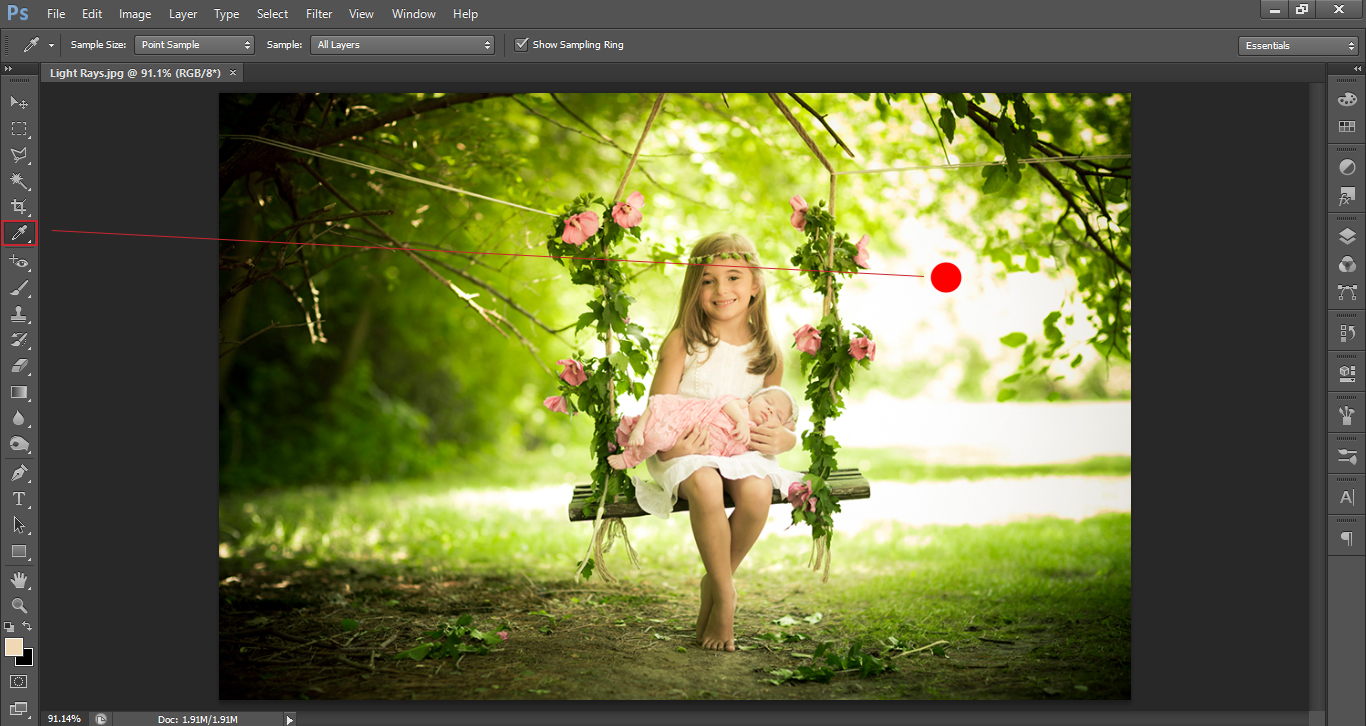
Now there are two ways you can do this, you can use just white or you can click on the Eye Dropper Tool

Then, click the Eye Dropper on the Light Source to give you the actual colour of the Light.

I prefer to use the actual colour of the light, though you can just use white if you wish, and experiment with which one makes you happiest.

lr3

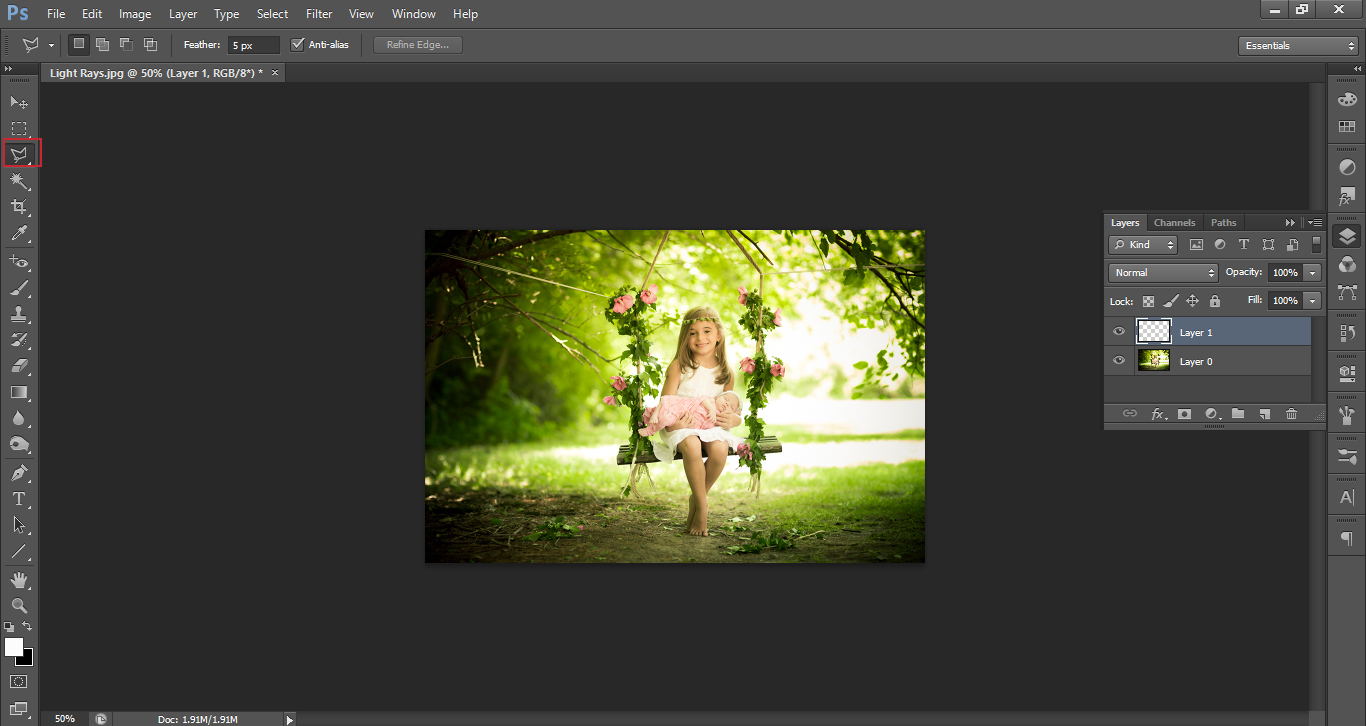
Now that we’re in our new layer, you’ll want to click on the Polygonal Lasso Tool

The keyboard shortcut for this is (L).

Or, you will find it 3rd down on the Right hand Tool bar.

lr4

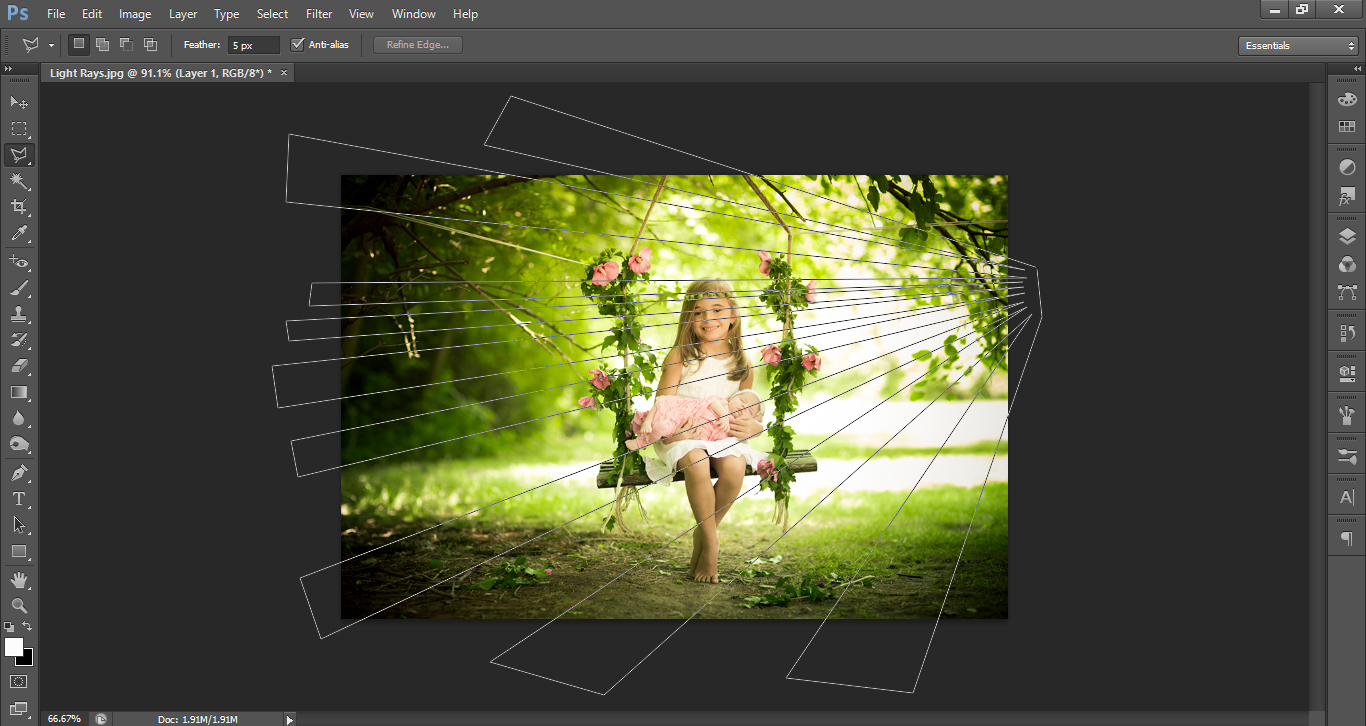
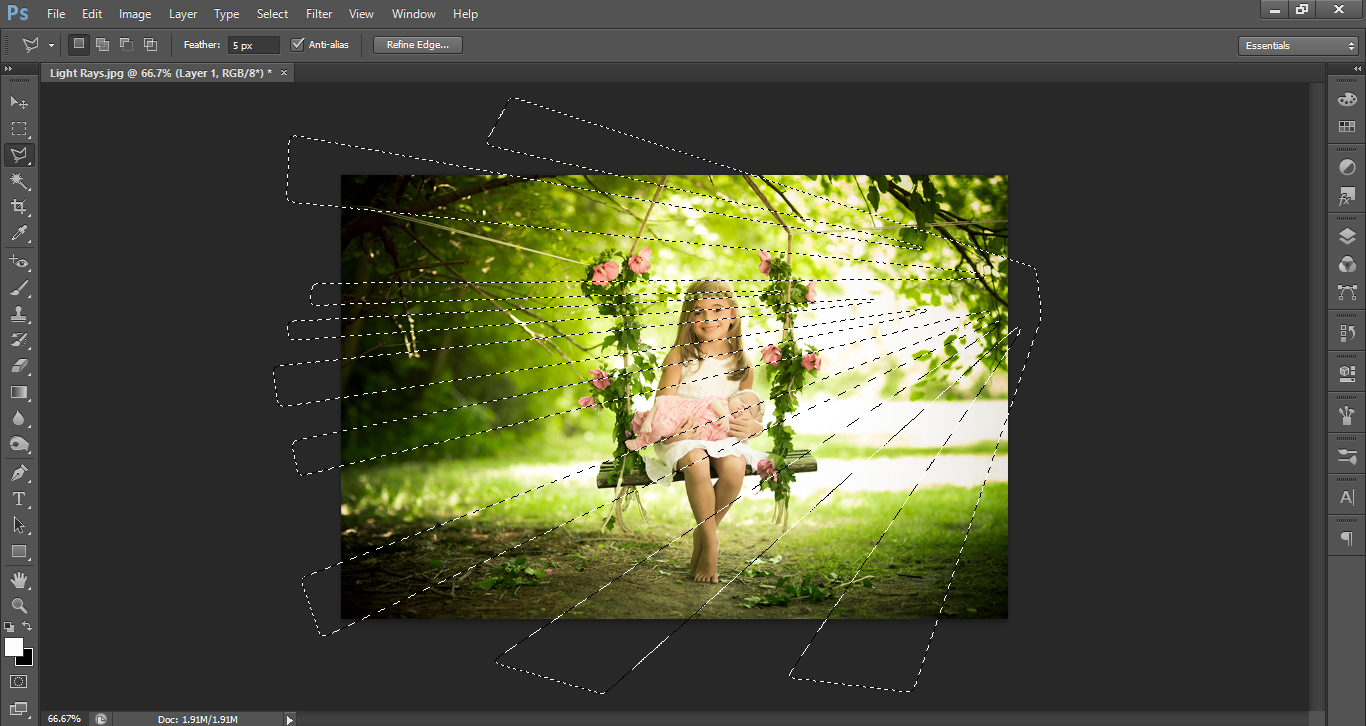
Now, use this by clicking from the light source out. Using the selection tool, you’ll want to draw the broad and basic shape of the light rays coming out of the sun.

This is where your creativity can take over! Draw as many or as few as you want, make them as big or as small, it is totally up to you.

Once you have drawn your shape, make sure to click the point where you started before closing the selection.

lr5lr6

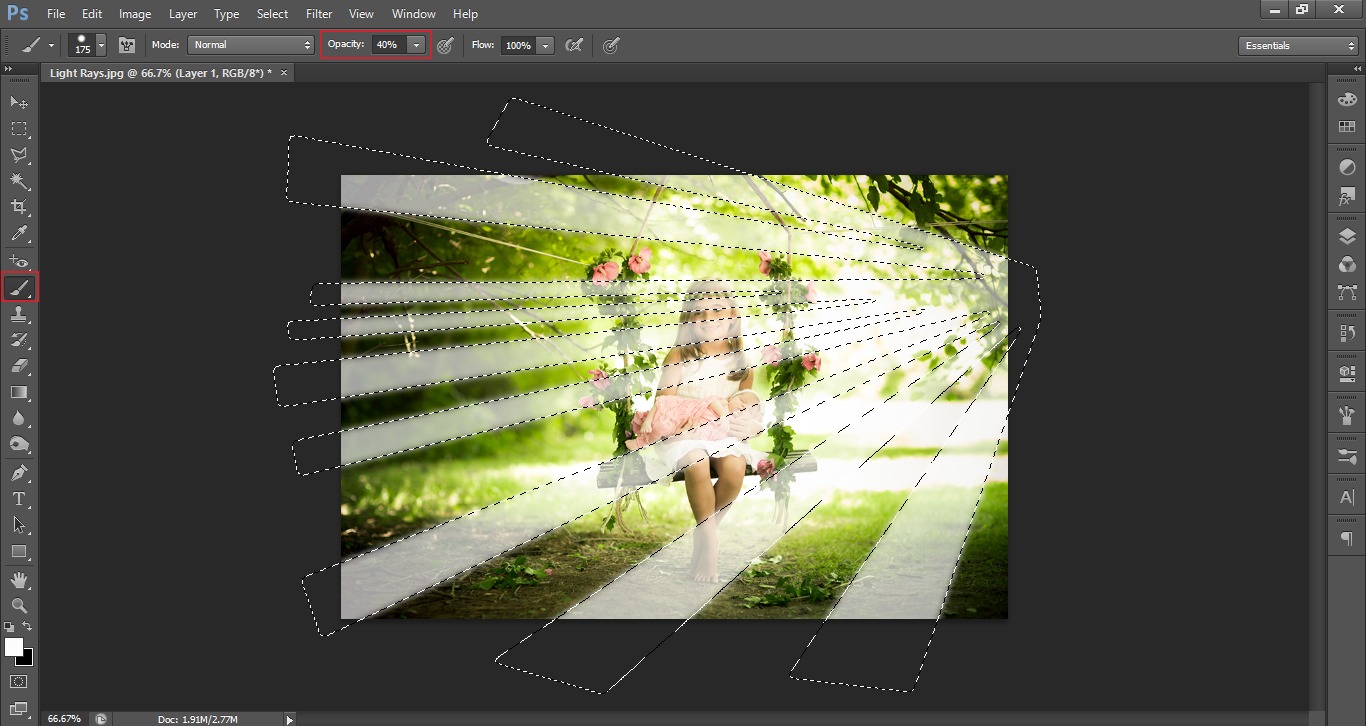
Next step is to click on your Brush Tool (keyboard shortcut B).

Then, paint over the selection with an opacity of around 40% with a hard or soft brush, it really doesn’t matter, so don’t worry if you don’t know what that is yet. Perhaps save those words in your head for future reference.

The opacity is indicated at the top of the picture below under View.

lr7

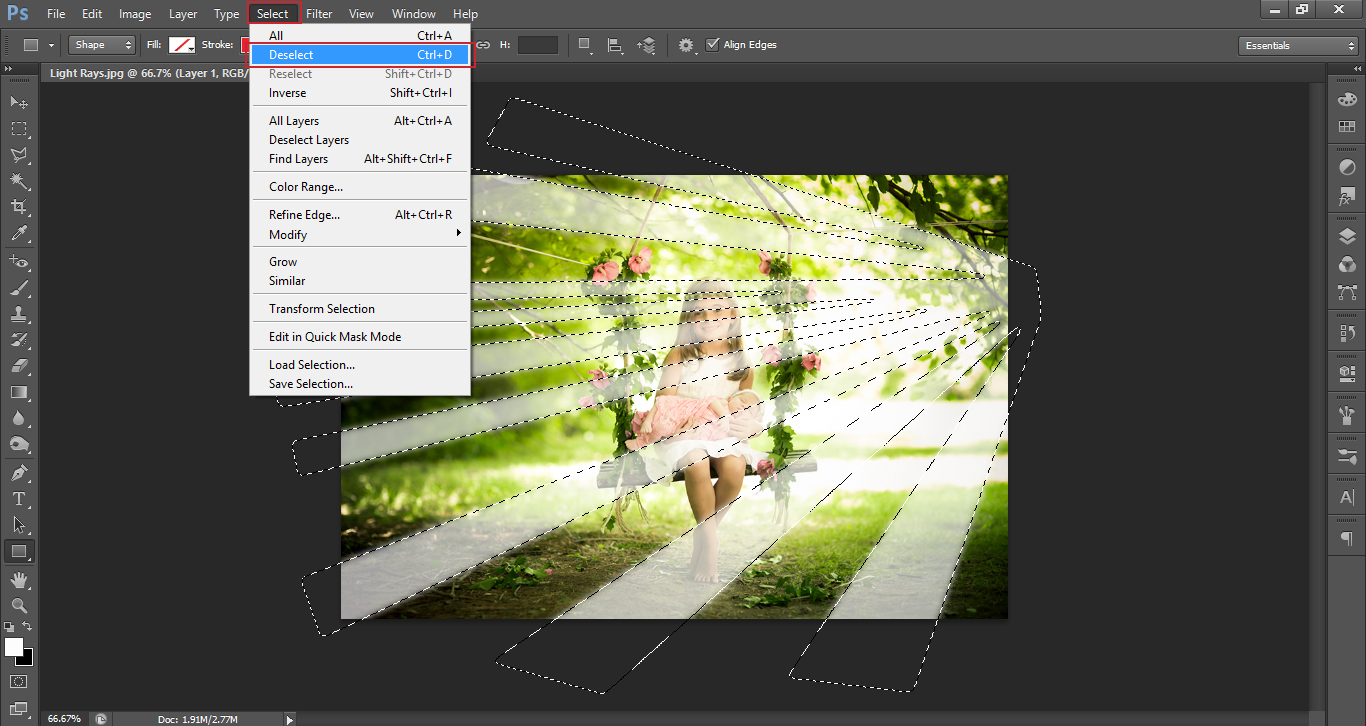
 Now Deselect.

lr8

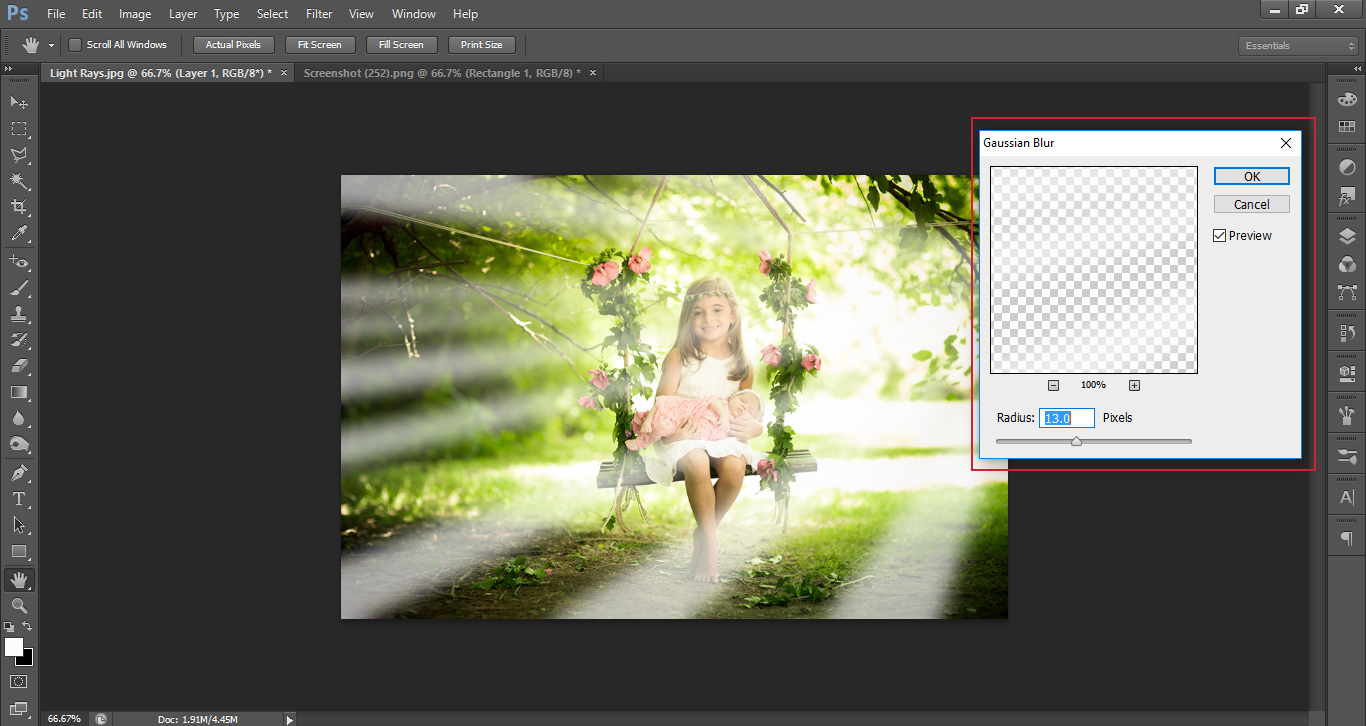
Once you have Deselected go to Filter – Blur – Gaussian Blur.

Set the Blur to around 13, you’ll want the Blur to blend in, but also want it to still remain as a stream of light with its own shape.

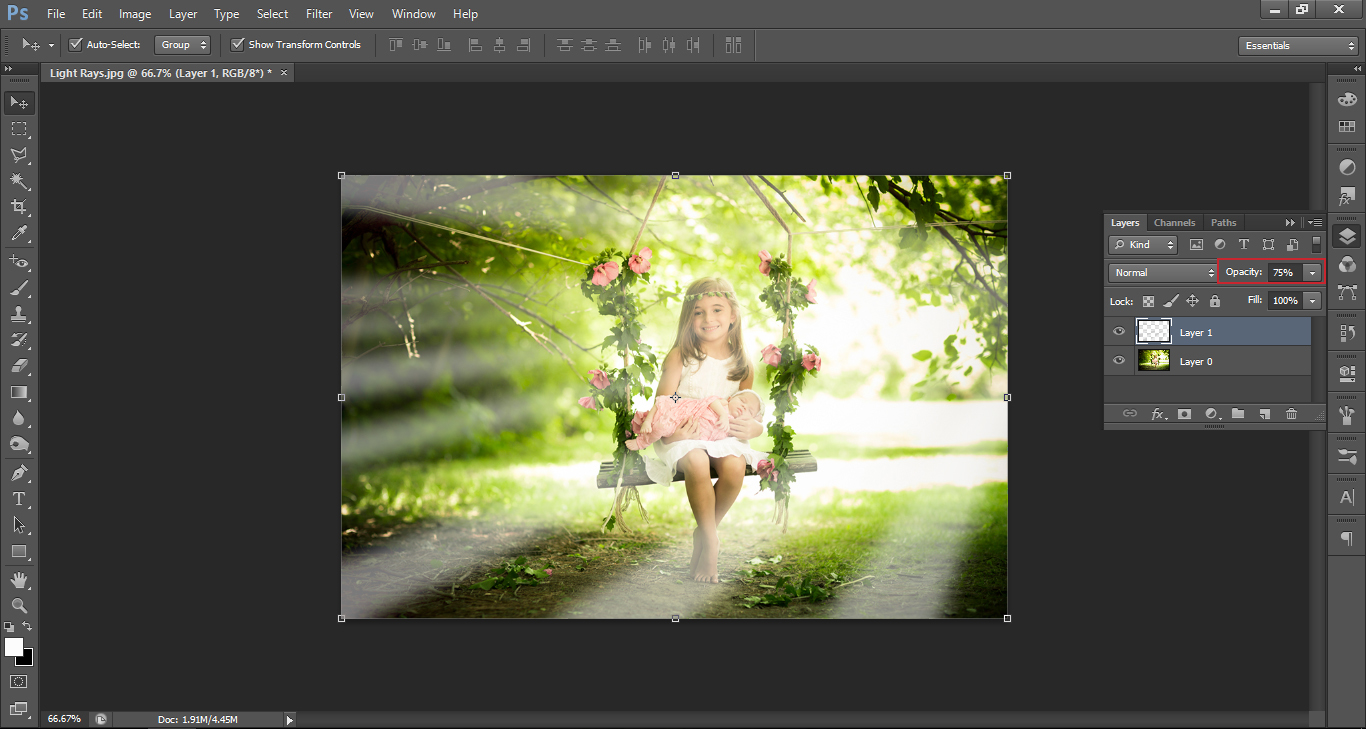
Then, set your Layer opacity to about 75.

lr9lr10

Now it’s time to resurface what we talked about a short while ago, remember how I was talking about Soft and Hard Brushes?

Now, I’ll show you what those are.

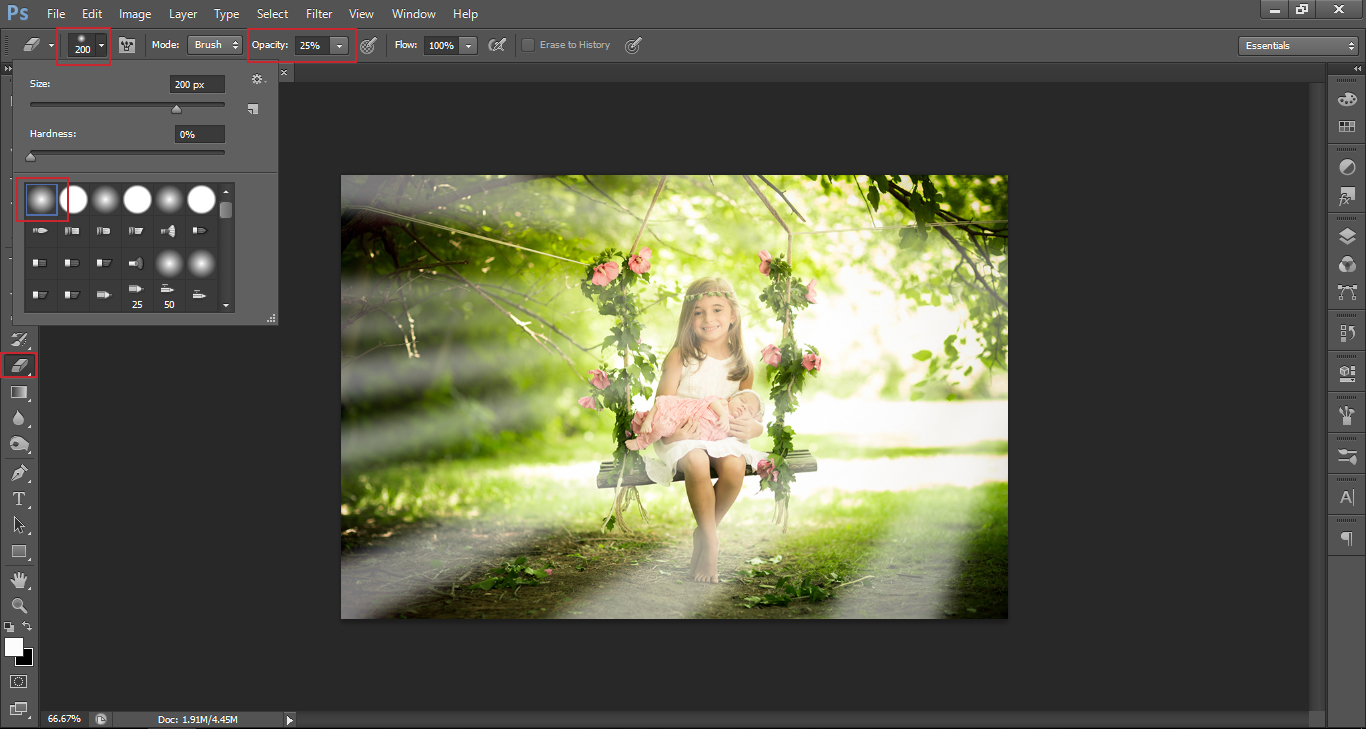
Click on your Eraser Tool (E) Set the Opacity to 25% as indicated in the Diagram below.

lr11

You will also notice the Brush drop down in the diagram.

This is where you will find all of the different types of brushes.

The first brush indicated is a Soft Brush and the one right beside that is a Hard Brush.

There are literally thousands of brush types out there, probably a lot more. We have our own range for Lightroom and I’m sure similar Photoshop products will be added, so keep an eye out for those, if you’re interested.

Make sure you choose a Soft Brush for this.

You may also need to drop the opacity as you see fit.

What I now want to start doing is going over and erasing the outer areas of the light, weakening the beams to give them a gradient effect, so they will be stronger at the suns end and weaker further out.

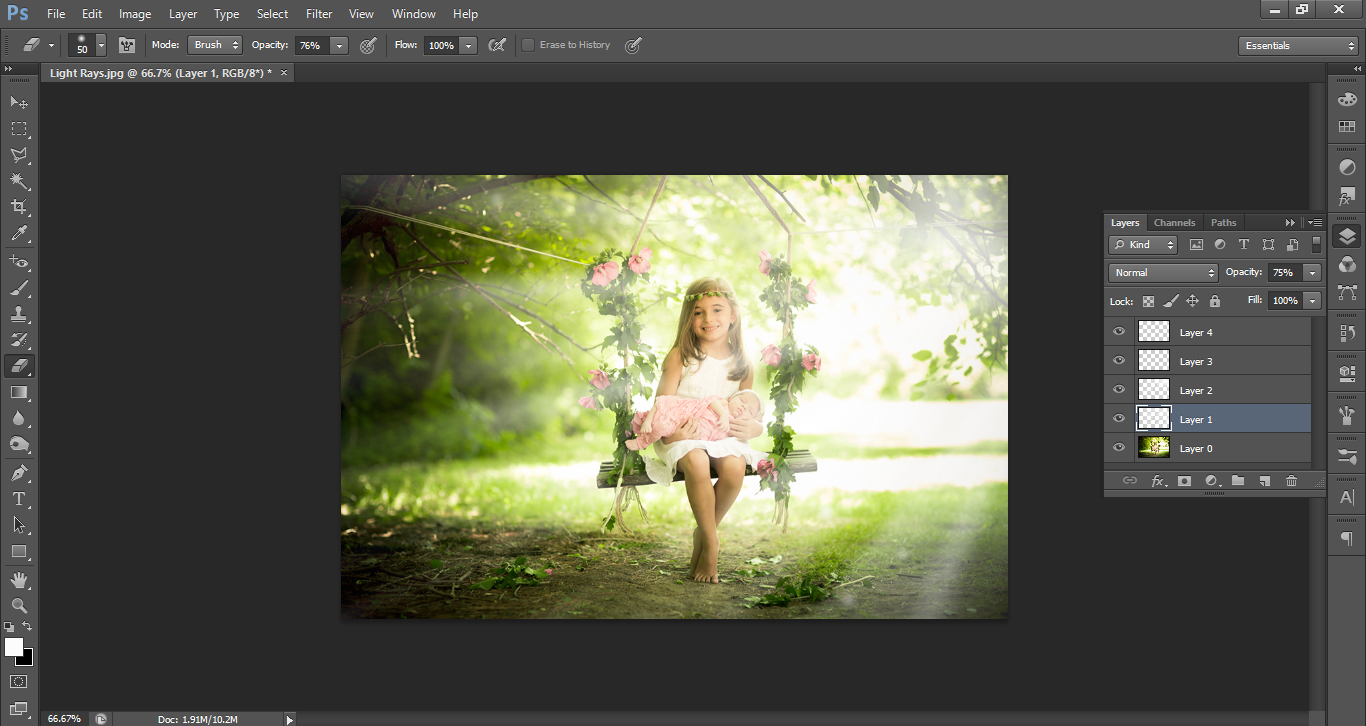
Then repeat all the steps on new Layers once or twice more, but each time less and less Blur will be used, right up until the point where a strong beam will be visible.

I recommend you keep the Strong Beams at a very low number, one or two well placed ones will make all the difference.

As a finishing touch, I will go through my layers and on one side of the Girl erase out some of the light to darken the shadow side.

lr12

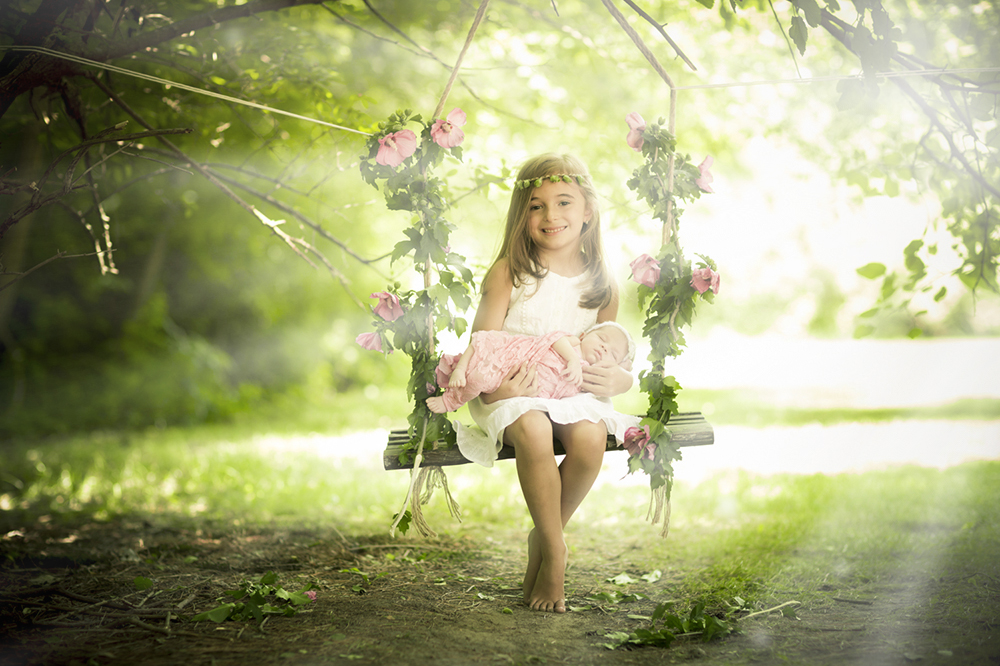
Your final image should be subtle, that’s the key.

lr13

Bokeh Photography for Beginners

Holidays are a good chance to get great color and lights in your shots. Winter, in general, is a great time to go out and experiment with ways of shooting scenes that are not always at your disposal. With all of those lights and colors for the holidays, also comes the opportunity to create some awesome bokeh. Essentially, bokeh is the way the lens renders out of focus light. It is circles of light like in the above image or the creamy background in portraits if taken with the right settings. Aside from having a nice out of focus bokeh in portraits, there are tons of objects you can use to create some great bokeh by holding objects in front of your lens. Incorporating out of focus elements can enhance your images and give it a mood you otherwise would not have.

1 – Starting Point

So what do you need to know before taking photos, and how to achieve bokeh in your images? Well, the biggest things that go into creating bokeh are the lens choice and the aperture you shoot at. The shape of the bokeh, a lot of times, is determined by the aperture blade amount. Generally, the better the lens the more blades (around 9), while the lower end lenses have about 5. The higher amount of blades creates more of a circle which creates the bokeh, more creamy and soft, where the lower blade count will create something like a hexagon. I tend to prefer the more round bokeh, but that is not to say that the less circular ones are not good and should not be done. Everyone has a preference but it is good to know the difference of why the bokeh might look different from lens to lens.

2 – Prep

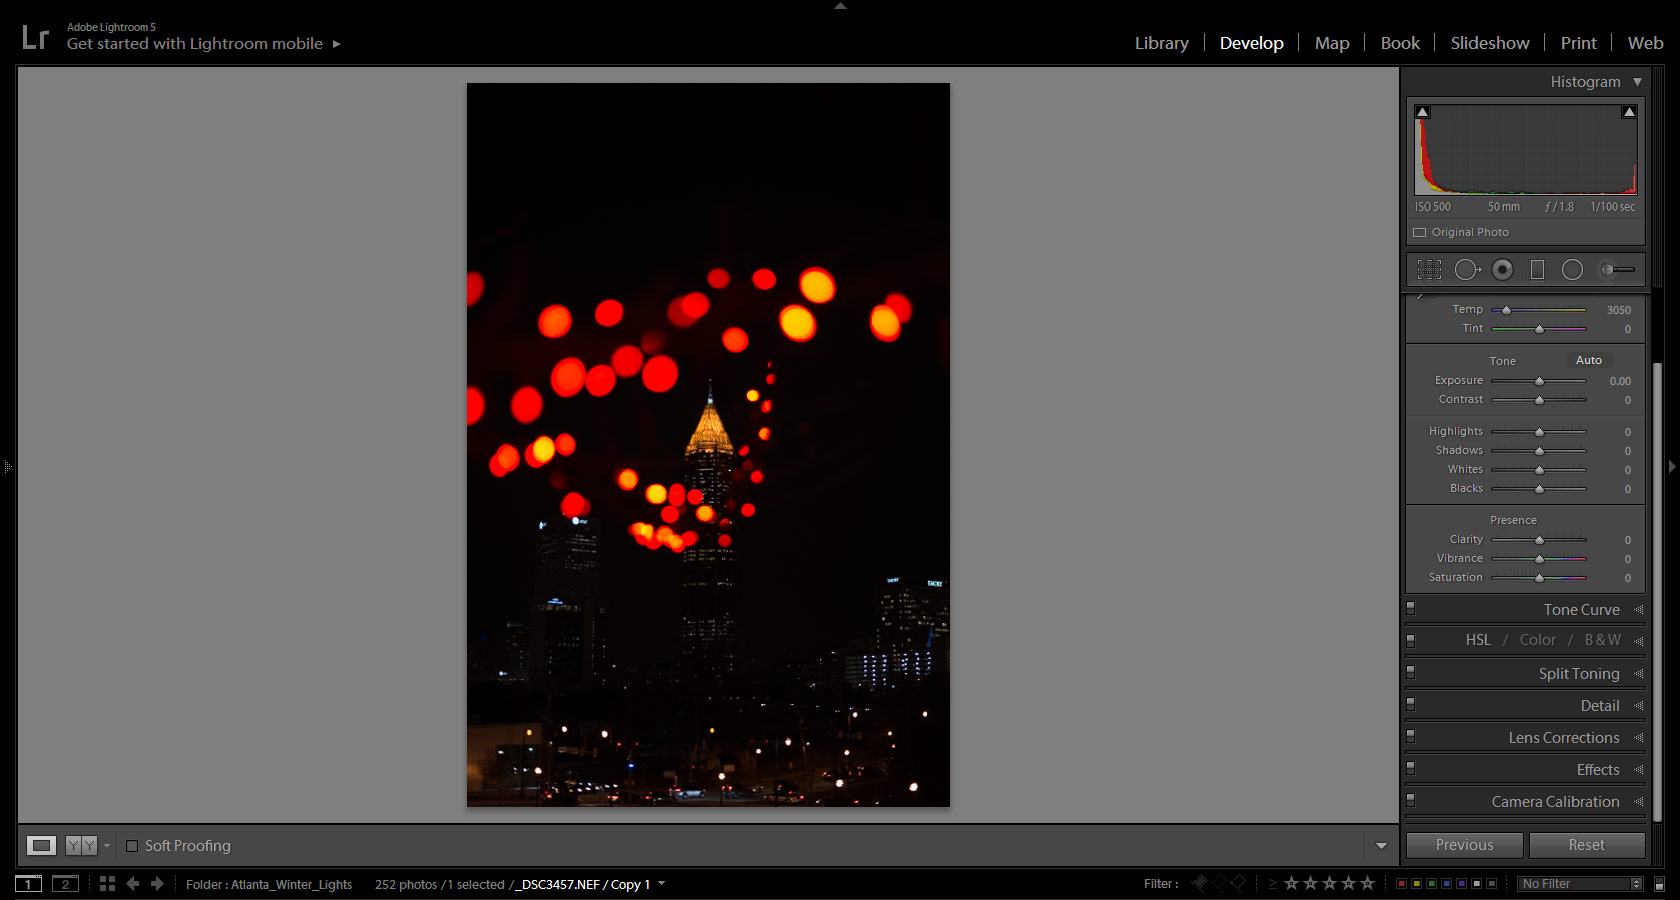
If we look at one of the images I started with, we can gain a lot of information by looking at the histogram below. I mentioned above that aperture also plays a role in creating bokeh. One of the things to keep in mind if you are trying to get nice bokeh, is shooting around f 2.0 or wider. Having the lens open wider allows for a smaller depth of focus, thus giving you the out of focus bokeh in your images. What you generally see in portraits is that the subject is in focus and the whole background is out of focus. In the images I shot, I used the foreground as a framing device and made that the out of focus part. So in my image, I made the foreground out of focus and used that as a nice way to introduce some interest in my image. Going, either way, works (either creating the foreground/background out of focus), just as long as there is enough difference in the field of focus to get one of the elements to go blurry. As an artist, that is up to you to decide on how you want to incorporate things being out of focus into your images.

Arnel Hasanovic Bokeh Tutorial

3 – Shooting Bokeh

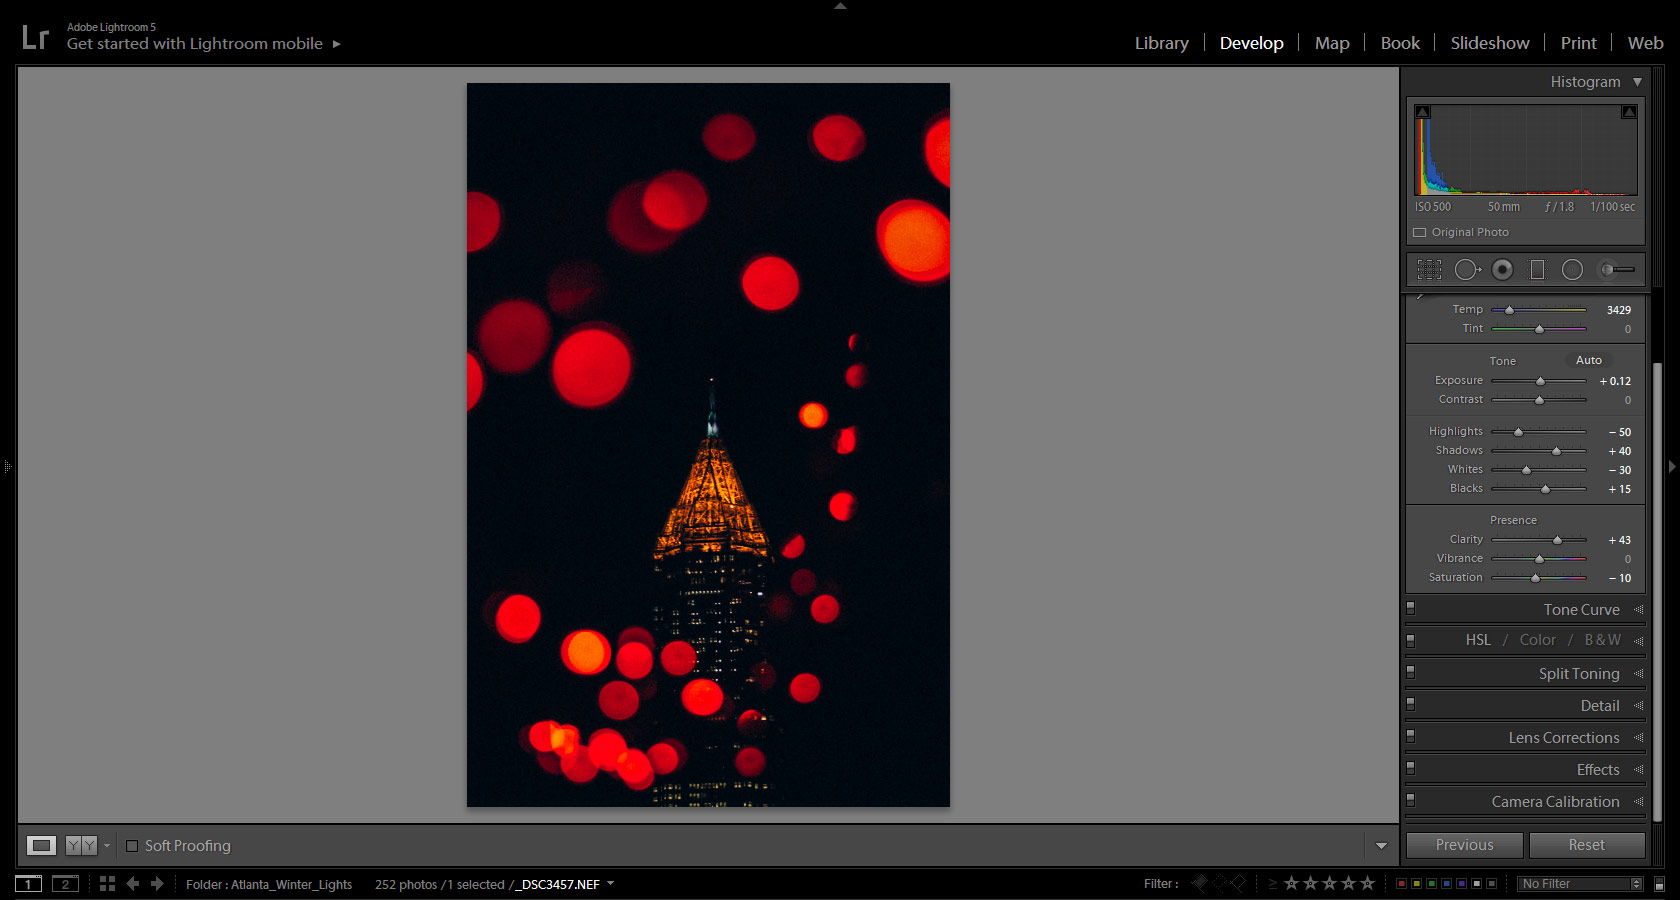
So, once you have in your head what you want the subject to be and how you want to incorporate bokeh into your shot, you then experiment! When shooting out of focus especially with the object almost touching your lens, it is often unpredictable and fun to see what slight movements will do with the light. In my case I kept adjusting, moving from angle to angle, making minute changes, to get something that looks like the image below. One thing to remember is that the color of the object out of focus can play a big role in helping you get a nice clean image. Before getting this shot I was using some more green light that did not look good against the color of the building, so I moved over to the more red holiday lights and that made all of the difference.

Arnel Hasanovic Bokeh Tutorial

4 – Experiment! Experiment! Experiment!

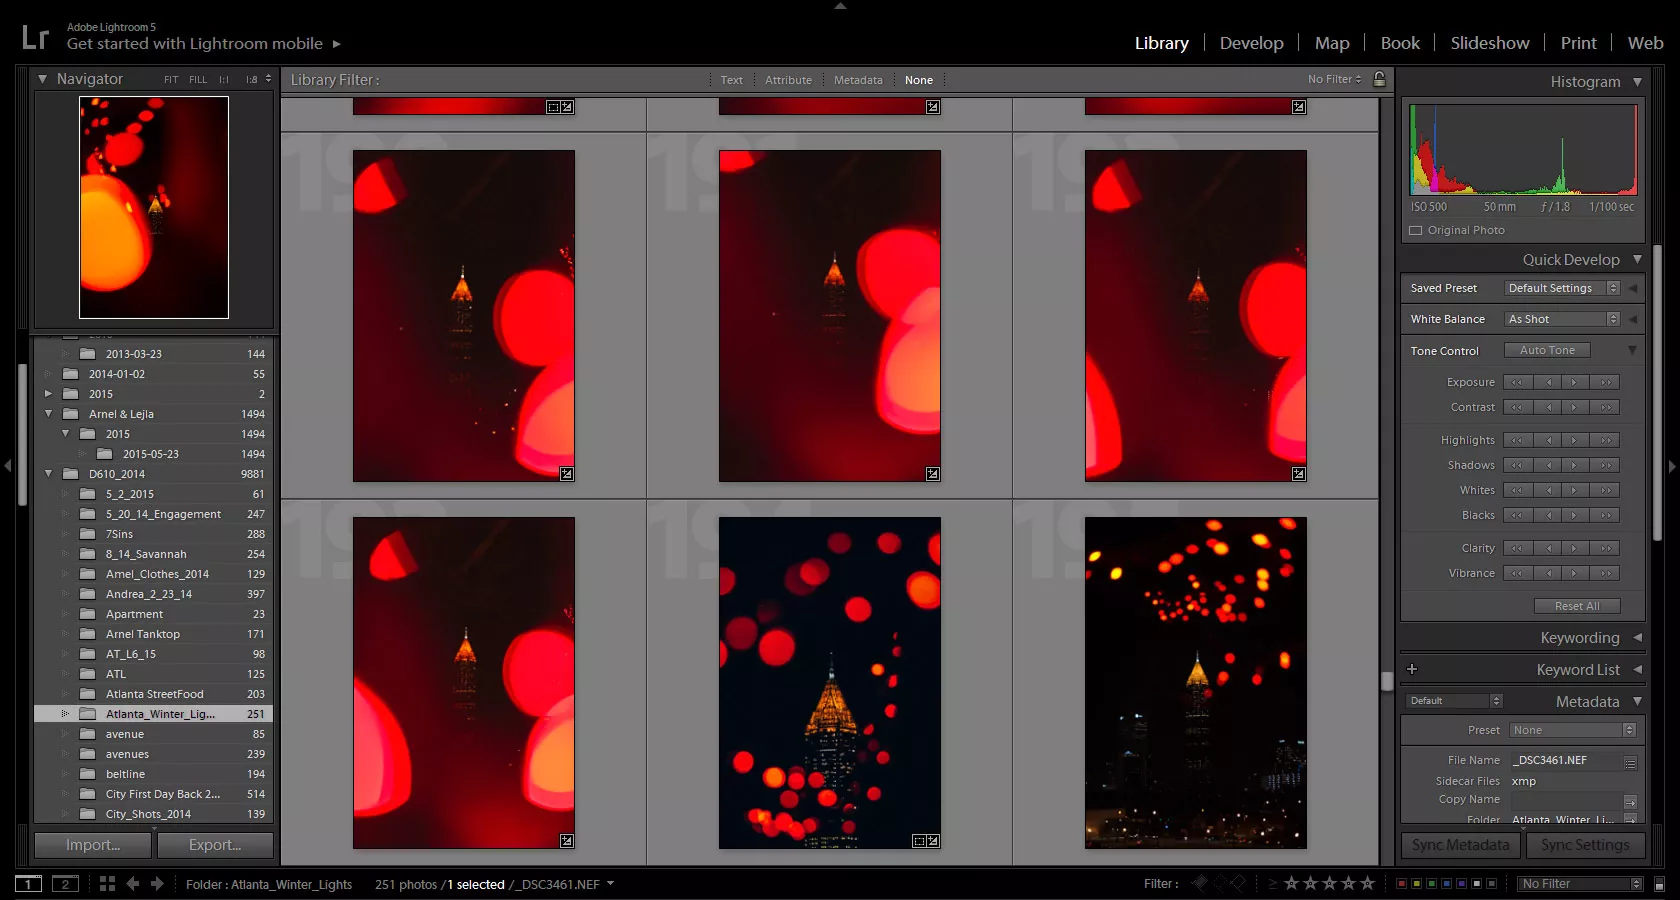
Did I mention experiment?! Trying out new things and making slight changes with your camera will yield two great and unexpected results that you can learn from. Shooting at night is not something I do a lot of, so when I get a chance to do something I do not normally do, I play around, knowing that there is no consequence for failing. Below is a small sample of the different angles and changes I made along the way to getting the image above. If you notice, a lot of the images look the same in a row, but one move up or down changed it. When working with light bouncing around your lens and it is so close that it almost touched the lens, the smallest change can get you to a winning shot.

Arnel Hasanovic Bokeh Tutorial

5 – Conclusion

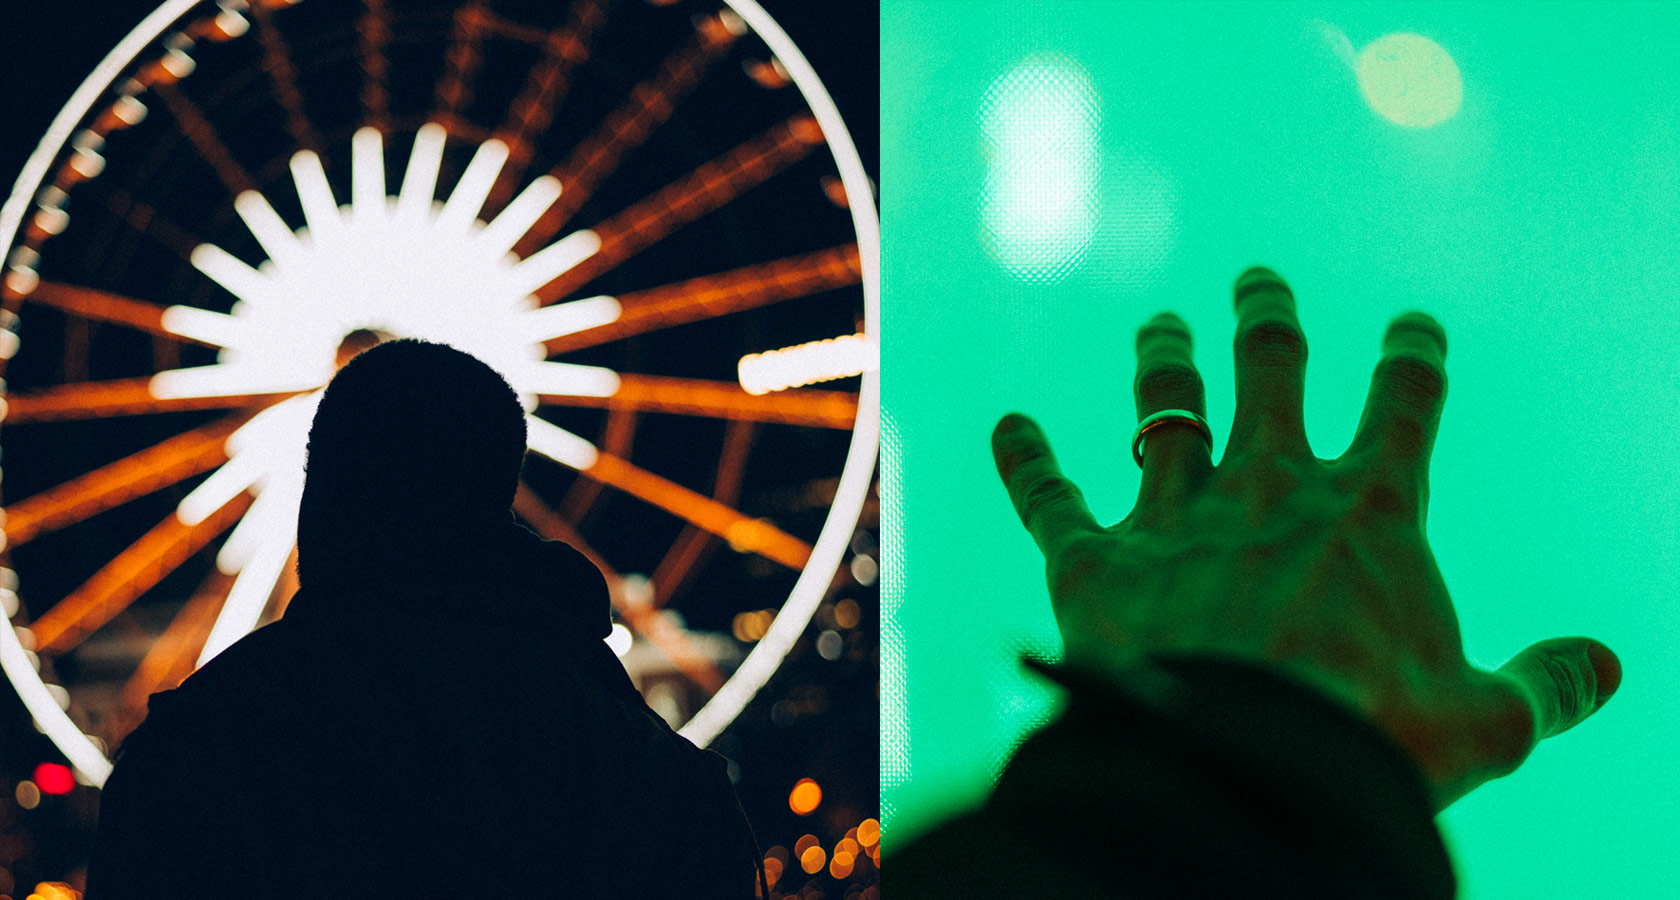
Shooting bokeh can be a lot of fun and there are a lot of different ways to incorporate it into an image. Sometimes used just for fun, and other times to hide distracting objects. Whatever the case may be, it’s fun to take a time to try new things and play around.  Below are some other images and uses of bokeh during the night.

Arnel Hasanovic Bokeh Tutorial