A Guide to Using the Adjustment Brush in Lightroomwww.sleeklens.com
Correcting exposure, color balance, and contrast are likely how you begin editing the majority of images in Lightroom presets. Often, it might be all that is required to finish editing the image; however, to take your images a step further Lightroom has given its users a tool called the Adjustment Brush. It allows for photographers and retouchers to localize their editing by carefully selecting specific parts of the image to enhance, hide or correct. The Adjustment Brush is a fairly easy tool to master, but it comes with a few settings that need to be understood, to use this tool well. This is the complete guide to using the Adjustment Brush in Lightroom.
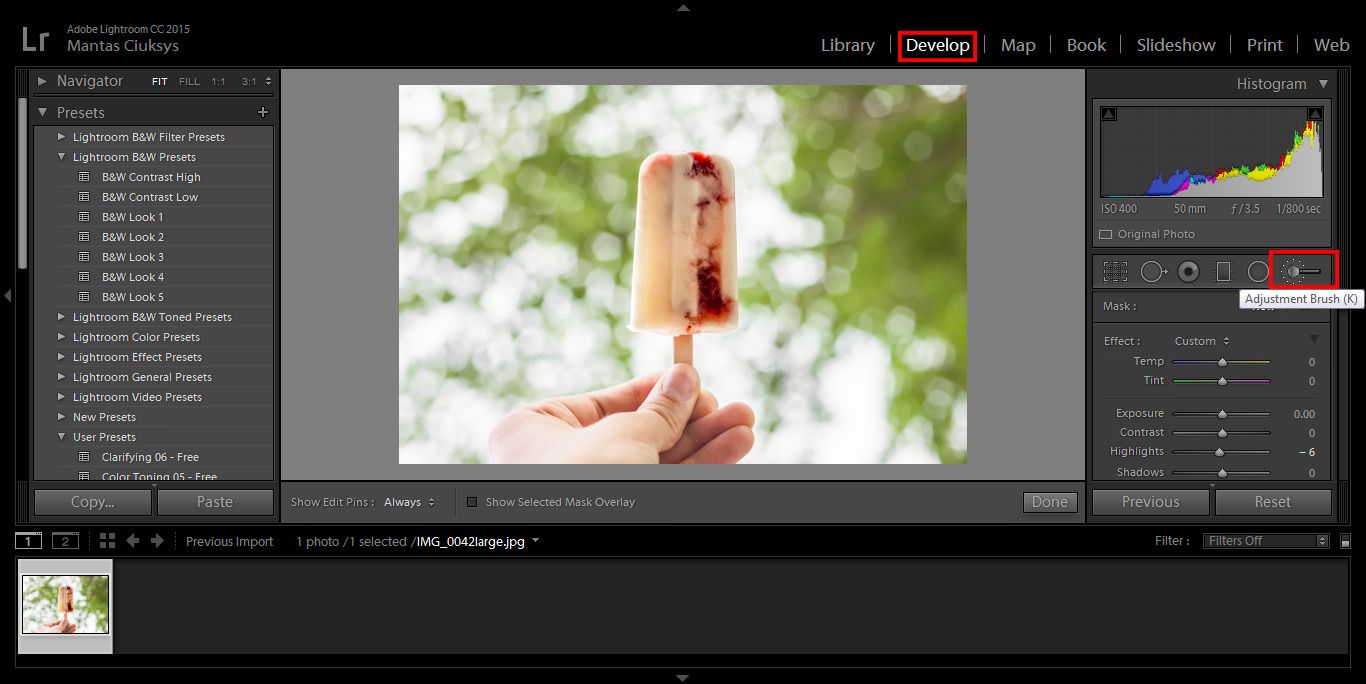
The Adjustment Brush tool is found in the Develop module of the Lightroom panel which can be found if you have an installed Lightroom presets. You can quickly access the Develop module by using the keyboard shortcut ‘D’. The Adjustment Brush tool is marked as a dotted circle with a brush coming out of it – make a habit of using keyboard shortcut ‘K’ to access the tool, to save time when retouching.
Once the tool is selected, you will see that the mouse pointer turns into a circle. It marks the area affected by the Adjustment Brush. Further, you will notice that it opens a number of options that change what affect the Adjustment Brush will have on the image.
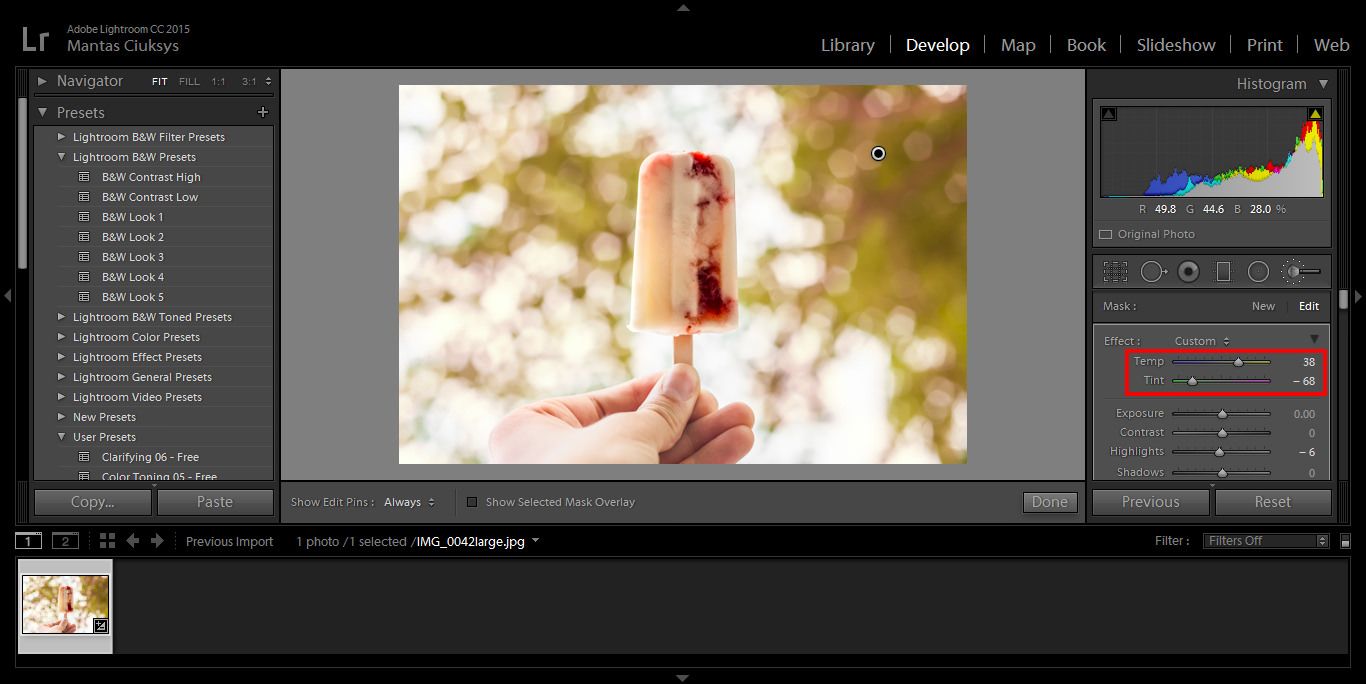
The first two sliders control the temperature and color tint of the image. These, in short, control the white balance settings of the Adjustment Brush. For example, you could use this tool stylistically to add a complimentary color in the shadows of an image for a more saturated photo.
Moving forward, the next six sliders control the exposure and tone settings of the Adjustment Brush. Exposure will change the overall tone shift of the area affected by the Adjustment Brush. The contrast will control the ratio between the black and the white values of the image, which can be the further adjusted by the last two ‘Whites’ and ‘Blacks’ sliders. The Highlights slider will control the extent to which the Adjustment Brush affects the brightest sections of the adjusted area, while the Shadows slider will control the darker areas. Adjusting these settings can help you bring certain parts of the image forward or hide other areas in shadows.
The next section allows for changes in clarity (one of the features you have to consider for rating system in Lightroom), which controls the contrast of the lines in the image, and saturation, that affects the intensity of the colors in the area of the adjustment brush. Often clarity can be great in revealing the amount of detail present in the image; however, usually you want to avoid adding it to faces as it will accentuate lines and creases in the skin – to avoid that we can use the Adjustment Brush tool to only increase clarity outside those areas.
The next section is responsible for correcting the issues caused by the camera sensors. First, are the Sharpness and Noise sliders that can be used to make parts of the image stand out from the rest or used to reduce noise and grain caused by the camera sensor. The Moire slider is there to compensate for the Moire effect that occurs when a frequency of pattern in the image aligns with the pixels of the sensor, resulting in a distortion of that pattern. The Defringe slider reduces the chromatic aberration caused by lens shortcomings.
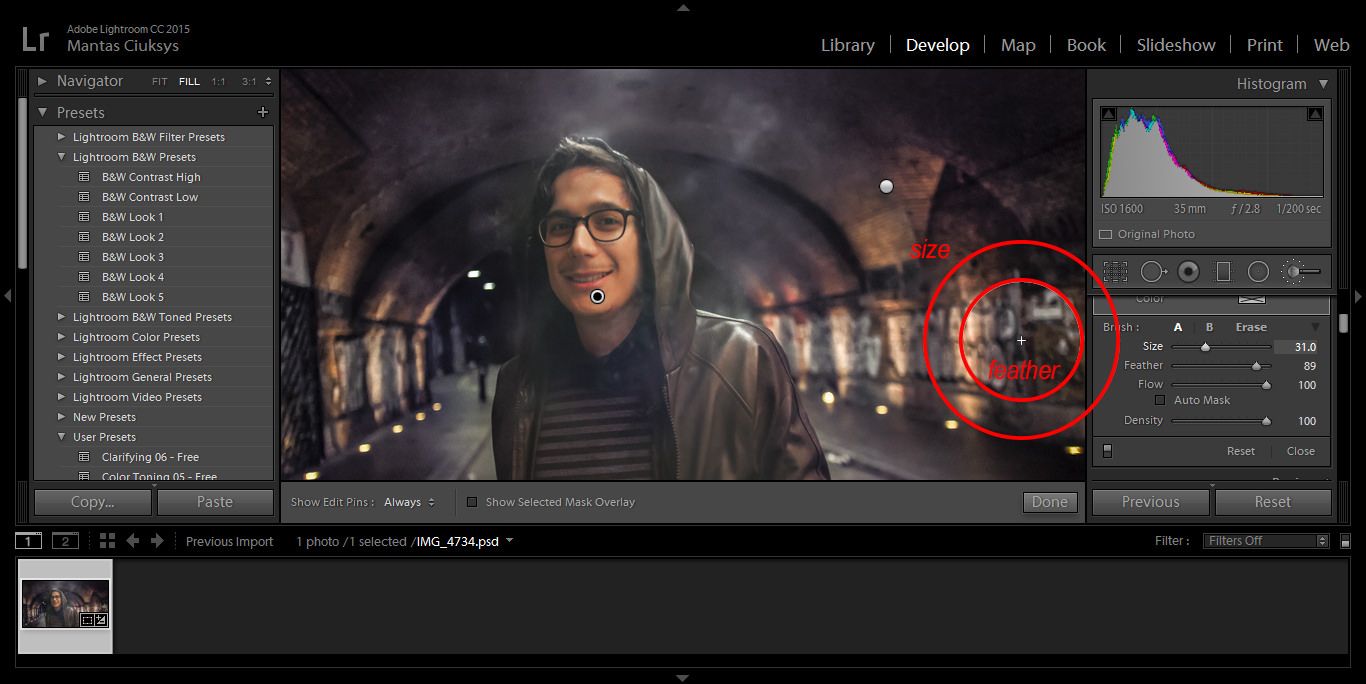
Further, the Color option of the Adjustment Brush allows you to select a color cast that the brush will add to the affected area of the image. Last part of the Adjustment Brush options controls the Size, Feather, Flow and Density of the Adjustment Brush. A quick way to adjust the size of the brush while retouching is to use the keyboard shortcut ‘[‘ to make it smaller and ‘]’ to increase its size. The Feather of the Adjustment Brush controls how quickly the Adjustment Brush will fade into the rest of the image. The larger the Feather level – the more gradual the fade will be.
Flow affects how quickly the Adjustment Brush is applied to the image. If it is set to 100%, it means the Adjustment Brush will affect the area to a maximum level. If it is set to 50%, only half of the effect of the Brush will be seen.
The Density slider is similar to Flow and controls the amount of change that can be applied by the Adjustment Brush; however, unlike Flow, it will limit the effect indefinitely, meaning that once it is set to a specific value that area will always remain affected at that percentage, unless the Adjustment Brush settings are changed.
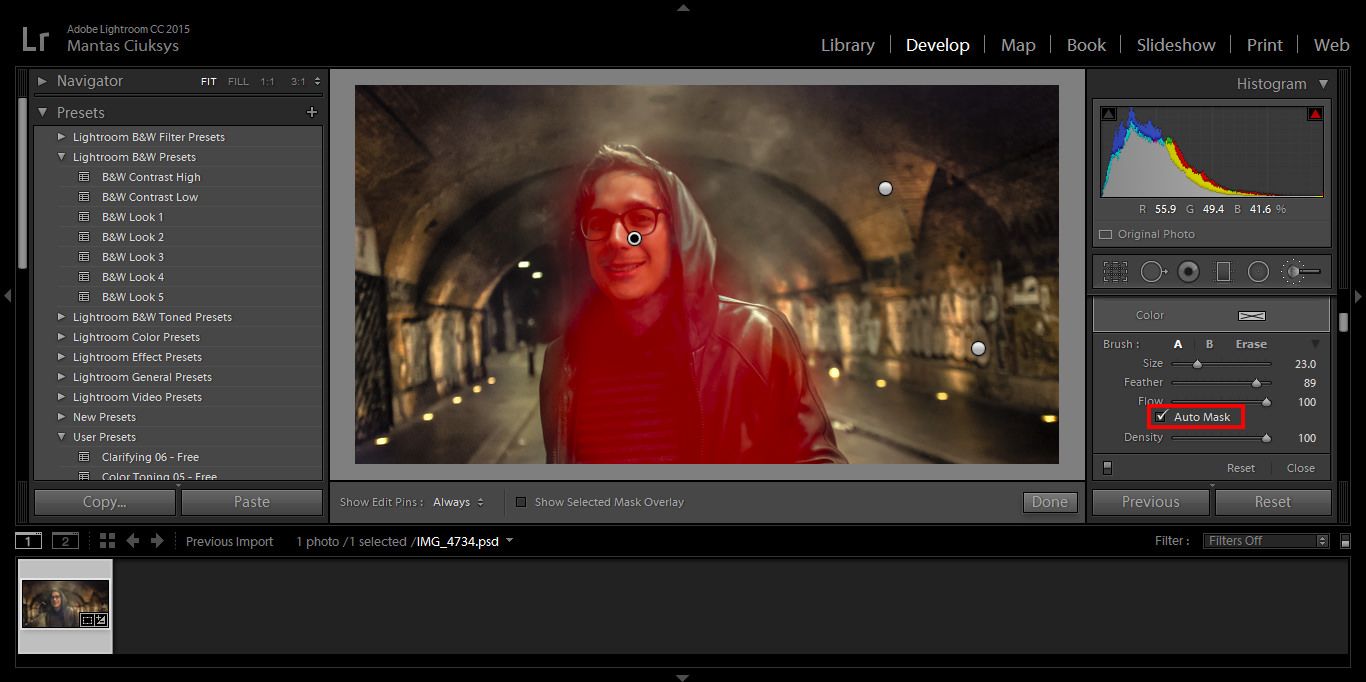
Last, the Auto Mask options attempts to guess, which parts of the image you aim to be affected by
the Adjustment Brush. It does so by checking for contrast ratios between pixels, meaning that if you have a subject in the image that clearly stands out from the background, it should be able to easily identify that you only want the subject affected; however, if the background is very cluttered, likely, it will not be able to distinguish the subject well.
If you are finished with the first set of adjustments, you can create a new brush. Simply click the ‘New’ option in the Adjustment Brush settings panel, set the new settings for the Adjustment Brush and start applying it to the image. Note, that you will be painting on top of the first Adjustment Brush that you used. A quick way to undo the changes made by the Adjustment Brush is to hold the ‘Alt’ key while brushing the areas you want to be undone.
Hello Laurie,
Unfortunately there is no way to do such thing as we’re limited by Adobe’s way of programming its software. We tried to implement a plugin for this behalf and it wasn’t possible. The only way is to keep scrolling through all the brush presets (which we know it can be tedious) in order to find the desired brush.
Laurie •
Guest
Is there a way to quickly scroll through the brush presets I have accumulated from sleeklens?! Kind of a pain to always have to click on arrow to scroll. Thanks so much!!!


 Facebook
 Google +
Comments (2)
Hello Laurie,
Unfortunately there is no way to do such thing as we’re limited by Adobe’s way of programming its software. We tried to implement a plugin for this behalf and it wasn’t possible. The only way is to keep scrolling through all the brush presets (which we know it can be tedious) in order to find the desired brush.
Is there a way to quickly scroll through the brush presets I have accumulated from sleeklens?! Kind of a pain to always have to click on arrow to scroll. Thanks so much!!!