Hello, and today I’m going to bring you another great free lesson from Sleeklens.com. Today we’re going to talk about Creating Brush Presets in Adobe Lightroom.
So, the reason you want to create Brush Presets is because you may find yourself doing certain types of work over and over and to save yourself time, it makes sense to create a Brush Preset.
You can find links to our own made Brush Presets.
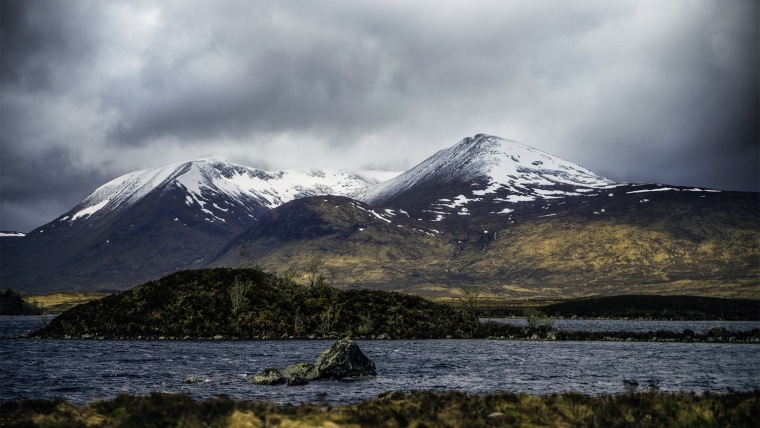
In the image above, I’m going to create two different presets. I’m introduce some sunlight to the right hand side, adding a bit of drama to my picture.
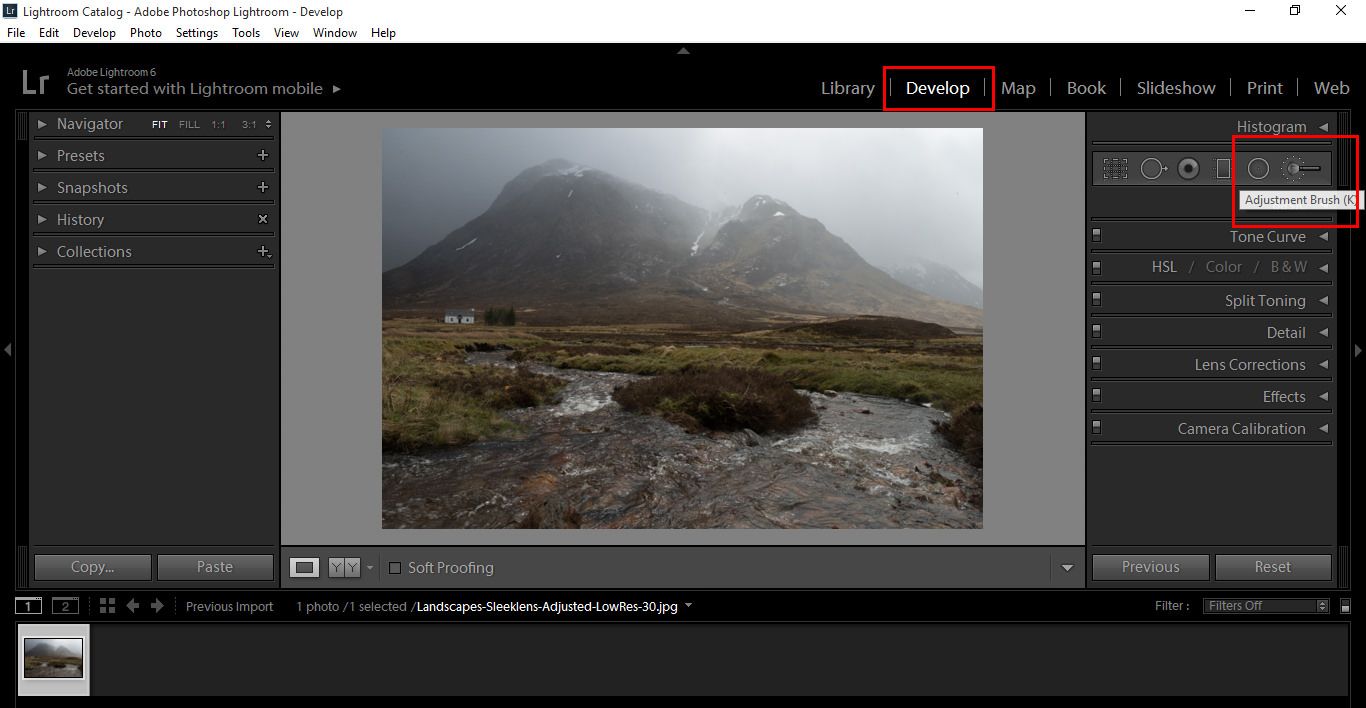
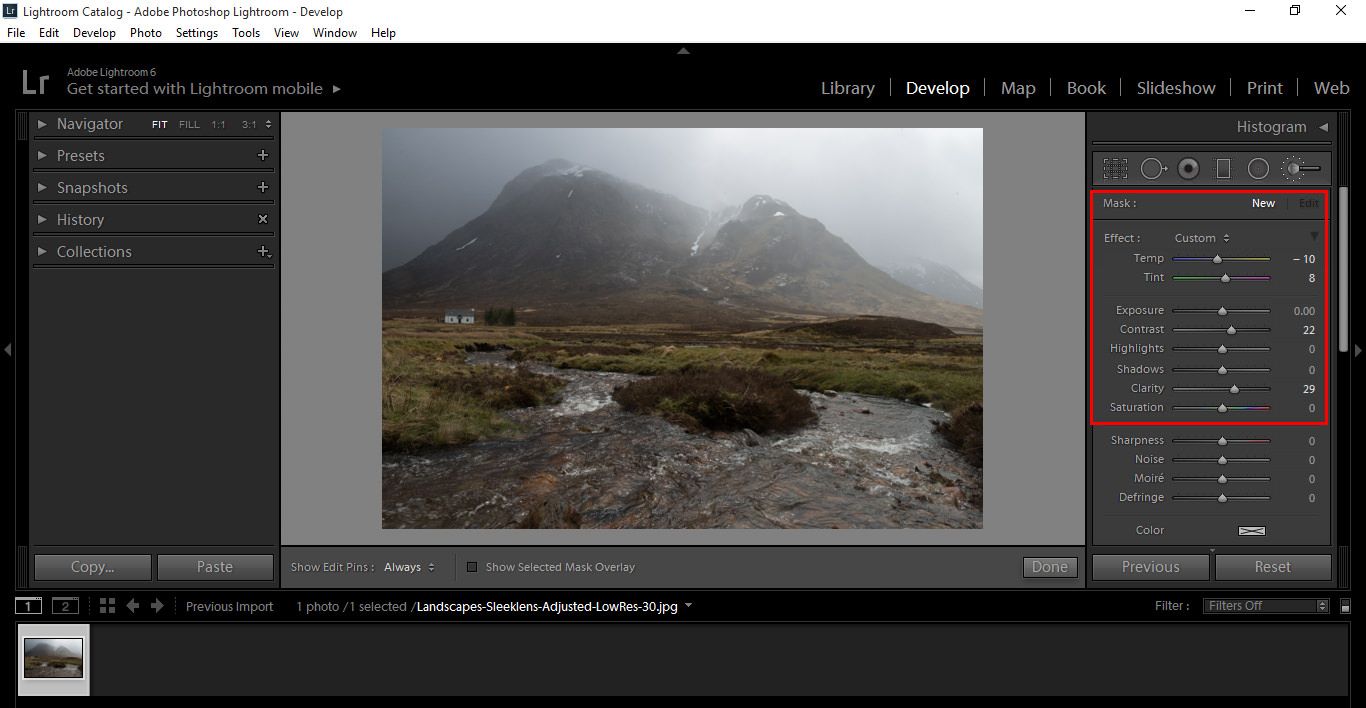
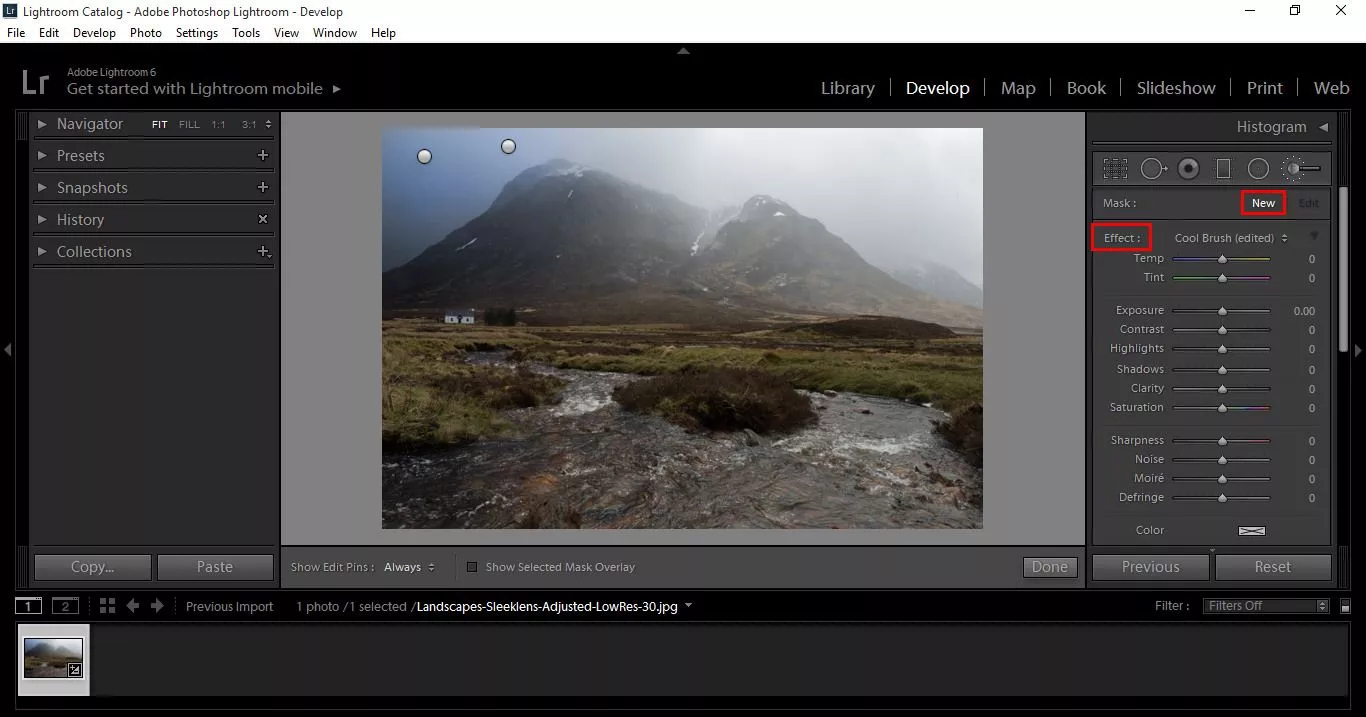
So to select your Brush, go to develop and press (K).
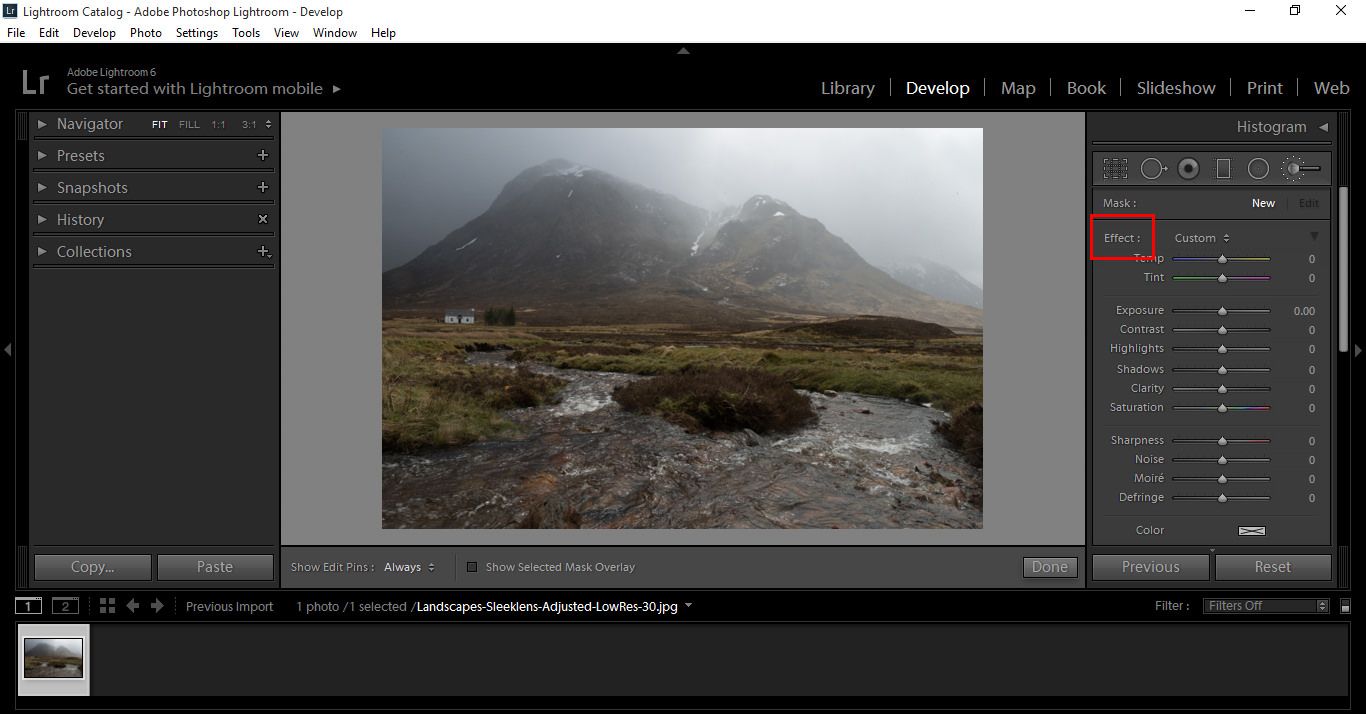
Then double click where is says effect to reset your brushes if they are not already.
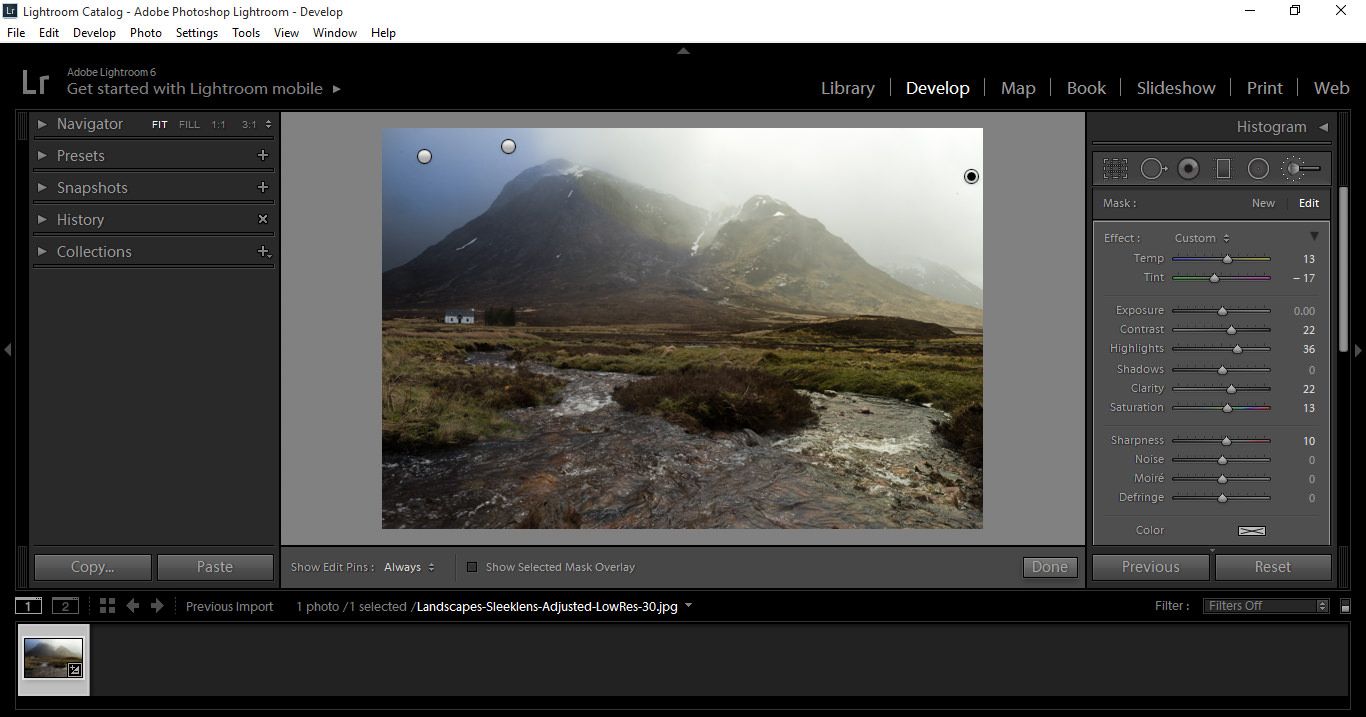
First, I’m going to give my left hand side a cooler feel so that when I warm up the right hand side, it will give that little bit more drama.
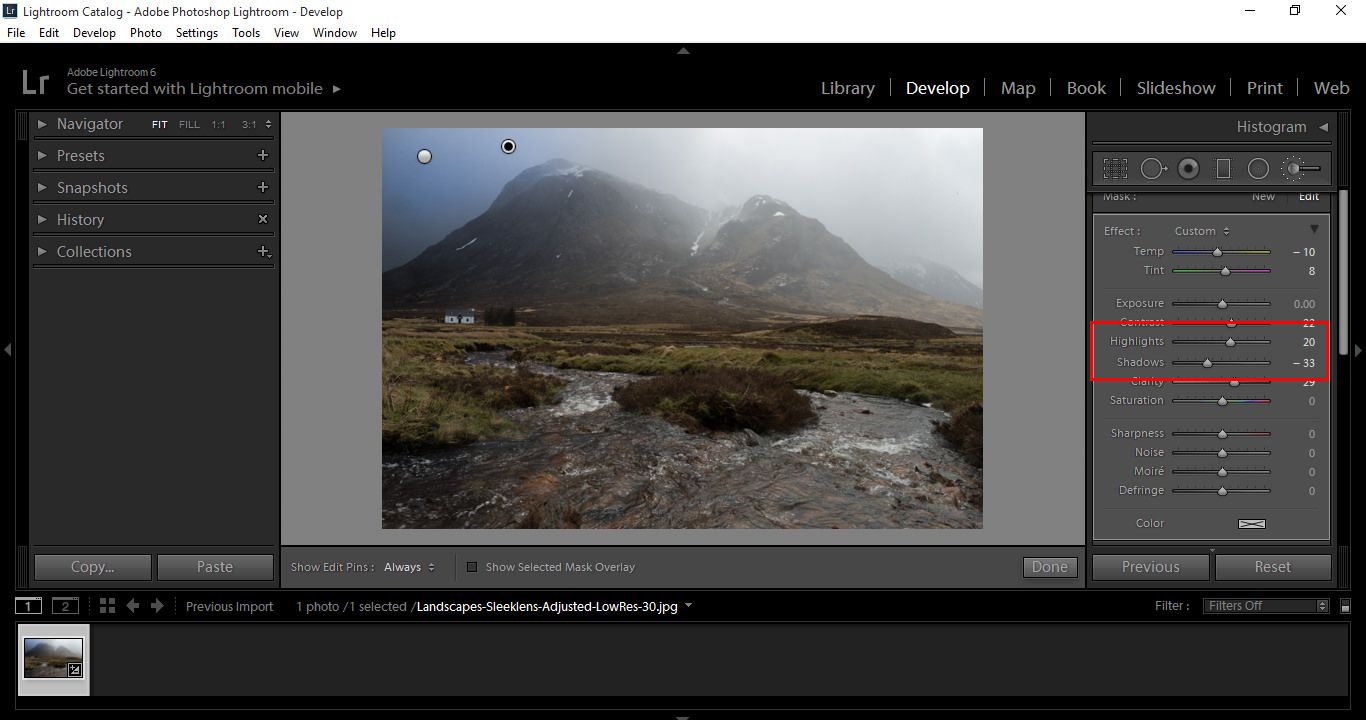
Slide the Temp slider to the left about 5-10 points and the Tint to the right roughly the same.
I’m also going to up my contrast, so slide that to the right about 20 points. If you’d rather it have a softer feel, I wouldn’t touch Contrast or I would leave it at or around 3-5 points to the right.
The same goes for Clarity, I’m going to sharpen my sky a little so I’m will move it to the right a little, round about the same size as my Contrast. (Side note: Contrast and Clarity more or less work together, you can have one without the other but when I boost Contrast I like to get just that little bit more range out of it by adding Clarity)
Now in my Brush setting at the bottom, I’m going to Feather my Brush to about 80-100 points to the Right and the same with my Flow and Density. Make sure you have AutoMask checked
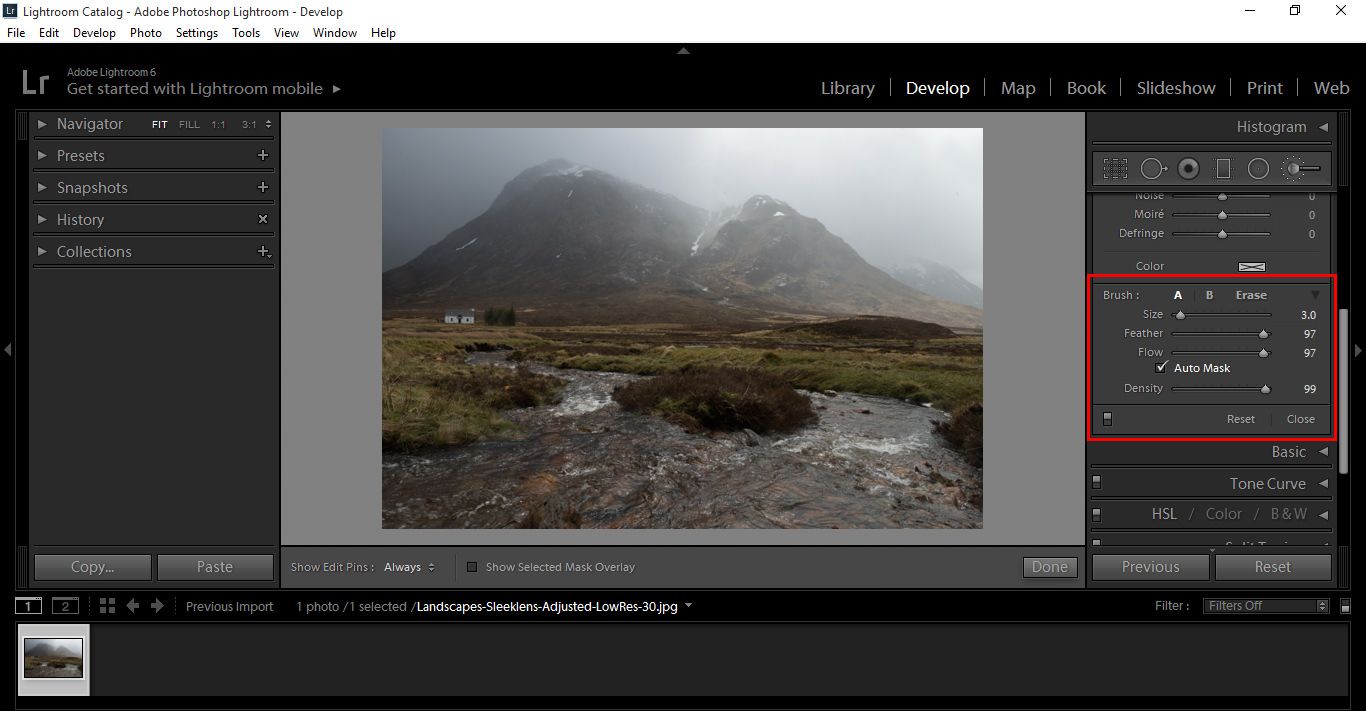
If you like, you can take a minute while painting, to go back and forth and try some try larger point settings or lower just to get a good feel for the differences in the effects.
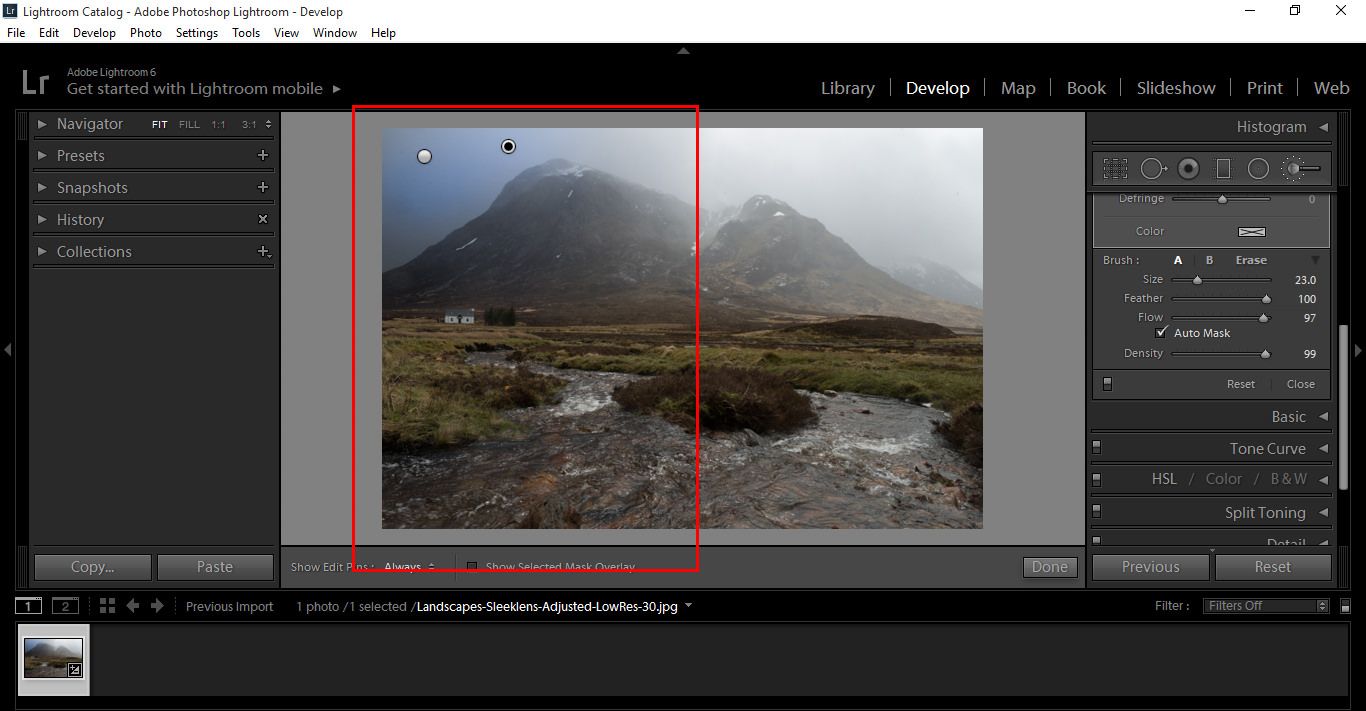
Making my brush a good size using the bracket keys [ or ] to enlarge or decrease size as I see fit. Then, I’m going to paint on the area that I want to cool.
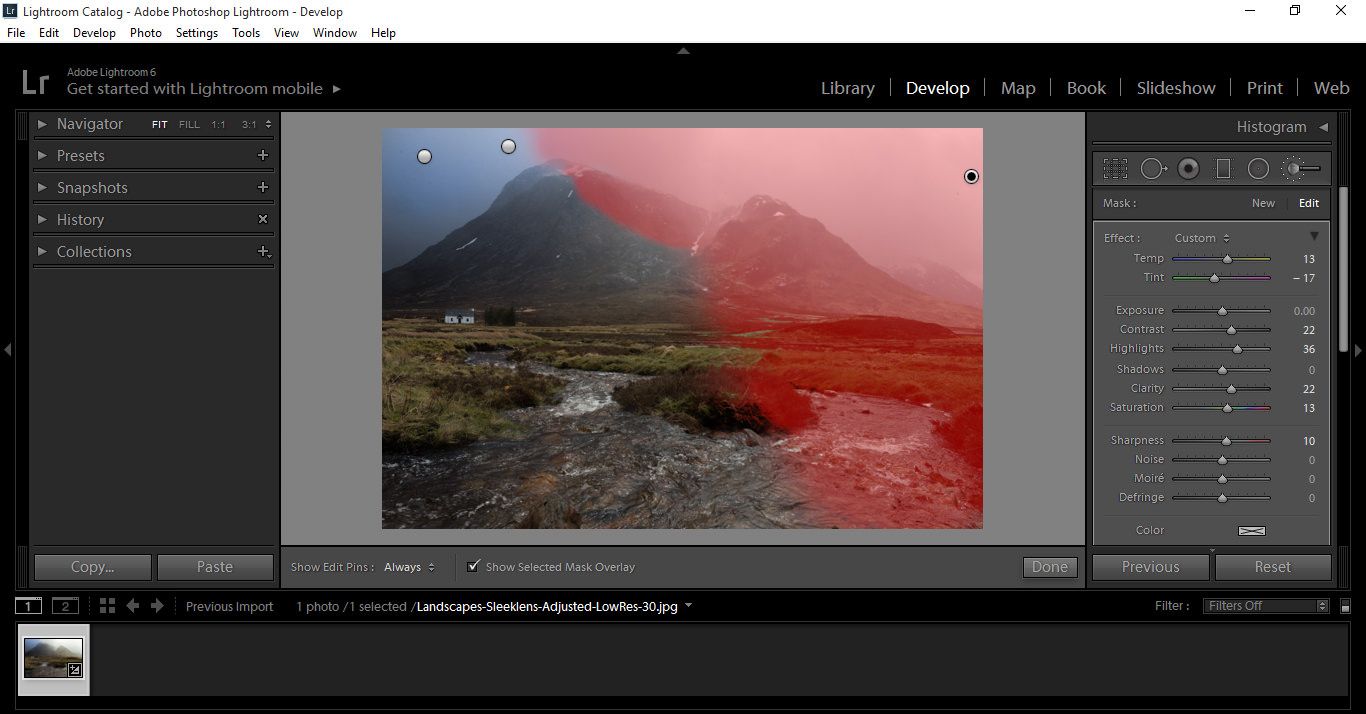
I’m going to add to the sky and to the background of the mountains, as that would be in the shade.
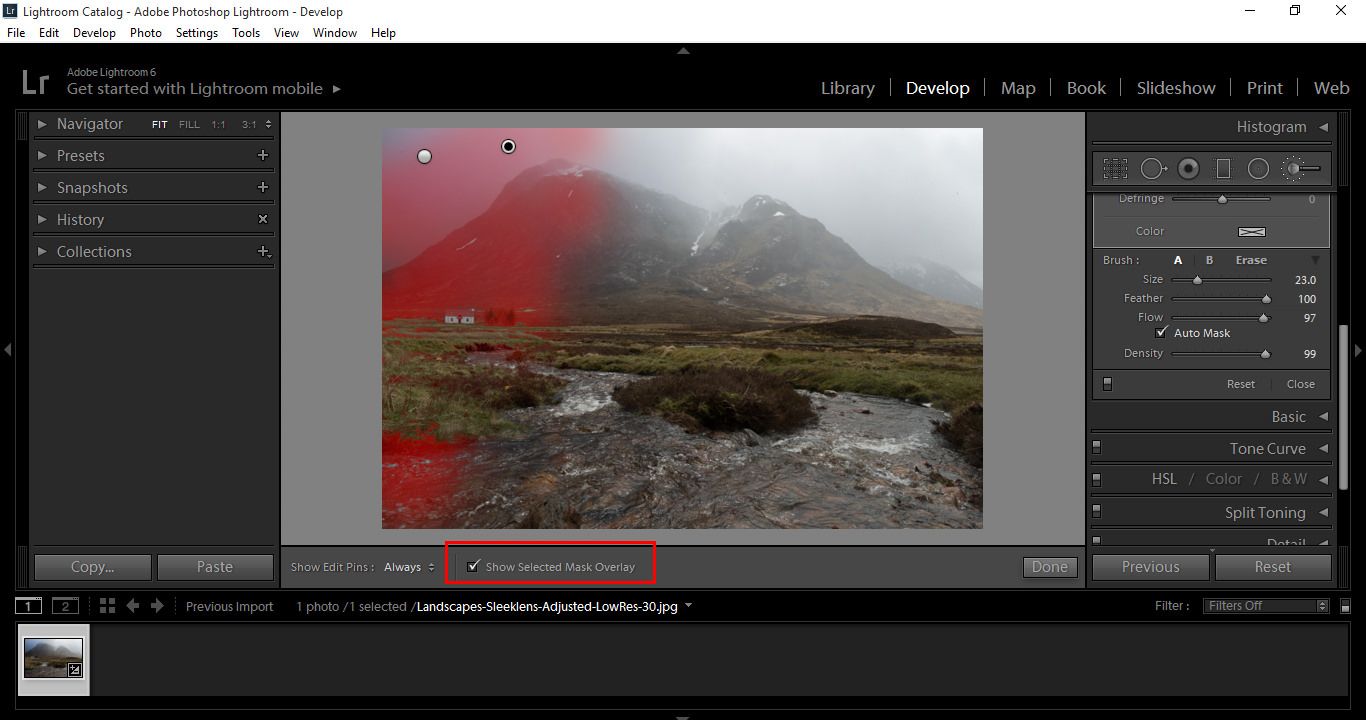
You can also click back and forth on Show Selected Mask Overlay, to check on where exactly your brush strokes are going.
And, you might also want to adjust your Highlights and Shadows in your brush settings as shown below.
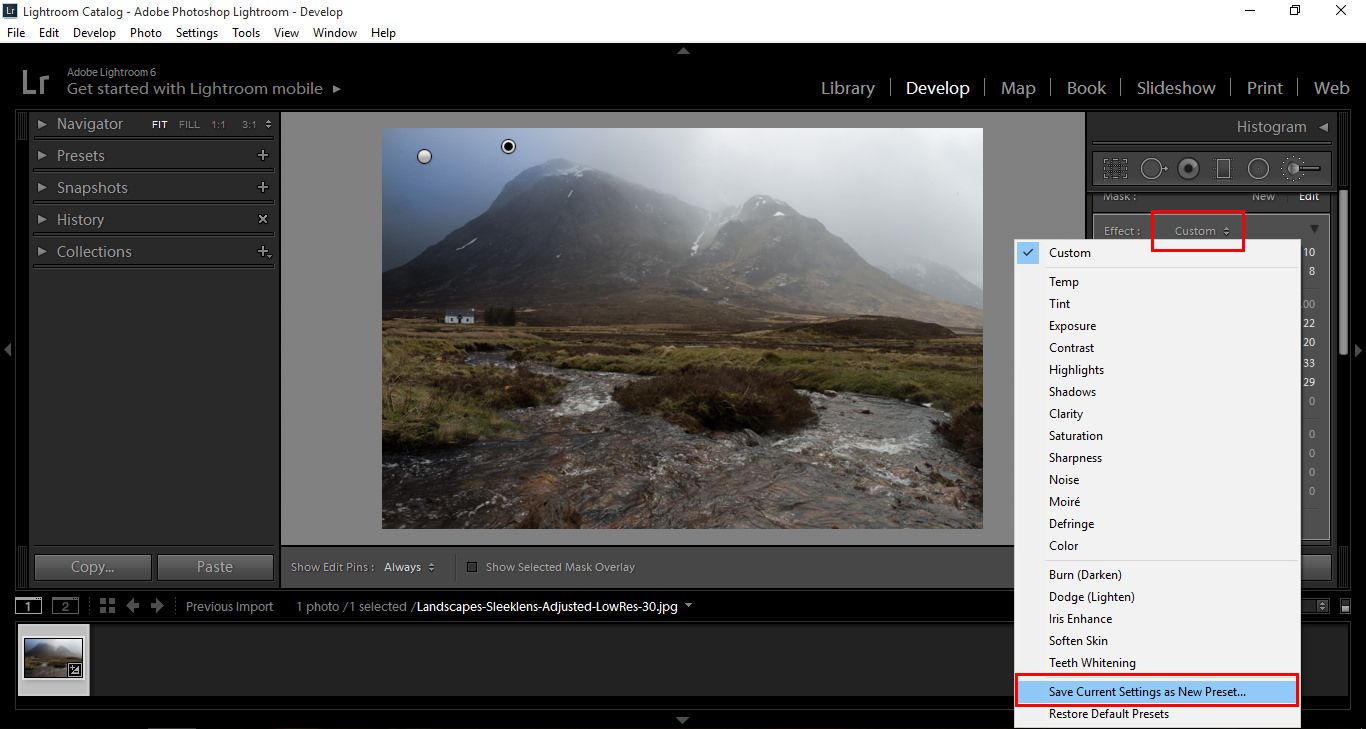
Now to save this brush as a new Preset, go over to where it says Custom and scan down to the second to last choice where it says Save Current Settings as New Preset as shown below.
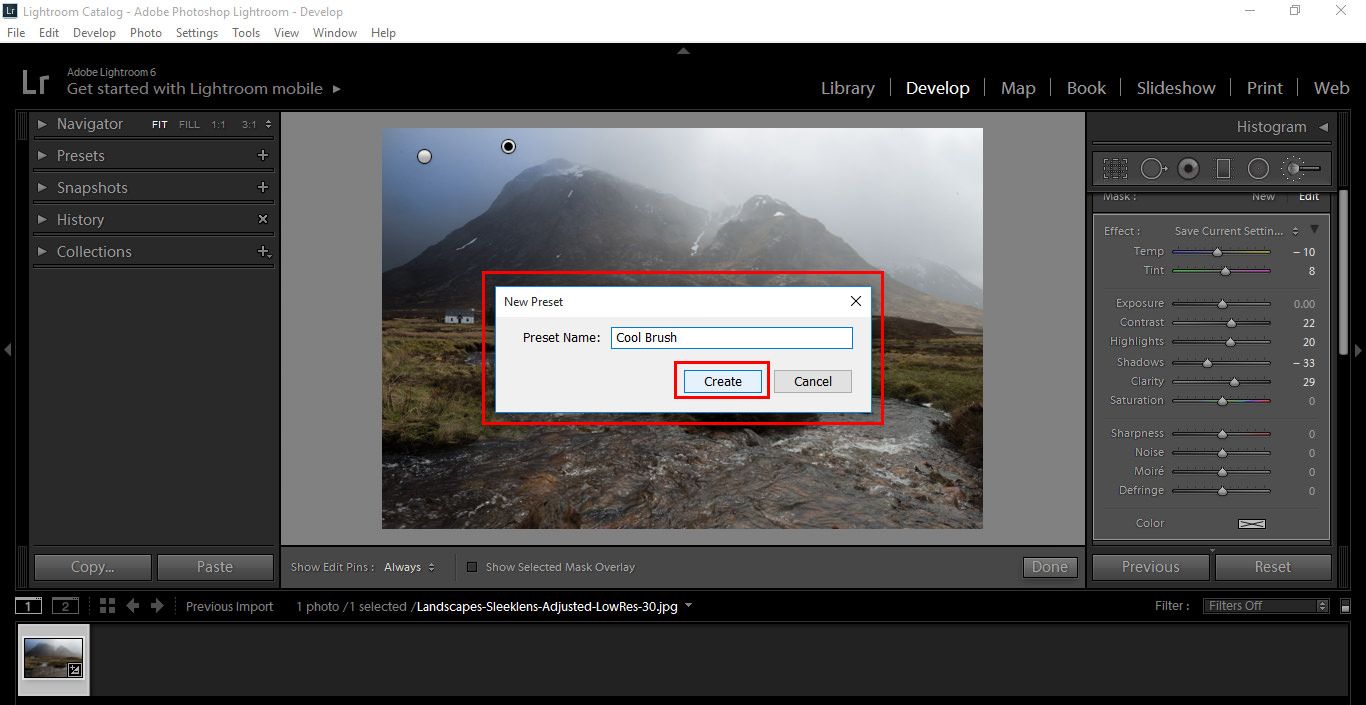
Add the name you wish to call it and hit Create.
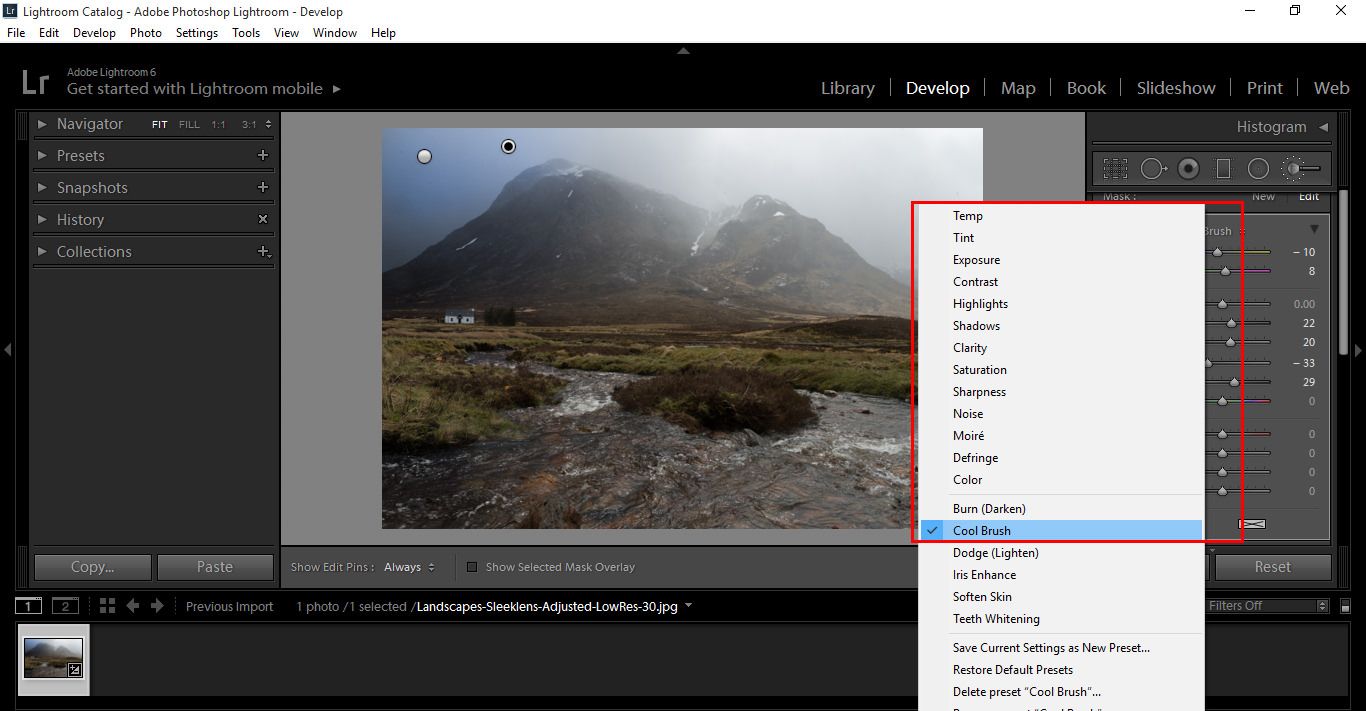
Anytime you wish to use that setting you can find it in your Custom drop down box, the same place as you opened to save.
We are now ready to add in the sun, click on New and Reset as you did at the start of this tutorial. If you can’t remember how to reset, click on Effect twice, you will see New just to the right of that.
Once you are ready we are going to do the opposite of what we did, but in the same manner. Move your Temp to the right, roughly the same settings but opposite, so plus 7-10 etc.
Then paint on as before, following where you think it would hit.
As before with the Show Selected Mask Overlay option, you can see exactly where you have been painting.
Next step is as before, go to Custom – Save Current Settings as New Preset (Second From the end) – Add the name and hit Create.
And if you check, you will see your brush will be in the Custom area ready for use.
So, I hope you got a lot out of this and I will be back again with more free lessons, courtesy of Sleeklens
And don’t forget you can find loads of these Presets in our product sections Through the Woods Landscape Workflow with up to 50 Brush Presets per product.


Please verify your software version before proceeding.
 I’ve verified my software version


 Facebook
 Google +
Comments (0)
There are no comments yet.