Welcome back! Today we are going to be working with the “Grayscale Essentials” workflow by Sleeklens. In this tutorial, We will go over how to use light and dark to enhance your black & white photographs.
Starting out, I have a color photograph up of two girls walking between rows of trees, which I have already gone ahead and converted to black & white, using the All in One – Syrup preset.
Sometimes you may want to change your photographs to black & white, so you’ll add a black & white filter or switched it to black & white and the photo feels kind of flat or everything blends together, with the subjects no longer standing out in the picture. For that reason, we are going to talk about using certain tools in our “Grayscale Essentials” workflow.
So, let’s now scroll down through our presets and apply the Vignette – Black preset. Once applied, it has added a whole lot of dark contrast to the outer edge of my photo.
So, now we will go over to the brushes and open the “Grayscale Essentials” brushes. We’ll scroll down and select the Light – Brighten brush, then use this brush over the subjects to really bring some light back to them and make them stand out.
Then I will click New, use the same brush, but make it smaller and increase the exposure, then go over the subjects once again.
Going back into our “Grayscale Essentials” brushes, let’s scroll down and select the Light – Darken Shadows brush. Sometimes you will notice that when you go with Darken Shadows, it will come with a pale yellow color to it. Since we are working in black & white, I don’t want to have any color tone to it, so we will move the color all the way down until it is gone.
We will go ahead and use this Darken Shadows brush all throughout the trees and foliage in the photo, while turning the Shadows down a little. We’ll also use it on the ground some.
Next we will click New, but go back and select the same brush, making it smaller. With this brush, I am going to turn the Exposure down a little and run it around the subjects to get rid of the ring light directly surrounding them.
The last that we will do with this photograph is go back to our “Grayscale Essentials” presets and apply Polish – Sharp as a Tack, to sharpen the photo up a little bit, then we’ll use Exposure – Darken Shadows. Then to slightly adjust the darkened shadows, I will go over to the panel and turn the Shadows up and the Highlights down just a bit.
So, what we have done is added a lot of light to the subjects in the middle, while really darkening the outer edge of the photograph. This has made the subjects really stand out and added more depth and dimension overall to the photo.
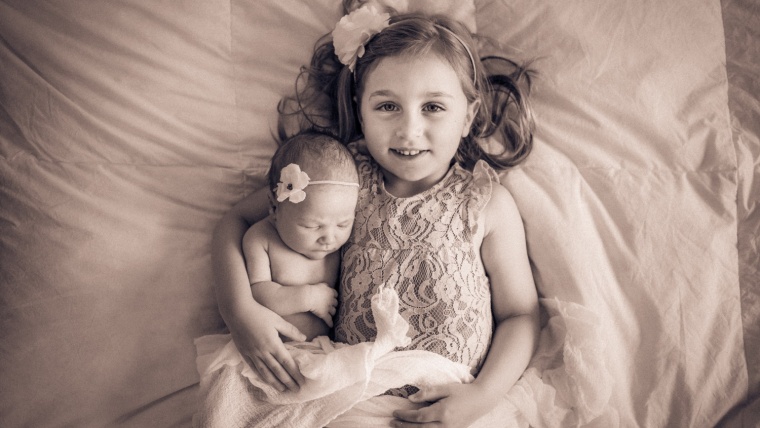
Moving on to our next photograph, in this one we have a color photo of a little girl lying with a newborn.
This time we are going to change the photograph to black & white without using an All in One preset to do it.
To start, let’s go over to the Colors tab and click B&W, which will automatically change it.
Now that we have converted the photo to Black & white, we can go over to our “Grayscale Essentials” presets and add a vignette. For this photograph, I’m going to go with the Vignette – White preset to make the image a little softer.
Once applied, it seems to be a little too much white, so we’ll go over to the Effects tab and under Highlight Priority we are going to slide the amount down, just a little.
For the next “Grayscale Essentials” preset, we will apply Polish – Fuzz, which will give the photograph a softer look, to compliment the newborn and small child in the picture.
What we can do next, is going back into our Colors tab and use the sliders to change the colors in the photograph. For example, whatever red was in the photograph before being converted to black & white I can now manipulate. So, what I will do is pull the red and orange up a bit, then pull the yellow down a little. If there wasn’t much of a particular color in the photo before converting to black & white, there won’t be much to manipulate with that color after.
Next, we’ll open our “Grayscale Essentials” brushes again and scroll down to the Face – Sharpen Face brush to help eliminate some of the out of focus look on the face, caused when we applied the Polish – Fuzz preset.
We’ll go ahead and run this brush over the subject’s face, increasing Sharpness and Clarity as we go along. Although we want that nice hazy look around the subjects, we don’t really want that on their faces.
Similar to what we did with our previous photograph, we’ll go back into our “Grayscale Essentials” brushes and go for the Light – Brighten. We will turn the Exposure up a little bit and use this brush to add some more light to our subjects.
After that, let’s click New, and go back to our brushes. Now we’re going to select the Light – Brighten Eyes brush and zoom into the photo pretty close. I will use this brush on the subject’s eyes, to add some more light to them.
Now, we will use one more “Grayscale Essentials” brush on the photograph. We’ll go into our bushes one more time and click on Light – Darken. I will use this brush to go over some of the areas where I want to darken some of the shadows, such as the hair and maybe some of the background as well.
So, before we finish, I want to use one last custom brush. This time we’re going to use the Contrast brush and go over the lace on the little girl’s dress to bring that out some more.
Alright, now we’re done with that photograph. We have taken a color photo and created a soft black & white photograph with a slightly more muted feel, while maintaining some of the light and dark texture to it.
I hope you all enjoyed this tutorial and found it helpful. Hopefully you can go try it out for yourself soon!


Please verify your software version before proceeding.
 I’ve verified my software version


 Facebook
 Google +
Comments (0)
There are no comments yet.