How To Add Watermark In Lightroom And Photoshop All Herewww.sleeklens.com
Watermarks are always a good way to keep your images safe. However, it will be good to note that having a watermark on your photo or image does not necessarily mean someone won’t steal them. Nevertheless, there is nothing bad about putting a watermark especially because this procedure is very easy. Also, when you add a watermark, it ensures authenticity.
To begin with, it is important to understand that there are many ways of putting watermarks on an image. First, you can decide to use Adobe Lightroom (the main procedure we will be discussing in this post) or choose to go for Photoshop CC. however, Adobe Lightroom always presents you with an easier procedure that anyone can do with a little bit of learning.
How to add Watermark in Adobe Lightroom
Before starting the procedure, it will be good to know that you cannot add a watermark in the Export menu but have to set it up beforehand. To do this, install the Lightroom presets then open your Lightroom and if you are in a Mac, just go to the Lightroom Presets Menu and then click on ‘lightroom Edit Watermarks”. If you are in PC, just go to “Edit Menu > Edit Watermarks”.
In this tutorial, we will be using Mac for setting up a watermark in Adobe Lightroom. You will get a style dialog box where you can set up the watermark the way you want it to look from here on. There are multiple watermarks including your name, company or any other option you find preferable. On the right side of your image, you will find a number of options available to you and from there you can choose your desired font and anchor points among other things. If you have a personal logo you would intend to use, you can click on the graphic dialog box on the top of the menu box and this will take you to your computer from where you can select the containing folder and then choose your desired logo. You choose the format of the image in any form, png or Jpeg, your like. Before making any changes to your simple watermark to make it look more sophisticated as you would want it to be, make sure to select Text at the top of the menu box under “Watermark Style.”
With your watermark set, just go to the Export menu and then select the “Watermark section” and choose the watermark checkbox and pick your saved watermark and click the “Export” button. This will help in exporting. This action will apply and position your saved watermark where you wanted it to be and just the way you wanted it to be. The procedure to add a watermark in Adobe Lightroom is that simple and you can do it on your photos with ease. If you want to save any settings as a preset, always exit the watermark editor and then save it.
Love the tips we shared here? Share it with your friends!
Setting up watermark in Photoshop CC
We would also like to briefly look at how you apply a watermark in Photoshop CC. as earlier mentioned, setting up a watermark in Adobe Lightroom is just one of the processes but you can also do it in Photoshop CC. So, how do you go about the procedure?
It is easy to modify the color and the size of your text using the tool options bar located below the “main menu” or select “Window > Character” and this will give you the panel for text adjustment. Highlight the text you intend to change and move it around to the section you want to appear. You can use the opacity slider located above the “Layers Panel” and manipulate it until it has the desired appearance. You can also insert your logo when setting up a watermark in Photoshop CC almost the same way as you would do when setting up a watermark in Adobe Lightroom.
Let us know if you want to know how to get a transparent background!
But of course, it is always to try and make your watermarks or logos very large as doing so will obstruct the view of your photos. Even if you are out to protect your selected photos, you do not have to hide or mess up their beauty by adding too big logos or watermarks especially if they are clearly visible.
When you specify watermark effects, remember to check the opacity, size, inset and anchor (to rotate the watermark left or right).
Now you know the best method to apply watermark on your images in Lightroom and Photoshop CC. There are also other methods of adding a watermark in your images without having to go through the whole procedure of creating a new one every now and then. Just make sure that your watermark is saved and whenever you want to add it in your future images, all you have to do is to open it, and then select all (Command + A for Mac or Ctrl +A for a PC) and then copy it (Command + C for Mac or Ctrl + C for PC). Then click on your photo or image and press “Command + V” and “Ctrl + V” to paste the logo. Then position the watermark where you want it. You may also like our post about how to become a tone curve master in Lightroom. (check this out). To get more insights on watermarking, keep reading.
Today, I’m showing you the process on Standard and Digital Watermarking in Lightroom, as we have a lot to go over.
If you google ”Watermarking my Images” or something along those lines, you can find websites that will do this for you with various plans, they will even go as far as to scan the net to find your images if they are being used without your permission, which is pretty handy.
As you can see on this wonderfully enhanced image with some of Sleeklens’ Presets, we have our standard watermark at the bottom right hand side.
It visually puts a stamp on your image and can point the viewer to a specific website. This one specifically directs you to our products, so you can see how the image was created using them.
The other kind of watermark is Digital, which isn’t so visual and actually embeds the Watermarking into the pixels themselves, both of these types have their pluses and minuses, so we’re going to be exploring both.
One advantage of having the Standard watermark on your work is, as mentioned, you can advertise your website without really having to do much. Let’s say you took a load of pictures of an event for someone to share via social media. if their friends see the images and decided that they wanted some of those prints, they would know which website and area to go for what they want..
The problem with this is that they can easily edit your watermark out, or simply crop the image to get rid of it.
Now, with the Digital Watermarking it’s kind of the opposite. You have no advertising benefits, but if a company wanted to use your photo they don’t really want to see your big watermark anyway.
An advantage is that with it being embedded, your watermark can’t just be removed by any amateur who knows how to use the Clone tool in Photoshop.
And, if someone lifts that image from your website and starts using it for their own commercial use without permission, you can detect it with the types of websites mentioned at the top, who provide these services for you.
That being said, Lightroom doesn’t have a Digital Watermarking feature, but you can process your images in Lightroom and, using a Droplet to export your images direct/automatically into Photoshop to apply your Digital Watermark.
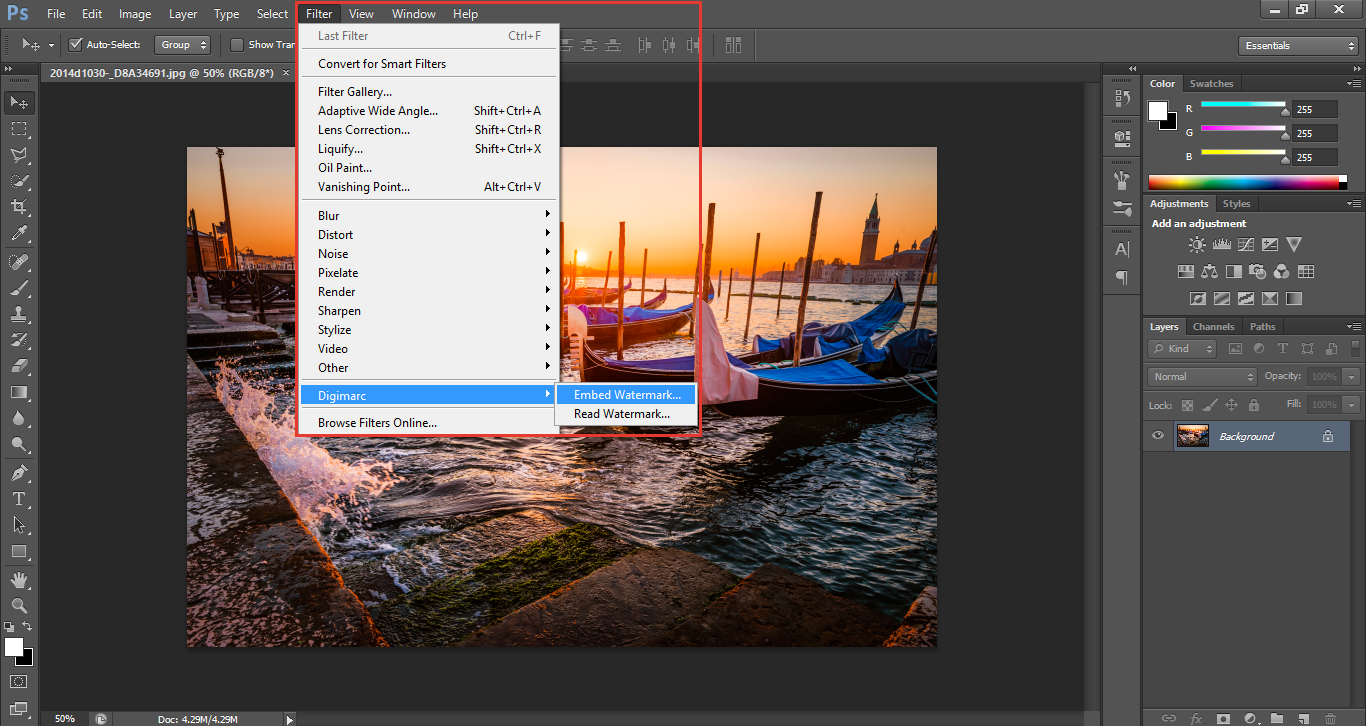
Now we are going to work on applying the image.
As you can see here, we have the same image only this time minus our Watermark.
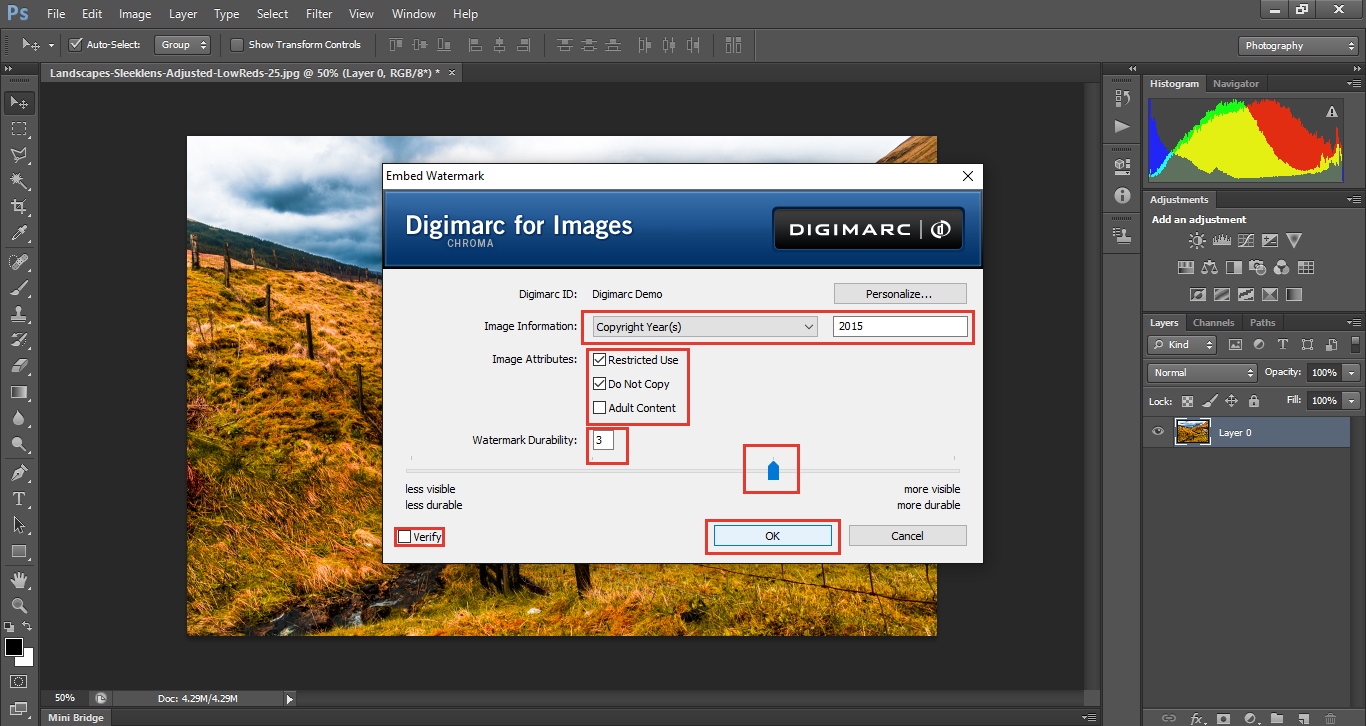
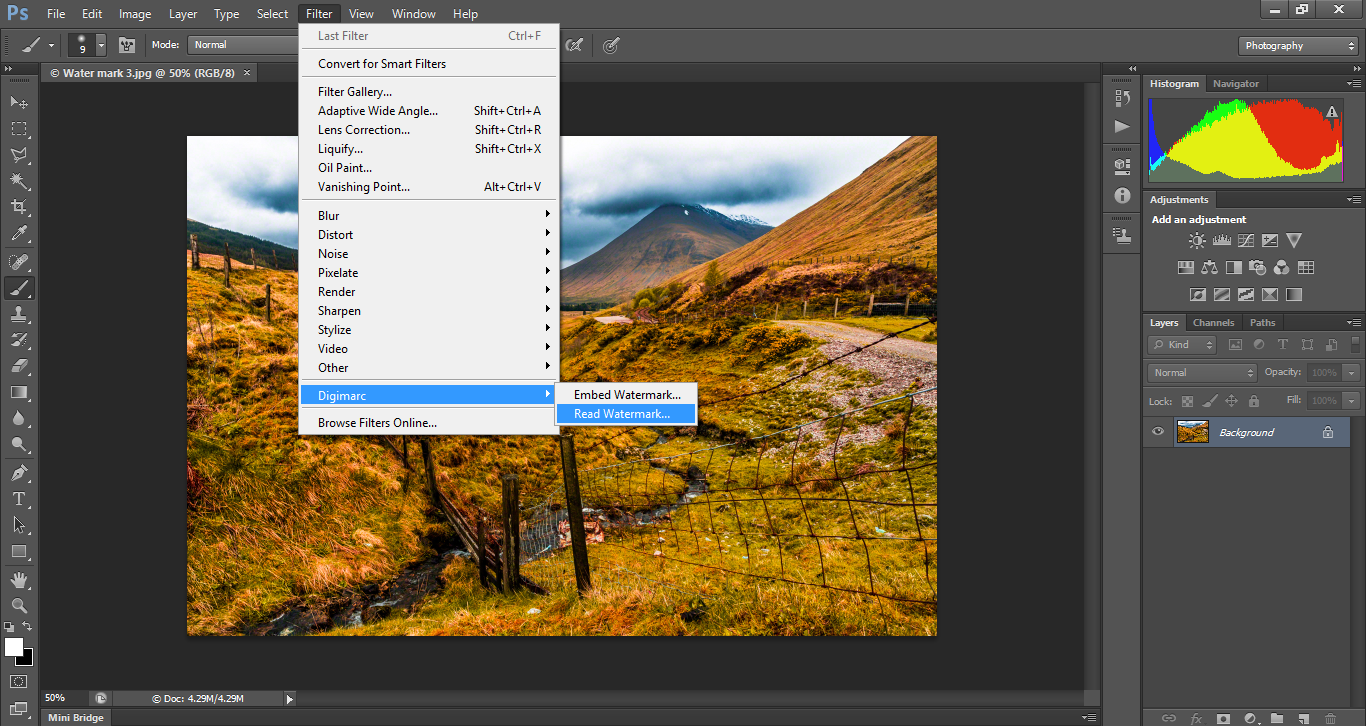
Under Filter you will find Digimarc right at the bottom, which allows you to embed your Watermark. The only issue with this is that your information will not be in there yet.
If you click on Embed Watermark you will see a popup appear. This is one of the Website options that I was talking about, which will provide you with the Watermarking service.
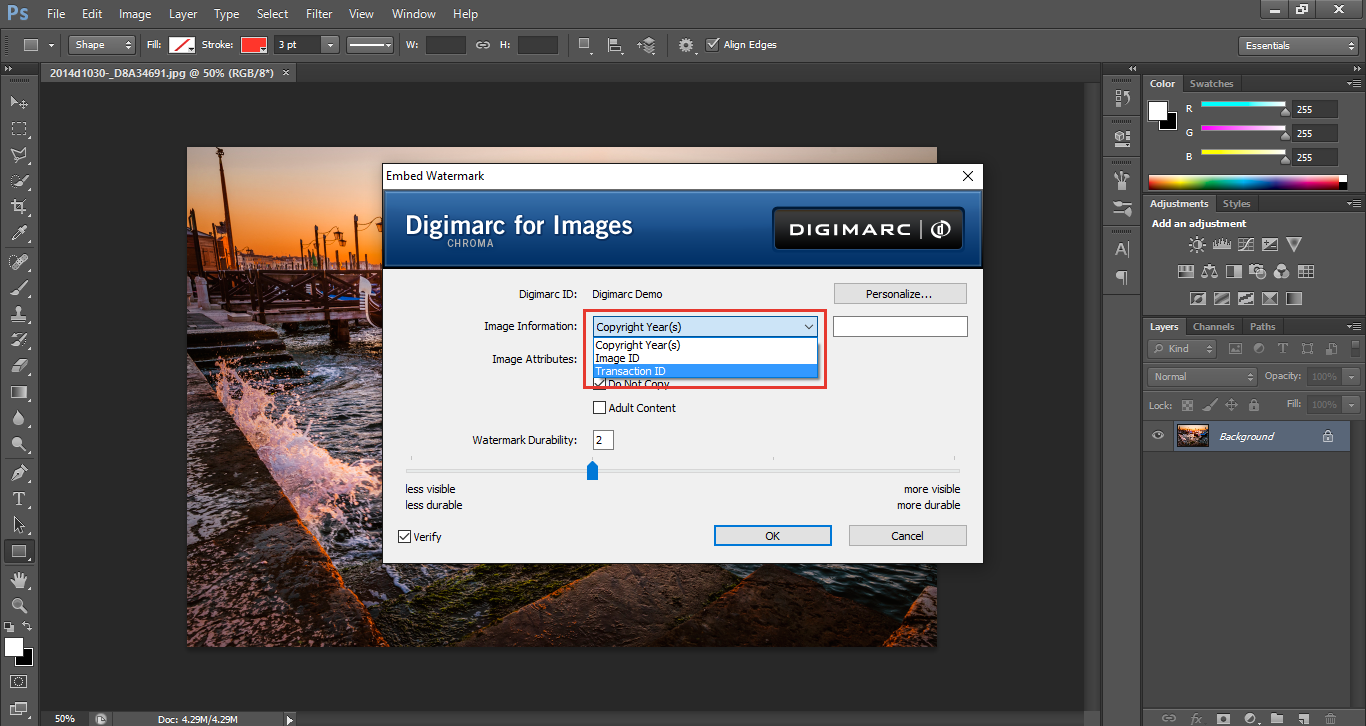
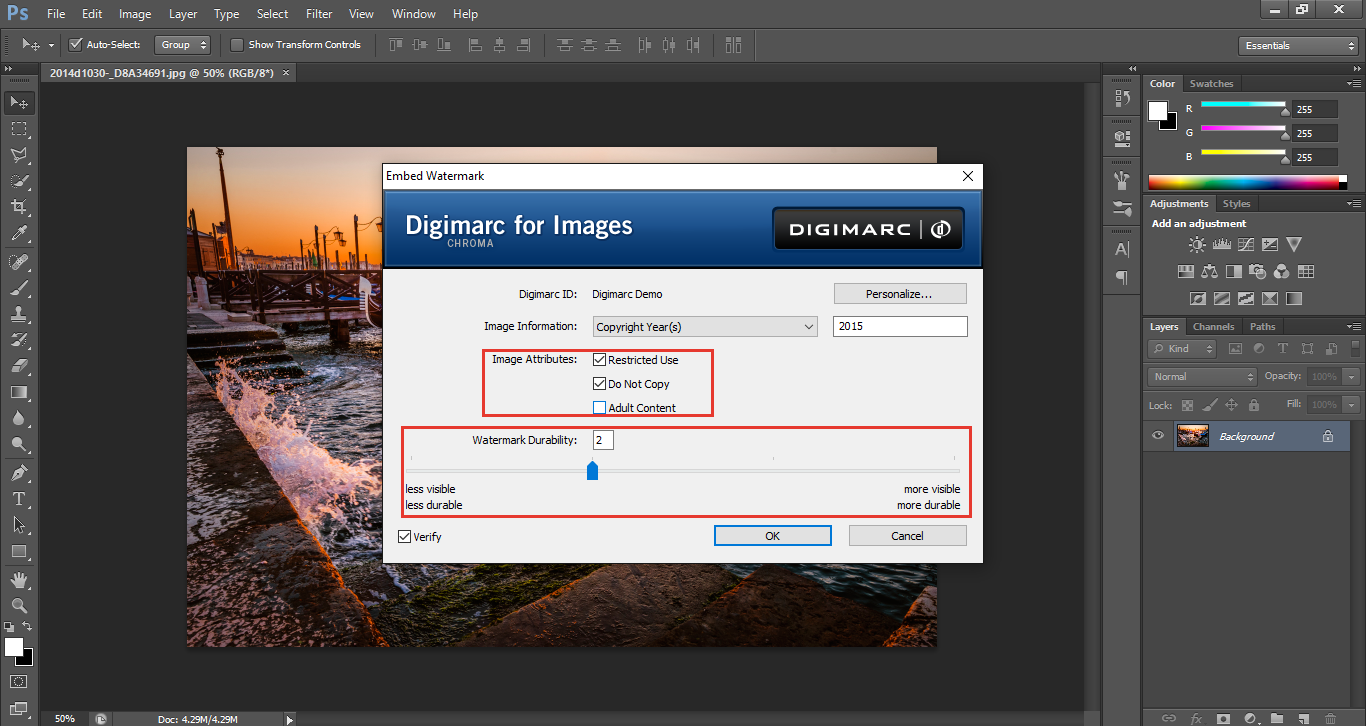
There you can see your options available. You can copyright the year, the Image ID or even embed the Transaction ID from a sale.
In Image attributes you can click on the box, choosing whether the image will Restricted or not and that you do not want it to be copied.
Below that, you will see Watermark Durability, which allows you to raise or lower its durability using the selection bar. If the durability is lowered too much, you may not see the Watermark at all. In my opinion, around 2 or 3 is best, but it’s up to you, so experiment.
Your setting will also depend on the image, It could be very dark or very bright, so you may need to set the Durability to compensate for that as well.
But even when set at 4 I found it can still be hard to see, if at all.
So set the details you want and click ok, then the Watermark will be embedded in your image.
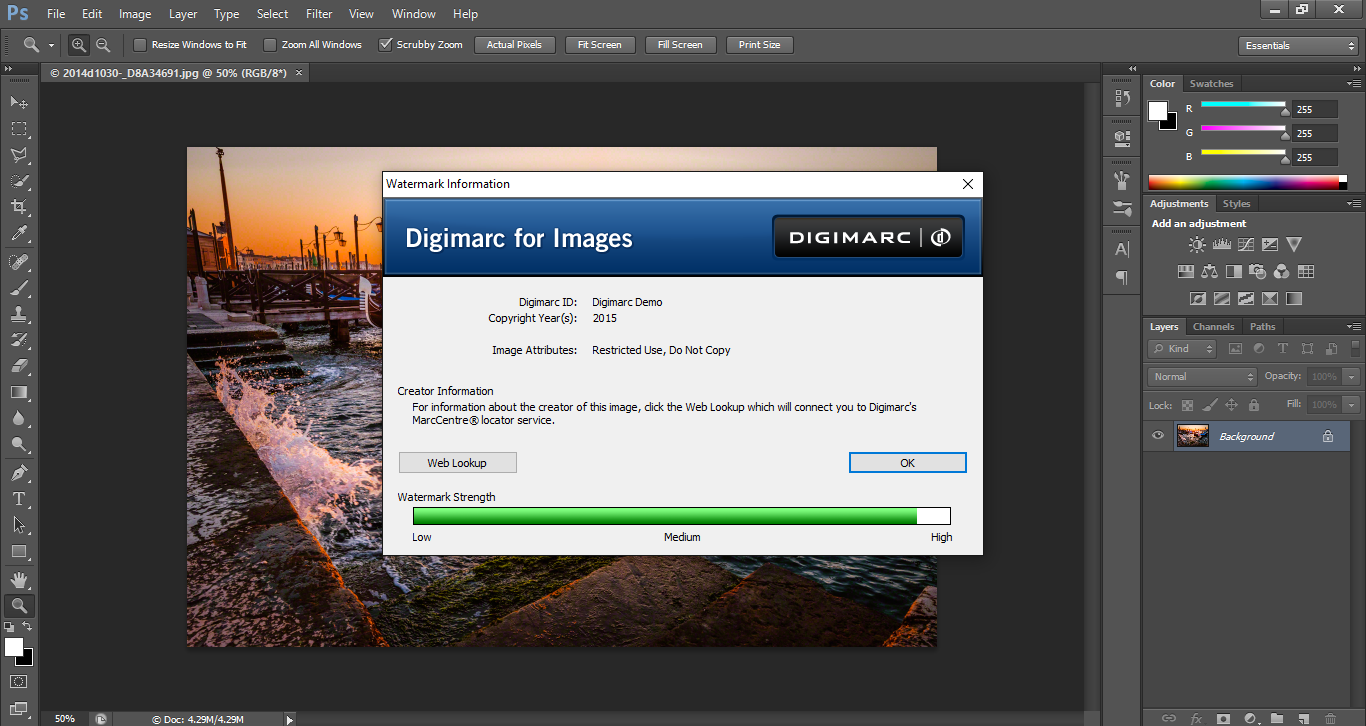
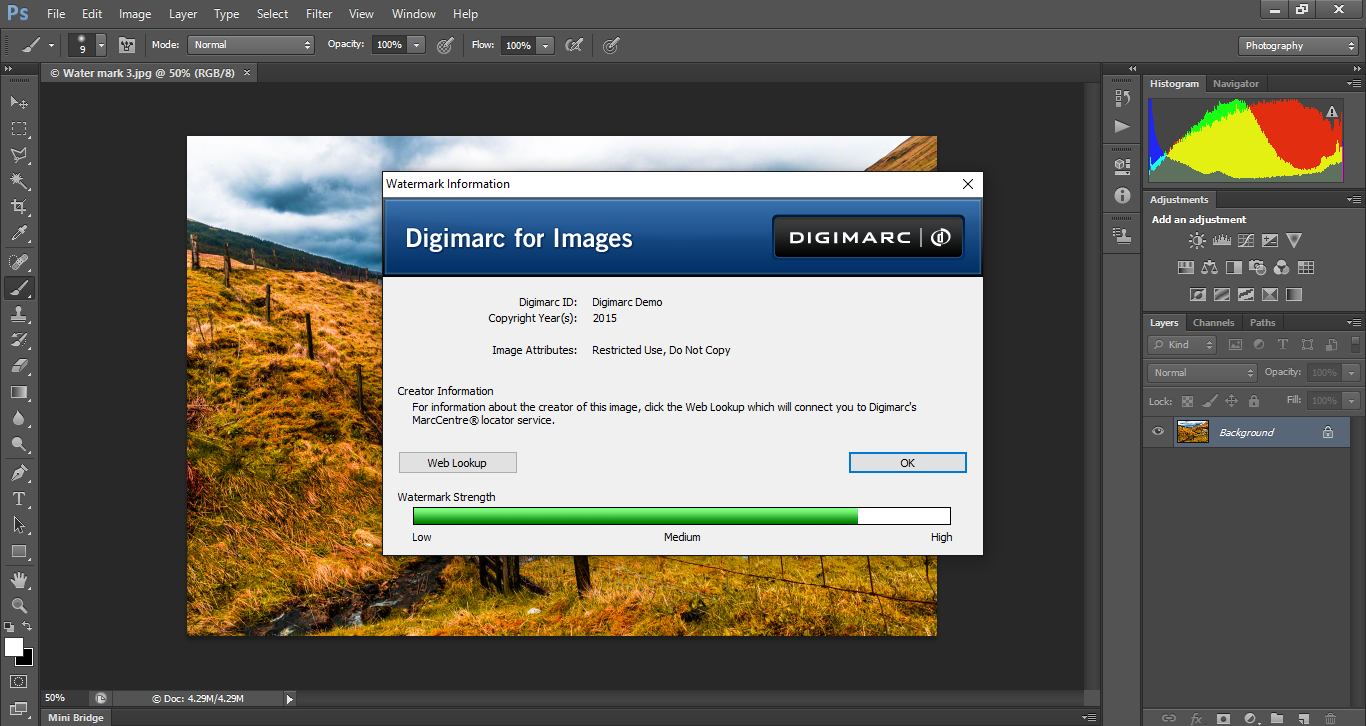
Now, you’ll want to save your image and exit out of it. Then open it back up and go to Filter then Digimarc again, only this time click on Read Watermark.
There you have it, you can see the information embedded within the image.
Please note that you do need Photoshop for this, open that up and make sure you are in the Photography option, which is Highlighted below on the top right hand corner.
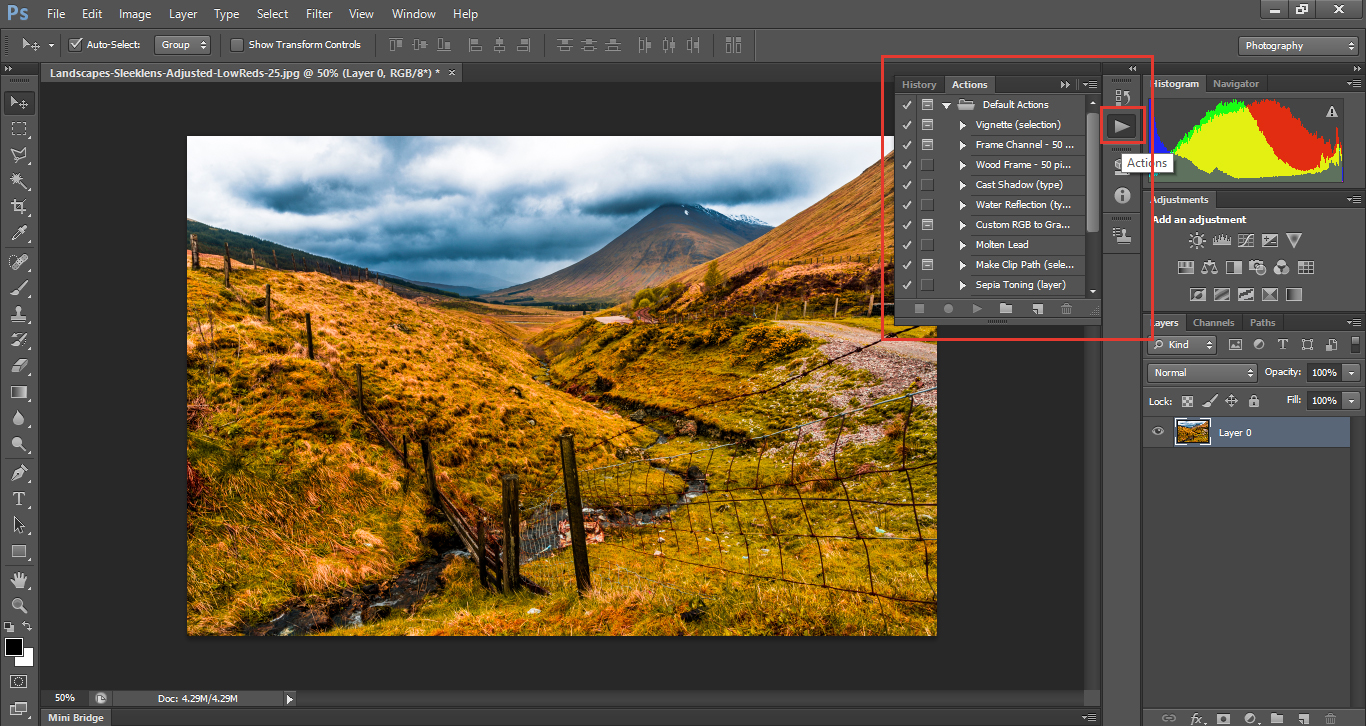
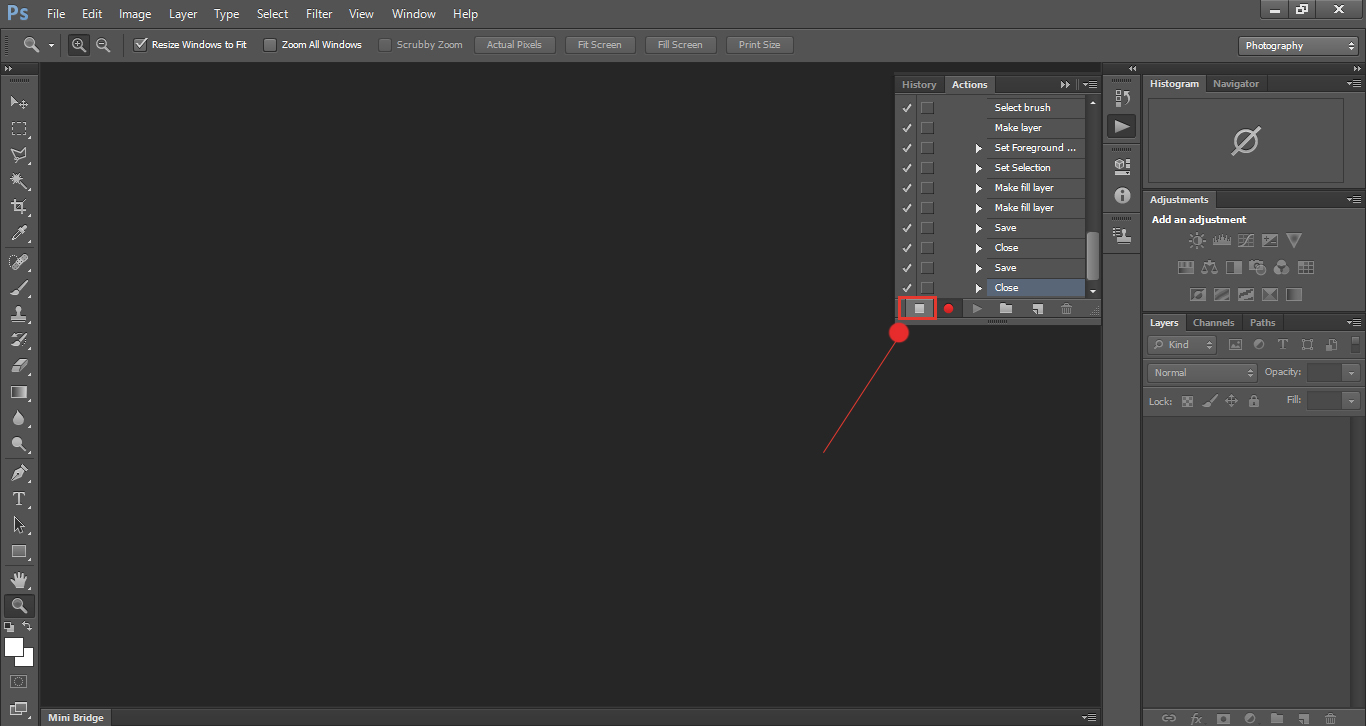
Now click on the Play button, that is your actions panel. We’re now going to create an action.
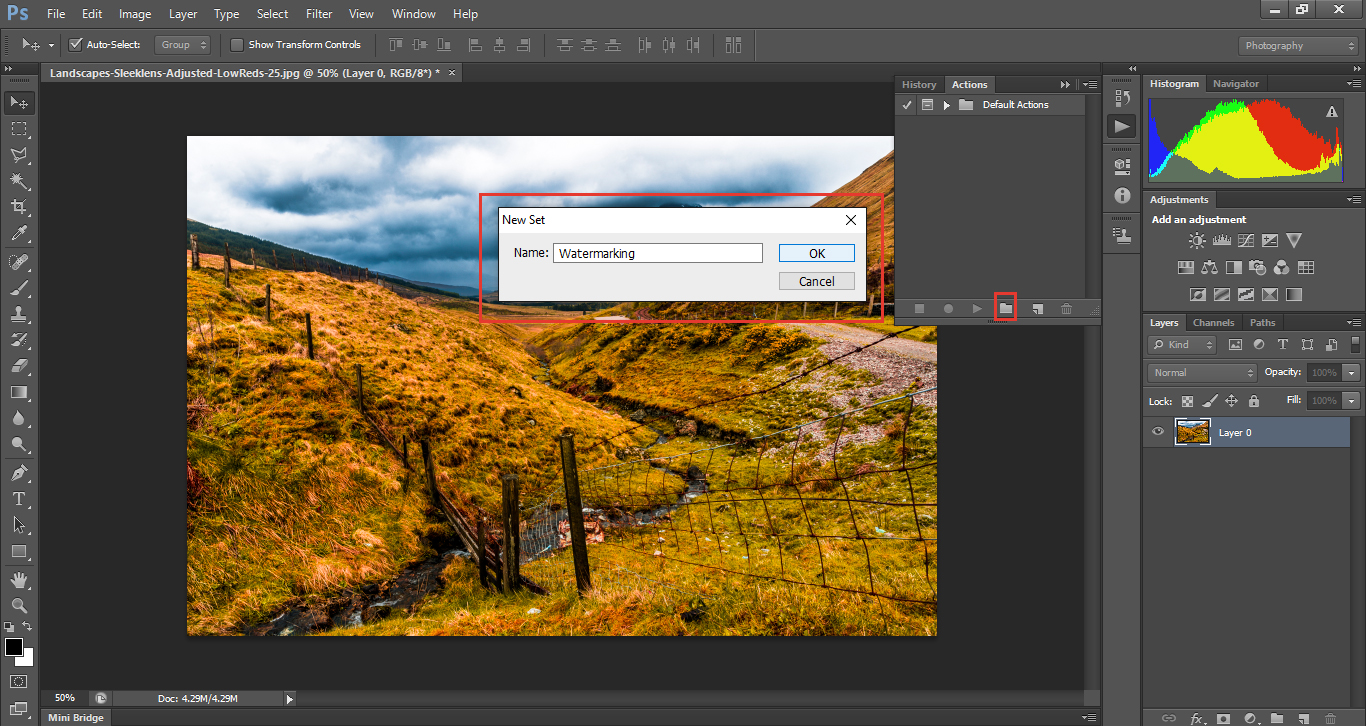
First thing I want you to do is to create a New Folder.
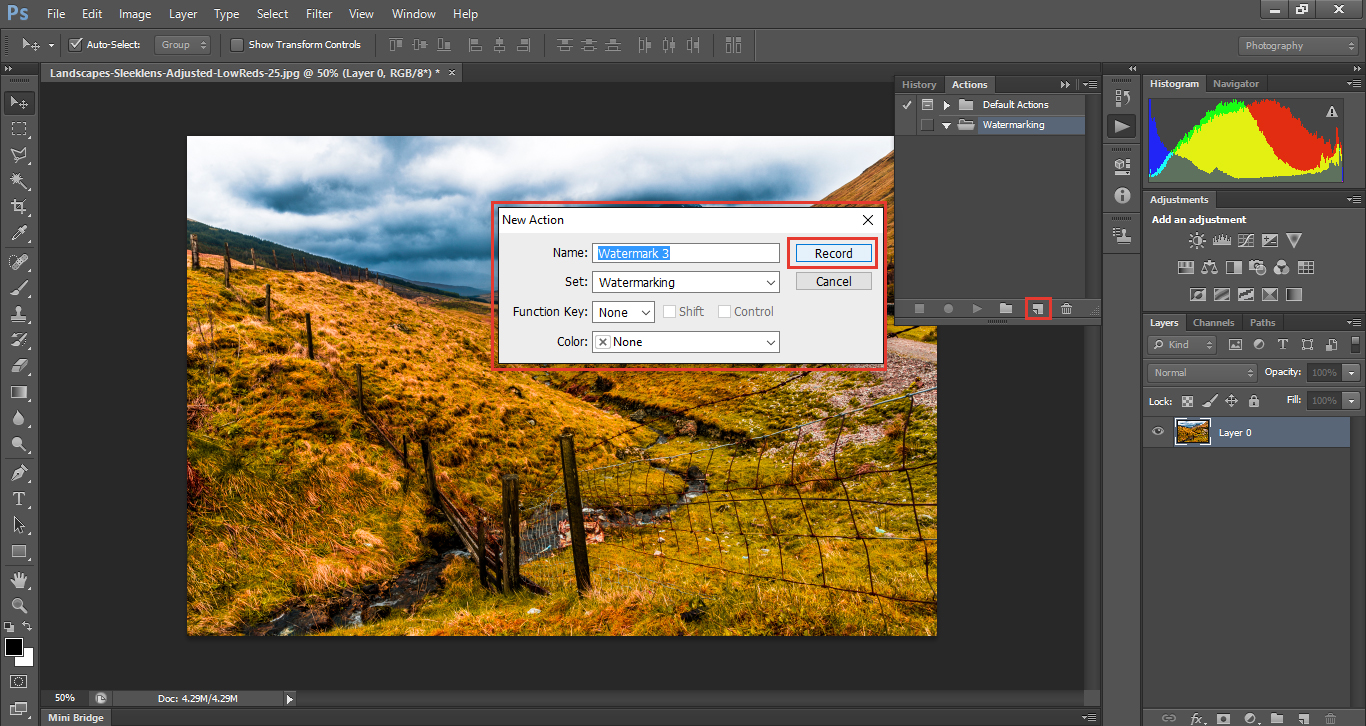
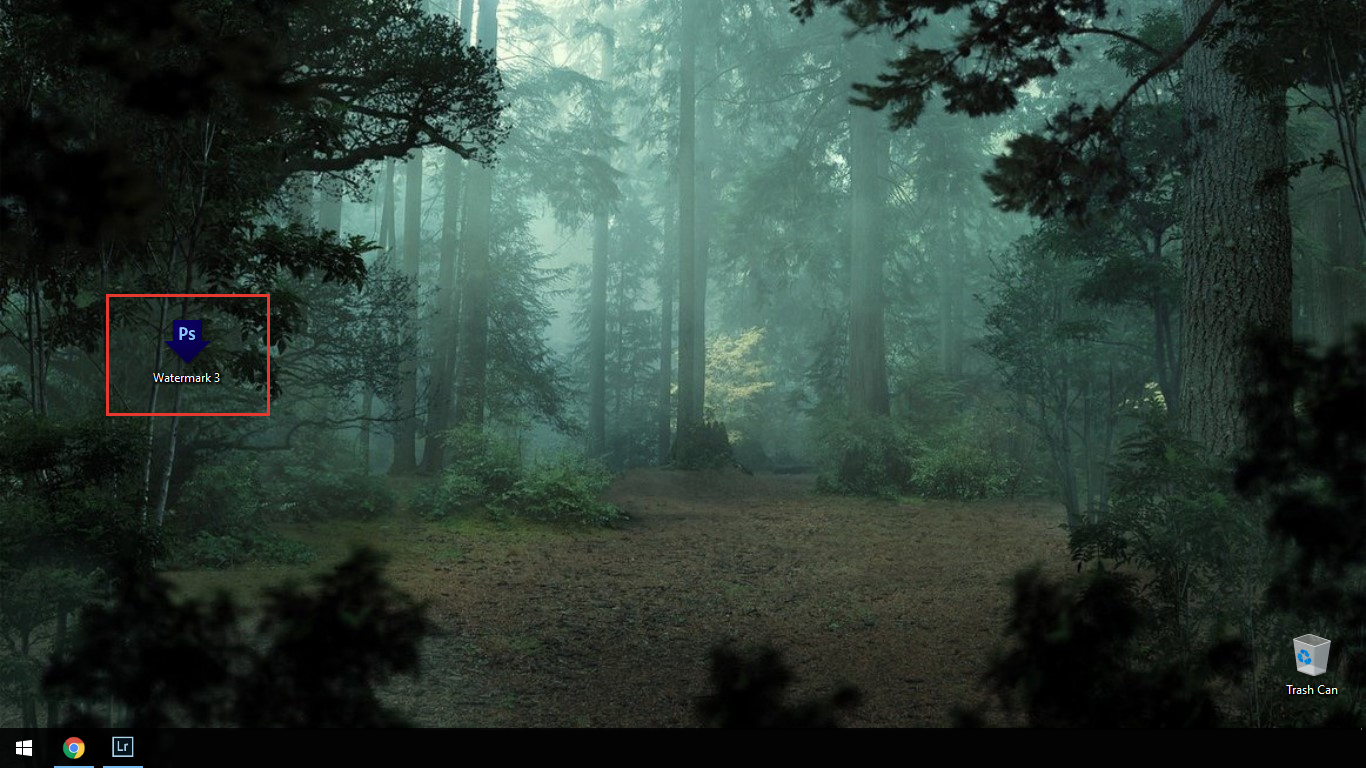
Next, click on the Icon beside that to create an action, I’m going to call that “Watermark 3” indicating the strength of my Watermark as mentioned in Part 1. Then, click Record to create.
So from here on in, every step will be Recorded by Photoshop and Watermarking in Lightroom will be automated.
If you don’t have an image open already open one up and we’re going to apply the Watermark.
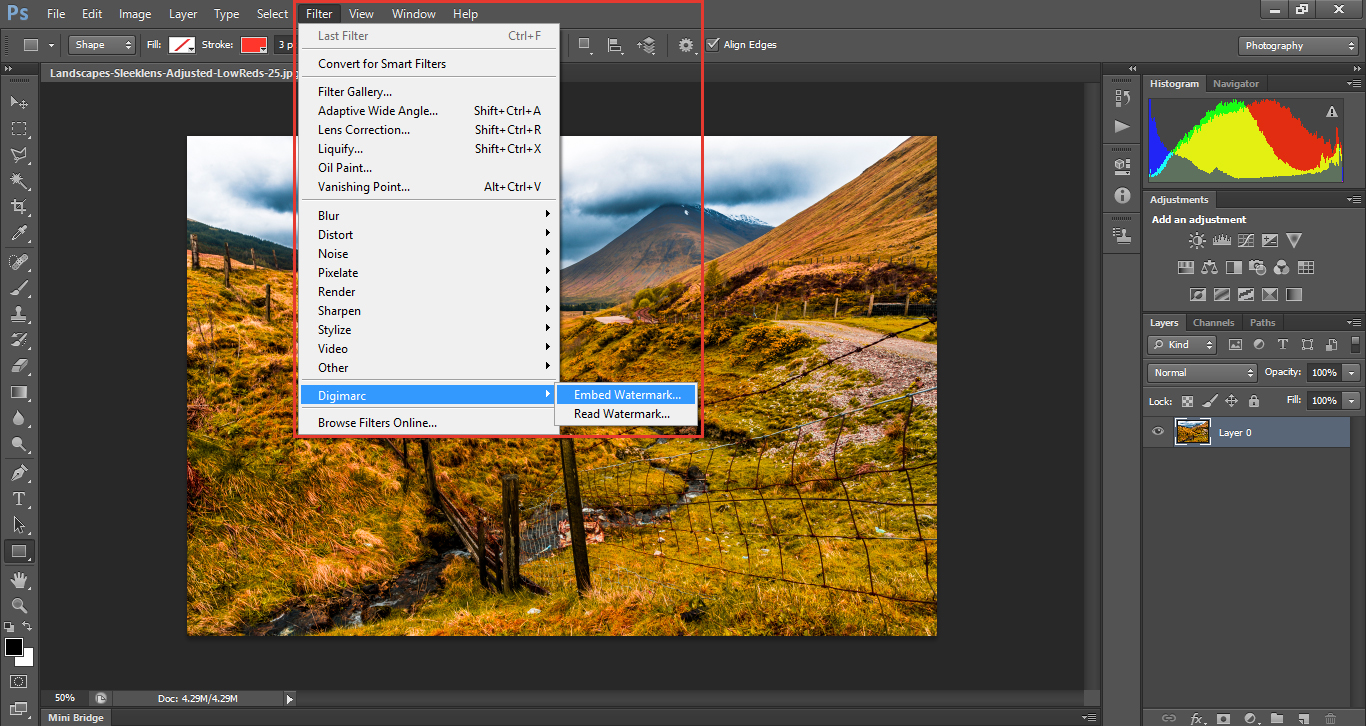
Go to
Filter
Digimarc
Embed Watermark
Add in the year, set to Level 3 and unclick Verify.
So from here on in, every step will be Recorded by Photoshop and Watermarking in Lightroom will be automated.
We’re done for the time being on Photoshop, so go to File Save.
Then click Stop on the Action.
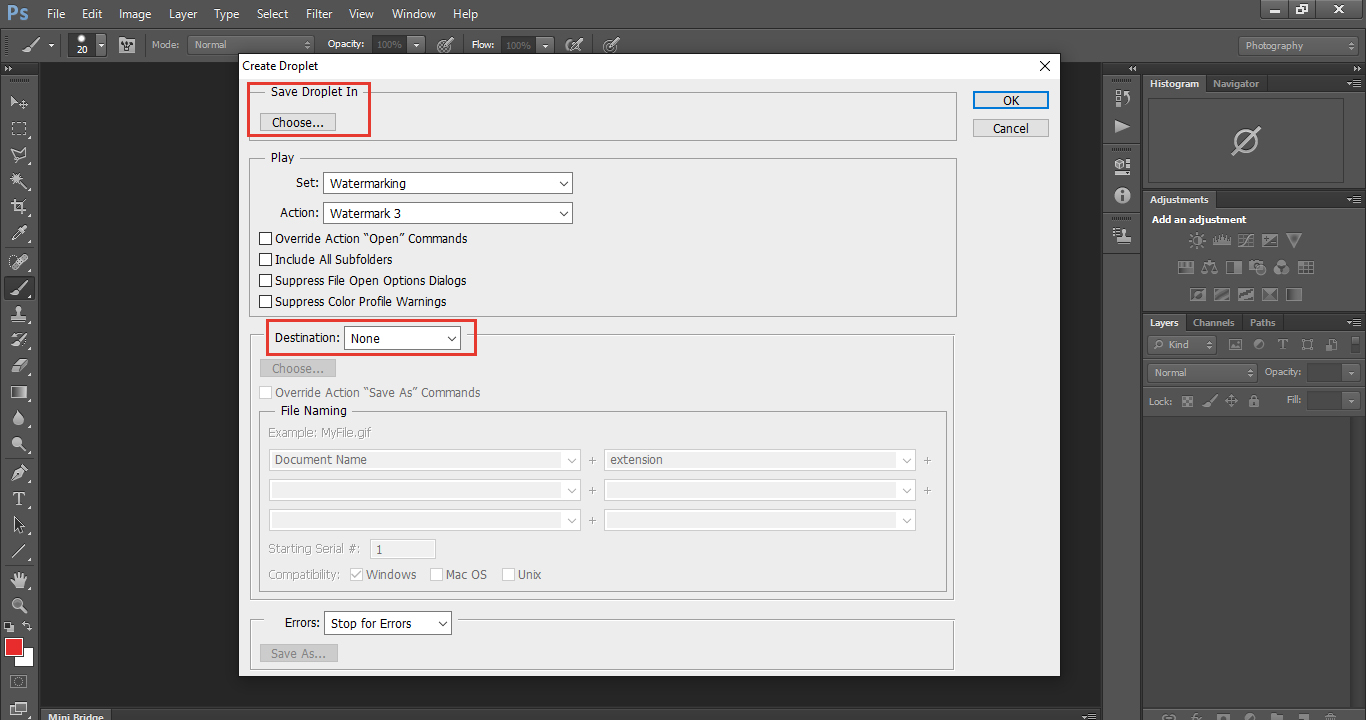
Now we’re going to create a Droplet, don’t worry too much about what this is at the moment, you’ll see once we get into Lightroom, what it’s all about.
Go to
File
Automate
Create Droplet
When you click on that, a dialog box will appear with multiple setting options.
First, you want to click on Destination and select Save and Close.
Next, go to Save the Droplet in, Click on that and save it to your Desktop as Watermark 3.
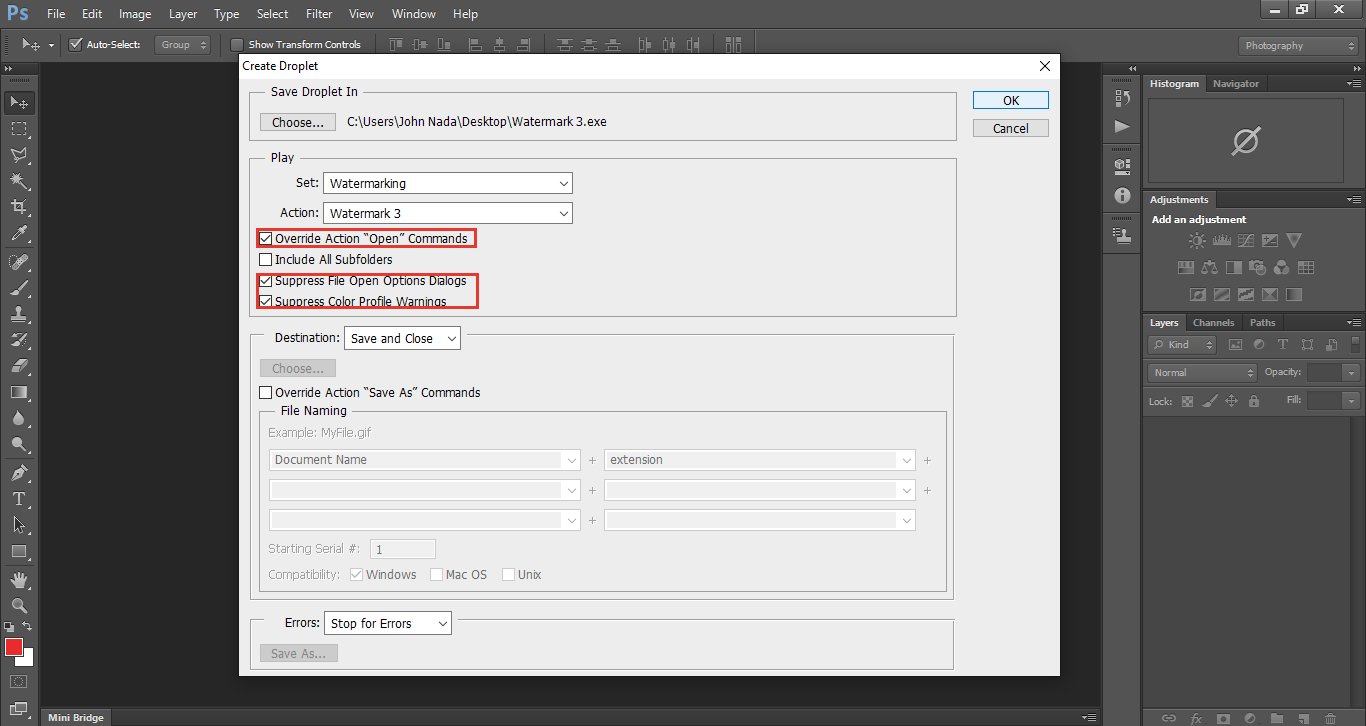
Next under Play, we’re going to change the settings there to the following.
Check
Override action “Open” Commands
Suppress File Open Options Dialogs
Suppress Colour Profile Warnings
And the Press OK
You will now be able to see your Droplet on your Desktop.
Now open up Lightroom, to an image you want to Watermark.
I’m using a new image already processed with Sleeklens Presets so it looks pretty good.
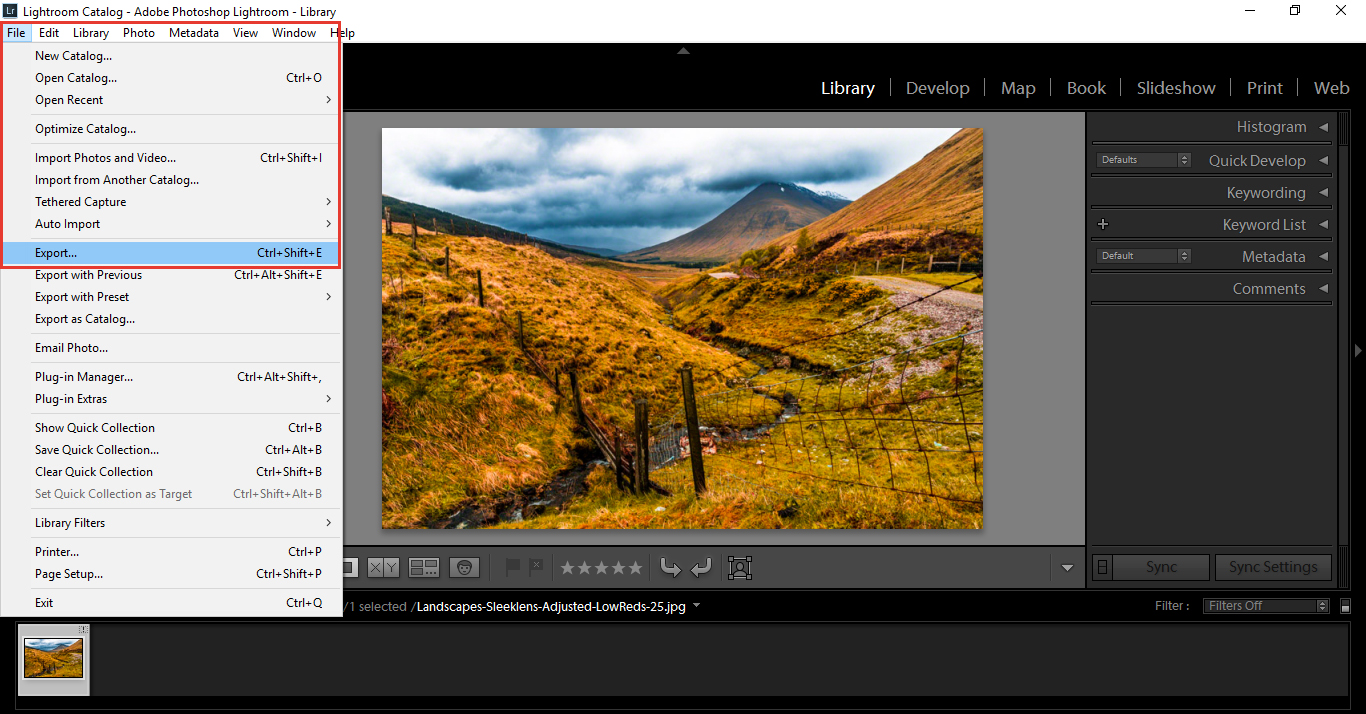
And we’re going to export it.
Go to
File
Export
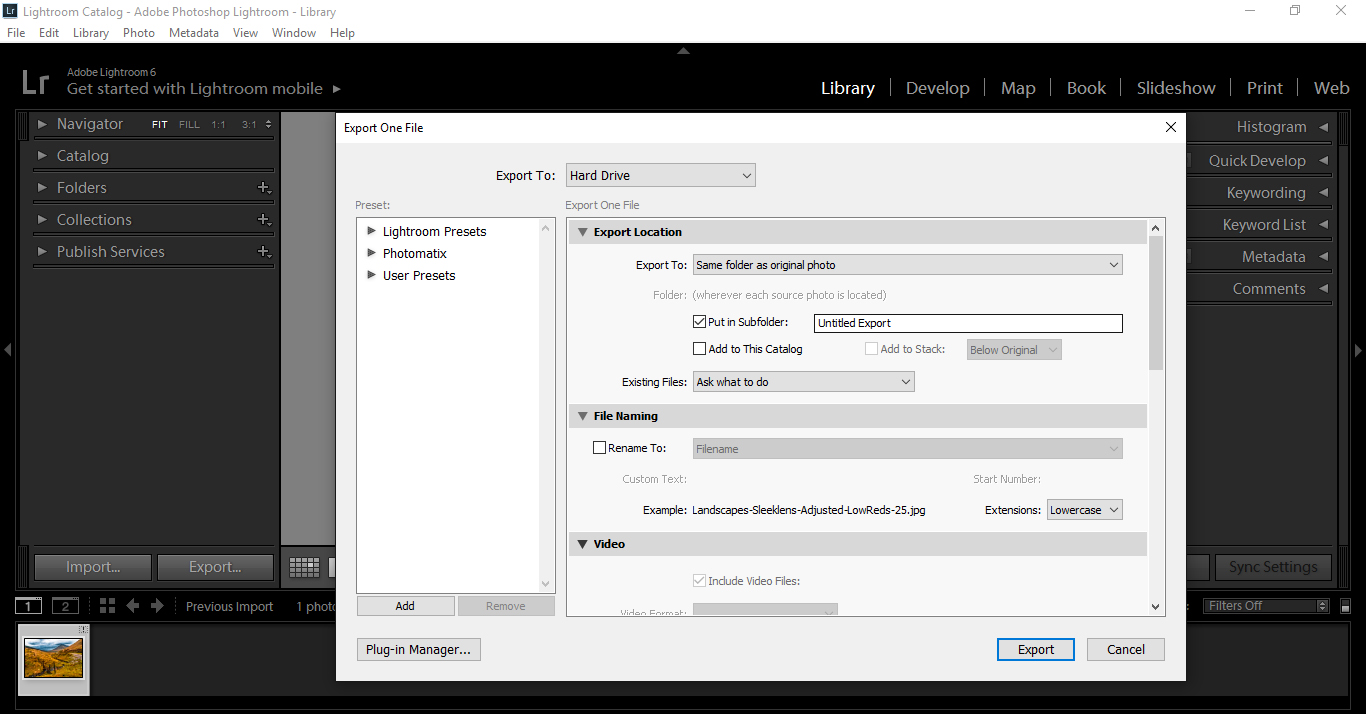
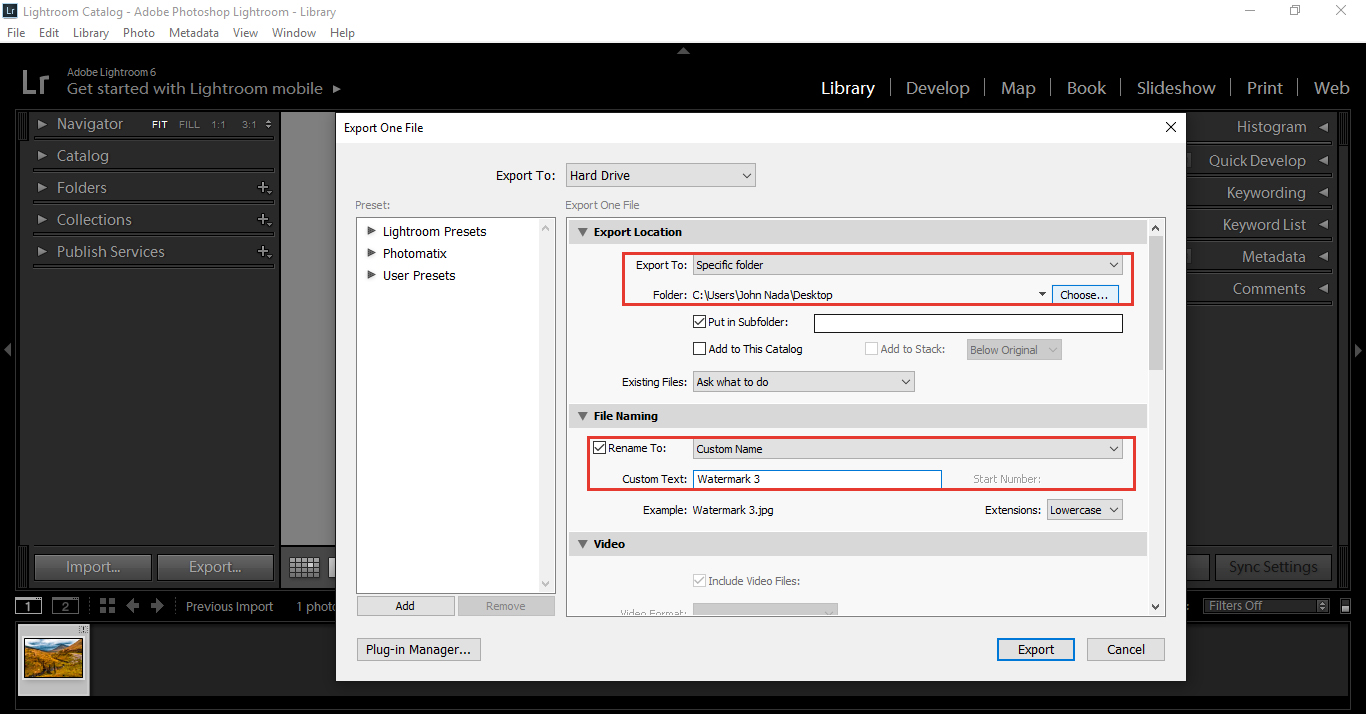
We’re going to send it to our Desktop and Give the Image a Custom Name (Shown Below)
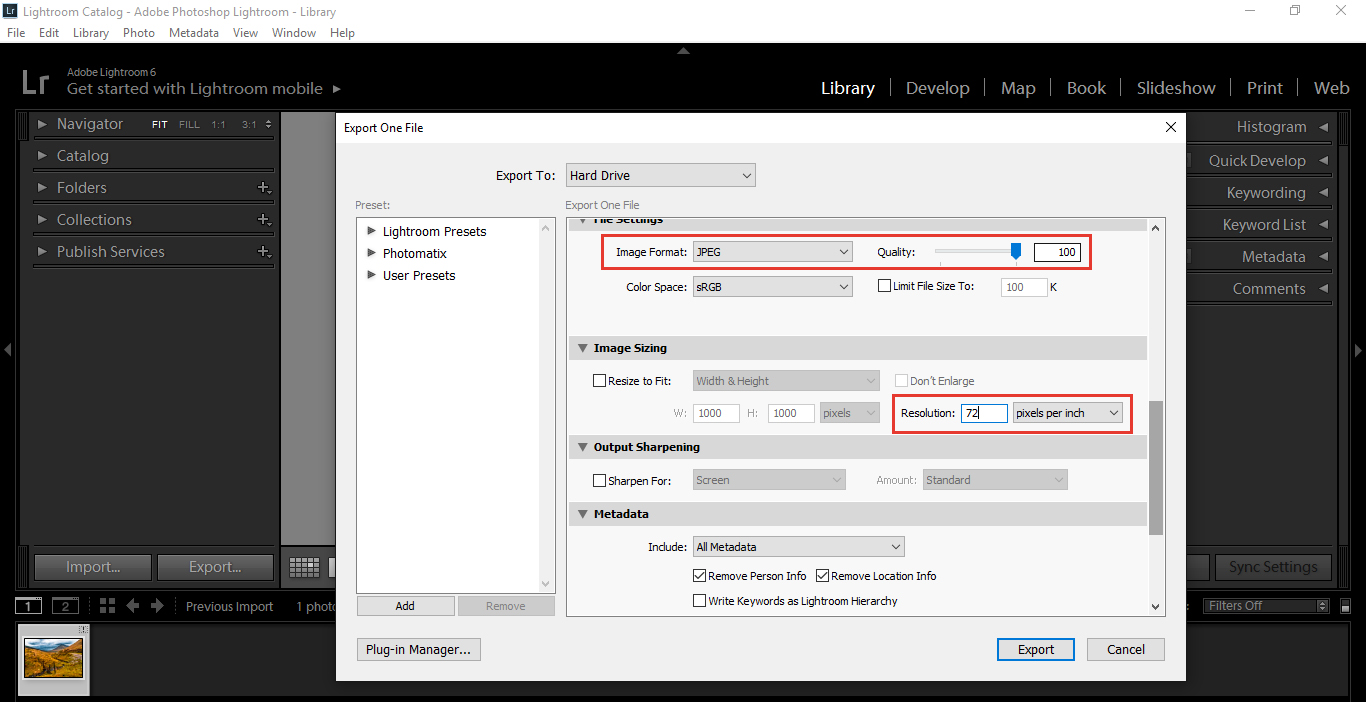
Then set your JPEG to 100% quality and the Resolution to 72 (Though anything is really ok for Resolution)
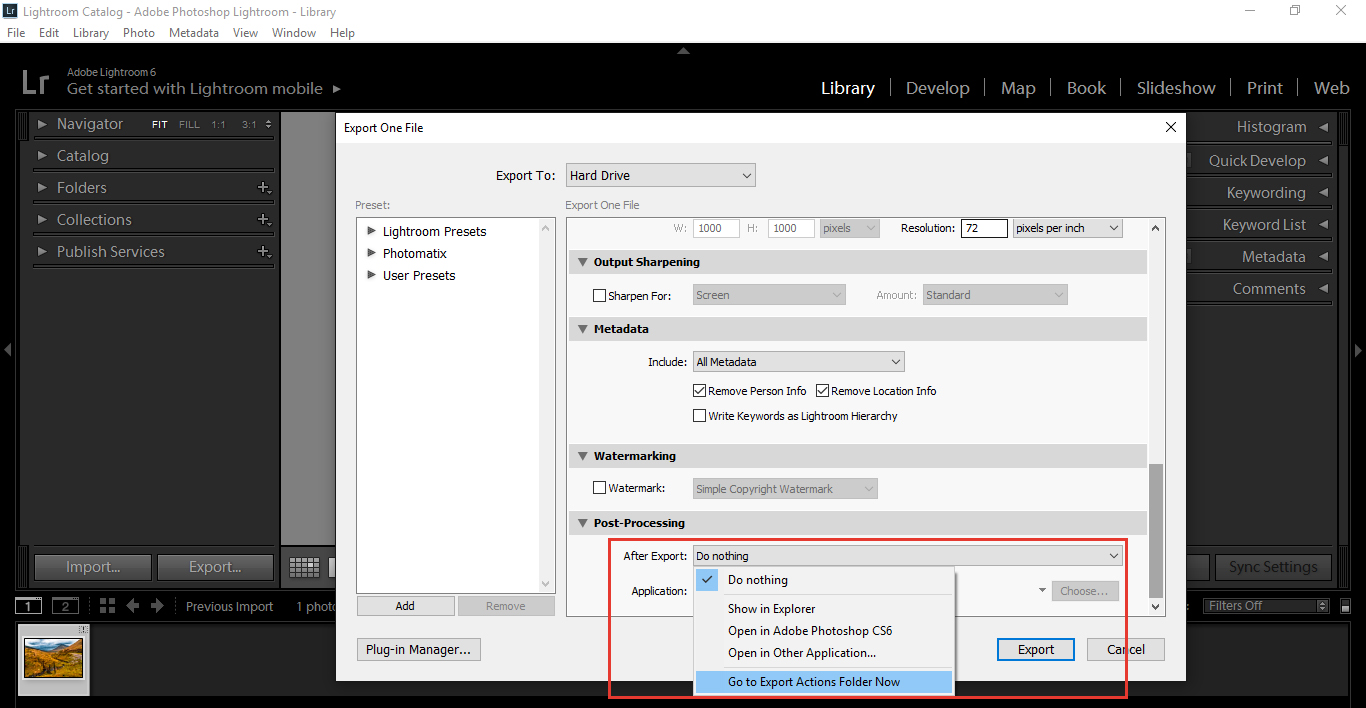
Next is the important part, all the other settings should be fine, so scroll to the bottom and there you’ll see Post Processing.
Click on After Export and Click on Go To Export Actions Folder Now.
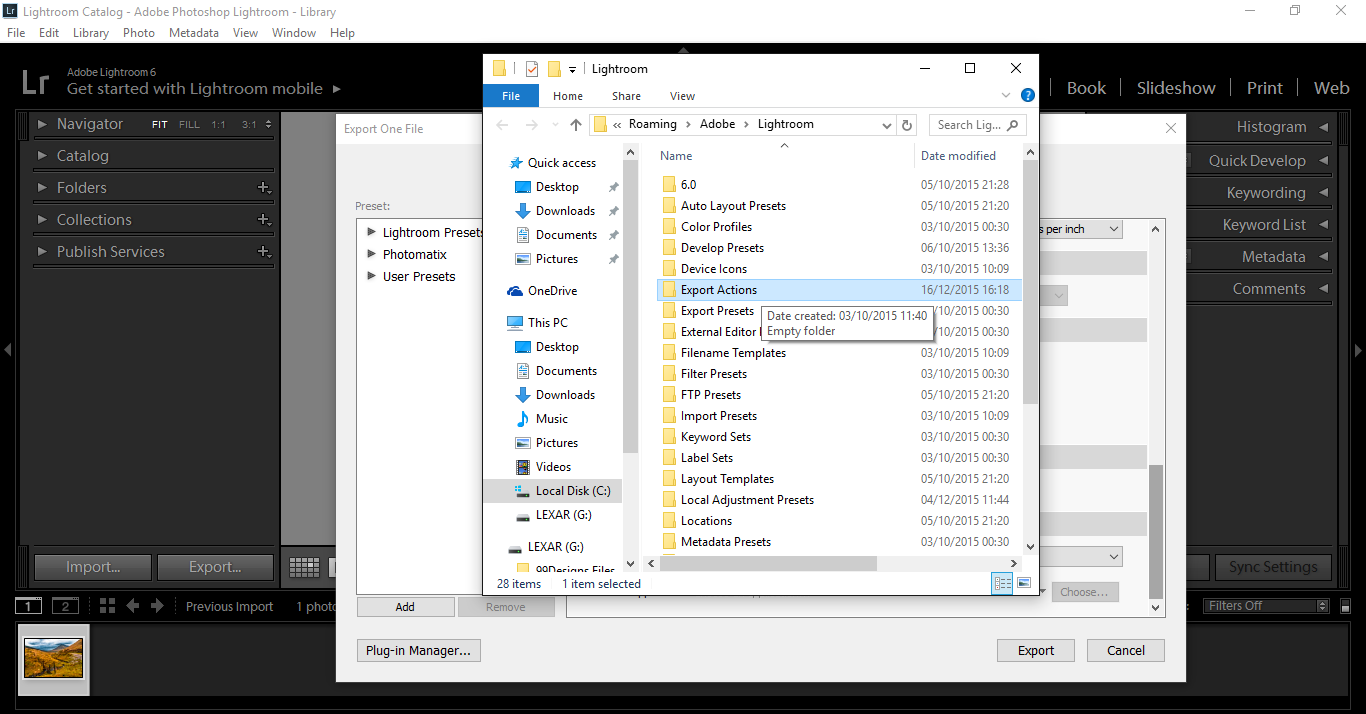
As you can see under File, Export Actions.
What you need to do is copy your Droplet File and paste it in there (or just drag and drop)
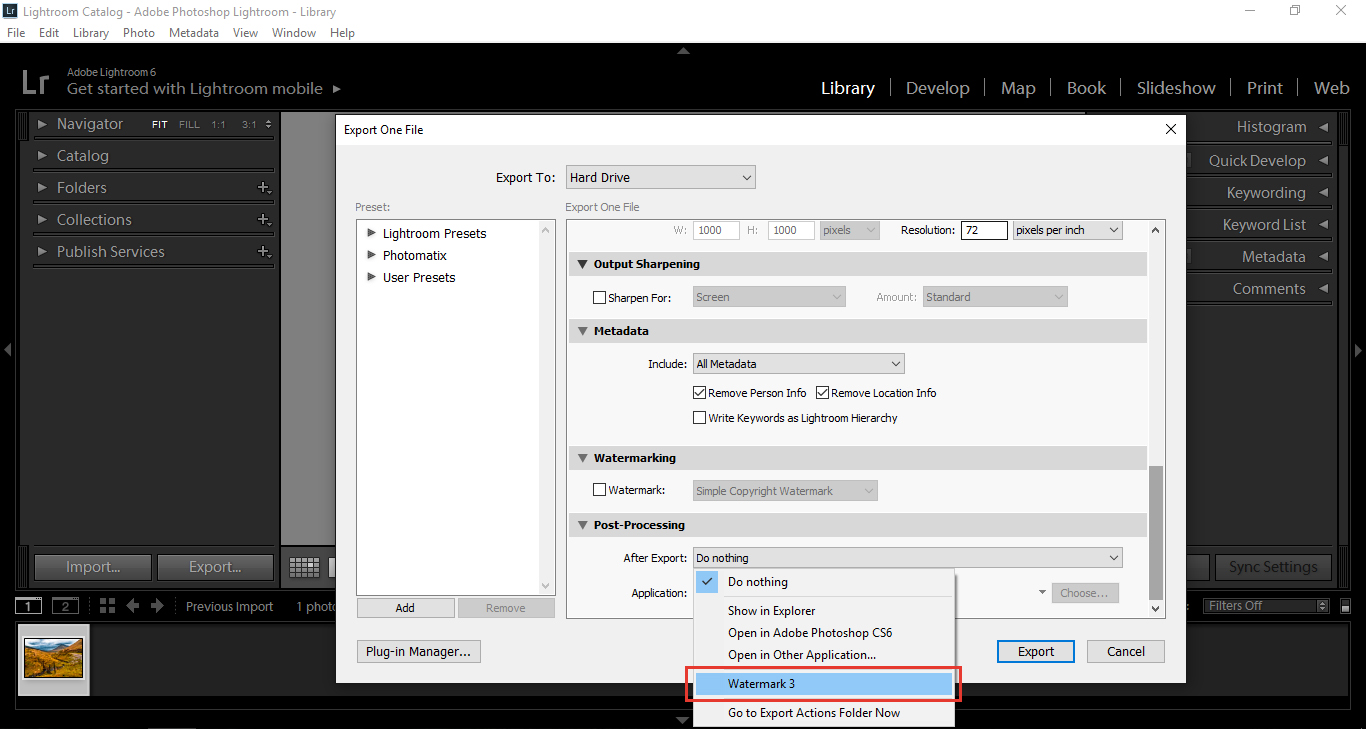
Now, go back and open Post Processing again and you will see that the Droplet is now an option.
Choose that, then click on Export. Photoshop will open Automatically, apply the layer, then close Automatically as well.
Re-open the file and click on Filter – Digimarc – Read Water Mark, and you will see it on there.
That is how you use Photoshop to Automatically apply the Watermark for Lightroom.
I am a Real Estate and Landscape photography as well as a Graphic Designer based in North Carolina, USA. My passion for photography started with taking photos with a point-and-shoot and now I own a successful photography business. My goal is to help others learn the art of photography, develop their creative side and just have fun.


Comments (0)
There are no comments yet.