Hi Y’all! today I’m going to be showing you a cool way to save your underexposed images.
So picture this, you have done a full photo shoot and you’re looking through all your images but the set up was just quite right…oh no! what a disaster.
BUT! wait you have found a few photos that have the perfect positioning and it looks great except for one little tiny detail.
It’s underexposed!
Well you can’t very well phone up the model again or whatever you were doing and take another day out for redo everything, that would just be crazy AND highly expensive and time-consuming to set up, but low and behold good old Photoshop there in the background holds up its hand and says “Hey! did you forget about how amazing I am”
And then you think “YES!!!” I know this really awesome way to save these underexposed images that I learned from this guy that writes Tutorials for that cool site Sleeklens 🙂
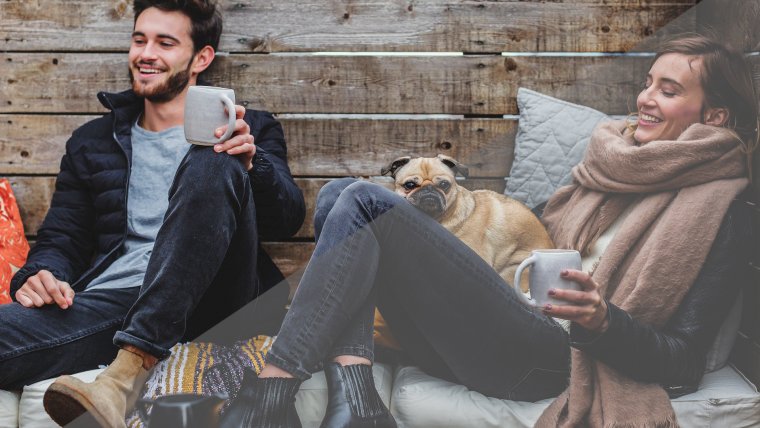
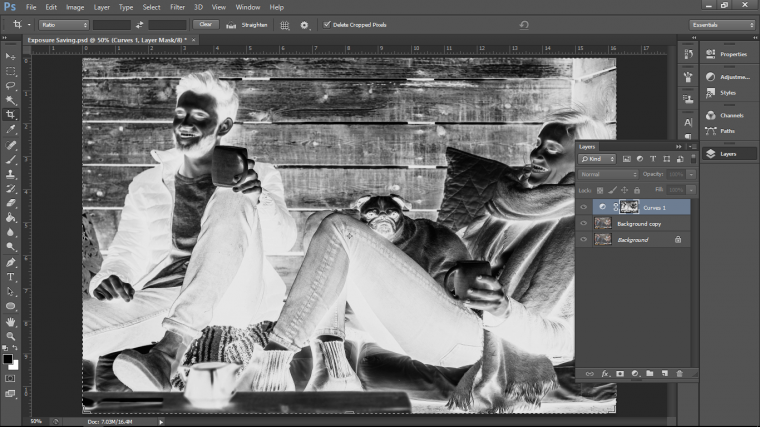
So this is my image I’ll be working with today, and as you can see I’ve messed up pretty bad with the exposure to show you just how good we can make it in the end.
OK, so the first thing that I’m going to be doing is to create a duplicate layer of this image.
I do this by going to Layer – Duplicate Layer
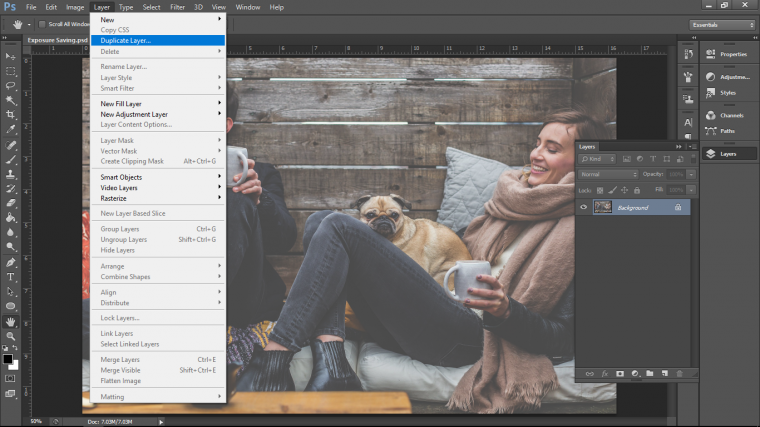
I do this for the purpose of keeping one in the background in case something goes wrong and I need the original, but just as well too I can at the end flip back and forth between the two images to see the differences which are always satisfying to be perfectly honest haha.
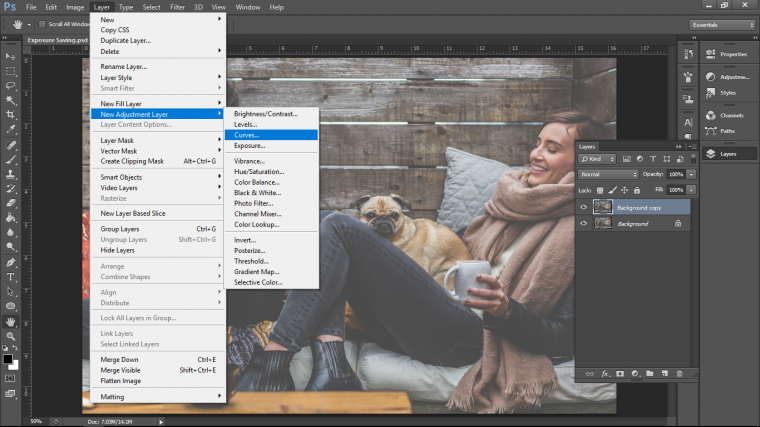
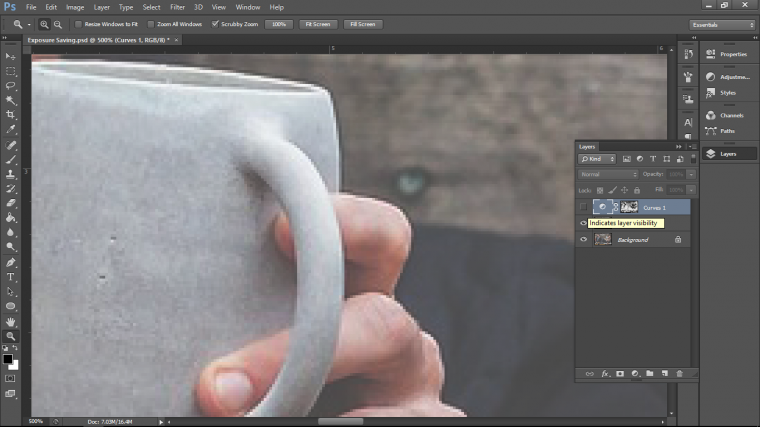
OK so what we’ll do now it brightens the image up just a little, and for that, we’re going to use a Curves Adjustment Layer.
Now an Adjustment Layer is different than if you were to go and just use Curves direct from the Image Adjustments Menu.
An Adjustment Layer will become an actual Layer that you will be able to go back on at any time and double click to change the setting, so keep that in mind and make it part of your everyday Photoshop practice to save yourself a whole bunch of a headache in the future.
Go to Layer-New Adjustment Layer-Curves
So you will see the histogram in the middle of the Curves Adjustment Layer that has just appeared on your screen, for me, I had a little bit of matting (Fading) on my image so I had to grab the very bottom of the histogram where the diagonal line meets the bottom where the tiny box is and click and drag it towards the center until I reached where the histogram diagram starts, you may have something similar, if not don’t worry, just click in the center of the graph and drag the horizontal line up and towards the left until your image lightens up so it starts to look pretty good.

Ok so I have a huge difference on my image already but we’re nowhere near done yet, there’s still a few little tricks to be incorporated.
So what has happened here is that when we lightened our image we brought up all the colors which mean our highlights aren’t looking so good!
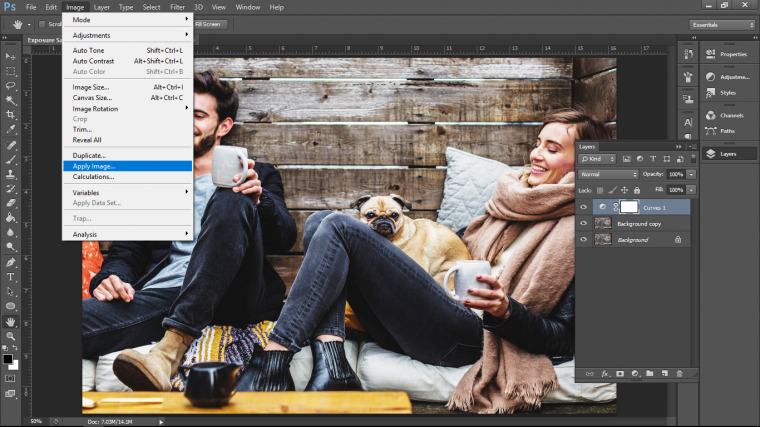
Right now what we’re going to do here to fix this problem is to use Apply Image.
So look at your Layers Panel, if you do not have this then go to ‘Window’
Then scan down the list and you will see Layers or type F7 for your keyboard shortcut.
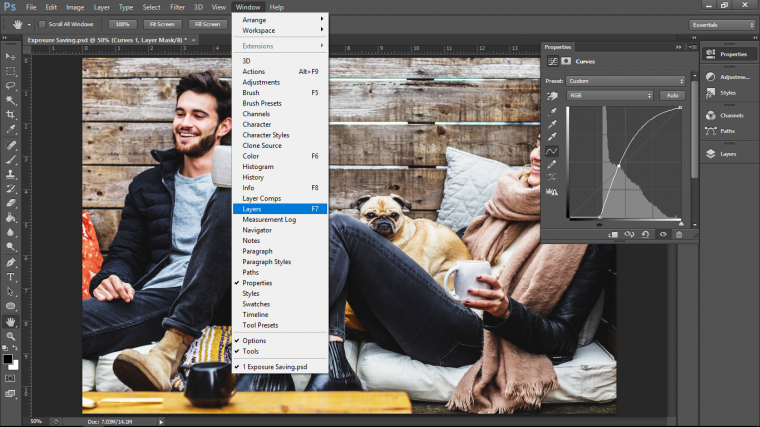
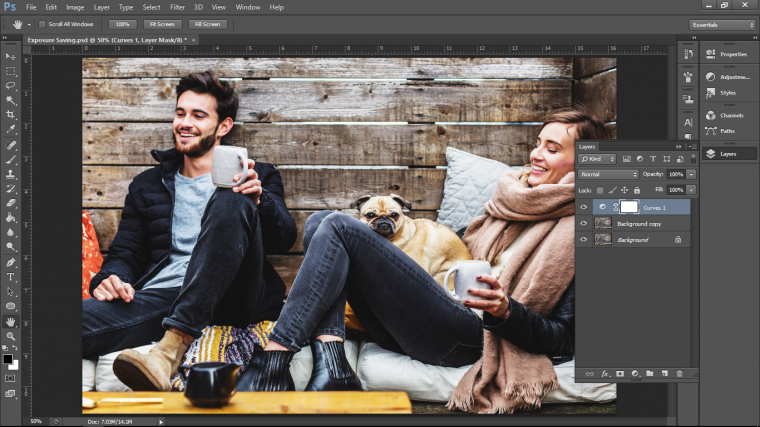
Now you will see the little Layers panel on the right-hand side there and in it, you should be able to see the little white box on the Curves Adjustment Layer, click on that little white box.
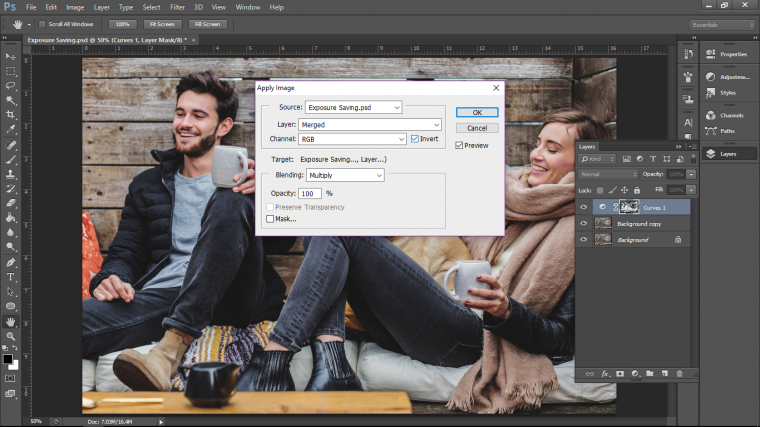
Then go to Image – Apply Image
This will create a mask on your image, you will be able to see it a little bit on your white thumbnail box now.
If your image reverted back to how it was at the start all you have to do is to click on the little Invert checkbox on the right of the new panel that appeared, click OK and save up and we’ll move on.
I’m going to just briefly talk about what the layer mask is doing here.
So if you hold Alt on your keyboard and then click on the Thumbnail on our Layers panel for the Curves Adjustment Layer it will give you a negative of the image we’re working with.
So in a Layer mask, the Light areas are visible and the Black areas are invisible, so when you choose your Brush Tool and start to paint Black on your image it will start to hide the areas that you have painted black on to, and then of course white will do the opposite revealing what was hidden.
It works just the same as using the paint Brush for just paint with layers and the opacities etc, the basics are the same.
So what we have done here is we have made the lighter areas of our image invisible and the darker areas visible.
What we are looking to do it to take those dark areas and make them brighter but not to disturb the lighter areas which end up blown out and look horrible.
Ok so now we know that, you can click on the little circle icon beside your thumbnail to turn of the current negative view on your screen, then you can click on the little Eye Icon beside that to see what the difference is between the original and what the Curves Adjustment Layer has done, by clicking that little Eye Icon you can flip back and forth.
So if you zoom in on the image to the Highlighted Area and flip back and forth you will see that the mask has only affected the dark areas bringing them to life, and the Highlights combined with that are looking sweet!
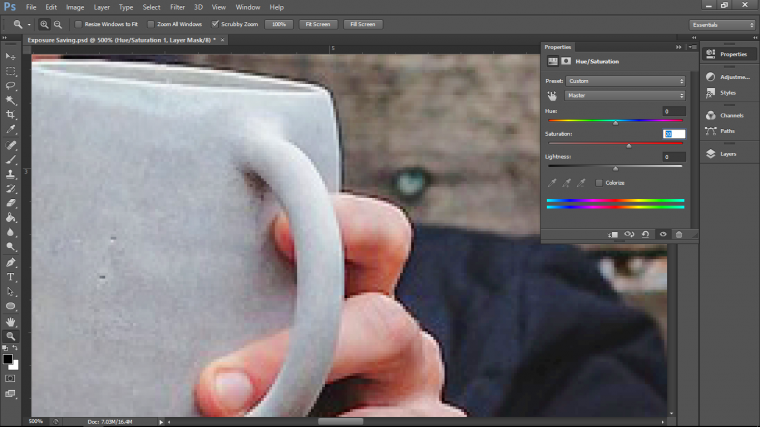
Ok, so the next thing that we’re going to be doing here is to play with the saturation a little bit to try to add in a little bit more color, because when an image has been underexposed it will have a lot of the color drained out of it as well as being darkened.
So grab yourself a Hue and Saturation Adjustment Layer, remember where you find it right?
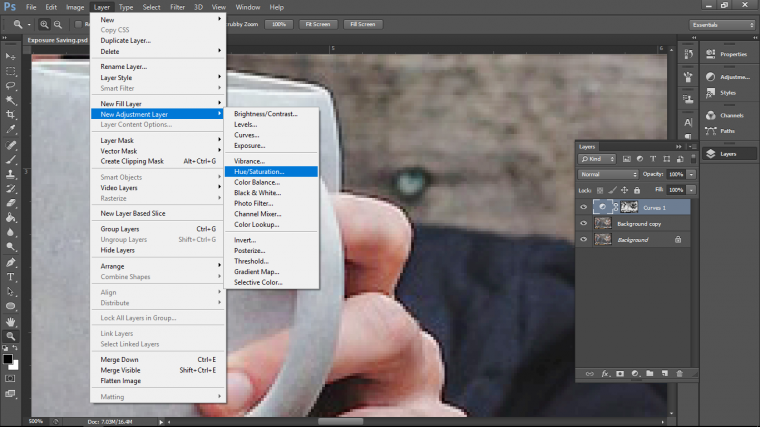
When you click that, you will now see a panel appear on the right-hand side, in there you’ll see the three sliders and the one out of those that we want to use is the Saturation Slider in the middle.
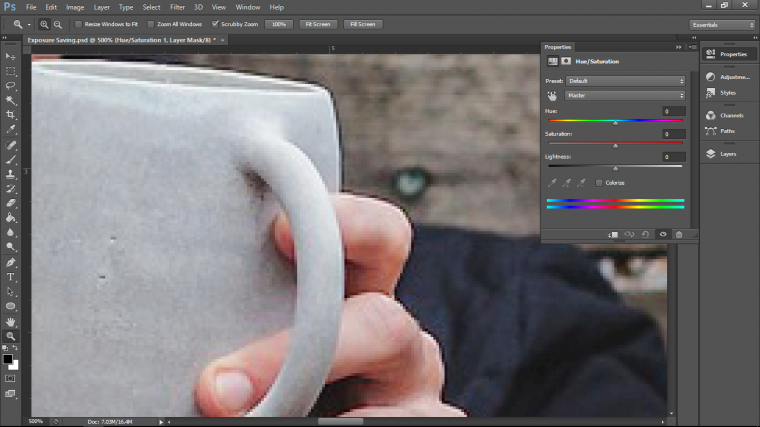
Click the little tab and drag it to the right till you reach about 20, you can also just type 20 into the box, when you do this you will notice that colour return to your image but again just like when we did the original Curves Adjustment Layer it has changed the whole image overall, we don’t want this.
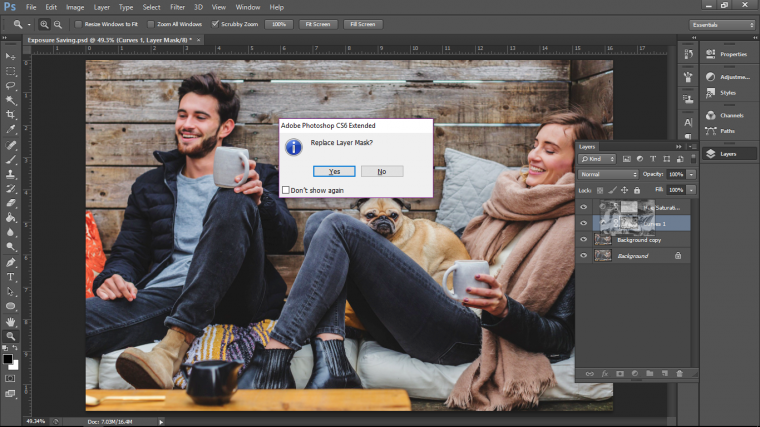
So what we are going to do is to make a copy of the layer that we created for the Curves one and transfer it to out new saturation layer, this is very easy to achieve.
All you have to do is hold alt and then click on the mask layer thumbnail that you have for the Curves Layer and drag it up to the new saturation Layer Thumbnail.
Then release, when you do this you’ll be prompted with a pop-up box asking you if you want to replace the layer mask, you click Yes!
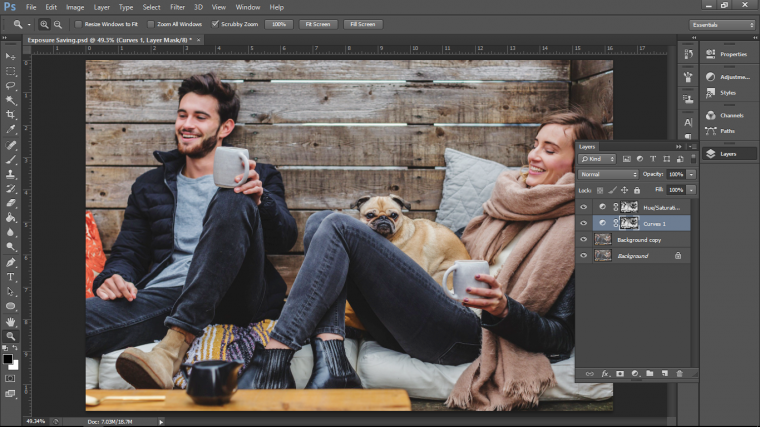
Now you will see that your new mask has been applied successfully.
What this will do is it will leave all those highlighted areas alone and only concentrate on the dark’s which tend to be desaturated.
Now you may only see a subtle effect for now or it might have gotten it right away, but remember that these layers are Adjustment Layers, so if you feel the colour is too strong then you can go back in there and change the saturation, so you can either add more colour which would be to slide your slider to the right or less sliding it to the left.
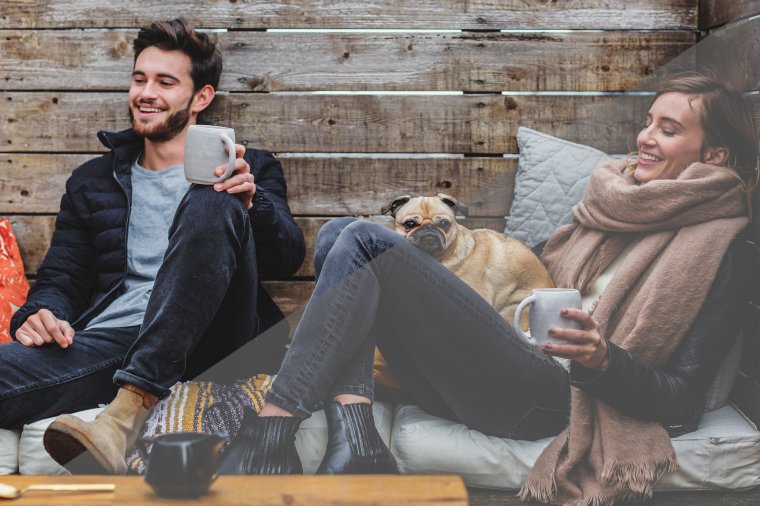
So check out the huge difference that these few simple techniques have done.
We have gone from a very washed out looking picture to a nicely exposed image with nice colors.


Please verify your software version before proceeding.
 I’ve verified my software version


 Facebook
 Google +
Comments (0)
There are no comments yet.