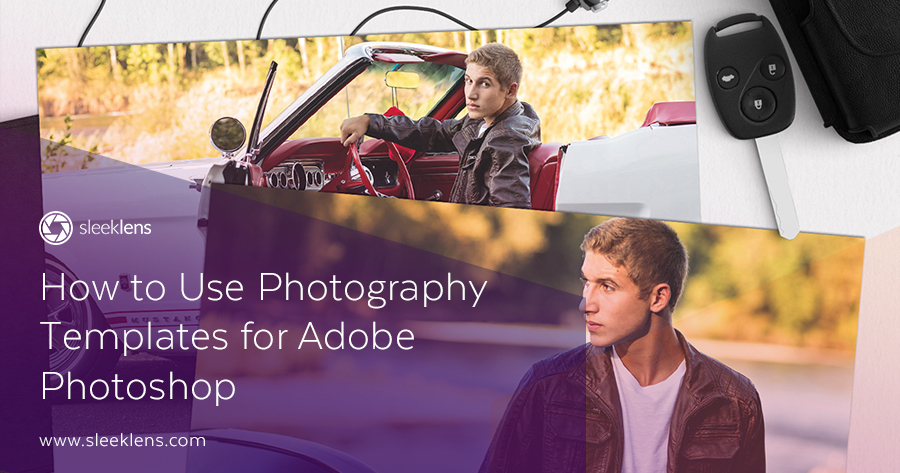
Hello everyone! Wondering how it is possible to create effects that make up such an amazing layout of our photographs, like the ones that we can see on the web sites of professional designers? The truth is that such a big secret: Much of that type of work can be done with Photography Templates for Adobe Photoshop.
These templates are extremely versatile: they allow us to adjust different parameters such as the images to use, text, colour of the source, etc. In just seconds you can change the appearance of a template from a guy’s graduation card to a female version of the same, even if we are not that well versed in the use Adobe Photoshop.
In this guide on how to use photoshop templates for photographers, we will show, one by one, how to use the Photography Templates designed by Sleeklens most effectively.
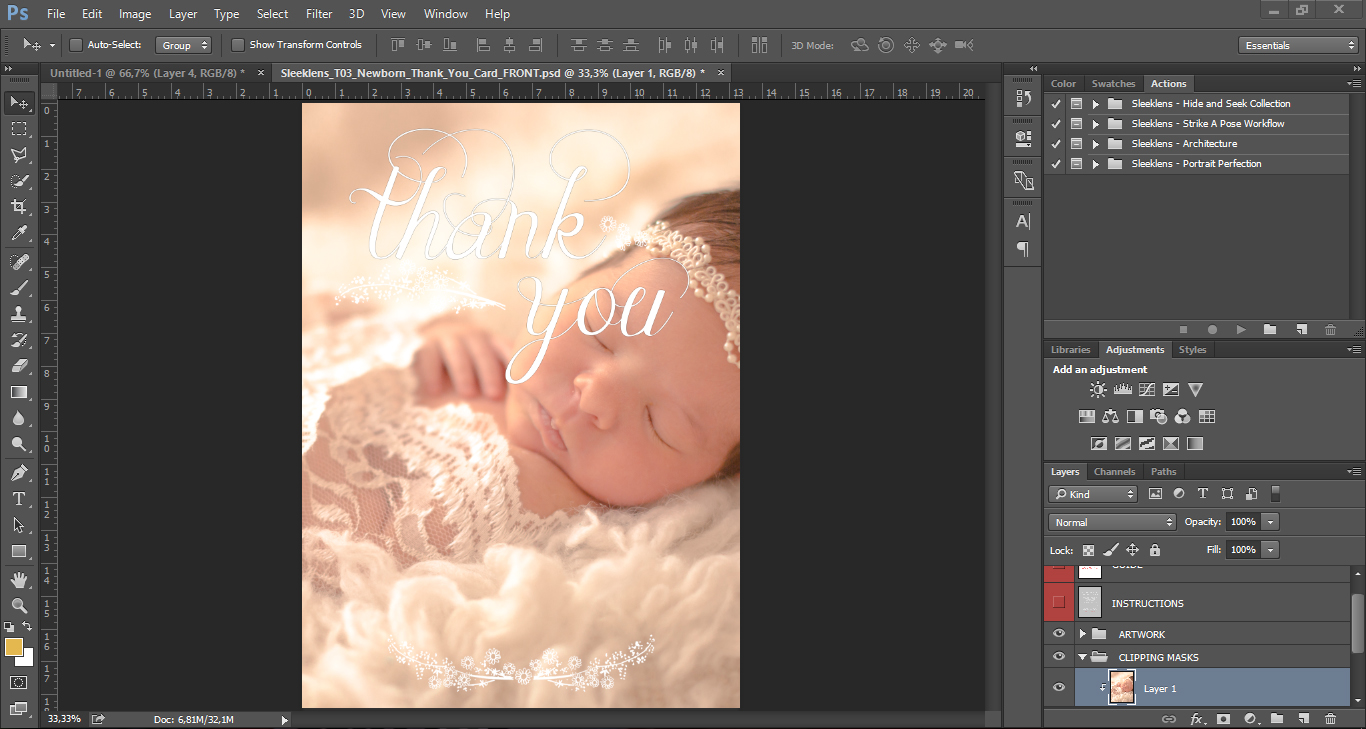
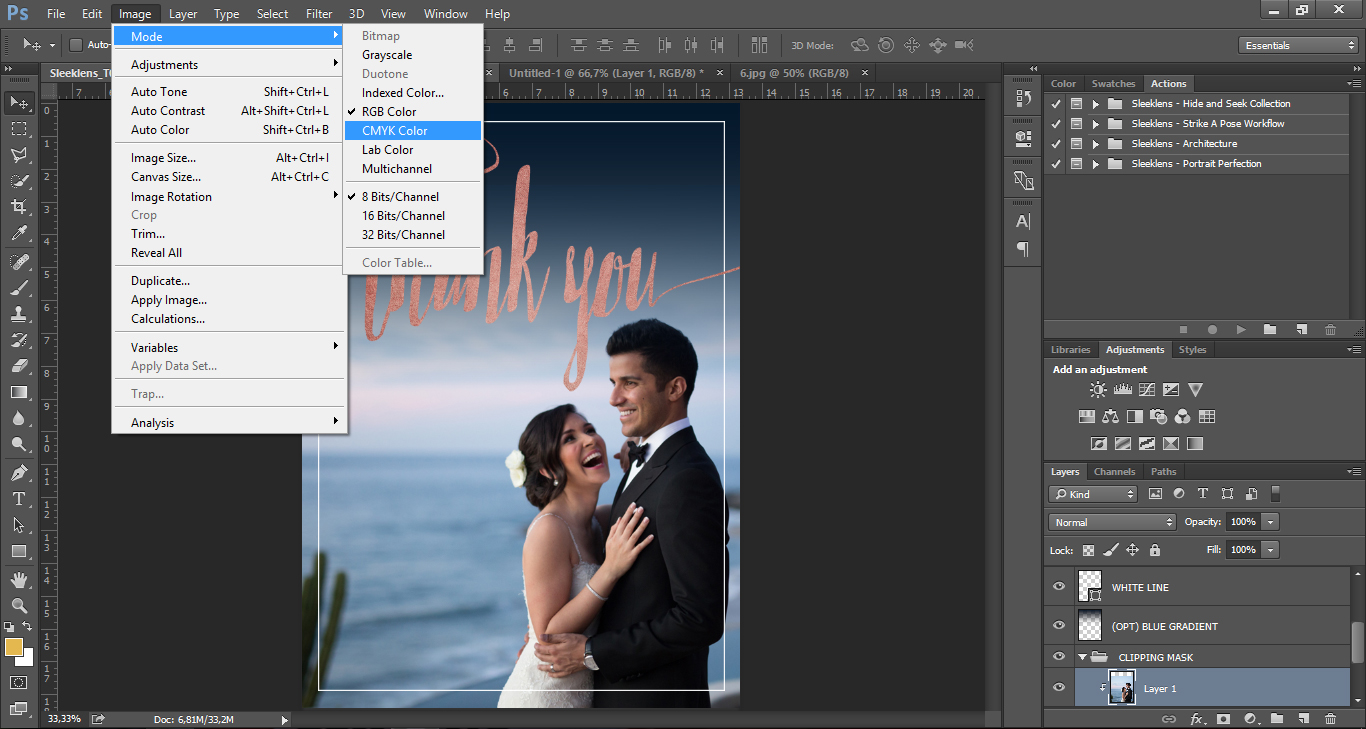
These types of cards are an ideal souvenir for our loved ones. Express, with a touch of elegance and finesse, your gratitude to all those who took part in the most important day of your life.
Instructions are the same for Windows or Mac OSX
1) Unzip the Zip file
2) Enter the folder where the PSD files
3) Double click on the file that you want to do (1 file corresponds at the front of the card and the other to the back)
4) The two first layers are instructions. The first shows where would pass the cut lines at the time of printing; the second instructions to the Clipping Mask. Hide both layers before saving the final image
5) Open in Photoshop the image you want to use
6) Drag the image to the template file. You must position the image inside the folder “Clipping Mask” – place the image on the top of the Clipping Mask to use
7) Go to Layer menu – Create Clipping Mask (adjusts the size and position of the picture using the Move and Free Transform Tools). Repeat the procedure to add new images.
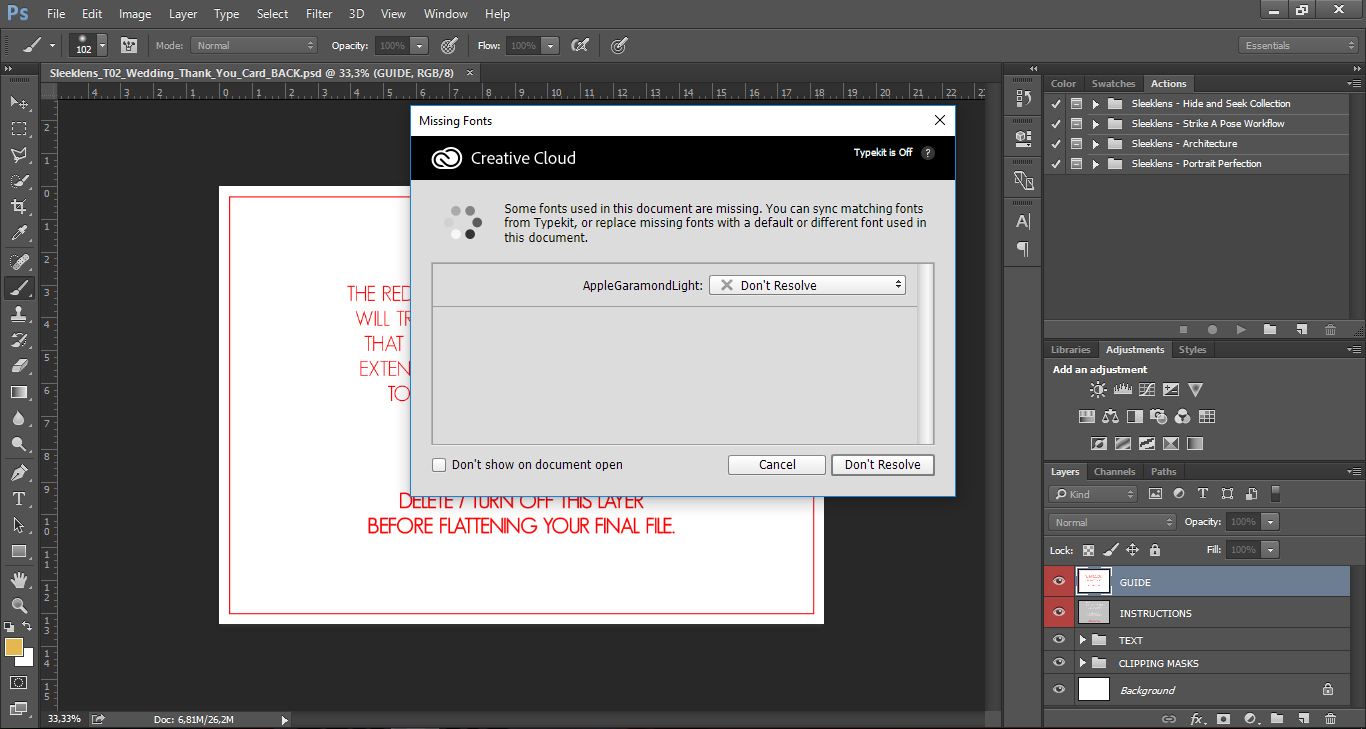
8) In order to amend the text, it is necessary to have installed the fonts used in the Template (Adobe Photoshop will display a warning do not find the necessary sources in the operating system). Change with the Text tool and click on the layer that you want to edit, can be both the text as the same color.
Tip – Do digital painting from photos in photoshop
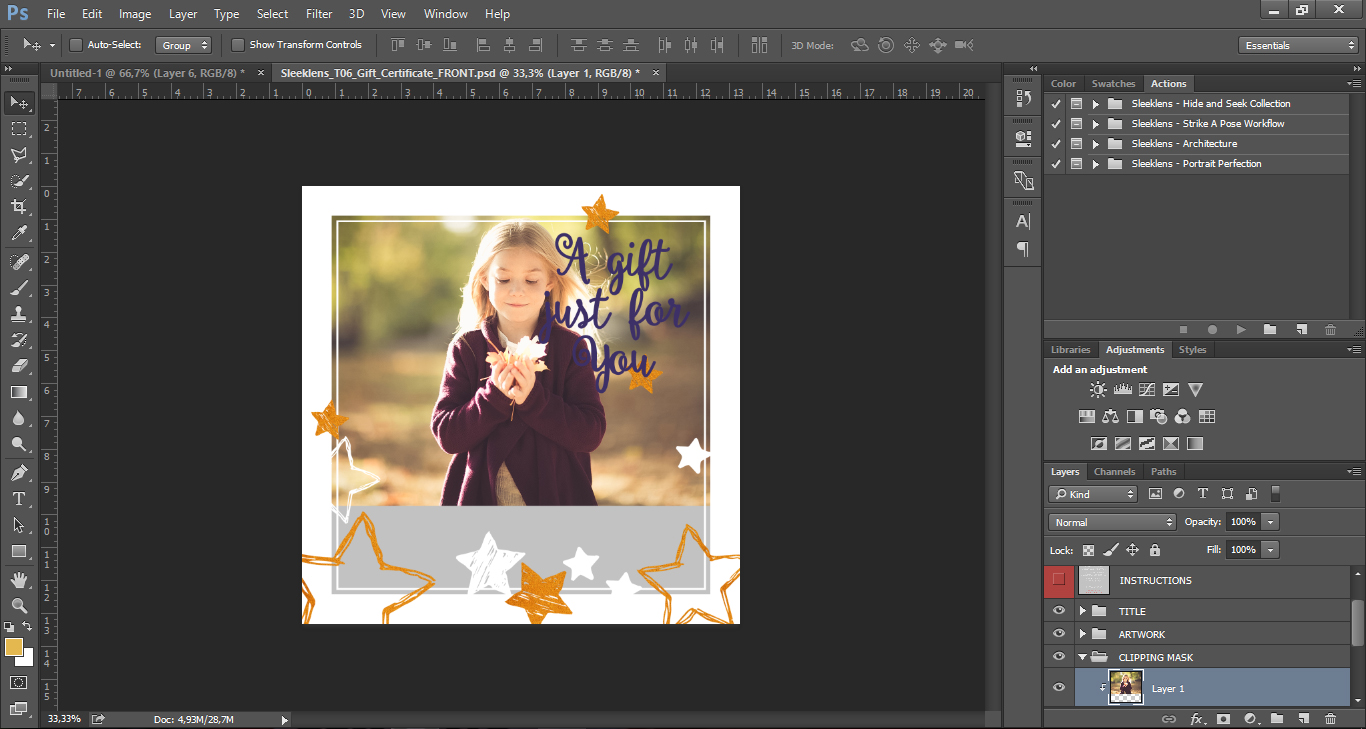
Give a gift with style? Don’t miss these trendy tools for Adobe Photoshop: Gift Certificate Templates. Ideal both for companies and common persons, it’s that professional touch every gift deserves.
Instructions are the same for Windows or Mac OSX
1) Unzip the Zip file
2) Enter the folder where the PSD files
3) Double click on the file that you want to do (1 file corresponds at the front of the card and the other to the back)
4) The two first layers are instructions. The first shows where would pass the cut lines at the time of printing; the second instructions to the Clipping Mask. Hide both layers before saving the final image
5) Open in Photoshop the image you want to use
6) Drag the image to the template file. You must position the image inside the folder “Clipping Mask” – place the image on the top of the Clipping Mask to use
7) Go to Layer menu – Create Clipping Mask (adjusts the size and position of the picture using the Move and Free Transform Tools). Repeat the procedure to add new images.
8) In order to amend the text, it is necessary to have installed the fonts used in the Template (Adobe Photoshop will display a warning do not find the necessary sources in the operating system). Change with the Text tool and click on the layer that you want to edit, can be both the text as the same color.
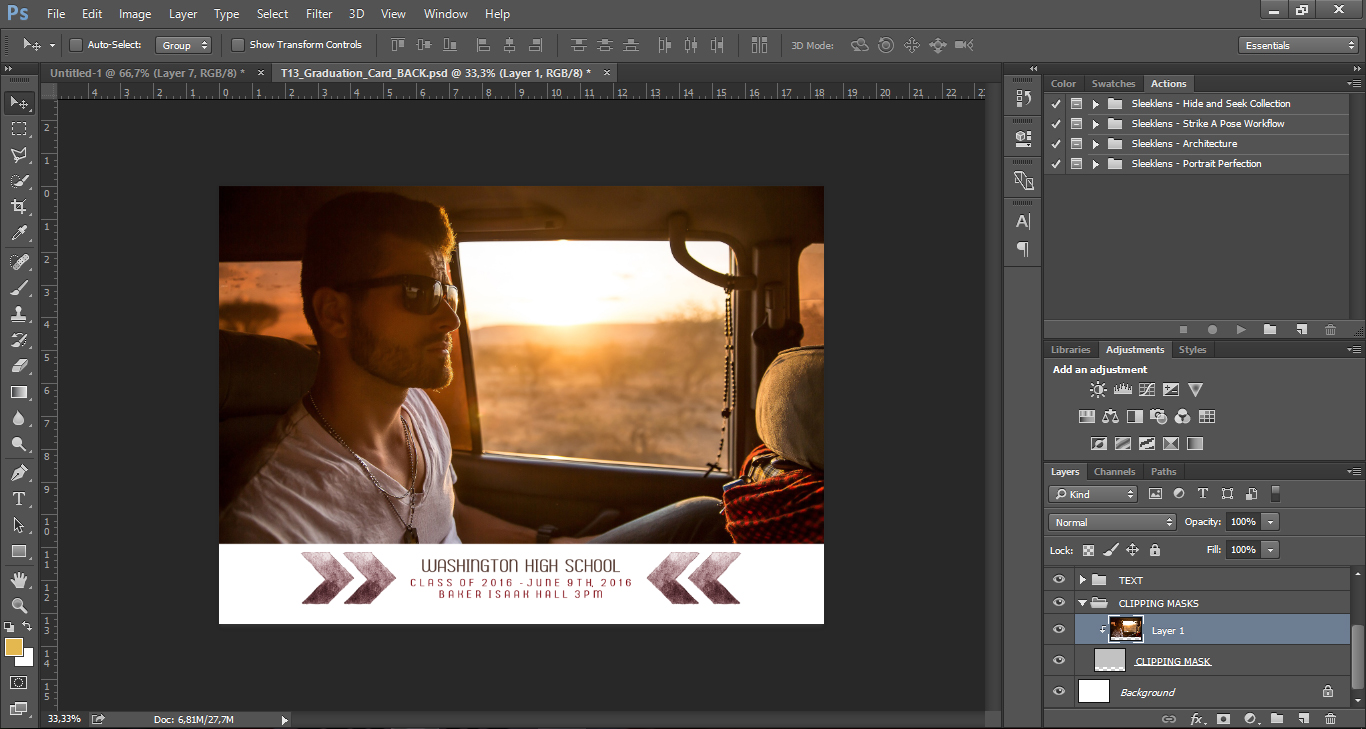
Be the hit of the Prom Night thanks to these fashionable Graduation Card Templates. Keep a memory for a lifetime of this special night, while setting the best way to take the first step into College life.
Instructions are the same for Windows or Mac OSX
1) Unzip the Zip file
2) Enter the folder where the PSD files
3) Double click on the file that you want to do (1 file corresponds at the front of the card and the other to the back)
4) The two first layers are instructions. The first shows where would pass the cut lines at the time of printing; the second instructions to the Clipping Mask. Hide both layers before saving the final image
5) Open in Photoshop the image you want to use
6) Drag the image to the template file. You must position the image inside the folder “Clipping Mask” – place the image on the top of the Clipping Mask to use
7) Go to Layer menu – Create Clipping Mask (adjusts the size and position of the picture using the Move and Free Transform Tools). Repeat the procedure to add new images.
8) In order to amend the text, it is necessary to have installed the fonts used in the Template (Adobe Photoshop will display a warning do not find the necessary sources in the operating system). Change with the Text tool and click on the layer that you want to edit, can be both the text as the same color.
Color scheme is not directly editable – If you want to change the color scheme of the templates you need to work your way either by using a layer in Color as its Layer Blending Mode or other similar options.
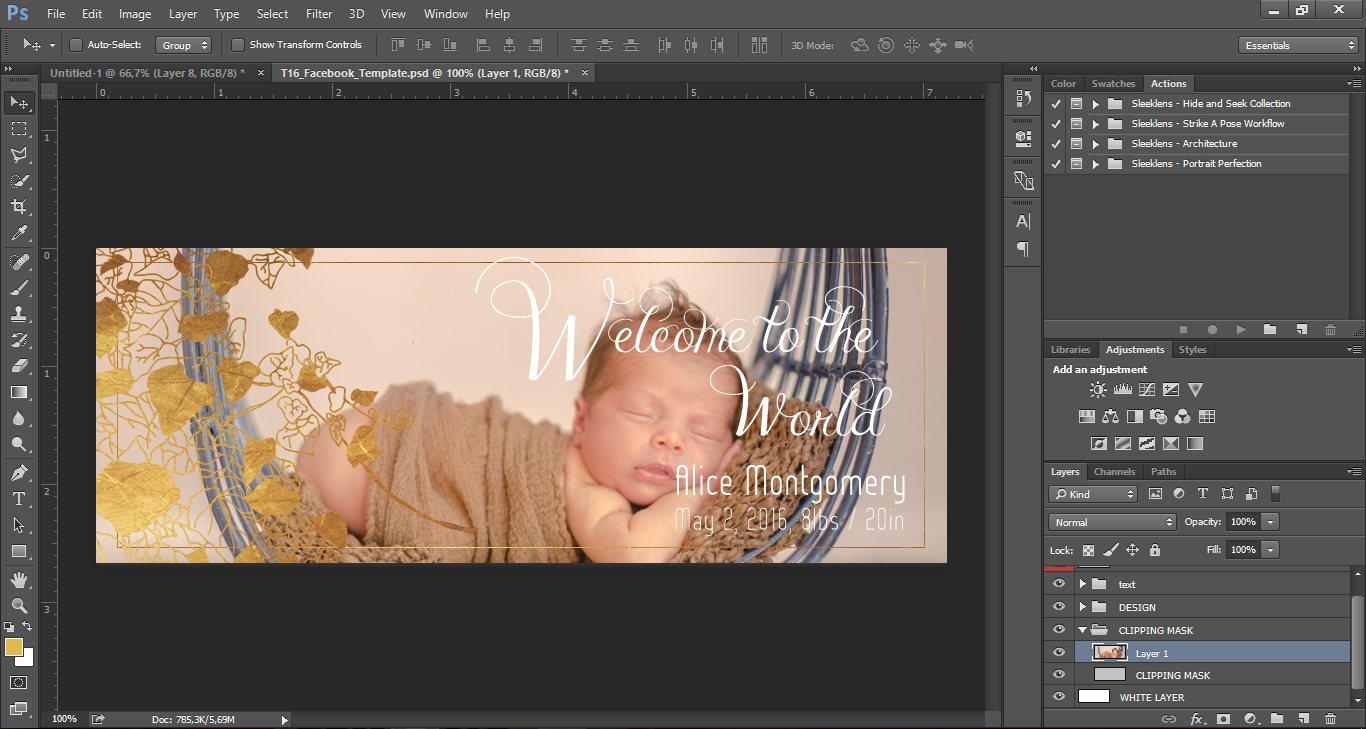
Ideal for business, for passionate photographers or for simple users who want to give a unique look to their Facebook profile. Don’t miss the chance to personalize your space with these Facebook Timeline Templates for Adobe Photoshop!
Instructions are the same for Windows or Mac OSX
1) Unzip the Zip file
2) Enter the folder where the PSD files
3) Double click on the file that you want to do (1 file corresponds at the front of the card and the other to the back)
4) The two first layers are instructions. The first shows where would pass the cut lines at the time of printing; the second instructions to the Clipping Mask. Hide both layers before saving the final image
5) Open in Photoshop the image you want to use
6) Drag the image to the template file. You must position the image inside the folder “Clipping Mask” – place the image on the top of the Clipping Mask to use
7) Go to Layer menu – Create Clipping Mask (adjusts the size and position of the picture using the Move and Free Transform Tools). Repeat the procedure to add new images.
8) In order to amend the text, it is necessary to have installed the fonts used in the Template (Adobe Photoshop will display a warning do not find the necessary sources in the operating system). Change with the Text tool and click on the layer that you want to edit, can be both the text as the same color.
Keep in mind that space required by Facebook Profile Picture is not included within the Template, therefore you should leave at least 1/3 of the template without text or focus center point in order to avoid the Profile Picture to affect your composition.
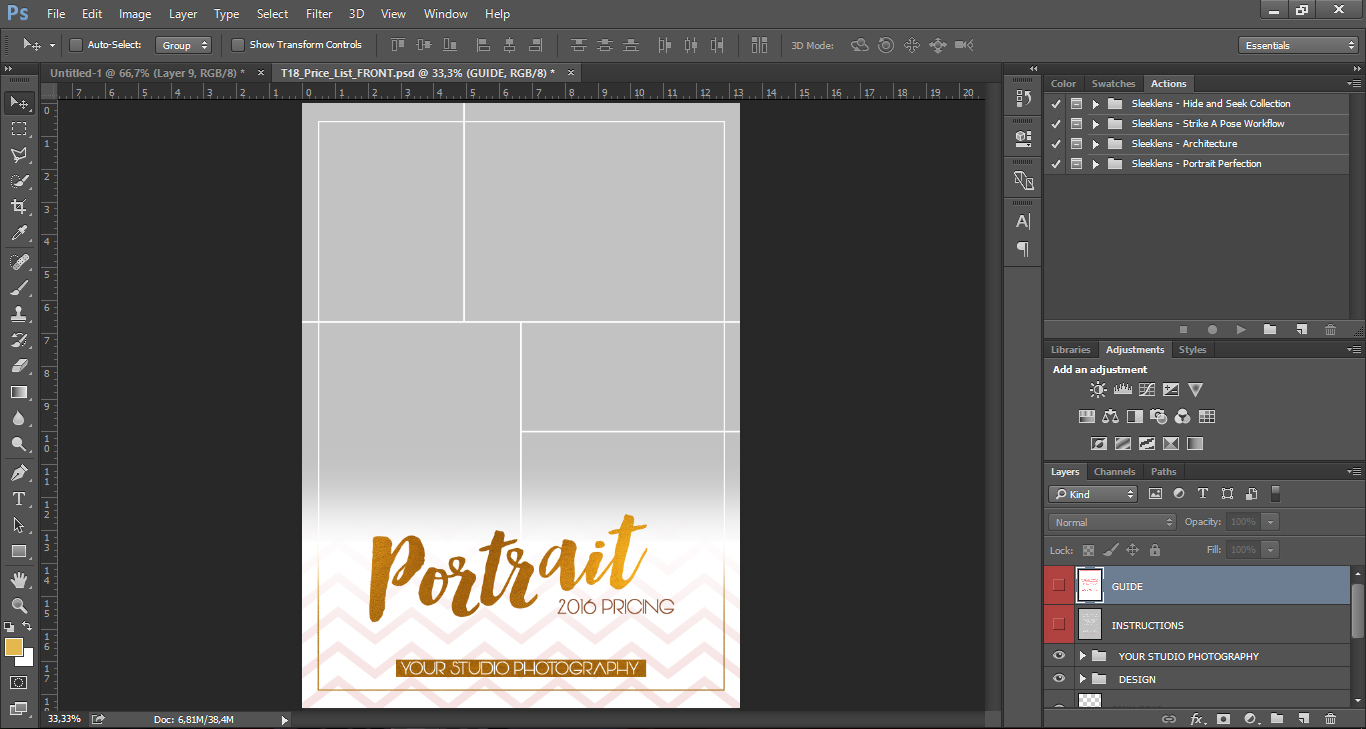
Now it’s time to promote your professional photography business with the quality that you deserve! Thanks to our templates for Adobe Photoshop, you can deliver your full list of prices to your clients in a fast, efficient way and with a unique design – the best way to publicize your business without losing your personal style.
Instructions are the same for Windows or Mac OSX
1) Unzip the Zip file
2) Enter the folder where the PSD files
3) Double click on the file that you want to do (1 file corresponds at the front of the card and the other to the back)
4) The two first layers are instructions. The first shows where would pass the cut lines at the time of printing; the second instructions to the Clipping Mask. Hide both layers before saving the final image
5) Open in Photoshop the image you want to use
6) Drag the image to the template file. You must position the image inside the folder “Clipping Mask” – place the image on the top of the Clipping Mask to use
7) Go to Layer menu – Create Clipping Mask (adjusts the size and position of the picture using the Move and Free Transform Tools). Repeat the procedure to add new images.
8) In order to amend the text, it is necessary to have installed the fonts used in the Template (Adobe Photoshop will display a warning do not find the necessary sources in the operating system). Change with the Text tool and click on the layer that you want to edit, can be both the text as the same color.
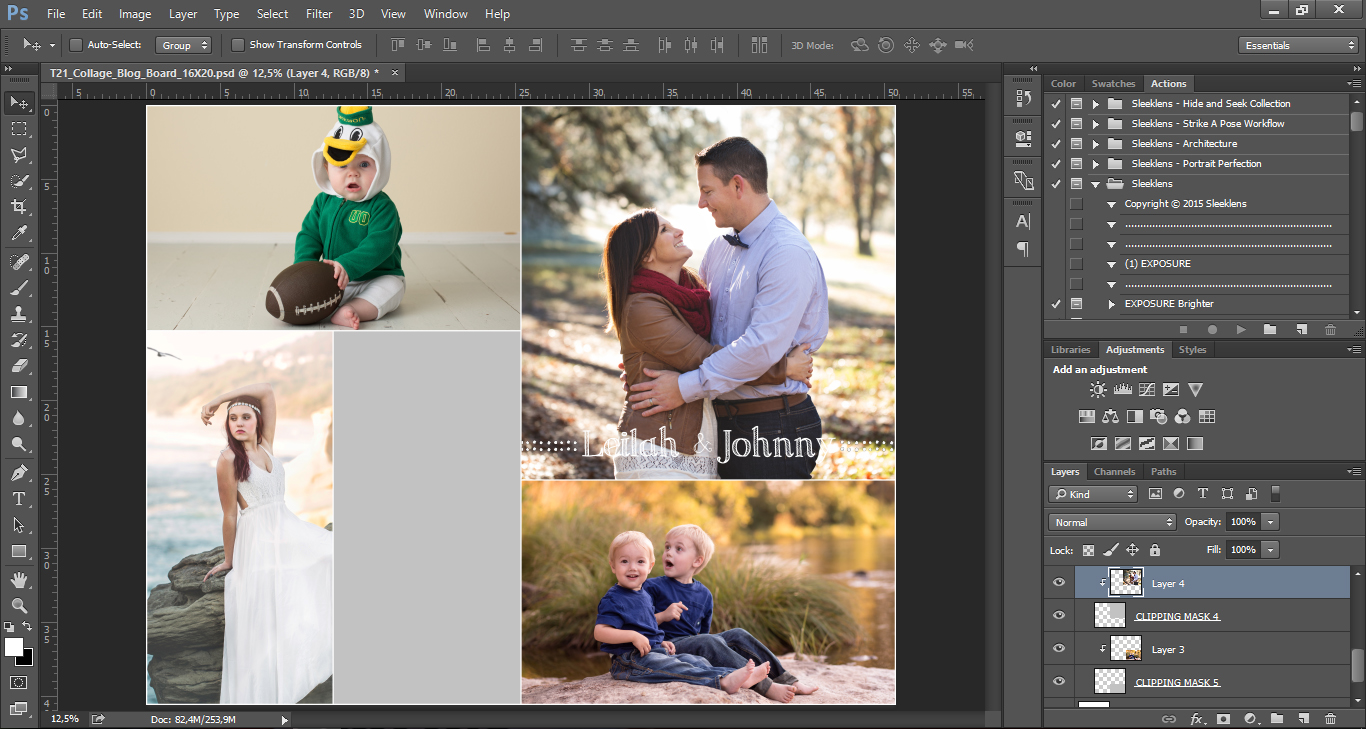
A quick and efficient solution to make beautiful compositions with those special moments that marked our lives. Go beyond simple gifts and give something with meaning: a memory for a lifetime thanks to Adobe Photoshop!
Instructions are the same for Windows or Mac OSX
1) Unzip the Zip file
2) Enter the folder where the PSD files
3) Double click on the file that you want to do (1 file corresponds at the front of the card and the other to the back)
4) The two first layers are instructions. The first shows where would pass the cut lines at the time of printing; the second instructions to the Clipping Mask. Hide both layers before saving the final image
5) Open in Photoshop the image you want to use
6) Drag the image to the template file. You must position the image inside the folder “Clipping Mask” – place the image on the top of the Clipping Mask to use
7) Go to Layer menu – Create Clipping Mask (adjusts the size and position of the picture using the Move and Free Transform Tools). Repeat the procedure to add new images.
8) In order to amend the text, it is necessary to have installed the fonts used in the Template (Adobe Photoshop will display a warning do not find the necessary sources in the operating system). Change with the Text tool and click on the layer that you want to edit, can be both the text as the same color.
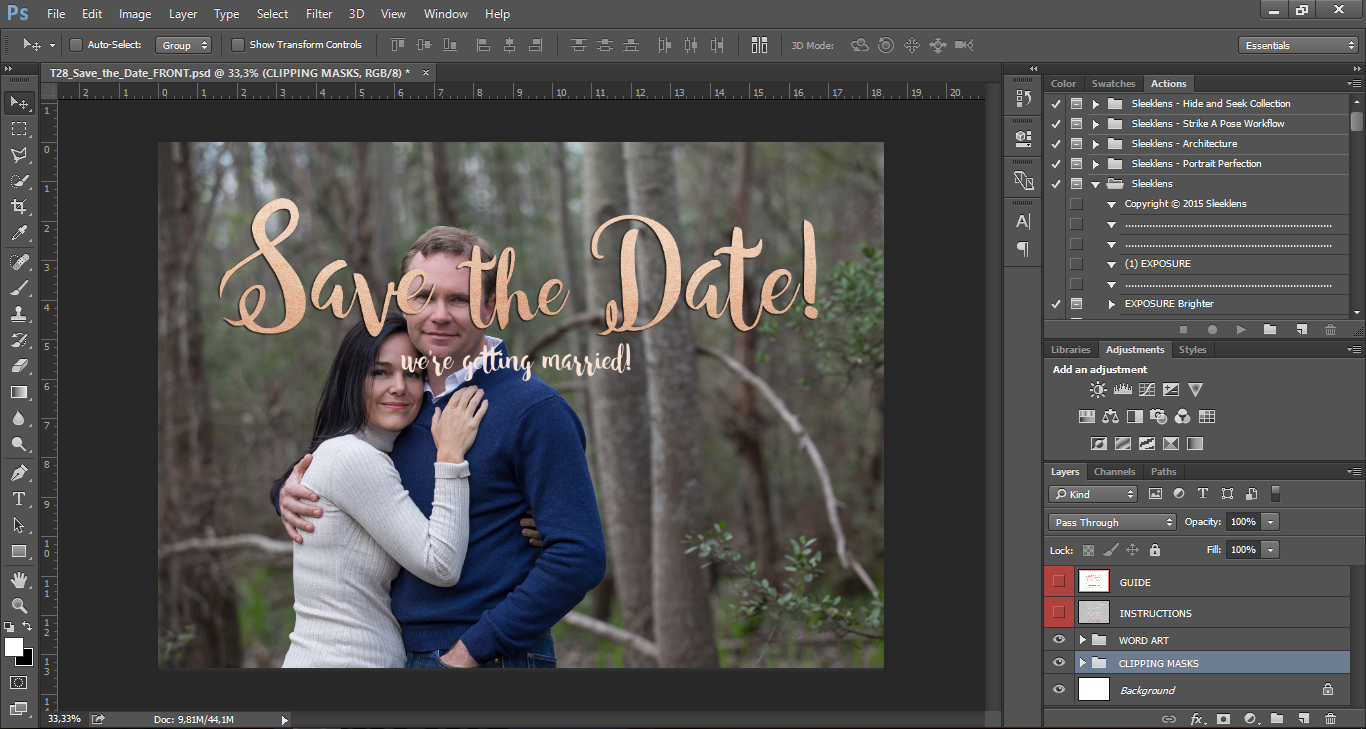
And finally, the day has arrived! That special time to share with your friends, family and other loved ones; that day in which you will embark a new adventure in your life, and why not do it with elegance and freshness? Don’t miss these templates for Adobe Photoshop can do for your ceremony!
Instructions are the same for Windows or Mac OSX
1) Unzip the Zip file
2) Enter the folder where the PSD files
3) Double click on the file that you want to do (1 file corresponds at the front of the card and the other to the back)
4) The two first layers are instructions. The first shows where would pass the cut lines at the time of printing; the second instructions to the Clipping Mask. Hide both layers before saving the final image
5) Open in Photoshop the image you want to use
6) Drag the image to the template file. You must position the image inside the folder “Clipping Mask” – place the image on the top of the Clipping Mask to use
7) Go to Layer menu – Create Clipping Mask (adjusts the size and position of the picture using the Move and Free Transform Tools). Repeat the procedure to add new images.
8) In order to amend the text, it is necessary to have installed the fonts used in the Template (Adobe Photoshop will display a warning do not find the necessary sources in the operating system). Change with the Text tool and click on the layer that you want to edit, can be both the text as the same color.
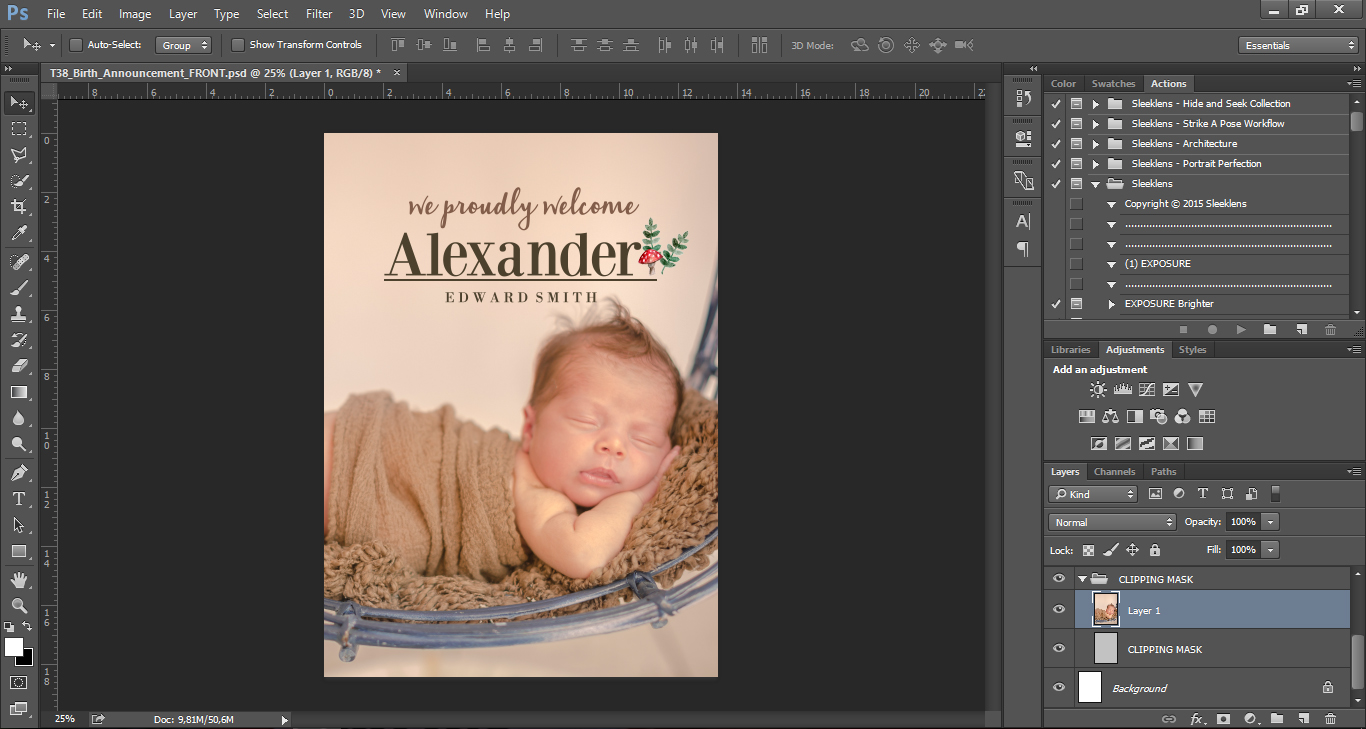
Receive who that little someone you have waited for so long with elegance and style! With these templates designed for keen photographers you’re just a step closer to create a lasting memory of the most important day of your life: the day when your baby came into the world! Differentiated by sex in their shades of color, or simply with a classic traditional tonality, a lovely way to announce the arrival of the newest member of the family.
Instructions are the same for Windows or Mac OSX
1) Unzip the Zip file
2) Enter the folder where the PSD files
3) Double click on the file that you want to do (1 file corresponds at the front of the card and the other to the back)
4) The two first layers are instructions. The first shows where would pass the cut lines at the time of printing; the second instructions to the Clipping Mask. Hide both layers before saving the final image
5) Open in Photoshop the image you want to use
6) Drag the image to the template file. You must position the image inside the folder “Clipping Mask” – place the image on the top of the Clipping Mask to use
7) Go to Layer menu – Create Clipping Mask (adjusts the size and position of the picture using the Move and Free Transform Tools). Repeat the procedure to add new images.
8) In order to amend the text, it is necessary to have installed the fonts used in the Template (Adobe Photoshop will display a warning do not find the necessary sources in the operating system). Change with the Text tool and click on the layer that you want to edit, can be both the text as the same color.
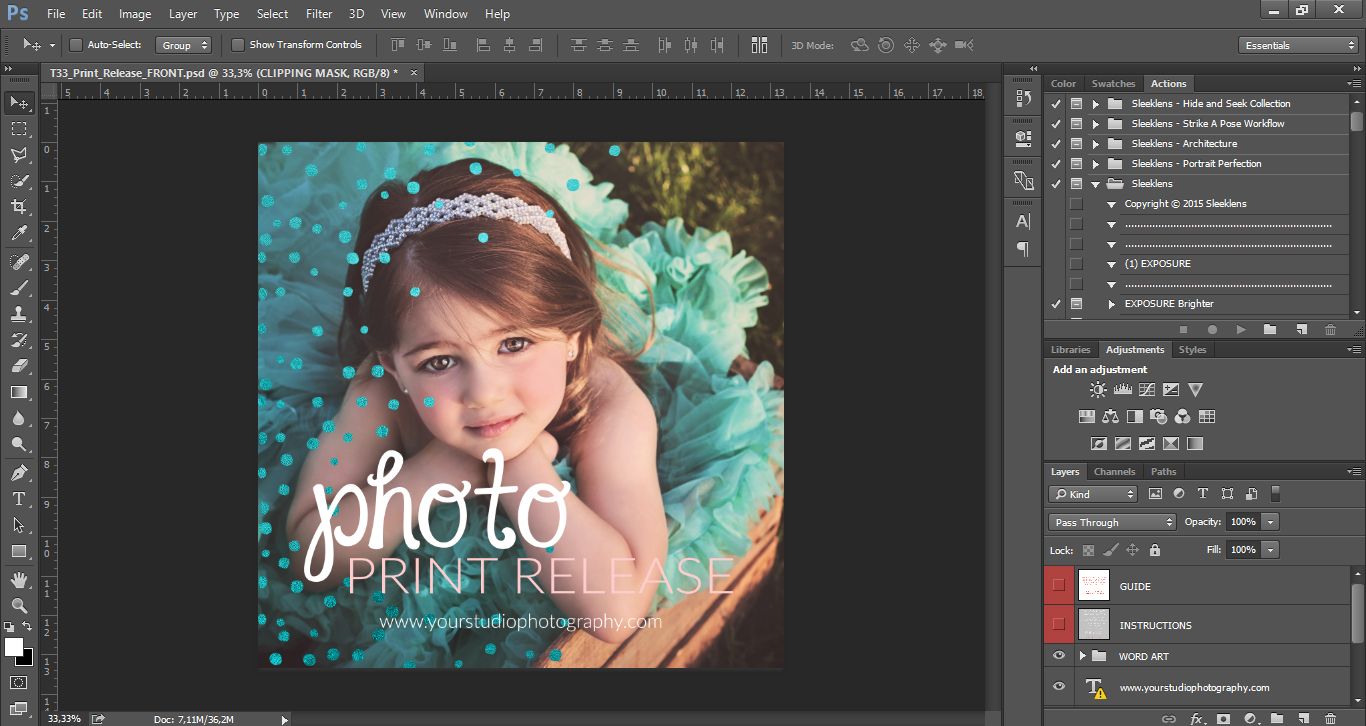
That professional touch your photography business was needing! Discover an elegant and efficient way to authorize your customers to print the sessions you’ve done; protect your work without losing a style of seriousness and charm with these templates for Adobe Photoshop.
Instructions are the same for Windows or Mac OSX
1) Unzip the Zip file
2) Enter the folder where the PSD files
3) Double click on the file that you want to do (1 file corresponds at the front of the card and the other to the back)
4) The two first layers are instructions. The first shows where would pass the cut lines at the time of printing; the second instructions to the Clipping Mask. Hide both layers before saving the final image
5) Open in Photoshop the image you want to use
6) Drag the image to the template file. You must position the image inside the folder “Clipping Mask” – place the image on the top of the Clipping Mask to use
7) Go to Layer menu – Create Clipping Mask (adjusts the size and position of the picture using the Move and Free Transform Tools). Repeat the procedure to add new images.
8) In order to amend the text, it is necessary to have installed the fonts used in the Template (Adobe Photoshop will display a warning do not find the necessary sources in the operating system). Change with the Text tool and click on the layer that you want to edit, can be both the text as the same color.
Windows Procedure
Mac OSX Procedure
Please verify your software version before proceeding.
 I’ve verified my software version


 Facebook
 Google +