First, congratulations on taking the first step into becoming a professional photographer! Sleeklens products will prove to be lifelong companions in your post-production sessions.
In order to ensure that your Photoshop Actions are installed properly, we will go through three different methods of installation, suitable for both Windows and Mac OSX users.
Method #1: Extract To…
- Locate and download your new action in your Download folder. It should be a *.zip file that will have to be extracted, so we recommend you move it to another folder where you can store it for later.
- If you are working with Windows 10, simply double click the file and you will be able to access to its contents; otherwise extract it by using tools such as Winzip/Winrar with right-click on the file, “Extract to…”
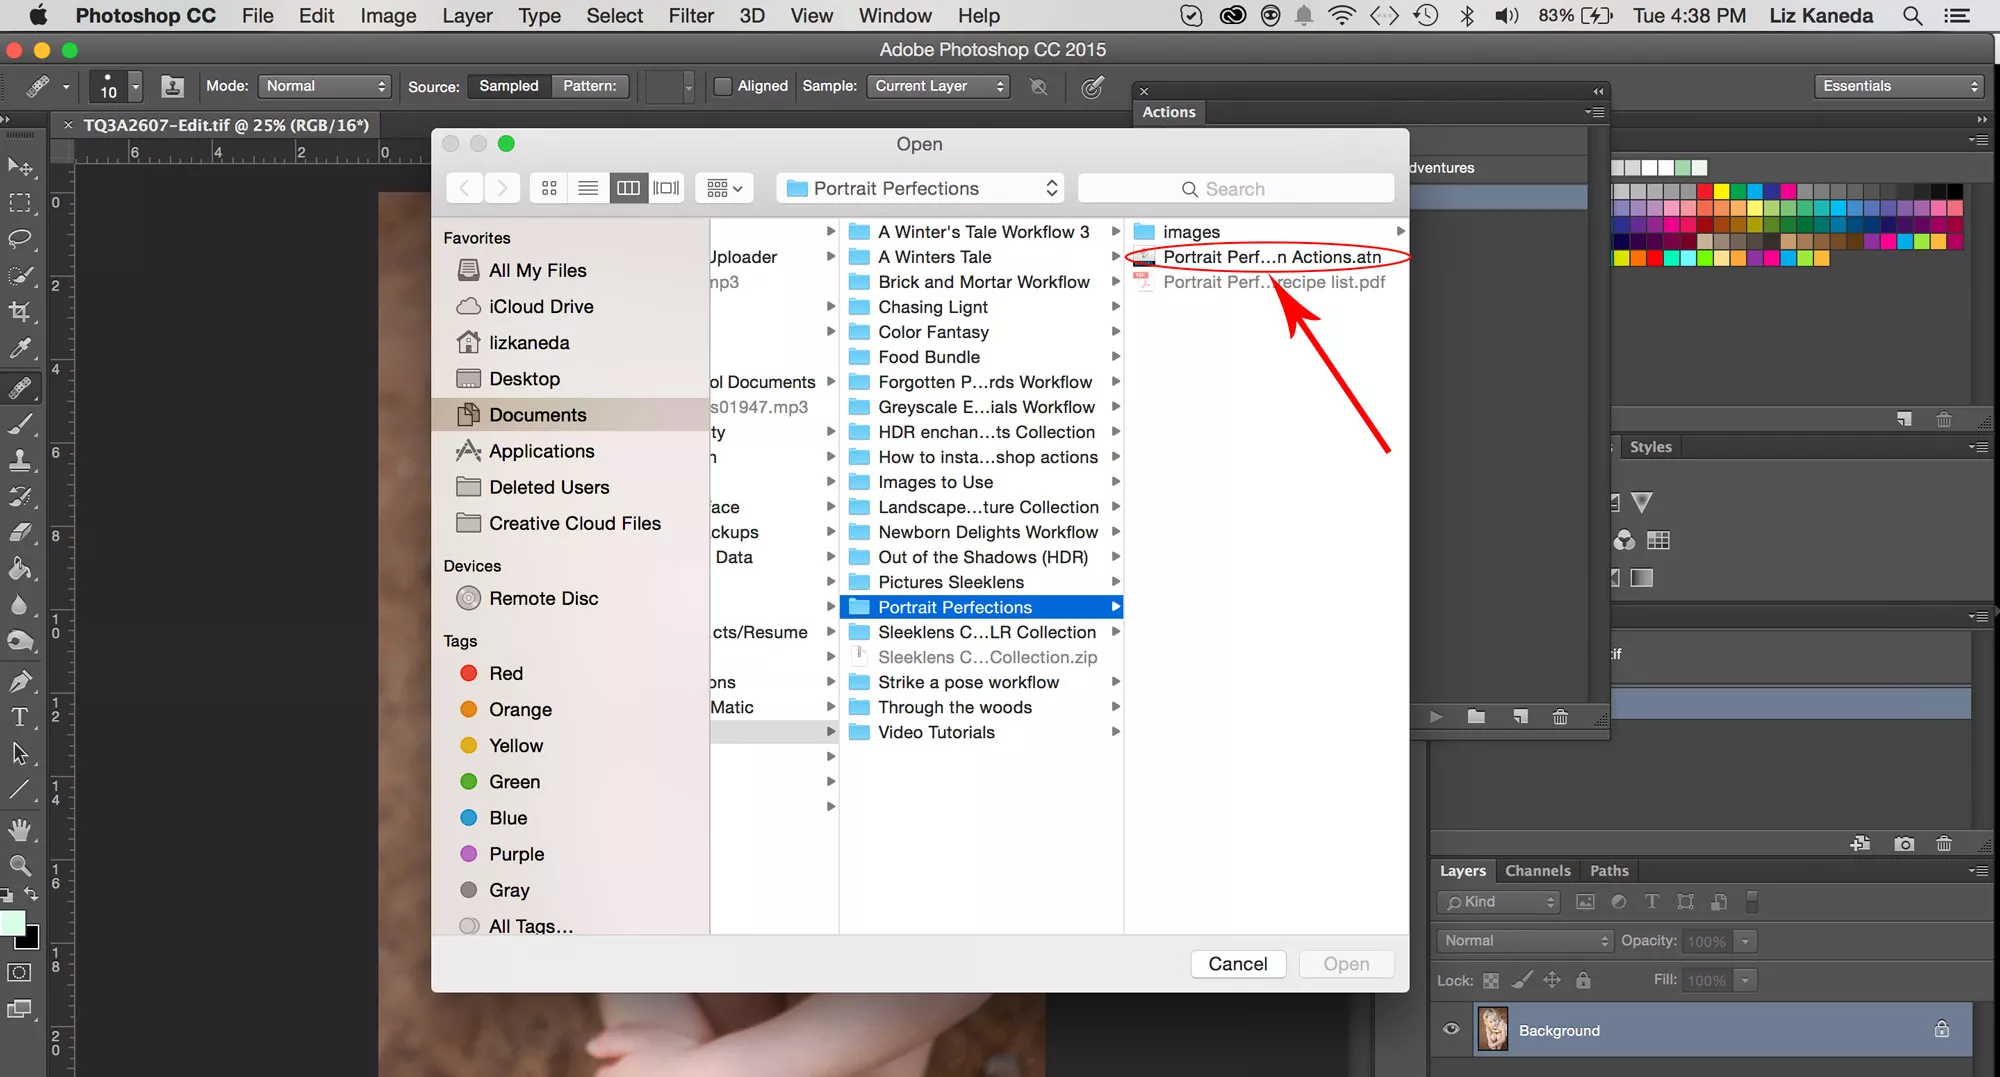
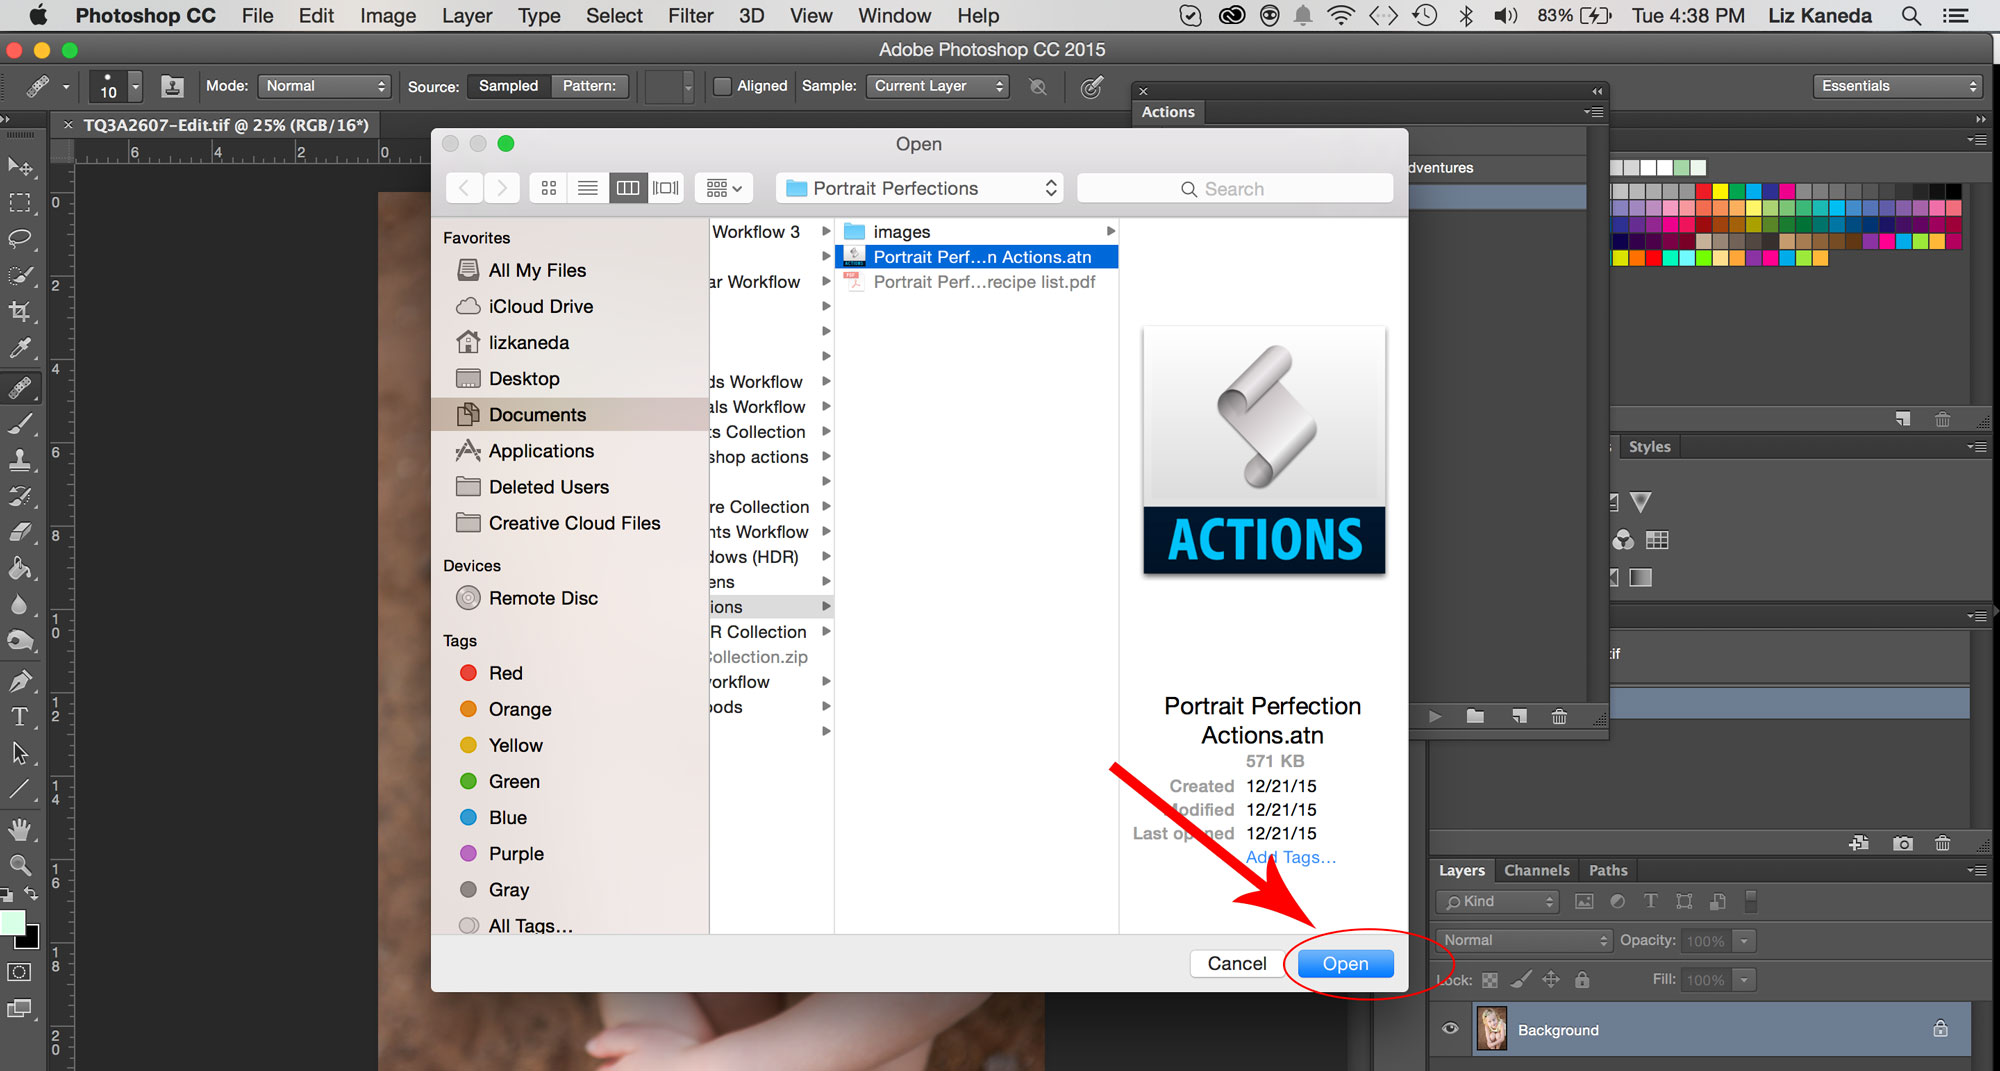
- Go into the folder and double click any of the files ending in format ATN; that will cause Adobe Photoshop to load them to the Actions Palette.
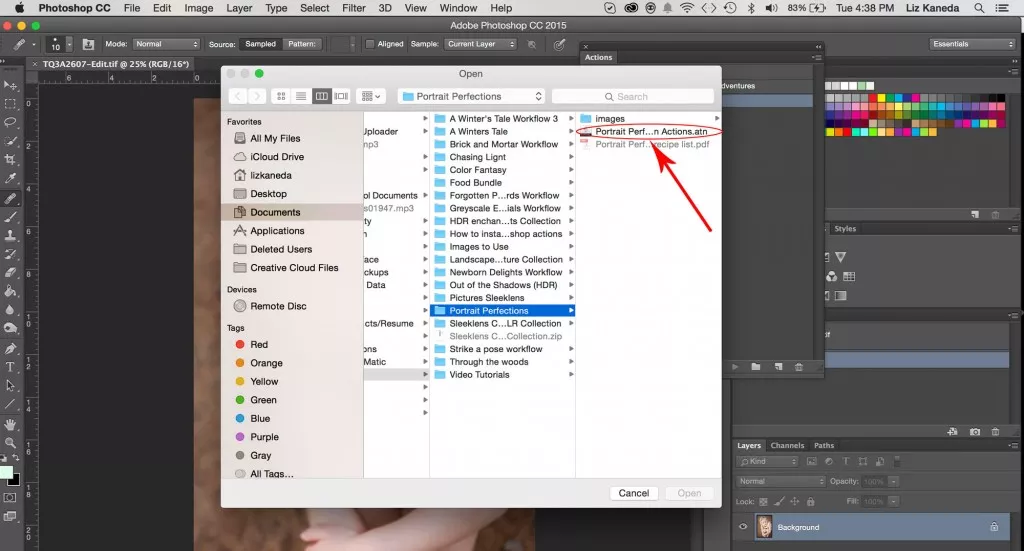
Keep in mind that when using this method you can’t change the location of the Actions later on or Adobe Photoshop will report an error as it won’t be able to track back the files.
Method #2: Load to Adobe Photoshop Actions Palette
If the new action won’t open by using the first method, simply follow up these quick instructions.
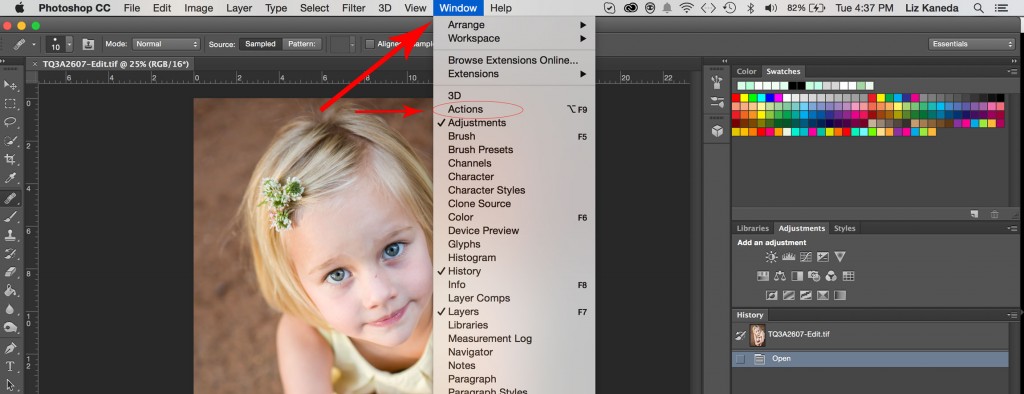
- Open Photoshop and go to the Actions Palette (if it is not loaded in the UI, click on Window menu – Actions or Alt+F9)
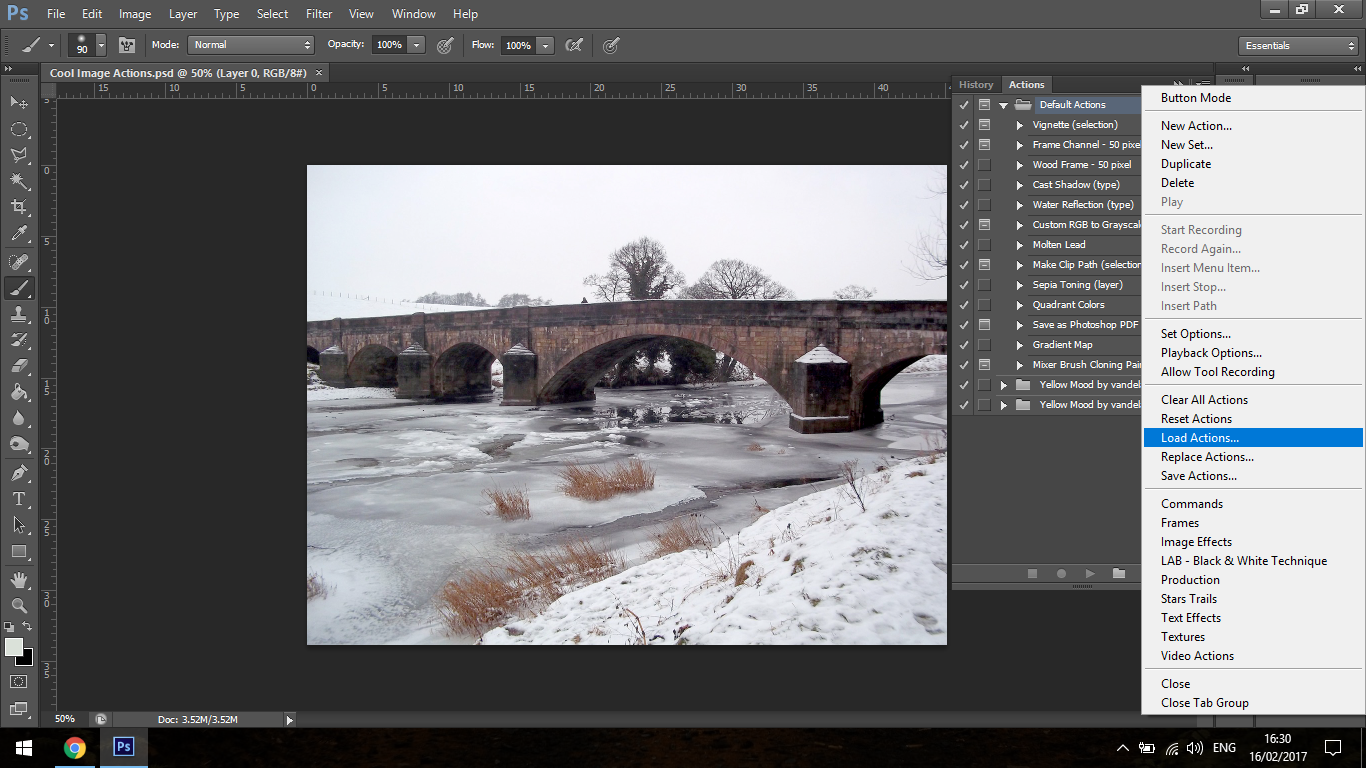
- Select “Load Actions…”
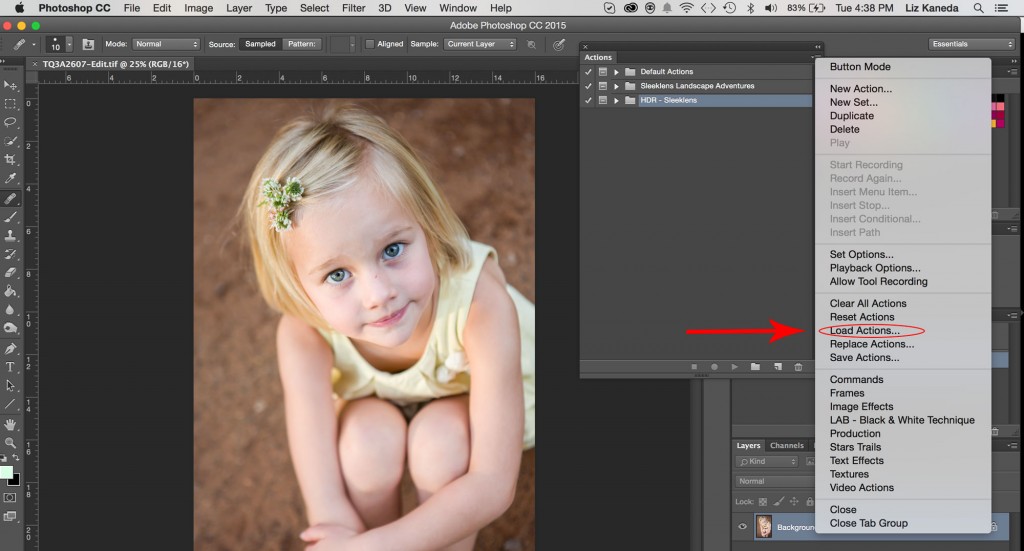
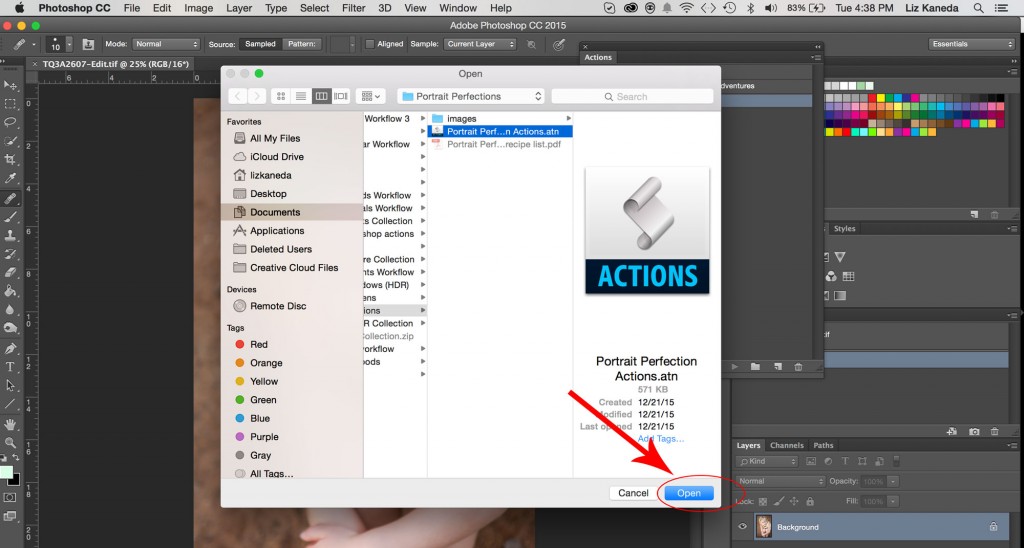
- Select the files you want to be loaded into Adobe Photoshop; repeat the process if necessary
Method #3: System Explorer
In the case that the above two methods don’t work… don’t worry! You can always use this reliable method.
- Select the files you want to copy.
- Go to the system explorer and locate this folder:
- For Windows users: c:\Program Files\Adobe\<Photoshop Version>\Presets\Photoshop Actions
- For Mac users: Locate the root folder of Adobe Photoshop at Finder (inside Applications) and follow the Presets-Photoshop Actions route.
- Copy the ATN files inside the located folder; Adobe Photoshop will open the PSD action every time it opens up.
Note: For Windows 10, instead of Program Files the folder can be labeled as Program Data.
There is a lot of different Photoshop actions styles–one of them is Japanese style effect check it out
How to Use Photoshop Actions
Now that we’ve discussed about how to install actions in Adobe Photoshop, let’s go over how to use Photoshop Actions and what they are and what they’re actually used for while photo editing.
Just a quick tip, if you want to be able to get royalty-free images, you can find lots of them on Pixabay–it’s where I get all my images, so if you want to follow this Photoshop tutorial exactly, you can get loads of similar images (if not the same image) which I will post below for you to ‘Right Click’ on and save.
With that being said let’s start the Photoshop tutorial.
A Photoshop action (also known as a PS action) is a set of steps created by Adobe to speed up your photo editing workflow. Say you created an image and you wanted to recreate it on another image; a Photoshop action is what you would use so you wouldn’t have to do the same steps all over again.
They are set up so it will only take one second for you to apply them to your new image.
To open a Photoshop action, all you do is click where I have indicated below.
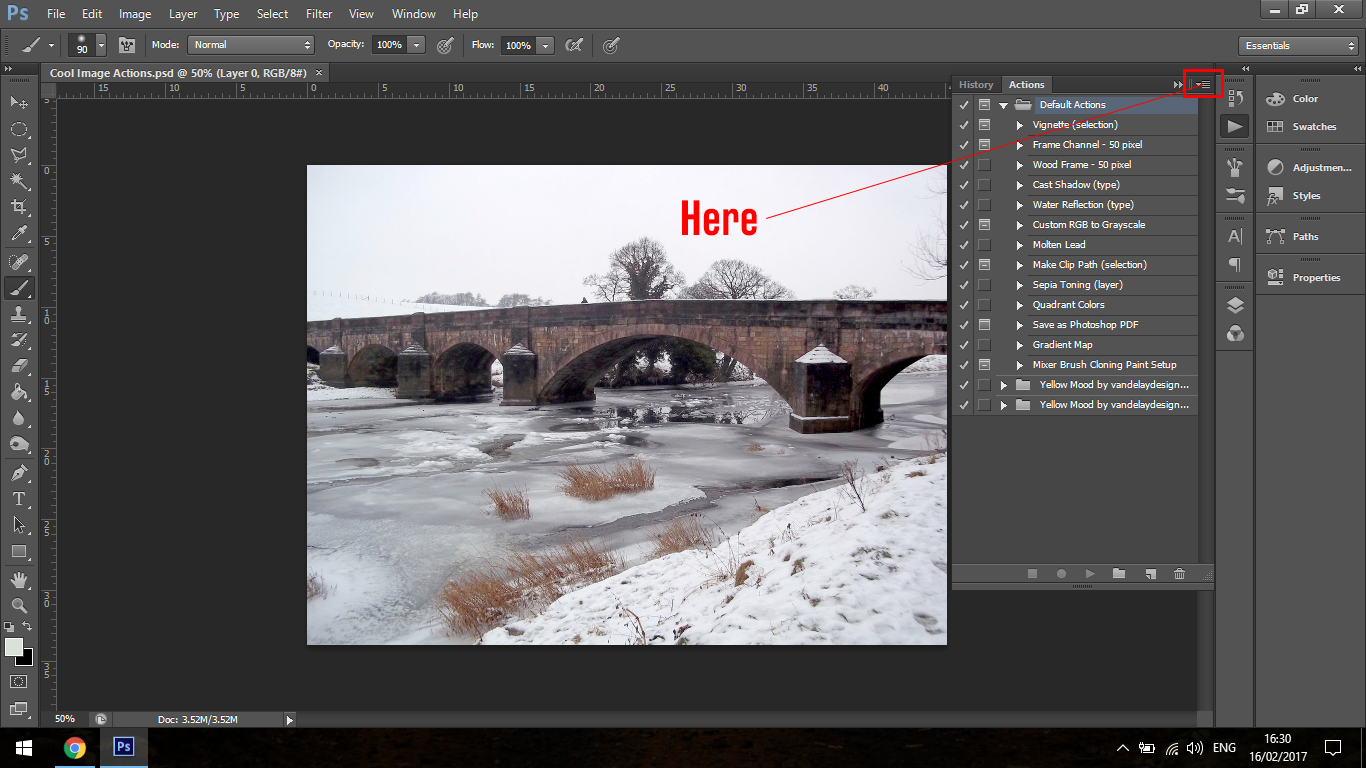
Remember the name of the preset you want to use if you downloaded it before, because there are a quite a few actions that comes pre-installed with Photoshop.

For simplicity’s sake, you can close the Photoshop Defaults by clicking on the little folder in the panel and clicking on the one you just installed. You will be able to open it up and see all the actions within it.
Just a side note: you may download a Photoshop action file and when you open it up it will have a folder saying “Play All.” What this does is apply all the options within that folder to the folder.
But we’re going to be looking at more individual actions instead of throwing the whole lot on top of our image.
If you click on the top folder and press the Play button (located at the bottom of the Actions panel) it will play through all the different actions and apply them. At any stage, you can hit Stop or Cancel out any of the actions on the list you do not want to include in the final image. It’s very flexible.
Another way to do this is if you click on one and hold Shift, you can select a certain group that you would like to use, or if you Ctrl you can click on specific ones that you want.
Once you do this again, hit Play and it will cycle through all of those actions that you have chosen and apply them for you to and you can key through to approve after each one.
If you wish to Delete any actions, all you do is just click on the action layer you want to discard and then click or Drag to the Recycling Bin within the Photoshop Panels at the bottom.
That way, you will be able to further refine beforehand if need be.
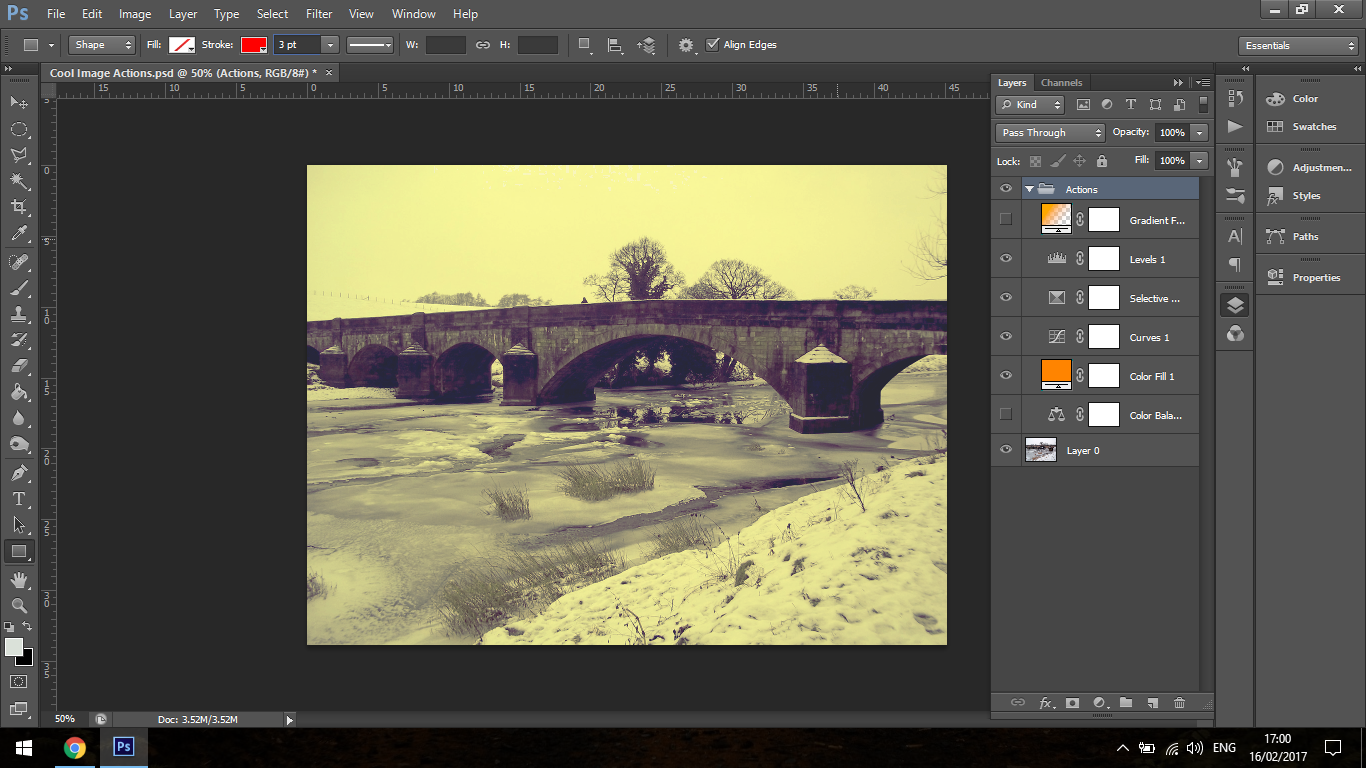
As you can see Photoshop Actions are really easy to incorporate into your photography, and if you feel at any stage that some of the actions are a little too strong or perhaps not strong enough, then you can find them in your layers panel and edit them, just like you would an ordinary adjustment layer.
Frequently Asked Questions
Adobe Photoshop is a world-class photo editing solution that has earned renown as the best creative software in the industry. What some people don’t know, however, is that it’s possible to use Photoshop actions to streamline editing tasks. You can find professionally-developed Photoshop actions to simplify editing, and even create your own new action. Here are a few of the best Photoshop actions to know:
- HDR Photoshop Actions
- Portrait Actions
- Vintage Photoshop Actions
- Cinematic Photoshop Action
Even non-photographers recognize the value of Photoshop, due to its impressive editing capabilities. However, some people may assume Photoshop requires a steep learning curve and that only an experienced graphic designer or photo editor can use the software. Nothing could be further from the truth. Photoshop actions make it easier to get up-to-speed so that anyone can achieve professional-quality photo editing.
A Photoshop action reduces the time and effort it takes to complete photo editing processes. You can even accomplish complex processes like selective color in seconds and achieve professional results for every image, every time. Even if you haven’t worked through a complete Photoshop tutorial, you can learn how to use actions and upgrade your photo editing capabilities. Try a free Photoshop action today.
What types of Photoshop actions deliver the most value? Familiarizing yourself with four types of PS actions can benefit any photographer, from newbie to professional.
HDR Photoshop Action
In photography, the acronym HDR stands for “high dynamic range.” HDR allows photographers to achieve a greater range of tones by combining multiple photos in a single image. Typically, you use at least three photos with different exposures to create an HDR image.
However, HDR Photoshop actions can help you achieve the depth and vibrance of an HDR image with a single photograph. With a Photoshop action, you can improve the lighting and colors of your image to improve its overall appearance. If you are editing photos from a single event, you can quickly apply the same Photoshop action to each image to achieve a consistent look. Alternatively, you can “stack” several Photoshop actions – that is, apply them in succession – to achieve a unique aesthetic for any image.
Portrait and Bundle Actions
Whether you take casual portraits just for fun or professional headshots, you can take your portrait photography to the next level with Portrait Photoshop Actions. You can use these actions to edit both RAW and JPEG portraits for maximum flexibility.
Not sure where to start? When you download professionally-developed actions you get recipes to follow along with sample images for testing. You can get base actions to perform essential edits on any photo, along with actions that let you adjust color, tone, and temperature.
Other specialized portrait actions and bundles – including vignette, light glow, paint effect, and advanced portrait retouch – can help you create one-of-a-kind images that bring your subjects’ personalities to life.
Vintage Photoshop Actions
Vintage-look photographs are always popular. For some photographers, the goal is recreating an aesthetic of days gone by, while others enjoy the rich tones and tints that endure across the decades.
You can give any image a nostalgic feel with an easy-to-use Vintage Photoshop Action. With actions, you can do everything from apply environmental haze effects to creating retro-inspired tones to using colorful overlays. Photoshop actions make it effortless to apply one vintage effect, or several, to turn your contemporary photographs into vintage-look works of art.
Cinematic Photoshop Actions
Have you ever been awestruck by the cinematic quality of a professional-grade video or photo? If so, you’ll be happy to know you can achieve the same look with your own photos through Cinematic Photoshop Actions.
These actions work by creating custom Lookup Tables (LUTs) that adjust the red, green, and blue channels of an image or video. Instead of recreating LUTs yourself, A cinema action lets you access the knowledge of professionals and upgrade the look of any image in seconds.
Yes, you can set up your own Adobe Photoshop actions and save time on routine editing tasks. All you need to do is follow some simple steps to record, review, manage, and edit your actions.
- Open the Actions Panel in Photoshop CC. You’ll see all the Default Actions. Click on the button at the top right of the Actions Panel to create a new action set of your own. Type a name in the dialog box that appears.
- Record Your New Action. Now, you are ready to record. Perform all the steps you want to include in your new Action.
- Play Your Action. To double-check your new action, click on the button at the top of the Actions Panel. This pulls up a menu, where you’ll see “Playback Options.” You can choose whether you want to view the recorded action in real-time or step through the process more slowly.
- Manage and Edit Your Actions. After recording your Actions, you can apply them to other images with ease. One way is to go to “File” then click “Automate, ” then select “Batch.” Choose the desired option in the “Action” dialog box and click “OK.”
Although Photoshop actions are similar to Lightroom presets, actions only work in Photoshop. Both features make it easier to apply a photo effect combination more quickly but there are some differences to know.
Both action and preset features allow users to define specific edits and apply them to other photos to streamline the editing process. And both allow you to achieve consistency across a set of images in a time-efficient way.
What’s the difference between the two? The main distinction between Photoshop actions and Lightroom presets is that actions typically take longer to run. Another difference is that it can be somewhat more difficult to edit photos after applying an action in Photoshop. Also, you can’t preview actions before you apply them, and they only work with Photoshop.


 Facebook
 Google +