
Glad to see you here again. Last time, we have gone through the characteristics of Japanese style photography, which has been a trending style in Japan, Hong Kong, and Taiwan. Post-processing plays an important role in the creation of Japanese style photographs. Before we move on to post-editing, we will have to assess if a particular photo is suitable to edit into such style. The following are some of the criteria that may be taken into account.
As I mentioned in the previous article, themes and lighting matter especially while shooting in Japanese style. Moments of daily life is the best theme for the style. Undeniably, it is sometimes an ideal style for portrait and fine art photography too. Lighting condition is also an unneglectable criterion. The editing tutorial below will only work on photos shot on sunny days. Nevertheless, it is unlikely to work on the photos shot on overcast days due to the fact that clouds act as an enormous softbox during an overcast day. Sunlight is completely diffused and the scene is softly lit. However, we are looking for direct sunlight and crisp sharp shadows. In addition, we also want our subject and scene be lit with relative hard light. In a nutshell, sunny day is nearly a must. There are no strict rules for composition. Almost all compositions will do.
After going through the criteria for the selection of photos, we will get down to business and start editing the selected photo. In fact, this tutorial is applicable to both Lightroom and Photoshop as we are going to edit in the Camera Raw editor of Photoshop only, which resembles the functionality of Lightroom.
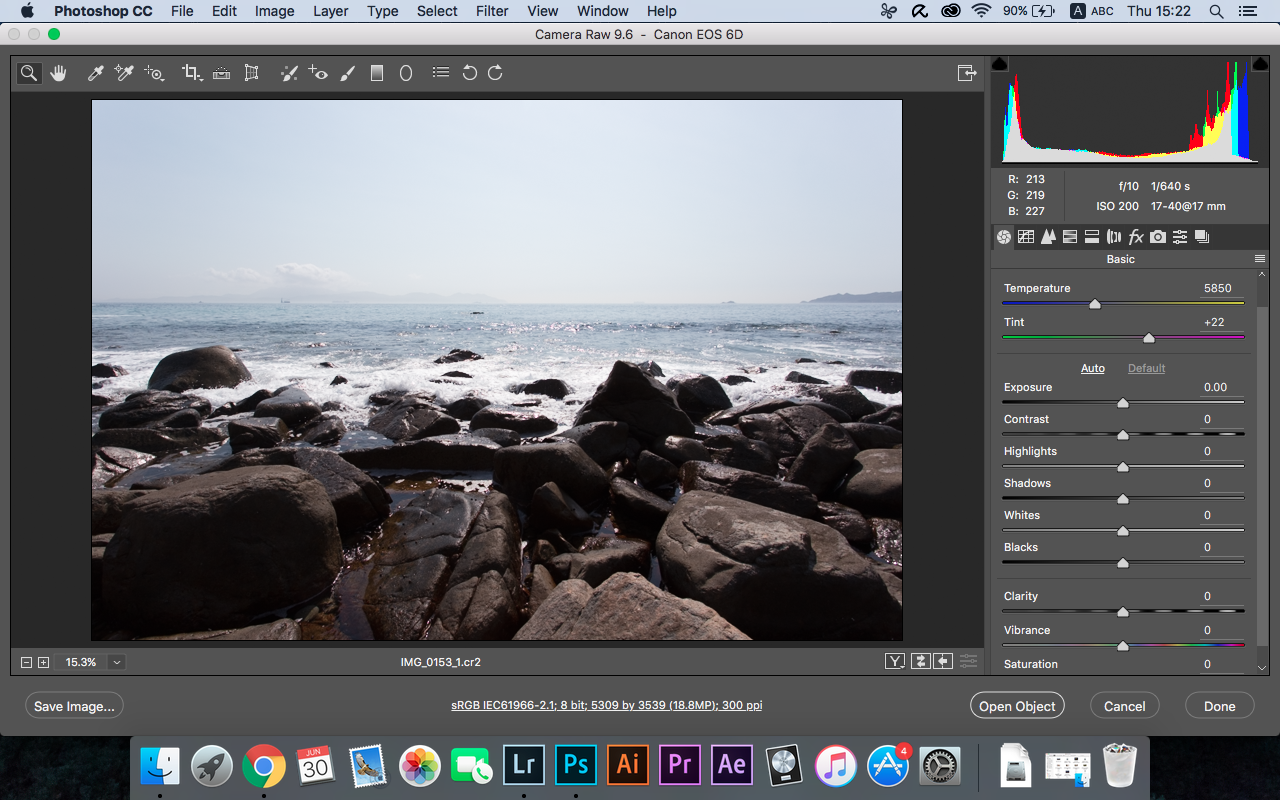
First a slight digression, I have just updated to CC 2015.5, which is the latest version of Photoshop with notable improvement. I would recommend you to install the update if you have subscribed to the Adobe Creative Cloud. Nevertheless, older versions will do fine for this particular edit. This is the photo that we are going to work on today. It was shot in the afternoon of a sunny day. Although the sun was hanging high up in the sky, as you may notice, the rocks were not sufficiently lit in the front. It resembles a backlit scene to a certain extent. The photo is dull and unappealing in terms of vibrance. It is dominated by plain black and pale blue. We will have to fix these problems during retouching. The photo was shot in RAW file. Camera Raw editor will pop-up once you opened it in Photoshop. For Lightroom users, you may still follow the steps below as the UI of Camera Raw editor is similar to the one in Lightroom.

First and foremost, we have to recover all the details of the photo. As you would expect, we need to suppress Highlights and Blacks and vice versa for Shadows and Whites. While adjusting the value of Blacks and Whites, you may drag the slider while holding Alt (Windows) or Opt (Mac) key down. You will be able to preview the areas that are subjected to clipping. Clipping happens when parts of the photo are too dark or too bright. They will appear in pure black or white. You will lose the information in these areas once you export your photo to JPEG. Thus, you should always make every effort to prevent clipping.

In order to make the photo looks refreshing, which is a major characteristic of Japanese style photography, we need to boost the exposure to brighten up the whole scene. Raise the exposure until most of the data move to the right on Histogram without touching the edge of it. Furthermore, we would reduce Contrast considerably to further recover the areas that are insufficiently lit.

Navigate to the bottom of the panel. You will find the parameter Saturation. We will increase the Saturation a bit to make the photo looks more vivid. Undoubtedly, it is not a must and sometimes you may even want to reduce the Saturation if the photo is filled with colorful backgrounds and objects.
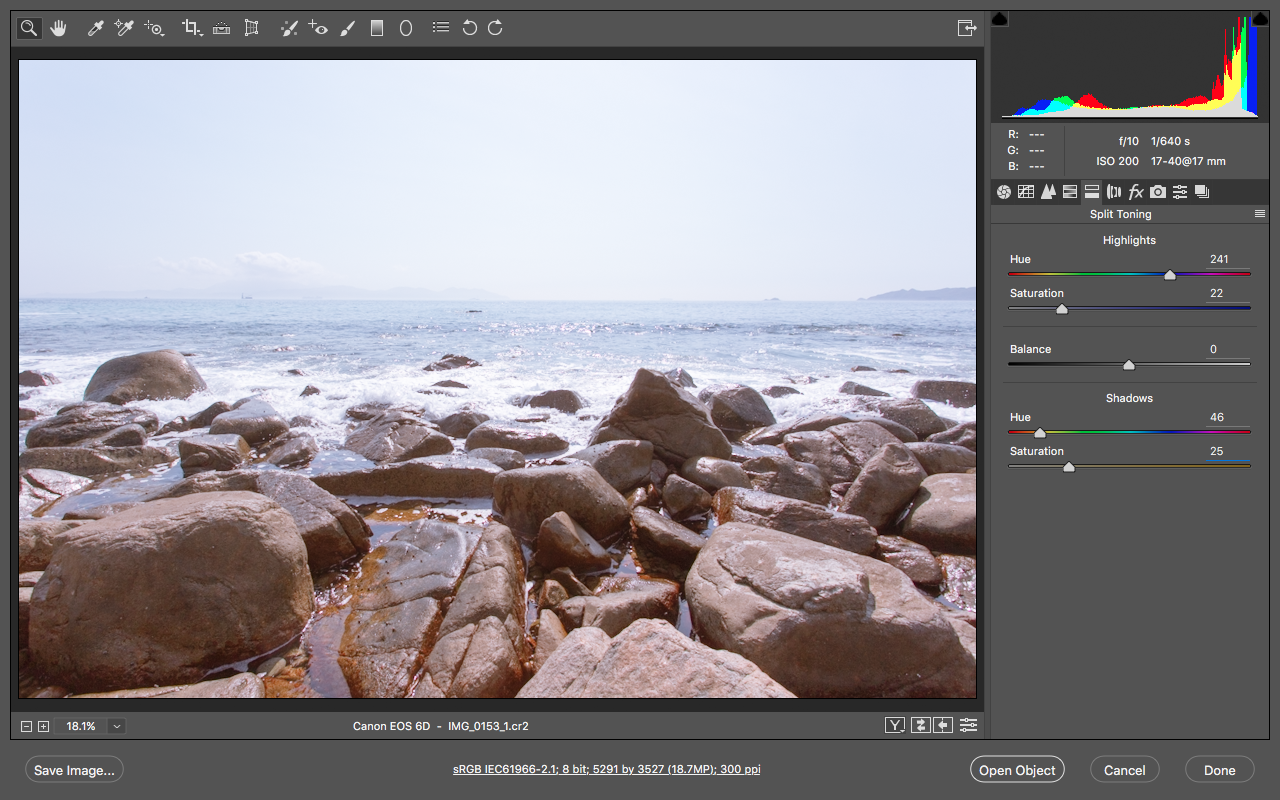
THIS IS THE MOST CRUCIAL STEP! Navigate to the Split Toning panel as we are going to adjust the color tone of the brighter and darker parts separately. In order to achieve the toning of Japanese style, we want the Highlights to look bluish while the Shadows appear yellowish. Drag along the Hue sliders so as to select the appropriate color for Highlights and Shadows respectively. Then, give them an appropriate amount of saturation. To have a further tweak on the toning, you may look into the Balance parameter. If you hope to get a more bluish result, move the slider to the right or vice versa for a yellowish photo.
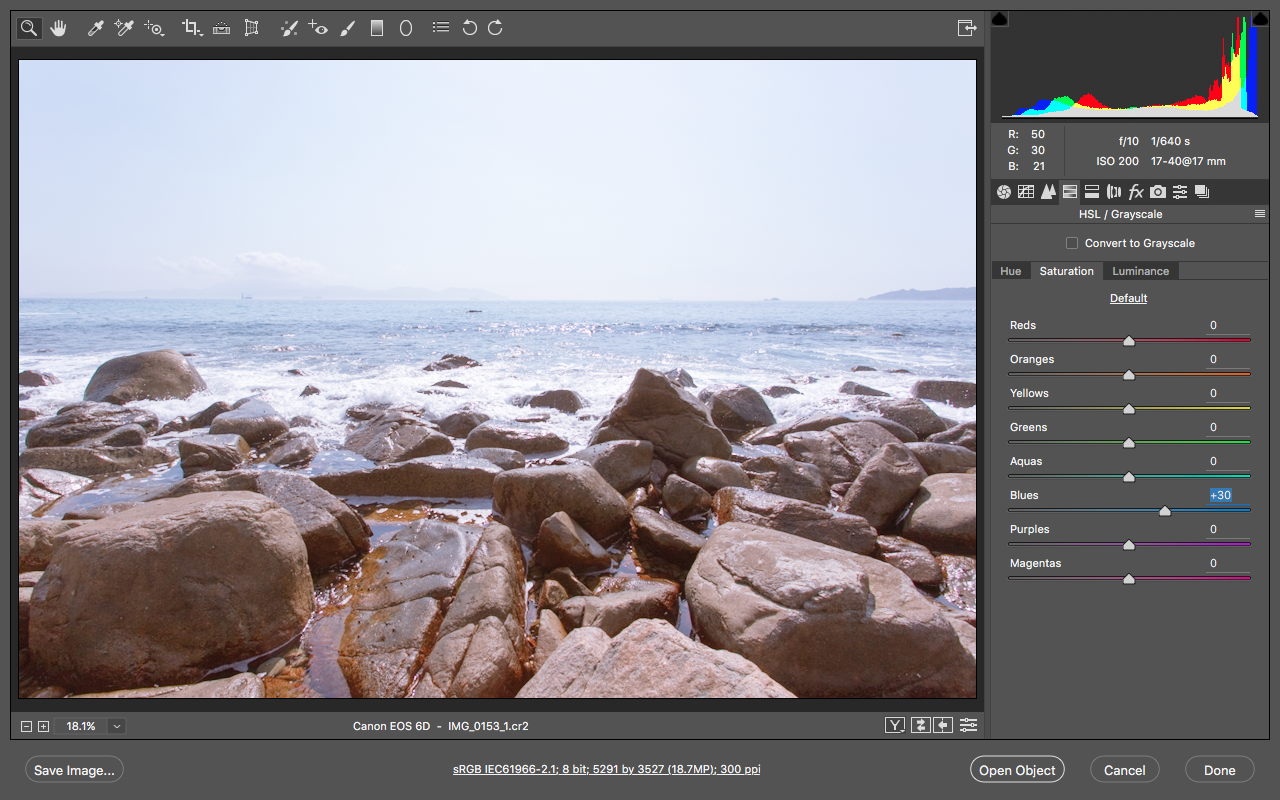
You may also look into the HSL panel and give the Blue a boost because blue is one of the dominant colors in Japanese style photography.
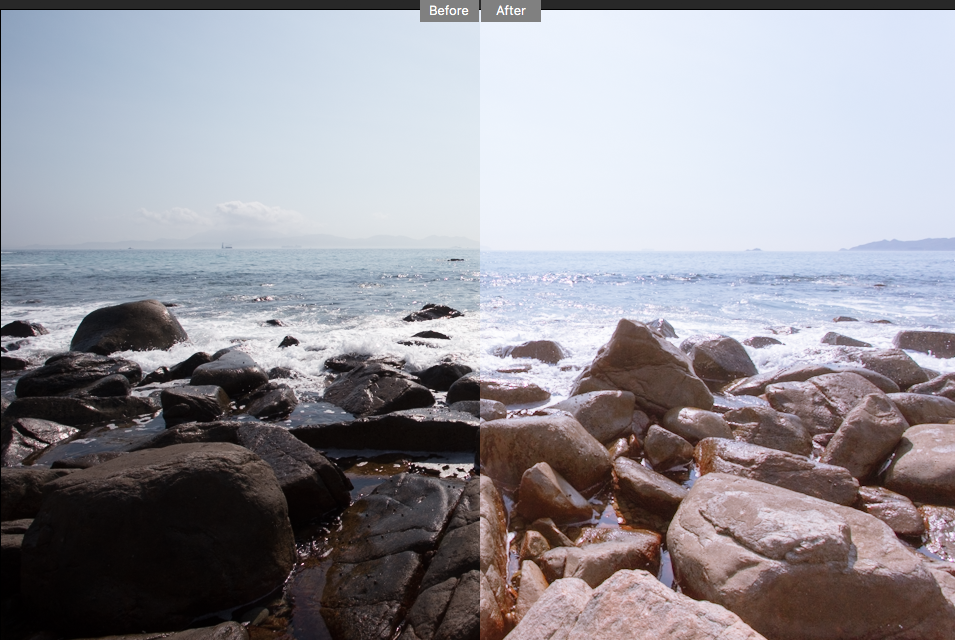
Here is a comparison of the before and after. I hope you have enjoyed these two consecutive tutorials on Japanese style photography.
Next, check out how to add texture in photoshop. Check out more photoshop textures products here.


Please verify your software version before proceeding.
 I’ve verified my software version


 Facebook
 Google +
Comments (1)
Nice