Are you looking for a quick tutorial on how to install Lightroom presets? If that’s the case, then you have landed on the right page because here you can know. This tutorial will help you learn the easy steps to install lightroom presets on Mac as well as on Windows. Don’t forget to check the version while following the steps. For photographers, this guide is a dream come true! Ain’t that good news?
What Are Lightroom Presets and how to install Lightroom presets?
Presets in Lightroom classic are different kinds of settings that are created by photographers, photographic manufacturers and companies. As per your need, any adjustment can be applied to any image with the help of presets. Lightroom Presets are tweakable too. One can also create their own presets and use them in the future. Adobe Lightroom comes with its own presets, installed default with the software. Presets are only used by Lightroom. A few companies do make presets like VSCO Lightroom presets. The installation of Lightroom presets is very simple and with this article, you can learn the step-by-step process of how to add presets found on the internet. Since the presets are available online, all you got to do is get them from the website of your choice. You may be following a website of a particular photographer who provides presets that work best for you. So you can get presets from there as well.
The good thing about Lightroom Presets is that you can find thousands of custom-built Lightroom Presets that are created by professional photographers. Different types of presets that you can shop for include minimal looks, classic styles, vintage and retro film effects, food photography preset, black and white effects, and much more.
With the help of versatile Lightroom presets, you can easily set up the workflow of your editing. The Lightroom presets also help in improving the color, light, tone and contrast in the photos. Once you know how to install Lightroom Presets for the various operating systems, you can then add various kinds of presets that are developed to fulfill a variety of purposes, including travel and lifestyle photo filters, and other unique photo effects. Read ahead to find out how to install Lightroom presets.
Note – Kindly follow all the instructions properly given in this post and improve your photography skills quickly.
A Step-by-step Guide to learn how to install Lightroom Presets
Congratulations on your new preset bundle! You are taking the first step in becoming a better Lightroom classic user by knowing the best way to install lightroom presets provided in this post. We will also show you how to install develop presets folder. Follow the procedure that matches your operating system, i.e., Mac or Windows. Why should you do that? Because the steps to install change depending on the OS and version you choose
Here is a video on how to Install develop Presets folder in Adobe Lightroom for LR6 and older. You can also choose or select our step by step tutorial given below in this post:
Please remember this step-by-step solution does not apply to Adobe Lightroom mobile develop presets folder. Lightroom presets on mobile versions depend on the subscription license. Please check our Adobe Lightroom Presets Mobile guide here.
Learn how to install Lightroom Presets in Lightroom (lrtemplate files format) for WINDOWS USERS
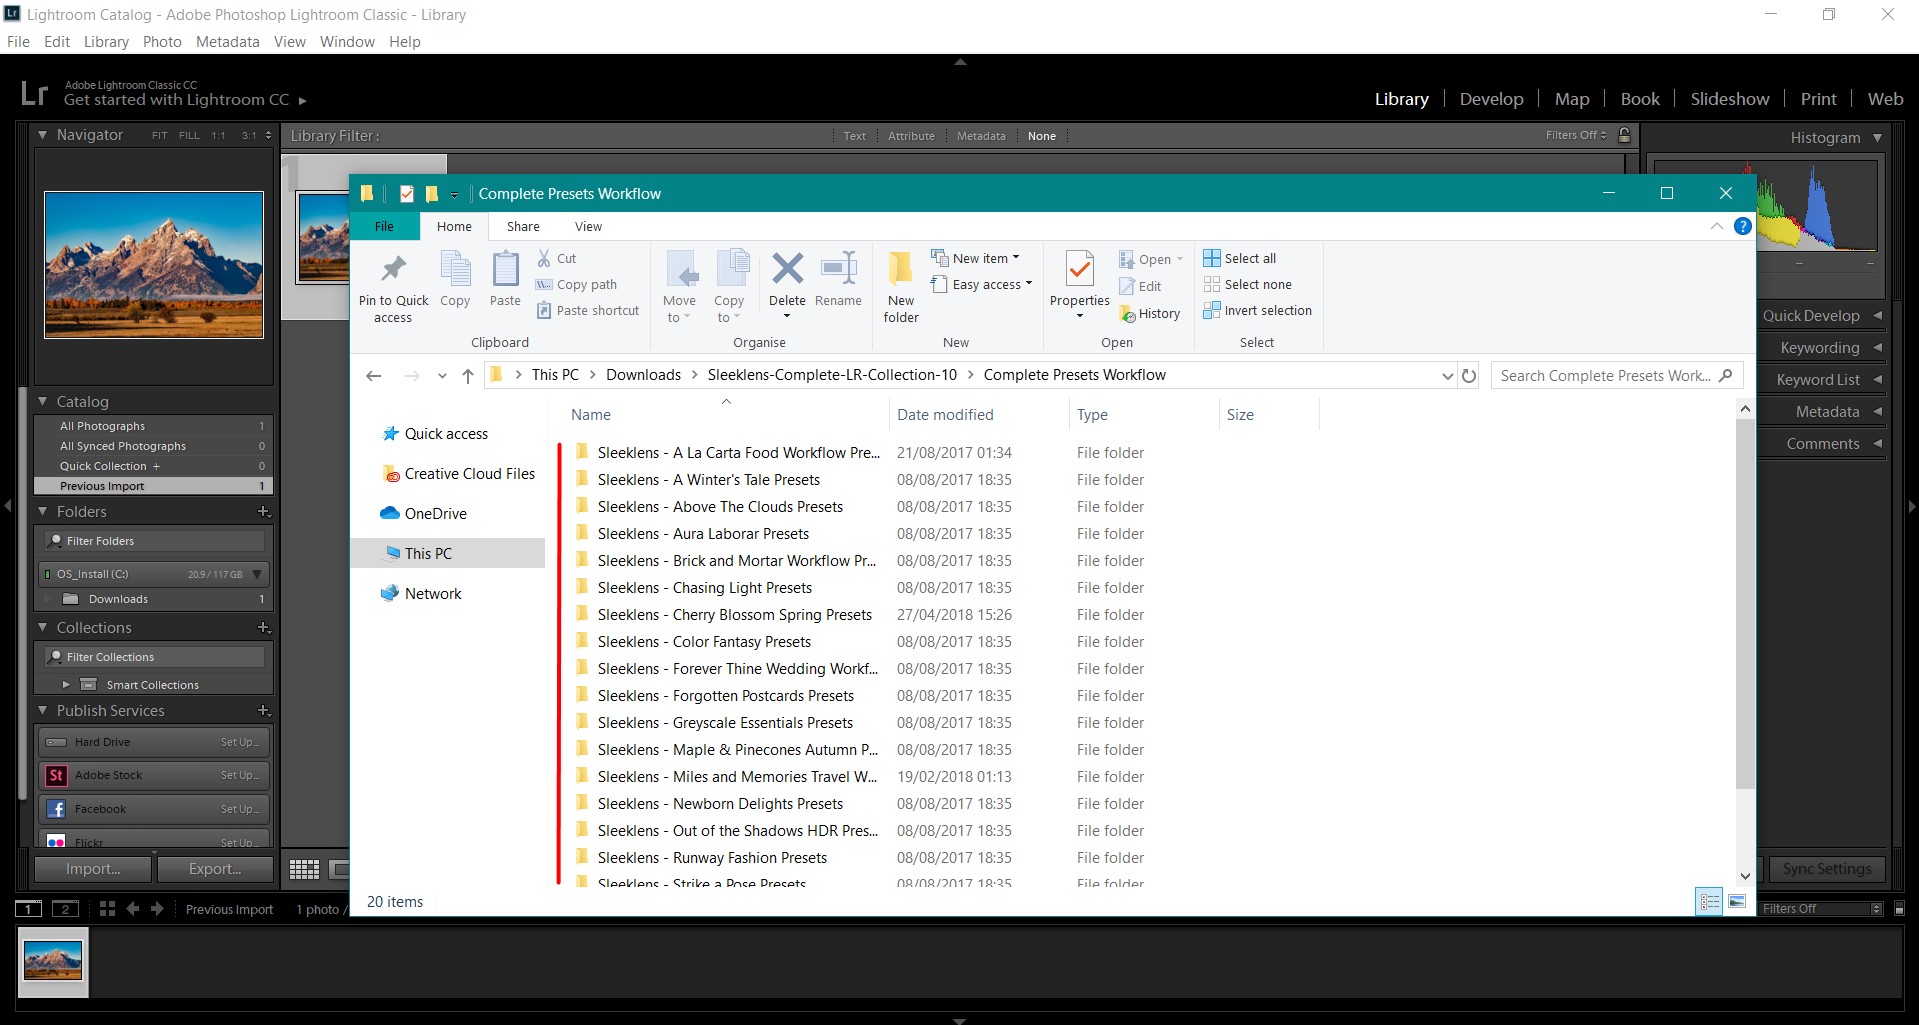
1. Locate the folder where your presets have been downloaded (for Windows 8 users and above, it is commonly located in C:\Users\<Username>\Downloads).
2. Extract or choose the downloaded lrtemplate files (it may be zip or rar file; we recommend using Window file extractors such as Winrar).
3. Choose or select folders that include the presets. They should have the bundle name followed by ‘Presets’. CTRL+C for copying them.
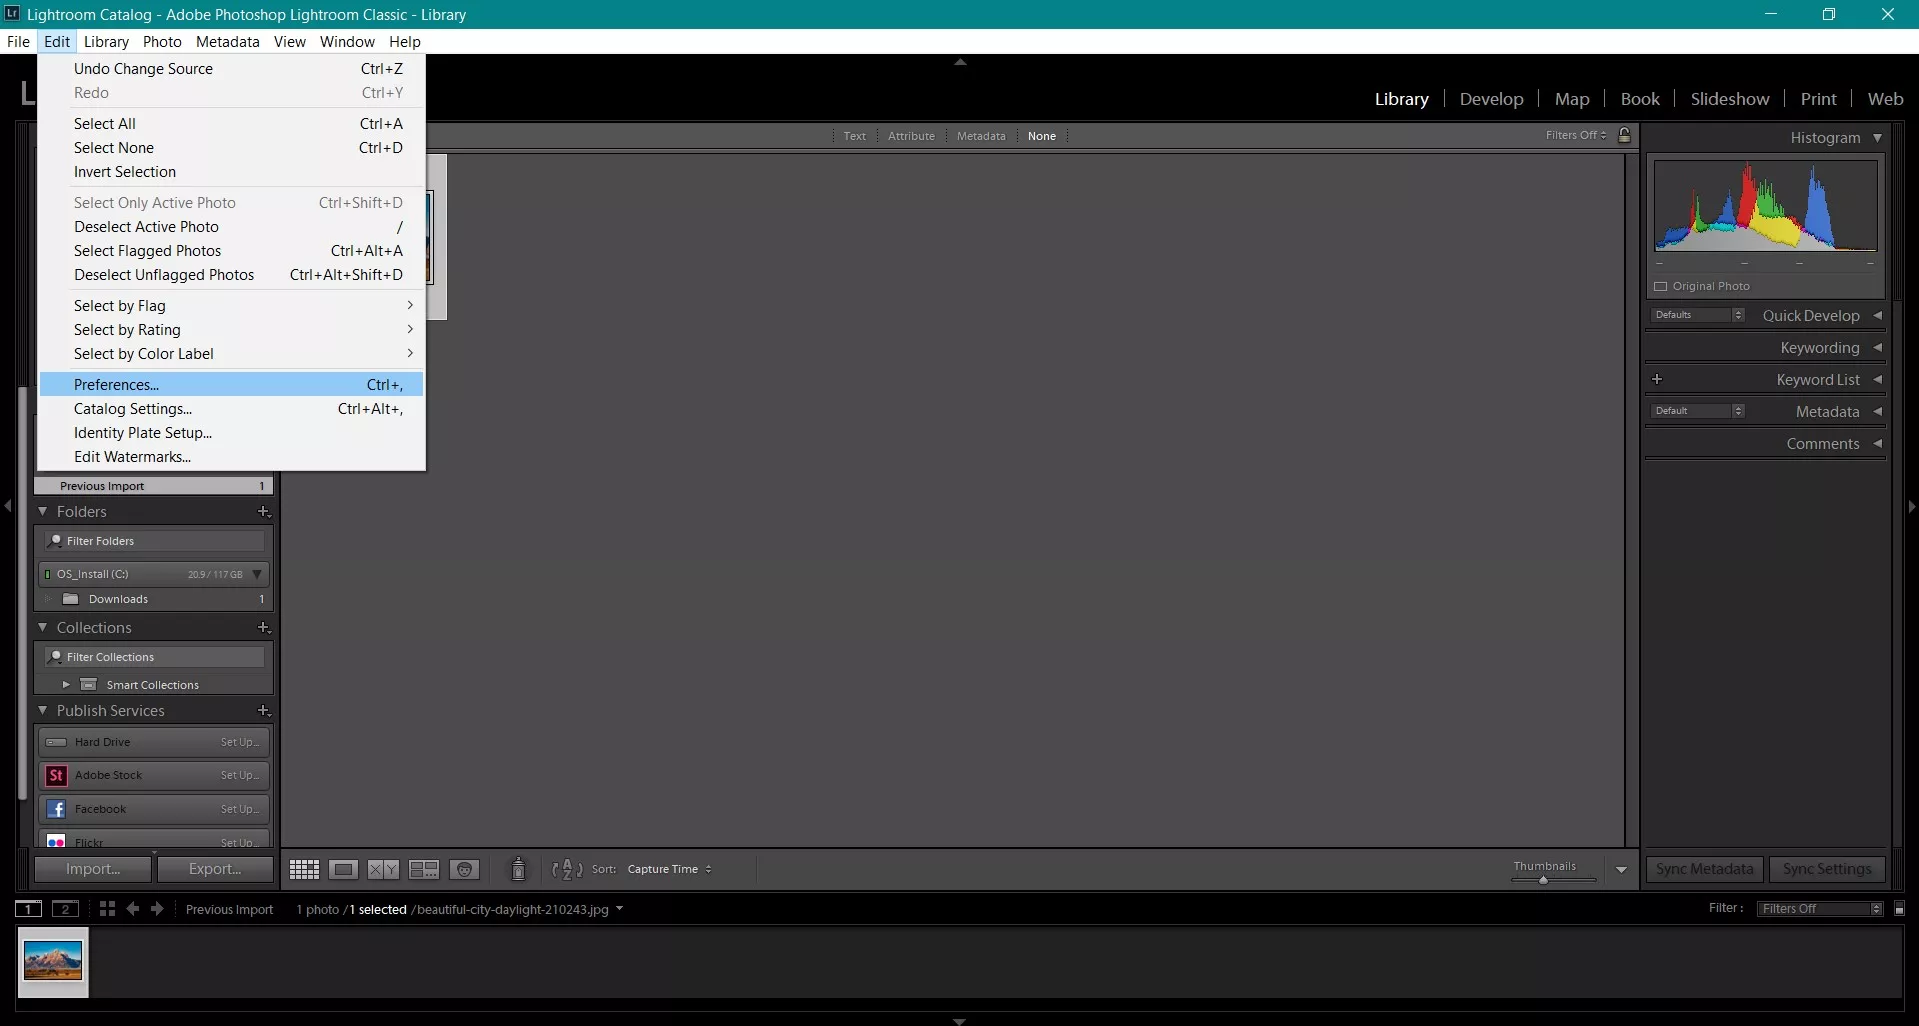
4. Unzip Adobe Lightroom (probably the latest version) by clicking on the icon and visit the Preferences Menu.
5. This step will vary depending on the Adobe Lightroom version you have. Read as it applies.
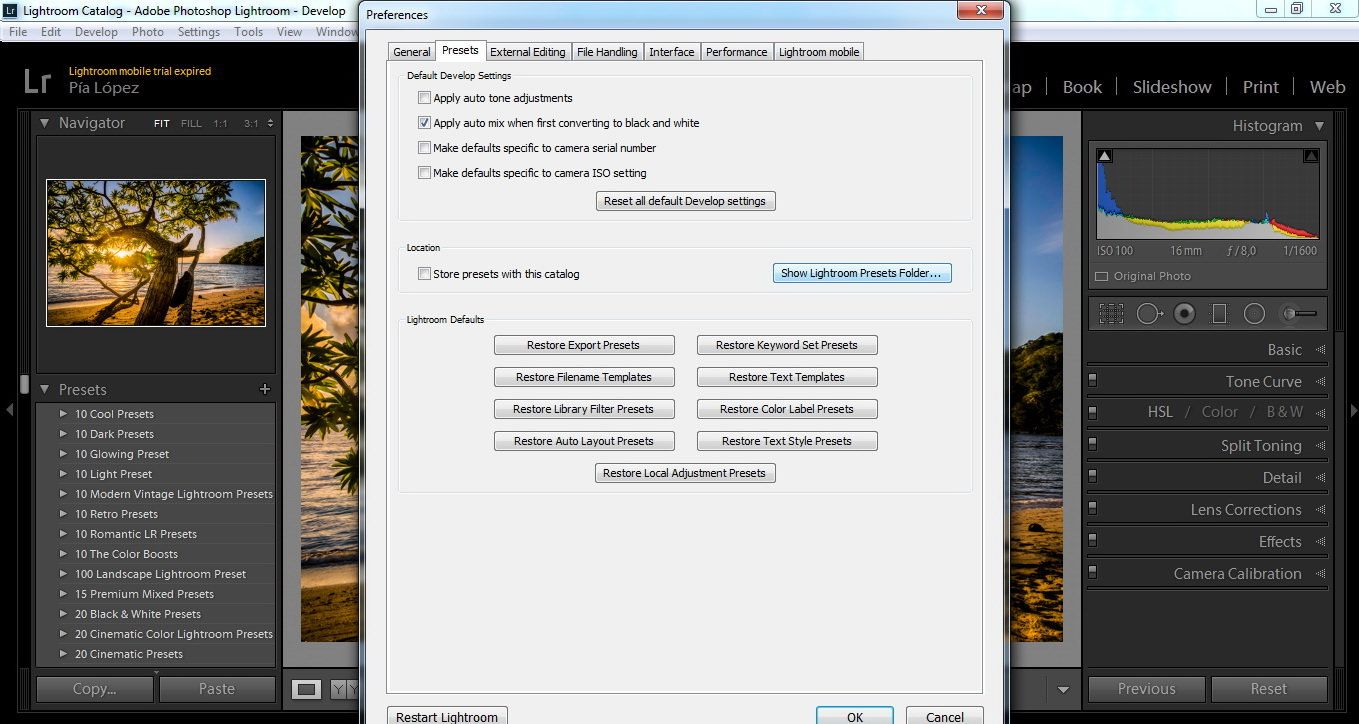
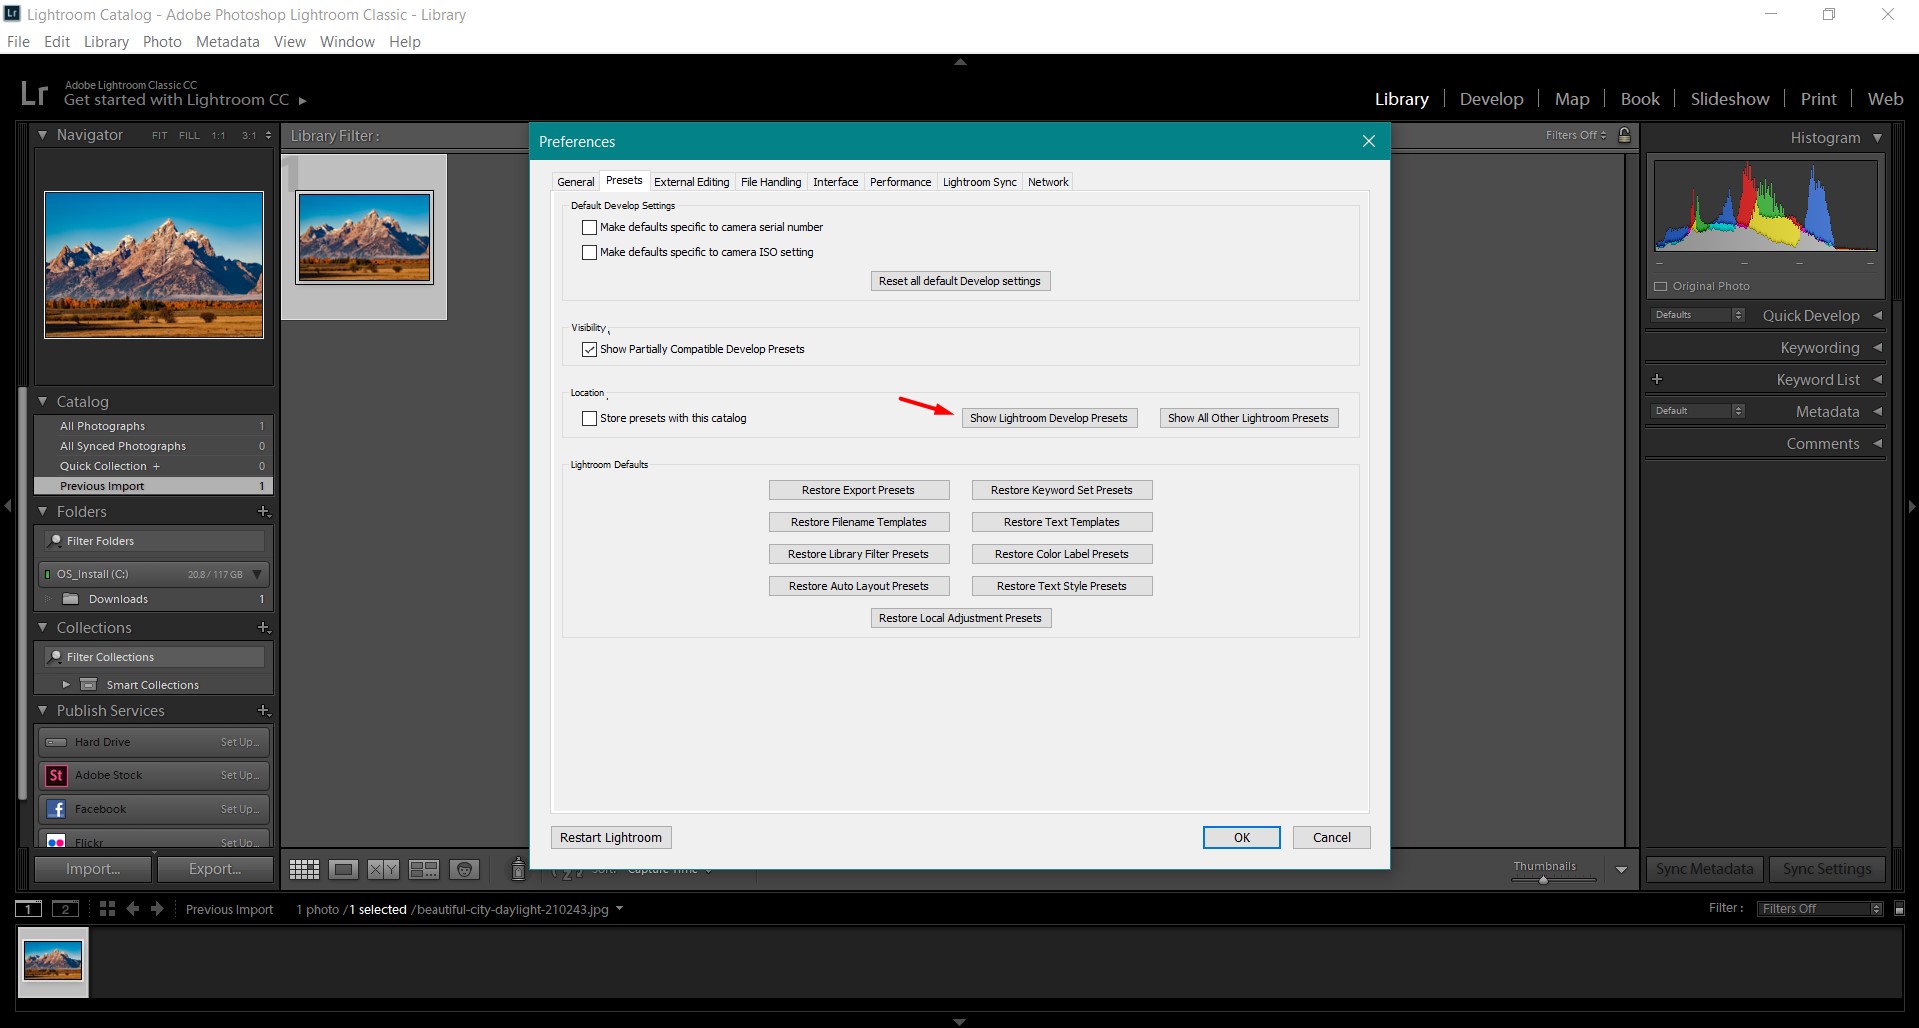
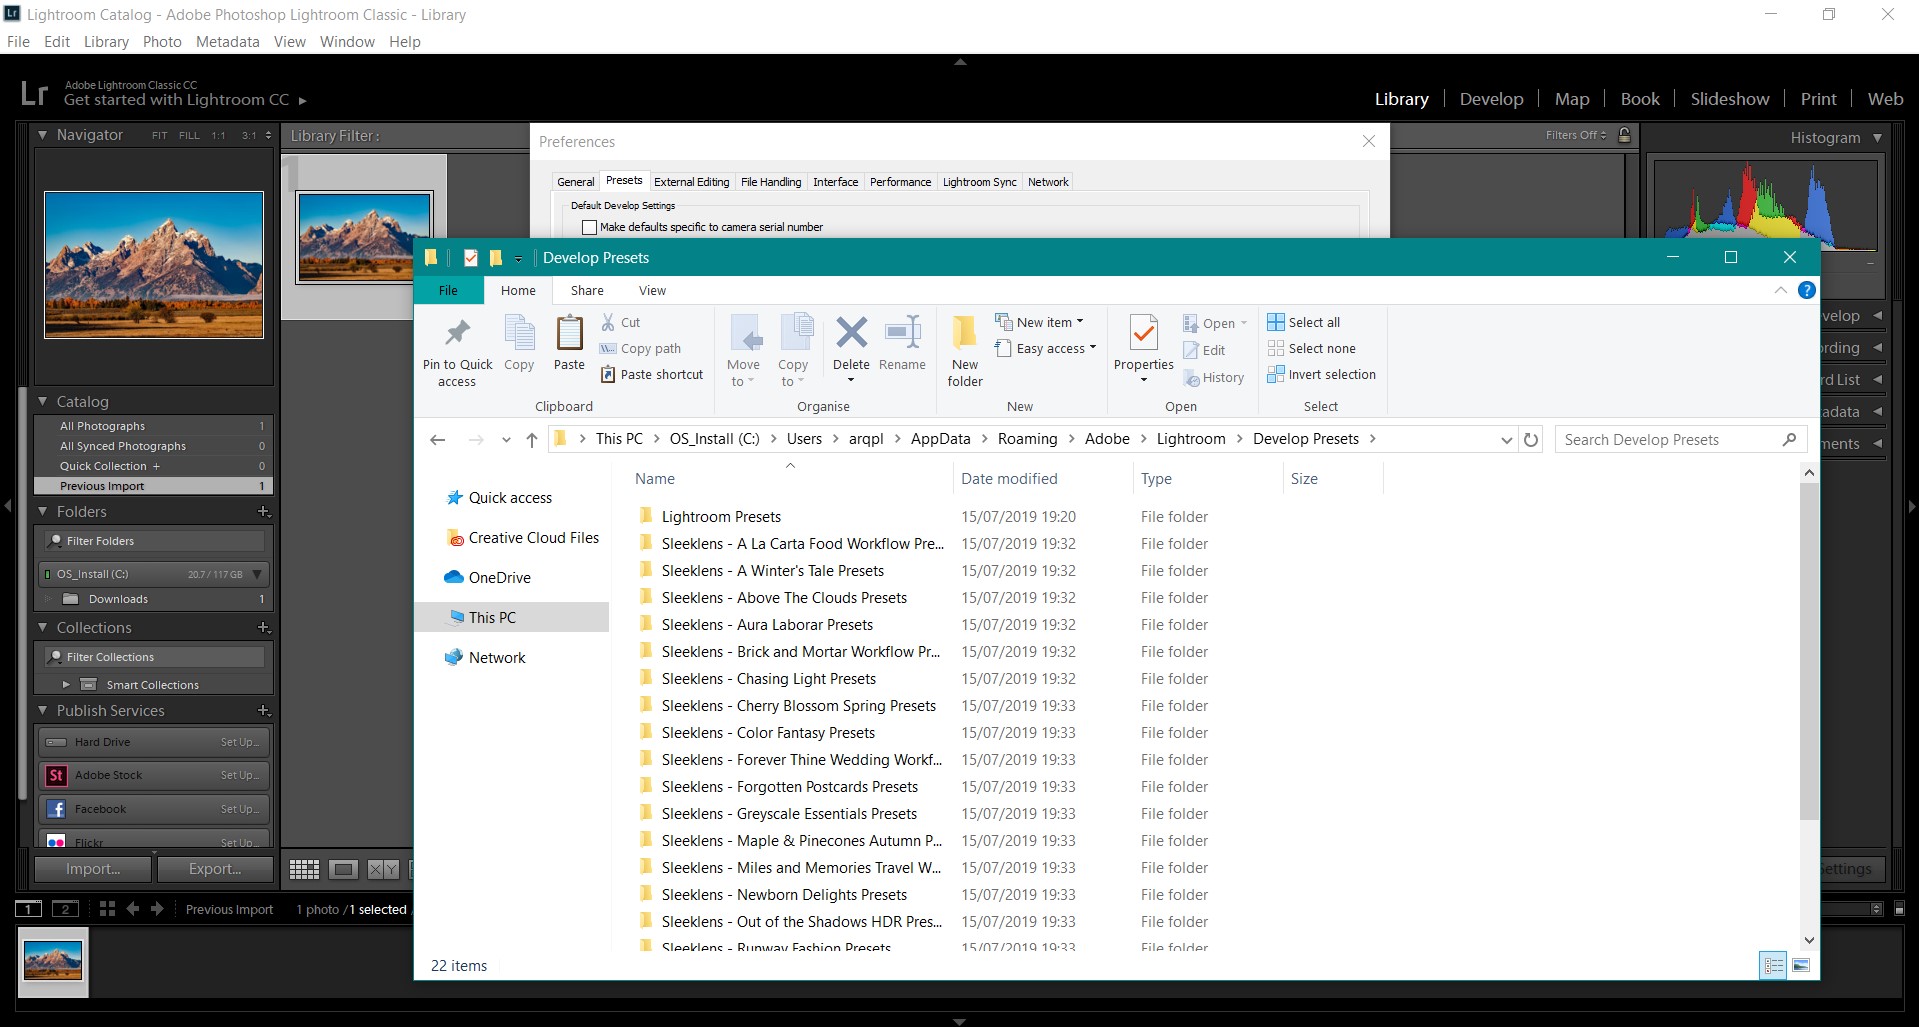
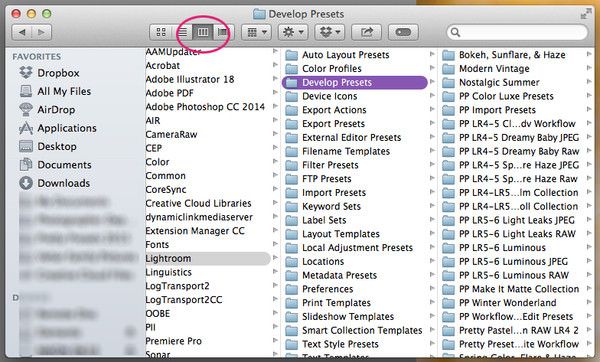
Choose or select the Presets tab and select ‘Show Lightroom Presets Folder…’ Depending on your Lightroom version it could also be “Show All Other Lightroom Presets”.
Select by double-clicking on the Lightroom icon. Then again select by double-clicking on Develop Presets folder.

Post, clicking you will get inside the develop presets folder.
Instructions for Lightroom Classic CC – Install Lightroom Presets
Navigate to Edit Preferences. Choose or select the Presets tab and select Show Lightroom Develop Presets folder post going to edit preferences.
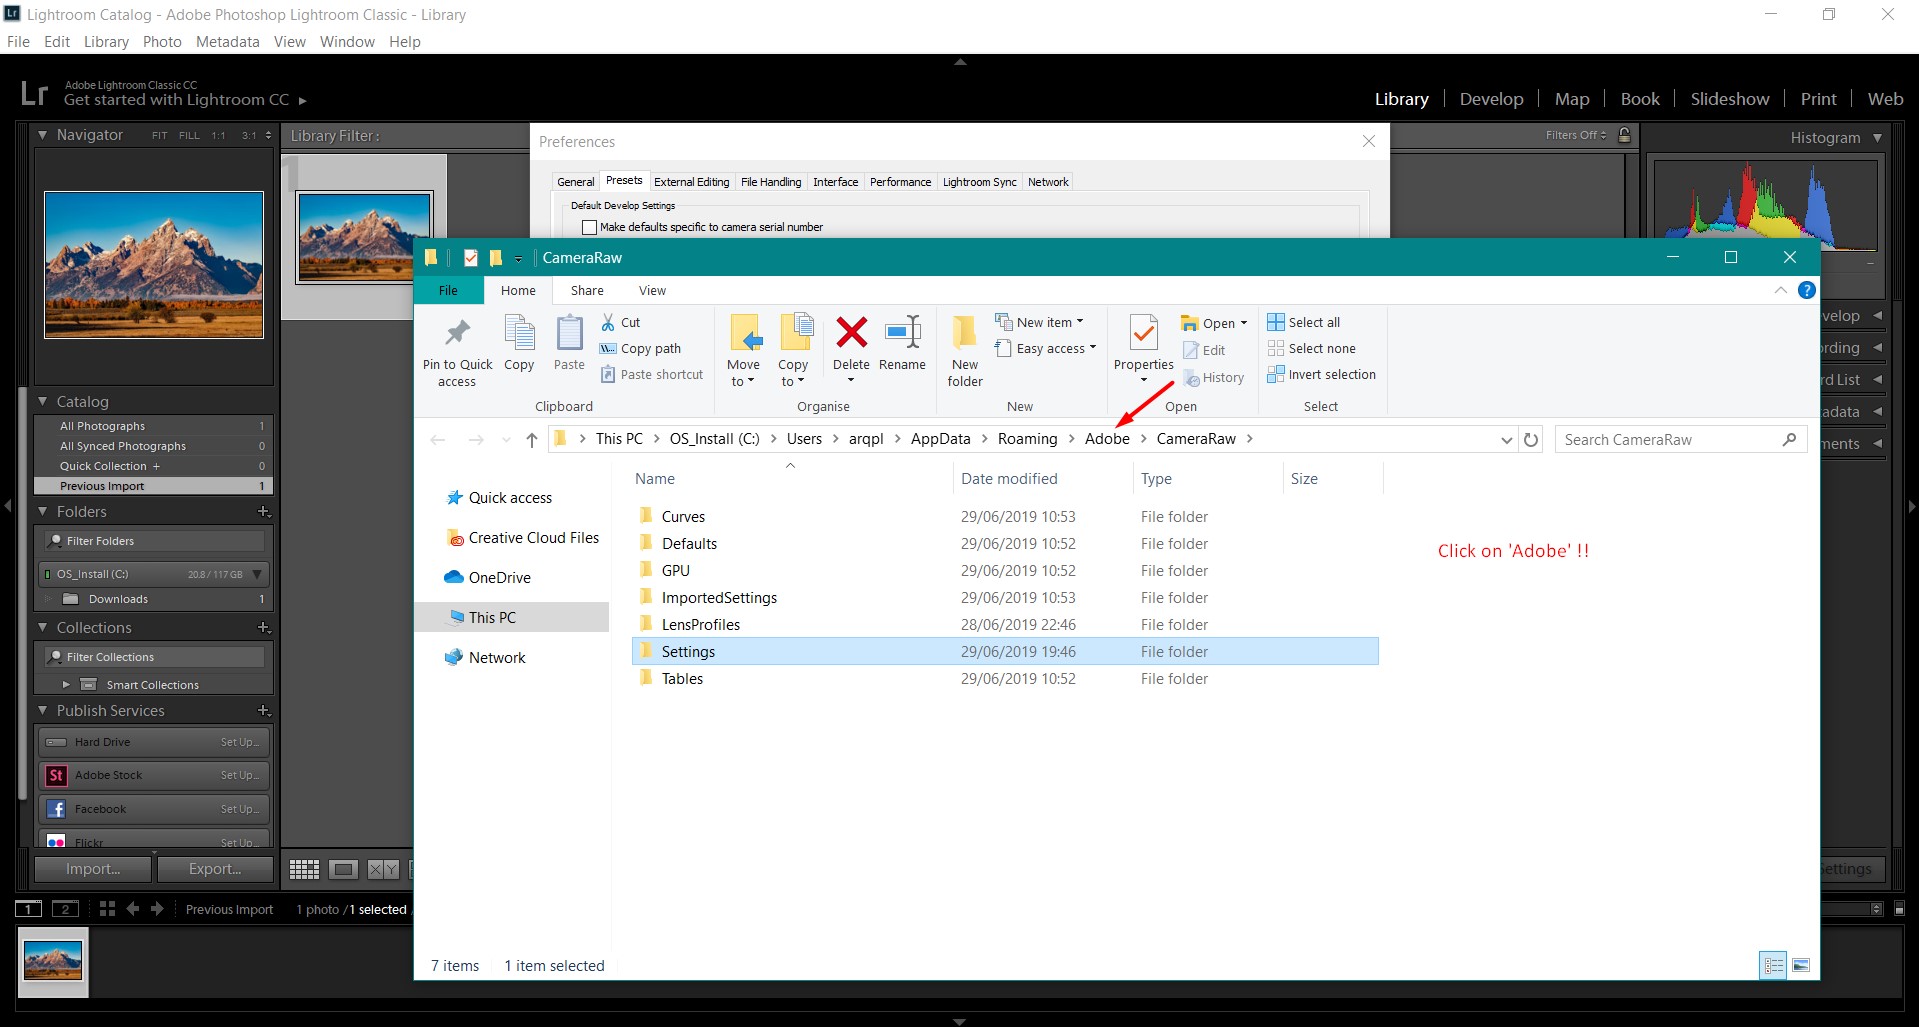
Once you have done the above step where you click on edit preferences, it will unzip the \CameraRaw\ folder – which we will check later for Adobe Lightroom Classic CC users – but now you need to navigate back to the root folder of Adobe Lightroom classic to choose or select the Develop Presets folder.
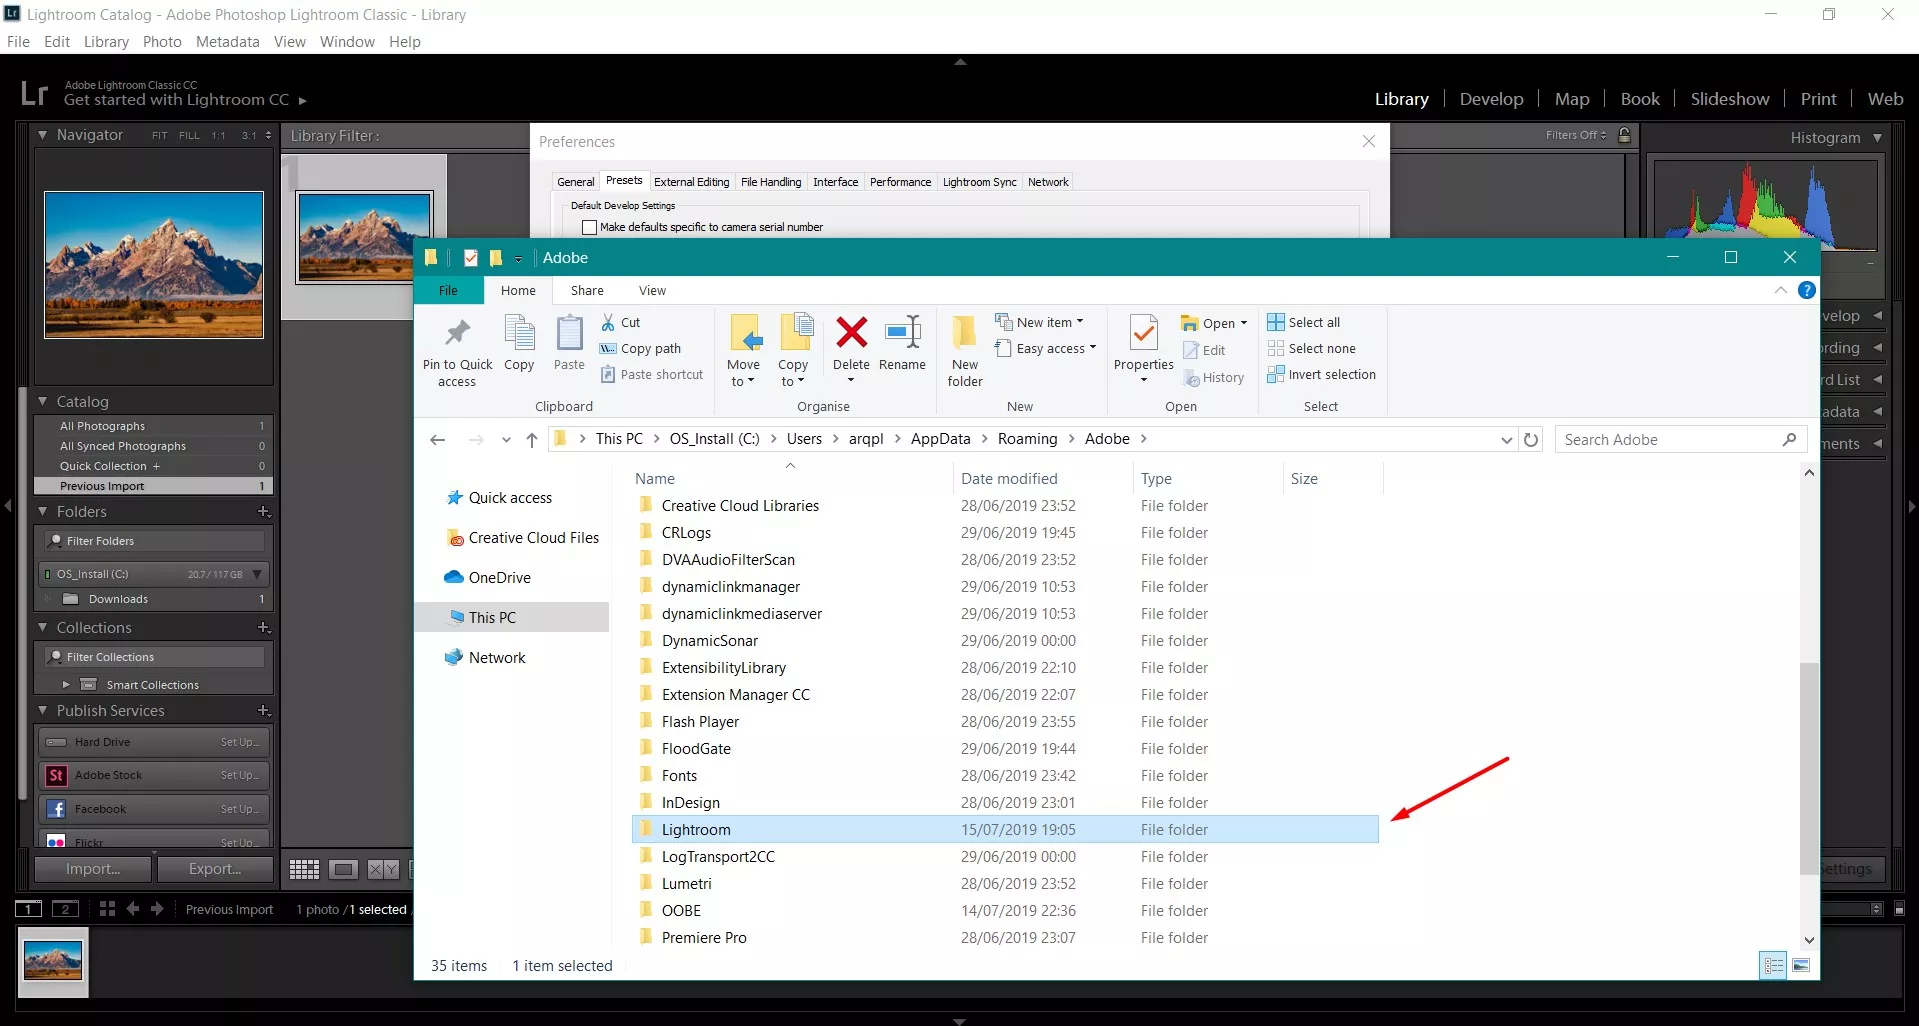
Select by double-clicking on the ‘Lightroom’ folder
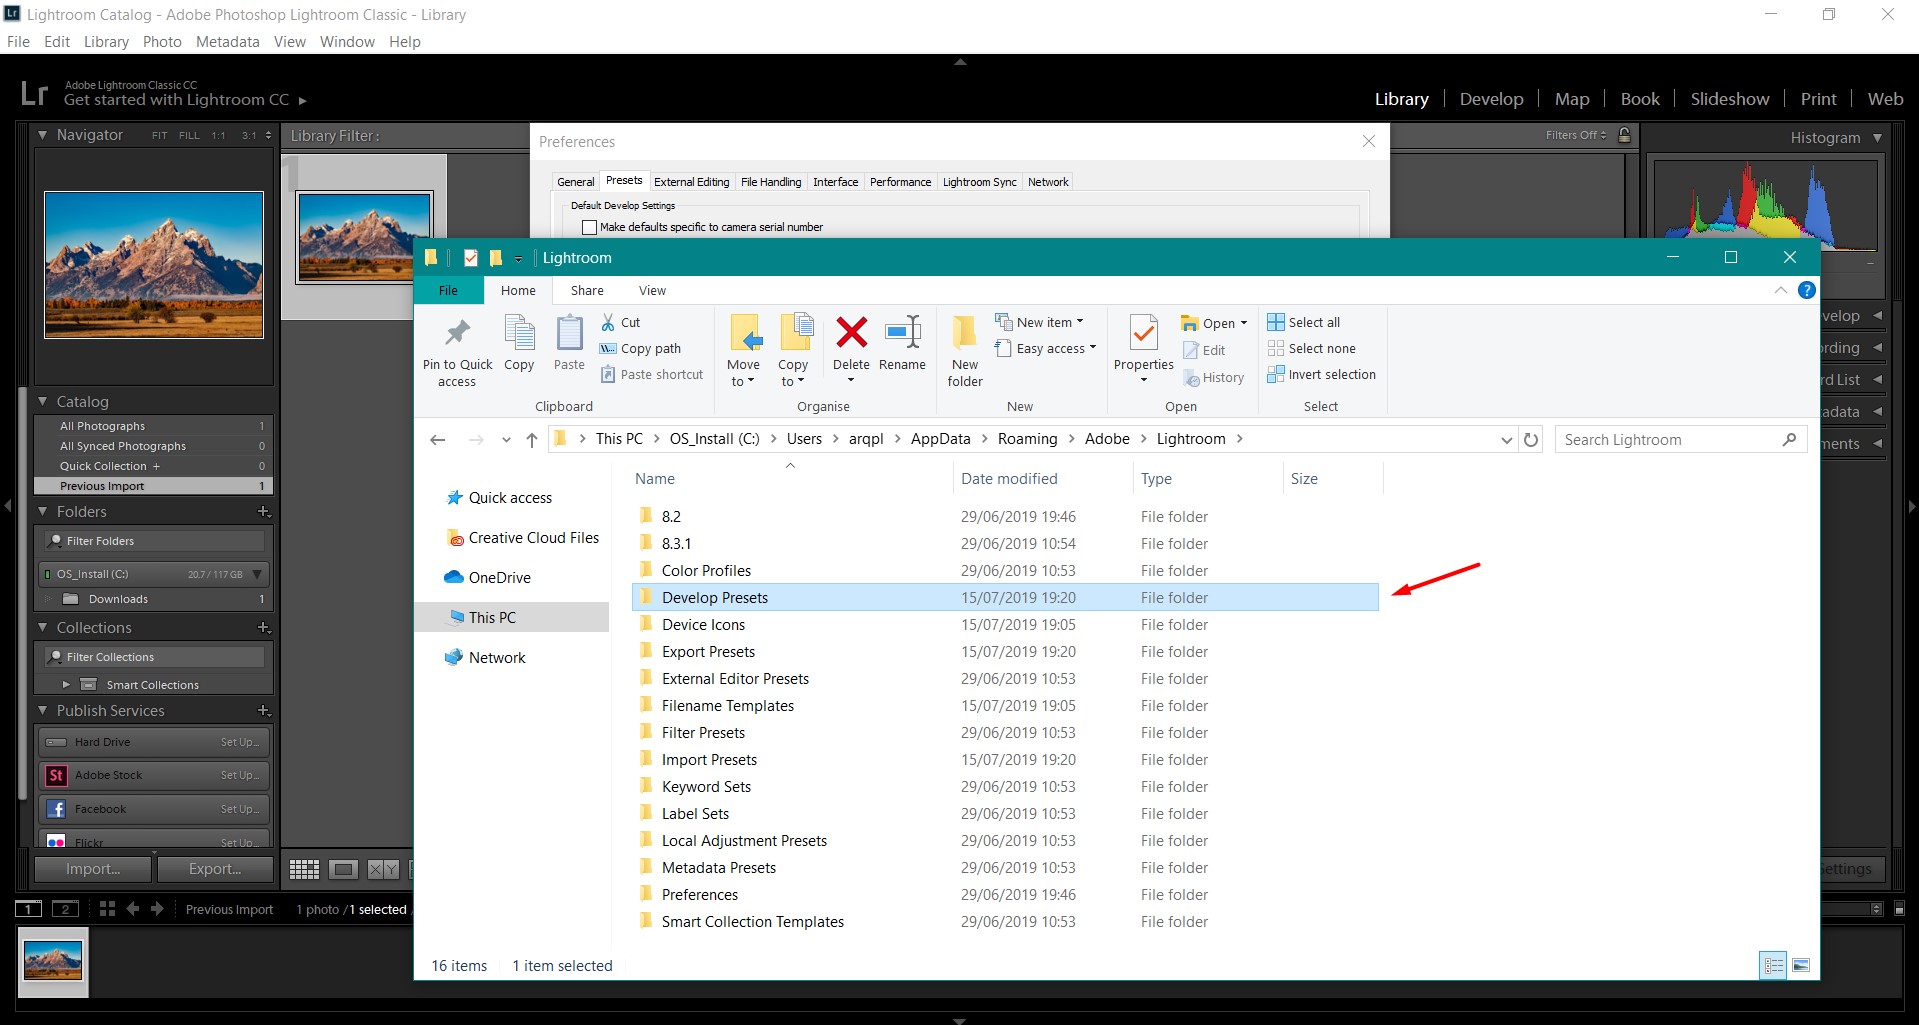
Select by double-clicking on Develop Presets folder
6. Add the Preset files that you want to install. This way you will easily install lightroom presets. It is strongly advisable to maintain folder structure, meaning you need to create a new folder with the name of the Preset bundle, then copy the Window files into that folder. That way the data won’t get mixed up if you own several preset packs.
8. Restart Lightroom classic for making your new lightroom presets folder work.
Remember that you can also install Lightroom Presets by right-clicking at the Presets panel in Lightroom’s Develop Module and selecting the Import option, but the folder structure system is recommended as an easier way to organize your workflow. It is highly recommended to restart lightroom as stated earlier. The import option makes it easy to get things imported.
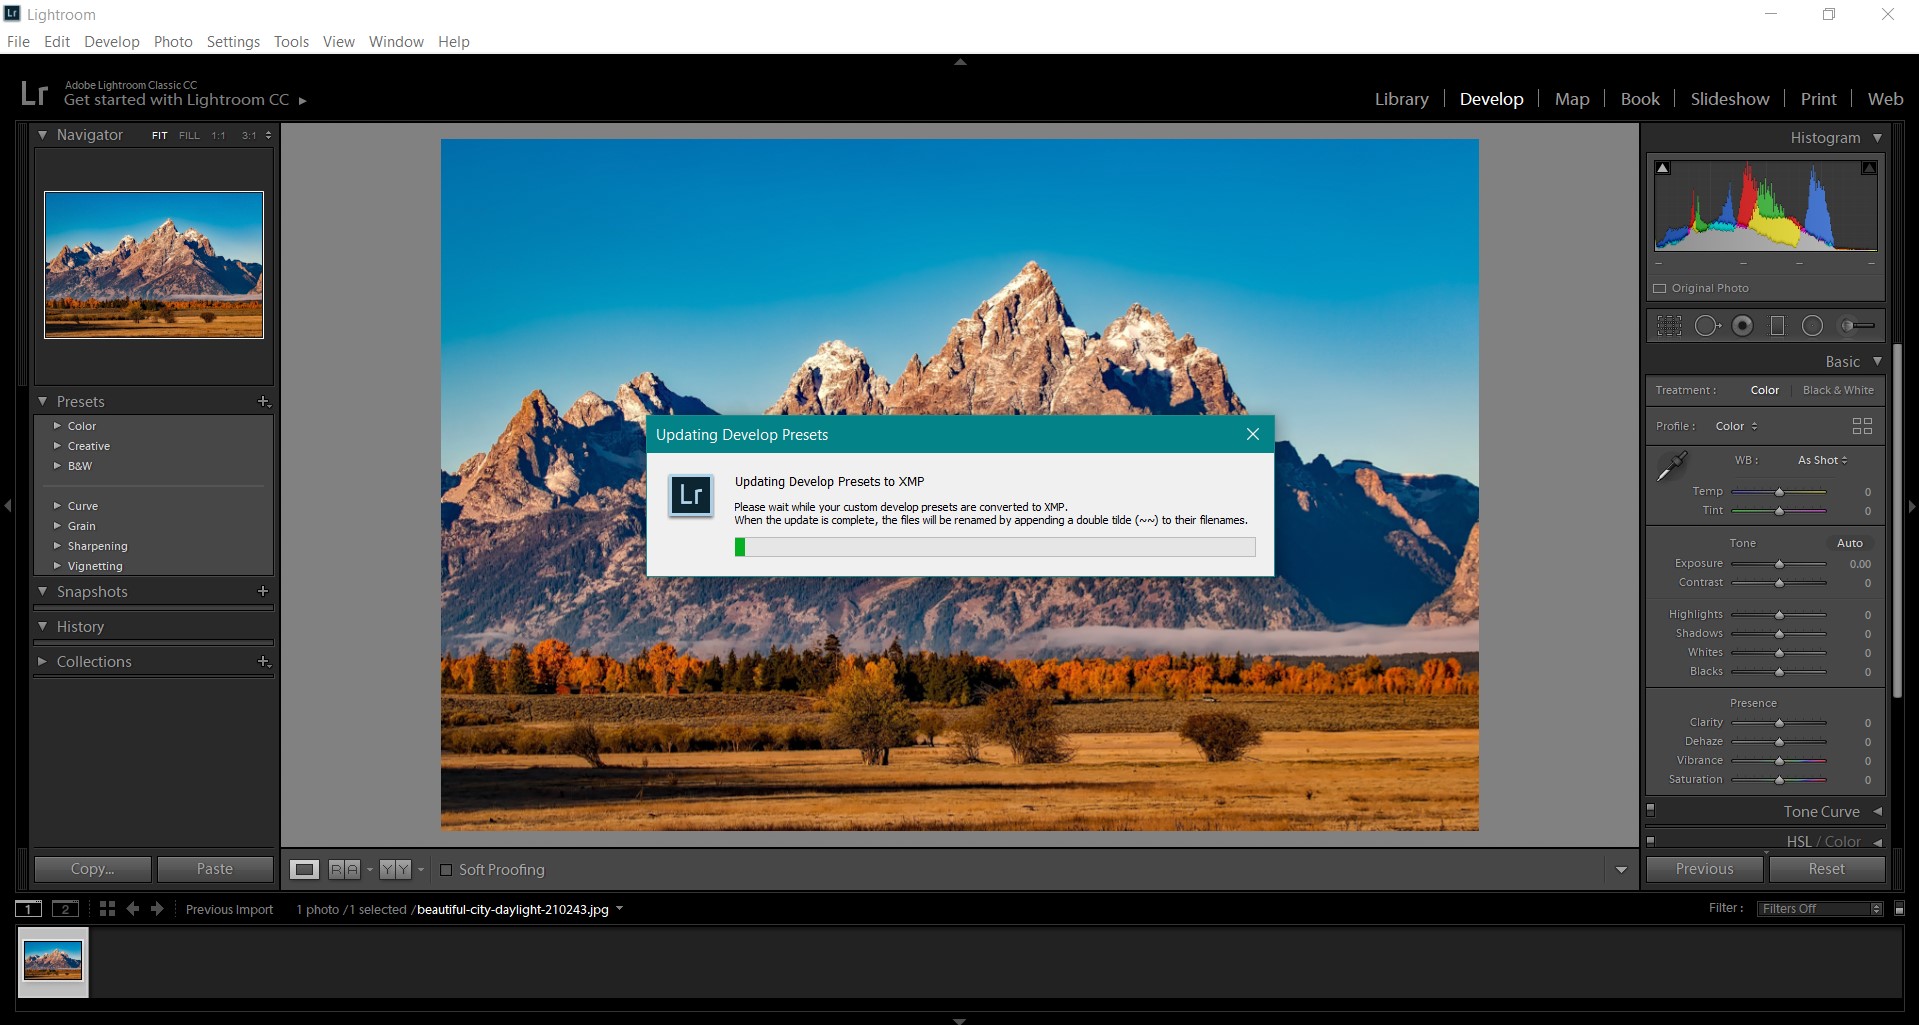
For Lightroom Classic CC Users: Lightroom will perform automatic conversion to XMP format the next time you launch the software, that way lightroom presets folder is updated to the new native format of Lightroom. This process happens just after launch (Develop Module on or not)
If you have any questions related to the develop module, do not hesitate to question us.
Install Lightroom Presets folder (lrtemplate format) for MAC OSX USERS
Choose or select the folder on your Mac where your browser has downloaded the lightroom presets folder on Finder.
Extract the downloaded file (it may be zip or rar file, we recommend you to use Window file extractors such as Winrar).
Go into the MAC_OSX folder and copy the files from there.
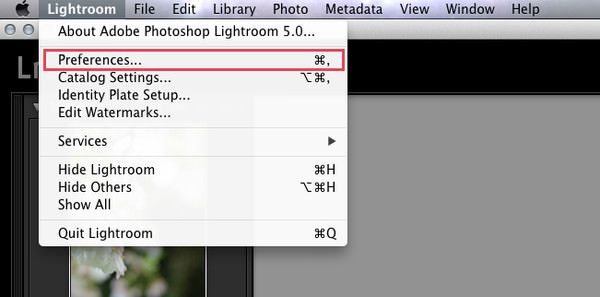
Unzip Lightroom classic and go to the edit Preferences Menu on your Mac system.
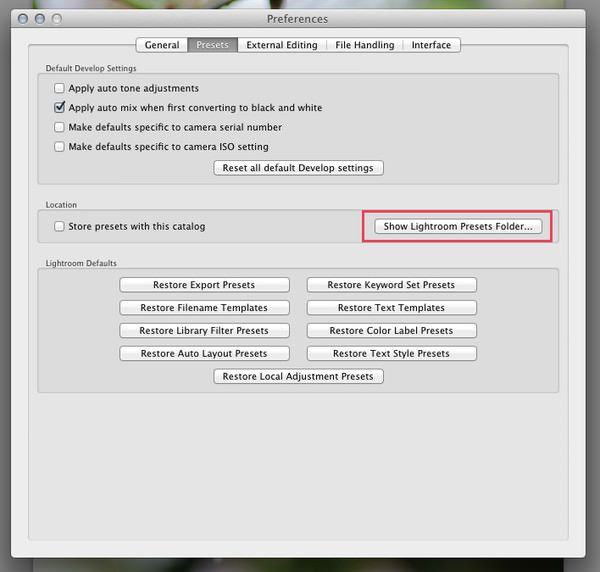
5. Switch to the Presets tab and select ‘Show Lightroom Presets Folder …’ (If working with LR CC, please refer to the steps mentioned above for Windows users)
6. Select by double-clicking on Lightroom. Then again select by double-clicking on Develop Presets folder on your Mac.
7. Add the Preset files that you want to install. It is strongly advisable to maintain folder structure, meaning you need to create a new folder with the name of the Preset bundle, then copy the files into that folder after you select it. That way the data won’t get mixed up if you own several preset packs.
8. Restart Lightroom for making your new Presets work.
Remember that you can also add your lightroom presets folder collection by right-clicking at the Presets panel in Adobe Lightroom classic and selecting the Import option, but the folder structure system is recommended as an easier way to organize your workflow. Never forget to restart lightroom as told earlier.
Show your support, don’t forget to share this post on social media
Installing Lightroom Presets folder (XMP format/ version) for WINDOWS USERS – Lightroom CC or Lightroom Classic CC
Remember step #5 in the lrtemplate step-by-step guide? Well, we shall take on from there.
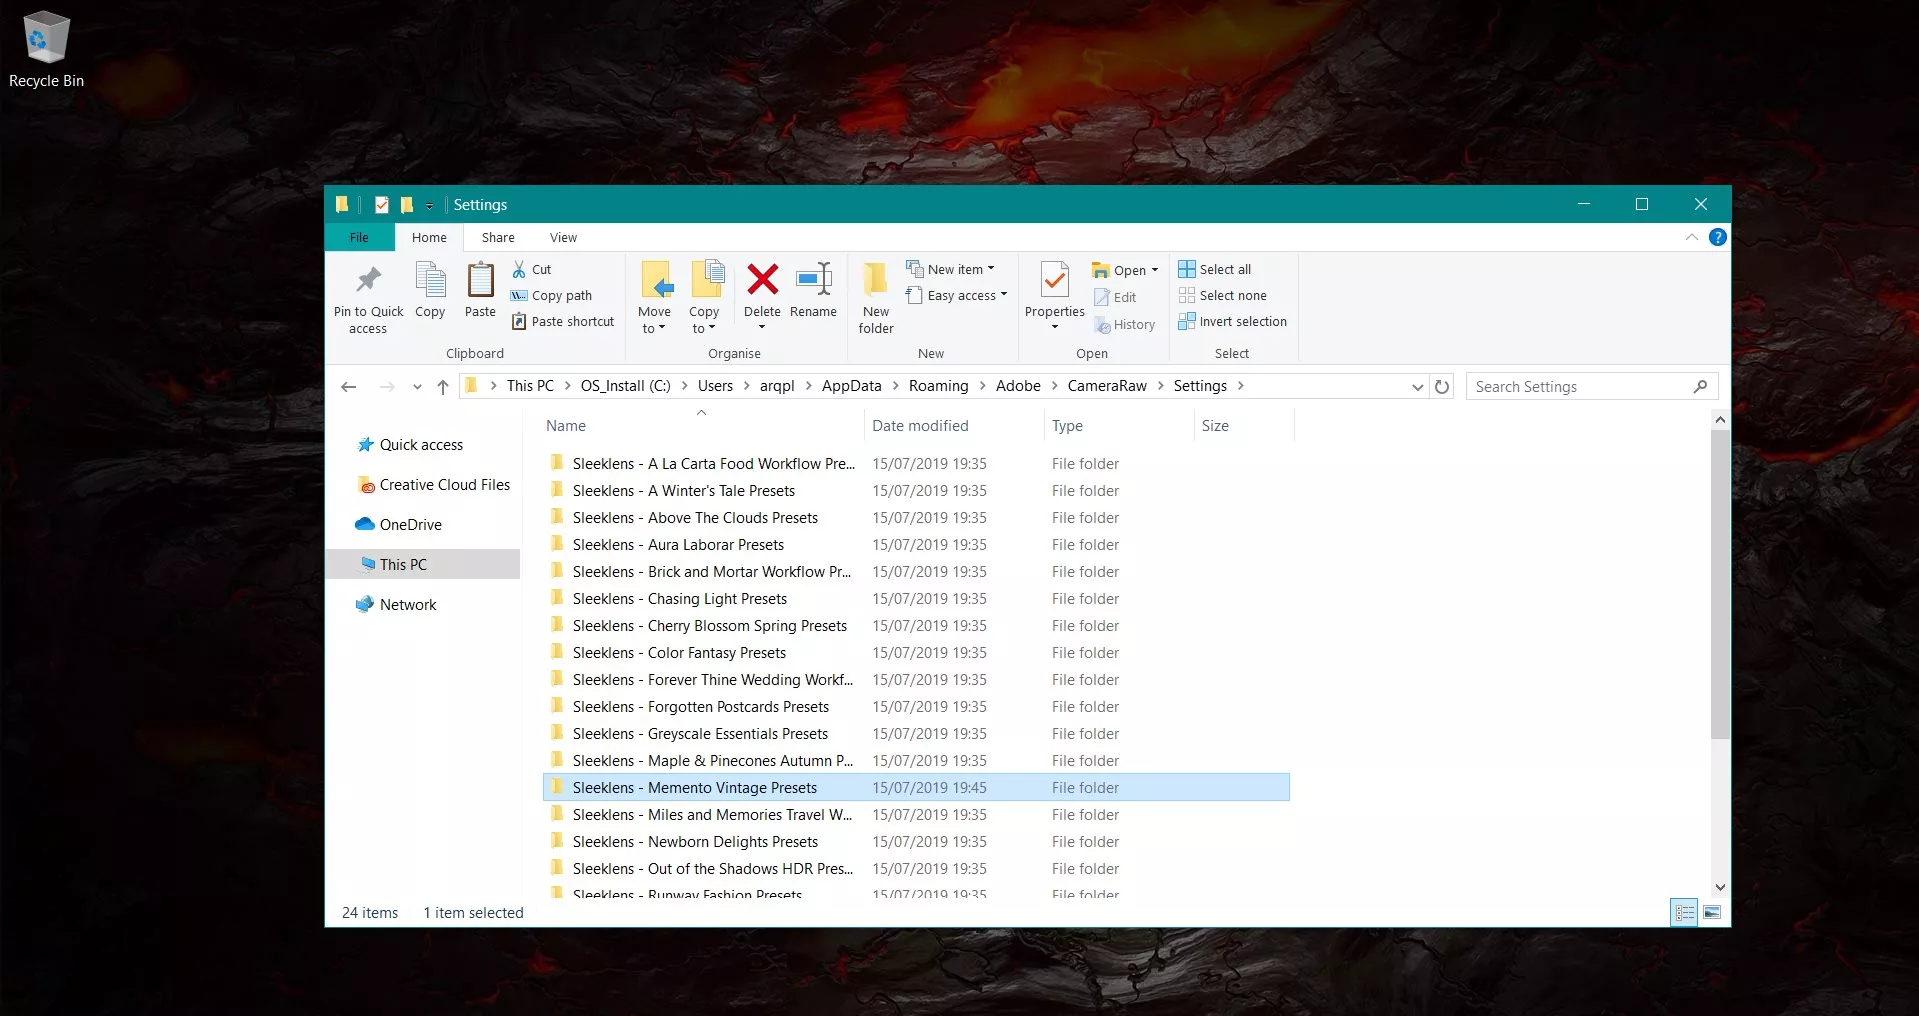
1. Locate and select the \CameraRaw\Settings folder
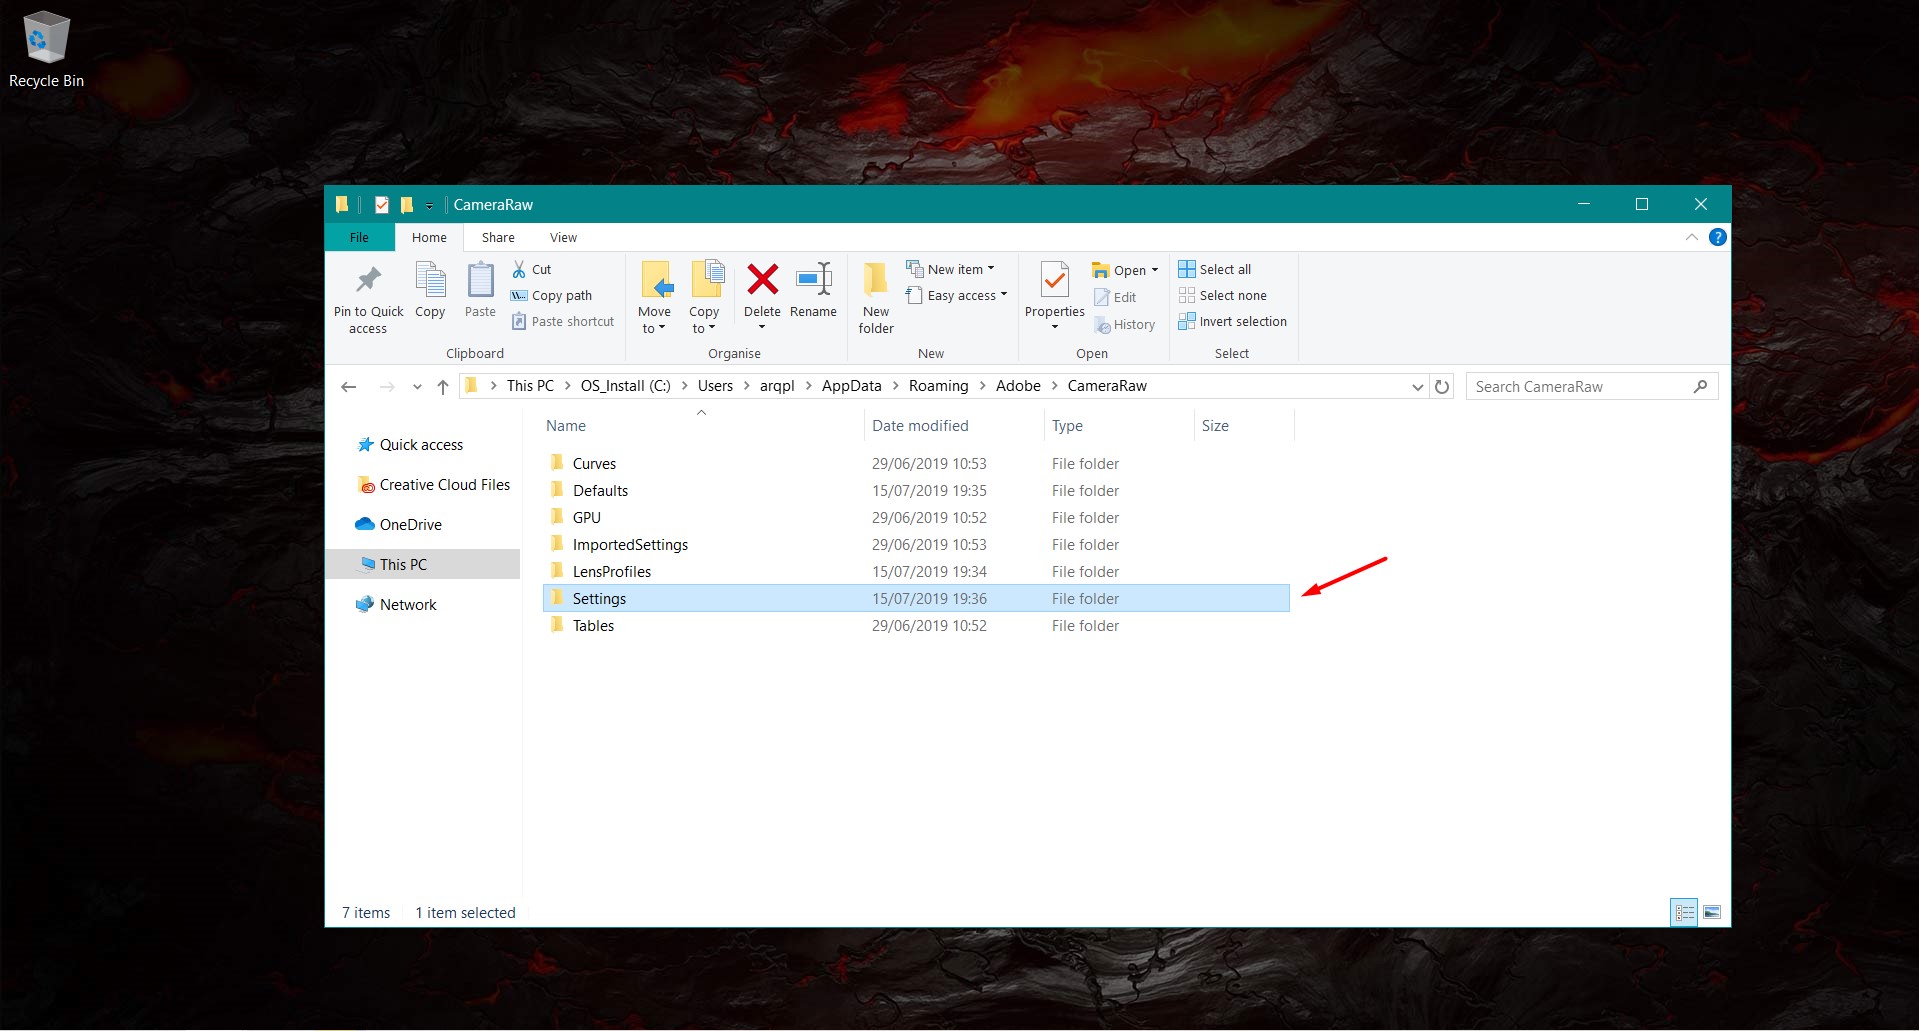
2. Add the folder collection containing the presets into the \CameraRaw\Settings folder. Restart Lightroom after that.
Your presets should show up after you open Adobe Lightroom again. Please note XMP presets also work with Adobe Photoshop by using the CameraRaw images tool. Don’t forget to restart lightroom as told earlier.
Common mistakes when installing Lightroom Presets folder
1. Not extracting the presets: Commonly, new users may simply download the presets and place them inside Lightroom’s folder structure, instead of actually extracting the appropriate files; especially when the file is packed as a .rar, but the user doesn’t have a file extractor that support .rar files, becoming masked as common RAW images for the inexperienced user. Never forget to keep checking for the latest version.
2. Not seeing the Preset panel: Go to edit preferences in the menu and the Presets tab uncheck the “Store lightroom presets folder collection with this catalog” option. That way Presets are always present in the Lightroom installation software and not just part of the catalog. Restart Lightroom to see the changes.
3. XMP presets and Lightroom 4-6/Lightroom CC 7.2 version or below: These presets only work for Adobe Lightroom CC/ Lightroom Classic CC 7.3 version onwards. Please see the compatibility of a bundle before acquiring it. In case your presets won’t show, there’s no special know-how. Just open them in Adobe Photoshop via CameraRaw and show up in Lightroom develop Presets Folder.
We hope the tutorial here regarding installing Lightroom presets for Mac and Windows has helped you learn the whole process.
Comment below if you think this post on how to install Lightroom presets was good news. Support us!
Be sure to backup your Preset Library!
As you all may know, viruses never ask for an invitation, and often they bother us at the most inconvenient time. Even though it is recommended to work with a different partition on your hard drive for data, Lightroom’s Preset Library is contained in the root folder collection of the Adobe Lightroom Presets classic installation. This means that if your PC is affected by a virus and the operating system cannot boot, you are likely to lose your complete Lightroom Preset library.
Keep a backup of your preset library on an external memory drive; either a hard drive or even a good Pendrive, as the files won’t occupy that much space in regards to MB. This is a must for all photographers out there. You don’t want to lose the Lightroom presets that you have purchased or found on your own.
Enjoy your product and keep editing! Don’t forget to leave good reviews about us, if you like our post on how to install Lightroom presets or our products.
For further technical questions/answers and tutorials regarding Lightroom presets, please read our Facebook page at https://www.facebook.com/Sleeklens


 Facebook
 Google +