Hello all,
Today we’ll be having a look at how to add a sunset to your images, to brighten up even the most dull and miserable images of you’re photography trials and tribulations.
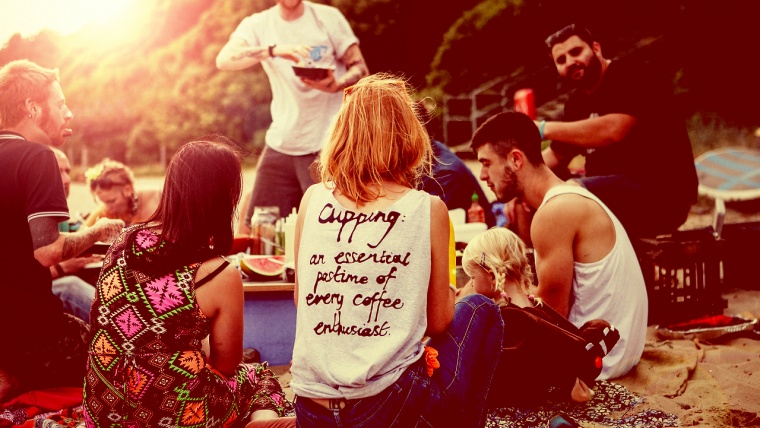
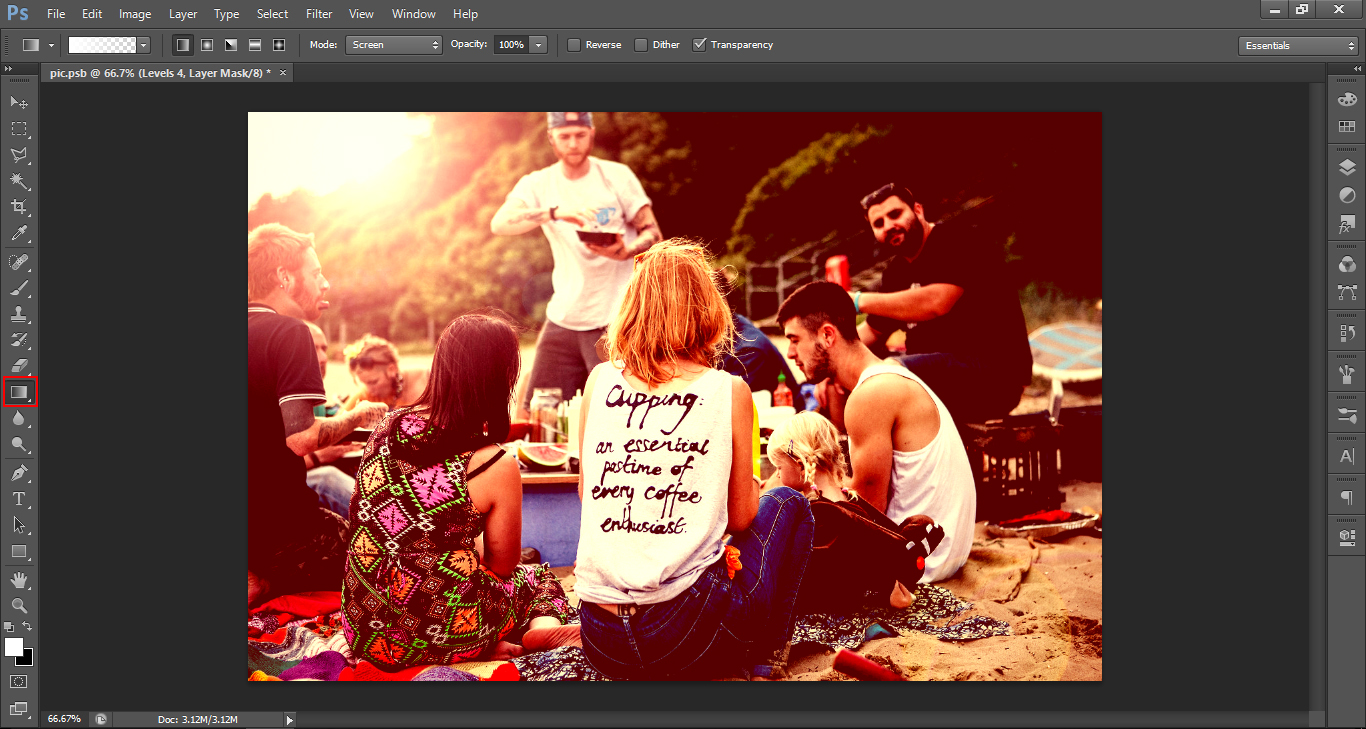
So check it out, this is the image that we’ll be working on today.
The first thing you have to be aware of is the placement of your light source, because for this to work it will have to be behind your subject(s).
My light source is over the left hand side, so it will be perfect.
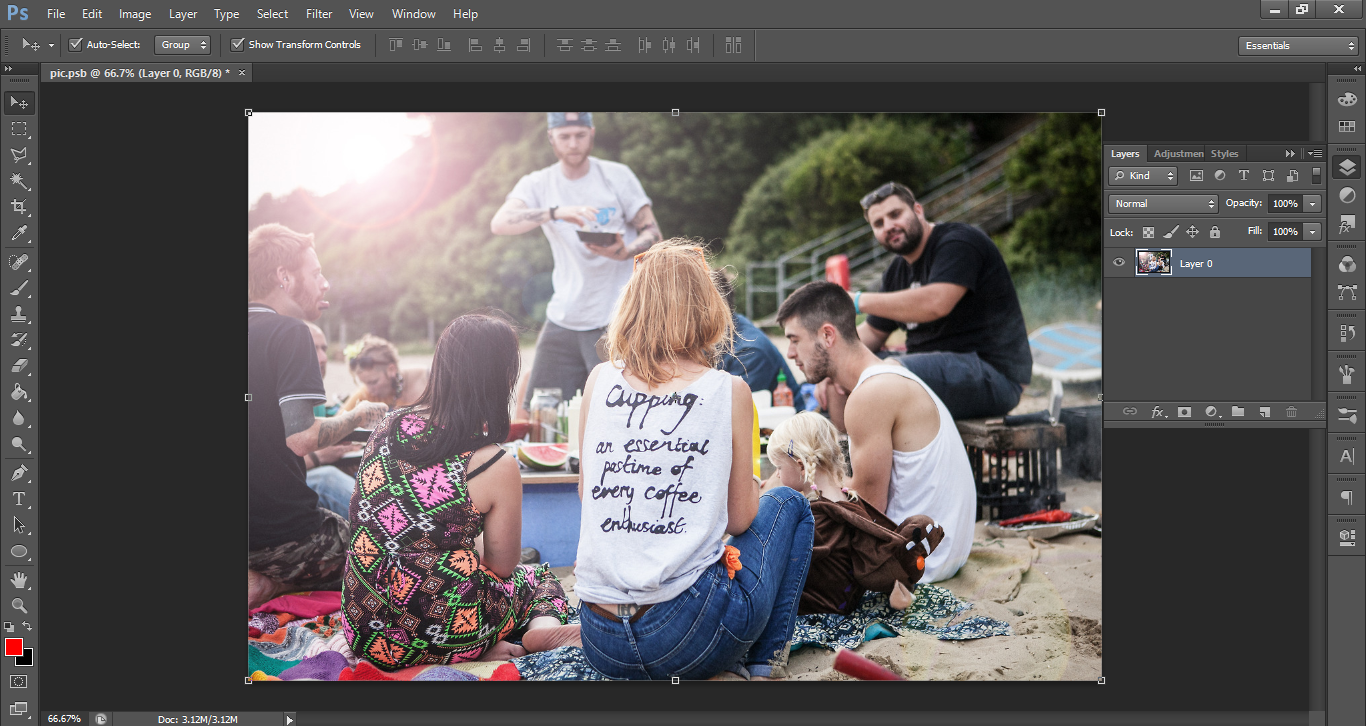
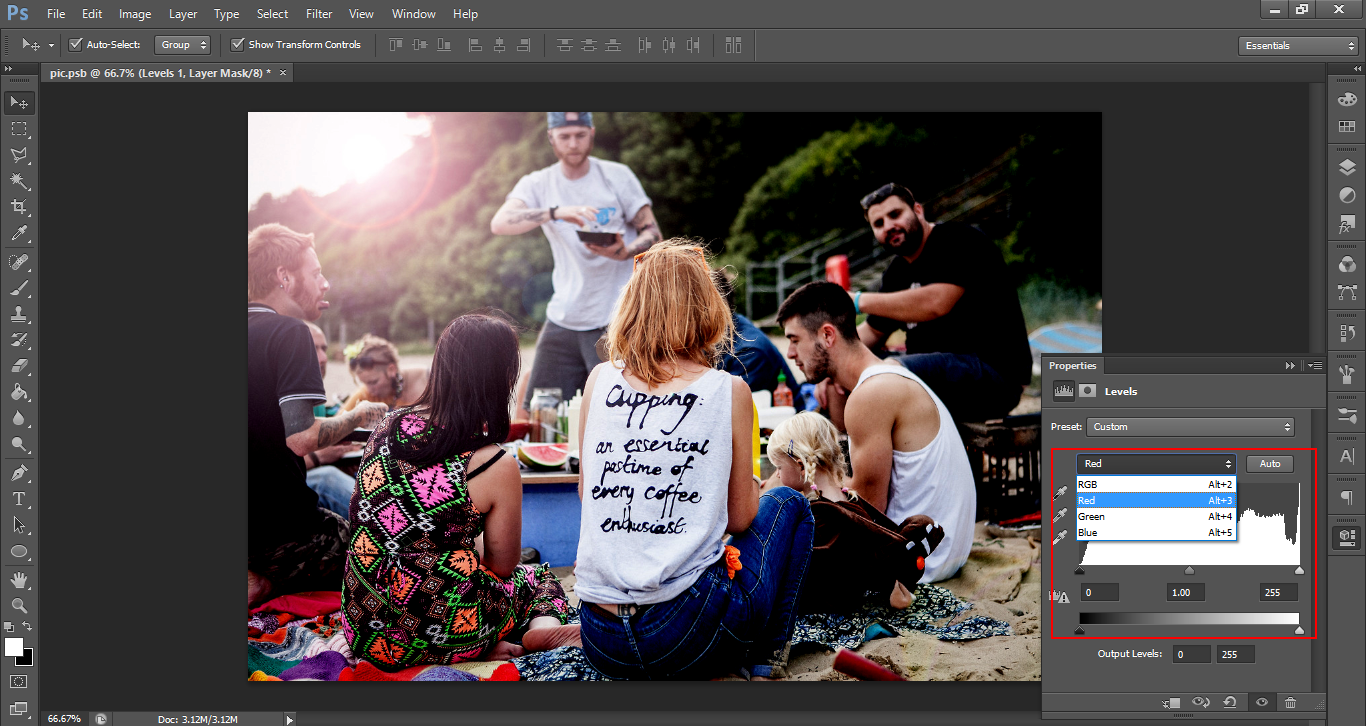
So first up, open a new adjustment layer and click on levels.

Now you are going to adjust your image to make it a little darker so that it loses some of it’s details, just like it would in real life while getting dark.
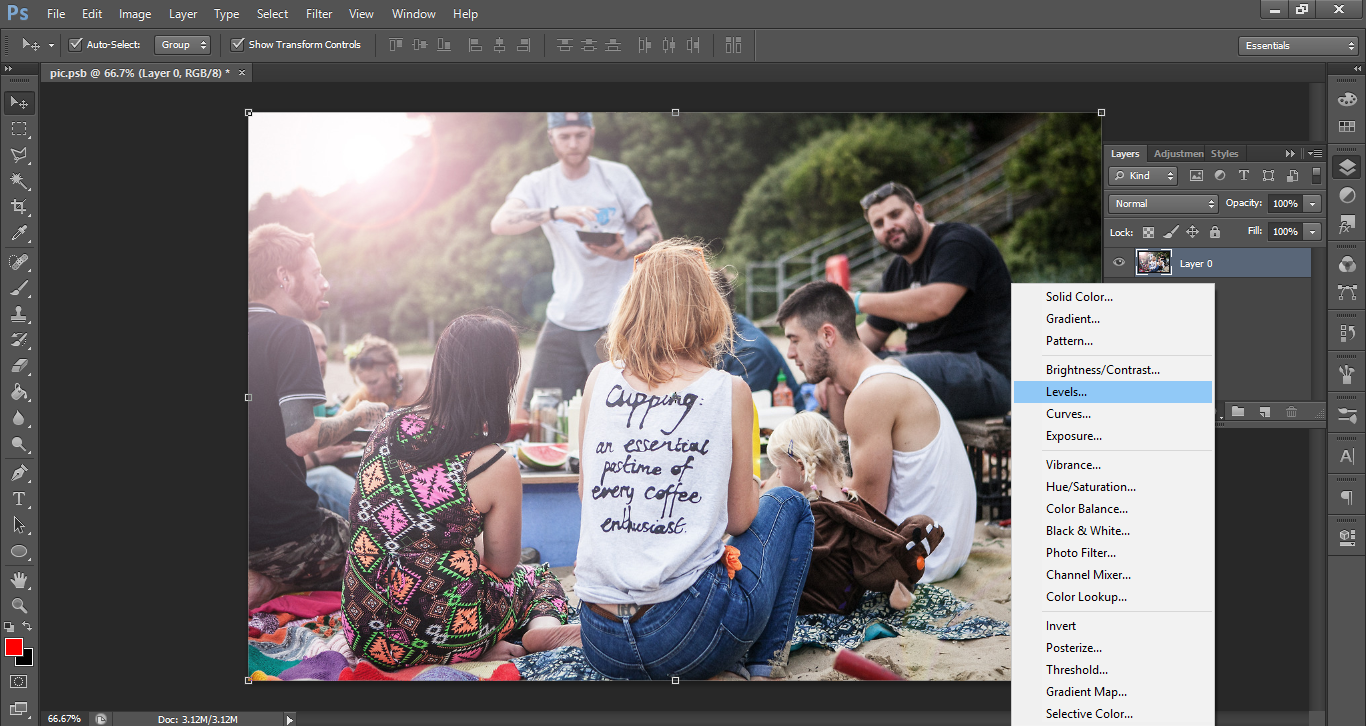
So indicated below, you will see the highlight box, on the histogram to the left there will be a Black slider, click on that and slide it toward the center of you’re histogram.
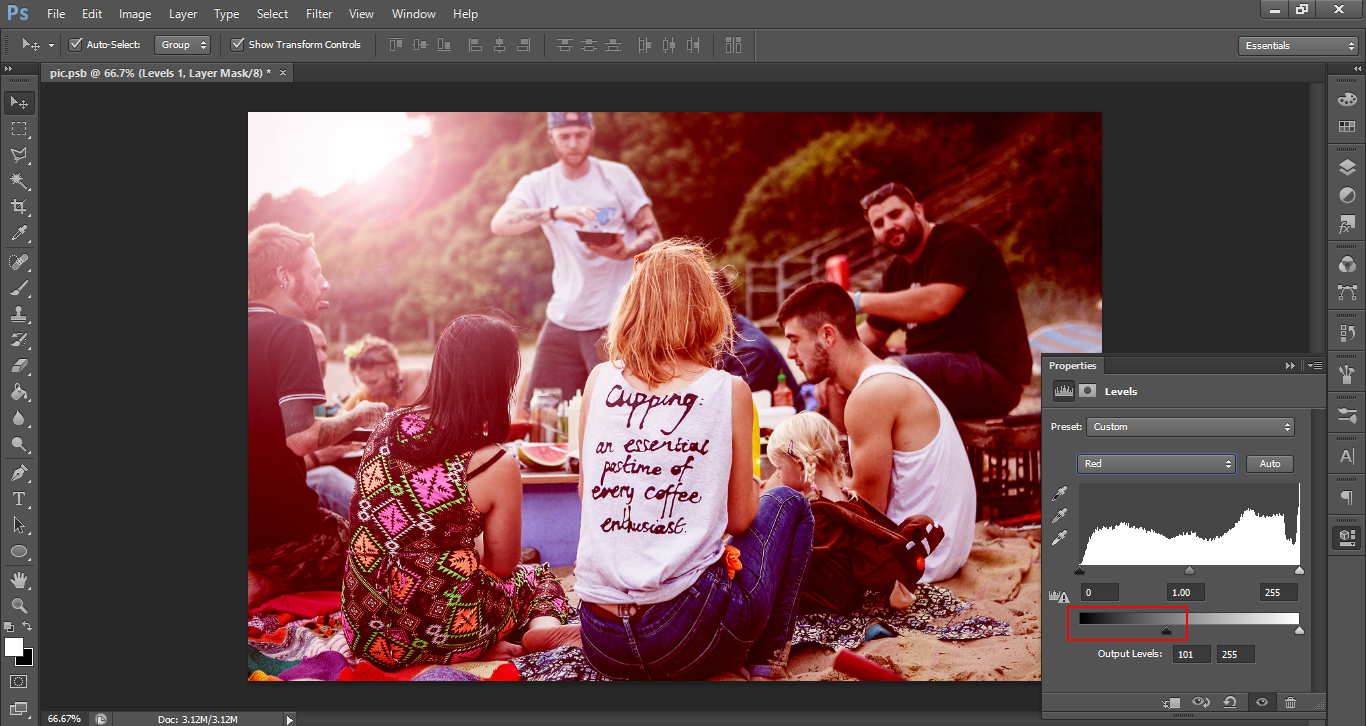
Now open up another adjustment layer, only this time click on the RGB Colour box and choose Red.
Then slide the bottom black slider toward the center like you did previously to darken, but this time it will increase the reds so you will get a bright dusk effect.
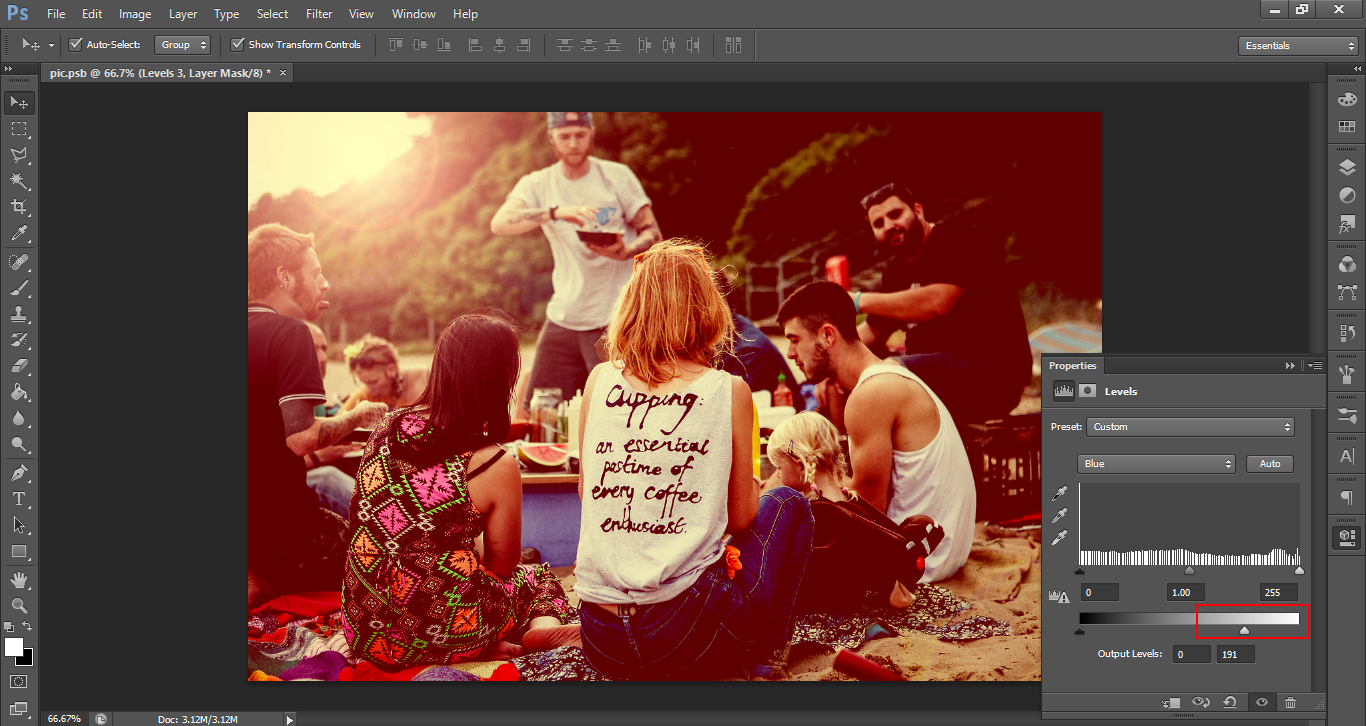
This time make another adjustments layer, only now go to the blue channel instead of the red, we’re going to adjust the highlights.
Instead of using the Black slider you’ll click on the White one and slide it towards the center, just like the time previous, only the opposite.
Now that we have that done, we’ll want to draw our attention more toward the source of light and brighten it up.
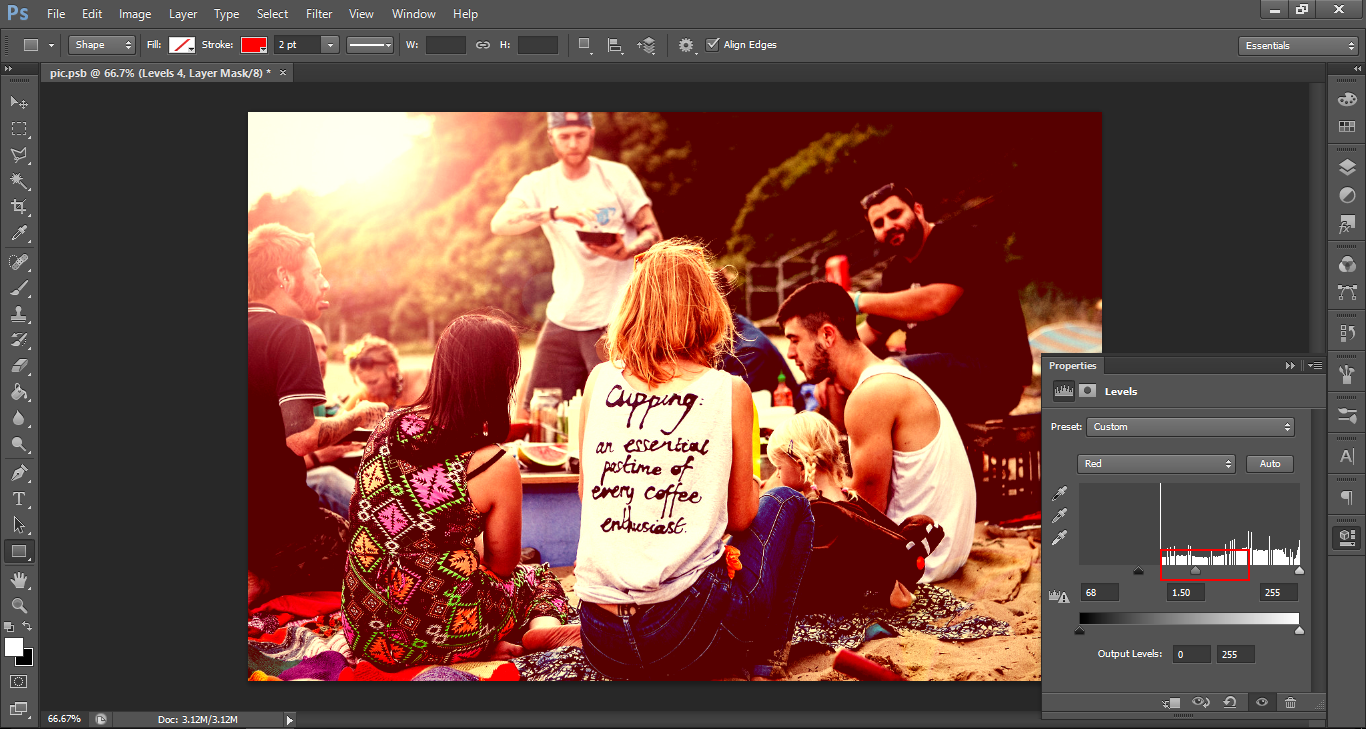
Open up another adjustment layer with Levels on this time, as we did in the first adjustment. We’ll be using the top sliders, only clicking on the white one! Then, drag it towards the center.

Next, open the red channel and move the center slider to the left a little (about a forth of an inch or so, if you were to measure on your screen)
Now we are at the stage where it’s time to apply our gradient, which will direct all of our attention (or viewers attention should I say) toward the sun.
To open you’re Gradient Tool, hit G and. It will also be highlighted below where it is on the Tool bar, if you don’t know where it is already.
Open that up and then choose the second one across *Foreground to Transparent and click Ok.
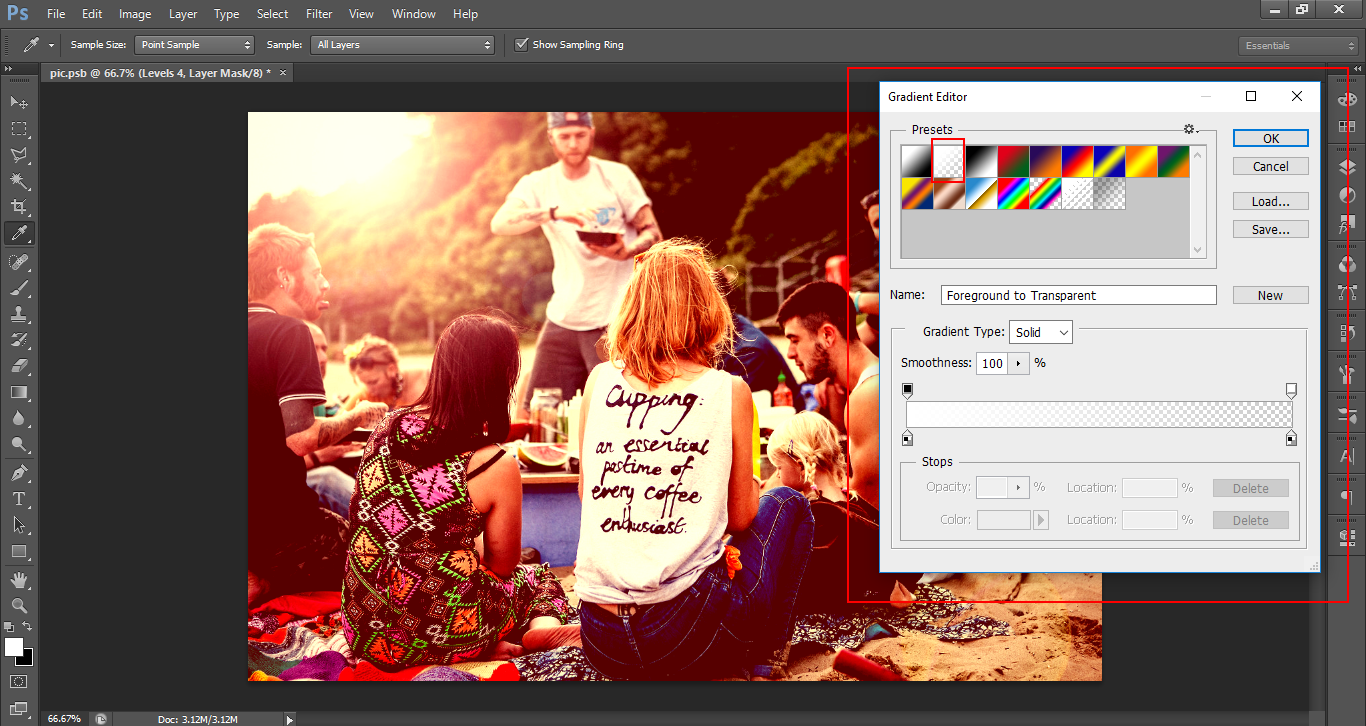
Make sure you have now clicked on the Top layer, or if you are still on that layer it’s all good, press Ctrl I.
This will invert your layer mask to black, which means your gradient will show on the image.

So, the Gradient we now want to choose is the Radial Gradient.

Now click in the center of the Sun and drag the gradient out until you reach the girls back where it says coffee. I stopped at the last “e” which created a very nice flair effect from the sun.
Probably try this a few times to see what results you get as you’re picture will be different than mine.
As you can see from the original image, this effect has brought it to life and it looks very atmospheric. I can imagine myself sitting on the beach 🙂

To get more Effects such like these, you should check out our range of Presets. We have the best Presets to help you get great effects like these with one click of your mouse button.
It doesn’t get much easier than that in the Photography world.


Please verify your software version before proceeding.
 I’ve verified my software version


 Facebook
 Google +
Comments (0)
There are no comments yet.