
Today I want to address a problem that most of us face at some point during our lives (that sounds dramatic, but it is true, at least if you care about photography anyway!): how to get a perfectly sharp image.
There are a couple of great articles on the Sleeklens blog covering sharpening and noise reduction (two things that are deeply intertwined) in Lightroom, so for this entry I will focus on how to get the sharpest image right from your camera so that the post-processing is as simple as possible. And, for those situations where we had to deal with some blurriness anyway, I will briefly explain a nice technique for that in Photoshop as well.
First of all, let’s define sharpness, for the purpose of this article, as the contrary to blurriness. This helps us focus on what we need to do to get a sharp image, which is the same as getting an image as free of blurriness as possible.
But where does blurriness come from? In photography, this can originate as an effect of moving the camera or a subject in motion while taking a photo (motion blur), or by more specific aspects related to the camera itself, the lens or filters being used (Gaussian blur). Then there is also the artificial blur that can be introduced with so-called low pass filters, but we are not concerned with that right now.
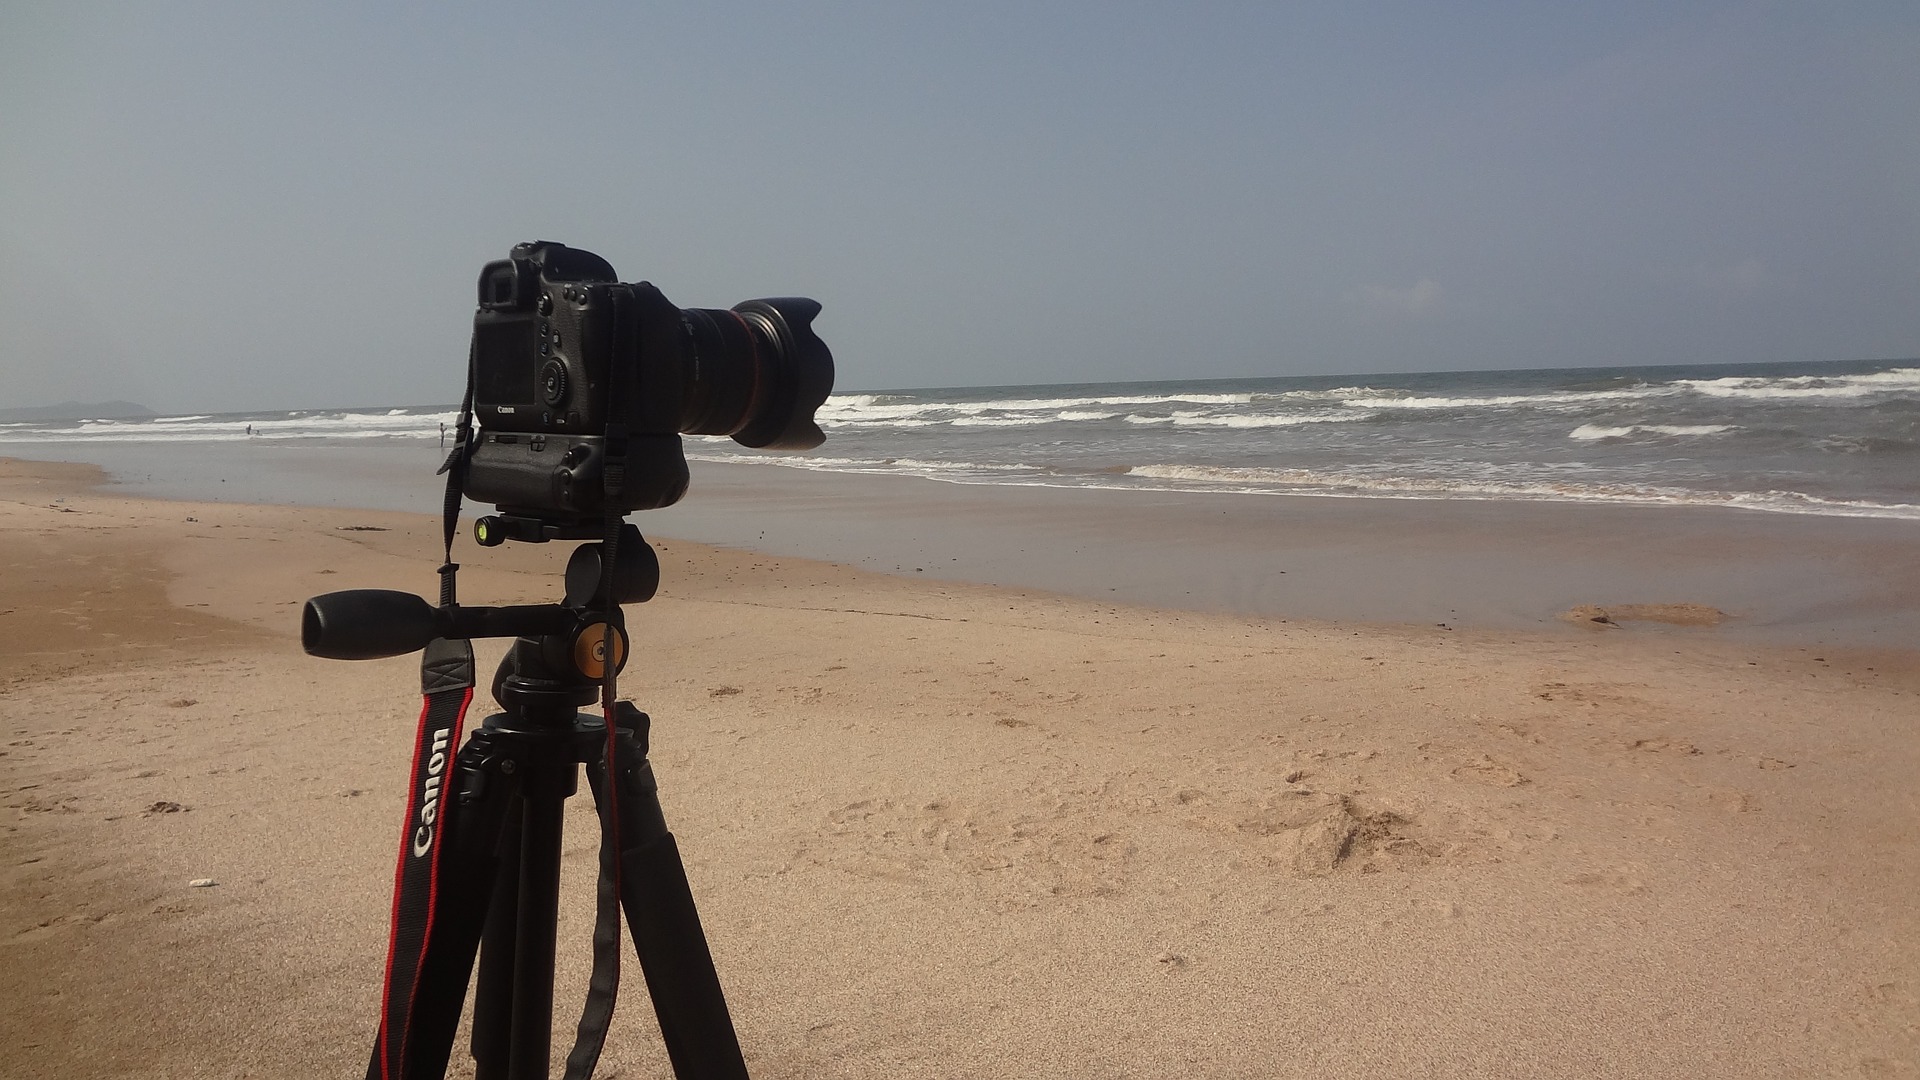
So let’s start with the easy one: motion blur. Unless you are trying to capture moving objects with long exposure photography or experimenting with your camera in different ways, motion blur is something you want to avoid. And there is only one way to do it: get a sturdy tripod and use it whenever you can. Many people only get their tripods out of their bags when they want to take photos under low light conditions, but I really recommend always using your tripod, unless you are after an action shot that happens too quick to set the tripod or if you don’t carry one at all.
That said, even with a very good tripod, a mild wind can shake your camera in a way you cannot perceive but still make your final image look blurry, so if there is any wind at all, try to put your body between the wind and your camera to block as much as you can. Sometimes this might prove harder than it seems, but most of the time this is as much as you can do.
Finally, use the delay function of your camera to give some time for the tripod to stabilize after pressing the shutter button. Two seconds are usually enough, but the exact time will depend on the camera you use.
Now let’s move on to the hard part. Sometimes you might notice that even on a perfectly still day and after spending $500 on a tripod, after you take your photo, go back home and open your file on Photoshop or Lightroom, you realize that the image is blurry anyway! But before throwing away your tripod or getting a new camera, read on (even though it is true that better cameras produce sharper images, chances are that you have some things that you are able to improve in your workflow before thinking about that!).
One easy thing to try if you are taking long exposures is to turn off the image stabilization of your lens. That sounds counter-intuitive, but if you are using a tripod and taking relatively long exposures, the image stabilization system can actually try to compensate for some motion that is not there, finally producing a slightly blurred image. Image stabilization has helped to push the exposure time at which we definitely need a tripod a lot, but when using a tripod, it becomes unnecessary so taking it out of the way might be helpful sometimes.
The next one is related to the focal length you use. Building lenses is a delicate and difficult task. And building lenses that retain the same sharpness throughout the whole focal length range is almost impossible. It is for this reason that lenses have something called ‘sweet spot’. Simply put, when you take the aperture to the extremes (very small or very large f-numbers) your lens will produced less sharp images. Each lens is different, so the only way to find out the ideal range for your lens is to go out and take the same image only changing the f-number, but as a rule of thumb, staying three steps away from the limits should work quite well.
Finally, using certain types of filters will also affect the overall sharpness of your image. Probably the filters that have the worst effect are neutral density (ND) filters. These filters, used to capture long exposure images in daylight, can have very strong effects both in the sharpness of your image and in the white balance.
But what happens if you end up with a blurry image anyway? You might have needed to use an ND filter or you just did not realize your image was blurry until you got home. What can you do?
Photoshop, as well as Lightroom, has a set of filters devoted to the sharpening of your images. They are simple to use but they also have a downside: when you want to remove the blurriness of an image, what the filters do is enhance the borders by applying a so-called high pass filter. The problem with high pass filters is that they tend to introduce noise, and this noise can sometimes damage parts of your image, especially those with low contrast such as the sky.
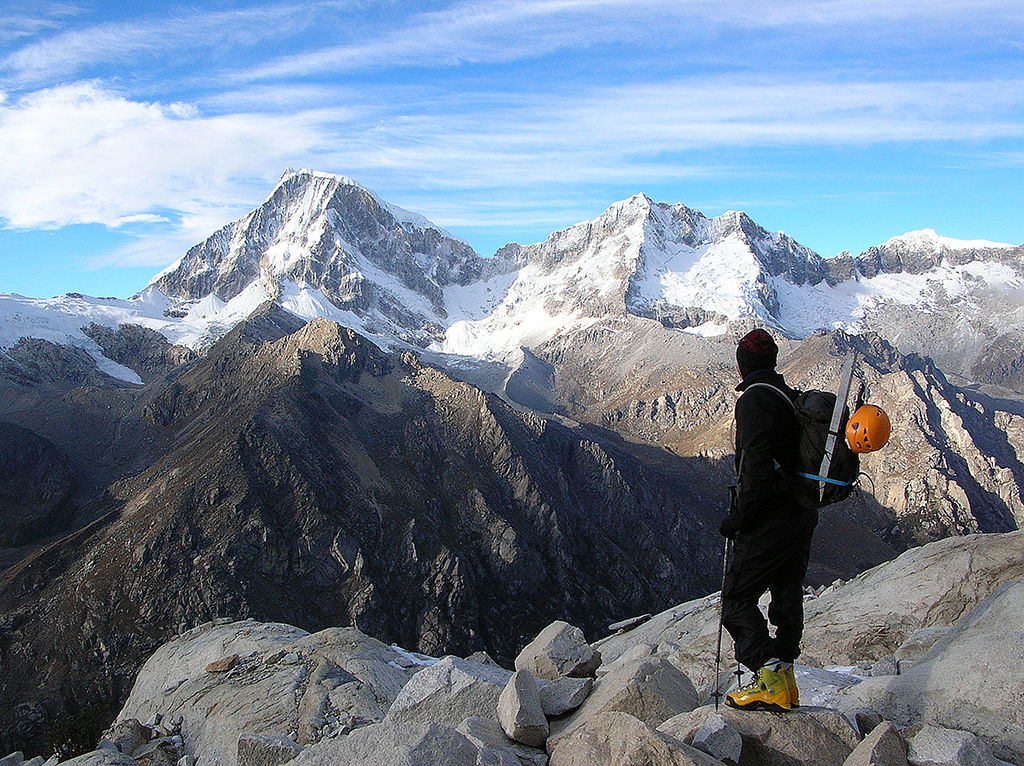
Take a look at this image, captured in the Cordillera Blanca in Peru:

The top image is the original file without any added effect while for the bottom one a simple sharpening filter was added (Filter -> Sharpen -> Smart Sharpen… in Photoshop). They both might look pretty similar, but if you look closely enough, the top one is a bit blurry, especially noticeable in the mountains. This has been improved in the bottom one, but the problem I mentioned before is there: the sky looks now rather noisy. This is easier to see if we zoom in to 100%:


You can improve the situation by creating a layer mask in Photoshop and masking out the sharpening effect on the sky, but then it gets quite complicated when you try to select the horizon. Luckily enough, there is a nice technique called ‘frequency separation’ that comes to our rescue.
The term frequency separation comes from the fact that images, same as for instance music, are formed of many different components that have different frequencies. While in music high frequency refers to high pitch tones and low frequency to low pitch tones, in photography high frequency refers to regions where there are many changes in contrast within a small area while low frequency refers to regions with few changes over that same area. For instance, in our image, the sky is a low-frequency area (because for a given area there are not many changes in color) while the mountains are high-frequency areas.
So what we want to do is separate the low-frequency part of our image from the high-frequency part in order to be able to separately edit them. This way, we can increase the sharpness in the high-frequency part (mountains in this case) without affecting the low-frequency part (sky).
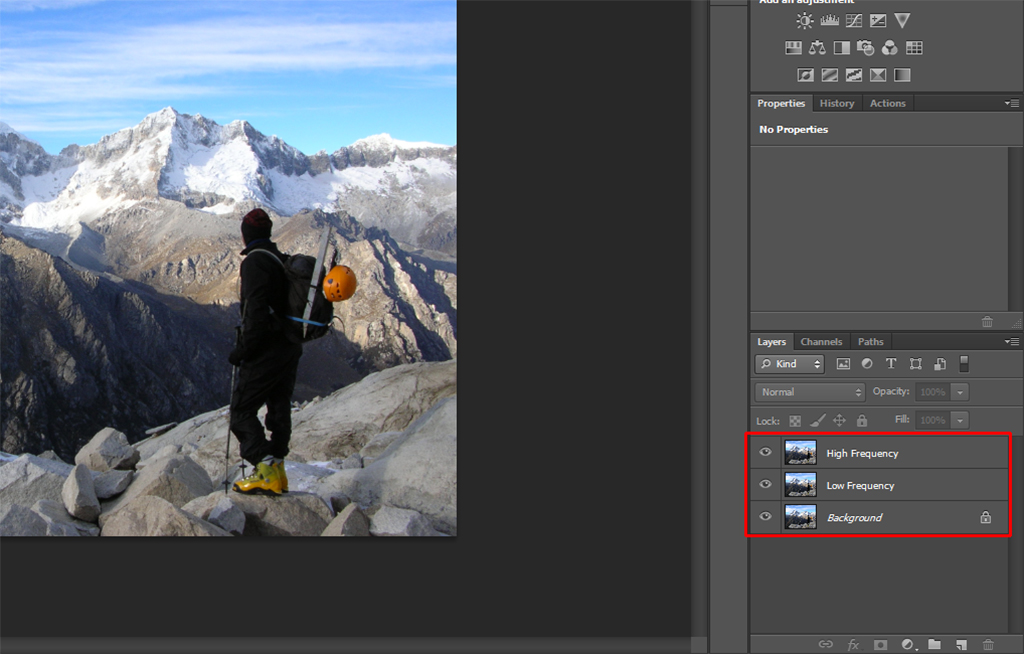
The first thing we do is duplicate our base layer twice. You can name these new layers however you want. I called them here ‘Low Frequency’ and ‘High Frequency’.
The next thing to do is separate the frequencies. The low-frequency component is achieved by blurring the image until you see a uniform sky (or any other part of your image that you don’t want to get modified when applying the sharpening filter later on). The amount of blur will vary, but it usually is relatively large (around 10 pixels or more), so that the whole image looks blurry. For this you make the top layer (high frequency) invisible, select the middle layer (low frequency), go to Filter -> Blur -> Gaussian Blur… and apply the amount you feel happy with. In my case, I chose 50 pixels.

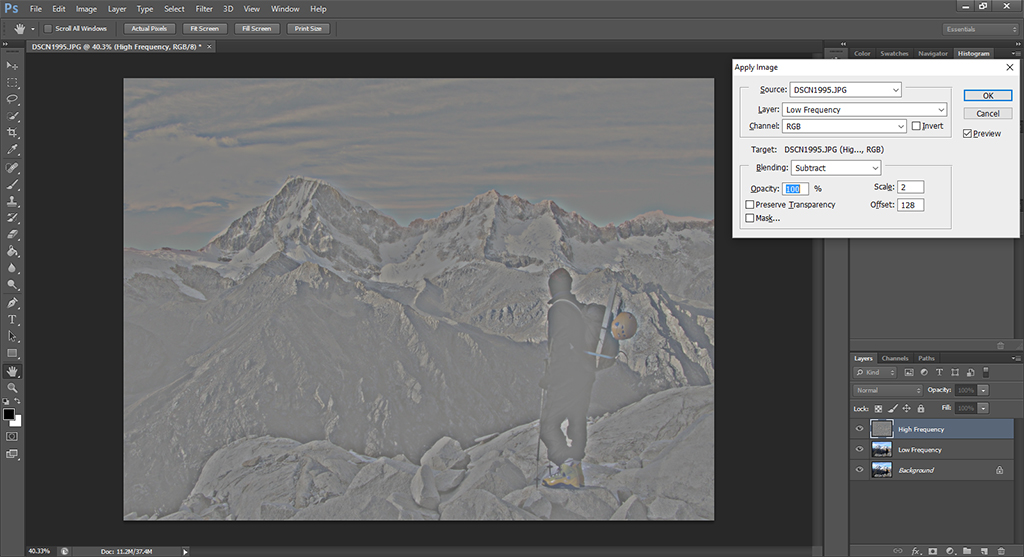
For the high-frequency component, we make the top layer visible again, go to Image -> Apply Image… and select Subtract as the Blending method and apply it to the Low-Frequency layer (see the different parameters in the next figure).
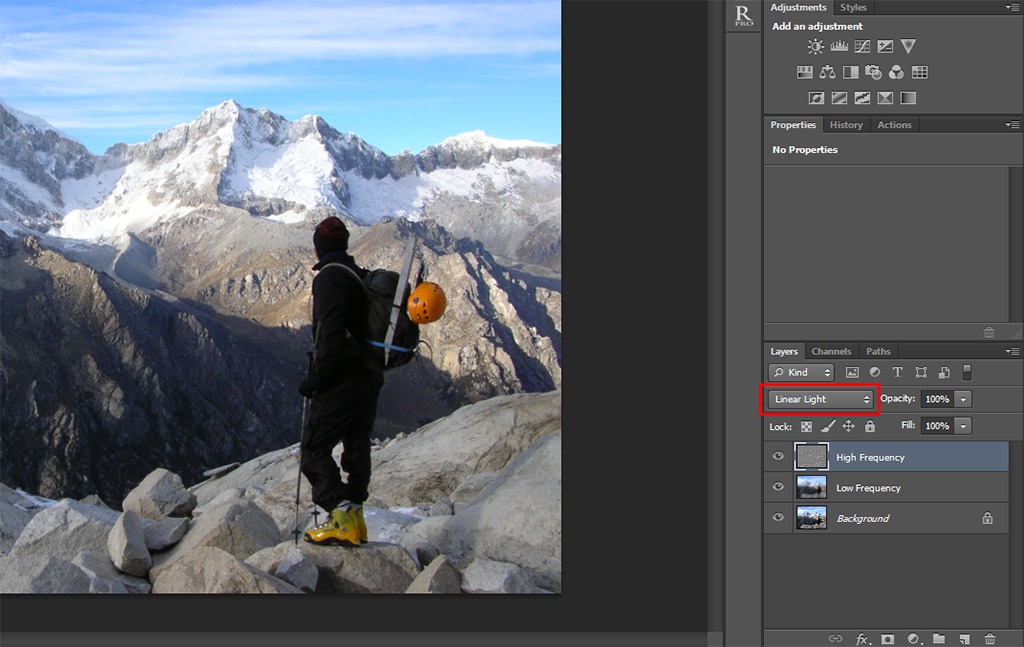
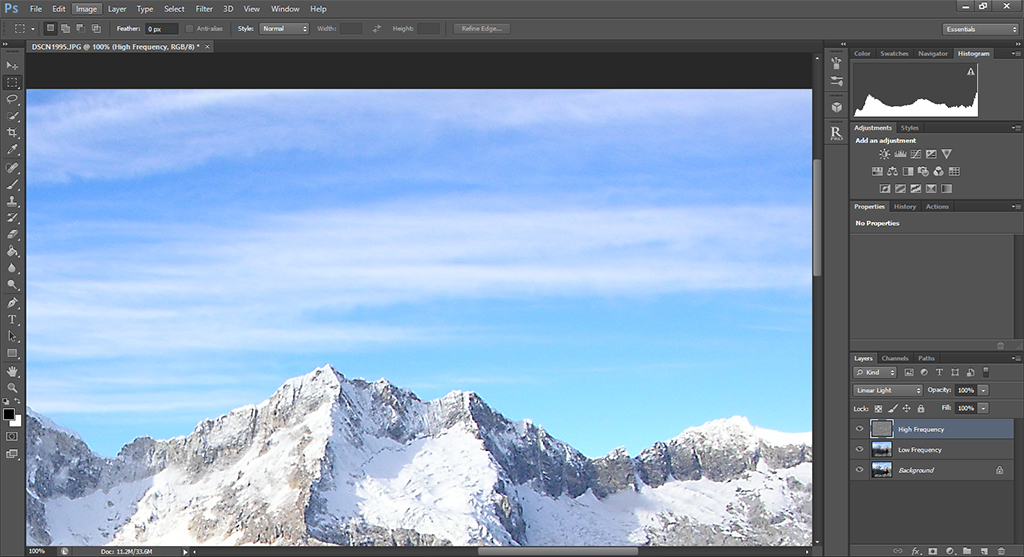
After you do this last step, the image will look like the one above. This is because you are looking at the difference between the two layers. To get a normal image again, just change ‘Normal’ to ‘Linear Light’ in the drop-down menu right above your layers and to the left of opacity.
We are now ready to apply the sharpening filter. For this, we select the top layer, go to Filter -> Sharpen -> Unsharp Mask… and we select the values according to what makes our image look the way we want.

Notice that we are able to select relatively large values for the Amount and the Radius and, as we will see in the next couple of images, the sky is unaffected by this.

The top image shows a 100% view of a part of the image before the sharpening and the bottom image shows the same area after the sharpening. Notice that the sharpening is visible in the mountains but not in the sky, thus avoiding the appearance of unwanted noise. The really neat thing about frequency separation is that we don’t need to worry about a very precise horizon selection, but with just a few steps, everything is automatically done.
I know this might sound a bit complicated at first (it was for me, at least!) but with practice you will work it out. So, as usual, have fun with it!


Please verify your software version before proceeding.
 I’ve verified my software version


 Facebook
 Google +
Comments (0)
There are no comments yet.