Perhaps one of the greatest challenges of landscape photography is finding the perfect exposure, that will give you a well-lit landscape and a beautiful looking sky in one mesmerizing photo. Before digital went mainstream, the common tool was to use the graduated filter that would go in front of your lens, it is still widely used with digital technology as well. You also have the option to shoot with two exposures and stitch them together, but even if you ended up shooting only one image, you can still achieve a similar effect using the Graduated Filter tool in Lightroom.
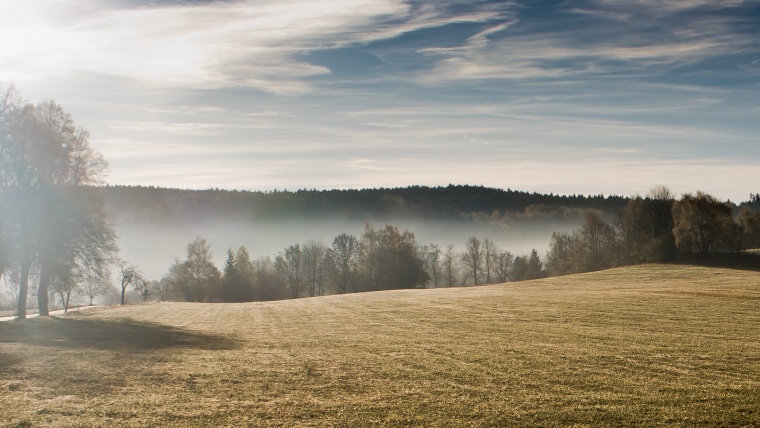
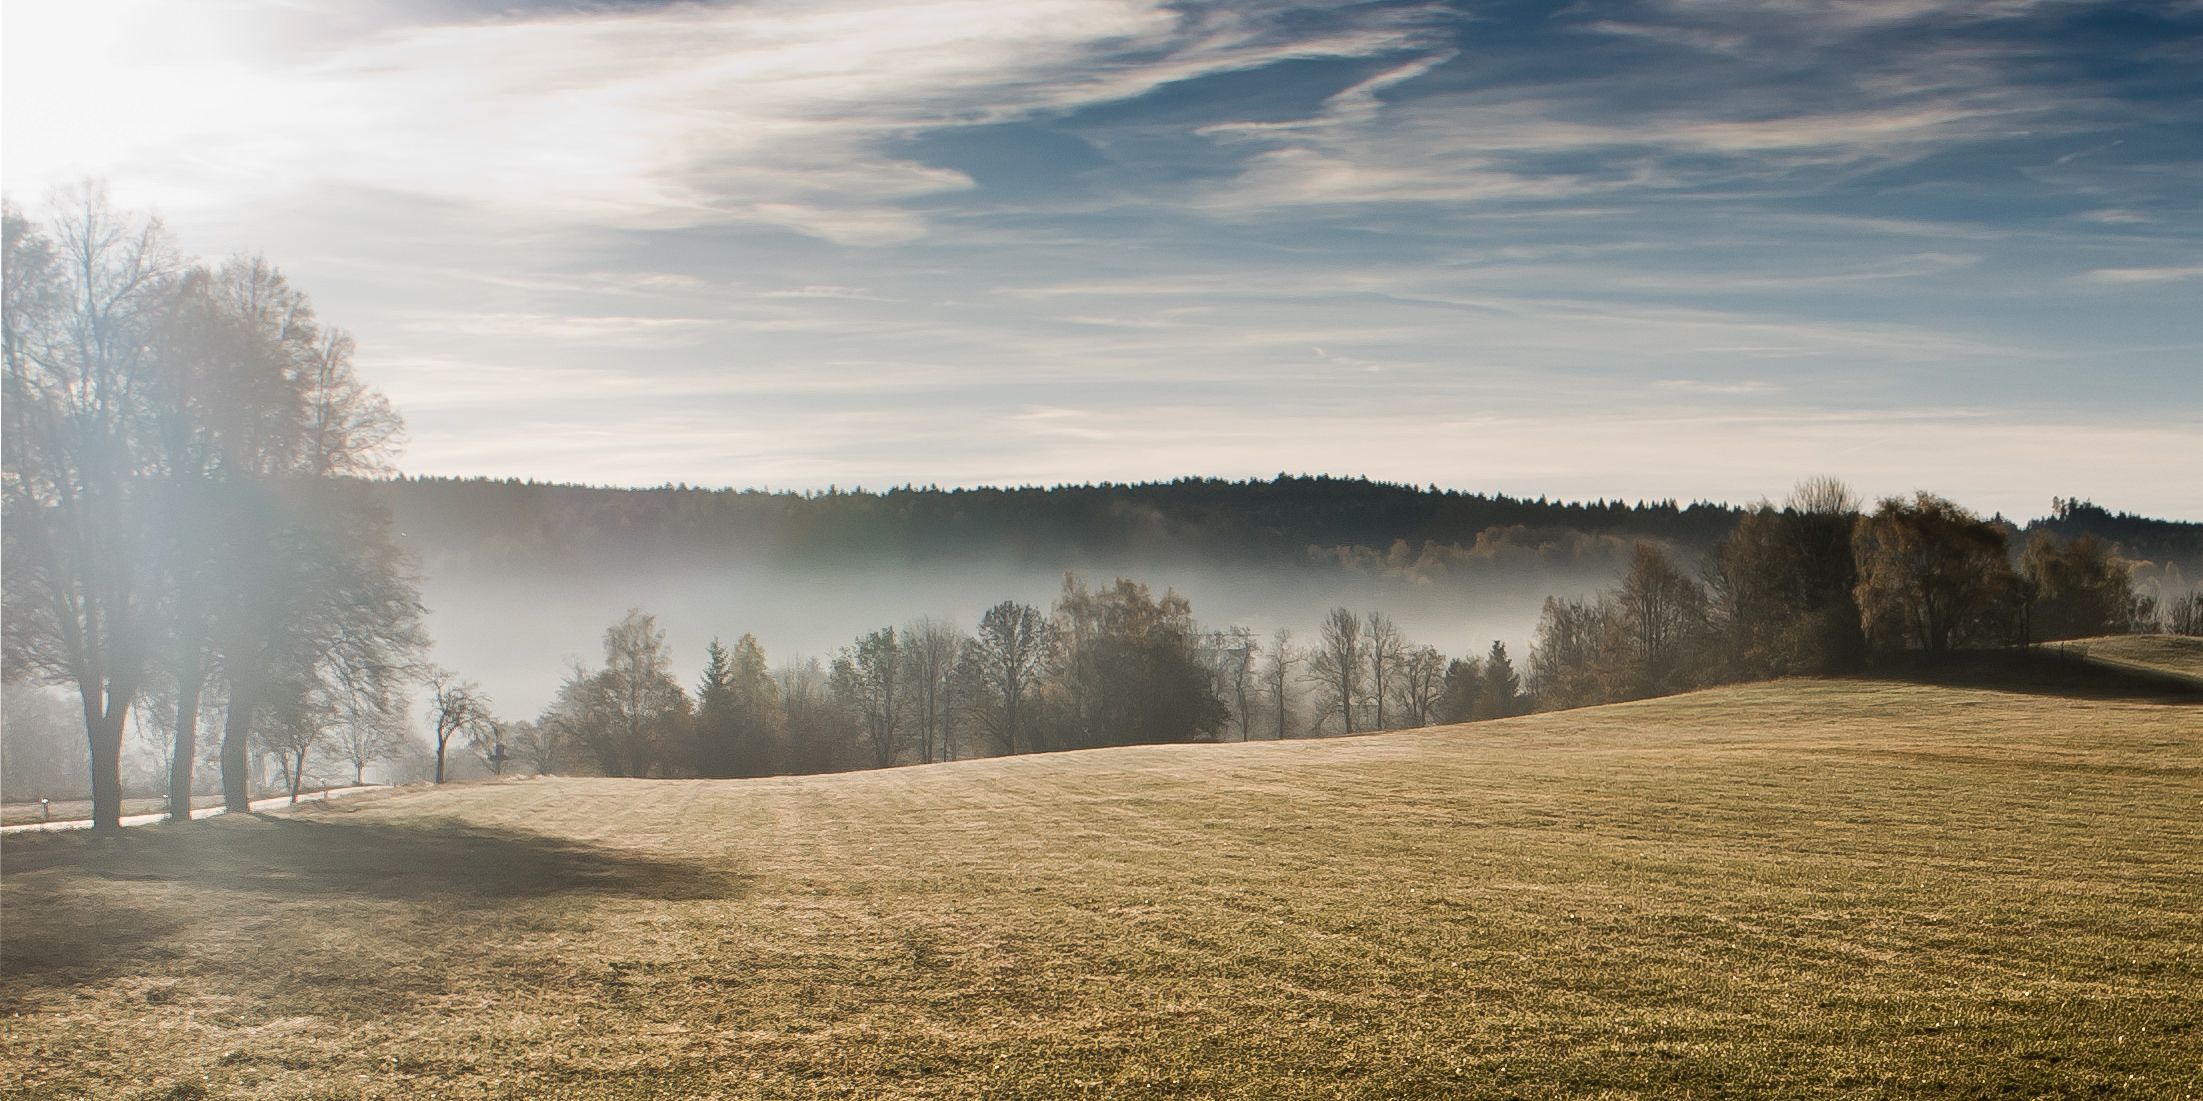
In the example image, we see a landscape scene, showing green rolling hills and a mist covering an early morning valley. The image has potential, but the sky, unfortunately, looks overexposed and dull. The foreground could use some minor tweaking as well, to bring out the dark tones. These are the two problems we will want to fix with the Graduated Filter tool.
Begin by opening the image you want to be corrected in Lightroom and find the Develop module. In the develop module you will find the Graduated Filter tool – the fourth adjustment tool in the module. Alternatively, use the Keyboard shortcut “H” to access the tool.
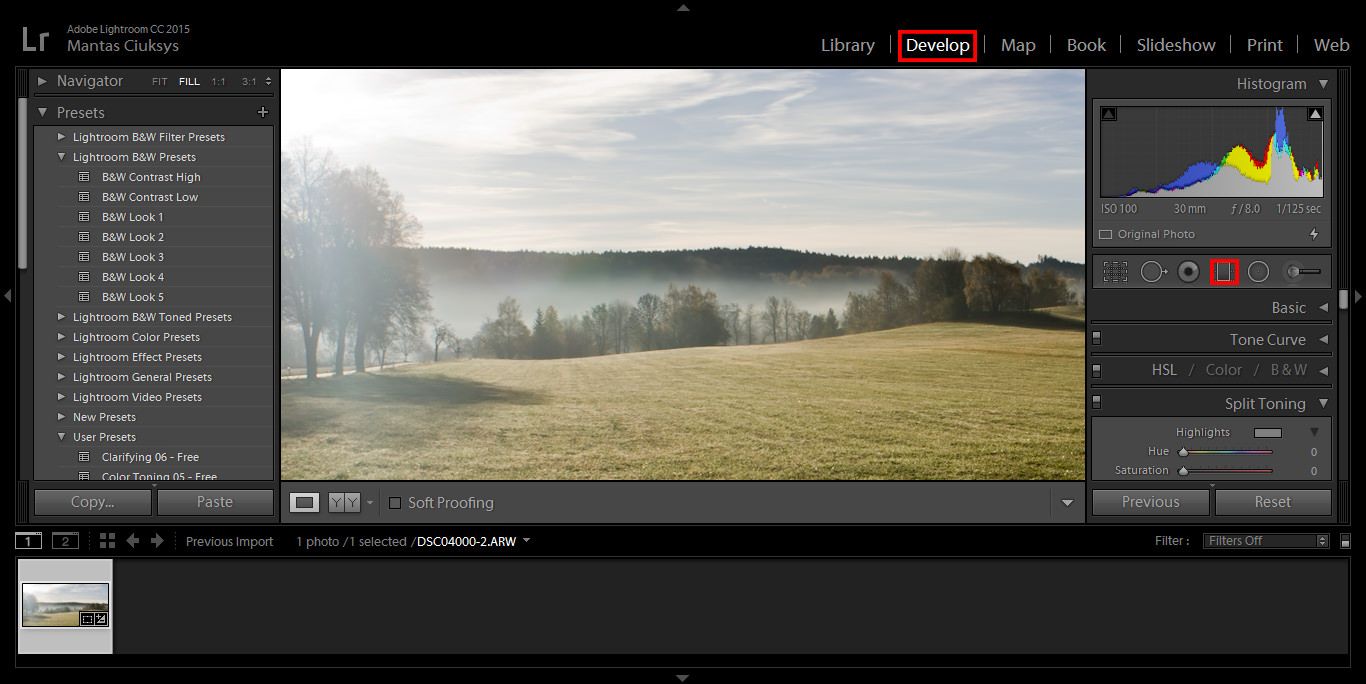
Once the tool is selected, hold the mouse and drag it down from the top of the image, towards the lower half. You want it to go comfortably over the land areas in your image for a more realistic final look. Naturally light scatters, it does not get cut off unless an object interferes with its path – we want the changes we make to the sky areas of the image to reflect that; therefore, we allow the adjustments to transition just a tiny bit into the foreground as well.

If the graduated filter you applied does not align with the horizon, rotate it by moving the mouse cursor towards the center of the filter. Once you are close enough, the mouse icon will change indicating you are able to rotate it. To prevent the graduated filter from misalignment in the first place, hold down the ‘Shift’ key when dragging it.
Once you have the graduated filter you will notice that it allows you to change a number of settings. They include: exposure, brightness, contrast, saturation, clarity, sharpness and add color. The changes you make to these settings will only affect the area covered by the Graduated filter.
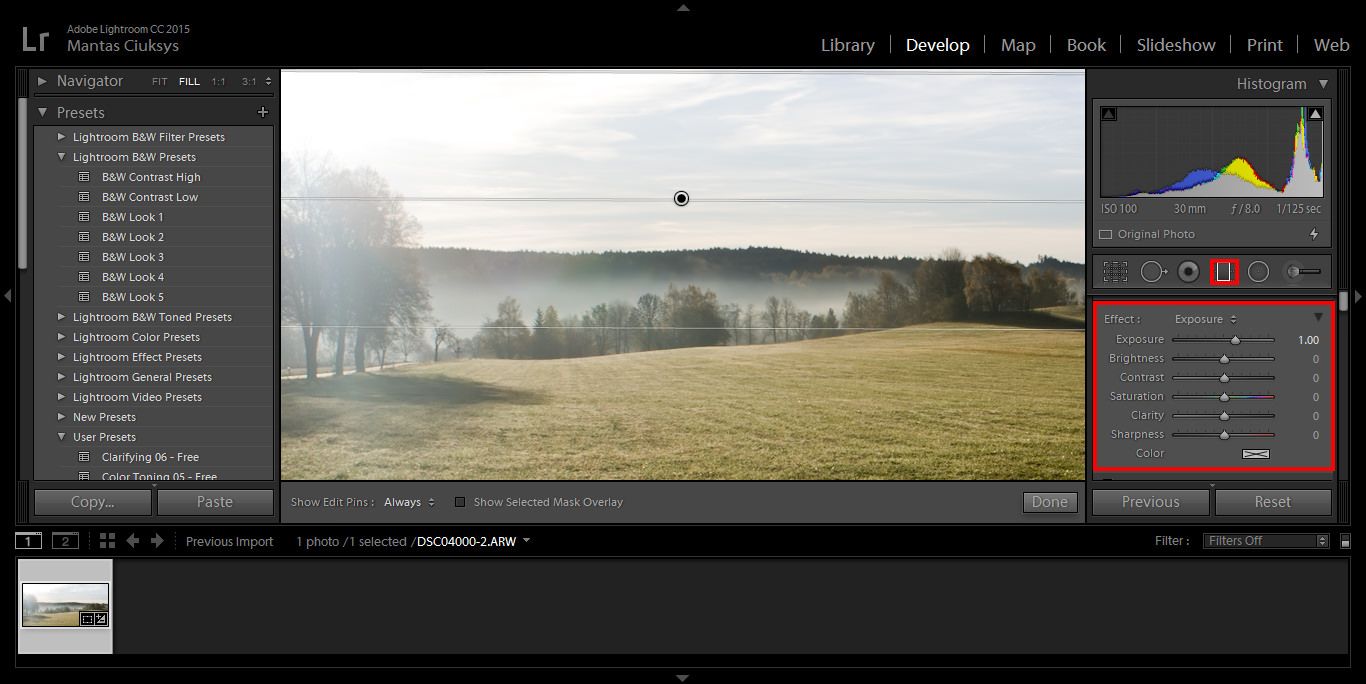
Since we aim to darken the sky, we begin by lowering the exposure levels. Lowering the exposure will also lower the highlights for that area, if you have clouds in your image, you will want to regain some of their whiteness by raising the contrast ratio. Making these changes to the image will usually increase the saturation of the image – adjust it accordingly.
Further, if you aim to have a dramatic looking image, you can increase clarity of the Graduated Filter – it will increase the edge contrast ratio. Beware that increasing the clarity of the sky can reveal uneven color graduation, going from dark to light, if you are seeing that reduce the clarity. If you aim to have a smoother sky then decrease the clarity to achieve a softer look.
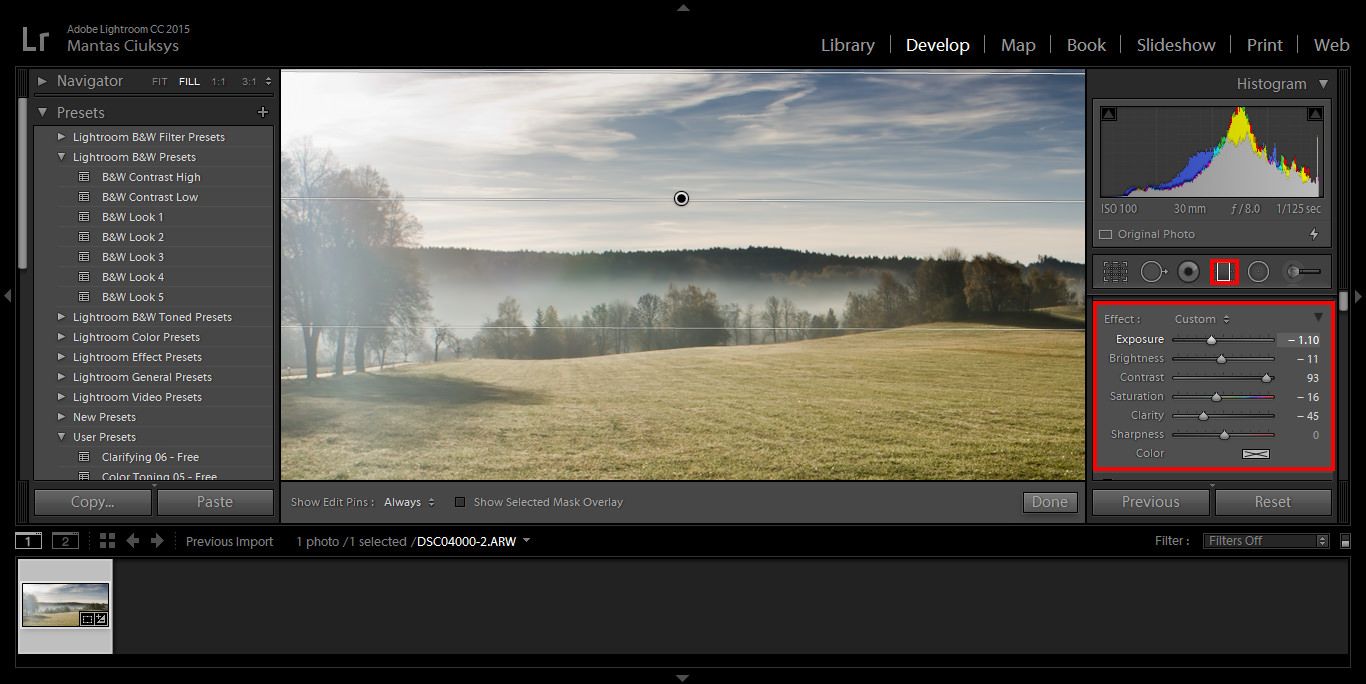
While you are applying changes to the Graduated Filter beware of the land areas of the image. Often, parts of those areas will become underexposed when lowering the filter setting. You will likely need to bring the shadows back slightly or move the graduated filter higher so that those areas are not affected.
Lightroom’s Graduated Filter tool is not only limited to for use on skies, feel free to experiment by adding it to any part of the image. For instance, the Graduated Filter can be further used in the example image to deepen the black tones in the foreground area.
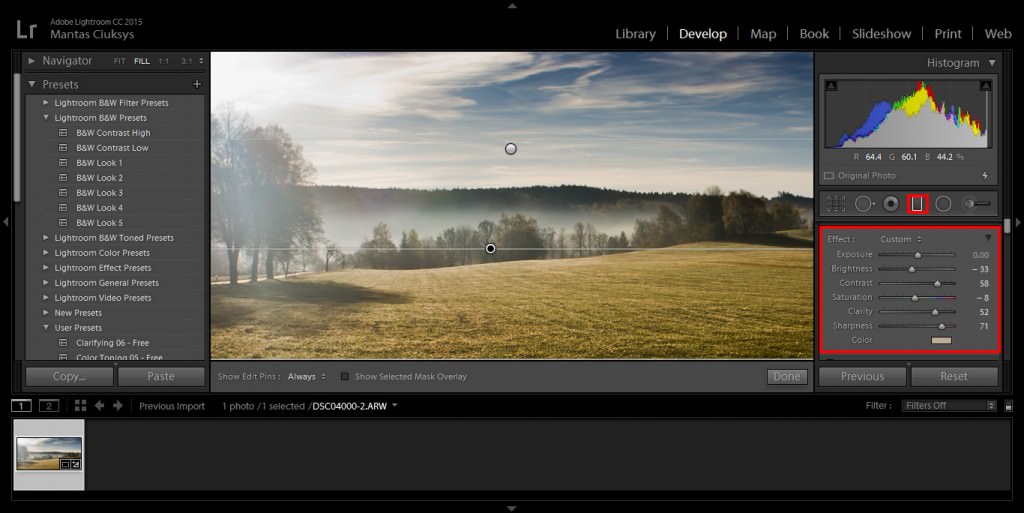
The same process as the one used on the sky applies. We drag the Graduated Filter across the areas we want to be corrected, once it is applied we change the settings for the filter. In the case of the example image, we increase the clarity, add sharpness for a crisp look, lower the highlight by lowering the brightness, compensate for saturation and add warmth by adding just a little bit of a color cast to the gradient.


Please verify your software version before proceeding.
 I’ve verified my software version


 Facebook
 Google +
Comments (3)
Thanks for the Tut on the Graduated Filter. Very nice. I have Lightroom 5, and am considering stepping up to Lightroom CC. There is so much that Lightroom will do! There are some functions that I have no idea!
thats wonderful tutorial, thanks for sharing
the script for graduated filter is clear and beneficial
thank you