It is not always creativity and an eye for detail that photo retouching requires. Being a photographer or working in photo retouching requires you to know quite a number of technical details, and Lightroom color management is one of them. At first, color spaces, gamut and color profiles might sound off-putting and complicated, but in reality, they are not difficult to understand, and in practice, you will find that you mostly need to know just a few simple rules. This tutorial will be your guide to Lightroom color management. Click here to find out how to install Lightroom Presets.
Lightroom Color Profiles, in a nutshell, are a set of guidelines you provide your computer or software to help it display the image; it will include the information on the range of colors, depth of white and black tones and the color distribution between tones of the image. It sets boundaries as to how much color information in the image there is. Click here for more infos.
There are three important color profiles to consider. First one being ProPhoto RGB, Adobe RGB, and sRGB. Considering you are working with a RAW image, when you import it into Lightroom, the software will automatically assign it the ProPhoto RGB profile, the reason being, it can hold most of the information a camera sensor can capture, therefore, working in this color space will preserve most of the information in the image. Adobe RGB covers slightly less color space than ProPhoto RGB, but it still retains most of the color that an industrial CMYK printer will be able to print, meaning that if you plan to have your photos printed professionally, a magazine or a poster, it is usually the profile to go with. Last, the sRGB color profile, probably the one you will be converting your photos to the most – it limits the color space to that of the most monitors. Although more new monitors are trying to reach the Adobe RGB color space, still, the color profile used online is sRGB, and therefore, the most common one you will find. Underneath is a graph that shows how the three color spaces relate to each other in addition to a 2200 matt paper.

It is key to consider that converting the image’s color profile is irreversible. If you convert the profile from ProPhoto RGB to Adobe sRGB, you will not be able to regain the information lost through conversion, because a color profile that uses a narrower color gamut than the original compresses the image. Sometimes you might be asked to deliver the photos to a client in Adobe RGB profile, despite you only having the sRGB file. That is not a problem, you can still convert your sRGB file to Adobe RGB profile; however, you will not be regaining the extra color that Adobe RGB offers.
Before you convert your image to the required profile, make note that it is best practice to work on the image without applying a color profile for as long as you can – make it the last step in the editing process. Luckily, in Lightroom, your choice to select a color profile comes when you export the image. Last note, is that this primarily concerns RAW images, certainly, most files downloaded online will be in sRGB profile already. If the image is imported into Lightroom that does not have a color profile assigned, Lightroom will automatically treat it as an sRGB image.
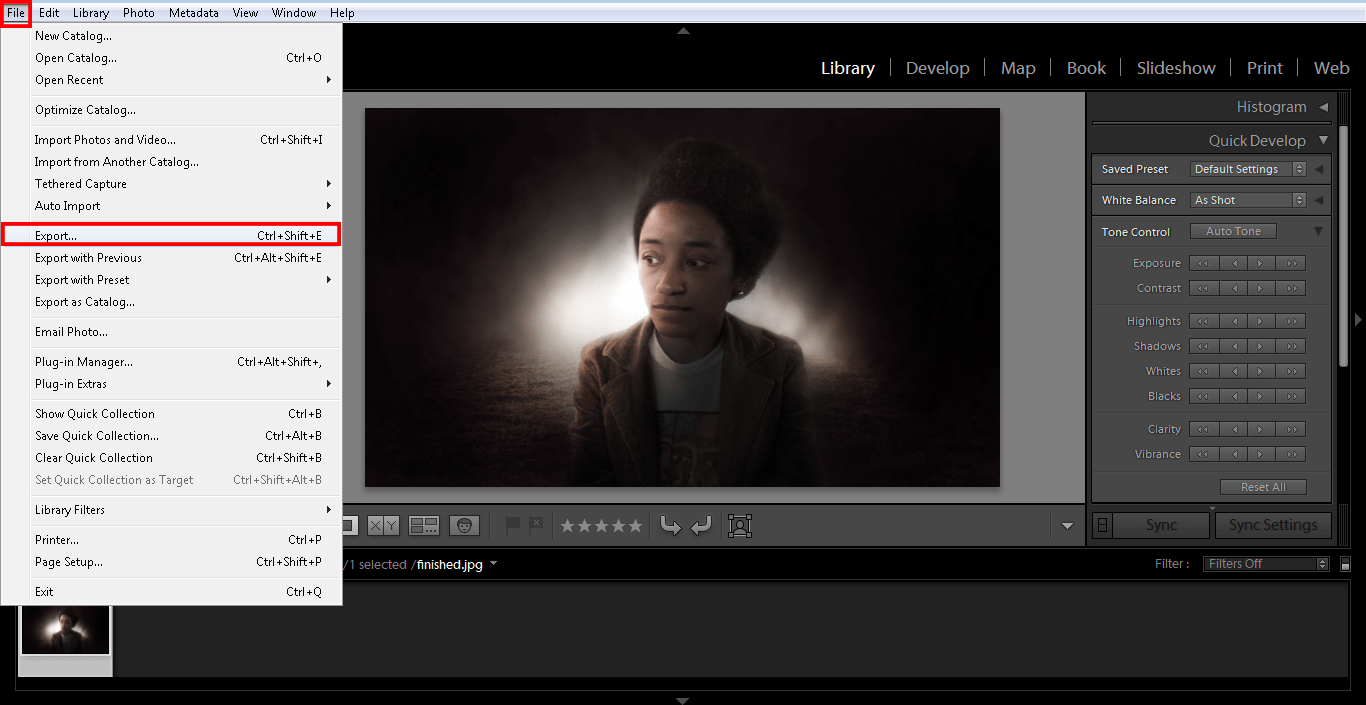
To choose a color profile in Lightroom, go to ‘File’ and select ‘Export’. A new window will open asking you to set the Export settings for the image. Here you can set the output folder, size, sharpening, watermark and the color profile settings. Find the ‘File Settings’ section and open the ‘Color Space’ options, from the drop-down menu that appears, then select the color profile you need. Select the image format, and bit depth if applicable. Bit depth will be irrelevant if you are saving in the JPEG format as it uses 8 bits as standard. Bit memory will be more important if you are editing an image that will use the Adobe RGB color space. To fully utilize the extra color gamut available in Adobe RGB, the 16-bit image will open more available colors to be used – 65,536 shades of each color, Red, Green and Blue, as opposed to the 256 shades of 8-bit images.
If you are unsure what color profile you need to be using, your best bet is that it is the sRGB profile in 8-bit mode. It might sound like it is the most compromising option of all; however, it is the most compact and most commonly used. Unless you know you need to be using a different color profile, there is little need to convert to a profile other than sRGB, and if you always save the copy of the original file, you will be able to return to it if a different color profile is needed, without compromising image quality. Now that you know about color management, it might interest you to visit our post about tool overlay in Lightroom.


Please verify your software version before proceeding.
 I’ve verified my software version


 Facebook
 Google +
Comments (1)
What should I set my camera to?