Hi, everyone so I’m back from my holidays and a tutorial I was thinking of was, at the minute where I live it is quite dull and grey out so any images I’ve taken reflect that, it is winter after all.
But what came to mind was I think it would be a great idea to do a tutorial on how to replace the sky if you were not happy with the results.
Now you don’t have to completely replace the sky you can take it to as far as you are happy with.
Sometimes images look great, there is a whole lot going on accept for one thing, the sky is bland and mundane with absolutely zero going on which then technically means so has your image.
So we are going to learn how to spice this up a little and take what was a pretty dull sky and add in something with a little more life and drama and improve on your image greatly.
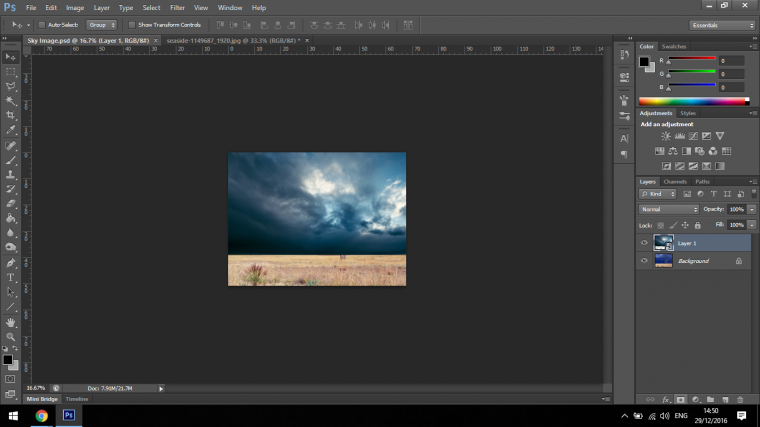
So the two images I will be working with today are as follows.
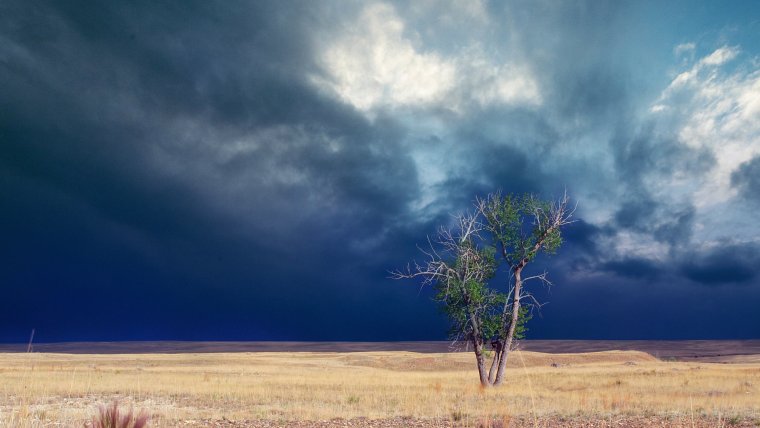
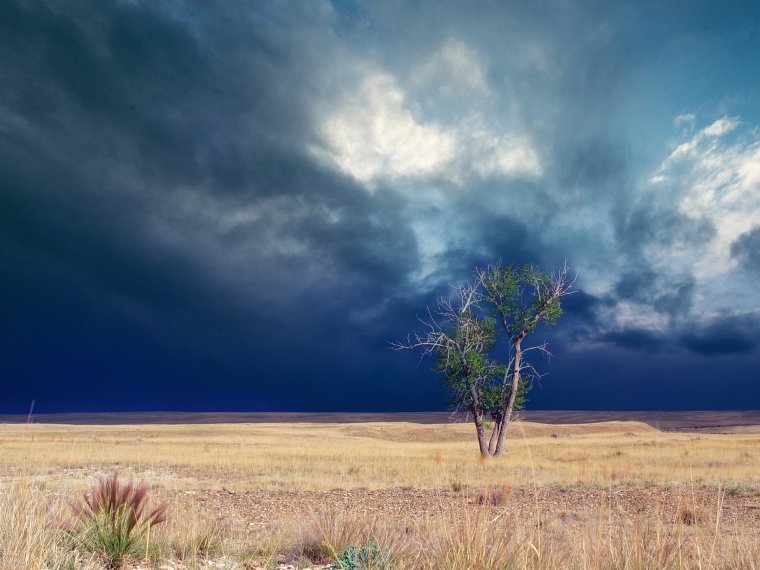
The first is the image we will be editing, as you can see there isn’t much going on with this dull sky unfortunately.
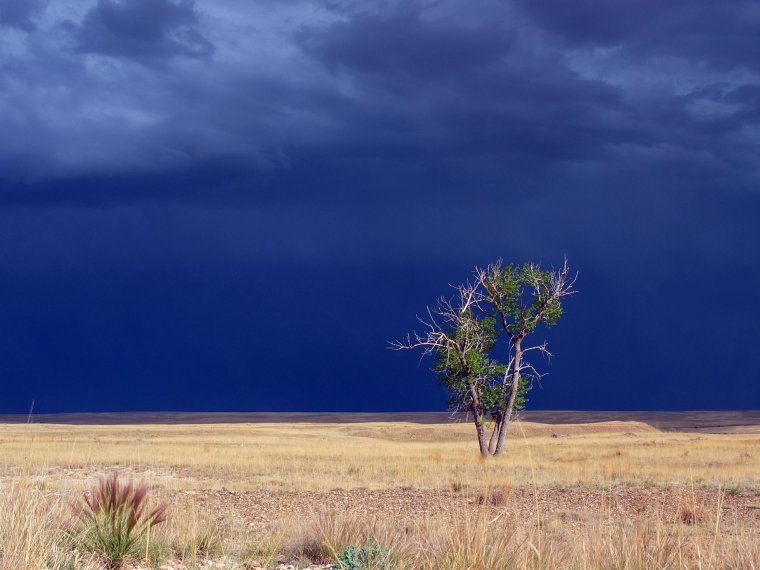
and the second is our dramatic somewhat stormy sky that will bring everything to life and give the tree a sense of isolation to fit the Theme of the image.

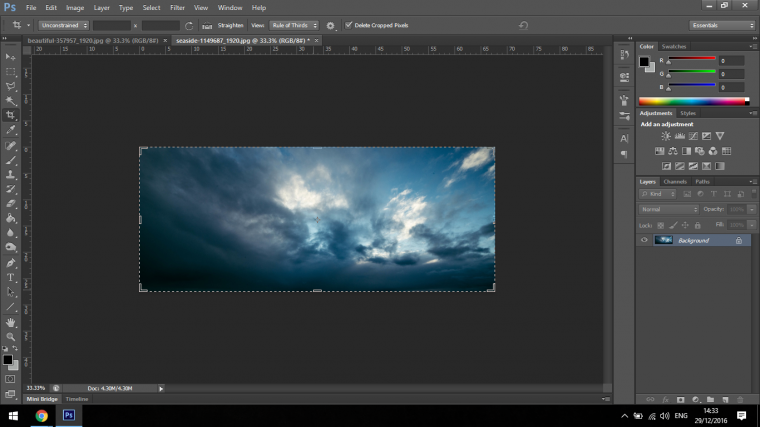
You first mission once you open up Photoshop will be to crop your image if your image has land included in it, we only want the sky part of the image.
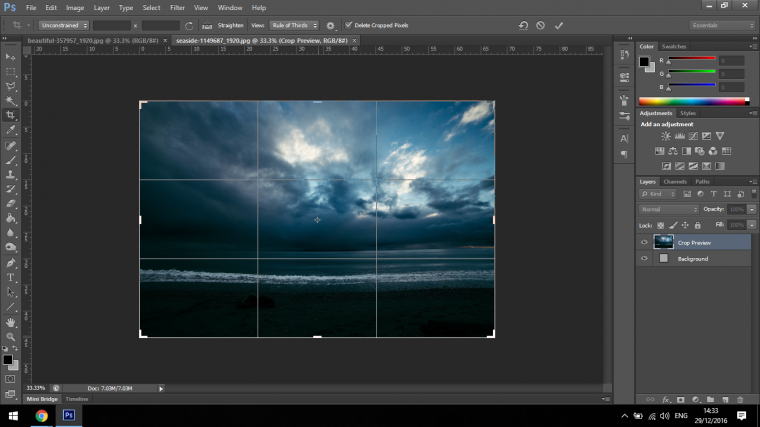
Once you do that select all (under Select – All) and copy using Edit – Copy.
Then paste the image into the image in which you wish to change the sky in.
![]()
Right so the next step depending on the size of your image will be to resize it and re position it somewhere that will work nicely.
I do this by right clicking on my image layer and clicking on convert to smart object, I do this so that the image will become scalable multiple times if we need it to be resized again.
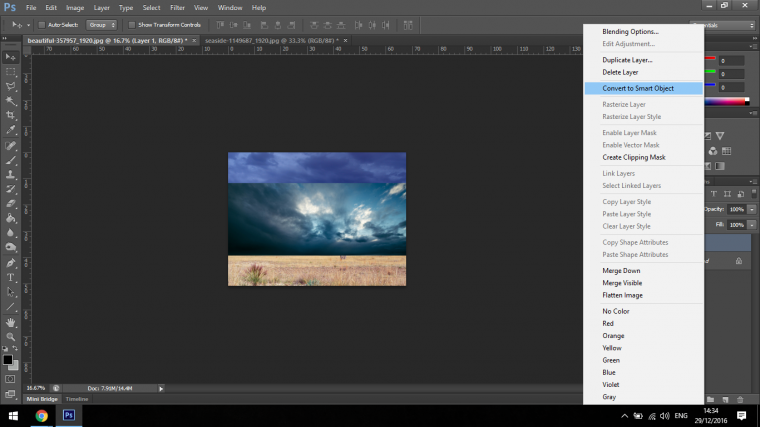
Then just click on the edges holding shift to scale accurately and position where you feel is the best place for you to position/where it looks the best.

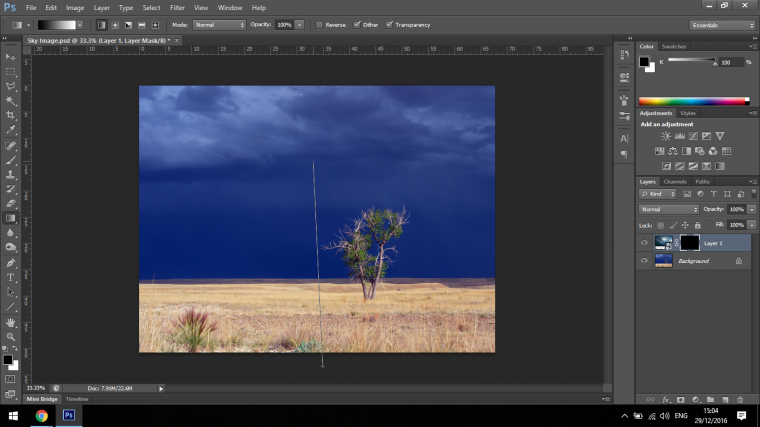
Ok cool so now your image should be looking similar to mine above, press return and we will be ready to move to the next part of our tutorial.
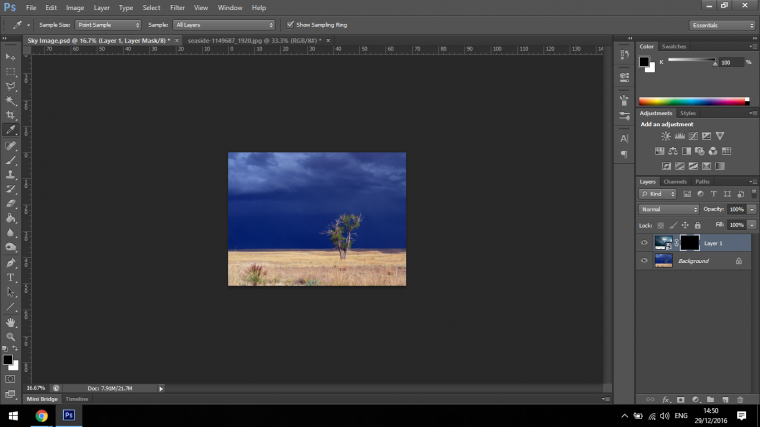
The next part will be to create a layer mask, you will find the layer mask icon at the bottom right hand corner, look for the recycling bin right at the bottom edge on Photoshop, then where you have to click is 4 across with FX beside it, it looks like a circle within a square.
Once you click on that you will now see a little white box appear on your layer image.
We want this to be Black to hold Ctrl and press I on your keyboard.
This will invert the white to black.
The next step is now to grab our Gradient Tool.
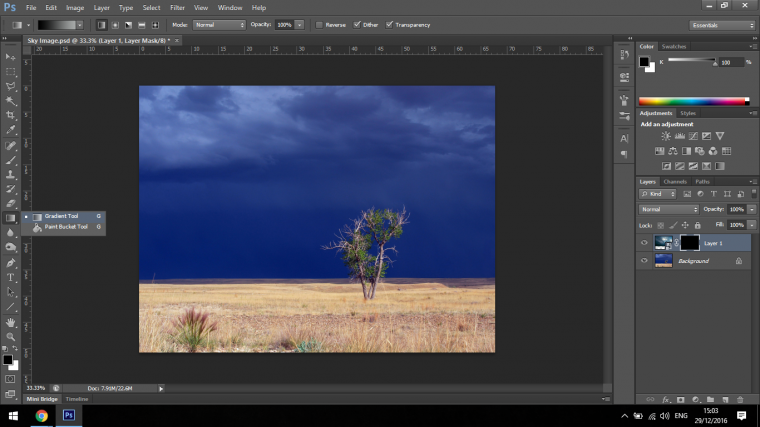
Then you click below the image or somewhere on it at the bottom have, click and drag the Gradient Line towards the top.

This may take you a few tries to do and I would suggest playing around with it first before you settle on one.
Tip To Remember – Create a lomo effect in photoshop
But when you do then the next step will be to use the Brush Tool with Black activated to lift out the details.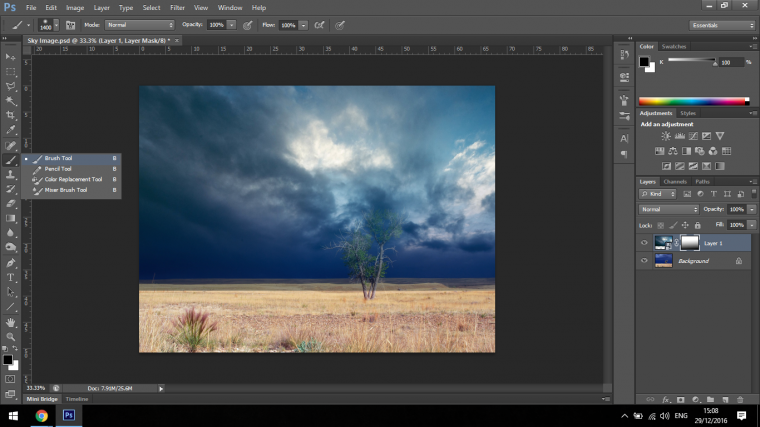
To do this you must zoom right in so you can see the details, you will also have to resize your Brush as you go along I’d imagine, I do this by using the minus and plus keys on my keyboard.
Also another huge tip is that I suggest you drop the opacity of your Brush to around 40% (though you should have to change this as you go along) and build and blend by clicking over an area multiple times otherwise your transition will just be far too noticeable to be accepted as a real image.
If you make a mistake with your Brushing, you can simply click on White and just in the same fashion as you’re doing with Black painting with White will do the opposite.
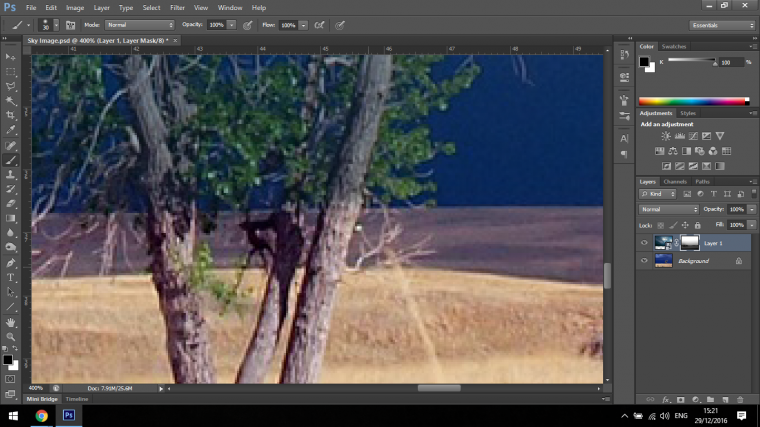
When you are finished going over all the fine areas you should have an image that look like my image below with a nicely transitioned realistic sky.
Looking for a faster way to boost your productivity? Don’t miss our exclusive Skies Overlays Collection for Adobe Photoshop – 170+ Skies Photoshop Textures to choose from, plus some amazing sky-enhancing Photoshop Actions to turn your images into masterpieces.


Please verify your software version before proceeding.
 I’ve verified my software version


 Facebook
 Google +
Comments (0)
There are no comments yet.