Tag: guide

Complete guide to flash for beginners (III): Tips for using an external flash

If you are still reading this article series is probably because you decided that you need an external flash or you even got already one! Congratulations! You did the harder part. Now it is time to have fun! Unlike with the built-in-flash, shooting with an external one is a bit more than pointing and firing. If you don´t know yet how to handle your new gadget, don´t worry! We will give you some tips that will help you starting using it.

#1. If you want to use the TTL, you need to set your camera in Aperture Mode

This might seem obvious for a lot of photographers, but I did not know it when I started using the external flash. I usually  shoot in Manual, so the TTL was not working for me. I was kind of: “What happens to this flash? Maybe I have to ask for a refund because it doesn’t work!”.  So remember: No Aperture mode= No TTL!

flash guide

#2. Wait a little between shots to give time to the flash to load 

Maybe you are used to shoot several photos in a raw or in continuous mode. External flashes need some time to load , so if you shoot too fast, some of the times it won´t fire.

#3. Become a Bouncing master

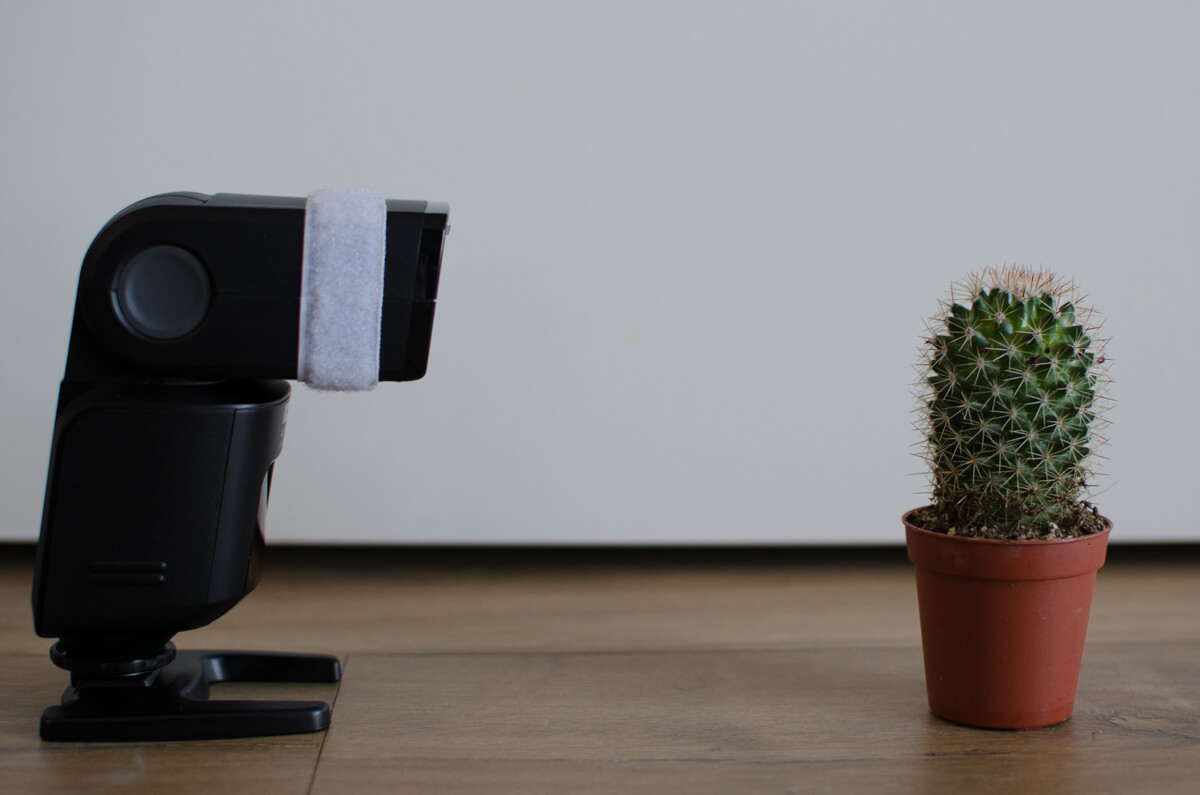
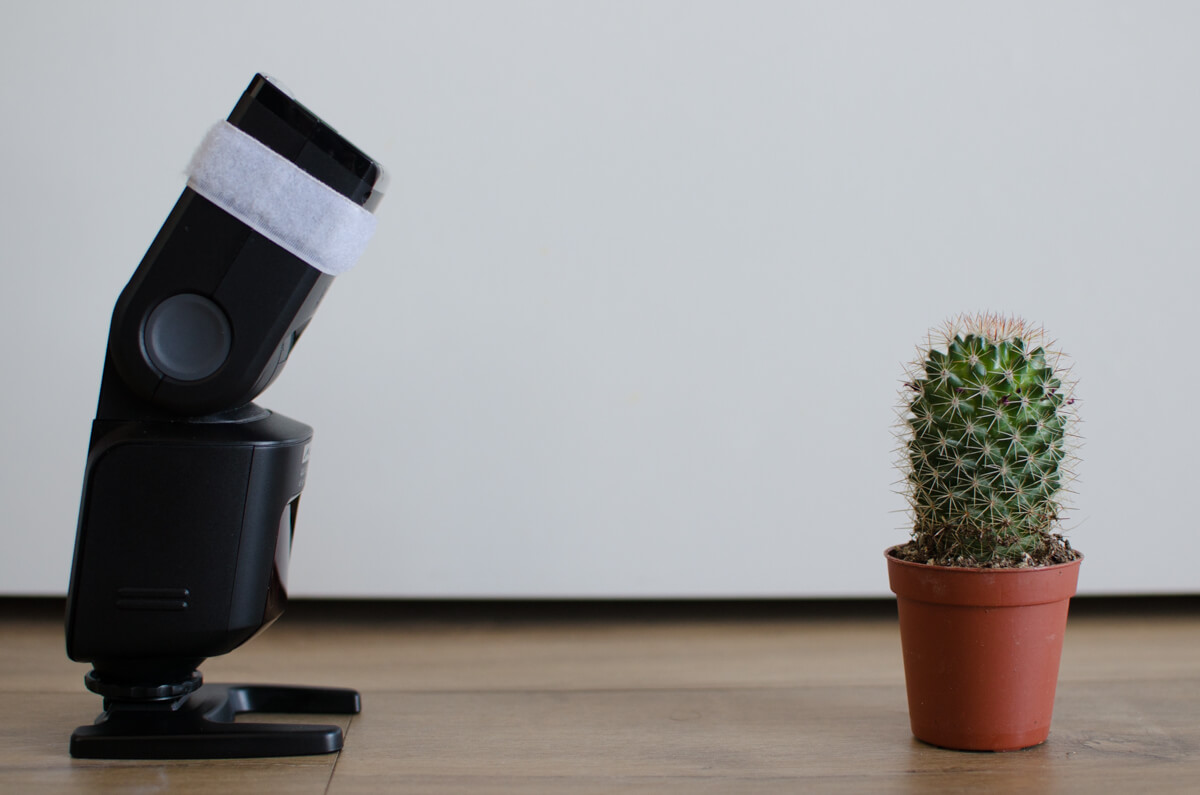
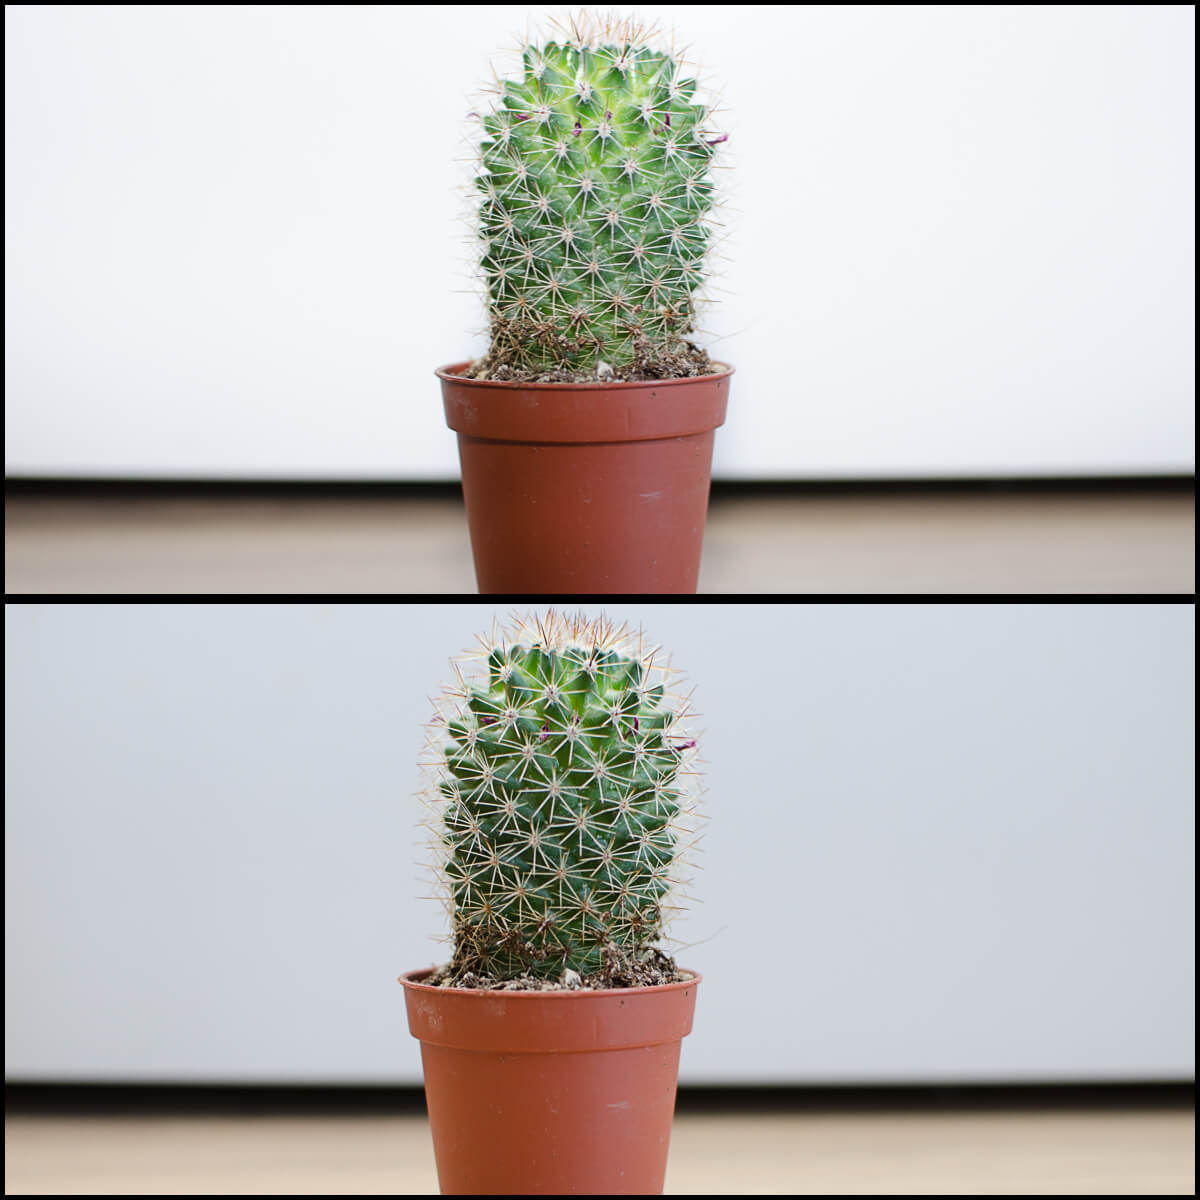
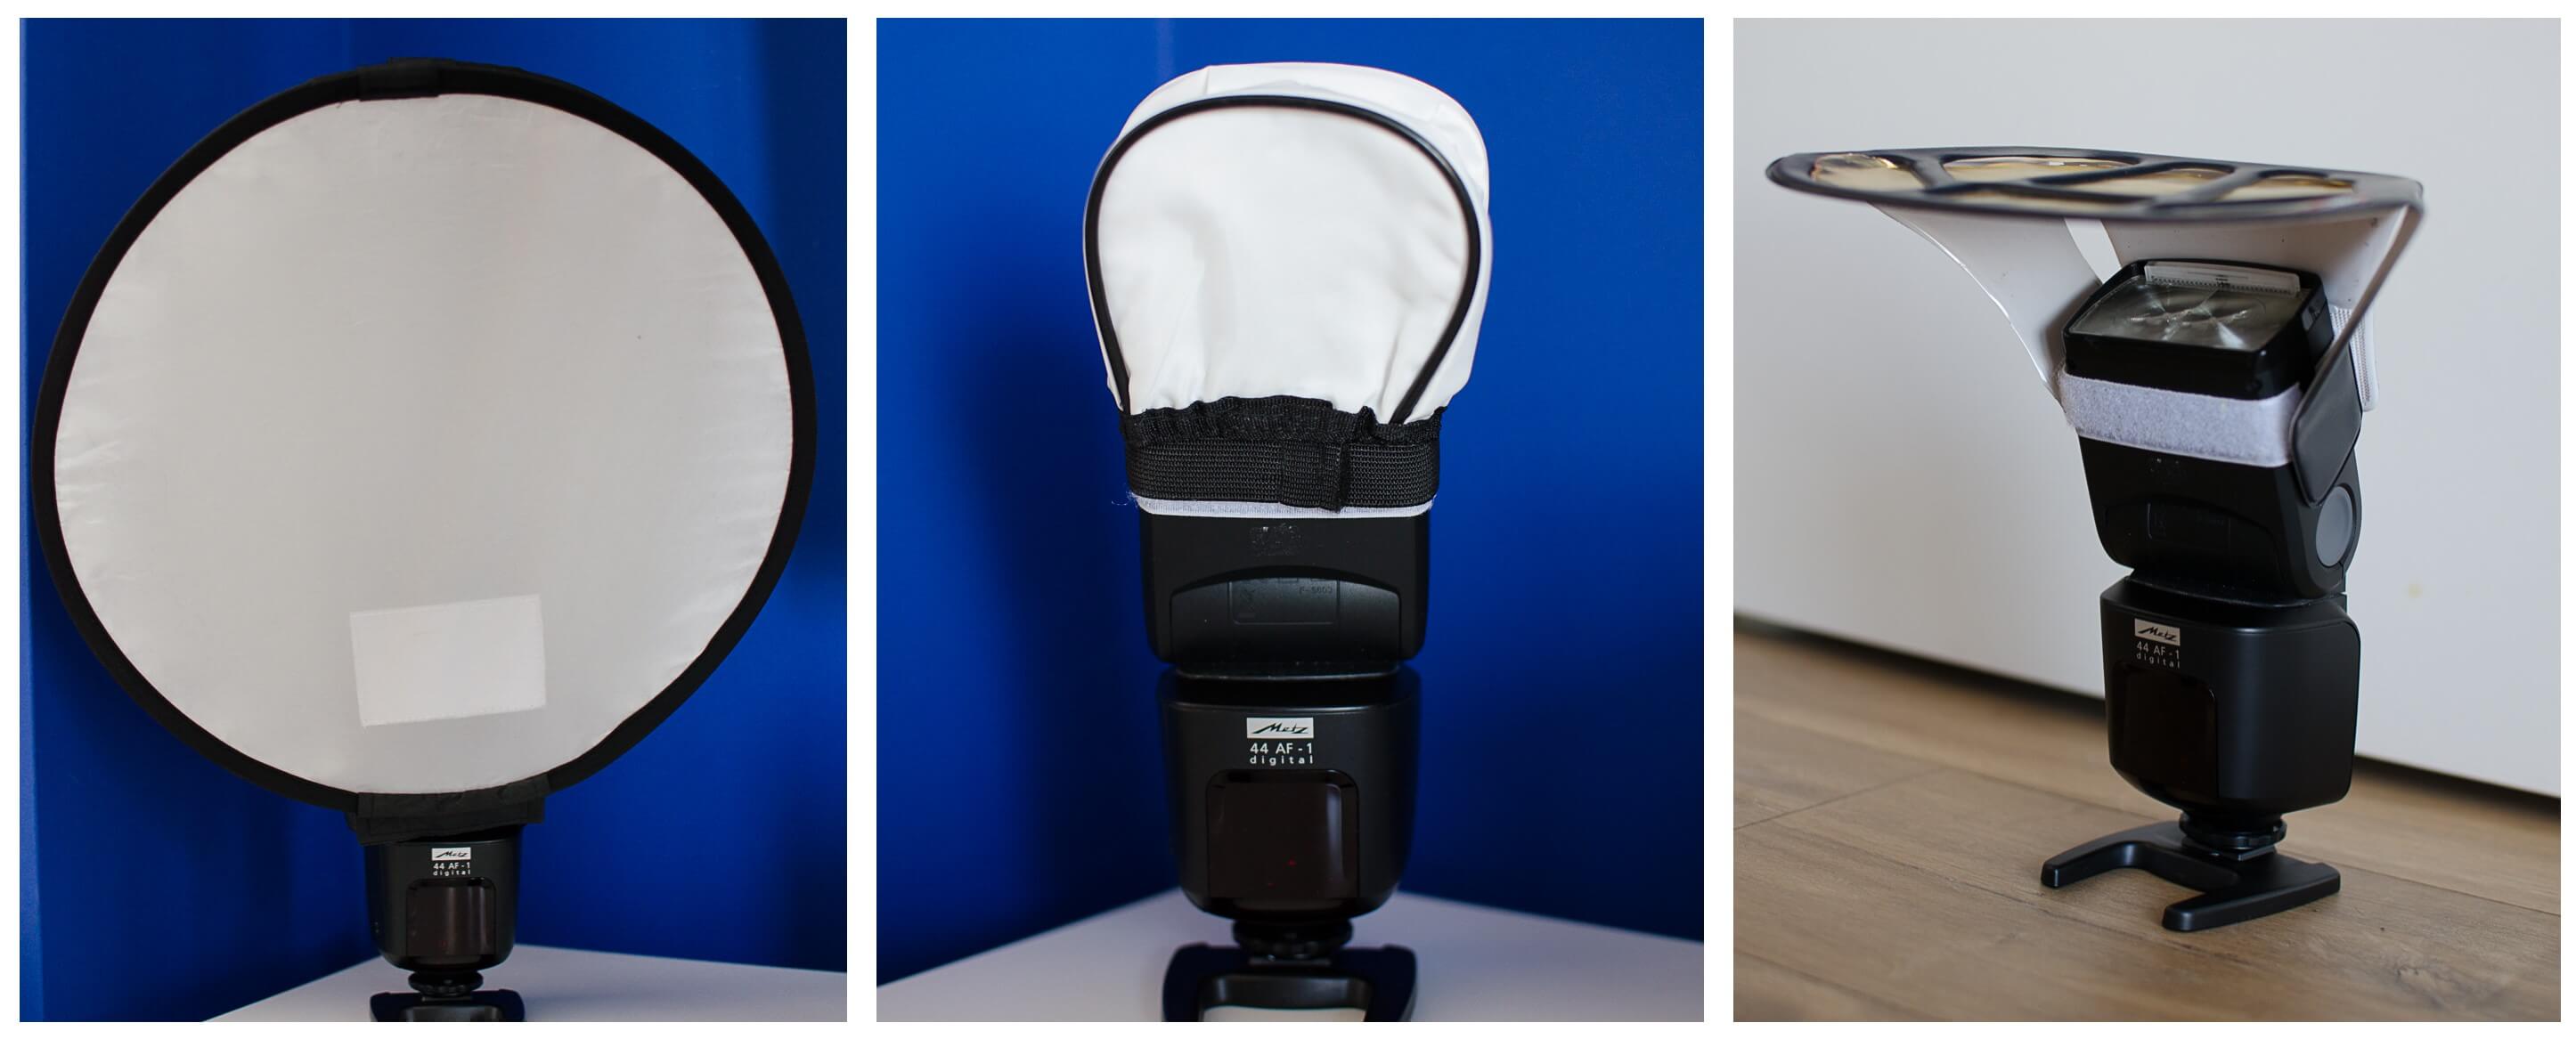
Bouncing is  one of the most important things you can do while using a external flash.  It is not common to flash directly to the subject. Light will be too strong, it  will look unnatural and in addition, it is uncomfortable for the model. Instead, the good thing to do is pointing with the flash to a surface close to your subject (wall, ceiling…). It is the light that reflects from this surface the one that will add light to your subject. It will be a diffused light, so it won´t be so strong and it will look

flash guide

flash guide


flash guide

If you don´t have any evident surface to bounce in, you can use other things, such as the white clothes of somebody around you, a board, some furniture… or you can use reflectors and difusers .

flash guide

#4 Be respectful when using your flash

Don´t fire your flash directly to the eyes of neither people nor animals. I always like to make sure that people does not mind I use the flash, especially if I am shooting events. The strong light can be quite annoying, so it is good that people agree. Some people get into the situation of wanting you to take nice photos, but they don´t want you to use the flash (or they complain about the light). In that cases, try to explain to them nicely that not using it might affect the quality of the photo. If they decide they don´t want flash anyway, at least you were clear about the consequences.

External flash guide III

#5. Be extremely aware for not flashing  babies.

It is easy remembering not using the flash when you take photos of a baby at home. But when you are in an event or with a big group of people, it is easier to miss it. Flashes are quite aggressive for delicate eyes of a baby, so try to be always aware of the proximity of one of them.


#6. Do wrist workouts.

Do some gym style exercises that will  increase the strength of your wrists. Just kidding!! But if you are going to hold your camera with a external flash for long time (this happens a lot if you are shooting events), you will notice the extra weight. Rest form time to time to avoid soreness (and now I am serious! After shooting a night wedding and carrying the camera with the flash for several hours, I felt my writs sore next day).

I hope you liked this series and that you find it useful. Have a happy flashing

Complete guide to How To Use Flash : Do I need an external flash?

There is a moment in the life of each photographer that the big question arrives: Do I need to get an external flash? The question is not easy to answer, mostly because when you are new to the subject, even the terminology used to describe them sounds confusing. After checking for a couple of flashes it’s easy to feel even more confused, so you can end up not getting an external flash or getting the first one you check. I want to help you to decide if you should get an external flash by putting together a complete guide with everything I learned when I decided to go into the wonderful world of external flashes.

External flash
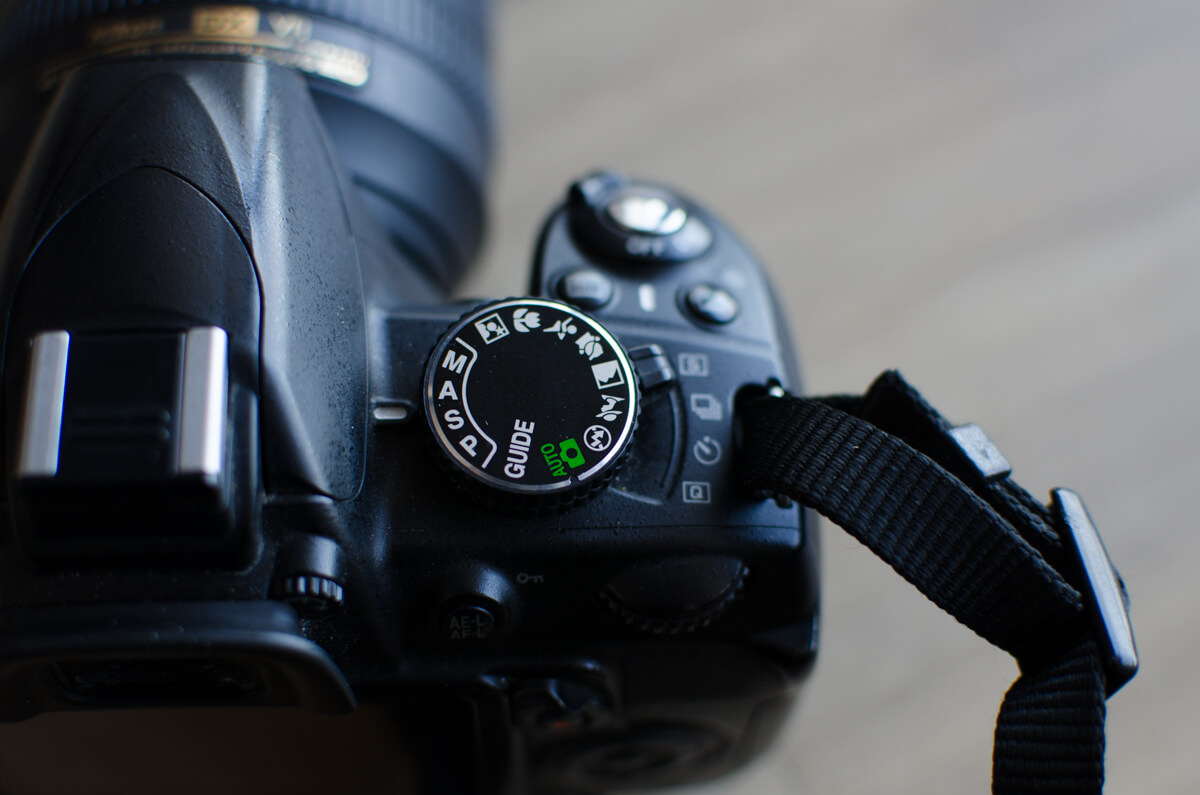
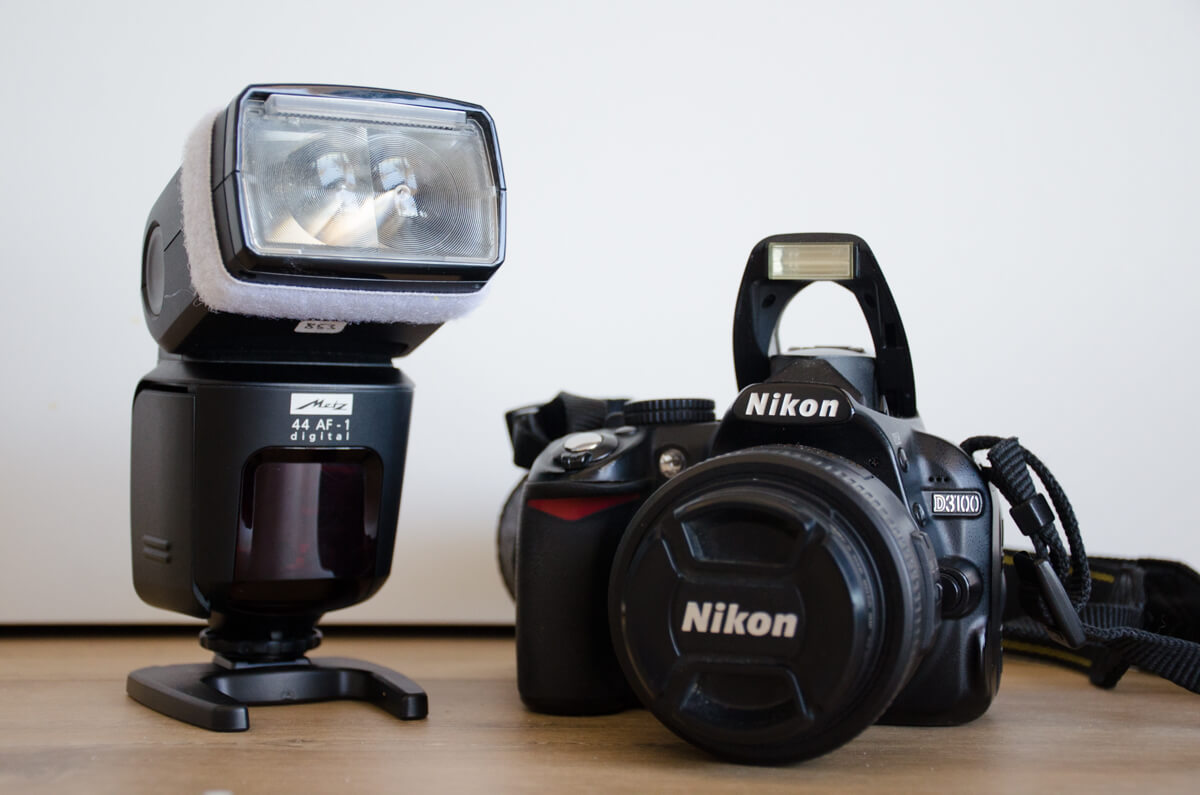
My first DSLR camera with its built-in flash raised and my first external flash. Both of them I still use today, that’s why I recommend to take the time and check what you need and what the market has to offer before purchasing

In this first article, we will focus on the advantages and disadvantages of both the external and the built-in flash. This will help you to decide if you need to invest in an external flash or not. In the following articles of this guide, I will talk about things you should consider when you choose your external flash, some useful accessories and I will give some tips to start using your brand new flash! Let´s start!

Built-in flash

A built-in flash is an integral unit of the camera that discharges strong, rapid pulses of light when you are taking a photo. It is working in the most basic way possible. It is synchronized with the camera’s other apparatus.

External flash
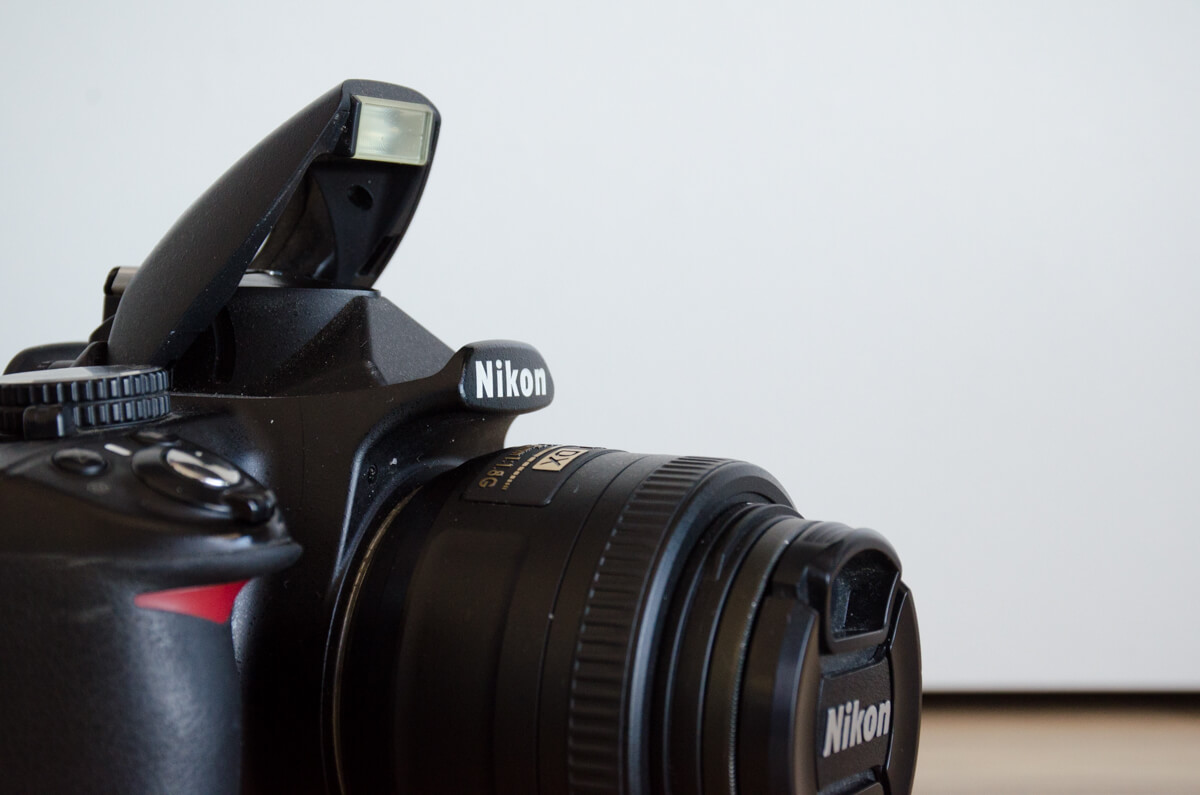
The built-in flash; compact and available, you can see it is a quite simple apparatus

Advantages of using a built-in flash

#1. Always with you: One of the main advantages of this flash is that it is already in your camera. You don´t need to choose it or make any effort to remember to put it inside your bag. It is always there ready to fire!

#2. Intuitive: Using the flash is something quite intuitive to most starting photographers; you are in the dark, you pop out your camera’s built-in flash, you take the photo- problem solved.

#3. Small and light: The built-in flash does not add extra volume or weight to your camera bag. Depending on the situation, this can be a really good thing.

Disadvantages of the built-in flash

#1 Light always comes from the same spot: The most obvious disadvantage of the built-in flash is marked in its name; you have no control over the light source location or its direction, it will always come from right in front of your subject. And most of the times this means that the light will go straight to his eyes (besides being annoying, it produces a very evident red-eye effect).

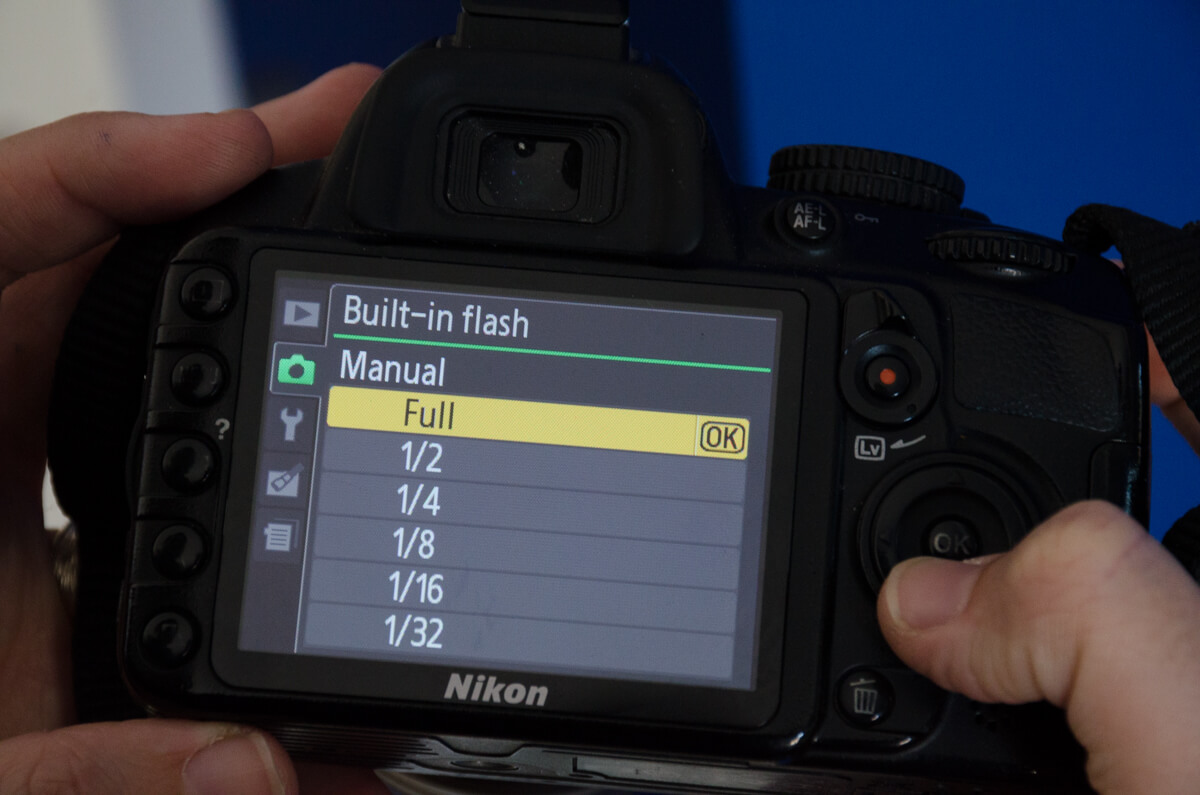
#2. Lack of adjustability: Most built-in flashes offer very little in terms of adjustability. Some cameras offer three options: “No flash” in which flash will not be fired, “Auto flash” in which the camera will trigger the flash if the exposure is too low, or “Default flesh” in which the flash will be fired every time you’ll take a photo. That´s all! In cameras with more advanced flash options you might find some more options, but usually, you need to change them from the settings menu and it is quite uncomfortable to do it.

External flash
The built in flash is quite limited in terms of adjustability, and changing its settings is not so easy to get to

#3. It uses your camera battery: The built-in flash is dependent on your camera’s battery, making your battery’s lifetime shorter.

#4. Not good for long distances: Although it could illuminate quite well for short distances of up to three or four meters, it loses its effectiveness at greater distances.

External flash

The external flash is like the built-in flash’s bigger brother. It is an external unit which can be attached to the camera body through a designated port called a horseshoe. The more basic external flashes are merely triggered by the camera while the more advanced ones can get more information from the camera such as the lighting conditions and the settings of the camera (aperture and shutter speed)

Advantages of using an external flash

#1. It saves camera battery because it has its own

#2. Placement flexibility: the fact that the external flash has its own battery means it is also possible to mount it on tripods or on feet of its own and place it wherever you want.

external flash
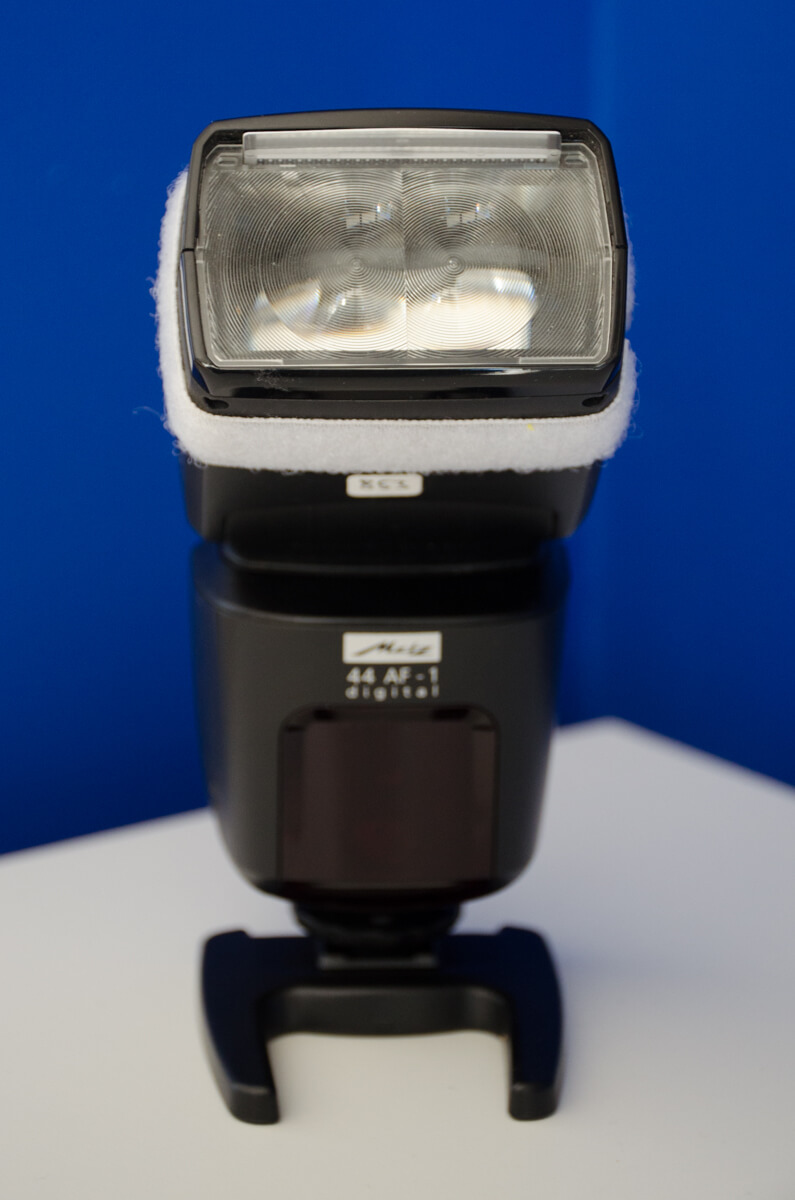
The external flash can stand and work independently and separately from the camera, here you can see it standing on a foot

#3. Bouncing Head: the light source itself is usually set on a rotating and tilting head which allows you to play a bit more with the lighting’s angle, enabling you to bounce the light off of surfaces (this is good when you want to avoid hard light)

#4. accessories: the external flash can be combined with many gadgets and accessories such as reflectors, tripods, filters, diffusers and more. Using them could be very helpful and fun.

external flash
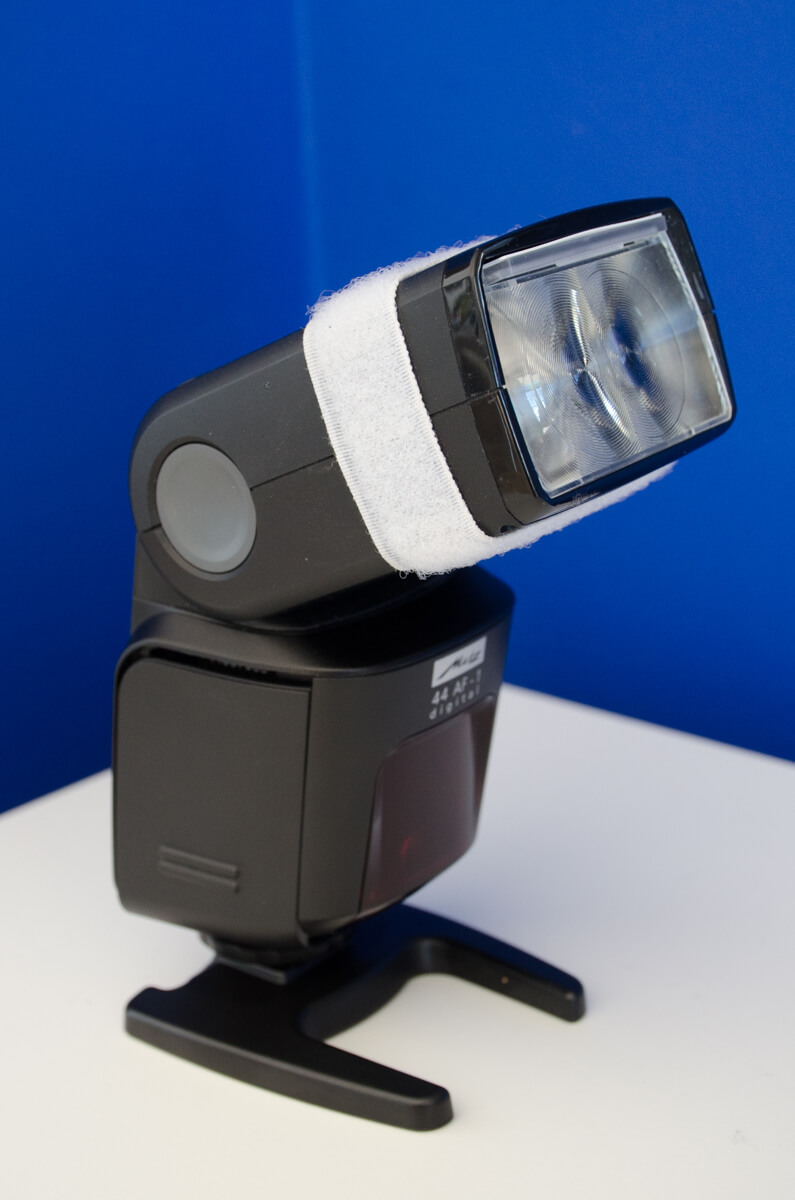
Here you can see the flash is built with a tilting head (it’s a bit harder to see but it is rotating too). Another thing you can see here is the white velcro I glued on it, I use it to attach many accessories to my flash

#5. You can control the light better: at the most fundamental level, the flash is a lightbulb, its intensity does not change, but the duration of the discharge can change if the flash is lit for a longer time the amount of light captured by the sensor is greater. In the external flash, setting and changing the duration of the discharge is one of the most basic things you can do.

external flash
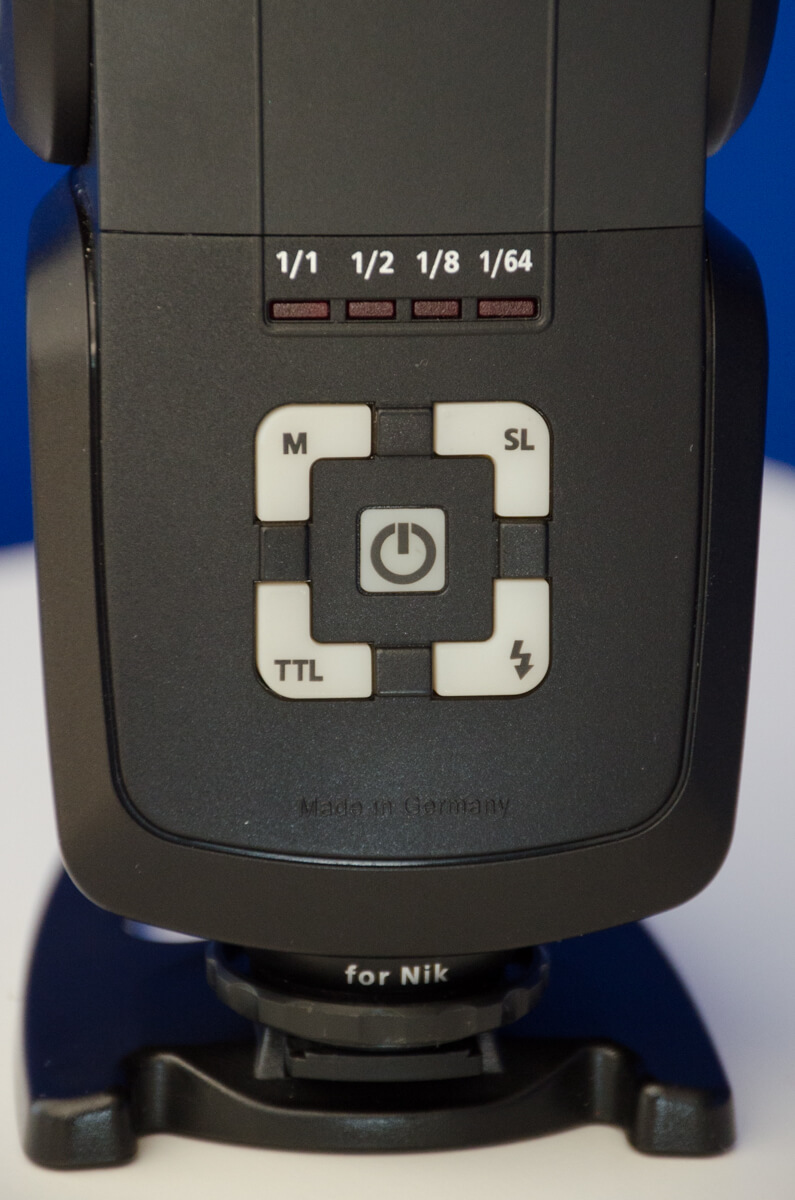
With just five buttons, you need a little practice but after you get the hang of it, it is quite easy to adjust the flash and change its settings

#6. You can synchronize several flashes: I don’t know if you are thinking about using more than one flash for now, but it is good to know this possibility exists. It is a good way to ensure even lighting in the photo, especially when you have a big group or a complex subject, or if you want to create certain effects.

#7. They can reach further: external flashes have more power than the built-in ones, so you can illuminate subjects that are further from the flash.

Disadvantages of external flashes

Like with everything else in life, there is a trade-off when using an external flash. The more you want to get from the flash, the more planning is required and less spontaneous you can be.

#1. It adds weight to your camera bag: having its own battery means the weight is greater. Think that you usually will carry extra batteries too. So you end up with almost the same weight as if you are traveling with two cameras, and when you take a photo it’s as if you’re holding a camera and a half.

external flash
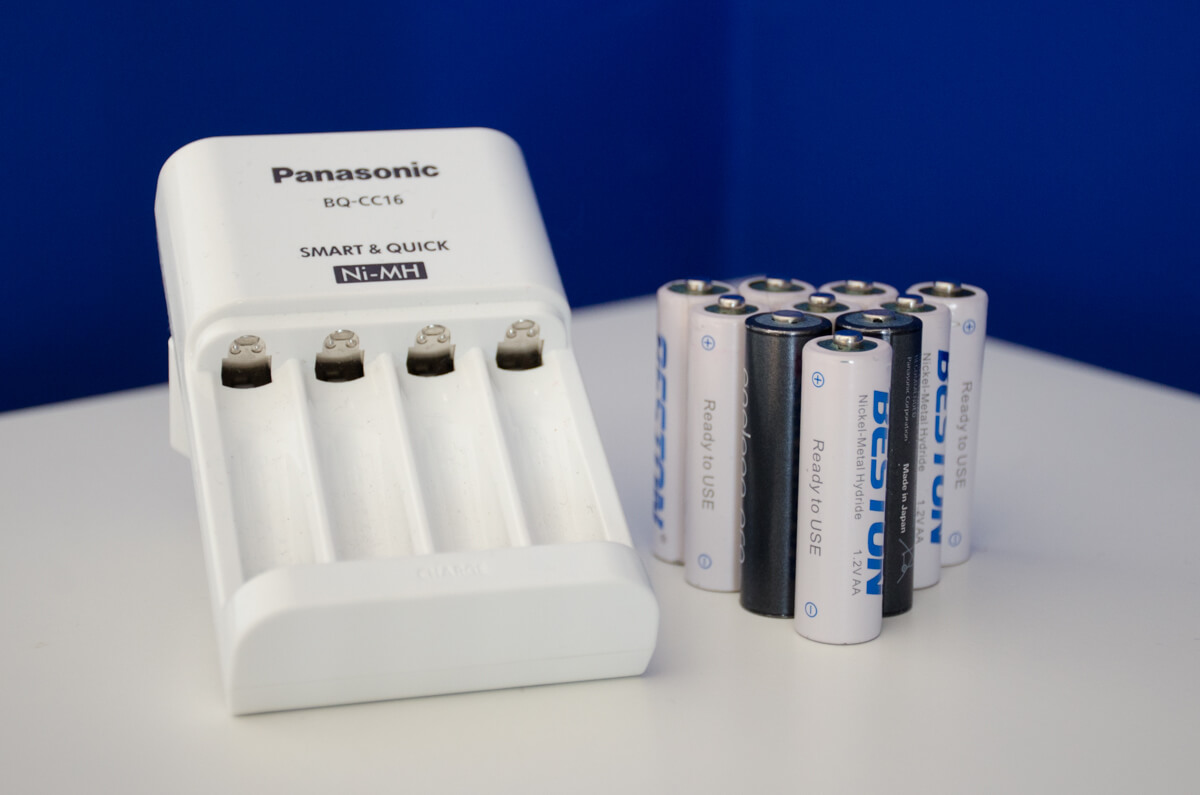
Several sets of batteries and a charger sure take their space in your bag and you certainly can feel their weight

#2. It might take a lot of places: most external flashes are too big to fit in a standard camera side bag and require you to either have a specific bag or have a much bigger bag and the flash to be detached from the camera while inside.

#3. It is one more thing you need to recharge (and to remember to recharge). Having its own battery means you have another thing that requires a charger and a socket, this could be especially limiting if you are traveling

#4. You need to invest extra money: external flashes are not included with the camera, so you will need to spend some money and depending which type of flash you want, they can get really expensive (the range of prices is wide). In addition, depending on the type of photography you are into, it might be at risk of damage or loss (outdoors, bad weather conditions…) so you might prefer to get two cheaper flashes instead of one that is more expensive.

#5. Not so intuitive: after using them for a while they are not so complicated, but at first they are a bit hard to get used to. It is not just turn on and fire.

#6. Not all the flashes are compatible with all the cameras. This means you should ALWAYS CHECK COMPATIBILITY before purchasing a flash

In summary, built-in flashes are a good option if you don’t want to carry the extra weight that an external flash (and it’s batteries!!) might add to your bag. It will free you from charging batteries all the time and needing to check if they are ok (they don´t last so long when you the flash a lot). However, this freedom comes with a price: the loss of flexibility and control. Usually, the built-in flash is good if your photos aim to document a moment without too much regard to the photo’s technical quality (a good example of this situation will be when you are at a party and you want to commemorate your friends goofing off). However, when you want to have more control over your photos, The built-in flash is quite limited. If this is your case, you will need to consider the option of getting external flashes.

This is my first article in a series of articles about flash I hope you find it useful. If you have any questions, topic suggestions or remark write me a comment. Have a happy shooting!

Batch-Process Cleverly on Lightroom

So, remember all those times when you come back home from a shoot with a hundred shots with varied light set-ups? Remember, struggling and pushing to process all those beautiful shots one by one? Will I make your day better if I told you how to cleverly batch-process these images? Maybe, yes.

So, the easiest way to processes your images without consuming too much time would be to split them into batches. When you go for a wedding shoot, or some indoor event, you end up with over hundreds of images in varying light set-ups. So what you can do is split these images into batches of 5 or batches of 10 and apply a setting/edit common to all these selected photographs.

Ideally, a “shoot” indicates that you’ve used various lenses, applied different ISO speed settings, etc. And different images look different depending on the kind of light that got reflected in that moment or depending on the kind of colours that got captured in that particular moment. So how do you cleverly segregate these images into different batches? How do you figure out which ones to group together?

The fundamental idea is to choose a set of photographs where you can apply a group of similar settings. Follow the steps below to make your work progress a lot faster, easier, and a lot more efficient.

Step – 01

Choose a set of photographs (it can range from a set of 4 photographs to almost 20 photographs), this is what we call a “Batch”. Start correcting the first photograph in that set – adjusting Exposure, White Balance, Tint, Tone curve, Sharpness, etc. Remember, you’re going to apply all these settings later to the rest of the batch, so make sure that your corrections will apply similarly for the remaining images as well.

Screenshot 2016-07-19 13.37.35
The first three images are the ones I’ve combined into a batch for similar processing.

Tip: Do not make major adjustments with the local correction tools, as this might vary from one image to another. What you correct for one image might not apply to the next, even though you’ve grouped them all in the same batch.

Step – 02

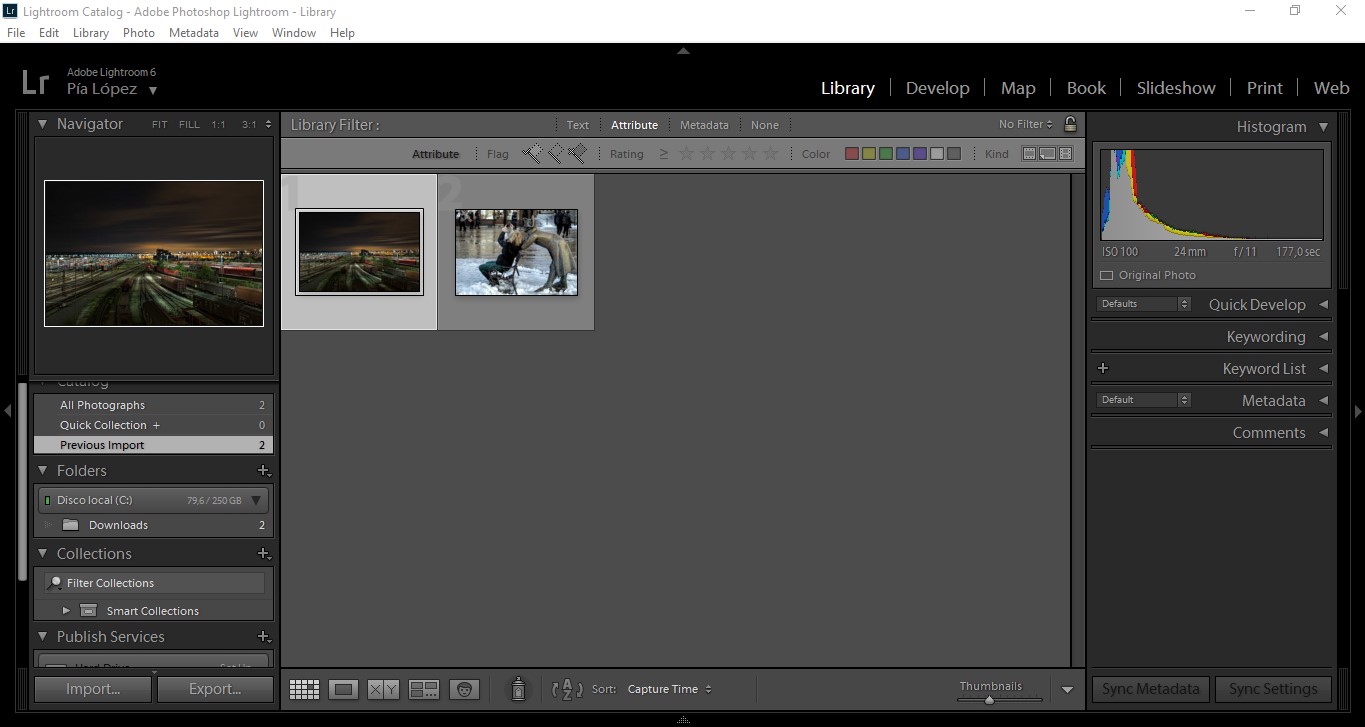
The next step is to copy the develop settings from the first photograph, and paste them to the rest of the images in that particular batch. Or alternatively, select the first image, press and hold the ‘Shift’ key and select the remaining photographs. Then, click on the “Sync Settings” button that appears on the lower right bottom of the Library Module.

Batch Processing – Synchronize settings.

Tip: Shortcut to Sync settings is Command + Shift + S

Once you click the sync settings button, a dialog box will open asking about the settings which you would like to copy to the remaining photographs. Make sure that you deselect all the local corrections, and select everything else. Remember, local corrections vary from image to image. So it is advisable to work on the images individually for those changes.  

Step – 03

Repeat the above steps 1 and 2, until you are done with all the photographs in the batch. 

Step – 04

This is the stage that takes up considerable amount of time. True, it depends on the number of images we’re dealing with and the kind of correction it requires, but this stage also calls for some care and concentration so we don’t go wrong.  All the local correction tools namely Crop tool, Adjustment brush tool and Spot removal tool shall be applied manually to each and every photograph in that particular batch. And there we go, you’ve now learned how to speed up your work process while cleverly using the batch process method.Just like how you copy paste the settings from one image to another, you can copy paste noise correction settings as well. The trick is to filter out your images based on a particular ISO setting. Use the filter tool, and filter out images with similar ISO settings. Let’s look at an example. Say, I’m looking for images with an ISO of 1600. Use the filter tool, and filter out all the images in my collection with similar ISO settings. Let’s say Lightroom provides me with a set of 80 images. What do I do no? Pick one image, apply noise-correction changes to this one image, and sync these settings to the remaining 79 images. Tada!

So, use the batch process method effectively, and reduce stress, time-consumption and make your work a lot more fun. We hope this article helped you out, and if yes, let us know about our experience in the comments below.

Adobe Lightroom’s Rating System Guide for Beginners

When you have hundreds, maybe even thousands of images you need a way to sort through them that’s both quick in practice and set-up. Lightroom gives the photographer several methods of tagging / attributing images ready to be put into collections and you may find you have a preferred method or actually find them all useful. Whatever the outcome, this Lightroom’s Rating System tutorial will talk you through the various tagging methods as well as give you tips on why rating your images is important.Lightroom offers three different rating systems – star ratings, flags and colors. Star ratings are usually used to record the quality or value of the photo, with 1-star photos being poor, and 5-star photos being the best you’ve ever taken. Grading the photos gives you more information to help you find the best photos again later. The downside is if you’re indecisive, you could spend ages trying to figure out whether a photo deserves 2 stars or 3, and as your photography improves, your older 3-star photos might only count as 2-star photos now. But, you can always change the rating on a photograph, so you don’t have to worry about it much, now. Flags are much simpler, having just 3 states – flagged, unflagged or rejected. It’s quicker to decide whether you like the photo or not, so if you find yourself dithering between 2 and 3 stars, flags might be the ideal system for you.Colors are kind of open to interpretation. This gives you a lot of flexibility, but it also means that in order to get the most out of color labels you will need to develop your own system. For example, when you are finished with a photo and it is ready to export you could mark it as green. When there is a photo that you know you want to print you could mark it as red. Photos that need more work could be set to yellow. The colors can mean whatever you want them to mean, you just need to decide on the system that will work for you.These three options are collectively referred to as “Image Attributes”.

Why would you need this feature?

The answer to this question is simple. You need to use these features too:

  1. Keep your workspace organised.
  2. Easily sort through your library.
  3. Save a lot of time.
  4. Make your work a lot more friendly, neat and easy.
  5. Easily separate and tell the difference between specific shots in various ways.

How do you effectively use this feature?

First you have to install the Lightroom preset.  When you are in the library module of Lightroom presets, if you look near the bottom of the screen you should see the controls for flags, stars, and colors.Screenshot_2

Star Rating in Lightroom

Like I said before, an image can be given a star rating ranging from 0-5, with 0 being the worst and 5 being the best. It’s best to apply the theory that the more stars an image have the better you believe it is. This will speed up your work-flow and stop things becoming confusing when you’re looking back through your images. Rating stars can be set or displayed in any view of the Library module (Grid view, Loupe view or Survey view). There are multiple ways to provide star rating to your image(s):

  1. Select the photo that you want to rate, then choose Photo > Set rating and select a number from the drop-down list.  
  2. Alternatively, select the image you wish to rate and press a number from 1 – 5 on your keyboard to rate the picture.
  3. Hover your mouse cursor over a thumbnail and to the bottom left you will see 5 dots appear. Clicking on these allows you to apply a number of stars to the image. But please note that this method works only in the Grid View.

Tip 1: You can select photos and press ] to increase the rating or press [ to decrease the rating.Tip 2: You may find the Compare View useful when applying stars as this will allow you to compare two similar shots side-by-side so you can decide which one deserves the higher score.

How to Flag Photos in Lightroom

The main purpose of flagging photos is to help you know which ones to keep and which ones to reject. When it comes to flags each photo will be in one of three states: it can be marked to keep, marked to reject, or unmarked.

  1. The quickest way to pick or reject an image is to use the keyboard shortcuts:
    P – to pick an image.
    X – to reject an image.
    U – to mark an image as unflagged.
  2. Alternatively, you can select an image in Grid view or Loupe view, and mark it as any of the three ( Flagged, Rejected or Unflagged). Choose Photo > Set Flag > Choose any of the options from the drop-down list. This method works in any of the views (Grid, Loupe or Survey)

Note: Marking a photo as “Reject” will not remove it from the Library. They will simply be grouped as rejected photographs.

A flagged image.


A rejected image would have a flag icon with a cross over it. (top left of the cell)

Colour Labelling

Labeling photos with a certain color is a flexible way to quickly mark a large number of photos. Like I mentioned before, colours are open to interpretation. They can mean whatever you want them to mean, and you just have to identify a system that works best for you. Like the other two attributes, the colour rating can be done in a number of methods:

  1. Select the photograph that you want to rate, choose Photo > Set colour rating and choose a colour from the drop-down menu.
  2. Alternatively, you can also use the keys 6-9 to select a particular colour.
    the “6” key for red
    the “7” key for yellow
    the “8” key for green
    the “9” key for blue

Unfortunately, the colour purple does not have a keyboard shortcut. Press the same number key again to remove the colour rating. Once applied, the colours will be visible around the images.

An example of what a colour-rated cell would look like.

That covers three of Lightroom’s most powerful features for keeping your photos organized. The key is to decide on your own system and then actually use it by tagging your photos.

We hope this article is helpful in guiding you to maintain a clean and organized workspace. Leave a comment below and let us know about your experience. And if you’re interested about lightroom’s features, check our post about Lightroom Masterclass in Clarity.


70-200mm Lens – How to Avoid Blurring?

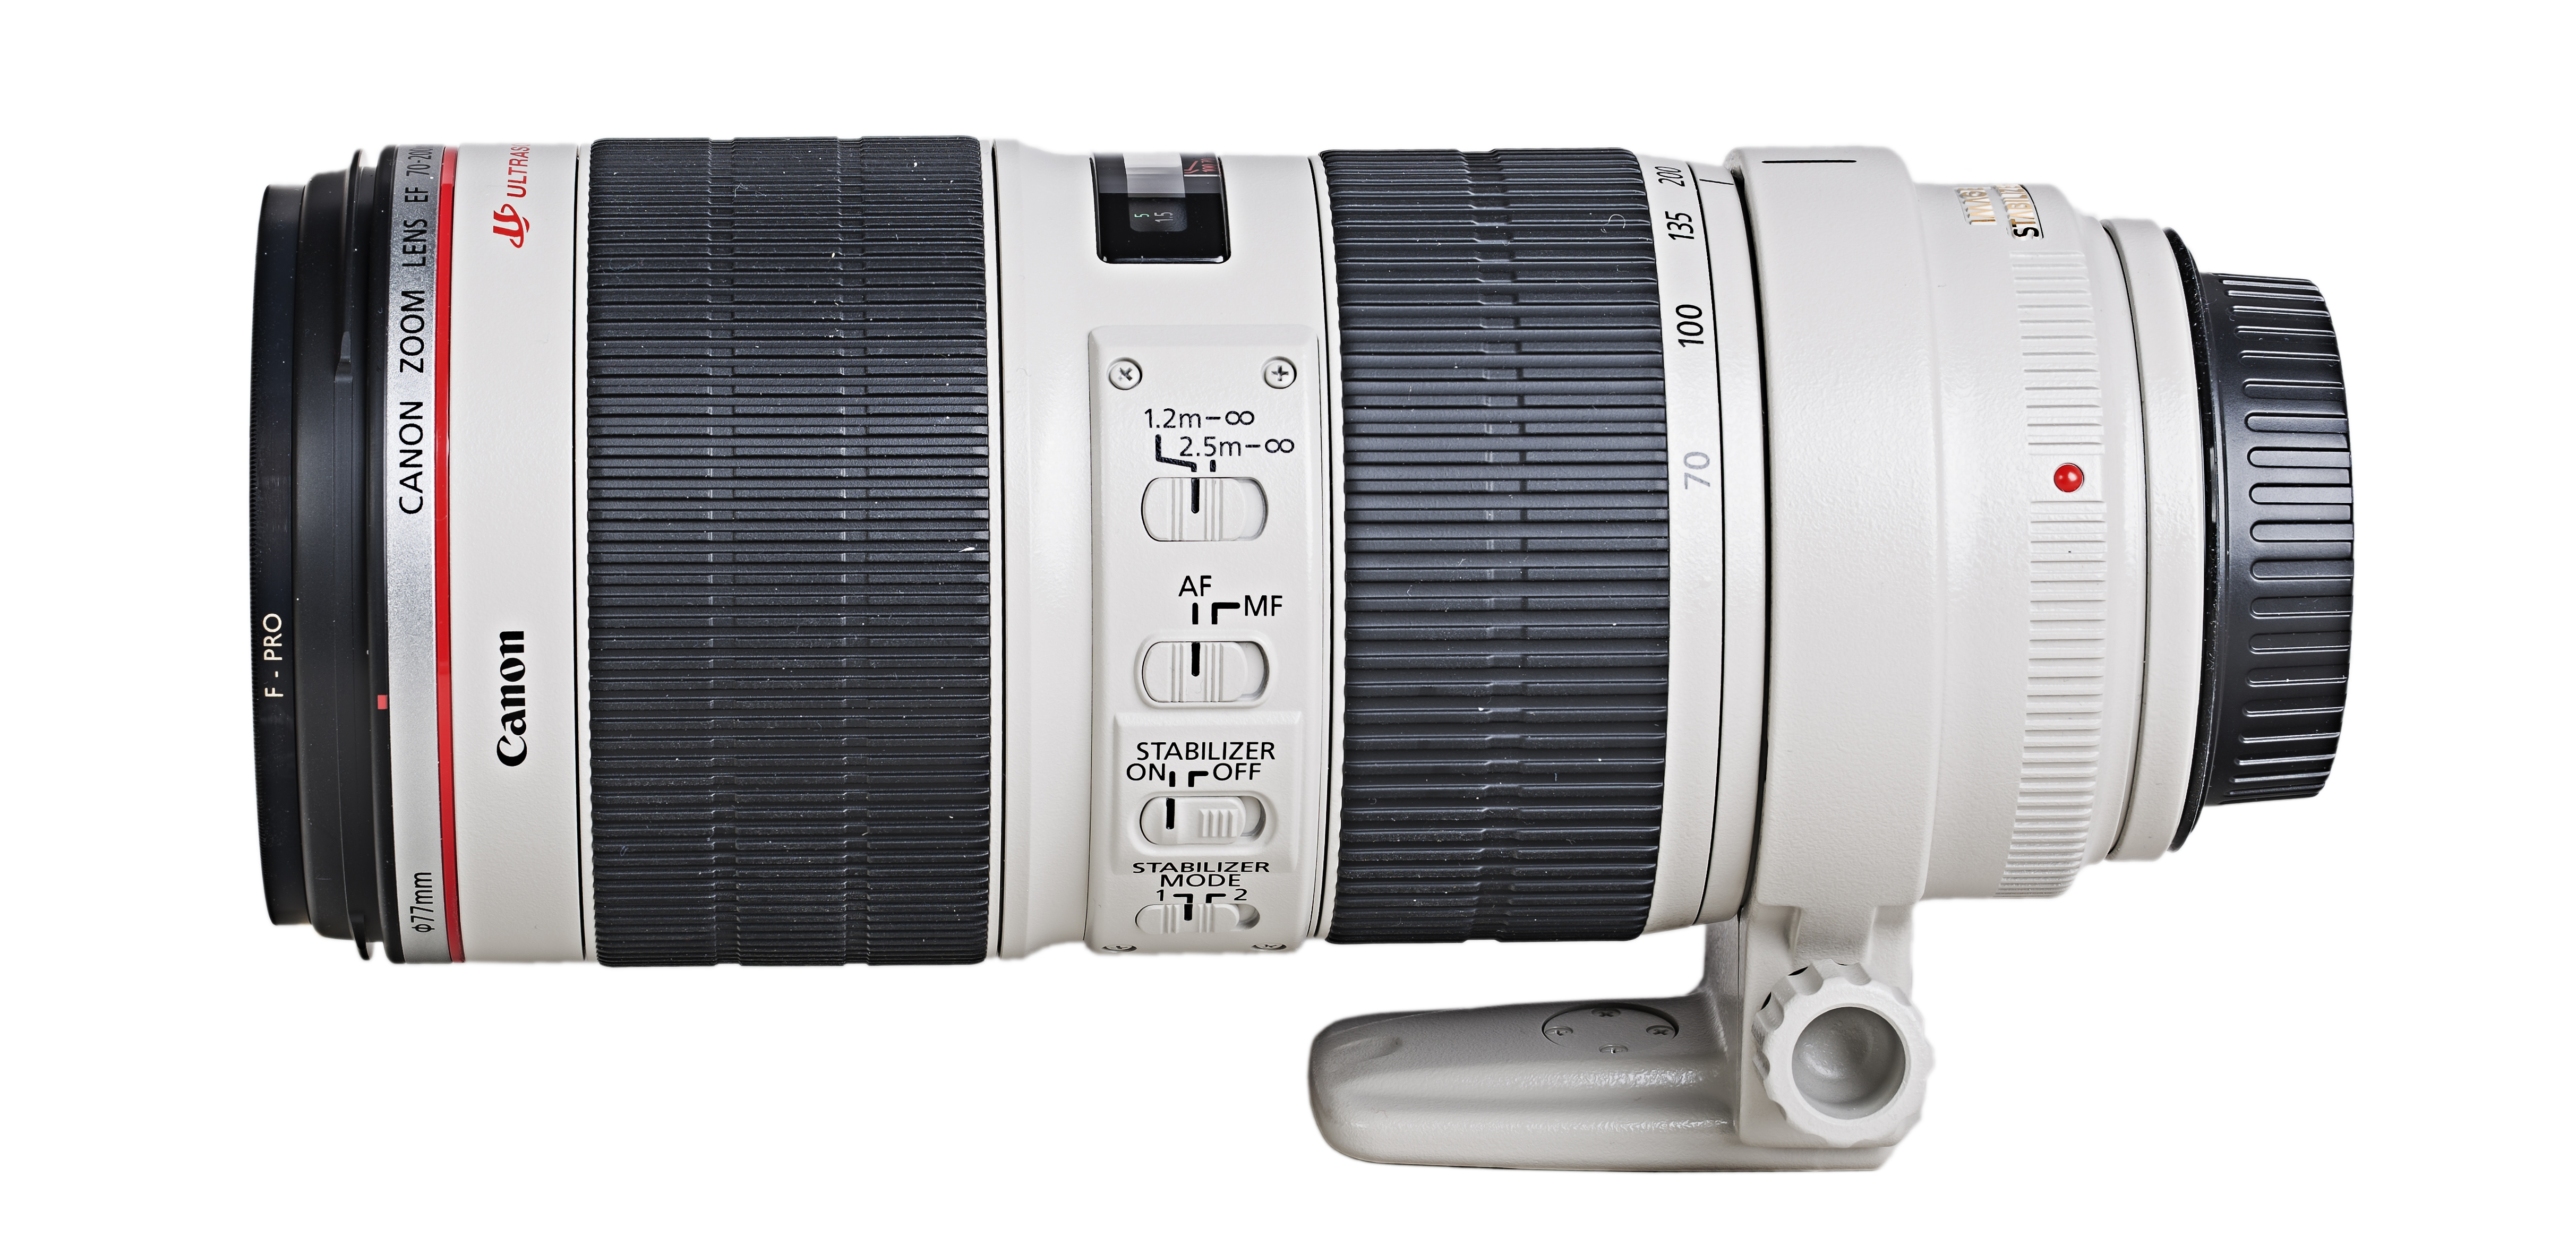
It’s very common among the professional Canon users to grab our 70-200mm lens for indoor as well as for outdoor shoots. The lens is one of the top choices for portraits and product photography due to its versatility and interesting zoom range.

Lens Overview

Speaking of this versatile and powerful Canon lens, we can start to say that it was launched in 2010 as an update of the EF 70 – 200 mm F2.8 L IS USM from 2001. With a gap of 9 years and considering the advances in the technology of DSLR cameras, Canon redesigns this powerhouse by improving both the stabilization and optics, as well as autofocus and its design.

Optics consists of 23 elements in 19 groups, including more than 5 of them with the Ultra-Low Dispersion technology (UD), plus one with Fluorite Coating. The reason? Reducing the Chromatic Aberration of the lens.

Canon_Zoom-Lens_EF_70-200_F2.8L_IS_II_USM-01a_

Built-in metal, we are not talking about a light lens; however, it compensates for the weight with its excellent image quality and enhanced protection in regards to dust that can enter our camera, in addition to being weather sealed.

The Autofocus motor belongs to the technology of Canon Ultrasonic Motor (USM), being extremely agile while maintaining a silent profile.

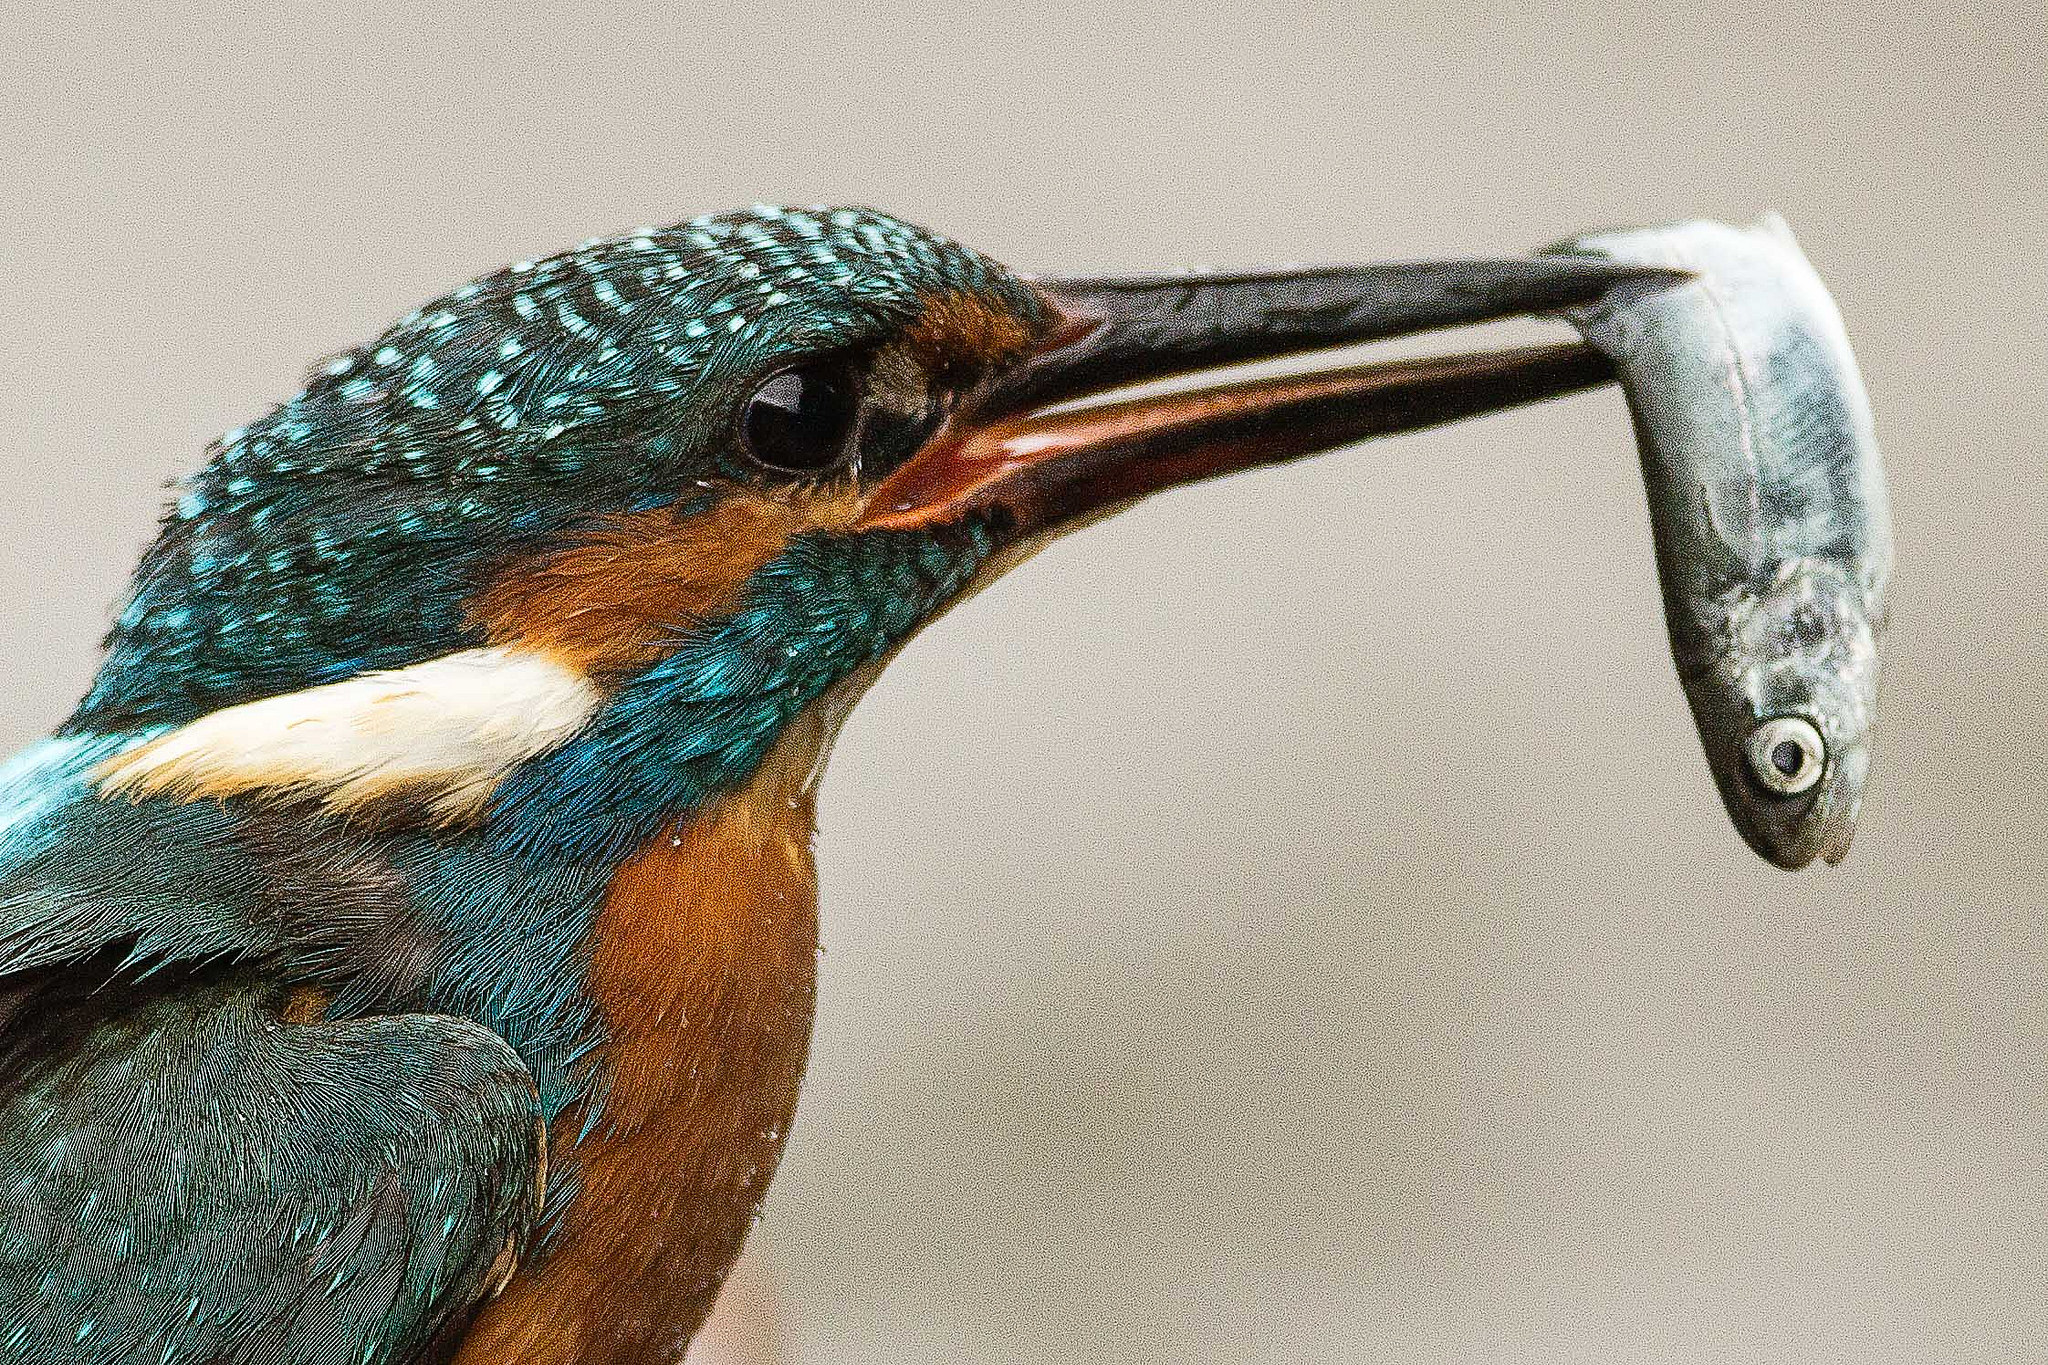
27358305815_713c7db69e_k

Photo courtesy of Eric Schaffer

The price is something to consider in this lens since we are talking about high-end equipment for what should not amaze us that its initial price is higher than $1500.

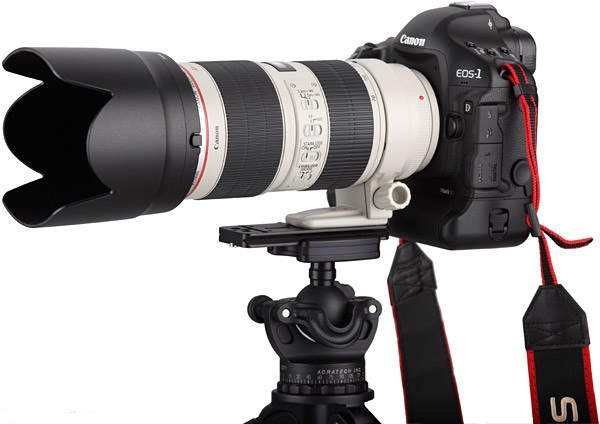
The only difficulty that photographers face while using the lens is its weight. A Canon 70-200mm [ f 2.8 IS II ] lens weighs approximately 1600 gms. So, this lens when mounted on a full-frame camera like Canon 5D Mark III weighs almost 2.5 kilograms.

When weight matters

So, how do you take a sharp photograph while holding so much weight in your hand? You might use a tripod to bring in the extra support, balance, and stability. But do tripods work during all circumstances? Not really. How far does ‘Image Stabilisation’ in your lens, help? Not very much. True, it provides the minor stabilization features that you need and but that’s not all.

canon-ef-70-200mm-f-2-8l-is-ii-usm-lens

The way you hold your lens plays a major role. It can sometimes be the ‘break-it’ or ‘make-it’ factor for your photographs.

We are assuming here that you will be using the kit (Canon 5D MK III + Canon 70-200mm f/2.8L IS II lens) handheld and not by tripod mounted. The first thing to do is to rotate the tripod collar from the bottom side of the lens(while mounted with the camera) towards the top side. This way, the tripod collar won’t obtrude and disturb your grip with the lens.

Kindly note: Indoor shoots are tripod-mounted most of the time. So this article may not be applicable to you. But for those who shoot by hand-held devices, this article might be helpful.

A quick but effective solution

So, like I mentioned earlier, the way you hold the lens while shooting may affect your photograph, for good or for worse. Most of the time, we tend to hold the lens somewhere on its collar ( really close to the body of the camera). I used to do this too in my earlier days as a photographer. This helps us control the zoom ring better while composing the photograph. True, but it also indirectly affects the balance in your focus. This sometimes results in blurred images and lesser sharpness. This is because of improper positioning of your palm by the lens. By supporting the lens at the collar location by your palm you are letting more weight towards the front side of the lens which leads to improper balance and with blurred photographs.photographer-1191562_1920This can be overcome by slightly shifting your palm position towards the front side of the lens, which means you need to place your palm almost on the zoom ring. As soon as you shift your palm towards the front end of the lens, you immediately feel the perfect balance of weight while holding. But this situation restricts the zooming ability immediately before you press the shutter button. You have to be prepared in advance, as you cannot zoom as you used to before. Get your frame right, compose what you need and then click away!27010607034_afe1fb94d0_k

Photo courtesy of Pengcheng Pi

We hope this article helped ease your discomfort while shooting using the 70-200mm lens.

Please leave your comments below and let us know about your experience. 🙂

Header photo courtesy of Francesca Pippi

Shortcuts for Lightroom’s Develop Module

Knowing some key shortcuts makes one’s job a lot easier and faster. It makes your work process faster and your job a lot more comfortable. In our previous article, we had discussed some key shortcuts to know while working in the Library module of Lightroom. So naturally, this article will focus on the next module- the one with a lot of action- the develop module of Lightroom. So, what is the Develop module? It is the part of Lightroom that lets you, literally, develop your image into one that looks magical and enticing. It is the part of Lightroom that allows you to process your image into something much better. So, knowing a few key shortcuts for this module will help you a lot in the long run.

View All Lightroom Develop Module Shortcuts

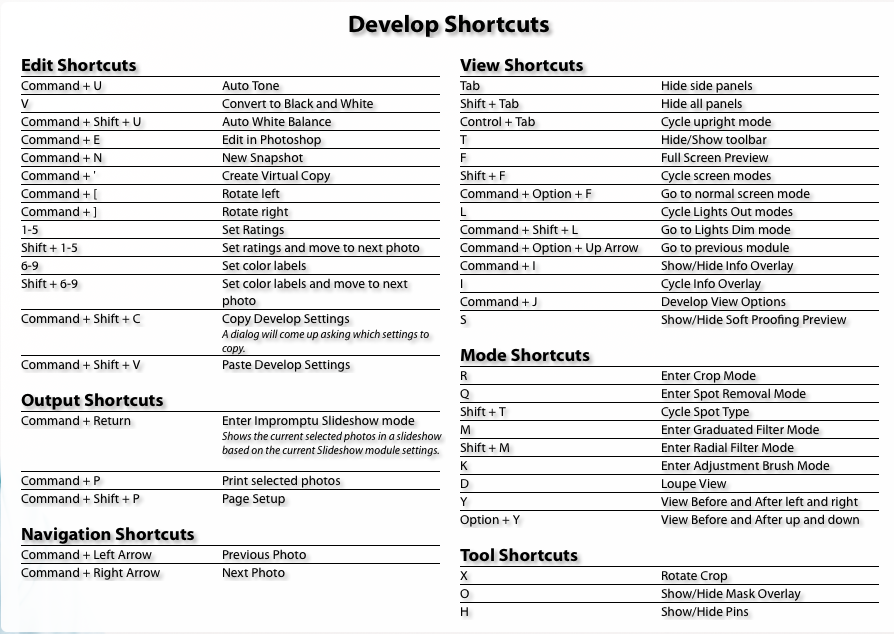
Like in the Library module, “Ctrl + Alt + /” on the Windows or “Command + Alt + /” on the Mac will take you to a window that shows all the shortcuts applicable for the Develop module only. This is helpful when you quickly want to refer the shortcut for a particular process.

Develop Module shortcuts.

Display Options

Some people don’t like the hindrance of a hundred panels on the left and right, while processing an image. So, is there a way to hide all those panels from view? Yes. TAB 

: Press the Tab key on your keyboard to hide the side panels from view. Press the Tab key again to view the panels.

: Press the F key to enter full-screen mode. Now, work without any disturbance!

: While working on the image, press the L key to dim the lights surrounding the image. This highlights the image area and helps you to view your progress better. Press the L key again to remove light completely from the surrounding area. And press the L key again, to bring the lights back on.

Dim lights . These settings can also be changed in Preferences.

Adjustment shortcuts for Basic Panel

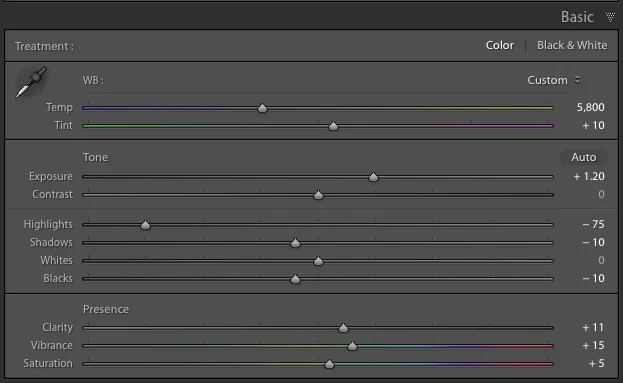
If you are in the habit of using your keyboard in Develop module, then you should know some of these keys to control the entire basic correction panel only.
1. Press period (.) or comma (,) for selecting a slider (e.g., Exposure)
2. Then press plus (+) to increase the value and press minus (-) to decrease the value of the same.
3. Now press period (.) to go to the next.

Basic Correction Panel

Tip:

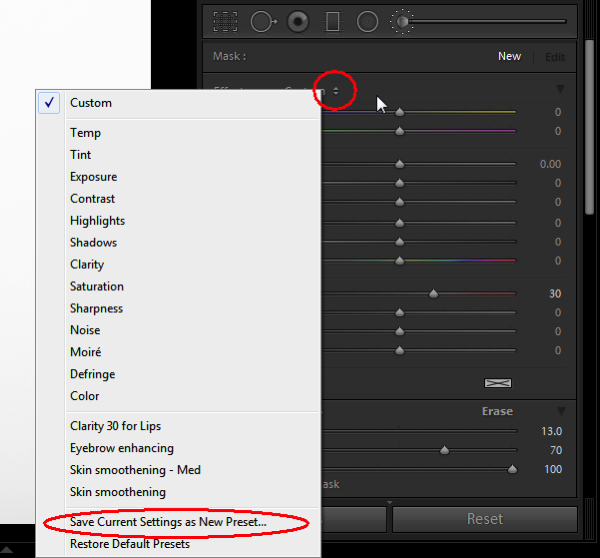
You can save any of the local adjustment tool settings as a preset which can be used for any of the tools. For example, if you are a portrait retoucher, you may want to save your favorite skin-softening settings as a preset. You can do that by clicking “Save as a preset” at the bottom of the local correction tool set. Likewise you can save any kind of settings which you may use often.


Save settings as Preset shortcut.

Auto Tone & Auto White Balance

Most of the time, you start with and finish with the Auto Tone in Lightroom specially if the photos are family or friends photo or even vacation documentation collections. When you don’t want to spend a lot of time setting your WB and retouching:

  1. To set Auto WB:”Ctrl + Shift + U” on Windows ; “Command + Shift + U “ on Mac
  2. To set Auto Tone:”Ctrl + U” on Windows ; “Command + U “ on Mac

Cropping And Straightening

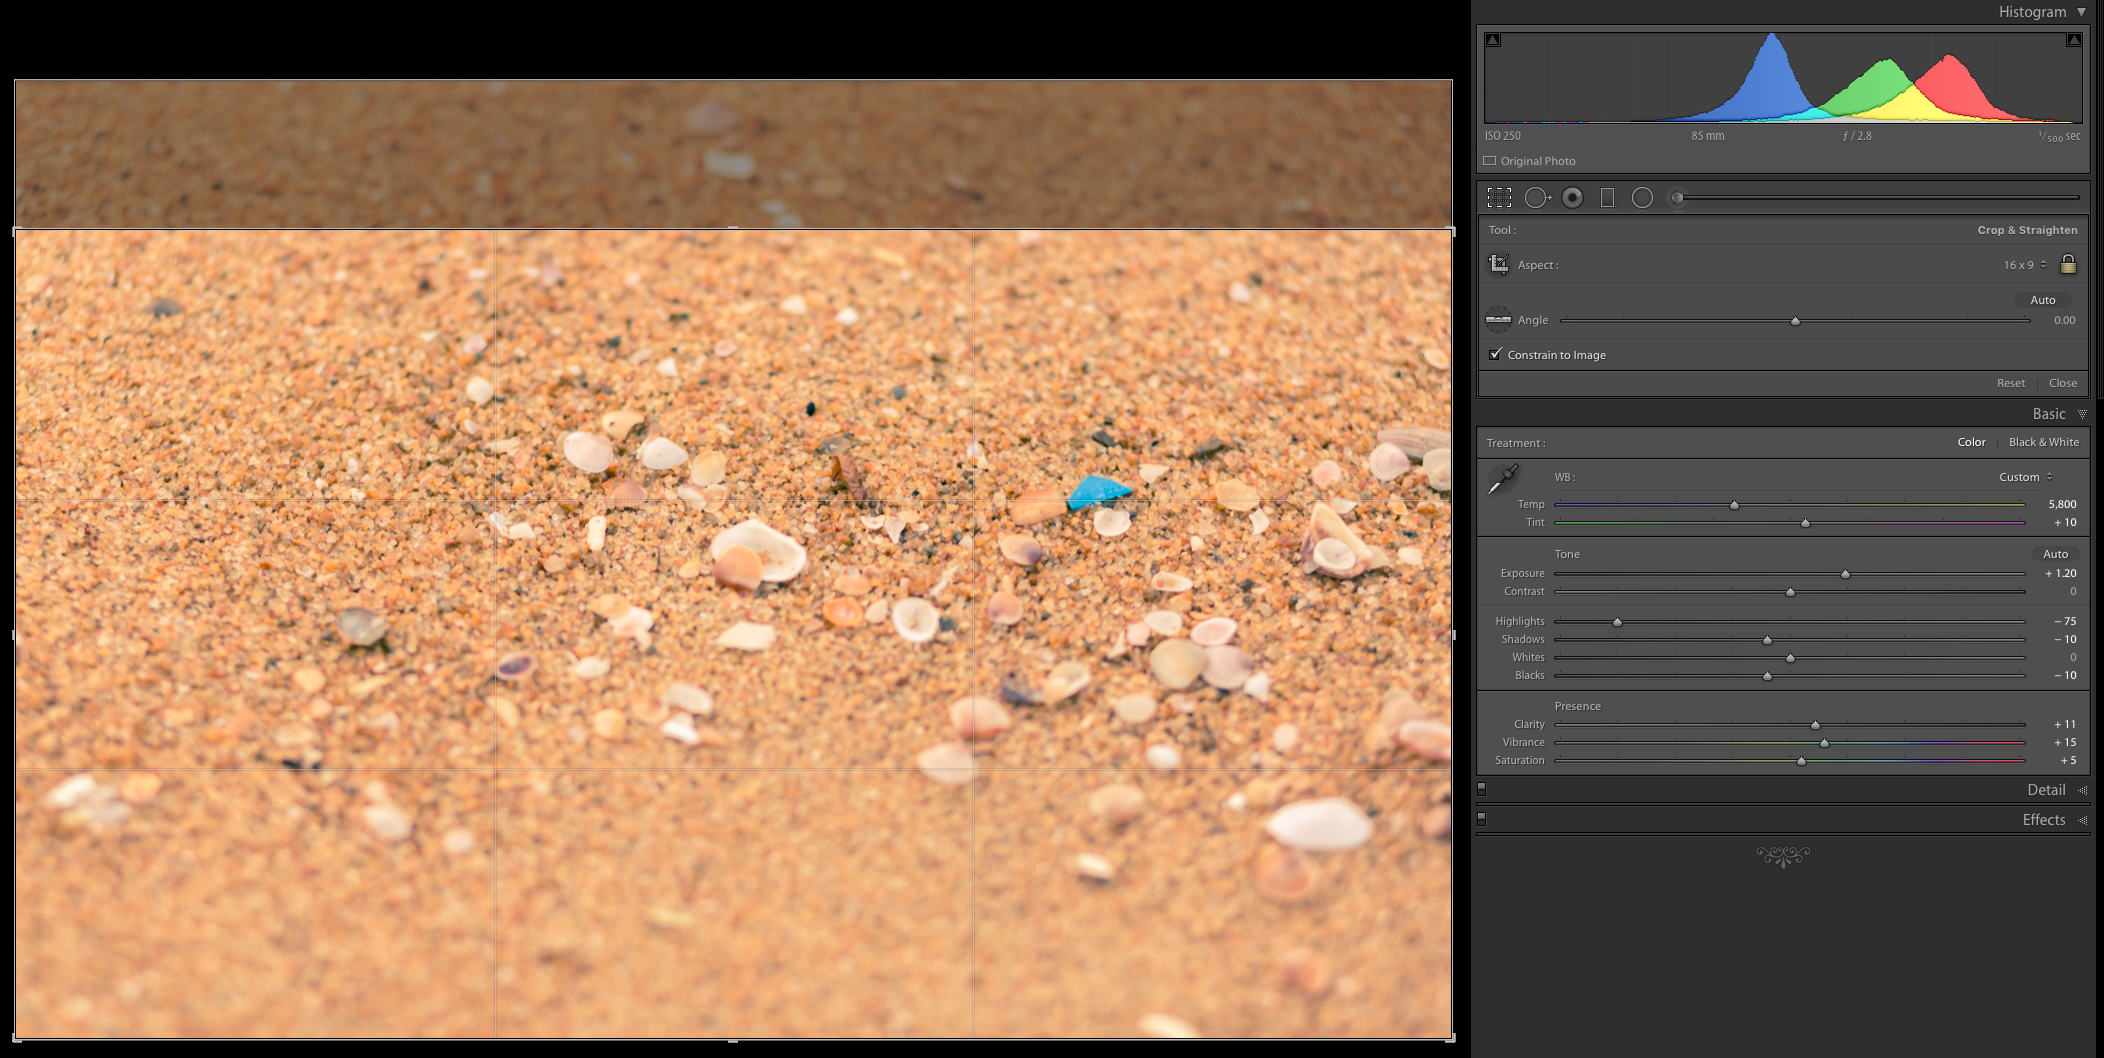
The Straighten Tool within Crop tool can be used to straighten out a photo by drawing a line across the horizon that should be a straight. The crop will automatically adjust itself so this line. This is useful if the horizon line is not leveled or you want to straighten against a pillar or vertical line. If you have many photos that need leveling or straightening, you can speed up the process by using this shortcut: Just press R to go to the crop tool. Now to straighten with the keyboard rather than accessing the Straighten Tool by clicking on the icon in the panel, just hold down the Command (Mac) / Control (Win) key and the straighten tool will appear. From there just draw the line and the crop will adjust. This is a quick way to straighten a photo without needing to click on the tool itself.

Cropping and straightening.

Tip:

O : Show Cycle Crop grid overlay.

Shift + O : Show Cycle Crop grid overlay orientation.

Create Virtual Copies

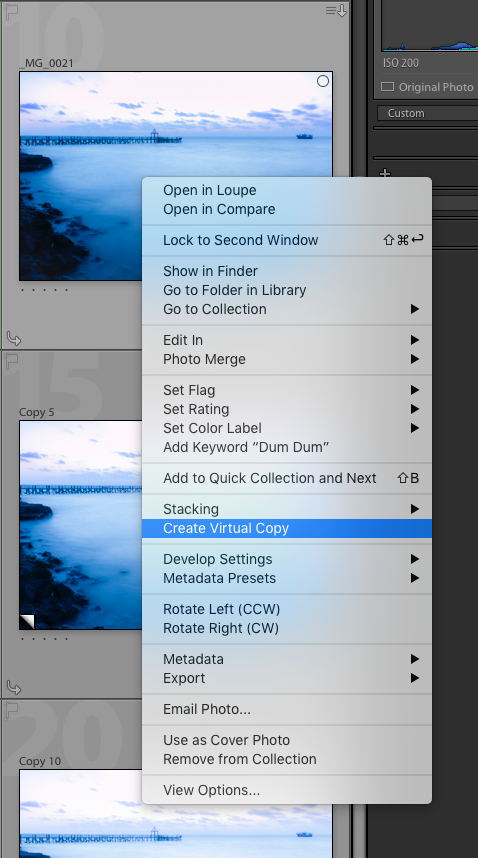
For those of you aren’t aware of what virtual copies are, read our previous article on the significance of virtual copies in Lightroom, to know more about their uses. Now, for those of you use virtual copies regularly, did you know that “Ctrl + ‘ “ on Windows or “ Command + ‘ “ on Mac will create a new virtual copy? Yup, it’s that easy. You don’t have to right click the image and select “Create Virtual Copy” every time. Make work faster, use the shortcut!

Create a new virtual copy.

Paste Settings from one image to another

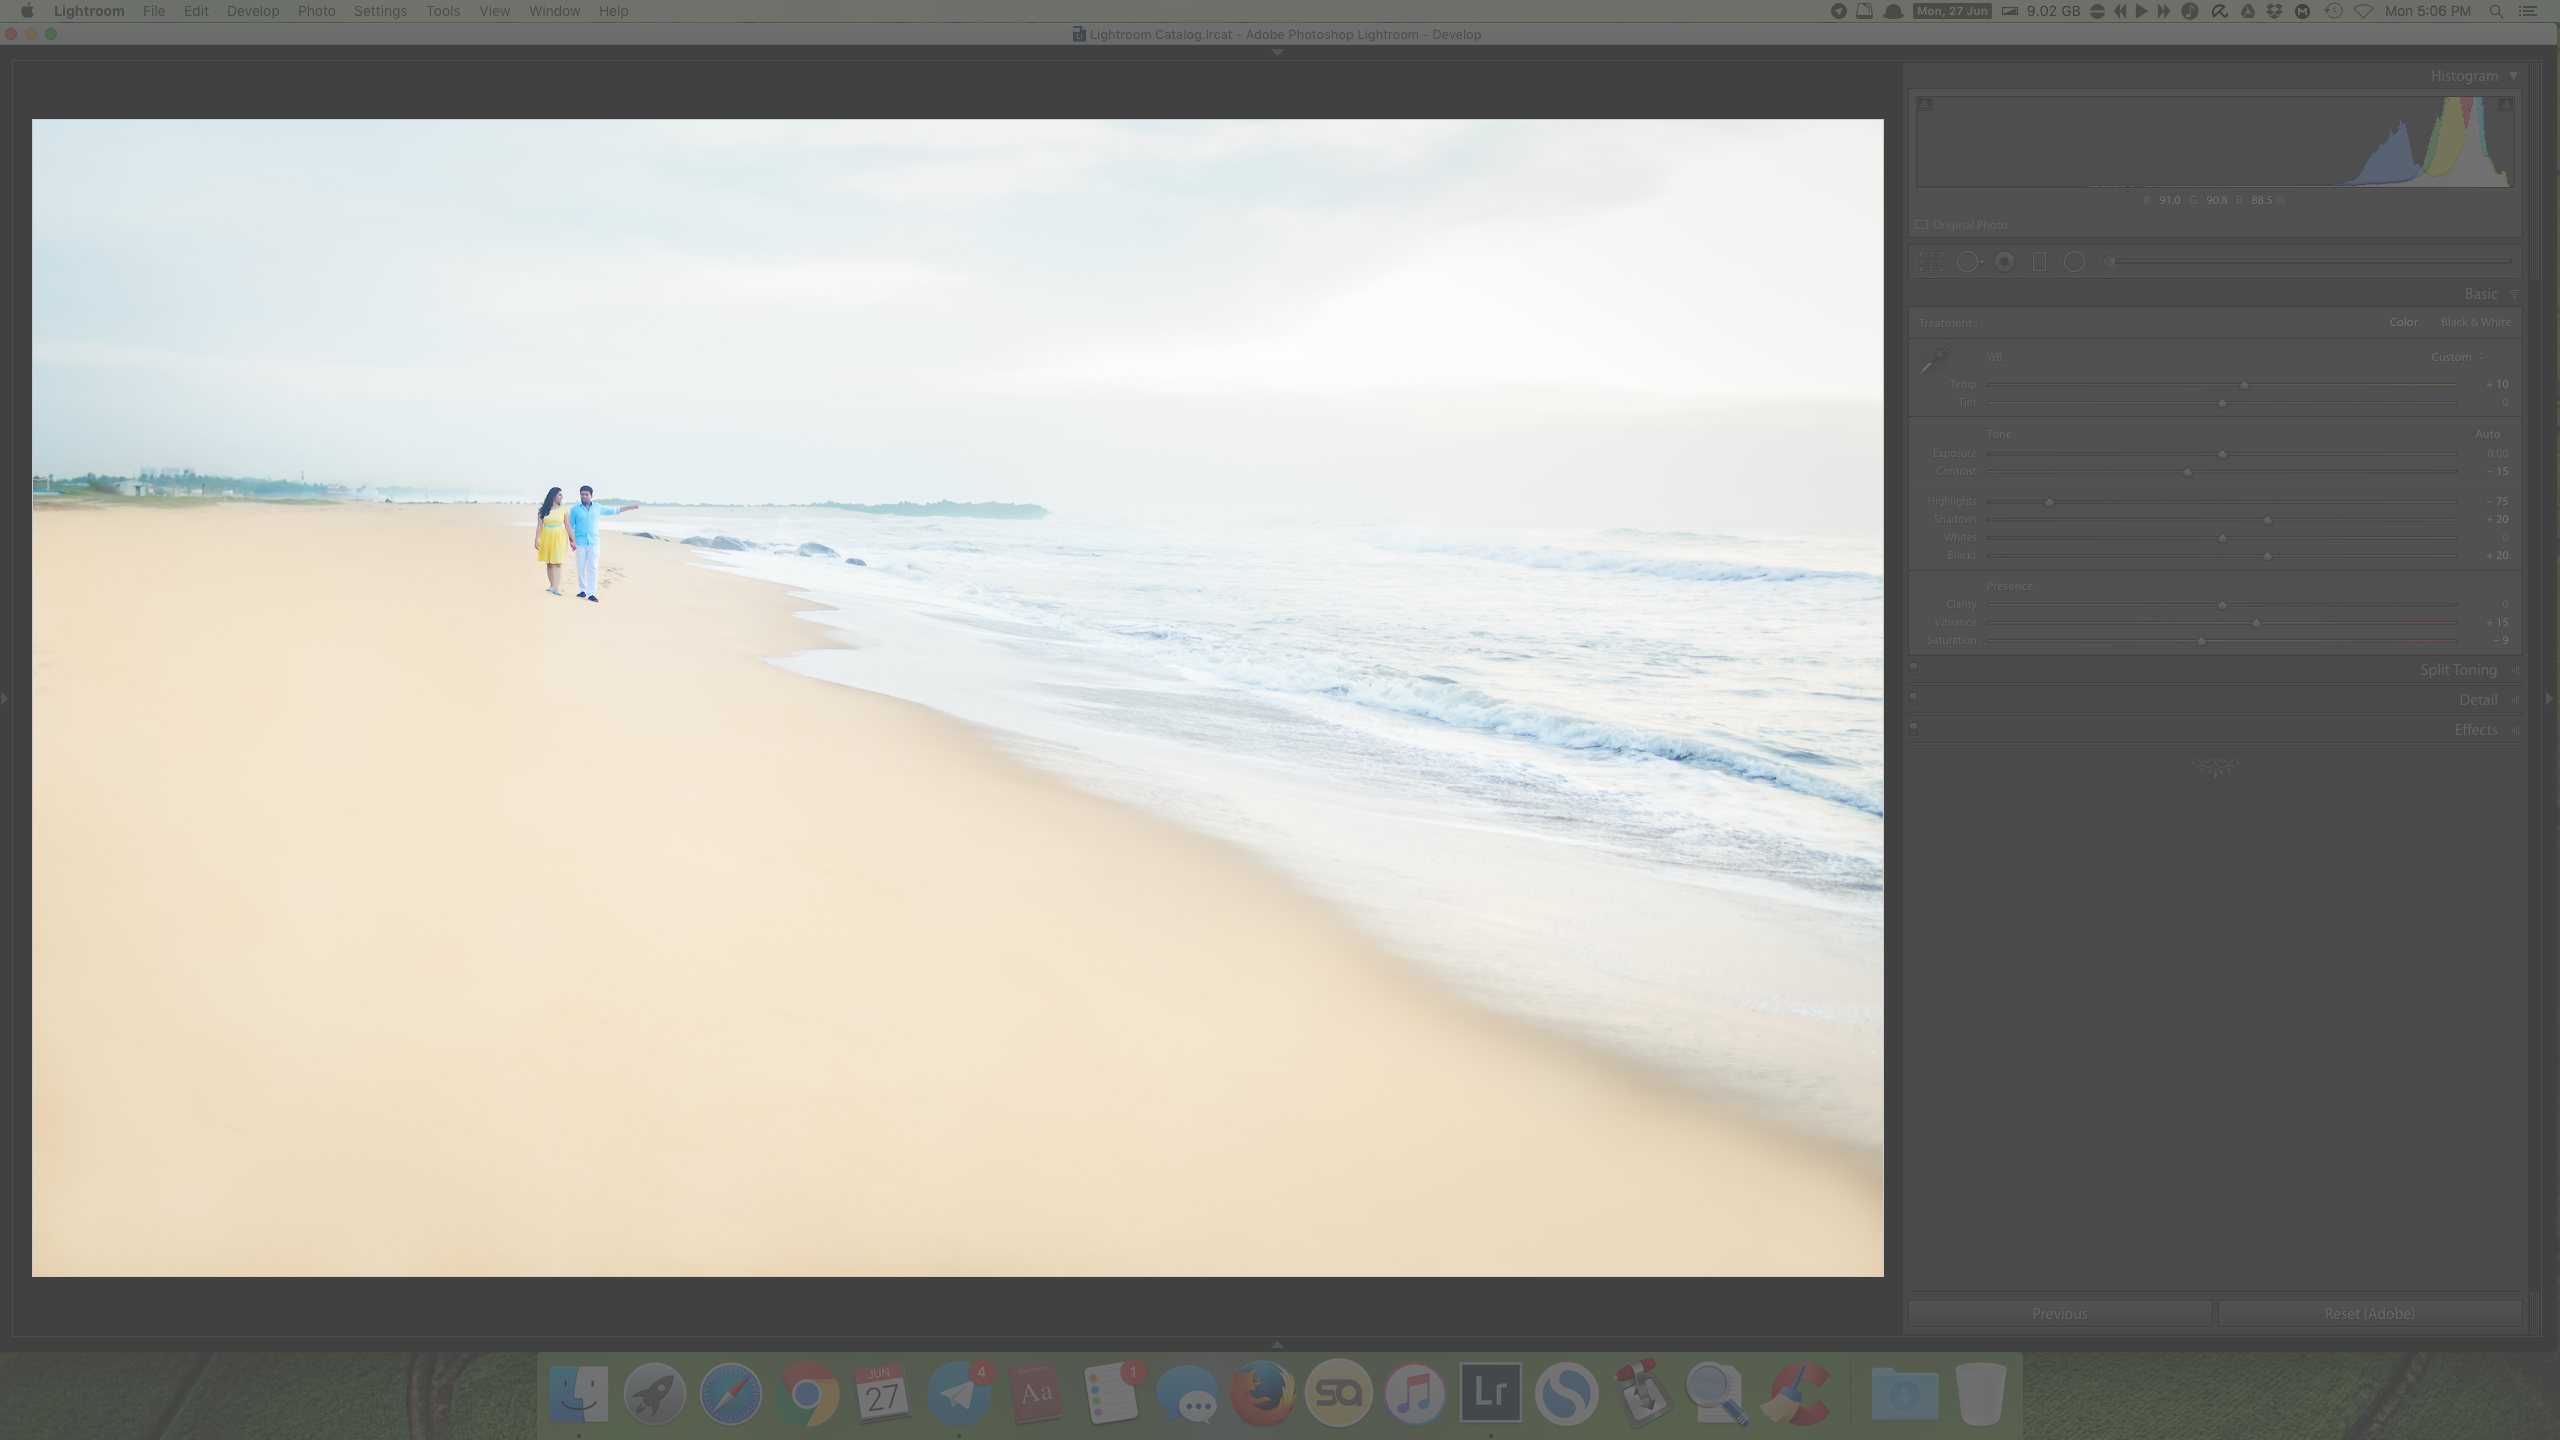
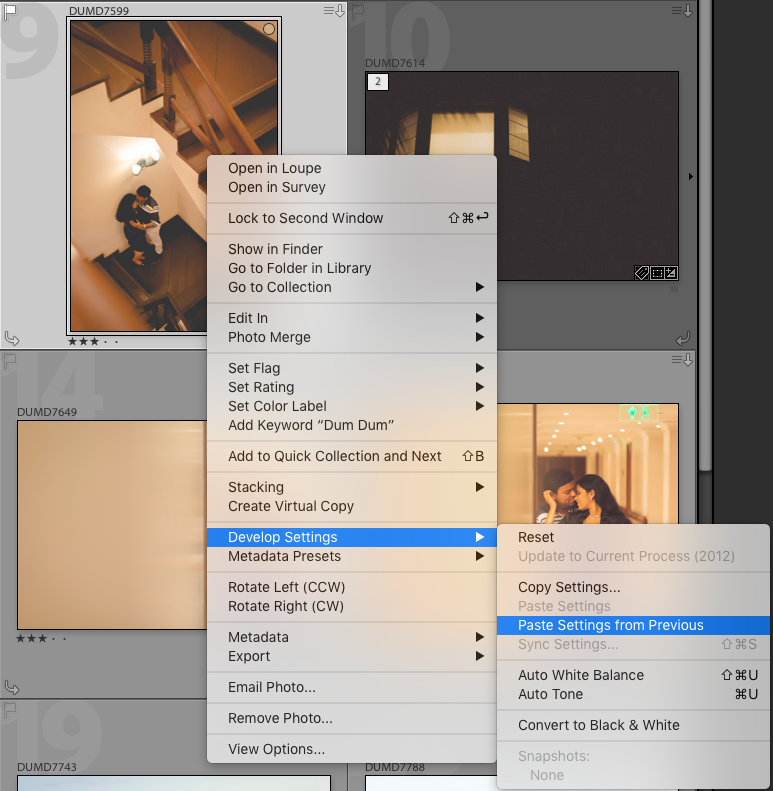
Shortcut: “Ctrl + Alt + V” for Windows or “Command + Option + V” for Mac. Transfers all the adjustment settings from the selected photo onto the current photo. When you have images that require similar processing, this is the most valuable and time-saving shortcut!

Screenshot 2016-06-27 16.57.28
Paste settings from one image to another.

Export your Image

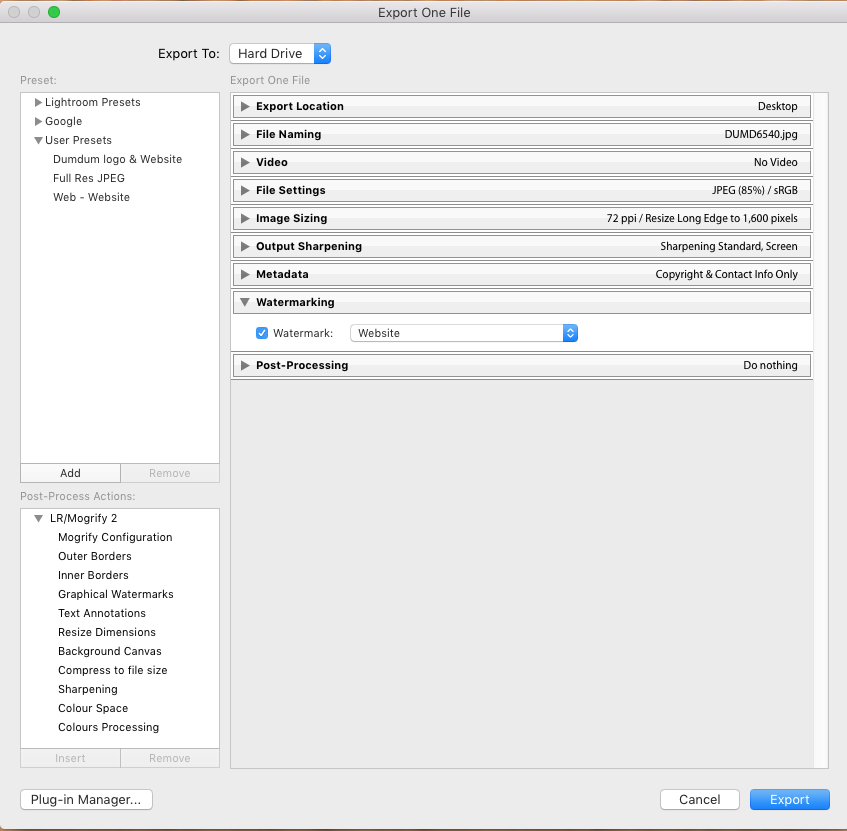
So, the easiest way to export your image is to press “Ctrl + Shift + E” for Windows or “Command + Shift + E” for the Mac.You can export photos using the same settings from the most recent export session that was set manually, including modified presets. Use “Ctrl + Alt + Shift + E” or “Command + Option + Shift + E” and export the image with the previous settings saved. Easy!

Now, need to mail the image to the client for approval? Need to show your boss before printing? What do you do? Use “Ctrl + Shift + M” or “Command + Shift + M” to email the image directly from Lightroom to the recipient.

Export settings.
Export settings.

We hope this article was helpful to you. Please share your comments below and let us know if we have missed out on any other interesting shortcut.


Lightroom Library Module Shortcuts

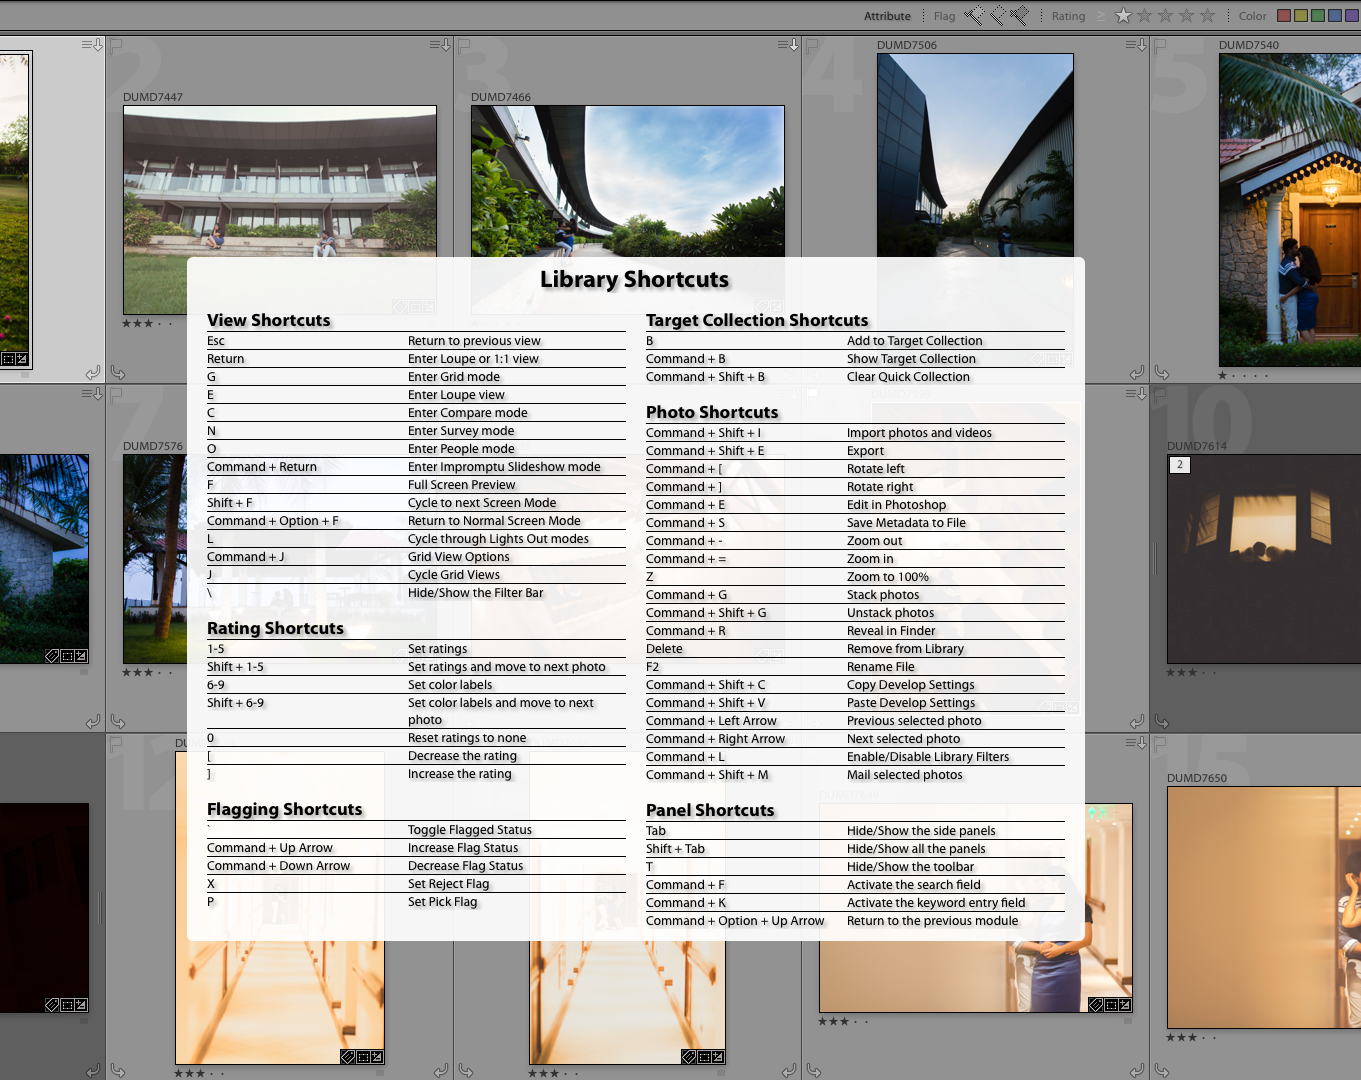
One of the simplest and most important ways to speed up your photo editing is by using shortcuts. Lightroom has hundreds of shortcuts, and it would be nearly impossible to memorize them all. But by learning a key few, you will be able to save hours over the course of your lifetime.We are going to focus on some key shortcuts that every photographer/image processor should know while working on the Library module in Lightroom.

View All Shortcuts

Lightroom provides us with a number of shortcuts to make our jobs a lot easier and less time-consuming. But what most people do not know is the pop-up window that gives you a list of all these existing shortcuts for your reference.

Ctrl + / on the windows or Command + / on the mac will take you to the shortcut window. Not all of us can remember the keys and codes for all processes, so this one is handy for those of us who need to refer to the shortcuts guide once in a while to brush up our memory. More specifically, using the keys “Ctrl + Alt + /” or “Command + Alt + /” while in a particular module will show you the shortcuts window for that particular window that you’re operating on.
For example, using the keys “Ctrl + Alt + /” or “Command + Alt + /” while in the Library module will show me the shortcuts applicable for the library module only. Screenshot 2016-06-24 16.37.34

While in the library module, use Ctrl+Alt+/ or Command+Alt+/ to view the shortcuts applicable for library module.

Rotating Images

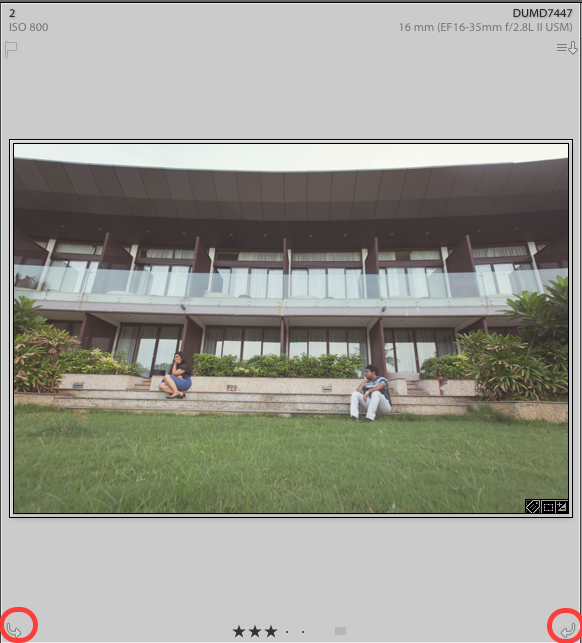
Sometimes, we’d like to rotate images to view them from a different perspective – either portrait or landscape. But do we always have to open up the image in Loupe view to rotate it clockwise or anticlockwise, or do we have to press the little rotate icon every time? No. To rotate your images to the left, hit “Ctrl + [”. To rotate your images to the right, hit “Ctrl + ]

To rotate multiple images at once, go to the Grid View (“G”). Once you are in the Grid View, select your images by holding down “Ctrl” while clicking on your images and rotate by using the same shortcuts.

An image thumbnail showing the clockwise and anticlockwise rotate icons.

Flagging, Unflagging And Rating

P: For picking images to be flagged.

X: For rejecting images that are already flagged.
U: For unflagging images.
Numbers 1 – 5: For star rating
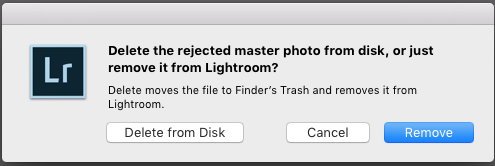
Numbers 6 – 9: For color labelingTip: If you want to delete all the rejected images from Lightroom, use “Ctrl + backspace” or “Command + backspace”. A separate dialogue box will pop asking if you want to either delete it from Library or from harddisk itself. Dialogue box pops up upon deletion of a rejected image. A dialogue box pops up upon deletion of a rejected image.

Caps Lock For Auto-Advance

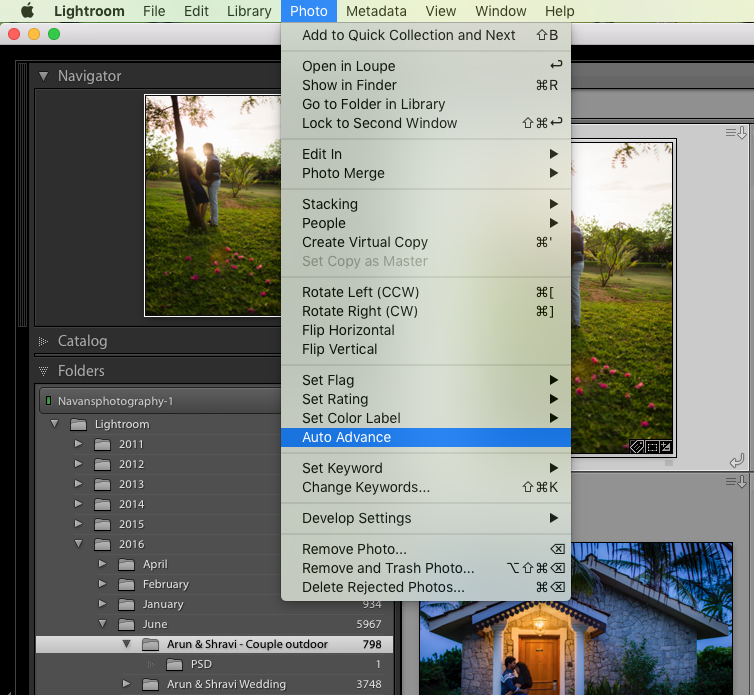
Whether you use stars, flags, or colors, rating your photos is an important step in Lightroom workflow. Going through and rating every photo accounts for a significant amount of time. You can cut down on some of that time by using the Caps Lock Auto Advance. Within the Library Module, turn on the CAPS LOCK key (or go to Photo -> Auto Advance). After rating a photo, rather than using the arrow key to advance to the next photo, Lightroom will automatically do it for you. This trick works for stars, flags, and color labels.

Use the auto-advance feature to complete your flagging and rating process in a jiffy!

Use the auto-advance feature to complete your flagging and rating process in a jiffy!

To Toggle Between Different Modules

There is a total of 7 Modules in Lightroom and each corresponds with numbers from 1 – 7. To switch to a Module, hit “Ctrl + Alt + 1-7” or “Command + Option + 1-7

.“1” is the Library Module, “2” is the Develop Module, “3” is the Map Module, and so on. For example, if you want to go to the Develop Module, hit “Ctrl + Alt + 2.”

Alternatively, press the key D on your keyboard while in the Library module to move to the Develop module quickly. Saves time and works best.

The different Lightroom modules. The different Lightroom modules.

Stacking 

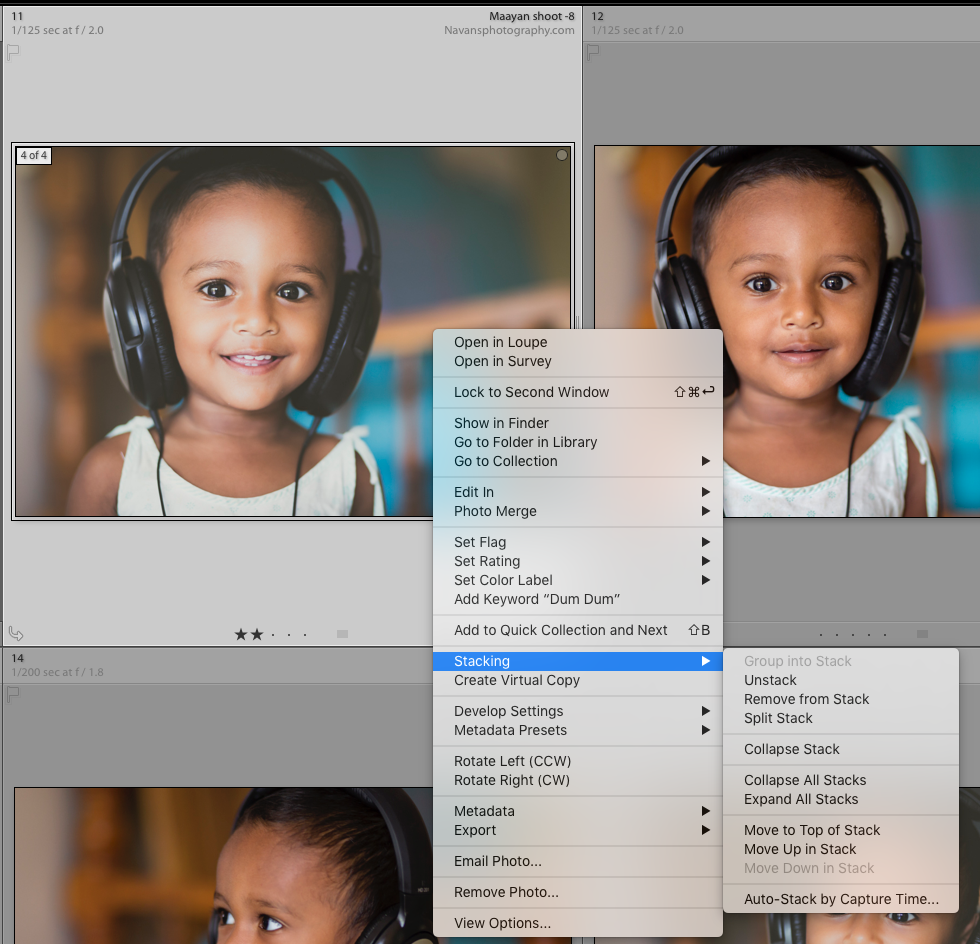
Stacking is an important tool that all photographers use to maintain an organised and neat workspace. If you don’t already know about stacking, read our article on the significance of stacking in lightroom.For those who already know about stacking, here are some shortcuts to help you out.

Group into stack :
Ctrl + G / Command + G
Unstack : Ctrl + Shift + G / Command + Shift + G
Collapse / Expand Stack: S key
Move to top of stack: Shift + S
Move up in stack: Shift + [
Move down in stack: Shift + ]Image stacking in Library Module

Image stacking in Library Module

Import / Export Files

To import images into Lightroom, hit “Ctrl + Shift + I”. This will bring up the Import Dialogue Box. Hit “Ctrl + Shift + E” to bring up the Export Dialogue Box to export your images out of Lightroom

We hope these shortcuts prove helpful to you. Let us know in the comments below if we’ve missed you out on any other interesting shortcut, so we can make our jobs a lot easier too.


Introduction to Landscape Photography

Content

  • Introduction
  • Before you get started
  • Planning – Location and time
  • Technique – Camera settings (HDR, depth of field etc) and composition etc
  • Post-processing
  • Publishing

Introduction

Four years ago my passion for photography started and the main reason for this was that I explored the beauty of landscape photography. I wanted to get some wonderful wallpapers for my desktop but found myself astounded by the art that is landscape photography instead, I could browse landscape wallpapers for hours. My interest in landscape photography grew and getting my first camera I started doing it myself, today my landscape photography have progressed a lot and I hope to share some tips that will help anyone getting started with landscape photography.farsbooktober2014-10

Before You Get Started

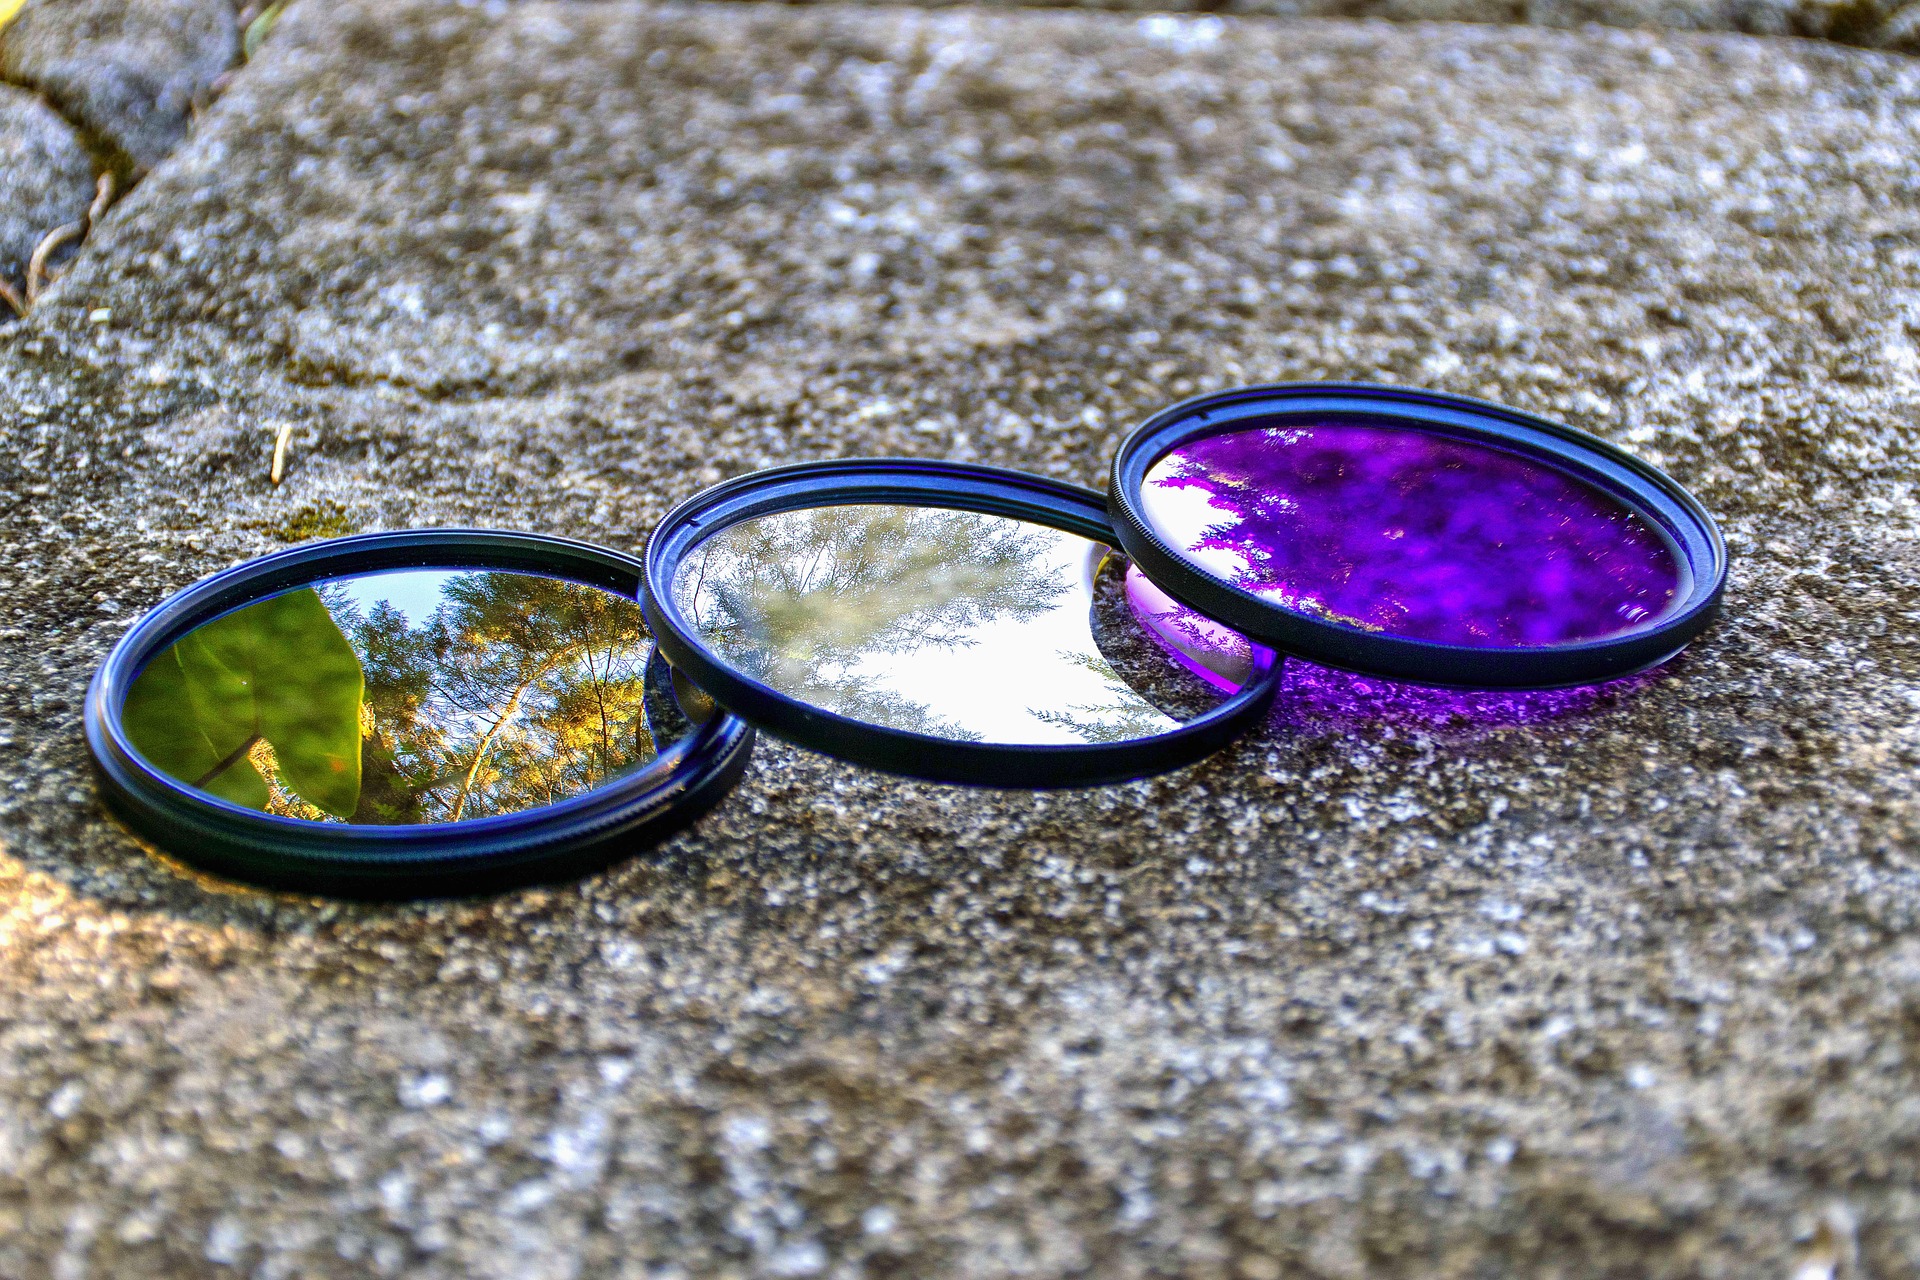
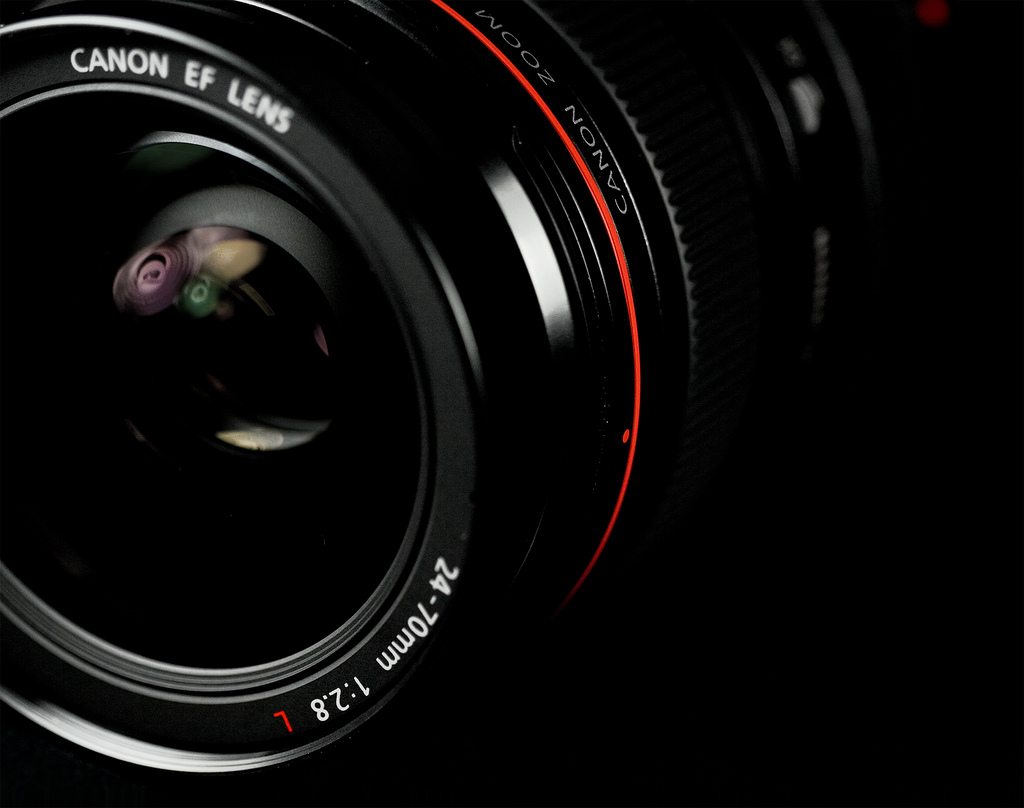
There are of course no definite rules of what you need before you get started but there are some things that I recommend you have and some basic knowledge of photography. In terms of equipment, I recommend that you at least have a camera, lens(es), tripod and a computer with photo editing software (preferably Lightroom and/or Photoshop). That you need a camera is obvious, but what kind of camera? First of all, it needs to take good photos, but there are some other capabilities that are more or less a must. This includes the capability for interchangeable lenses, manual settings, and RAW-format. I recommend having a DSLR from one of the bigger brands since this will give you a wide array of lenses to choose from and a greater possibility to upgrade your equipment within the brand (so that you don’t need to buy new lenses when/if you decide to get a camera upgrade). Any newer DSLR will do just fine, but if you can afford it a full frame camera that is great (don’t be afraid to buy used cameras and lenses), there are also mirrorless cameras that would be suitable, but unless size and weight are important issues I would stick to a DSLR.      photographer-1031249_1920As with any type of photography the lenses are of great importance in landscape photography, and there are three types of lenses that will fill all your needs, these are the normal zoom lens (usually somewhere around 24-70mm equivalent to a full frame sensor, 18-55 on a cropped sensor), the ultra wide angle zoom lens (usually somewhere around 12-35mm equivalent) and the telephoto zoom lens (usually somewhere around 70-300mm). If you have all of these lenses you will be able to capture all types of landscape photography. I recommend that you buy lenses with a big aperture like f/2,8 if you can afford it, but there are cheaper alternatives that work great as well. Depending on your style of photography you will use different lenses more than others, personally, I use my normal zoom lens (24-70mm f/2,8) the most since I find it to be plenty wide for most situations and I also have the possibility to capture tighter images as well.dawn-1284235_1920I would also recommend that you use a tripod for landscape photography, and while it isn’t completely necessary I find that it makes you slow down and think more about the process, such as composition. A tripod will also help you eliminate blurry photos and is a must if you plan to take long exposures. Be sure to use a sturdy tripod that won’t wobble around too much. Another tip for when using a tripod is to also use a cable release so you won’t have to touch your camera, and in that way producing slightly blurred photos. You could also set a timer to eliminate this risk. There is various other equipment that you can use, primarily filters. If you want to achieve long exposures in the daytime you have to use a strong ND-filter, and a circular polarizer is great to have at hand to reduce glare and increase vibrance in photos.filter-1259839_1920For post-processing, you can use whatever software you like, but for some more advanced features, Adobe Photoshop is the way to go. I really like working with Lightroom as well, as it is easy to manage and very powerful.This guide will not be going over how the technical aspects of your camera work, like shutter speed, aperture, and ISO, so if you are not yet comfortable with these aspects of photography I recommend that you read about it. I would say it is essential to know these things if you want to achieve great landscape photography.

Planning a Landscape Shoot

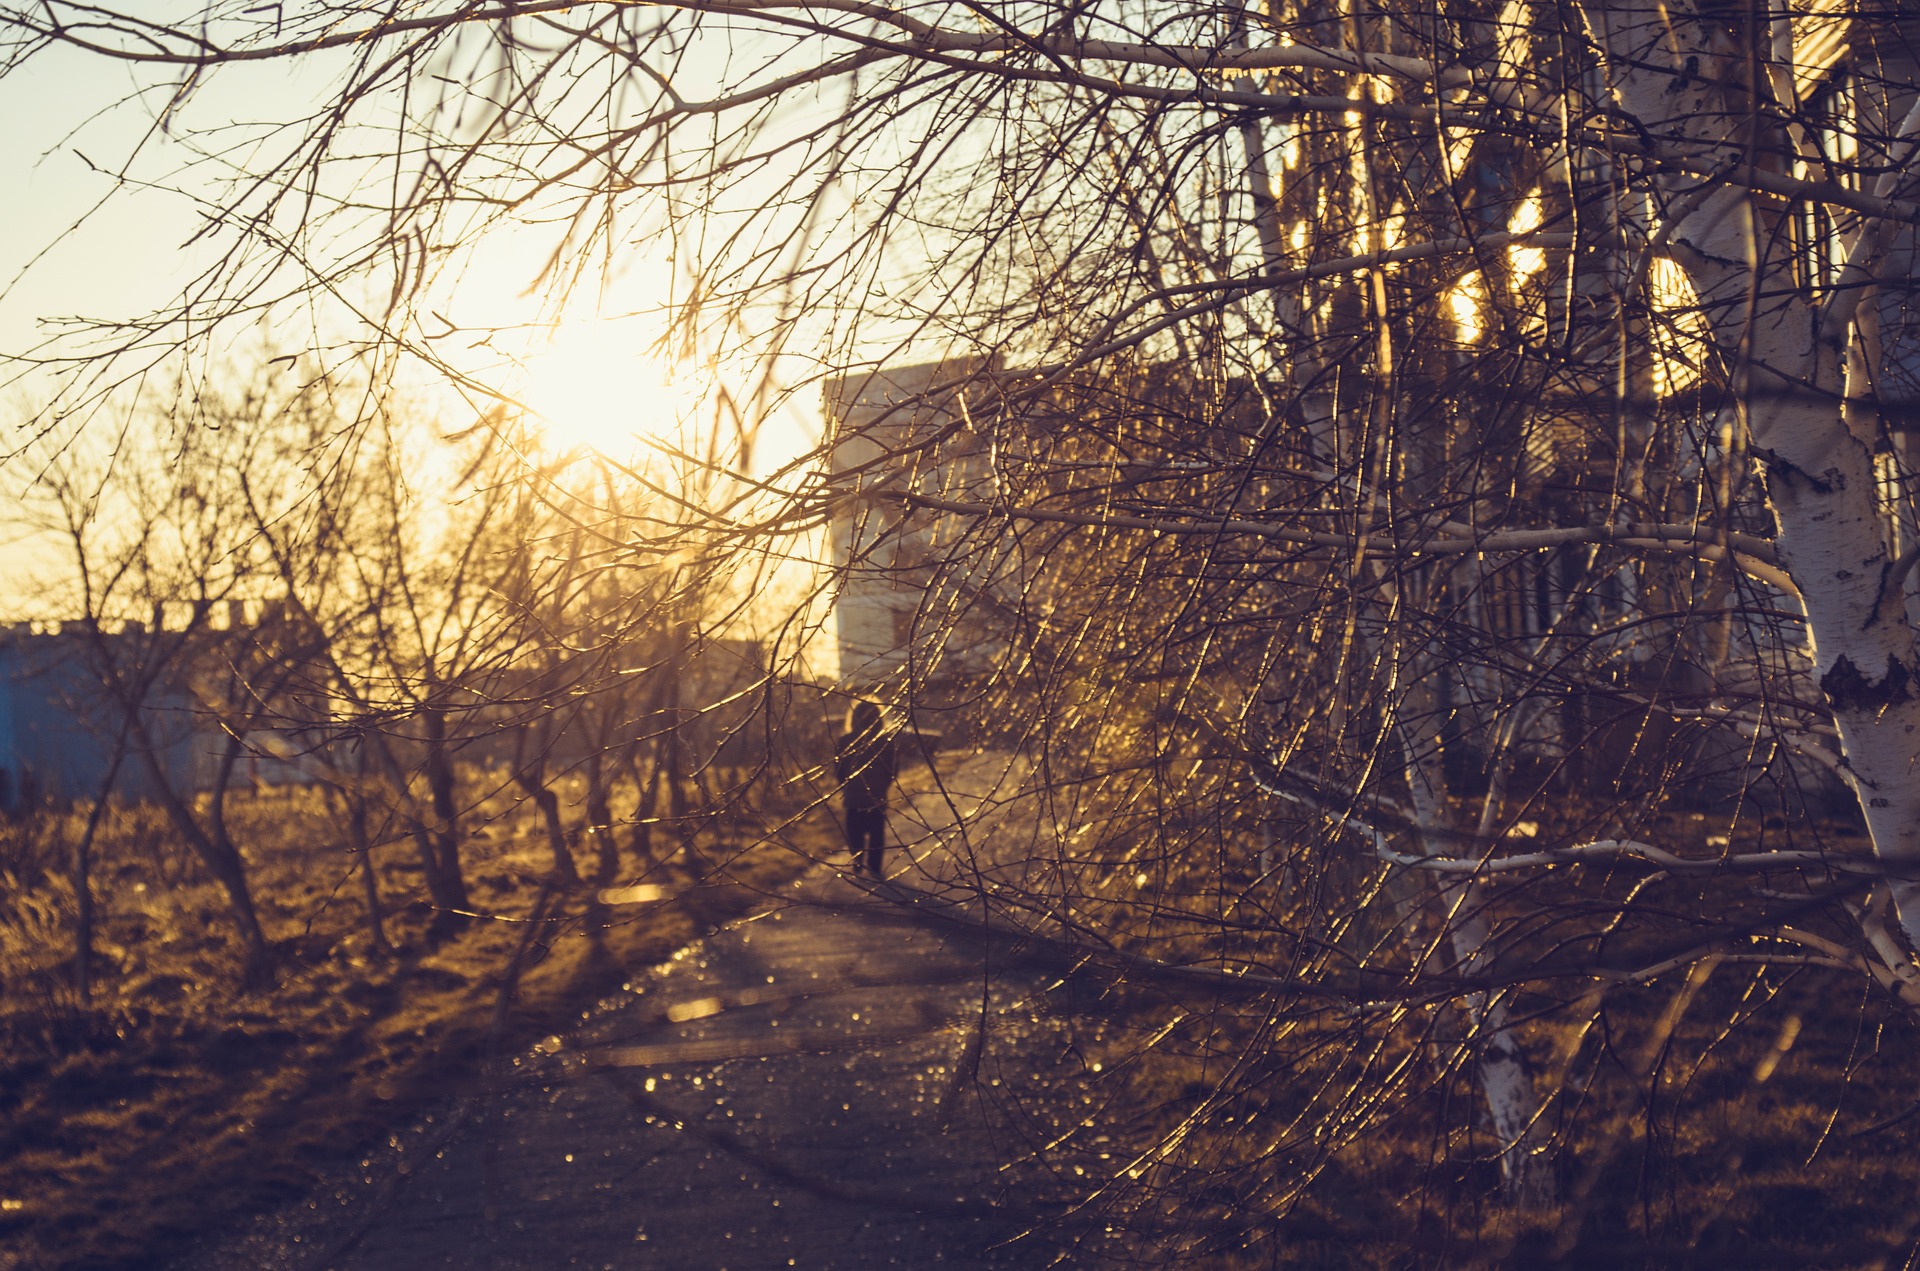
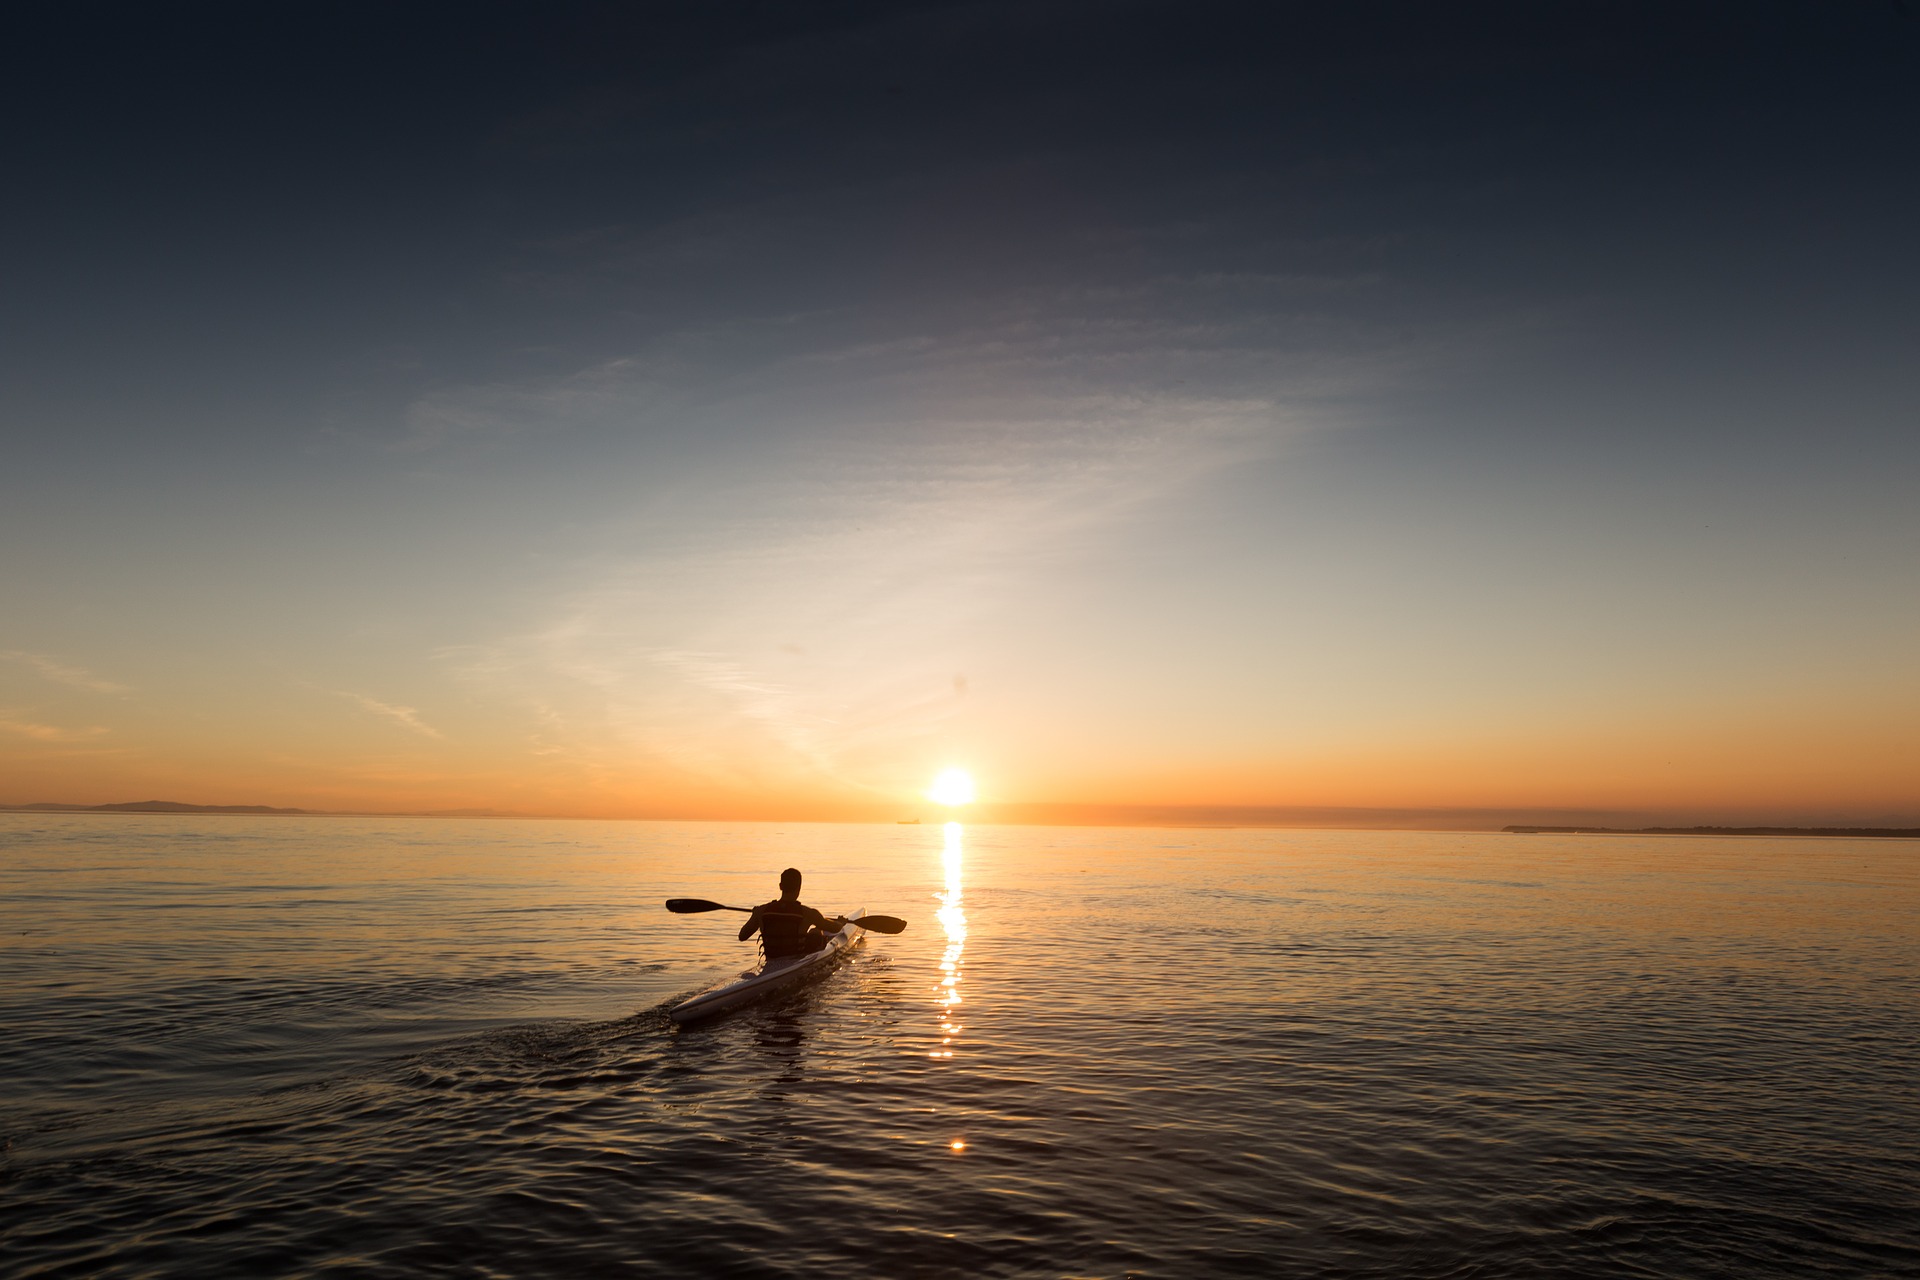
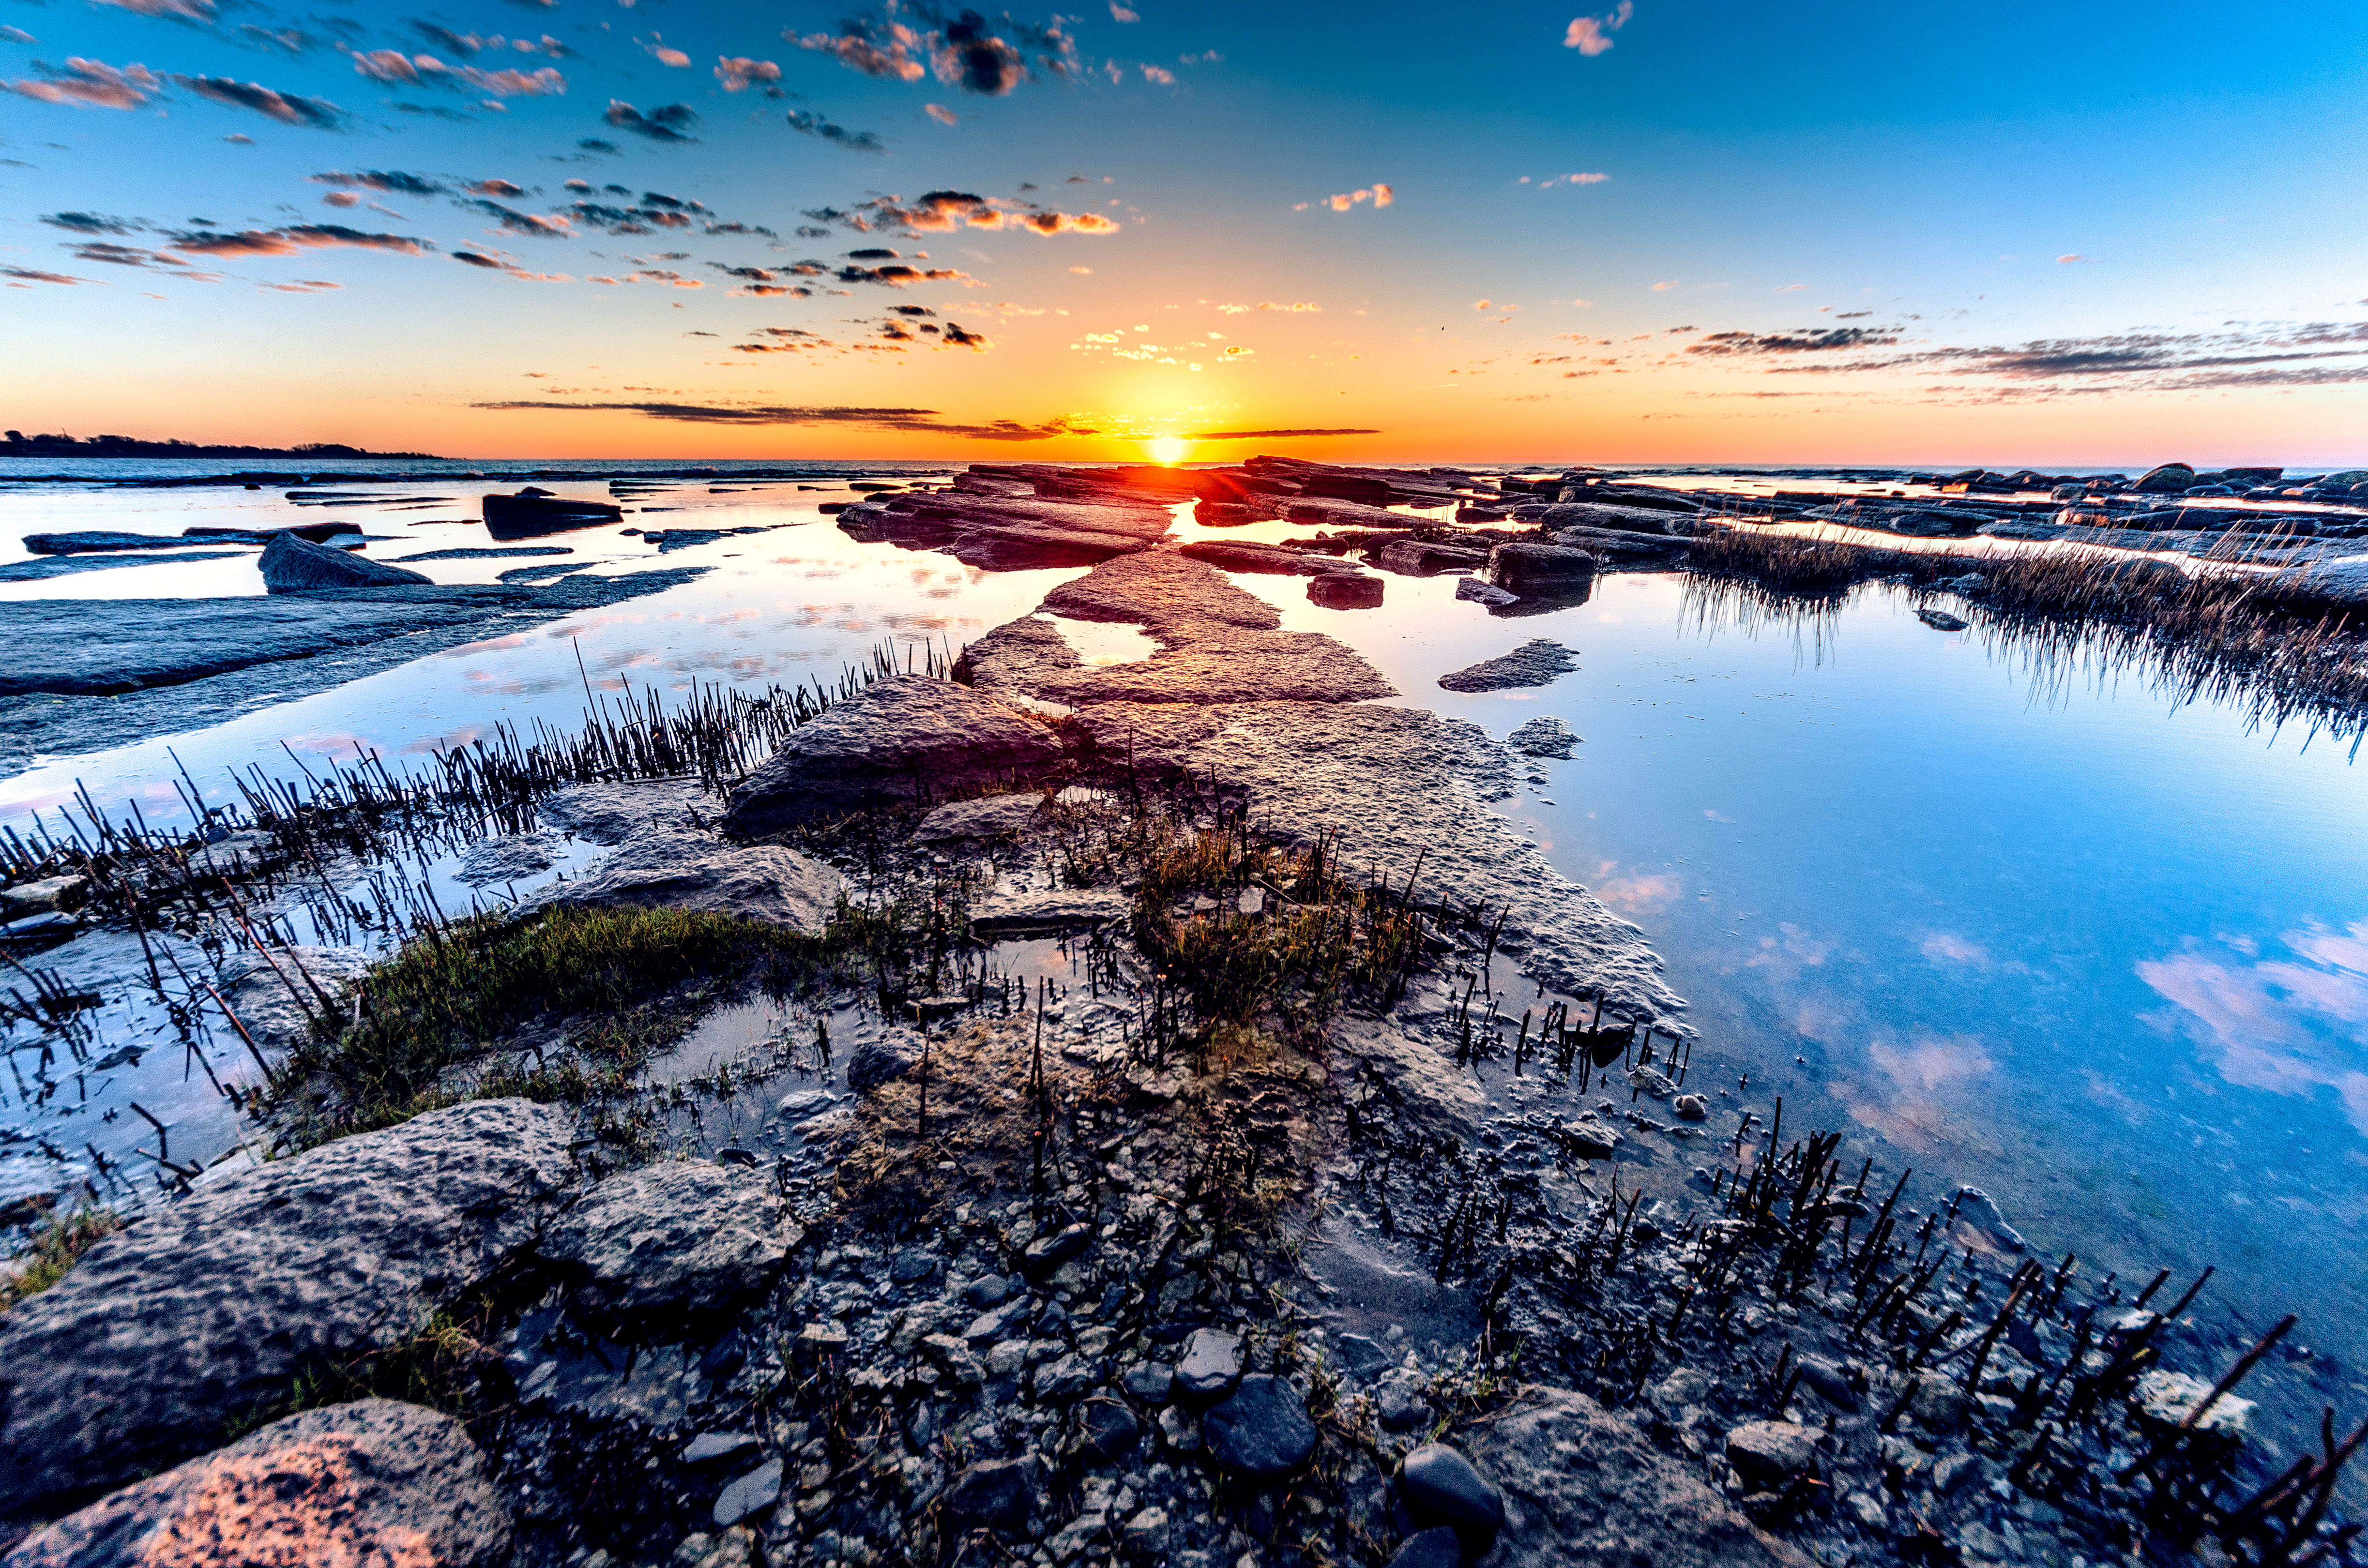
Before you head out to capture amazing landscape photos you need to make some sort of plan, it can be very detailed but it is often good enough to make a general plan. There are three basics in planning a landscape shoot, these are location, time of day and look at the photo/composition. Before you go you should, of course, know the location you are heading to, maybe you have scouted the location the day before or earlier the same day, or maybe you have just found a certain spot through other photographers photos on the internet. Often you will be taking photos in locations that you have never been to before and if you don’t have time to come back to a location several times it can be a good idea to research the place beforehand through sites like 500px. By doing this you will get some inspiration for what photos you want to capture when you arrive at the location. If you are staying in the same place for a longer period I would recommend that you spend a bit more time on scouting locations that you can go to when the time is right, for example during golden hour.branches-325411_1920Time of day is crucial when it comes to landscape photography since we are dependent on the weather and light gave to us by mother nature. We simply have to adapt to mother nature. As a rule of thumb, you should try to capture landscapes during golden hour. That is the hour (give and take) during sunset and sunrise. At this time the light cast by the sun is the most beautiful, and since we are usually trying to take beautiful photos this is the best time for landscape photographers. But of course, you can capture landscapes at different times as well, for example, long exposures during the night or on cloudy days. At least you want to avoid broad daylight since it makes everything very flat and boring. Lastly, you have to plan how you want the photo to look, this is, of course, dependent on the time of day and location but it is good to have an idea about composition and subjects among other things before you arrive at the location. paddle-839814_1920   When I took the photo you can see below I was staying with some acquaintances for two nights, in a beautiful small village at Österlen, Sweden. When I first arrived in the evening I went down to the sea to scout for a location (I didn’t bother taking the photos I wanted at this time since I knew it would be much better at sunrise the next day) and I found two spots that I really liked. I used an app to find out in what direction the sun would rise the next day and decided to try to capture an image where the lines formed by the rocks in the foreground were leading the eye of the viewer towards the rising sun. So the next morning I woke up at about 04.00 (4 AM) to capture the photo I had envisioned the previous day. The sun rose approximately 04.30, but the things you do for great photos… My plan worked out great and I got this photo that I am very happy about.      ÖsterlenApril2014-113

Technique

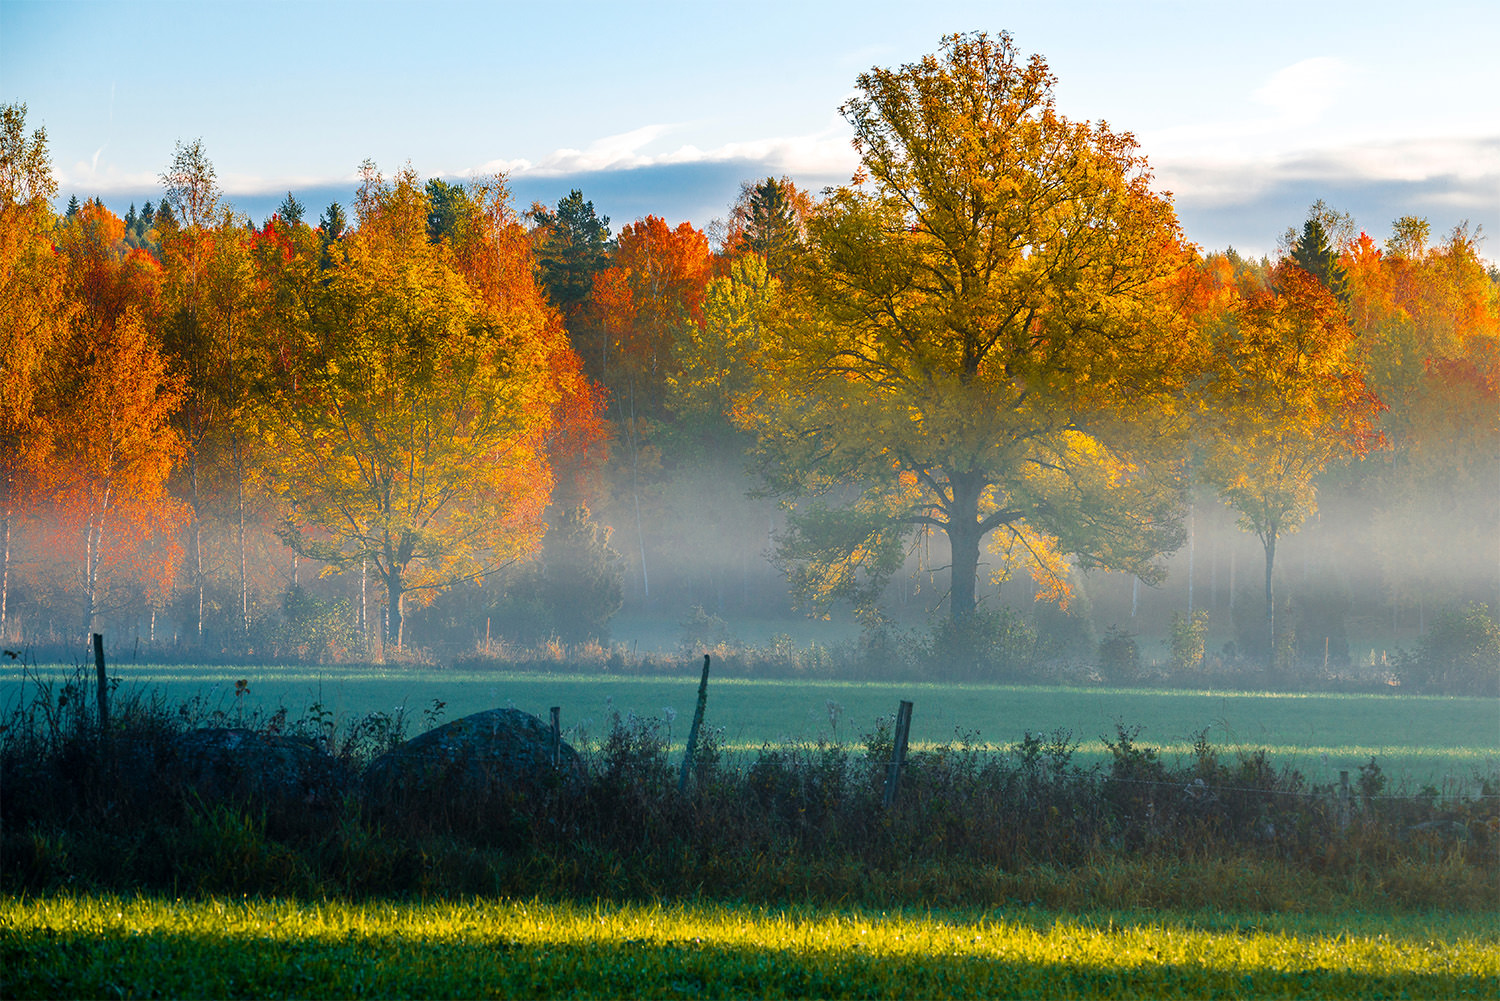
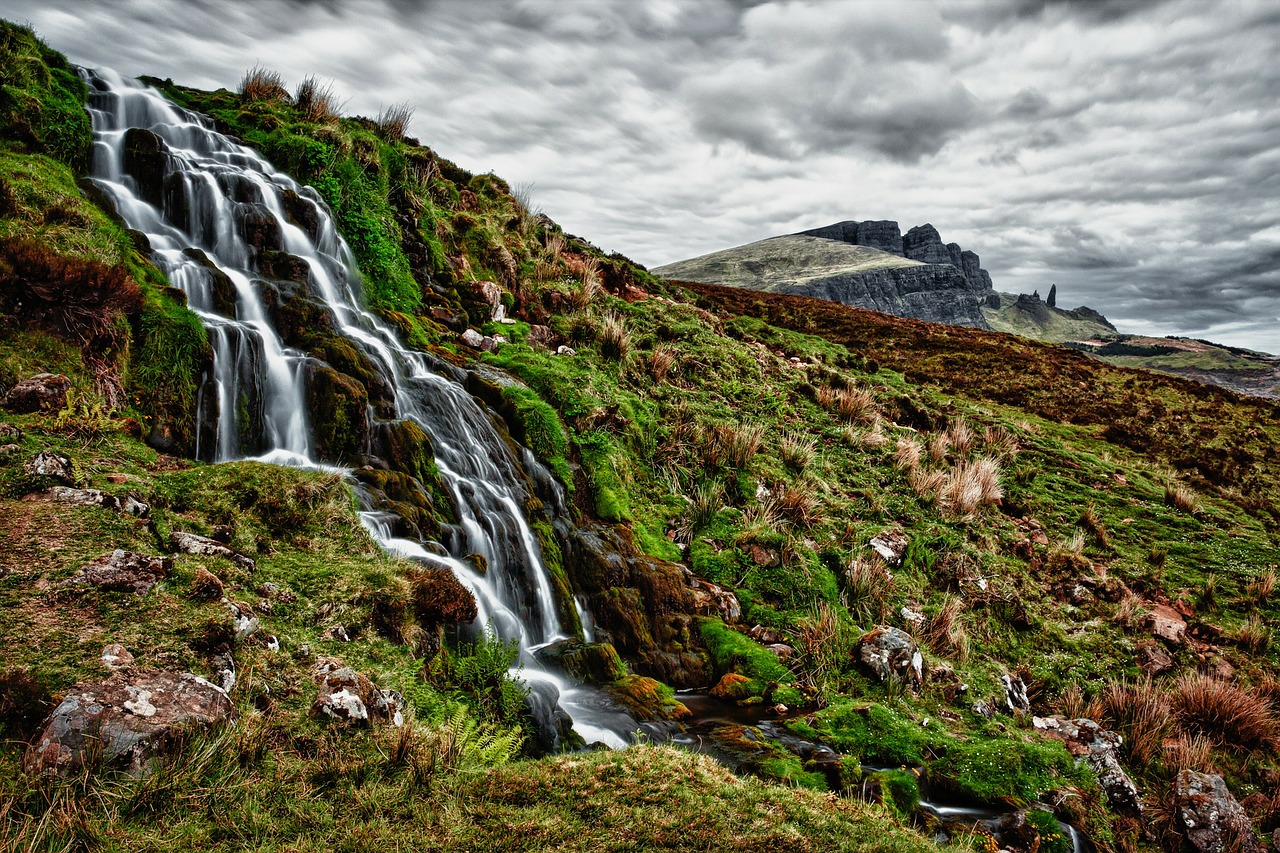
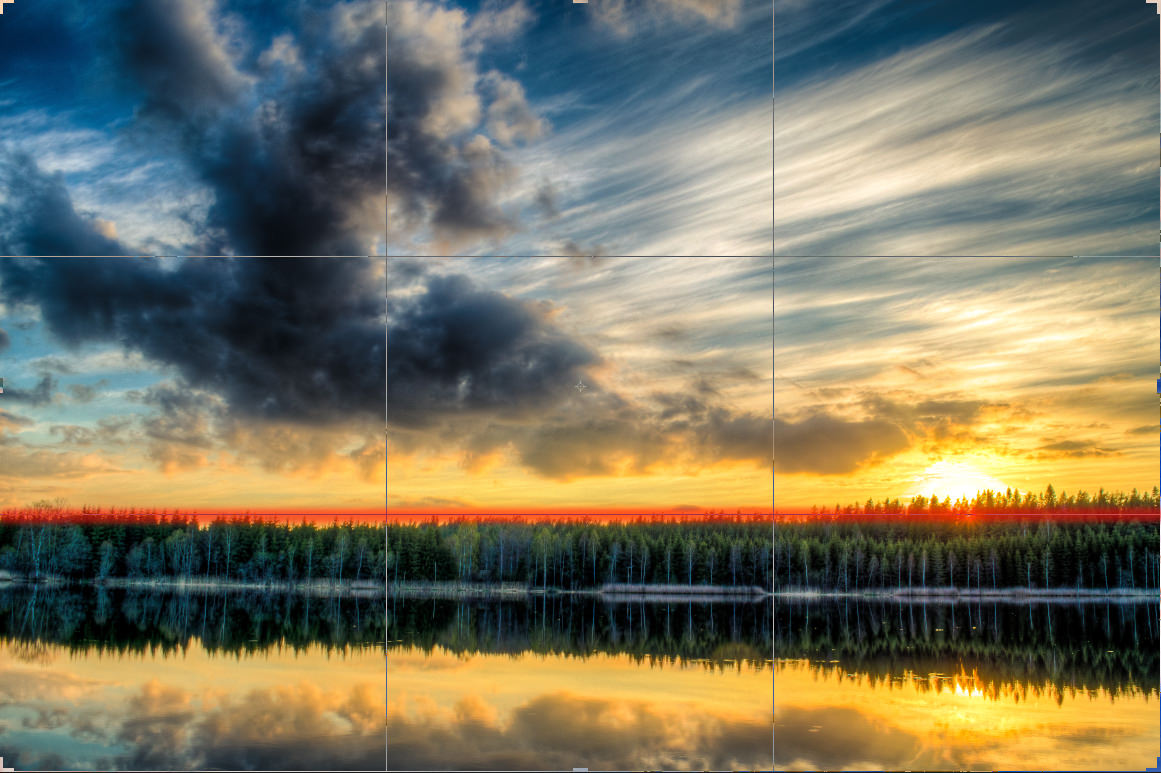
A big part of photography is technique since we must know how to use our cameras and how to compose a photo to get the best results. I won’t go over in detail how to set up you camera and how the technical aspects of your camera work but rather focusing on the specifics for landscape photography. Some keywords in landscape photography are sharpness and correct exposure. To achieve sharpness you have to use the appropriate aperture, make sure you have focused your lens at the right distance and that there is no risk for blur. Since we want the entire landscape in focus most of the time we should use a smaller aperture. This will also depend on your focal length since the depth of field is smaller on lenses with longer focal lengths. I usually never go below f/8 for my landscape photos, unless it is very dark or I’m using a super wide angle lens (like 16mm equivalent or below). The aim is to have as much of the scene in focus as possible, without having a too small aperture (since that might lead to softer photos). Somewhere around f/8 to F/16 is usually suitable for landscape photography. You also want to make sure that you focus your lens somewhere a third into the frame, which usually is the foreground. If you focus too far back the foreground will be out of focus, but if you focus on the foreground the background will most likely be in focus if you are using a fairly small aperture.dog-190056_1280It is also important that you eliminate any risks of camera shake, by using either a shorter shutter speed (the shutter speed should be no less than the focal length of your lens, so if you are using a 24mm lens the shutter speed should at least be 1/24th of a second) or a tripod. If you are shooting hand-held it is recommended that you use vibration reduction if your lens (or camera) has it (keep in mind that it is called different names depending on the brand). Additionally, It is very important that you have a correct exposure, no matter if you are shooting JPEG or RAW (recommended). Something that really can ruin landscape photos is overexposure, usually meaning that there is no possibility to recover blown highlights in the sky. It is also horrible to have such underexposure that the colors are destroyed by noise when you try to recover the shadows. You should aim for an exposure were highlights are bright (but not blown) and shadows bright enough to increase them a little bit in post-process (if needed). You should rather have a bit darker shadows than to bright highlights. Another option is to use the technique HDR (High Dynamic Range) where you take several photos with different exposures and combine in post-processing, leading to an image with both no blown highlights and bright shadows.waterfall-192984_1280Another very important technical aspect of landscape photography is composition. This is such an important part that is impossible to cover thoroughly but there are some basic tips for landscape composition that you need to know.One important part of composing landscape photos is the rule of thirds. According to this rule, the horizon should be placed either at the top or bottom third, but absolutely not in the middle. This is to create a balanced photo, but of course, there are some exceptions, for example when there is reflection, then it can be nice to place the middle of the reflection in the middle of the frame.


Untitled-1

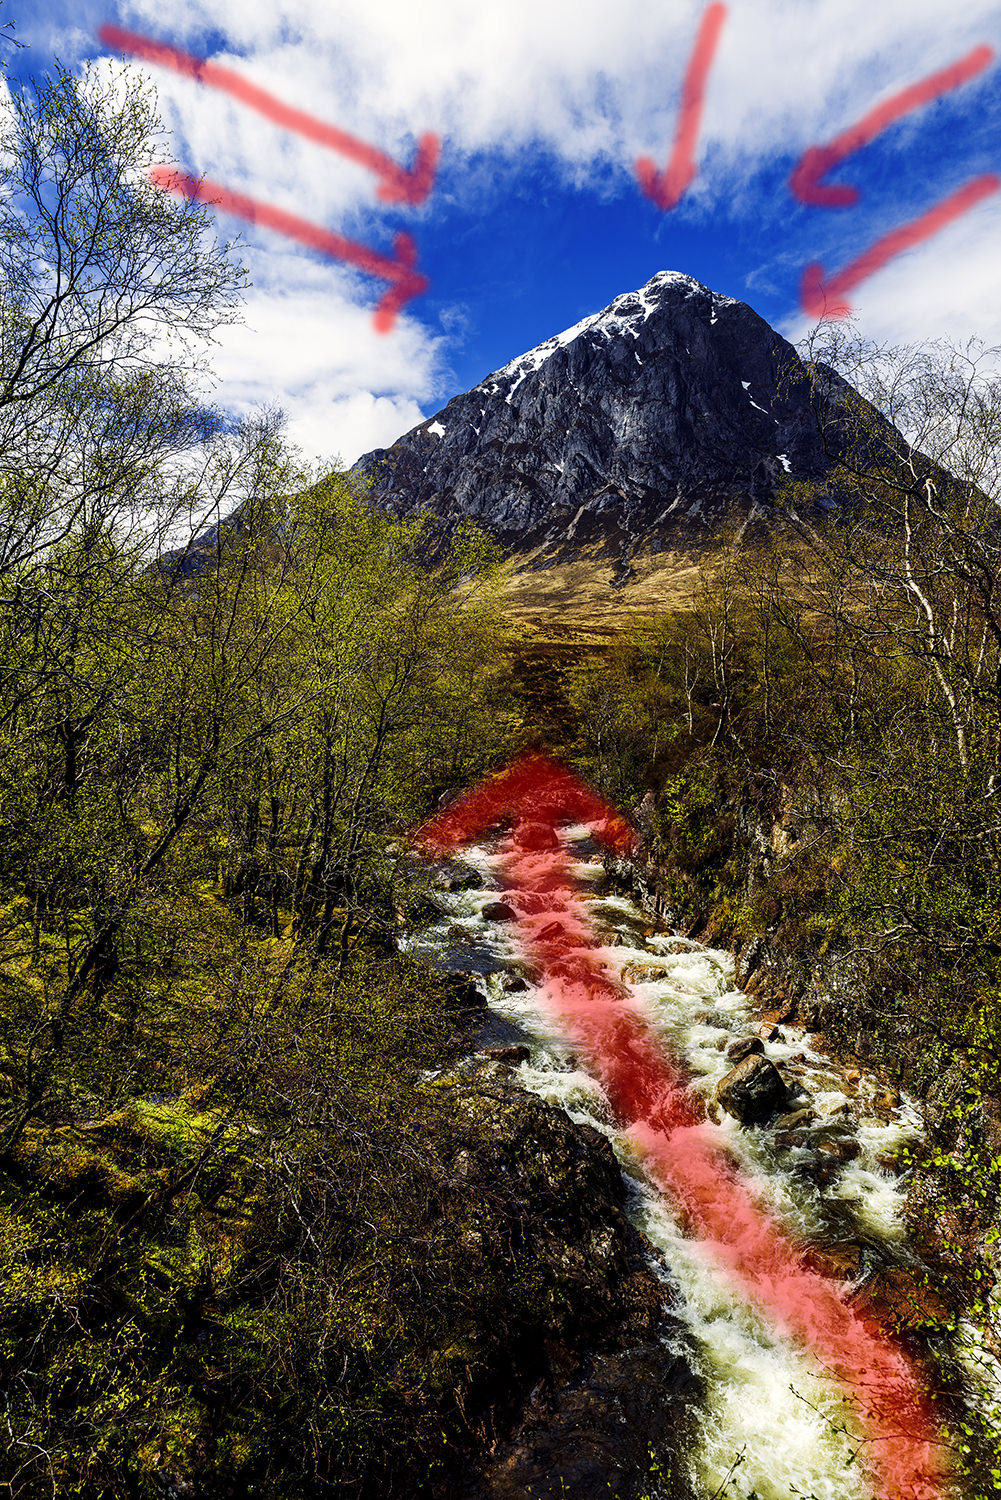
Another tip is to take advantage of leading lines. You can use lines in photos to lead the viewer to where you want them to look. Lines should be leading into the frame and not out from it since you want the viewer to look at the photo and not be distracted. For example, you can use a stream leading towards a mountain or a path leading the viewer from the foreground to the main subject as leading lines.

_D8A6277-PS-1

Post-Processing

When you are back after a landscape shoot the work is not done yet. What you do with the pictures after they have been taken is crucial to creating a fantastic image. I would almost say that it is in post-processing you turn the photograph from an image file to a piece of art. If you decide to shoot in RAW-format you will have much greater artistic freedom when you edit the photos, since RAW files have much more data in them, meaning you can change exposure and color to a greater extent. I use Lightroom for most of my editing and they use Photoshop for more advanced edits of my favorite photos.When I edit photos I usually try to enhance elements that are already in the picture. But first I create a base edit where I make sure that the exposure and contrast are what I want and then I go on to more in-depth editing, like modifying tones and details of the image. before-afterI highly recommend that you check out the different bundles for landscape photography that Sleeklens has to offer, they are a great and easy way to make your images look fantastic, and by combining different presets you can create completely unique looks.

Photoshop: Landscape Adventure Collection

Lightroom: Landscape Essentials Workflow

Conclusion

I hope you have found this short guide useful and that you will be comfortable to start exploring the wonderful field of landscape photography. This guide has just scratched on the top of an extensive subject and I recommend that you continue reading other guides that can help you get a better understanding for each part of the process, like the composition. Good luck with your landscape photography!

3 Rules for Budgeting Your Photography Gear

So, you’re either looking to get into photography or you’re looking to upgrade your equipment. Or you’re like me and you’re a little obsessed with scouting out the gear you want to get but will probably never pull the trigger and actually buy it. Fair enough.

Whether you’re an Instagram loving amateur looking to bump the quality of your posts or a seasoned fashion photographer who needs the latest gear to keep up with the crowd, there are some basic rules to budgeting your photography purchases. The guidelines below will help you get the most bang for your buck.

Copyright An Mai
Copyright An Mai

1. Actually have a budget (or two)

Regardless of your situation, you’re gonna need a budget (even if it’s a hypothetical one). It’s all too easy to purchase one camera and get roped into buying tons of supporting gear to match your fancy new shooter, and before you know it you’ve sunk thousand of dollars that you didn’t want to spend into your setup. Do not do this. Instead, come up with two numbers, one that is the best case scenario low budget you’d love to get away with, and the other being the high budget total that you’d still be comfortable spending on all of your gear, then aim for the low one and you’ll probably end up at the high one.

Depending on your situation and photographic needs, your numbers will probably range anywhere between $500 to $10,000 or more, only you can figure that out for yourself. But keep in mind that the gear doesn’t make the image, the photographer does. No camera and lens, no matter how expensive, will make you a good photographer, and the best photographers can make amazing photos using just about anything.

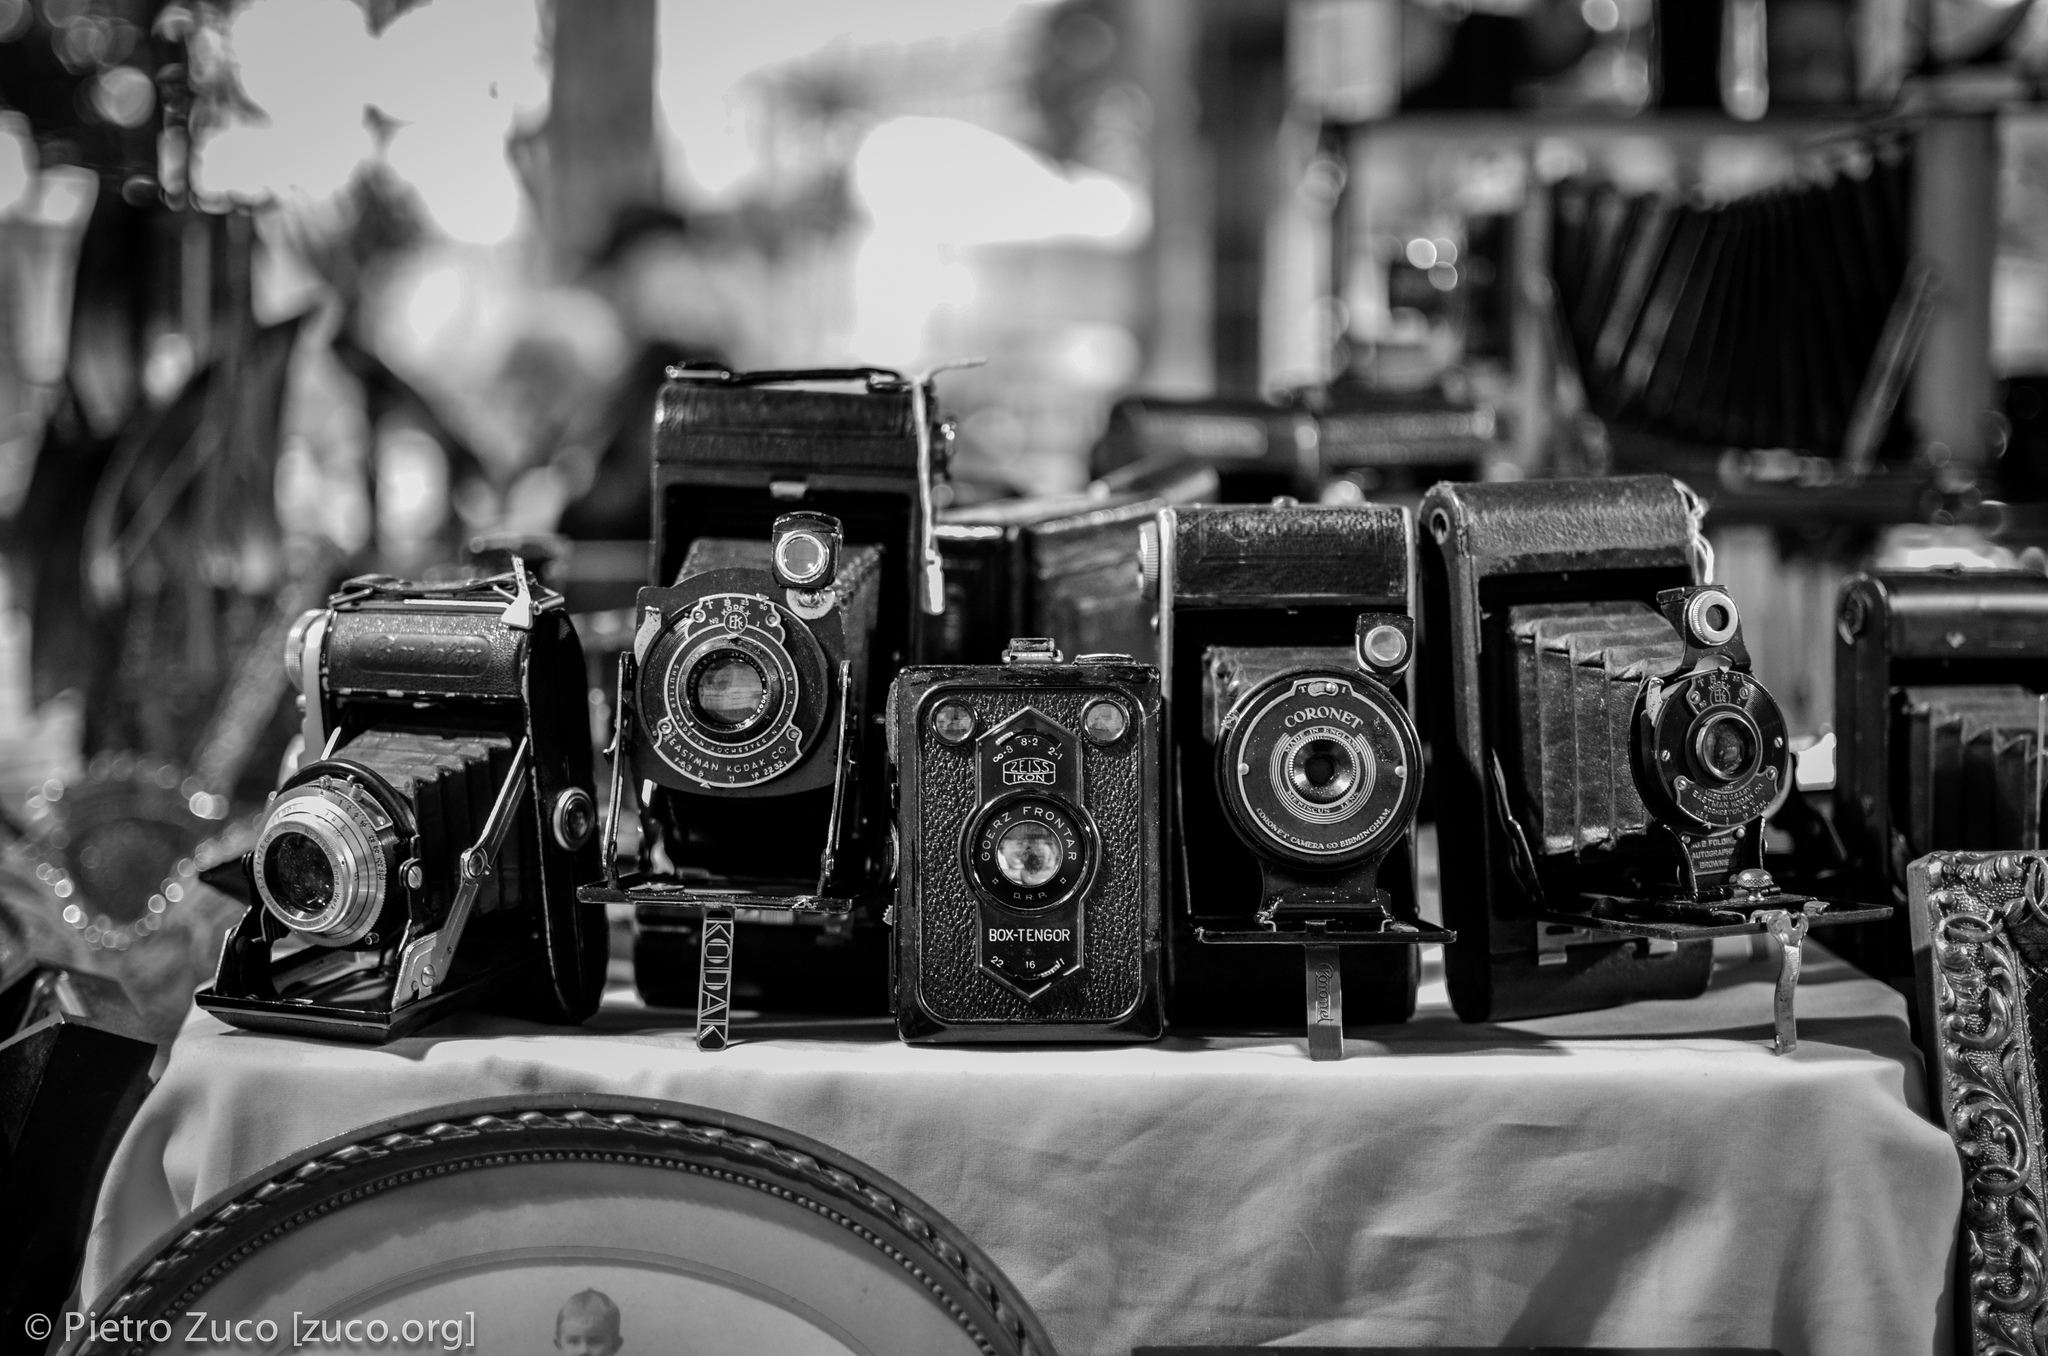
Copyright Peter Zuco

 2. Keep what you can

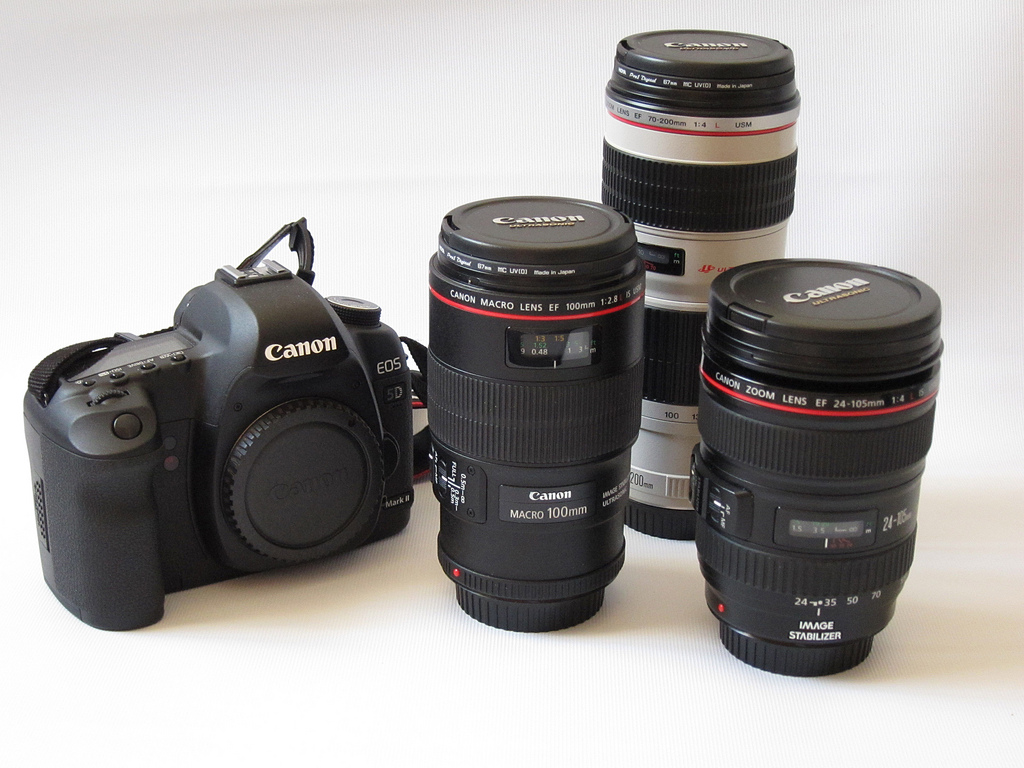
If you’ve already invested $3,000 in Canon lenses, don’t switch to Nikon. This should be obvious but many people jump to whichever system has the best looking gear at the moment and completely abandon the often significant financial investment they’ve already made in another system. But guess what, no camera company makes anything significantly better than all the other camera companies. Every camera on the market takes good photos, some take great photos, basically none of them take mediocre photos. The difference between a $400 camera and a $4,000 camera is minuscule at best, and the difference between Sony’s latest offering and Panasonic’s best gear is even less significant. You are far better off keeping your budget down by utilizing as much of your current gear as you can than selling it for a loss just to get into a different (but rarely better) camera system.

If you don’t have any gear yet, then this rule is even more important for you. THINK LONG TERM. For all the reasons listed above, whatever photo equipment you get first will likely decide what type of equipment you buy from then on. So if you buy a Canon Rebel body and a couple Canon lenses right now (a great long-term choice) then you probably won’t want to buy a Fujifilm camera next because then your Canon lenses will be useless (don’t expect to rely on converters). Before you know it, you’re entirely entrenched in the Canon system and it will cost thousands of dollars to get out of it. You can read up on which camera brand is right for you in this helpful Sleeklens guide.

Copyright Kieth Williamson
Copyright Keith Williamson

3. Trust the 2-1-1 rule

This is easily the biggest mistake any new photographer makes when buying photography gear. Most people spend all of their money, or close to it, on the camera. WRONG. If your budget is $1,000 don’t spend it on a Canon 70D with a kit lens, in fact, you should almost never buy a kit lens at all. (For those who don’t know, a “kit lens” is the zoom lens included with a camera body that usually covers a large focal range, like 18-105mm, but is almost always very low quality.) So what exactly is the 2-1-1 rule? It’s a ratio: 2 parts of your budget on lenses, 1 part on the camera, 1 part on everything else.

This may seem crazy to new photographers, but you should be concentrating on the lenses you’re getting, not the camera body. Why? Most camera companies use the exact same Sony sensors. While there are other factors that go into the quality of a camera body, the sensor is easily the most important one. Even companies that don’t use Sony sensors (like Fujifilm) use the same technology and produce almost the same images. The camera body really doesn’t matter that much, it’s mostly a personal preference. The only truly important elements of a camera body that affect the final image are the sensor size, technology, and megapixel count. Even then, there are pros and cons to all possibilities and they don’t have a huge affect on the final photograph.

3479553798_01312d8f52_b-2
Copyright G M

Lenses, on the other hand, all but decide the quality of your images. Camera companies make their own lenses, all of which have some stellar options, and many third part companies like Sigma make some great lenses too. While, like cameras, there is little difference from one brand to the next, there is a significant difference from one “tier” to the next. It’s really difficult to get those stunning photos with micro-contrast, a low depth of field, and beautiful color and tonal gradations with a cheapo zoom lens. It might be impossible. Compare that to a Canon L lens, for example, which can make virtually any snap look decent, and you’ll see why the lens is the key.

The last 25% of you budget should be reserved for supporting gear like bags, UV filters, strobe lights if you need them, that kind of thing. If you already have equipment you’re planning on keeping (which you’d be wise to do) then you should follow the 2-1-1 rule for your total set of equipment, not what you’re buying right now.

Finding the right photo gear may seem like an impossible task, but as long as you keep those three rules in mind (especially the 2-1-1 rule) you’ll end up with a kit you can be proud to call your own.

Choosing the Sensor Size that’s Right for You: Bigger isn’t Always Better

Whether you’re a seasoned pro or an aspiring amateur, your choice of the camera goes a long way to defining and reflect who you are as a photographer. While a sports photographer will likely lust at the low-light, quick shooting behemoths, a street photographer will want a quiet, compact, one-handed companion. There are a ton of factors that go into choosing the camera that best fits your needs and style, and one of the first decisions that should be made is what sensor size to go for.

If you aren’t familiar with the concept of sensor size, it is literally the physical dimension of the electronic sensor that records the light and thereby makes the image. The sensor size is not only built into the camera but has a direct effect on the lenses and image characteristics as well. From the days of film, when the sensor size was simply the type of film the camera accepted (35mm, 120mm 4×5, etc.), this has been a key factor in choosing a camera and ultimately a shooting style that fits the photographer’s needs. Today, most camera companies offer at least two options through different camera lines, with some offering even more. It’s important to note that when choosing a camera and the sensor that’s in it, you’re also choosing what lenses and accessories that will be available to you, so do your research on the entire system that surrounds the camera as well.

1234526868_02ef3f04e7_o
A CCD sensor (© Matt Laskowski)

Before we dive in, a basic explanation of how sensor sizes relate to the actual photo is in order. It’s helpful to think of an image sensor as a water bucket and light as rain. A larger sensor (larger bucket) can collect more light (more rain) than a smaller sensor in the same situation. So a camera with a larger sensor will perform better than a camera with a smaller sensor in a low-light scenario because it can collect more of the light that’s available. This means faster shutter speeds, lower ISO, and overall nicer images. Another major factor of having a large sensor is the shallower depth-of-field (more background blurriness) it creates. Because of optical math, we needn’t worry about, a larger sensor produces a shallower depth-of-field than a smaller one shooting the exact same image. The last important element of a larger sensor is simply the advanced technology it requires. Because larger sensors are simply harder to make, they often come in overall better (and more expensive) cameras. Because companies put their best tech in their most expensive cameras, larger sensor sizes nearly always come with better and more recent technology. These three factors— low-light performance, shallow depth-of-field, and cutting-edge technology— are why most people assume bigger sensors are always better. However, amazing images can be made with any sensor size out there, it just depends on what you’re shooting and how you shoot it.

Here, we’ll go through the pros and cons of the four major size options available for interchangeable lens cameras, with some examples for each size mentioned.

Taken with Medium Format Camera (© Takuma Kimura)

Taken with a Medium Format camera (© Takuma Kimora)

1. Medium Format (~44x33mm to ~54x40mm)

These are super expensive, high-end studio cameras from companies most people have never even heard of such as Phase One, Mamiya, and Hasselblad. While they’re unwieldy, slow shooting, and a rental-only option for most people, they also produce the highest quality images available. With amazing dynamic range (range of brightness to the darkness that can be recorded in the same image), extremely fine detail (up to 100mp), and great bokeh (quality of the out-of-focus area), these cameras are perfect for many types of art, fashion, and archival photography. However, they are difficult and unnecessary for most other types of shooting and serve as a specialty option.

  • Pros:
    • Best Image quality available in favorable situations
    • Instantly gives any image a high-end look
    • The shooting experience is unlike anything else
  • Cons:
    • Extremely expensive
    • So difficult to manufacture that high ISO and other recent technology isn’t available
    • Large and clunky
  • Examples:
    • Pentax 645Z ($4,000, one of the best cameras ever made)
    • Hasselblad H5D series ($7,500-$45,000)
    • Phase One XF series (Up to 100mp for up to $55,000)

Taken with a Full Frame camera

Taken with a Full Frame camera

2. Full Frame (~36x24mm)

While in the days of film, this size was thought of as too small for any self-respecting professional photographer, digital cameras make this the go-to size for most professionals today. This is what the flagship cameras for many companies utilize, as it offers a great balance between superb performance and acceptable price. Many people believe that a 10-year-old camera with this sensor format (such as the Canon 5D Mark I) is still better than any new camera with a smaller sensor inside. However, with the improved high-ISO performance of modern cameras and tons of great lenses available for almost any mount, there’s not much supporting this way of thinking.

  • Pros:
    • Often sports the best technology available
    • Amazing low light performance and high-quality look
    • Best lenses and accessories available are for these professional-grade cameras
  • Cons:
    • Still pretty expensive
    • Fairly large bodies and lenses
    • The industry may start to favor smaller formats soon
  • Examples:
    • Canon 5DSR ($3,600, 50mp of raw power)
    • Sony a7R II ($3,200, mirrorless that’s fairly compact and critically acclaimed)
    • Pentax K-1 ($1,800, amazing quality for half the price of its competition)

Taken with an APS-C camera

Taken with an APS-C camera

3. APS-C (~23x15mm)

This is what you’ll find in most cameras that aren’t point-and-shoots, and for good reason. While for a long time this format has been aimed at amateurs, more and more pro-quality cameras are coming out with this size thanks in large part to the introduction of mirrorless cameras. If you’re not already invested in a camera system, you should strongly consider getting an entry-level APS-C mirrorless camera and going from there. While Canon and Nikon have been sticking with the same DSLR formula for over a decade, companies like Sony and Fujifilm have bet big on mirrorless APS-C cameras and it looks like it will pay off. The absolute best cameras that won’t break the bank are of this variety. Because recent technological advancements allow them to accommodate high-res sensors with clean images at high ISO— and there are now many amazing lenses built for this format— some APS-C cameras can go head-to-head with all but the best full-frame competition.

  • Pros:
    • Much more affordable options available
    • Some are both compact and still high-quality
    • Next generation of popular cameras will be APS-C Mirrorless
  • Cons:
    • Still, can’t match the performance of the best full-frame cameras in demanding situations
    • Some of the amateur options aren’t worth buying (looking at you Nikon and Canon)
    • Still thought of as unprofessional in some circles
  • Examples:
    • Canon Rebel series ($400+, better options available for similar prices)
    • Sony Alpha a6000 ($600, very compact with great image quality)
    • Fuji film X-Pro2 ($1,700, unique design with professional image and build quality)

Taken with a Micro Four Thirds camera

Taken with a Micro Four Thirds camera

4. Micro Four Thirds (17x13mm)

This is a very interesting option that deserves serious consideration from almost any photographer. About five years ago, many people believed this format to be the future of all photography. While it hasn’t yet lived up to that hype, it has quietly grown into a robust segment that can offer superb image quality for very low prices, but definitely, sacrifices some flexibility. Unlike all other image sensors, Micro Four Thirds (MFT) cameras are standardized across manufacturers. So a lens that fits a Panasonic MFT camera will also fit an Olympus MFT camera, which can be very helpful. Also unlike all other image sensors, this option is mirrorless only, no DSLRs here. But even the cheapest MFT cameras can offer image quality that often out-performs popular, entry-level DSLRs. While this sensor size is a little too small to work well in low-light settings, the bodies are so compact that it might be worth the sacrifice. One thing to note is that most if not all MFT cameras lack the premium build quality available in other formats.

  • Pros:
    • Cheapest option available
    • More nice lenses than you’d expect thanks to universal standards
    • Some extremely small options out there
  • Cons:
    • Poor low-light performance
    • Generally not acceptable for professionals
    • Not many studio accessories available
  • Examples:
    • Olympus PEN EPL7 ($450, extremely compact but toy-like body)
    • Panasonic GH4 ($1,300, professional-ish option with great 4K video)
    • Olympus EM-5 ($480, worth every penny)

There are amazing cameras made using every sensor-size, so choosing a size is really just a matter of taste. If you want to be able to take incredibly detailed images for large prints that are dripping with quality, then a Medium Format or Full Frame camera is probably your best bet. If you want a decent shooter that won’t be noticed when you’re taking close-up street portraits (or if you just want to save your wallet), then an MFT camera may be right for you. And if you’re looking for a jack of all trades that can create amazing images in favorable light and perfectly acceptable images in almost any situation, then maybe go for an APS-C sensor. Before deciding on a specific camera or even one brand, it’s best to weigh your options and consider what your expectations are, then you can find the camera best suited to capture the images you want.

Wide Angle Lens Photography – Practical Guide

One of the biggest advantages of SLR and DSLR cameras has always been the possibility of interchanging lenses. In the last few years, a new type of camera has appeared on the market, which combined the reduced size and weight of compact cameras with the possibility of attaching different lenses (sometimes called mirrorless or system cameras).

The truth is that without this possibility, the ability of capturing the scene we want in different situations is significantly reduced. In this post I want to concentrate on a specific type of lens, with focal lengths that are rarely achieved by compact cameras. Moreover, these lenses are not usually at the top of photographer’s bucket lists despite their versatility and ability to get some unique results, especially when talking about landscape and travel photography. I am talking about wide angle lenses.

photographer-324921_1920

Since I shoot with a cropped sensor camera (not a full-frame), the focal lengths I will be referring to are specific for that type of cameras. Also, to avoid using ‘cropped sensor’ all the time, whenever I say ‘camera’ I am referring to ‘cropped sensor camera’.

Usually, DSLR cameras come with a kit lens and it is not uncommon that this kit lens is a 18-55 mm. This is a good general purpose lens (I am not talking about quality, just focal length) that can serve to shoot landscapes as well as portraits, for instance. Many wide angle lens photography aficionados stick to this lens but the truth is that it has some important shortcomings. Not only the build quality is not the best (with some sharpness and focusing issues) but the fact that the aperture range in the wide side is quite limited, makes it difficult to take photos under low light conditions or to have the right depth-of-field when taking for instance portraits.

However, the largest limitation and why I recommend experimenting with different lenses, is the focal length itself. While you would need a large zoom or telephoto if your interest is street or wildlife photography, if landscape and travel photography is what motivates you, I would definitely recommend giving wide angle lenses a try.

Why Wide Angle Lens Photography?

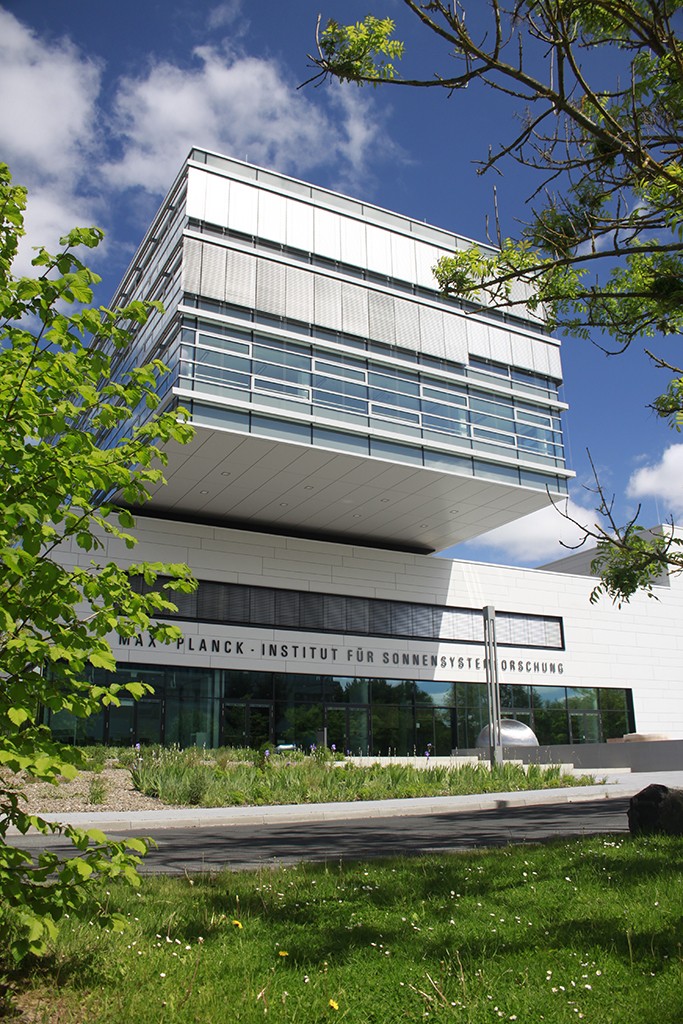
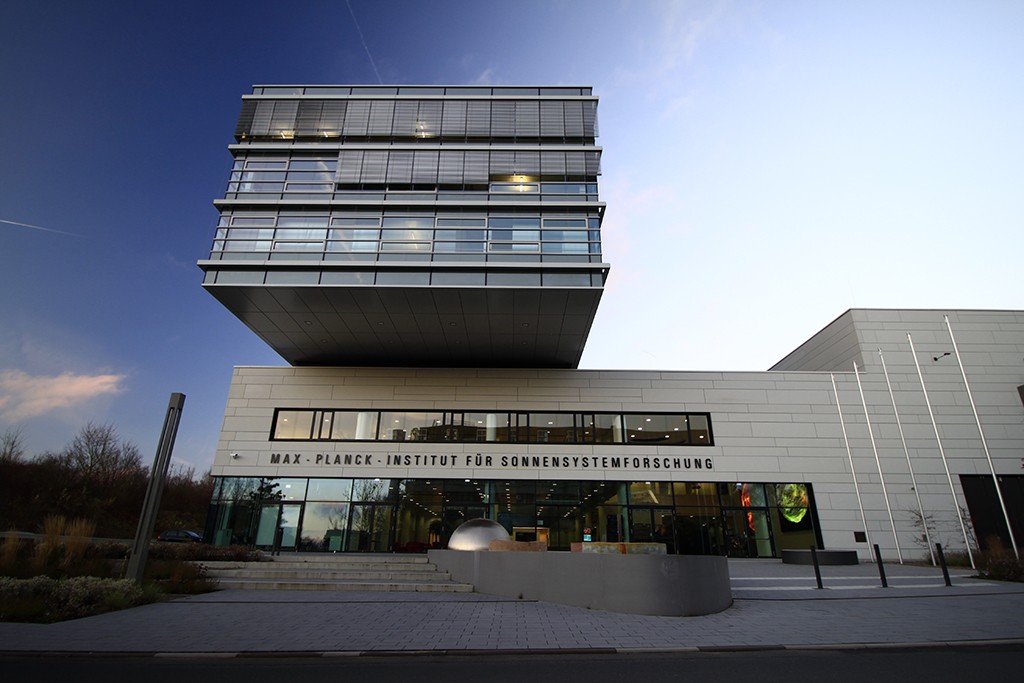
The obvious reason is that sometimes 18 mm is not wide enough to allow us capture everything with a single shot. This is especially relevant in travel and cityscape photography, where sometimes it is just impossible to step back a bit in order to get all the scene in a single exposure. Take, for instance, this image of the Max Planck Institute for Solar System Research in Göttingen, Germany, taken with a focal length of 18 mm.

_MG_9027_1024_nob_noproc

Being a medium-size building, even though I could not capture the whole structure, by stepping back a bit I was able to capture at least the main entrance and a good part of the structure. The image might look interesting like this, but it is simply impossible to get the rest of the building in a single shot, simply because the focal length of the lens is not enough.

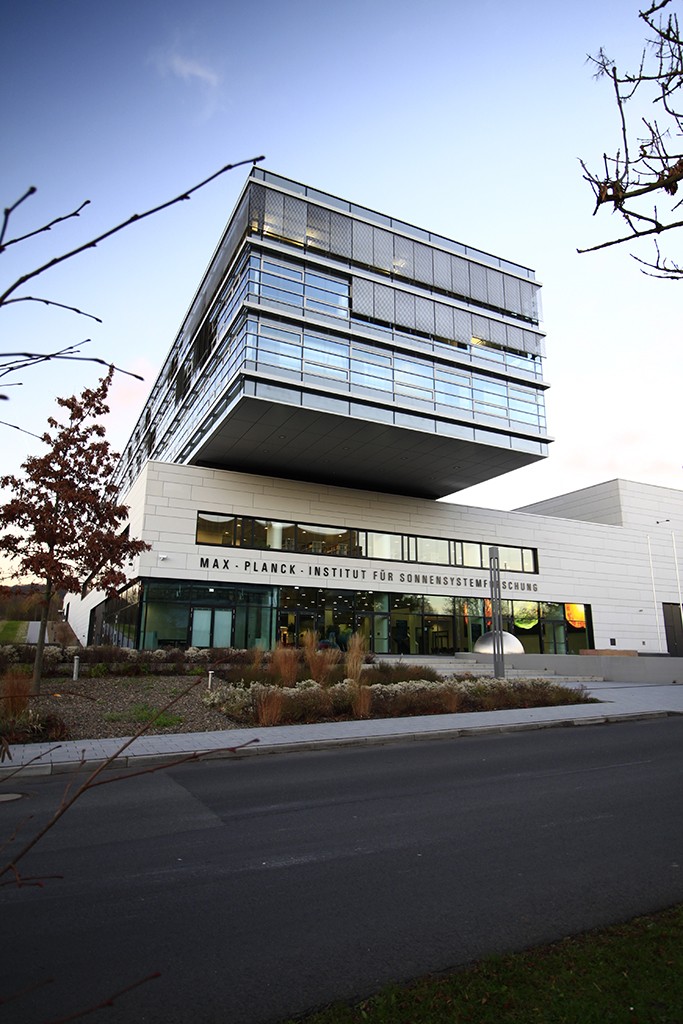
Now take this image of the same building and almost from the same spot, taken this time with a focal length of 10 mm.

_MG_0007_1024_nob_noproc

Ignore the obvious change in mood (the first image was taken in summer while this one was taken in winter). Now, by actually moving forward to cover less foreground, I was able to capture the whole structure, better conveying the size and 3-dimensional structure of the building.

This is actually something central when interested in architecture photography, not only for the outside of the buildings but also for the inside like for instance when doing a photo session for real estate purposes.

Things to keep in mind

Now, as usual, there are some things to keep in mind when using wide angle lenses. When shooting, you need some practice to get the results you want, mostly because the effect of having such a small focal length will make everything look smaller and seem to be farther from the camera than in reality. This is something that cannot be avoided and the only thing you can do is keep it in mind when composing your image by for instance getting a subject in the foreground when capturing a landscape or a building (unless, of course the building itself is the subject!).

_MG_0475_1024_nob_noproc

Another problem that comes with smaller focal lengths is optical distortion. Take for instance this image of the same building as before, this time taken with an 18 mm focal length and looking directly into the entrance (no angle as before).

_MG_9046_1024_nob_noproc

If you look at the straight lines on the image like the border of the sidewalk or the building itself, you will notice that some optical distortion is present, making the lines look bent towards the inner part of the photo. Now look at the same angle, this time captured with a 10 mm focal length.

_MG_0026_1024_nob_noproc

Here you can first see how much of the building we are able to capture (as described before) but also how stronger the optical distortion is, especially when you compare the left border of the building. In fact, as with every lens, the optical distortion is stronger on the borders of the image. This distortion can sometimes be aesthetically appealing, as with the color cast caused by ND filters. However, sometimes it is something we will want to get rid of. Fortunately, this is a simple task in Photoshop but keep in mind that by fixing the distortion you will loose information in different parts of the picture, so you might want to plan for this in advance by, for instance, taking some extra photos at the sky above the building to be able to combine them with your original image later on.

Getting your lens

Unfortunately, photography is an expensive hobby, and arguably the most expensive part of it are precisely the lenses. Some manufacturers have relatively inexpensive and good quality lenses (around €200) but other versions or brands can cost more than a good camera. For this reason, it might be a good idea to first ask some friends to borrow their lenses or even get them for some days at some photography shops that rent equipment. This way you can really find out if that is what you need before committing to an important investment.

I hope you have a better idea now on what you can expect from wide-angle lenses and, as usual, don’t hesitate to write me an email if you have any question regarding this (or any other) topic. I will try my best to answer!

Long exposure photography – Step by Step Guide

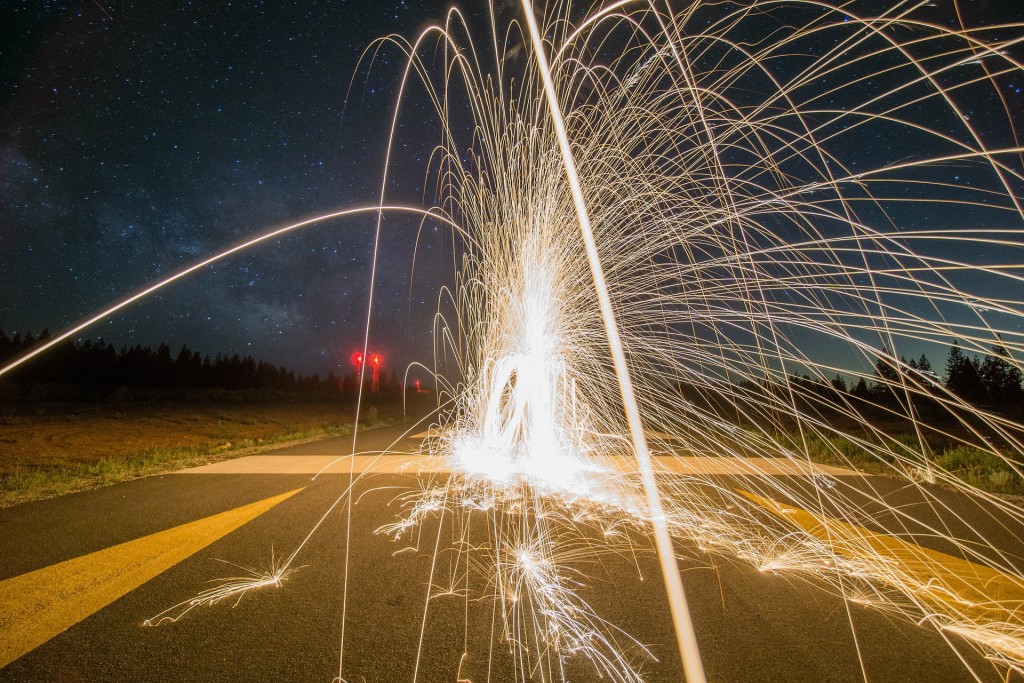
This entry is about long exposure photography: How to capture light trails, motion in clouds or water and basically any other factor that adds dynamism to a picture.

When capturing a striking landscape or cityscape, if we carefully choose the point of view, the static scene itself will have enough elements to capture the viewer’s attention. However, we can always add some extra appeal by including some dynamic element.

There are some techniques in Photoshop to mimic some of these effects, but I certainly prefer to capture those with the camera. This way not only makes the post-processing simpler, but it also remains more truthful to the original scene we tried to catch. It is for this reason that I will not talk about artificial long exposure on this post.
firework-828652_1920

As a general rule (one that I would say will become obsolete relatively soon), long exposure usually works better with DSLR cameras. I know that technology is evolving quite fast nowadays. In fact, if I am not making justice to mirrorless cameras here, please forgive me; it’s been a while since the last time I used one! However, the main issue right now with compact cameras (including cell phones) is that they do not always allow the user to play with all the settings the way it is needed and the signal to noise ratio under low light conditions tends to be rather low when compared to DSLRs, especially with full frame ones.

But to be fair, let’s say that if your camera has a manual mode, then you will be able to follow everything I say here, so here we go.

Capturing light trails

Given that the workflow is the same for whatever moving subject you want to capture, I will describe, step-by-step, how to capture light trails.

Basically, light trails are just that. Trails left by moving light sources that could include passing cars, trains, planes, artificial satellites or even stars. The basic principle to create interesting images with all of them is the same: find a nice location with an interesting background or foreground (depending on what’s on your mind) and correctly configuring the settings on your camera, which of course will include leaving the shutter open for a relatively long time (the time will actually depend on the motion we are trying to capture).

Camera settings

So let’s consider the settings that we need to take into account when dealing with long exposure photography. These are:

  • Light sensitivity (ISO).
  • Exposure time.
  • Aperture (f-number).

Light sensitivity refers to exactly that. How sensitive to light your sensor is going to be while capturing an image. The name ISO (International Standards Organization) comes from the distant times when film photography was the norm. Back then, different films had different sensitivity based on the way they were produced. Now, without getting into technical details, your camera is able to capture almost as much light as desired, but unfortunately at a given price. When you choose a large ISO number, the camera applies some sort of multiplication factor to increase the captured number of photons (after all, that is what light is about, photons!). That sounds like a clever thing to do. However, camera sensors have an intrinsic level of noise that will also be multiplied by that same factor, thus producing noisy (a.k.a. grainy) images. For this reason, I would suggest always leave the ISO as low as possible (100 is a good value to start with).
camera-1067853_1920

Exposure time, as briefly mentioned above, is the time during which the shutter of your camera will be left open, allowing light to get into the sensor. This is usually given in seconds but beware: for short exposure times (shorter than a second), the number you see is the fraction of a second; for instance, if you see a 500 (could also be 1/500 depending on the camera), that means that the shutter will be left open a 500th of a second. When you go to longer exposure times, then the number shown will be seconds. Most DSLR cameras get down to 30 s and if you want to get even longer exposures, a so-called “bulb” mode is offered. In this mode, the shutter will be open as long as you press the shutter button (for this you should get a remote shutter release!).

Finally, the aperture is how much will the diaphragm of your camera will open. This has nothing to do with time, but rather with the physical area through which the light will go through. Now, to make things even more complicated, the way the aperture is defined makes it that the larger the f-number, the smaller the aperture, but I will explain a bit more later on.

So now we know what to take into account but, how do we capture the image we want?

In terms of exposure time, anything between a couple of seconds and a couple of minutes might work depending on the scene. If you are after a photo of a landmark with trails from passing cars like the already famous capture of London buses passing in front of the Houses of Parliament, then a couple of seconds are enough. This one, for instance, was captured with an exposure time of 1.6 s:
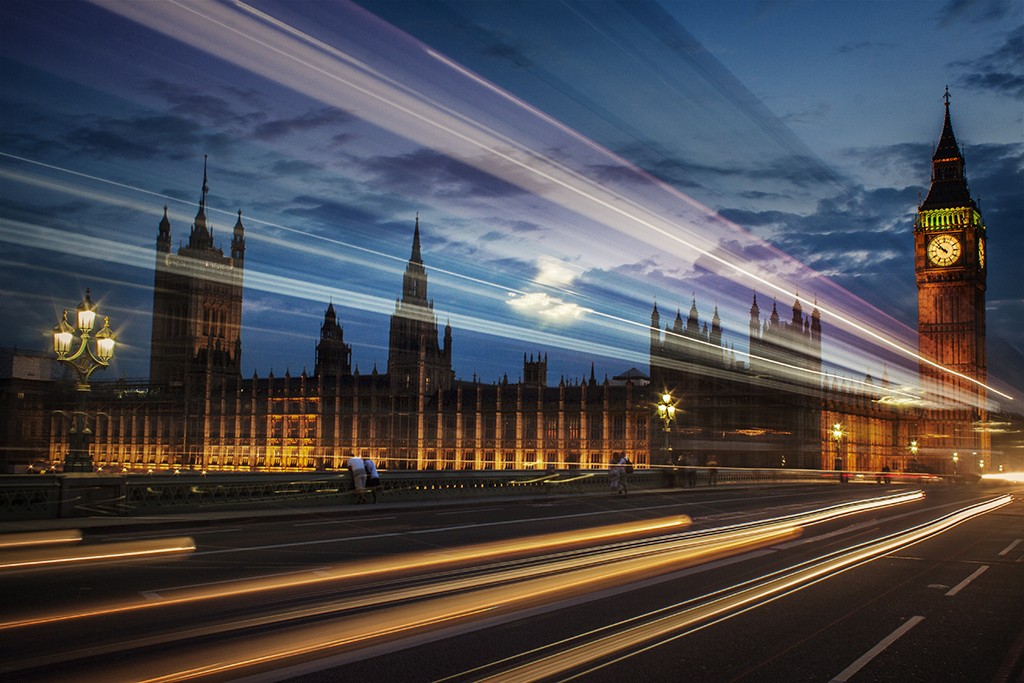
longexposure_london

If what we are trying to capture is the light trails left by cars on a busy street, then it might make sense to push the exposure time a bit further, basically because that way the density of lights will increase, making the final result more interesting. The following one of Atlanta’s skyline at sunset was captured with an exposure time of 13 s:
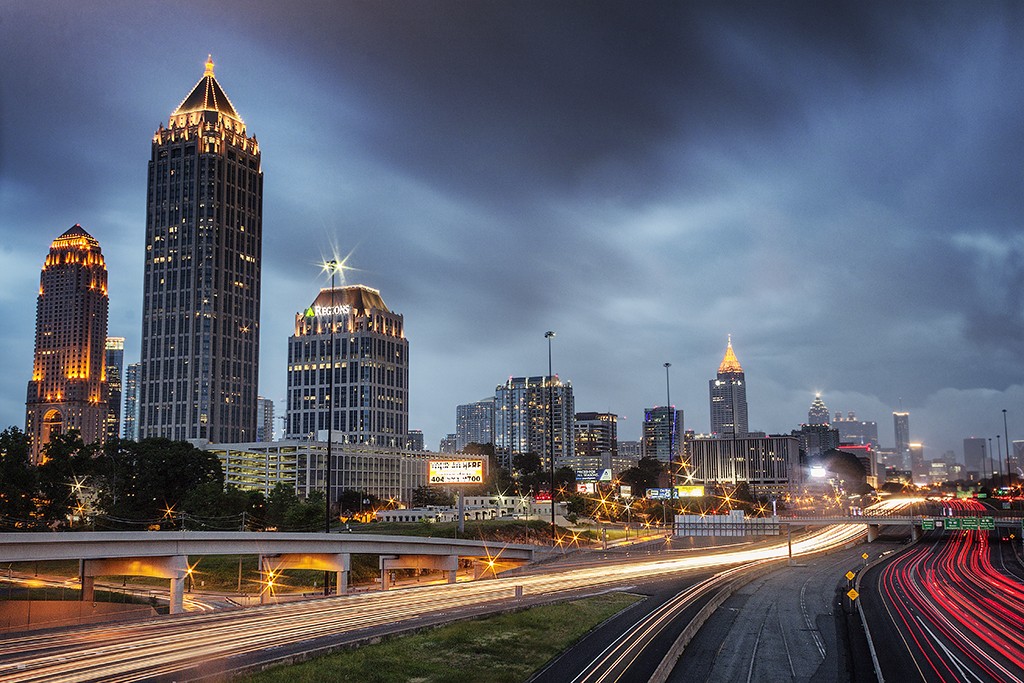
longexposure_atlanta

Notice that here we can increase the number of light trails without loosing information on the image simply because, in contrast to the image from London, the subject of the photo are not behind the passing cars. Also notice the motion of the clouds, another interesting element that can be captured with long exposure.

So enough for exposure time. What is the role of the other element, namely the f-number? Well, for our purpose here, it has two main functions. One, compensate the exposure to get the exposure time we want to work well. In order to capture a well-balanced picture, the right amount of light needs to reach the sensor. Now, simply put, the right amount of light will be defined as a balance between the exposure time and the aperture you choose. It is quite an intuitive thing: if the aperture is large (small f-number), we will need a certain amount of time (relatively short) to get the desired light to reach the sensor. If the aperture is small (large f-number), then we will need to increase the time to get the same amount of light to get in!
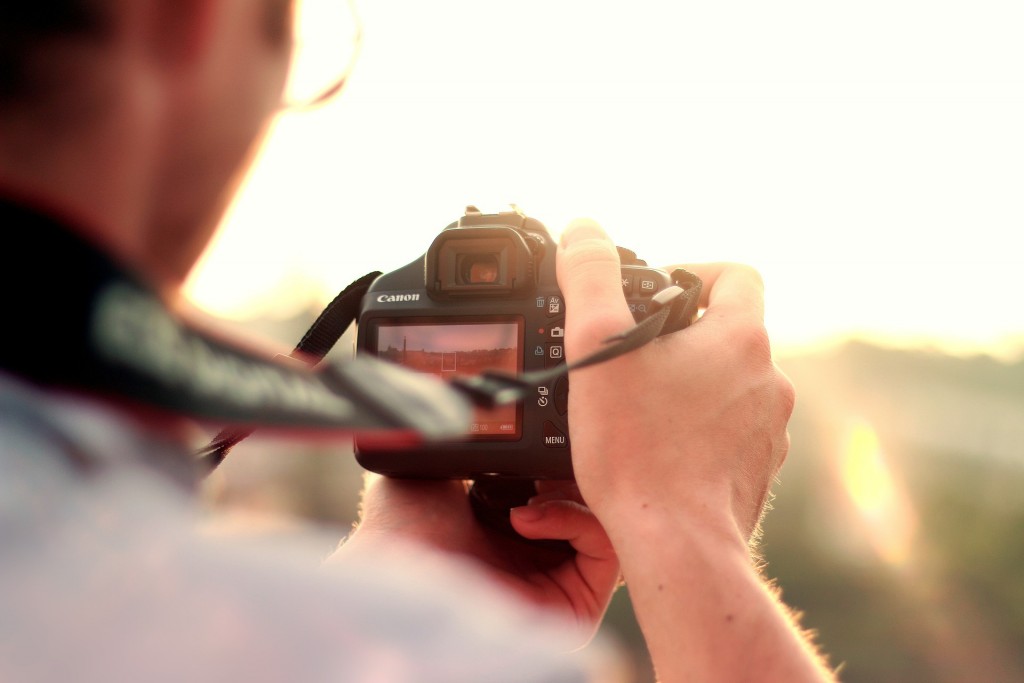
photographer-410326_1920

Fortunately, we don’t need to calculate that since the camera already does that for us. What we need to look at is a small sequence of lines in the viewfinder or camera screen (called a photometer) that indicates how much light will reach the sensor with the current settings.

The other purpose is to create the star-like appearance on light sources and that you can see on the street lights in the two images above. Some people prefer not to get this, but I personally like it. To get this effect, you need to keep the f-number as large as possible. I would say above 16, as a general rule.
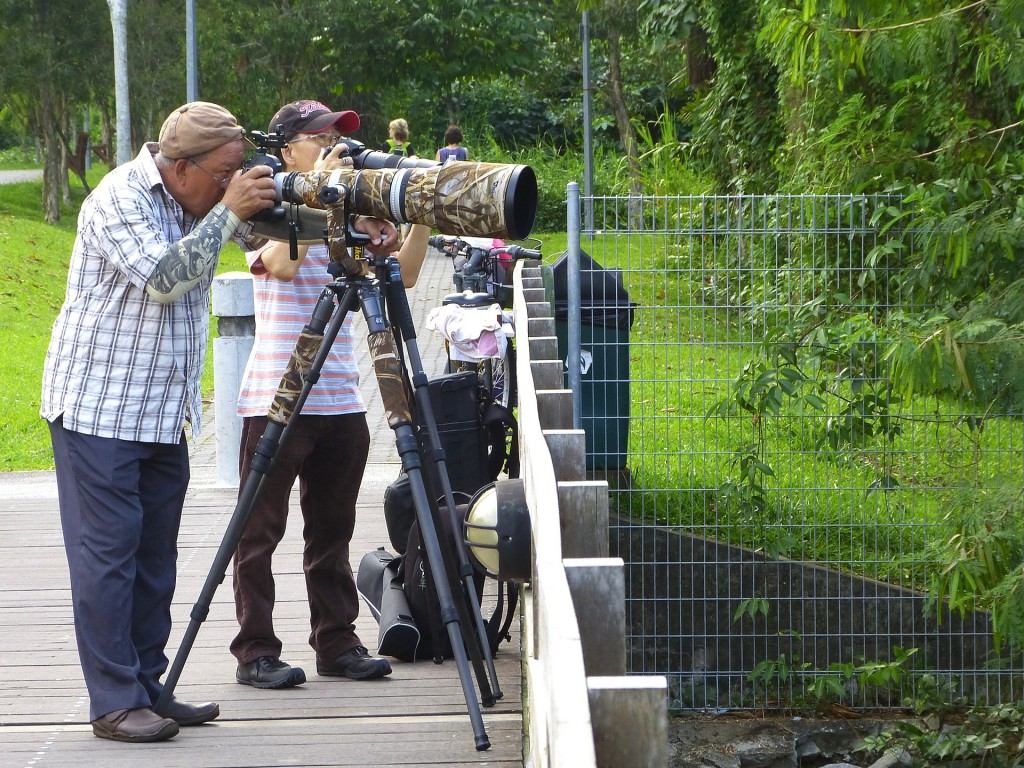
photographers-238565_1920

To the things described above, I need to add a couple of important things. First, use your tripod! It does not have to be a $500 tripod. A relatively basic one will do the job, but if you want to capture anything that moves without getting a blurred image, you will definitely need a tripod. And second, set a waiting time for the shutter of your camera to be released. Most cameras offer a 2 s or a 10 s option. The 2 s option is enough. The idea is to give a delay between the moment when you press the button and when the shutter is released to avoid the shaking produced by you pressing the button to blur the image.
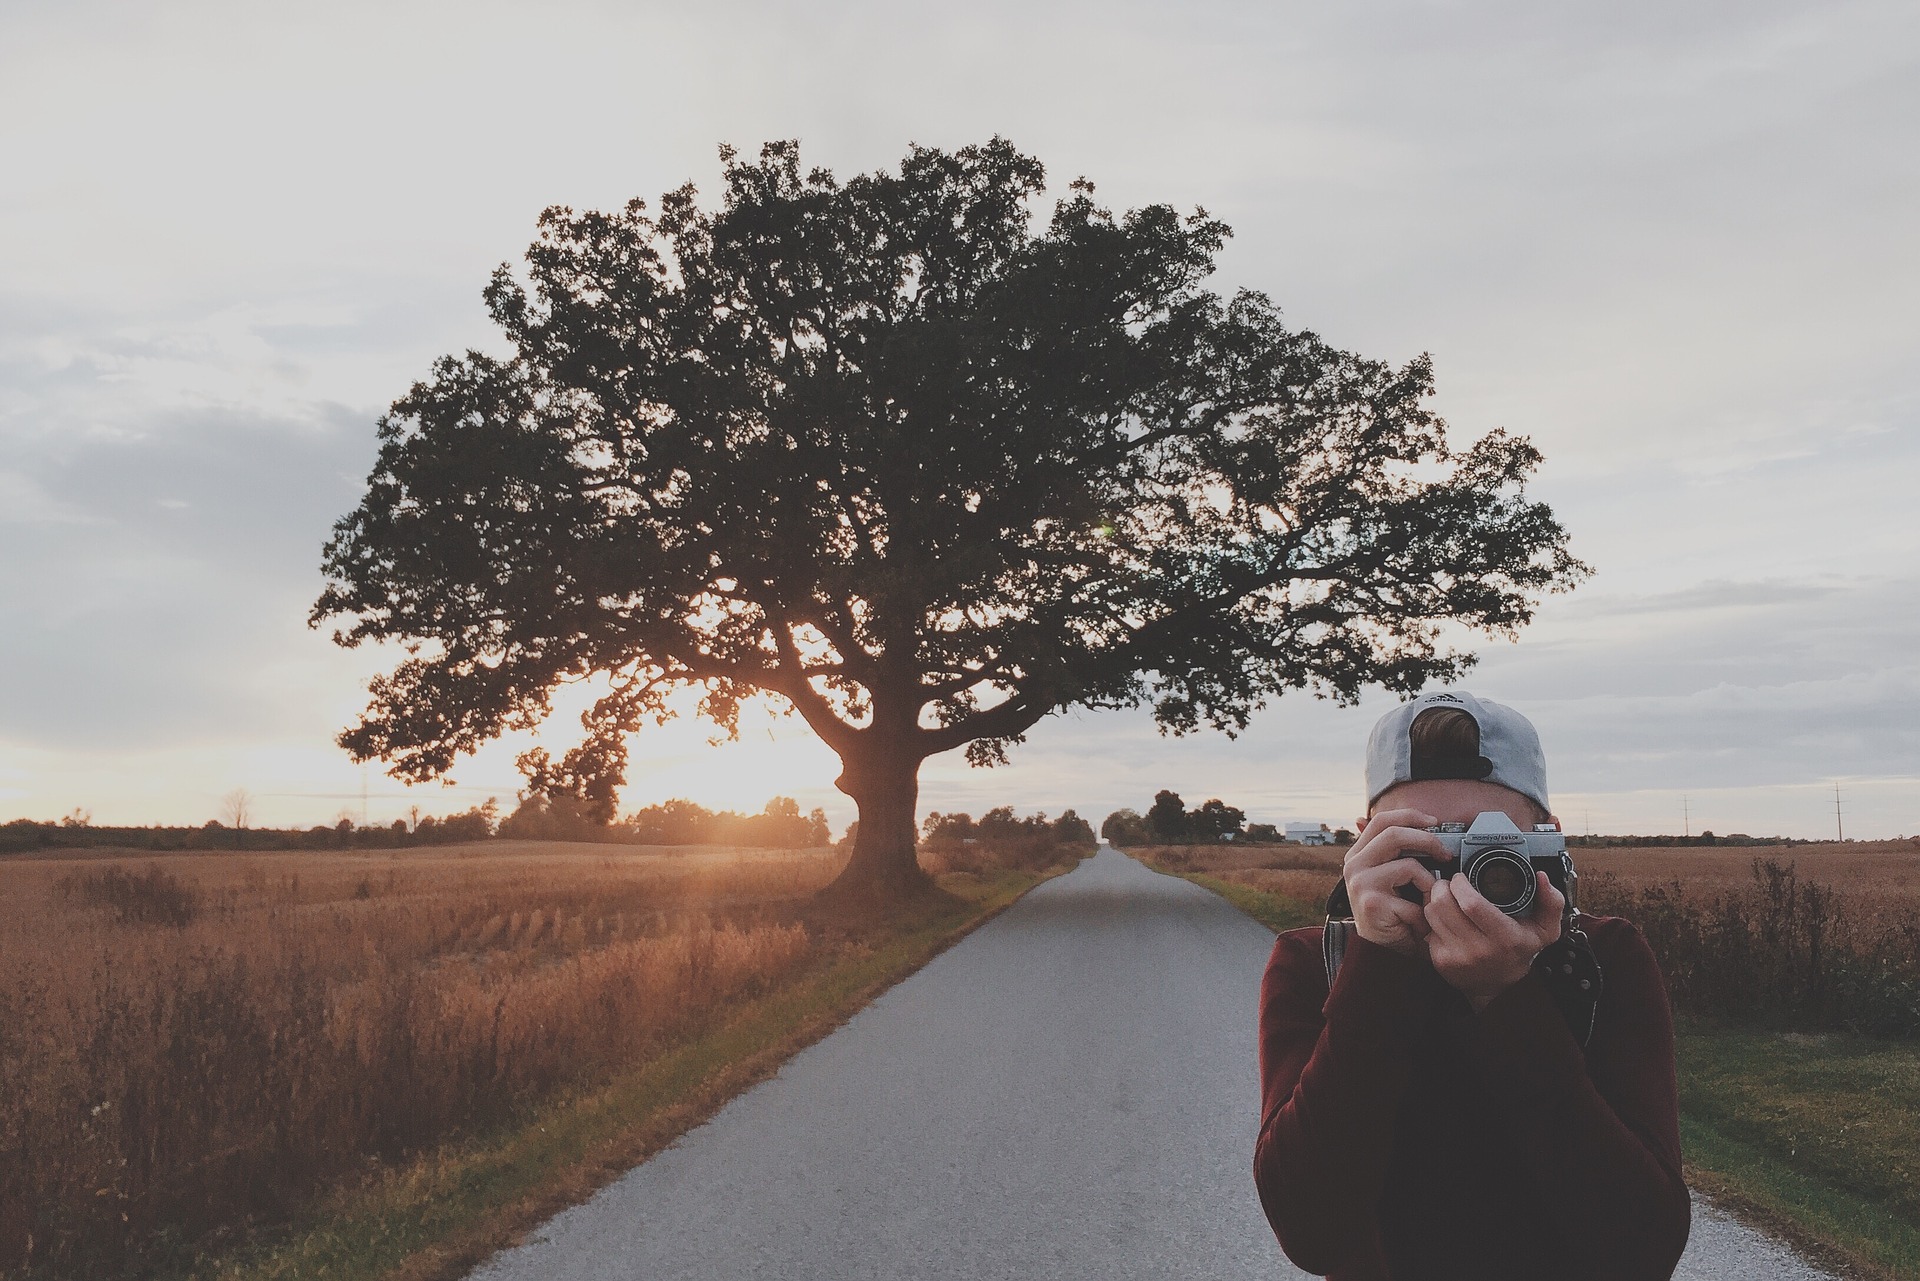
And as a final step, you can process your images with Lightroom or Photoshop to enhance the information and details that are hard to capture at those times where the natural light is starting to fade.

Summary

So to summarize in a way easier to remember, if you want to capture light trails:

  1. Find a location with a nice subject that is behind a street.
  2. Wait until the time is right; you want the cars to have the lights on!
  3. Set your tripod.
  4. Set your camera to manual mode.
  5. Set the ISO to 100.
  6. Start setting your exposure time at around 5 s.
  7. Set the f-number accordingly to get a good reading in your photometer.
  8. Take the picture.
  9. Play with the exposure time to get the desired effect.
  10. Get that final look you are after by processing your files.

That’s it. Go out there and try this. Even when it might look a bit complicated in the beginning, you will get it in no time and capturing light trails can be a really fun experience and once you master these techniques, try combining them with other great ideas for night photography such as bokeh.