Tag: editing

Instagram Stories: Shoot Daily and Share

For those that don’t have access to professional gear, it may seem difficult to believe that you can still produce nice images. So much emphasis is put on equipment these days that it can be easy to believe this. As someone who travels often, sometimes I purposefully choose to shoot with the bare minimum. It lightens the luggage and helps you avoid attention. It also forces to you to focus on what’s important when creating images. Things such as lighting, composition, lines, genuine expressions and things like these.

Something that has really encouraged me to shoot like this is Instagram’s story feature. It’s a great little platform that allows you to share your images from your day with those that follow you. It keeps your followers engaged and can keep you in a creative mindset throughout your day. How can we use this feature for our benefit?

In order to show you a real-life example of how this can be done, I decided to run (literally went for a run) through the city of Ho Chi Min in Vietnam with only my iPhone 6. I want to show that even if you don’t have top of the end gear, you can practice,  improve your craft and interact with your followers all at the same time!

IPhone Collage

Instagram Story

Instagram

, in general, is a great way to showcase your work to an international audience. It seems like nowadays Instagram presence and following is a great way to secure jobs and receive income from sponsorships. With that being said, how can we make the most of this app in our everyday life?

First, let’s take a look at what this Story feature is all about. Stories will appear on the top of your Instagram feed in the shape of a circle. Your followers can click the circle and see either photos or video that you posted. They will be present for your followers to look at for the next 24 hours. If your plan is to use this medium to share your images, you will want to shoot knowing you will have to crop to 16×9 later. This can affect that way you compose your shots.

Story

Understanding Your Camera

The next thing you need to do is fully understand the camera you will be using. If you’re using a phone, there are many downloadable applications that allow you to get uncompressed, highly detailed images. Many also allow you to manually control such settings as aperture, shutter speed, and ISO. My goal is to get the best medium exposure possible and having these extra controls allows me to do just that.

Understanding all the possible ways to release the shutter can be extremely useful as well. On all the typical iPhones you can take a photo by pressing the volume buttons (this includes the earphones when they are attached as well). This allows you to take more inconspicuous photos.

Once you have a complete understanding of all the functions that can be used, you can then use them to have full control over your final images.

EditingColor Story

Once you have a good amount of images to choose from, it’s time to edit them. The best option is to upload them to a computer but if you’re traveling, there are some excellent options to edit right off of your phone. There are many apps that I could recommend such as VSCO or Snapseed but my favorite one recently is an app called Color Story. It’s a free app that gives you most of the controls you would have on your computer. It also has some excellent free filters and effects.

ApplicationVietnam Collage

When I was in Vietnam this past month I used all of these suggestions. I shot every day and shared my images with my followers. They were able to get a glimpse into the wonderful country of Vietnam and I was able to push myself creatively.

If you ever plan to visit Vietnam, I would highly recommend that you learn some basic phrases in their native language. It seemed like no one spoke English at all. Such phrases such as “hello” and “thank you” can be very useful, especially if you are going to be taking pictures of strangers.

I would also recommend that if you don’t have any experience riding a motorcycle that you don’t learn there. It has the craziest form of traffic that I’ve ever seen.

You don’t need the best equipment in order to progress as a photographer. It can be done with a simple camera phone with some forethought and diligence. Take advantage of Instagram’s Story feature which can encourage you to shoot daily and interact with your followers!

Keep learning and have fun!

How to Fix Overexposed Photos in Lightroom

We’ve all been there: attempting to capture the heart of a photo shoot in a limited amount of time, coming home with a heart full of wild excitement, and being disappointed with the results. Maybe you shot on a sunny day, creating bright photographs that somehow managed to conceal your subject completely. Perhaps you shot during the golden hour, resulting in beautifully warm – yet unbearably bright – images.

Photographer friend, I have some good news for you: fixing these lighting errors is possible using a number of editing programs. The program we’ll be focusing on today is Lightroom. After installing the Lightroom presets, you will see that Lightroom presets is filled with a plethora of handy little tools like exposure, highlights, shadows, clarity, and more. These tools – which can be altered by using sliders – can fix both dramatic and minor issues. If you’re refusing to share one of your favorite shots due to overexposure, the tutorial below will help you fix your dilemma. In no time, you’ll be able to find potential in photographs that, at first glance, seem impossible to fix. This will give you more opportunities to add great photos to your portfolio and make your shots less stressful.

//

Before you begin, it’s very important to remember the power of shooting in RAW mode. The value of RAW lies in the amount of image data it collects; JPEG stores less image data, resulting in photographs whose quality isn’t the best it can be. Thus, editing RAW files enables the photographer to alter things dramatically without instantly ruining the overall quality. When it comes to images that are too bright or too dark, this is especially valuable.

Preset-loving folks, please keep this in mind: In Photoshop, it’s possible to use an action after editing your image and not lose any of the minor details you fixed. In Lightroom, however, this is possible but not easy to achieve. When presets are applied, any changes you made before the application are completely altered to fit the preset’s inbuilt adjustments. To avoid losing precious work, apply your desired preset first and then work with the sliders. This will save you a lot of time and frustration.

Now that you’re aware of these points, let’s begin!

The Basic panel contains the most important sliders – if you were to use only those during the editing process, you’d get an abundance of great images. Imagine how wonderful your work can be if you master the basics, apply stunning presets, and understand how to use Lightroom’s other panels (such as Tone Curve and Split Toning). It would be great also if you could master how to remove blue cast photos in Lightroom.

//

  • Exposure: dragging the slider to the left will darken your image significantly. Use this tool carefully as it will affect every part of your image. Of all the sliders, exposure is the most sensitive to changes. Keep this in mind as you experiment with it. Since the eye isn’t always sensitive to small changes, use the before & after tool as often as you can.
  • Contrast: this is as important as exposure, though playing around with it won’t result in overly exaggerated shots (especially if your photograph is very flat). Even a contrast of +100 could work! Drag the Contrast slider to the right until you’re satisfied with the results.
  • Highlights and Whites: the brightest parts of your photo can be fixed using these sliders. Blown out highlights in photos can be softened by dragging the highlights slider to the left. To help your shot reclaim its beautiful contrast, increase the whites by dragging the slider to the right. This will help maintain a balance and prevent any clipping from happening. (Clipping is the loss of image data – this is common when working with photos that require much editing.)
  • Shadows and blacks: to recover the strength of shadows in an overexposed image, drag the shadows slider to the right and the blacks slider to the left. Similarly to the previous point, this balance will get rid of unnecessary clipping and let your image naturally stand out.
  • Clarity: if you feel that your image has the potential to look even better, increase its clarity. Too much clarity will result in very unnatural looking photos, so be careful as you drag the slider to the right.

Once you’re done with the basics, feel free to experiment with other panels. Now you’re ready to make the most of any shoot, no matter how bright it may be outdoors. Be proud of yourself for learning something new!

//

Happy shooting, and don’t forget to never stop learning.

Most Important Lightroom Features to Explore

Lightroom is one of the most popular photo editing tools on the market. Thus, you have to install the Lightroom presets so you will know. It’s surpassed the competition not only because of its reliable Adobe branding, but because the software uses an intuitive system to deliver the latest creative tools to photographers. The post-production software addresses the most common photo edits with an eye for ease of use and final quality. It also allows incredible batch processing options. There are a number of amazing Lightroom features that will help you create the images you want.

It’s easy to feel overwhelmed when working with new software, especially software as advanced and nuanced as Lightroom. However, some features are more important to understand and master than others. These features are a great place for beginners to start, and a crucial part of any Lightroom presets pro’s skill set.

Creative Adjustment Tools

Of all the Lightroom features and creative tools, the gradient filter, adjustment brush, and post-crop vignettes are definitely at the top of the list. They’re simple to use, and they make detail work dramatically easier. Although these tools aren’t strikingly original, they allow users to handle delicate changes for select parts of an image like creating a dreamy portrait effect.

adjust selected color

For example, you can darken overexposed skies, or restore images white-washed by the flash in the foreground without compromising the parts of the picture you like. These Lightroom features combine to address the most common photo errors and enable users to make quick, creative changes that leave a huge impact on the final image.

Presets

Although many photo editors offer auto-edit presets, Lightroom allows users to develop their own, original presets. Not only do these presets make editing faster and more efficient, but they help photographers develop independent, recognizable styles. Editing every photo from scratch allows for a lot of minor changes that diverge from a photographer’s overall canon of work. There’s nothing necessarily wrong with that, but every artist has a distinct style. Painters use certain colors and brush strokes. Photographers edit to bring out particular colors, alter light, and add contrast. Personal style is just as important for a photographer to develop as it is for a painter.

Quick Develop and Match Total Exposure

Every image needs a little individual tweaking, but if you edit a lot of images from the same shoot, you’ll be making a lot of the same adjustments over and over. Editing photos by the batch, however, through Lightroom’s quick develop tool, allows you to make basic fixes to a whole bunch of images at the same time. It takes the repetition out of editing and allows maximum efficiency for busy photographers.

lightroom batch editing

The batch editing feature becomes even more impressive when you pair it with Lightroom’s match total exposure feature. For instance, if you find after editing the first photo in a series that your lighting was a little brighter than you’d intended, you can use the corrections you made on the first photo to correct the rest in the batch. This not only saves time but also ensures uniformity across images from the same shoot. That way, your portrait collection doesn’t look like your subject’s hair color changes between each image, and your landscape series doesn’t go from forest green to lime between shots. You’ll never have to worry about maintaining white balance across the board ever again.

RAW

Since photography has entered the DSLR age, photographers are no longer restricted by JPEG files in post production. DSLR cameras can record RAW photos, which are dramatically more detailed than other digital images. Since one of the greatest arguments against digital cameras revolves around image quality, this is a massive improvement. A key Lightroom feature allows users to edit and save RAW files.

Lightroom is able to handle and manipulates RAW files. While Lightroom allows you to edit images from many different file types, RAW files face the least distortion and loss of quality during editing. A JPEG file loses quality whenever you edit it. Whether you’re adjusting white balance and exposure or turning a color image into black and white, you’ll ultimately lose some definition and quality. Lightroom does protect the original of any image to ensure users don’t damage the raw material during editing. However, the final edited image won’t quite have the original’s clarity. This is a problem with the file, however, and not Lightroom.

lightroom raw files

By giving users the chance to edit RAW files, Lightroom has surpassed the majority of the competition. While DSLR cameras can capture these intensely detailed images, editing options are often limited, and sometimes cause quality loss similar to JPEG files. Lightroom has bridged the gap between RAW files and full-service editing tools.

Lightroom relies on a core set of features, and the list above includes the most important to understand. They provide the fastest, most thorough, and nuanced photo editing opportunities. The software is able to support RAW files and process entire batches of photos at the same time. These awesome Lightroom features can help you edit not only well, but quickly.

Lightroom Masterclass: What is Saturation?

For many different reasons, you can take a picture and have the color come out not as you expected. Maybe the fall leaves are too dull, or maybe your friend’s sweater is too bright and overshadows the rest of the image. Whatever the cause may be, the fix doesn’t have to be difficult. By using the saturation setting in Lightroom, you can easily turn any lackluster or overly bright picture into a masterpiece. All you need is a basic understanding of how the saturation tab works.

We’ll use the below image as an example to learn about saturation in Lightroom and how you can use it to really spruce up your photos.

adding color to dull photo

As you can see, the picture itself looks just fine. But the leaves look dull and it doesn’t really scream fall colors. There are a lot of different ways you can use saturation to get unique and creative results for this picture.

Basic Color Enhance

One of the easiest and quickest ways to use saturation in Lightroom is under the Basics tab. Once you’re in Development, the Basics tab should already be open, if it’s not, just click on it to access some basic sliders. The one you’ll be using most often for color is the Saturation slider. It’s pretty easy. If you want to enhance colors and really make them pop, move the slider up (to the right) until you reach a desired color level.

lightroom color enhancing

This is also the tab to use for a quick black and white effect. By moving the slider down (to the left), you can remove the color from the photo.

black and white photo using saturation

Pick and Choose

Saturation doesn’t have to be an all or nothing deal. Under the HSL tab, you can use saturation to create different, amazing effects. First, you can use the Saturation sub tab to pick and choose which colors to enhance. In the example below, we chose to only enhance the reds, oranges, and yellows to really get the best fall colors. Unlike the full saturation, this will only enhance the colors you chose. You can see the differences in how bright the leaves are compared to the grass and the hazy glow that the settings give the model.

choose colors to enhance

Something fun you can do is enhance only one color, and turn down all of the others. This will lower the other colors to black and white status, yet leave your selected color intact. Here’s our example with the yellow all the way up, and everything else lowered.

enhancing one color lightroom

Monotone

Under the Split Toning tab, you can use Highlights and Shadows to achieve even more fun effects. For this special saturation method, you need to click in the colored boxes to choose a color. Then, simply slide the saturation bar up (to the right) to give your photo a monotone feeling to it. Here, the shadows are set to blue which adds a cool, winter look to the picture.

create monotone coloring lightroom

And here is our picture with the highlights set to yellow. This brings back some of that fall feeling, with a little bit of summer glow mixed in.

yellow highlights lightroom photo

These are two great, quick and easy ways to give a picture a certain feeling or mood with very little editing. You can also use these settings to create fun and whacky pictures by picking unusual colors like purple or green for your monotone images.

Sometimes photo editing requires a bit of pre-planning, but post-production is important and totally worth it. Of course, you can’t control everything in your world. But if you know that you’re going to be doing a fall photoshoot in a pile of leaves, it may be best to leave out the red/yellow/orange outfits, or at least have them be dull. If someone is wearing a bright red sweater and you go to enhance the red leaves, you’re going to have one ugly fall sweater on your hands. It’s best to keep these photo editing abilities in mind when you go out to plan your next shoot.

Changing colors in your image doesn’t have to be a difficult chore. You don’t need to be proficient in photo editing, and you don’t need to spend hours fixing them up. Lightroom’s saturation settings allow you to quickly and painlessly enhance or remove colors from your work.

Now that you know how saturation works, and all of the cool things you can do with it, go out there and try it for yourself! Let us know your favorite techniques!

Why is Photography Post-Production Important?

Post-production is the defining factor that separates professional quality images from casual snapshots. Just as writers need editing, photographers need post-production. You don’t have to be a professional, though, to benefit from editing tools. Even if you don’t plan on selling or showcasing your photos, you still want your photos to represent what you meant to capture. Although photography techniques and equipment continue to improve, its methods are still primitive compared to the mechanics of the human eye. Post-production gives photographers the opportunity to fix errors and enhance an image’s features so the image lives up to the photographer’s vision.

Post-production is half of the art behind photography. It’s the photographer’s chance to engage with their photos in a hands-on fashion, making improvements and alterations to the RAW image. The photographer’s artistic vision is not complete until after the finishing touches they add using photo editing software like Photoshop or Lightroom.

Flaws

Reality isn’t perfect. Your camera isn’t perfect, either. Sometimes the weather doesn’t cooperate and you’re left with images that appear too dull, too dark, or even overexposed. Accidents happen, too, and you may discover your perfect shot was actually taken with the wrong settings. Portraits may need retouching, and you may discover your photos are off-center or in need of cropping. No photographer, and no camera is perfect.

Photos Aren’t Always True to Life

No matter how advanced your equipment may be, it can’t capture the exact same shades and lighting you perceive with your naked eye. Every photographer is familiar with the frustration of trying to capture a beautiful sky without turning the foreground into a black mass. On the other hand, if you have a clear, well-illuminated foreground, the sky will almost inevitably become a blank, gray or white field. The secret to linking illuminated foreground with fascinating clouds and blue skies is post-production.

editing foreground

Light is essential for photography, but it can still cause problems. Although you can control your light sources very well in an indoor studio, you may still have issues with color. Light causes more problems when you shoot on location, however. You will deal with backlit subjects, side lighting, and frustrating shadows. Your eyes compensate for various light levels, but your camera records all of those levels at the same time, which means even slightly brighter areas will appear overexposed in your image. Post-production allows you to adjust the image the camera captured to match what you saw with your eyes.

Your Vision May Not Be True to Life

Photography is an art form. In order to bring your vision to life, however, you will often have to manipulate the contents of your photo. Post-production allows you to bend reality to suit fantastical shots or to add various effects to your work. It’s common for photographers to blend black and white techniques with color features, or for light sources included in an image to be exaggerated for dramatic effect.

bring photo to life

Post-production also gives you tools to manage the quality and focus of light and color. This is essential for composites and single images alike since these qualities set the tone and mood of your photo. The same qualities also determine the focus of an image. Many of today’s most popular photographers use regular post-production techniques to transform simple images into fantastic glimpses into the photographer’s imagination.

Benjamin Von Wong takes incredible underwater photography, for instance, and relies on post-production to translate flat, gray shots into images full of bright contrasts and dazzling colors. Von Wong routinely overexposes his images in order to have the most range for post-production. While it’s easy to enhance shadows, it’s harder to recover details buried in darkness. Without the edits he makes in post, his images wouldn’t quite be the breathtaking masterpieces that have gone viral.

Even Good Photos Could Be Better

Even a little time in post can turn an average photo into something worth sharing. The second look gives photographers the chance to see their image as a viewer rather than as the photographer. They can assess angles, light, and subject. Cropping, one of the easiest and most common post-production tools, can dramatically change the entire focus and balance of an image.

photo composition

More advanced techniques can reveal details lost to overexposure and restore a realistic color balance to the image. Whether you are improving professional portraits or trying to recapture the memories in your vacation pictures, post-production can make the difference between giving your image a frame or sending it on a trip to the trash can.

Everything you do in post is just as important as the initial shoot. Collecting RAW images is probably more fun than editing them, but a RAW image is an unfinished product. Photographers often display some of their greatest artistic talents in post-production, and photography is one of today’s most popular art forms. It doesn’t matter if you take photographs for yourself or others. You owe it to your craft to spend at least a little time in post-production.

Making Water Vibrant in Photoshop

Have you ever taken a vacation to a beach, or followed a river up a mountain? It’s hard not to want to take pictures of the beautiful scenery that water provides. Photographing water can be tricky, however. Often times the picture you take and the image you saw don’t match up. Whether it’s the way the sun reflects on the water or that your camera picked up more of the vegetation around your stream, sometimes the water in your picture comes out looking dark and muddy.

No one wants to remember a good time through pictures of murky water. Fixing this problem in Photoshop is easy, and can turn your dark pictures into beautiful memories.

water-vibrant
Before
water-vibrant-1
After

Create the New Layer

The first step in making your picture amazing is creating your new layer. Add a new solid color layer. Pick out the color that you eventually want your water to look like. (This is a fun opportunity to make fantasy pictures by using an unusual color, like purple). Your picture will then change to that whole color.

water-vibrant-2

In order to see your original picture you need to change the type of layer mask you have set. Different pictures require different settings. The most common are color dodge, color burn, soft and hard light, and overlay. In this example, we use a soft light. Play around with each of the different settings to see which one works best for you.

In this step, it’s important to only pay attention to the water. Don’t worry right now about how the surroundings or any people/animals look in the picture. We’ll be touching those up next. For now, keep your focus on how the settings make the water look.

water-vibrant-3

Separating the Water

Now that you have your water looking amazing, there’s the issue of the background and any people or animals that also inhabit the image. While the water got the special treatment, this often leaves everything else looking weird and out of place. But, there is a simple fix that doesn’t take too long.

Once you’re ready, click on the layer mask of your new layer (the white box next to your color) and set your brush to black. This process removes the layer settings from whatever you paint over. Use this to restore the original beauty to any friends or family or the natural surroundings of your water.

water-vibrant-4

When doing this, use a brush that’s smaller than the area you’re filling in, and just fill in the center. When you’re ready to move to the edges of your subject, be sure to change the opacity of your brush to a lower setting. This way you don’t have to worry as much about accidentally ruining your water. This is also a useful way of painting edges if you have an unsteady hand.

There is no right or wrong here. It all depends on what you want to do. Sometimes it’s best not to paint over everything that isn’t water. If you want to make something or someone in your image pop, it’s best not to paint the background. If you’re on a crowded beach, just paint over your models and leave the rest of the crowd in the layer mask. This will let your subjects be bright and vibrant, and the center of attention in the busy picture. You might also want to paint over some parts of your water, drawing attention to a specific location in your image.

The dad is now unpainted to draw attention to the child

Fixing Mistakes

Once you’ve finished, you may notice some mistakes, or just want to check to be sure you got everything. Here are some simple ways to check your work, and fix any errors you made along the way.

If you want to see if there are any spots in your image you missed, simply turn off the visibility of the background layer. This will produce a screen that shows translucency where you painted over. If you see any spots of color in your person or background, go back over them with your black brush.

water-vibrant-6

If you notice that you accidentally brushed over some water, or you decide later on that you really don’t want to paint over the crowd, it’s easy enough to go back. Simply set the brush to white, and paint back over your mistakes. This reverts that part of the image back to the layer mask settings.

Everyone loves a good picture of water, but it can be hard to produce. More often than not, a beautiful water scene comes out looking dark and murky in the final product. If this happens to you, it’s easy enough to use some simple Photoshop tools to turn your gloomy water picture into the amazingly bright image you remember seeing.

Here are the best ways to change colors in photoshop for you only!

Tips for editing your flower photographs in Lightroom

In a previous article I gave you some tips about flower photography. Today I want to talk about the editing of this type of photos. I always recommend doing your best in the moment of capturing the photo. Invest some time looking for the right perspective, work on the composition of your image, avoid cluttered backgrounds, focus on the right spot and aim for a good exposure.  However, there are some simple things you can do in post-processing that can make your flower photo even better.

sleeklens-29-final-sharp-1

I will show you some of my general post editing tips in Lightroom.  They are general, not universal. These tips will give you a good basis to start with, but they might not work in all the situations you might encounter. You will need to experiment with your flowers a little (this is part of the fun in photography, isn’t it?). The basic idea behind all my editings is to make my main flower/s pop out. So let’s jump to Lightroom Develop module and see how these tips goes!

Do some global adjustments first

This is a good tip for any kind of photography. First of all do the global adjustments, meaning the ones that affect the whole photo. For this tutorial I am going to use this straight of the camera photo:

Straight of the camera photo

The slides I like to work with are:

  • Exposure: You might need to adjust a bit the exposure (or a lot if you didn’t manage to adjust it at the moment of taking the photo). If your photo is overexposed, you need to move the slide to the right and if it is underexposed, to the left.

screenshot-2

  • Highlights: I usually try to recover some highlights by moving the Highlight slide to the left. This is especially useful if you have to deal with a background which is too bright because it will bring a bit of detail to the photo. By default, our eyes are drawn to bright things so they tend to focus on the lighter areas of an image. If the background is too bright it will draw our eyes to it and make us ignore the flower, and this is exactly what we don’t what want!! So if you can make the background less bright, it will be better. This doesn’t mean that you always need a dark background. You can use white backgrounds too. What I mean is that they should not be extremely bright.

screenshot-3

  • Shadows and blacks: If I see that my main subject has an interesting area too dark, I move the shadow slide to the right. You will see how details will appear in your image.

screenshot-4

However, the contrast of the area can get a bit weak. Increase a bit the blacks (moving Blacks slide to the left) and your problem is solved! By decreasing shadows and increasing blacks you give a higher dynamic range to your image.

screenshot-5

Add your personal touch with the clarity slide

I love the clarity slide! This is the point in the editing when you really need to decide which kind of final look you want for your flowers. Do you want to show all the little details of your flower? Then you should move the clarity slide to the right. This might darken your photo a little, so you might need to adjust the exposure again.

screenshot-6

screenshot-7

If you prefer a softer look, move the clarity slide to the left.

screenshot-8

In this case too, you might need to adjust the exposure. In the example, by changing the clarity I also causes the colors to stand out a bit too much, to counter this side effect, I moved the vibrance slide to the left in order to get a more natural look.

screenshot-9

When you decrease the clarity of a photo you get this blurry dreamy effect. However, you might like to keep the details in specific parts of the photos. For this, you can use a circular filter like in the image below.

screenshot-10
You can add a circular filter to do local adjustments in your photos. In this case I checked the “Invert Mask” because I wanted the adjustments to be made inside the circle. I wanted the center of the flower to be more defined, so I increased the clarity and the sharpness of the area inside the circle. Note that I feathered the circular filter quite a lot to make the adjustments gradual from the center of the circle to the outside.

So here you have the 2 versions of the same photo.

This is the final shraper version of the image
This is the final sharper version of the image
This is the final softer version of the image

Increase (or not) vibrance/saturation 

By increasing the vibrance and/or saturation you can make the colors of your flower pop out. However… if you increase them too much your flower’s color can get to a point it looks unreal. If you are doing some creative post-processing, this might be a good thing. But if you are trying to achieve a natural-looking flower image, too much vibrance and saturation will not be good.

screenshot-12
I did some general adjustments to this image, but I didn’t touch the vibrance and saturation slides yet.

I usually increase the vibrance little by little until I reach to a point that I like. Sometimes you won’t need to touch vibrance/saturation at all because your original picture has already beautiful colors.

screenshot-13
I usually increase the vibrance little by little so I could find a point where the colors stand out, but the flower still looks real

screenshot-14

In this image I increased both the vibrance and the saturation too much the so that you can see their effect on the photograph. You should be careful with these slides because you can reach an unnatural look pretty easily.

Highlight your subject

Imagine that you have a photo like the one below. The background is ok because it is quite dark, but your flower does not really stand out.

screenshot-15

In this situation you can use a circular filter to highlight your flower and make it the focus of your image. I usually add the circle, then I check “Invert Mask” so that all the adjustments will affect the inner part of the circle and I feather it at 100 to make the adjustments look gradual. You might need to play a little with your adjustments, but usually you will need to increase the exposure. I also like to add a bit of sharpness and clarity, but this is up to you!

screenshot-16
I use the circular filter to increase the exposure of my main subject/s and make them pop out from the darker background.

If you are using black backgrounds…make them really black!

If you are using black backgrounds for your flower photography, they might look a bit grey-ish in the original photo.

Straight of the camera photo
Straight out of the camera photo

Make them really black by using Lightroom brush tool. You just need to “paint” the background. I like to check the “Show Selected Mask overlay” because then I can see in red the places where I paint. Another tip: check “Auto Mask” and Lightroom will detect the edges and will help you to paint just the background (and not “stray” with the brush onto the flower).

screenshot-17
When you have the “Show Selected Mask Overlay” checked, you can see in red the places where you “painted” with your brush. Check also “Auto Mask” to make Lightroom help with not painting outside of the borders.

Once you have painted the background, adjust the brush by decreasing the exposure, making the shadows darker (slide to the left) and make it smooth by moving the Clarity slide to the left too.

screenshot-18

Last thing is doing general adjustments to the photo to make the flower really stand out!

screenshot-19

Now it is your turn to practice with your own flower photos and Lightroom! Do you have a tip I have not included here? Tell me about how it goes with your editing! Have a happy post-processing!!

How to Create Snow in Photoshop

If it’s summer time and you’re craving some cold or if you’re trying to get an image of your dog sticking its tongue out in the snow, Photoshop can help make an image a snowy image. Sometimes the weather doesn’t always cooperate with us and it’s not always possible to get the winter photography shot we’re looking for. But using Photoshop, we can make snow whenever and wherever we want.

Creating Your Brush

The first step in creating a winter setting in Photoshop is to create a snow brush. To do this, open a new image in Photoshop, any size or shape. Next, grab the elliptical tool and create two-three shapes on the blank canvas. Use the brush or the paint bucket to fill the circles in black.

To make these two dots into your snow brush, go to Edit, and click on Define Brush. Give your brush a name and it’s ready to be used in any of your images in Photoshop.

create-snow-photoshop-2

Once you’re in the photo you want to edit, there’s one more step to do before you start painting away. Under the Window tab, click on the Brush option. This will pull up a little dialogue window that you can use to edit the way your brush will look as you start to use it. You can change any of the settings that you want to create any kind of snowy effect that you want.

You’ll want to try and create a brush that isn’t too spread out or sporadic, something that is clumped together and defined so that your snow comes out looking realistic. The more chaos that’s in your brush, the more stormy and blizzard-like your final image will look.

create-snow-photoshop-3

Layers of Snow

After you’ve got your brush set up and ready to go, it’s time to start brushing, in layers. Create a few new layers, at least three. Each layer will represent a different size of the brush. You want to create different layers of snowfall to create the illusion that some of it is falling far away in the background, and some flakes are falling right in front of the camera.

It’s important to keep in mind where you’re placing which sized snowflakes. It wouldn’t make logical sense to have the smaller flakes falling on the ground or in front of a featured object. For example, in the example photo, there are three different layers. The top layer is the big flakes that fall in all sections of the scene. The second are smaller flakes that fall in between the subject and the trees. Then there’s a third layer of smaller flakes that appear in the very back. It would not be correct to have layer two or layer three painted over the cat.

Making the Snow Look Real

Now that the snowflakes are there, they probably look too round and defined. Snow doesn’t play that nice on camera. To create the illusion of snow falling, you need to use two blur tools. Under the Filter tab, hover over the Blur category. The two blurs you’ll be using are Gaussian Blur, to make the snow look fuzzy like it’s moving, and Motion Blur, to make the snow look like it’s falling in one specific direction.

create-snow-photoshop-4

You can choose whatever settings you want for these categories. The bigger the Gaussian Blur the harder it’ll look like the snow is falling. The more severe the distance of the Motion Blur, the more it’ll look like you’re taking a picture in a snow storm. A number of snowflakes you painted into your scene will also affect this. To create a blizzard, use more of the brush and keep the blur counts high. With settings like these, your picture will look more like a light snowfall.

Finishing Touches

If any of your snow looks out of place, removing it is simple. Just go to the layer where the discrepancy lies and use the Erase tool to remove some snow. If there’s a section of your picture that seems to be lacking, simply go to the layer needed and paint over it again. Your snow brush is simple and easy to manipulate to help you get the best image you could possibly get.

Adding snow to any picture can help create a sense of wonder and excitement. It can be used to express holiday cheer and childhood joy. Yet the weather is not always cooperative, and getting that perfect snowy picture may be impossible. By using simple Photoshop tools and techniques like these, you can take any photo you have and turn it into a winter wonderland.

Are you familiar with the rule of thirds versus the golden ratio in photoshop?

Using Photoshop’s History Panel To Fix Editing Mistakes

We all make mistakes. It’s going to happen. After all, mistakes are something that happen and that’s why pencils have erasers. When you are working on photo editing in post production, mistakes used to cost you the photo and often hours of work. That is not the case anymore with new digital software and digital photos. Now, fixing a mistake in a program like Photoshop can be resolved quickly and easily. All it takes is understanding how the history panel works in Photoshop CC.

history-panel-1

How the History Panel Works

When you are using Photoshop, every little thing that you do is recorded by the program. Every mouse click and every keystroke is logged. This is not done to spy on you, or figure out what you are doing, but to provide you with a means to reverse a change that you made. This change could have been made a minute ago, or hours ago. You could spend an hour on a picture, realize you don’t like how it is turning out, and you can revert back to how it looked an hour ago with the click of a mouse and a press of the button. It really is that easy.

Think of it this way, every change you make in a picture is a step in the process. The history panel shows those steps, and all you have to do is step back once, twice, or two dozen times, to get back to where you want to be. Hansel and Gretel left bread crumbs but Photoshop leaves you the history panel to find your way back.

If you’re using Essentials, you’ll find the History icon in the top right corner of your image. If you can’t see that, go to the Window tab and select History.

history-panel-2

The Commands

So, how do you fix mistakes, or redo something that you accidentally undid? Well, as it turns out it is very easy to do.

If you want to step backward once, twice or more, then do the following:

Mac: cmd + opt + z

PC: ctrl + alt + z

That’s it. Keep clicking those and you will move backwards in the history of the picture. The more you use those commands, the farther back you are going to go in steps.

history-panel-3

What if you go back too far and you need to step forward? Don’t worry, Photoshop has you covered there as well:

Mac: cmd + shift + z

PC: ctrl + shift + z

That is once again, all there is to it. Just substitute in Shift and you are able to move forward with ease to fix any undo mistakes you made.

History Preferences

It should be noted that currently, you can only move back 20 steps in the default settings of Photoshop in your history panel. If your mistake was 21 steps ago, well you are out of luck unless you change your history preferences.

Once again, this is made very easy to do by Photoshop. On a Mac, just go to the Photoshop tab on the top of the page, while in Windows you go to Edit. While there, you click Preferences and then choose Performance. There you will find History States.

history-panel-4

history-panel-5

Now, you need to be aware that you can set this to 1000 if you want, but the more steps you save, the larger the memory used is going to be. When you are editing a large file, and you are keeping hundreds of edits in memory, you are going to use a lot of your system memory and you are going to use a lot of your system space. This in turn can cause performance issues on your computer. If you have an extremely fast and powerful computer, then you have nothing to worry about, but older computers will be hard pressed to handle the extra load.

Go Back to the Start

If you are editing and you are not happy with anything you did and you just want to go back to the very start of the entire process, you can do that. There are actually several options to choose from in this regard.

First, you can just close the file and not save it. If you have created something original, that may not be the option that you want.

Second, you can choose File and select Revert, which will take things back to the very beginning of the entire process for you.

history-panel-6

Third, you can click on Snapshot at the top of the history panel.

Making mistakes will happen, especially when you are looking at really large files and complex designs. Being able to move back in time to fix things makes everything easier, and you will be very happy that you can move one, 10, 100 or 1000 steps back if need be. Just remember to change the steps setting so that you don’t lose out if you need to go back 21 steps. You can also start learning about Photoshop actions to keep mistakes to a minimum.

How to add an interesting reflection in photoshop?

Batch-Process Cleverly on Lightroom

So, remember all those times when you come back home from a shoot with a hundred shots with varied light set-ups? Remember, struggling and pushing to process all those beautiful shots one by one? Will I make your day better if I told you how to cleverly batch-process these images? Maybe, yes.

So, the easiest way to processes your images without consuming too much time would be to split them into batches. When you go for a wedding shoot, or some indoor event, you end up with over hundreds of images in varying light set-ups. So what you can do is split these images into batches of 5 or batches of 10 and apply a setting/edit common to all these selected photographs.

Ideally, a “shoot” indicates that you’ve used various lenses, applied different ISO speed settings, etc. And different images look different depending on the kind of light that got reflected in that moment or depending on the kind of colours that got captured in that particular moment. So how do you cleverly segregate these images into different batches? How do you figure out which ones to group together?

The fundamental idea is to choose a set of photographs where you can apply a group of similar settings. Follow the steps below to make your work progress a lot faster, easier, and a lot more efficient.

Step – 01

Choose a set of photographs (it can range from a set of 4 photographs to almost 20 photographs), this is what we call a “Batch”. Start correcting the first photograph in that set – adjusting Exposure, White Balance, Tint, Tone curve, Sharpness, etc. Remember, you’re going to apply all these settings later to the rest of the batch, so make sure that your corrections will apply similarly for the remaining images as well.

Screenshot 2016-07-19 13.37.35
The first three images are the ones I’ve combined into a batch for similar processing.

Tip: Do not make major adjustments with the local correction tools, as this might vary from one image to another. What you correct for one image might not apply to the next, even though you’ve grouped them all in the same batch.

Step – 02

The next step is to copy the develop settings from the first photograph, and paste them to the rest of the images in that particular batch. Or alternatively, select the first image, press and hold the ‘Shift’ key and select the remaining photographs. Then, click on the “Sync Settings” button that appears on the lower right bottom of the Library Module.

Batch Processing – Synchronize settings.

Tip: Shortcut to Sync settings is Command + Shift + S

Once you click the sync settings button, a dialog box will open asking about the settings which you would like to copy to the remaining photographs. Make sure that you deselect all the local corrections, and select everything else. Remember, local corrections vary from image to image. So it is advisable to work on the images individually for those changes.  

Step – 03

Repeat the above steps 1 and 2, until you are done with all the photographs in the batch. 

Step – 04

This is the stage that takes up considerable amount of time. True, it depends on the number of images we’re dealing with and the kind of correction it requires, but this stage also calls for some care and concentration so we don’t go wrong.  All the local correction tools namely Crop tool, Adjustment brush tool and Spot removal tool shall be applied manually to each and every photograph in that particular batch. And there we go, you’ve now learned how to speed up your work process while cleverly using the batch process method.Just like how you copy paste the settings from one image to another, you can copy paste noise correction settings as well. The trick is to filter out your images based on a particular ISO setting. Use the filter tool, and filter out images with similar ISO settings. Let’s look at an example. Say, I’m looking for images with an ISO of 1600. Use the filter tool, and filter out all the images in my collection with similar ISO settings. Let’s say Lightroom provides me with a set of 80 images. What do I do no? Pick one image, apply noise-correction changes to this one image, and sync these settings to the remaining 79 images. Tada!

So, use the batch process method effectively, and reduce stress, time-consumption and make your work a lot more fun. We hope this article helped you out, and if yes, let us know about our experience in the comments below.

Comparing Photos without Becoming a Bitter Photographer

I am going to share something I am not proud of: comparing my photos with the ones taken by other photographers makes me a bitter person. Yes, I too, have these moments in which I hate all the photographers in the world. OK, I am exaggerating. I don’t hate them all. I just hate the ones that are better than me. When I come to this realization, I feel even worst. I will give you a real example.

The other day I went to take photos of a valley close to my home. It is one of my favorite landscapes. I know that sunsets are beautiful in this area. And now is already summer, so everything turns golden. I was feeling happy and inspired. I found the perfect spot, set the tripod and my camera and I was shooting until I got what at that point I considered the perfect picture. I ran home and first thing I did was to transfer the photos to my computer. I searched for “THE PHOTO” and I did some post-processing using my best photo edition skills and Lightroom tools.  When I saw the final picture I thought:  “This is a great landscape photo”. I felt happy and proud. Such a great moment!

Comparing photos
This place is right next to my home. I was feeling so happy when I took this photo! I emphasized the summer mood of the scene in post-processing and I was proud of the result. Until I started comparing myself with other photographers.

I decided to share it in a photography community to see if people like it. I usually post my photos in 500px. In case you don’t know it, 500px is an online community that encourage photographers to share their best work. It is a good place to connect with other photographers and get some inspiration. At that point I just needed to wait for the “likes” and the comments. I decided to have a look at what other photographers posted in the landscape category. I started comparing my photos with all the others. And so I entered into what I like to call the “negative criticism spiral”.  I am so familiar with it that I can even describe it by stages.

Stages of the negative criticism spiral

  • First 30 seconds: everything looks amazing. I like all the pictures. They are so BEAUTIFUL!! I love the colors, and the composition. Everything!!
  • From second 31 to 1 minute: Insecurity. Would I ever be able to take a photo like this? And I thought that my picture was good!! Next to these beautiful landscapes my photo looks so bad!!
  • Second minute: Hate. “I am sure that these photographers have a better camera and better lenses“. “I am sure they are  having fun all the time! They just travel to these wonderful places and they have all the time of the world for finding the perfect composition”. “I hate them!”
  • Third minute: Sadness. I go into a very negative mindset: “I am not good enough. I should quit photography”.
  • Fourth minute: Comfort. I feel desperate and I try to cheer myself up. “Let’s see the pictures of the beginners. I am sure there are going to be worse than mine” (recognizing that I can think in this way is kind of embarrassing)
  • Fifth minute: Deep sadness. I realized what just happened in the last minutes and I conclude that I am a bitter photographer.
Comparing photos
When I start comparing myself to others I am like a cactus: I put barriers between me and anything that can come from the outside.

Can you relate? In just five minutes I went from having a positive mindset (I was happy and enjoying my photography) to a deep sadness. I was either putting myself down or putting others down in order to feel better. Why do I do it? I guess that the answer is simple:

I compare myself with others because I am human.

I was not getting any benefit out of these comparisons. They were just making me sad and angry. I was losing my passion for photography too. These comparisons are destructive, so instead I decided to turn them into something constructive. I want to share with you my 3 ways not to become such a bitter photographer:

Put yourself in the shoes of the other photographer

For some reason I tend to think that these photographers are not making any effort. I just see their final photo and I forget that it is the result of their work. You can’t know just by looking at one photo how many books they read about composition or how many years it took them to find their photographic vision. They might be travelling all the time. But you can’t know what they left behind. Maybe they did a big sacrifice in life in order to become a landscape photographer. Maybe they feel lonely. Maybe they took 10000 photos that day in order to get this one outstanding photo. Maybe they also feel that other photographers are much better than them. Now when I see that I start hating some photographer, I take a deep breath and I imagine all the efforts that this person might have done for taking the photo. It also helps to appreciate the picture even more.

Comparing photos
I took this photo in Australia. You might think that I spent months travelling to the other side of the world and living great adventures. But the reality is totally different. I couldn’t afford travelling to Australia. I did it because they send me to a Biology conference (I am also a biologist. I spend most of my day working inside a laboratory). Instead of going to the good recommended hotels, I went to hostels. In that way I saved some money that I spent travelling around for just 2 weeks because I needed to come back to work in the lab. The stories behind the photos are not always what we thought.

Instead of comparing yourself with these photographers, use them as inspiration

Now every time I see a photo that I find great I add it to a gallery. This way I can come back to it at any time I want. I study them. I try to figure out what I like in them so much. Is it because of the composition? Or maybe it is the mood of the photo? When I focus on the photo and not on the photographer, I go into a positive mindset and I feel like I want to learn from the guy (or girl). I end up following them as a fan.

Comparing photos
I was never modifying my backgrounds. But I saw the awesome work of other nature photographers that were doing it. I decided to give it a try and in my next hike I took with me a black cardboard. The cardboard allowed me to isolate this gorgeous Gilboa Irus (Iris haynei) from the messy background.

Compare your pictures from now with the photos you took some time ago

If still feel like I need to compare myself with something, I do it with one of my old photos. That I can see how I evolved and improved. I would like to go over all the learning process and take awesome pictures NOW. But photography doesn’t work like that. You learn, you practice, you make mistakes, you keep learning… and you improve. Slowly but surely. Put a new and an old photo next to each other and feel proud of yourself. Then comparing your photos can become something positive.  Be aware of your strengths and keep learning to improve. Enjoy the journey. Love your photography. Appreciating yourself is the best way to keep motivated!

Comparing photos
I took this photo 5 years ago. I am not sure what I wanted to show here. The only thing I see is a flat sand landscape that doesn’t talks to me.
Comparing photos
I took this photo the last weekend. I wanted to show how summer looks like for me. It is not the best landscape photography ever. But if I compare it with the previous photo, I can see my progression. Now I put more of myself into each photo.

Each time you feel you are entering into a negative spiral of comparison, take a breath and apply one of the tips I told you. Think that it is all about mindset. My strategies are focused on promoting a positivity. When you’re looking at photos with a negative mood you close your mind, you don’t want to learn or to see any more good photos. On the other hand, a positive mindset will keep your mind open, You will learn from others and this will lead you to good places!

Introduction to Landscape Photography

Content

  • Introduction
  • Before you get started
  • Planning – Location and time
  • Technique – Camera settings (HDR, depth of field etc) and composition etc
  • Post-processing
  • Publishing

Introduction

Four years ago my passion for photography started and the main reason for this was that I explored the beauty of landscape photography. I wanted to get some wonderful wallpapers for my desktop but found myself astounded by the art that is landscape photography instead, I could browse landscape wallpapers for hours. My interest in landscape photography grew and getting my first camera I started doing it myself, today my landscape photography have progressed a lot and I hope to share some tips that will help anyone getting started with landscape photography.farsbooktober2014-10

Before You Get Started

There are of course no definite rules of what you need before you get started but there are some things that I recommend you have and some basic knowledge of photography. In terms of equipment, I recommend that you at least have a camera, lens(es), tripod and a computer with photo editing software (preferably Lightroom and/or Photoshop). That you need a camera is obvious, but what kind of camera? First of all, it needs to take good photos, but there are some other capabilities that are more or less a must. This includes the capability for interchangeable lenses, manual settings, and RAW-format. I recommend having a DSLR from one of the bigger brands since this will give you a wide array of lenses to choose from and a greater possibility to upgrade your equipment within the brand (so that you don’t need to buy new lenses when/if you decide to get a camera upgrade). Any newer DSLR will do just fine, but if you can afford it a full frame camera that is great (don’t be afraid to buy used cameras and lenses), there are also mirrorless cameras that would be suitable, but unless size and weight are important issues I would stick to a DSLR.      photographer-1031249_1920
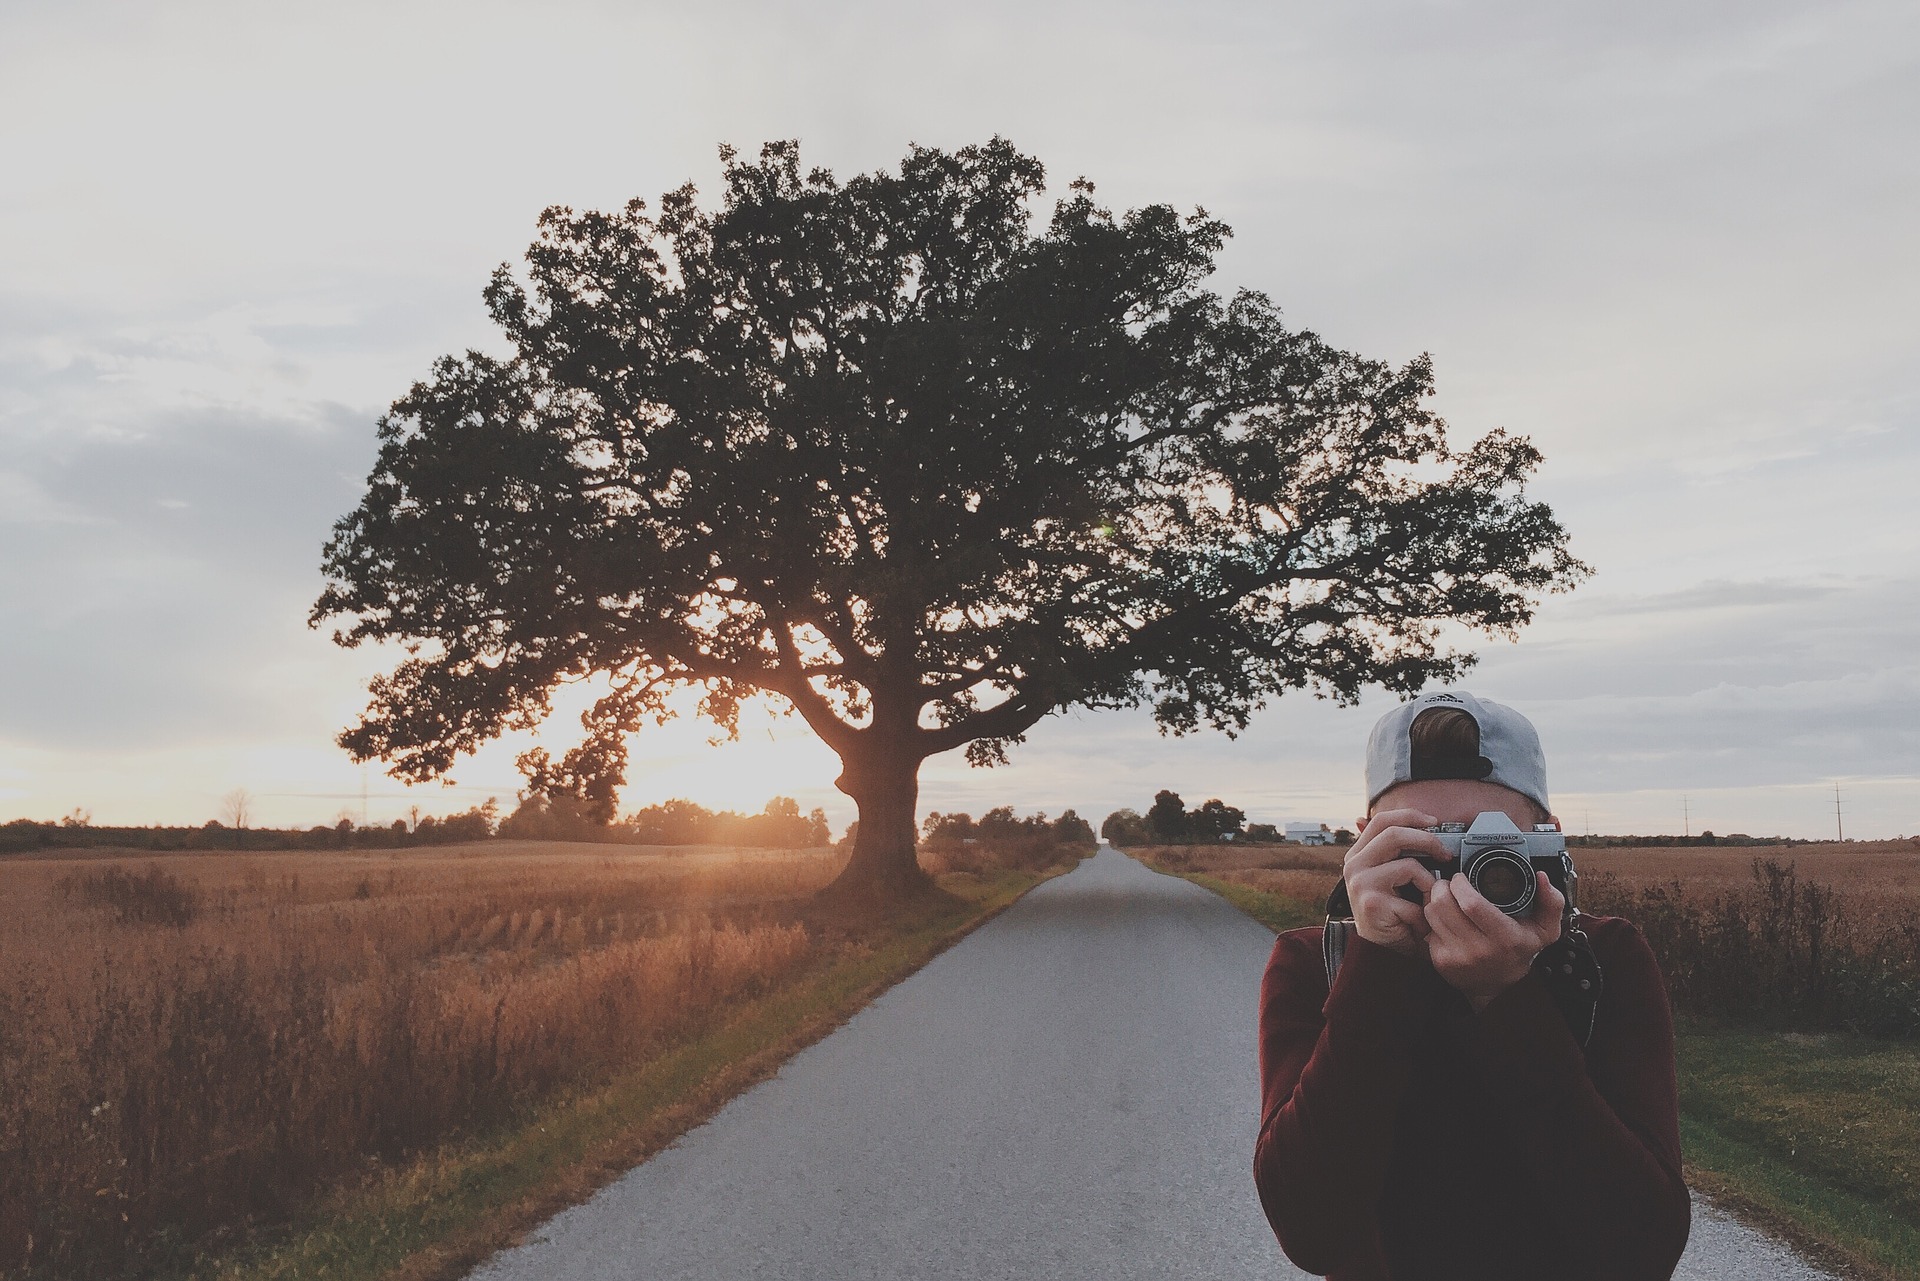
As with any type of photography the lenses are of great importance in landscape photography, and there are three types of lenses that will fill all your needs, these are the normal zoom lens (usually somewhere around 24-70mm equivalent to a full frame sensor, 18-55 on a cropped sensor), the ultra wide angle zoom lens (usually somewhere around 12-35mm equivalent) and the telephoto zoom lens (usually somewhere around 70-300mm). If you have all of these lenses you will be able to capture all types of landscape photography. I recommend that you buy lenses with a big aperture like f/2,8 if you can afford it, but there are cheaper alternatives that work great as well. Depending on your style of photography you will use different lenses more than others, personally, I use my normal zoom lens (24-70mm f/2,8) the most since I find it to be plenty wide for most situations and I also have the possibility to capture tighter images as well.dawn-1284235_1920
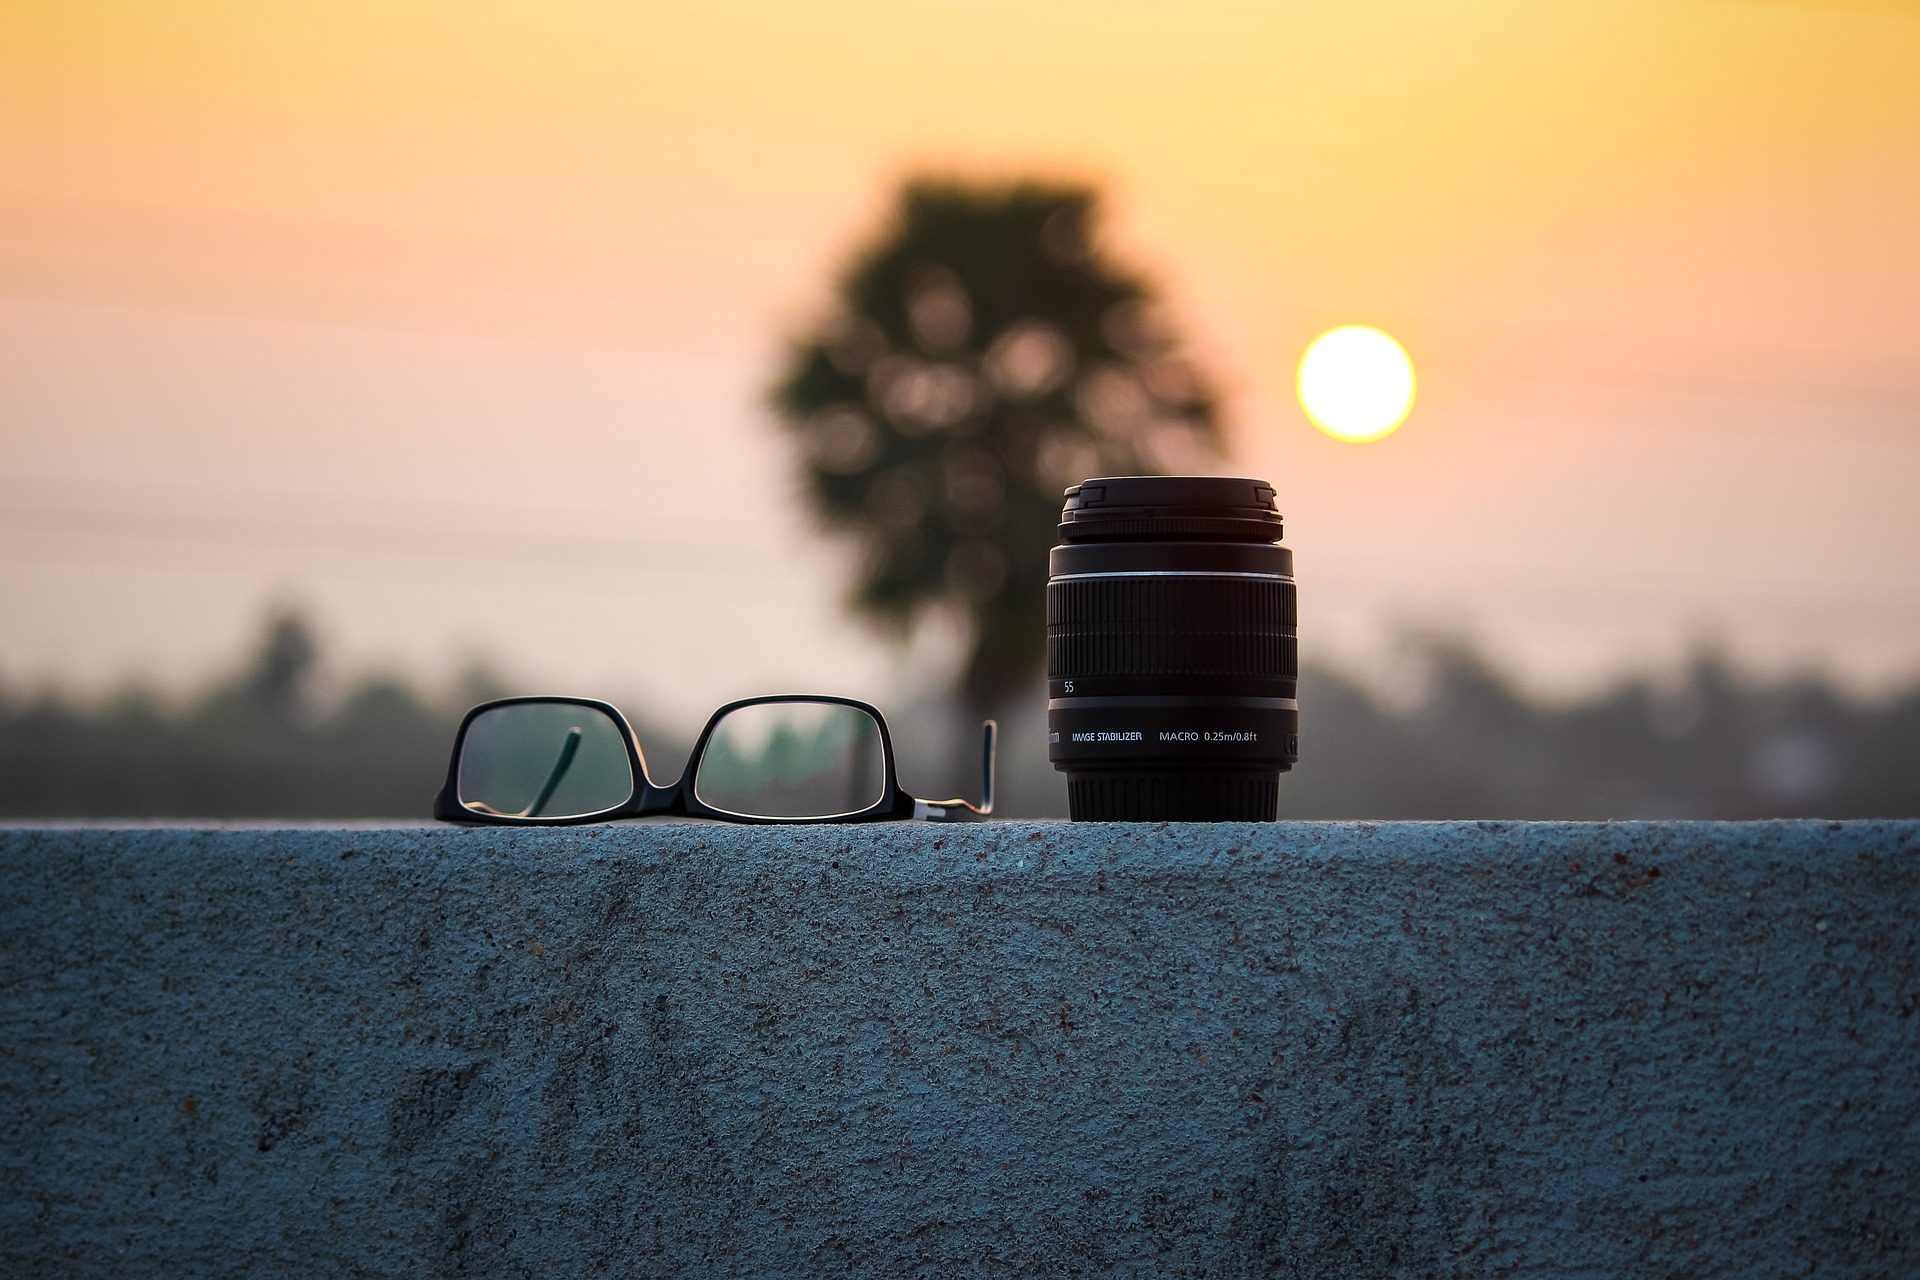
I would also recommend that you use a tripod for landscape photography, and while it isn’t completely necessary I find that it makes you slow down and think more about the process, such as composition. A tripod will also help you eliminate blurry photos and is a must if you plan to take long exposures. Be sure to use a sturdy tripod that won’t wobble around too much. Another tip for when using a tripod is to also use a cable release so you won’t have to touch your camera, and in that way producing slightly blurred photos. You could also set a timer to eliminate this risk. There is various other equipment that you can use, primarily filters. If you want to achieve long exposures in the daytime you have to use a strong ND-filter, and a circular polarizer is great to have at hand to reduce glare and increase vibrance in photos.filter-1259839_1920
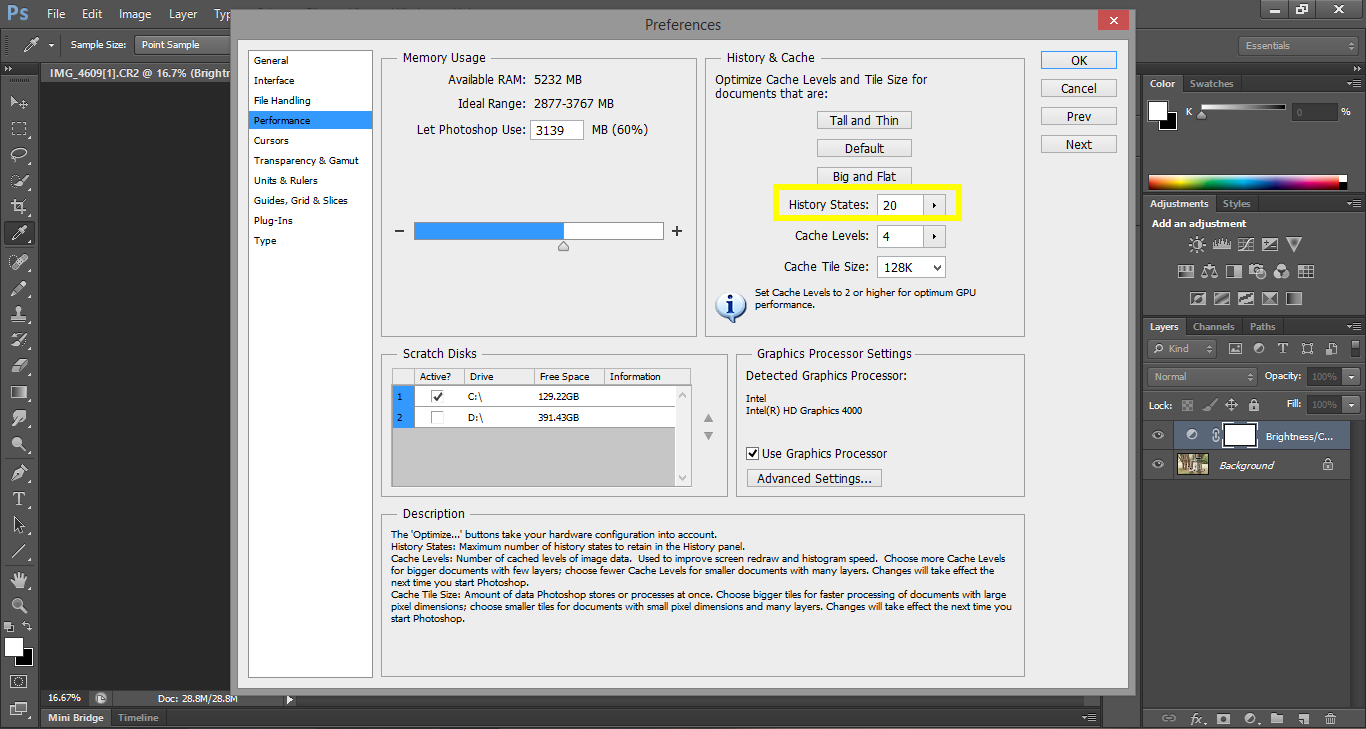
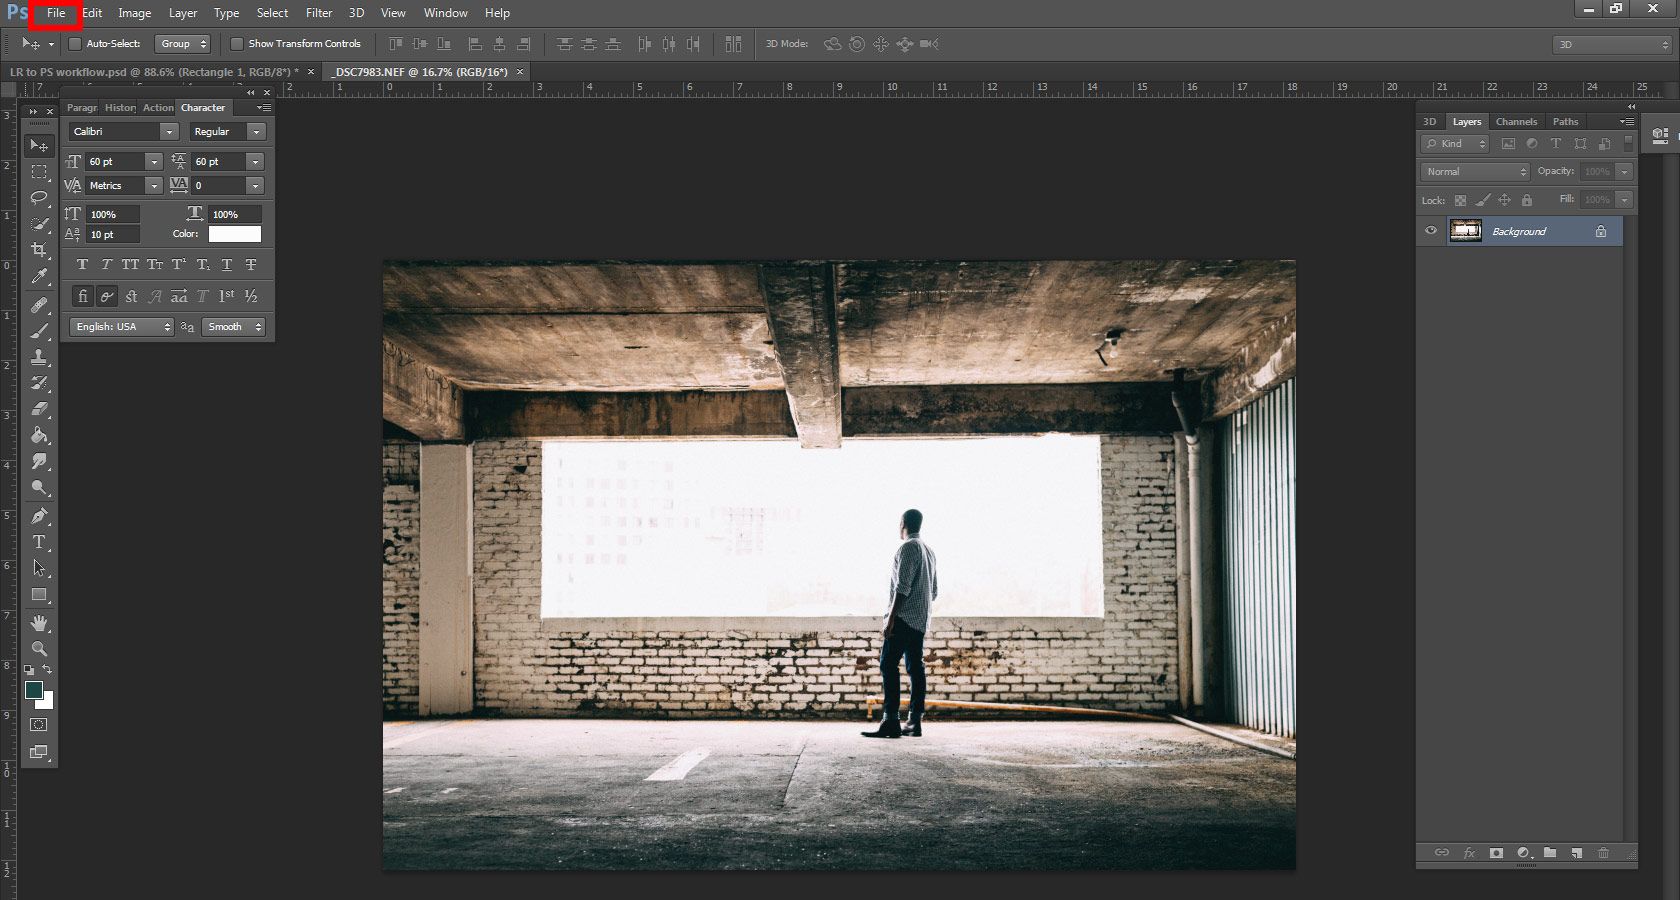
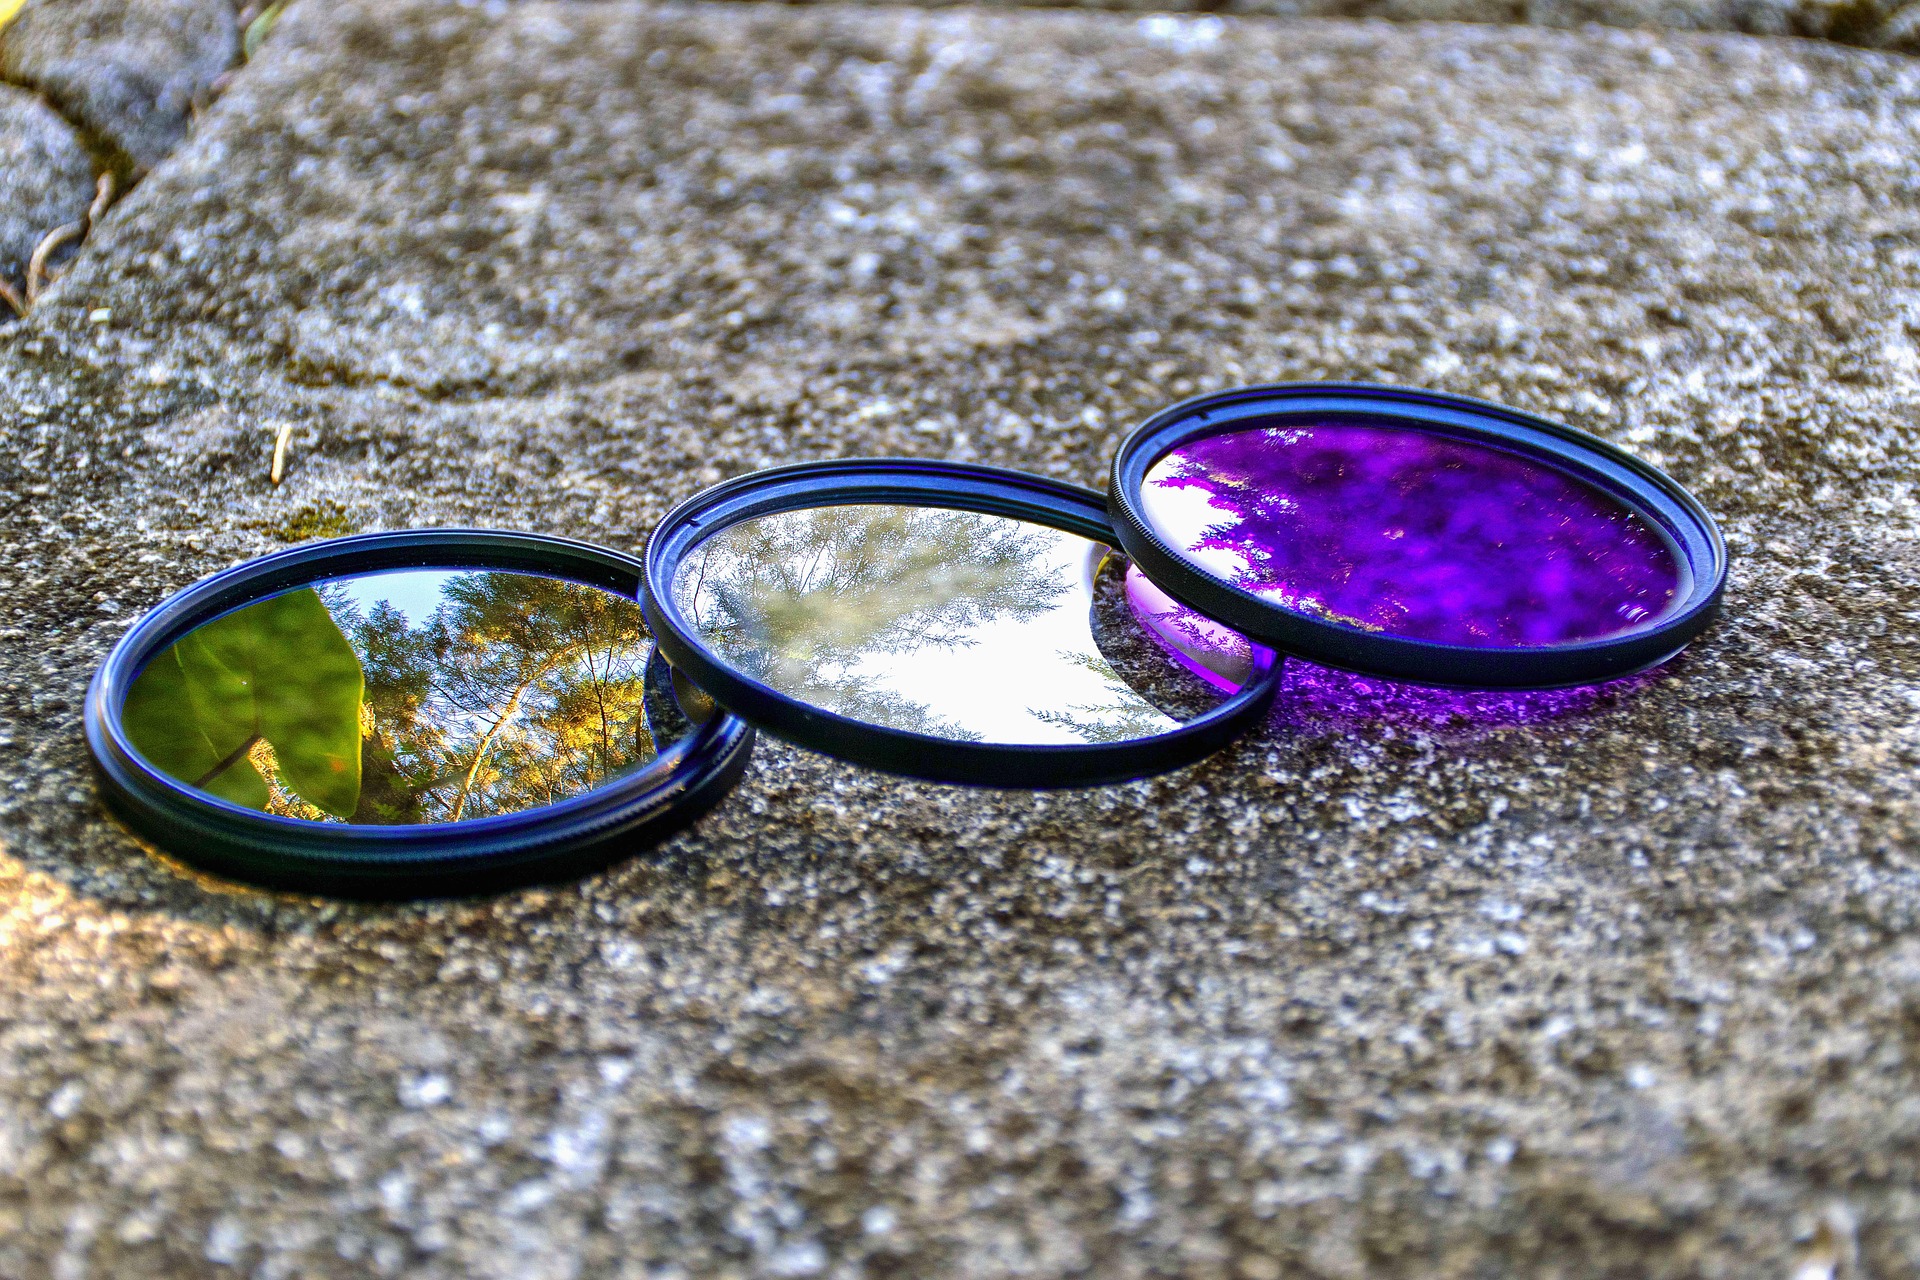
For post-processing, you can use whatever software you like, but for some more advanced features, Adobe Photoshop is the way to go. I really like working with Lightroom as well, as it is easy to manage and very powerful.This guide will not be going over how the technical aspects of your camera work, like shutter speed, aperture, and ISO, so if you are not yet comfortable with these aspects of photography I recommend that you read about it. I would say it is essential to know these things if you want to achieve great landscape photography.

Planning a Landscape Shoot

Before you head out to capture amazing landscape photos you need to make some sort of plan, it can be very detailed but it is often good enough to make a general plan. There are three basics in planning a landscape shoot, these are location, time of day and look at the photo/composition. Before you go you should, of course, know the location you are heading to, maybe you have scouted the location the day before or earlier the same day, or maybe you have just found a certain spot through other photographers photos on the internet. Often you will be taking photos in locations that you have never been to before and if you don’t have time to come back to a location several times it can be a good idea to research the place beforehand through sites like 500px. By doing this you will get some inspiration for what photos you want to capture when you arrive at the location. If you are staying in the same place for a longer period I would recommend that you spend a bit more time on scouting locations that you can go to when the time is right, for example during golden hour.branches-325411_1920
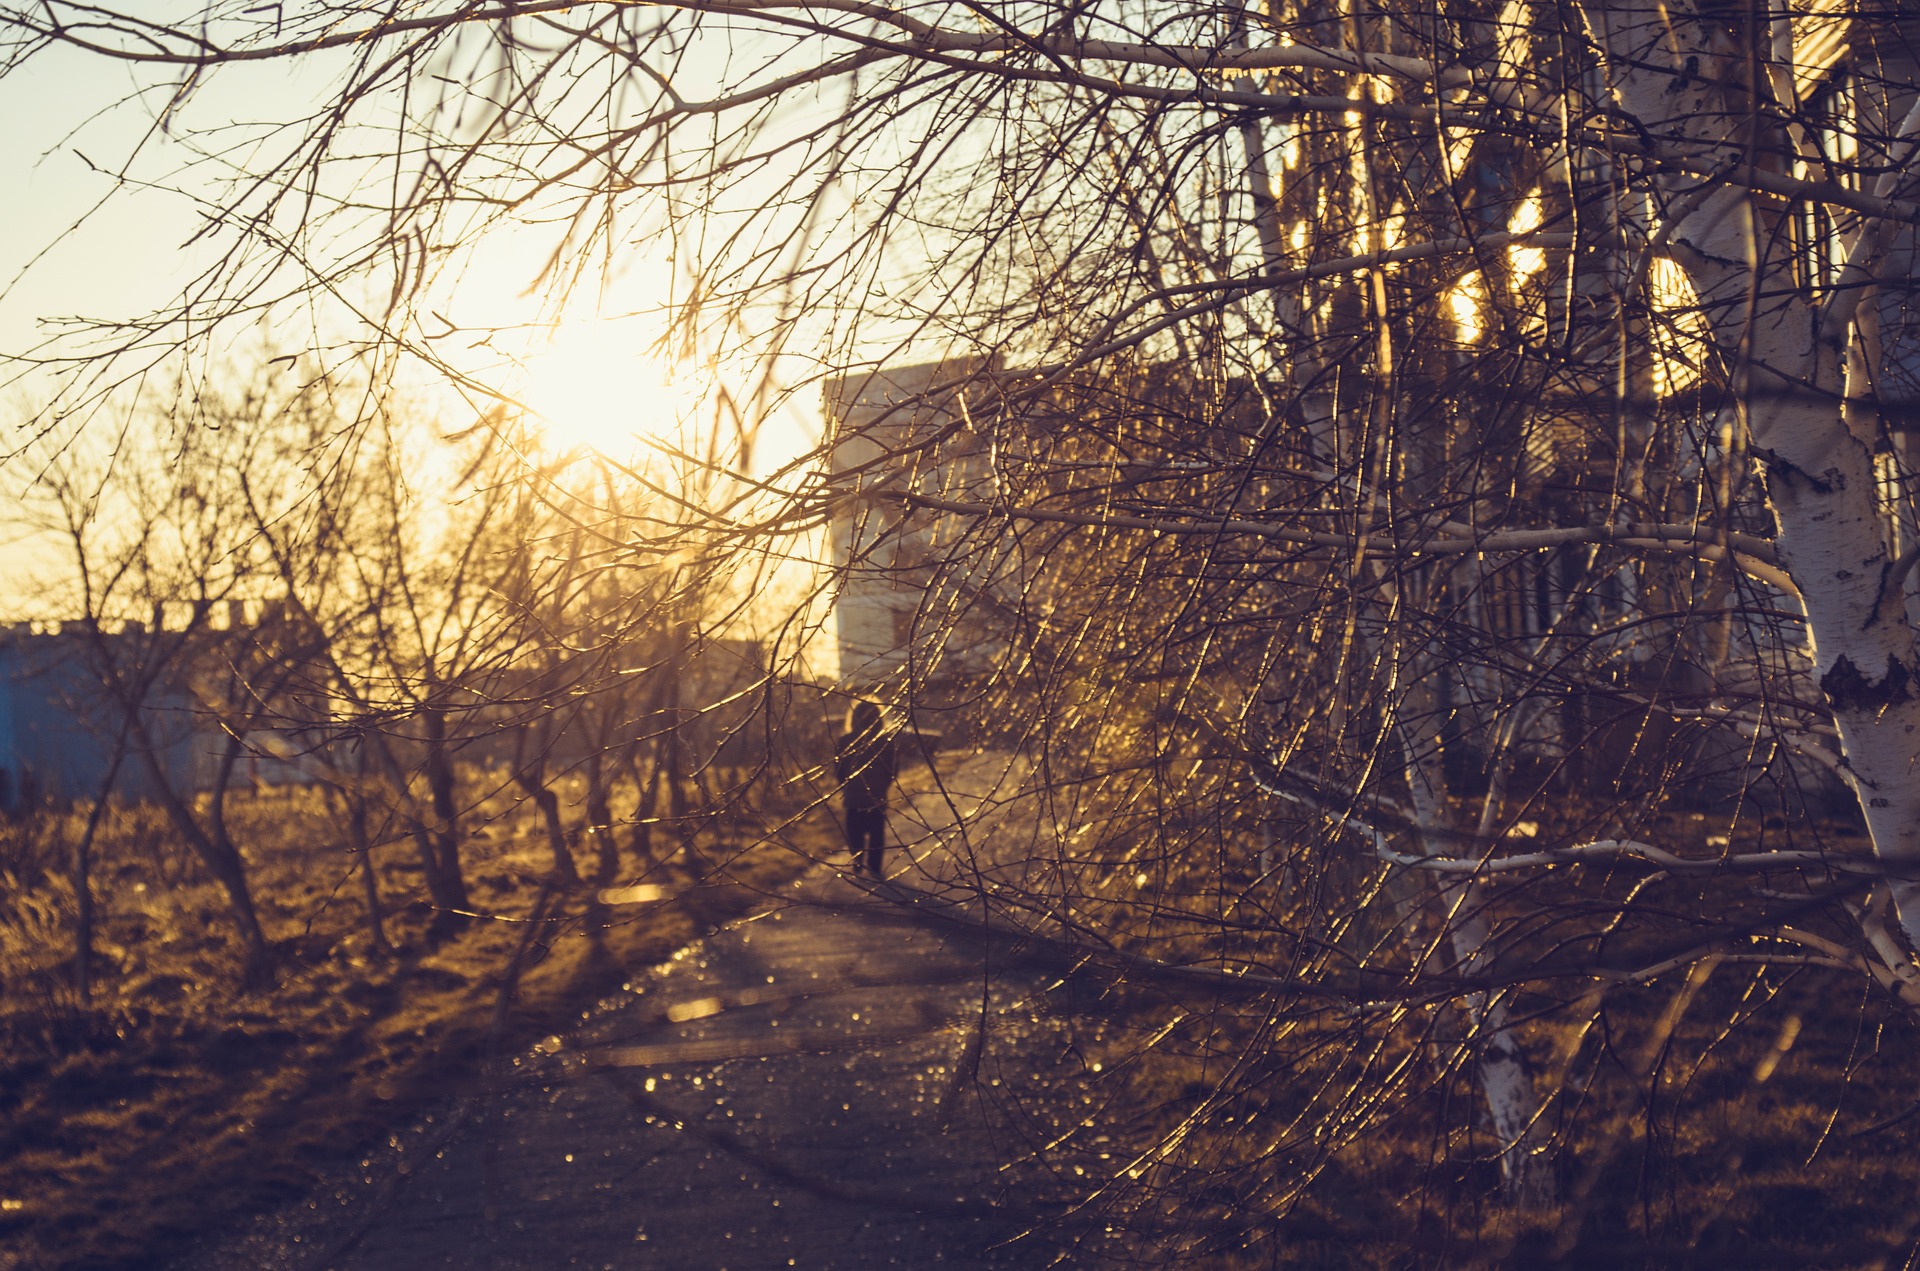
Time of day is crucial when it comes to landscape photography since we are dependent on the weather and light gave to us by mother nature. We simply have to adapt to mother nature. As a rule of thumb, you should try to capture landscapes during golden hour. That is the hour (give and take) during sunset and sunrise. At this time the light cast by the sun is the most beautiful, and since we are usually trying to take beautiful photos this is the best time for landscape photographers. But of course, you can capture landscapes at different times as well, for example, long exposures during the night or on cloudy days. At least you want to avoid broad daylight since it makes everything very flat and boring. Lastly, you have to plan how you want the photo to look, this is, of course, dependent on the time of day and location but it is good to have an idea about composition and subjects among other things before you arrive at the location. paddle-839814_1920   
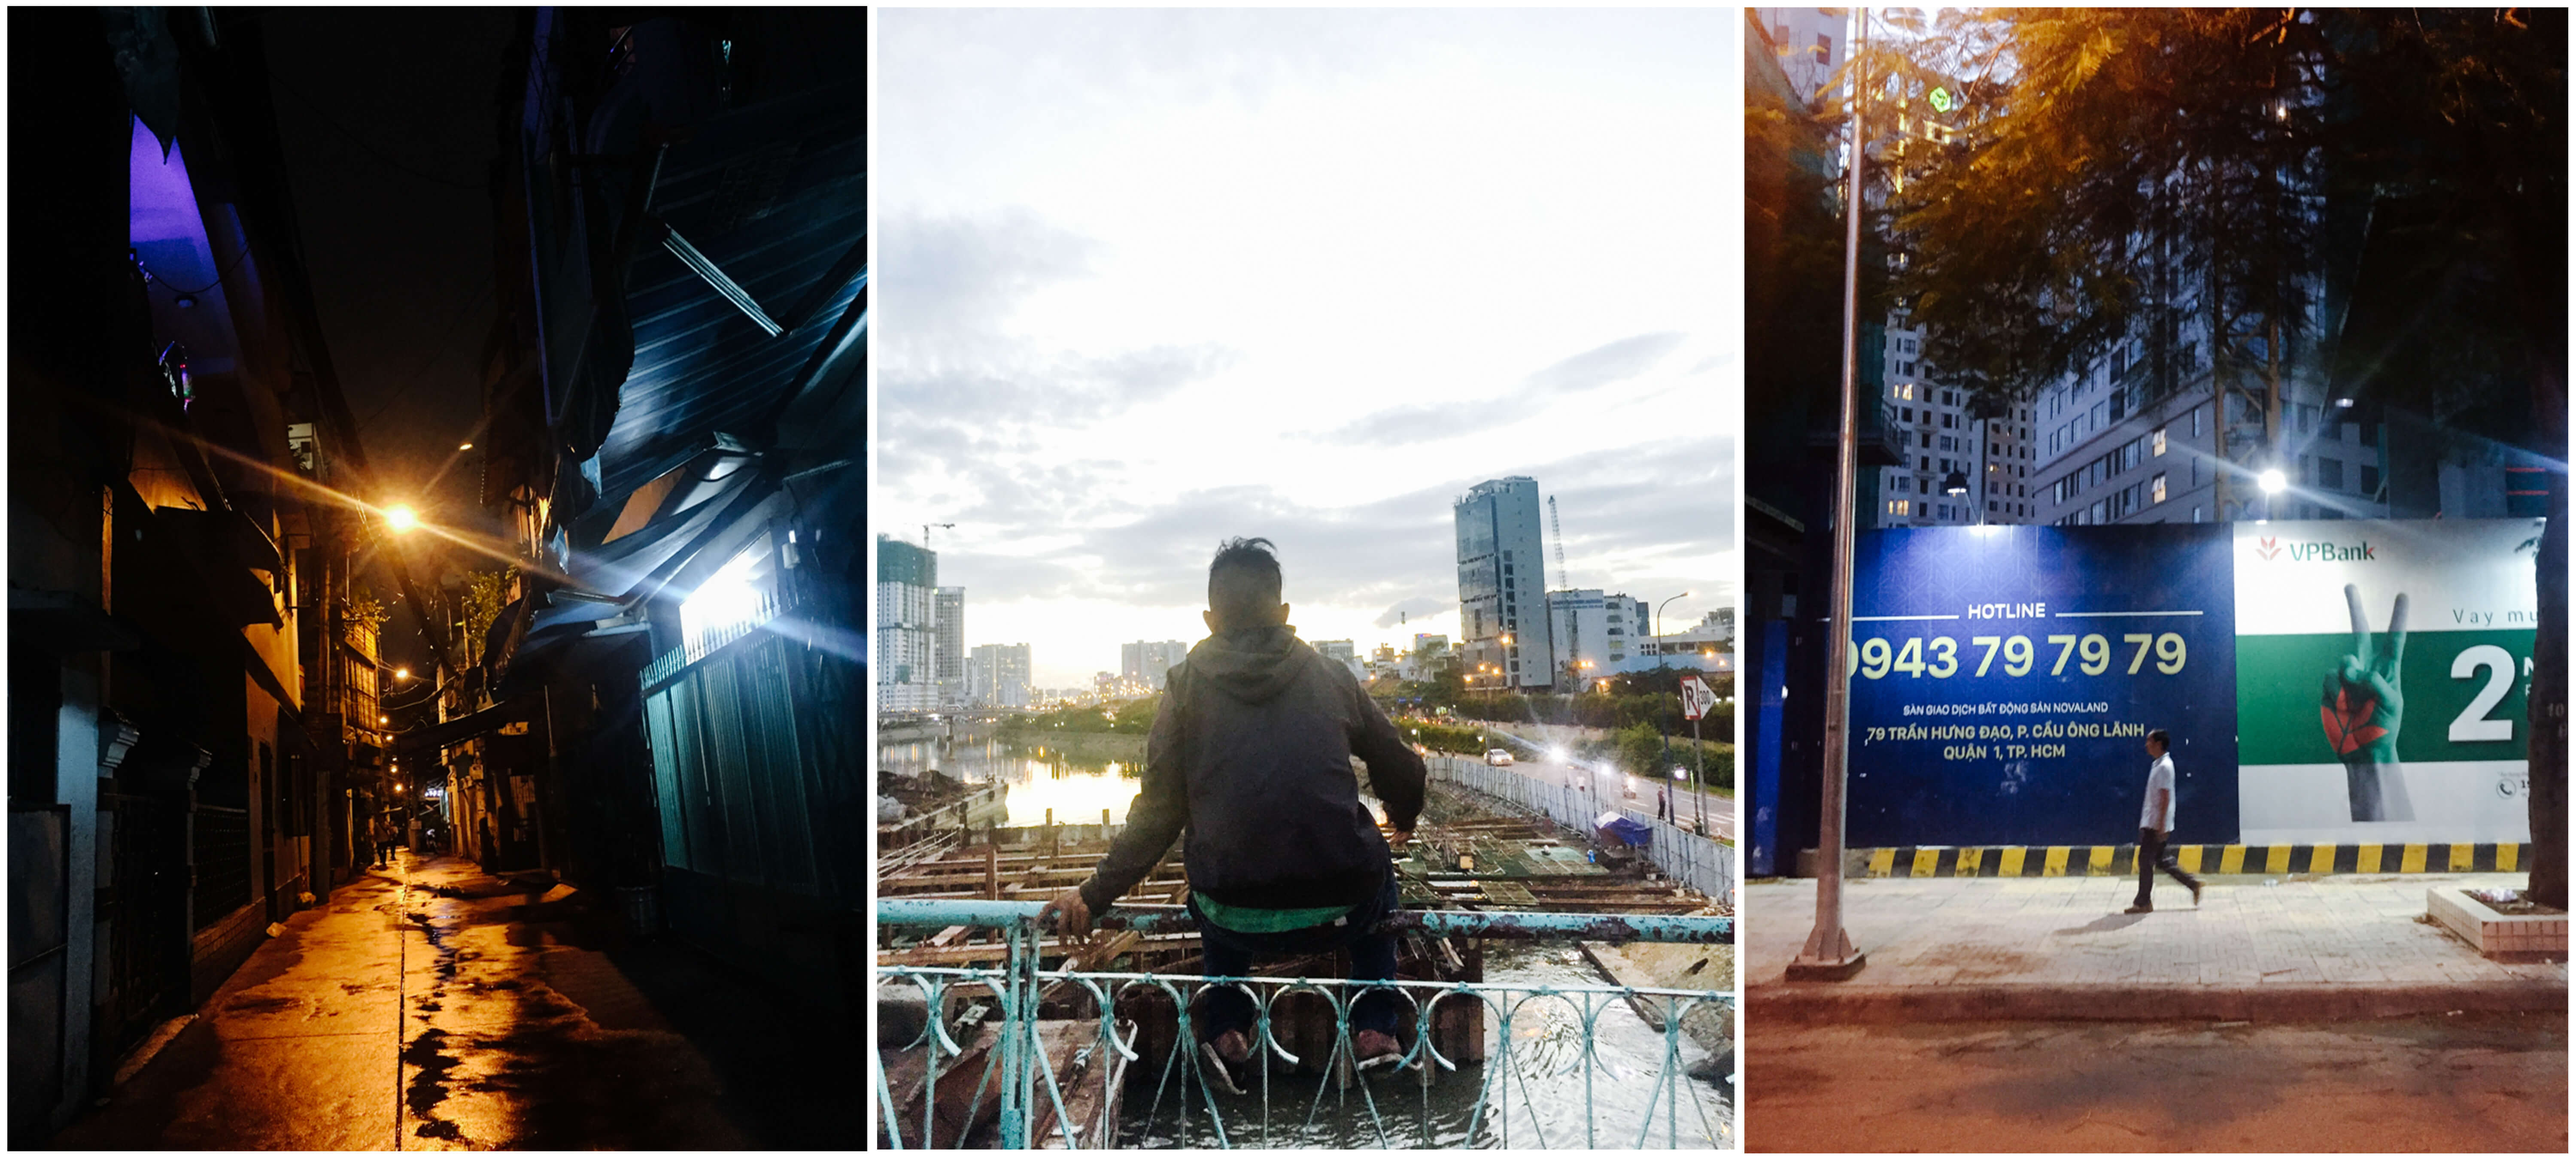
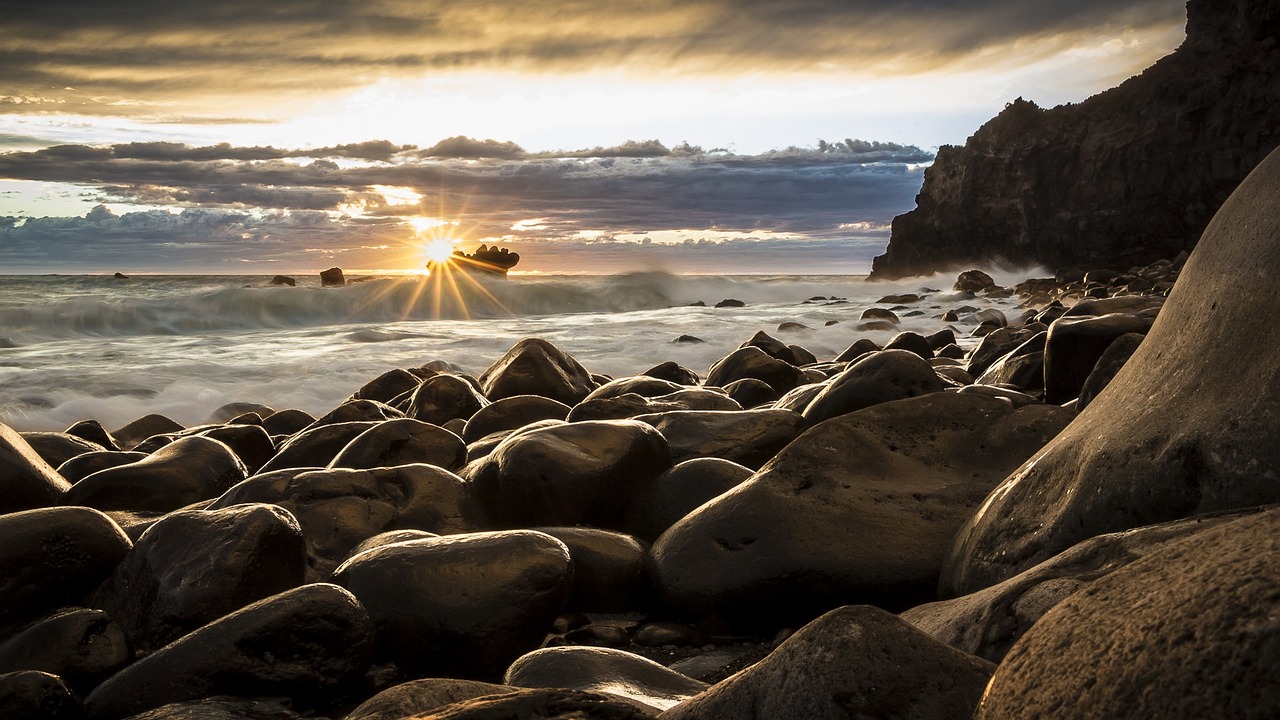
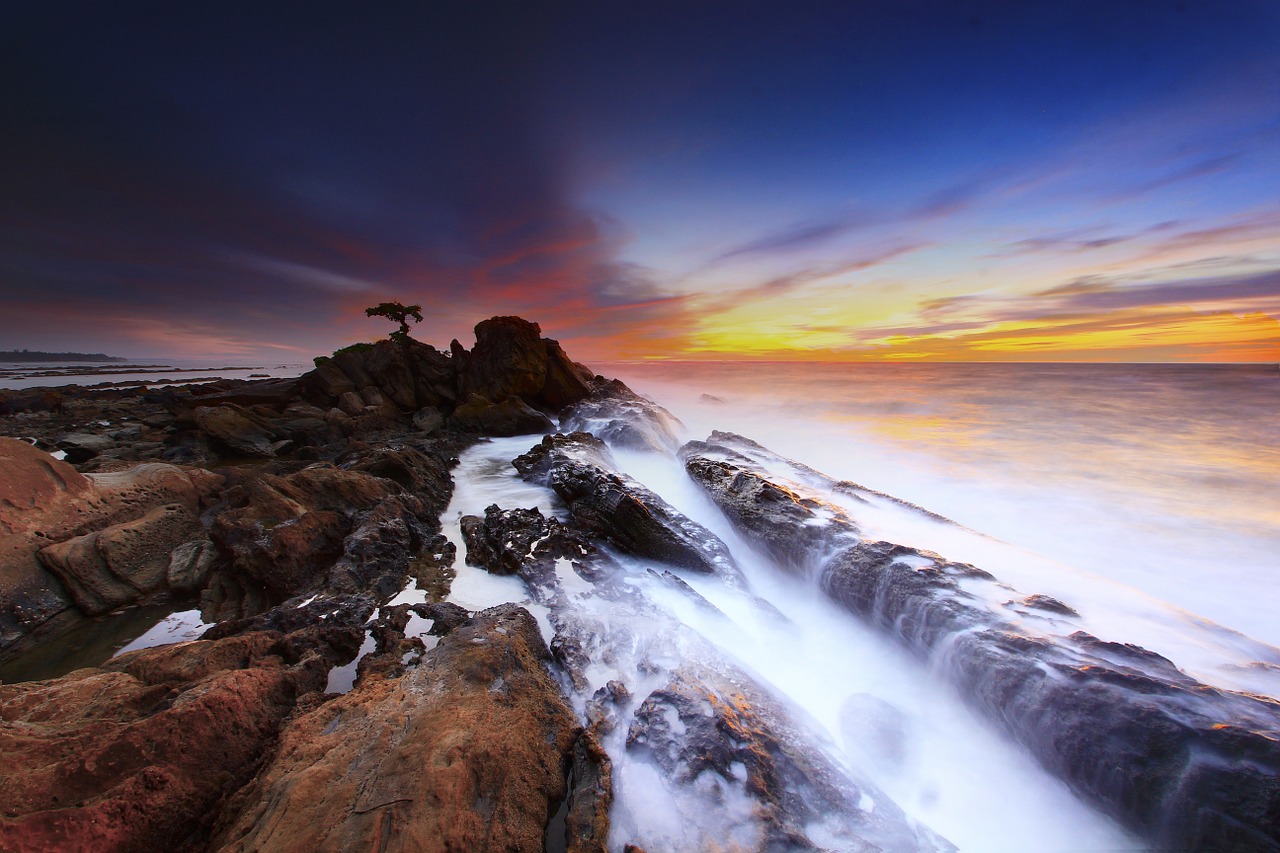
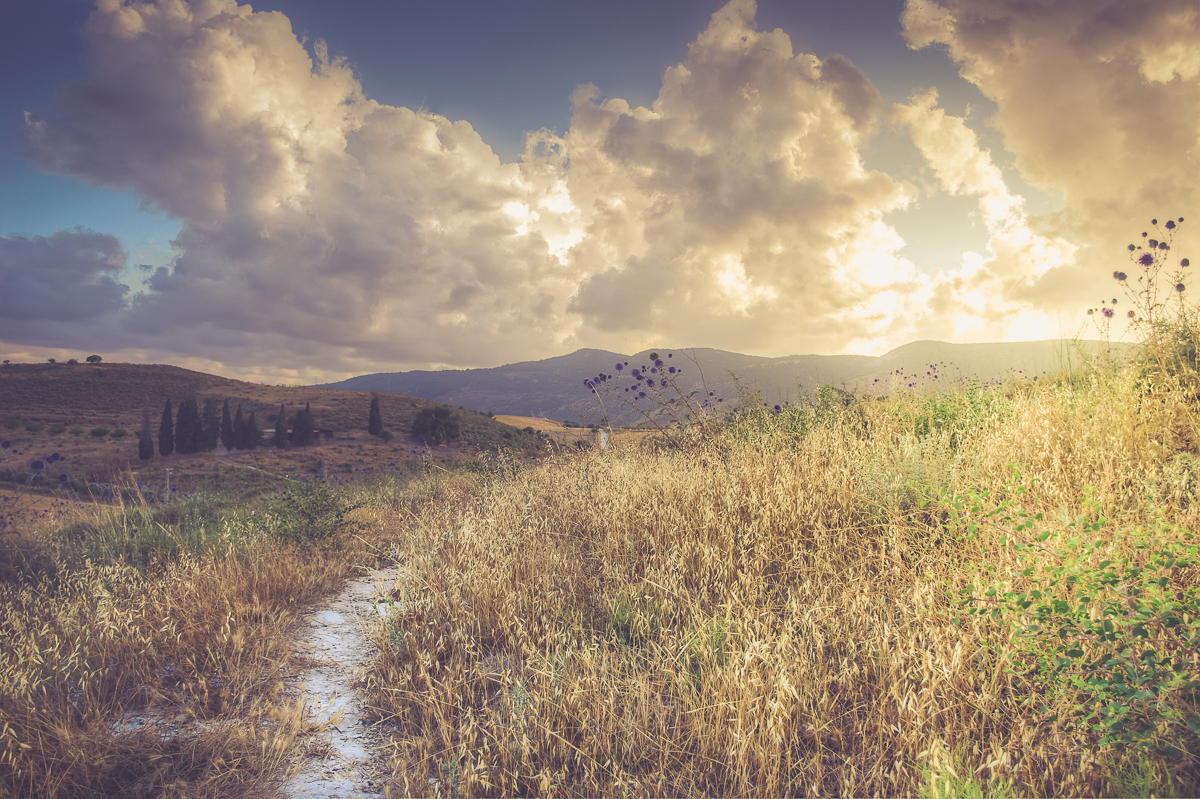
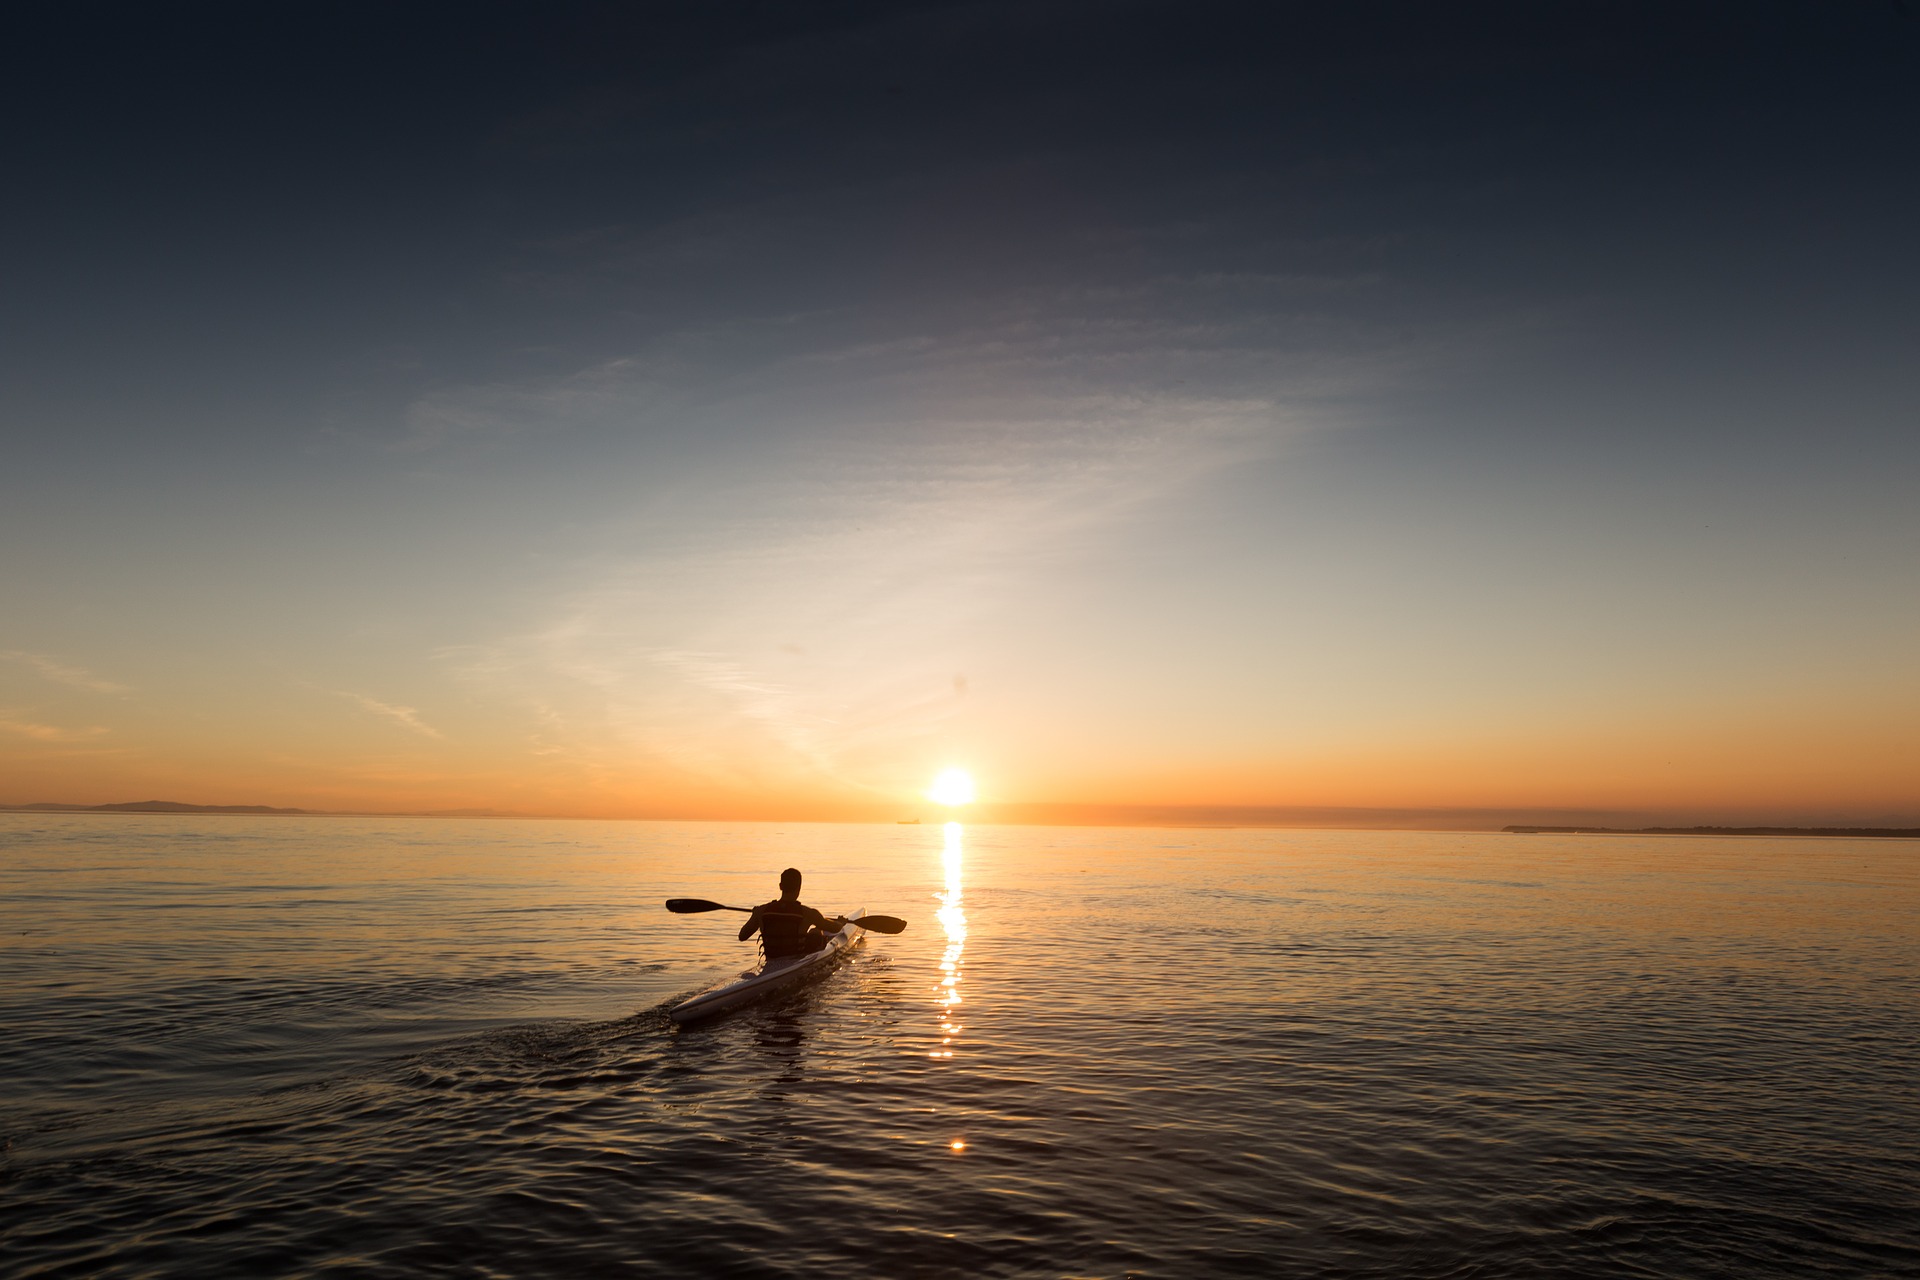
When I took the photo you can see below I was staying with some acquaintances for two nights, in a beautiful small village at Österlen, Sweden. When I first arrived in the evening I went down to the sea to scout for a location (I didn’t bother taking the photos I wanted at this time since I knew it would be much better at sunrise the next day) and I found two spots that I really liked. I used an app to find out in what direction the sun would rise the next day and decided to try to capture an image where the lines formed by the rocks in the foreground were leading the eye of the viewer towards the rising sun. So the next morning I woke up at about 04.00 (4 AM) to capture the photo I had envisioned the previous day. The sun rose approximately 04.30, but the things you do for great photos… My plan worked out great and I got this photo that I am very happy about.
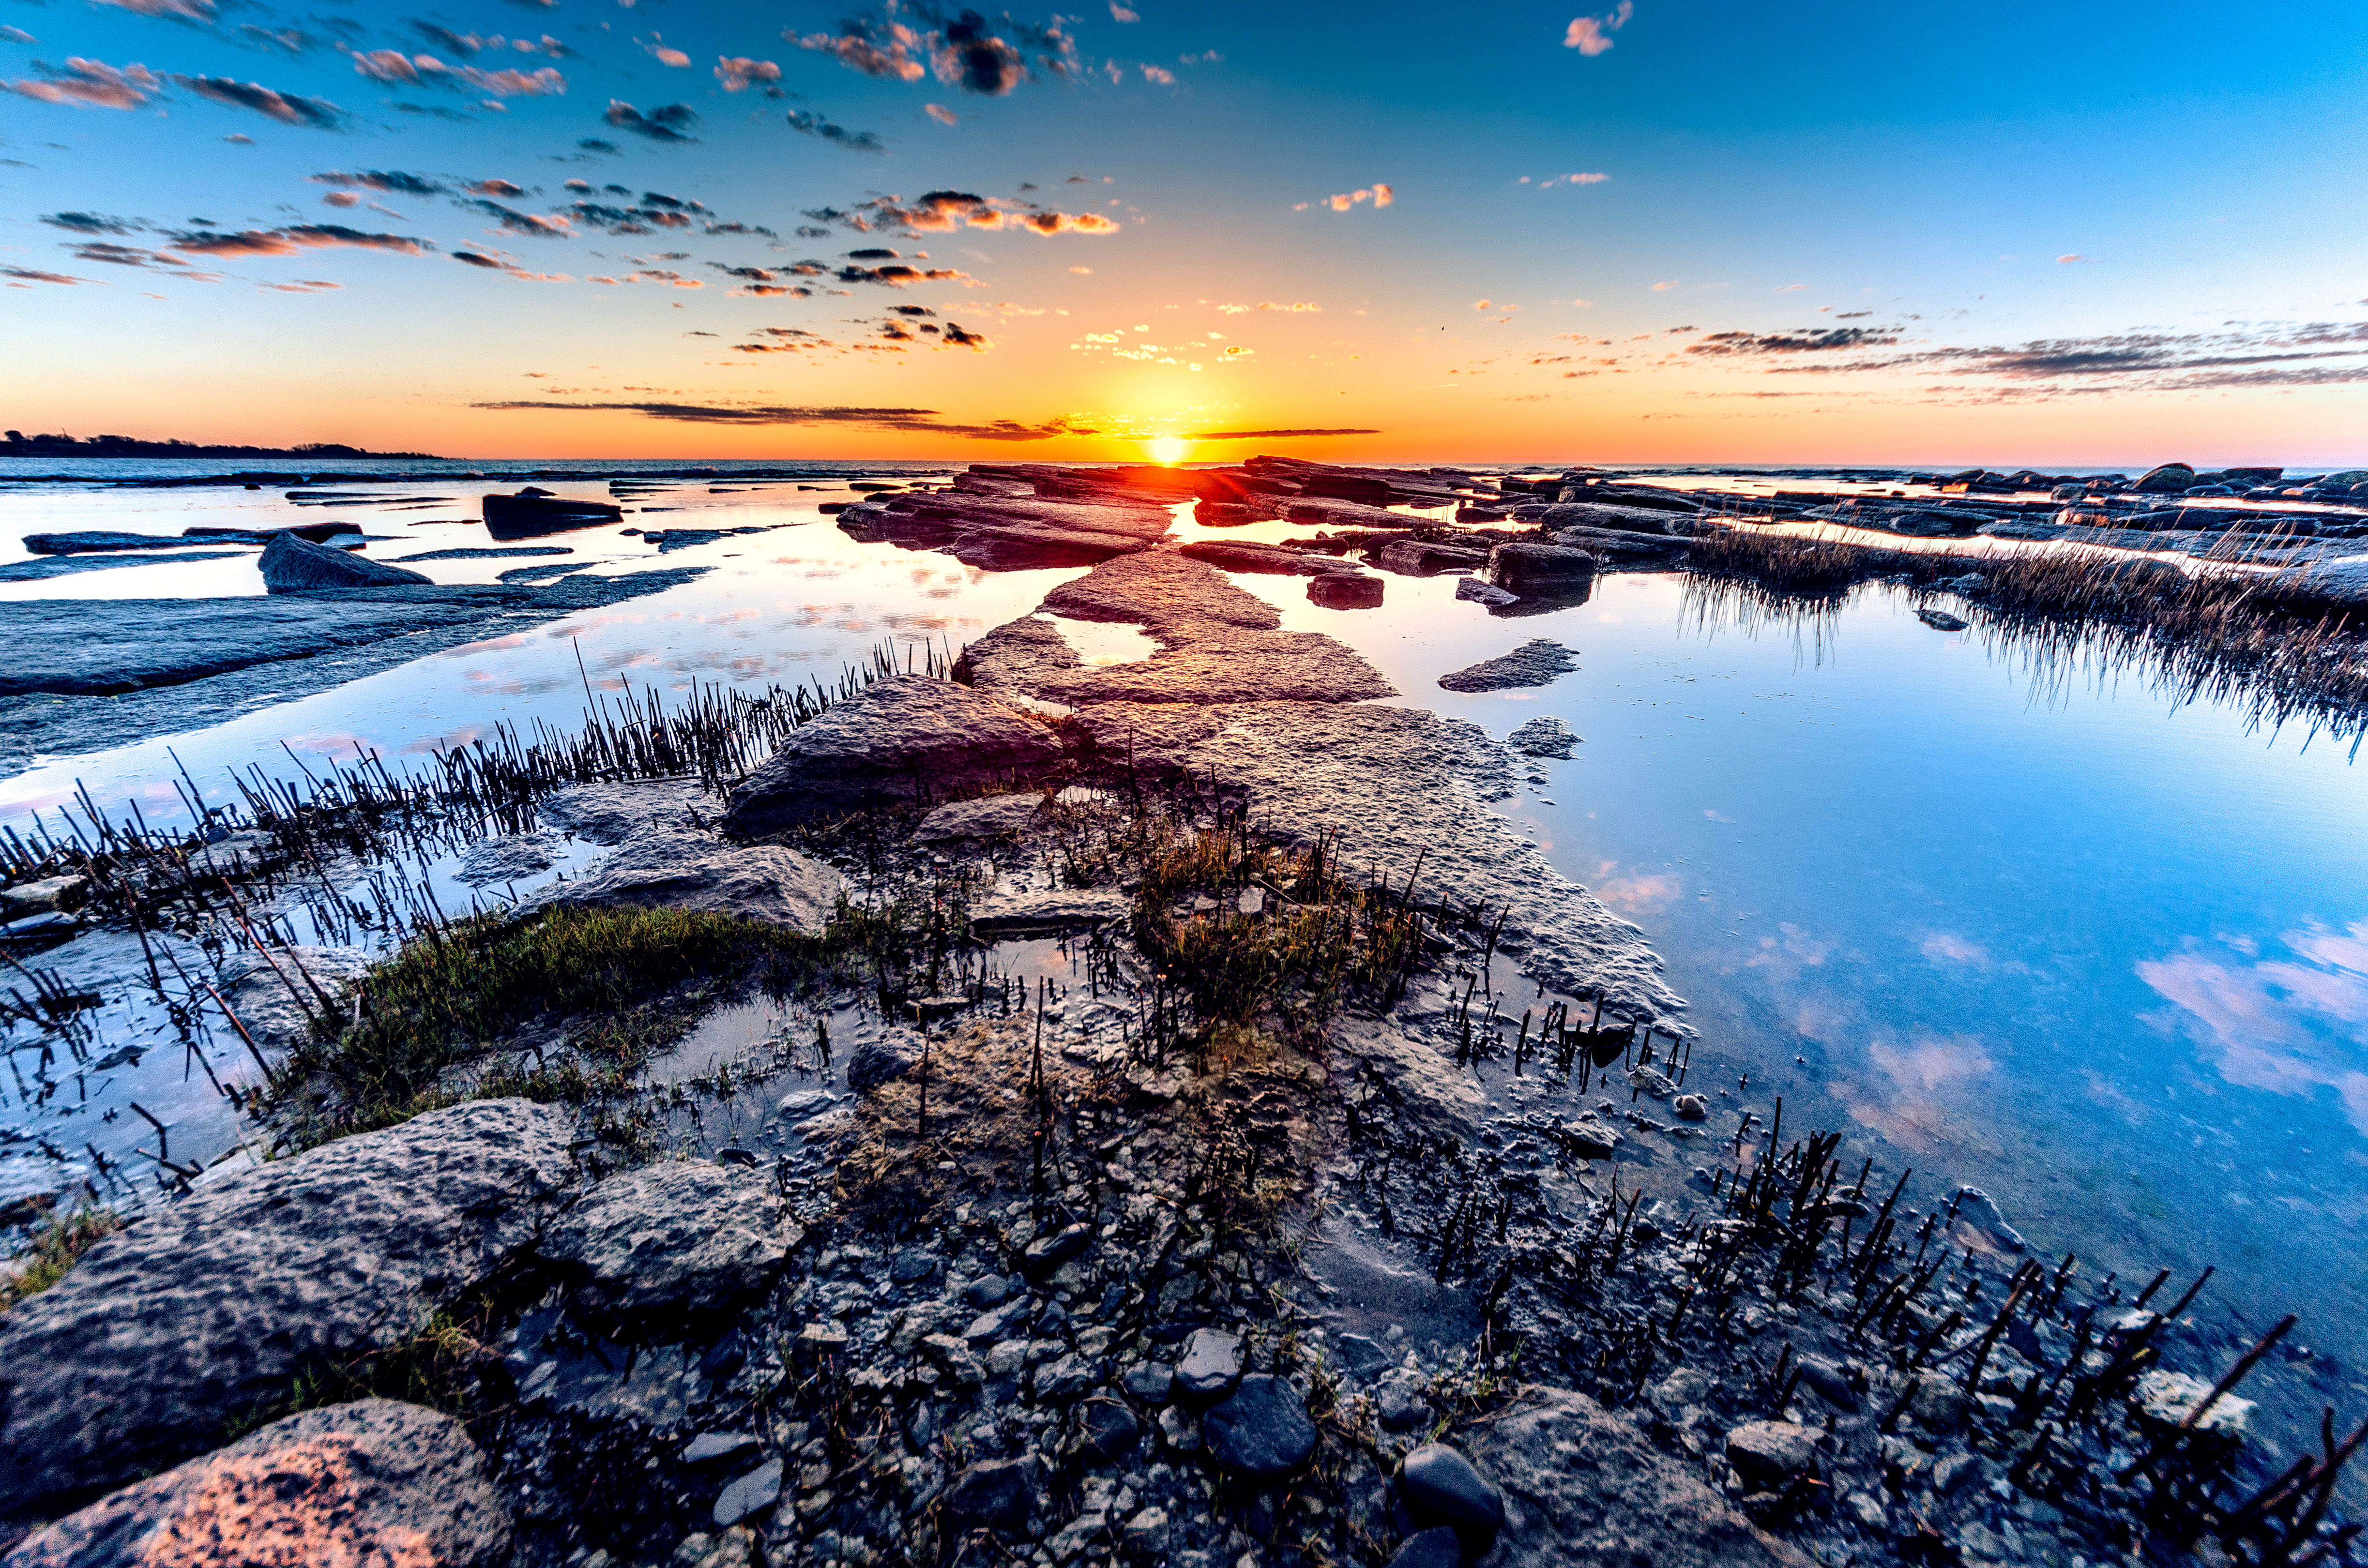
      ÖsterlenApril2014-113

Technique

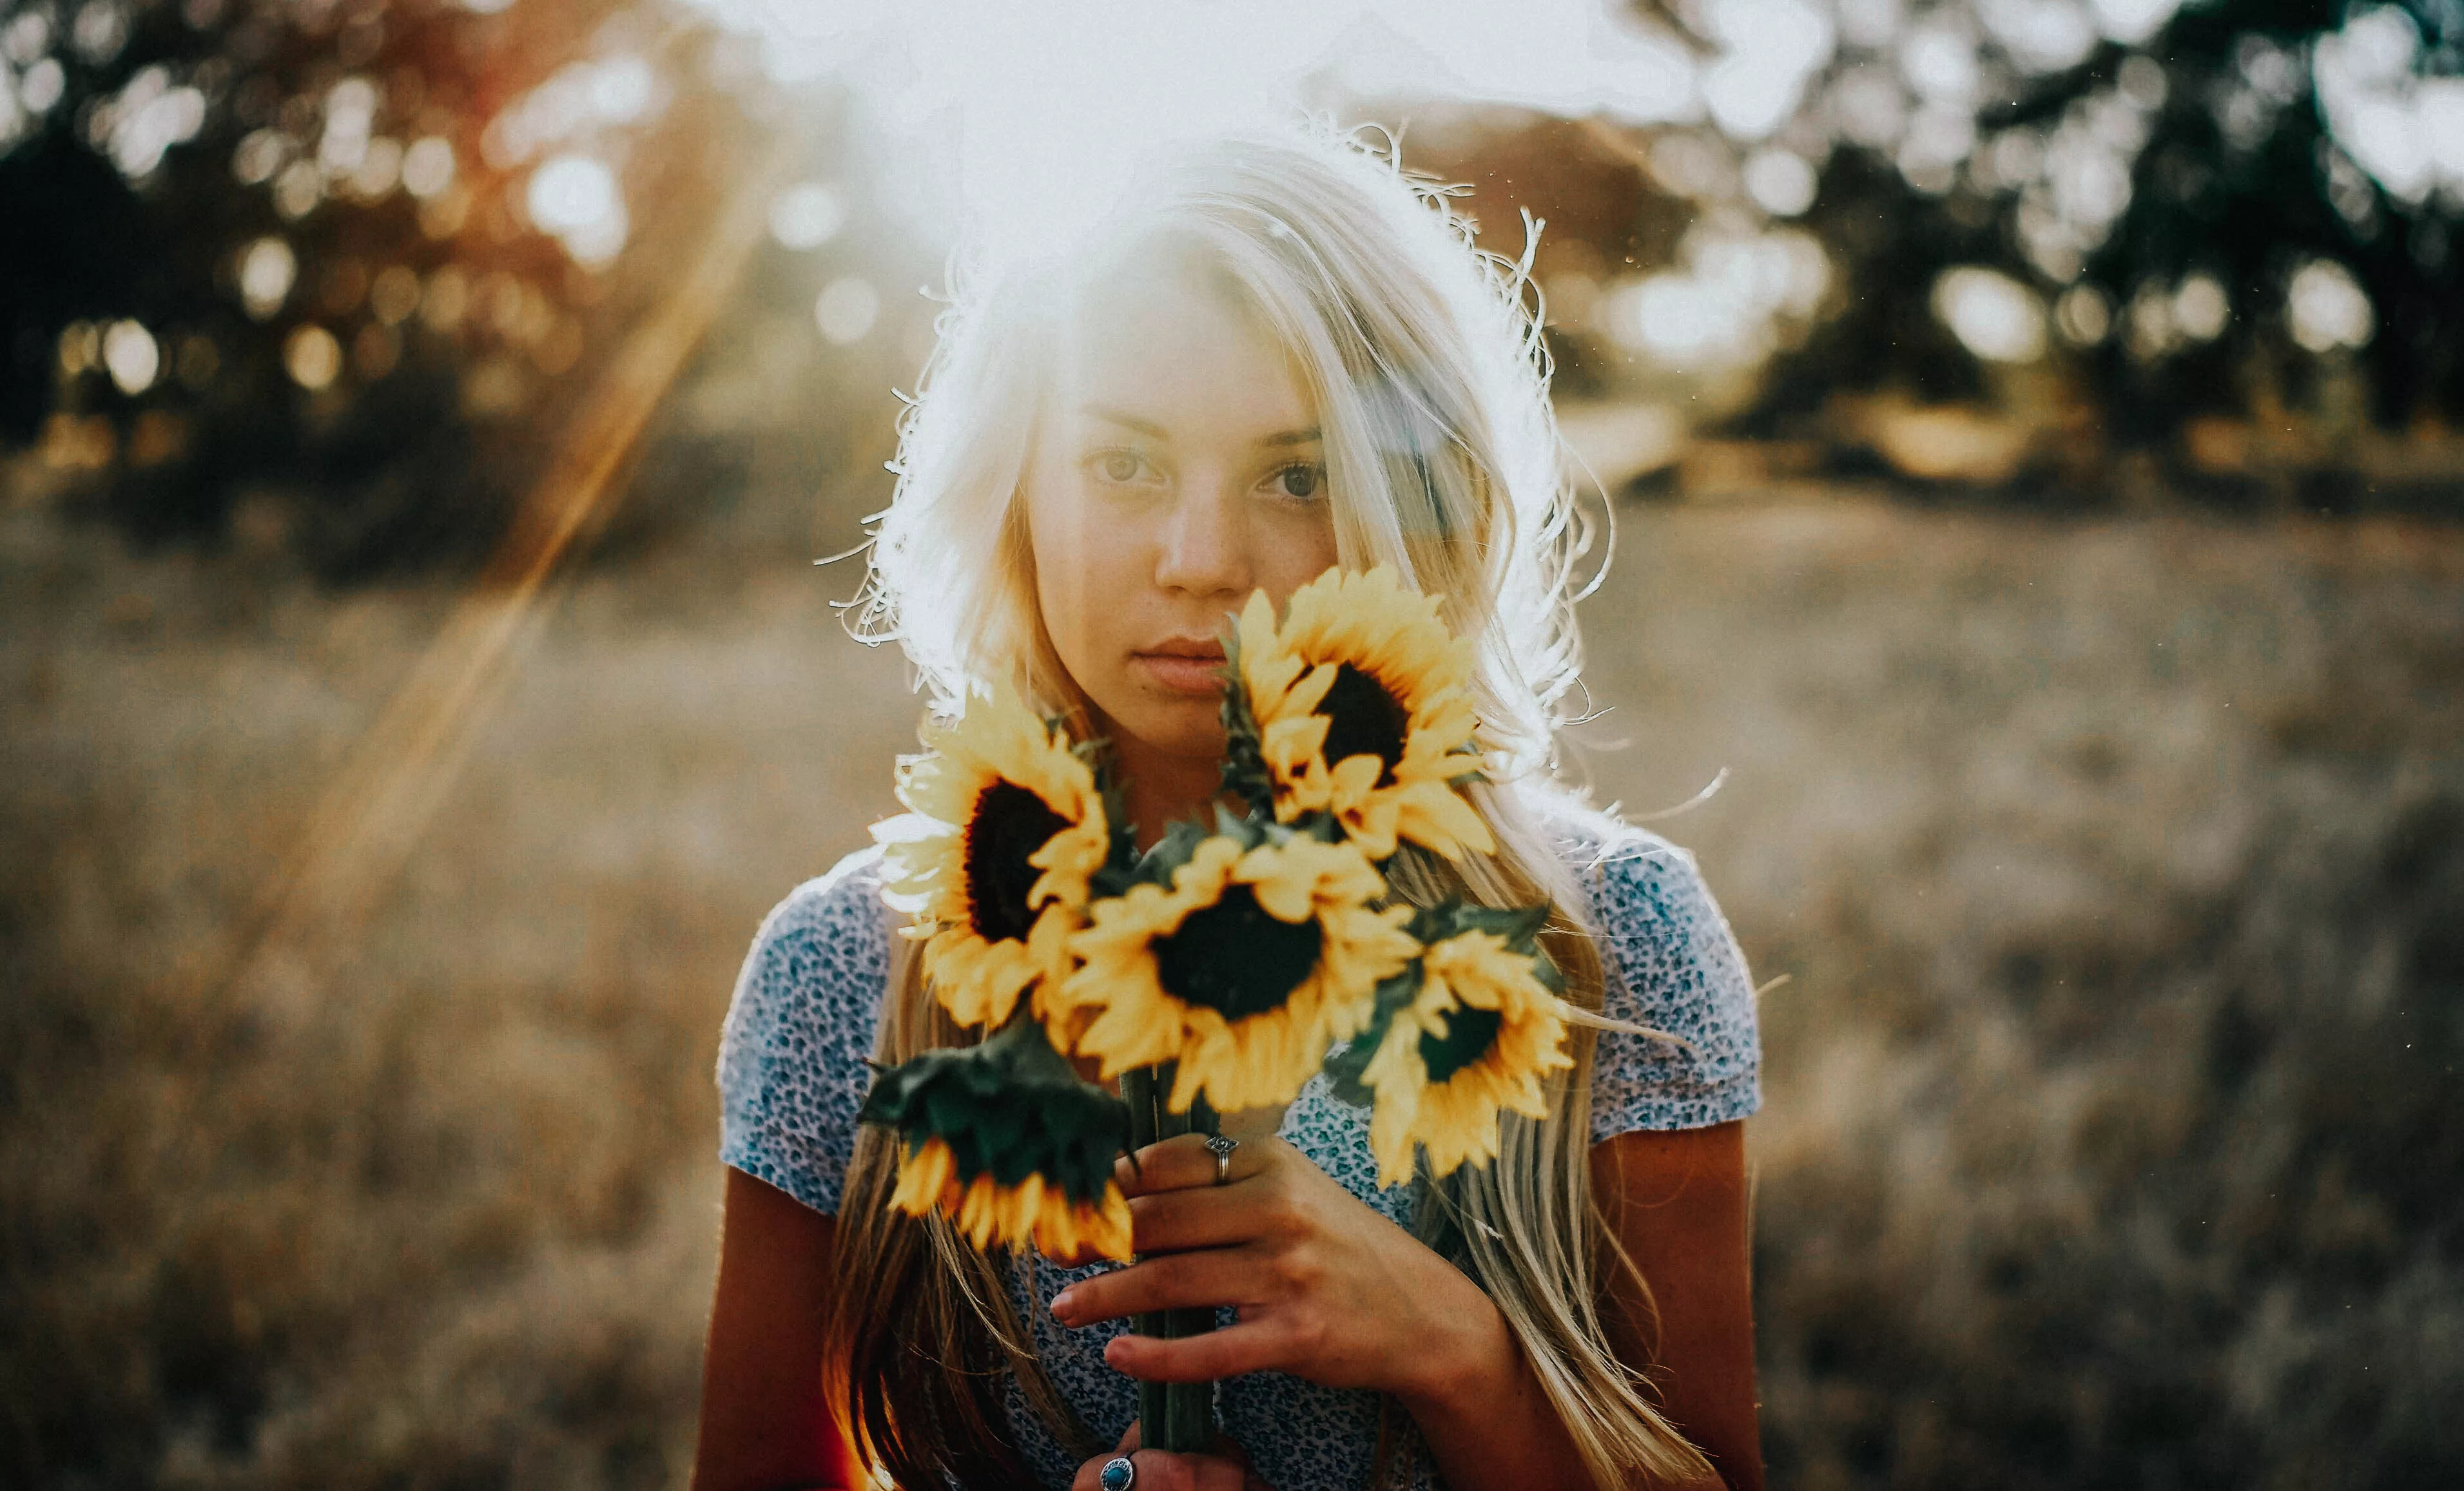
A big part of photography is technique since we must know how to use our cameras and how to compose a photo to get the best results. I won’t go over in detail how to set up you camera and how the technical aspects of your camera work but rather focusing on the specifics for landscape photography. Some keywords in landscape photography are sharpness and correct exposure. To achieve sharpness you have to use the appropriate aperture, make sure you have focused your lens at the right distance and that there is no risk for blur. Since we want the entire landscape in focus most of the time we should use a smaller aperture. This will also depend on your focal length since the depth of field is smaller on lenses with longer focal lengths. I usually never go below f/8 for my landscape photos, unless it is very dark or I’m using a super wide angle lens (like 16mm equivalent or below). The aim is to have as much of the scene in focus as possible, without having a too small aperture (since that might lead to softer photos). Somewhere around f/8 to F/16 is usually suitable for landscape photography. You also want to make sure that you focus your lens somewhere a third into the frame, which usually is the foreground. If you focus too far back the foreground will be out of focus, but if you focus on the foreground the background will most likely be in focus if you are using a fairly small aperture.dog-190056_1280It is also important that you eliminate any risks of camera shake, by using either a shorter shutter speed (the shutter speed should be no less than the focal length of your lens, so if you are using a 24mm lens the shutter speed should at least be 1/24th of a second) or a tripod. If you are shooting hand-held it is recommended that you use vibration reduction if your lens (or camera) has it (keep in mind that it is called different names depending on the brand). Additionally, It is very important that you have a correct exposure, no matter if you are shooting JPEG or RAW (recommended). Something that really can ruin landscape photos is overexposure, usually meaning that there is no possibility to recover blown highlights in the sky. It is also horrible to have such underexposure that the colors are destroyed by noise when you try to recover the shadows. You should aim for an exposure were highlights are bright (but not blown) and shadows bright enough to increase them a little bit in post-process (if needed). You should rather have a bit darker shadows than to bright highlights. Another option is to use the technique HDR (High Dynamic Range) where you take several photos with different exposures and combine in post-processing, leading to an image with both no blown highlights and bright shadows.waterfall-192984_1280
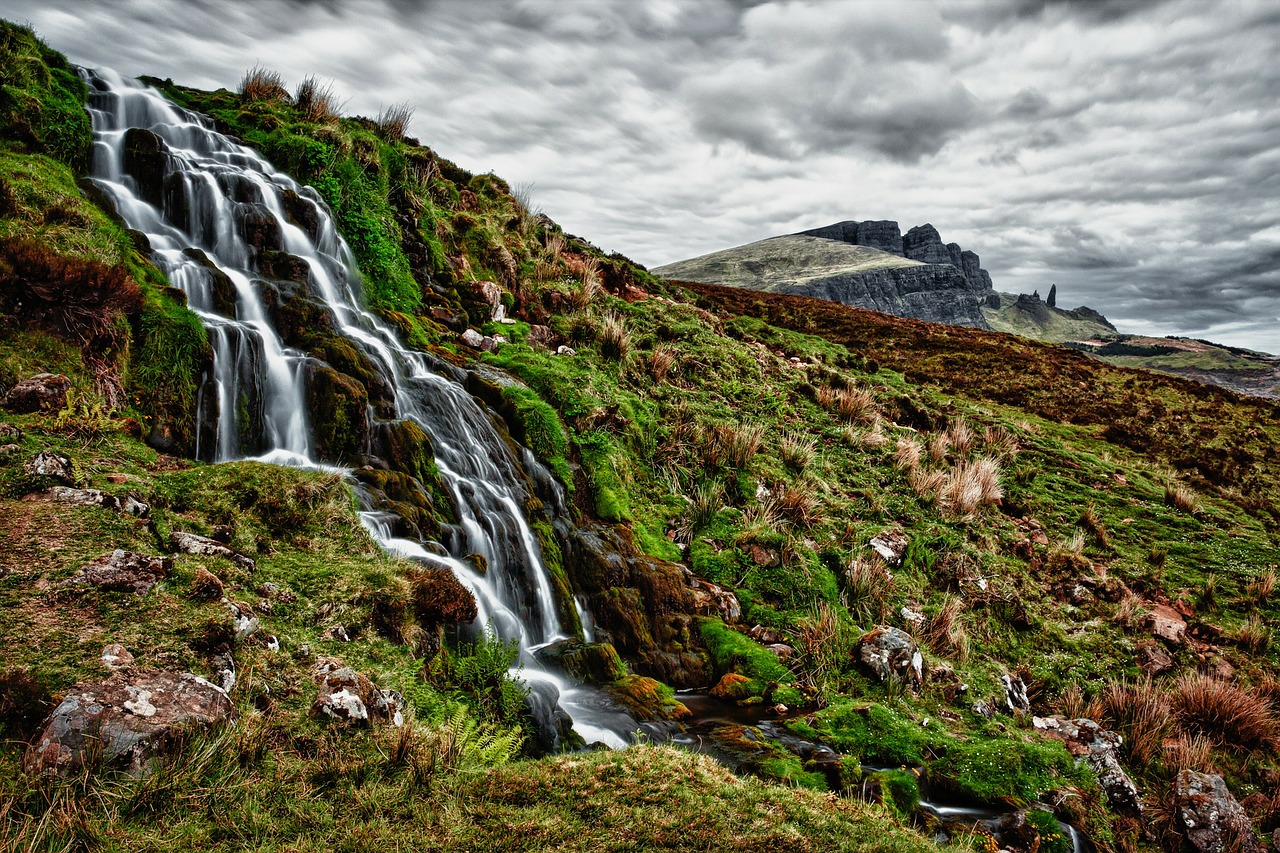
Another very important technical aspect of landscape photography is composition. This is such an important part that is impossible to cover thoroughly but there are some basic tips for landscape composition that you need to know.One important part of composing landscape photos is the rule of thirds. According to this rule, the horizon should be placed either at the top or bottom third, but absolutely not in the middle. This is to create a balanced photo, but of course, there are some exceptions, for example when there is reflection, then it can be nice to place the middle of the reflection in the middle of the frame.


Untitled-1

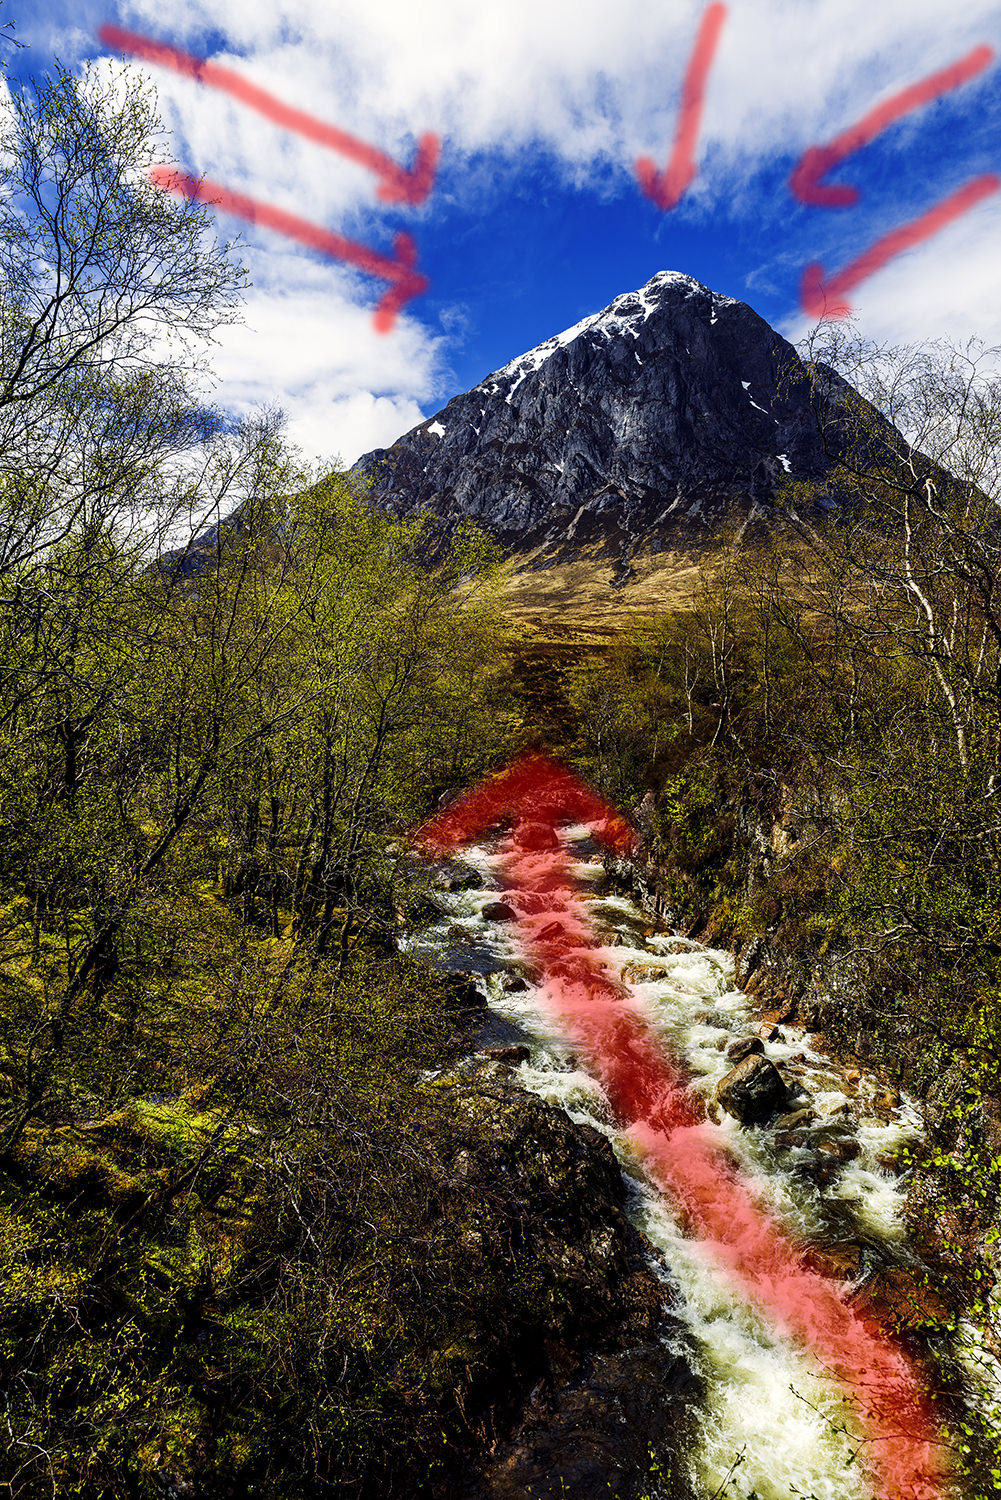
Another tip is to take advantage of leading lines. You can use lines in photos to lead the viewer to where you want them to look. Lines should be leading into the frame and not out from it since you want the viewer to look at the photo and not be distracted. For example, you can use a stream leading towards a mountain or a path leading the viewer from the foreground to the main subject as leading lines.
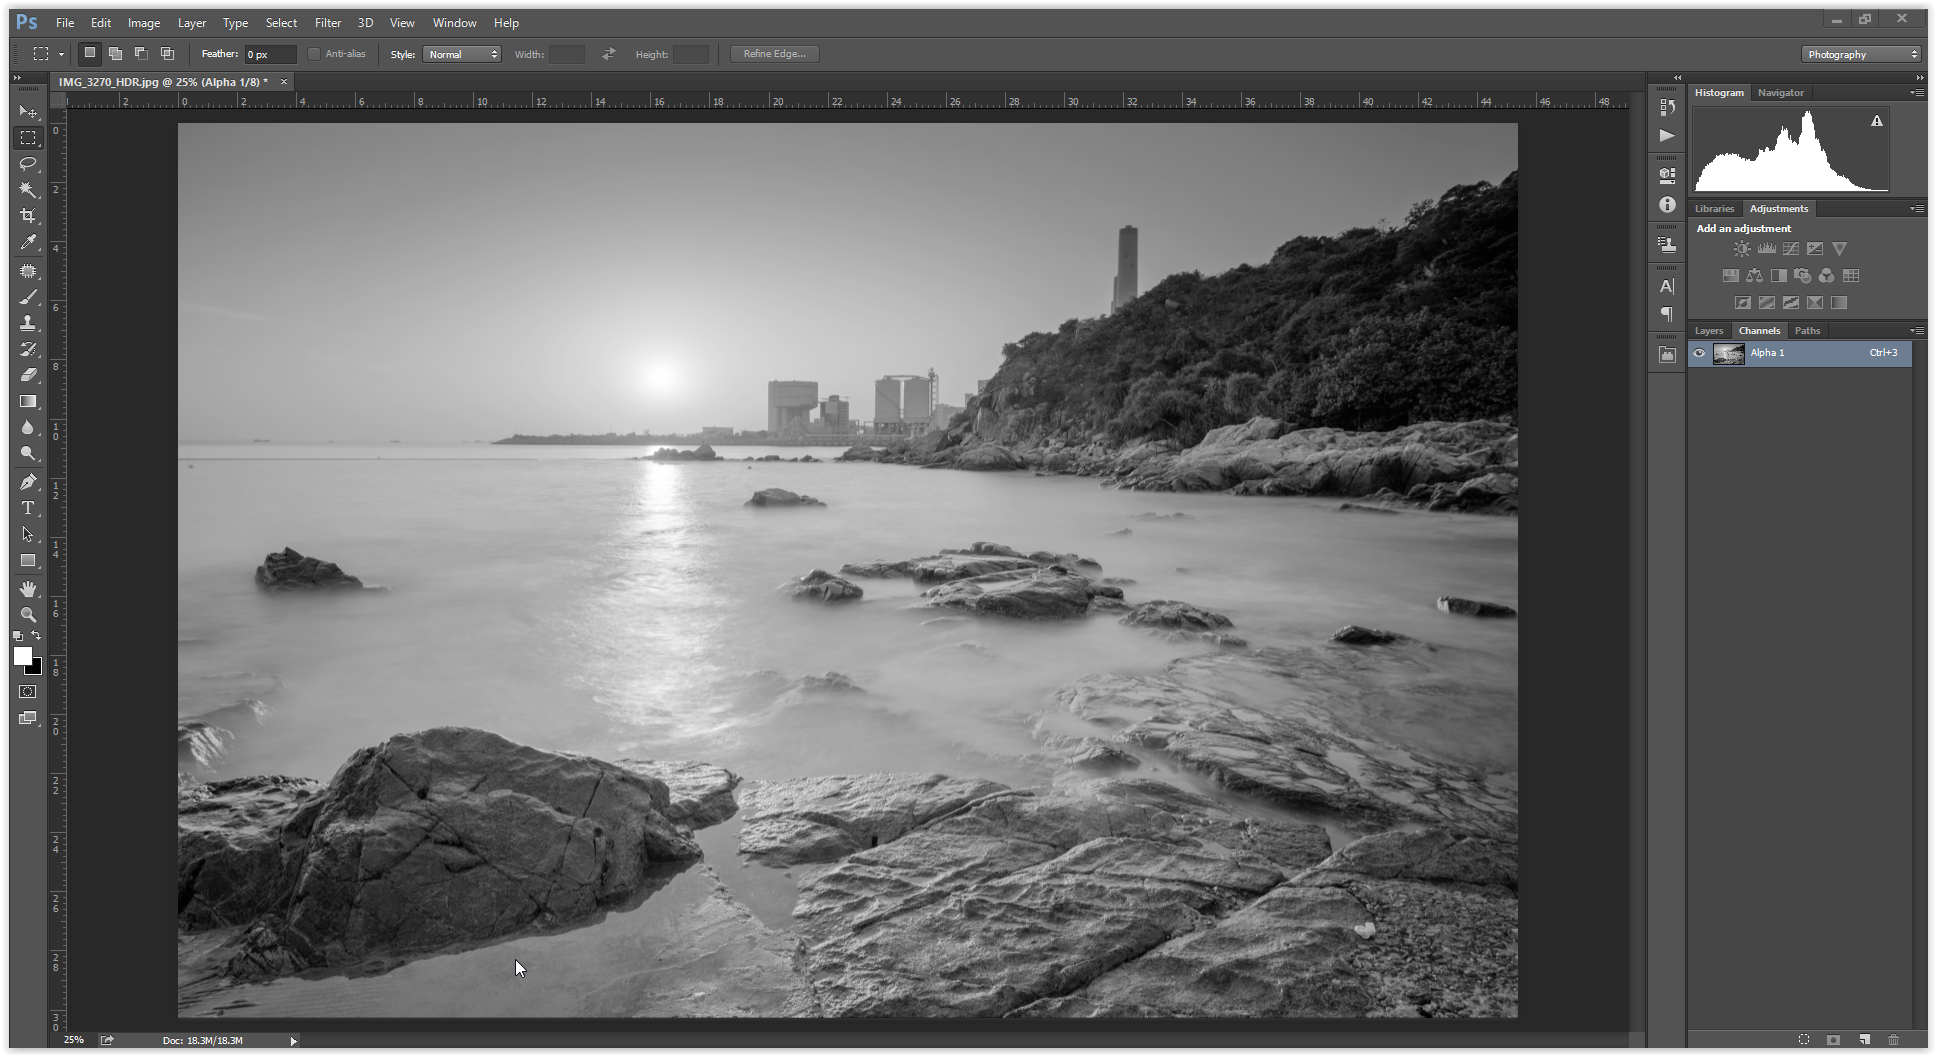
_D8A6277-PS-1

Post-Processing

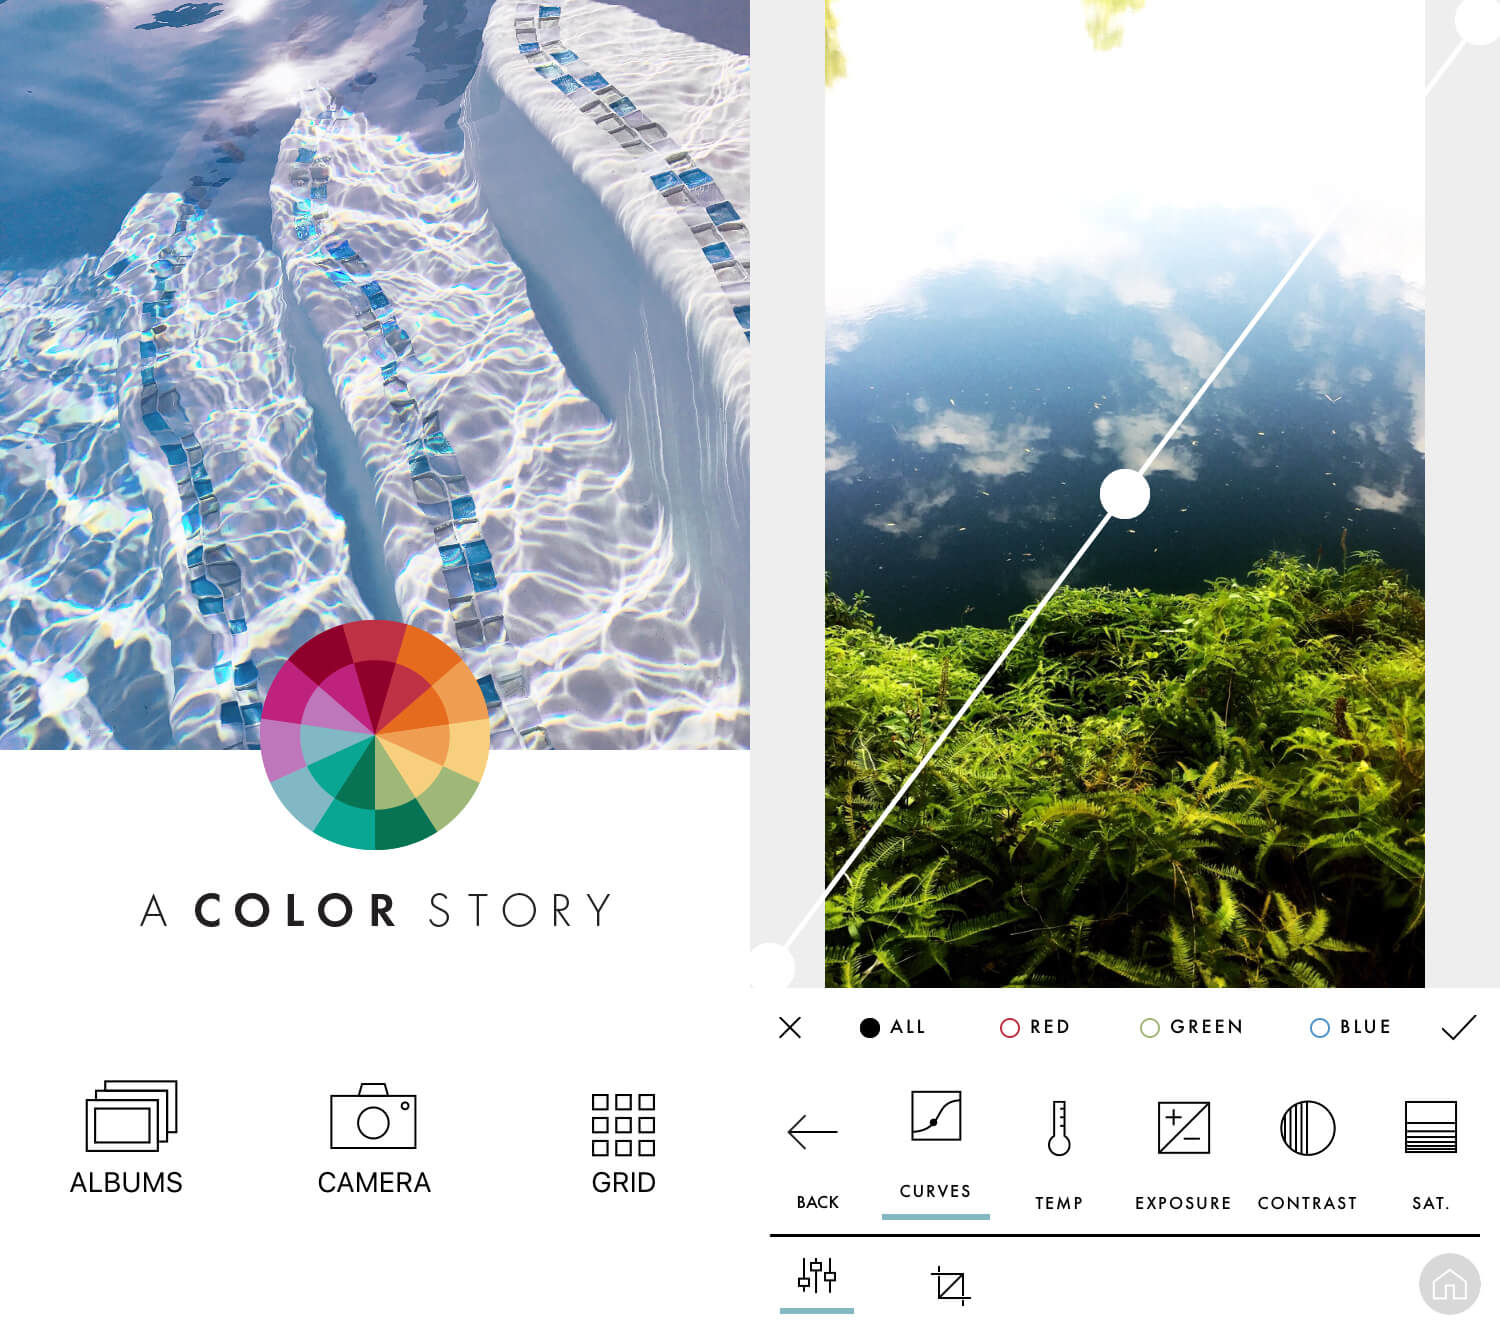
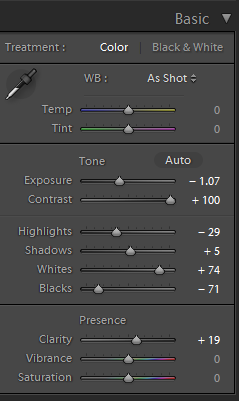
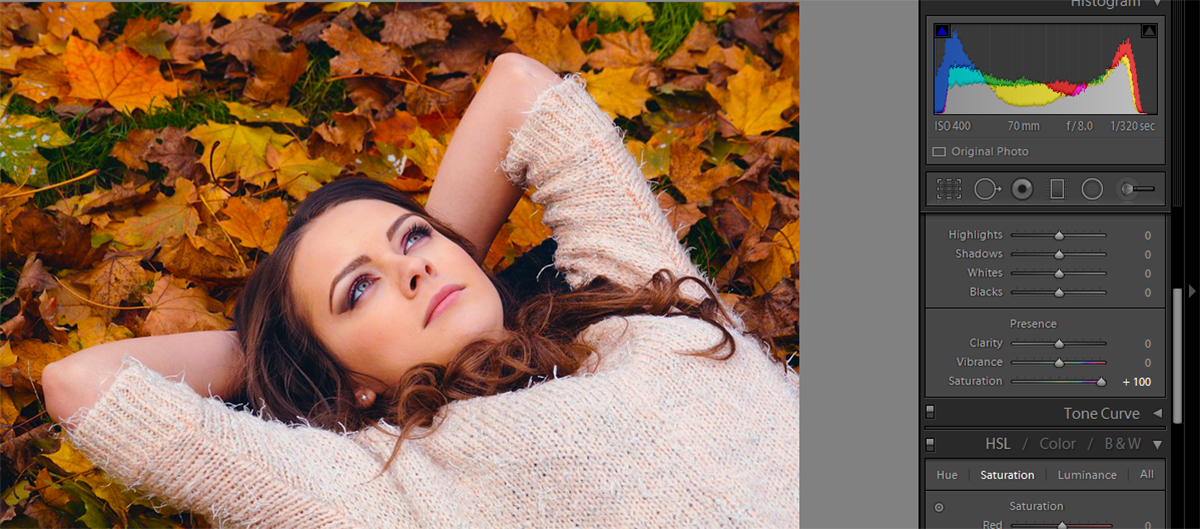
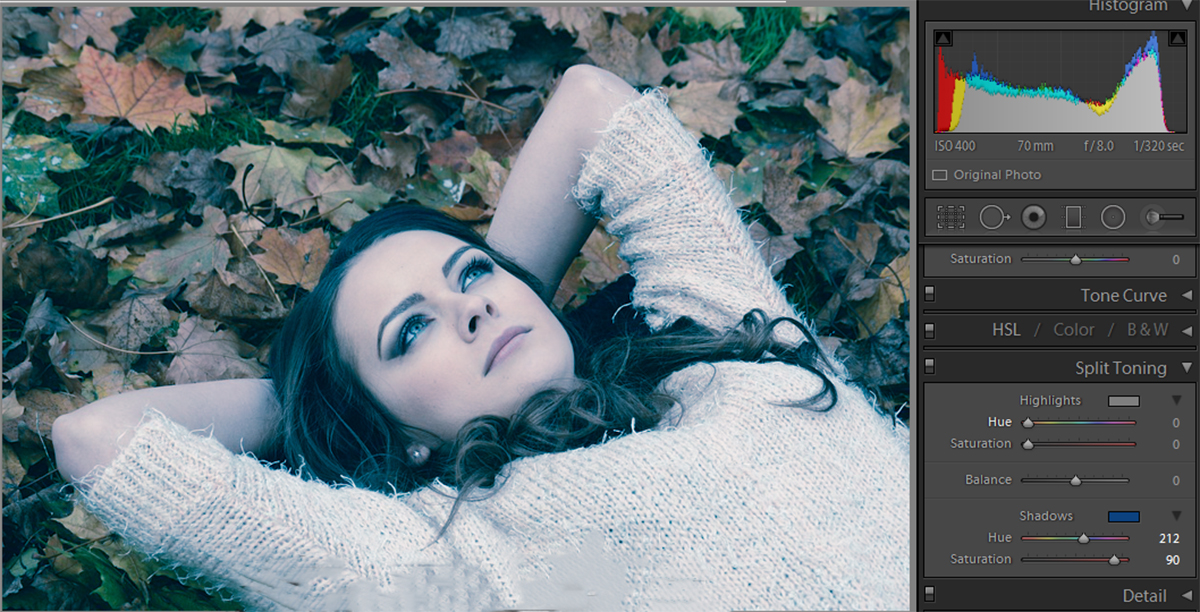
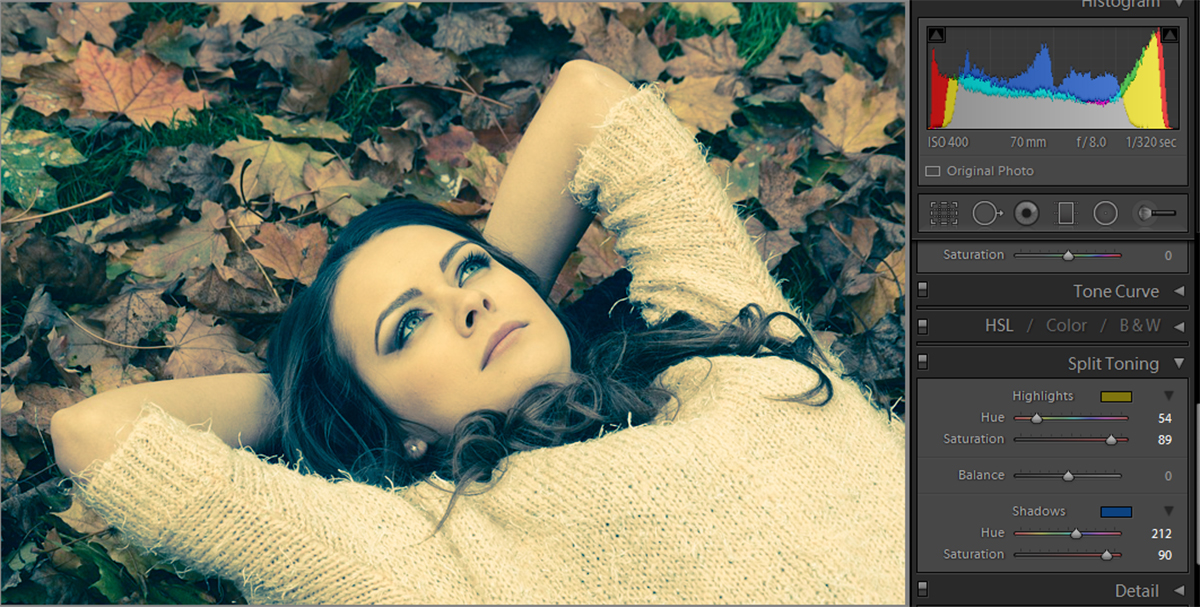
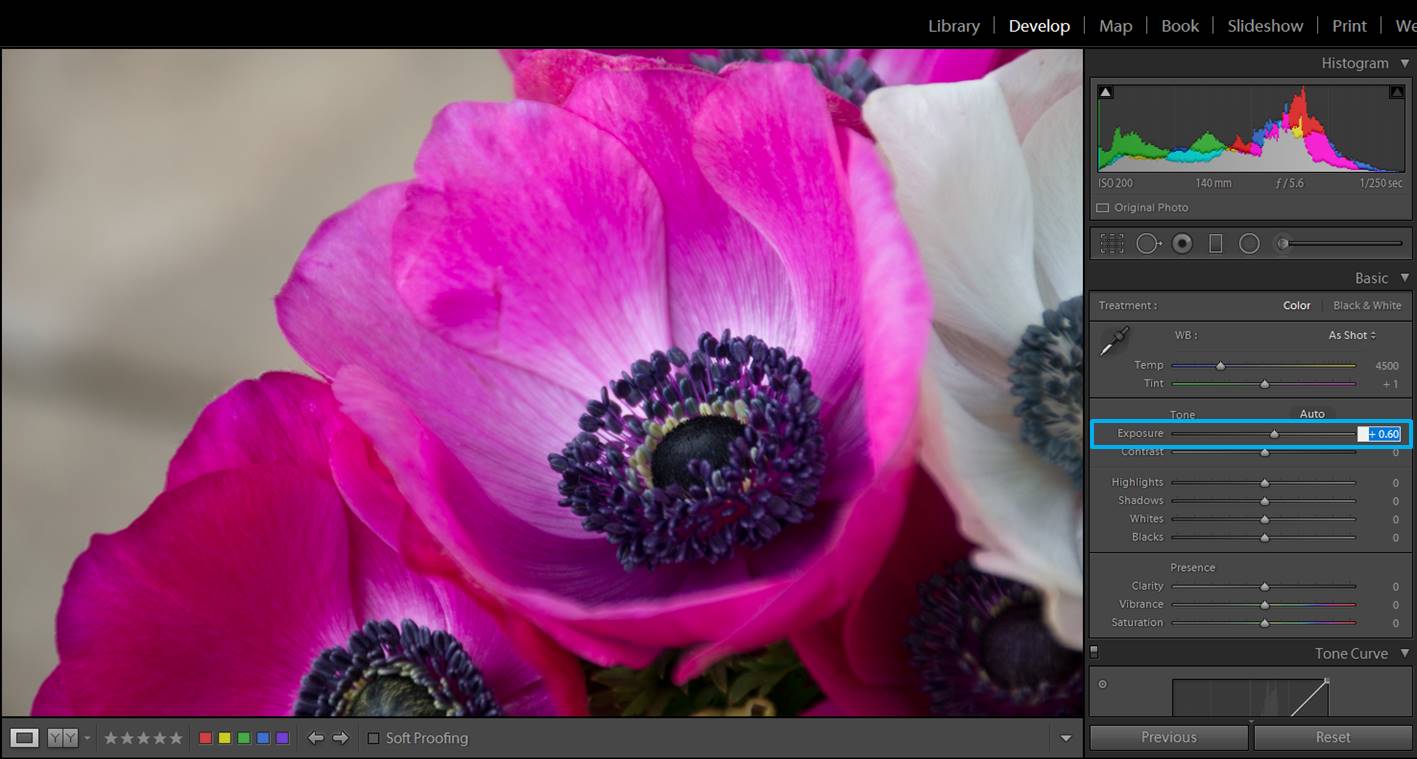
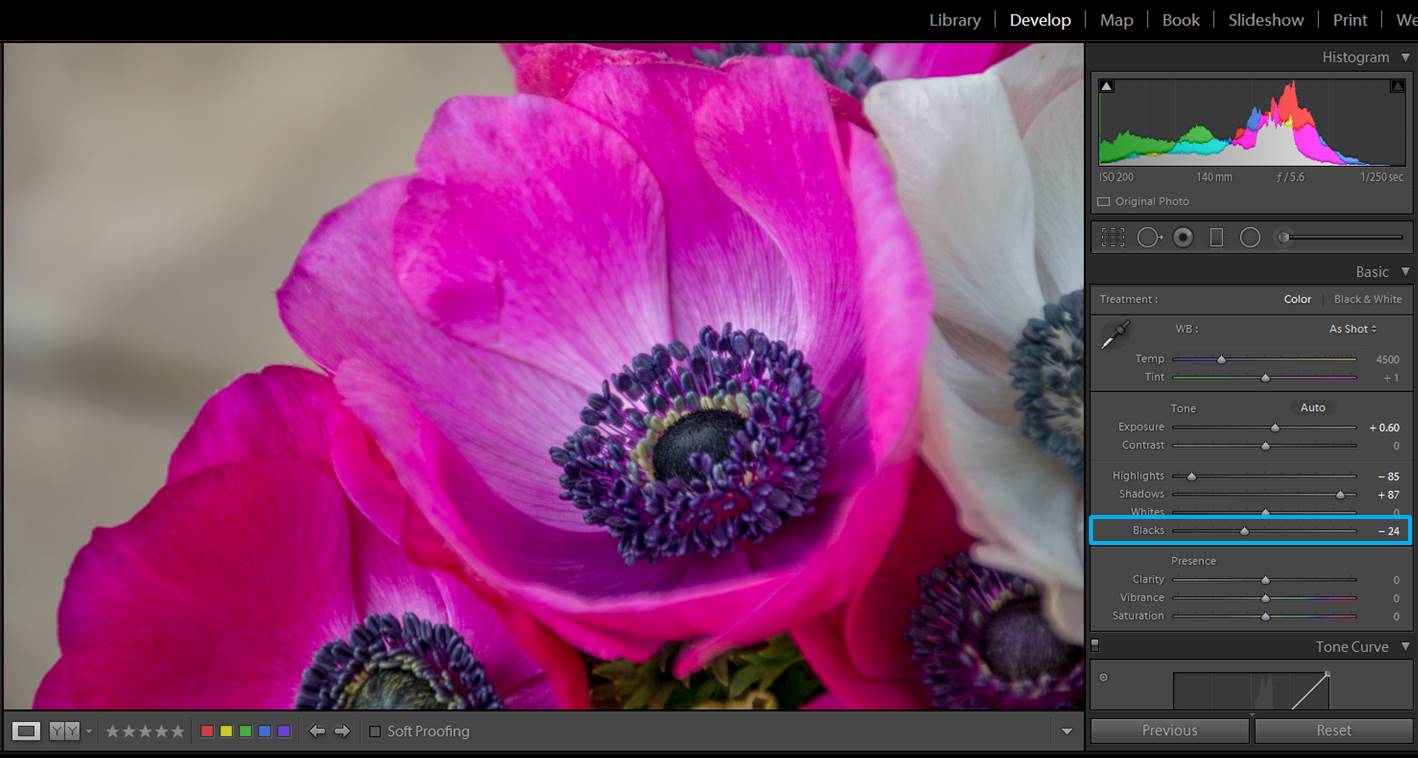
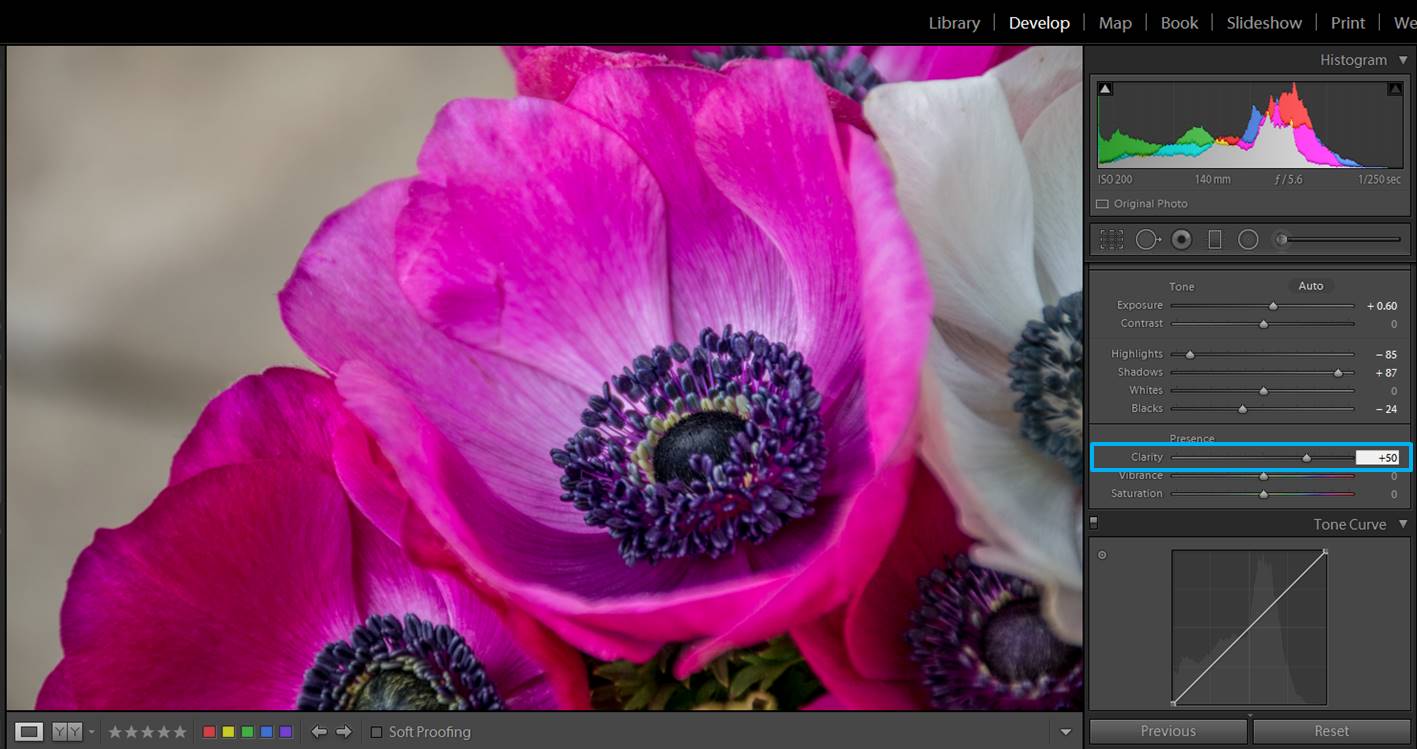
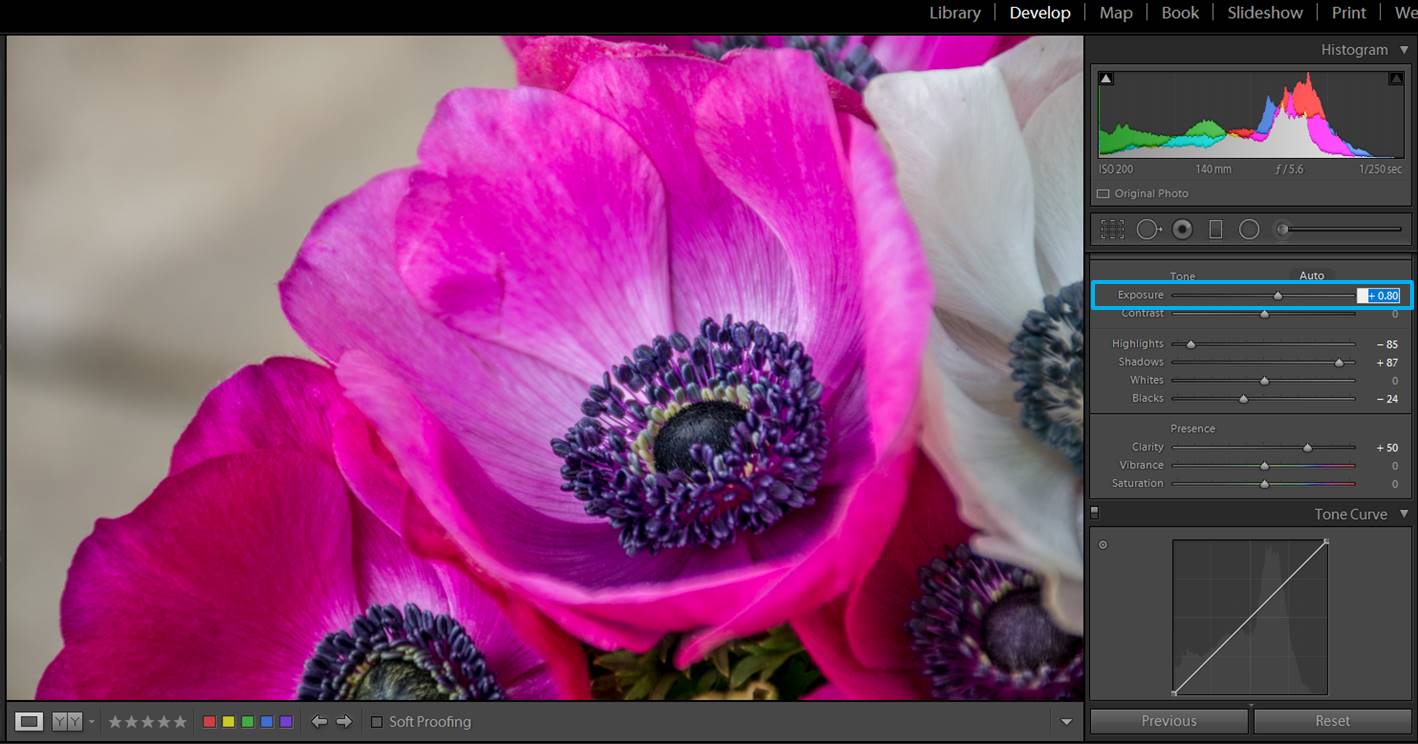
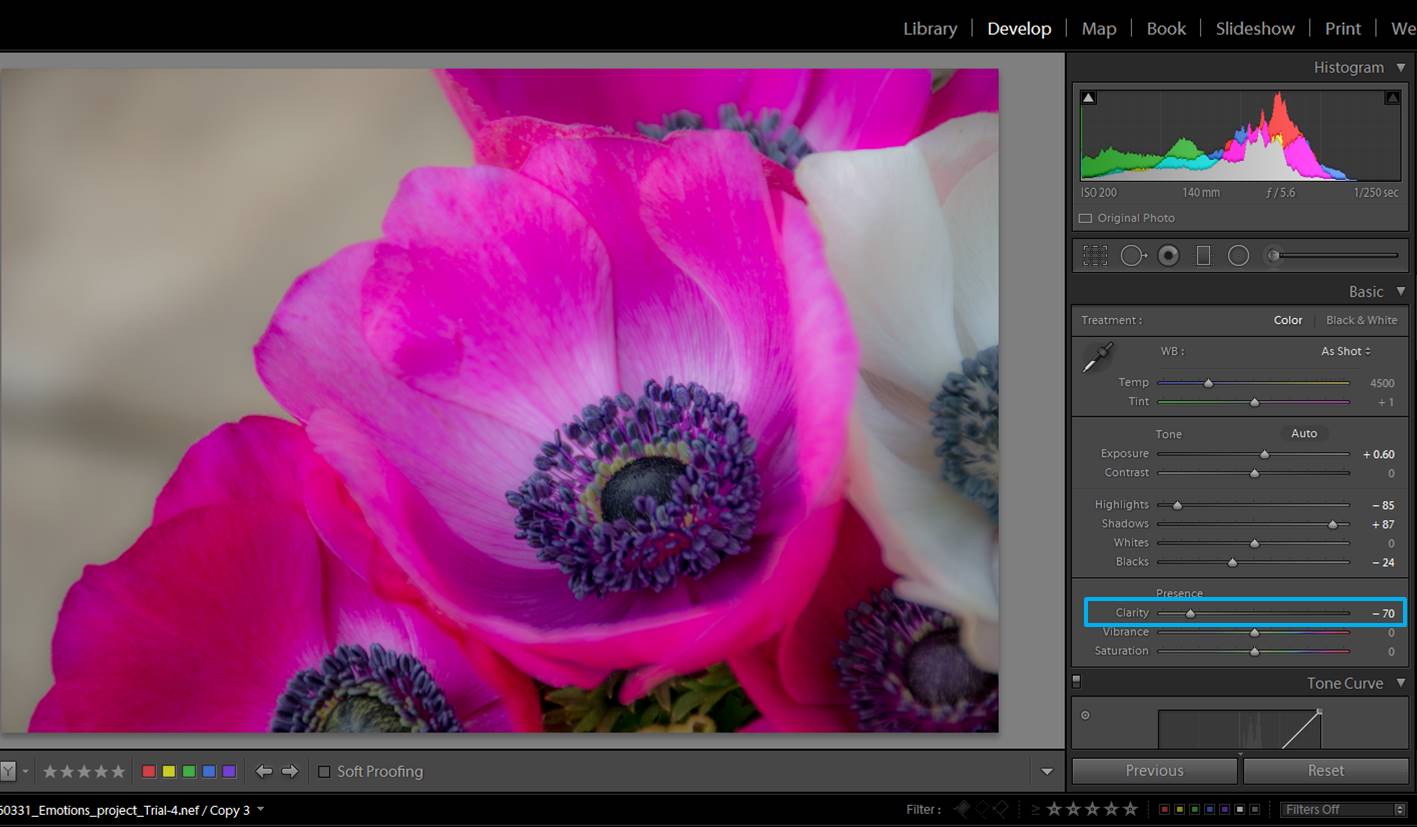
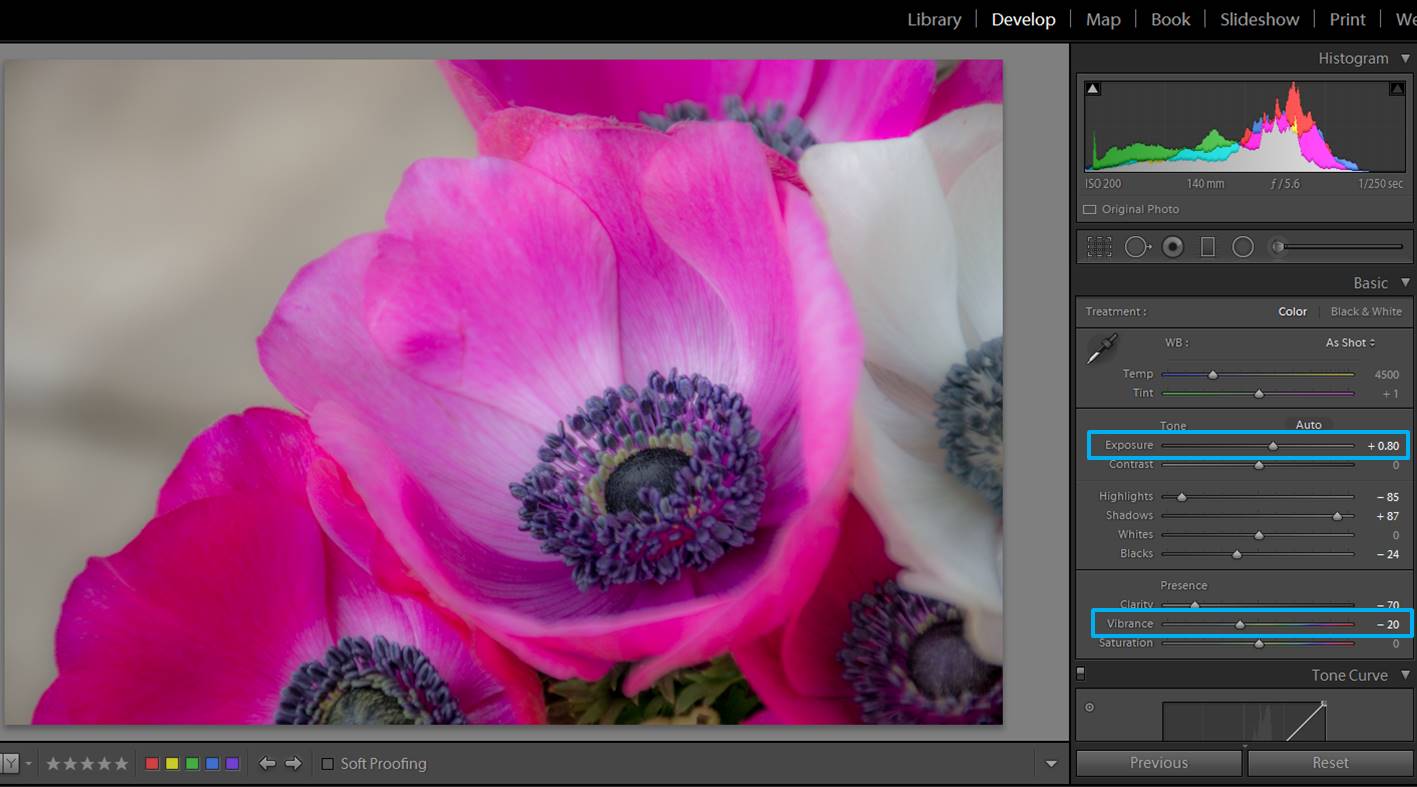
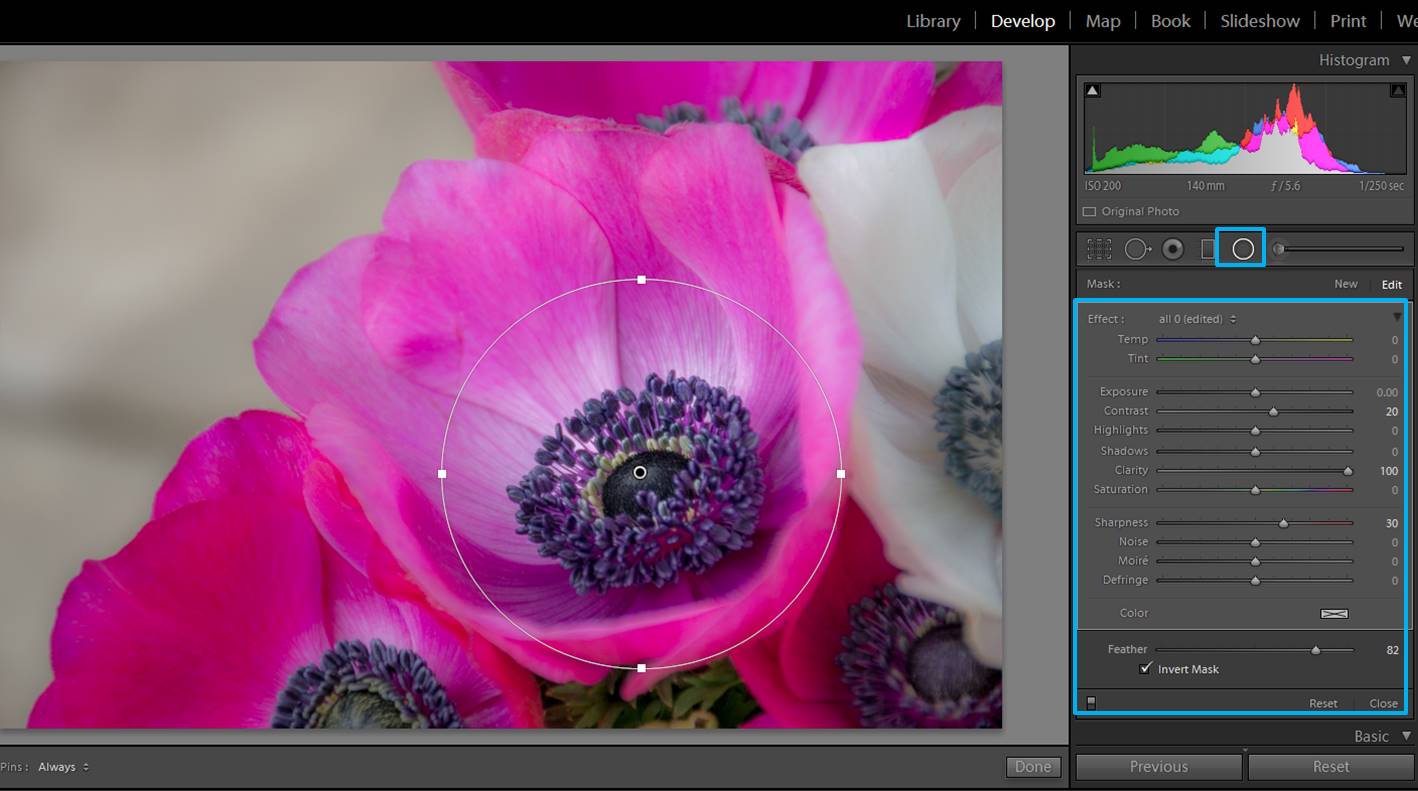
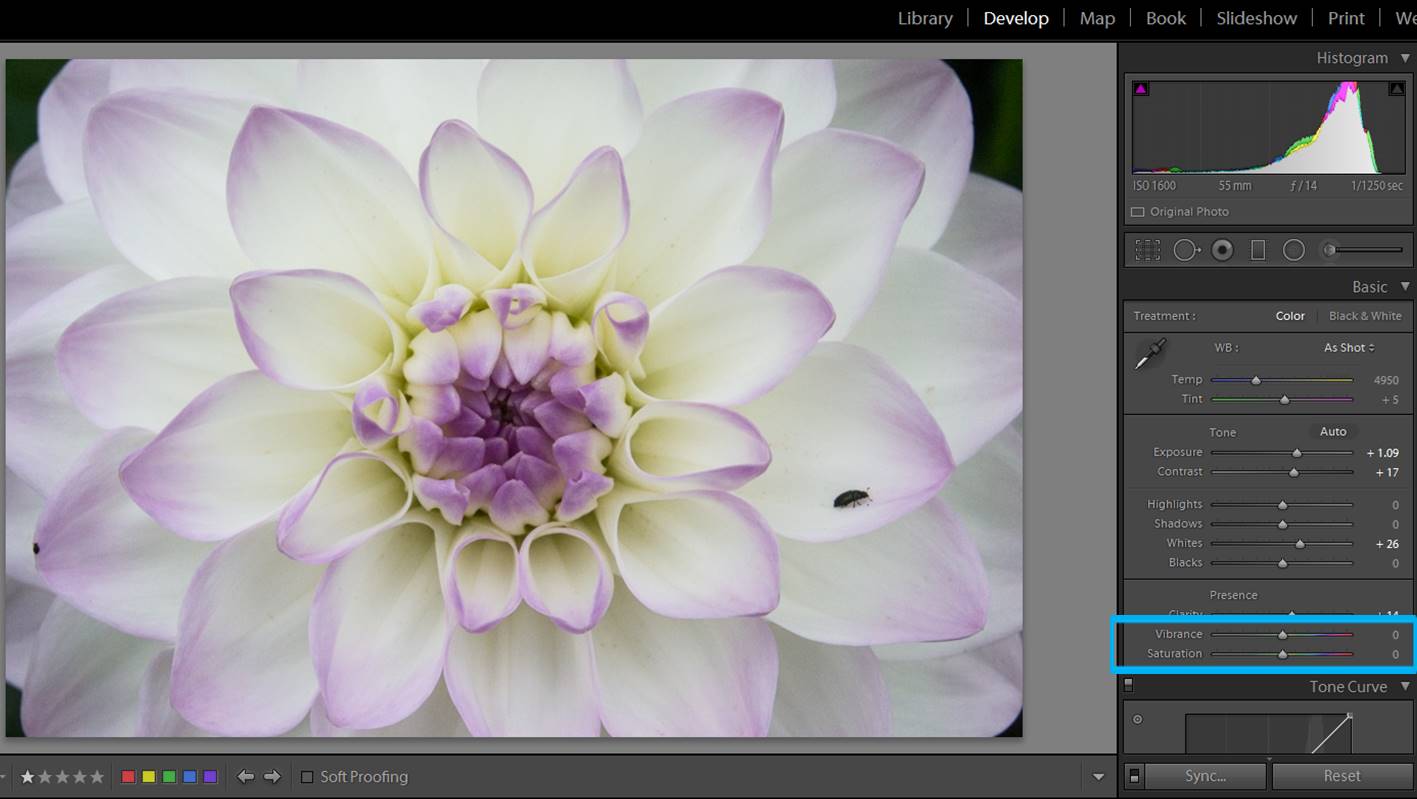
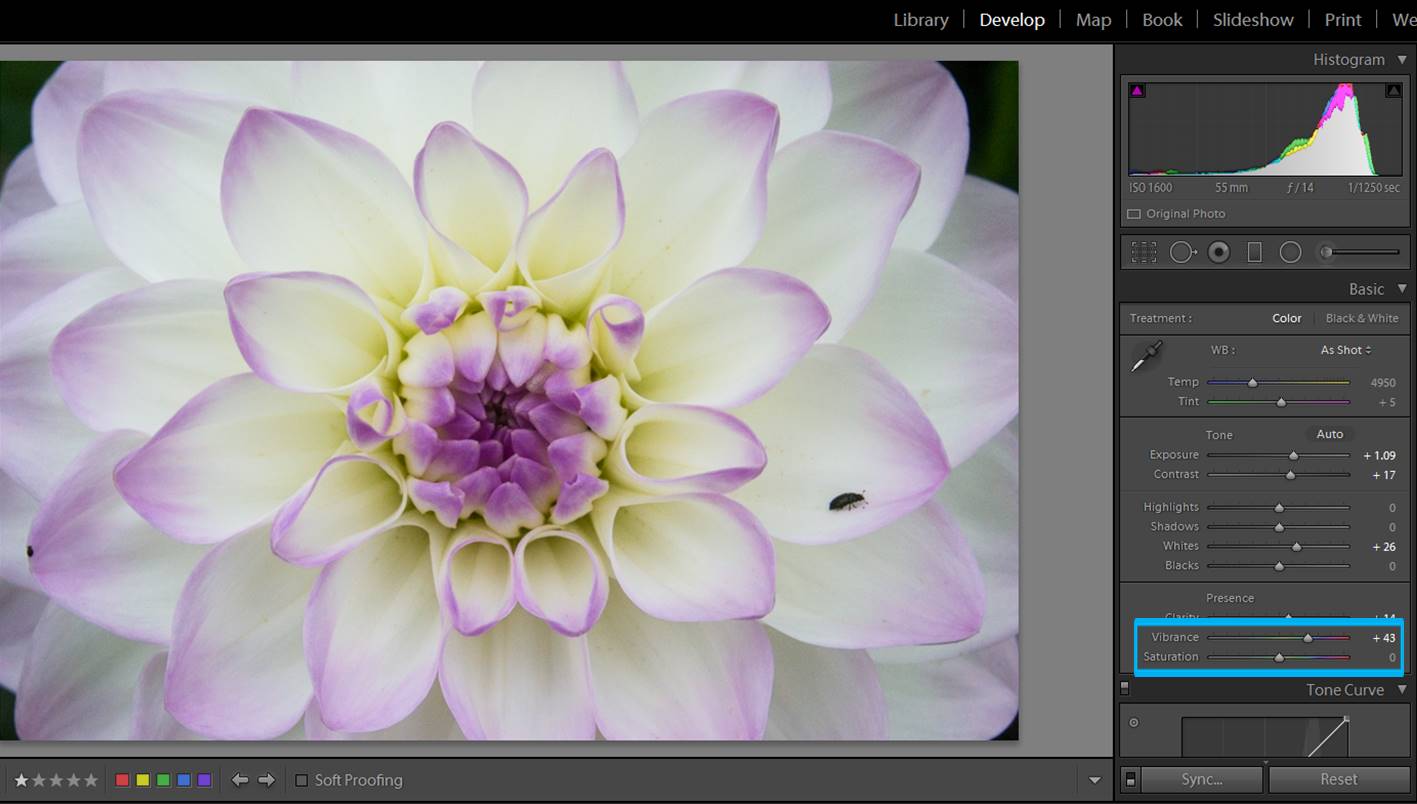
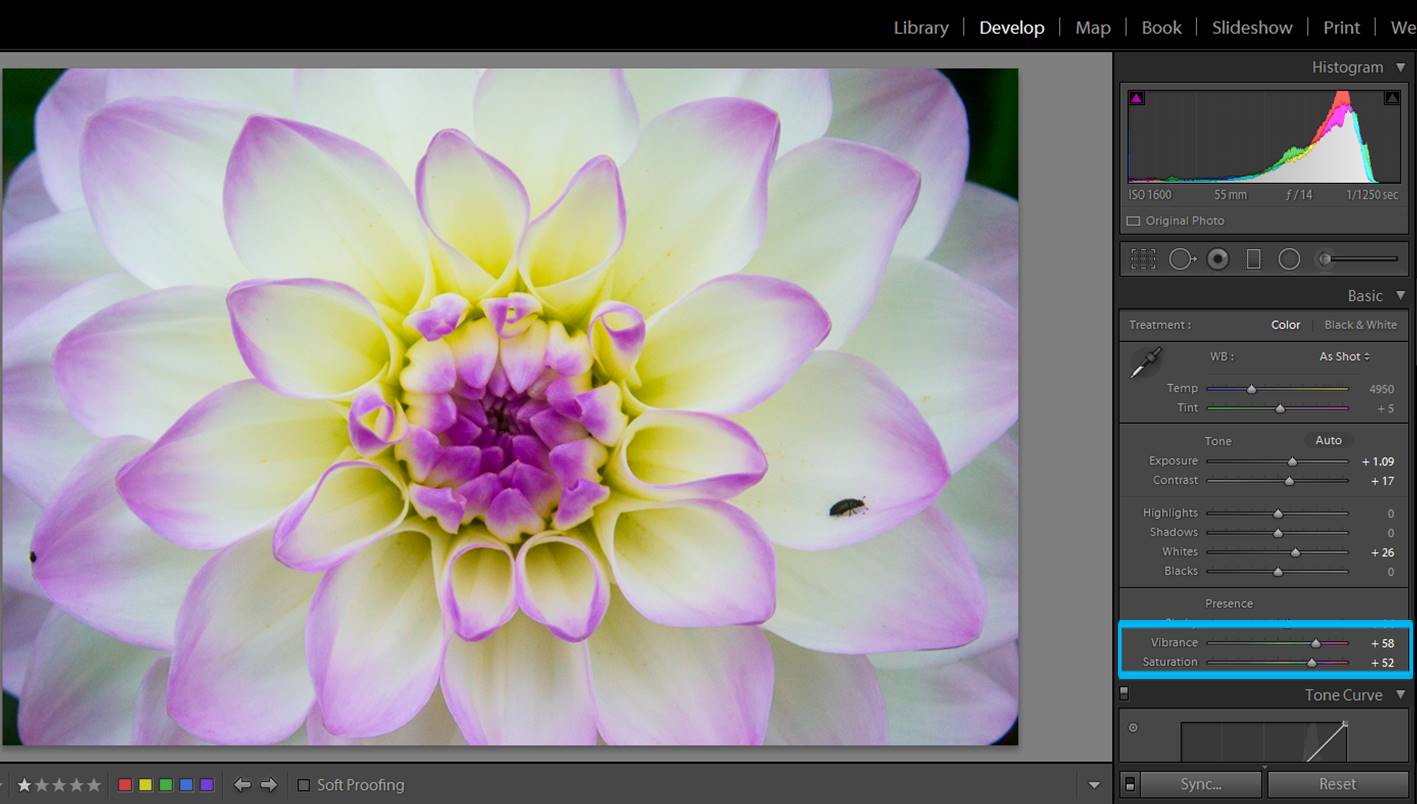
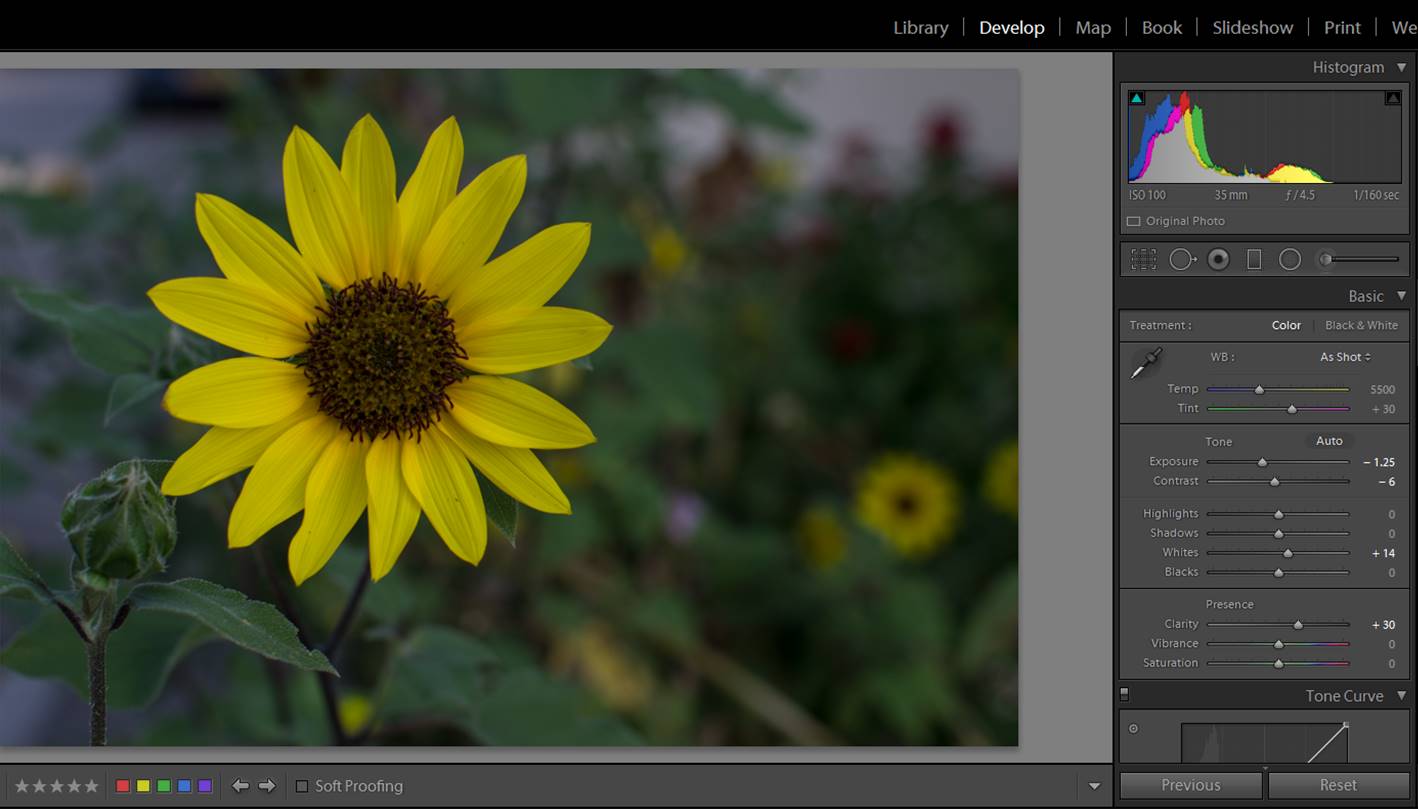
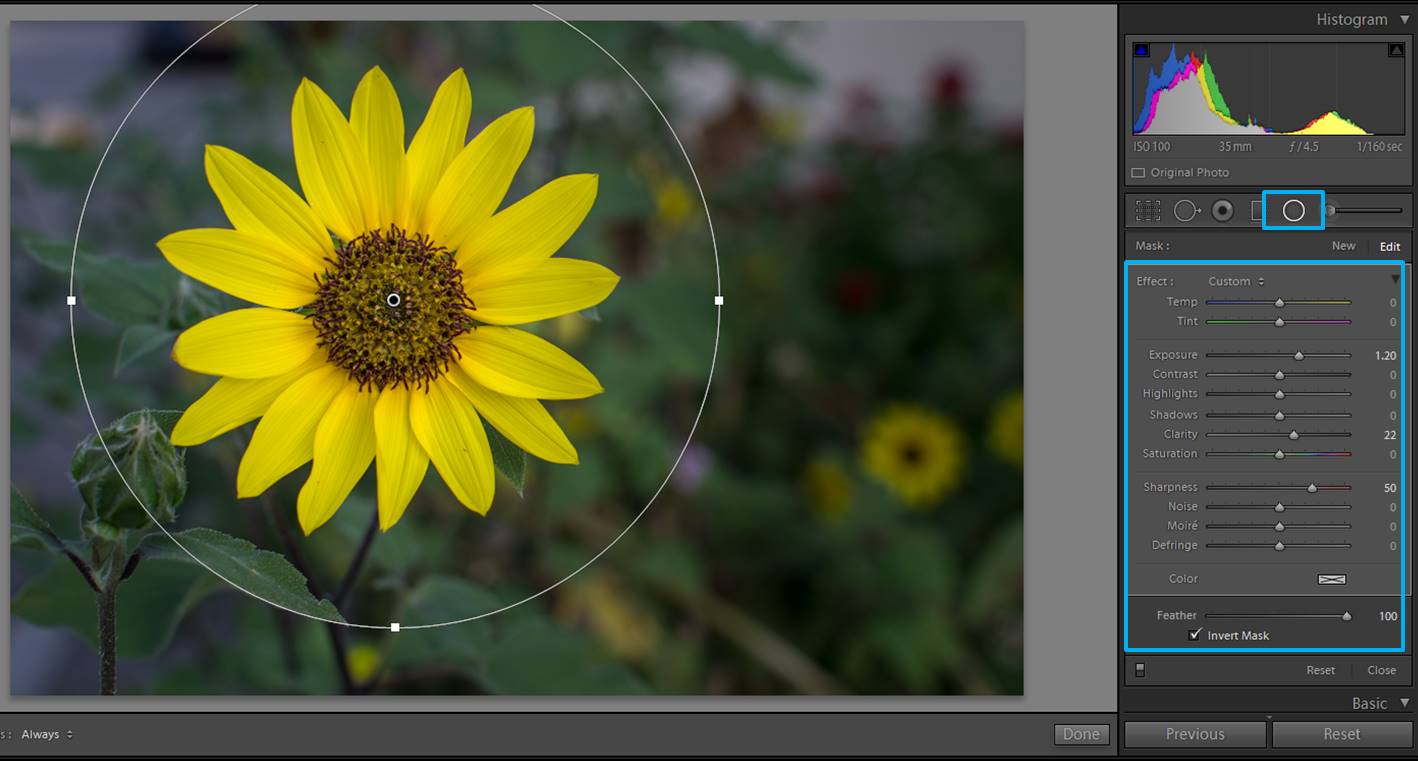
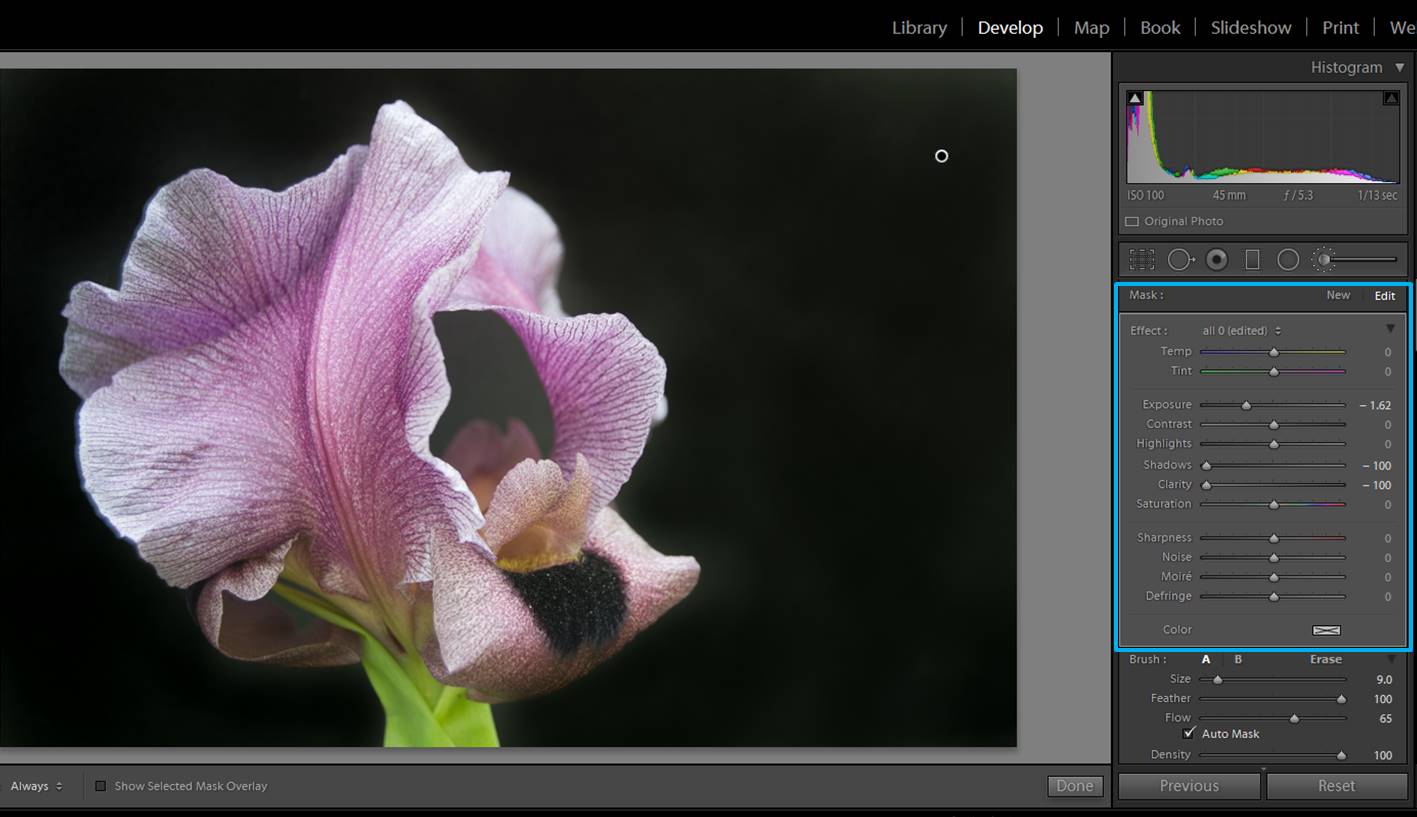
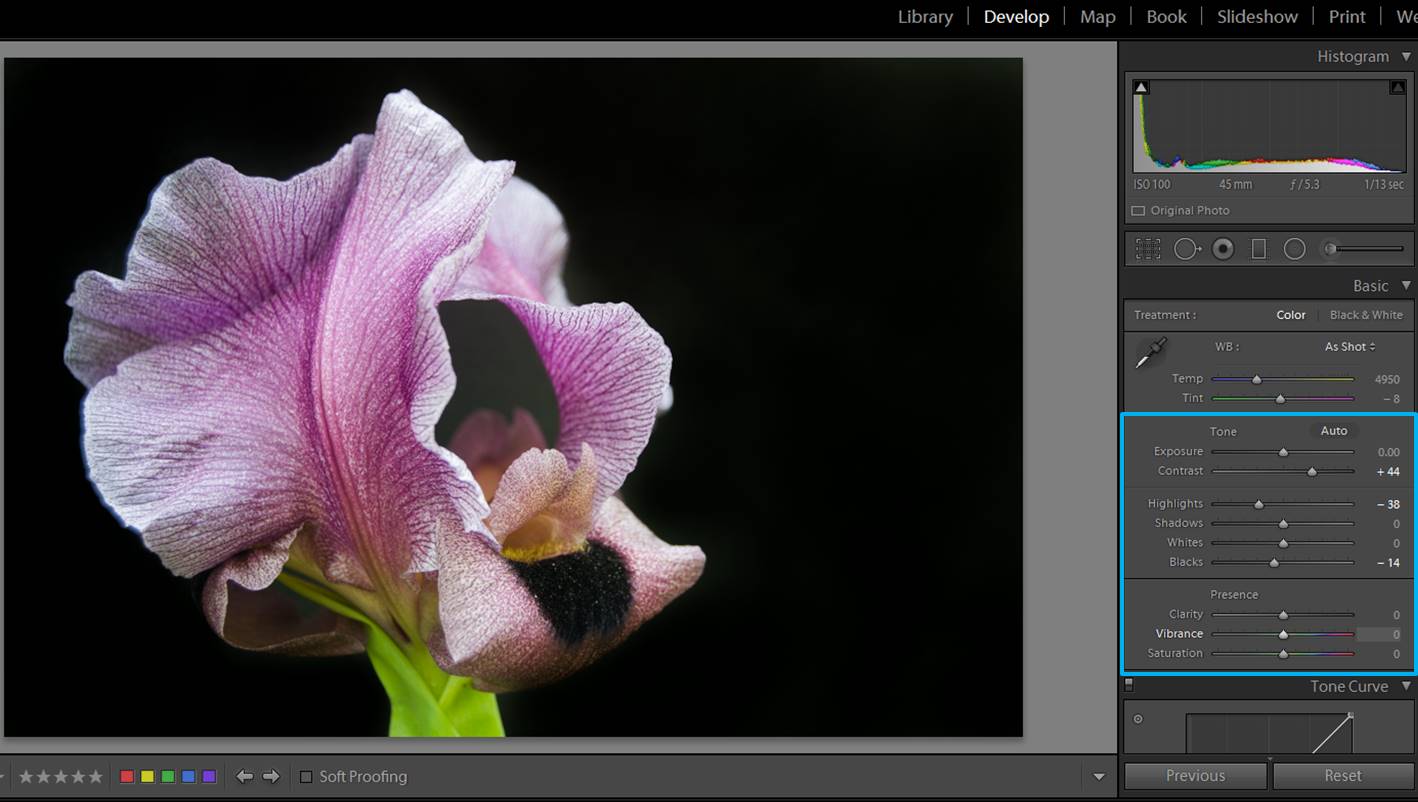
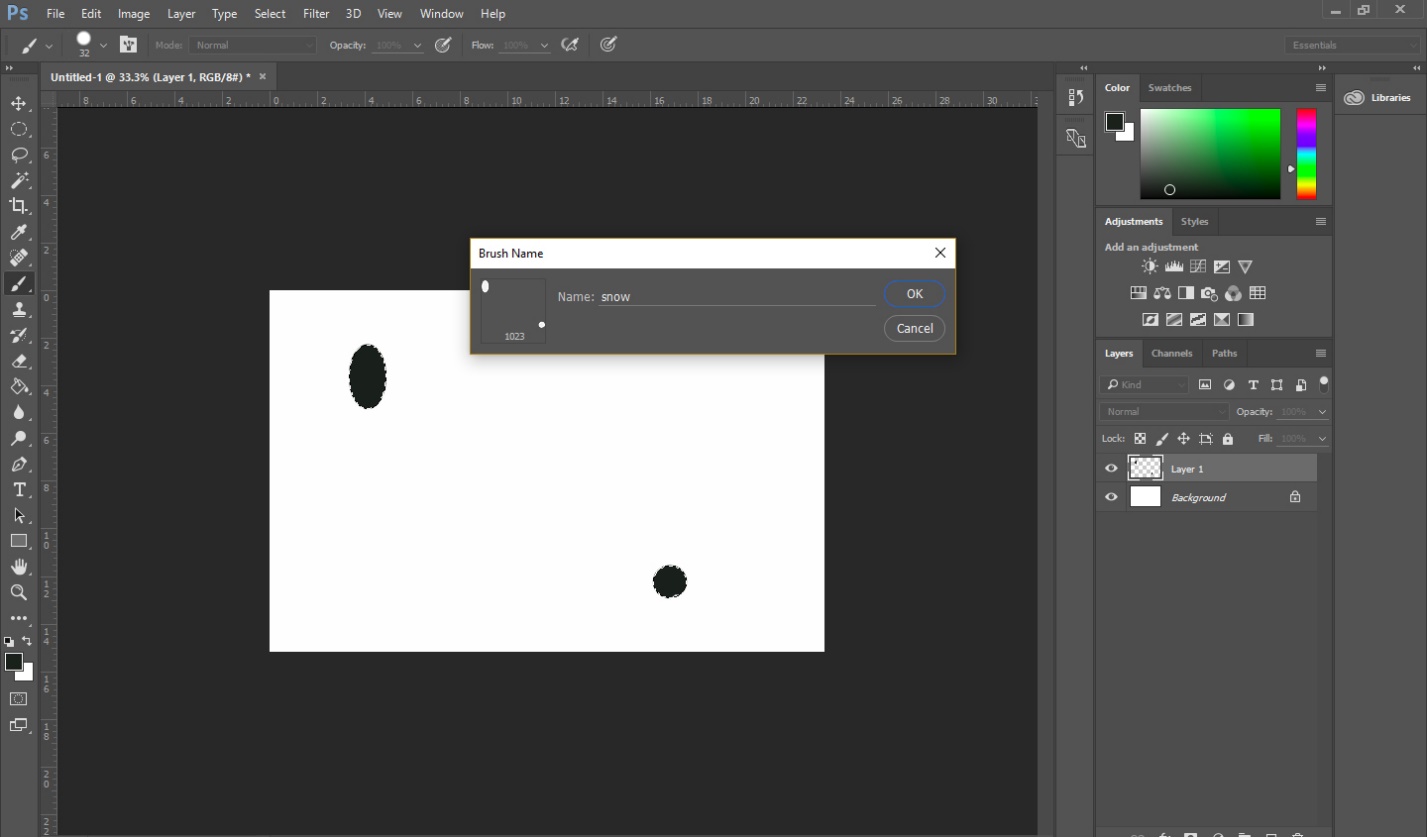
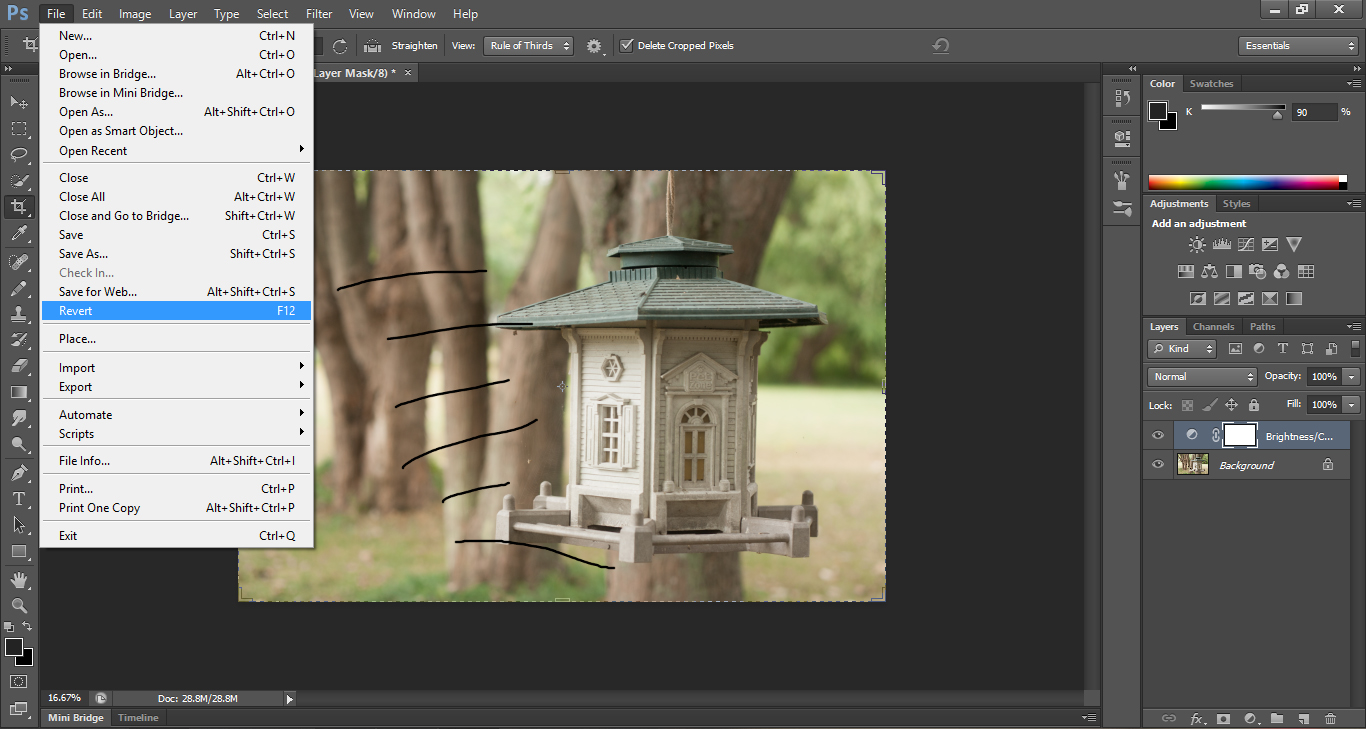
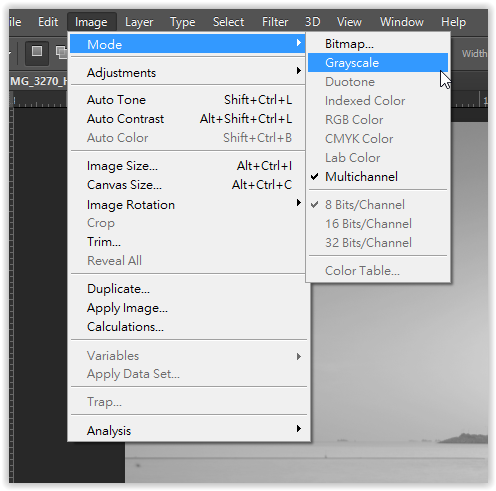
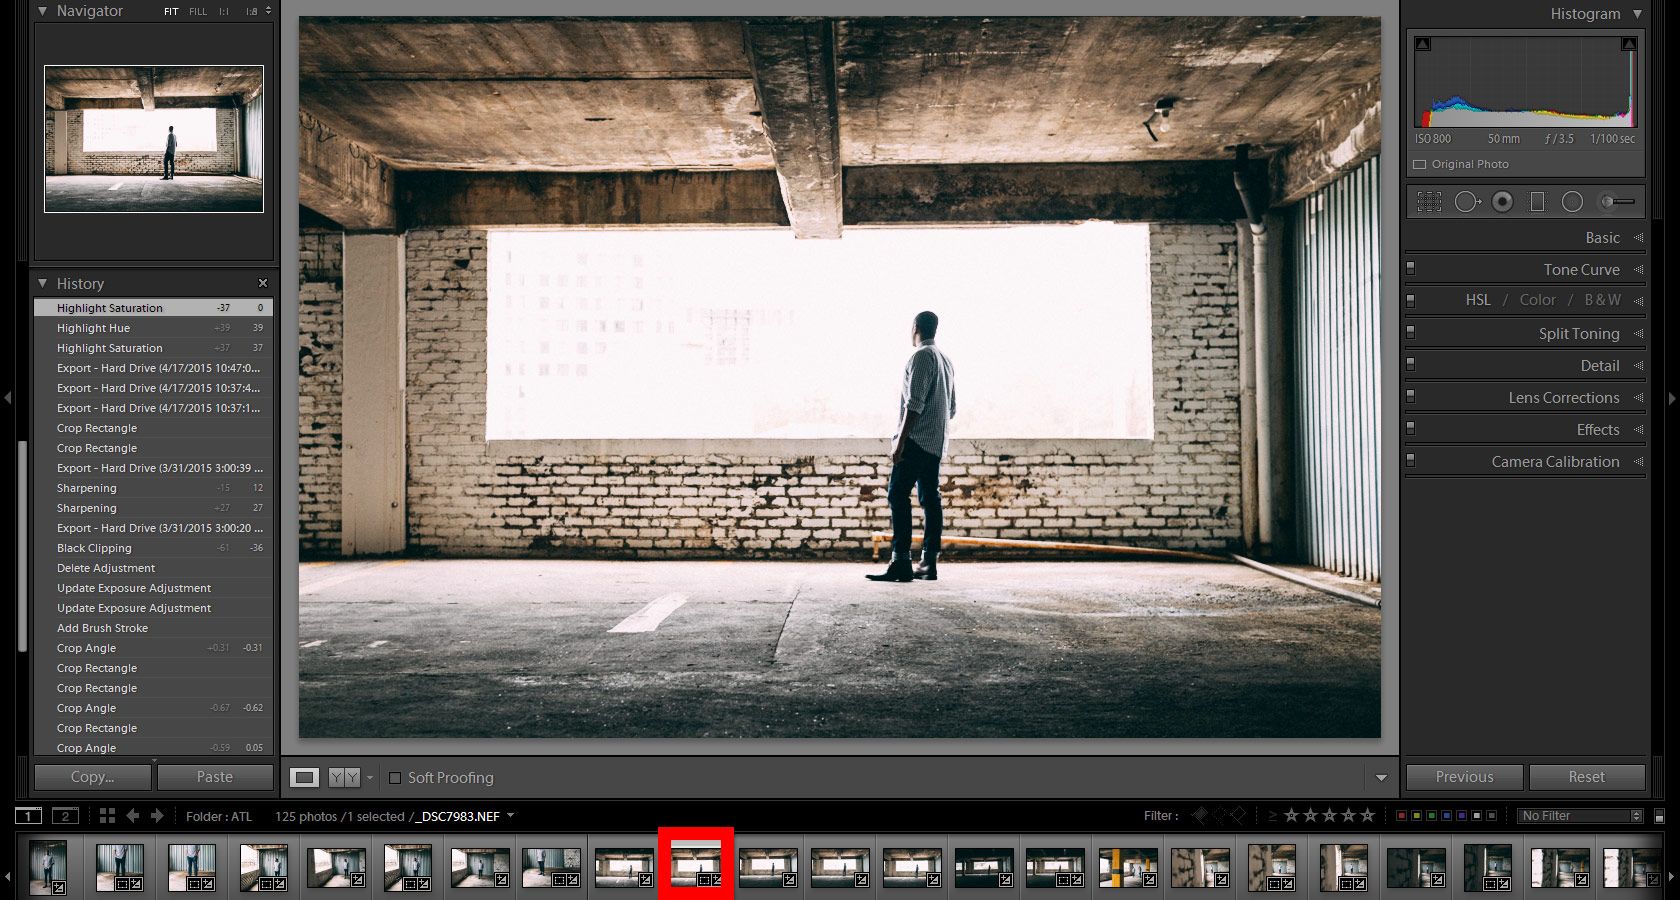
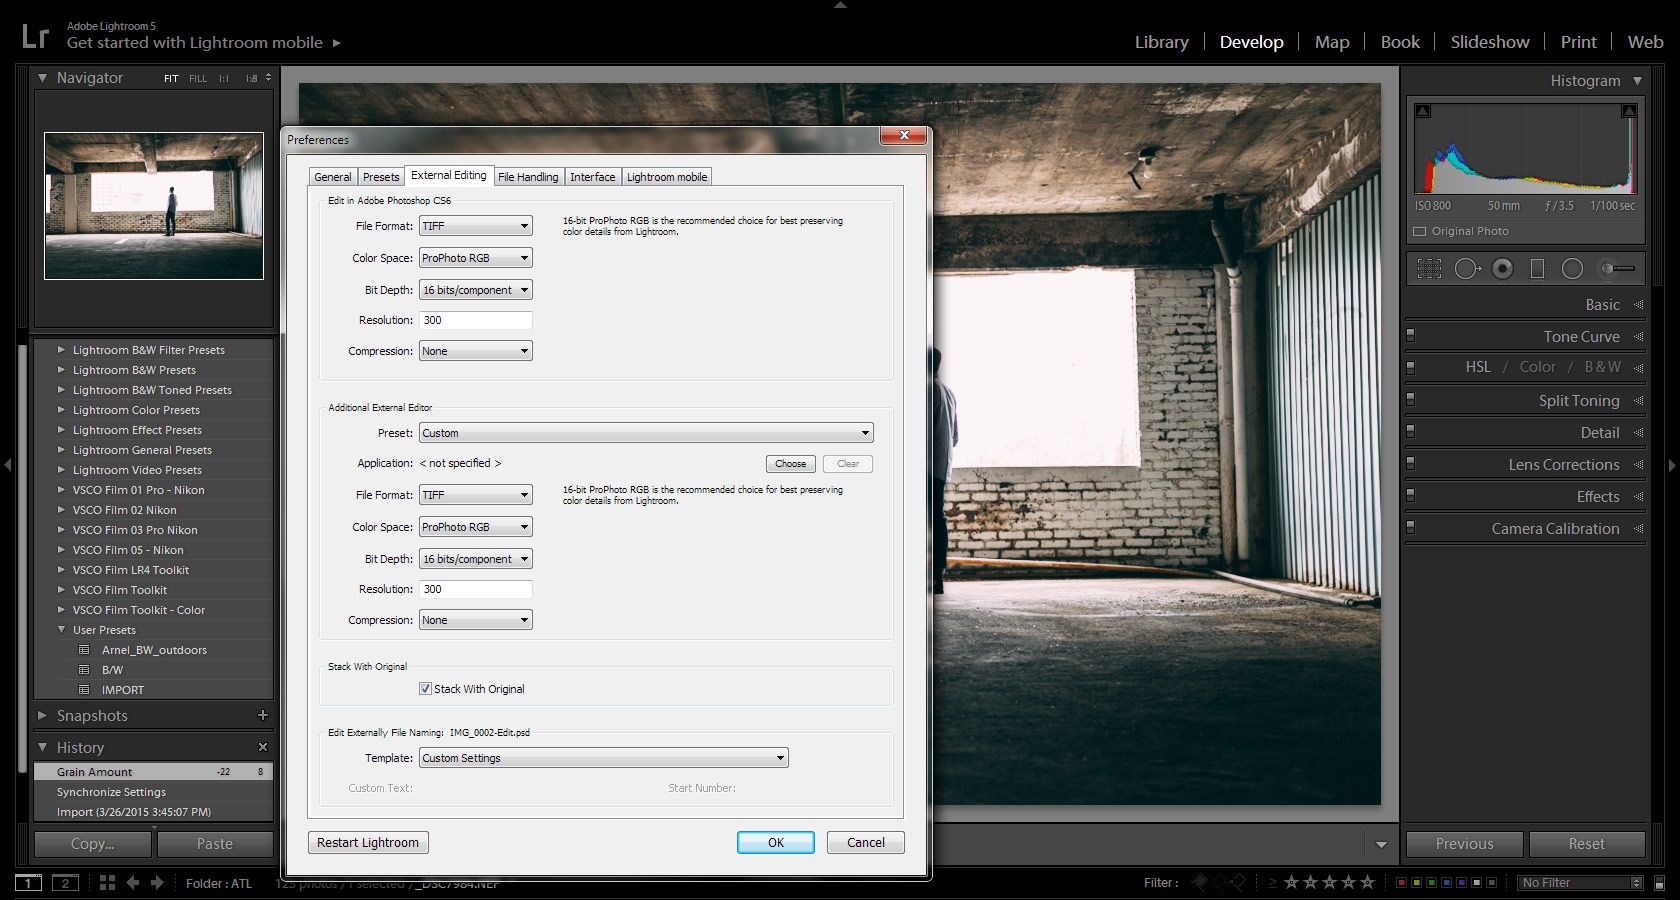
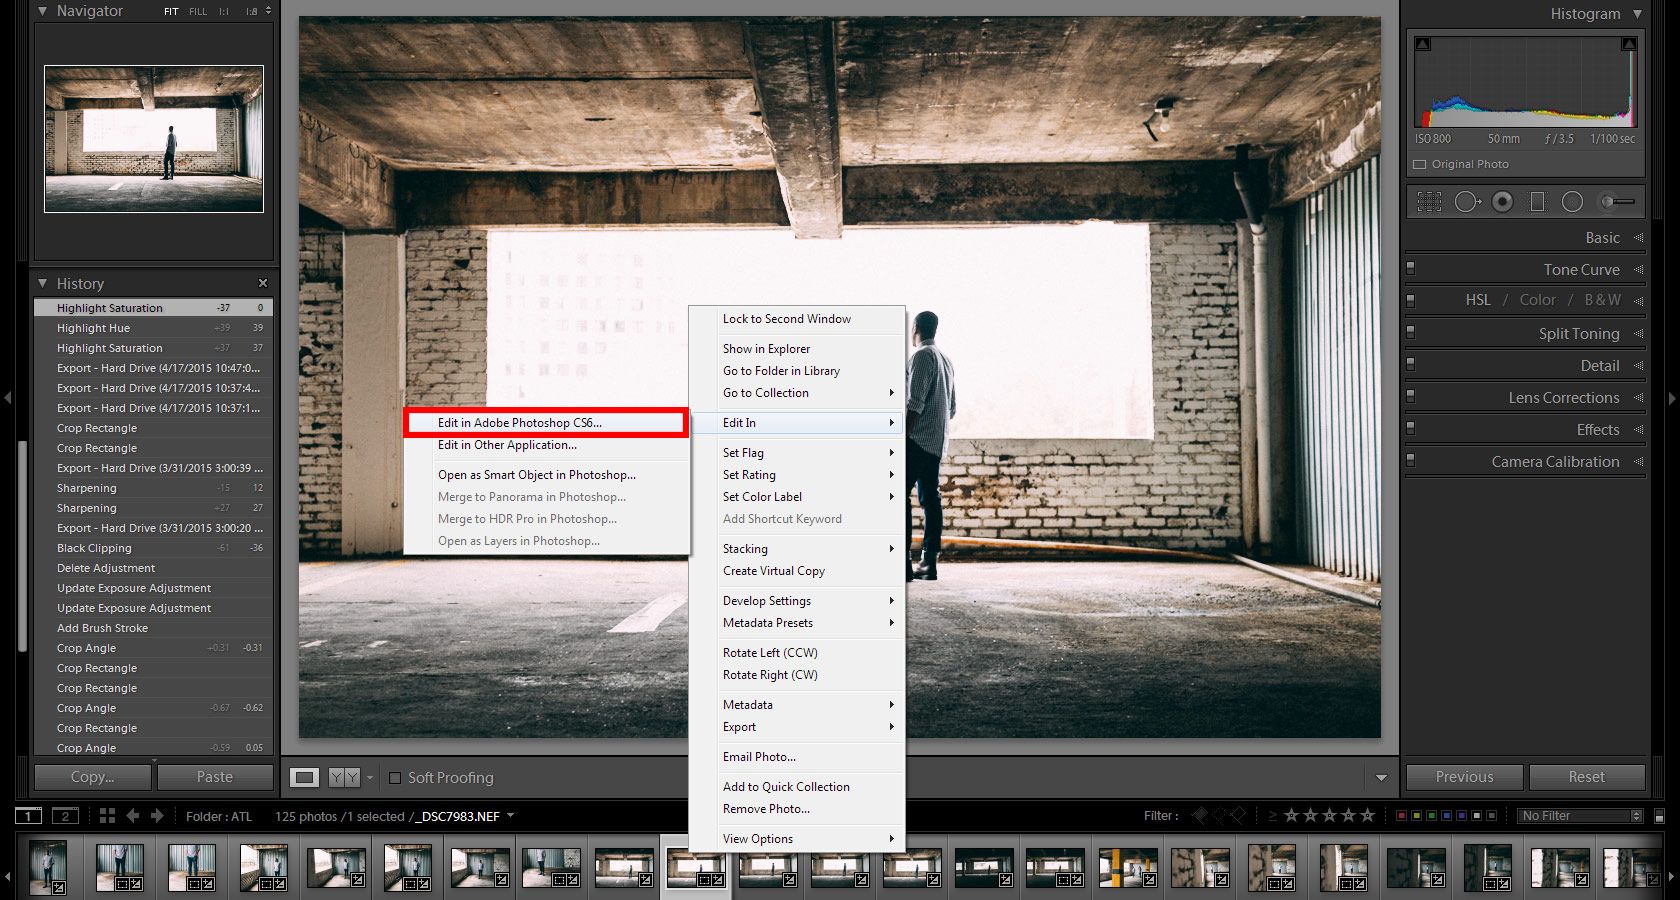
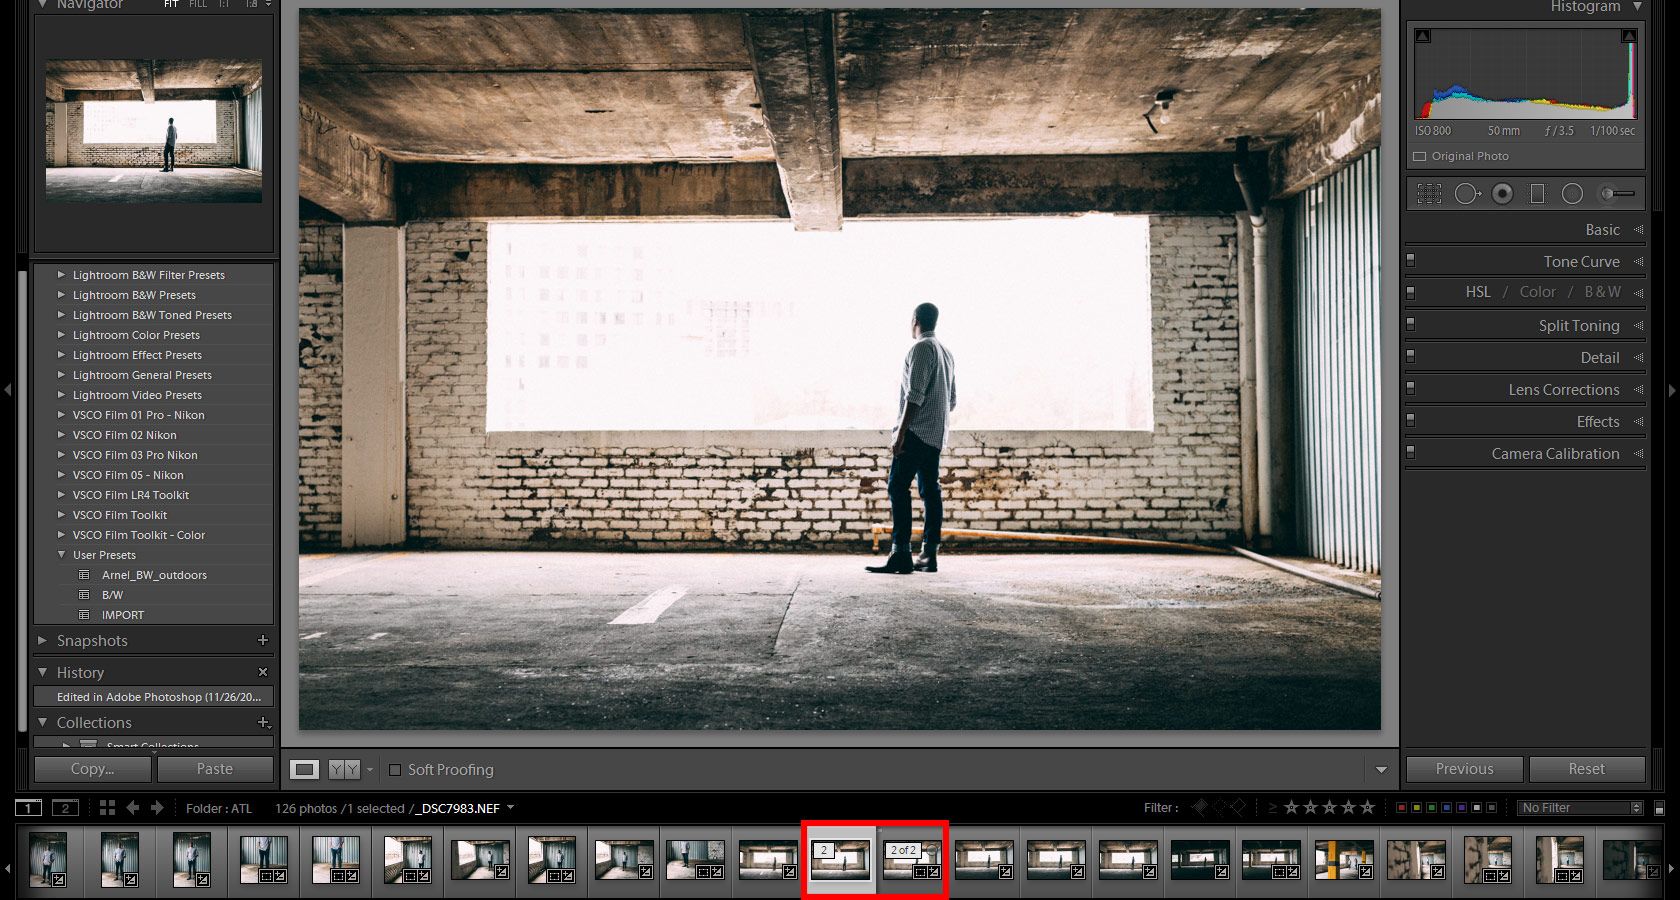
When you are back after a landscape shoot the work is not done yet. What you do with the pictures after they have been taken is crucial to creating a fantastic image. I would almost say that it is in post-processing you turn the photograph from an image file to a piece of art. If you decide to shoot in RAW-format you will have much greater artistic freedom when you edit the photos, since RAW files have much more data in them, meaning you can change exposure and color to a greater extent. I use Lightroom for most of my editing and they use Photoshop for more advanced edits of my favorite photos.When I edit photos I usually try to enhance elements that are already in the picture. But first I create a base edit where I make sure that the exposure and contrast are what I want and then I go on to more in-depth editing, like modifying tones and details of the image. before-after
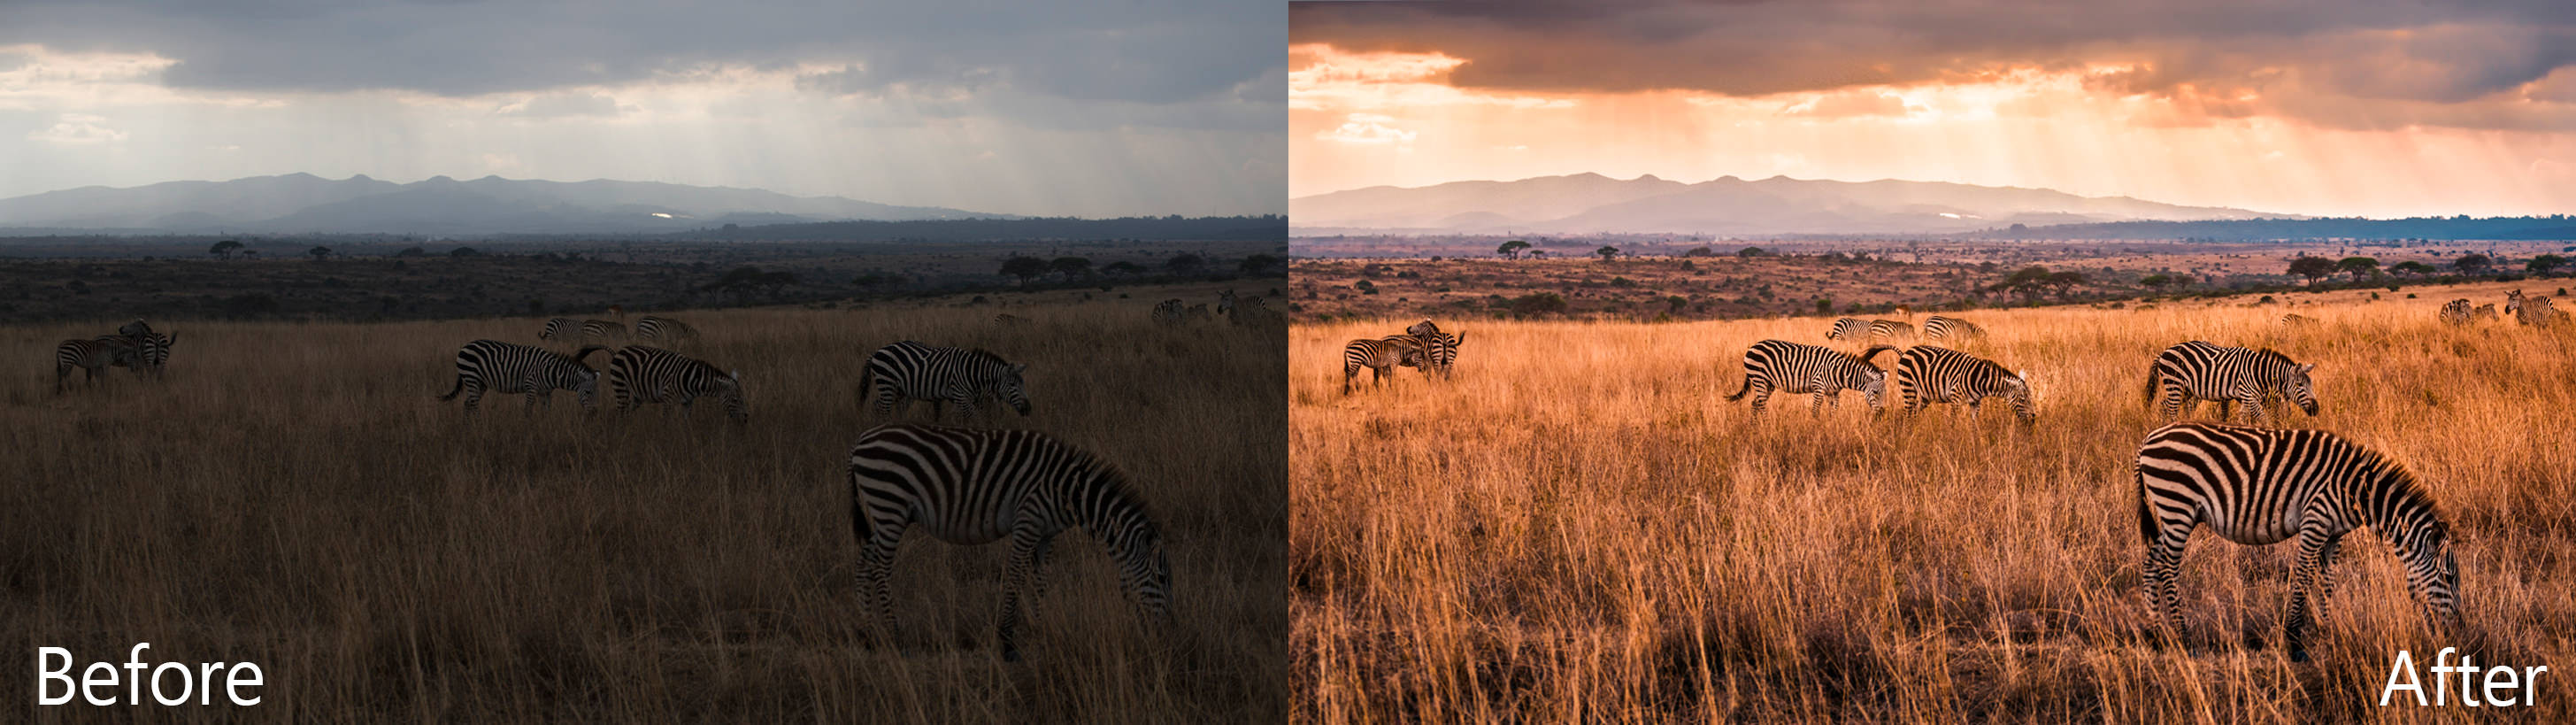
I highly recommend that you check out the different bundles for landscape photography that Sleeklens has to offer, they are a great and easy way to make your images look fantastic, and by combining different presets you can create completely unique looks.

Photoshop: Landscape Adventure Collection

Lightroom: Landscape Essentials Workflow

Conclusion

I hope you have found this short guide useful and that you will be comfortable to start exploring the wonderful field of landscape photography. This guide has just scratched on the top of an extensive subject and I recommend that you continue reading other guides that can help you get a better understanding for each part of the process, like the composition. Good luck with your landscape photography!

Knacks of Shooting in Black and White and Conversion of Black and White Images

In the early days, there was only black and white photography due to technical limitations. We could say black and white photography is the most original form of photography. Although color photography is now a mainstream, there are still numerous photographers who are passionate about black and white. I used to believe it was the dullest style I could think of until I truly understood the spirit of it. Black and white photography are, in my opinion, the purest yet the most challenging form of photography. The purity of it captivates my heart. Since then, I have become a big fan of black and white photography. Sometimes, colors can be a distraction for the viewers. Without the disturbance of colors, viewers could focus on the beauty of the composition, lighting, and shape of the subject.

But, black and white photography is not as simple as the majority think. It is not a simple conversion of a color image into grayscale image. As some of the scenes are not suitable to be presented in black and white, we will have to consider whether a photo should be shot in black and white or color beforehand. In this article, I would like to offer some tips on shooting black and white images. In addition, I will include a brief introduction to the methods of black and white image conversion.

How to Take Good Black and White Photos?

First, you can search for a scene where strong contrast in lighting or rich gradient exists. It is essential to capture the spectacular light while shooting in black and white as there are no colors in the photograph. It becomes the stage of lighting. The following two photos are some examples of black and white photos with notable brightness contrasts. In the first photo, I waited for the man to walk into the ‘bright triangle’ before clicking the shutter. This composition highlights the subject in the photograph. Imagine if I pressed the shutter before the pedestrian entered the ‘triangle’, viewers could hardly see the subject.

Secondly, you can seek the points, lines, and planes in the surroundings. These are the basic elements that construct a picture. You have to figure out the relationships between them in a scene and a suitable composition to capture what you see. This is also applicable to architectural photography as planes and lines are commonly found in modern buildings. The photo below demonstrates how we can apply during a photo shoot. The triangle is the dominant shape, which is a ‘plane’ element, in this image. In addition, there is also an invisible guiding line which starts from the bottom right-hand corner extending to the upper left-hand corner.

Thirdly, you can consider shooting black and white photos with long exposure. If it is done appropriately, it will add a fine-art feel to your photo. The moving objects in a long-exposure photo will be blurred. Such blurring effect could make your work looks more abstract. The following image is an example of long-exposure photography in black and white.

How to Make Photos Black and White in Photoshop

In this section, we would go through different skills and methods of the conversion of black and white images. Undoubtedly, each method has its own pros and cons. You may choose the most suitable one according to the circumstances.

1. Desaturation

This is the quickest and easiest method. You simply suppress the saturation value of your color photo to -100 and you will have a black and white photo. But, desaturation is not an optimal way out. It has the least flexibility during the conversion process. You have no control on how it desaturates the image. The photo usually turns out with undesired results.

2. Black and White Adjustment

I usually convert my photos into black and white with this method. It gives you tons of control over the conversion process. You may adjust the lightness of each color separately until it fulfills your expectation. For instance, if you move the slider of Red to the left, the parts of the photo with red color will turn into dark gray or even black or vice versa.

3. Lab Color

Lab color, which is pronounced as ‘L-a-b’, is a color space. It has nothing to do with the abbreviation of Laboratory. This color space is named after the channels it includes, which are namely Lightness, a and b. It is a good choice for conversion of the black and white image as it separates the lightness value from the color of the photo.

First, you need to go to Image> Mode> Lab Color to convert the photo into the Lab color space.

bw3

You can notice that the channels are changed into Lightness, a and b which were originally Red, Green, and Blue if your photo was in RGB color space.

You may proceed to delete the a and b channel and keep the lightness channel untouched. Then you will get a black and white image.

After that, convert it into Grayscale so as to ensure all the remaining color information is completely eliminated. That’s all.

bw6

Hope this guide was helpful for you guys and see you in the next guide!

Five Editing Mistakes Beginning Photographers Make

When you’re first starting out in photography, it’s easy to fall victim to a few common mistakes. When I look back at my work from seven years ago, it’s apparent to me (and probably any other photographer) that I fell into many of the same traps as a lot of other beginners. Things that draw attention to your subject don’t necessarily improve the photo–they can simply be distracting.

In this list below we’re going to get in touch with the five most common mistakes beginners tend to make during their journey towards becoming professional photographers:

Heavy Vignetting

2_vinette-1

Exaggerated vignettes are a tell-tale sign of an amateur photographer. Beginners like them because they draw attention to the center of the frame where they are most likely to compose their focus. What they’re effectively doing, though, is underexposing the sides of the image and detracting from their talent. A good photographer ought to use the whole shot, utilizing natural elements to frame the subject. Amateur photographers also like to use vignettes in an attempt to add some drama to the photo. Luckily, there are natural ways to do this–mastering the sun flare technique can really enhance an otherwise lifeless image.

Overusing Presets

3_Going over the top with presets-1

It’s easy to go overboard with presets. Overuse can make a photo look unnatural and unflattering. If you suspect you’ve done too much, you’re probably right. Keep it simple. Instead of over-editing the entire photo, use local adjustments to accentuate specific areas.

Histogram tool can be your best friend under situations like this, as you’re constantly checking over clipped values (mostly at highlights or shadows), but also Lightroom’s before/after mode can be extremely handy for checking where things went wrong.

Overdoing Black and White

4_Only editing in black and white-1

This is the mistake I’m most guilty of in my early work. Converting an image to black and white does not generally make it more artistic. Of course, there are ways to use black and white to effectively enhance a photo, but many new photographers end up using this style as a crutch. The number of variables that color adds to the editing process can be intimidating. Be sure to learn about complementary colors and incorporate them into your photos. However, do try to avoid photographing bright and heavily saturated colors because camera sensors don’t tend to register these colors well. If you’re unsure which way to go, this post can help you decide whether to edit your photo in color or black and white, but also keep in mind that not only black and white effects count as the only range of monochromatic effects – sepia or cyanotype effects also looks appealing for most clients.

Heavily Retouching Skin

5_Over Retouching-1

Most photographers fear that their clients won’t like their photos because of the way they themselves look (by no fault of the photographer). It’s tempting to heavily retouch skin in an attempt to flatter your client, however, it’s best to edit only what is necessary. A good rule of thumb is to touch up or remove only imperfections that are impermanent, such as acne or bruises – try, also, to find flattering angles and accentuate those.

Overdoing such adjustments will end up in unnatural results, mostly if you don’t happen to ace post production tools such as Lightroom Presets & Brushes or Photoshop Actions. In the end, you’re prone to ruin all your hard work by just trying to make it look better.

HDR Processing

6_Going crazy with the clairity slider-1-1

Every photographer wants to learn new techniques; more often than not, though, HDR processing looks a bit over the top. While it can be tempting to bracket exposures, it’s best to avoid it until you’ve mastered basic photography skills first. Instead, if you don’t have enough dynamic range in a shot, bracket the exposure and brush locally in the post.

A quality image ought to appear natural, polished, and simple:

1_original-1

Now that you’re familiar with these common mistakes, you can easily avoid them by mastering photography techniques that surely will take your photographs to the next level! Don’t feel disappointed by making mistakes during your first attempts – everybody had a starting point and a goal to reach, therefore it’s your right to learn from bad experiences and add all that knowledge to your future work.

Hope this guide was useful and keep shooting!

How to Go from Lightroom to Photoshop to Wrap Up Editing

As photographers, we have many different options of software to edit our images. The different tools we use are usually geared towards being great at specific tasks, so we end up having to use multiple tools to get the exact look we want. When I just want to lightly edit or keep it as a photo with no manipulation or heavy editing, I start and finish in Lightroom. If I am going to do anything more than the Lightroom options allow, I will start in Lightroom and move into Photoshop to finalize my image. In this tutorial, I am going to show you how I go from editing in LR to finishing in PS.

1 – Starting Point

Let’s say this is the photo I want to edit. I have done all of my edits in Lightroom and now I want to move into doing some more editing in Photoshop. I would do all of my color, lens correction and tone curve edits, but would stay away from doing sharpening and grain. I would do grain and sharpening as a final step, depending on the size and medium of how my final image will go out. In the next step, I will show you the actual settings I have set up for when I export images to Photoshop.

Arnel Hasanovic LR to PS workflow

2 – Settings

 There are many different options in this section, but this is what I go with because I want to have as much and as good of information in my file as I can. To get to this menu you go to Edit>Preferences. Once you do this step you may have to restart LR for the changes to occur.

Arnel Hasanovic LR to PS workflow

3 – Exporting

 After you have changed your settings for the kind of file you want to export, then go to your image> Right Click > Edit In> Edit in Adobe Photoshop (your version). You can also Open as Smart Object, in which if you make any changes in LR they should automatically update in PS. I won’t do this now because I have no need for it in this case. If you look at the options in gray, you have the ability to do HDR and Panorama export from here after selecting a group of photos that apply.

Arnel Hasanovic LR to PS workflow

4 – Photoshop

 Now, this is what I get when the file opens in PS. In this case, after I have done all the edits I want, I click File>Save and it will save the file in the same folder as the original, which will also show up in LR as you will see in the next step.

Arnel Hasanovic LR to PS workflow

5 – Back to Lightroom

 Once you have saved the image in PS you will go back to LR and possibly see the stack of photos icon on the original image. It means there is a photo stack of the related images and if you click on it, you will see the rest of images.

Arnel Hasanovic LR to PS workflow

Once you click the photo stack, you will see 1, 2 or something similar, depending on which photo and out of how many. You now have the images with the PS adjustments back in LR for you to edit or make any further changes that you may need to. I generally would export straight from PS, but if you have any reason to come back into LR then this is how you end in itself. From here you can make your normal export from Lightroom.

Arnel Hasanovic LR to PS workflow

6 – Conclusion

It’s good to know how to jump from one software to another and there are several ways of doing it. This is just my way and the settings I use. If you have other ways, share them with me.