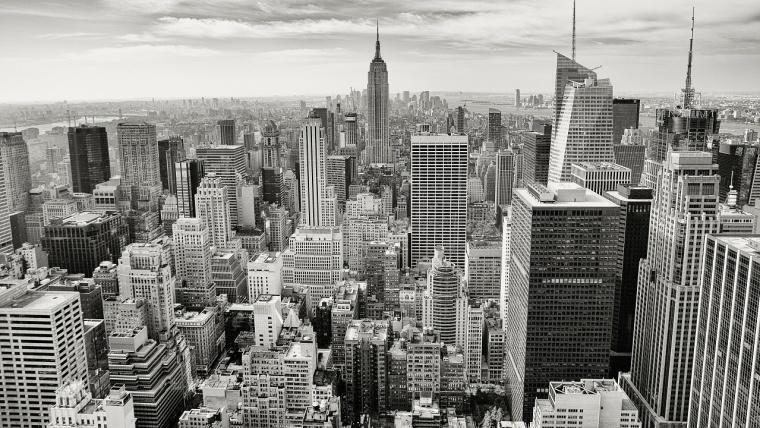
In the early days, there was only black and white photography due to technical limitations. We could say black and white photography is the most original form of photography. Although color photography is now a mainstream, there are still numerous photographers who are passionate about black and white. I used to believe it was the dullest style I could think of until I truly understood the spirit of it. Black and white photography are, in my opinion, the purest yet the most challenging form of photography. The purity of it captivates my heart. Since then, I have become a big fan of black and white photography. Sometimes, colors can be a distraction for the viewers. Without the disturbance of colors, viewers could focus on the beauty of the composition, lighting, and shape of the subject.
But, black and white photography is not as simple as the majority think. It is not a simple conversion of a color image into grayscale image. As some of the scenes are not suitable to be presented in black and white, we will have to consider whether a photo should be shot in black and white or color beforehand. In this article, I would like to offer some tips on shooting black and white images. In addition, I will include a brief introduction to the methods of black and white image conversion.
Table of Contents
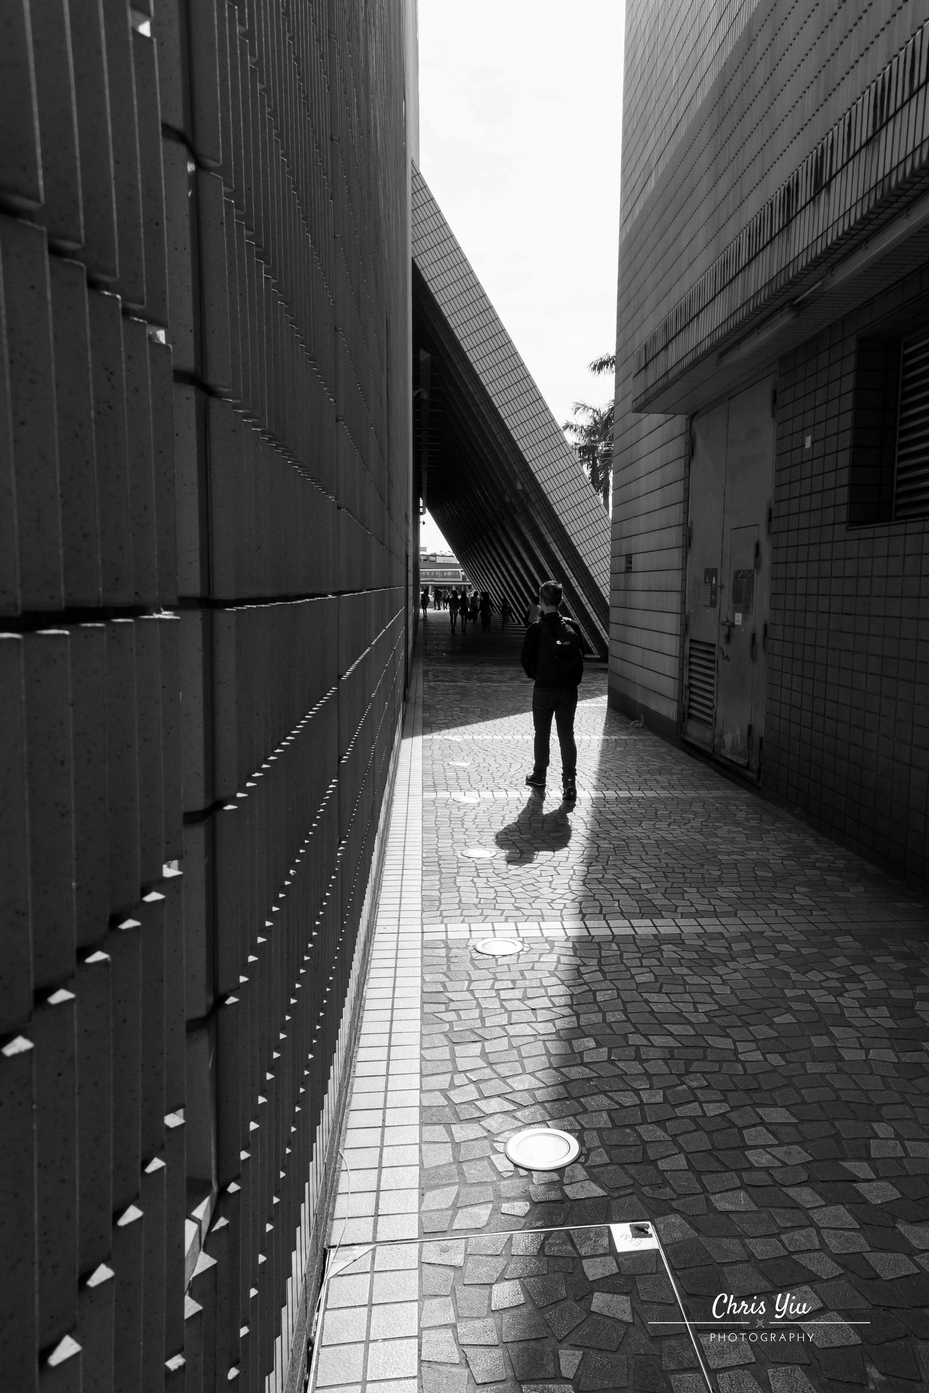
First, you can search for a scene where strong contrast in lighting or rich gradient exists. It is essential to capture the spectacular light while shooting in black and white as there are no colors in the photograph. It becomes the stage of lighting. The following two photos are some examples of black and white photos with notable brightness contrasts. In the first photo, I waited for the man to walk into the ‘bright triangle’ before clicking the shutter. This composition highlights the subject in the photograph. Imagine if I pressed the shutter before the pedestrian entered the ‘triangle’, viewers could hardly see the subject.
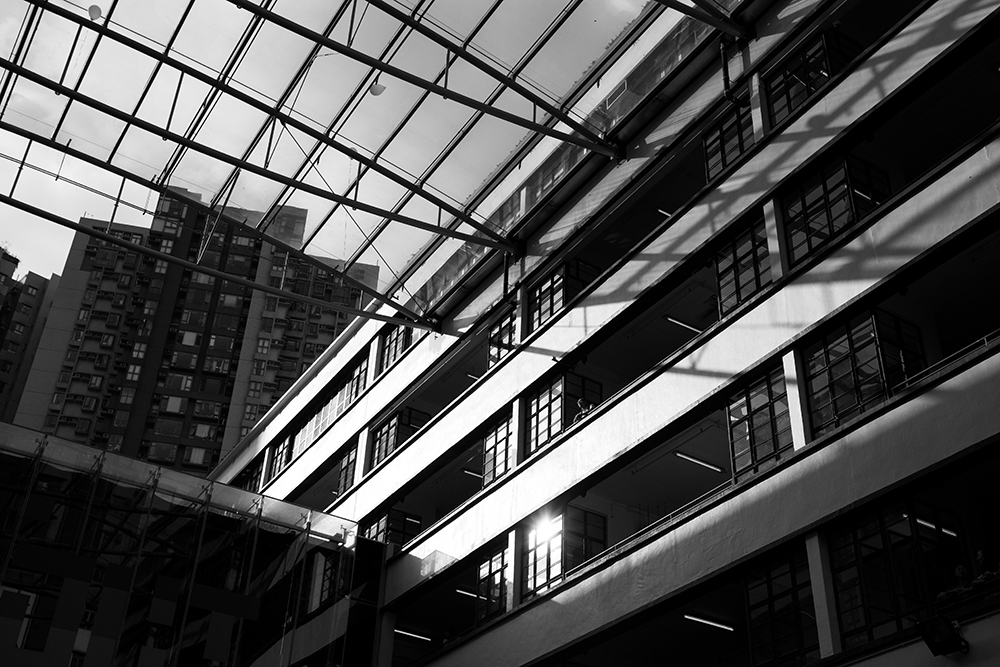
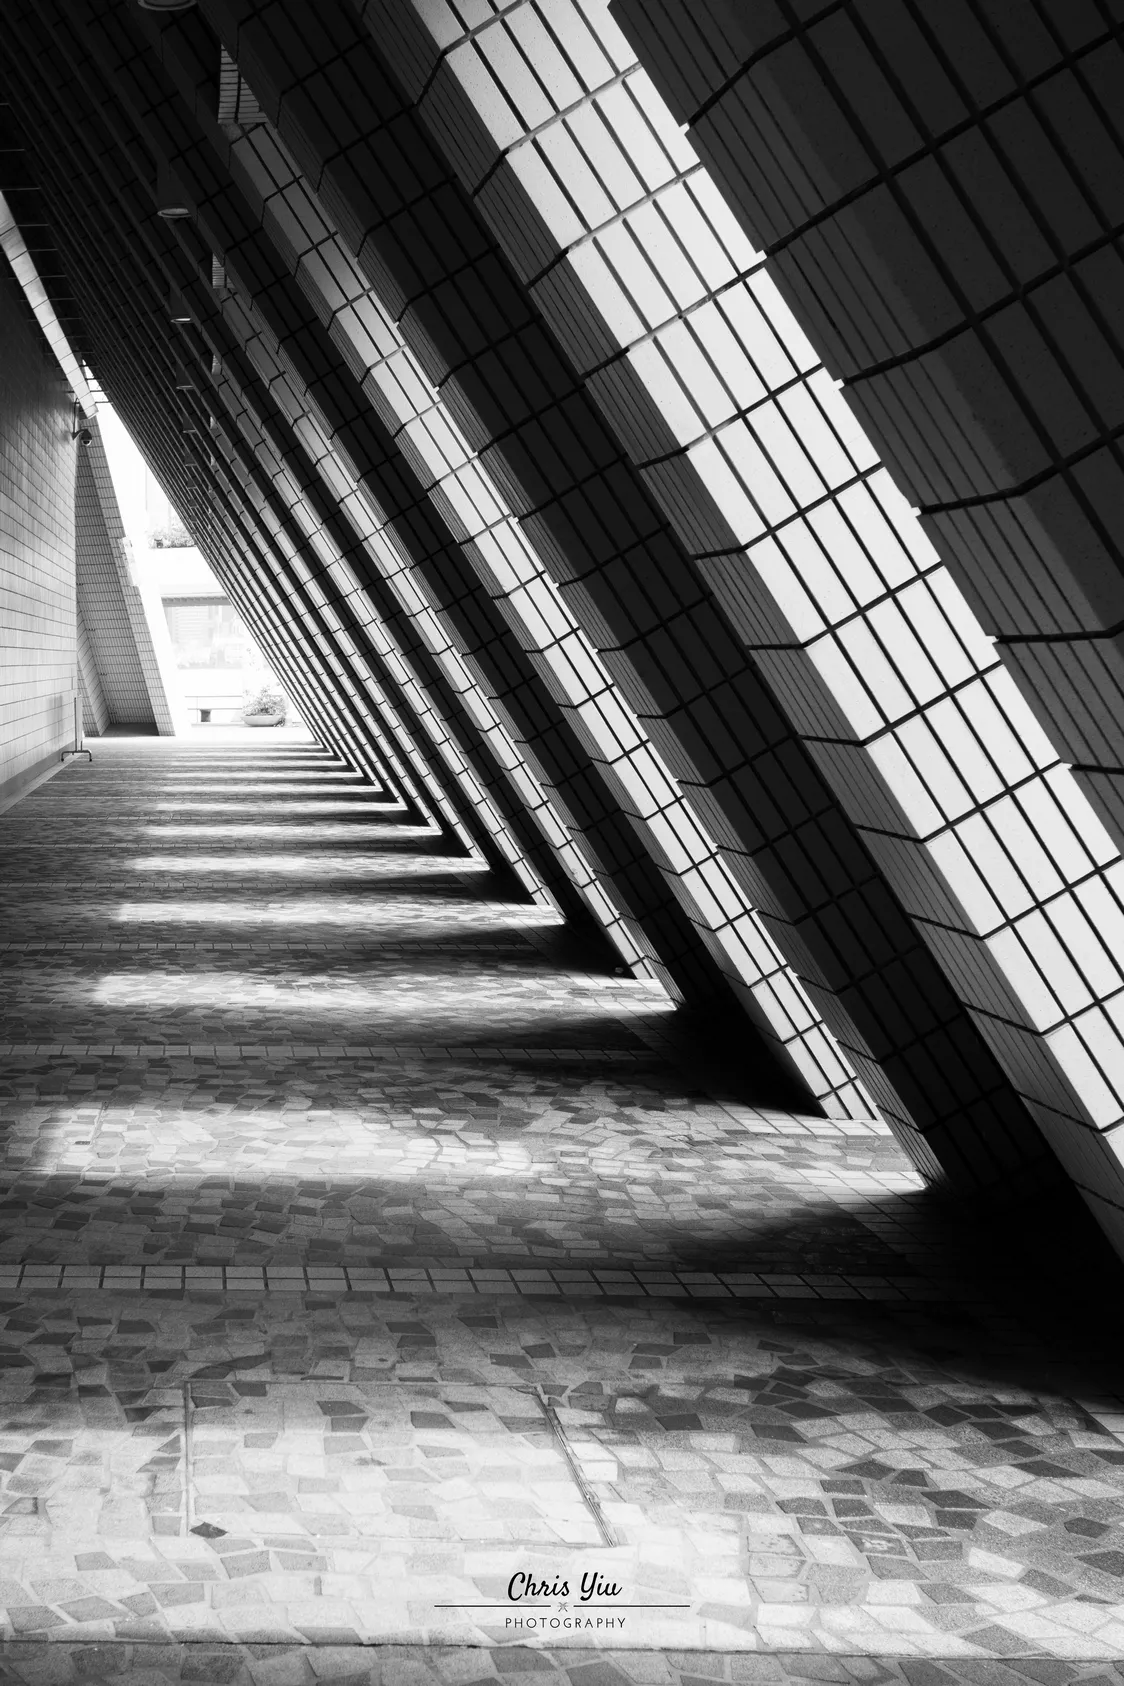
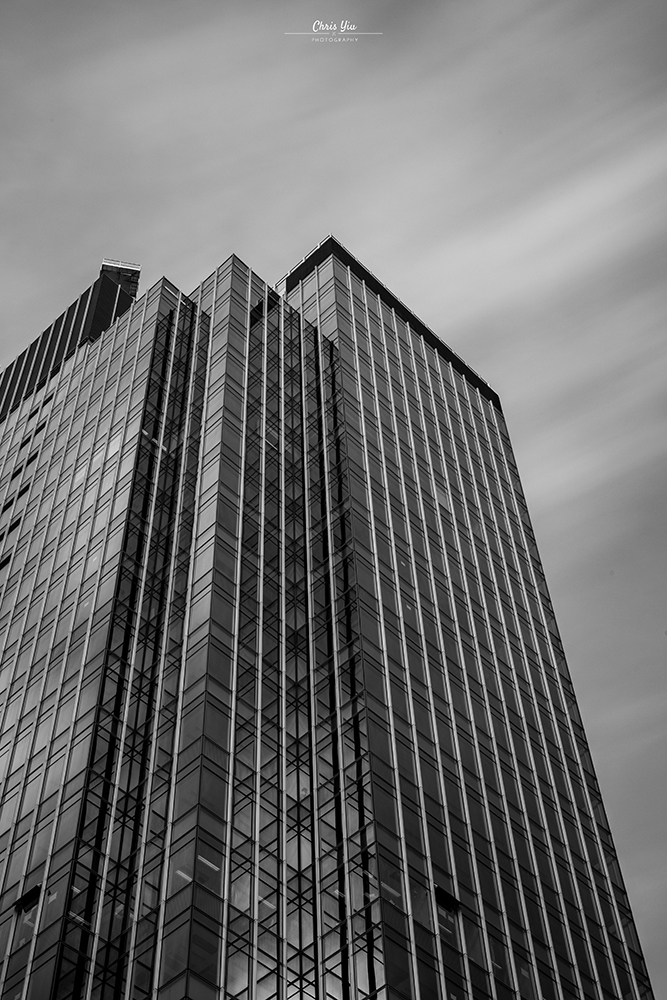
Secondly, you can seek the points, lines, and planes in the surroundings. These are the basic elements that construct a picture. You have to figure out the relationships between them in a scene and a suitable composition to capture what you see. This is also applicable to architectural photography as planes and lines are commonly found in modern buildings. The photo below demonstrates how we can apply during a photo shoot. The triangle is the dominant shape, which is a ‘plane’ element, in this image. In addition, there is also an invisible guiding line which starts from the bottom right-hand corner extending to the upper left-hand corner.
Thirdly, you can consider shooting black and white photos with long exposure. If it is done appropriately, it will add a fine-art feel to your photo. The moving objects in a long-exposure photo will be blurred. Such blurring effect could make your work looks more abstract. The following image is an example of long-exposure photography in black and white.
In this section, we would go through different skills and methods of the conversion of black and white images. Undoubtedly, each method has its own pros and cons. You may choose the most suitable one according to the circumstances.
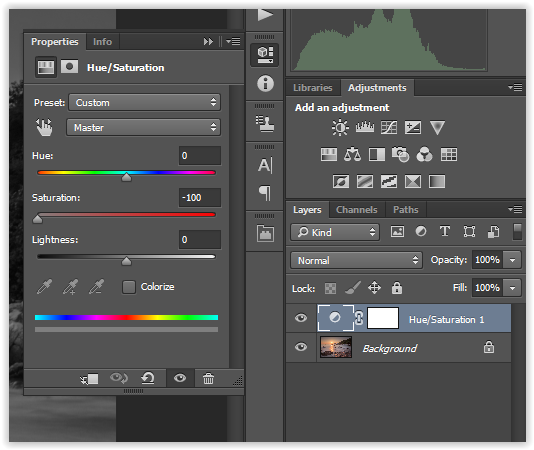
This is the quickest and easiest method. You simply suppress the saturation value of your color photo to -100 and you will have a black and white photo. But, desaturation is not an optimal way out. It has the least flexibility during the conversion process. You have no control on how it desaturates the image. The photo usually turns out with undesired results.
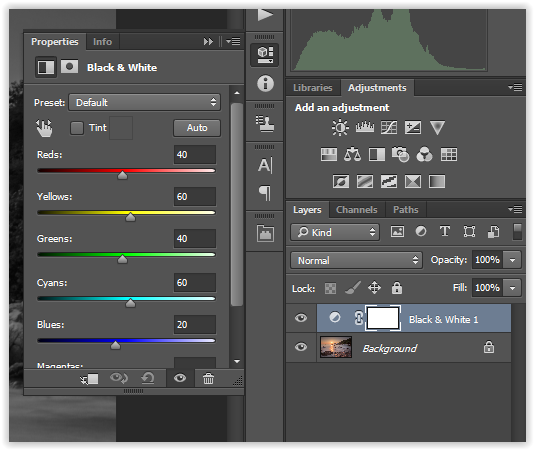
I usually convert my photos into black and white with this method. It gives you tons of control over the conversion process. You may adjust the lightness of each color separately until it fulfills your expectation. For instance, if you move the slider of Red to the left, the parts of the photo with red color will turn into dark gray or even black or vice versa.
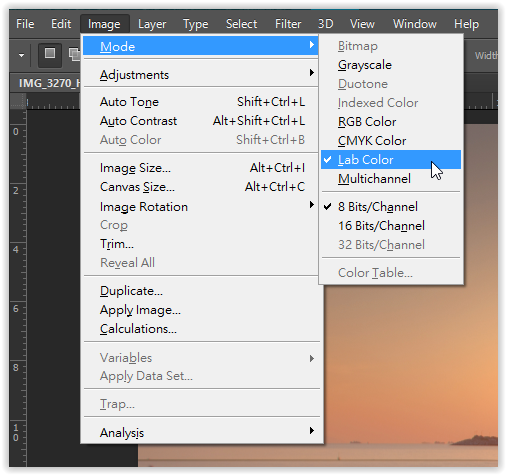
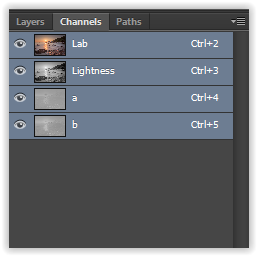
Lab color, which is pronounced as ‘L-a-b’, is a color space. It has nothing to do with the abbreviation of Laboratory. This color space is named after the channels it includes, which are namely Lightness, a and b. It is a good choice for conversion of the black and white image as it separates the lightness value from the color of the photo.
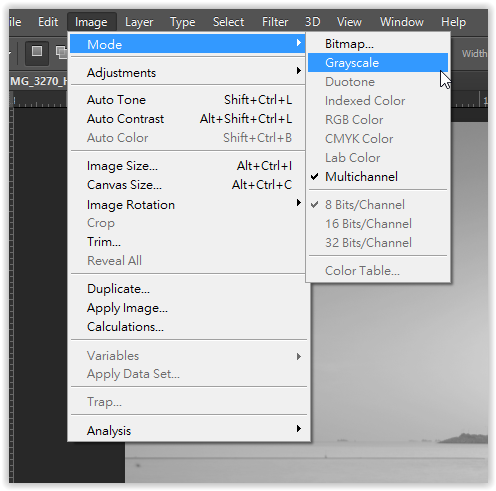
First, you need to go to Image> Mode> Lab Color to convert the photo into the Lab color space.
You can notice that the channels are changed into Lightness, a and b which were originally Red, Green, and Blue if your photo was in RGB color space.
You may proceed to delete the a and b channel and keep the lightness channel untouched. Then you will get a black and white image.
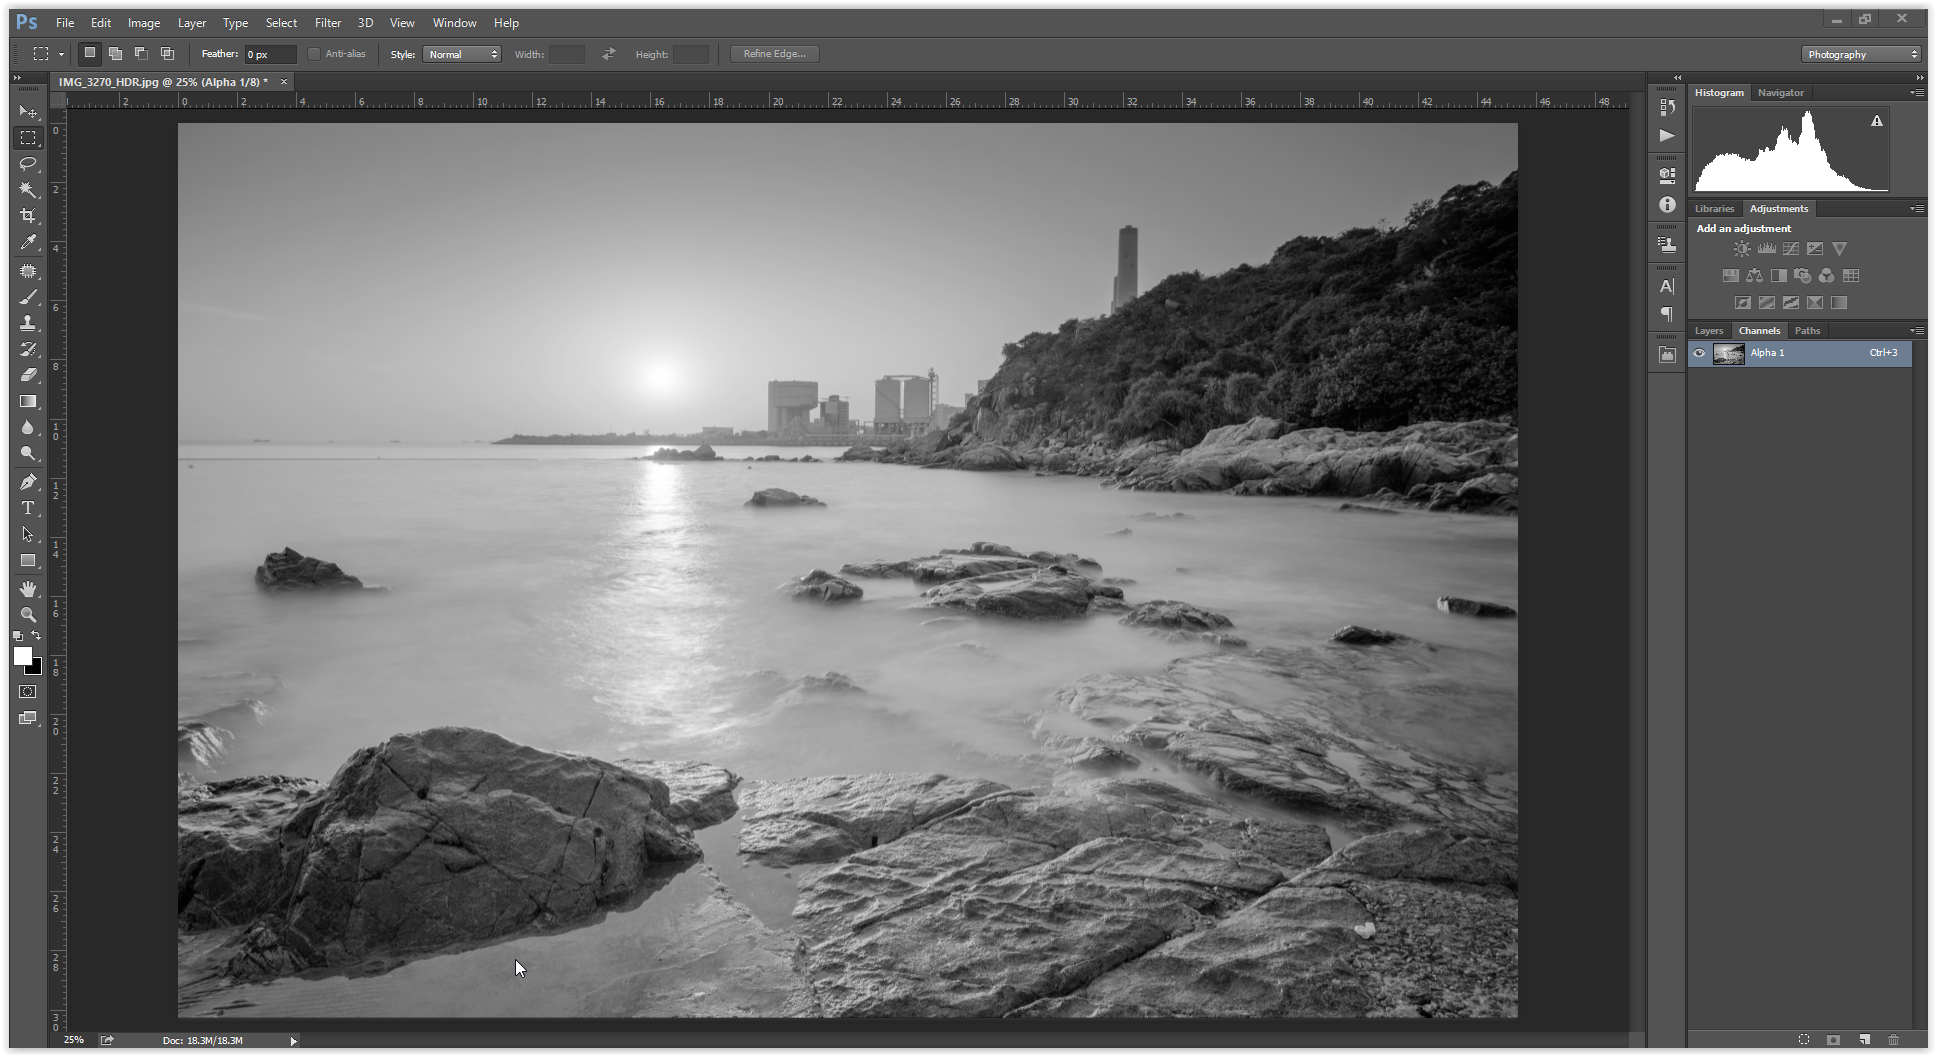
After that, convert it into Grayscale so as to ensure all the remaining color information is completely eliminated. That’s all.
Hope this guide was helpful for you guys and see you in the next guide!


Please verify your software version before proceeding.
 I’ve verified my software version


 Facebook
 Google +
Comments (0)
There are no comments yet.