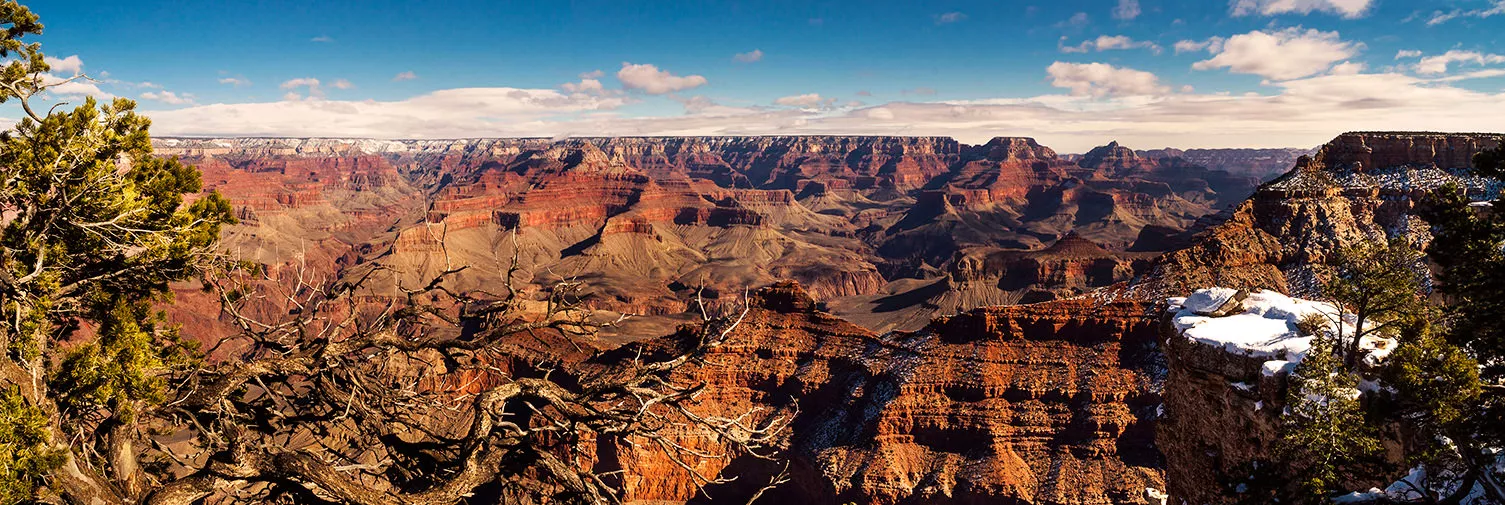
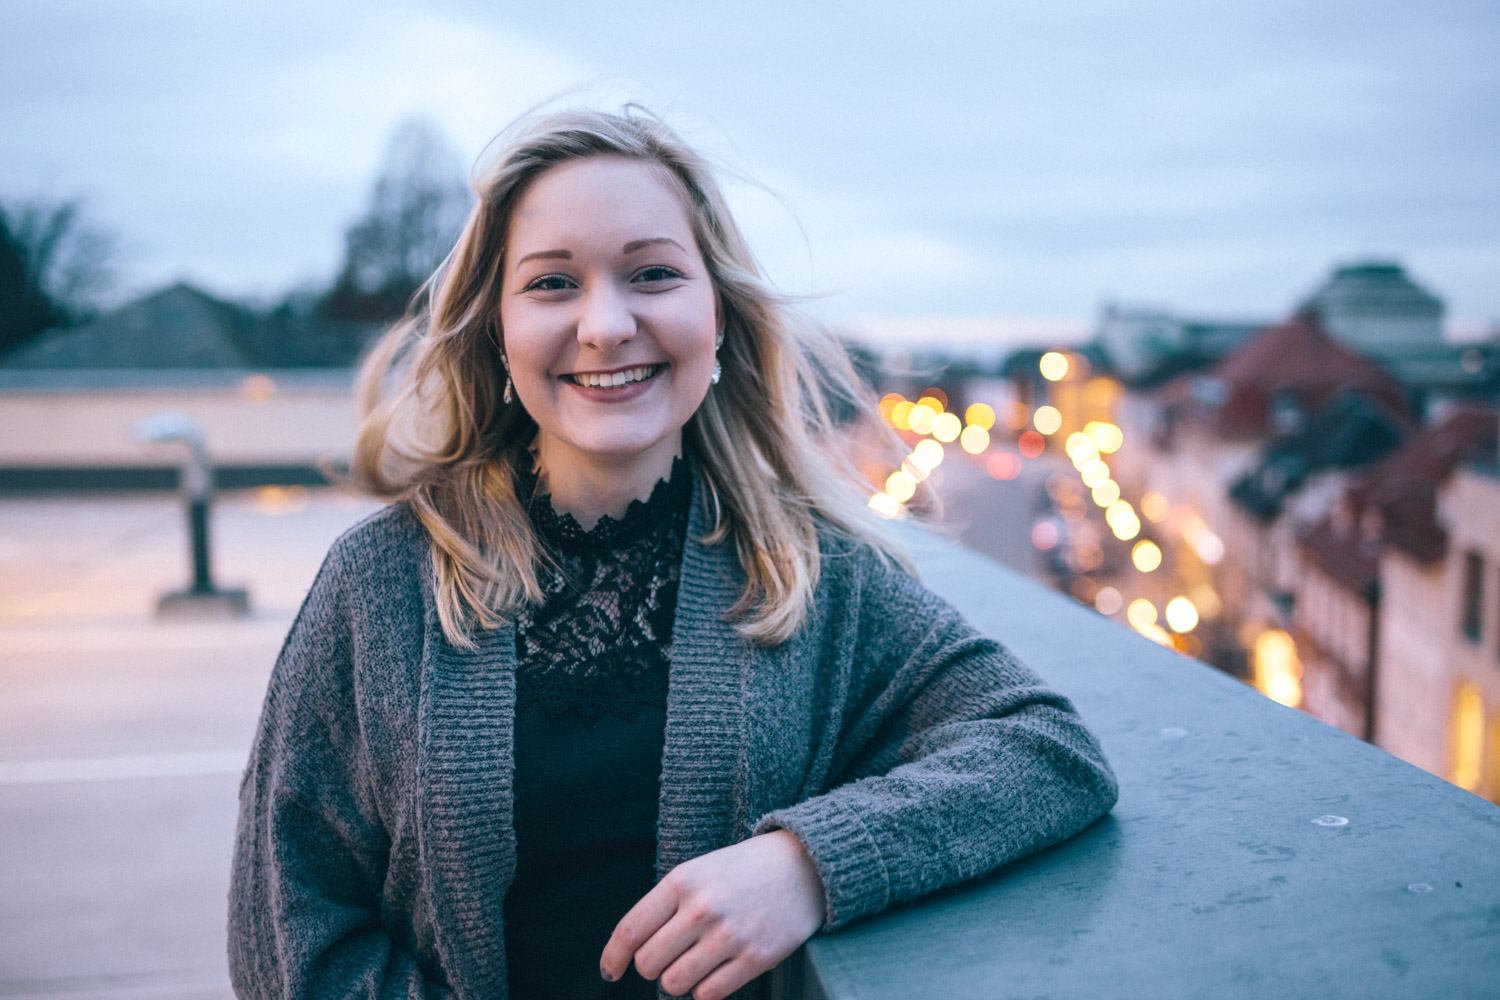
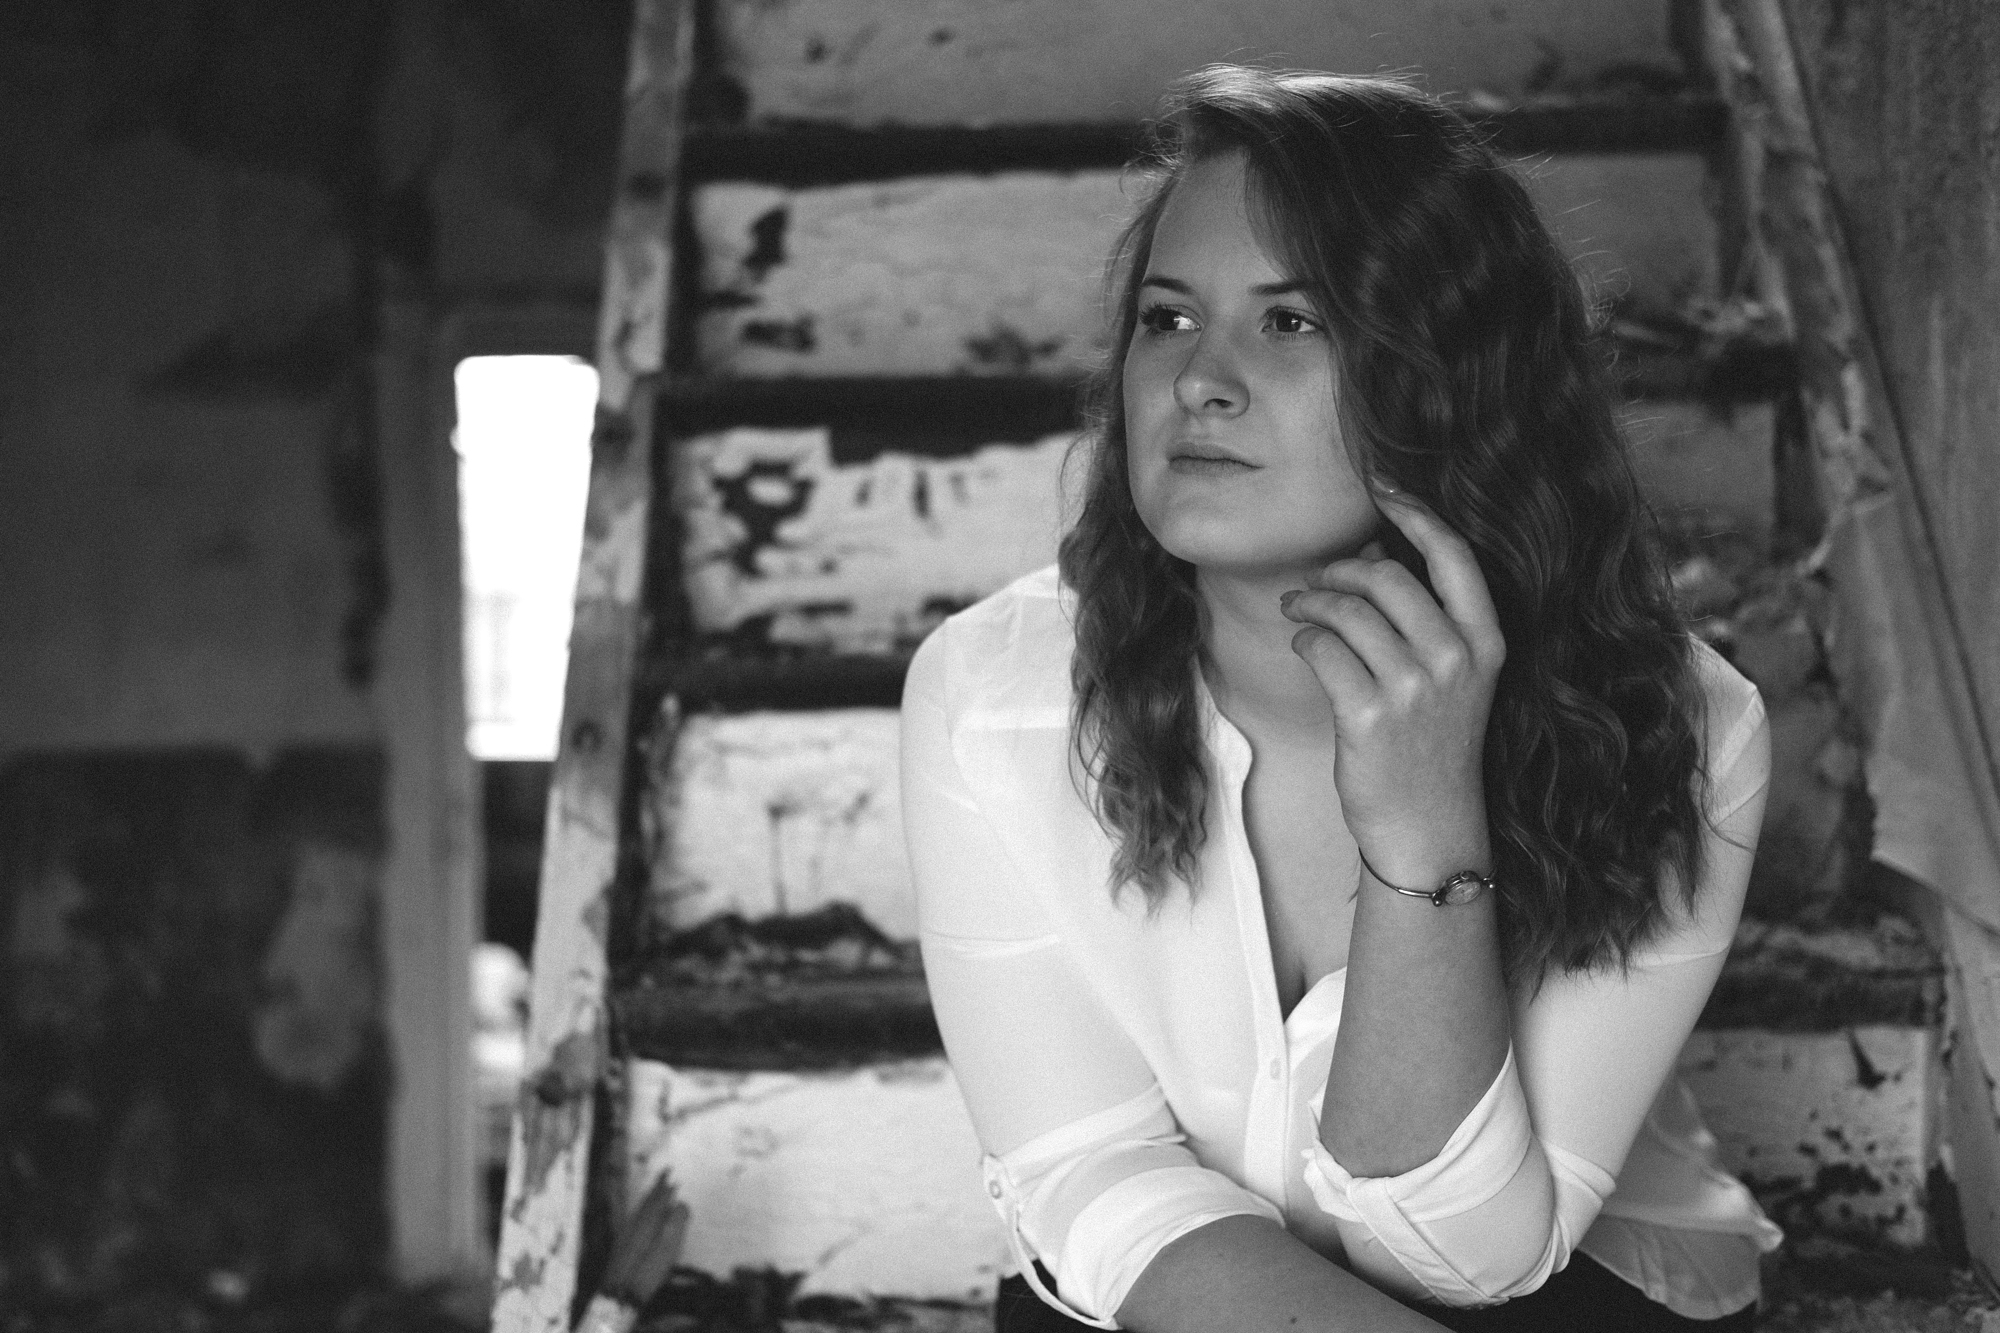
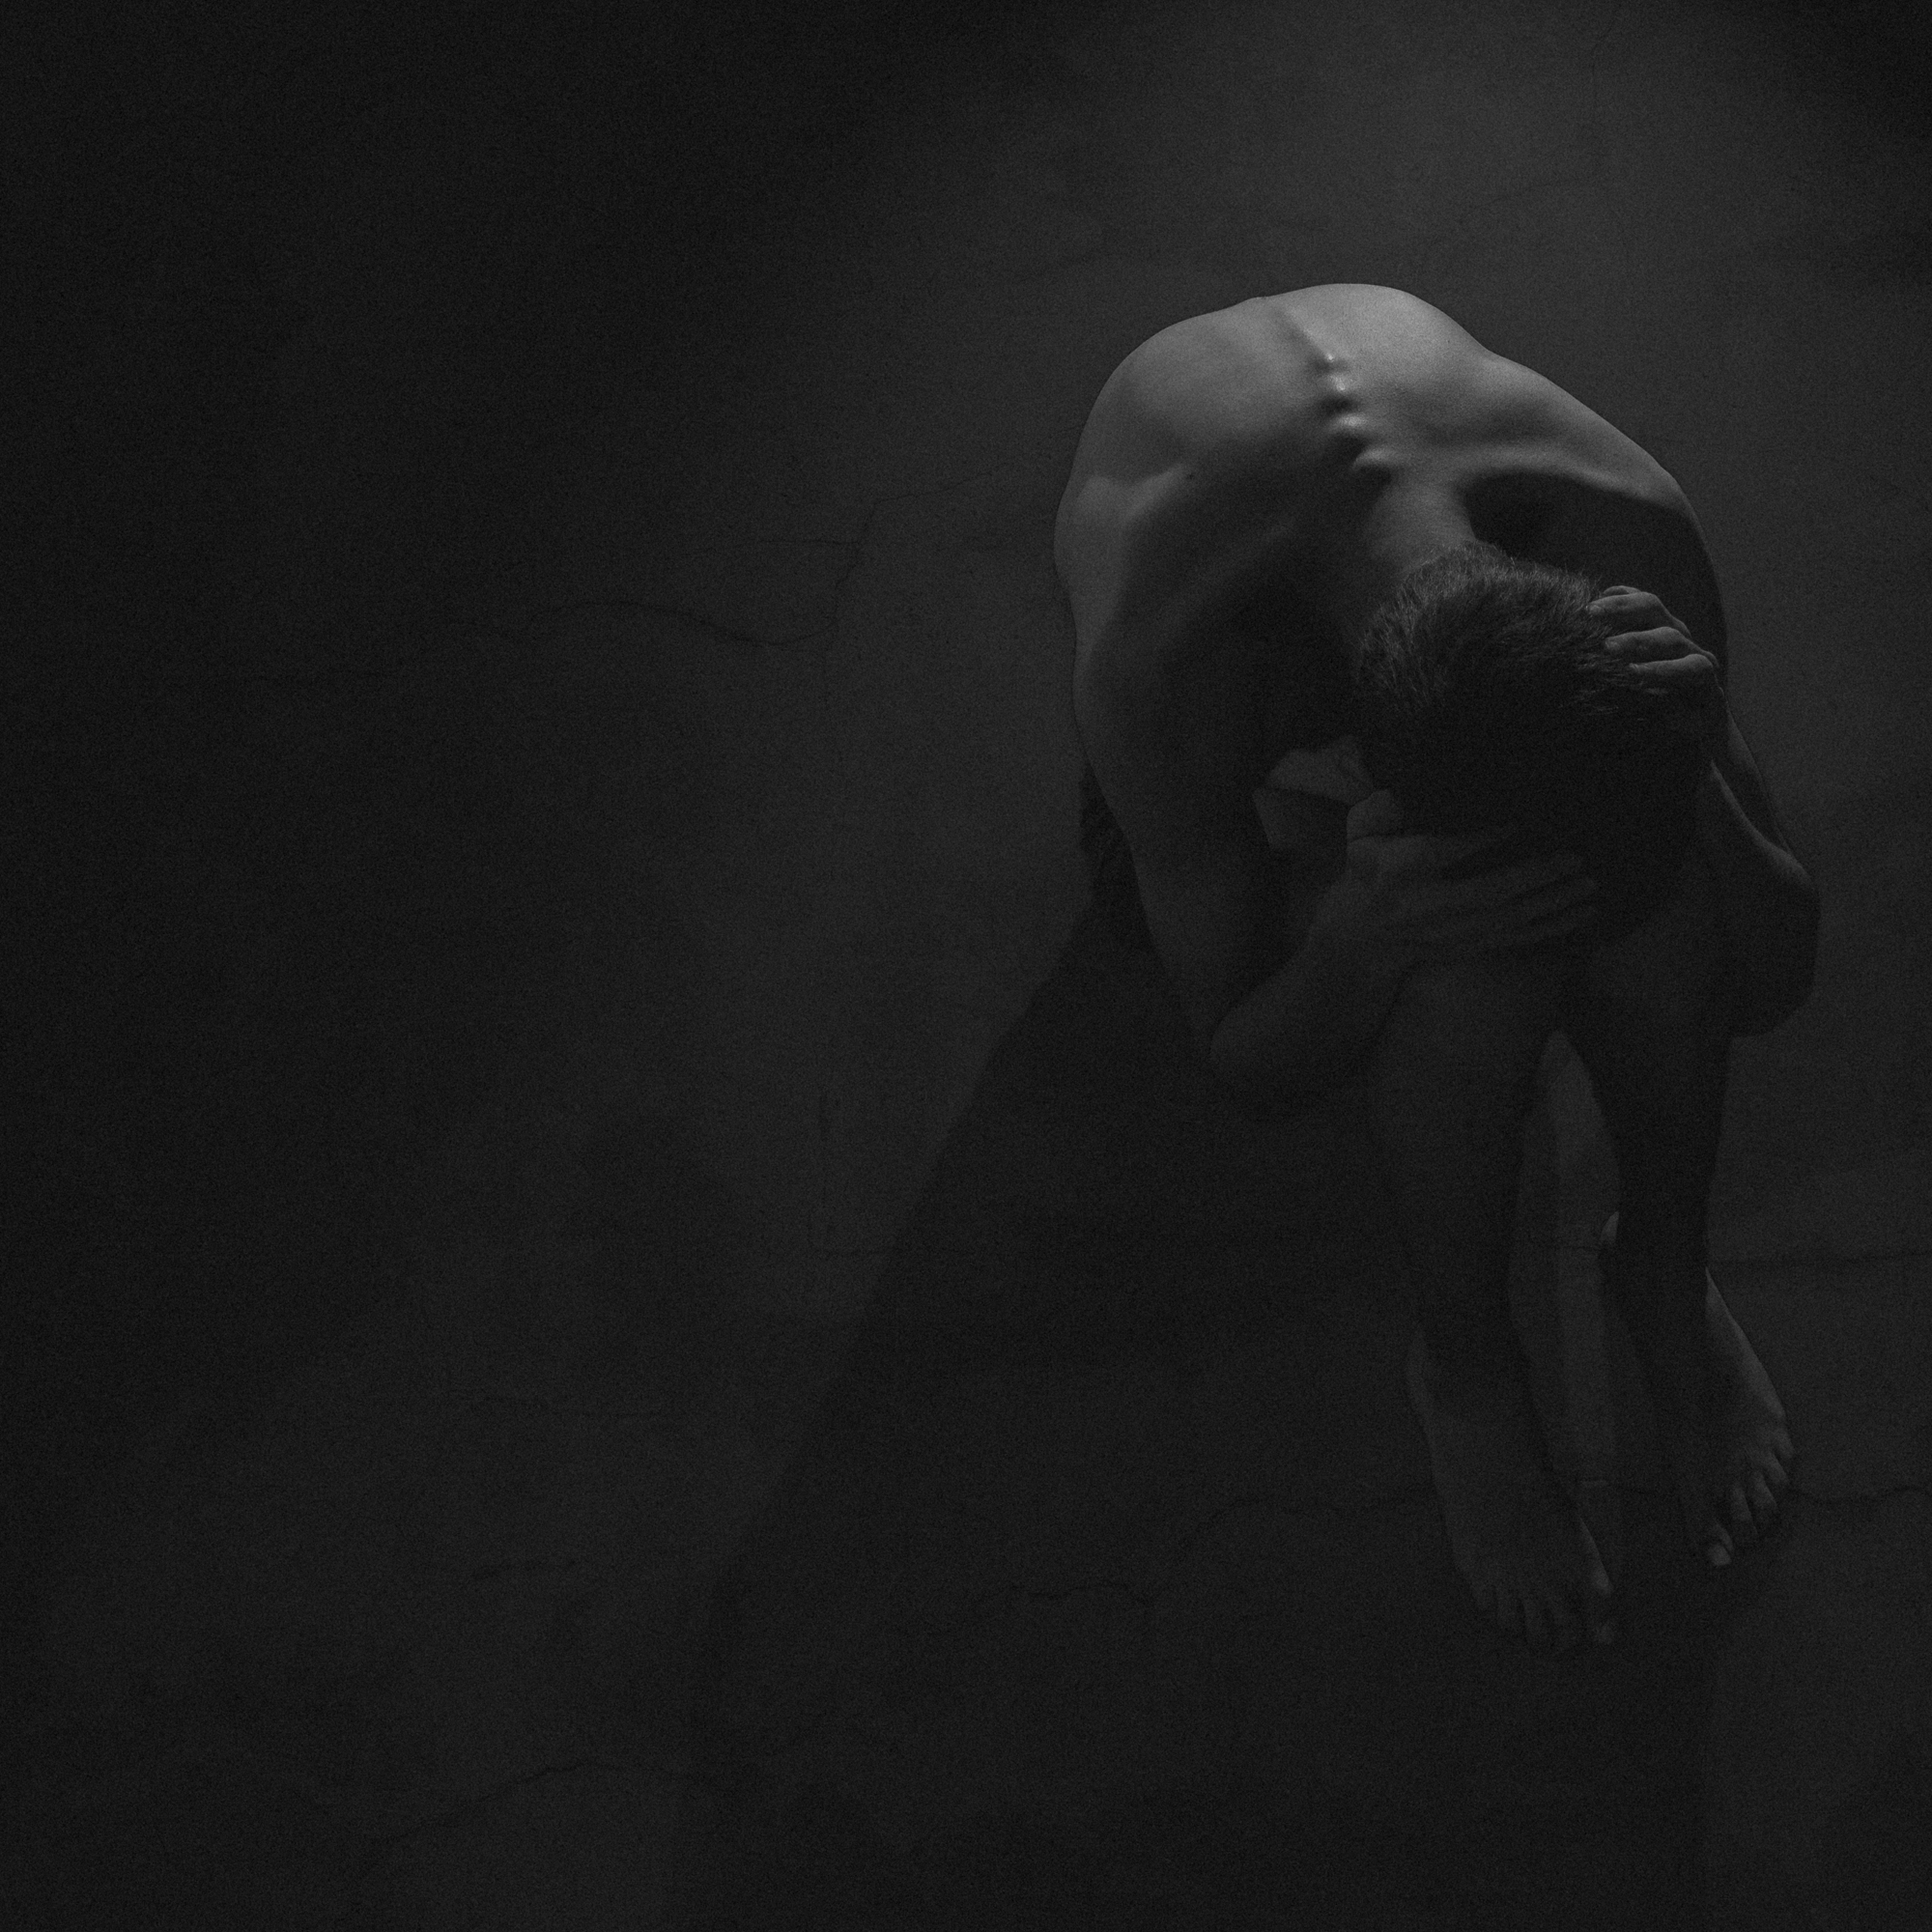
Tag: tricks

How to Create Panorama in Lightroom CC

Have you ever desired to take a panoramic photograph and your camera doesn’t have the panorama feature? Do you want to do panoramas without switching to Photoshop or other specialized software? Have you forgotten to take your wide angle lens with you on your vacation? Do not give up on the amazing scenery that is in front of you. Following this tutorial, all you will have to do is photograph some parts of the scene and the software will process your images to produce a panoramic image within Lightroom CC (2015).For those who are not familiar with Panoramic Photography, it is a technique of photography that captures a series of images using a photographic camera and aligns them all together, to make a single photograph with a wider aspect ratio than a commonly used photograph.

Before Lightroom CC (2015) came out, in order to stitch together multiple images, you needed to switch between Photoshop or use other specialized software. Even though there are some cameras that have the panorama feature built into them, but most professional DSLR cameras do not.

Recently, after the latest update, you can create your panorama images inside Lightroom CC itself. The best part is that after the software process all the images, it will create a brand new seamlessly stitched RAW file from the images without rendering the images in pixels, with this new raw file, you will be able to retouch the panorama preset in Lightroom as you would any other image. So, you have to know first how to install Lightroom preset and once it has been installed, you can now create your panorama images inside the Lightroom CC.

Panorama is a feature that has been missing for a long time in the software. In order to create breathtaking panoramas, just follow the simple steps below.

Step 1 – Take multiple shots with your camera

  • With your digital camera take multiple pictures from left to right or from bottom to top, depending on the scenery you have chosen.
  • After the first shot is taken, while shooting the subsequent photos, make sure to get a little bit of the scene of the previous image so that Lightroom has data to render them together.
  • If you are using a DSLR or a camera that can manually change its settings, do not change the aperture of the camera. For example, if you use an aperture opening of F11 make sure you use it in every single shot.
  • I did not use a tripod to shot the images used in this tutorial, although it is not crucial, the use of a tripod is recommended.

import

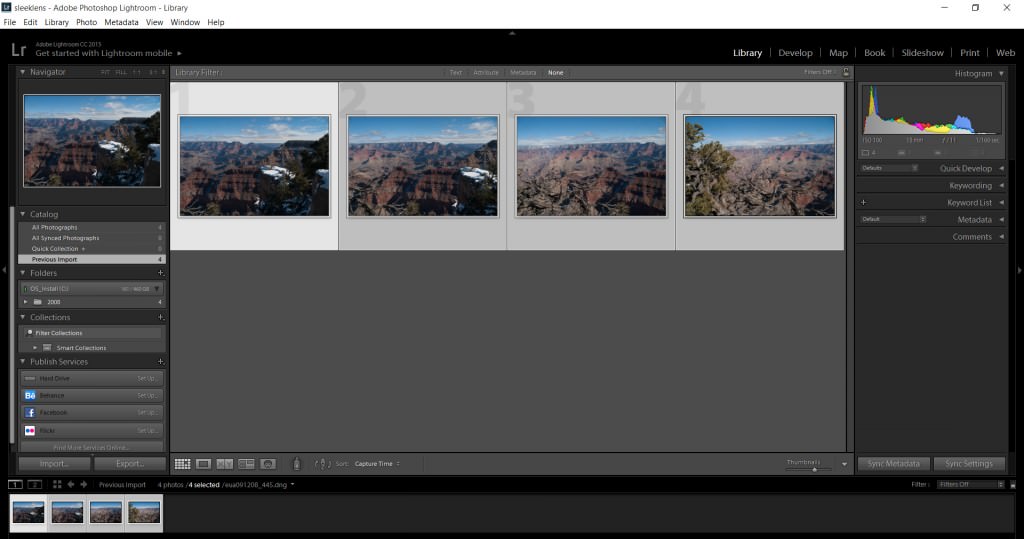
Step 2- Import your images into Lightroom

Import the images that you have photographed.

File/Import Photos and Video 

import_select

Step 3 – Select the images

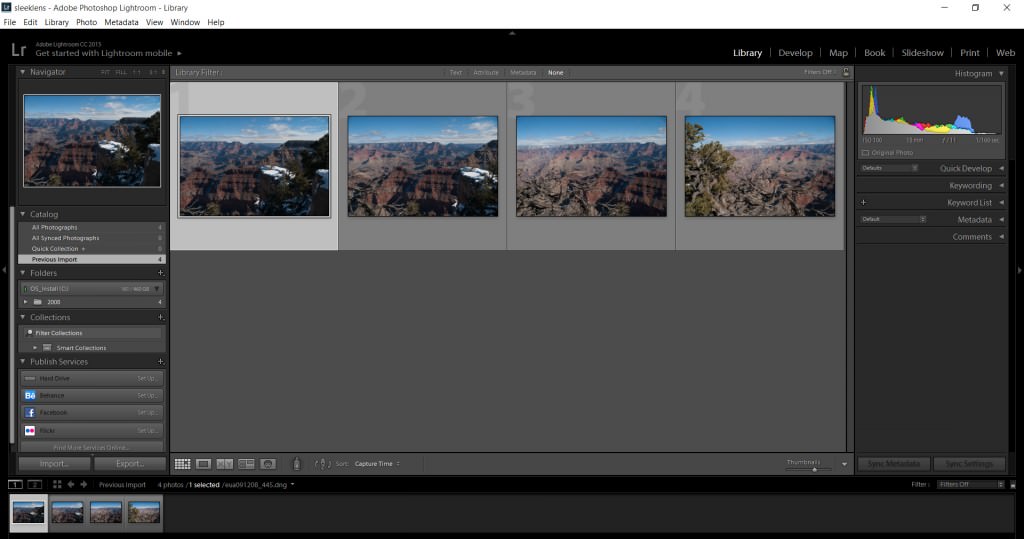
Select all the images that will be used. Shift+click the first image and click on the last image in order to select all the images.

If your images are not in sequence, (cmd+click on the mac or ctrl+click on the PC) on each image to select them.

There is no need to adjust your images on the Develop Module at this stage. We will do it afterward, on the final image.

photomerge-panorama02

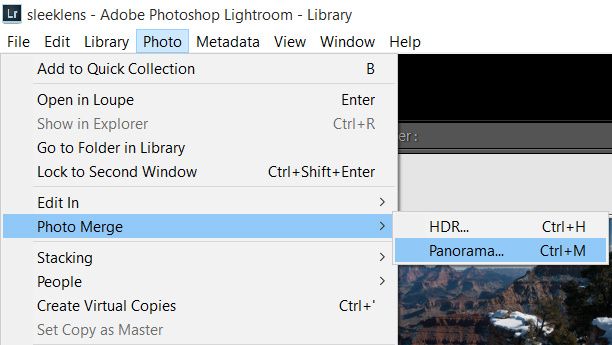
Step 4 – Merge the images 

After selecting the images, go ahead and merge them together.

Photo / Photo Merge / Panorama (cmd+M on the Mac or ctrl+M on the PC)

pano_autosphe

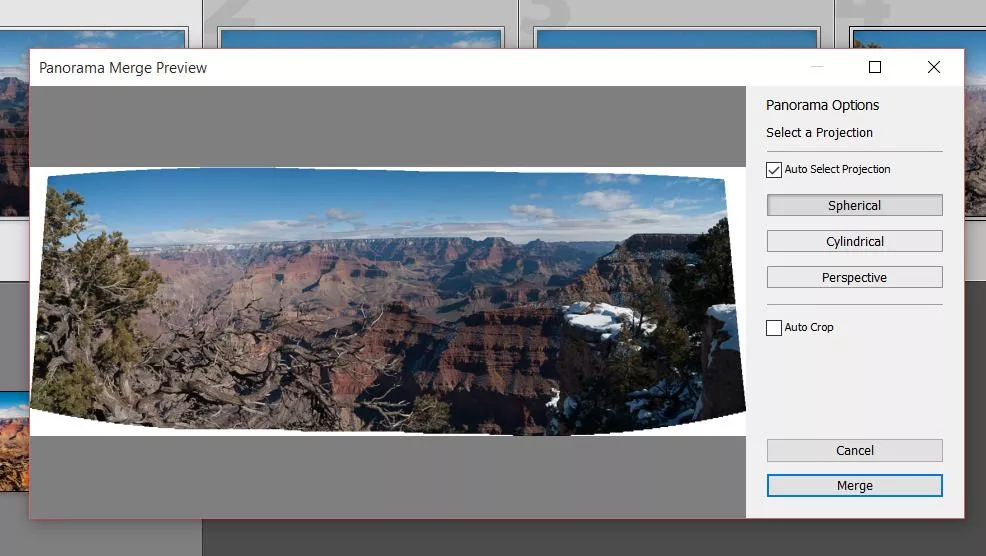
Panorama Merge Preview box will appear.

  • Auto Select Projection: Lightroom will choose automatically which projection fits better.
  • Spherical: The images will be aligned and transformed as they were inside a sphere. Best for wider or multi row panoramas.
  • Perspective: The images will be aligned and transformed as they were mapped to a flat dimension. Best for architectural photography.
  • Cylindrical: The images will be aligned and transformed as they were inside a cylinder. Best for wide panoramas, but with straight lines.
  • Auto Crop: The white edges will automatically be cropped. You can also crop it later on even crop it inside Photoshop, that way you can recover these white areas.

click Merge after the best settings are chosen.

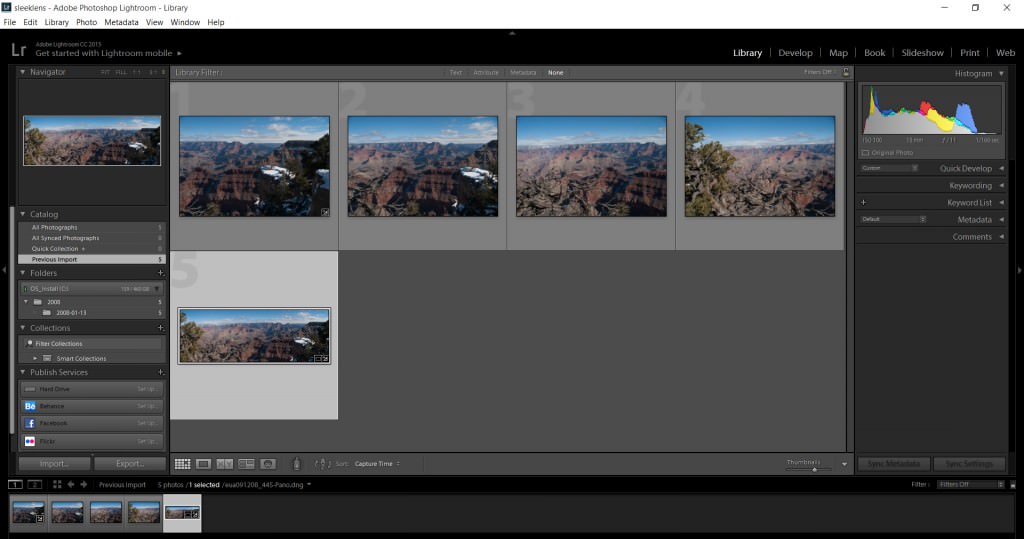
After that, Lightroom will render all the images together. Depending on your machine it may take some time to do the renderings.

newpano

Step 5 – Adjust the final stitched image

The neat thing is that Lightroom creates a brand new RAW file, that means that you will end up with the maximum capability to edit your image.final01
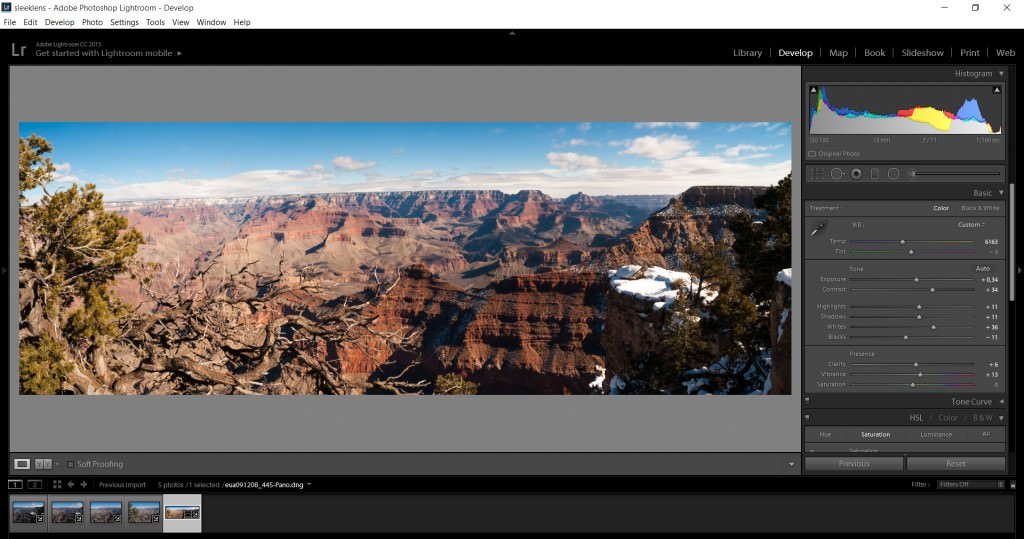
Select the new file and adjust it on the Develop Module as you would normally do in any other image.

In the end, you will end up with a nice panoramic picture.  So, did you enjoy our tutorial?  You may want to check on other tutorials such as How to Correct White Balance in Photoshop and let me know if you find it helpful.

final02

You can watch this helpful video to learn how to make a panorama photo in Adobe Lightroom. This feature has been there for quite a while much like the HDR feature and they were kind of added at the same time. The feature is super easy and does a very good job of stitching together all the images no matter how many you have.

As we begin, you can see that we have eight images at the bottom which I took. These are almost 180 panorama and this was handheld since I did not have a tripod with me. As such, it’ll take a little bit more work for the program to go ahead and stitch them together. This is also a very tricky scene since as I was taking the image, the waves were constantly moving so it’ll also stitch those as well.

To get the panorama, I will highlight on all the images, right click on them, and then choose “Photo Merge” and then Panorama. This gives us a final rendering for the preview and it is clear that this is a little bit low quality and this is just to give Lightroom a little bit easier time to mess with it since it has many pixels to play with especially with eight photos.

We have several projection options to work with including spherical, cylindrical and perspective. The spherical was great for a wide panorama especially that transitions into objects that are kind of in the frame and so it’ll be the best one for the image we have because of the sphere that we have on the bridge. Cylindrical is kind of has the same effects as spherical but does a better job in making vertical line stay straight. However, we are interested more in the horizontal lines than in the horizon of the image, as this makes spherical much better. On the other hand, perspective is mainly suitable for real estate and architectural stuff as it seeks to do a lot of distortion.

We will, therefore, stick with the spherical projection. We have a couple of features such as auto crop which takes away the white space and kind of automatically crops it in so you don’t have to do it later. We also have boundary warp which is a new feature in Lightroom and kinds of take all the white features and stretches the image to try and fill out spaces in the image. We will use the boundary warp and increase the cover size to 100 and this fills in space very easily thus giving us an image that is perfectly fitting in the available space. We can opt to reduce the numbers and then do some cropping but this will mean going back into Photoshop to try and fill in the spaces.

With all the white spaces filled, we will click “Merge” and wait for the program to put all the images together. Once done, we will have an extra image on top of our initial eight. This is the panorama image which looks great and everything is stitched together perfectly.

The next step will be to fix some of the distortions which arise when we shoot panorama images especially if you have them handheld. To fix some of these distortions we will go to Lens Collection and enable for Profile Collection and then go to Transform and try auto to see whether it’ll collect things for us. However, this only does some minimal collections and therefore we will need to play around with the distortion. We will, therefore, go back to Lens Collection and try playing around with the distortion so as to get some straight line. We will need to change things such as scale, aspect, and the rest until we get the best results possible.

This done, we can go ahead and do the fun bit of changing the effects including the shadows, highlights, vibrancy, clarity and temperature to make it look like a sunrise. Once this is done, we will have our panorama image which includes all the eight images combined into a single image. If we want a large image, we will have a lot of data to play with. We can even crop this image to make it narrow one or crop parts of it to make different size photo print if we want to. All these will come out looking perfect since we have all the data to play with which is a combination of the eight images we had. This is the beauty of making panorama images since you have different cropping aspects and know that your image will come out very clear because of the data you have.

You can check more of our Lightroom tutorials as well as Lightroom Presets and Photoshop Actions to help you do your post-processing edits in an easy and remarkable way.

Discussing the beauty of portraits with photographer Bluewaterandlight

Ben, also known as bluewaterandlight, is a talented portrait photographer from Germany. His interest in people is very evident in his images, which vary from heartwarming portraits to emotional works of art. In this interview, Ben talks about his working process, how he feels about human interactions, and what he believes aspiring photographers should know. Please enjoy this fascinating conversation.

Tell us a little about yourself and what you do.

Hey, my name is Benjamin, but I prefer Ben. I’m a portrait & people photographer from Germany. I wanted a new toy to play with, which I couldn’t understand directly, so at Christmas, in 2014 I decided to buy a camera. And the journey began. Since I got this camera I knew I wanted to photograph people, but my introversion and shyness made it impossible. But with every little step, I noticed more and more that I must photograph people and not landscapes, so I spent time with other people and I found the most interesting thing in our world: humans.

//

Landscapes are really beautiful but without people they are dead. I’ve learned to see the beauty in every little piece of God’s nature. The beauty is there, everywhere. But unfortunately, most people can’t see it. If every earth inhabitant could see this beauty, we would not enslave and destroy our nature, but live in harmony with it.

Photography for me is the best therapy and way to express myself. When I am sad or full of anxiety I create a picture of myself or another person with these feelings and put all my sadness and anxiety in the picture and then my heart is ready for happiness and love. I love people and I think this gives me the power to work hard and follow my dream, to be a worldwide working photographer.

Your portfolio is filled with gorgeous portraits. How do you make your models feel comfortable in front of your camera?

I start my photo shoots with a hug for my models to create a friendship. I’m really interested in people and this is one of the reasons my pictures look so natural. During the shoot, we talk a lot about life, love, anxiety and other things. My shoots look like this: two friends talking about their life and creating “a few” pictures.

//

In addition to being sharp and well-lit, your photos are beautifully edited. What does your editing process consist of?

My editing process begins during the shoot. I alway try to get the perfect exposure directly in the camera. Great make-up is also very helpful. At home, I import my pictures to Lightroom and choose the best pictures, if I didn’t do that already at the location together with the model. Then I import my/our favorites to Affinity Photo to edit the skin and if necessary, I remove distracting elements. Then I go back to Lightroom and edit the color, brightness, etc. Here I use my own or the VSCO presets.

Many of your images were shot using a limited amount of light. What do you think is the most important thing to consider when shooting in darker locations?

Shootings at dark locations are really hard because my Canon 6D’s autofocus isn’t good, and at dark locations, it’s extremely bad. So I mostly focus with manual focus and focus peak (Magic Lantern). Often, I use a reflector or even a flash. Many people don’t like noise/grain, but I love it because it gives the portrait a bit of a painting and creates a symbiosis between the model and the background.

//

Are there any photography genres you’d like to experiment with more?

In the future, I want to take more “Fine Art” pictures because I want to tell the world what’s in my mind. I want to travel more to talk with people all over the world and take pictures with them. And I would love if I find a model to take pictures of her/him crying, it’s one of the strongest feelings.

What do you find most challenging about portrait photography?

For me, people photography is the masterclass of photography. It’s extremely hard to make people familiar with you and your work and make them trust you. In my preparation for a photo shoot, I listen to my “power playlist” to give myself certainty that the photo shoot will be awesome. You should create your own “power playlist” filled with songs which give you energy and self-confidence.

//


If an aspiring photographer asked you for advice, what would you tell them?

  • Follow your heart, don’t give a shit on what other people think.
  • If something doesn’t work, wait a bit, try it later and get some rest. But never give up!
  • Use music to make the emotion more intense (a mobile music box with Bluetooth and battery is helpful.) Classic music, for example, can slow down the space around you and help you see through chaos.
  • Write down your ideas and thoughts in a notebook. If you don’t, you will forget them.
  • Don’t look at cameras, lens or other gear. It’s not important. The image in your mind, your ideas and people are important.

You’re a fan of black & white photography. What do you find most appealing about it?

Black and white photography is the origin of photography and the most natural photography. It puts my focus on the model/subject and away from color. For me, it’s the essence of photography. It makes the light and structure more important.

//

If you could meet your favorite artist and ask them 3 photography-related questions, what would they be?

  1. What’s your story?
  2. Why do you do your photography the way you do it?
  3. How do you handle anxiety and depression?

What has been your most challenging creative obstacle so far, and how did you overcome it?

Every single time, it’s hard to transfer the image from your mind to the reality. My most challenging picture was the picture of my best friend Ante. I was inspired by the pictures of “omerika” (https://www.instagram.com/omerika/).

The act of sleeping fascinated me all time because during sleep you solve problems you can’t understand in the real world. During sleep, you can be every person you want. You can be an astronaut, race car driver, a bird and even the doctor (knock, knock. Who is there? Doctor! Doctor Who? Correct. 😛 ) In this picture I wanted to create a symbiosis between a sleeping girl and mother nature. First, I tried to use a tree as a symbol of “mother nature” but then I didn’t like the picture. So I put it away for a few days, and later I decided to use a forest and merge it. It was so beautiful. I love this image.

//


A few last words from the photographer:

Don’t do what other people want you to do. Do what you love and never give up!
“The limits in photography are in yourself, for what we see is only what we are.” -Ernst Haas
Good light and great ideas,
With love, Ben 

You can find more of Ben’s work on his website and Instagram.

//

A day in the life of a photogenic kitten

I own a sassy little Scottish Fold called Mimi whose rambunctious personality gives me unique photo-taking opportunities every day. Though I mostly focus on portraiture, taking photos of animals gives me a chance to broaden my creative horizons and familiarize myself with mind-opening, genre-specific techniques. With this in mind, I decided to focus on an average day with my cat and find interesting creative doors as the day progressed. Here are the results.

//

//

While some cats are nocturnal animals, others enjoy sleeping at the same time as their owners. Mimi is a combination of both, switching from a peaceful nighttime cat to a wild creature lurking in the dark. The former is preferred by everyone not just because it gives the family an undisturbed night of sleep, but also because it makes Mimi fairly sleepy in the mornings – the ideal time to take cozy pet photos. A kitten experiencing the light of a new morning is exceedingly charming. This time of day is particularly useful for those who own wild kittens; photographing them early in the morning will help you avoid taking unsuccessful and blurry shots. Keeping the curtains drawn on a bright morning will also provide you with the best light: a mild yet clear environment for the best indoor pictures.

//

//

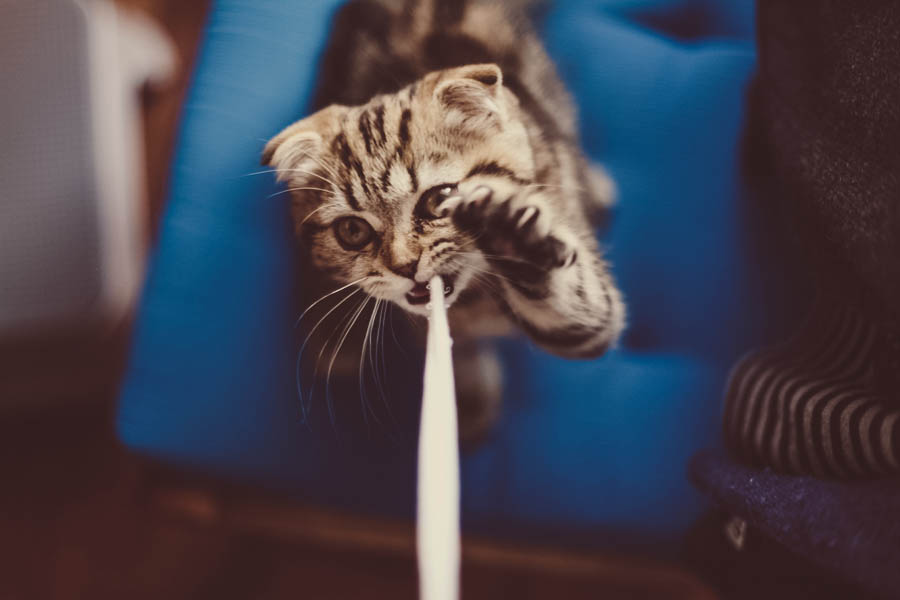
Mimi turns into a hyper creature as soon as she devours her breakfast. While this part of the day is a challenging one to capture, it’s worth diving into thanks to the often funny creative opportunities that arise. The light during this time is still mild, so worrying about lighting conditions isn’t a necessity. Taking into consideration the importance of capturing movement, the good lighting conditions are a huge plus. If the light isn’t favorable when your cat is in a playful mood, consider increasing your camera’s ISO number for less blurred results.

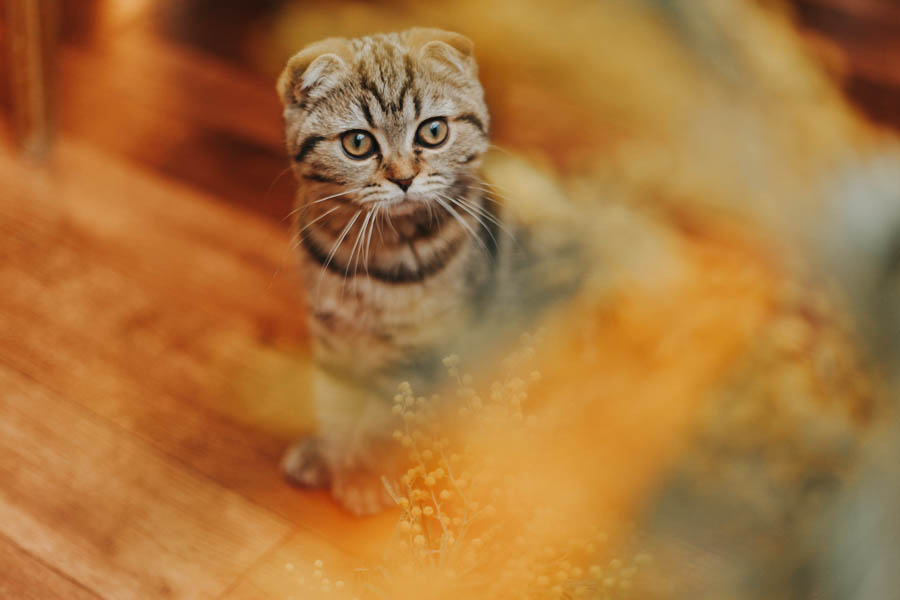
To make playtime more entertaining for both you and your cat, consider using distractions such as toys and snacks. These will catch your pet’s attention and serve as visually appealing foregrounds. Other objects which have the potential of becoming striking foregrounds are hair, blankets, and plants. Remember to reward your cat every few minutes so it feels encouraged and loved. Grumpy pets don’t make the best models, no matter how sweet they may look.

//

//

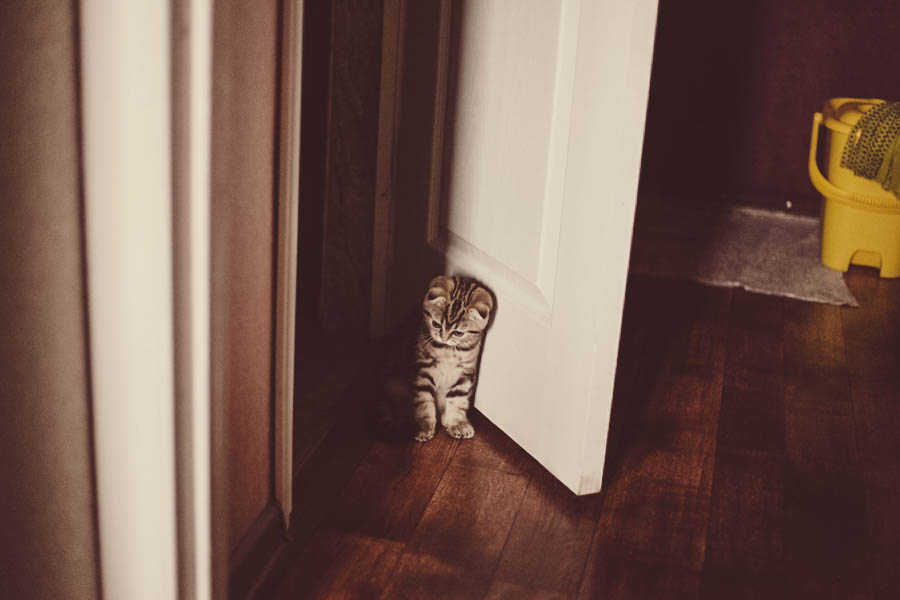
Exploring the apartment is something Mimi thoroughly enjoys, no matter how well she knows every room. Washing machines, doors, tables, and windows all fascinate her beyond measure. For unique and endearing images, follow your cat around and notice what interests them. Photograph them while they’re in their own bubble of curiosity. Exploration is the perfect time for spontaneity, and spontaneity is perfect for eye-catching and impressive shots.

//

//

Take advantage of your cat’s favorite hobby: napping. Mimi can sleep for hours on end, occasionally getting up and freezing mid-stretch. Since cats are so flexible, their sleeping and resting positions are often quite amusing. Mimi, for example, loves sleeping with her paws lined up neatly in front of her, just like The Sphinx of Giza. Photographing your cat’s unique quirks will give your photos more personality, so use your pet’s naptimes as an excuse to take awesome photos.

//

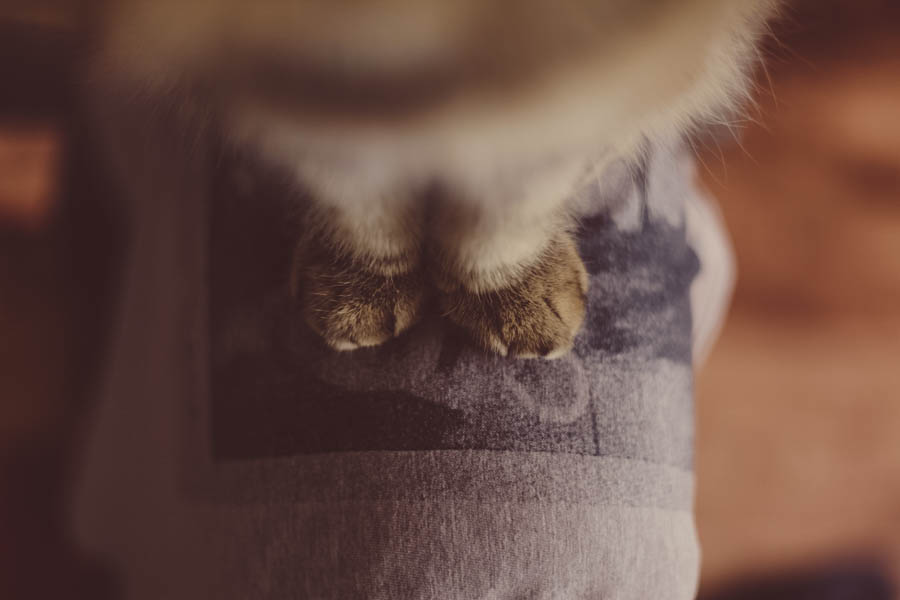
It really is all in the details. Focusing on parts of your cat – its paws, ears, eyes, and so on – will allow you to think more creatively due to the fact that it takes careful observation to find outstanding details. Instead of photographing your cat from a distance, find graceful parts that stand out to you. Making a collage out of those parts could be the start of an interesting project, for instance.

In just a day, you could acquire a plethora of sweet cat photographs. Imagine how wonderful your results would be if you photographed your pet more often if you started a project tracking its development and growth. Such projects, tough as they may sometimes be, are fantastic methods of improvement. Whatever you decide to do after reading this article, remember to reward your cat, be present while shooting (even if you’re focused), avoid stress, and most importantly, enjoy this wonderfully pleasant time together. The experience will leave you feeling warm and the photos will be the beginning of something wonderful.
Good luck!

//

Photographer interview: Ines Rehberger

Ines Rehberger is a very talented portrait photographer from Germany. Her photographs possess raw beauty, honesty, and an infinite amount of stories. I had a chance to ask her about the value of lighting, her working process, and more. I hope Ines’ outlook on life motivates you to believe in yourself and look at life from a different perspective.

What inspired you to start taking photographs?

I grew up being an art-focused child. I loved to draw and paint. But it never fulfilled my aim to show who I am inside. I wasn’t able to make myself happy with what I did. So one day I grabbed my mom’s pocket camera and started taking pictures of friends and myself and since those days I never stopped. Photography opened a world of endless possibilities to capture my soul, to create worlds and transfer feelings.

//

Your portfolio is beyond stunning. Which photograph of yours is your favorite and why?

Thank you so much! Since I’ve been taking pictures for many many years it is really hard to pick a favourite. It also depends on my mood. But as I’m sitting here, feeling kind of Scotland-homesick I have to go with this one featuring my host mom Therèse:

//

The quality and creativity of your images are extremely impressive. What does a typical portrait shoot consist of?

You’re making me speechless! Thanks again! Well, usually I welcome the model at my home and we have a chat and maybe a tea and talk about ideas and choose some outfits. My shootings are very spontaneous. Whatever happens, happens. And most of the time I’m happy about it.

Every person you photograph possesses raw honesty and such touching emotions. How do you make your subjects comfortable during a shoot?

To me, it is very important to talk to the model like I talk to everyone else. I don’t treat them like clients. I want to get to know them and in the same way, I tell them about myself. Once there is a state of trust it is quite easy to tell someone what kind of emotion I’d like to have for a portrait.

//

Your relationship with light is phenomenal. What lighting-related advice would you give to an aspiring photographer?

I’d tell her/him to go and try as many light situations as possible. Natural light, as well as artificial light. There are so many ways to create beautiful light situations without having to spend money. I personally love to use mirrors to reflect light or use a flashlight through glass. Car lights and traffic lights also create amazing effects.

You’ve shot so many interesting people. Is there anyone you dream of photographing one day?

Sometimes I dream about taking pictures of celebrities like Lana Del Rey or Benedict Cumberbatch. Some people say: dream big, but at the moment I like to take pictures of the people I trust and love the most and in my opinion, they are just as interesting as celebs.

What has been the most challenging creative obstacle in your life so far, and how did you overcome it?

I actually just overcame it. I was really struggling with my work. I still like my old style of photography but it came to a point that I realized it wasn’t what I truly wanted to do. I felt like I was simply taking the pictures people expected me to take. I took a rather long break and came back as motivated as I used to be. Now taking pictures became a rare thing for me but it is more intense than ever before.

//

If you could visit your past self, what art-related advice would you give her?

Always trust in art. It will never let you down.

Most of your photos are accompanied by intriguing titles (such as “lumen” and “in winter when I bloom”) which deepen the value of your photos. How important are titles to you and why?

Titles can be important. There were times I wanted to title every series and every portrait I took. With time they became less important to me. Sometimes I want people to find their own stories and ideas for my pictures.

//

What 3 tips would you give to a beginner in photography?

1-> Believe in yourself
2-> Be yourself
3-> Take your camera and go outside and take pictures of random things and love the possibility to freeze anything you want in time. You’re a magician!

You can find more of Ines’ work on her Flickr and Facebook.

Hiding and highlighting facial features

At times, the key to a unique portrait is a touch of mystery: hands covering an eye, windswept hair sheltering half a person’s face, a seemingly simple texture highlighting one’s lips. These subtle layers of obscurity create fascinating – sometimes even abstract – works of art, ones which amuse their viewers and make their creators beam with pride. Transforming simple portraits into creative, eye-catching ones isn’t as challenging as many artists believe. Even if you’re short on time during a shoot, you can still take gorgeous photographs which will please both you and your subject. Here are tips on how to do this.

Hair

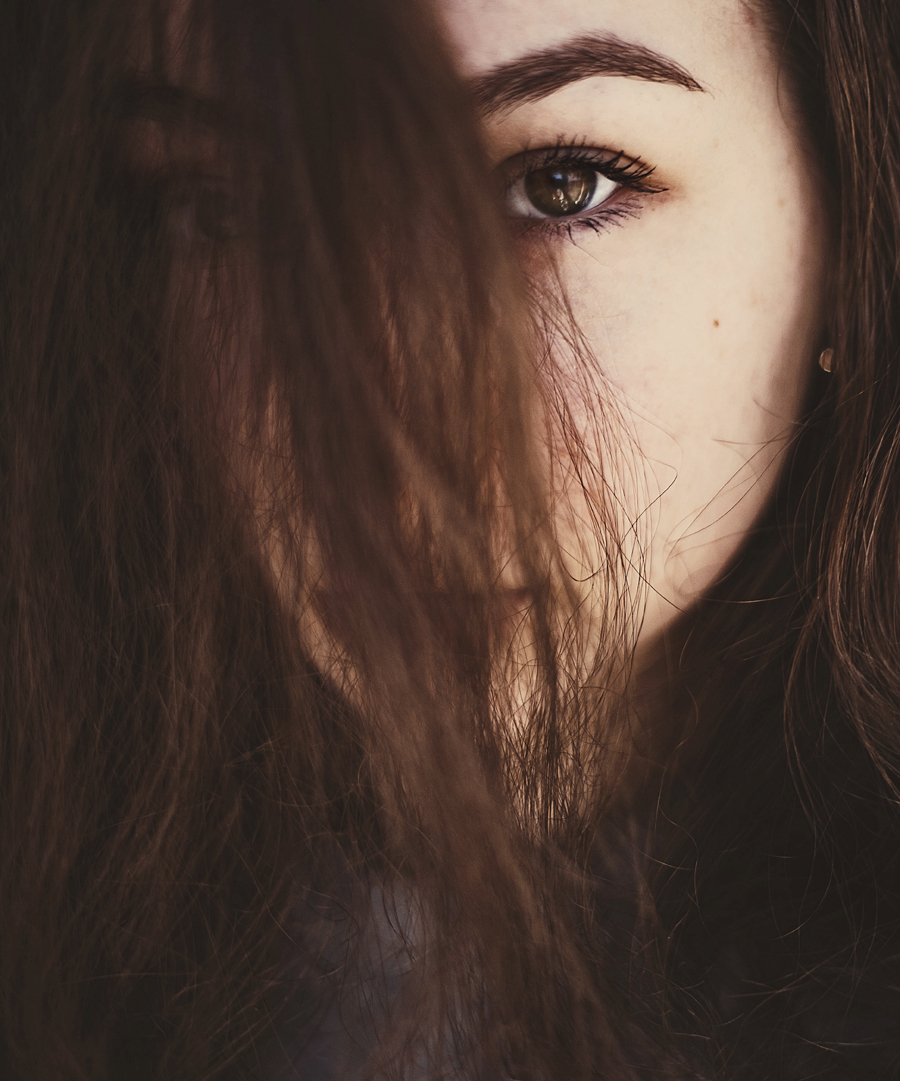
We’re all familiar with portraits in which the model’s face is hiding behind vibrantly colored locks. The impact such images have aren’t capable of losing their allure since there’s an overwhelming amount of hair textures and colors out there. No matter how cliché such images might seem to you, try covering your subject’s face with their hair and see if the results pleasantly surprise you. 🙂

//

//

Foregrounds

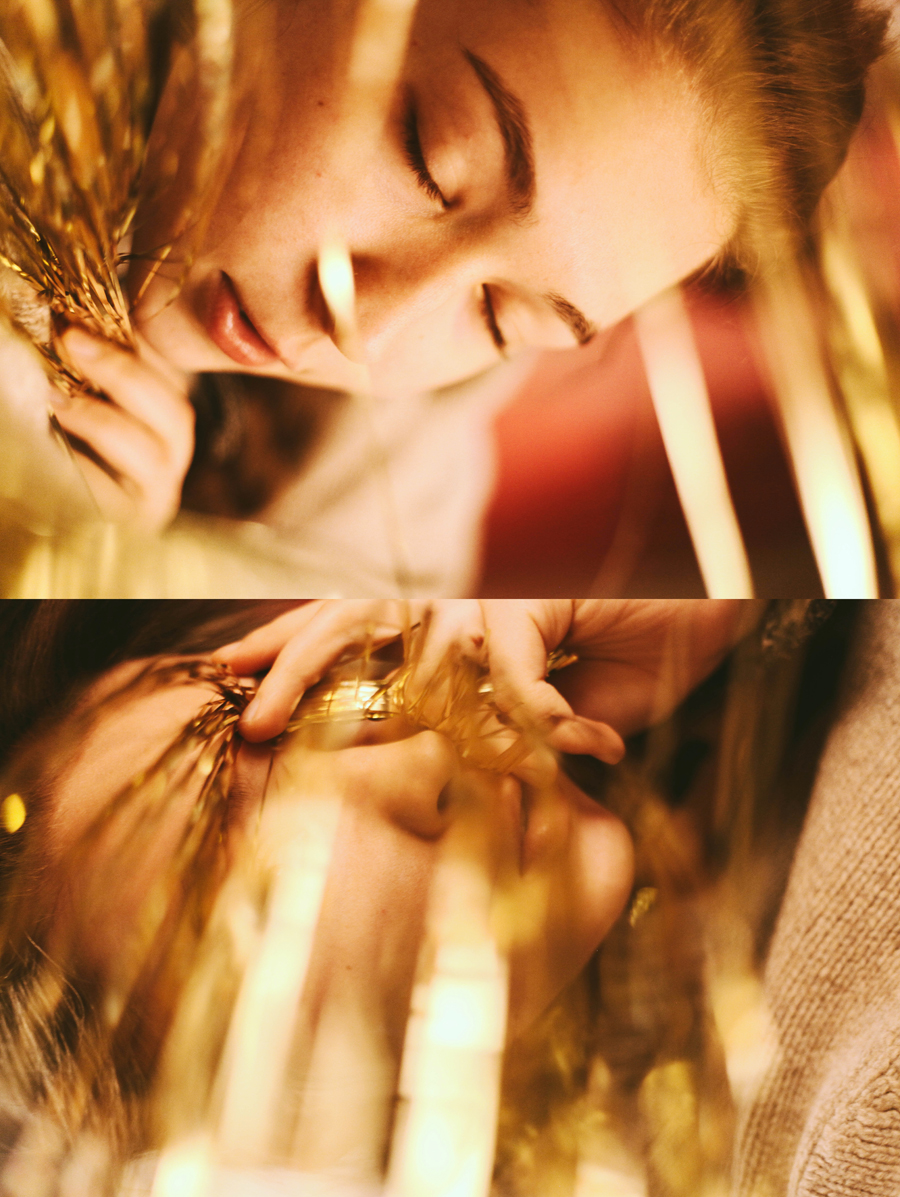
Foregrounds possess an infinite amount of creative possibilities because they can be almost anything, from a tattered curtain to a wrecked window pane in an abandoned house. These objects, visually appealing or not, will inevitably increase the meaning of your images and add a great creative touch to them. Foregrounds are blurred most of the time, so how they look shouldn’t be important to you. Experiment with shapes, sizes, and patterns, remembering to hide parts of your subject’s face at the same time. The results will impress both you and others.

Cropping

The cropping tool is perfect for creating mysterious photographs. If you find an image too dull and exposed, forget the rules for a moment and crop part of your subject’s face. Experiment fearlessly with this tool and see what looks right to you as an art-loving individual. Combining intriguing foregrounds and cropping half of your subject’s face to expose their eye, for example, will create an image the story of which others will want to know. Similarly, you could conceal your subject’s face with their hair and crop out their lips. Photos of this sort are a great way to experiment with compositions and to challenge yourself as a photographer and editor. Additionally, mysterious (yet at the same time, simple) photos like this are often used for book covers, a huge plus which will inevitably enrich your portfolio.

//

//

Hands

Since hands are capable of reflecting a plethora of emotions, adding them to your portraits will give them even more potential to touch your viewers. If you wish to give your photos a fragile touch, photograph your subject peeking at the camera through their fingers. If you want to achieve a feeling of inner strength, shoot your subject while they’re covering their mouth during a carefree moment of laughter. These interactions and “disguises” will add an interesting element to your photograph, something that’ll make your entire portfolio stand out.

//

Light

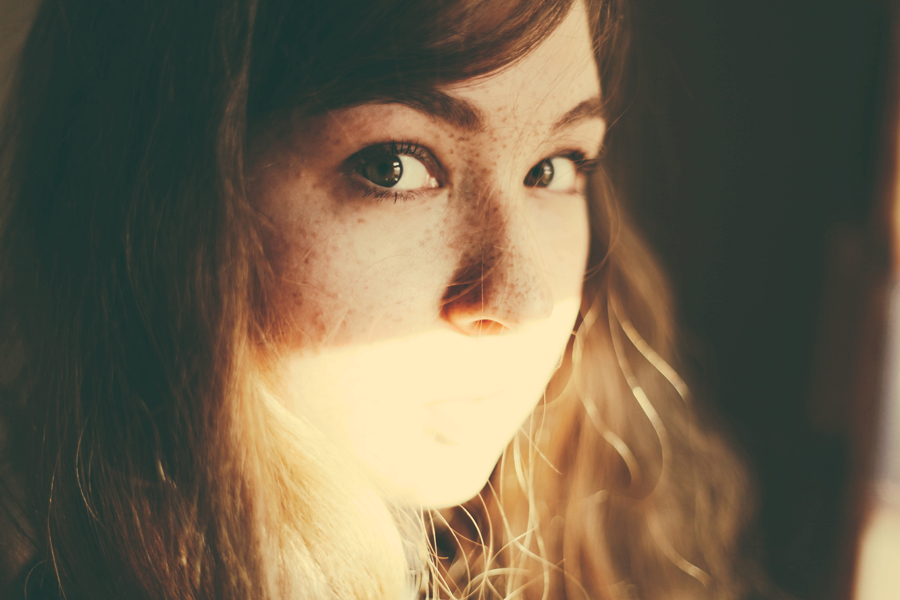
While overexposure is often looked down upon, it can prove to be a useful tool for photographers. In the image below, the lower part of the subject’s face is overexposed, giving a powerful idea of silence. Her surprised and almost pleading expression adds to the image’s quietening atmosphere, further strengthening the concept of silence. Thus, finding patches of light and concealing/highlighting certain facial features will not only make your images interesting to look at, but it will also intensify their meaning.

//

Objects

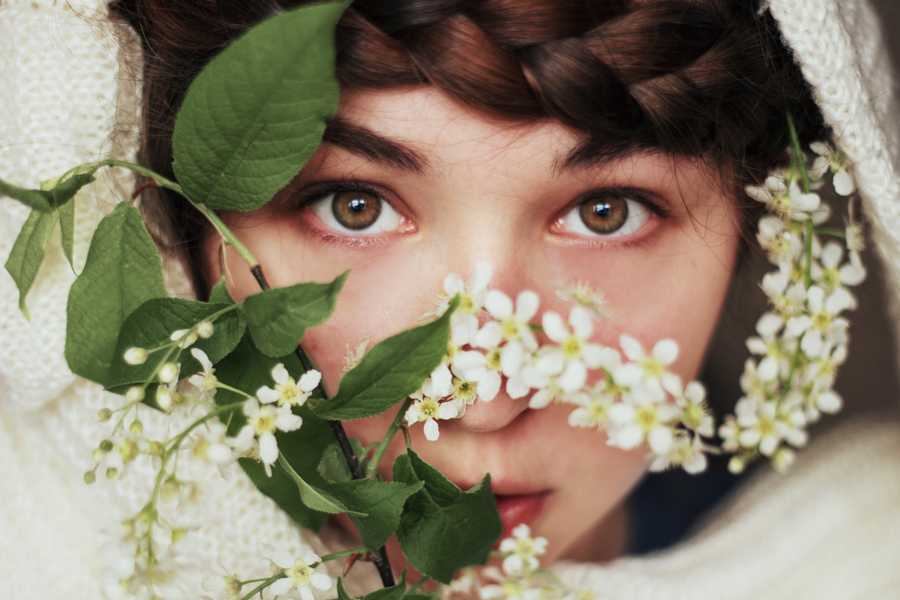
While foregrounds serve as composition enhancers, objects like plants can be used to both hide parts of a face and become a part of it. Flowers are ideal for this as they’re photogenic and capable of beautifully complementing a face. (For example, simple white flowers could enhance a natural makeup look.) If you’re having a (client) shoot outdoors, make the most of nature, especially branches and flowers. Hide certain facial features using nature to tell a powerful story. (If you don’t have a desire to strengthen your storytelling skills, this method will still work for you.)

//

Textures

The Internet is brimming with textures of all sorts. Even if you’re not experienced in Photoshop, you can master textures within a few minutes thanks to the abundance of free tutorials out there. Textures are valuable to all kinds of photographers – they add gorgeous details to images that would’ve been too simple without them and are capable of concealing unwanted details. Furthermore, they just make your image look great. Use them to your creative advantage, whether it’s to cover an eye using a light leak or to hide everything saves your subject’s lips using a stock photo of water.

//

What story do you want to tell? Will hiding your subject’s eyes and focusing on his or her lips reflect your unique story? Will cropping half of their face make a strong point? Prepare ideas before your shoot, taking the time to consider your shooting location and your model’s features, and you’ll end up with impressive, incredible results.

Good luck!

Shooting From the Hip: Taking Pictures at a Low Angle

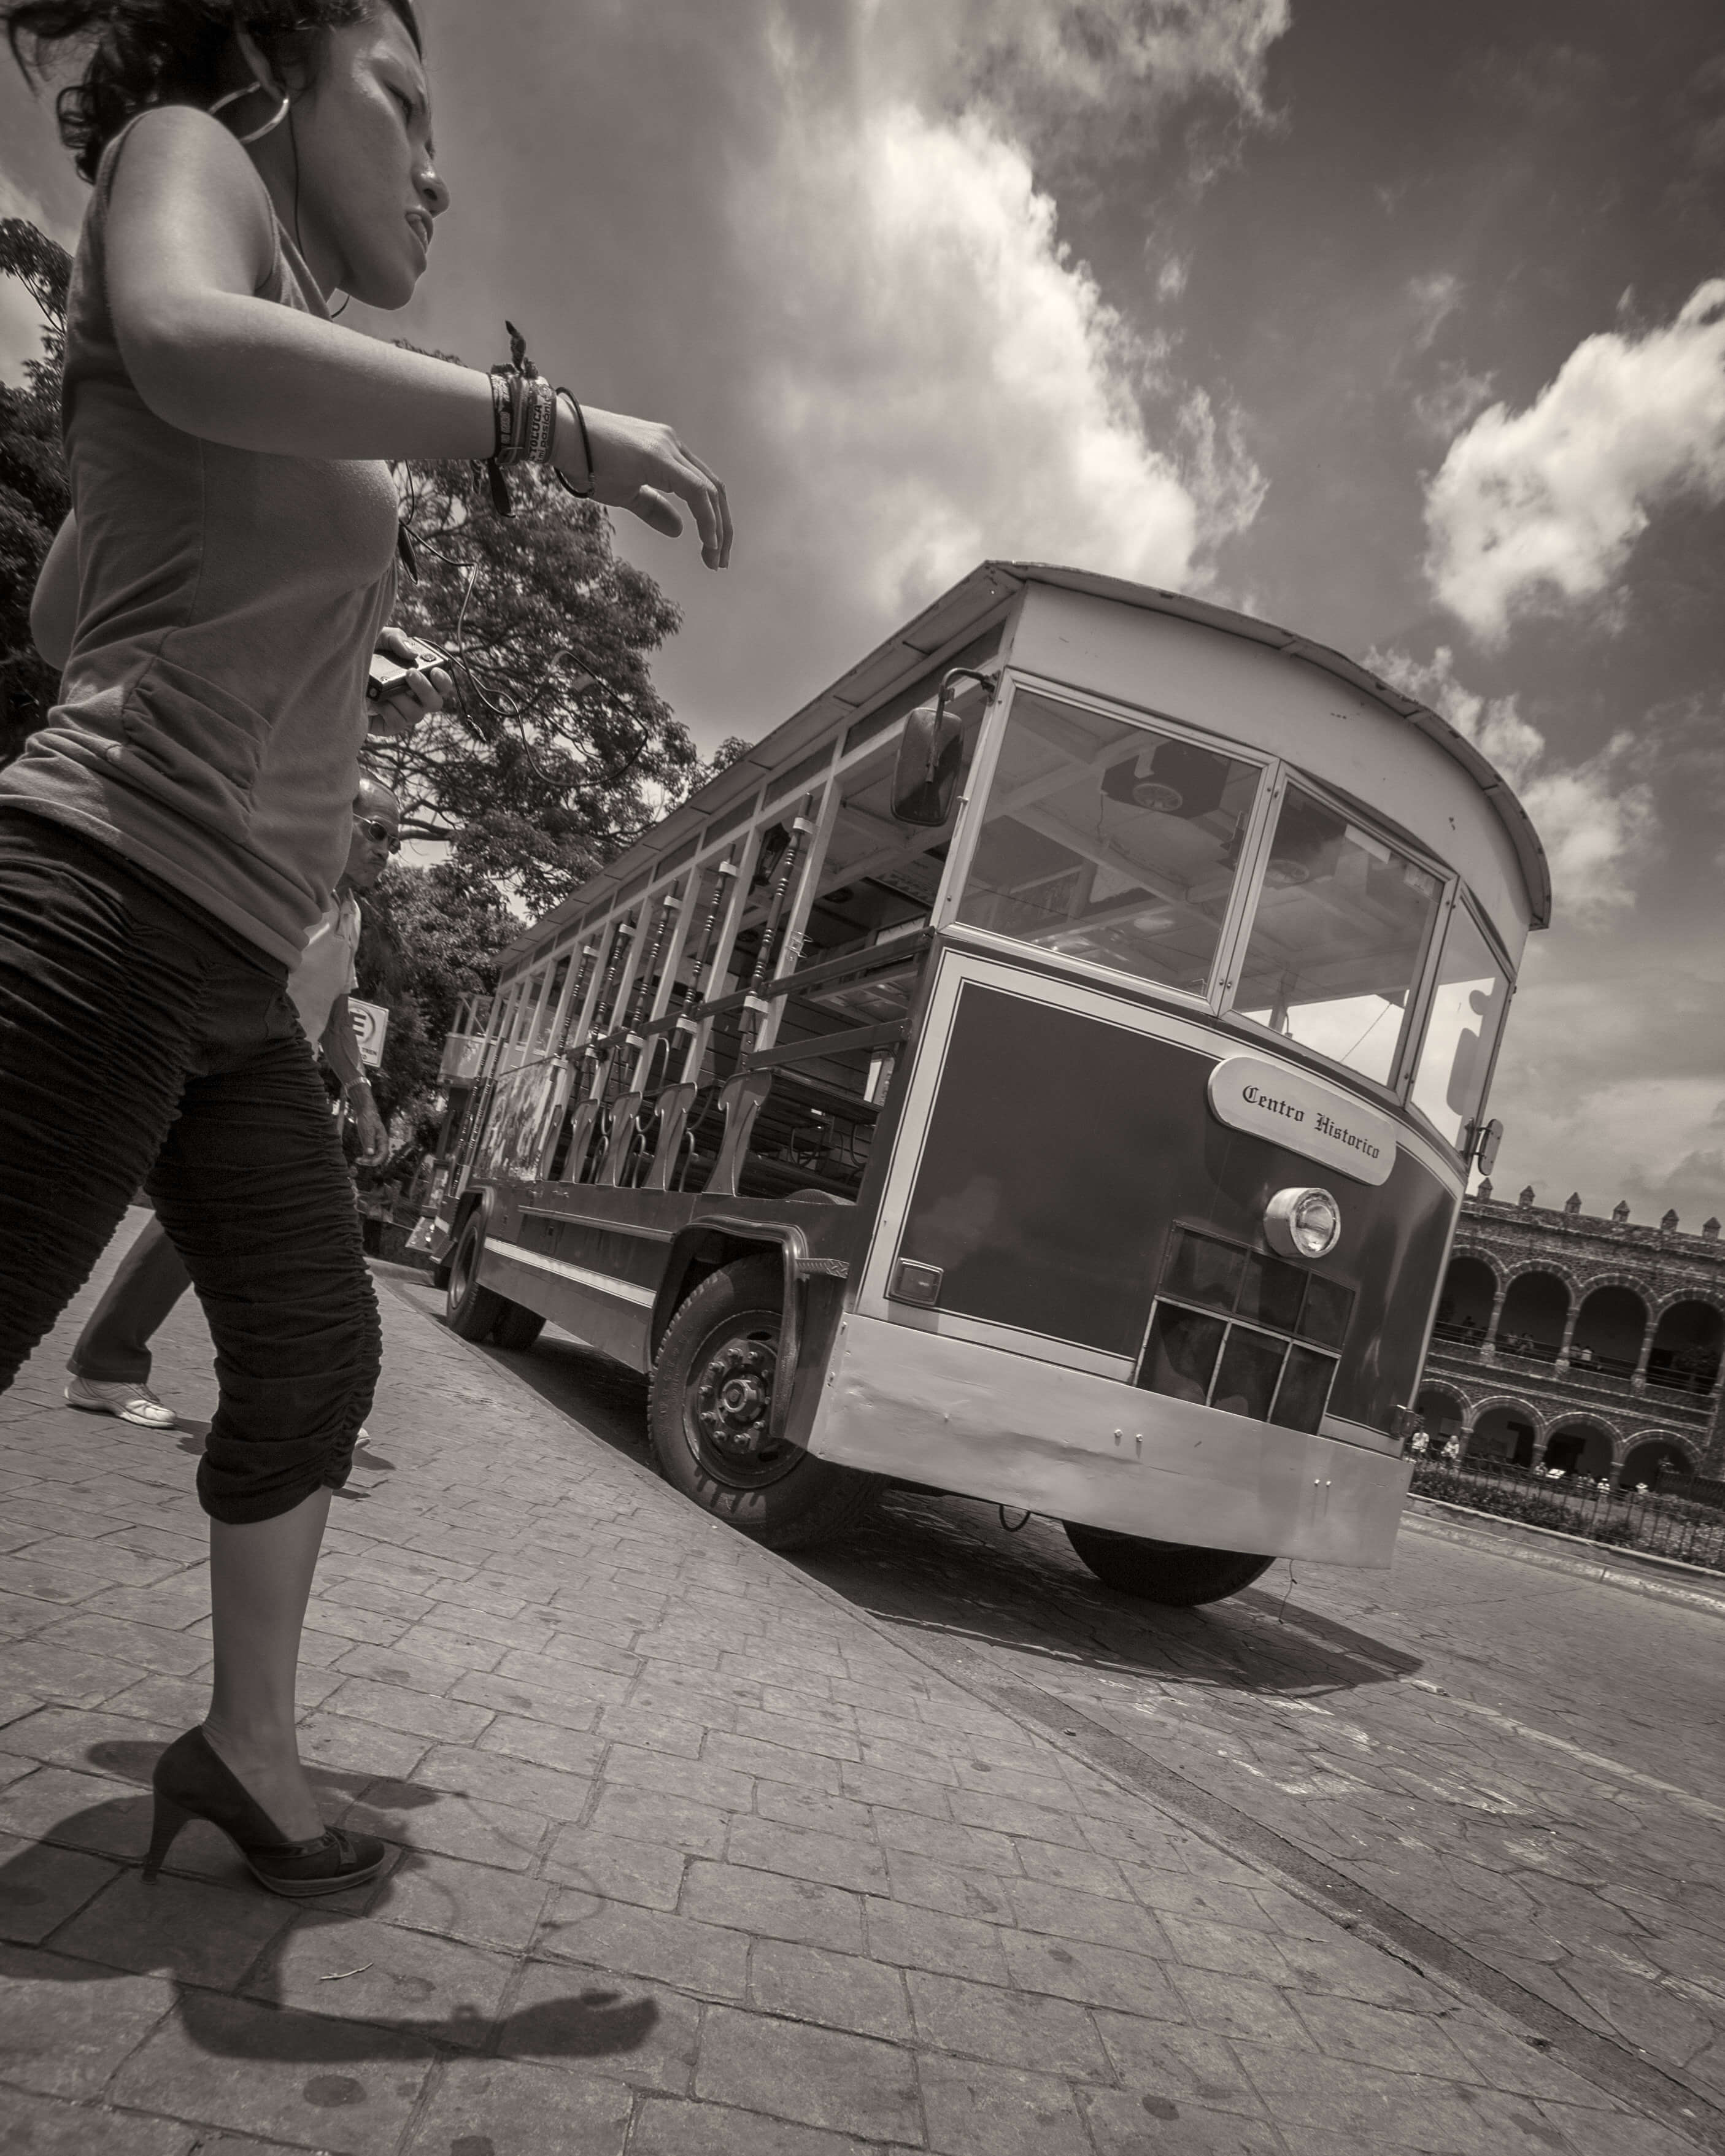
I saw this woman charging across the market square in Cuernavaca, Mexico, and fired away with the camera at my side. This frame had the best feeling of that random, kinetic moment.

There are times when I need a new perspective to my photography. That means shooting blind. Well, not literally blind, or even with my eyes closed. I mean I’m not looking through the viewfinder or the LCD. Just pointing the camera at my subject and blasting away. In a way, it’s the purest form of visualization because I’m imagining the photo and trusting my motor skills to properly aim my camera. I do this mostly with the camera anywhere from hip height to my ankles. Literally point and shoot. (On occasion, I will also raise the camera above my head for a higher angle than my short legs will otherwise allow.)

I’m sure you’ve already figured out why I do this: to get a unique angle on my subject, or, in the case of street photography, to not draw attention to the fact I’m taking someone’s picture. And lest you think this is something that depends more on hit or miss luck than a true photographic skill, I consider this a technique that can only be successful with lots of practice. In a way, you become one with the camera and get to know what it’s recording just by where you point the lens at a scene.

Street Photography

 I’ve always thought that some of the best street photographs are ones that are dripping in spontaneity. You can’t always get that by bringing the viewfinder to your eye which signals to anyone in front of you they’re about to have their picture taken. You have to be fast and unobserved. So I hold my camera at my side in a vertical position, my finger on the shutter and when the moment’s right, grab my shot. I know I have the composition relatively nailed because I’ve developed an instinct for what’s included in the frame just by pointing the lens in the right direction. I don’t worry if the camera is tilted a bit. In fact, that sometimes adds to the kinetic quality of the picture, adding a little-implied movement.I also have to trust my camera settings to help get the shot and that starts with focus. In a crowd, I’ll disengage autofocus so it doesn’t get distracted by foreground objects and adjust the lens focus for close quarters (say, 10-15 feet). I then stop down the aperture to at least f/8 or f/11 to let the depth of field pull more elements in focus. I set ISO to auto, exposure to manual and then turn up the shutter speed to around 1/250 to compensate for any unsteadiness on my part as well as the subject’s movement. Lastly, I set the drive to silent, which on my Canon DSLRs isn’t exactly stealth mode, but quiet enough to not draw attention to itself. (This is how I shot the opening image of the shopkeeper in Rosarito, Mexico.)Where there’s nothing in the way to throw off the autofocus, I’ll set the focus points to full auto and with utter recklessness, let the camera decide what should be in focus. Amazingly, it gets things right most of the time.My lens setting is a usually a wide one, somewhere between 24mm and 35mm (I do most of my street work with a 24-70mm lens). This also helps keep things in focus while the wide angle brings a greater feeling for the viewer of being smack in the scene.

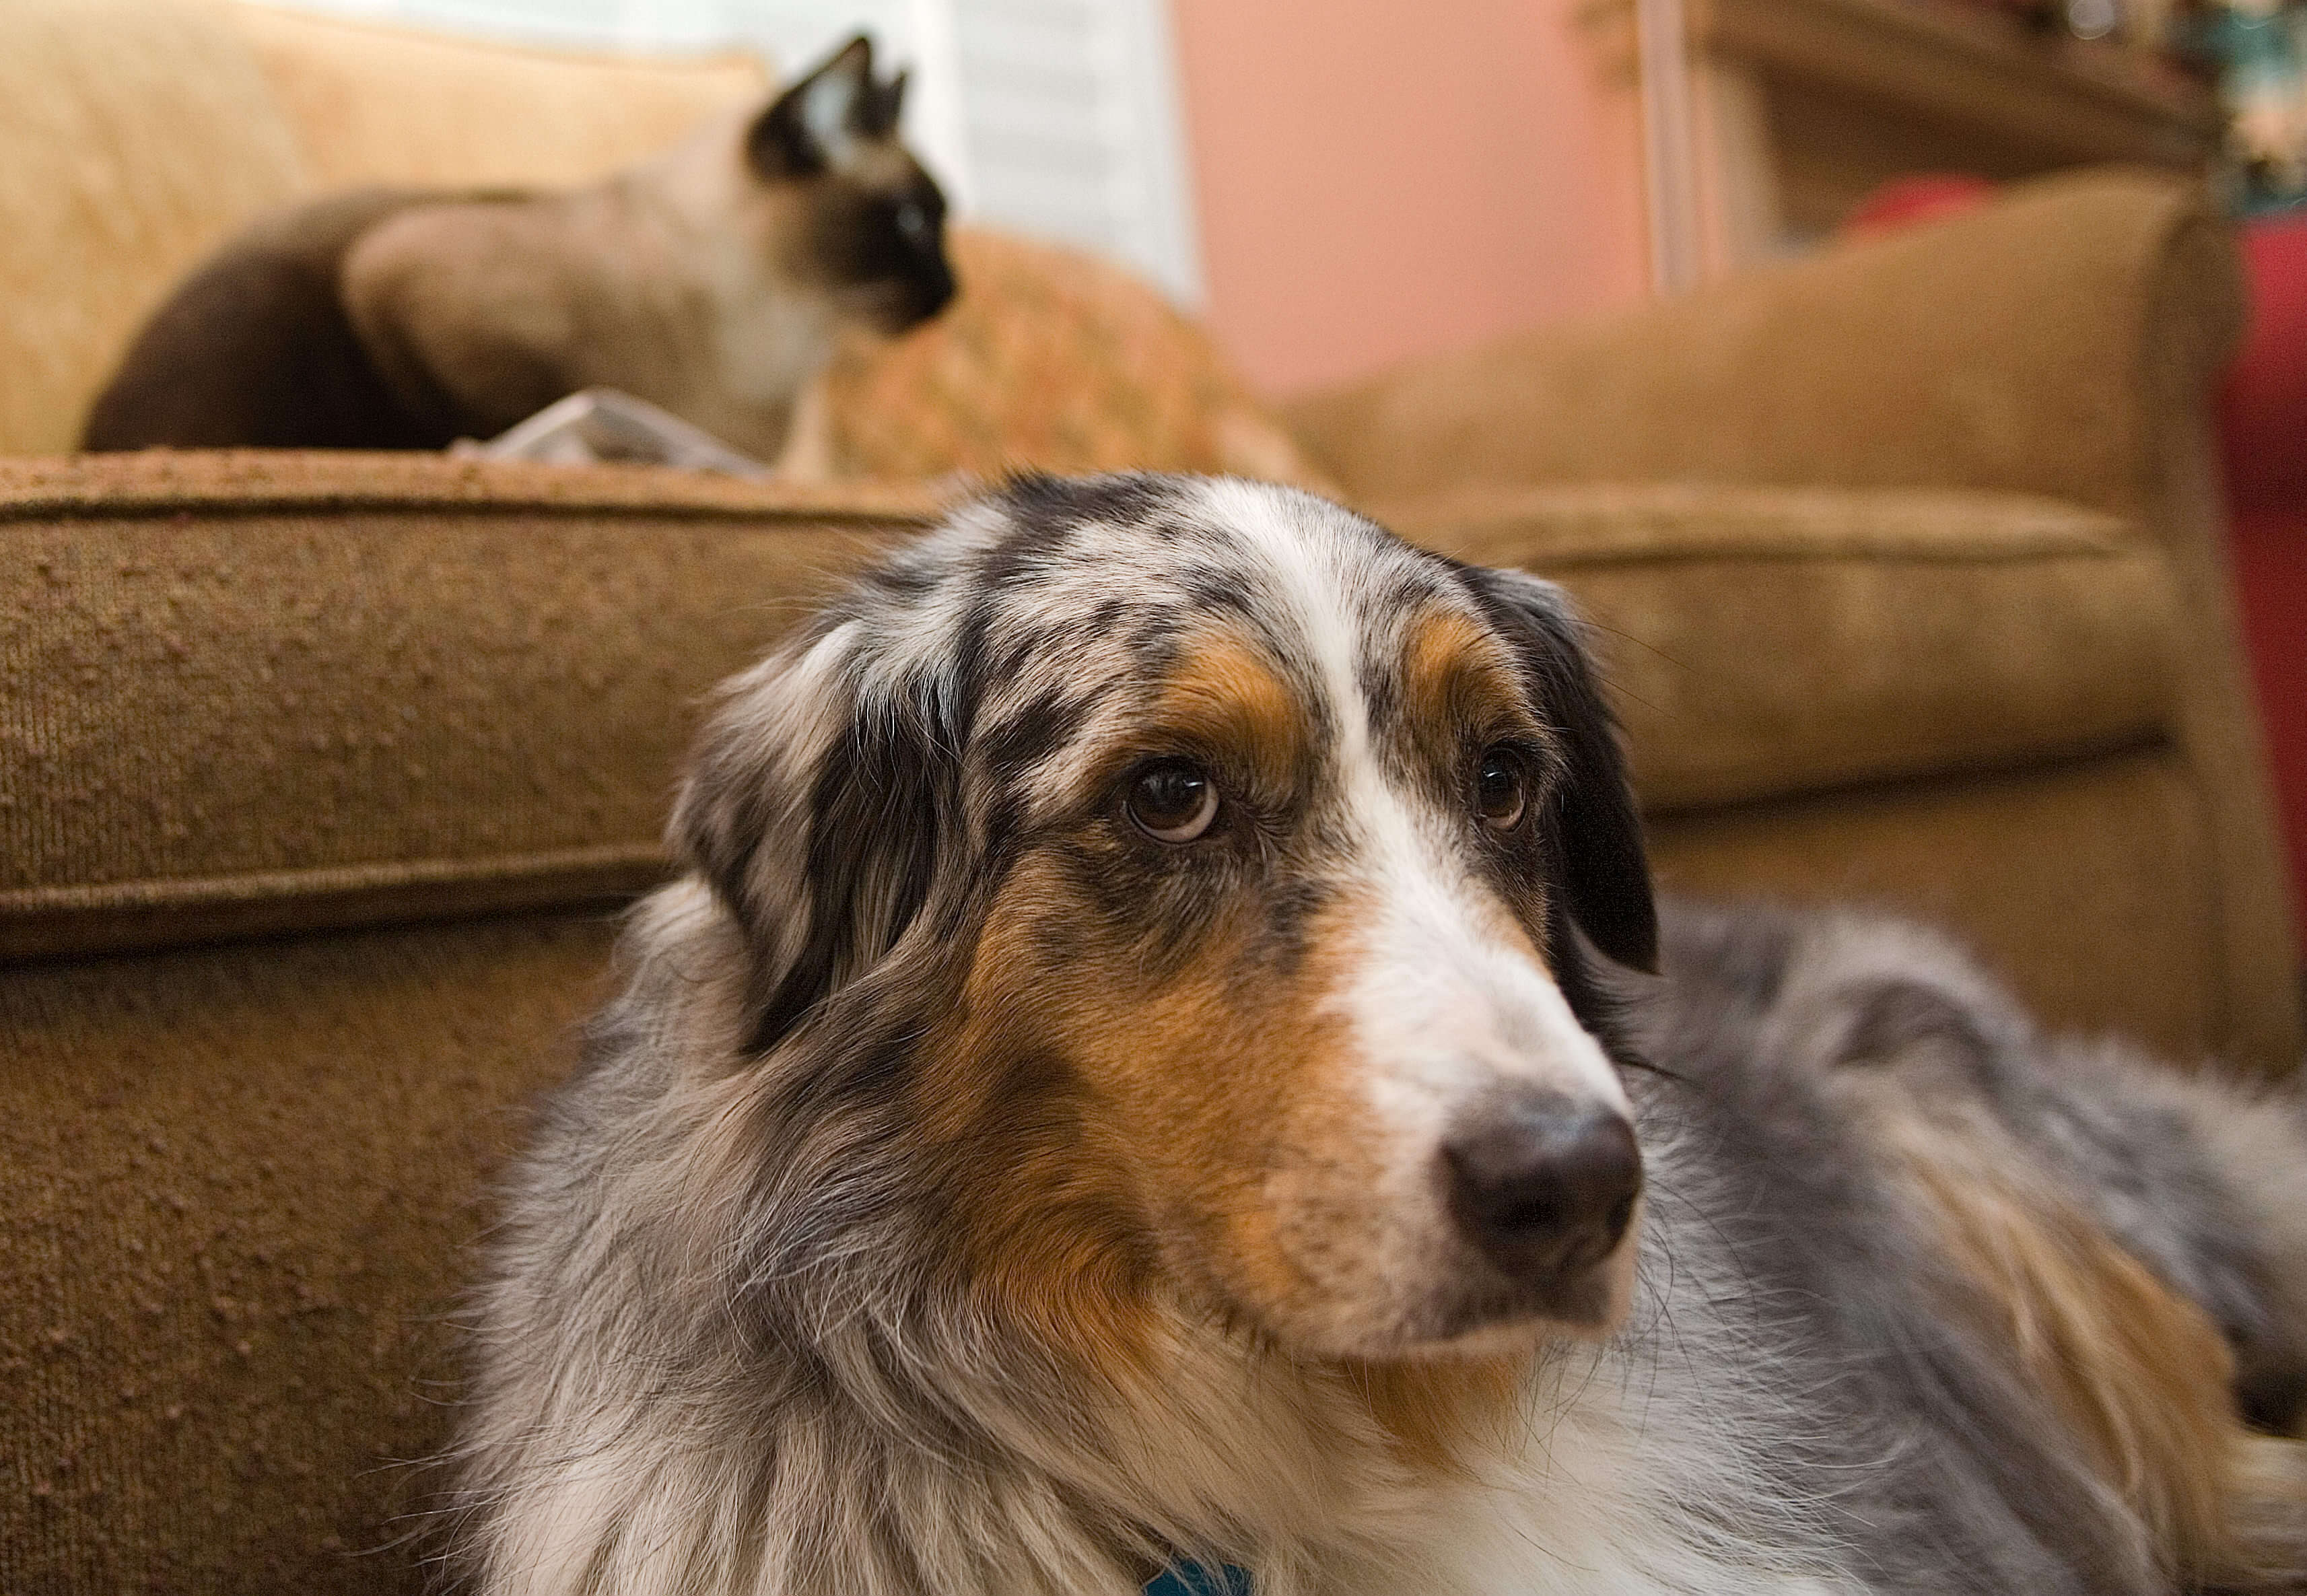
Our dog, Sydney, a little concerned about the cat, Stinky, who had a habit of whacking her for no apparent reason. Taking this from floor level gives the scene from the dog's perspective and connects the two animals, something I couldn't have gotten from a higher angle.
Our dog, Sydney, a little concerned about the cat, Stinky, who had a habit of whacking her for no apparent reason. Taking this from floor level gives the scene from the dog’s perspective and connects the two animals, something I couldn’t have gotten from a higher angle.

The Bug’s Eye View

There’s something about an image taken from a low angle that can really add a dynamic element to the scene. Of course, it depends on the subject. Children, pets, and some landscapes just look better if you take the position of a bug on the ground, seeing the world from their perspective. A lot of cameras have tilting LCDs that make this kind of shot much easier to compose so go head and make use of that feature. Canon, with its bizarre notions of what a pro camera should have and not have, doesn’t make the 5D or 1Dx line-ups with a tilting screen. Then again, in bright light or if you are trying to get that bit of spontaneity from a subject—children and puppies won’t hold still while you stare into the LCD screen trying to get the composition lined up—you may still need to set the camera on the ground, angle it toward the subject and shoot as quickly as you can without concern for getting it perfect in-camera.

Christmas from a child's perspective. With the camera resting on the floor, the autofocus nailed it.
Christmas from a child’s perspective. With the camera resting on the floor, the autofocus nailed it.

If you’re not dealing with a moving target, then, by all means, use the tilting screen. If you don’t have one, there’s no reason to get cocky—check each shot after you take it and recompose by angling the camera differently until you get exactly what you want. Okay, you should do that anyway—whoever dismissed the “chimping” habit was nuts—but it’s triply important if shooting “blind.” In addition, this is how I learned to take pictures without using the viewfinder. I would point the camera at the scene, take a shot, see what it got me and then do it again until I got a feel for what the camera saw at any particular angle.

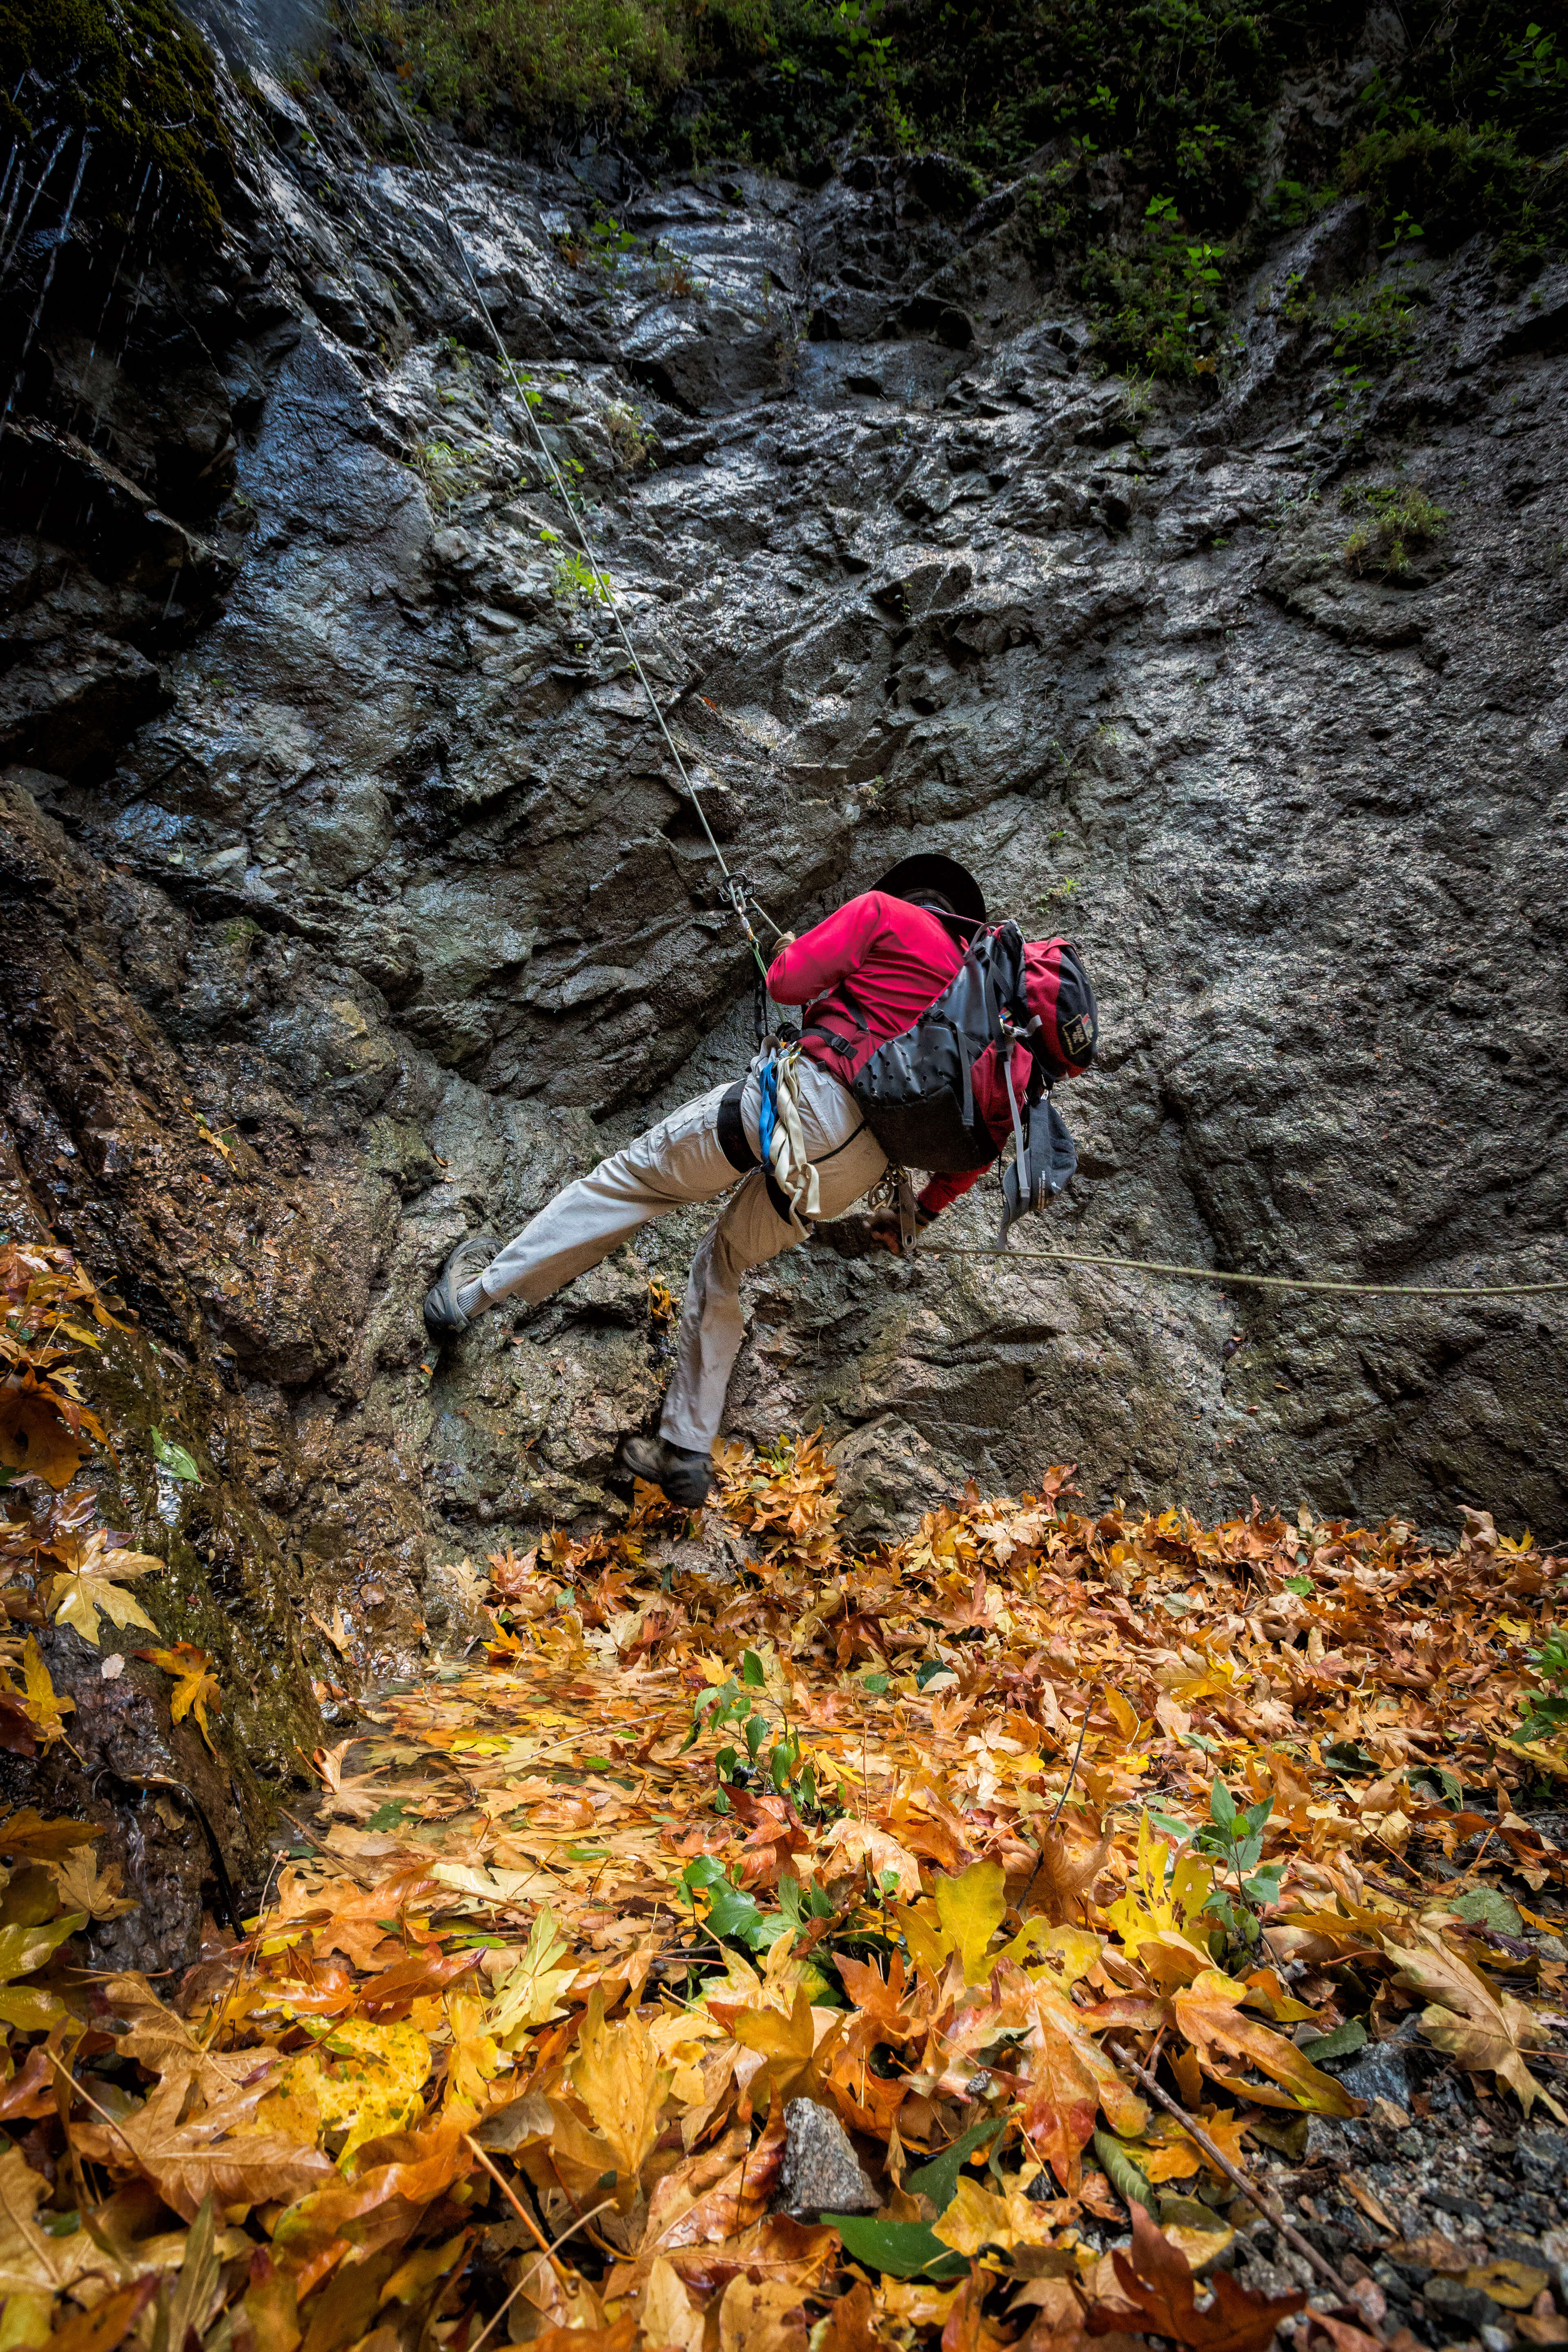
Canyoneering in Suicide Canyon, located in the San Gabriel Mountains near Los Angeles. The camera was practically touching the leaves when I shot this. I wanted to show Rich rappelling into this thick floor of colorful leaves and the only way to express that was from as low as I could get.

To Crop or Not To Crop

Because I use a wide angle lens setting, I’m often confronted with an image that might be great in the center but has too much business surrounding the subject. So I crop without shame.

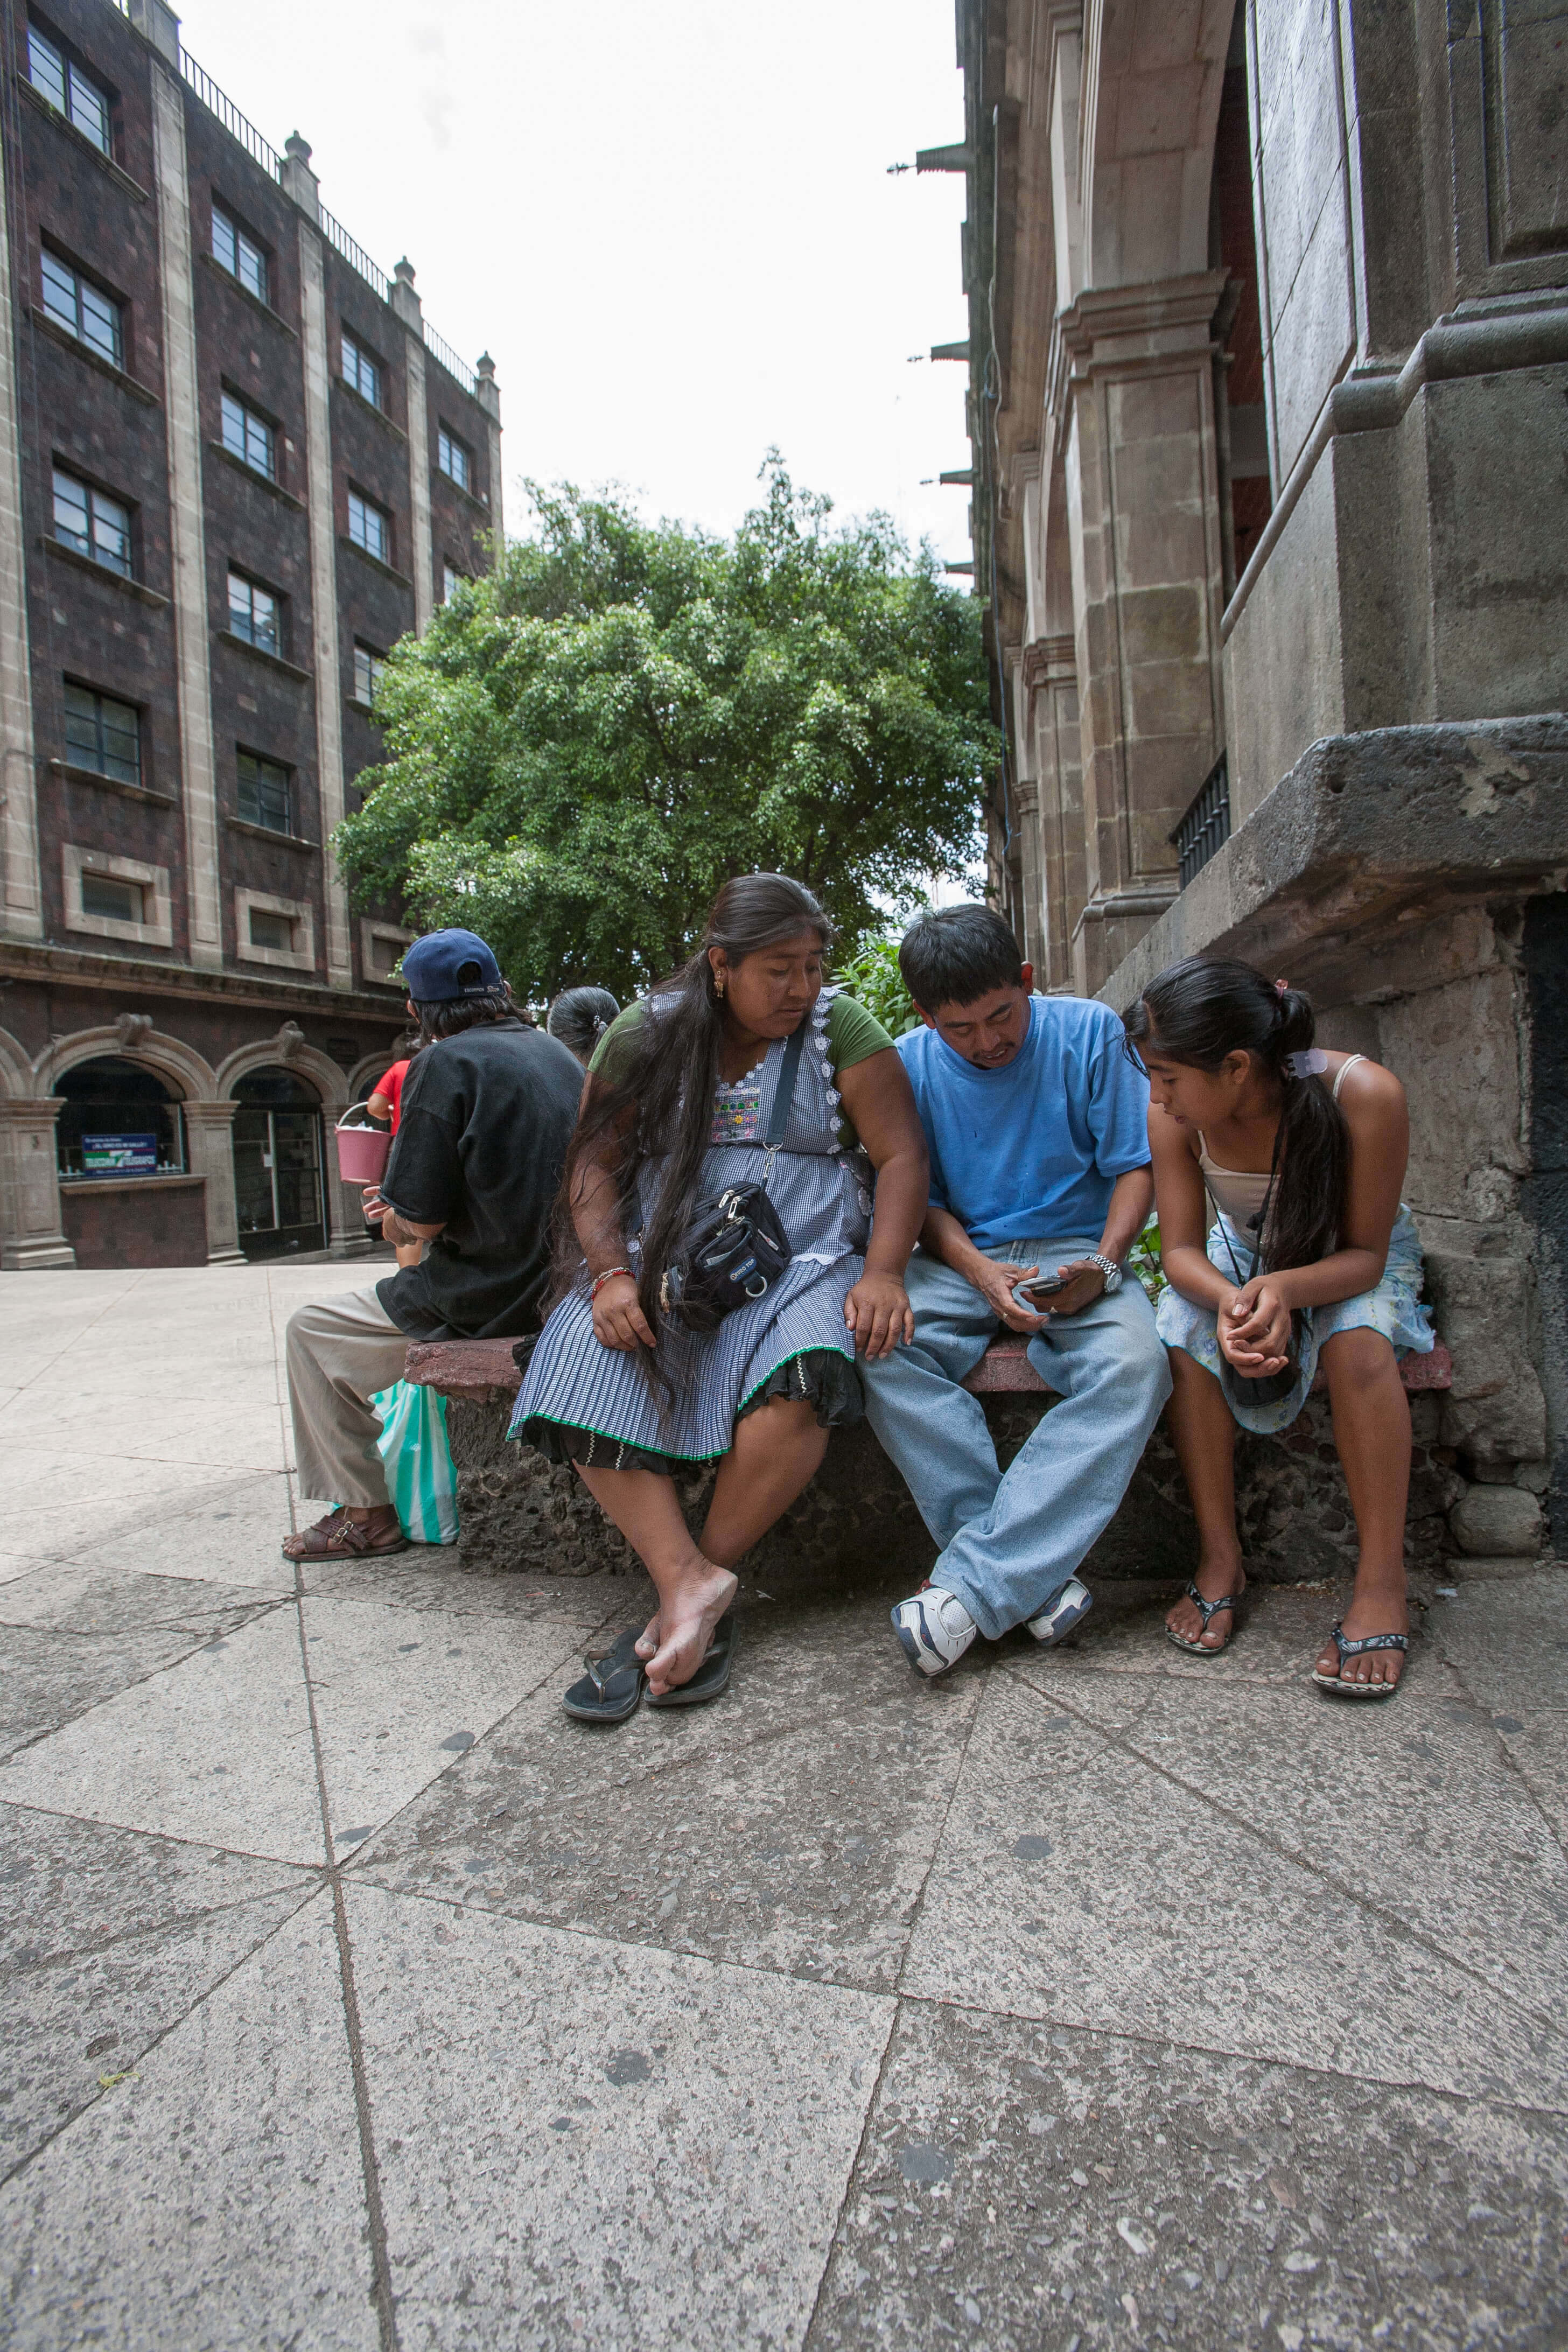
The raw file taken in the market square in Cuernavaca, Mexico.
The raw file is taken in the market square in Cuernavaca, Mexico.
cuernavaca-el-centro-scene-2_mini
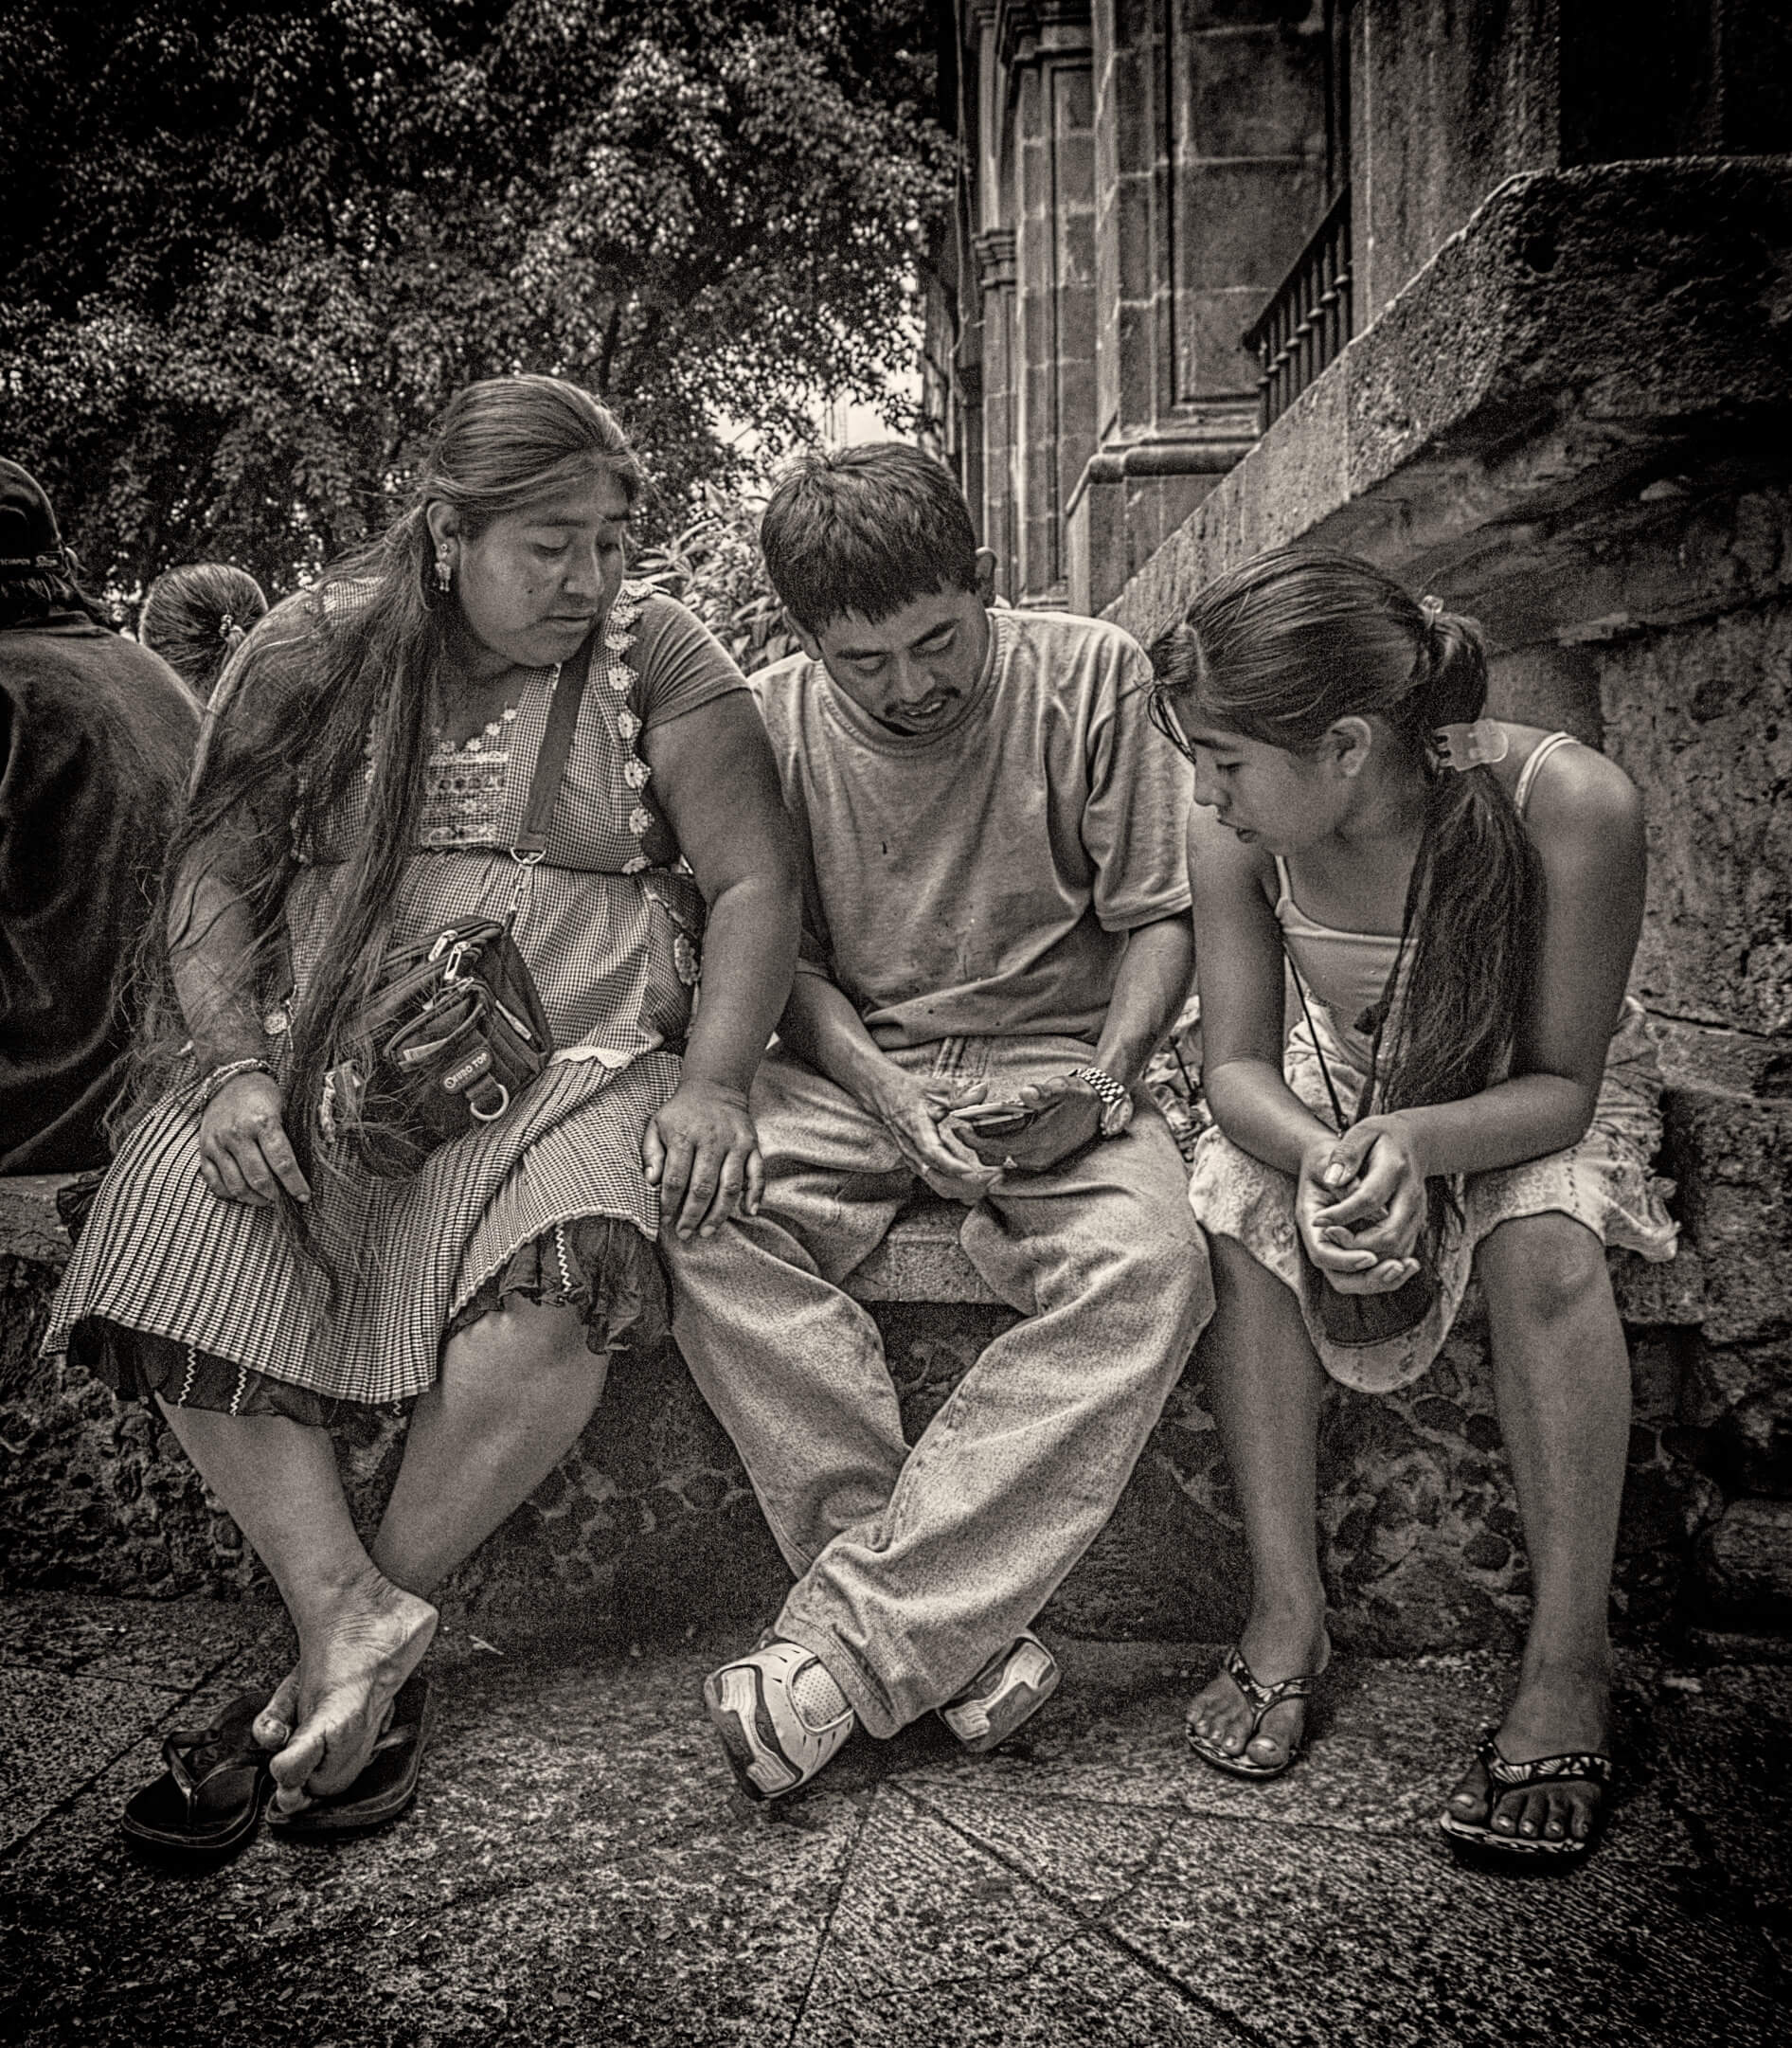
. . . And the finished, cropped image showing a nice moment between the three.

Sometimes, this will involve straightening the picture which necessarily cuts out the corners, although as I said before, I like these pictures to be slightly out of kilter. Other times, I’ll crop to a square which I find to be a great format for street photography. There’s something about the equidistant sides that relaxes the eyes and draws them to the subject, thus involving the viewer even more. My advice—never be afraid to crop.

I consider shooting from the hip just another way to present the world through my photographs and I think it’s a skill worth pursuing. Hey, who needs a viewfinder?

Faking Golden Hour: How to Create Believable Sunset Lighting Indoors

Golden hour, whether it’s early morning or evening, can be a photographer’s best friend. The natural, golden lighting of the setting sun creates an ethereal effect that can really make an image pop.

What do you do if you need that ethereal effect, but you don’t have the option of lugging everything outside at just the right time to capture the shot? The following tips and techniques will help you set up your studio to capture believable sunset lighting effects from the comfort of the great indoors.

Use Flash Lighting Sources and Gels

You can use an array of varying strength flashes and gels to effectively render sunset lighting inside. This technique works well if you’re shooting an image that is meant to look as though it was taken indoors with sunset lighting coming through a window.

sunset-lighting-1

To start with, set up a strong flash in the background of the image. You can cover the light with a gold gel, or use a combination of yellow and orange placed side-by-side over the light source. This will provide a strong directional glow in the background of the image that looks like the setting sun as it crests over the horizon. Place the flash outside the window or directly in front of it, if possible, using the glass to further refract the light.

Next, you should set up a weaker flash in the foreground – try using an for this one. Place a gold, yellow, or orange gel over the flash. Use light diffusion to create a soft glow by aiming it away from the foreground, casting the light on a gold reflector or reflective wall. The other option is to aim it at the foreground while using a softbox which will create a more directional light. Be careful with this as you can accidentally make it look as though the sun is shining from two different directions.

Fill in the Shadows

You may need to use additional SB600 or other speedlight, and reflectors to fill in the shadows and create just the right glow. You’ll need to experiment with your space and your camera to get the type of sunset effects you’re looking for.

sunset-lighting-2

If you don’t want to use a window to create the effect of having the setting sun in the background of the shot, then angle your backlight so that it is not causing such direct illumination. Instead of a flash, you can also use bare-bulb lighting for this. Either way, remember that the lighting will create deeper shadows when it is placed further away from the foreground.

You should also remember that sunset lighting often creates unique directional shadowing. You will need to play with your light positioning and reflectors to create proper shadowing in the image.

The Right Camera Settings

You’ll need to control the exposure of the image by playing with the shutter speed, ISO, and aperture settings on your camera. You can try out different combinations to create different effects. Let’s take a look at two basic ways to create a different type of sunset image using these settings.

Crisp Images with a Sunset Glow

If you want the entire image to appear crisp and in focus, try the following settings: Use a low shutter speed and a tripod. The low speed will help you capture more light, and the tripod will keep the image from appearing blurry.

sunset-lighting-3

Next, you’ll want to use a high aperture setting. This will produce a lower-level of light, but this should be balanced by the shutter speed. The aperture setting, when combined with the right lighting, will ensure that the image appears crisp instead of soft and nuanced.

The last thing to do is play with your camera’s ISO settings. High-quality equipment can use ISO setting above 400, but low-quality equipment may produce a grainy effect at higher settings. Low ISO lets in less light, high ISO lets in more. Use the ISO to better balance the lighting captured by the camera’s shutter speed and aperture settings.

Soft Images with an Ethereal Background

If you want the light in your image to appear more glowing, with only the foreground appearing in crisp focus, then try out the exact opposite of the above. Set a higher shutter speed with a lower aperture setting, then use the ISO to create just the right balance of lighting.

sunset-lighting-4

Recreate the Effects of Nature

If you want to take an indoor sunset shot that looks like it was taken outdoors, you’ll need to play around with some additional equipment. You can place vellums with holes in front of lights to create cloud shadowing or use a softbox cover with a hole in the center over your foreground light to create the glowing directional light of the setting sun.

While these tips and tricks will help you to get started, experimentation is the only real way to get things set up just right. Have fun working it out in your studio, and please feel free to share any tips you discover along the way!

How to Deal with Difficult Clients – Photographer’s Edition

In a creative field like freelance photography, it’s not uncommon to encounter difficult clients and have to deal with their strange requests. Don’t start pulling your hair out. Instead, consider the following when a challenge arises.

Smile

Yes, that’s right. The first thing you should do is smile. Whether it’s in person or on the phone, start on a positive note and don’t get emotional. Don’t criticize, condemn, or complain. This will only make the situation worse. This alone is likely to make them like you, and consider the situation handled without even knowing why. If they feel positive about you, they’re less likely to be difficult.

Difficult clients

Show that you care

Listen to what they say, repeat it back to them, offer a solution, and then ask them how their son’s graduation was. Becoming genuinely interested in people and talking in terms of their interests is important with any client, difficult or not. Showing that you’re listening to them is crucial here, even if you disagree. Proving your points about how wrong they are will not get you anywhere good. Tell them that their issues will be taken care of and take care of them. After doing this, encourage them to talk about another subject like something personal you know they care about. Their kids, an article they posted on Facebook, or simply ask them how everything else is going. This is likely to clear the air and leave them feeling happy.

Difficult clients

Don’t over-communicate with clients

Difficult clients are known to be creatures that harass you all day long with their requests. Consider that if you engage in this, you are using valuable time (typically unpaid) that you could instead allocate towards finishing the job or working on something else. Selectively ignoring your clients can be useful here. If your client tends to write you lengthy emails about what they want, do not reply to them with the same level of detail. If you understand what needs to be fixed, replying with “will do” is enough. I very often write emails using only the subject line. Putting “Updated images are in Dropbox” in the subject line and clicking send will take a few seconds, instead of writing a novel about your thoughts. If they interrupt you with many emails throughout the day, consider waiting until the end of the day to go over and reply to all of them at once. If they like to get on the phone and play personal therapy session for an hour, let them leave a message and let them know you have received their notes.

Finish the job

Don’t get immersed in the drama of it all. If you get frustrated, focus on finishing the job. Even if there are many disagreements, consider that it could be best to put money and creative differences aside, and just do what they ask. You can always introduce new terms for the next job you do for them. Doing this will show that you provide excellent customer service, something that may be seen as more valuable than getting an extra dollar or providing your best creative work.

When to fire clients: The 80/20 rule

If things get really frustrating, it’s important to consider whether you want to work with your client again. In the Four Hour Workweek, Tim Ferris explains that in any trade, 20% of the work equals 80% of the income. This means that 80% of what your time could be spent on things that are not efficient or effective for you and your business. Instead, it is better to focus on the 20% that you know brings you income. If this client is taking up a lot of emotional space and time, maybe they are not in your 20%. Consider saying goodbye and instead of generating new leads and focusing on jobs from other clients who are a better fit for you.

Difficult clients

Suggested Readings:

How To Win Friends and Influence People by Dale Carnegie

20/80 Rule explained by Matt Bodnar

Batch-Process Cleverly on Lightroom

So, remember all those times when you come back home from a shoot with a hundred shots with varied light set-ups? Remember, struggling and pushing to process all those beautiful shots one by one? Will I make your day better if I told you how to cleverly batch-process these images? Maybe, yes.

So, the easiest way to processes your images without consuming too much time would be to split them into batches. When you go for a wedding shoot, or some indoor event, you end up with over hundreds of images in varying light set-ups. So what you can do is split these images into batches of 5 or batches of 10 and apply a setting/edit common to all these selected photographs.

Ideally, a “shoot” indicates that you’ve used various lenses, applied different ISO speed settings, etc. And different images look different depending on the kind of light that got reflected in that moment or depending on the kind of colours that got captured in that particular moment. So how do you cleverly segregate these images into different batches? How do you figure out which ones to group together?

The fundamental idea is to choose a set of photographs where you can apply a group of similar settings. Follow the steps below to make your work progress a lot faster, easier, and a lot more efficient.

Step – 01

Choose a set of photographs (it can range from a set of 4 photographs to almost 20 photographs), this is what we call a “Batch”. Start correcting the first photograph in that set – adjusting Exposure, White Balance, Tint, Tone curve, Sharpness, etc. Remember, you’re going to apply all these settings later to the rest of the batch, so make sure that your corrections will apply similarly for the remaining images as well.

Screenshot 2016-07-19 13.37.35
The first three images are the ones I’ve combined into a batch for similar processing.

Tip: Do not make major adjustments with the local correction tools, as this might vary from one image to another. What you correct for one image might not apply to the next, even though you’ve grouped them all in the same batch.

Step – 02

The next step is to copy the develop settings from the first photograph, and paste them to the rest of the images in that particular batch. Or alternatively, select the first image, press and hold the ‘Shift’ key and select the remaining photographs. Then, click on the “Sync Settings” button that appears on the lower right bottom of the Library Module.

Batch Processing – Synchronize settings.

Tip: Shortcut to Sync settings is Command + Shift + S

Once you click the sync settings button, a dialog box will open asking about the settings which you would like to copy to the remaining photographs. Make sure that you deselect all the local corrections, and select everything else. Remember, local corrections vary from image to image. So it is advisable to work on the images individually for those changes.  

Step – 03

Repeat the above steps 1 and 2, until you are done with all the photographs in the batch. 

Step – 04

This is the stage that takes up considerable amount of time. True, it depends on the number of images we’re dealing with and the kind of correction it requires, but this stage also calls for some care and concentration so we don’t go wrong.  All the local correction tools namely Crop tool, Adjustment brush tool and Spot removal tool shall be applied manually to each and every photograph in that particular batch. And there we go, you’ve now learned how to speed up your work process while cleverly using the batch process method.Just like how you copy paste the settings from one image to another, you can copy paste noise correction settings as well. The trick is to filter out your images based on a particular ISO setting. Use the filter tool, and filter out images with similar ISO settings. Let’s look at an example. Say, I’m looking for images with an ISO of 1600. Use the filter tool, and filter out all the images in my collection with similar ISO settings. Let’s say Lightroom provides me with a set of 80 images. What do I do no? Pick one image, apply noise-correction changes to this one image, and sync these settings to the remaining 79 images. Tada!

So, use the batch process method effectively, and reduce stress, time-consumption and make your work a lot more fun. We hope this article helped you out, and if yes, let us know about our experience in the comments below.

Local Correction Tools – Lightroom

Color correction is an art form that relies on your perception, experience, and interpretation of the image. We can do this correction if we have an installed Lightroom presets. The fundamental difference between Global & Local correction tools is simple:Global edits are the enhancements we make to the whole photograph.Global correction does apply the changes across all the pixels in the frame. Global editing shouldn’t be used to correct one part of an image, to the detriment of the remainder.Too often I’ve seen people adjust the white balance of an entire photo to try to achieve “perfect” skin tones. Not only is this quite difficult, it frequently makes the rest of the photo look strange. Good global edits are essential, but they don’t negate the need for local editing. Well-executed local edits are the difference between a nice photo and a great one.Whereas local correction tools apply the changes only based on the areas we choose to apply. Some of the Basic Lightroom tools and Photoshop’s Shadow/Highlight act locally and do not treat all pixels with the same brightness values as identical. Some of the Local correction tools in Lightroom  Presets are:
Crop tool(R)
Spot removal tool(Q)
Red eye removal tool
Graduated filter(M)
Radial filter(Shift+M)
Adjustment brush(K)

Local Correction Tools - Toolbar
Local Correction Tools – Toolbar

These tools are available only in develop module and are placed right below the histogram on the right side.

  • Crop tool ( R)
    Crop tool helps us to recompose the photograph that we have taken, to make it aesthetically better or to simply make it more pleasing to the eye. The kind of cropping we do, without a doubt, will vary from one photograph to another. Some might require minor corrections on the horizon while some others might require vertical alignments. Regardless, the crop tool provides the photographer with an opportunity to play around with the proportions, perspective, and the way a photograph looks ultimately. This tool plays a vital role in the post-processing of a photograph.

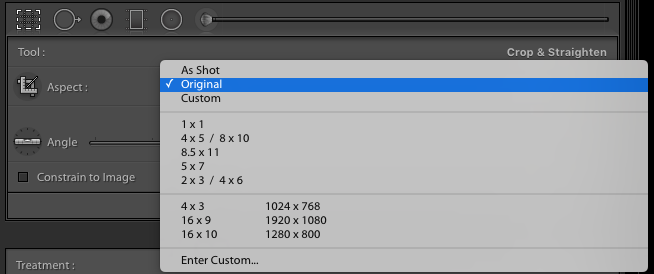
    Click the Develop tab at the top of your workspace. Locate and select the Crop & Straighten tool icon in the toolbar, which opens the options for the tool. Alternatively, press “R” on your keyboard to open the Crop & Straighten tool options. 

    The Crop & Straighten tools are often the first step many photographers use when editing photos in Lightroom. Use these options to crop a photo for Instagram, straighten crooked photos, or prepare photos for printing.

    Crop Tool features
    Crop Tool features
  • Spot Removal (Q)
    In the Develop module, select the Spot Removal tool from the tool strip, or press Q.

    The Spot Removal tool in Lightroom lets you repair a selected area of an image by sampling from a different area of the same image. It helps us remove dust speckles, insignificant or unnecessary elements from the photograph, remove skin blemishes, etc. On an advanced level, the spot removal might also help to us to remove certain elements from the photograph, like a person, overhead electrical wiring, etc. 
    The two spot removal techniques are Clone and Heal.

    Heal matches the texture, lighting, and shading of the sampled area to the selected area.
    Clone duplicates the sampled area of the image to the selected area.
  • Spot removal tool - features.
    Spot removal tool – features.
  • Red eye removal tool
    Red Eye will remove the red discoloration of a person or a pet’s eyes that can result from a camera flash going off. Unfortunately, there aren’t any shortcuts available for this particular Lightroom feature, but this is yet another vital tool when it comes to post-processing photographs. To remove a red eye from an eye on a photograph, you can use this tool to remove the red eye and to enhance the eye.
  • Spot removal tool.
    Red-Eye Removal Tool.
  • Graduated Filter Tool
    Graduated Filter Tool
  • Graduated filter (M)
    In the Develop module, select the Graduated Filter tool from the tool strip, or press M.
    The Lightroom Graduated Filter is a versatile tool for making local adjustments to your photos.This tool is a huge help for landscape photo retouch as it can be used to enhance the details from the foreground and the skies.
  • Radial Filter (Shift + M)
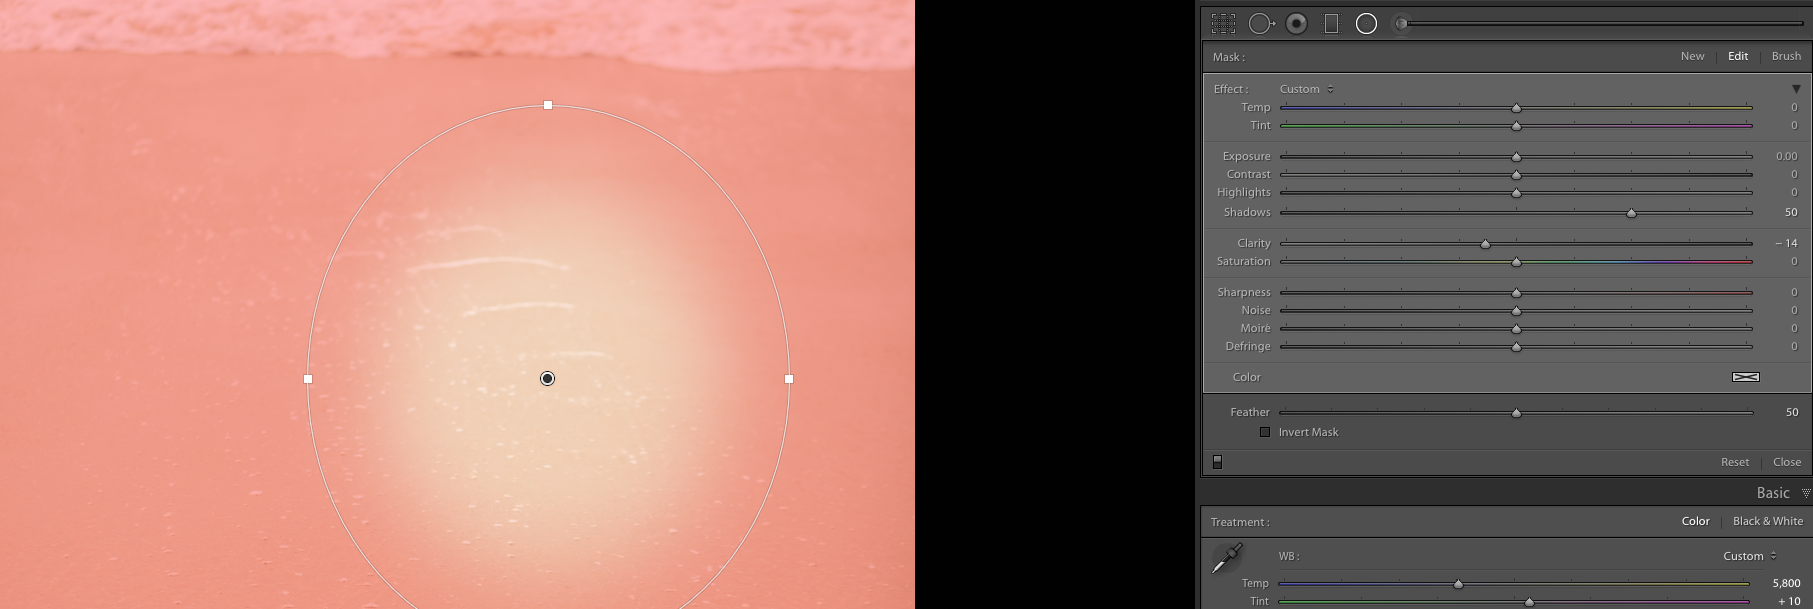
    The background or elements surrounding the primary object of your photograph can distract the viewer. To draw attention to the subject, you can create a vignette effect. The Radial Filter tool enables you to create multiple, off-center, vignetted areas to highlight specific portions of a photograph.

    In the Develop module, select the Radial Filter tool from the tool strip, or press “Shift + M”.
  • Radial Filter Tool
    Radial Filter Tool

    Adjustment Brush (K)

    The Adjustment Brush tool, literally, works like a brush. The changes or corrections get applied to those regions that you select or brush over. This is one the major advantages of this particular tool – make changes to specific areas or regions of the photograph. The Adjustment Brush tool lets you selectively apply Exposure, Clarity, Brightness, and other adjustments to photos by “painting” them onto the photo.

    In the Develop module, select the Adjustment Brush tool from the tool strip, or press K.

Adjustment Brush Tool

The adjustment brush tool combined with the graduated filter tool are a deadly combination. These two tools together have the power to create/produce magical outputs even out of the most simple photographs.

Lightroom is great for processing your photos and understanding how its tools work will help you use it more effectively. Use these features, play around with the tools and tell us about your experience in the comments below. 🙂 

70-200mm Lens – How to Avoid Blurring?

It’s very common among the professional Canon users to grab our 70-200mm lens for indoor as well as for outdoor shoots. The lens is one of the top choices for portraits and product photography due to its versatility and interesting zoom range.

Lens Overview

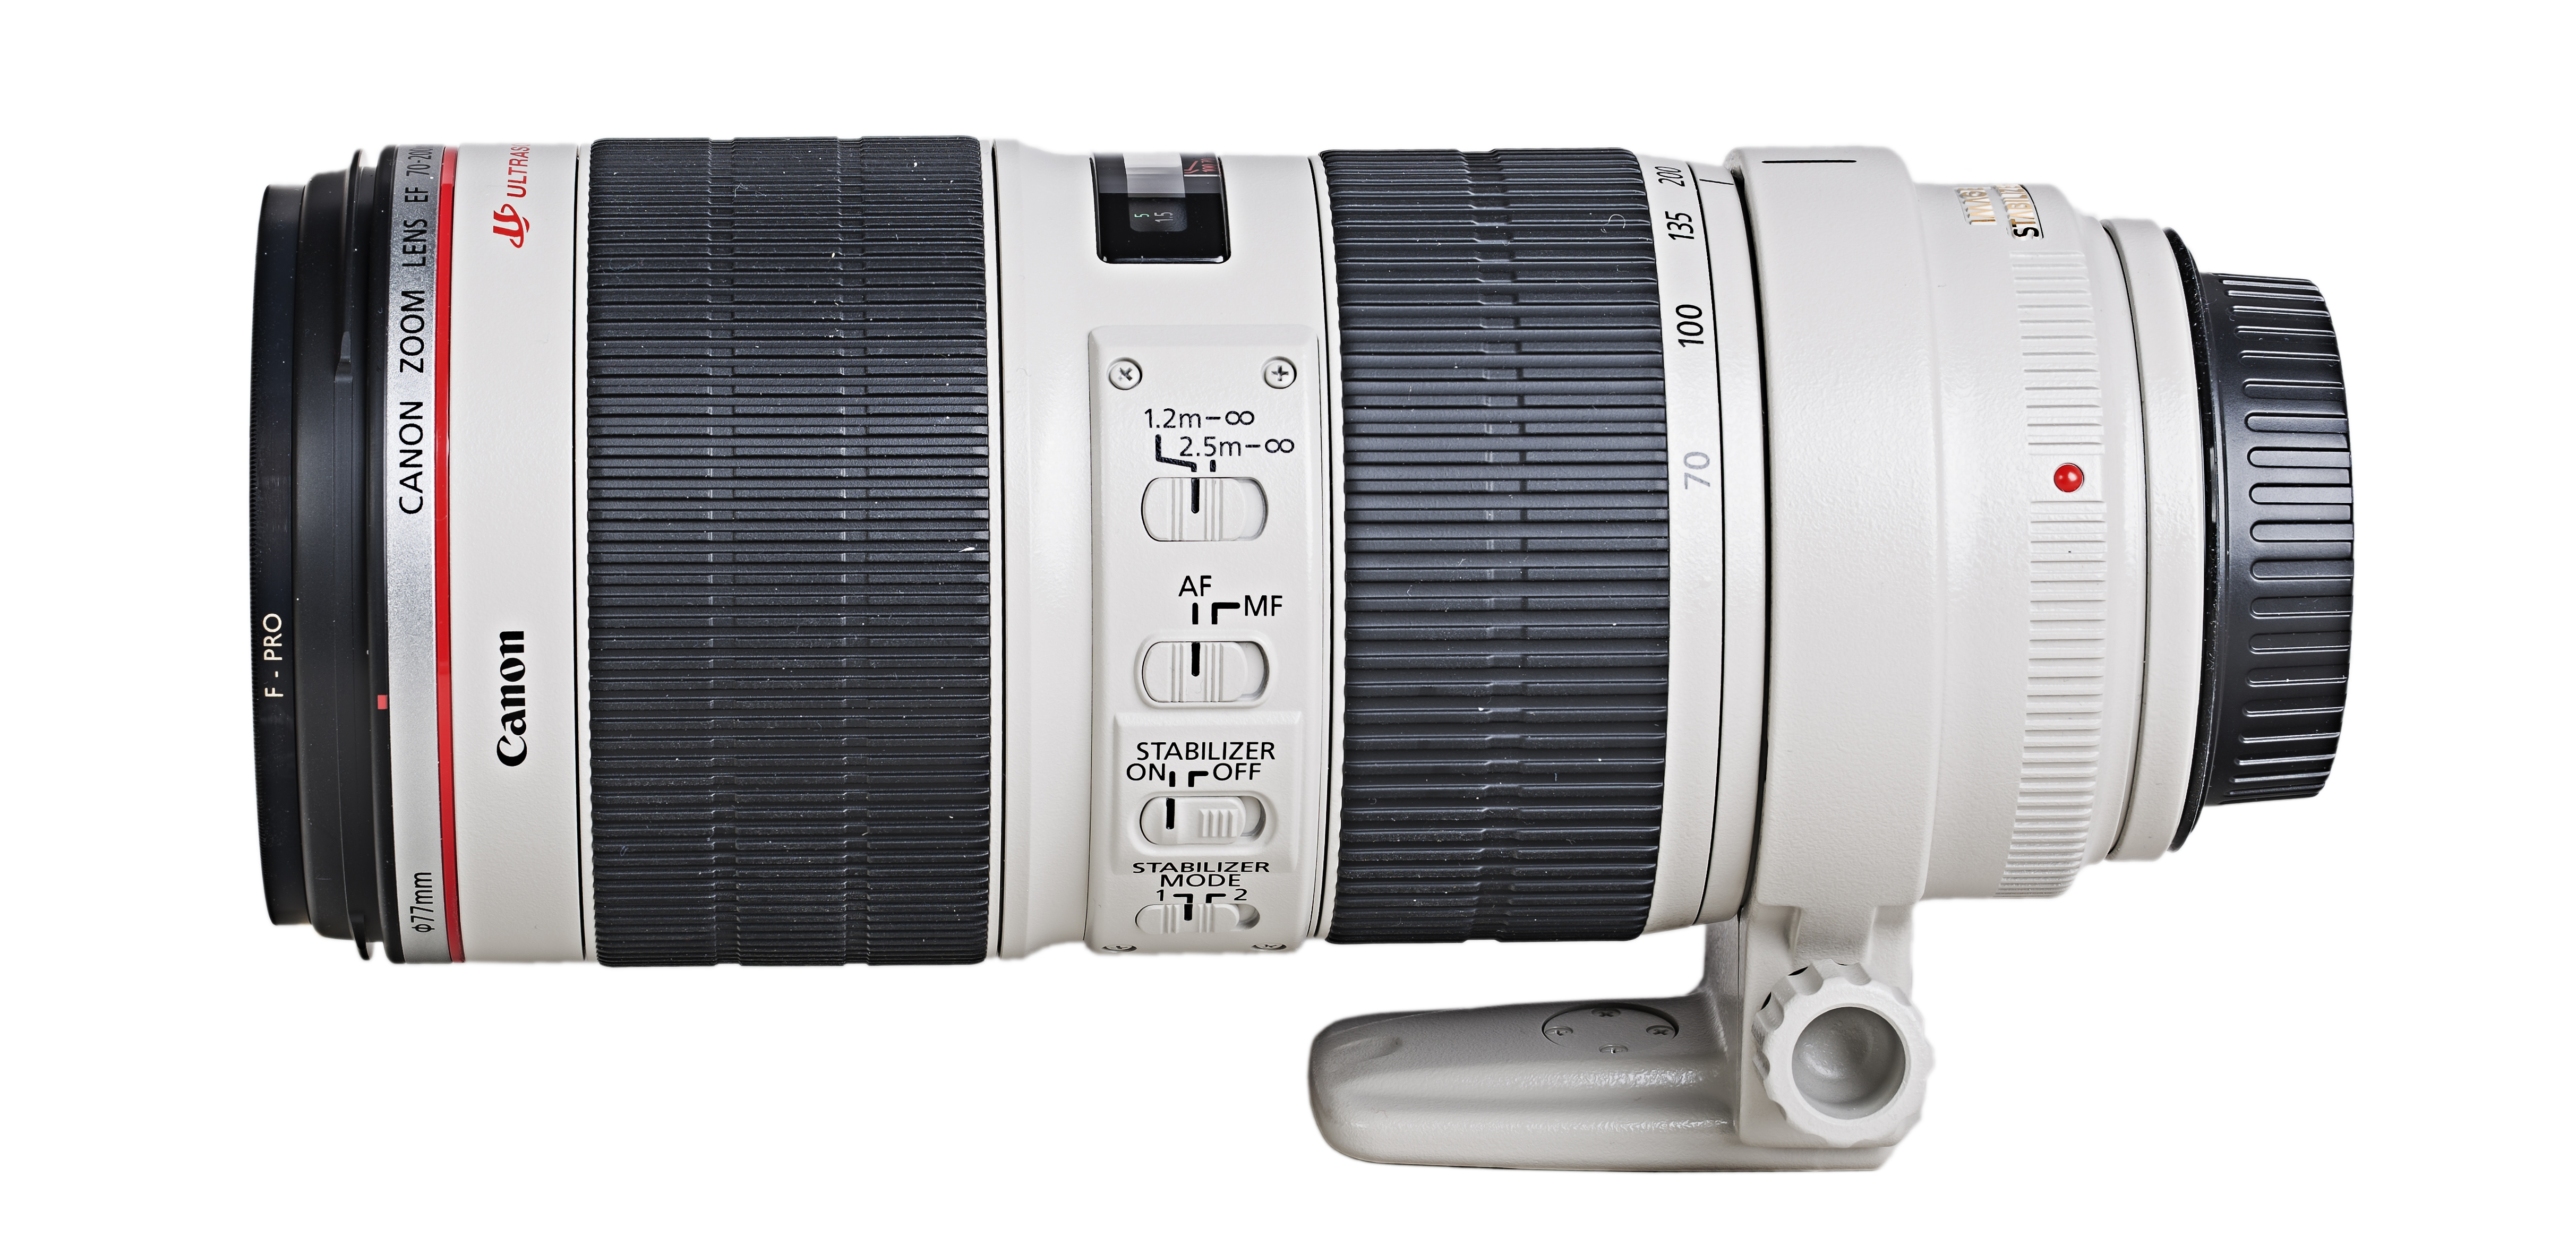
Speaking of this versatile and powerful Canon lens, we can start to say that it was launched in 2010 as an update of the EF 70 – 200 mm F2.8 L IS USM from 2001. With a gap of 9 years and considering the advances in the technology of DSLR cameras, Canon redesigns this powerhouse by improving both the stabilization and optics, as well as autofocus and its design.

Optics consists of 23 elements in 19 groups, including more than 5 of them with the Ultra-Low Dispersion technology (UD), plus one with Fluorite Coating. The reason? Reducing the Chromatic Aberration of the lens.

Canon_Zoom-Lens_EF_70-200_F2.8L_IS_II_USM-01a_

Built-in metal, we are not talking about a light lens; however, it compensates for the weight with its excellent image quality and enhanced protection in regards to dust that can enter our camera, in addition to being weather sealed.

The Autofocus motor belongs to the technology of Canon Ultrasonic Motor (USM), being extremely agile while maintaining a silent profile.

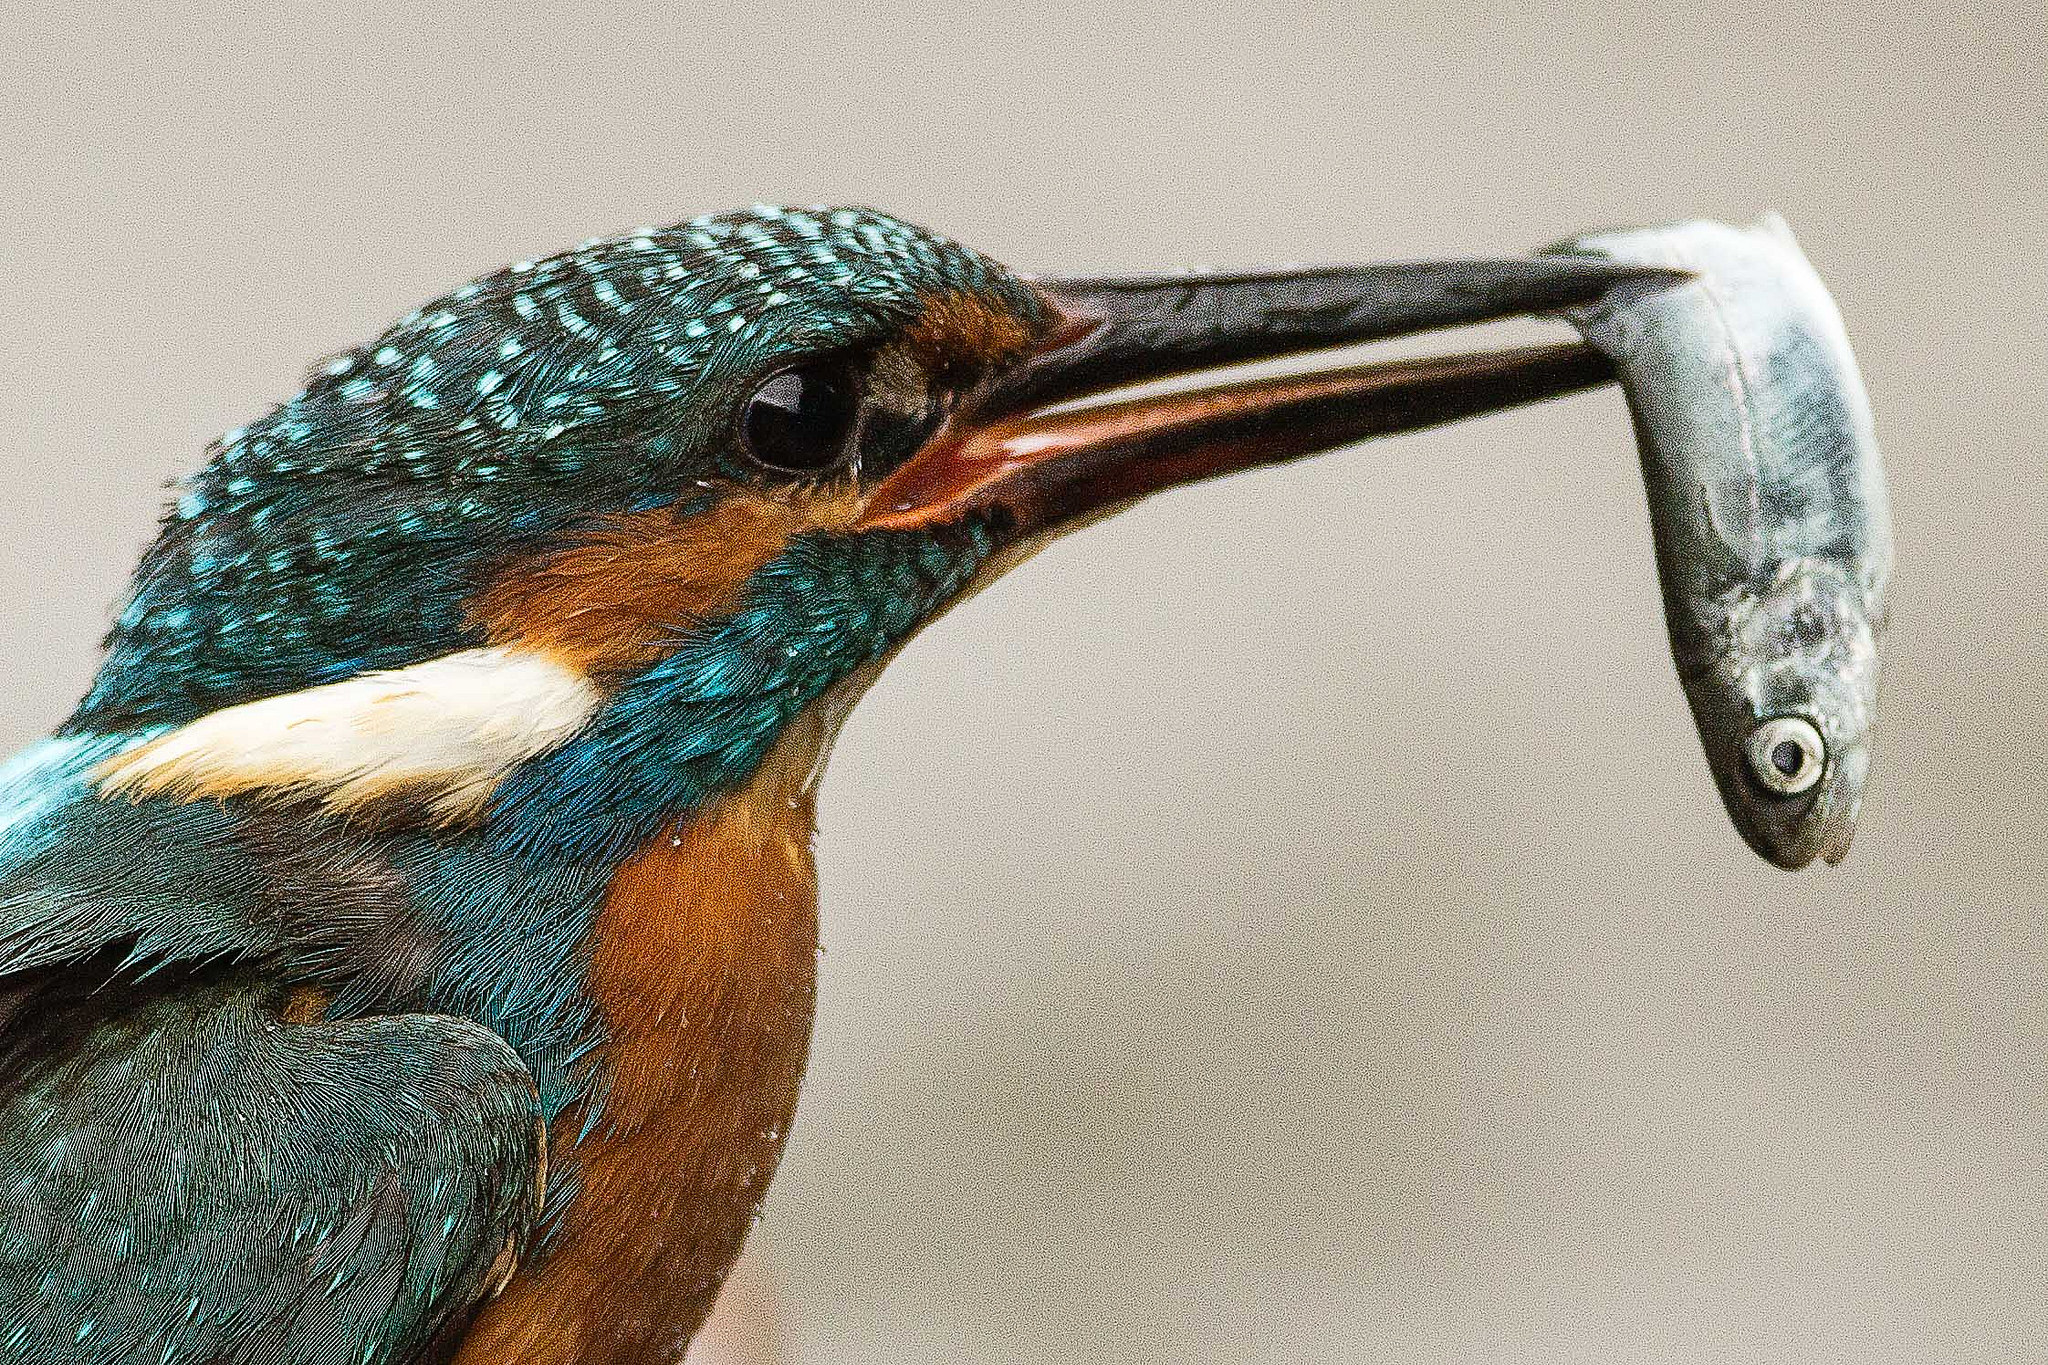
27358305815_713c7db69e_k

Photo courtesy of Eric Schaffer

The price is something to consider in this lens since we are talking about high-end equipment for what should not amaze us that its initial price is higher than $1500.

The only difficulty that photographers face while using the lens is its weight. A Canon 70-200mm [ f 2.8 IS II ] lens weighs approximately 1600 gms. So, this lens when mounted on a full-frame camera like Canon 5D Mark III weighs almost 2.5 kilograms.

When weight matters

So, how do you take a sharp photograph while holding so much weight in your hand? You might use a tripod to bring in the extra support, balance, and stability. But do tripods work during all circumstances? Not really. How far does ‘Image Stabilisation’ in your lens, help? Not very much. True, it provides the minor stabilization features that you need and but that’s not all.

canon-ef-70-200mm-f-2-8l-is-ii-usm-lens

The way you hold your lens plays a major role. It can sometimes be the ‘break-it’ or ‘make-it’ factor for your photographs.

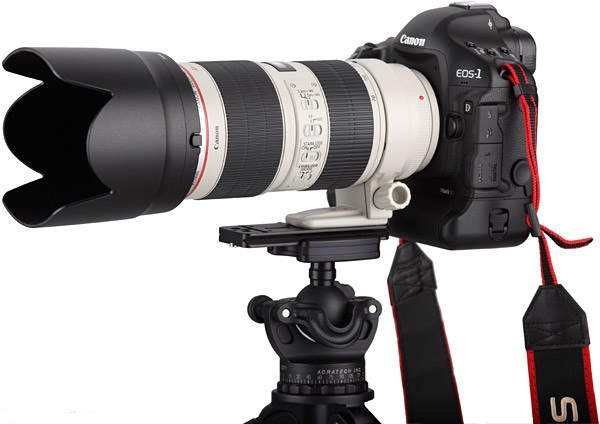
We are assuming here that you will be using the kit (Canon 5D MK III + Canon 70-200mm f/2.8L IS II lens) handheld and not by tripod mounted. The first thing to do is to rotate the tripod collar from the bottom side of the lens(while mounted with the camera) towards the top side. This way, the tripod collar won’t obtrude and disturb your grip with the lens.

Kindly note: Indoor shoots are tripod-mounted most of the time. So this article may not be applicable to you. But for those who shoot by hand-held devices, this article might be helpful.

A quick but effective solution

So, like I mentioned earlier, the way you hold the lens while shooting may affect your photograph, for good or for worse. Most of the time, we tend to hold the lens somewhere on its collar ( really close to the body of the camera). I used to do this too in my earlier days as a photographer. This helps us control the zoom ring better while composing the photograph. True, but it also indirectly affects the balance in your focus. This sometimes results in blurred images and lesser sharpness. This is because of improper positioning of your palm by the lens. By supporting the lens at the collar location by your palm you are letting more weight towards the front side of the lens which leads to improper balance and with blurred photographs.photographer-1191562_1920This can be overcome by slightly shifting your palm position towards the front side of the lens, which means you need to place your palm almost on the zoom ring. As soon as you shift your palm towards the front end of the lens, you immediately feel the perfect balance of weight while holding. But this situation restricts the zooming ability immediately before you press the shutter button. You have to be prepared in advance, as you cannot zoom as you used to before. Get your frame right, compose what you need and then click away!27010607034_afe1fb94d0_k

Photo courtesy of Pengcheng Pi

We hope this article helped ease your discomfort while shooting using the 70-200mm lens.

Please leave your comments below and let us know about your experience. 🙂

Header photo courtesy of Francesca Pippi

Shooting Wedding Details: A Comprehensive Guide

Effectively capturing details is essential to communicating the atmosphere and emotions of your clients’ wedding day. Formal shots and group photos are essential, but often times it’s the little things that really bring back memories.

First, let’s clarify exactly what is meant by the word “detail.” In this case, “detail” refers to two things: smaller articles that are particularly valuable to the couple (wedding rings, especially), and things that do not necessarily carry any sentimentality, but aid in expressing the spirit of the celebration. Adequately documenting these particular elements requires that the photographer adheres to a few simple guidelines.

The Basics

Regardless of what you are shooting, it’s important to pay attention to angles and composition. When I’m working on details, I always shoot directly above or directly in front of my subject. Usually, any other angle detracts from the image and makes the photograph appear unbalanced.

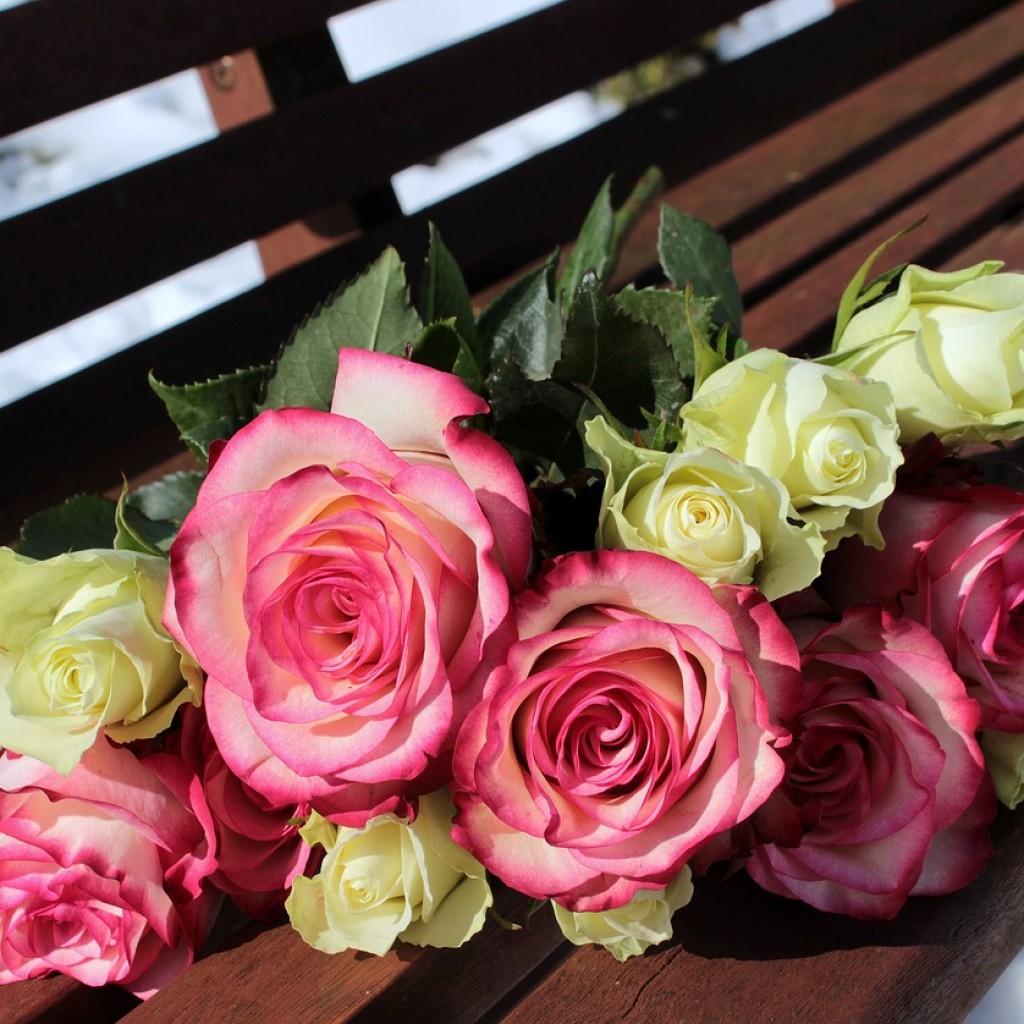
bouquet-of-roses-1246490_1280

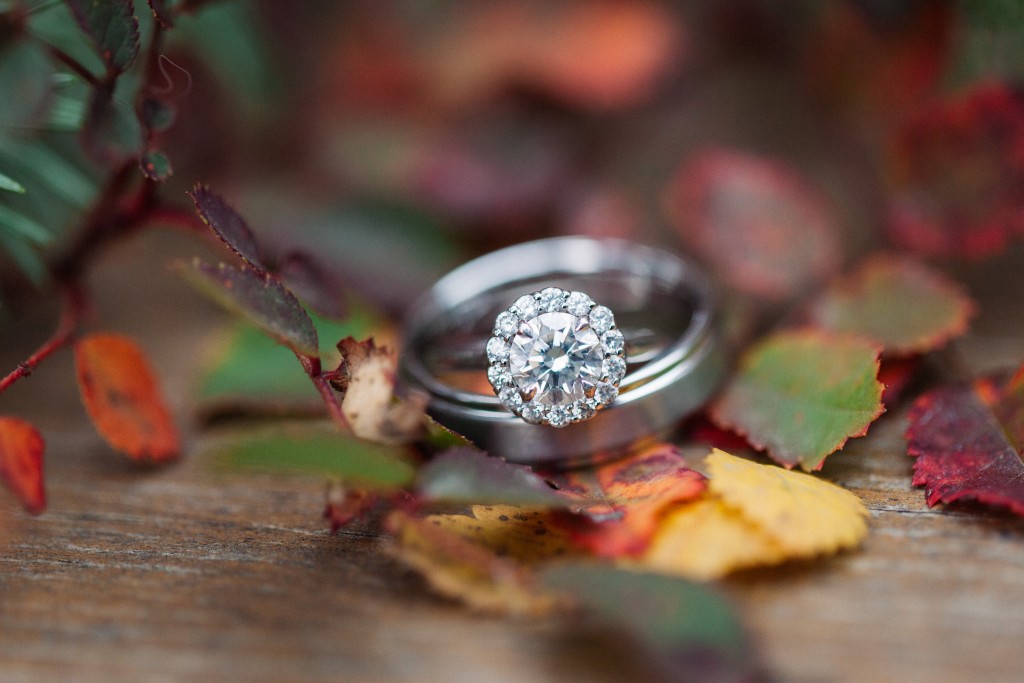
If you’re shooting small details, using a macro lens is imperative. It’s impossible to photograph a multifaceted diamond without one. Again, I’m emphasizing wedding rings, but this applies to any tiny object that would otherwise lose detail without a lens that lacks the ability to focus closely.

Furthermore, lighting plays an extremely important role in sufficiently enhancing smaller features. Position your subjects next to a window or another source of natural light. Artificial light typically comes from above and casts harsh shadows (just as if you were shooting outdoors at high noon).

Photographing Sentimental and Essential Details

Valuable objects directly related to the wedding must be captured clearly and thoughtfully. Jewelry, clothing, decorations, the cake, etc. are the unique accessories that showcase the couple’s personalities and will thus be some of their most treasured photos. The goal here is to highlight each item without complicating the image and detracting from the subject. I like to add outside elements that complement the subject. This is really a great way to augment shots of jewelry or other accessories that are very small. If you have the opportunity to work outdoors, you can use sticks, leaves, rocks, and so forth to give the image a rustic, nature-inspired vibe.

20151004-175926-2_mini

If you can’t go outside, simply find ways to add eye-catching textures or patterns to the shot, or incorporate something else that is special to your clients to add interest.

20150711-142947-478_mini

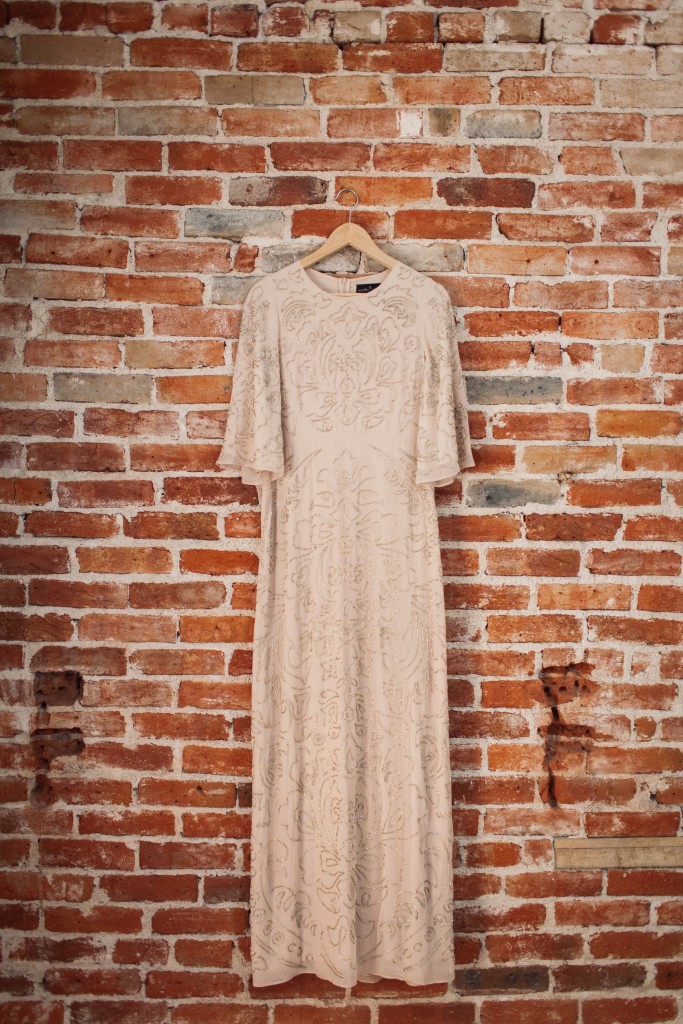
The bride’s dress is equally important. The same rules apply, but it can sometimes be difficult to get a creative shot of the gown. Again, incorporate textures and patterns when you can.

20150711-135407_mini

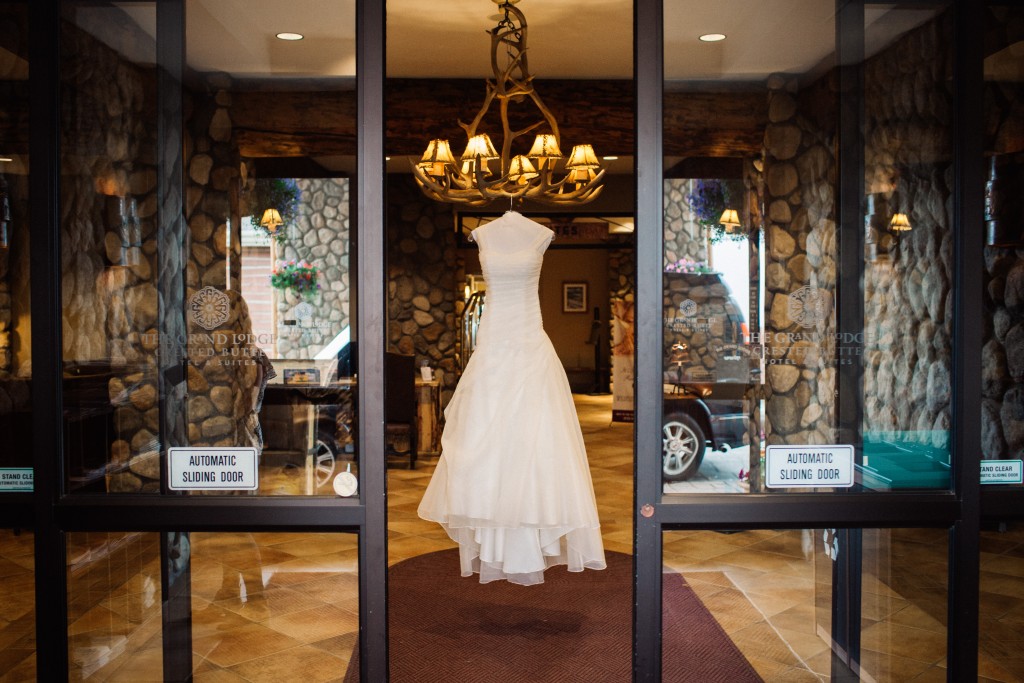
Creating a unique dress shot requires a little artistry and sometimes, improvisation. At one of the weddings I worked last summer, we had been having a tough time finding a nice place to photograph the dress. The hotel was beautiful, but the circumstances just weren’t quite right. We ended up taking the dress down to the lobby and asked the concierge if we could hang it from their chandelier. Surprisingly, they agreed, and it looked perfect. Then, as I stepped back through the automatic doors to get a wider shot, I ended up with this:

dress_mini

The point is, you can always find creative ways to work around seemingly impractical or unappealing situations. Keep in mind, too, that when you’re shooting wedding dresses, it is important to get wide shots of the entire dress as well as close-ups of the fabric and details.

dress2

Photographing Non-essentials

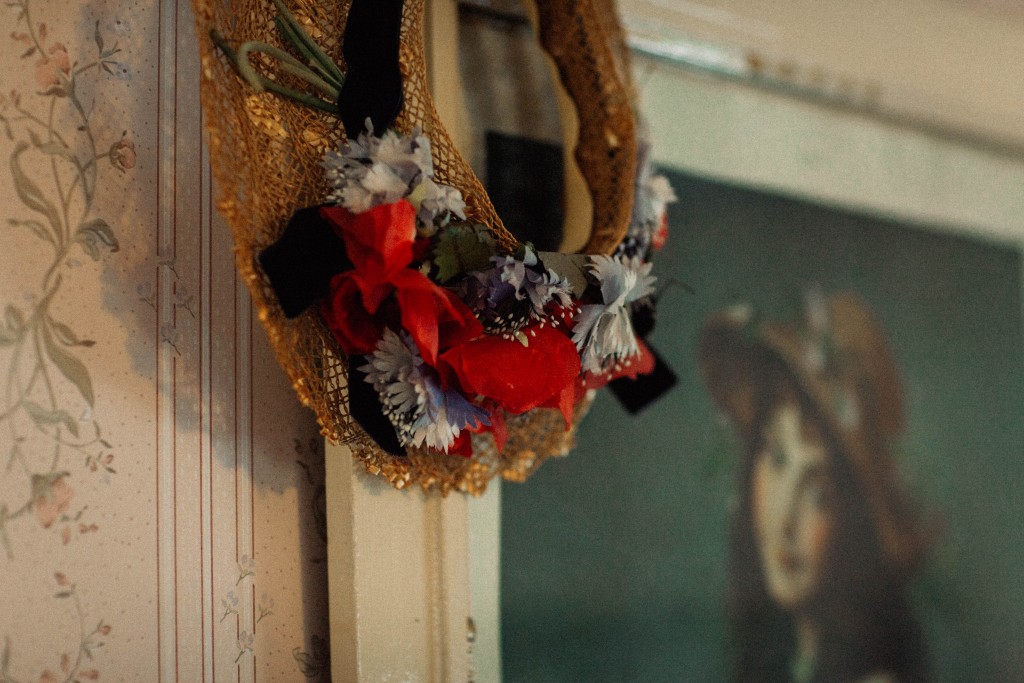
After you’ve covered the necessities, you can really get creative with the more obscure details. These are particularly important, though, because they really help convey the feel of the entire day. Not to mention, this is really a lot of fun during the reception or whenever you have some downtime. I also take a lot of pride in images like these because they sincerely express my unique photography style.

painting_mini

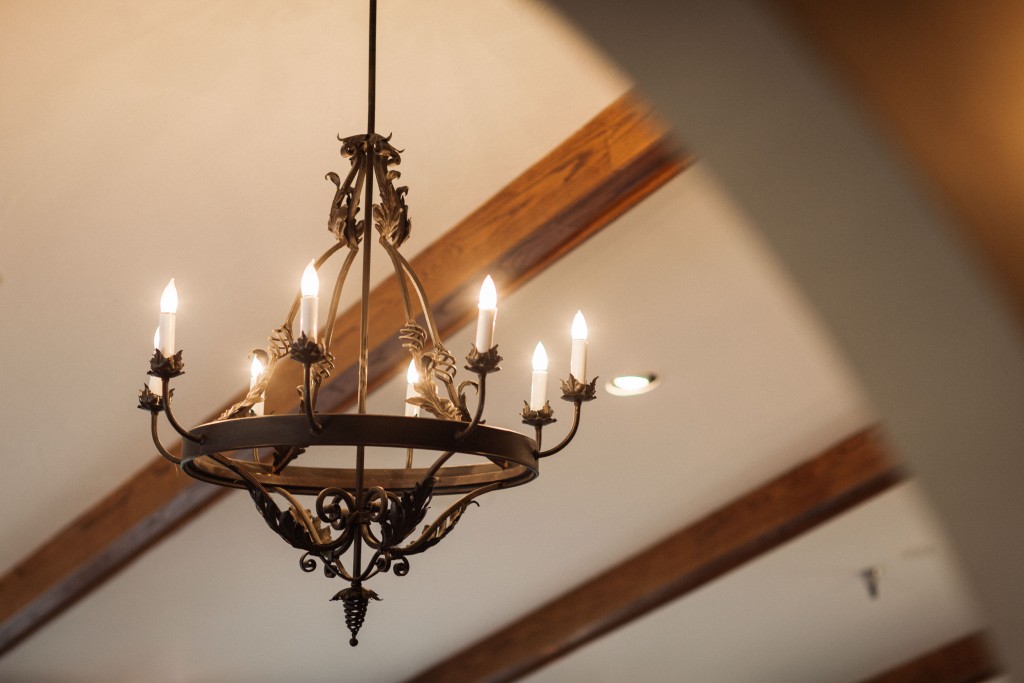
I try to choose things that will evoke strong feelings in the couple long after the wedding. They may forget little things like what they were eating while getting ready, details in the room where the bride prepared, and so forth. When they look back at these photos in years to come, all of the emotions of the day will come flooding back, and that is really the fundamental goal of quality wedding photography.

makeup_mini

chandelier_mini

To further enhance your wedding day details, Sleeklens offers a wide array of Lightroom presets and Photoshop actions.

Five Editing Mistakes Beginning Photographers Make

When you’re first starting out in photography, it’s easy to fall victim to a few common mistakes. When I look back at my work from seven years ago, it’s apparent to me (and probably any other photographer) that I fell into many of the same traps as a lot of other beginners. Things that draw attention to your subject don’t necessarily improve the photo–they can simply be distracting.

In this list below we’re going to get in touch with the five most common mistakes beginners tend to make during their journey towards becoming professional photographers:

Heavy Vignetting

2_vinette-1

Exaggerated vignettes are a tell-tale sign of an amateur photographer. Beginners like them because they draw attention to the center of the frame where they are most likely to compose their focus. What they’re effectively doing, though, is underexposing the sides of the image and detracting from their talent. A good photographer ought to use the whole shot, utilizing natural elements to frame the subject. Amateur photographers also like to use vignettes in an attempt to add some drama to the photo. Luckily, there are natural ways to do this–mastering the sun flare technique can really enhance an otherwise lifeless image.

Overusing Presets

3_Going over the top with presets-1

It’s easy to go overboard with presets. Overuse can make a photo look unnatural and unflattering. If you suspect you’ve done too much, you’re probably right. Keep it simple. Instead of over-editing the entire photo, use local adjustments to accentuate specific areas.

Histogram tool can be your best friend under situations like this, as you’re constantly checking over clipped values (mostly at highlights or shadows), but also Lightroom’s before/after mode can be extremely handy for checking where things went wrong.

Overdoing Black and White

4_Only editing in black and white-1

This is the mistake I’m most guilty of in my early work. Converting an image to black and white does not generally make it more artistic. Of course, there are ways to use black and white to effectively enhance a photo, but many new photographers end up using this style as a crutch. The number of variables that color adds to the editing process can be intimidating. Be sure to learn about complementary colors and incorporate them into your photos. However, do try to avoid photographing bright and heavily saturated colors because camera sensors don’t tend to register these colors well. If you’re unsure which way to go, this post can help you decide whether to edit your photo in color or black and white, but also keep in mind that not only black and white effects count as the only range of monochromatic effects – sepia or cyanotype effects also looks appealing for most clients.

Heavily Retouching Skin

5_Over Retouching-1

Most photographers fear that their clients won’t like their photos because of the way they themselves look (by no fault of the photographer). It’s tempting to heavily retouch skin in an attempt to flatter your client, however, it’s best to edit only what is necessary. A good rule of thumb is to touch up or remove only imperfections that are impermanent, such as acne or bruises – try, also, to find flattering angles and accentuate those.

Overdoing such adjustments will end up in unnatural results, mostly if you don’t happen to ace post production tools such as Lightroom Presets & Brushes or Photoshop Actions. In the end, you’re prone to ruin all your hard work by just trying to make it look better.

HDR Processing

6_Going crazy with the clairity slider-1-1

Every photographer wants to learn new techniques; more often than not, though, HDR processing looks a bit over the top. While it can be tempting to bracket exposures, it’s best to avoid it until you’ve mastered basic photography skills first. Instead, if you don’t have enough dynamic range in a shot, bracket the exposure and brush locally in the post.

A quality image ought to appear natural, polished, and simple:

1_original-1

Now that you’re familiar with these common mistakes, you can easily avoid them by mastering photography techniques that surely will take your photographs to the next level! Don’t feel disappointed by making mistakes during your first attempts – everybody had a starting point and a goal to reach, therefore it’s your right to learn from bad experiences and add all that knowledge to your future work.

Hope this guide was useful and keep shooting!

How to Get Perfect White Balance in Lightroom Using a Color Chart

Imagine that you have spent an awfully long amount of time editing a photograph for the cover of a magazine and as soon as you get the copy, the colors did not match what you had on your monitor. Trying to get accurate colors can be quite challenging and the process of getting an efficient color management in lightroom can be a nightmare at first.

From time to time, a client will have some doubts regarding color, saying that the color of a certain product that he sees on his computer is not right or even after printing an image and the color is not the same that you had on your monitor. As photographers, we want to make sure our photographs are printed or delivered to our clients with the correct color that we see on our monitor. Therefore, we have to be certain that the problem is not in our process. That’s why getting accurate colors is such an important factor that can’t be ignored in the photography workflow.

There are some products available on the market, like monitor calibrating devices from brands like X-rite or Datacolor and professional high-end monitors like Eizo and LaCie. Although, it can be quite expensive for someone starting out in photography, color charts can be an affordable way to get the colors right every time, and there are a lot of types and brands to choose from.

In this tutorial, I will show you how to manage colors using only a color chart, while not having to spend a lot of money.

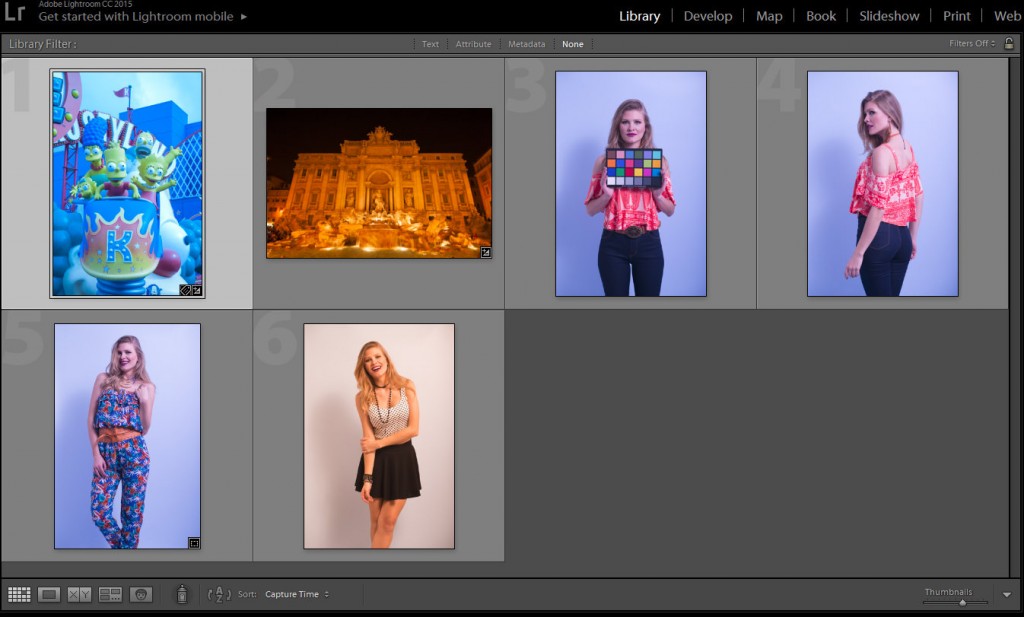
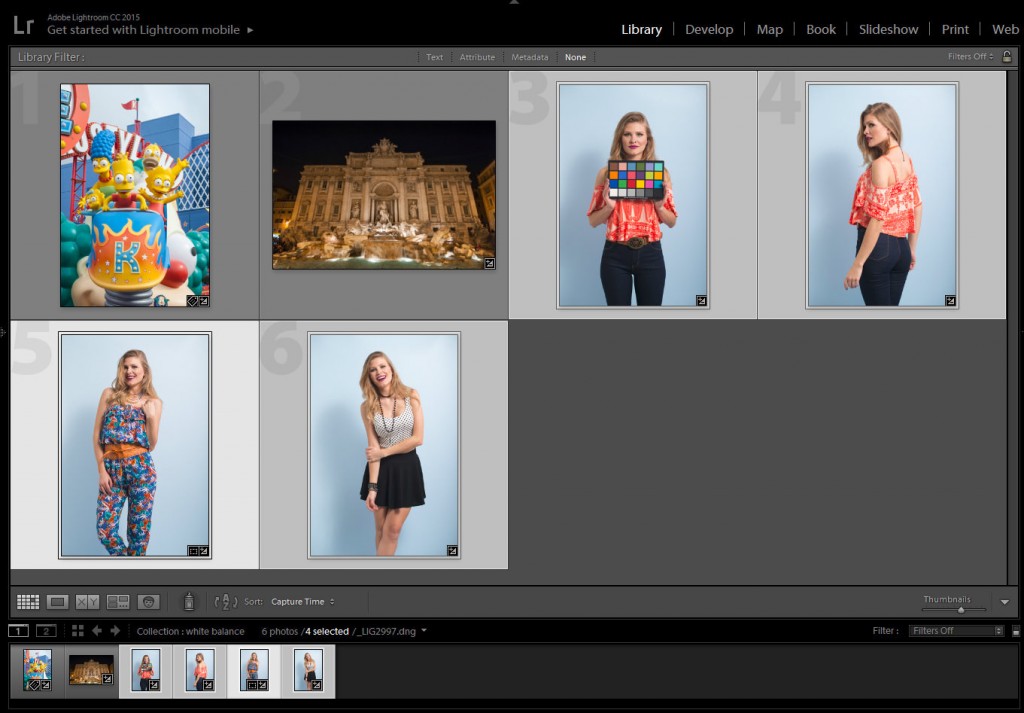
01_all_imgModel:  Jessica Waldow / Photo: Luiz Kim

I did a series of photographs for a fashion lookbook (images 3 to 6) using the same light setting and, on purpose, messed with the white balance on my camera, since I photographed in RAW I could tweak the white balance as much as I wanted, nondestructively.

As I mentioned in my last white balance tutorial, studio strobes are set up to 5000K – 5500K, therefore I should have photographed using the setting for the white balance to the flash icon or manually change the setting to 5000K on my camera. The bluish photographs were set up around 2000K and the one with a more yellowish color around 7000K. Even if you set up the white balance on your camera, you will never be a 100% sure if the colors are correct, either because the flash strobe is not giving 5000K – 5500K, or the tint of the photograph appears green or magenta.

Step 1: Photograph the subject with the color chart, position it accordingly to the main light source

After you have set up the lighting for the photo shoot, position the color chart near the main subject and face it toward the main light source.

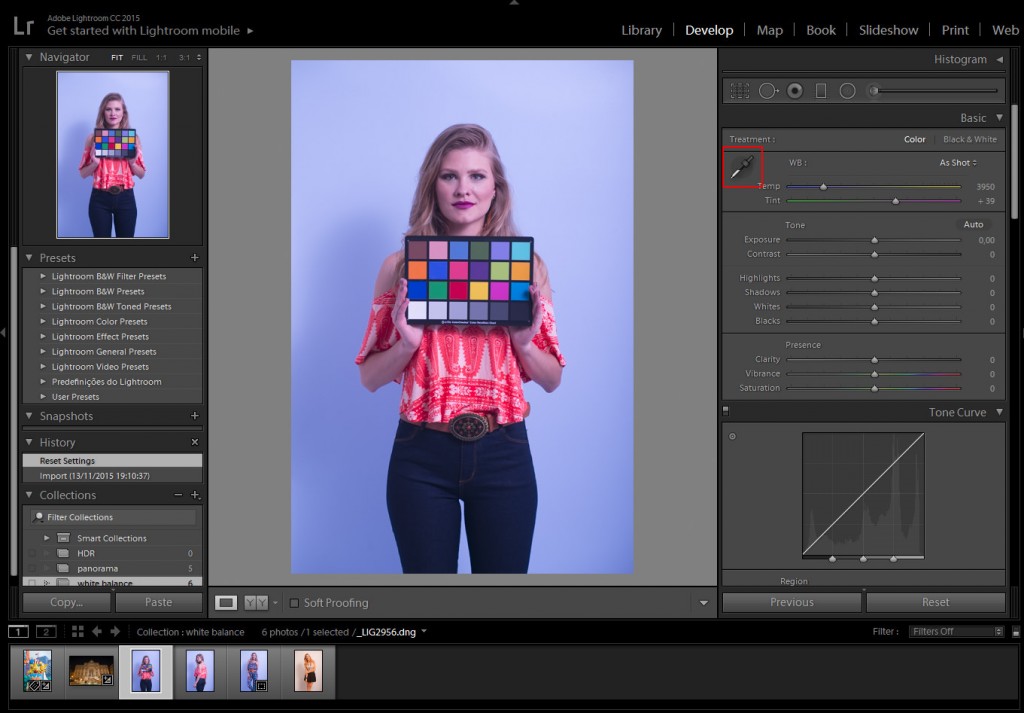
Click on the White Balance Selector (W), which looks like an eyedropper tool.04_checker_a01

Step 2: select the gray area of the color chart

With the White Balance, Selector tool selected, click on the gray box of the color chart. Each color chart may differ, depending on the manufacturer.

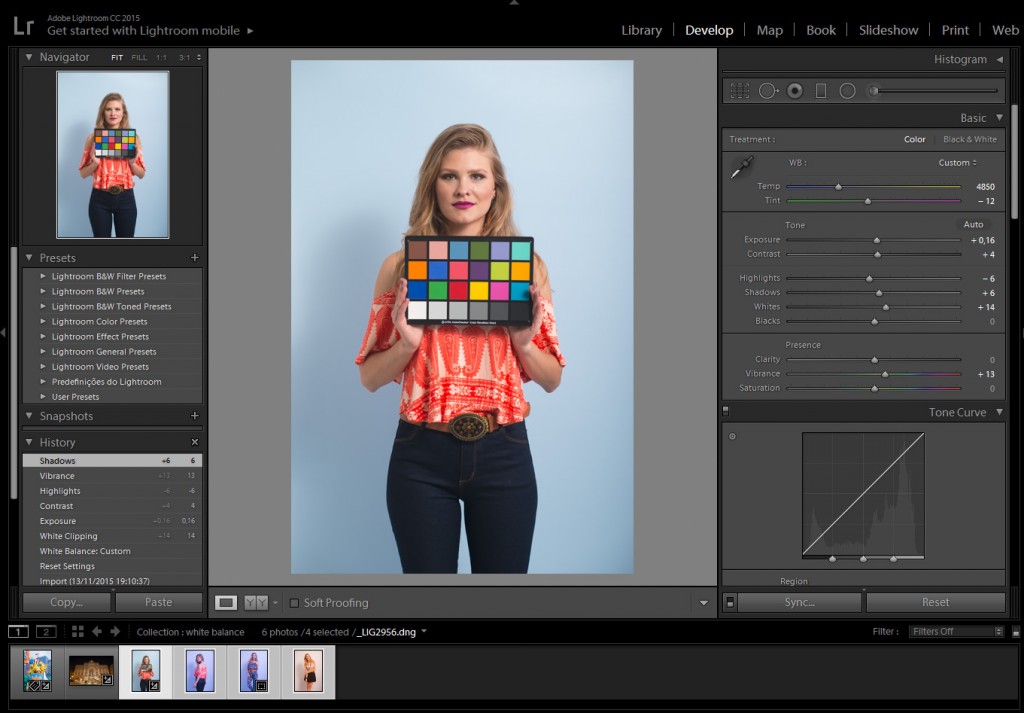
With the White Balance Selector, hover over the image. We can see the preview in the navigator window before we even click it.

04_checker_a03

As you can see, it will automatically correct the white balance of the image, even if your monitor is not calibrated, Using this method guarantees that the white balance is correct.

At this stage, you can edit your image as you would normally do, remembering not to tweak the white balance too much, since the whole purpose is to correct it.

After correcting one image, you can adjust the others as a batch. It doesn’t matter if there are a thousand images, you can match it with the steps below.

Step 3: batch correcting the white balance

Click on the image you have corrected and press shift+click on the last image of the series, that will select the images you want. If you want to select images that are not in order, Ctrl+click for PC, or Cmd+click for mac, selecting the images one by one. Just make sure that the highlighted image is the one with the adjustments.

05_sync_a01

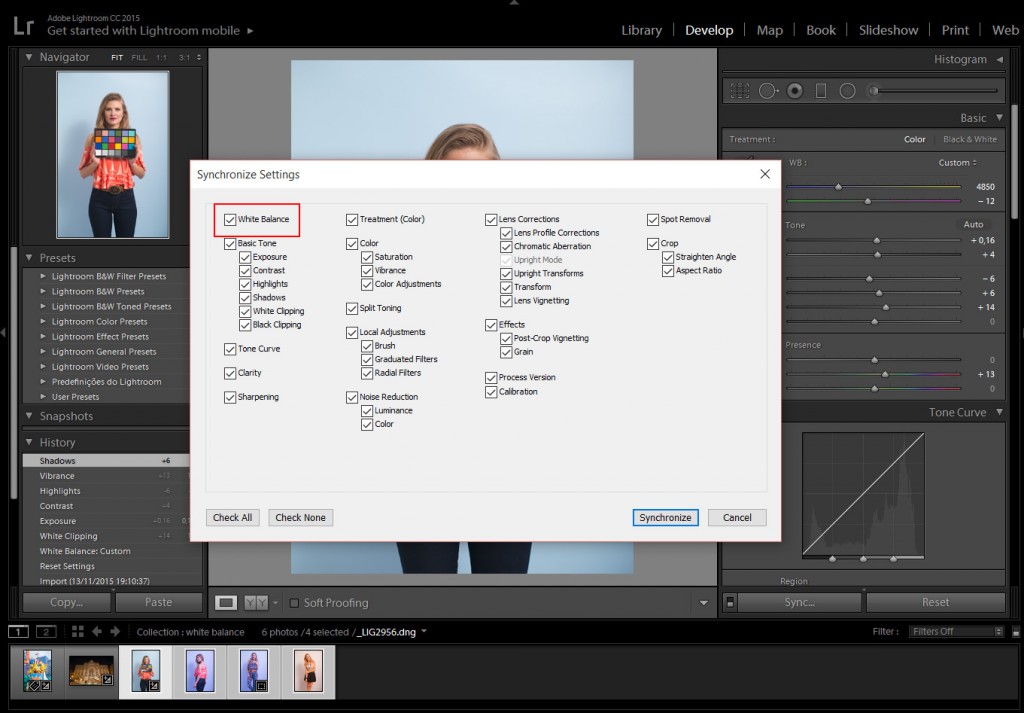
Step 4: Synchronize the settings

Click on the ”sync” button, which is located in the bottom right corner.

The ”synchronize settings” panel will pop up, you can either check just the white balance to sync all the images with the same white balance, or check whatever you want to sync with the settings.

Hit the synchronize button and Lightroom will synchronize the settings.

01_all_img_a02

As you can see, no matter how many photographs you have taken with the same light source, you will always get the correct white balance.

White Balance in Lightroom

Do we need to give up on our images, just because the image came out a little bluish or reddish? The answer is no. Well, if you photograph in RAW, you can correct the colors later on inside Lightroom. So we have to download Lightroom presets to correct this. Not that you can’t do it in JPG, but doing it on a RAW image is a nondestructive way to correct any of your images, even if you did not correct it on your camera beforehand. So don’t give up on your image, we can make it work. It’s just like not giving up on your photographic negatives because we can .

For those who are just beginning in photography, white balance, color temperature, Kelvin, 5000k, etc. can seem difficult to understand, but with Lightroom, we can manage it quite intuitively.

Light temperature is measured in Kelvin and every type of light has a certain temperature, and each temperature has a certain color, like a candle light which is red or xenon car lights that have a more bluish color. When you are messing with your camera’s white balance, you will see an icon of a sun, shadow, flash or clouds. When you select any of them, what the camera is attempting to do is to compensate for the light you are photographing.

chart

To illustrate the temperature, let’s separate them into 3 different categories: RED, NEUTRAL, and BLUE.

RED: Candle Light 2000K, sunrise/sunset 2000-3000K, incandescent lights 2500K.

NEUTRAL: the Sun at its peak around 5500K, flashes and studio flash strobes are in that range as well.

BLUE:  xenon 6200K and blue sky 10000K.

Our eyes adjust automatically to the color temperature either in the shade or in the sun, but the camera is not able to do that, therefore you will have to do it for your camera. There are a lot of hardware devices that will help you get the correct colors every time; monitors for photography, monitor calibrating devices, color checker cards, color booths, etc.

In this Lightroom presets tutorial, we will learn how to correct the white balance of photographs, either by using manual settings or automatic settings or by using the White Balance Selector.

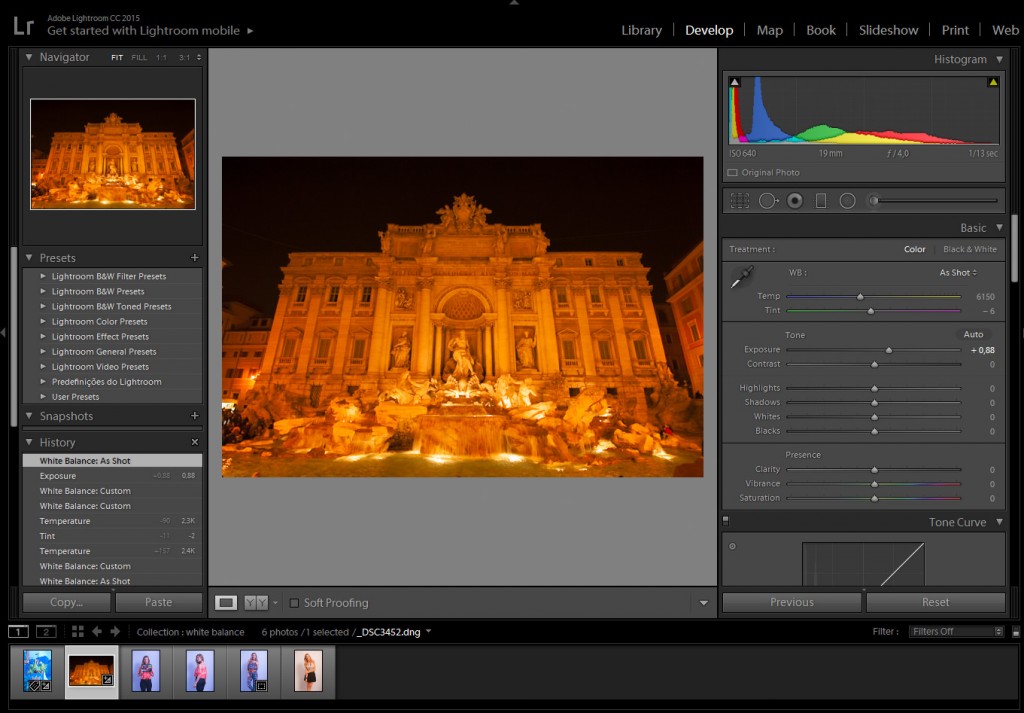
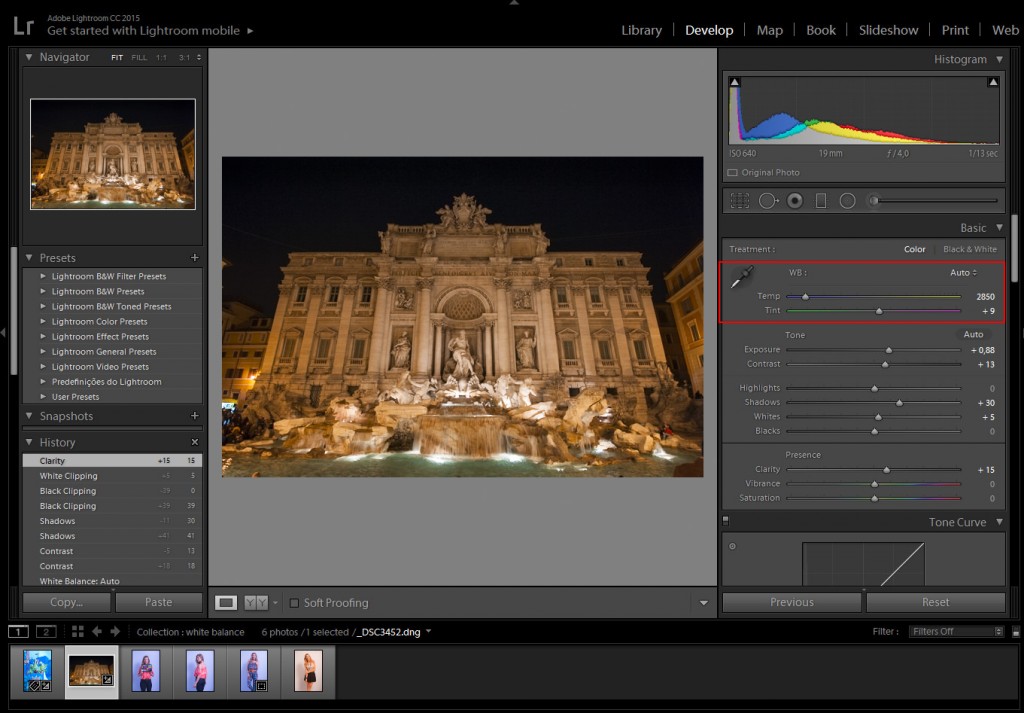
02_trevi_a01

In this particular image, the color temperature is way off. As we can see, the image is quite red, most people would delete the image and try to set the correct white balance in the camera, then take the shot again. But, since I have photographed in RAW, I can always change the white balance settings later inside Lightroom, in a nondestructive way.

For those shooting JPG, it is best that you choose the correct white balance in your camera. Lightroom can try to correct it later, but not as it would with a RAW image.

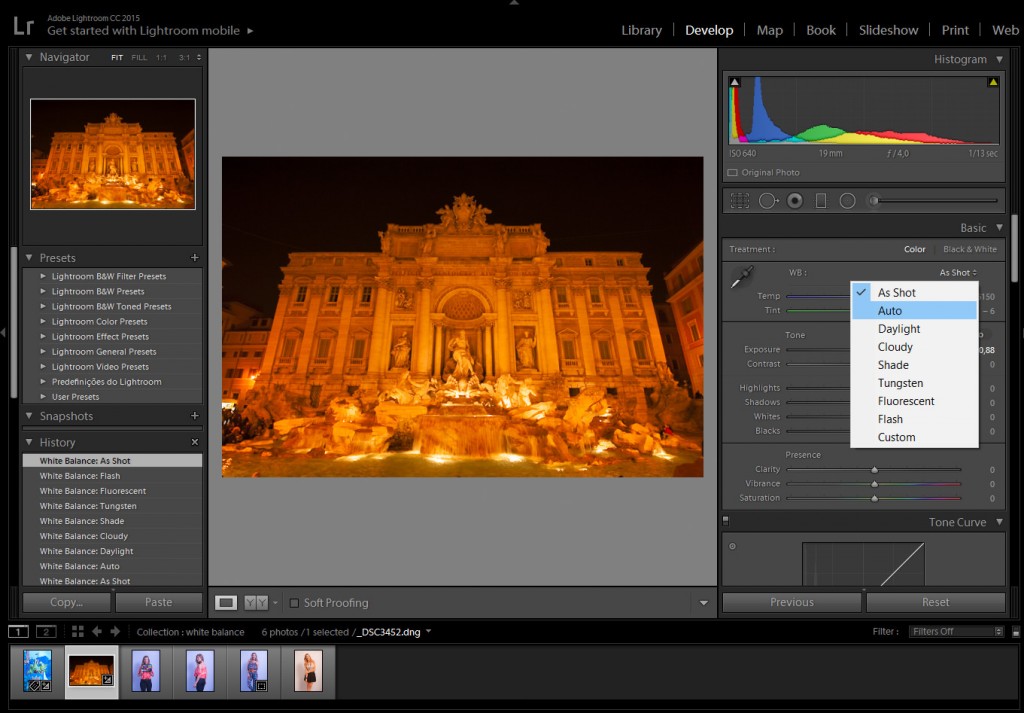
02_trevi_a02

In the Develop Module, we have some presets to choose from, as we would have inside our camera settings.

Auto: the auto mode does a pretty decent job on outdoor photographs, but when indoors, we sometimes may have to adjust it a bit further.

The other preset settings will correct it as the names would suggest; daylight will assume that you have photographed outdoors in daylight, cloudy as on a cloudy day, or tungsten, as under a tungsten light bulb and so on.

If any of those presets won’t fit your needs, we can always correct it manually.
02_trevi_a03

In order to manually correct the color temperature, we can change the temperature and tint sliders.
Temp: will correct the white balance from blue to yellow.

Tint: will correct the white balance from green to magenta.

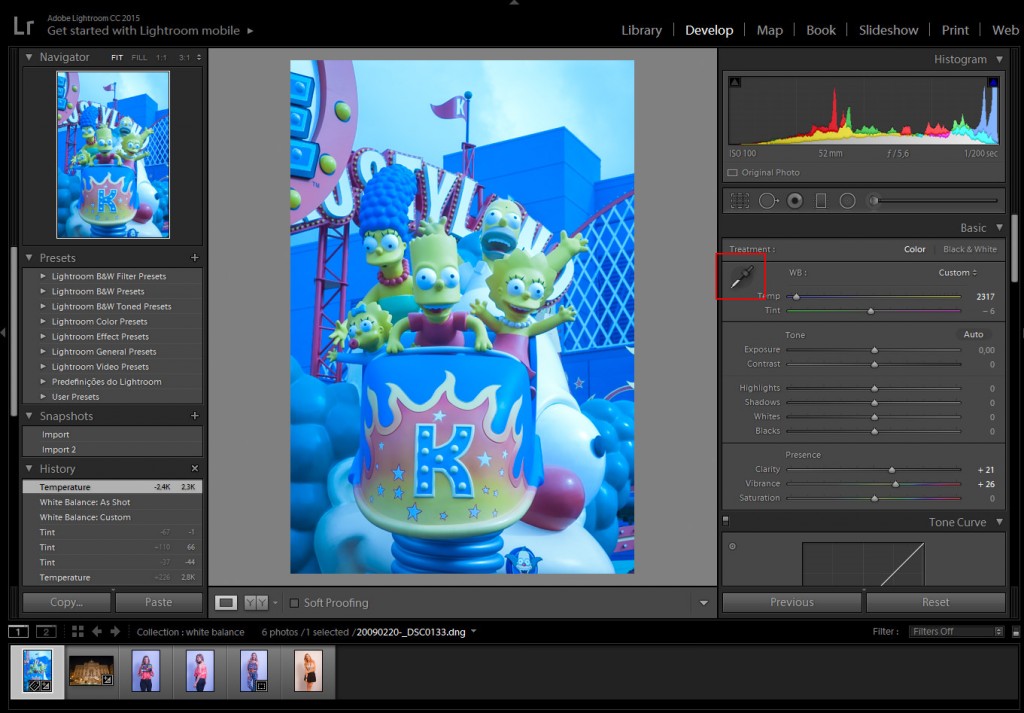
01_simps_a01

In this particular image, the white balance is off too, tending to a more bluish feel.

We could correct it manually like we did on the image before, but if there is something in the scene that you remember that has a neutral color, we can use it in our favor to correct the color temperature automatically.

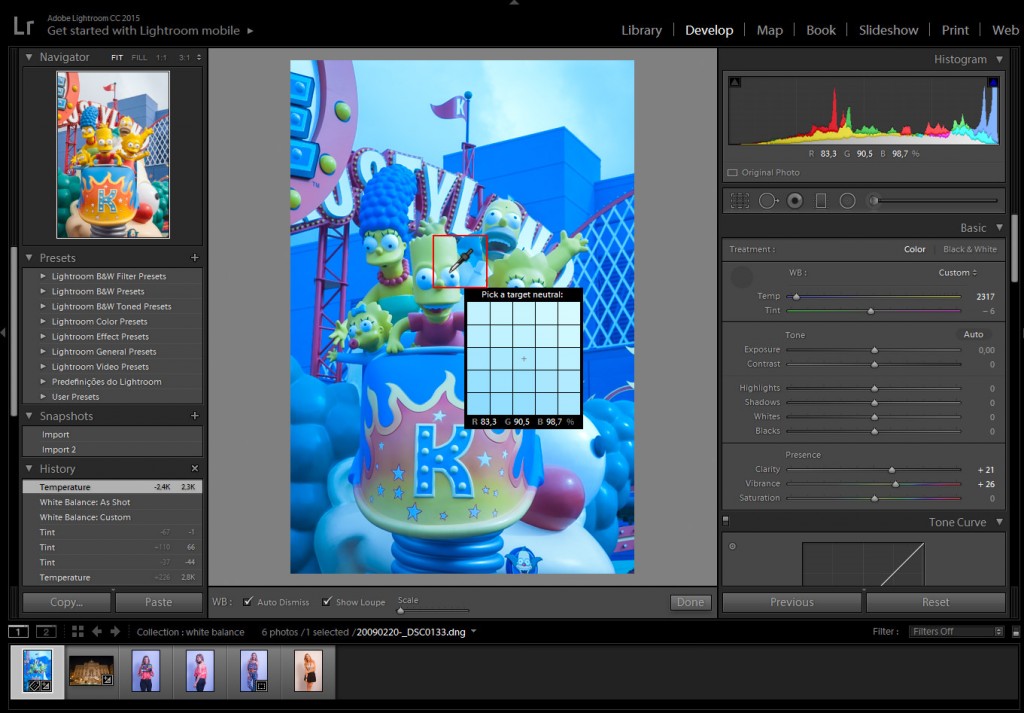
01_simps_a02

Click on the White Balance Selector (W), which looks like an eyedropper tool and click either on the white or the black part of Bart Simpson’s eye. That’s because the White Balance Selector tool will work on the neutral colors like whites, grays, and blacks.

Using the White Balance Selector, hover over the image. We can see the preview in the navigator window before we even click it.

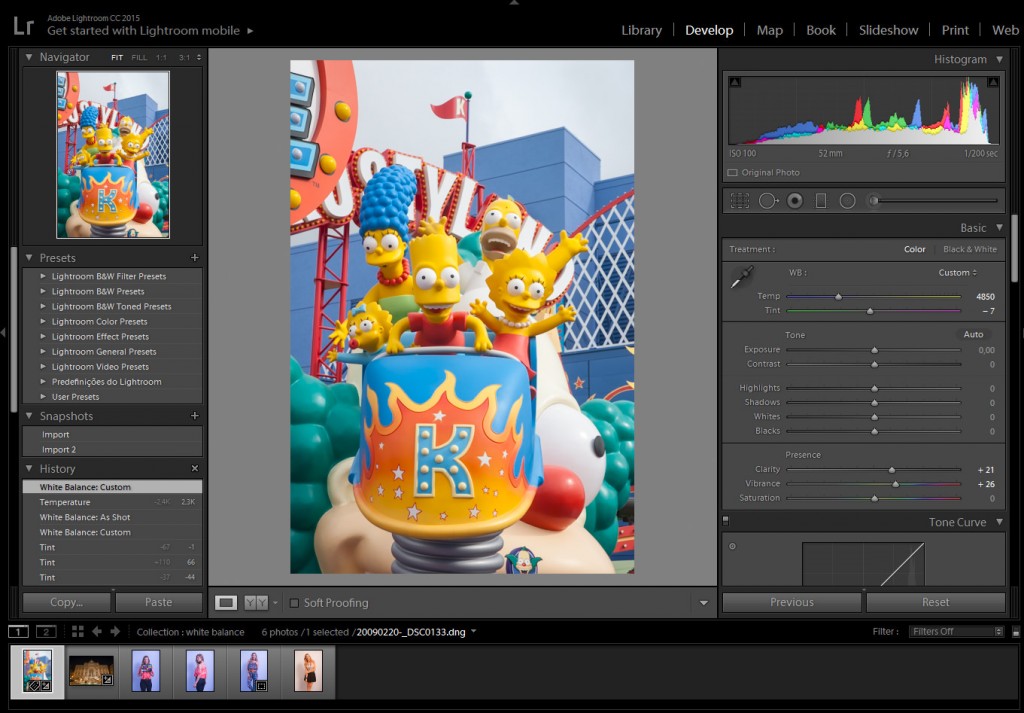
01_simps_a03

After you click on a neutral color, Lightroom will try to correct it by assuming the color you clicked is neutral white, neutral gray or neutral black depending on the color you chose to click.

Sometimes you can see that is not 100% correct, so you can tweak the temperature to get the desired color, but at least it could be a starting point.

This way we can easily correct the colors of the images. If you need to get the perfect color, either for those clients that need the correct color of their product or if you are photographing a work of art, using a color checker card can be an effective way to do it, I will make a tutorial on that later.