Tag: white balance

How to adjust the color temperature of your photos directly in your camera

Have you ever taken photos and realized that the colors are not as you saw them in the scene? Don’t worry because this is common in photography. This effect is caused by the difference in the light sources. The sun on a bright day, on a cloudy day, a light bulb… different light sources emit light with different hues and this makes them have different color cast. Our brains “corrects” the color cast, but our cameras don’t do it unless we tell them. Have you ever heard about white balance (WB)? This is what will help you to avoid color casts in your photos due to the light source.  Color and WB might be a bit confusing at first, but once you understand, it gets easy and fun to play with them. Let’s start with color!

How to adjust the color temperature of your photos directly in your camera
The same scene with different color temperature has a totally different effect on the viewer. The upper photo has a slightly yellow cast that makes it seem warm. The lower one has a blue cast that makes it have a cooler feeling to it.

A bit of color science: The connection between color and temperature:

I am not going to get into a huge scientific explanation, but I think it helps to know the story of William Thomson in order to understand where some color concepts are coming from. William Thomson was also known as Baron Kelvin the 1st (1824-1907). He was a mathematical physicist and engineer. He was the responsible for formulating the Kelvin scale which measures absolute temperatures (for that reason temperature is measured in Kelvin units!).

How to adjust the color temperature of your photos directly in your camera
This photo has a color temperature of 5500 Kelvin. This temperature corresponds to daylight and it is usually considered neutral (at this temperature, whites look actually white).

In his experiments, Kelvin noticed that, as it is being heated, carbon changes its color. Thus he saw that it is possible to align a scale of colors to the one of temperature. This is how the concept of color temperature was born.  At absolute zero (-273.15ºC, cold) the corresponding color is black. The visible spectrum of the scale runs between 1700K and 12000K. Ironically, the colors are organized on the kelvin scale in reverse from what we consider as “warm colors” and “cold colors”; “warmer” colors like red orange or yellow have lower temperatures on the kelvin scale than “cooler” colors like blue or purple.

Color temperature and photography

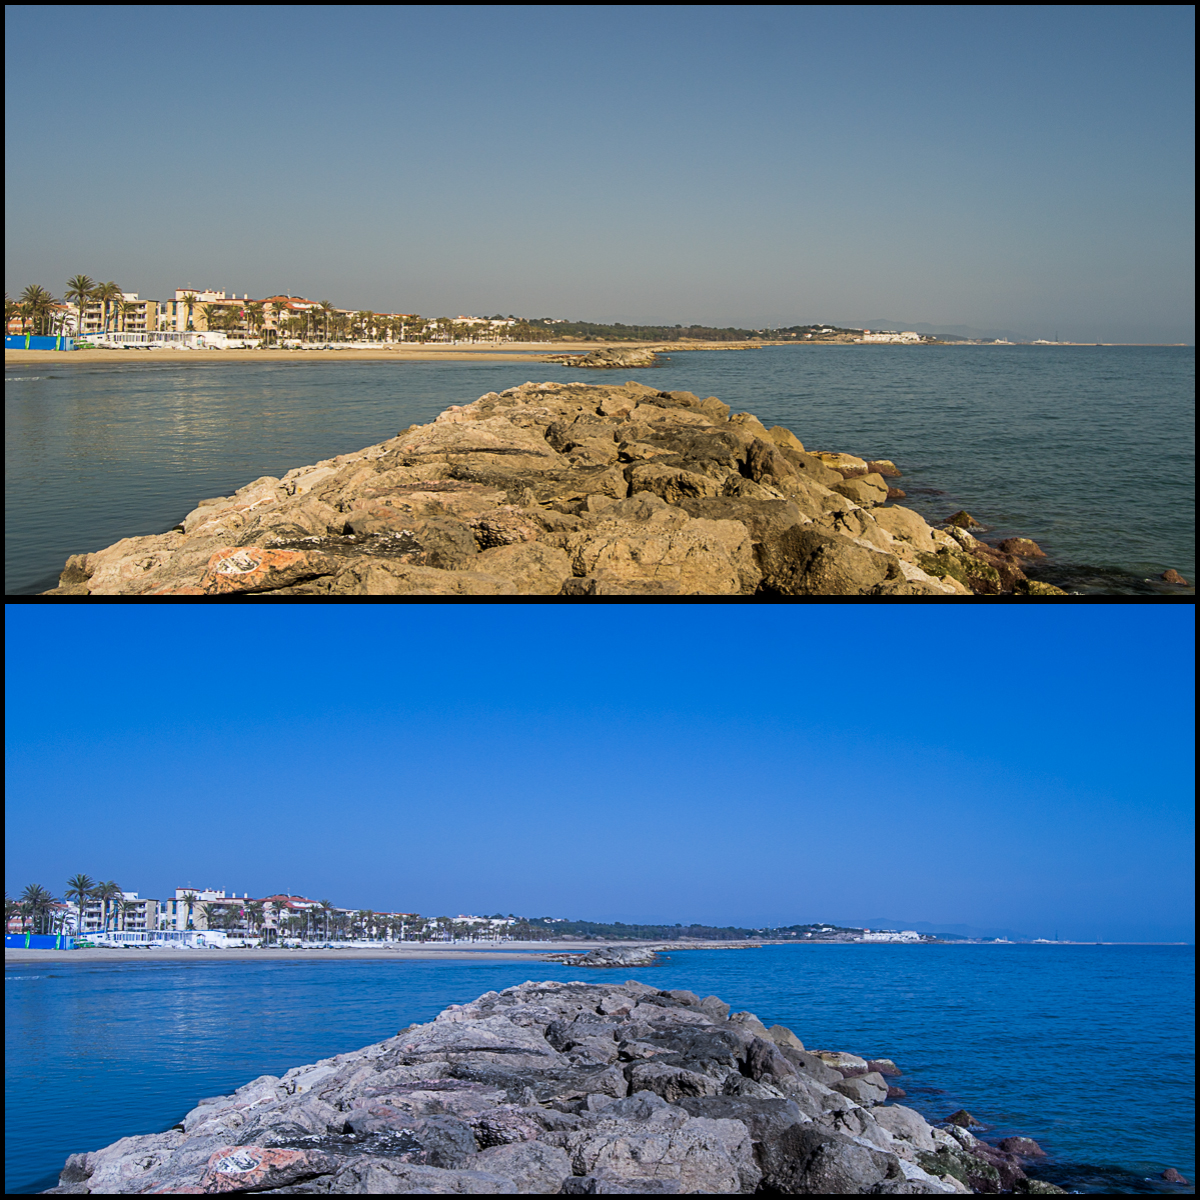
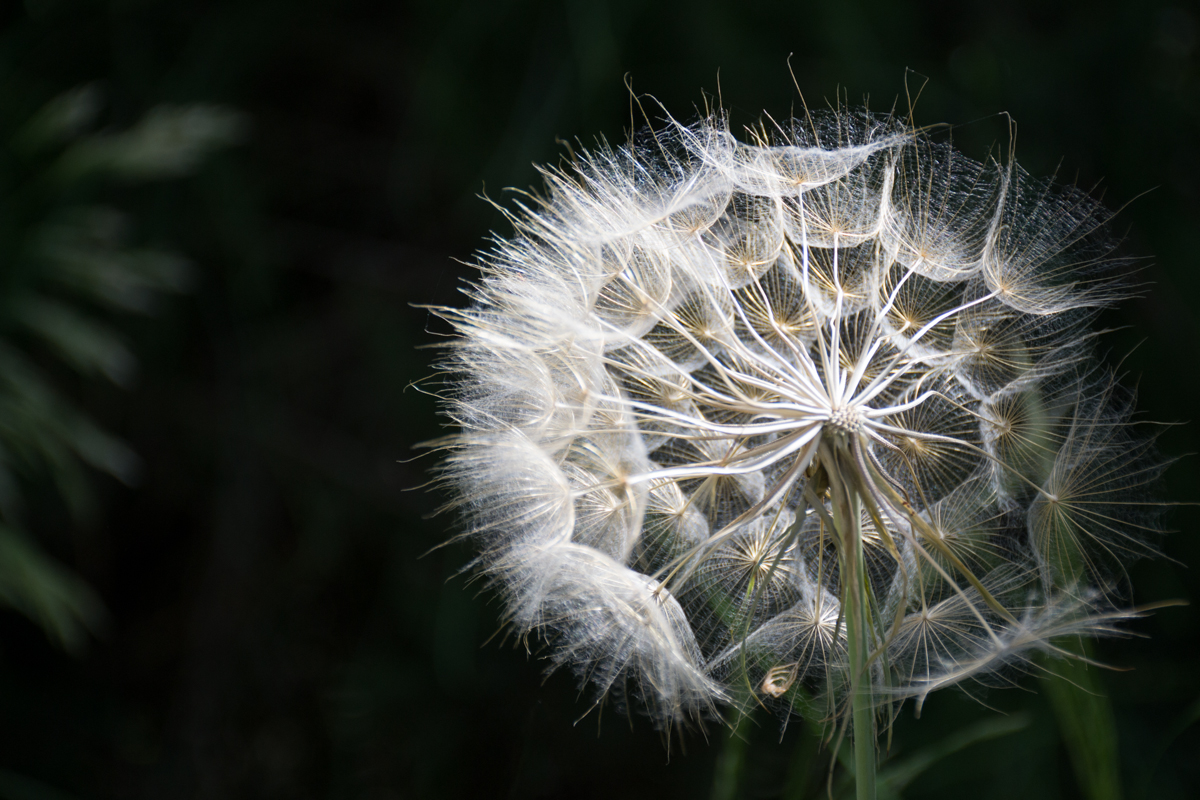
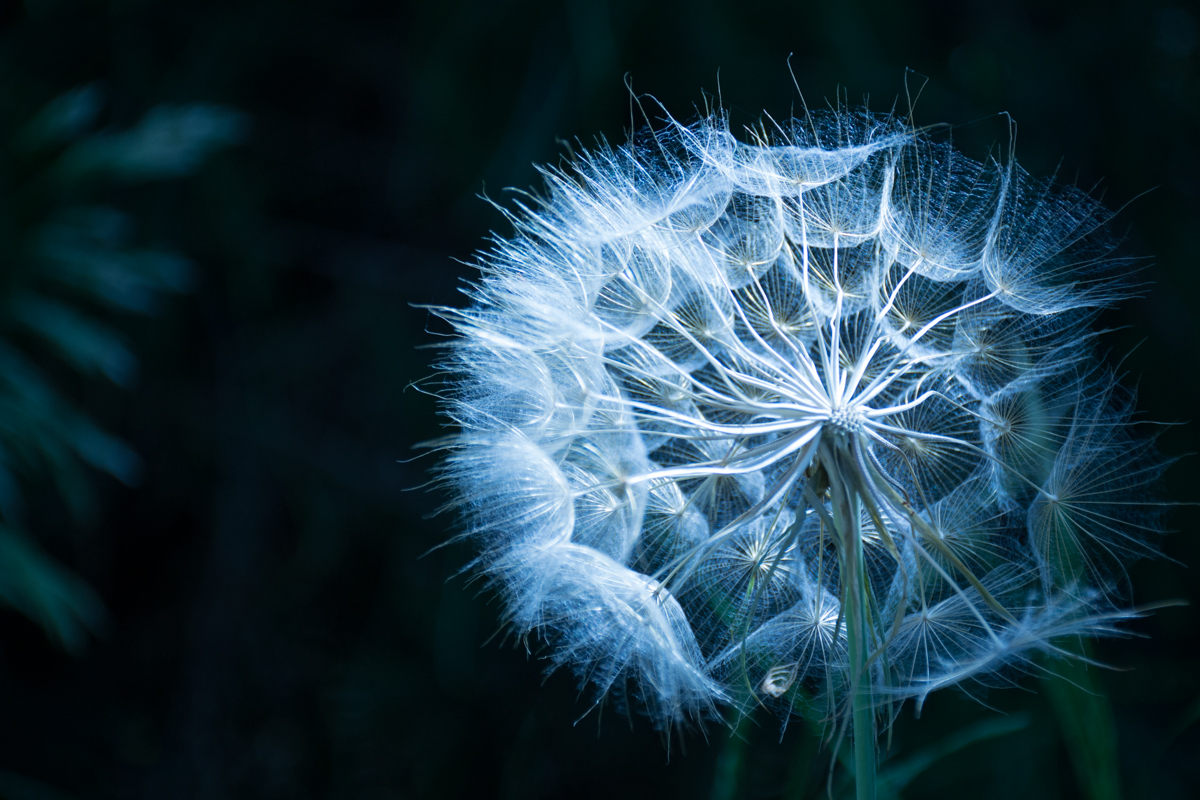
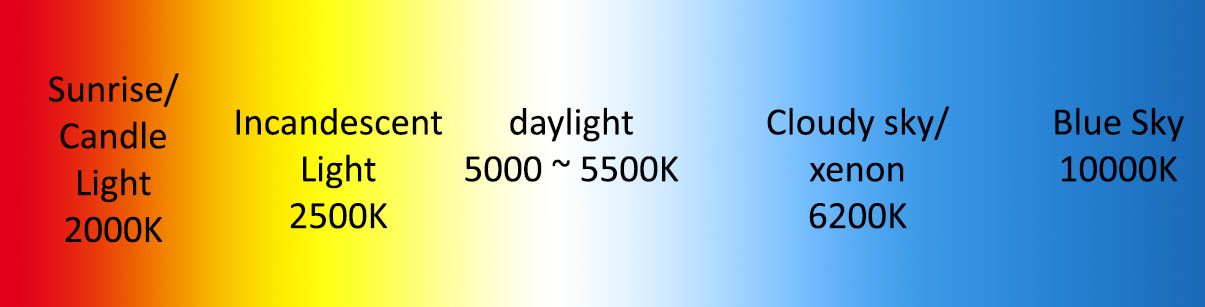
The color temperature of a photograph is the dominance of some colors over others. When the lighting is what we call “neutral” the whites will appear as white. However, when the scene has a light cast that goes towards the red (yellow, orange) or towards the blue than whites won’t look like white anymore, but reddish or bluish respectively. So depending on the light of a scene, its color temperature will vary. Let’s see it with some examples

5500K: white or neutral. Correspond to the midday light

How to adjust the color temperature of your photos directly in your camera
This photo has 5500 K. As you can see, the white parts of the shell are white. When color temperature is different than 5500 K, whites turn yellowish or bluish.

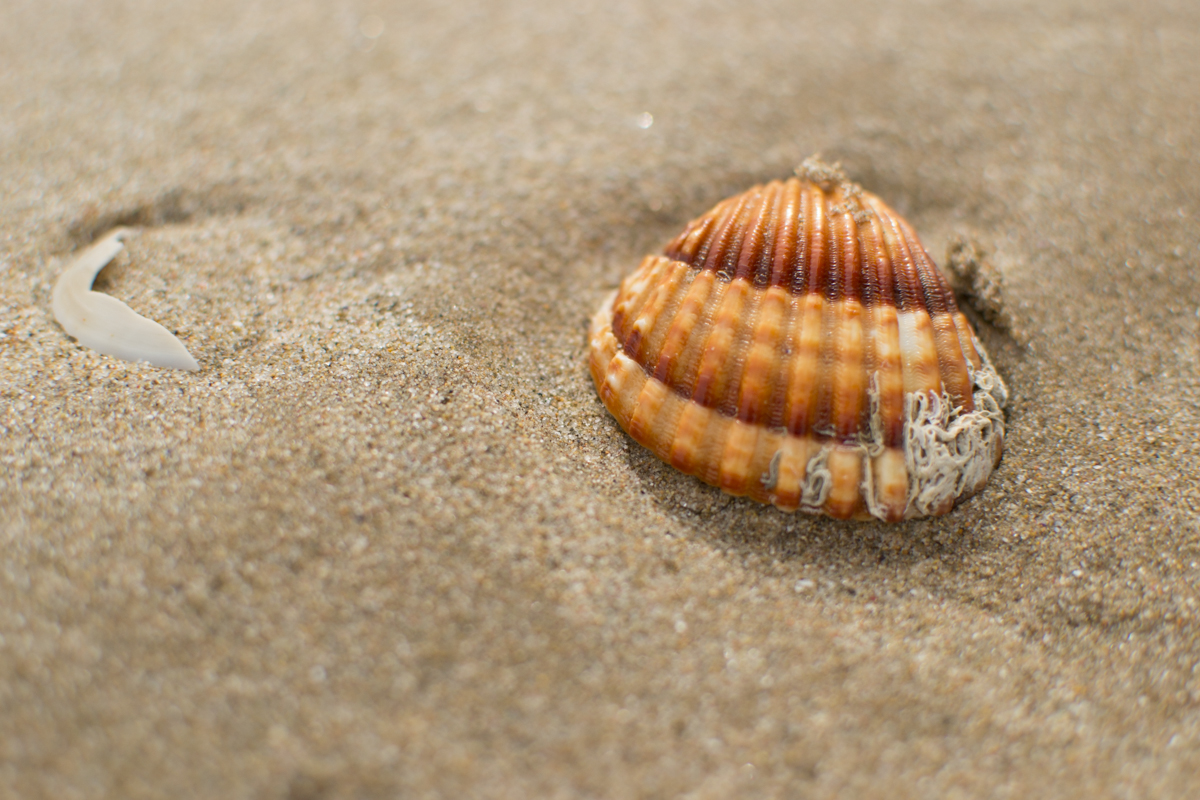
Less than 5500K: more yellow, red

How to adjust the color temperature of your photos directly in your camera
I modified the previous photo to show you the look it has when its temperature is lower than 5500K. As you can see, it takes a yellow cast. The whites are not totally white but cream-yellow.

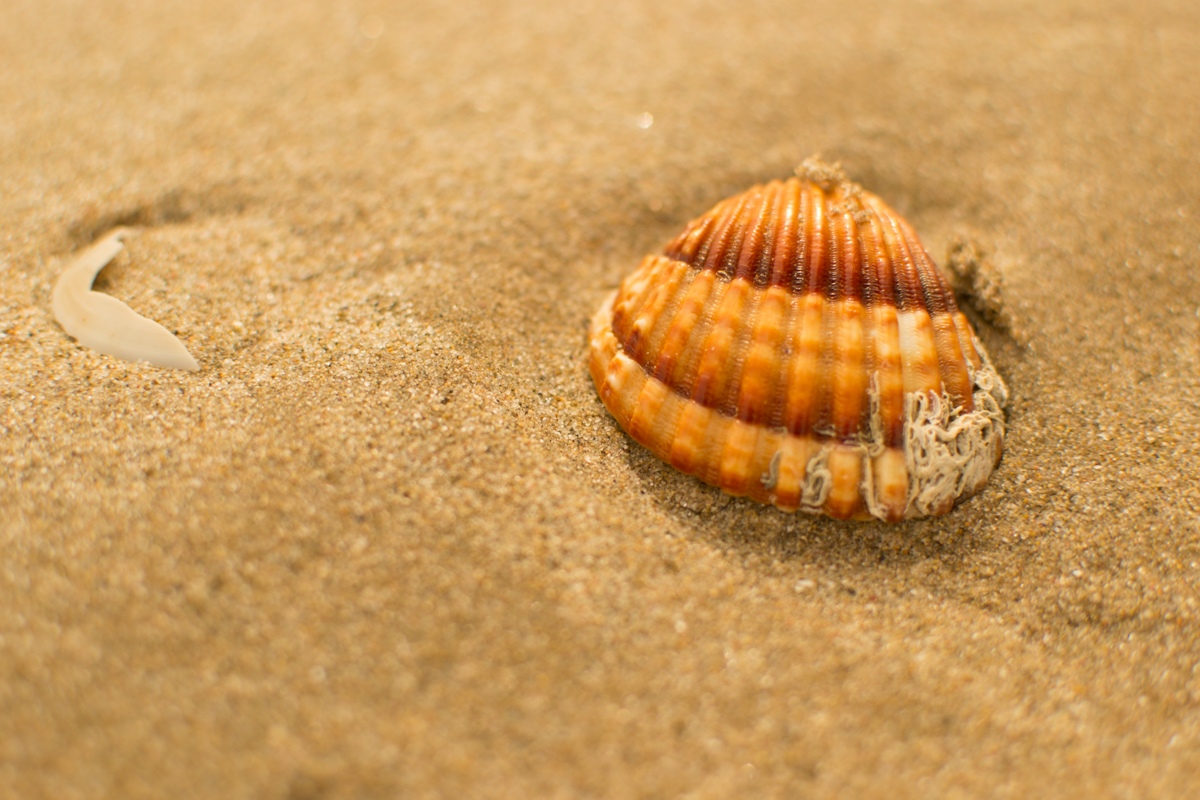
More than 5500K: towards the blues

How to adjust the color temperature of your photos directly in your camera
If the same photo would have had a temperature higher than 5500K, it would have a blue cast.

Some useful numbers that are good to keep in mind are:

1000K: candle light (they are towards the yellows)

2000K: sunset (yellows-reds)

2500K: light bulbs (they usually have a yellowish tint)

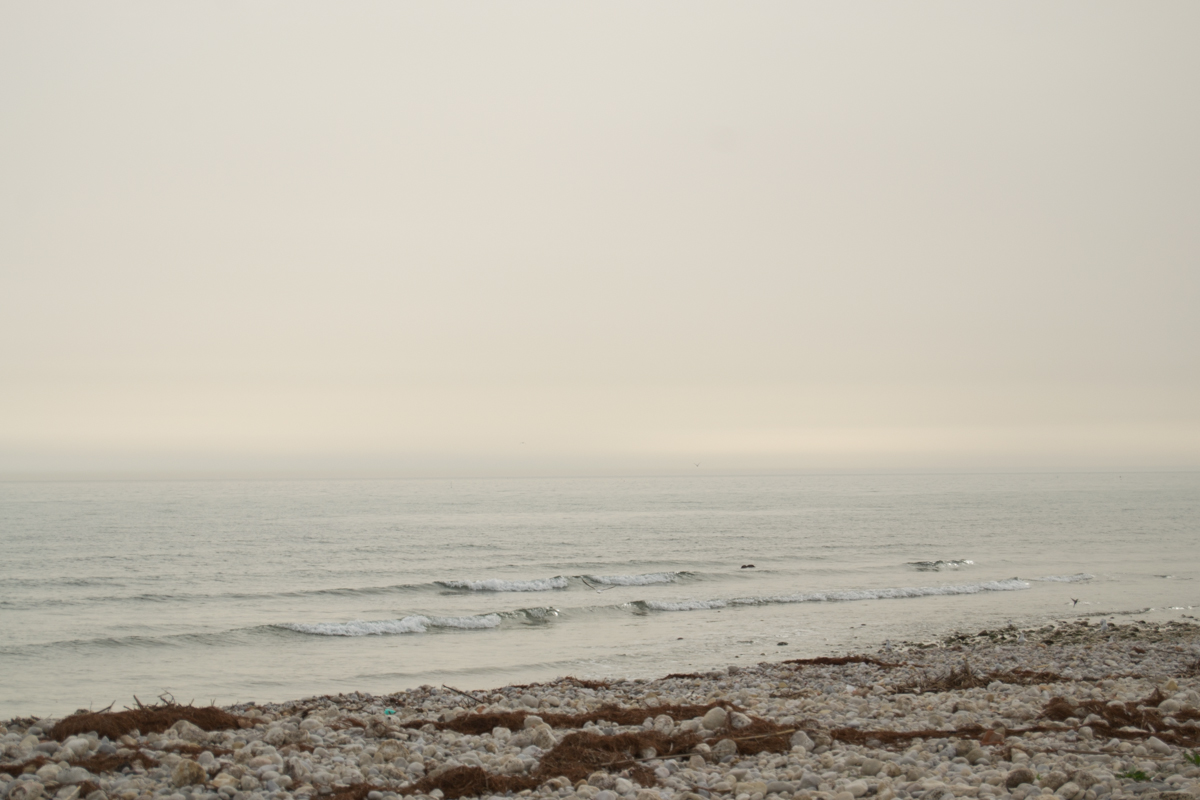
6000-8000K: cloudy day (they are towards the blue and gray colors)

So, in different situations, our light emits different color temperatures, which in turn give our photos different hues. This can be used to make beautiful photos. However, this also causes complications. As I said before, our human brains are able to detect and adjust the images we see with our eyes so we understand what is the true color of the object we see. Our cameras are not able to do it and unless we tell them what is the color temperature of the scene.

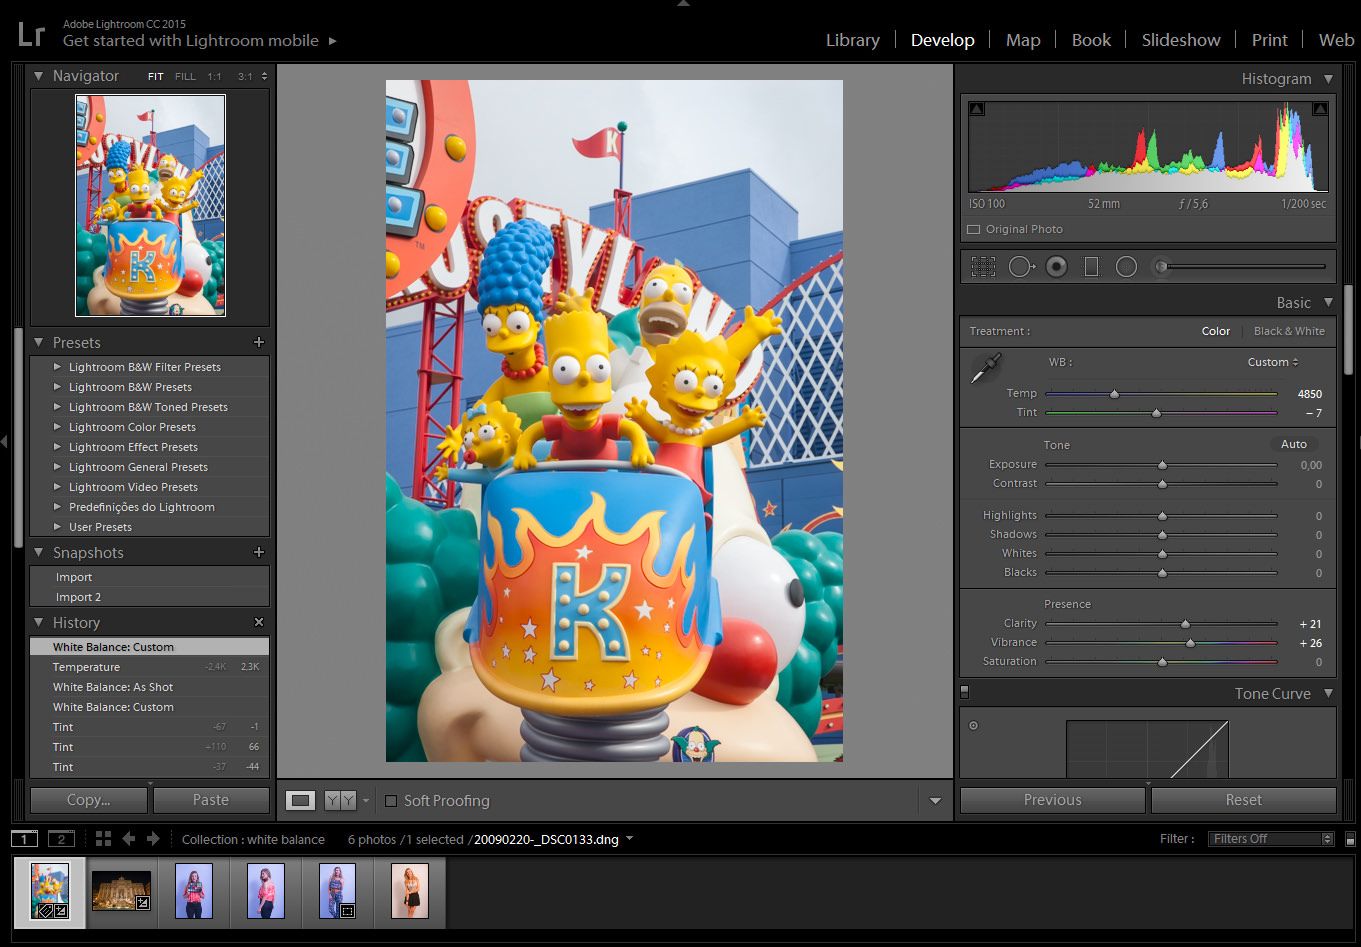
Fortunately, we have ways to correct the hues of our photos. We can do it in post-processing using Lightroom for example, but usually, I prefer doing it through the camera itself.

How to adjust the color temperature on the field: white balance

Most cameras (even point and shoot compact cameras) have an option to set the white balance, using this option you are telling the camera what type of lighting you are in. Here I will talk in general, but take a look at the manual of your camera to check specifications.

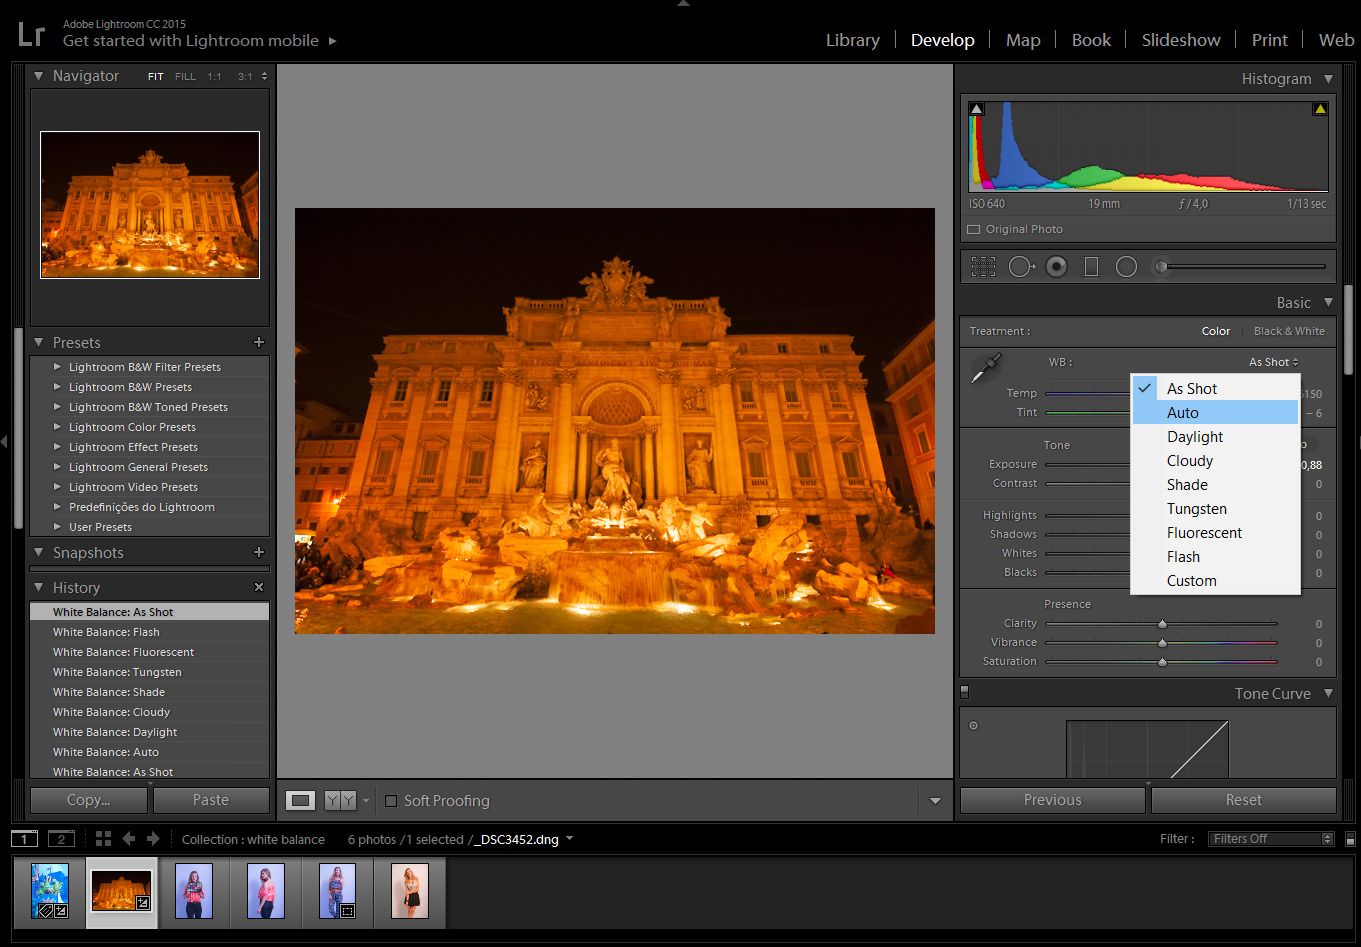
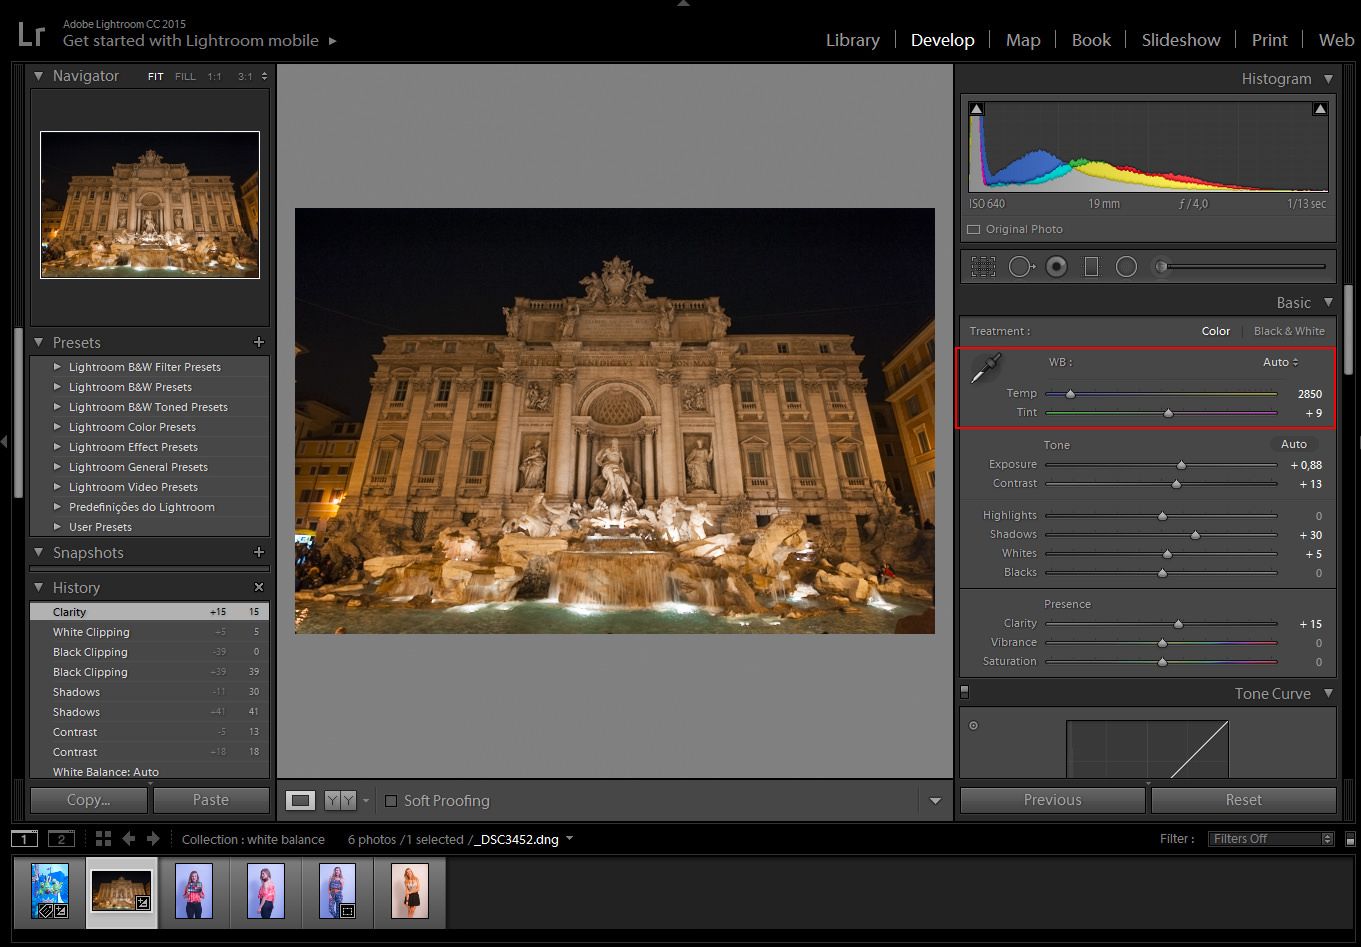
Auto white balance: This is the easiest way and it actually works in most of the cases. I am not the biggest fan of auto modes (I even shoot most of my photos in Manual mode!!), but I had to admit that Auto White Balance does a decent job. You just need to set your camera on Auto WB and it will make the best adjustment according to the measurements it does when the photo is taken. However, in some cases, the AutoWB is not working well (it usually happens more with artificial lights) and then you need to use other settings.

Semi-automatic white balance: In the more basic cameras, you can choose between a few preset defaults. The most common are Cloudy, shade, tungsten, fluorescent and flash. Each one of these presets try to compensate the light temperature in each situation and bring the hues closer to neutral lighting. Let’s see it with some examples:

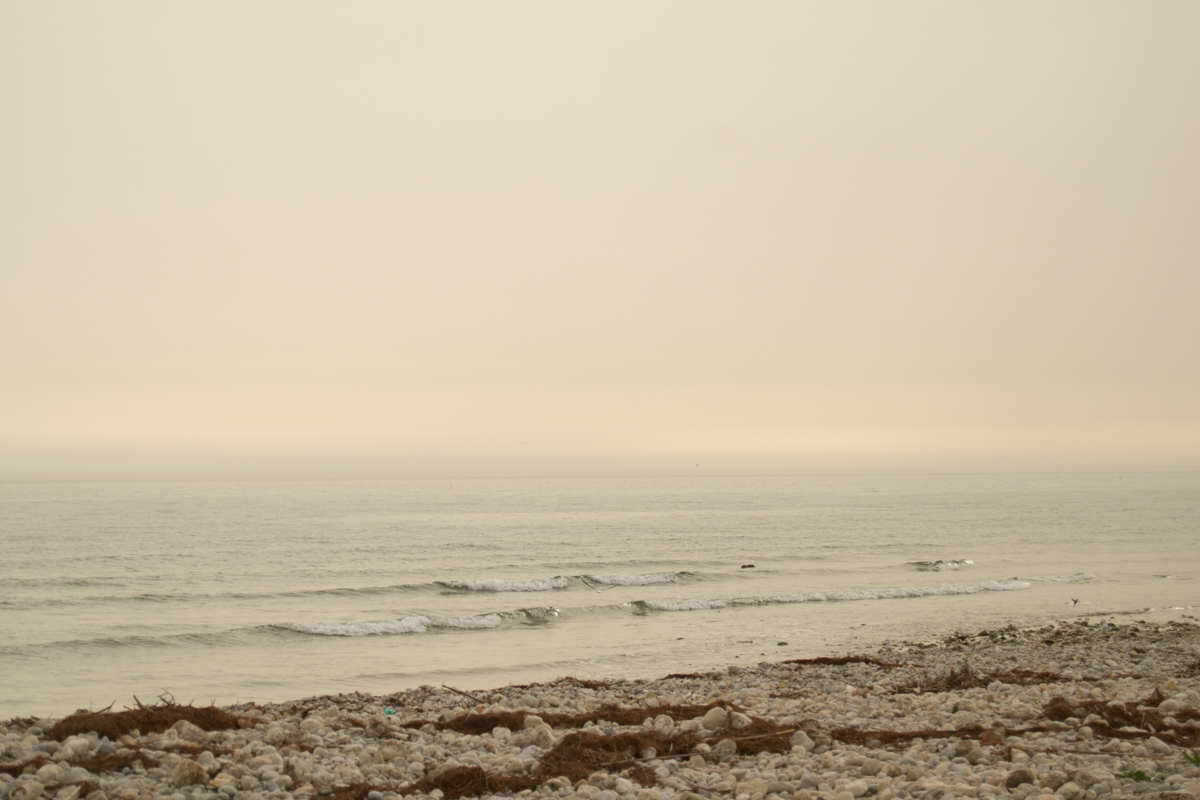
Photos from cloudy days are usually looking quite gray. The Cloud setting will warm them up already in your camera. The shade preset is doing something similar, but adding a bit more of yellow than the Cloudy preset.

Color temperature
Cloudy days are usually quite cold in their color temperature because they have a lot of blue and gray in them


Color temperature
The Cloudy preset is adding a bit of warmth to the scene by increasing the yellows in the image

For indoors and night photography, fluorescent and tungsten can be really handy. Fluorescent lights are quite cold, so using their preset will warm the image. On the other hand, tungsten lights are usually warm, so their presets will cool down the image.

Color temperature
I took this photo indoors, under a tungsten light. You can see the photo has a yellow cast


Color temperature
The tungsten preset corrects the yellow color cast by adding blue to the image

When you are using a flash, your photos might look a bit cold. The Flash preset will also warm the image a little.

Presets change from camera to camera so have a look to your manual and get to know the presets of your camera and play with them in order to understand the effect they have on the image.

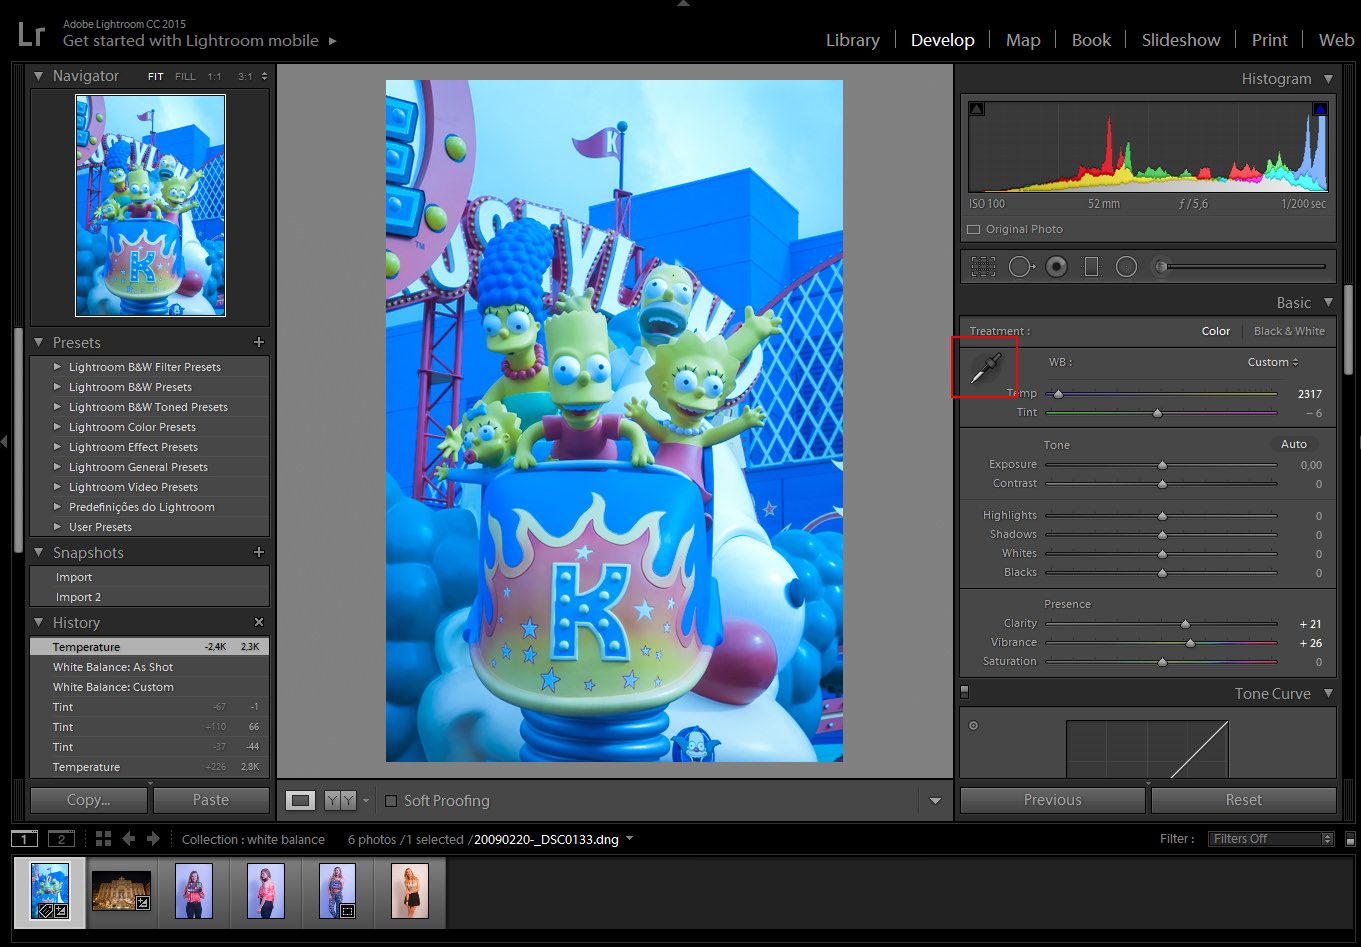
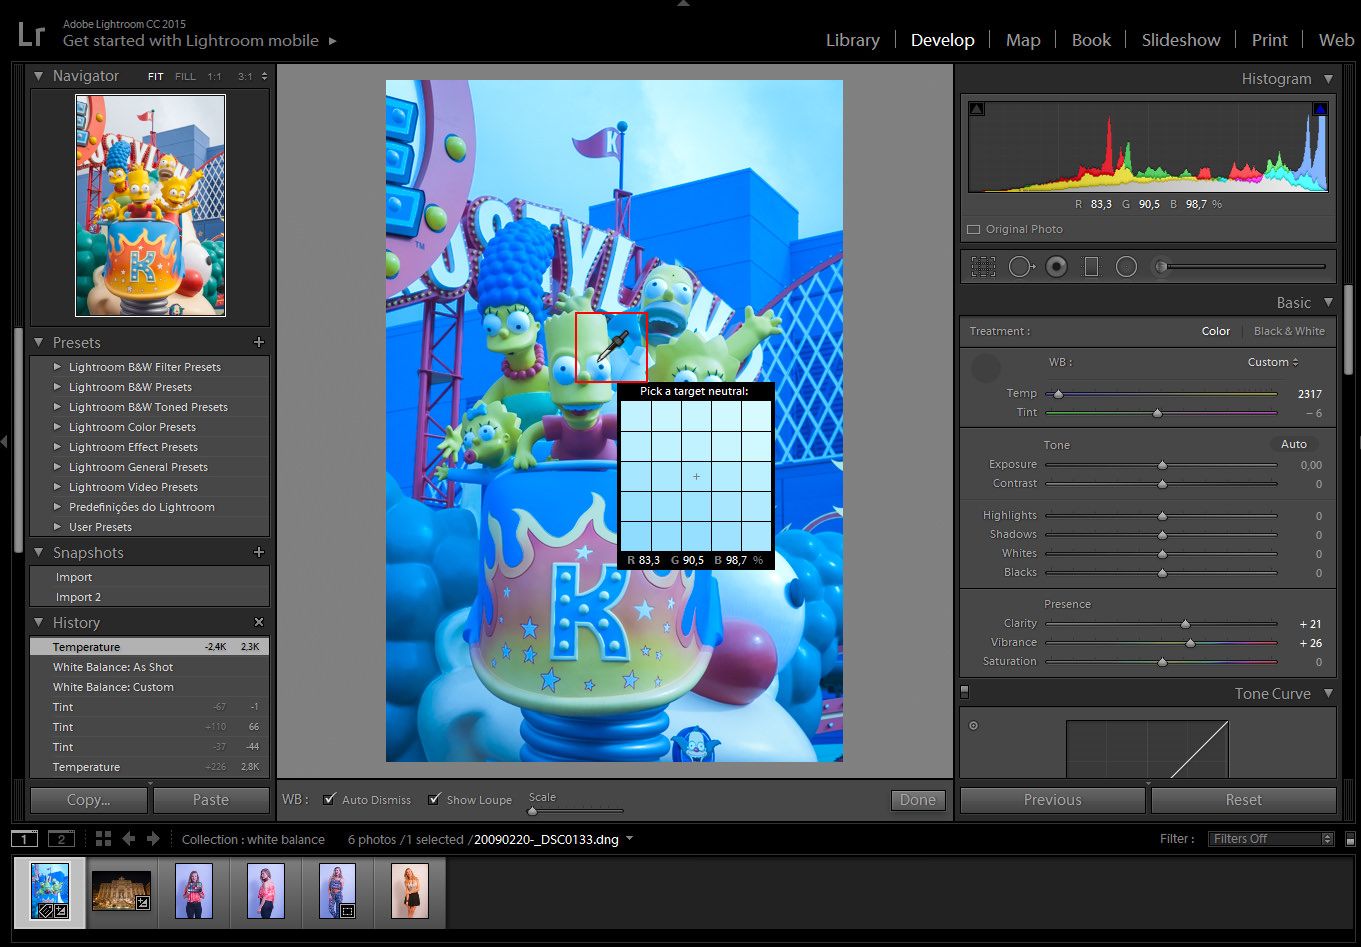
Tell the camera a value in Kelvin:  In the more advanced cameras in addition to the auto WB and the semiautomatic presets,  you can also define the light balance yourself by telling the camera the Kelvin value of the light of the scene.

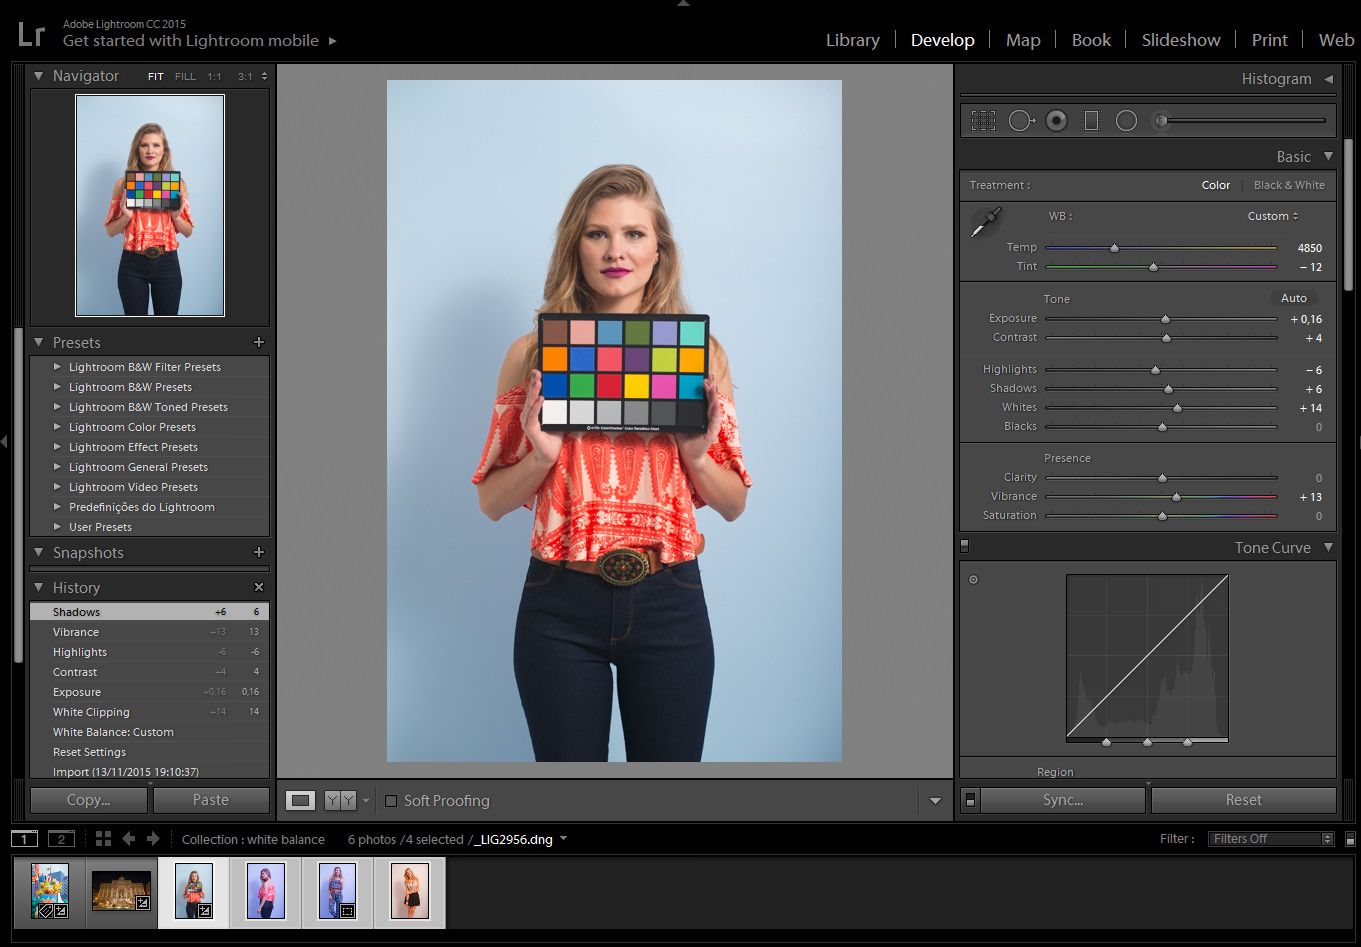
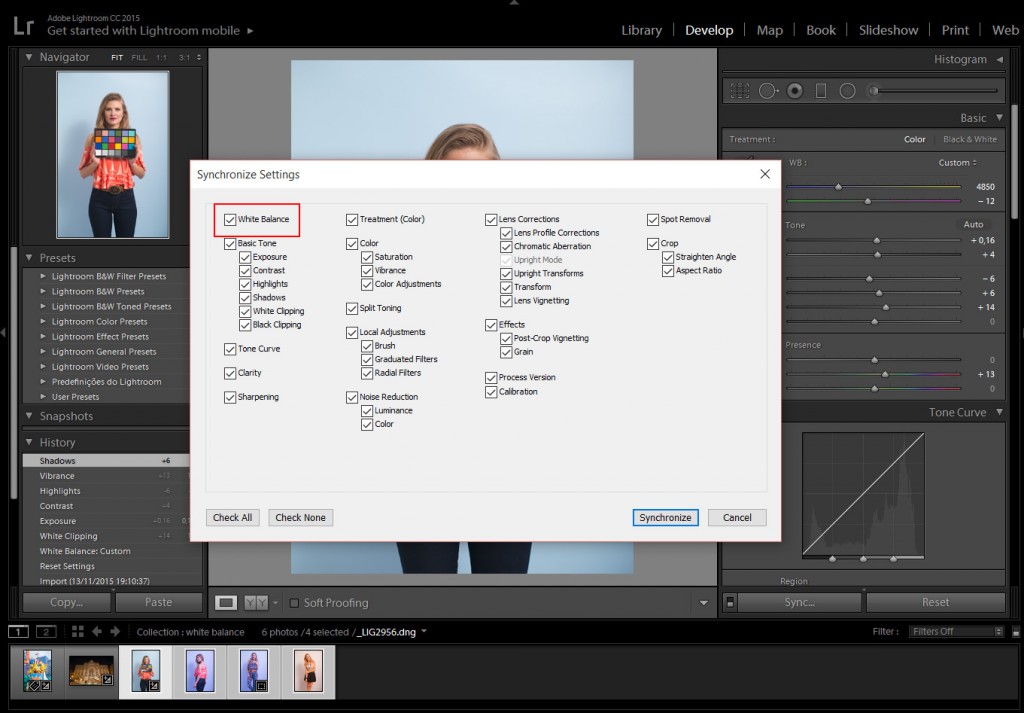
If you took a photo with a color cast you don’t like, don’t worry! You can change it on your computer! However, I highly recommend you to have the files in RAW format and not jpg. Although it is possible to modify color temperature in jpg format, the loss of quality will be so high that it won’t be worth it. With RAW, the process will be easy and your image will keep its quality.

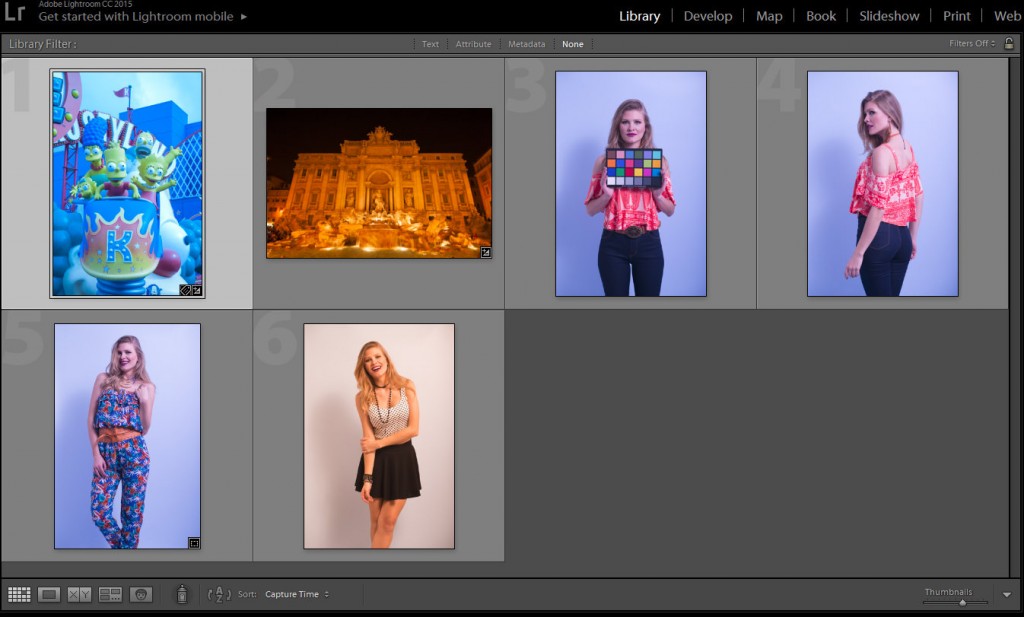
You can adjust color temperature in post-processing using different software. My colleagues wrote about how to do it in  Lightroom, Camera RAW, and Photoshop.

Use color temperature creatively

Now that you have an understanding of color temperature and white balance, you can use the color temperature in order to express what you want in your images. Do you want to give a sense of warmth to your image by adding a bit of yellow? Use the Cloud setting even if it is not cloudy and you will have a yellow cast in your photo! Do you want to add a bit of blues to add a sense of coldness? Try with the Tungsten preset! Experiment and have fun with WB!

Color temperature
I took this photo of a dandelion in the sunlight. It has a pretty neutral color temperature.
Color temperature
This is the same photo, but using the Tungsten preset. This preset added a blue cast to the photo that I find interesting. It might not be the “correct” white balance. I think that when you are being creative, there is not such a thing as “Correct”. If you think that a different WB can express better the way you saw the scene when you took the photo- go for it!!

Happy shooting!!!

How to Get Perfect White Balance in Lightroom Using a Color Chart

Imagine that you have spent an awfully long amount of time editing a photograph for the cover of a magazine and as soon as you get the copy, the colors did not match what you had on your monitor. Trying to get accurate colors can be quite challenging and the process of getting an efficient color management in lightroom can be a nightmare at first.

From time to time, a client will have some doubts regarding color, saying that the color of a certain product that he sees on his computer is not right or even after printing an image and the color is not the same that you had on your monitor. As photographers, we want to make sure our photographs are printed or delivered to our clients with the correct color that we see on our monitor. Therefore, we have to be certain that the problem is not in our process. That’s why getting accurate colors is such an important factor that can’t be ignored in the photography workflow.

There are some products available on the market, like monitor calibrating devices from brands like X-rite or Datacolor and professional high-end monitors like Eizo and LaCie. Although, it can be quite expensive for someone starting out in photography, color charts can be an affordable way to get the colors right every time, and there are a lot of types and brands to choose from.

In this tutorial, I will show you how to manage colors using only a color chart, while not having to spend a lot of money.

01_all_img
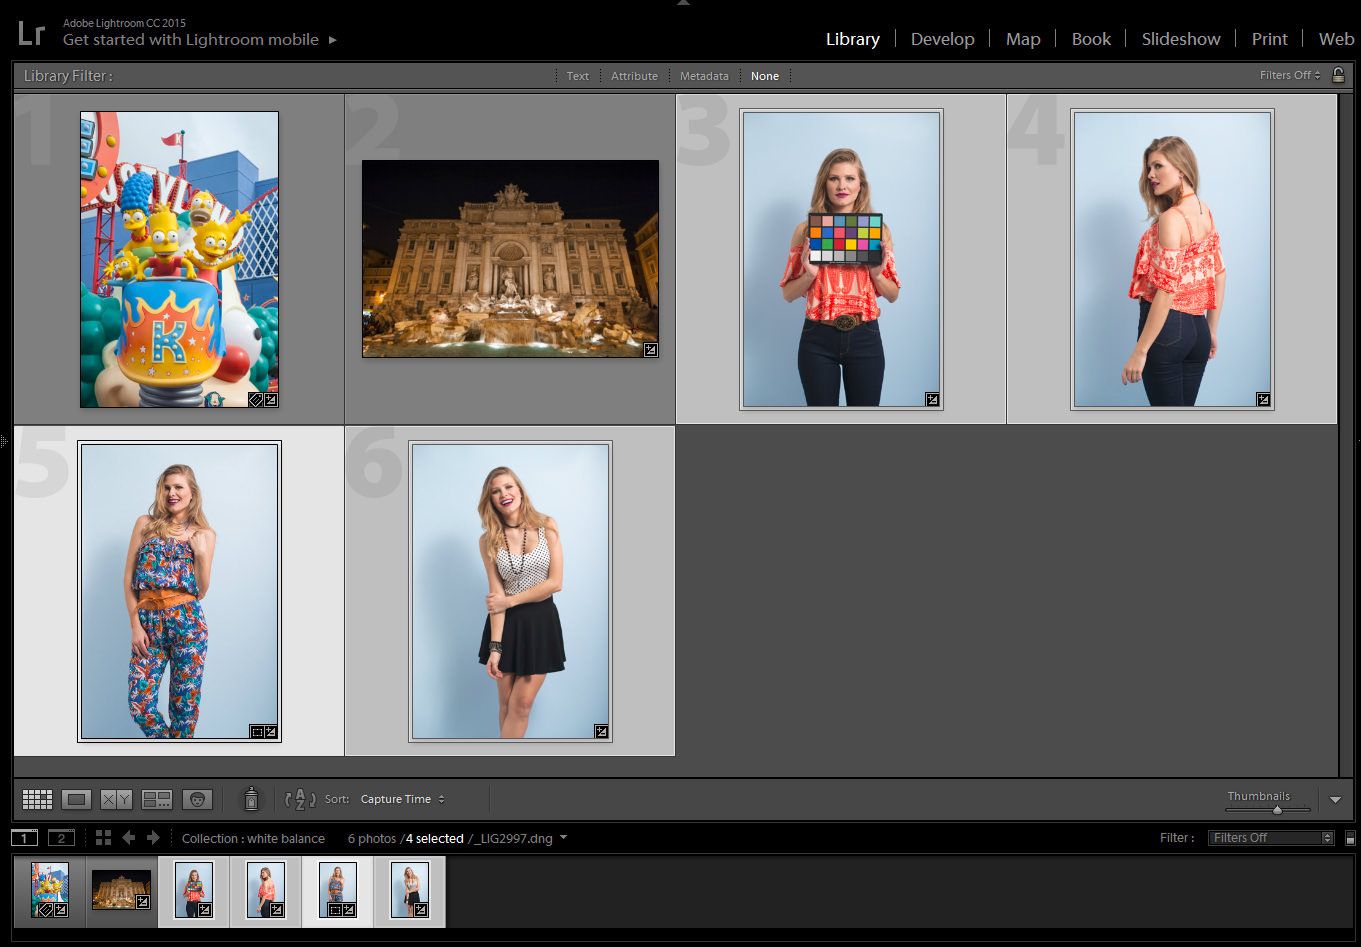
Model:  Jessica Waldow / Photo: Luiz Kim
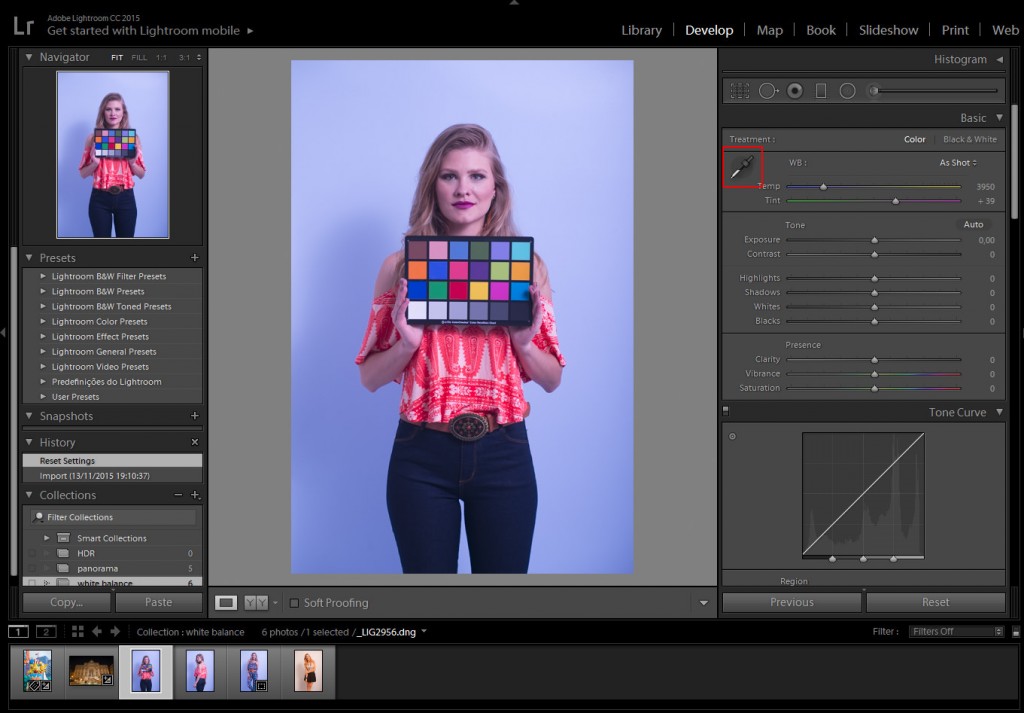
I did a series of photographs for a fashion lookbook (images 3 to 6) using the same light setting and, on purpose, messed with the white balance on my camera, since I photographed in RAW I could tweak the white balance as much as I wanted, nondestructively.

As I mentioned in my last white balance tutorial, studio strobes are set up to 5000K – 5500K, therefore I should have photographed using the setting for the white balance to the flash icon or manually change the setting to 5000K on my camera. The bluish photographs were set up around 2000K and the one with a more yellowish color around 7000K. Even if you set up the white balance on your camera, you will never be a 100% sure if the colors are correct, either because the flash strobe is not giving 5000K – 5500K, or the tint of the photograph appears green or magenta.

Step 1: Photograph the subject with the color chart, position it accordingly to the main light source

After you have set up the lighting for the photo shoot, position the color chart near the main subject and face it toward the main light source.

Click on the White Balance Selector (W), which looks like an eyedropper tool.04_checker_a01

Step 2: select the gray area of the color chart

With the White Balance, Selector tool selected, click on the gray box of the color chart. Each color chart may differ, depending on the manufacturer.

With the White Balance Selector, hover over the image. We can see the preview in the navigator window before we even click it.

04_checker_a03

As you can see, it will automatically correct the white balance of the image, even if your monitor is not calibrated, Using this method guarantees that the white balance is correct.

At this stage, you can edit your image as you would normally do, remembering not to tweak the white balance too much, since the whole purpose is to correct it.

After correcting one image, you can adjust the others as a batch. It doesn’t matter if there are a thousand images, you can match it with the steps below.

Step 3: batch correcting the white balance

Click on the image you have corrected and press shift+click on the last image of the series, that will select the images you want. If you want to select images that are not in order, Ctrl+click for PC, or Cmd+click for mac, selecting the images one by one. Just make sure that the highlighted image is the one with the adjustments.

05_sync_a01

Step 4: Synchronize the settings

Click on the ”sync” button, which is located in the bottom right corner.

The ”synchronize settings” panel will pop up, you can either check just the white balance to sync all the images with the same white balance, or check whatever you want to sync with the settings.

Hit the synchronize button and Lightroom will synchronize the settings.

01_all_img_a02

As you can see, no matter how many photographs you have taken with the same light source, you will always get the correct white balance.

White Balance in Lightroom

Do we need to give up on our images, just because the image came out a little bluish or reddish? The answer is no. Well, if you photograph in RAW, you can correct the colors later on inside Lightroom. So we have to download Lightroom presets to correct this. Not that you can’t do it in JPG, but doing it on a RAW image is a nondestructive way to correct any of your images, even if you did not correct it on your camera beforehand. So don’t give up on your image, we can make it work. It’s just like not giving up on your photographic negatives because we can .

For those who are just beginning in photography, white balance, color temperature, Kelvin, 5000k, etc. can seem difficult to understand, but with Lightroom, we can manage it quite intuitively.

Light temperature is measured in Kelvin and every type of light has a certain temperature, and each temperature has a certain color, like a candle light which is red or xenon car lights that have a more bluish color. When you are messing with your camera’s white balance, you will see an icon of a sun, shadow, flash or clouds. When you select any of them, what the camera is attempting to do is to compensate for the light you are photographing.

chart

To illustrate the temperature, let’s separate them into 3 different categories: RED, NEUTRAL, and BLUE.

RED: Candle Light 2000K, sunrise/sunset 2000-3000K, incandescent lights 2500K.

NEUTRAL: the Sun at its peak around 5500K, flashes and studio flash strobes are in that range as well.

BLUE:  xenon 6200K and blue sky 10000K.

Our eyes adjust automatically to the color temperature either in the shade or in the sun, but the camera is not able to do that, therefore you will have to do it for your camera. There are a lot of hardware devices that will help you get the correct colors every time; monitors for photography, monitor calibrating devices, color checker cards, color booths, etc.

In this Lightroom presets tutorial, we will learn how to correct the white balance of photographs, either by using manual settings or automatic settings or by using the White Balance Selector.

02_trevi_a01

In this particular image, the color temperature is way off. As we can see, the image is quite red, most people would delete the image and try to set the correct white balance in the camera, then take the shot again. But, since I have photographed in RAW, I can always change the white balance settings later inside Lightroom, in a nondestructive way.

For those shooting JPG, it is best that you choose the correct white balance in your camera. Lightroom can try to correct it later, but not as it would with a RAW image.

02_trevi_a02

In the Develop Module, we have some presets to choose from, as we would have inside our camera settings.

Auto: the auto mode does a pretty decent job on outdoor photographs, but when indoors, we sometimes may have to adjust it a bit further.

The other preset settings will correct it as the names would suggest; daylight will assume that you have photographed outdoors in daylight, cloudy as on a cloudy day, or tungsten, as under a tungsten light bulb and so on.

If any of those presets won’t fit your needs, we can always correct it manually.

02_trevi_a03

In order to manually correct the color temperature, we can change the temperature and tint sliders.

Temp: will correct the white balance from blue to yellow.

Tint: will correct the white balance from green to magenta.

01_simps_a01

In this particular image, the white balance is off too, tending to a more bluish feel.

We could correct it manually like we did on the image before, but if there is something in the scene that you remember that has a neutral color, we can use it in our favor to correct the color temperature automatically.

01_simps_a02

Click on the White Balance Selector (W), which looks like an eyedropper tool and click either on the white or the black part of Bart Simpson’s eye. That’s because the White Balance Selector tool will work on the neutral colors like whites, grays, and blacks.

Using the White Balance Selector, hover over the image. We can see the preview in the navigator window before we even click it.

01_simps_a03

After you click on a neutral color, Lightroom will try to correct it by assuming the color you clicked is neutral white, neutral gray or neutral black depending on the color you chose to click.

Sometimes you can see that is not 100% correct, so you can tweak the temperature to get the desired color, but at least it could be a starting point.

This way we can easily correct the colors of the images. If you need to get the perfect color, either for those clients that need the correct color of their product or if you are photographing a work of art, using a color checker card can be an effective way to do it, I will make a tutorial on that later.