Tag: photographer

What is Shutter Speed?

When it comes to photography basics, mastering the the exposure triangle is imperative to taking a well-lit photograph. In this post we will talk about one of the three elements that control exposure: shutter speed.

What is Shutter Speed?

Your camera has a shutter, which is a curtain in front of the sensor. When this curtain is closed the light can’t reach to the camera sensor. The shutter curtain opens and let light into your camera. When you press the camera shutter button, it is open just for a certain time (usually for fractions of seconds or one/few seconds). The amount of time that it is open is the time that the camera sensor is exposed to light, it is known as “shutter speed”.

Shutter speed is measured in either seconds or fractions of seconds. Keep in mind that in the second case, the bigger is the denominator of the fraction, the shorter is the time that the camera shutter is open. For example, 1/4000sec is a much faster shutter speed than 1/250sec.

What is shutter speed scheme


Shutter speed can be used creatively because short shutter speeds (also known as a faster shutter speed) freeze action while long speeds (also called slow shutter speed) can create motion blur. In the latter case, moving objects appear blurry along the direction of their movement. It is useful to know which shutter speeds are good for freezing or blurring some common actions. These numbers will give you a good starting point for your own experimentation.
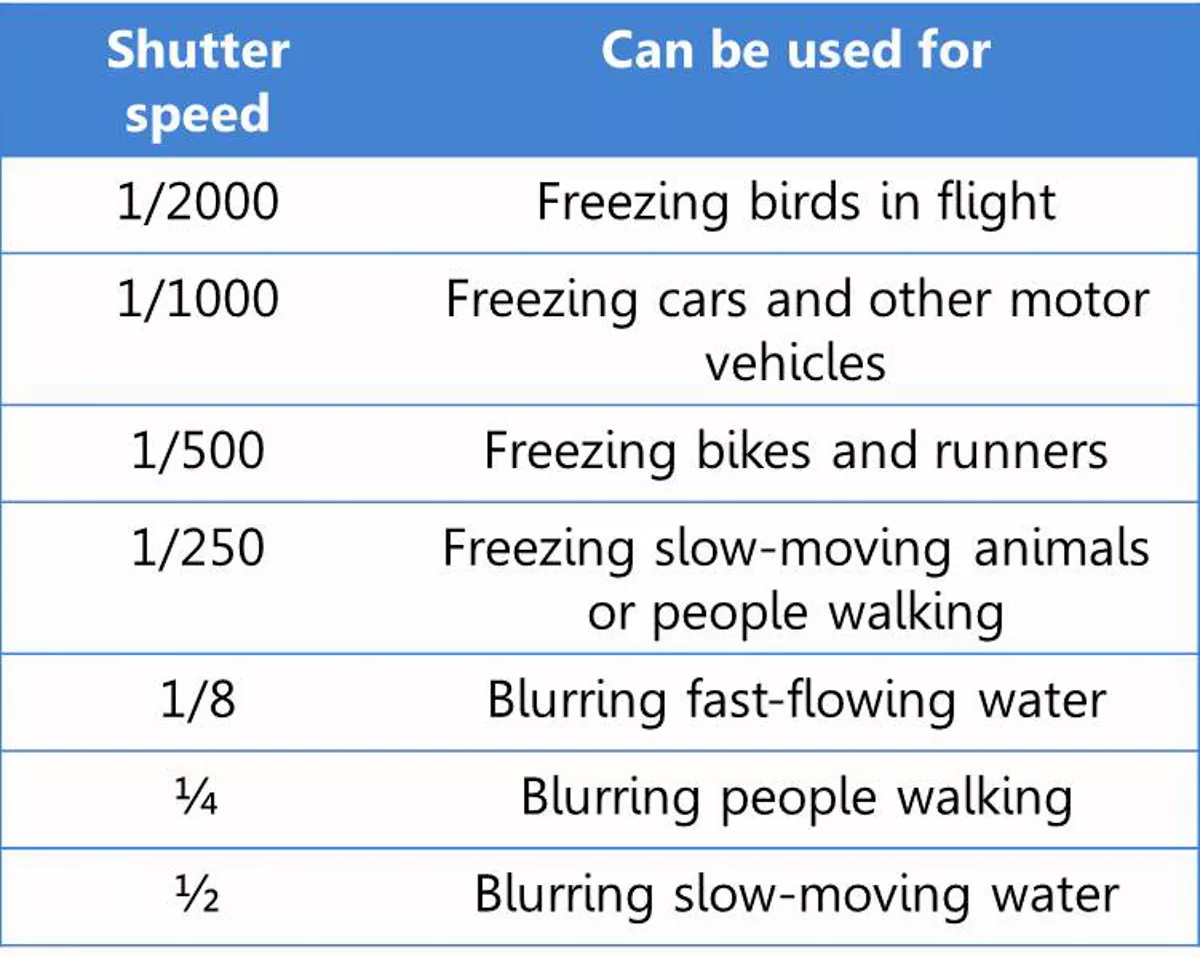
Shutter speed table
The numbers in this table are an approximation.

When you are shooting at lower shutter speeds, you can get blurriness even if you don’t want it. This happens especially when you are taking pictures holding the camera in your hands. When the shutter speeds are slow, the slightest movement of your hands makes the picture blurry (I mean the unwanted “OMG this mountain looks blurry”—this is known as camera shake, not the creative blurriness we were talking in the previous paragraph). For that reason it is recommended to use a tripod when using a slow shutter speed.

What is the threshold between using tripod and not? It is said that you need to use a tripod when your shutter speed is less than 1/focal length. The result of the equation is expressed in seconds. Focal length is the measure of how much you are zooming. It is easier to understand with an example: if you are using a focal length of 35mm, then you need a tripod when the shutter speed is 1/35sec. For myself, I know that I need a tripod when I shoot slower than 1/80sec, doesn’t matter the focal length I am using. I guess there is a personal factor here. If you don’t have a tripod, look for alternatives that can help you to stabilize your camera. For example, you can lean on solid and stable things (trees, walls, light posts, tables…).

Benefits of Using Different Types of Shutter Speeds

With this understanding, let’s look at the benefits of using different types of shutter speed.

In the tutorial video above, we have a photo capturing a waterfall and this is taken at a faster shutter speed. What this does is that it is freezing the water coming out of the waterfall. But we have seen amazing waterfall photos with silky smooth waters and those are taken at a slower shutter speed. What this does is that when the camera opens the shutter, it’s seeing the motion of the water and then closing, allowing it to show the motion of the water thus giving a silky smooth appearance of the water.

We also have another example of light coming into the camera. If we have the photo and want to take a photo of it, we are going to have a very slow shutter speed with everything set neutral, we will have a dark image. We need to make sure it is exposed to the right situation. We will, therefore, allow more light to come into the camera, using a longer shutter speed. It’s going to vary from scene to scene and this is what we call ‘exposure triangle’ where you try to have everything calculated including the shutter speed. So, when you have a longer shutter speed, you are allowing the collect manner of light to hit the sensors thus giving you the proper exposure.

Shutter Speed Practice Exercises

Messing around with shutter speed can help you to set the tone or add emotion to an image. In essence, the less motion in a photo, one could say there are more tension and drama to be seen.

Imagine catching a still frame of a friend or group of friends laughing simultaneously. Within that image, with a fast shutter speed, you’re guaranteed to capture the raw emotion on each face. As opposed to our example of the waterfall, where the camera captures the movement of the water, giving it a soft, cotton type look. This then makes the image more soothing, peaceful and serene. You can try these shots in low light conditions or make use of the shutter priority mode where the camera automatically adjusts your ISO and aperture levels  so you don’t end up with an overexposed image.

Exercise 1: Understand How Shutter Speed Affects Light

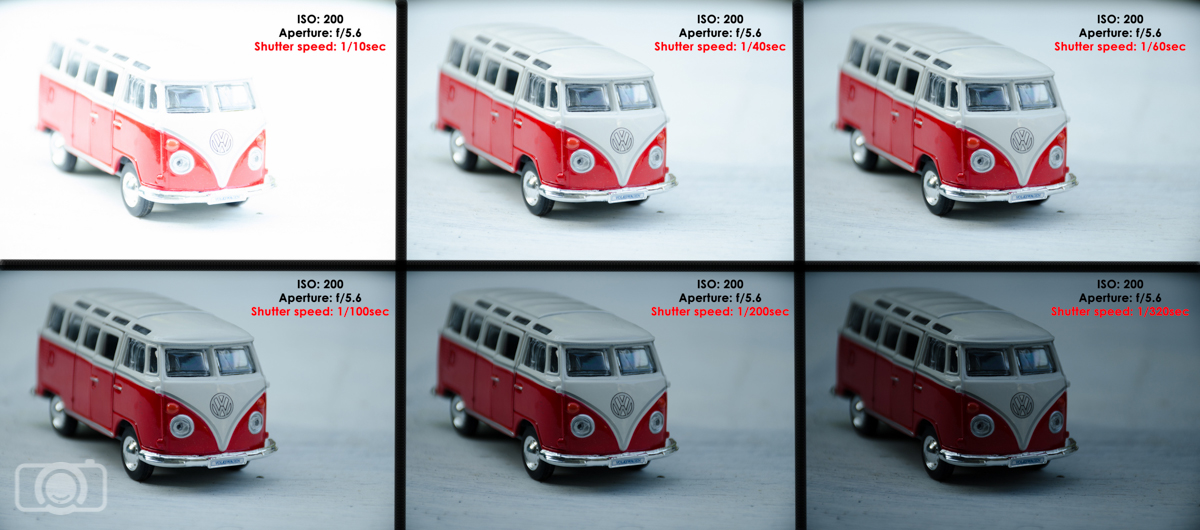
For this exercise you need to set your camera on manual mode. Then, fix the ISO to a certain value. ISO 100 or 200 is a good way to start. After that, fix the aperture. You can try a value of f/5.6. Find a subject for your photos and set the camera on a tripod (or any alternative means of stabilization). Take a photo using a slow shutter speed (for example 1/10sec). Take photos changing the camera shutter speed progressively. Once you are done, check what happened with the exposure of your photos. The only thing that changed between your photos was the shutter speed because you fixed the ISO and aperture. So whatever changes you see in the exposure are due to the changes in the shutter speed. You can repeat this exercise with new values of ISO and/or aperture and see what happens!

The numbers in this table are an approximation.

Exercise 2: Understand How Shutter Speed Works with Other Camera Settings

For this exercise you need to set your camera in Shutter Speed Mode. Set the ISO on a fixed value, for example ISO 100 or 200.  Find a moving subject for your photos (I used a Maneki-neko—this cat turned out to be really useful for practicing exposure) and set the camera on your tripod.

Take photos while changing the camera shutter speed progressively. As you are using shutter speed mode, the camera is constantly changing the aperture in order to get what it considers a good exposure, so all your photos will look the same from the point of view of amount of light. Go over your photos and see which aperture value the camera used for each shutter speed value. The faster the shutter speed, the lower is the light going into the lens (because the lens is open just for a short time) and to compensate for that, the aperture needs to be bigger (remember that bigger aperture is expressed with lower f numbers). Have a look at your photos. Did you managed to freeze the movement? At which shutter speed? Do you have any photos with motion blur?
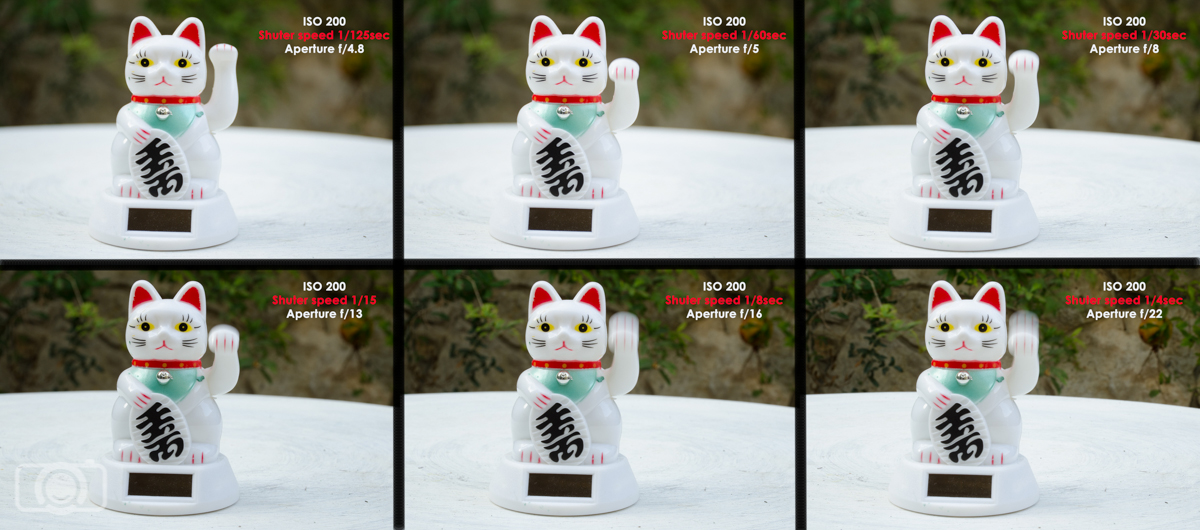
Exercise 2 shutter speed
When you use Shutter speed mode, you play changing with the shutter speed and the camera will adjust the aperture in order to obtain a well exposed photo.

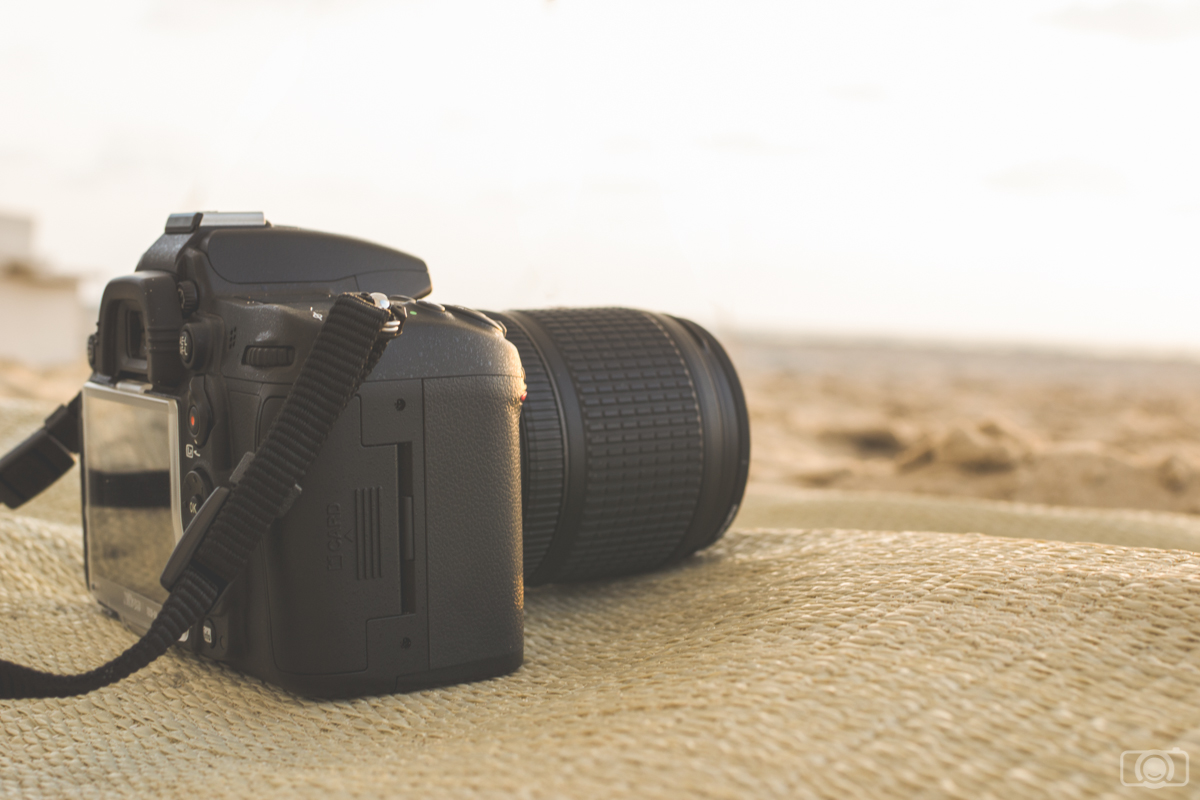
Depending on the lens you are using, It is possible that the camera won’t be able to compensate for the shutter speed by the aperture. For example, the lens that I used today is an AF-S Nikkor 18-140mm 1:3.5-5.6G; its aperture can open to a maximum of f/3.5. Other lenses can open more and reach f/1.8. Check always which is the maximum aperture of your lens and take into account that if you zoom in, this value will change a little (for example, when I zoom to 140mm with my lens, I can open it not to f/3.5 but only to f/4.8). If you reach the aperture limit of your lens, what you can do to get a well exposed photo is use a slower shutter speed. If you still want to keep the fast shutter speed, as you can’t change the aperture (you reached its limit), you will need to play with the ISO settings. You can have a look to our college  Damon Pena’s post to see another example of ISO adjusting.

Exercise 3: Freezing and Blurring Moving Objects

This is one of my favorite exercises! Go to the street and take photos of moving things. Cars are perfect subjects. Set your camera in the same way as in exercise 2 (Shutter Mode and ISO 100 or 200).  Use your tripod/alternative option to stabilize the camera. Pick a fast shutter speed and take a photo of a moving car. Did you manage to freeze it? Change to a slow shutter speed. Is the car blurry now? You can try also to freeze/blur bikes, runners, walking people, pets. Try to use varying shutter speeds to see how the camera setting affects motion.
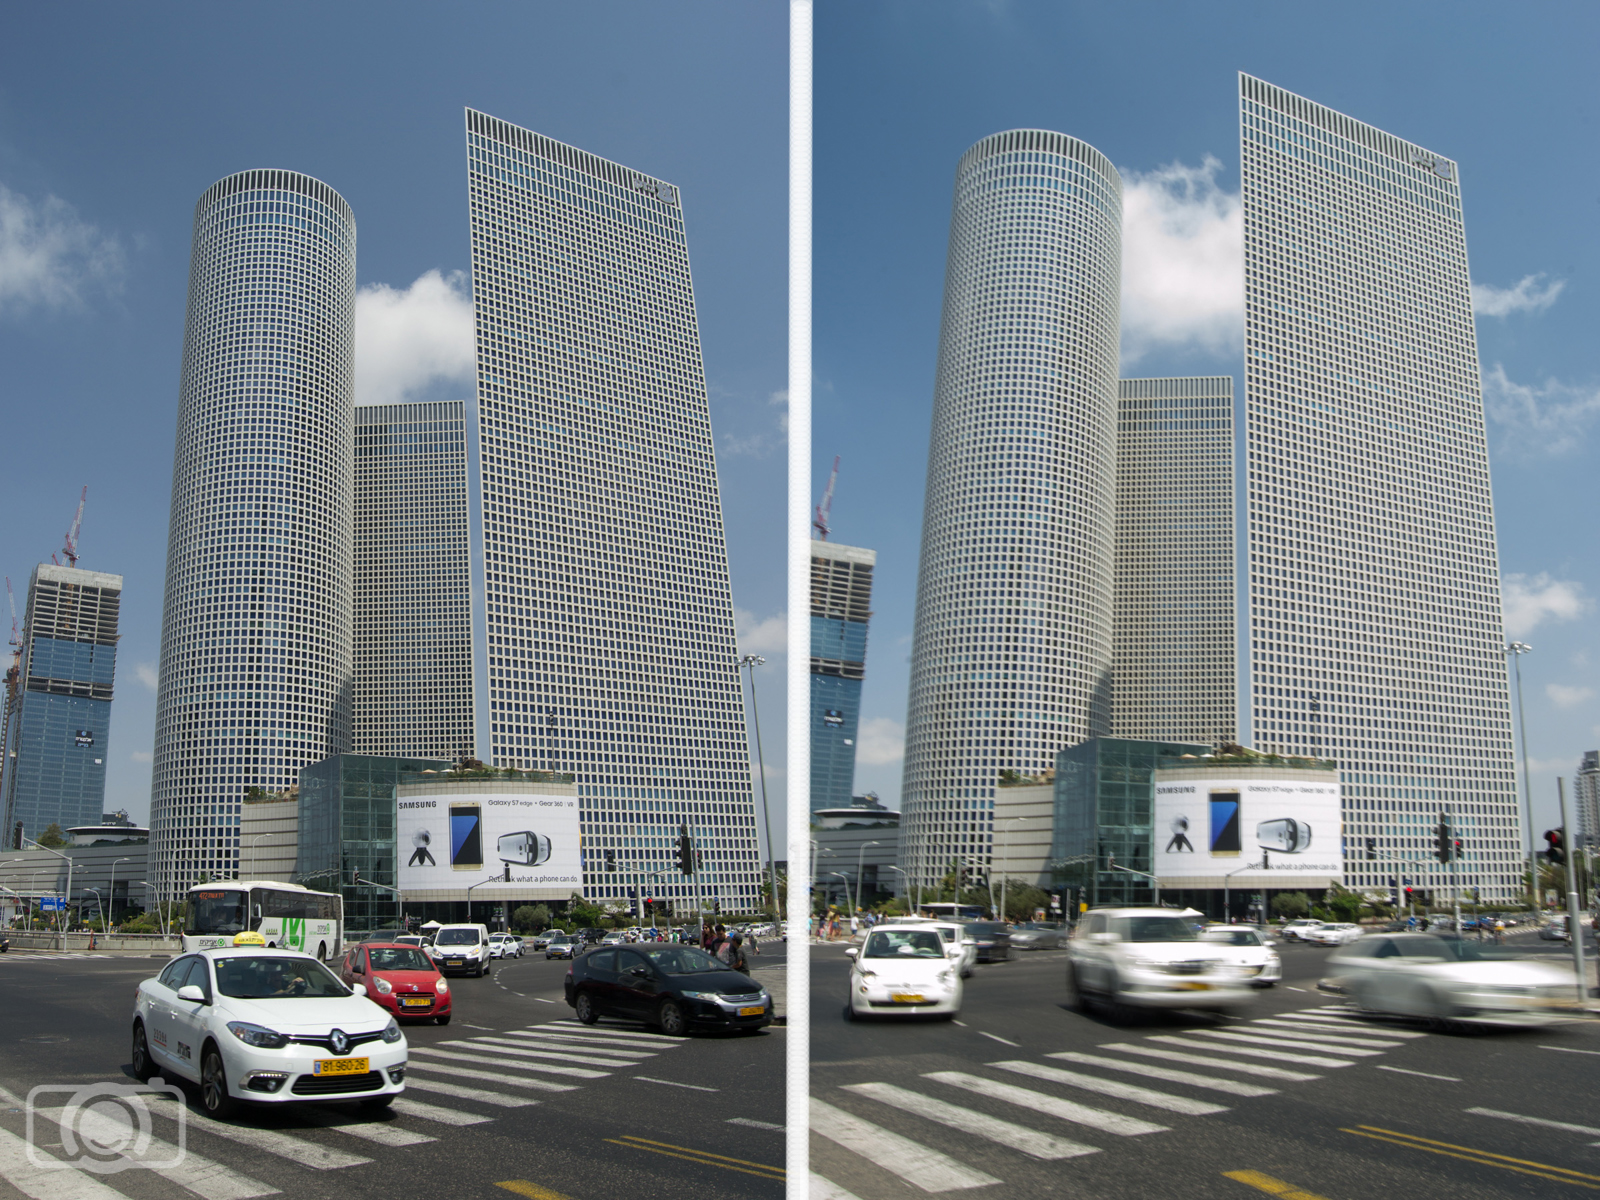
Shutter speed and movement
I took these two photos in a busy junction in Tel Aviv (Israel). In the left my camera was set on: ISO 100, f/9and shutter speed 1/160sec. The cars were not going too fast, so I managed to freeze them. In the right my settings were ISO 100, f/22 and shutter speed 1/6sec. At this shutter speed I got the blur motion I was looking for.

Exercise 4: Night Photography

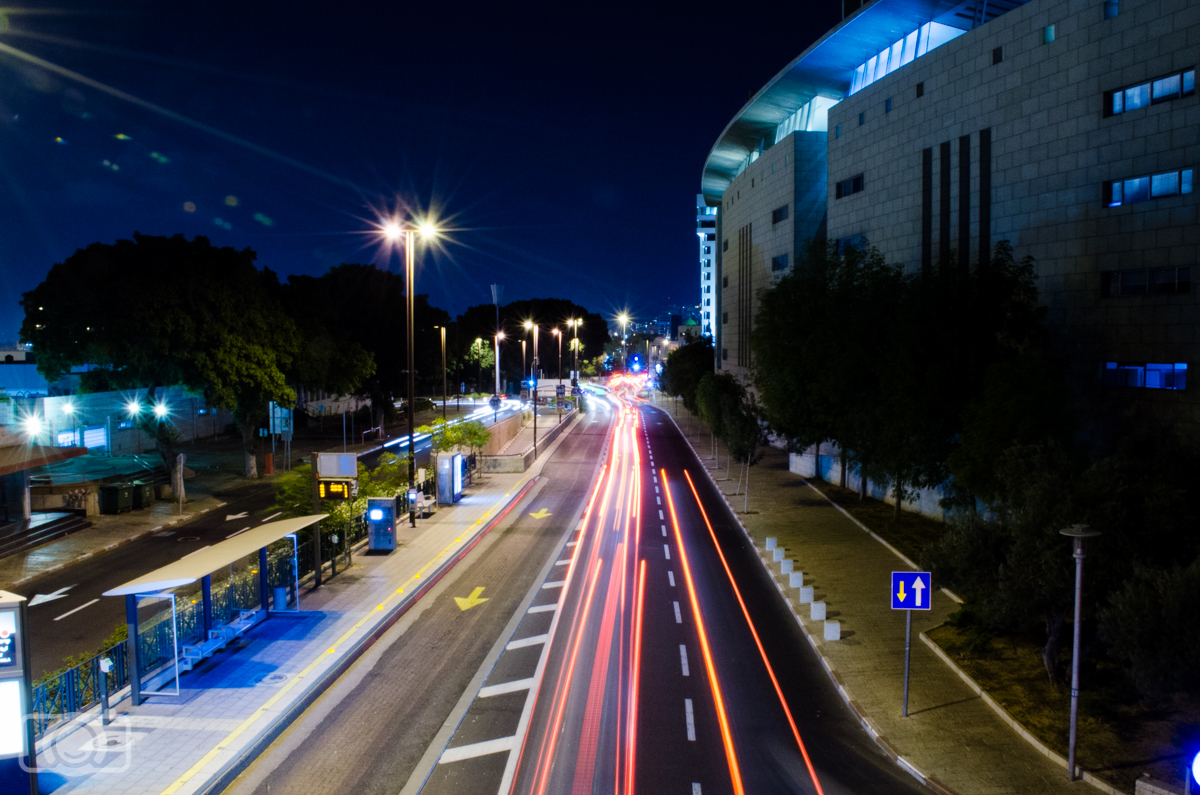
If you like night photography, you might also like playing with light trails. Light trails are the lines recorded from the movement of a point of light (like for example cars) during the exposure. Set your camera on a tripod (important). With the camera on Manual mode, set a low ISO, an aperture higher than f/8 and try different long shutter speeds until you get the light trails you like. Maybe you will need to reset ISO and aperture values to get a good result.
Night long exposure
Light trails are always fun. I set my tripod and camera on a bridge in Haifa (Israel). I tried several settings and I ended up using ISO 500 (although you can use lower ISOs too), f/22 and a shutter speed of 6 seconds. This shutter speed worked well in my case because it allowed me to capture long light trails. Shorter shutter speeds also allowed me to capture light trails, but they were short (They didn’t stretch all over the road).

I hope these exercises will help you to get familiar with shutter speed. Soon you will be able to get more creative by freezing and blurring your subjects. Have a happy shooting!!

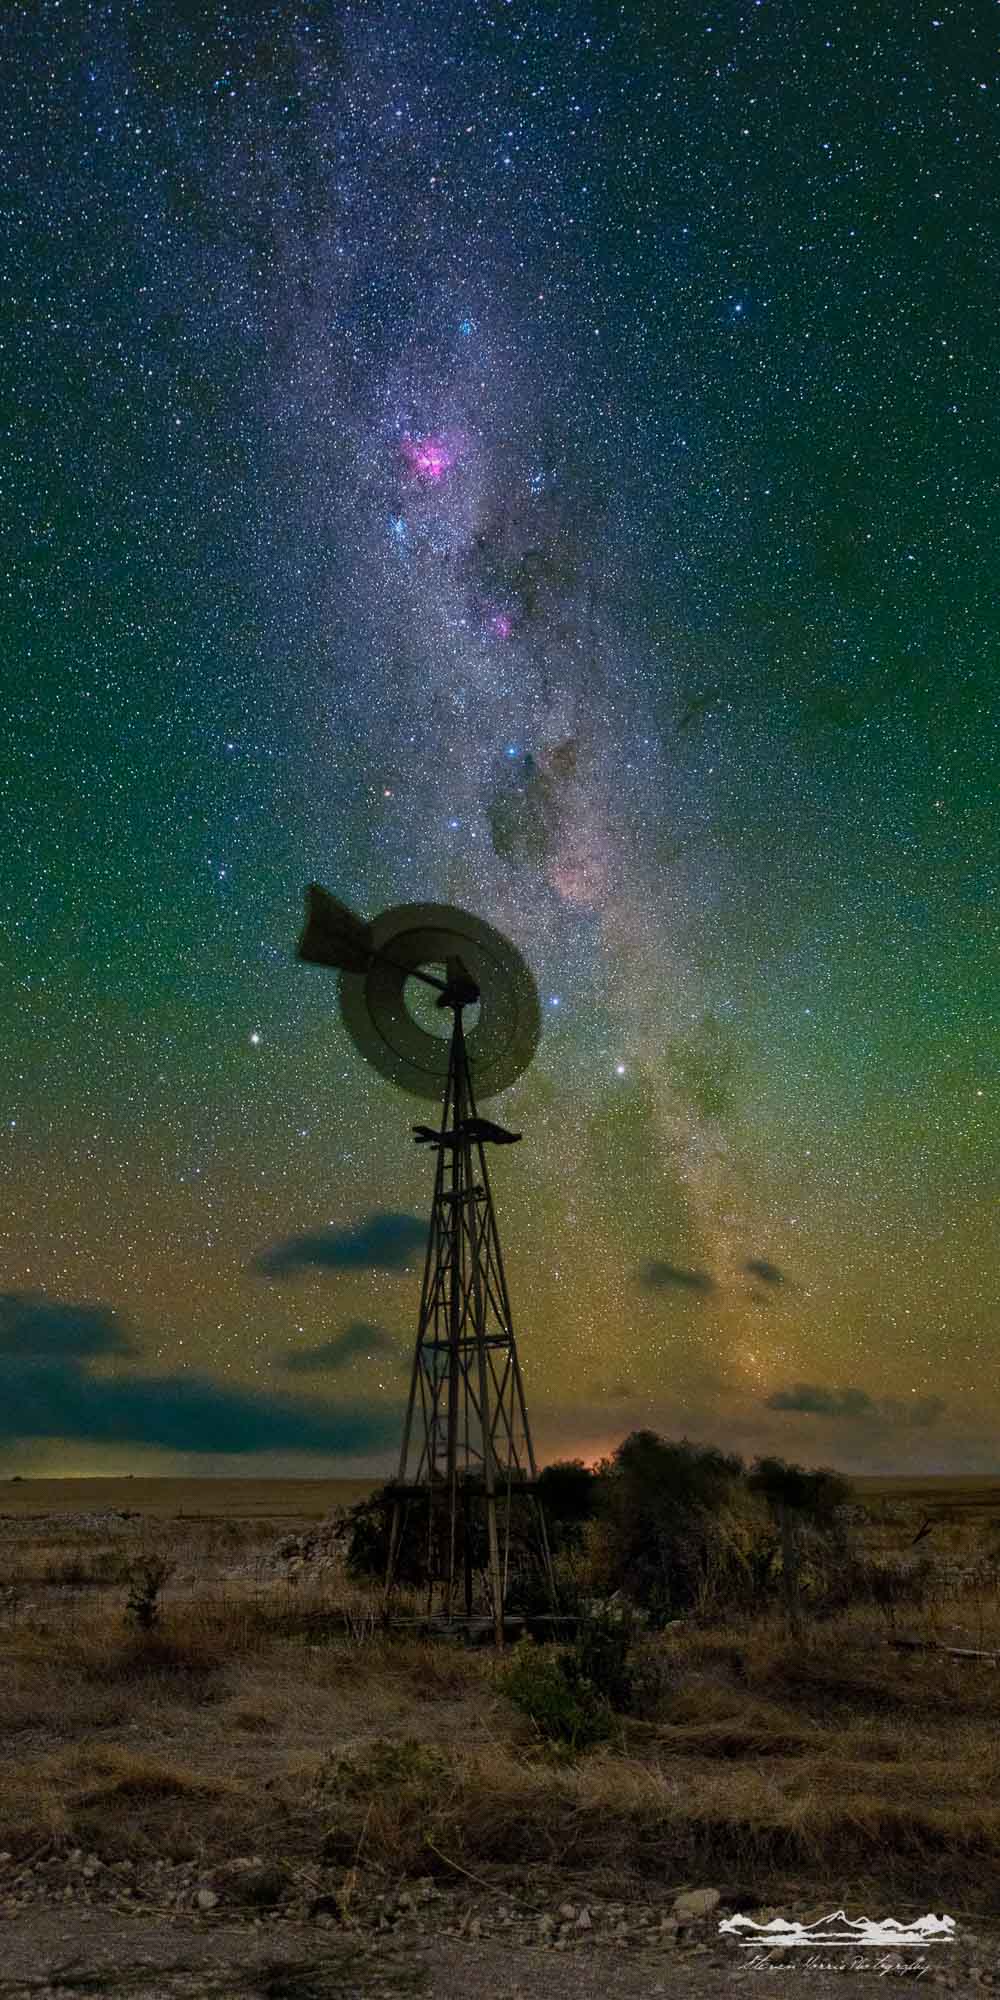
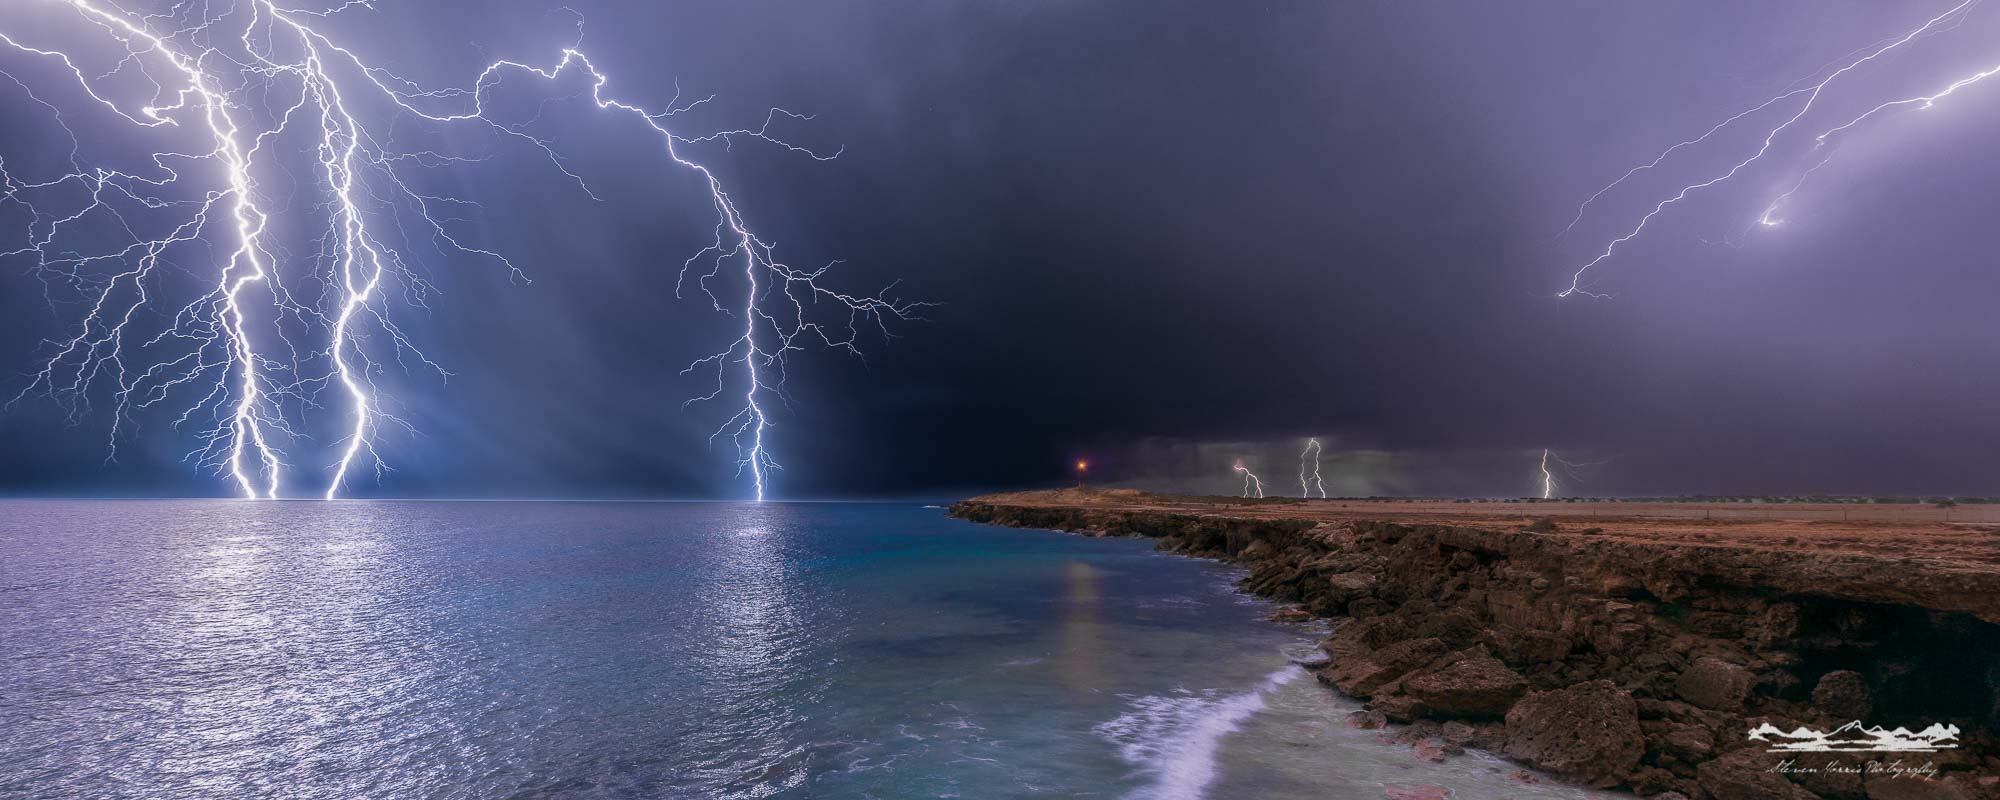
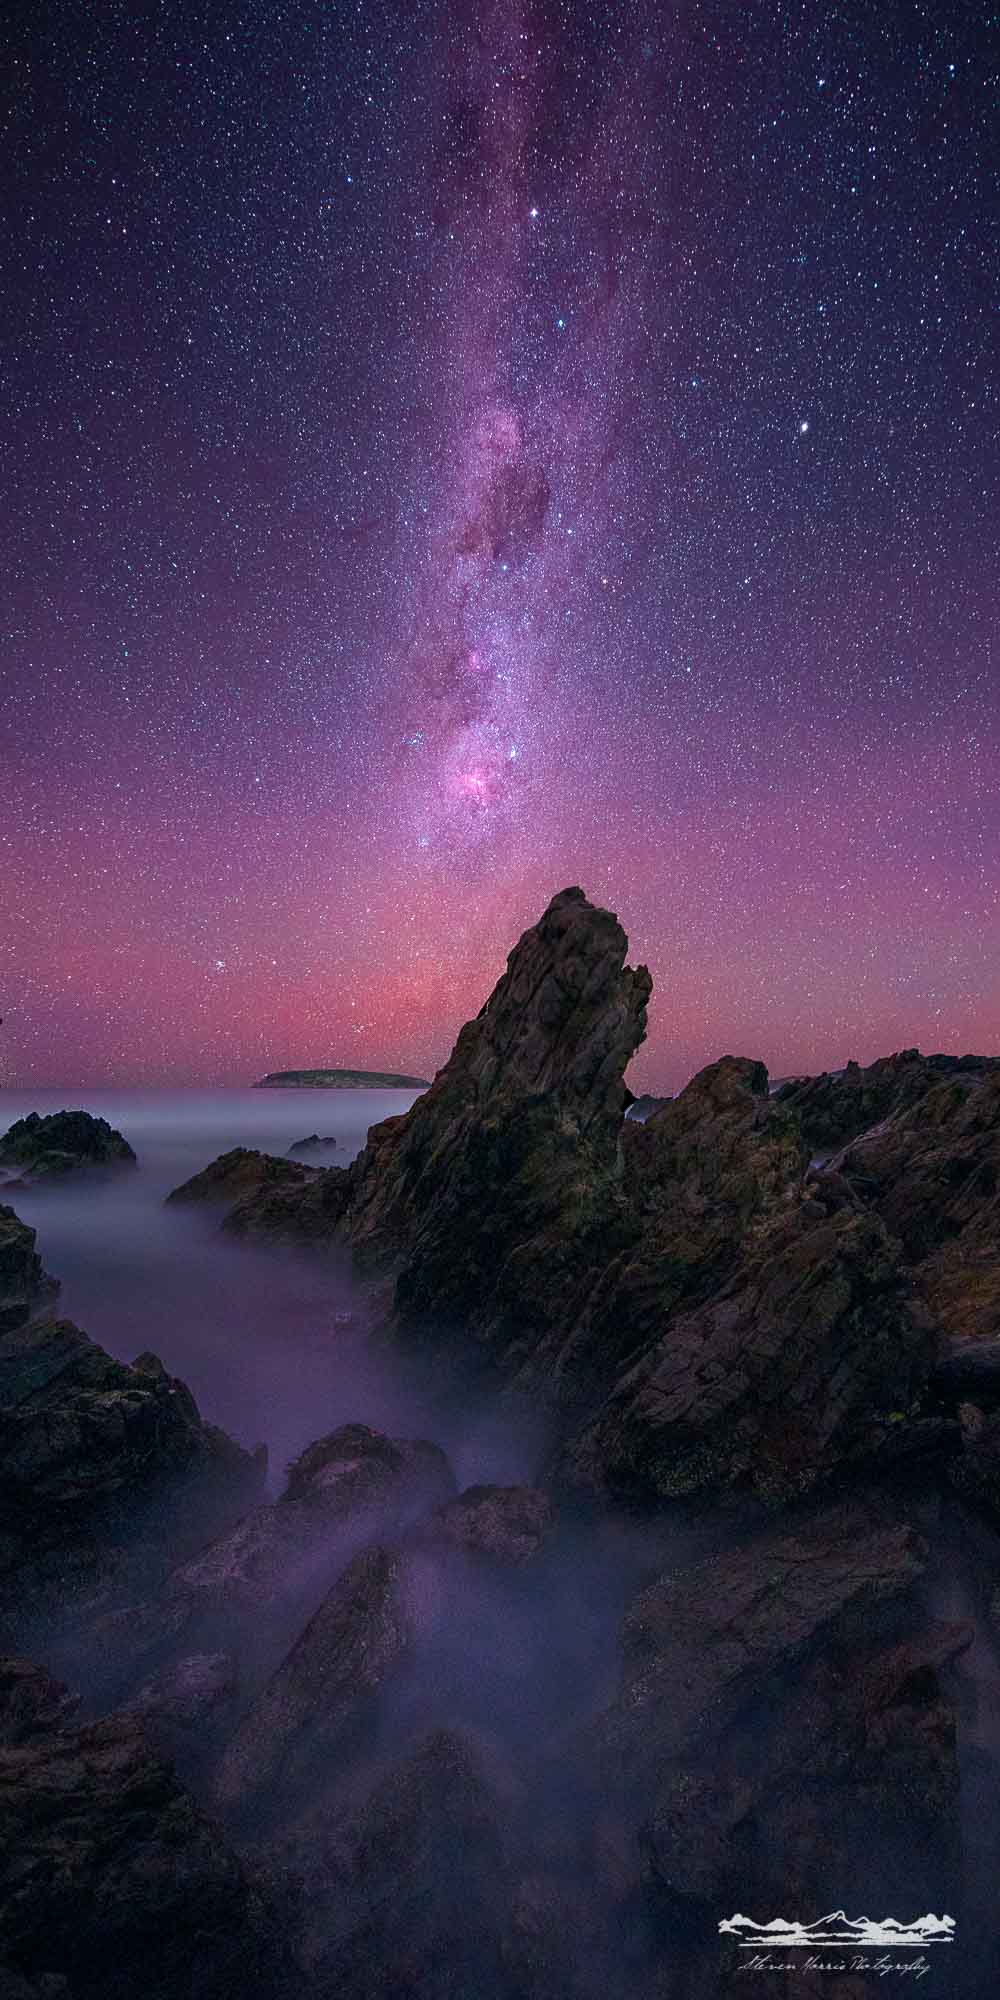
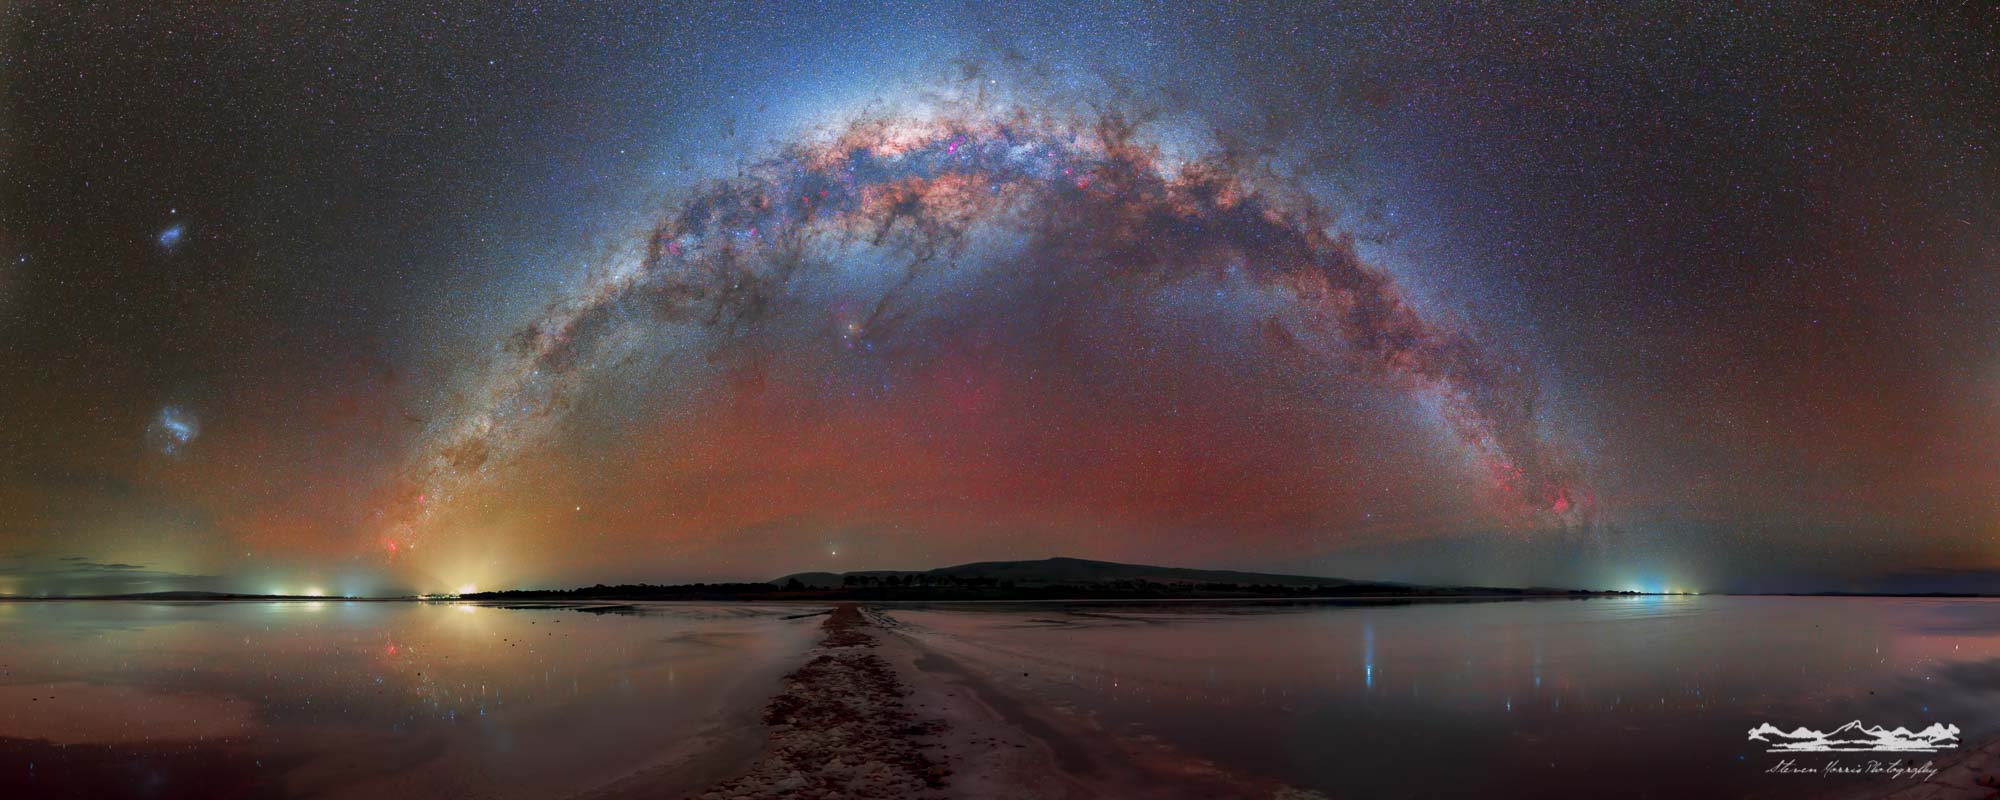
Photographer Focus: Steven Morris Photography

Want to be excited by truly inspiring Astrophotography and Landscape Photography images? Then check out this latest Photographer Focus article featuring Steven Morris Photography.

Who Is Steven Morris Photography?

My name is Steven Morris and I own/operate Steven Morris Photography. I am thirty-six years old and I live in Adelaide, South Australia.

When Did You First Take Up Photography?

In 2014 it was announced that my job was going to become redundant. I had worked for the company for twelve years. It was during these stressful times, working out how I was going to keep paying my mortgage, that I needed to find something to take my mind off things. So I decided to purchase a telescope and do some star gazing. Something I was always fascinated by but knew very little about.

A friend of mine was capturing and producing Landscape and Milky Way imagery. I became drawn to that and wanted to give it a go. I borrowed my dad’s Nikon D300s and Tokina 11-16 2.8 wide angle lens. And I asked my friend if she would like to show me how to photograph the milky way. Well, my first images were mostly out of focus blobs. My friend was a Canon shooter and didn’t know how to set the optimum Nikon settings. After this, I bought my first Nikon DSLR which was the Nikon D5100.

The telescope that I had at the time was a Celestron 6SE. I had found out that I could connect my Nikon DSLR to this telescope. So I did!

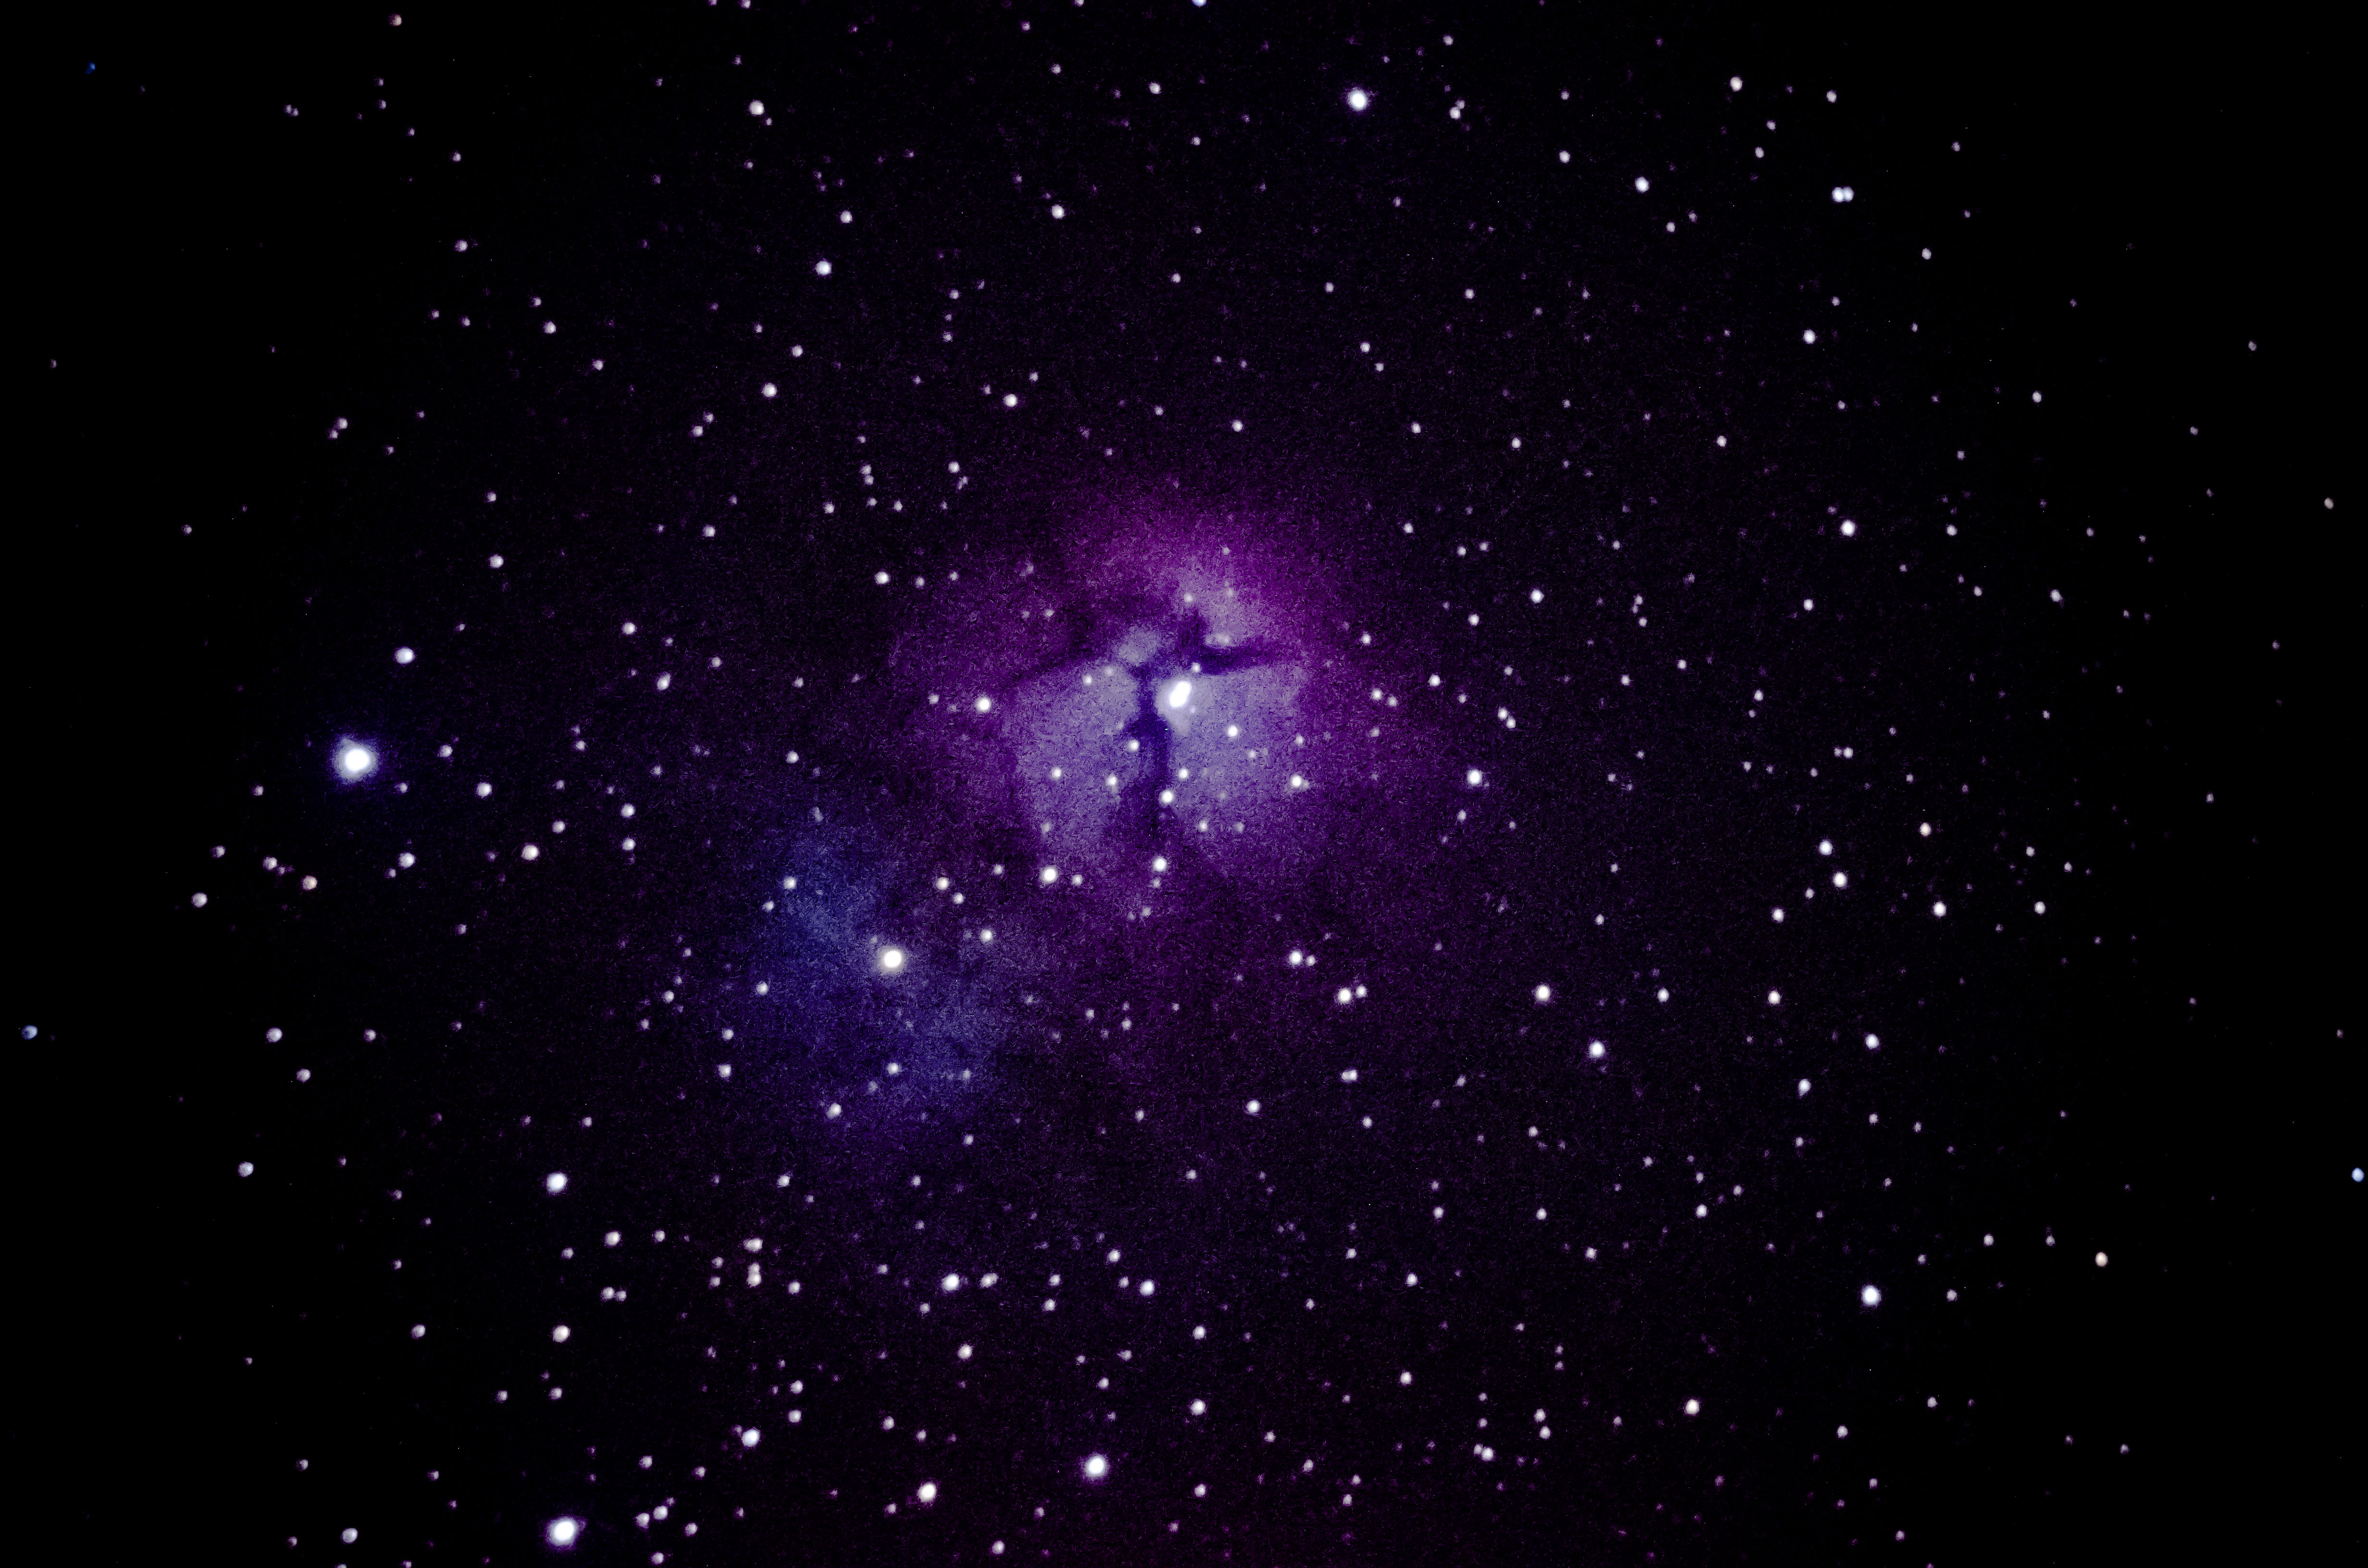
It was that first thirty-second exposure of the Trifid Nebula that made my jaw drop. At that moment my passion for Astrophotography began. And with it many sleepless nights researching and developing my own Astrophotography abilities.

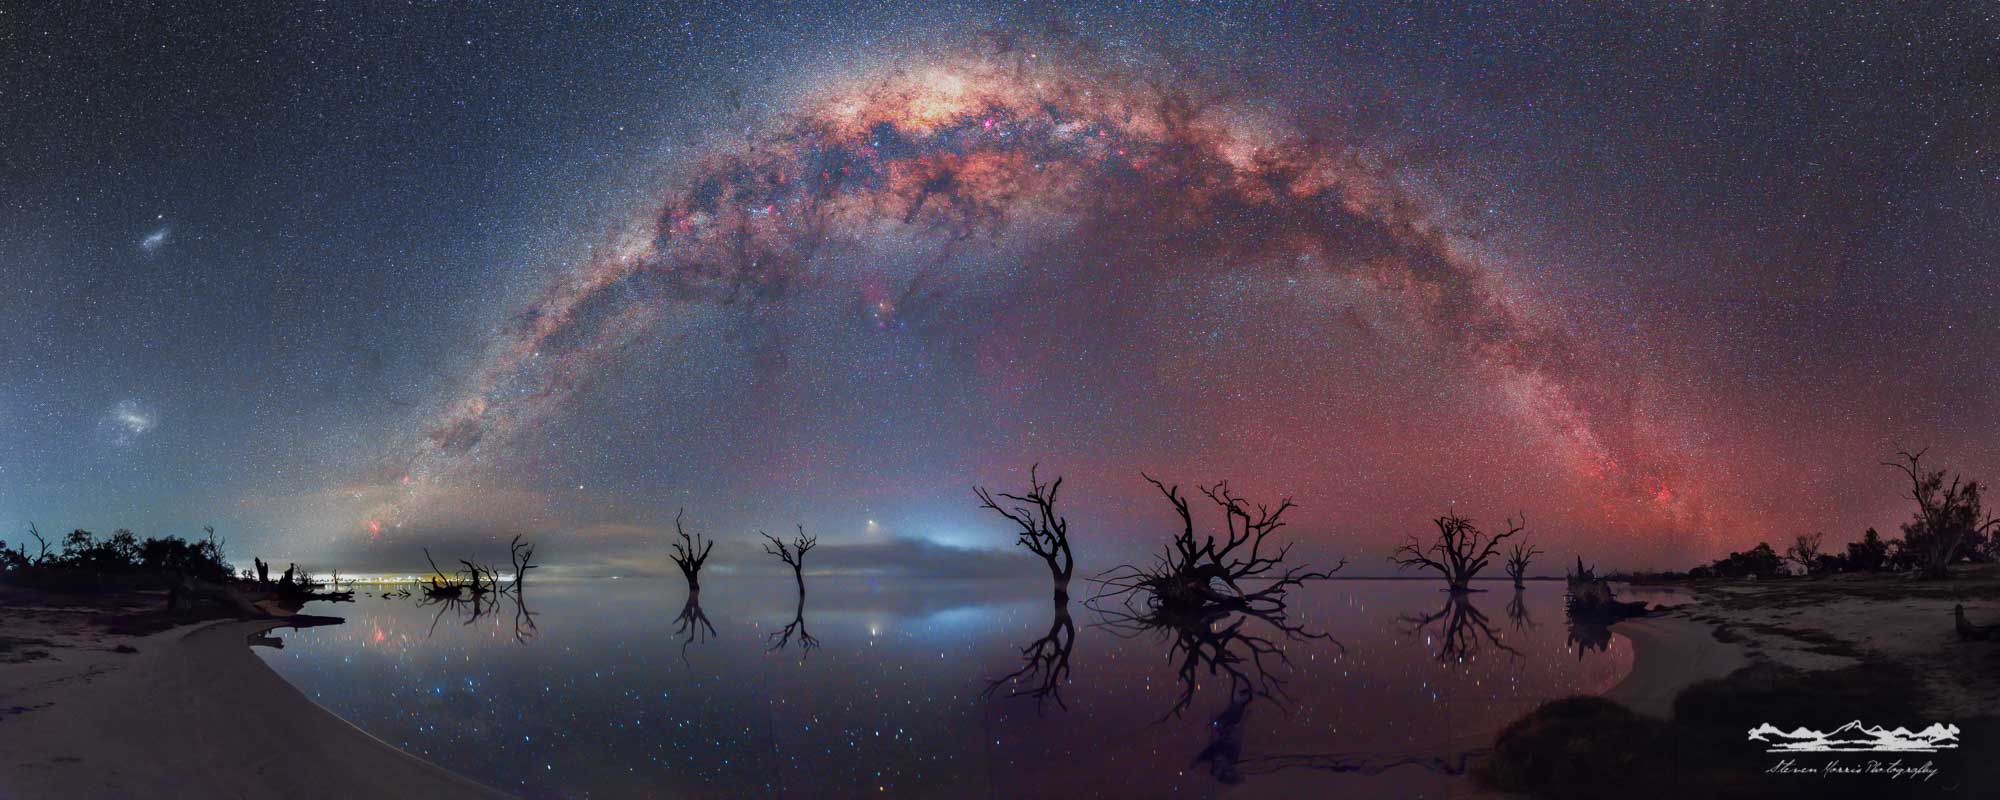
Lanscape Image by Austrailian Photographer Steven Morris

Have you turned “Pro”?

I don’t like the word “Pro”. Mostly because I’m just like everyone else who has a passion for photography. However, I do get paid for my work and running workshops, so then the answer is yes I’m a professional photographer. I turned pro about one and a half years ago.

What styles of photography do you mostly shoot for yourself?

I shoot mostly Astrophotography and Landscape Photography. Well, that is basically all I shoot!

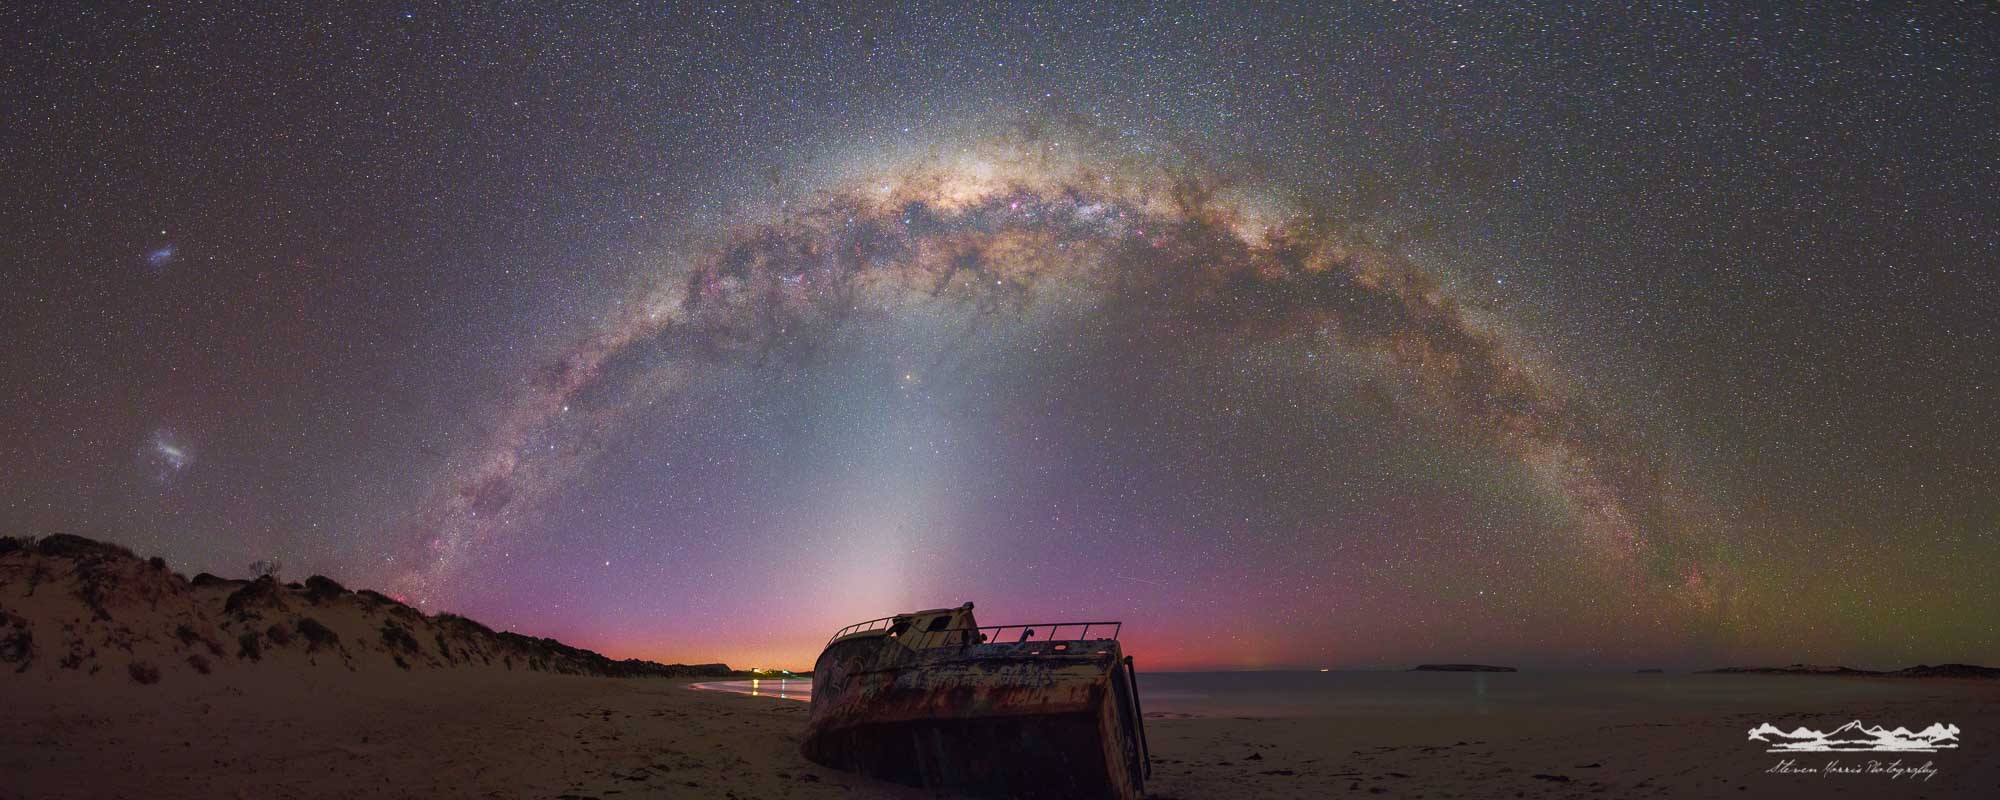
Lanscape Image by Austrailian Photographer Steven Morris

What styles of photography do you shoot for clients?

I get requested now and then to shoot a landscape for someone as they admire my work and have always wanted a photograph of a landscape that is close to them. Other than that, I don’t have many clients as I consider my work to be art and sell it via very low numbered limited edition prints. I do have some people who keep coming back to purchase my prints to be framed for their houses though.

Lanscape Image by Austrailian Photographer Steven Morris

What was your first camera and what do you shoot with now?

My first camera was a Nikon D5100 DSLR. I now photograph with a Nikon D810a DSLR. I also use a Nikon 1 V3 for video footage for upcoming YouTube adventures I wish to create. An inspiration for this has been from Thomas Heaton. But it is strange being in front of the camera!

What is your favorite piece of kit in your camera bag?

My favorite piece of kit would have to be the Nikon D810a. It is Nikon’s first ever dedicated Astro camera. It captures additional detail throughout the milky way by picking up the H-Alpha gasses in space. Also, I like the colors this camera produces for my landscape imagery too.

I would also have to say my favorite lenses so far are the Nikon 14-24 F/2.8, Nikon 35mm F/1.8G, Nikon 70-200 F/2.8, and Nikon 300mm F2.8. And let’s not forget all my Haida Filters and Manfrotto Tripod. I guess I love all my gear!

Lanscape Image by Austrailian Photographer Steven Morris

Any new gear on the horizon that you will be investing in?

Ultimately, I would love to own two 200mm F2 Nikon lenses with 2 x Nikon D810a for some wide field deep space imaging. That is a long-time dream and something that will have to wait for now.

I see you are sponsored by Nikon and by Haida. How did those opportunities come about and what responsibilities does a Brand Ambassador have?

I was introduced to Nikon when I was imaging deep space and they bought out the Nikon D810a Astro camera. It was through this relationship of sharing images that I had taken with my D810a of deep space and Nightscapes that lead to me now teaching Nightscape photography with Nikon through Nikon MySchool Australia in various locations around Australia.

Haida had seen my Astrophotography and asked me if I would like to test out the Haida Clear Night Filter. This is a filter which I absolutely love for Nightscape photography. I use it all the time regardless of dark sky locations because it can also protect the front element of the lens during those cold dewy winter nights. After sending them some images that I had taken, they were so impressed that I was asked to be an Ambassador for the brand here in Australia which I thoroughly enjoy doing because their filters are stunning.

Lanscape Image by Austrailian Photographer Steven Morris

What has been your greatest photography achievement to date?

Greatest photography achievement…..That is a hard one because there are a few. Working with Nikon and Haida are two of my greatest achievements along with my most recent Nightscape image in which I had to wait one whole year for the right conditions to present themselves.

What have been your biggest photography challenges to date?

The biggest photography challenge was shooting a Nightscape image consisting of a hundred and fifty images stitched together. It was fair to say that my computer didn’t like handling a 20Gb file. So the image was kind of scrapped. I also don’t shoot with a robotic pano tool like a Gigapan because it just adds to weight. So in the dark shooting at 70mm focal length whilst trying to maintain a fifty percent overlap between image. It was very challenging.

Lanscape Image by Austrailian Photographer Steven Morris

What photographic projects do you have planned for the rest of 2018?

I have a few images I would still like to capture before the Milky Way season is over. The next shot I’m currently planning is an image of the Milky Way rising above some large sand dunes. I have a location in South Australia I wish to shoot at. Now it is just a matter of scouting the location and waiting for the right moment.

I’m also very excited about 2019. In April I will be in the United Kingdom for a few weeks. My brother had moved to the UK a few years back and is now happily in love and getting married. So I hope to head up to Scotland and Wales (Snowdonia) to shoot some landscapes in my spare time. I don’t know how if the weather will allow me to shoot some Astro. But it will be great if I can!

Lanscape Image by Austrailian Photographer Steven Morris

What advice or tips can you offer to anyone looking to make a career or a lifestyle switch to that of Professional Photography?

My biggest advice would be that it takes time. Don’t rush into it. I mean, don’t quit that job you may dislike and the next day begin your dream as a photographer. Build into it. Build up your portfolio and ask questions to those photographers that inspire you to live the dream you wish to live.

Where and how can people follow your work and keep updated with your photography adventures?

You can head to my website www.stevenmorris.com.au for my latest collections and print purchases. Also, you can follow my work or occasional live feeds on Facebook https://www.facebook.com/stevenmorrisphotographer or over on Instagram at https://www.instagram.com/stevenmorrisphotography.

Photographer Focus: Irish Landscape Photographer Colm Keating

Are you a fan of Landscape and Travel Photography? Then check out this article.  Continuing on with my Photographer Focus series, in this edition, I am placing the focus on Colm Keating, an Irish Photographer who currently resides in New Zealand.

Who is Colm Keating Photography? Tell us about yourself

I’m a self-taught photographer from Ireland, who now lives in New Zealand. I was studying for a doctorate in chemistry when I decided I had enough and quit to pursue photography full time. I loved chemistry, but I knew I didn’t want to spend my days inside a lab working on the same problem every day when I could be out with my camera instead. That was in Sept 2017 and my life has changed dramatically since then.  In January 2018 I moved to New Zealand, and I now live in the Queenstown, surrounded by the southern Alps.

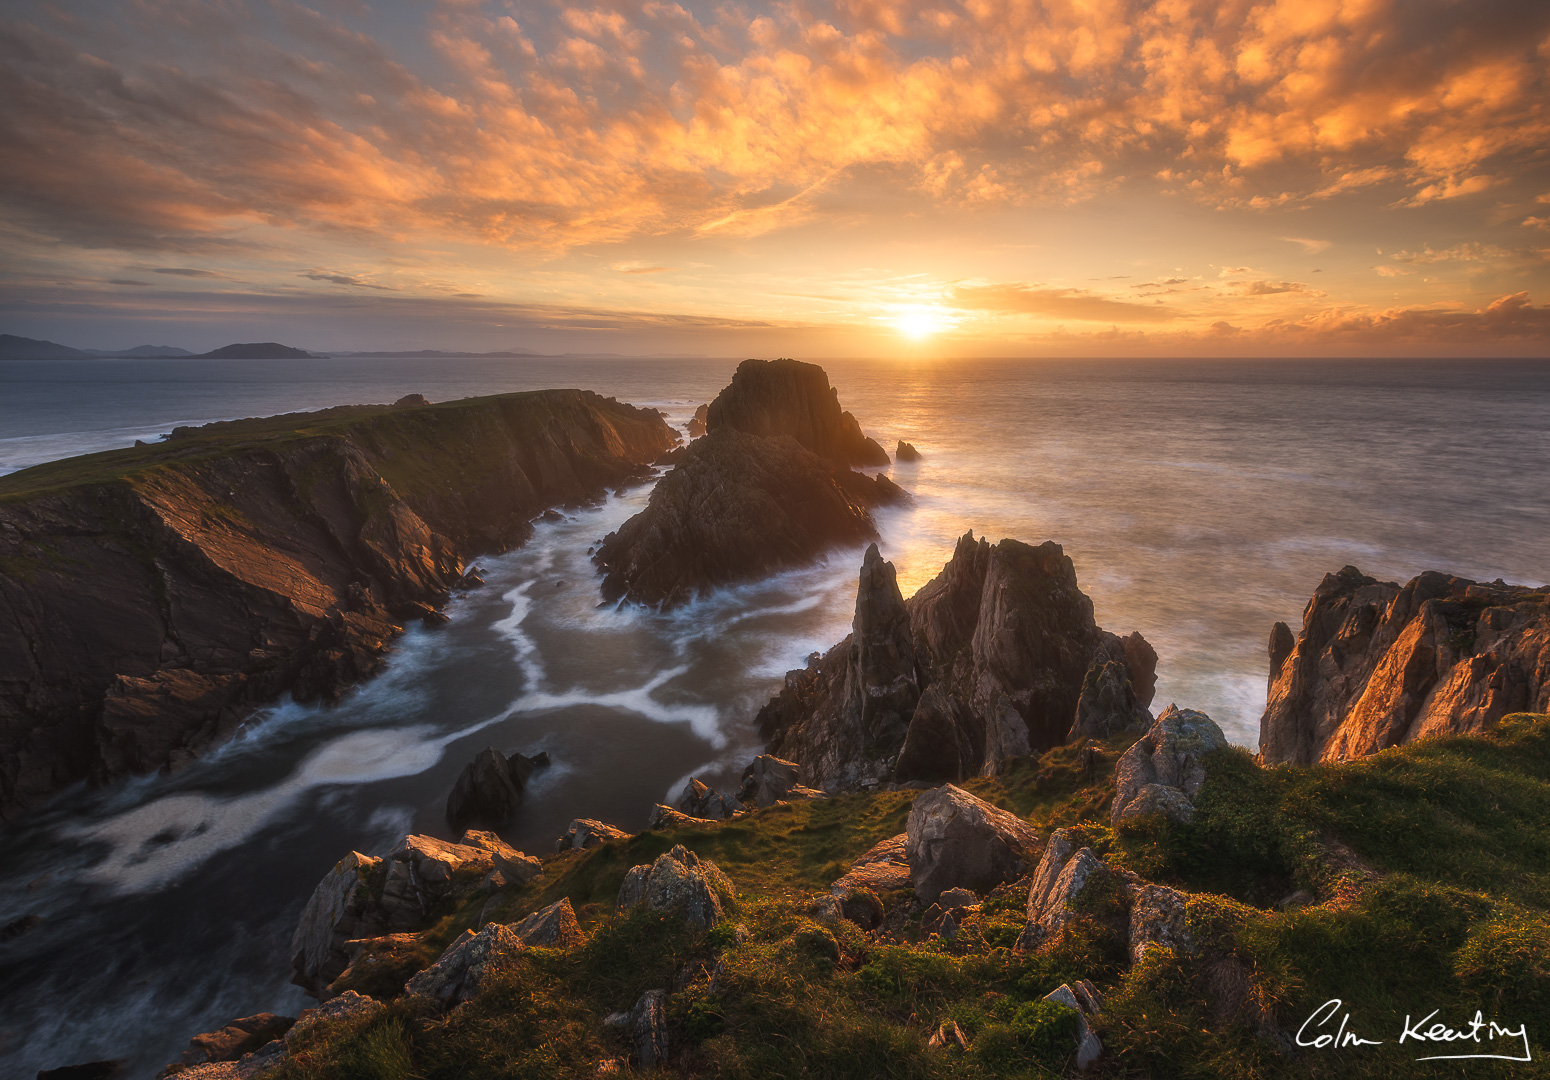
Landscape Image by Irish Photographer Colm Keating

When did you get your first camera and what was it?

Presumably, people probably answer this question with a DSLR but the first camera that really sparked my interest in photography was the first-generation iPhone. This was the first phone I had with a camera and it is definitely the camera responsible for lighting the fire. However, after a few years of iPhone photography, I did eventually get a Canon 600D in the summer of 2013 which is where the traditional photography journey started.

As an Irish Photographer, what type of photography do you mostly shoot?

Although it doesn’t earn me a large income, I will always likely be a landscape photographer over any other genre. Living near the sea, it was seascapes in particular that I mostly shot in the beginning, but photography opened up a whole new world of other interests with it, hiking being a huge one. Now I shoot more in the mountains than anywhere else. And I have fostered a love for adventure photography involving outdoor sports since becoming an avid hiker and camper myself. This is an area where I really want to steer my business over the next few years as it combines my love of landscape photography with outdoor sports. For professionals, I think this is the ultimate goal. Many begin shooting whatever photography jobs they can when they turn pro just to keep things rolling over, however, we all would love to just shoot the type of photography we love in return for an income. This isn’t always possible, but finding a niche where you can mold that genre into a profitable product for someone is the perfect compromise, for me anyway!

Landscape Image by Irish Photographer Colm Keating

What styles of photography or subjects interest and motivate you the most?

Its always been the power and beauty of nature for me. You can go to a gorgeous place over and over and it can look so different from one day to the next, all depending on the mood and atmosphere that the weather creates.

How long have you been a serious enthusiast photographer for?

As soon as I was making dedicated trips out to take photos is when I consider a photographer to be a serious enthusiast. For me, this was about six months after picking up my first camera, so the bug really didn’t take long to manifest in me!

What has been the highlight of your photography journey so far?

Meeting all the other amazing photographers I have had the pleasure of shooting with is by far the highlight. This is pretty much an ongoing thing, which is great as its something I can look forward to for as long as I am involved in photography. Many people reading will no doubt be able to relate to the friendship that can be formed with finding someone else who also has that “photography bug”. A lot of family and regular friends just cannot comprehend why we would stand for hours in the same spot, going back day after day just to catch the place at its best, but other photographers can, and I have been lucky enough to meet many I can now call very good friends.

Landscape Image by Irish Photographer Colm Keating

If you could go back in time, what advice would you provide to your younger self-knowing what you know now?

Just get going sooner. I held myself back, convincing myself the stereotypical route of getting a stable career through my degree was the right choice for me. I now know it was not and I am glad I have made the jump to full-time photography. My only regret is that I did not do it sooner.

What are the hardest parts about the type of photography that you do?

The hardest part will always be dragging yourself out of bed for sunrise. Whether the shoot was a success or not, I have never once regretted getting up for sunrise. However, that knowledge never seems to make it easier to leave the warmth of your bed when it’s still dark outside and it seems you only crawled into it 5 mins ago.

Landscape Image by Irish Photographer Colm Keating

What is in your kit bag?

Nikon D750 and D7100. Nikon 14-24 F/2.8. Tamron 24-70 F/2.8. Sigma 70-200 F/2.8. Haida Filters CPL, 6 stop ND, 10 stop ND. 6 batteries. Peak design strap and capture pro clip. Cable release. Rollei tripod. And last but definitely not least, a shower cap!

Most Photographers have GAS (Gear Acquisition Syndrome) – what gear is on your “to get” list?

To be honest I am very happy with the gear I have. My only complaint is how heavy it all is. As I do a lot of hiking, the weight can be somewhat problematic. Therefore I am considering swapping some of my fast aperture lenses for lighter variable aperture versions. I have not decided what I will do yet though. As regards GAS, I have it pretty well controlled (I think!). I have not bought anything photography related in well over a year, except for replacing a broken tripod head. Now I just have to ensure I keep telling myself that just because I have not bought anything in a year, that it does not allow me to justify a new purchase!

Landscape Image by Irish Photographer Colm Keating

You come from Ireland and are currently living in New Zealand – which satisfies your photography more?

At the moment I have to say New Zealand. My second love is wild camping/hiking and so the setup for that here is just phenomenal. Of course, there are great places to be found for this back home in Ireland too but it is just on another level here in New Zealand. There is also the appeal of a new place, seeing something with fresh eyes. New Zealand most certainly still has for me as I have only been here for six months. I will always want to continue to explore new countries though, that is something I am confident that will never stop.

What is next on your photography journey?

Recently I have begun to shoot more people in my photography, particularly with adventure-related sports. This is something I really want to move into more over the next year or so. That will entail me learning many new photography skills that come with the genre so there is another steep learning curve ahead. For me though, the learning is part of the fun. Dipping into other genres can open your mind to ideas that you wouldn’t have had if you stick in the one type of photography all the time. For that reason alone I really love giving every type of photography a go. Hoping it will bring something new to my staple genre that is landscape photography.

Profile Pic for Irish Photographer Colm Keating

You can view more of Colm’s Photography over on his website at www.colmkeating.com and you can follow along with his adventures over on his Facebook Page www.fb.com/keatingcolm –  and his Instagram Feed – www.instagram.com/keatingcolm

SaveSave

Interview with Josefine Hoestermann: Documenting Lifestyle

What inspired you to start taking photographs?

I started in about 2009 when I was 14 years old. I think it was mostly a way for me to document my daily life and travels that I did. I then discovered conceptual artists like Brooke Shaden and others during the time when Flickr was very active and felt very inspired by her. I would take my favorite songs and turn lyrics from those into conceptual images. I still do that sometimes, although I mostly do portraiture and travel photography today. So yeah, documenting my moments on this earth and music was what originally inspired me.

Your portraits are very graceful and eye-catching. What do you look for in a model?

I don’t really look for anything, though I seem to be more drawn to women, I am open to changing that! I am of the opinion that everyone is photogenic, most people just are not as confident in front of the camera, so they feel like they aren’t photogenic enough. But really, I love photographing anyone.

/

You’re also into cinematography. How has filmmaking influenced your photography work?

It has made me a lot more sure and confident in my style, both photography and cinematography wise. I now know a lot more about what I aim to create in both still and moving images. Also, it has made me more confident in my photography and editing skills – I am just starting out with cinematography, so I have been realizing how a lot of photography things come so natural to me now (especially in editing) that I have to completely re-learn for
when the images are moving. But it’s an exciting process and I see cinematography as an extension to my art, not a competition to my photography.

On your website, you state that it’s important to always create, even if it gets difficult. What has been the most surprisingly difficult creative obstacle in your life, and what did it teach you?

Fear. Always fear. My fear holds me back from a lot of creative work and I am still in the process of overcoming that and it’s hard. It comes in a lot of different forms – fear of rejection, fear of not liking the result, fear of your work not matter in comparison to what already has been done, fear of others being better than you and surprisingly to me also fear of what comes up to the surface emotionally when creating. A lot of my work is based on my emotions, especially my cinematography, and sometimes I need that extra push to actually start creating because I know the emotions that might surface can be painful. It always ends up being very therapeutic and I know that I need to get it all out through my art, but it takes a little something to overcome the fear every time.

/

Your images often feature both people and nature. What would be your dream location to shoot in?

Ohh that‘s a hard one. Travelling is one of my biggest hobbies next to creating and I love to combine those two. I very much love the ocean, so I would like to explore the Pacific Northwest more and also explore South-East Asia. Also Nepal. And the deserts, maybe the Sahara and Joshua Tree. Ahh, so many places, haha.

What advice, in relation to photography, would you give your younger self?

You need to do it. And don’t compare yourself. (Explanation: I took a couple of years “off” from creating as much because I felt discouraged after being rejected from art school. I have been realizing over the past year that I cannot live without a camera in my hand, though.)

/

What do you do when you feel insecure about your artistic skills?

Another hard question. I usually like to either listen to music that inspires me, go to a coffee shop, or — this method is a hit or miss with me — look at other people’s art that conveys the feeling that I want to portray in my art. That method can also backfire into me comparing myself to them, though, so I need to carefully monitor my mood. Also, journaling, traveling and watching my favorite Youtubers can inspire me and give me back n1y confidence. I like to combine those methods, so you will often find me in coffee shops with my laptop, headphones, and journal doing all of the above.

You’ve photographed a refreshing variety of subjects. Is there a photography genre you’d like to experiment more with?

I think high fashion photography and editorial work is something I would like to explore. I always look up to people who can make pictures look like they’re straight out of Vogue with the retouching.

/

Your photographs are beautifully edited. What is your favorite editing program to use and why?

I have been using Photoshop for the past seven years or so (currently CS6) and I love it. I used GIMP before that, but I wasn’t super impressed. I love Photoshop’s layout and easy use.

And finally, what is the most Valuable thing that photography has taught you?

Life is too short to not do what you want. What if it doesn’t work out, you ask? Oh, what if it does? Don’t you think finding out could be the greatest adventure? Do you really want to spend the rest of your life asking yourself “What if?”.

I know I don’t. Go out. Do it. It’ll be okay.

Instagram: @fourthousandstars
Website: josefinehoestermann,weebly,com
Shop: society6.com/josefinehoestermann

/


Interview with Katherine Robbins: A Self-Portrait Artist

What inspired you to start taking photographs?

I started photographing at the tender age of seventeen, thanks to a high school friend. She’s an amazing artist who got me into deviantART, where she showed me her favorite photographers, and it all started from there. I remember admiring several artist’s photographs, and soon enough I started getting my own ideas for photographs that would not rest until I executed them.

You take the most exceptional self-portraits. What does a typical self-portrait shoot consist of?

For me, it takes a few hours because my camera is so old. I can’t use a wireless remote, so I always spend a lot of time preparing, making sure that I will be in focus. I really love the light, like most photographers, so I’ll wait until a certain time of day, put on some makeup, grab my reflector, put on some music and start shooting. It could be an initial idea I had or a completely random shot but when I start shooting I forget everything else. Actually, most of the time, the ideas I had in my head change when I’m shooting. I’ll choose a different pose or theme because I start to like it more as I’m getting inspired.

/

What has been your biggest artistic challenge so far, and how did you overcome it?

My biggest challenge so far has just been overcoming my fears and anxiety. I think a lot of artists have that mindset that their work isn’t good, and I am one of those people. So, it’s hard for me sometimes when I don’t get an idea quite right, or if I don’t have the right model or location, but it’s good to just breathe and learn from one photo at a time.

Is there anyone you dream of photographing one day?

I dream of photographing you, Taya. ;3 If it’s someone famous, I would love to photograph Marina Diamandis. I just love her style, and when I watch her music videos I start getting ideas for shoots with her in my head.

You often combine people and nature in your art. What would be your dream location to shoot in?

My dream locations vary so often depending on my mood. But, I’ve always wanted to shoot a model in Salar de Uyuni, Bolivia. The reflections on the ground from the sky and the light just give off the feel that you’re in heaven, floating above everything else. I would love to do a shoot with that kind of ethereal feel. It’s hard to decide though. Anywhere really; this Earth is so beautiful.

/

/

What advice, in relation to photography, would you give your younger self?

Do not doubt yourself, do not be afraid to put yourself out there, find and work with other artists and advertize. If you have a concept, no matter how silly other people might think it is, just do it. Don’t be afraid of your ideas, don’t be afraid of yourself.

What do you do when you feel insecure about your artistic skills?

When I am feeling insecure, I usually watch youtube videos from my favorite photographers, or I look at my favorite photographs. I try to pump myself up, and by looking at the art I admire it revamps my passion and drives me to better myself and execute my ideas better next time.

/

Where do you wish to be, art-wise, in 10 years?

I would love to be a professional photographer here in Japan. But, I also have so many artists I would love to meet and collaborate with. Not only to take photos, but to meet them because all of my photographer friends are the most lovely people. I would love to say that in 10 years I have met them all.

Your photographs are made up of such elegant colors. What is your favorite editing program to use and why?

I use Adobe photoshop cs5. Years ago, I used cs2, which is old now, but it still did the trick. I love photoshop because I can do so much to a photograph with it. I’ve only ever used photoshop, so I’m used to it and I know how to maneuver with it. I use windows, so all of my favorite curves and actions I use in photoshop too.

/

What is the most valuable thing that photography has taught you?

Photography has taught me how to live. How to express myself and my ideas through the lens, how to push the boundaries of my dreams. I wouldn’t be who I am today if I hadn’t picked up a camera. I am so grateful for it.

You can find more of Katherine’s work on Flickr.


Discussing the beauty of portraits with photographer Bluewaterandlight

Ben, also known as bluewaterandlight, is a talented portrait photographer from Germany. His interest in people is very evident in his images, which vary from heartwarming portraits to emotional works of art. In this interview, Ben talks about his working process, how he feels about human interactions, and what he believes aspiring photographers should know. Please enjoy this fascinating conversation.

Tell us a little about yourself and what you do.

Hey, my name is Benjamin, but I prefer Ben. I’m a portrait & people photographer from Germany. I wanted a new toy to play with, which I couldn’t understand directly, so at Christmas, in 2014 I decided to buy a camera. And the journey began. Since I got this camera I knew I wanted to photograph people, but my introversion and shyness made it impossible. But with every little step, I noticed more and more that I must photograph people and not landscapes, so I spent time with other people and I found the most interesting thing in our world: humans.

//

Landscapes are really beautiful but without people they are dead. I’ve learned to see the beauty in every little piece of God’s nature. The beauty is there, everywhere. But unfortunately, most people can’t see it. If every earth inhabitant could see this beauty, we would not enslave and destroy our nature, but live in harmony with it.

Photography for me is the best therapy and way to express myself. When I am sad or full of anxiety I create a picture of myself or another person with these feelings and put all my sadness and anxiety in the picture and then my heart is ready for happiness and love. I love people and I think this gives me the power to work hard and follow my dream, to be a worldwide working photographer.

Your portfolio is filled with gorgeous portraits. How do you make your models feel comfortable in front of your camera?

I start my photo shoots with a hug for my models to create a friendship. I’m really interested in people and this is one of the reasons my pictures look so natural. During the shoot, we talk a lot about life, love, anxiety and other things. My shoots look like this: two friends talking about their life and creating “a few” pictures.

//

In addition to being sharp and well-lit, your photos are beautifully edited. What does your editing process consist of?

My editing process begins during the shoot. I alway try to get the perfect exposure directly in the camera. Great make-up is also very helpful. At home, I import my pictures to Lightroom and choose the best pictures, if I didn’t do that already at the location together with the model. Then I import my/our favorites to Affinity Photo to edit the skin and if necessary, I remove distracting elements. Then I go back to Lightroom and edit the color, brightness, etc. Here I use my own or the VSCO presets.

Many of your images were shot using a limited amount of light. What do you think is the most important thing to consider when shooting in darker locations?

Shootings at dark locations are really hard because my Canon 6D’s autofocus isn’t good, and at dark locations, it’s extremely bad. So I mostly focus with manual focus and focus peak (Magic Lantern). Often, I use a reflector or even a flash. Many people don’t like noise/grain, but I love it because it gives the portrait a bit of a painting and creates a symbiosis between the model and the background.

//

Are there any photography genres you’d like to experiment with more?

In the future, I want to take more “Fine Art” pictures because I want to tell the world what’s in my mind. I want to travel more to talk with people all over the world and take pictures with them. And I would love if I find a model to take pictures of her/him crying, it’s one of the strongest feelings.

What do you find most challenging about portrait photography?

For me, people photography is the masterclass of photography. It’s extremely hard to make people familiar with you and your work and make them trust you. In my preparation for a photo shoot, I listen to my “power playlist” to give myself certainty that the photo shoot will be awesome. You should create your own “power playlist” filled with songs which give you energy and self-confidence.

//


If an aspiring photographer asked you for advice, what would you tell them?

  • Follow your heart, don’t give a shit on what other people think.
  • If something doesn’t work, wait a bit, try it later and get some rest. But never give up!
  • Use music to make the emotion more intense (a mobile music box with Bluetooth and battery is helpful.) Classic music, for example, can slow down the space around you and help you see through chaos.
  • Write down your ideas and thoughts in a notebook. If you don’t, you will forget them.
  • Don’t look at cameras, lens or other gear. It’s not important. The image in your mind, your ideas and people are important.

You’re a fan of black & white photography. What do you find most appealing about it?

Black and white photography is the origin of photography and the most natural photography. It puts my focus on the model/subject and away from color. For me, it’s the essence of photography. It makes the light and structure more important.

//

If you could meet your favorite artist and ask them 3 photography-related questions, what would they be?

  1. What’s your story?
  2. Why do you do your photography the way you do it?
  3. How do you handle anxiety and depression?

What has been your most challenging creative obstacle so far, and how did you overcome it?

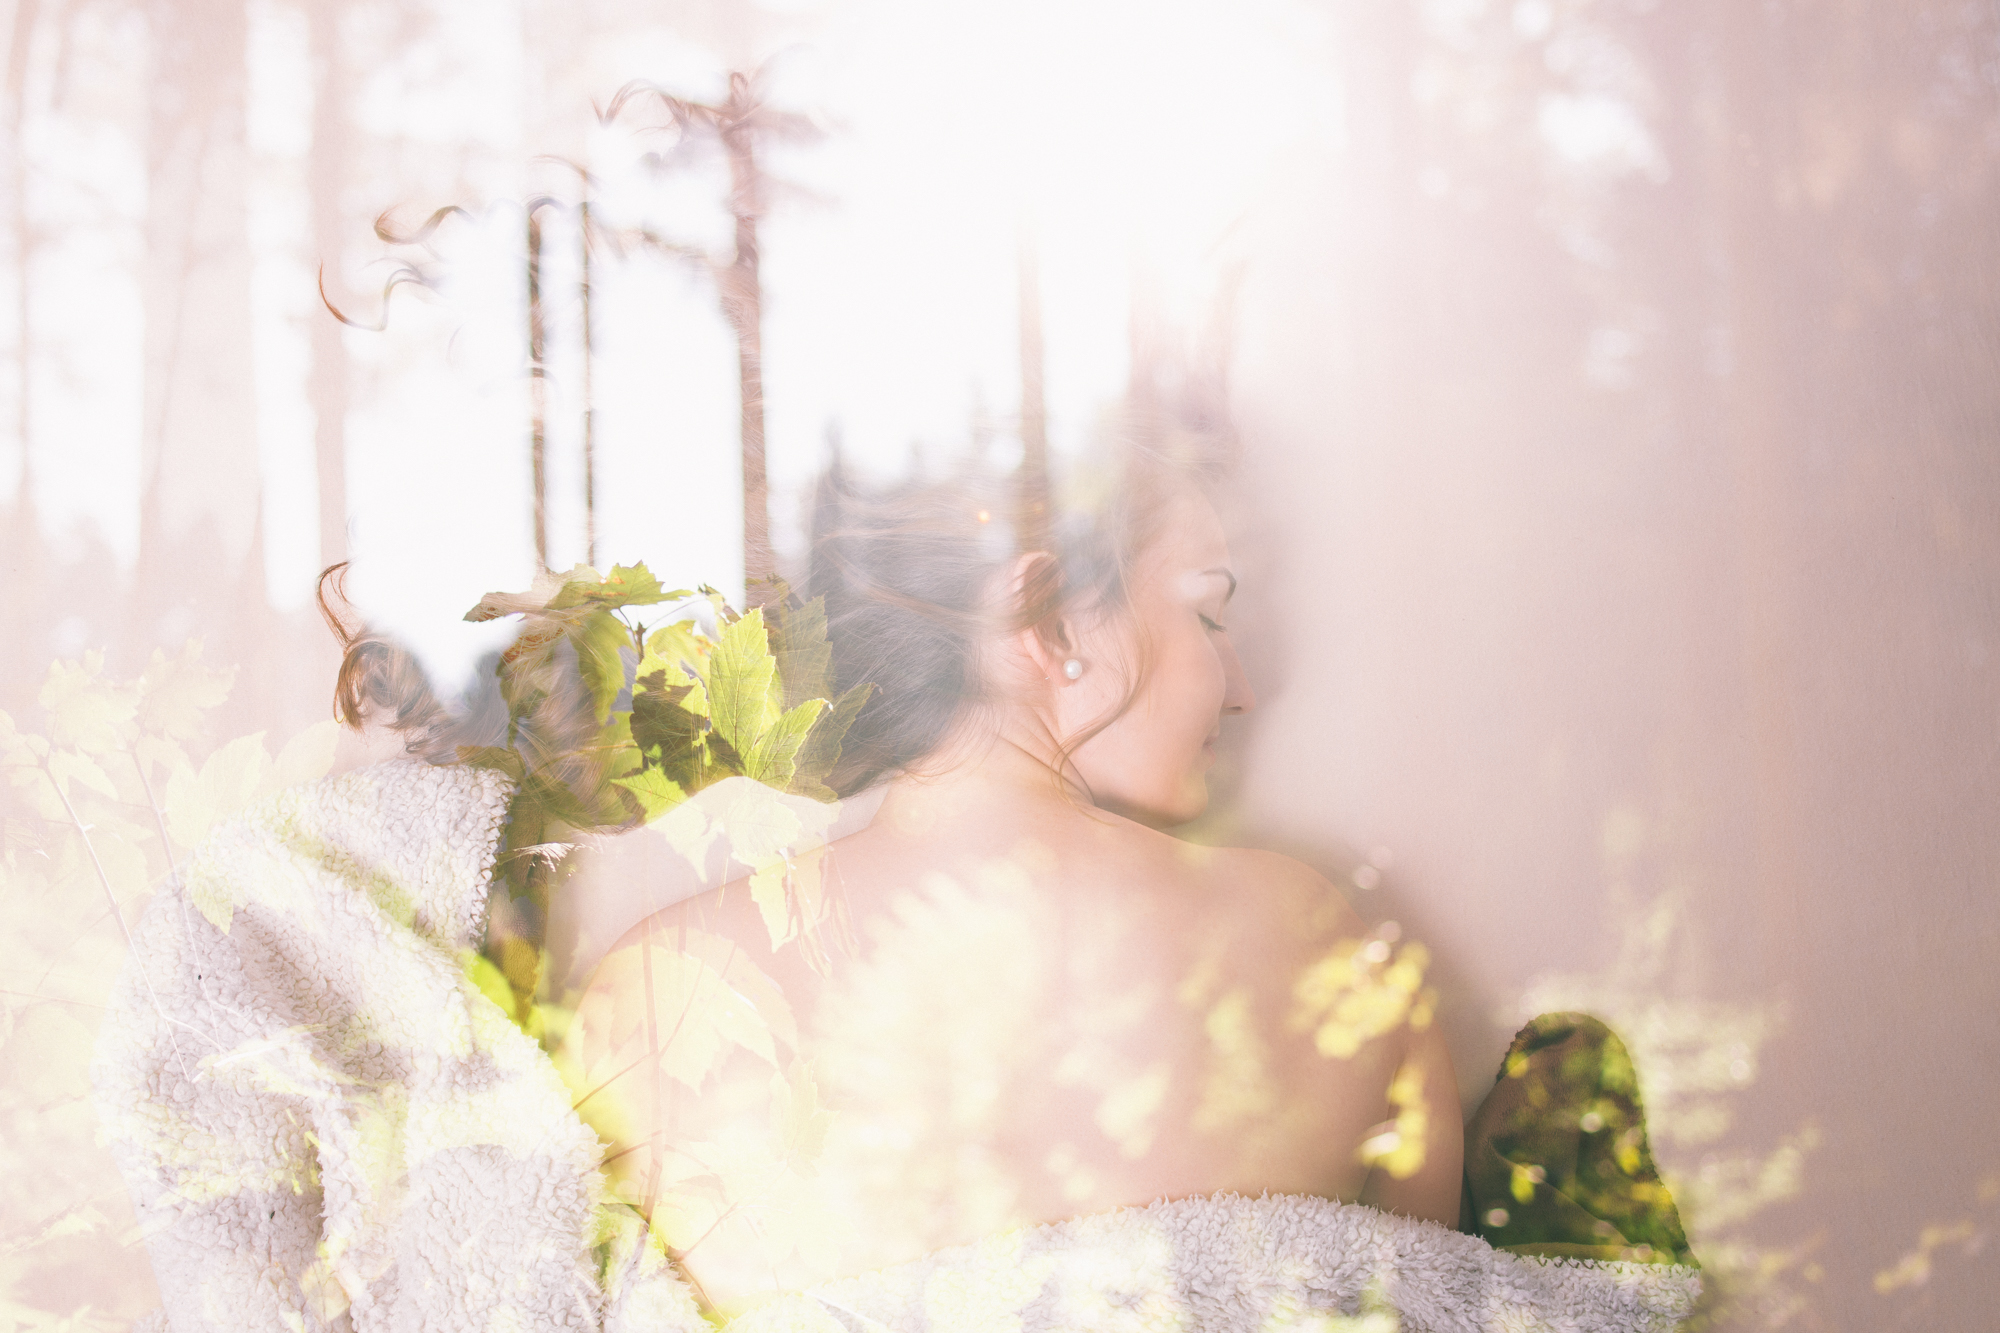
Every single time, it’s hard to transfer the image from your mind to the reality. My most challenging picture was the picture of my best friend Ante. I was inspired by the pictures of “omerika” (https://www.instagram.com/omerika/).

The act of sleeping fascinated me all time because during sleep you solve problems you can’t understand in the real world. During sleep, you can be every person you want. You can be an astronaut, race car driver, a bird and even the doctor (knock, knock. Who is there? Doctor! Doctor Who? Correct. 😛 ) In this picture I wanted to create a symbiosis between a sleeping girl and mother nature. First, I tried to use a tree as a symbol of “mother nature” but then I didn’t like the picture. So I put it away for a few days, and later I decided to use a forest and merge it. It was so beautiful. I love this image.

//


A few last words from the photographer:

Don’t do what other people want you to do. Do what you love and never give up!
“The limits in photography are in yourself, for what we see is only what we are.” -Ernst Haas
Good light and great ideas,
With love, Ben 

You can find more of Ben’s work on his website and Instagram.

//

Photographer interview: Rhiannon K.

Rhiannon K. is a talented photographer from Malaysia whose main focus is conceptual photography. Her self-portraits are emotional and mysterious in unique ways. In this interview, we talk about her favorite artists, what to do with creative blocks, and more. Enjoy!

What attracted you to photography?

When I first started taking photos, I was in awe of how it had the ability to capture and preserve memories. However, as I dived deeper into this hobby and passion of mine – I realized photography has enabled me to create and share a visualization on what goes on in my mind. Photography is my safe haven which I go to whenever I feel the need to express myself.

//

Your self-portraits are incredibly striking. How did you get into the world of self-portraiture?

Thank you so much! I knew photography was something that was meant for me, but I wasn’t quite sure on how I was able to fully express myself with it. I was on platforms like DeviantART and Flickr which helped expose me to the different photography genres. However, it took me 4 years until I stumbled upon self-portraiture which instantly stirred something inside of me that yearned to create more. As a photographer, you capture your perspective of the things in front of you. But with self-portraits, it’s different and it’s slightly more challenging. You are exposing yourself in front of a camera in a way that captures your own soul and emotion and I think that is absolutely beautiful.

Which have artists influenced you the most?

I have a list of artists that I look up to but if I were to narrow it down, I would have to say Brooke Shaden and Alex Stoddard. These two have been my pillar of inspiration and if it wasn’t through stumbling upon their amazing work, I wouldn’t have discovered conceptual photography. I adore how both Shaden and Stoddard have the ability to create stories through their timeless pieces. Each photo that they produce are well planned and creatively executed. The implementation of photo manipulation in their work proves that there are really no boundaries when it comes to creating art. It is just a joy to interpret their work and just like them, I wish my work will be able to inspire another to get out there and create.

//

It’s evident that creativity is one of your strongest skills. How do you come up with ideas for your shoots?

I create photos that mean something to me on a personal level; so I am most inspired by my web of emotions at the time being. If you see through my work, it flows through different stages which reflect a kind of metamorphosis of my life. I tend to take notes of the littlest details around me and try to make sense as to why it builds a certain relevant feeling. It can start off with a poem that I wrote in my notebook and then I’ll go around building an image around it or, I might have a vivid daydream I had earlier that day and I’ll go back to my notebook, sketch it out and write a poem for it. I could also be watching films and feel a certain kind of connection with the plot or a character and be inspired. Every photo is created with the intention of expressing a message or an idea – but it is conceptualized to a certain level of mystery which provides viewers a reason to further explore and interpret the photo.

In addition to being a creative individual, you’re also a very talented retoucher. What advice would you give to aspiring photographers who are new to editing programs?

Be open to the idea of starting from scratch and taking the initiative to learn at your own pace. Don’t limit yourself to following a certain kind of style that you admire but explore a bunch of them and find what represents your work best. You’ll definitely go through tons of trial and error, but the outcome of it will be incredible and worthwhile.

//

When faced with a creative block, what do you do?

I don’t think there is a fixed formula to this except having the constant grounds of being connected to yourself and your surroundings. When you lose this, you tend to lose your true intentions behind what you are doing and that can really affect you creatively. Spending time in solitude helps me gather my thoughts and find a new approach to things. I usually spend it with reading creative self-help books and listening to good music.

If you could meet your favorite artist and ask them only one photography-related piece of advice, what would it be?

Oh, definitely on how they keep themselves constantly inspired and motivated to create! I see some of my favorite photographers creating everyday without fail and I’d love to know what helps them jumpstart and preserve their creativity.

//

In your opinion, what are the 3 most important things a beginner photographer should know?

Firstly, take your time. It can be a very vexatious situation, trying to discover your style. You can spend all week, months, years doing your research on your favorite artists and imitate their creative process. But in the long run, you’re only following another person’s growth and not yours. Which comes to my second point, understand how your mind and soul works. The better you know yourself, the better you can create. After all, your work represents you. Lastly, allow yourself to grow. Embrace the idea of learning and discovering new things everyday – be it a new technique of editing or experimenting with different creative outlets.

Is there a photography genre you’d like to experiment more with?

As for now, I don’t have any photography genre that I’m particularly interested in besides conceptual photography. In spite of that, I would love to include a male subject in my photos. I realized I have never envisioned it because I create from my perspective – so that would be really interesting.

//

What has been the most challenging creative obstacle for you so far, and how did you overcome it?

Acknowledging the fact that I was a creative burnout for a couple of years. I placed more importance towards my education and the people around me. Needless to say, I found myself knee-deep in a creative rut. I overcame my internal struggle through simply spending time alone; realigning myself. Most importantly my goals and aspirations. I woke up the next day with a fresh perspective and eager to create again.

You can find more of Rhiannon’s work on Youpic

Photographer interview: Elliot Tratt

Elliot Tratt is a fine art, portrait, and event photographer who cherishes meaningful ideas and fascinating concepts. Despite his very young age, he has worked for several bands and has successfully captured the many dramatic sides of event photography. His desire to learn, improve, and endlessly persist is inspiring to photographers and other artists alike. I hope this interview opens your eyes, pushes you to try out new photography genres, and motivates you to keep going.

What inspired you to start taking photographs?

I grew up in the household of a photographer, so I must’ve picked up a camera first when I was very young. I always remember spending time with my granddad and him not having a camera on him. So I guess I live with a similar philosophy, always have a camera with me. He first gave me a DSLR on the Christmas of 2014, and from there I have discovered and learned myself to make the best images I can.

//

Your gallery is filled with inspiring conceptual images. How do you come up with ideas for your shoots?

Ideas for my conceptual shots can come from anywhere, from reading a line in a book to a line in a song, to really mundane things like the weather around me. When I am walking home from school, I find inspiration in the smallest and biggest things. I take inspiration from other images and combine ideas and manipulate them to try and tell the best story I can.

What has been your most challenging creative obstacle so far, and how did you overcome it?

My most challenging creative obstacle is inspiring myself regularly with an idea that tops my last idea. I want to develop and I want to grow, so I feel bad when I produce an image and the following image is sub-par. So, I fight mentally to make every single shot I take a bit better than the last.

//

You shoot in many stunning locations. What’s your favorite shooting place and why?

My favorite location is a beach where I shot the band Pattern Pusher. It’s a beach and cliff on the north coast of Cornwall called Strangles. It produces so many perfect different shots and angles. It has large cliffs, a nice beach, a rock arch, and a sea mist which is truly mystical.

You’ve photographed many great musicians. Which band, famous or not, would you love to take photos of one day?

I feel I have already shot the band that I always wanted to shoot most. In fact, I will be doing a promo shoot with them soon. The band is Tiny Folds. They truly captivated me with their music right away and I just had to take photos of them, so when they invited me to shoot their EP release show last year, I went out of my way to make sure I could! This year I have some big acts lined up to shoot, but I feel none of them will have quite the same rush as photographing Tiny Folds.

//

//

Is there a photography genre you’d like to experiment with more?

I have always dabbled with the conceptual portraits, but I have never felt I have truly become involved in the genre. I wish to be able to create such arts like that of David Talley and Kyle Thompson.

What lighting advice would you give to aspiring photographers?

Almost all of my light that I have ever used is natural, with nothing to modify it. I just play with the light that I am given. I love shooting portraits at sunset because the glorious light just before sunset and the light just after it create some of the most incredible back drops.

//

Who are your favorite artists at the moment and why?

When it comes to photographers, people like you, Alexandra Bloch, Emily Moy, David Talley, Kyle Thompson, Adam Elmakias. They all produce the most incredible art in images.

Musically, a band called Pattern Pusher, whom I am good friends with, consistently produce art in their songs. With their new EP coming out soon, I can’t wait to see what art they produce and how they set it out on stage (hopefully with my help). They are planning to make their live shows as artistic as their music, which I’m very excited for.

Your images are very cleverly edited. What’s the best editing advice you’d give someone?

Keep practicing. Practice, practice practice…. and watch Youtube tutorials, they teach A LOT! If you keep editing and pushing yourself each time and keep doing things that are a little out of your comfort zone, you get better. You just have to keep going at it, even if it does get a little hard or it doesn’t look right.

//

What, in your opinion, is the most important thing a beginner photographer should know?

Similar to what I previously said, practice is the key thing. Sometimes images will not come out as you imagine and sometimes they will just look bad. But you need to keep going, even through the hard and bad images, because eventually, you will make gold. It will make you proud and keep pushing you to make gold time and time again, and that will always keep you going. Strive to produce the best you can and you can’t go wrong!

Check out more of Elliot’s work on his Facebook and website.

Photographer interview: Ines Rehberger

Ines Rehberger is a very talented portrait photographer from Germany. Her photographs possess raw beauty, honesty, and an infinite amount of stories. I had a chance to ask her about the value of lighting, her working process, and more. I hope Ines’ outlook on life motivates you to believe in yourself and look at life from a different perspective.

What inspired you to start taking photographs?

I grew up being an art-focused child. I loved to draw and paint. But it never fulfilled my aim to show who I am inside. I wasn’t able to make myself happy with what I did. So one day I grabbed my mom’s pocket camera and started taking pictures of friends and myself and since those days I never stopped. Photography opened a world of endless possibilities to capture my soul, to create worlds and transfer feelings.

//

Your portfolio is beyond stunning. Which photograph of yours is your favorite and why?

Thank you so much! Since I’ve been taking pictures for many many years it is really hard to pick a favourite. It also depends on my mood. But as I’m sitting here, feeling kind of Scotland-homesick I have to go with this one featuring my host mom Therèse:

//

The quality and creativity of your images are extremely impressive. What does a typical portrait shoot consist of?

You’re making me speechless! Thanks again! Well, usually I welcome the model at my home and we have a chat and maybe a tea and talk about ideas and choose some outfits. My shootings are very spontaneous. Whatever happens, happens. And most of the time I’m happy about it.

Every person you photograph possesses raw honesty and such touching emotions. How do you make your subjects comfortable during a shoot?

To me, it is very important to talk to the model like I talk to everyone else. I don’t treat them like clients. I want to get to know them and in the same way, I tell them about myself. Once there is a state of trust it is quite easy to tell someone what kind of emotion I’d like to have for a portrait.

//

Your relationship with light is phenomenal. What lighting-related advice would you give to an aspiring photographer?

I’d tell her/him to go and try as many light situations as possible. Natural light, as well as artificial light. There are so many ways to create beautiful light situations without having to spend money. I personally love to use mirrors to reflect light or use a flashlight through glass. Car lights and traffic lights also create amazing effects.

You’ve shot so many interesting people. Is there anyone you dream of photographing one day?

Sometimes I dream about taking pictures of celebrities like Lana Del Rey or Benedict Cumberbatch. Some people say: dream big, but at the moment I like to take pictures of the people I trust and love the most and in my opinion, they are just as interesting as celebs.

What has been the most challenging creative obstacle in your life so far, and how did you overcome it?

I actually just overcame it. I was really struggling with my work. I still like my old style of photography but it came to a point that I realized it wasn’t what I truly wanted to do. I felt like I was simply taking the pictures people expected me to take. I took a rather long break and came back as motivated as I used to be. Now taking pictures became a rare thing for me but it is more intense than ever before.

//

If you could visit your past self, what art-related advice would you give her?

Always trust in art. It will never let you down.

Most of your photos are accompanied by intriguing titles (such as “lumen” and “in winter when I bloom”) which deepen the value of your photos. How important are titles to you and why?

Titles can be important. There were times I wanted to title every series and every portrait I took. With time they became less important to me. Sometimes I want people to find their own stories and ideas for my pictures.

//

What 3 tips would you give to a beginner in photography?

1-> Believe in yourself
2-> Be yourself
3-> Take your camera and go outside and take pictures of random things and love the possibility to freeze anything you want in time. You’re a magician!

You can find more of Ines’ work on her Flickr and Facebook.

Finding the Perfect Backgrounds for Your Photographs

There is always an element in photography that you have to think about with every subject, and that’s background. This is true in still life, product, fashion, portraits, and even landscape. There are a few background choices for each of these different types of photography. A background can be a wide array of buildings, walls, floors, color, landscape, greenery; the sky is the limit (literally.) It is always a good idea to know what to look for while location scouting as well.

Finding Backgrounds

A lot of your background detail also has to do with your depth of field. You can either control your background with a blurred or sharpness by a shallow or deep depth of field, depending on your subject matter. A shallow depth of field is popular in portraits, so your subject is your main point of focus. You can use a deeper depth of field though to enhance your background clarity and texture. Keep your subject away from the background and not right up against a graffiti wall and tree, this is because these textures and colors can be too distracting. Shooting your subject in wide open spaces with a shallow depth of field and will give you the ability to have a subtle background of light colors and textures. Graffiti is a great example for this because it is a popular choice for a fun and colorful background but can also become a little distracting to your subject so by shooting your subject away from the background you can still gather the color and design without too much detail. Other background choices that you can use the subtle color, texture, and pattern are brick walls, wallpapers, and colorful doors. Think about the landscape in your image too and the great environment you are located in.

Finding Backgrounds

finding backgrounds
finding backgrounds

A variety of angles can also help your background choices. If you are shooting down on your subject you can use various lines on the road, grass, or any other greenery around or even just the texture. Shooting forward onto your subject will give you space and environment area that you are in. Shooting up on your subject can make you a viewpoint of the sky, clouds, or anything else above your subject matter.

finding backgrounds

Finding Backgrounds

Food and still life photography gives you an excellent array of choices with colors, textures, and backgrounds and offers a great way to be creative. You can even make your backgrounds using various woods and papers. Another background choice for smaller subjects is scrapbook paper from your local craft store where you can purchase paper patterns that look like wood, marble, and other surfaces that you enjoy.

finding backgrounds

There are some things you will want to avoid in your background. By using these guidelines, it will help you avoid distractions from the subject of your image. You usually want the brightest point of your image to be your subject; this means that you will want to avoid brighter highlights in the background or colors that could be distracting such as bright oranges, neons, etc. Poles and tree branches are common objects that can get in the way of a great photograph and something you want to avoid, especially when shooting portraits.

If you are having a difficult time finding the right kind of background texture and color you can always Photoshop out your background and replace it with a new background. There are many Photoshop actions, and Lightroom presets to help you achieve this. This is also where green screen photography comes in handy. A green screen can help you knock out the background easier to replace it later on. This color is used because Photoshop can read the color much better to separate from your subject in post editing.

Finding backgrounds

When we are talking about the background, you always want to consider foreground as a factor in your photography. The foreground is a great way to bring depth into your image and also a good use of framing. You can achieve this by setting objects in front of your still-life images. Use trees or greenery in the foreground with a shallow depth of field, or any other creative factors to frame your image. If you find your foreground is too sharp in your image and becomes a distraction you can always blur this in post-production.

finding backgrounds

10 Tips that will help you prepare a yoga photo session

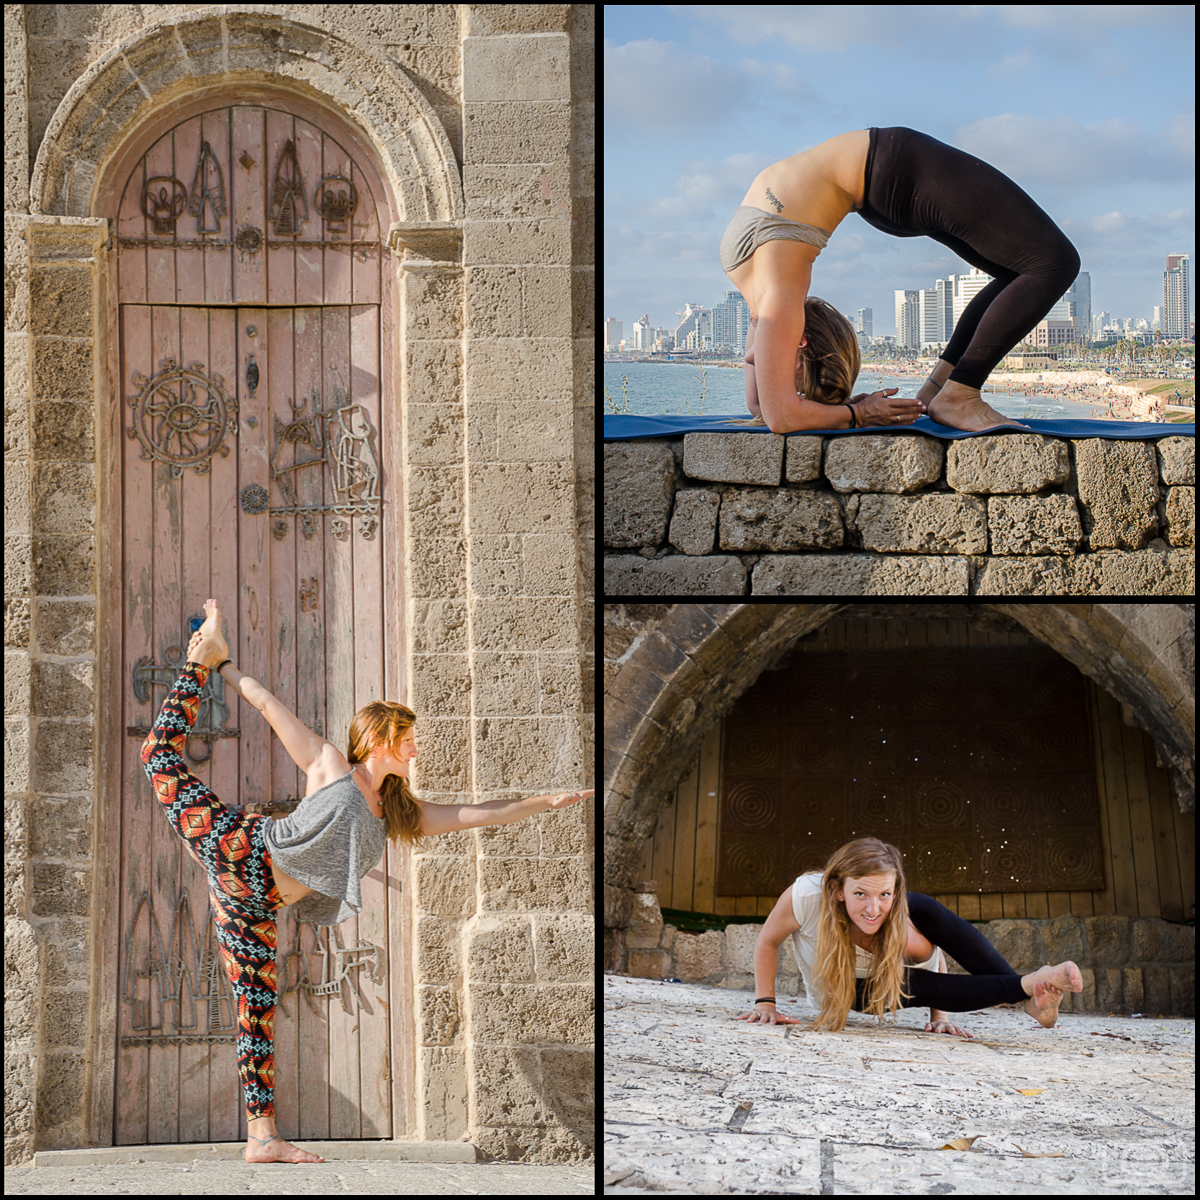
Yoga is an ancient eastern discipline that is getting more popular every day in western countries. Yoga combines physical, mental and spiritual practices that help to improve the well-being of the practitioner. My personal story with yoga started four years ago when I decided to take some classes. It was a life-changing experience, not just because of the benefits I got for my mind and body, but also for my career as a photographer. A friend that is a yoga professional asked me to take photos of her in different yoga postures (called asanas) because she needed them for her social media channels and accounts (to promote herself). This is how I got into yoga photography… and I love it!

yoga photo session
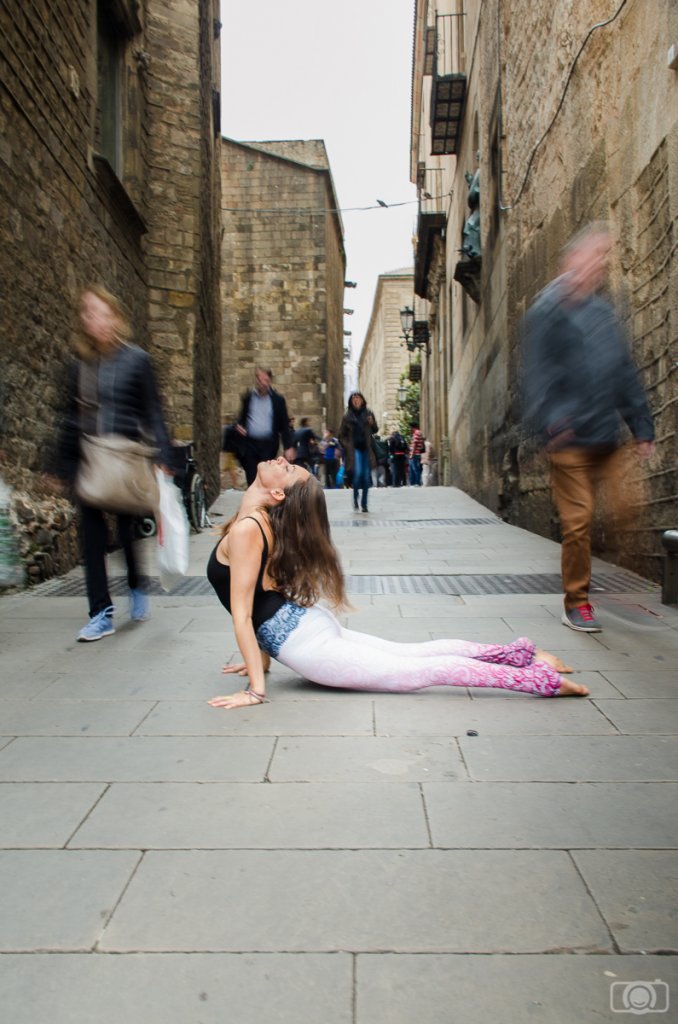
My friend Nita was the one who asked me to do my first yoga photo session. This photo was taken at our last photo shoot in Barcelona.

If you also want to get into yoga photography, first of all, you need to know how to get ready for the photo sessions. Most of the preparations I do for this type of sessions are the same as for another kind of portrait photography. You might be interested in checking my “A How-To Guide on organizing a portrait photo session” to learn in more detail how to get ready. However, there are some special things in yoga photo sessions that are handy to know beforehand.

#1 Get inspiration from yogis on social media

Some yoga professionals have a great social media presence. You can find them on Facebook, Periscope and of course…Instagram! In my opinion, Instagram is one of the best sources for yoga photography inspiration. If you follow some of the great yogis you will have an idea of the trends in the field. The list of yoga professionals you can find on Instagram is endless. Some of my favorite accounts:  kinoyoga, yoga_girl, beachyogagirl, nolatrees, carlingnicole, patrickbeach, dylanwerneryoga. And last but not least, the Instagram of my dear yogi friends: reinodenita and lilatotheworld.

Ask your yoga model if she/he has something in mind. Probably she/he is also following other yogis and can provide you a list of asanas she/he would like to try. However, do your own search to increase the variety of options.

yoga photo session

#2 Get familiar with the asana’s names

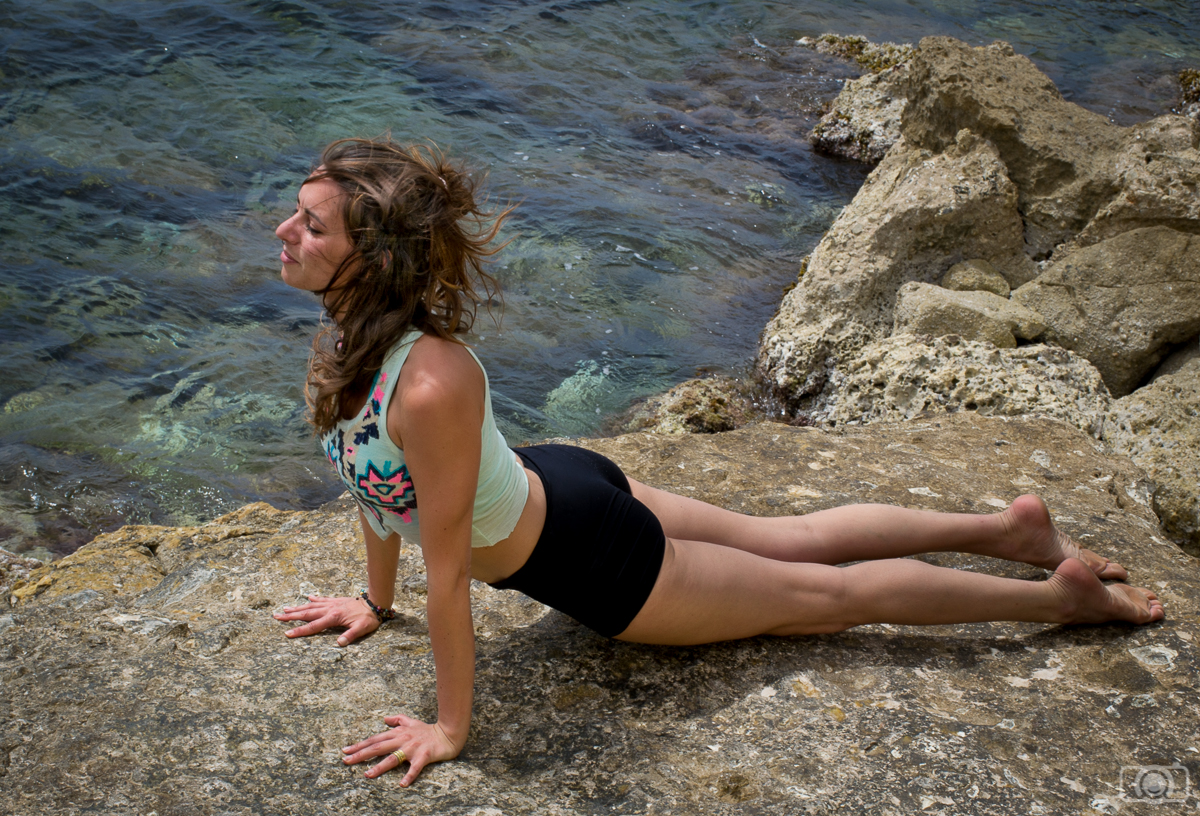
Asana is the name that yoga postures receive. They have names in Sanskrit, such as “Urdhva Mukha Svanasana”. But don’t worry. You won’t need to learn Sanskrit to be a yoga photographer. All the postures have translated names in English. For example “Urdhva Mukha Svanasana”  is also known as “Upward-Facing Dog”. Easier, right?

yoga photo session
This is how the asana “Upward-Facing Dog” looks like.

You will get familiar with these names while you are doing your inspirational searches. You can also make yourself a list of names with the corresponding asana posture and take it with you to the photo session. Having an idea about yoga terminology will make it easier for you and your model to communicate and convey your ideas during the session.

#3 Divide the asanas by categories

If you take the list of postures with you to the photo session (like I do), you should have them classified in a way that makes sense to you. This will help you to be more efficient. To find an asana in a big list can get really complicated, especially when your model is waiting for you to tell him or her what to do next!  I usually divided them by standing positions, sitting, inversions, bridges, arm balances and so on

yoga photo session

#4 Take photos from all the asana categories

Having the asanas organized in several categories has another advantage: you can make sure that you pick asanas belonging to each category and be certain that you have a good variety of photos. Your yogi model would love to have such a variety of photos!

yoga photo session
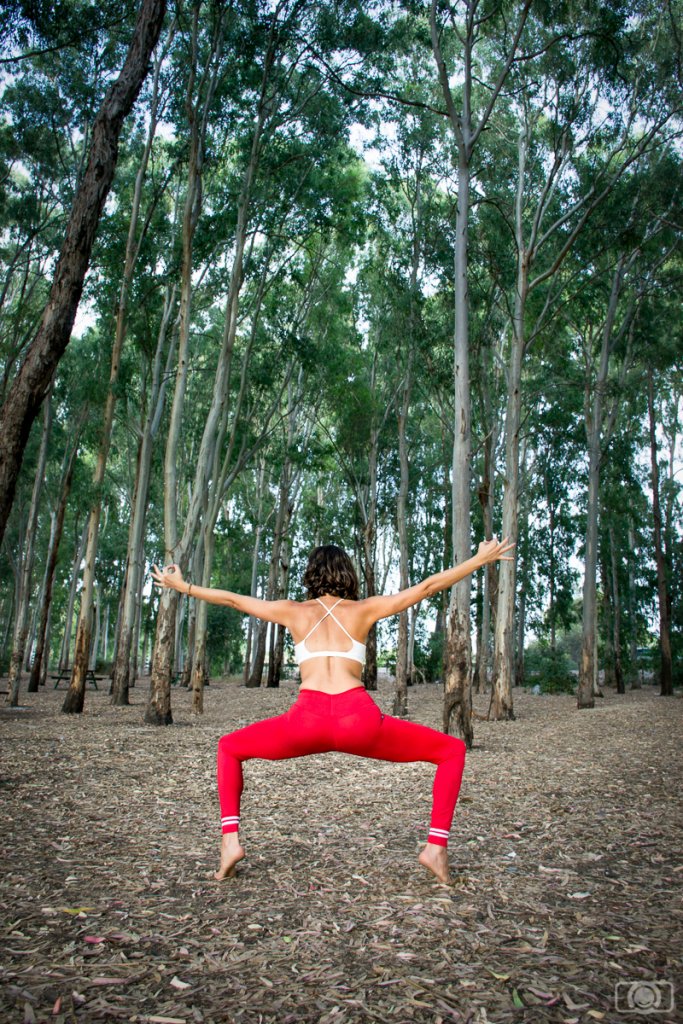
Diversity is always good in a yoga photo session and one way to achieve it is by taking photos of asanas from different categories: standing, bridges, and arm balances are just some examples.

#5 Get close

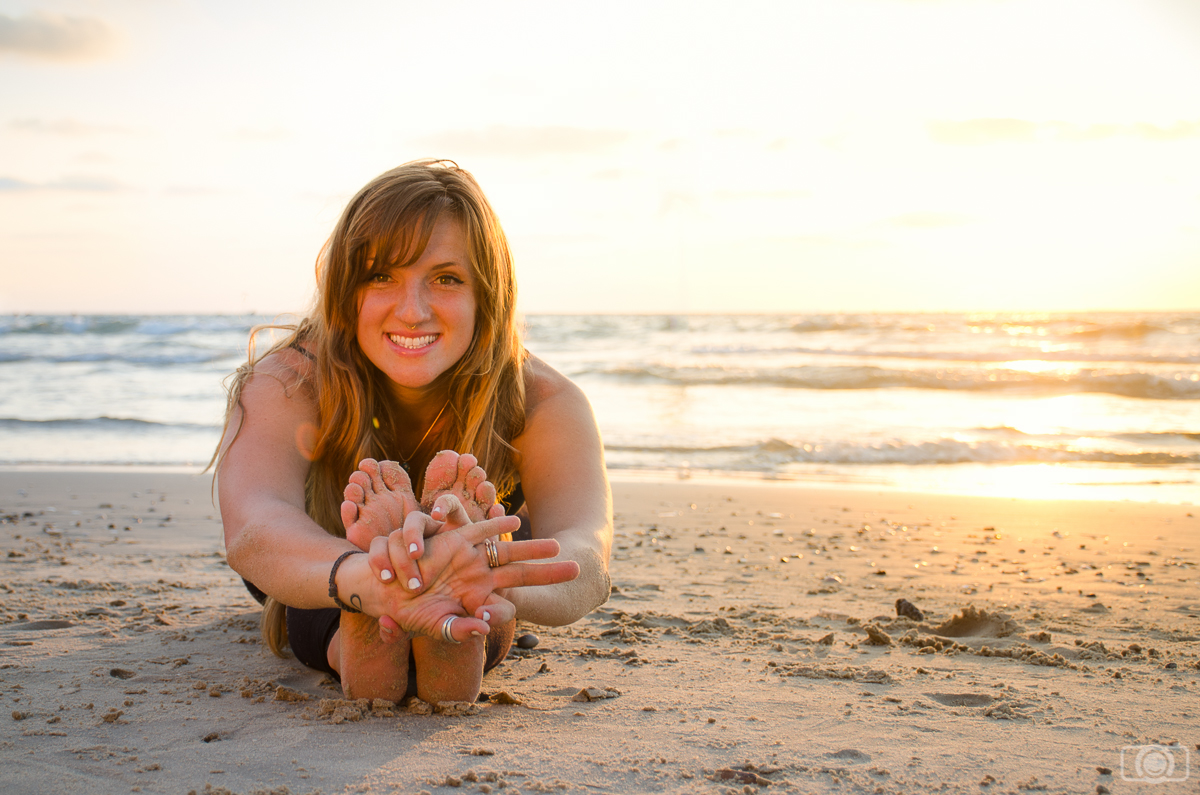
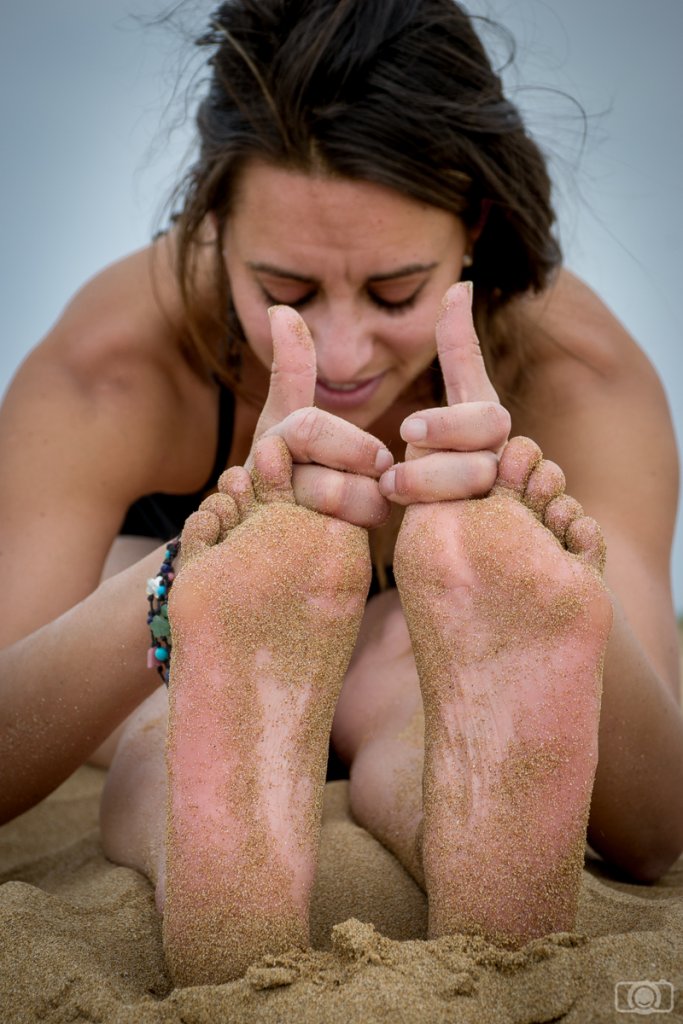
The whole body is included in the asanas. However, getting close to your model and take photos of just specific body parts can add new perspectives to your images. Hands, feet, back… play with your close ups and you will be surprised by your results!

yoga photo session
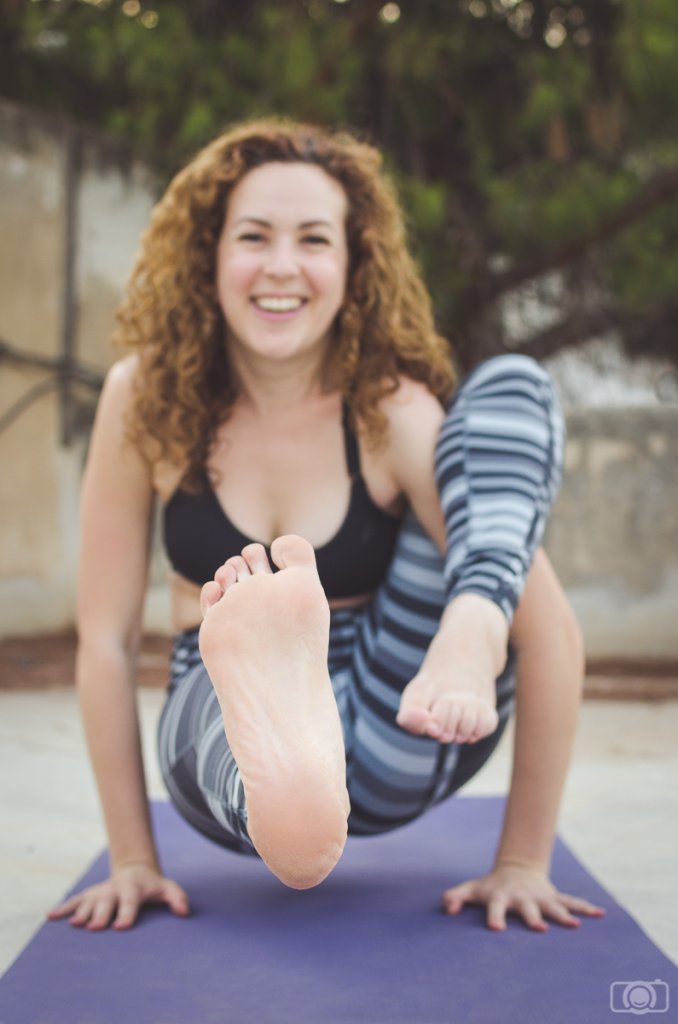
Feet are a photogenic subject in yoga photography.

#6 Clothes matters

Yoga is not about fancy clothes. However, clothes are important for the photo session. First of all, having several outfits will add variety to the photo session, so it is always a good idea. It is also possible that your model is promoting some brand. You should make sure to get photos of all the clothes he/she is interested to be photographed in.  In any case, you should include time for changing outfits when you plan the schedule of the photo session. You should also think how/where the yogi model will change the outfits. The solution for this will depend on the location of the photo shoot; if it is held in an urban environment maybe you should contact a local clothing store and ask permission to use their changing rooms if it is held outdoors perhaps you should bring with you a tent…

yoga photo session

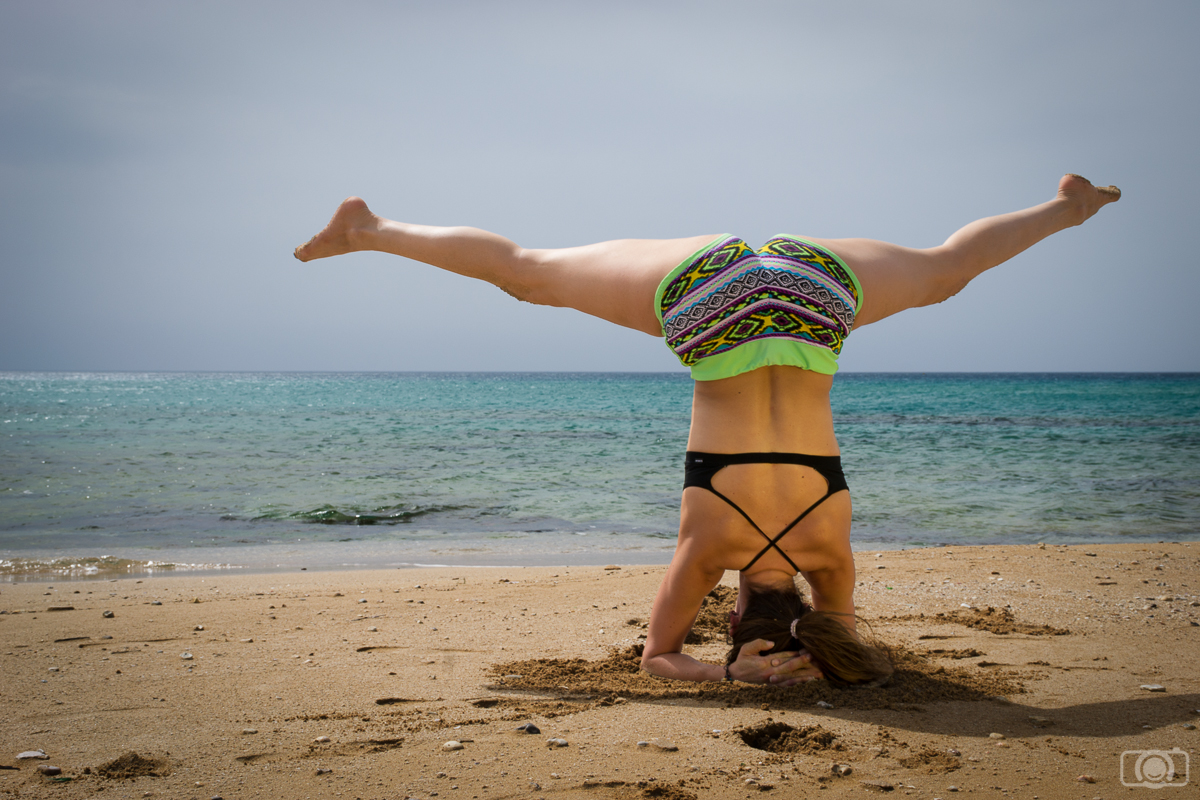
I also recommend you to tell your models to choose the outfit wisely, especially the underwear. They are going to be moving all the time and sometimes they are going to be upside down. They need outfits that stay perfect in all these different positions. Also, the last thing you want in your photos is underwear coming out. Or if it does…it needs to be a beautiful one! If you don’t want to spend hours on Photoshop retouching clothes, take care of these details during the photo session.

yoga photo session
Underwear might show up especially when the model is upside down. Here you don’t see it because I clone it out using Photoshop. You can save a lot of editing time by taking care of the clothing during the photo session.

#7 Give the model time to warm up

Yoga asanas are demanding. It is dangerous for the model to start with the yoga positions without warming up. Make sure they have enough time to do it in order to avoid injuries right before or even during the photo session. You should also make sure your model doesn’t get cold during the photo session, especially in between postures. Remember, for them, it is also a workout, they sweat, and between postures they can cold really fast!

yoga photo session
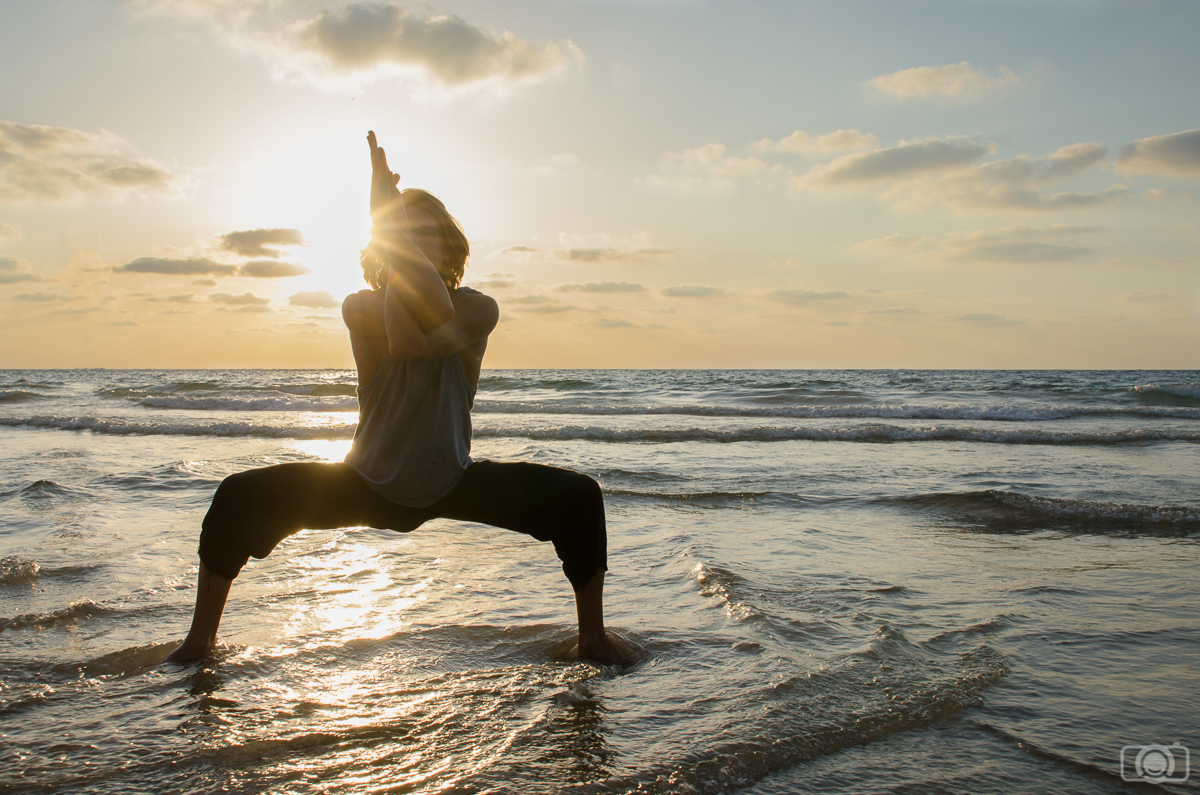
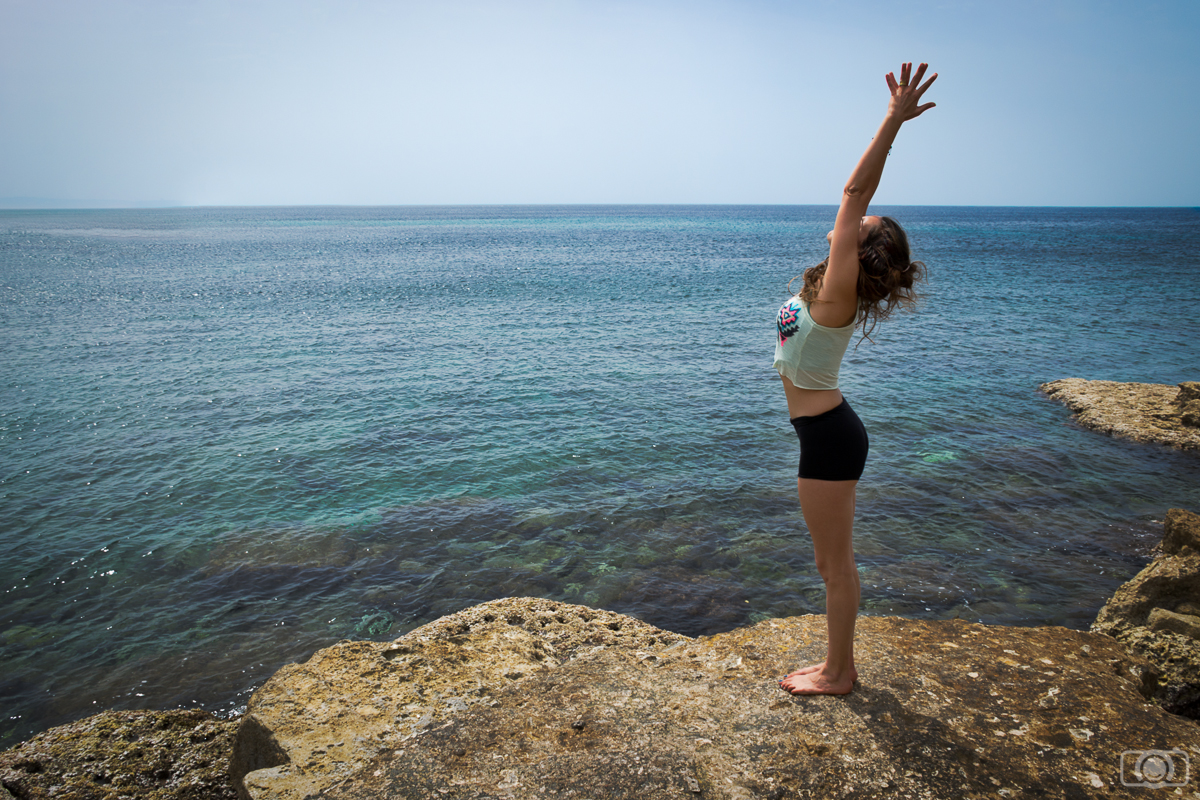
Sun salutation is the name given to a sequence of postures that yogis often do at the beginning of the practice to warm up. Here one of the asanas that belong to this sequence.

#8 Decide when to do the complicated postures

Some asanas are more demanding than others for the models. It is always good to ask them when they prefer to do them. Some yogis prefer to do the hardest positions at the beginning of the photo session because it is when they feel fresher and stronger. Other prefers to leave them to the end either because they need to warm up and stretch first, or because after these hard asanas they won’t be able to do anything else. You need to adjust the photo session to their body requirements.

yoga photo session
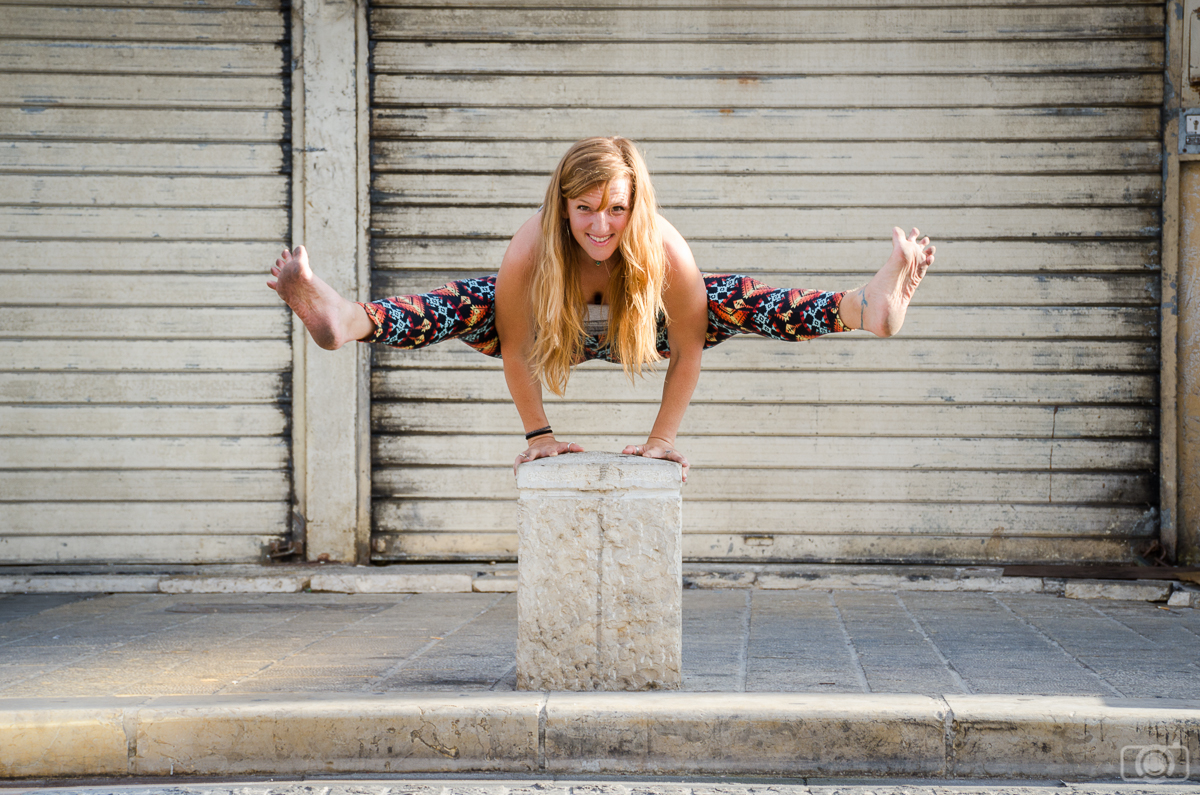
No doubt this is a quite demanding posture!!

#9 Never push your client to do something (even if it seems easy)

Some asanas might seem easy when you look from the side, but they are not. In these cases, it is especially easy for you and/or for your model to get carried away in an attempt to get the perfect photo. You mustn’t let your model lose the awareness of their body and their limitations! If they push themselves too far it can end in serious injury. Be respectful and if they tell you that they can’t do something (even if it seems easy to you), believe them. The safety of your model is the most important thing, not the photos. Anyway, there are tons of other asanas, all of them are beautiful!

yoga photo session
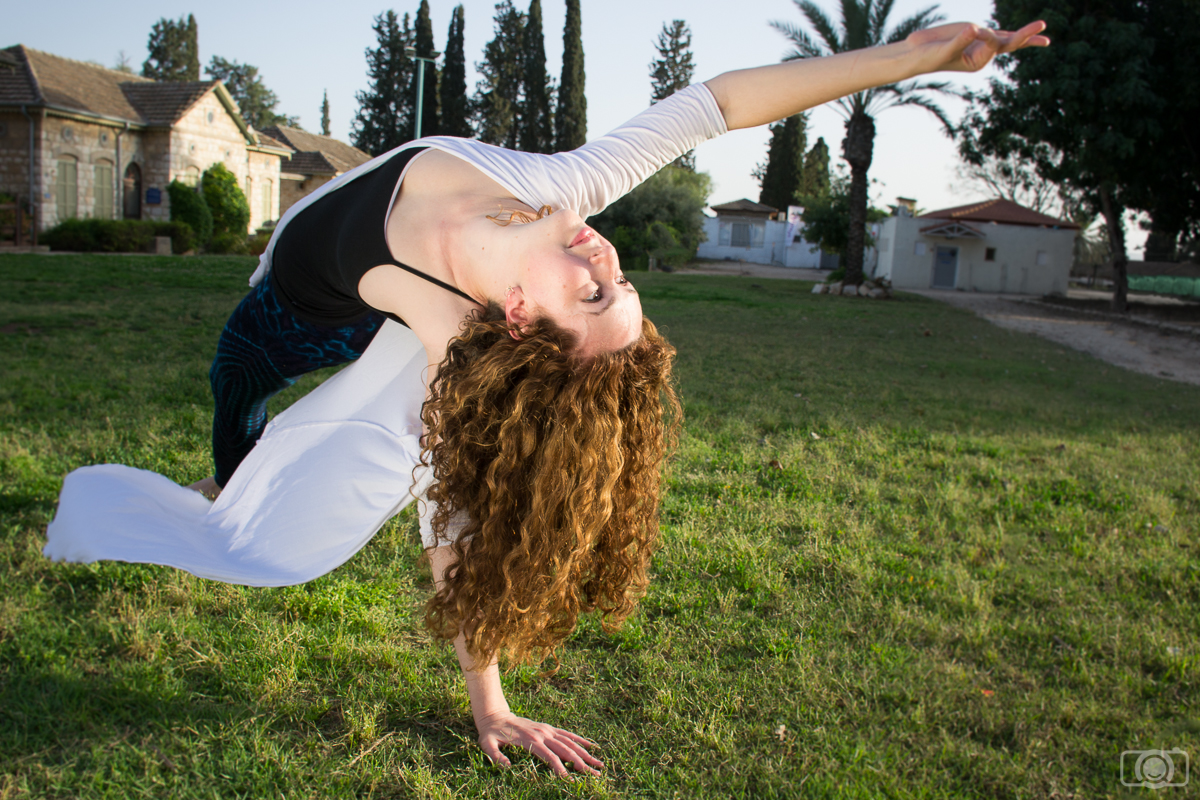
This posture might seem easy but can end up in a back injury

#10 Go to a yoga class before the photo session to get a feeling

Participate in a yoga session! I’m not telling you to become a yogi now (it is entirely your decision), but yoga is easily available for everybody and there are a lot of yoga studios everywhere. You should attend a class in order to get the yoga feeling and understand where your model comes from and what he/she has to deal with. This will make you a much more empathetic photographer. It is always a good thing to improve the model-photographer relation!

yoga photo session

I hope these tips will help you on organizing your yoga photo sessions. Feel free to contact me with any question you might have. I will be happy to help you! I would like to thank all my yogi models for giving me the chance to become a yoga photographer! Nita, Ashley, Ami and Inna… you are amazing! Namaste!

How to handle photographer’s anxiety before a photo session

I don’t know about you, but I always feel anxiety before a photo session. It is a strange feeling because on one hand I love photography and I am happy about booking photo sessions. On the other hand I suffer because all kind of fears come to me: Am I going to do it well? Is the client/model going to be happy with my photos? Maybe I am not good enough! OMG!! Sometimes I feel like I am boycotting myself. Luckily my passion for photography is stronger than my fears and for that reason I looked for strategies that help me to handle my pre-photo session anxiety.

photographer’s anxiety
Learning how to handle your photographer’s anxiety is crucial for developing yourself as an artist and professional.

Invest time on preparing the photo session

There might be photographers over there that are able to do great photo session without or just a little of preparation. Not me. I know that if I don’t prepare the photo session in advance my anxiety will be unbearable and I won’t perform well as a photographer when the moment of shooting arrives. I found than investing some time preparing the photo session makes me feel much more confident and in consequence my anxiety diminish. The first time I prepared a photo session took me a lot of time. But then I developed a protocol and now I enjoy getting ready for a photo shoot and doesn’t take me so long.  You can have a look to my How-To Guide on Organizing a Portrait Photo Session to check how I prepare everything and get some inspiration.

photographer’s anxiety
Investing time preparing your photo session is a great way of reducing the photographer’s anxiety: when you know you are ready, things looks easier!

Do the must-have photos first

I always recommend working on the poses before the photo session. You can create a list of poses and have it with you in the photo session (printed or in your phone/tablet). Put first in the list the must-have photos. This is a great strategy to reduce anxiety because you won’t need to be all the time thinking if you took all the important photos or if you forgot something. You just do the important photos at he beginning and then you can relax and be creative.

photographer’s anxiety
I always do the must-to-do shots first. In this photo session my model needed to have photos with props (the necklace was one of them). We did first a series of photos with her props and then we moved to more creative images.

Learn from your previous mistakes

Yes, we all make mistakes, even the super pro. Understanding this simple statement was difficult for me. I don’t like making mistakes. Especially if my clients are involve on them. Just thinking about the possible consequences of our mistakes might paralyze us and make us fell self-conscious. This feelings won’t help when you are with your client/model and you need to direct them and look professional. They will notice you don’t trust on yourself and they will feel uncomfortable about it.  I needed to meditate a lot about mistakes. I finally understood that the best thing I can do in order to develop myself as a photographer is trying to do always my best (because my clients deserve it) and if a mistake happens, solve it with a professional attitude and learn from it. Mistakes will happen and they will be hard and painful. However, they are a natural part of any learning process. The important thing is that you learn from them and don’t repeat them again. Mistakes can help you to growth as a photographer and as a professional. Accepting this was a big step for me.

photographer’s anxiety
I had a lot of mistakes along the way. Some of them are big and other small. The important thing is to learn from them. In this yoga session I didn’t put much attention to the hair of my model (Nita from Nita’s realm) and it is difficult seeing her face. This was a mistake and I learnt. Now I am always checking that the hair is ok before taking the photo.

Schedule some relaxing activity the day before the photo session

I do all the photo session preparations enough time in advance to be able to relax a little. I know we are all busy. But I have found myself preparing my equipment for a morning photo session in the middle of the night and believe me…. This didn’t help me to diminish my anxiety at all. Since then I arrange my schedule in order to have my equipment ready early enough to be able to relax doing some kind of activity I like. Personally, I like doing yoga, meditation, running or going for a hike. But this depends on your taste. Maybe you prefer reading or meeting with a friend. It is up to you! But take this relaxing time seriously enough to include it in your schedule. It will help you to recharge your energy and clear your mind. You will handle the photo session with a more positive attitude and much less anxiety.

photographer’s anxiety
Meditating is a good way to reduce anxiety.

Eat healthy and don’t drink so much

Don’t misunderstand me. I love going out for a beer or a wine with my friends. But the night before the photo session I prefer drinking something alcohol-free just because I want to make sure that I won’t have any headache in the photo session. I also try to eat healthy because if I eat heavy food that is hard to digest I usually don’t sleep well and next day I feel deadly tired. If you are like me, the day before the photo session eat something light and drink alcohol-free beverages. You will notice that you wake up in a good mood and with energy to handle any photo session

photographer’s anxiety
Eat a good amount of fresh vegetables and fruit the day before the photo session is better than eating food that is difficult to digest

Sleep enough hours

This advice goes in the same than the previous one: if you don’t sleep enough hours you won’t have enough energy to deal with all the little problems that a photo session might have. In fact these little problems will look like huge problems because you will feel too tired to solve them. Make sure to sleep enough hours and be rested for the photo session.

photographer’s anxiety
Coffee can help you when you didn’t get a good sleep, but it is not the best solution because too much coffee can also increase your anxiety levels. Instead of drinking liters of coffee try to sleep enough hours the day before your photo session

Breathe

If  at any point during the photo session you start to feel too anxious and you start breathing to fast, try to slow down. Take a 5 minutes break in the photo session, go to a calmer place and breathe deeply. Breathing exercises (http://www.mindbodygreen.com/0-4386/A-Simple-Breathing-Exercise-to-Calm-Your-Mind-Body.html) can calm the nervous system and reduce anxiety.

Are you also feeling this photographer’s anxiety before a photo session? Do you have a technic to handle it? Feel free to tell me about your strategy or anything else in the comments below. Have a happy photo session!!

Nature Photography Next To Your Home: Finding Beauty

I did a degree in Biology because I am in love with the environment. I needed to study plant and animal physiology, ecology, genetics… I was always surprised about the complexity of life.  As living beings, we are made by infinity of diverse molecules, each one with a specific function. Millions of chemical reactions are happening all the time to keep us alive. We interact with other living beings because we are all connected somehow by complex ecological networks. It is kind of a miracle that all these things are going on (and they actually work!!) without us even realizing.  Nature is wise.

Nature photography in pink
Even the smaller flower is much more complex that it seems at the first sight.


My fascination for Mother Nature combine perfectly with photography. I love taking photos of living beings such as trees, plants, flowers or animals. I do it all the time. Sometimes I go in trips to wonderful mountains, the desert or to the forests. These are all places that we usually recognize as natural. However, I don’t have the ability for travelling all the time. I work in a laboratory and I need to stay around it in order to accomplish my duties. Does this fact stop me from taking nature photography? Not at all. Because in my opinion, nature is not sitting only in faraway places. I am not the only one thinking that way. Emma Marris (environmental writer and reporter) redefines nature saying that it should not just be about pristine wilderness but also about the untended patches of plants growing in urban spaces. So here you have it.  Nature is next to us, even if we live in a city. Keep reading and I will give you some tips for finding nature photography opportunities next you your place.

Become a nature hunter

Do you think that your city is way to grey and full of cement? I am sure you are right. But I am almost sure that if you change your perspective about the place you will able to find some nature around you. Are there trees in the streets? Does your neighbor have some plants in the balcony? Is there any park nearby? Go out and try to look at the city with a new perspective. Become a nature hunter. You will find something. I will explain to you something that happens to me quite often: when I go out for a walk with some friends, I am always pointing out nature-related things. I ask them: “Have you seen this tree? And this flower? What about that cat?” The most part of the times their answer is “No, I didn’t notice them”. It is a matter of perspective. If you put your attention into nature, you will find nature.

Forgotten nature photography
Nature is there. You just need to change your perspective. Lots of people walked next to this little leave and they ignore it. They were too busy, running to arrive to their destinations and talking in the phones. I saw the leave because I was looking for something nature related. And I found it.

Think in seasons: what can you find each time?

Nature is everywhere, but this doesn’t means that it always keeps the same. Nature follows the rhythm of the seasons. Each season you will find different things. Knowing what is it possible to find and when will be very helpful and will save you some disappointments.

Nature photography in autumn

Part of the beauty of season is that they are completely different between them. For example, autumn is a good time to take photos of fallen leaves. They are quite photogenic.


Nature photography in spring
Spring has a total different vibe. You might find flowers and even some fruits.

Focus in the small

When we look at huge buildings or roads we might get discouraged. But don’t worry!! Here we are not talking about landscape photography. Instead of looking at the big picture, try to look into the details. Are there any plants or trees? Maybe there is a flower hidden somewhere. You need to get close. If you like macro photography, go for it! But you don’t need it. I take my photos without going into macro lens and it works well for me.

Focused nature photography
If you just see the big picture you might be losing a lot of chances for a good photo. This is how the big picture looks like. Beautiful? Not so much. But have a look inside the red circle.


Hidden nature photography
This is what I saw when I switched from looking at the big picture into looking for details. Nature likes to hide the best shots.

Keep it playful

Remember to have fun. When you are enjoying an activity you have more chances of success. I am always happy when I find nature in the middle of the city mess.

Nature photography close to your place
Taking nature related photos always makes me happy, especially when I am in the city. It might sound crazy, but when I get a nice nature shot in the middle of the city I feel that I still belong to some ecosystem and that not everything in life is made out of cement or metal.

I hope I encourage you to try some nature photos in your city!  I will be happy to know about your experiences. Feel free to share with me any suggestion about this type of nature photography! Have a happy shooting!!
5 Photography Assignments To Become a Better Photographer

I’ll be the first to admit, I hated school. I hated the structure and the monotony. I would have much rather completed the work on my own time, preferably outside. In any case, I actually do miss school now. I’ve since learned, thanks to Gretchen Rubin’s Better than Before, that I respond best to external accountability. I do need a certain structure and accountability partner to keep me on track, otherwise, I will easily fall off and walk away from the challenge. This is why I am constantly taking classes or reading books which layout assignments in photography.

160815PhotoPlaybook

One of the more fun resources I’ve found for this is Aperture Foundation’s The Photographer’s Playbook, which outlines 307 assignments and ideas from photographers around the world. Some are concrete, some are conceptual. But they all will make you think and look at a subject in a different way. I understand it is not new, but I often refer back to this book, either when I feel a lack of motivation, or just as a source of inspiration as I begin a new project. Below, I’ve outlined 5 of my favorite assignments, for those who have not had a chance to read the book or are simply looking for a fun project. I feel my photography has improved, I’d love to hear how the assignments work for you.

selfie-portrait-picture-photo

Photography Assignment #1: Take 1 Photo/Day for 7 Days

This assignment is based on Michael C. Brown’s assignment in The Photographer’s Playbook. He urges the student to take one photograph per day for 7 days in a row. The exercise will leave the student with not only a better understand of their week, but of themselves. They will learn what is truly important to them, and what they should be focusing on. In photography, we often take assignments that have us telling a story which is not our own. Here, the only story we tell is our own. Our own experiences of the past 7 days, and we can understand what stands out as important to us. Do this assignment, and see if another photographer can join you. After completing, get together and review the images. Offer critiques. You will learn a lot about the other photographer from these images.

pexels-photo

Photography Assignment #2: Take A Trip

This assignment is based on Todd Hido’s assignment in The Photographer’s Playbook. He tells students to take a trip, somewhere new, whether close or far and just go. Don’t plan anything out, just buy the flights. See where the character and emotion of the city take you. Start to brainstorm story ideas as you spend time there. Don’t worry, the ideas will come to you. What do you notice? What draws your attention above all else? This is what truly interests you, and this is what you should explore, both on your trip and back home. Turn the photos into a story. Even better, add some writing to it, and you’ve just created your first travel piece. This can be submitted to local publications, and once picked up, you’ll have your first published writing and photography piece!

150124RomeCorner

Photography Assignment #3: Find Your Passion

This assignment is based on Ed Kashi’s assignment in The Photographer’s Playbook. He urges the students to discover and explore subjects which they are passionate about. This means having a general interest and the willingness to spend hours, weeks, years with the subject. He spent eight years photographing aging in America, a subject which he felt passionate about, and which he’s maintained interest in, even after moving on to other projects. Your assignment is to find your passion and explore it deeply. This means to spend hours with the subject, asking questions and having a true interest. This will show through in the photograph, if the passion is not there, this will show as well. Be patient with this, as it will not come quick or easy. Over time, you will be able to find an interesting perspective which is yours alone. This is another element of a strong photographic story.

150512LondonPolice

Photography Assignment #4: Get Close

This assignment is based on Alexis Lambrou’s assignment in The Photographer’s Playbook. She recalls a professor who was inspired by the famous Robert Capa quote “If your picture isn’t good enough, you’re not close enough”. He had them reach out in front of the camera and focus on their hand. Afterward, they had to tape in place the focus and walk around shooting. It would force them to get closer to their subject than they might previously get. This is such a great assignment and it really changes how you approach shooting, soon finding yourself getting more comfortable approaching a subject and getting in close.

150717PortoBusStop

Photography Assignment #5: Think Bigger

This assignment is based on Gus Powell’s assignment in The Photographer’s Playbook. He lays out six street photography assignments which will make you think twice next time you are on a photo walk.

  • Wait at a bus stop and photograph the other people waiting. Don’t get on the bus, but stay and continue shooting. Move on to another bus stop if needed.
  • Pick a color and focus all your shots on this color. Start big, like a blue sky, and work down to a very small subject like a piece of trash on the ground.
  • Whenever you find something interesting, shoot the image but then turn completely around and take an image of what is directly behind you.
  • Pick someone out of a crowd and follow them. Don’t shoot any images and don’t be a total creeper. But just see where they go and experience the journey of where they are taking you.
  • Learn to visualize the way people move by trying to shoot two people walking past, right at the moment when they cross planes. Do this multiple times and then move on to shoot three, even four people in this way.
  • Take some images which you think are bad, and print them out pocket-size. Carry them with you and reflect on them as you are out shooting. Notice what you like or don’t like and if that translates in any way to what you are currently shooting.

Gus’s assignments teach us a different way to see the subject, and to look out for things which can be easily overlooked. Pick one of the above, and try it out next time you are out with your camera.

pexels-photo-109917

These may not be innovative, life-changing assignments, and they may not even work for you. They were designed to force your perspective to adjust, slightly or drastically, and look at a subject in a different way. Doing this is essential to improving as a photographer, and even to just maintain skill level. You may not think these assignments have helped you in any way, but next time you stop to think about a shot or project idea, it may surprise you how these have altered your way of thinking. I urge you to purchase this book, look up similar assignments online or sign up for a class, online or in person. Continuing to challenge your thinking and skill set will be vital to your development as a photographer. There is always something new to learn.

Photo Walks: A Way of Improving Your Photography Skills

According to Wikipedia a photo walk is the act of walking with a camera for the main purpose of taking pictures of things that the photographer may find interesting. For me a photo walk is much more than just walking and taking photos. I see it as a way of improving your photographic skills. Photo walks are commonly considered group activities.  The groups might be formed by amateur photographers that organize themselves or they might be also activities offered by a professional that set some guidelines and teach along the walks. Although I like the idea of group photo walks, I didn’t have the chance to do it yet. I hope I’d get the chance to do it in the near future. For now I have a less communal approach: either I go by myself, or with a friend. In group or alone, I highly recommend you to try photo walks.

Photo walks partner
I usually go on photo walks alone or with one or two people. My husband is one of my photo walks partners (here is a challenge for you: can you find where I am in the photo?).

Theme photo walks help you develop your creativity

Choosing a theme for a photo walk is an interesting thing to do. You can choose any subject such as shapes (triangles, circles…), colors (yellow, blue..), numbers or things (windows, doors, traffic signs…). If that day I am unable to decide a subject, I just ask somebody to tell me either a color, or a shape. And whatever they say I do. I saw that this helps me to develop my creativity because it forces me to take photos of things that I wouldn’t choose by myself. Trying to take nice photos of things that you don’t find attractive at first sight might push you out of your common thinking box.

Thematic photo walks
I did a photo walk about circles. This subject pushed me to take photos that I wouldn’t usually take.

Photo walks help you to improve your composition

You can pick a composition subject and focus on it in your photo walk. You can work on finding leading lines, look for patterns, rule of thirds, symmetry… Practicing composition when you are enjoying a relaxed photo walk will take you to the point that you can create well composed images even under stress (as for example in the middle of a portrait photo session).

Composition and photo walks
Using leading lines is a technique of composition where you lead the eye of the viewer through different elements of photo by using lines. They also give a sense of infinity. I like doing photo session focusing on leading lines.

Photo walks give you the chance to experiment with new things

Have you been reading about a new photography technique that you would like to try? Go on a photo walk focusing on that technique and you could see how you get better at it along the walk. You can try night photography, macro,  HDR, long exposure photography

Night photo walks
I am not a night photographer. But planning photo walks at night took me out of my comfort zone and made me experiment with my camera.

Photo walks help you to find your photographic style

I learnt this from the photographer Marlene Hielema. When you photowalk, you don’t have to focus on the technical aspects of photography. You don’t have to take perfect photos. You can even set the camera on program mode (I know it can be hard to do it, but give it a try). What can you do if you don’t need to take care about the technicalities? You are left with just the creative side of photography.  Focus on the way you see things. Once you return home, check the results of your walk. Pick the photos that show better what you wanted to express and analyze them. Do they follow a pattern? Finding these patterns will help you to understand your style.

Photo walks are a great way of networking

If you are going in a group photo walk you will have the chance to meet new people. If you are going alone, you will have the chance to talk with the people you are taking photos of, and you will probably meet a few curious people who would want to know what you are doing. You can interchange details with these people (phone number, social media) and share your photo walk images with them.

Photo walks might improve your mood

A photo walk is a physical activity done outdoors (sometimes even in the sunlight and the fresh air!). Walking is good for your health and being outside will bring refresh your mind.

Outdoor photo walks
Going outdoors and enjoying the fresh air is always good for your mind.

And finally some tips:

Take only the essentials

You will be walking for a while, so if you carry a lot of gear and other stuff it will become heavy and will make the photo walk a not so nice experience. Be brave and take just one lens. Take out unnecessary things from your camera bag.

I do recommend to take with you water (and maybe a hat and sunglasses) and a small snack, just in case your walk turns a bit longer then you expected.

Be safe

When you are focused on taking pictures you can disconnect a little from the surroundings. But you should keep all the time a certain amount of awareness. Don’t walk into the road without looking for coming cars. Don’t walk into other pedestrians. If you are in a place with a lot of people, keep an eye out for possible thieves. If you are going alone on a photo walk, tell somebody where you are going and for how long. Although a photo walk can also be a great chance to disconnect for a while, evaluate the area you are going to be at before leaving the phone behind, on long walks, walks in the wild, or in unfamiliar neighborhoods, it might be better to have your phone with you (just in case).

Keep safe in your photowalks
If you are taking photos in a place with a lot of people and traffic, you need to take care to be safe and not to disturb the others.

Be respectful (with people and with the law)

If you are taking photos of people, it is important that you keep a respectful attitude. Remember that it is nice to ask people for permission to take their portrait (it is also an opportunity to meet new people). Depending in which places, you must do it. For that reason it is always good to know the laws regarding photographer’s right (They change in every country). You should know beforehand what you are allowed and not allowed to do with your camera. It can save you a lot of problems.

Sit from time to time

I know that the activity is called photo walk, but you can also sit from time to time to rest. Sitting is also good for observing. You can study the place where you are and take other kind of photos.

Sitting during your photo walks
I decided to sit for a while. It was then when this little bird came close enough for me to be able to take a photo. This wouldn’t have happened if I was walking and moving around.

Do you like photo walks? Have you ever tried them? Are you going alone or with a group? Share your experiences with us, we would like to hear form you! 🙂

Have a happy shooting!!
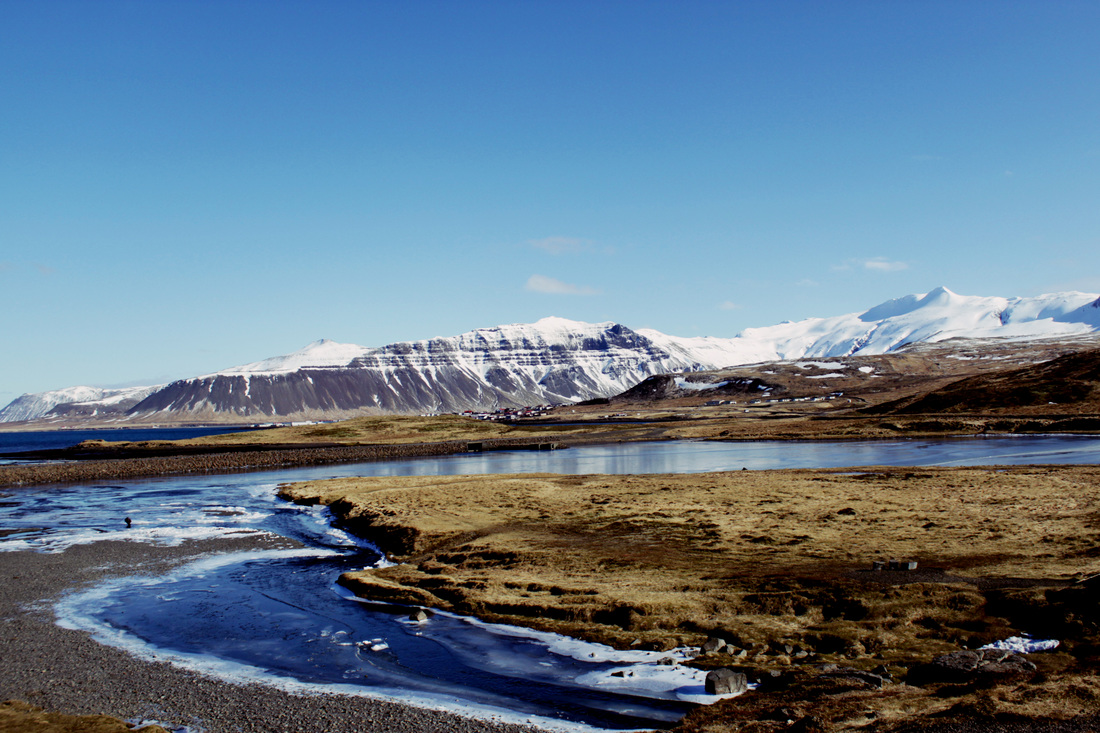
11 Tips for handling camera-shy models

The photo session day has arrived. You organized everything carefully. You feel confident. Everything is going to work well. You are going to rock it! You meet with your client at the scheduled time. It is a couple session. You have been talking with her these last 2 weeks and got everything set. But you don’t know him. And it is right now, just some minutes before the photo session starts, that you discover that he is camera-shy and he hates photos!! Oh no!!! He is not cooperating… he looks as lively and happy as a salted fish and his skin tones are even paler… Your confidence vanishes. How are you going to take nice photos when he doesn’t even want to be there? You are supposed to take photos of the couple showing that they are happy!! What can you do now? Sessions including camera-shy models can be challenging, but they are not impossible. Keep in mind these tips for handling camera-shy models. They can truly change the mood of the photo session.

Handling camera-shy models
This is Avraham, my husband. He agreed to be my model for this photo session.

#1 Don’t jump the gun (or the camera)!

Spend some time talking with them before you get down to business, even before you take out the camera, if possible. Get to know them a little before taking the camera out of your bag and let them to get comfortable with you. Try to ask them about things that put them in a good mood: what they like to do in their free time, about travelling, their favorite restaurant… As a photographer your responsibility is to keep a relaxed atmosphere along the photo session. In fact, the best thing for you to do is to make the photo session not to feel like a photo session at all. It should be more like a friendly meeting.

#2 Explain to them how the photo session is going to be

Shy people usually don’t like the feeling of not knowing what is going to happen next. Give your client an explanation about the photo session. Make them feel like they don’t have to worry about anything. Let them understand that the experience should be fun and that they are not being judged by anyone and that they are not obligated to do anything they don’t want to do.

#3 Ask them not to look at the camera

Looking straight at the camera can be intimidating, and it is not necessary in order to get great photos. They can look to the infinite or at somebody else and the results will be awesome.

Handling camera-shy models
Looking at the camera can be intimidating. For that reason I always tell my models that they don’t have to do it all the time. Photos like this one of Avraham looking at the side have a more candid look and they are also interesting. What was he looking at?

#4 Take out stress about posing

Tell them that you have a list of poses (even better if you show them the poses briefly using a tablet, a phone, or even a folder with prints) and they don’t have to be imaginative or creative about the poses. Even if they don’t know how to do, you can rescue them with your poses list. However, make clear that they don’t have to copy the poses. They are just an inspiration and they can adjust them to their taste. This is kind of magic. You will see that they check the poses’ list at the beginning, but soon they won’t need them anymore. It is like a placebo. If they get to the point of proposing you some poses, let them do it, even if you don’t like their ideas. First of all this will bust their confidence and second, you might be surprised of the result. Never underestimate the ideas of your clients.

#5 Pose with them

I do the poses with them and I tell them my experiences posing. I like trying the poses I prepare for my clients because then I can understand what they will feel. Honestly, there are some poses that look awesome but you feel pretty stupid while you are doing them. Have you ever tried posing? It is not so easy! Do it and you will have an insight of your client’s perspective. Joke about this. Make them understand that you relate with them.

#6 Start the photo session with easy poses

Make it easy at the beginning and keep more complicated poses for when the client feels at ease. Easy poses are those in which they are doing something (fixing their clothes, talking with somebody, and holding a prop they like…), sitting or leaning on something (a tree, a wall or a fence). There is nothing worse than leaving a camera-shy person posing doing nothing in the middle of an empty space. They will feel like running away from you and your camera.

Handling camera-shy models
If you just tell your model to stand in an empty space, in front of the camera without anything to do, they will feel uncomfortable for sure. Look at Avraham’s face in this photo. I was sure he was going to tell me that he was done with the photo session.
Handling camera-shy models
If you give the model something to do, things will get better. Here I just told Avraham to sit down and the improvement from the previous photo is clear, isn’t it?

#7 Make them move

This tip is related with the previous one. Standing still can feel awkward. But tell people to start walking towards you or far from you and good mood will start flowing again. A fun one is making them walk away from you and at some point you tell them: Look at me!! This is the moment when you take the photo. People usually like this strategy: easy, they don’t have to be looking at the camera (or you) for long and have good results.

Handling camera-shy models
Tell your model to move. Just a simple walk will give them something to do that feels natural.

#8 Make them do something silly and do it with them

There are a lot of silly things you can make them do. The idea is to take photos of all the process and especially of the laughs after! Some things you can try are: make them show emotions like happiness, sadness, madness, disgust… You can have a list ready and go from emotion to emotion fast. The faster the better. At some point they will start laughing and here you will have your best shot! You can also make them fake their laugh. This will make them laugh a lot after it.  Remember you are making them being silly. It is important that you will be silly too!! Making one person to look silly meanwhile you look wonderful is not fair. You are all in the same boat!

Handling camera-shy models
I told Avraham to be silly! And he did!! Here he was exaggerating his facial expressions so much that even I was laughing. Is this picture good? Of course not!! But I was not aiming for having this photo. I was aiming for the photos after the silly face.

Handling camera-shy models

After doing some silly faces, models can’t hold their laugh any more. You can see here Avraham laughing after all the silly things he did. He is showing a beautiful and natural smile. Note that he is kind of blurry. I was laughing so hard from the silly faces that I was not able to hold the camera without shaking it. Be aware that this can happens and wok with fast shutter speeds!

#9 Encourage them along the photo session

Show them the photos you are taking and tell them how well the photo shoot is going. Positive feedback encourages people and keeps them in a good mood. Let’s face it. We all like to know how well we are doing!

#10 Create an ice breaker

It can be useful to have something ready to make people laugh and relax. If you are good telling jokes, go for it!! I am not so good on that, so I use a toy as an ice breaker. Yes, you read well: I use a toy. It is mostly for family sessions, but I use it for both kids and adults. My toy is not a common one. Besides being a photographer, I am a biologist. For that reason, a friend gave me a plush Herpes Virus doll as a birthday present. It is in fact lovely Herpes. For kids it looks like a sun. Adults can’t stop laughing when I explain to them the story of the toy “A friend gave me Herpes for my birthday” and I say things like “Eihhh everybody…look at my Herpes”. I guess it is so unexpected that it is fun. You don’t need specifically a Herpes toy, but it is good to have something that will make your clients relax a little”

Handling camera-shy models
Here is my Herpes. Isn’t it lovely? It is great for kids because it looks like a sun and also for adults because it gives a humoristic relieve.

#11 Ask in advance if there are camera shy people in the photo session

Knowing if you will need to work with a camera-shy person will help you to organize a more appropriate photo session.

I hope you find these tips useful. Although they are mostly for camera-shy people, I admit that I use them on all my clients. They are helpful even just to create a good vibe. They also help when your client is stressed (for their own problems) or tired. Making your clients feel relaxed and laugh a little is always a good thing. It doesn’t matter if they are camera-shy or not.

Let me know if you tried some of these tips and how it turned out! Have a happy shooting!!
The Evolution of Mobile Photography

The term “Mobile Photography” has gained more popularity since the past 2-3 years as technology continues to advance in smartphone cameras. Back in time we held smartphones from Nokia/Siemens/Sony Ericson or may be Samsung that had VGA cameras or even basic cameras. In those times, having a camera in itself was a big deal for us. As it gave us the advantage of capturing moments and keeping those memories. Today, our cameras have advanced tremendously that we can even earn some money from Mobile Photography.

The term “Photography” was slightly restricted and specific to only Digital Cameras and DSLRs has now evolved into Mobile. Many photographers who are used to carrying their heavy DSLRs have started to use more and more of their iPhones or other smartphones to shoot.

India Gate - Nokia N97 India Gate – Nokia N97 Yellow Rose - iPhone 3GS Yellow Rose – iPhone 3GS

The quality seen in images today in comparison to olden days is huge. Sometime in April, an instagram account and app @doyouskrwt asked a question on Instagram “Mobile Photography is shifting – more and more people are going for a bigger camera. Do you think mobile photography will be a thing the next years or is it going to decrease drastically in near future?” Many people including myself agreed that it definitely will keep increasing considering, “technology advances – smartphones advances – camera in smartphone advances” (Jonathan @kennedyirl). The responses also discussed the quality of images. There is no denying that the DSLRs quality still reigns far superior to smartphones but, having a smartphone nowadays for those who enjoy photography is an asset. Like Florian @flori_anz_enk put it nicely saying “I guess it will be a combination of a great smartphone and an advanced camera. I am using two Sony Alpha 7/a7s for portraits, events, and weddings and for everything else my iPhone 6s. Smartphones are so versatile and you can go into stealth mode when it comes to discrete street photography. I love both and use it for completely different styles of photography.”

Hongkong - iPhone 3GS Hongkong – iPhone 3GS Flower Market Hongkong - iPhone3GS Flower Market Hongkong – iPhone3GS

Taking photos with our mobile phones has not just become a matter of passion but a trend. Although, many times our Instagram feeds are filled with unlimited and unnecessary selfies and a display of personal activities. Keeping aside the unnecessary, we come across many talents with wonderful feeds not forgetting the various hubs that have cropped up to expose Mobile Photography. Many of these photographers have started a business, gained partnerships with famous companies and achieved recognition. However, this creates a tough competition between Photographers using DSLRs. The popularity of mobile photographers can remain inconsistent as many times their interest in photography is only for a short time span or to gain fame.

Seattle - iPhone 4S Seattle – iPhone 4S by Bridgette Shima (@bridgette.xo)

Personally for me, having the iPhone handy to capture whenever I like has made me enjoy capturing moments even more. I do use a semi-pro-Canon camera which allows me to use manual controls and gives more satisfaction in terms of image quality. The availability of various apps with impressive editing features allows me to capture, create and instantly share on social media platforms. Some platforms like Eyeem allow us to sell our photos which are a great feature for budding photographers.

Fresh Vegetables - iPhone 5 Fresh Vegetables – iPhone 5 Landscape - iPhone 5 Landscape – iPhone 5

There is a vast difference in the quality of photos that can be seen through the Nokia N97 to iPhone 6S. You will notice with the Nokia N97, the image captured was pretty crisp and clear. The iPhone 3GS has improved the quality of images with more details in the capture. In some instances, the clarity depends on the lighting and exposure. For macro shots simply using iPhone 3GS, as you can see in the Yellow Rose above, it has a perfect composition defining the rose beautifully without needing any major edits. The image quality and composition balance continues to evolve with every iPhone (mobile phone). What I have noticed is from iPhone 3GS to iPhone 6S some of the elements in the camera are stable but, crisper and the noise is far lesser in the current iPhone 6S. Zooming was not encouraged in previous smartphones, however, as you see below, the zoom feature in the current iPhone 6S works well for a mobile phone as it doesn’t compromise the quality of the photo.

Museum Proklamasi Indonesia (Jakarta) - iPhone 6S Museum Proklamasi Indonesia (Jakarta) – iPhone 6S

Over the years, the pixels have increased to improve image quality and to allow larger size printing. The noise has been reduced to a greater extent enabling us to create spotless images. This allows photographers to be able to have the convenience of capturing without having to carry their heavy gears. Currently, smartphone companies are starting to create smartphone cameras with dual cameras whereby one camera would have higher specifications enabling to take even greater quality photos. Some mobile phone companies also use Carl Zeiss Lens like the Nokia Lumia. The Nokia Lumia is known to have a very good camera despite its limitations as far as editing apps are concerned. An article on Nokia Lumia was written by a good friend Bridgette Shima can be read here.

Raindrops - iPhone 6S Raindrops – iPhone 6S

In conclusion, I would say it has been quite interesting to see how mobile photography has progressed and continues to evolve. I wouldn’t say it can reach DSLR quality in a short span of time but having the option of using a smartphone is a big deal for all photographers. Photography is not just a passion or hobby but a profession for many people. Hopefully, mobile photographers can also walk hand in hand to learn from Professional Photographers and inspire all photographers everywhere to keep clicking.

Make Money as a Photographer: 7 Steps to Start Earning Money

Many people love to photograph everyday life, capturing beautiful moments or scenery in a variety of ways, from a number of angles. Earning money from photography is a whole other level though, and takes more than just snapping a pretty picture when the chance arises. Fortunately, there are some basic steps you can follow in order to make yourself more marketable and bring more work your way.

Today we’ll be taking a look at the most important of these steps, so you can get started right away and ensure you’re on the right track!

1. Shoot Whenever Possible

money-photographer-2

This is a key to improving your performance as a photographer, and your confidence in yourself and your work. It’s a way to gain experience easily and without needing to rely on jobs, and is both a great way to improve your work in the field you want to work in professionally, and to try new styles or techniques of photography without any risk of upsetting clients. Friends and family make great resources here if you are interested in photographing people rather than items or scenes.

2. Create a Portfolio

Whatever work you do, whether paid or free, be sure to keep a copy. This way you can go through your collection of work and pick out the best parts, using them to create your very own portfolio. This can be sent to potential clients and also placed online, showcasing your ability and helping you to land more work. After all, nobody wants to hire somebody without seeing what they can do, right?

3. Get Good Equipment

money-photographer-3

At first it’s easy enough to start off with just a camera, and not a particularly great one at that. As you progress though it should always be a priority to upgrade and add to your equipment whenever possible. More equipment means you can cover more situations and do cover many different types of shots, adding to your repertoire. Better equipment also means better quality photographs, a must if you are serious about succeeding in this business.

4. Get a Mentor

The quickest way to get good at photography, and to start earning money, is to get a good mentor. A mentor is somebody who has already achieved what you are aiming for, and you don’t need to restrict yourself to just one either.

Your mentor can speed up the learning process for you as they show you what has and hasn’t worked for them, as well as passing on their experience in dealing with clients, knowing how much to charge, and marketing yourself. This information is incredibly valuable, as your mentor will have spent a long time accumulating experience and knowledge, something they can pass on to you in much less time than it takes for you to learn it yourself.

5. Take Whatever Work is Available

money-photographer-4

In the early days it’s always a good idea to take whatever work you are offered. Even small gigs can lead to repeat business and bigger jobs, and working in areas you don’t entirely want to at the start can get your foot in the door for more lucrative work later on. Also keep in mind that any paid work reflects well on you, as long as you do a good job. These jobs can provide good feedback, portfolio pieces, and marketing by word-of-mouth between potential clients.

6. Actively Look For Work

One of the most common mistakes made by newer photographers is to wait for work to come to them. Those who only post a portfolio and/or their details in various places, then wait for job offers, don’t usually get much work. Until you have a big base of clients and a well-known reputation it’s best to put as much time and effort as you can in to actively finding work.

Look for anybody that might need a photographer and try to offer your services, the more you get yourself out there the more likely you are to find work – and it’s a great way to build confidence dealing with new clients too!

7. Build a Client Base

money-photographer-5

Treat every client and job you get as a possible repeat customer and try to build up a number of clients that will come back to you for work when they need it. This gives you a steady flow of regular work and allows you to be more selective with the work you take on to fill any remaining free time.

With that said, clients who have been with you from the early days should expect to pay a little more as your ability and reputation grow, though it’s always a good idea to cut them a little extra slack when possible in return for their loyalty and to keep them referring others to you.

Follow these seven steps and you’ll notice it won’t be long before you gain the confidence you need to start making money as a professional photographer. It will take time, but it will be worth it!

70-200mm Lens – How to Avoid Blurring?

It’s very common among the professional Canon users to grab our 70-200mm lens for indoor as well as for outdoor shoots. The lens is one of the top choices for portraits and product photography due to its versatility and interesting zoom range.

Lens Overview

Speaking of this versatile and powerful Canon lens, we can start to say that it was launched in 2010 as an update of the EF 70 – 200 mm F2.8 L IS USM from 2001. With a gap of 9 years and considering the advances in the technology of DSLR cameras, Canon redesigns this powerhouse by improving both the stabilization and optics, as well as autofocus and its design.

Optics consists of 23 elements in 19 groups, including more than 5 of them with the Ultra-Low Dispersion technology (UD), plus one with Fluorite Coating. The reason? Reducing the Chromatic Aberration of the lens.

Canon_Zoom-Lens_EF_70-200_F2.8L_IS_II_USM-01a_

Built-in metal, we are not talking about a light lens; however, it compensates for the weight with its excellent image quality and enhanced protection in regards to dust that can enter our camera, in addition to being weather sealed.

The Autofocus motor belongs to the technology of Canon Ultrasonic Motor (USM), being extremely agile while maintaining a silent profile.

27358305815_713c7db69e_k

Photo courtesy of Eric Schaffer

The price is something to consider in this lens since we are talking about high-end equipment for what should not amaze us that its initial price is higher than $1500.

The only difficulty that photographers face while using the lens is its weight. A Canon 70-200mm [ f 2.8 IS II ] lens weighs approximately 1600 gms. So, this lens when mounted on a full-frame camera like Canon 5D Mark III weighs almost 2.5 kilograms.

When weight matters

So, how do you take a sharp photograph while holding so much weight in your hand? You might use a tripod to bring in the extra support, balance, and stability. But do tripods work during all circumstances? Not really. How far does ‘Image Stabilisation’ in your lens, help? Not very much. True, it provides the minor stabilization features that you need and but that’s not all.

canon-ef-70-200mm-f-2-8l-is-ii-usm-lens

The way you hold your lens plays a major role. It can sometimes be the ‘break-it’ or ‘make-it’ factor for your photographs.

We are assuming here that you will be using the kit (Canon 5D MK III + Canon 70-200mm f/2.8L IS II lens) handheld and not by tripod mounted. The first thing to do is to rotate the tripod collar from the bottom side of the lens(while mounted with the camera) towards the top side. This way, the tripod collar won’t obtrude and disturb your grip with the lens.

Kindly note: Indoor shoots are tripod-mounted most of the time. So this article may not be applicable to you. But for those who shoot by hand-held devices, this article might be helpful.

A quick but effective solution

So, like I mentioned earlier, the way you hold the lens while shooting may affect your photograph, for good or for worse. Most of the time, we tend to hold the lens somewhere on its collar ( really close to the body of the camera). I used to do this too in my earlier days as a photographer. This helps us control the zoom ring better while composing the photograph. True, but it also indirectly affects the balance in your focus. This sometimes results in blurred images and lesser sharpness. This is because of improper positioning of your palm by the lens. By supporting the lens at the collar location by your palm you are letting more weight towards the front side of the lens which leads to improper balance and with blurred photographs.photographer-1191562_1920This can be overcome by slightly shifting your palm position towards the front side of the lens, which means you need to place your palm almost on the zoom ring. As soon as you shift your palm towards the front end of the lens, you immediately feel the perfect balance of weight while holding. But this situation restricts the zooming ability immediately before you press the shutter button. You have to be prepared in advance, as you cannot zoom as you used to before. Get your frame right, compose what you need and then click away!27010607034_afe1fb94d0_k

Photo courtesy of Pengcheng Pi

We hope this article helped ease your discomfort while shooting using the 70-200mm lens.

Please leave your comments below and let us know about your experience. 🙂

Header photo courtesy of Francesca Pippi

Advantages and Disadvantages of Being a Self-Taught Photographer

I am a self-taught photographer. When people ask me where I learnt photography, I  always feel a bit strange. I don´t know if I should be proud of being a self-taught photographer or if I should be embarrassed because I didn’t study a degree in arts or photography. I am always scared that people will think I am not good enough because of my lack of education. On the other hand, the percentage of self-taught photographers is pretty high. Some of them are extremely famous. For example,  Ansel Adams  was mostly a self-taught photographer. And he is considered one of the best american photographers. Almost everybody knows some of his wonderful photos of the Yosemite National Park. So it seems that you can be a pretty good photographer without a degree.

Advantages and disadvantages of being a self-taught photographer
If you are a self-taught photographer, you should know the advantages and especially the disadvantages. It will help you to become a great photographer.

Nowadays, almost everybody has a digital camera. Some of the phone cameras have a higher quality than my first DSRL. In short, the availability of cameras to the masses has grown significantly. My point here is that the number of self-taught photographers has increased a lot because of the easy access to cameras and to online resources. In this crowd of photographers, how can I stand out if I am also a self-taught photographer? This made me think.

Advantages and disadvantages of being a self-taught photographer
Advances in technology have made photography available to everybody everywhere. Some phones have better cameras than my first DSRL.

I decided to list down the advantages and disadvantages of being a self-taught photographer. Knowing the advantages would help me to feel more confident about myself. Knowing the disadvantages would make me aware of the things I have to work on in order to improve. I hope you find useful what I collected:

Advantages

There are a lot of resources online:

Nowadays you can have access to a lot of resources online: blogs, ebooks, tutorials, courses… Some of them are free, for others you will need to pay. However, you should take care of the type of resources you consume. Do some research about the teachers or look for non-biased testimonials. Keep in mind that everybody can upload information online. You need to be selective about the quality of the resources you choose.

You learn what you want and when you want:

I recognize that “learning what you want and when you want” might seem a bit fanciful. I will clarify my point of view. First of all I need to explain that I am not a full-time photographer. I work both as a biologist and photographer. Although I like being multidisciplinary, I have a serious lack of time and I end my days feeling really tired. I am usually able to learn photography at nights or on weekends. With this schedule getting a degree is quite impossible. This is one of the main reasons why I am a self-taught photographer: I am my own master and I can set my learning pace to fit my schedule. Moreover, being able to learn what I want when I want is good for the periods when I am low on energy. This keeps me motivated  and I  make the effort to learn even if I am tired. I can learn about  nature or landscape at any time. But I am not able to go into new Photoshop techniques when I am tired. I keep my less favorite subjects (or the hardest) for less demanding times. You just need to make sure that you learn them too. If not, you will have deficiencies in your development as a photographer.

Advantages and disadvantages of being a self-taught photographer
I love nature photography. I guess that this have a lot to do with the fact that I am a biologist besides being a photographer. It is easy for me to be interested in nature photography even when I am tired.

Constant improvement:

To compensate on the lack of a degree, self-taught photographers have a tendency to keep learning all the time. You either enjoy it, or you find a different field of interest.

Everything is new and exciting:

There is something satisfying and exciting in learning by yourself. It can be harder, but once you get it, the sense of accomplishment is so big that it makes you feel all your efforts were totally worth it. It is a feeling of “I am proud of myself because I should be!”.

Advantages and disadvantages of being a self-taught photographer
I got a kit of to improve my landscape photography. I have been reading about it and I followed an online course. Now I am super excited about putting what I learned into practice!

You are not influenced by your teacher’s vision or style:

When you are in a class with one teacher and 20 other classmates it is almost impossible not to absorb the point of views of the vast majority. However, being a self-taught photographer, you are free of constraints and you can develop your style.

Being a self-taught photographer doesn’t seem so bad, does it? But let´s face it. Not everything is so perfect. You should be aware of the disadvantages too. Knowing your weak points can be helpful in order to find ways to compensate for them.

Disadvantages (and how to go over them)

Second rate feelings:

You might feel second rate because you don´t have a degree/certificate that says that you are a professional. It seems that when you have a certificate to show, people automatically think that you are good. As a self-taught photographer you rely mostly on your portfolio and on the references/testimonies of other people. Solution: always try to do your best as a photographer. Keep learning and practicing. Your main goal is to build a great portfolio that shows your quality as a photographer because you are not going to be able to show a diploma.

Slow and hard learning curve:

The learning process is slower and sometimes it can be also painful. You don´t have anybody to teach you, so you have to figure it out for yourself. Things that somebody can teach you in 10 minutes, can take you hours to learn because you have to find resources, understand them, practice… Nobody corrects your mistakes neither. If you understand something in the wrong way, you can carry your mistake for a long time. Solution: be patient, humble and open-minded.

Advantages and disadvantages of being a self-taught photographer
I learnt HDR. I was super excited. However, I didn’t learn properly when HDR is necessary and when it is not and I over did it. In this picture from Barcelona it was totally unnecessary because the whole dynamic range of the photograph fitted in the histogram, but I did it anyway.

No connection with other artists:

You are not always surrounded by other artists that can be a source of inspirations and motivation. Solution: join a photography community to be able to establish friendships and connections with other photographers.

Advantages and disadvantages of being a self-taught photographer
I am not usually surrounded by art. When I am working as a biologist, I cant be farther from art. I needed to find my own community of photographers in order to widen my interactions with colleagues, make more artistic friends and keep updated about the last photography tendencies.

You need tons of discipline:

Nobody will tell you what you should do or what you need to learn next. If you are not disciplined about keeping learning you are at risk of getting stuck in a standstill. If you are not motivated to learn all the time, it is difficult to improve as a photographer. Solution: organize a weekly or monthly planning with subjects to learn.

You might forget your photographic vision:

There are a lot of resources about photographic techniques but not so many about photographic vision. If you don’t put attention, you might get carried away and become a technique collector. This is not bad because mastering techniques gives great advantages. However, if you neglect your photographic vision, you can end up taking perfect photos on the technical level that don’t convey any emotion (like a shell of a photo). Solution: Keep your vision in mind. Never stop spending some time developing your vision and how to express it through photography.

I hope you found this article useful. Personally, now that I know my strengths and my weaknesses I feel a bit more confident saying that I am a self-taught photographer. What about you?

Comparing Photos without Becoming a Bitter Photographer

I am going to share something I am not proud of: comparing my photos with the ones taken by other photographers makes me a bitter person. Yes, I too, have these moments in which I hate all the photographers in the world. OK, I am exaggerating. I don’t hate them all. I just hate the ones that are better than me. When I come to this realization, I feel even worst. I will give you a real example.

The other day I went to take photos of a valley close to my home. It is one of my favorite landscapes. I know that sunsets are beautiful in this area. And now is already summer, so everything turns golden. I was feeling happy and inspired. I found the perfect spot, set the tripod and my camera and I was shooting until I got what at that point I considered the perfect picture. I ran home and first thing I did was to transfer the photos to my computer. I searched for “THE PHOTO” and I did some post-processing using my best photo edition skills and Lightroom tools.  When I saw the final picture I thought:  “This is a great landscape photo”. I felt happy and proud. Such a great moment!

Comparing photos
This place is right next to my home. I was feeling so happy when I took this photo! I emphasized the summer mood of the scene in post-processing and I was proud of the result. Until I started comparing myself with other photographers.

I decided to share it in a photography community to see if people like it. I usually post my photos in 500px. In case you don’t know it, 500px is an online community that encourage photographers to share their best work. It is a good place to connect with other photographers and get some inspiration. At that point I just needed to wait for the “likes” and the comments. I decided to have a look at what other photographers posted in the landscape category. I started comparing my photos with all the others. And so I entered into what I like to call the “negative criticism spiral”.  I am so familiar with it that I can even describe it by stages.

Stages of the negative criticism spiral

  • First 30 seconds: everything looks amazing. I like all the pictures. They are so BEAUTIFUL!! I love the colors, and the composition. Everything!!
  • From second 31 to 1 minute: Insecurity. Would I ever be able to take a photo like this? And I thought that my picture was good!! Next to these beautiful landscapes my photo looks so bad!!
  • Second minute: Hate. “I am sure that these photographers have a better camera and better lenses“. “I am sure they are  having fun all the time! They just travel to these wonderful places and they have all the time of the world for finding the perfect composition”. “I hate them!”
  • Third minute: Sadness. I go into a very negative mindset: “I am not good enough. I should quit photography”.
  • Fourth minute: Comfort. I feel desperate and I try to cheer myself up. “Let’s see the pictures of the beginners. I am sure there are going to be worse than mine” (recognizing that I can think in this way is kind of embarrassing)
  • Fifth minute: Deep sadness. I realized what just happened in the last minutes and I conclude that I am a bitter photographer.
Comparing photos
When I start comparing myself to others I am like a cactus: I put barriers between me and anything that can come from the outside.

Can you relate? In just five minutes I went from having a positive mindset (I was happy and enjoying my photography) to a deep sadness. I was either putting myself down or putting others down in order to feel better. Why do I do it? I guess that the answer is simple:

I compare myself with others because I am human.

I was not getting any benefit out of these comparisons. They were just making me sad and angry. I was losing my passion for photography too. These comparisons are destructive, so instead I decided to turn them into something constructive. I want to share with you my 3 ways not to become such a bitter photographer:

Put yourself in the shoes of the other photographer

For some reason I tend to think that these photographers are not making any effort. I just see their final photo and I forget that it is the result of their work. You can’t know just by looking at one photo how many books they read about composition or how many years it took them to find their photographic vision. They might be travelling all the time. But you can’t know what they left behind. Maybe they did a big sacrifice in life in order to become a landscape photographer. Maybe they feel lonely. Maybe they took 10000 photos that day in order to get this one outstanding photo. Maybe they also feel that other photographers are much better than them. Now when I see that I start hating some photographer, I take a deep breath and I imagine all the efforts that this person might have done for taking the photo. It also helps to appreciate the picture even more.

Comparing photos
I took this photo in Australia. You might think that I spent months travelling to the other side of the world and living great adventures. But the reality is totally different. I couldn’t afford travelling to Australia. I did it because they send me to a Biology conference (I am also a biologist. I spend most of my day working inside a laboratory). Instead of going to the good recommended hotels, I went to hostels. In that way I saved some money that I spent travelling around for just 2 weeks because I needed to come back to work in the lab. The stories behind the photos are not always what we thought.

Instead of comparing yourself with these photographers, use them as inspiration

Now every time I see a photo that I find great I add it to a gallery. This way I can come back to it at any time I want. I study them. I try to figure out what I like in them so much. Is it because of the composition? Or maybe it is the mood of the photo? When I focus on the photo and not on the photographer, I go into a positive mindset and I feel like I want to learn from the guy (or girl). I end up following them as a fan.

Comparing photos
I was never modifying my backgrounds. But I saw the awesome work of other nature photographers that were doing it. I decided to give it a try and in my next hike I took with me a black cardboard. The cardboard allowed me to isolate this gorgeous Gilboa Irus (Iris haynei) from the messy background.

Compare your pictures from now with the photos you took some time ago

If still feel like I need to compare myself with something, I do it with one of my old photos. That I can see how I evolved and improved. I would like to go over all the learning process and take awesome pictures NOW. But photography doesn’t work like that. You learn, you practice, you make mistakes, you keep learning… and you improve. Slowly but surely. Put a new and an old photo next to each other and feel proud of yourself. Then comparing your photos can become something positive.  Be aware of your strengths and keep learning to improve. Enjoy the journey. Love your photography. Appreciating yourself is the best way to keep motivated!

Comparing photos
I took this photo 5 years ago. I am not sure what I wanted to show here. The only thing I see is a flat sand landscape that doesn’t talks to me.
Comparing photos
I took this photo the last weekend. I wanted to show how summer looks like for me. It is not the best landscape photography ever. But if I compare it with the previous photo, I can see my progression. Now I put more of myself into each photo.

Each time you feel you are entering into a negative spiral of comparison, take a breath and apply one of the tips I told you. Think that it is all about mindset. My strategies are focused on promoting a positivity. When you’re looking at photos with a negative mood you close your mind, you don’t want to learn or to see any more good photos. On the other hand, a positive mindset will keep your mind open, You will learn from others and this will lead you to good places!