Tag: ireland

Book Reviews – BEARA – A stunning collection of landscape imagery by Irish Photographer Norman McCloskey

Welcome to my new series of articles here on Sleeklens simply titled “Book Reviews”. In these articles, I review and discuss various photography books that I encounter and look through. First up on my list is BEARA. This book features a stunning collection of landscape imagery by Irish Photographer Norman McCloskey. Read on to get my thoughts and opinions about this photography book.

BEARA – First Impressions

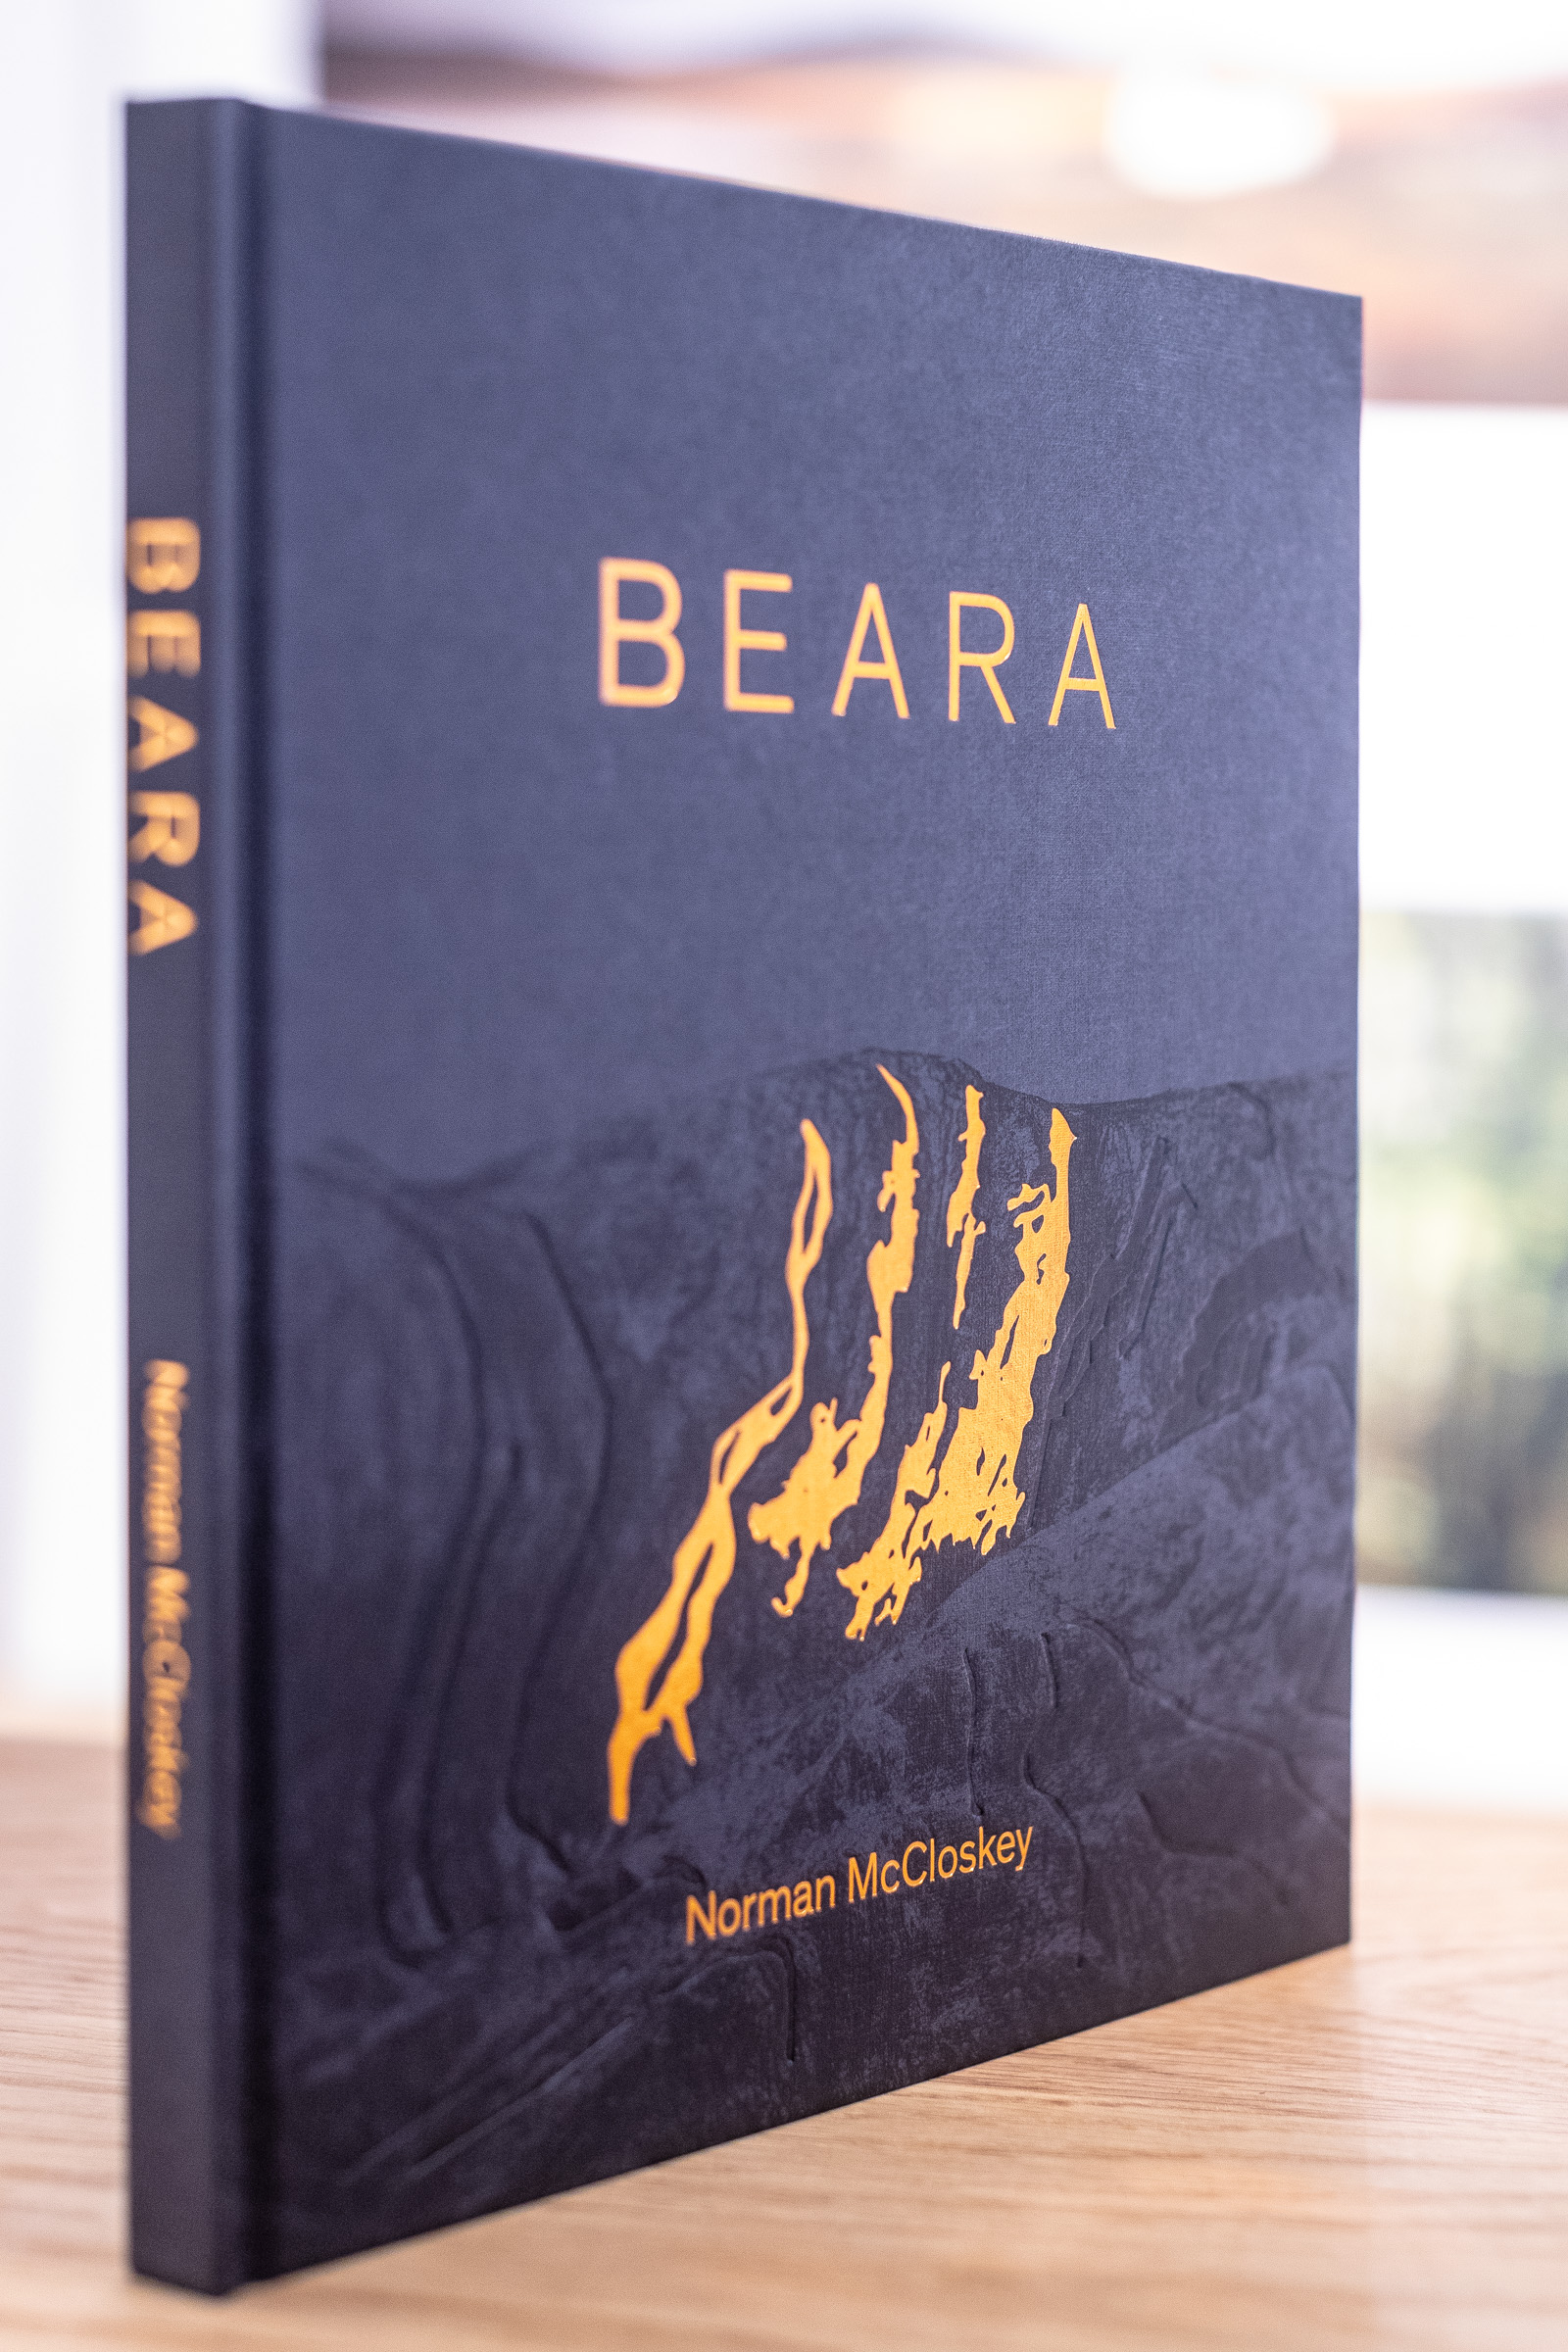
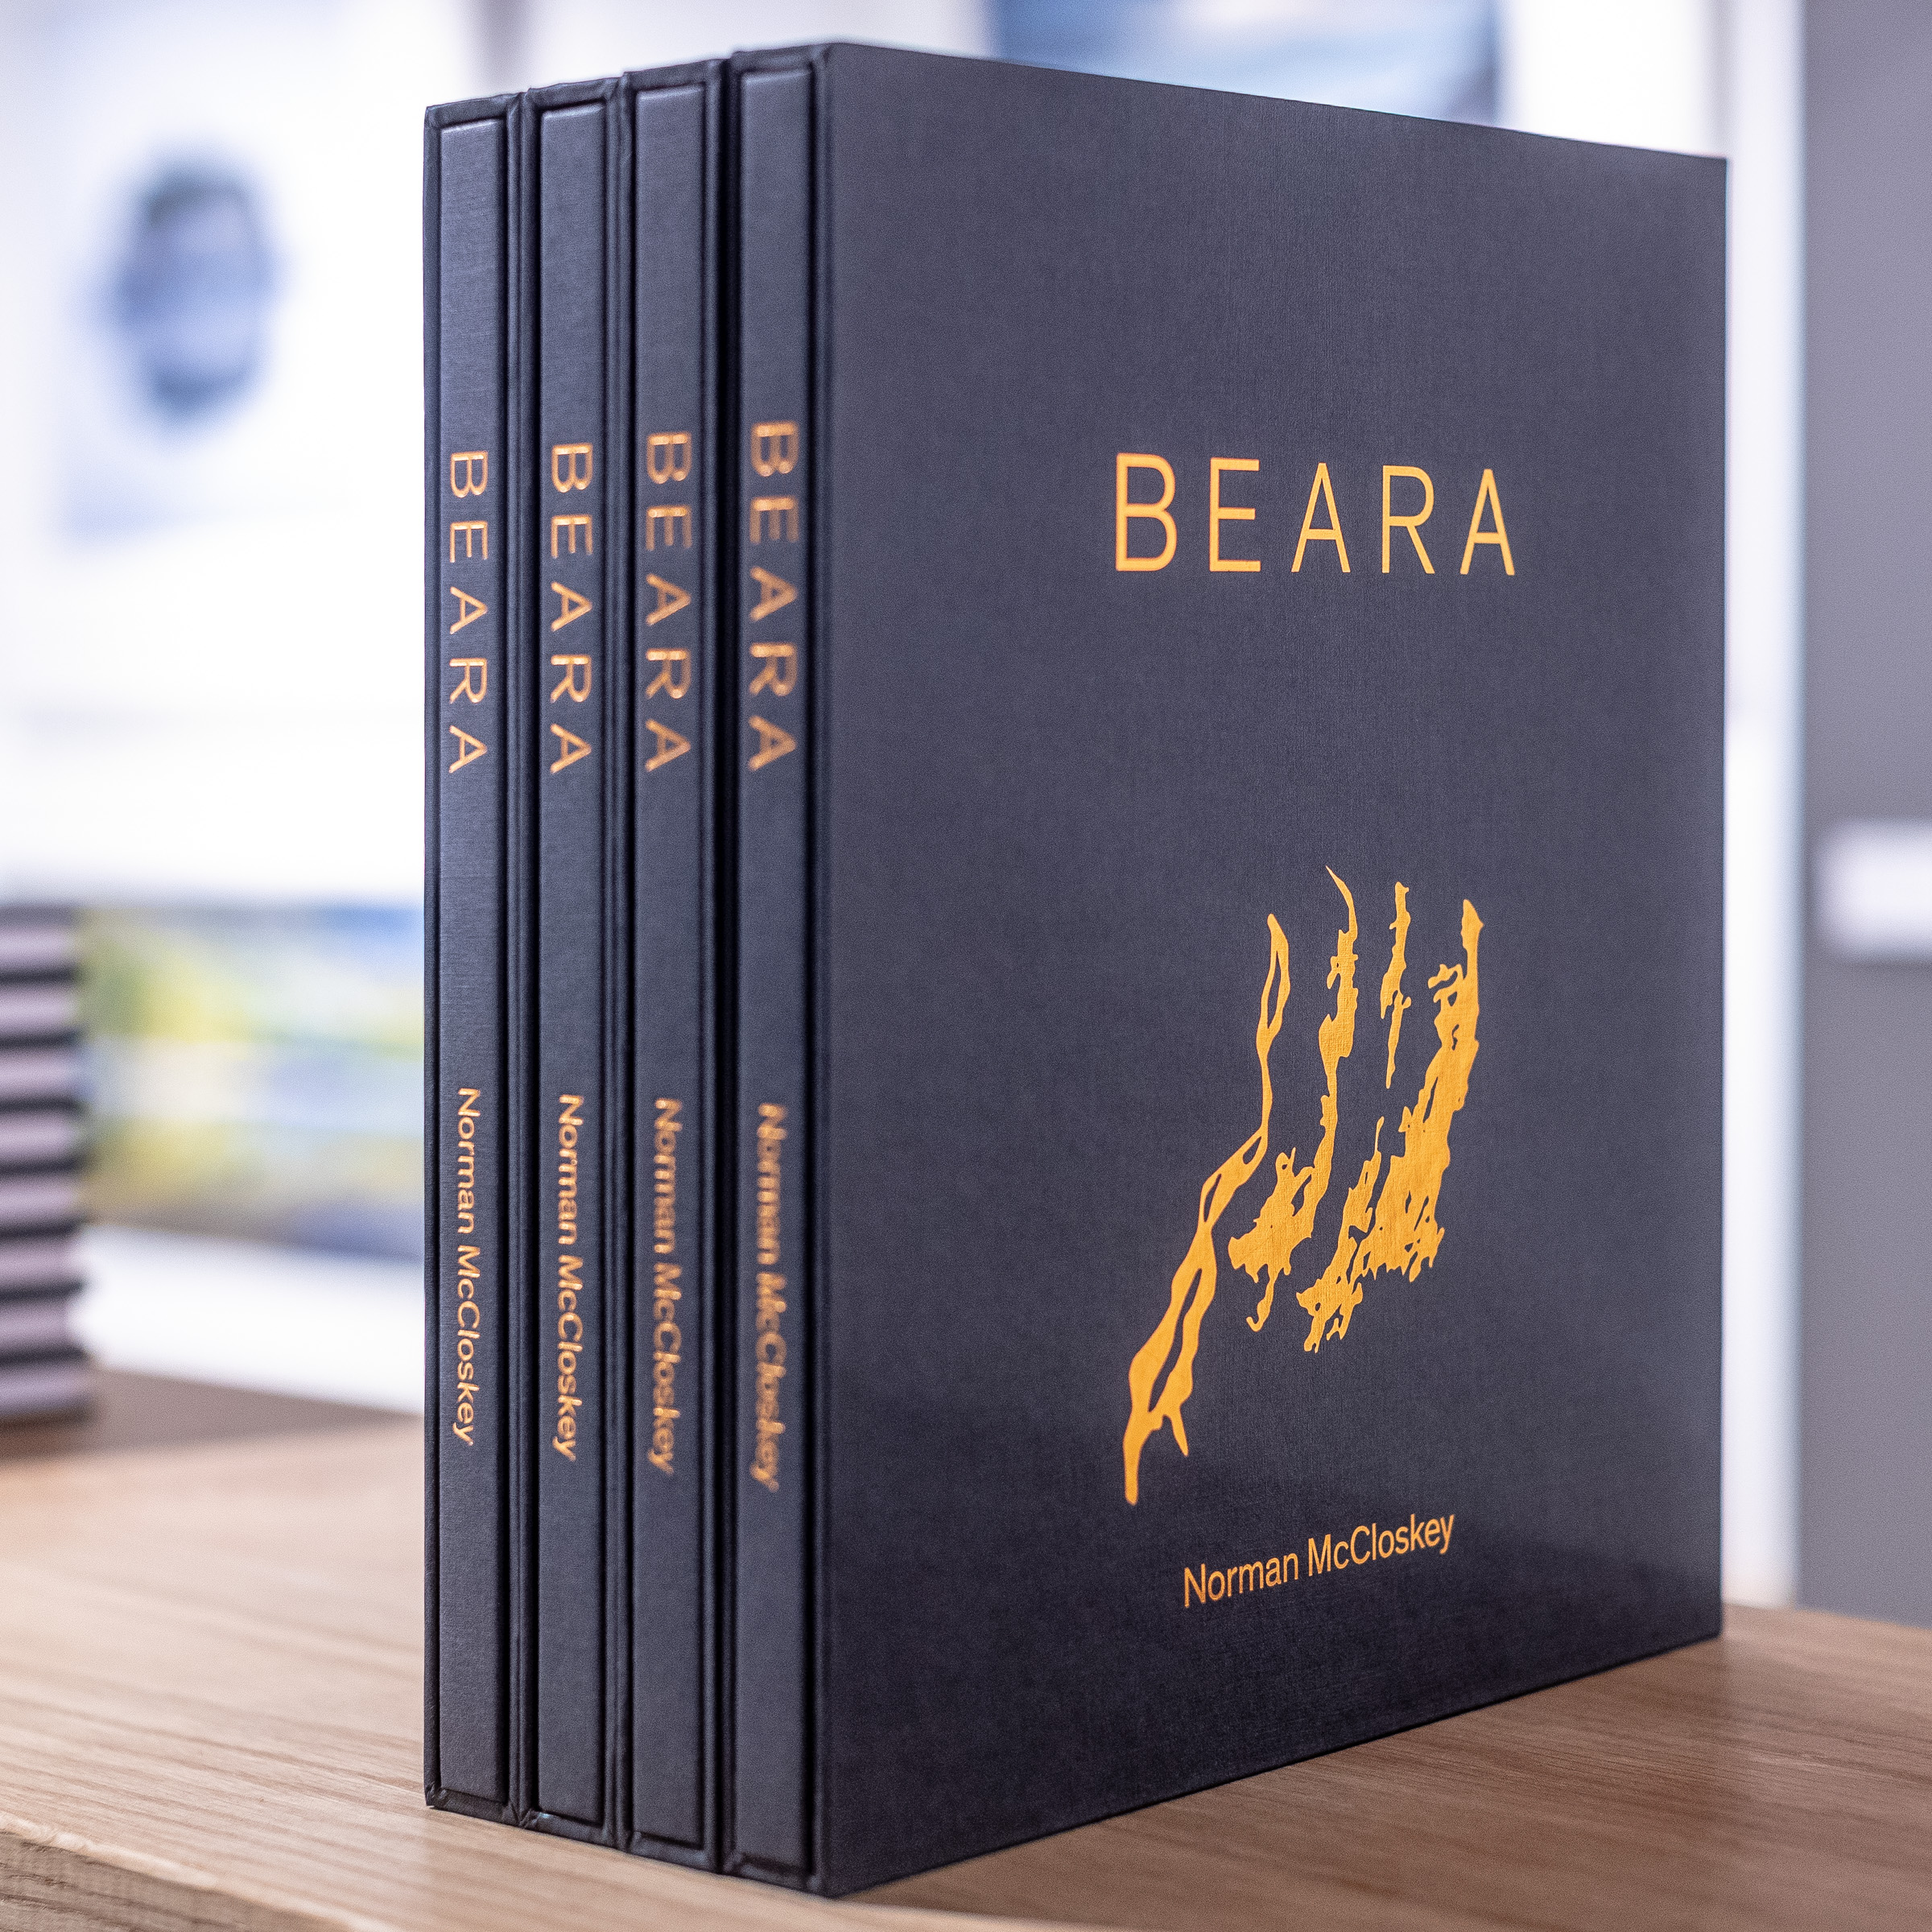
The old adage “First Impressions Are Lasting Impressions” may be a cliche but a valid and solid truth none the less. First impressions really do matter. And when it comes to making a lasting impression, BEARA lands a knockout blow. The cover is quite simply one of the best photography book covers that I have ever seen. It is simple and yet sophisticated. Clean and yet not void of substance. Bold and visually striking, yet humble and not overpowering. The plain dark grey of the cover contrasts ever so nicely with an orange coloured text. In fact, here orange represents the Copper mined in this region in times gone by. The dark grey cover delicately embellishes the landscape which also features this same orange/copper colour. The cover really shines and invites you to the exquisite landscape imagery found within.

Beara Book By Norman McCloskey

BEARA – Looking Inside The Book

Once you slowly go past the exciting cover and proceed to enter the book, an enchanting Irish landscape awaits. The content of this book focuses on a particular section of Ireland in the south west. The location in question is of course the Beara Peninsula. One of several peninsulas located in the south west in counties Cork and Kerry. The Beara peninsula is certainly less traveled when compared to the Dingle Peninsula. Looking for a good coffee shop down within the Beara Peninsula will be a tough ask. However, the isolation is part of the appeal of the Beara Peninsula. You really get a sense of connecting back with nature down there!

Regarding the the layout of the book, beyond the cover greets you with a nice sketching of the Beara Peninsula. Across the page, a foreword from Irish Film Director Neil Jordan. Next, you will find an introduction to the book from the author Norman McCloskey. And at the end of the book, you will find thumbnails of each image along with the EXIF data for those images. Now, it is between the opening and closing pages where the real magic lies.

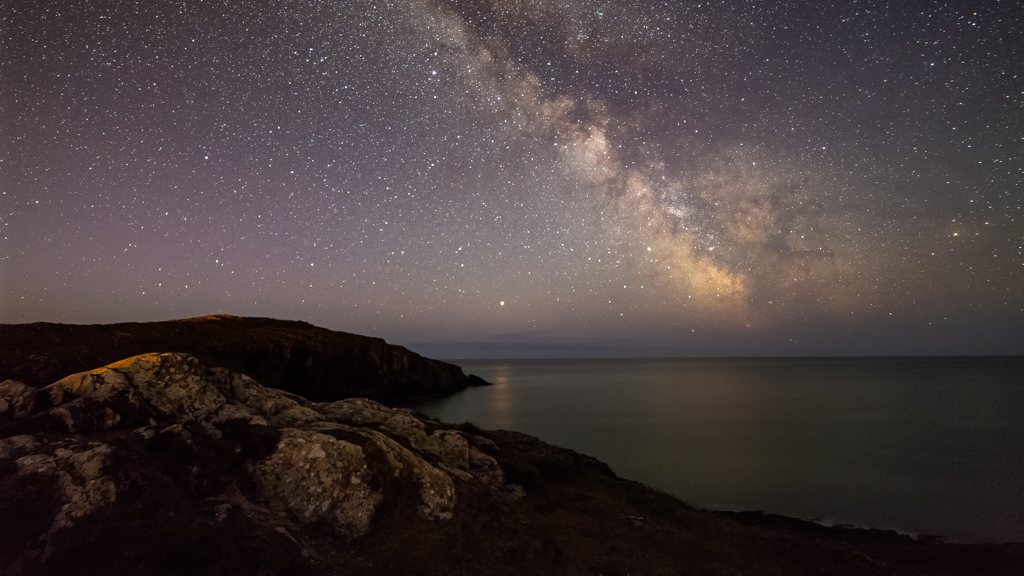
The images presented throughout Beara are a mixture of wide open vistas and more close up/detail style shots. Norman must have had a difficult time going through the editing process and selecting which images were included or excluded from the final version. Nevertheless, Norman did a great a job of varying the types of images on display. It is hard to pick a favorite image, although I am sure every reader will have their own favorite!

BEARA – A Word With The Author

When I called down to Norman’s Gallery located in Kenmare, County Kerry in the south west of Ireland, I asked him some questions concerning his latest book project. The first question on my mind was “How long did it take to create the book, from conceptualization to publishing?“. Norman’s answer; In total about two and a half years. With two years photographing two or three times a week. It was a tight turn around, and I very nearly considered extending the project for another year. But sometimes you have to just press the button and say it’s finished!

Next question was “What attracted you to the concept of the book?“. Norman answered; Beara has been my main source of inspiration from the very first time I picked up a camera and took my first landscape images. It’s a magical place to work, with great variance in light throughout the year. Lots of challenges and different terrain and no one had done a book like this on this part of Ireland before.

As I also have Norman’s first book PARKLIGHT, I wanted to ask him “In what ways was this book project different from the “PARKLIGHT” project?“. Norman’s reply; It was conceived as a far more personal project and I think you can see that in the result. PARKLIGHT had a ready made list of go to spots and must have images as it was so well known. The focus of the book was the very defined Killarney National Park. And so there were scenes and views that people would expect. I had a blank canvas with BEARA and chose to work in a more personal style, exploring details, form and texture and trying to avoid cliched well known views where possible.

Lastly, I wanted to throw a final question to Norman and that was “Any ideas for your next book project?“. Norman enthusiastically responded with; Yes ! I have two definite book projects in the pipeline. One is already started and the other a huge project that I would need a lot of time and resources for. I’m currently editing a commissioned book on Donegal as well as working on a project on offshore islands which also has lots of potential.

Beara Book By Norman McCloskey

BEARA – My thoughts?

Beara really is a visual delight for a Landscape Photographer such as myself. As a photographer who is native to the south of Ireland, the images contained within certainly inspires me to grab my bags, hop into my Landrover and drive the two and half hour drive down to the Beara Peninsula! As stated at the start of the article, I was really impressed by the cover of the book. It is just so beautiful. But I was equally as impressed with the print quality of the images within the book. The 170 gsm paper certainly helps with that aspect.

Because the default image aspect ratio on modern APS-C and Full Frame DSLRs is that of 3×2, a lot of the images that you will see on Facebook feeds are the default 3×2. Not that there is anything wrong with that! However, it was great to see Norman utilizing different aspect ratios such as 1×1 (square crop). I personally find 1×1 aspect ratio images to be very appealing. However, one needs to be careful about composition. While the Rule of Thirds lends itself nicely to the default 3×2 aspect ratio, I find 1×1 images of better-suit compositions containing more symmetry. And that certainly comes across in a lot of Norman’s images. Thoughtful compositions and no sense or rushing when capturing the image.

BEARA – Where can you get yourself a copy?

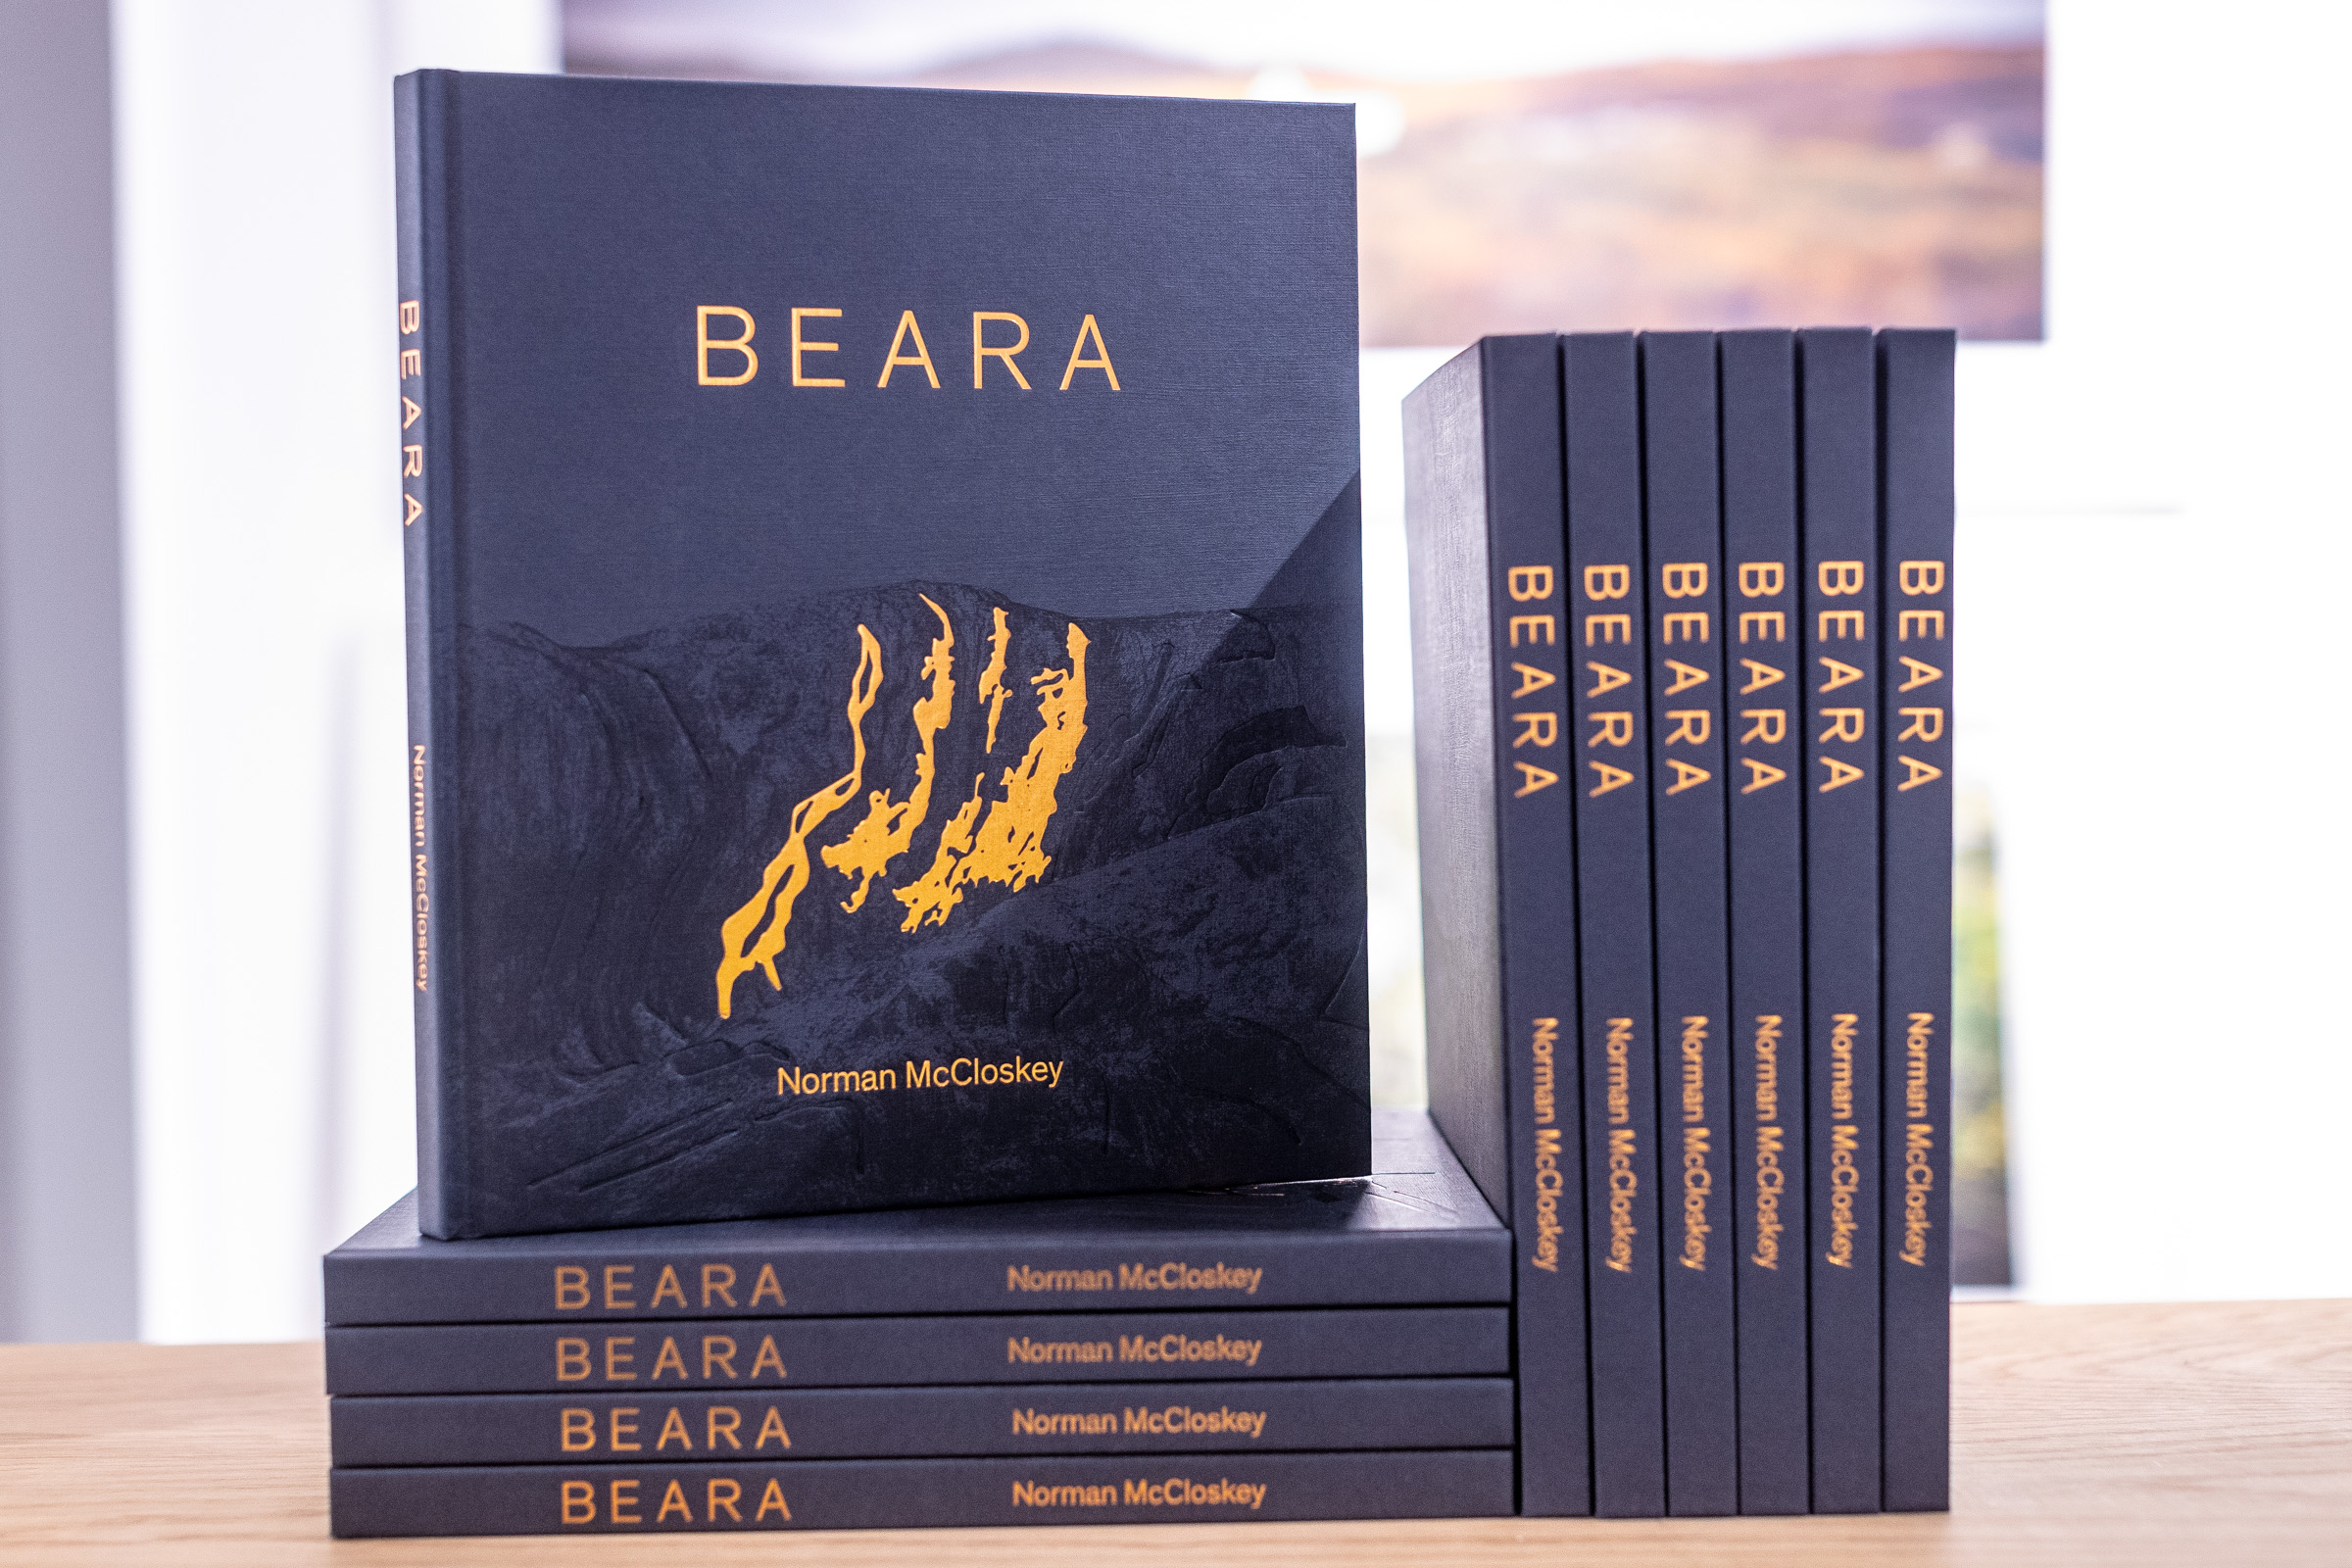
The best place is probably directly on Norman’s website https://www.normanmccloskey.com/books/beara/.  It is high quality 120 page hardback featuring 90 images that comes in two editions. It would really make a great addition to any book shelf or coffee table.

Beara Book By Norman McCloskey

Graham Daly Photography: My Love Affair With The Milky Way

The Milky Way – I Fell In Love With Shooting It!

Since picking up my first proper DSLR camera several years ago, I was quickly drawn to shooting landscapes. And I spent many an early morning and late evening chasing after those magic sunrise and sunset colors. I still like heading out in search of those golden hour images and I am happy when I get them. But I must admit, they are no longer my first love. Over the past two years, I have been seriously attracted to photographing the night sky. I have totally fallen in love with shooting the Milky Way.

Whenever there is a slight chance of clear skies, I will drop all of my other plans, grab my gear and head out to a predetermined location in order to spend several hours admiring and shooting the Milky Way. Nothing brings me more photographic joy than standing beneath the Milky Way arching across the night sky. I am blown away by the sheer beauty of the Milky Way. I count my blessings each time I get to see it. And I can tell you, that those occasions are rare enough over here in Ireland. Our climate produces a lot of clouds!

In future articles, I will dive into more detail around my Milky Way Processing Workflow. I will also highlight other photographers who inspire me with their Milky Way images. But for now, you can read about the equipment that I use and how I plan my Milky Way images.

Milky Way Photography Image By Graham Daly Photography

My “Go To” Equipment For Shooting The Milky Way?

Unlike regular Landscape shoots where I have to take several lenses with me, along with other gear such as my NiSi Filters in order to handle whatever lighting conditions that might arise, thankfully my Astro Photography & Milky Way shooting setup is a lot smaller and simpler.  When it comes to shooting the Milky Way, I need not worry about controlling the dynamic range with filters. Nor do I need to drag along various focal length lenses to create different image compositions.

My typical equipment for Landscape images (Canon 16-35mm ƒ/4, Canon 70-200mm ƒ/4, and NiSi 100mm Filters) are left at home and instead, the only lens that I pack along with my trusty Canon 6D is that of the seriously inexpensive but excellent value Samyang 14mm F2.8 IF ED UMC Aspherical lens. In certain regions of the world, this lens is also sold/branded as Rokinon. This 14mm lens provides a very wide angle of view on a Full Frame sensor. This enables me to capture large portions of the Milky Way in the night sky. The lens is very sharp (if you get a good copy!) and handles comatic aberration (otherwise referred to as “coma”) and chromatic aberration very well. How well a lens handles comatic aberration is important for shooting the Milky Way and the night sky in general. Because if the lens does not control coma effectively, then the captured stars will result with comet-like tails. However, the lens does produce a horrible mustache-distortion and a strong vignette.

Milky Way Photography Image By Graham Daly Photography

I also bring the following items out with me on when I head out shooting the Milky Way:

  • Rollei Rock Solid Alpha Tripod + Rollei T3S Ball Head
  • Really Right Stuff L Bracket
  • Hahnel Capture Pro Wireless Remote Shutter Release
  • Spare batteries for my Canon 6D (OEM Canon + Hahnel Extreme varieties)
  • Hahnel Modus 600RT Speedlights (for light painting + images featuring myself within the scene)
  • Various Head Torches (for finding my way around in the dark + light painting/images featuring myself within the scene)
  • Terrascape Lens Cloths (useful keeping lens clean and wiping off any condensation)
  • A thermos flask filled with strong coffee!!

Planning & Preparing For Milky Way Shoots

There are several key parts to my Astro Photography Preparation Workflow. When I am out at various locations shooting regular landscape images, I pay attention to interesting objects (man-made structures, trees, coastal rock formations, etc..) that might make good foreground interests within my Milky Way images.  I make note of these locations and objects for future Milky Way shots.

While I am at these locations, if mobile data coverage/access is available, I then use the PhotoPills app on my phone to verify how/when/if the Milky Way will line up with the desired foreground object at the specific location. The PhotoPills app is really useful as it allows me to not only to clarify sunrise/sunset times and directions on any given date for a particular location but it also tells me the moon rise/set times along with the moon phase as well for that given date. The PhotoPills app also shows me when/where the Milky Way core will rise and set as well as showing the location within the night sky relative to the location for a specified date.

In many ways, shooting the Milky Way and the night sky is a lot easier and less complicated than shooting regular landscapes on account of the fact that you do not need to worry about how the sunlight is going to interact with the landscape, what parts of the landscape will be in shadow, what the contrast and dynamic range will be like or even whether or not there will be just the right amount of clouds present in the sky in the correct location in order to capture any light/color from the rising/setting sun.

Milky Way Photography Image By Graham Daly Photography

Clear Skies – The Vital Ingredient For Milky Way Shooting!

The main requirement for shooting the night sky and the Milky Way, of course, is that of a cloudless sky. Clouds are the enemy for the Astro Photographer and those looking to capture beautiful images featuring the Milky Way. In order to get the best images of the Milky Way and stars in general, you will need a sky that is free from clouds during a two-week window throughout the month when the moon phase is before or after a New Moon. While moonlight can be great for illuminating the landscape under the night sky and thus removing a lot of unwanted digital noise from your images when shooting, moonlight will cause luminosity of the stars in the night sky to be diminished and will thus cause the Milky Way to be washed out.

Along with using the PhotoPills app for checking the moon phase and moon rise/set times for a particular location on a specified date, I also use several weather forecasting sites to check whether or not clear skies will be potentially possible for that date. Of course, while I can use the PhotoPills app at any stage throughout the year to check out the various planning information points as I eluded to in the preceding paragraphs, I really can only verify the cloud cover and potential for clear skies within a short period of time.

Milky Way Photography Image By Graham Daly Photography

Typically I use five-day forecasts to check for the possibility of clear skies in a given week. When I spot a potential for clear skies on the long-range forecasts, I then start to focus in on those potential days and start paying more attention to the forecasts in the forty-eight (48) and twenty-four (24) hour time periods building up to that date in question. If cloud forecasts look good on the day in question, I then grab my gear, load it into my Land Rover and then I hit the road to get to my desired location and pray for the skies to stay clear while en route!

High-Level Overview Of My Milky Way Processing Workflow

There are certainly more steps involved in my Milky Way Processing Workflow as opposed to my Landscape Processing Workflow. Not that there is any additional complexity. But rather the processing workflow just has more steps and thus requires a bit more time per image. I will write about my Milky Way Processing Workflow in more detail in a follow-up article. So I will just keep things brief and at a high level here in this article.

The following is a generic overview of the workflow that I apply when processing all of my Milky Way images:

  1. While on location, I capture several exposures of the same image composition using the exact same settings. Exif settings are typically [ 14mm | ƒ/2.8 | 20 seconds | ISO 12,800 ]
  2. The duplicate exposures captured while on location will be used for “Stacking” when processing for Noise Reduction purposes.
  3. When I get back home, I then prepare to offload the images from the camera’s memory card to my workstation. To facilitate this I create three folders within a directory specific to that shoot. A folder for the original RAW files, a folder for the processed TIFF files that will be used for the Stacking process and a folder where the final processed JPEGs will be exported to.
  4. Once the RAW files are on my workstation, I import them into Adobe Lightroom Classic CC.
  5. After importing the RAW files, I preview all of the potential image files that I want to process/keep and dump the files that did not turn out correctly for whatever reason (condensation, not sharp, stray and unwanted light pollution, etc…). I use the Lightroom Rating feature to help identity which files I think to hold the greatest potential for processing.
  6. Once I have identified the image composition I want to process first, I select and highlight the range of exposures for that given image composition. This is usually between eight and twelve exposures
  7. I apply basic adjustments to one of the selected RAW files. The adjustments are synced across the rest of the RAW files that will be used as part of the Stacking process. I will go through the exact adjustments that I apply to my Milky Way images in a future article.
  8. Next, I export all of the processed RAW files as full sized TIFF files to the designated “Image Stacks” folder on my workstation. Once exported, I select all of them and I open them within Starry Landscape Stacker. This great application then aligns all of the exposures and stacks them with just a few simple mouse clicks. The stacking process applies a “Median Noise Averaging” process which greatly reduces the amount of total digital noise that will be present in the final outputted image file.
  9. Once the stacking process has been completed, I then export the new composited TIFF file and I then import this into relevant folder structure within my Lightroom Library.
  10. Lastly, I apply some further adjustments to the stacked TIFF file within Lightroom and exports JPEGs with relevant settings.

Milky Way Photography Image By Graham Daly Photography

Top Tips For Capturing The Milky Way

  • Plan Your Shots – Use PhotoPills to research Milky Way visibility, rise/set times for a specified location on a particular date
  • Include strong foreground interest
  • Use large (fast) aperture lenses – ƒ/2.8 would be a minimum aperture to yield the best potential
  • Shoot several RAW exposures for each image composition while on-location. These can be stacked for noise reduction purposes
  • Bring plenty of spare batteries, suitable clothing, and coffee!

Milky Way Photography Image By Graham Daly Photography

Photographer Focus: Irish Landscape Photographer Colm Keating

Are you a fan of Landscape and Travel Photography? Then check out this article.  Continuing on with my Photographer Focus series, in this edition, I am placing the focus on Colm Keating, an Irish Photographer who currently resides in New Zealand.

Who is Colm Keating Photography? Tell us about yourself

I’m a self-taught photographer from Ireland, who now lives in New Zealand. I was studying for a doctorate in chemistry when I decided I had enough and quit to pursue photography full time. I loved chemistry, but I knew I didn’t want to spend my days inside a lab working on the same problem every day when I could be out with my camera instead. That was in Sept 2017 and my life has changed dramatically since then.  In January 2018 I moved to New Zealand, and I now live in the Queenstown, surrounded by the southern Alps.

Landscape Image by Irish Photographer Colm Keating

When did you get your first camera and what was it?

Presumably, people probably answer this question with a DSLR but the first camera that really sparked my interest in photography was the first-generation iPhone. This was the first phone I had with a camera and it is definitely the camera responsible for lighting the fire. However, after a few years of iPhone photography, I did eventually get a Canon 600D in the summer of 2013 which is where the traditional photography journey started.

As an Irish Photographer, what type of photography do you mostly shoot?

Although it doesn’t earn me a large income, I will always likely be a landscape photographer over any other genre. Living near the sea, it was seascapes in particular that I mostly shot in the beginning, but photography opened up a whole new world of other interests with it, hiking being a huge one. Now I shoot more in the mountains than anywhere else. And I have fostered a love for adventure photography involving outdoor sports since becoming an avid hiker and camper myself. This is an area where I really want to steer my business over the next few years as it combines my love of landscape photography with outdoor sports. For professionals, I think this is the ultimate goal. Many begin shooting whatever photography jobs they can when they turn pro just to keep things rolling over, however, we all would love to just shoot the type of photography we love in return for an income. This isn’t always possible, but finding a niche where you can mold that genre into a profitable product for someone is the perfect compromise, for me anyway!

Landscape Image by Irish Photographer Colm Keating

What styles of photography or subjects interest and motivate you the most?

Its always been the power and beauty of nature for me. You can go to a gorgeous place over and over and it can look so different from one day to the next, all depending on the mood and atmosphere that the weather creates.

How long have you been a serious enthusiast photographer for?

As soon as I was making dedicated trips out to take photos is when I consider a photographer to be a serious enthusiast. For me, this was about six months after picking up my first camera, so the bug really didn’t take long to manifest in me!

What has been the highlight of your photography journey so far?

Meeting all the other amazing photographers I have had the pleasure of shooting with is by far the highlight. This is pretty much an ongoing thing, which is great as its something I can look forward to for as long as I am involved in photography. Many people reading will no doubt be able to relate to the friendship that can be formed with finding someone else who also has that “photography bug”. A lot of family and regular friends just cannot comprehend why we would stand for hours in the same spot, going back day after day just to catch the place at its best, but other photographers can, and I have been lucky enough to meet many I can now call very good friends.

Landscape Image by Irish Photographer Colm Keating

If you could go back in time, what advice would you provide to your younger self-knowing what you know now?

Just get going sooner. I held myself back, convincing myself the stereotypical route of getting a stable career through my degree was the right choice for me. I now know it was not and I am glad I have made the jump to full-time photography. My only regret is that I did not do it sooner.

What are the hardest parts about the type of photography that you do?

The hardest part will always be dragging yourself out of bed for sunrise. Whether the shoot was a success or not, I have never once regretted getting up for sunrise. However, that knowledge never seems to make it easier to leave the warmth of your bed when it’s still dark outside and it seems you only crawled into it 5 mins ago.

Landscape Image by Irish Photographer Colm Keating

What is in your kit bag?

Nikon D750 and D7100. Nikon 14-24 F/2.8. Tamron 24-70 F/2.8. Sigma 70-200 F/2.8. Haida Filters CPL, 6 stop ND, 10 stop ND. 6 batteries. Peak design strap and capture pro clip. Cable release. Rollei tripod. And last but definitely not least, a shower cap!

Most Photographers have GAS (Gear Acquisition Syndrome) – what gear is on your “to get” list?

To be honest I am very happy with the gear I have. My only complaint is how heavy it all is. As I do a lot of hiking, the weight can be somewhat problematic. Therefore I am considering swapping some of my fast aperture lenses for lighter variable aperture versions. I have not decided what I will do yet though. As regards GAS, I have it pretty well controlled (I think!). I have not bought anything photography related in well over a year, except for replacing a broken tripod head. Now I just have to ensure I keep telling myself that just because I have not bought anything in a year, that it does not allow me to justify a new purchase!

Landscape Image by Irish Photographer Colm Keating

You come from Ireland and are currently living in New Zealand – which satisfies your photography more?

At the moment I have to say New Zealand. My second love is wild camping/hiking and so the setup for that here is just phenomenal. Of course, there are great places to be found for this back home in Ireland too but it is just on another level here in New Zealand. There is also the appeal of a new place, seeing something with fresh eyes. New Zealand most certainly still has for me as I have only been here for six months. I will always want to continue to explore new countries though, that is something I am confident that will never stop.

What is next on your photography journey?

Recently I have begun to shoot more people in my photography, particularly with adventure-related sports. This is something I really want to move into more over the next year or so. That will entail me learning many new photography skills that come with the genre so there is another steep learning curve ahead. For me though, the learning is part of the fun. Dipping into other genres can open your mind to ideas that you wouldn’t have had if you stick in the one type of photography all the time. For that reason alone I really love giving every type of photography a go. Hoping it will bring something new to my staple genre that is landscape photography.

Profile Pic for Irish Photographer Colm Keating

You can view more of Colm’s Photography over on his website at www.colmkeating.com and you can follow along with his adventures over on his Facebook Page www.fb.com/keatingcolm –  and his Instagram Feed – www.instagram.com/keatingcolm

SaveSave