Tag: Astrophotography

Beginner’s Guide to Astrophotography

Have you ever been out camping in the woods, far away from town, and spent the night stargazing? (I’d highly recommend it if you have not!) The overall feeling that one gets from stargazing is a feeling of celestial awe. In this beginner’s guide to star photography, we will discuss some tips on how to get started in this amazing field of photography.

To begin, let’s discuss a what kind of equipment is recommended for star photography. First of all, a full-frame SLR camera is highly recommended. Full-frame cameras have a higher image quality – a must for star photography. Higher ISO settings also look better in full-frame cameras than in cameras with smaller sensors. The second piece of equipment that is highly recommended is having a wide-angle lens such as a fisheye lens in your photography bag would be ideal. The wider the lens, the better view you will have of the sky. During night-time still photography, having a tripod can be a life-saver. This is the third item that every star photographer should have. A tripod will let the photographer have stability as they take 15 second or longer photos.

One thing to note: star photography doesn’t work well if there is a full moon out (a half moon can be an issue, too). Large light sources such as the moon will overpower the light from the stars. Also, city lights cause “light pollution”, which can interfere with the scene. It’s best to take star photos far away from the city and its bright lights.

When it comes to photography, space is more than the final frontier – it’s totally unexplored. That’s because astrophotography, which is photography of the night sky, requires special equipment, planning, and patience. But with the right attitude and the right gear, you can capture some incredible celestial imagery.

How to Do Astrophotography

  • Invest in the Right Equipment
  • Plan Timing and Location
  • Decide on Astrophotography Type
  • Determine Camera Settings
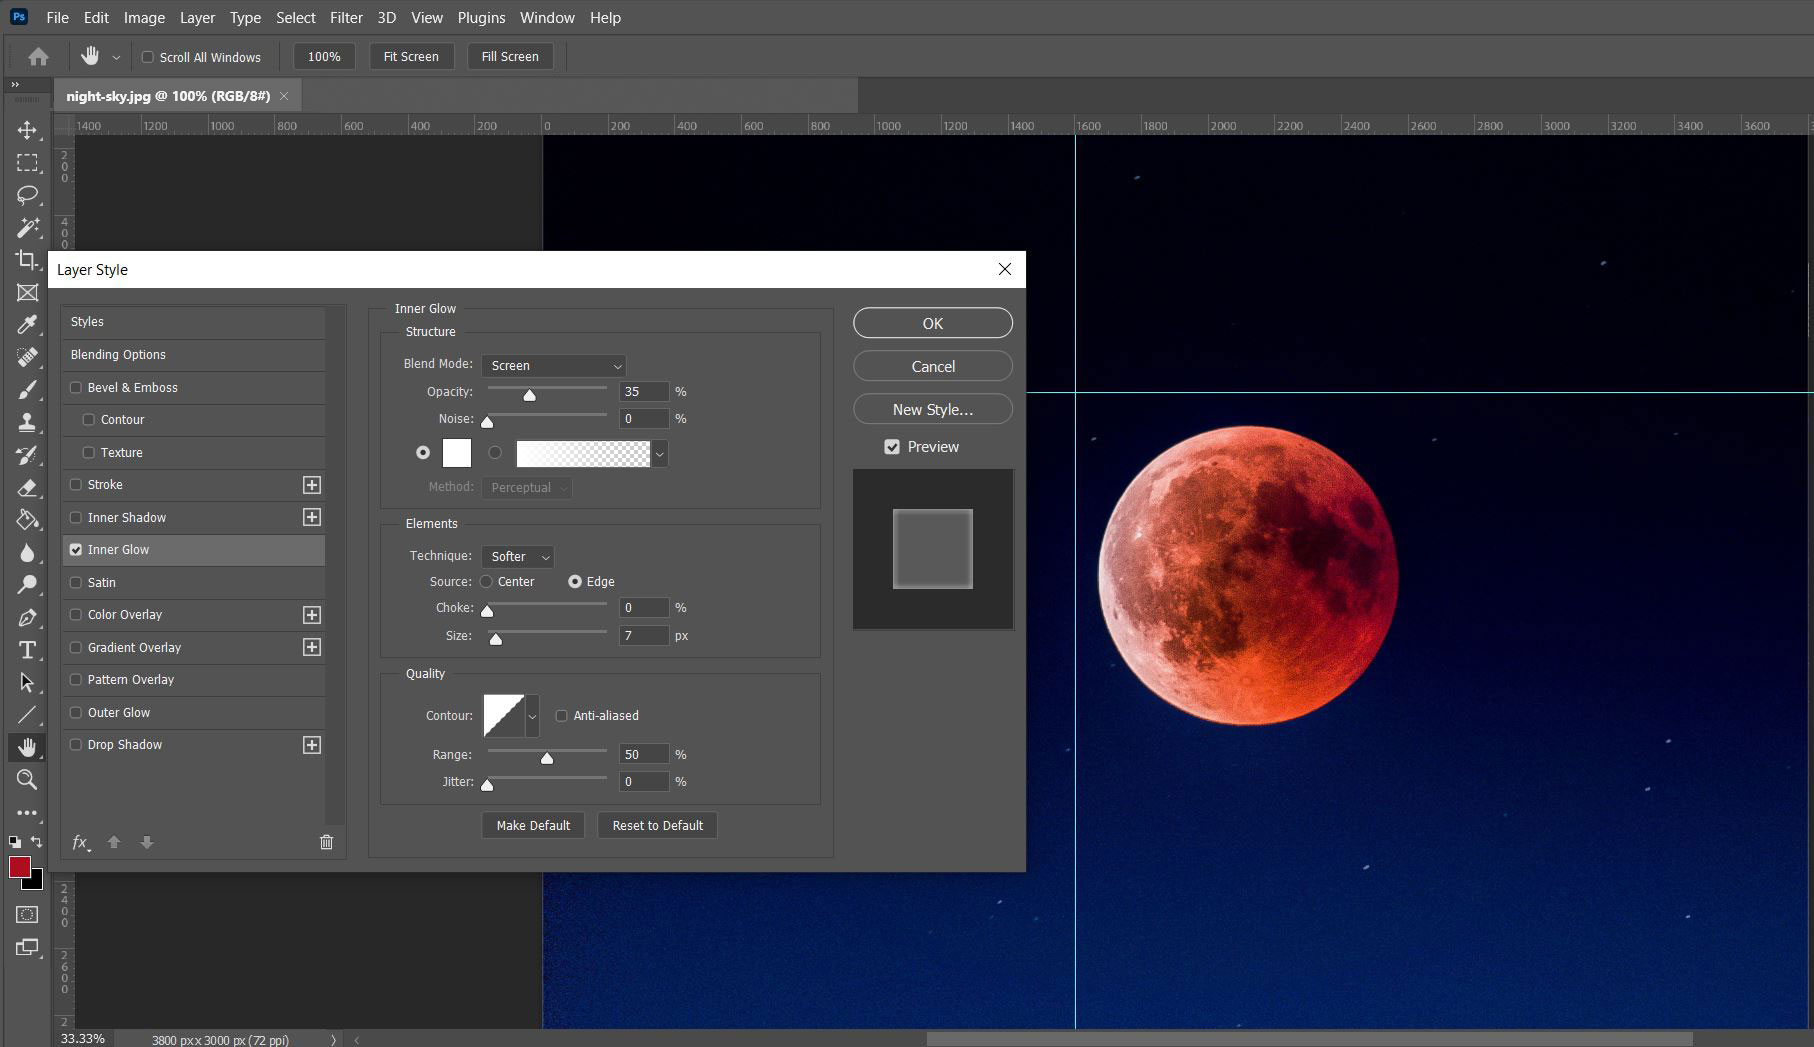
  • Edit Your Astrophotography Shots

Everyone is a photographer these days, since pretty much everyone has a smartphone. Photography allows us to capture an image, whether it’s to preserve a memory or show off an artistically beautiful scene or moment. That said, certain types of photography are more difficult than others. Perhaps one of the more elusive forms of capturing a photo is capturing subjects that are millions or billions of miles away from your camera lens.

What Is Astrophotography?

Many different types of photography allow photographers both professional and amateur to capture images of topics that interest them, whether that’s nature photography, travel photography, or portraits.

Astrophotography is the practice of photographing the night sky.

The first photographic image of the night sky was a daguerreotype of the moon captured in 1840 by John William Draper. Since then, millions of pictures of the cosmos have been captured, including stars, planets, nebulae, galaxies, comets, moons, northern lights, eclipses, and other celestial bodies and phenomena. While you might think it requires a satellite to capture images of outer space, that’s not necessarily true. Regular everyday people like you can also capture images of the night sky with the right equipment, planning, and skills.

How To Do Astrophotography

As you may have seen from your social media feeds, capturing the night sky is becoming an increasingly popular photography trend around the world. If this interests you, perhaps it’s time to go boldly where no one has gone before – without having to actually leave the earth’s atmosphere.

Invest in the Right Equipment

The first piece of equipment you’ll need is a good DSLR or mirrorless camera. A digital single lens reflex camera is different from a traditional camera because instead of displaying what the camera sees through a viewfinder, it shows you on a digital screen.

If you’re wondering why you can’t just use your iPhone or Android the same way, it’s because the sensors on a DSLR camera will facilitate much better quality images. This is something that can be especially hard to achieve photographing at night. DSLR cameras are noted for their low image noise – undesired variations in brightness – and high ISO – greater ability to capture images in low lighting. For taking pictures of bright pinpoints of light in the night sky, these attributes are simply a must-have. Some DSLRs can attach to a telescope lens, which can also vastly improve the precision of your photographs.

Other pieces of equipment can include lenses that can be attached to your DSLR. Lenses that are good for astrophotography are fast lenses with apertures of f2.8 and wider, which allow for as much light to reach the camera as possible. A tripod is often also a must-have so that you can keep your camera stable while photographing the night sky.

Some photographers like to use a remote shutter release, which allows you to trigger the shutter without touching the camera so you can minimize vibrations that could disturb your photograph during exposure. If you are going to be taking photos of moving objects like a comet or shooting star, an intervalometer will be a useful piece of equipment if one is not built into your camera. Some photographers also like to use a headlamp with red light so they can make sure their hands are free while they are setting up their shoot. If you’re photographing in cold weather, a lens heater can prevent condensation from ruining your pictures.

Plan Timing and Location

Most Americans live in urban or suburban areas that are heavily impacted by light pollution. But there’s a decent chance that just an hour away from where you live (or closer) there is a place with much less light pollution. You can use an app or site like Dark Site Finder or Light Pollution Map to locate a dark place near you for photographing the wonders of the celestial realm.

Timing is also an important consideration, because the stars and constellations move throughout the night, as do other heavenly bodies such as the moon and planets. Additional considerations are seasonal, as certain constellations, stars, and planets move across the sky throughout different times of the year, as you might be vaguely aware of from discussions of the zodiac and your horoscope. NASA, the U.S. National Park Service, and the Weather Channel can all be good resources for planning out astrophotography shoots of particular events in space like the alignment of planets, an eclipse, comet, or high visibility for the Milky Way.

Decide on Astrophotography Type

There are many different things to photograph in the night sky, and this will influence some of the investments you make in terms of time and money into astrophotography. Stars and the surface of the moon are relatively easy to photograph, and some aspiring night sky photographers are even able to capture decent images with a smartphone.

However, nebulae, galaxies (like the arm of the Milky Way in which we are located), northern lights, and images that are deeper into space will require more advanced equipment. It might be best to start with some simple types of astrophotography before investing money into cameras and lenses for capturing trickier imagery. That said, there are different types of astrophotography. Piggyback astrophotography involves mounting a camera to a telescope, whereas prime focus astrophotography involves using a telescope as a lens.

Afocal astrophotography is similar but involves taking a picture through the eyepiece of a telescope. And eyepiece projection astrophotography involves merging your camera and your telescope into one piece of equipment with a particular type of eyepiece on the telescope.

Determine Camera Settings

The main challenge with astrophotography is getting enough light in the shot since you are photographing elements surrounded by darkness. Some of the best practices for night sky photography will include using the manual or bulb mode on your camera. Fast apertures of f2.8 to f4 are better for capturing better images.

Setting your white balance to daylight or automatic may seem counterintuitive but also produces better results, as does manual focus and RAW image format. Shooting in RAW basically means your image will not be compressed into a JPEG, which is not only going to come in useful in terms of image quality, but in terms of the photo editing that you will be able to do. An ISO of 400 to 1600 is best, and some photographers recommend using the 10-second delay drive mode.

One standard rule that many photographers use is the 500 rule, which is basically as follows: divide the number 500 by the focal length of your lens to determine the longest amount of exposure (in seconds) before stars will begin to trail on your image. Keep in mind that the night sky is actually moving, so even just that small amount of time can result in a picture with star trails instead of clean pinpricks of light.

Edit Your Astrophotography Shots

Of course, as any photographer knows, capturing a shot is just half the battle. The other half needs to be waged in the Lightroom, or digital Lightroom if you are working with a DSLR camera. Knowing your astrophotography Lightroom presets can go a long way towards having a professional palette of options to choose from in terms of editing your final photograph.

Even if the colors, lighting, and focus were not 100% to your liking as captured during the night time shoot, you can use your digital Lightroom to make changes to the photograph and bring to fruition the night sky as you wish to present it.

Mastering the art of photo editing is one of those skill sets that really set great photographers apart from those who dabble. You can invest in the best equipment out there, but if you do not have editing skills or the right tools for that, then you won’t get to enjoy the full experience of capturing the night sky. And don’t think that capturing the night sky in remote locations means you have to forgo the editing experience, either due to logistical constraints (the weekend ended) or lack of mobile access… because there are also Astrophotography Lightroom mobile presets.

If you need some motivation to determine the importance of editing, browse through some of the social media posts that astrophotographers are putting up, using related hashtags (#astrophotographers, #space, #stars #nightsky), and see for yourself how many of the most standout images have been edited.

Still Star Photography
stars

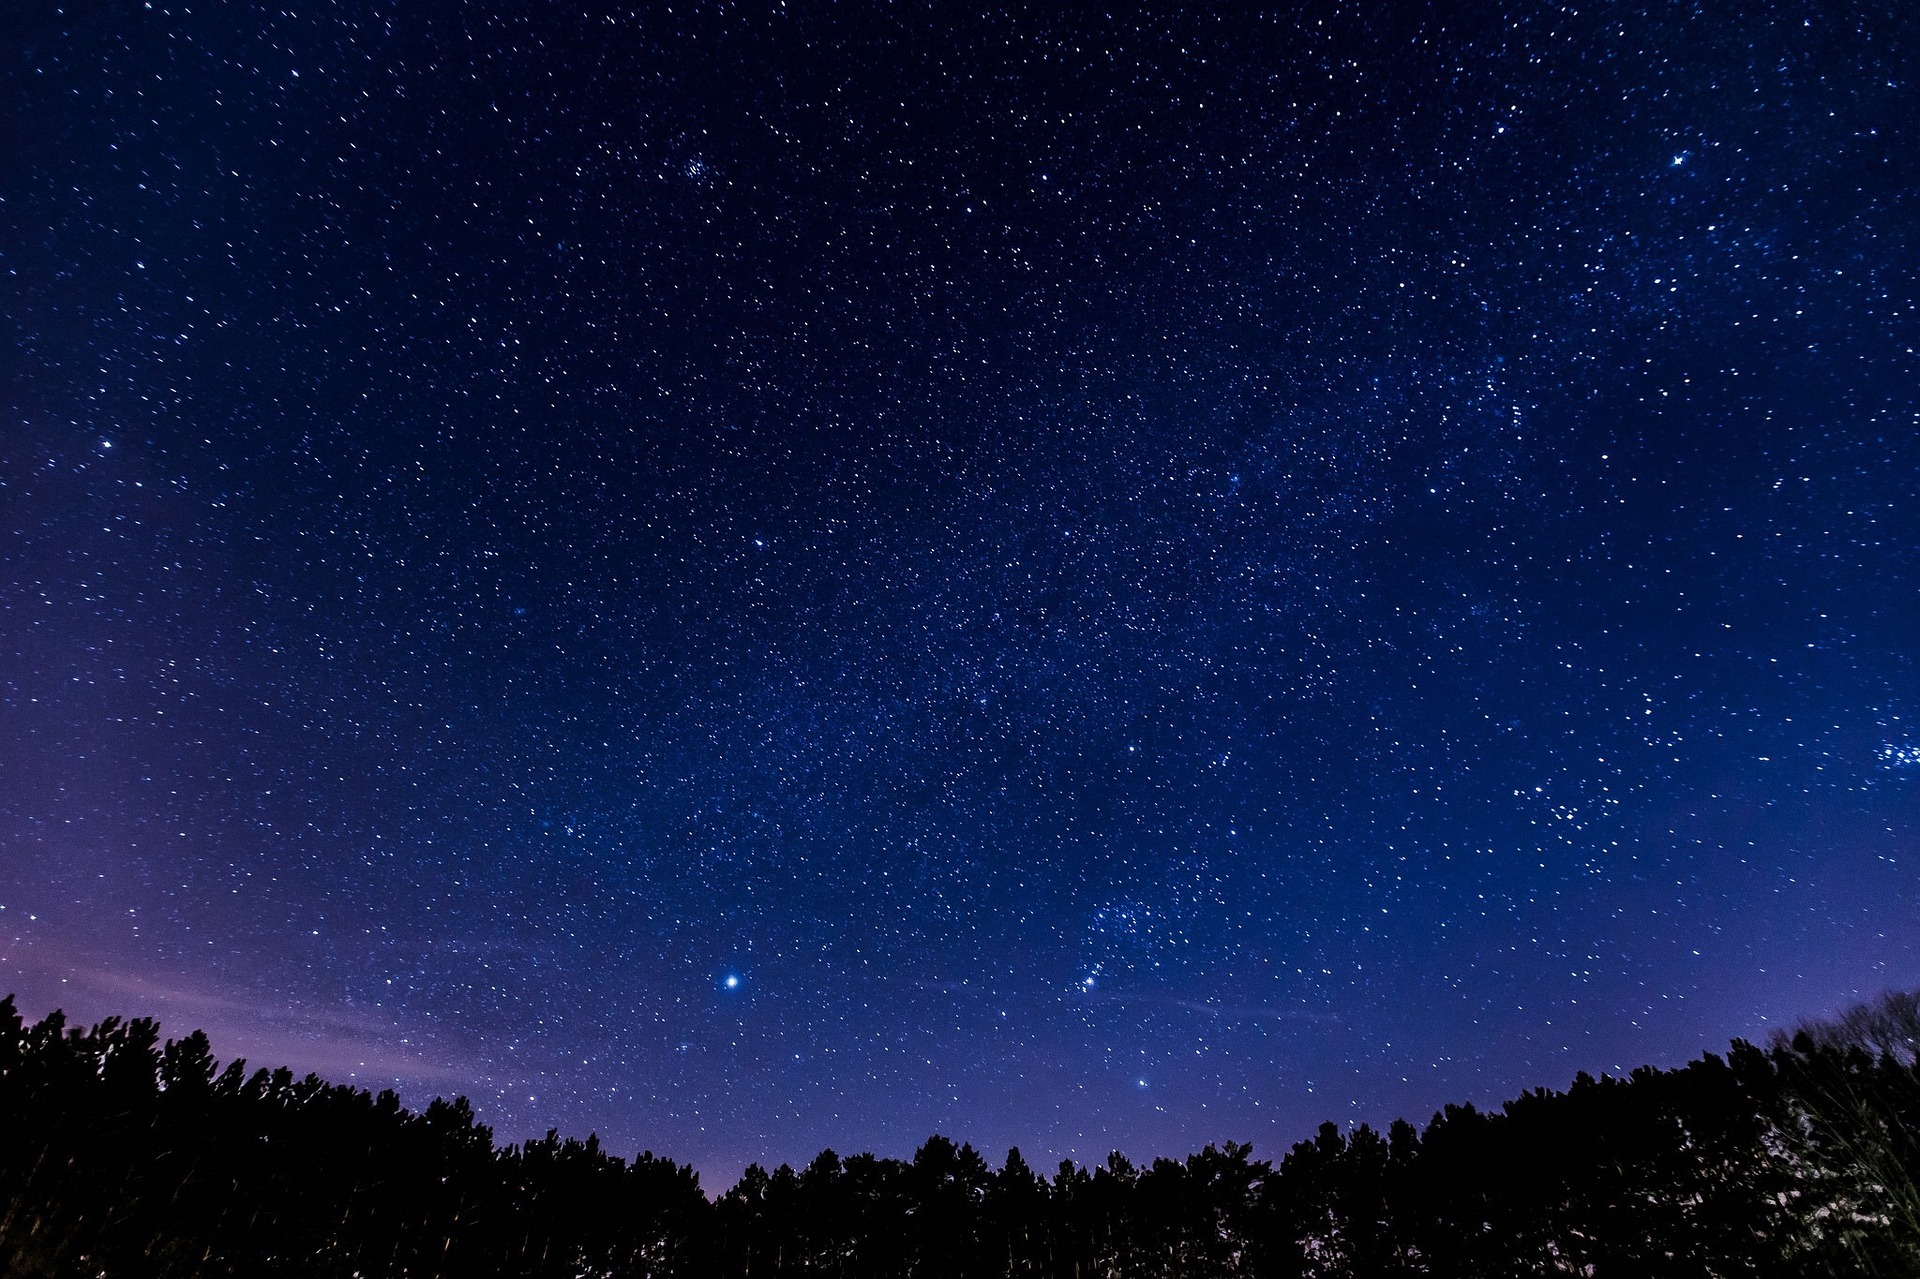
Especially with star photography, setting the correct camera settings is pertinent. With this in mind, shooting on the Manual mode on an SLR camera would make the most sense. To start with, try these settings: 25-second shutter speed, f/2.8 aperture, and ISO 1600. By limiting the shutter speed at a maximum of 15-25 seconds, the photographer keeps the picture from becoming a star trail photo. (We will discuss the settings for star trail photos in a separate section below.)
stars13

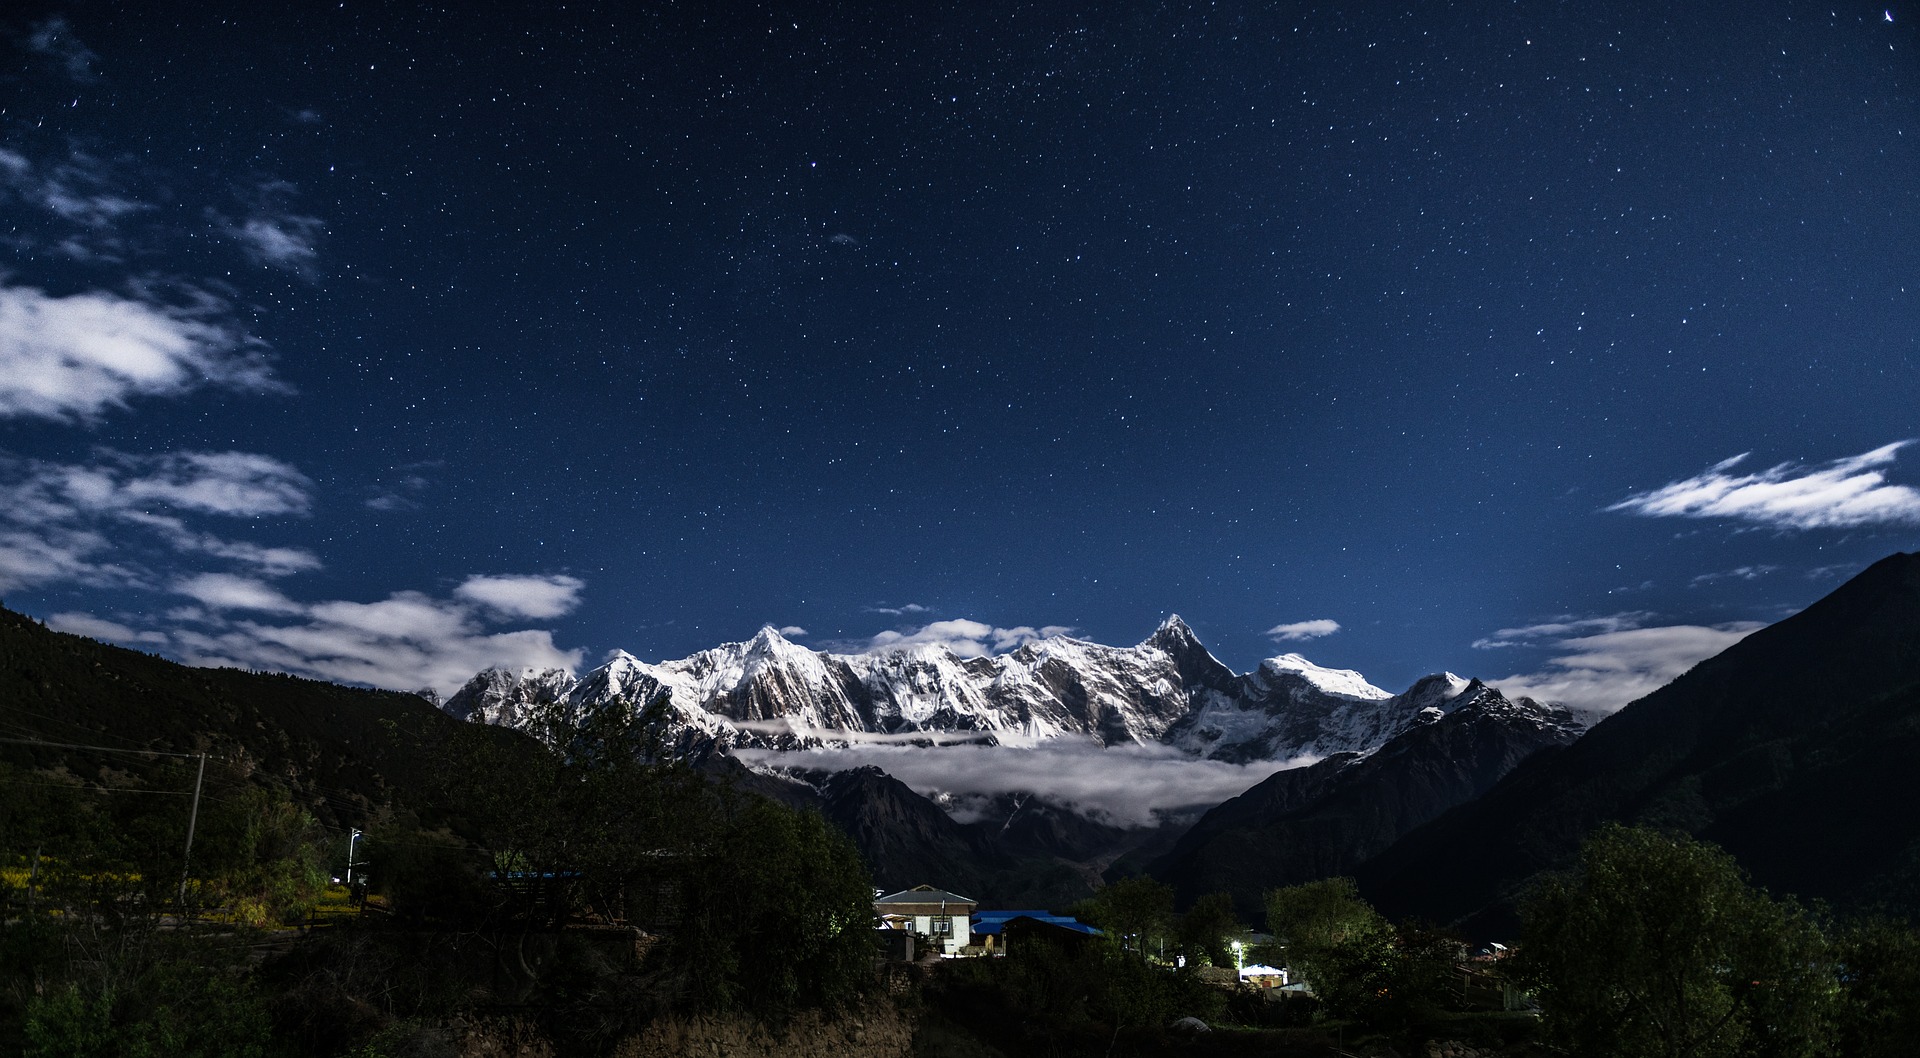
If you are using a fisheye lens, likely the maximum aperture setting is f/2.8. For this reason, we recommend using a full-frame SLR so you can crank up the ISO setting without too many repercussions. Full-frame SLRs handle high ISO setting quite well and won’t have as much noise as the same ISO setting on an SLR with a smaller sensor.
stars11

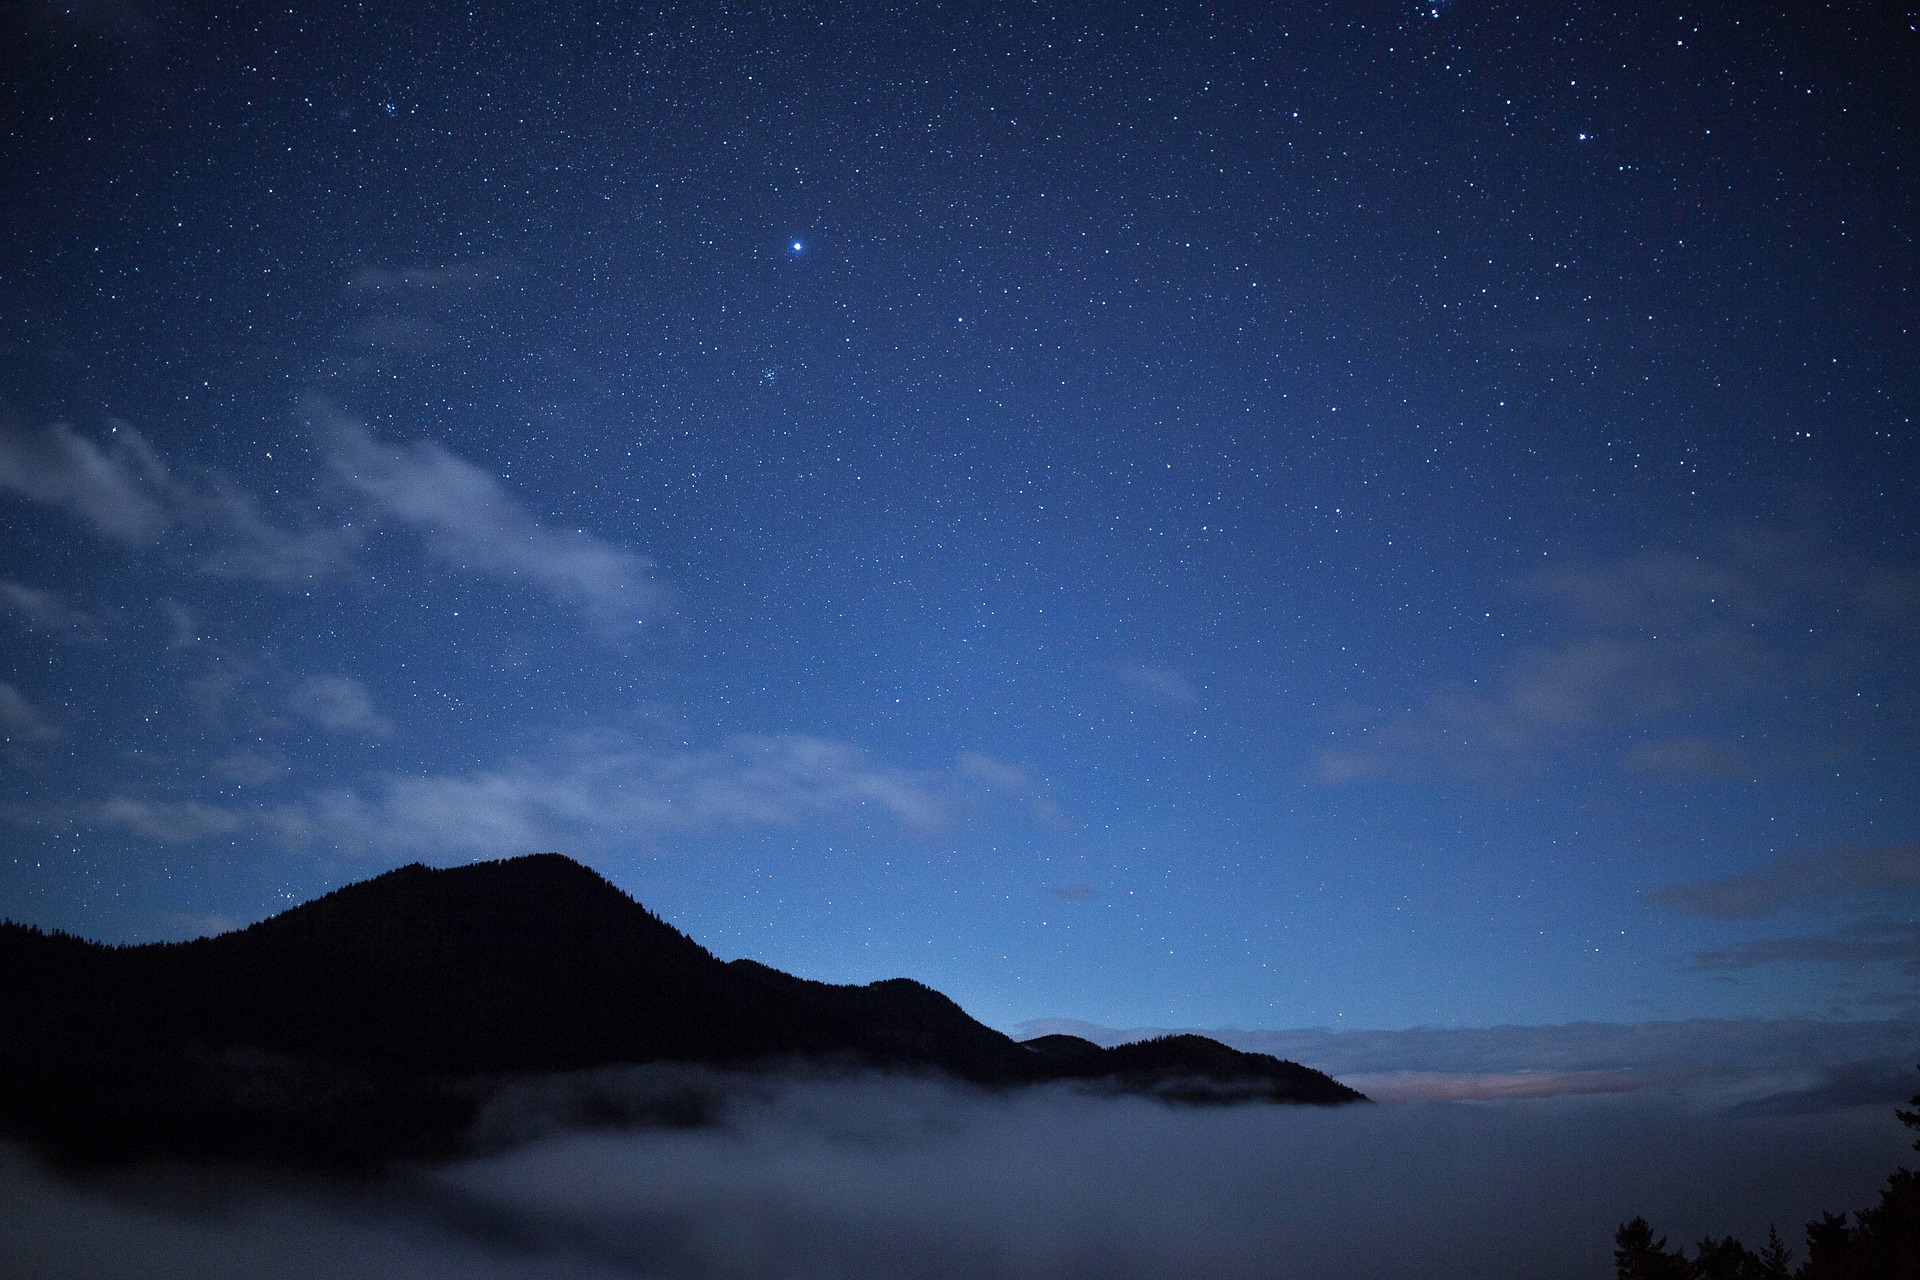
Now that you’ve inputted the settings into the camera, it’s time to shoot the photo. To focus, use the camera lens’ autofocus (AF) and point at a bright star, or the moon. After setting the focus, switch the auto focus (AF) on the lens to manual focus (MF). This way, you can mount the camera and not worry about awkwardly trying to focus the camera while it’s on a tripod. Just keep in mind not to bump the autofocus or the zoom ring on the lens, as that can mess up the focus. After the camera is mounted (make sure to use a sturdy tripod, and brace it if it’s windy outside), set the camera on a self-timer or use a remote to take the photo. It’s very easy for the photographer to accidentally bump the camera or move it ever so slightly when they manually press the shutter with their hand.

Star Trail Photography
stars2

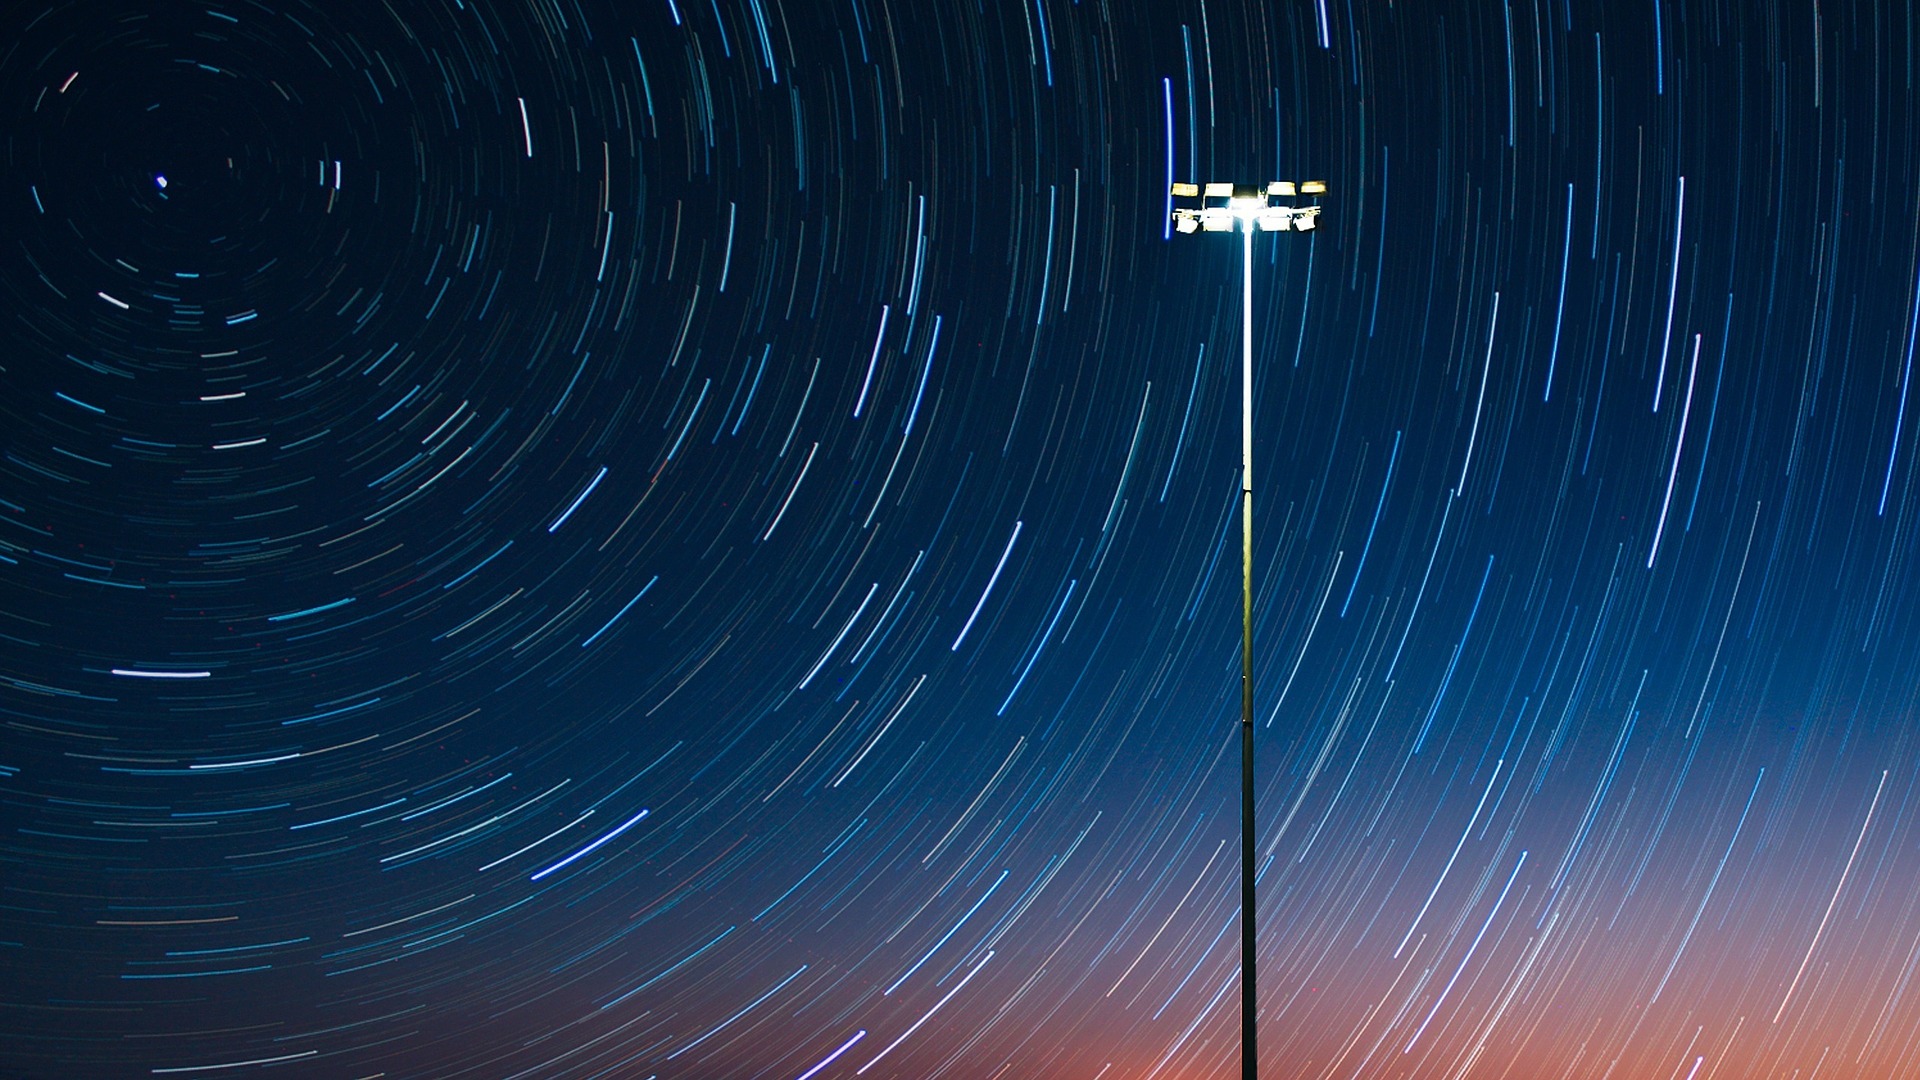
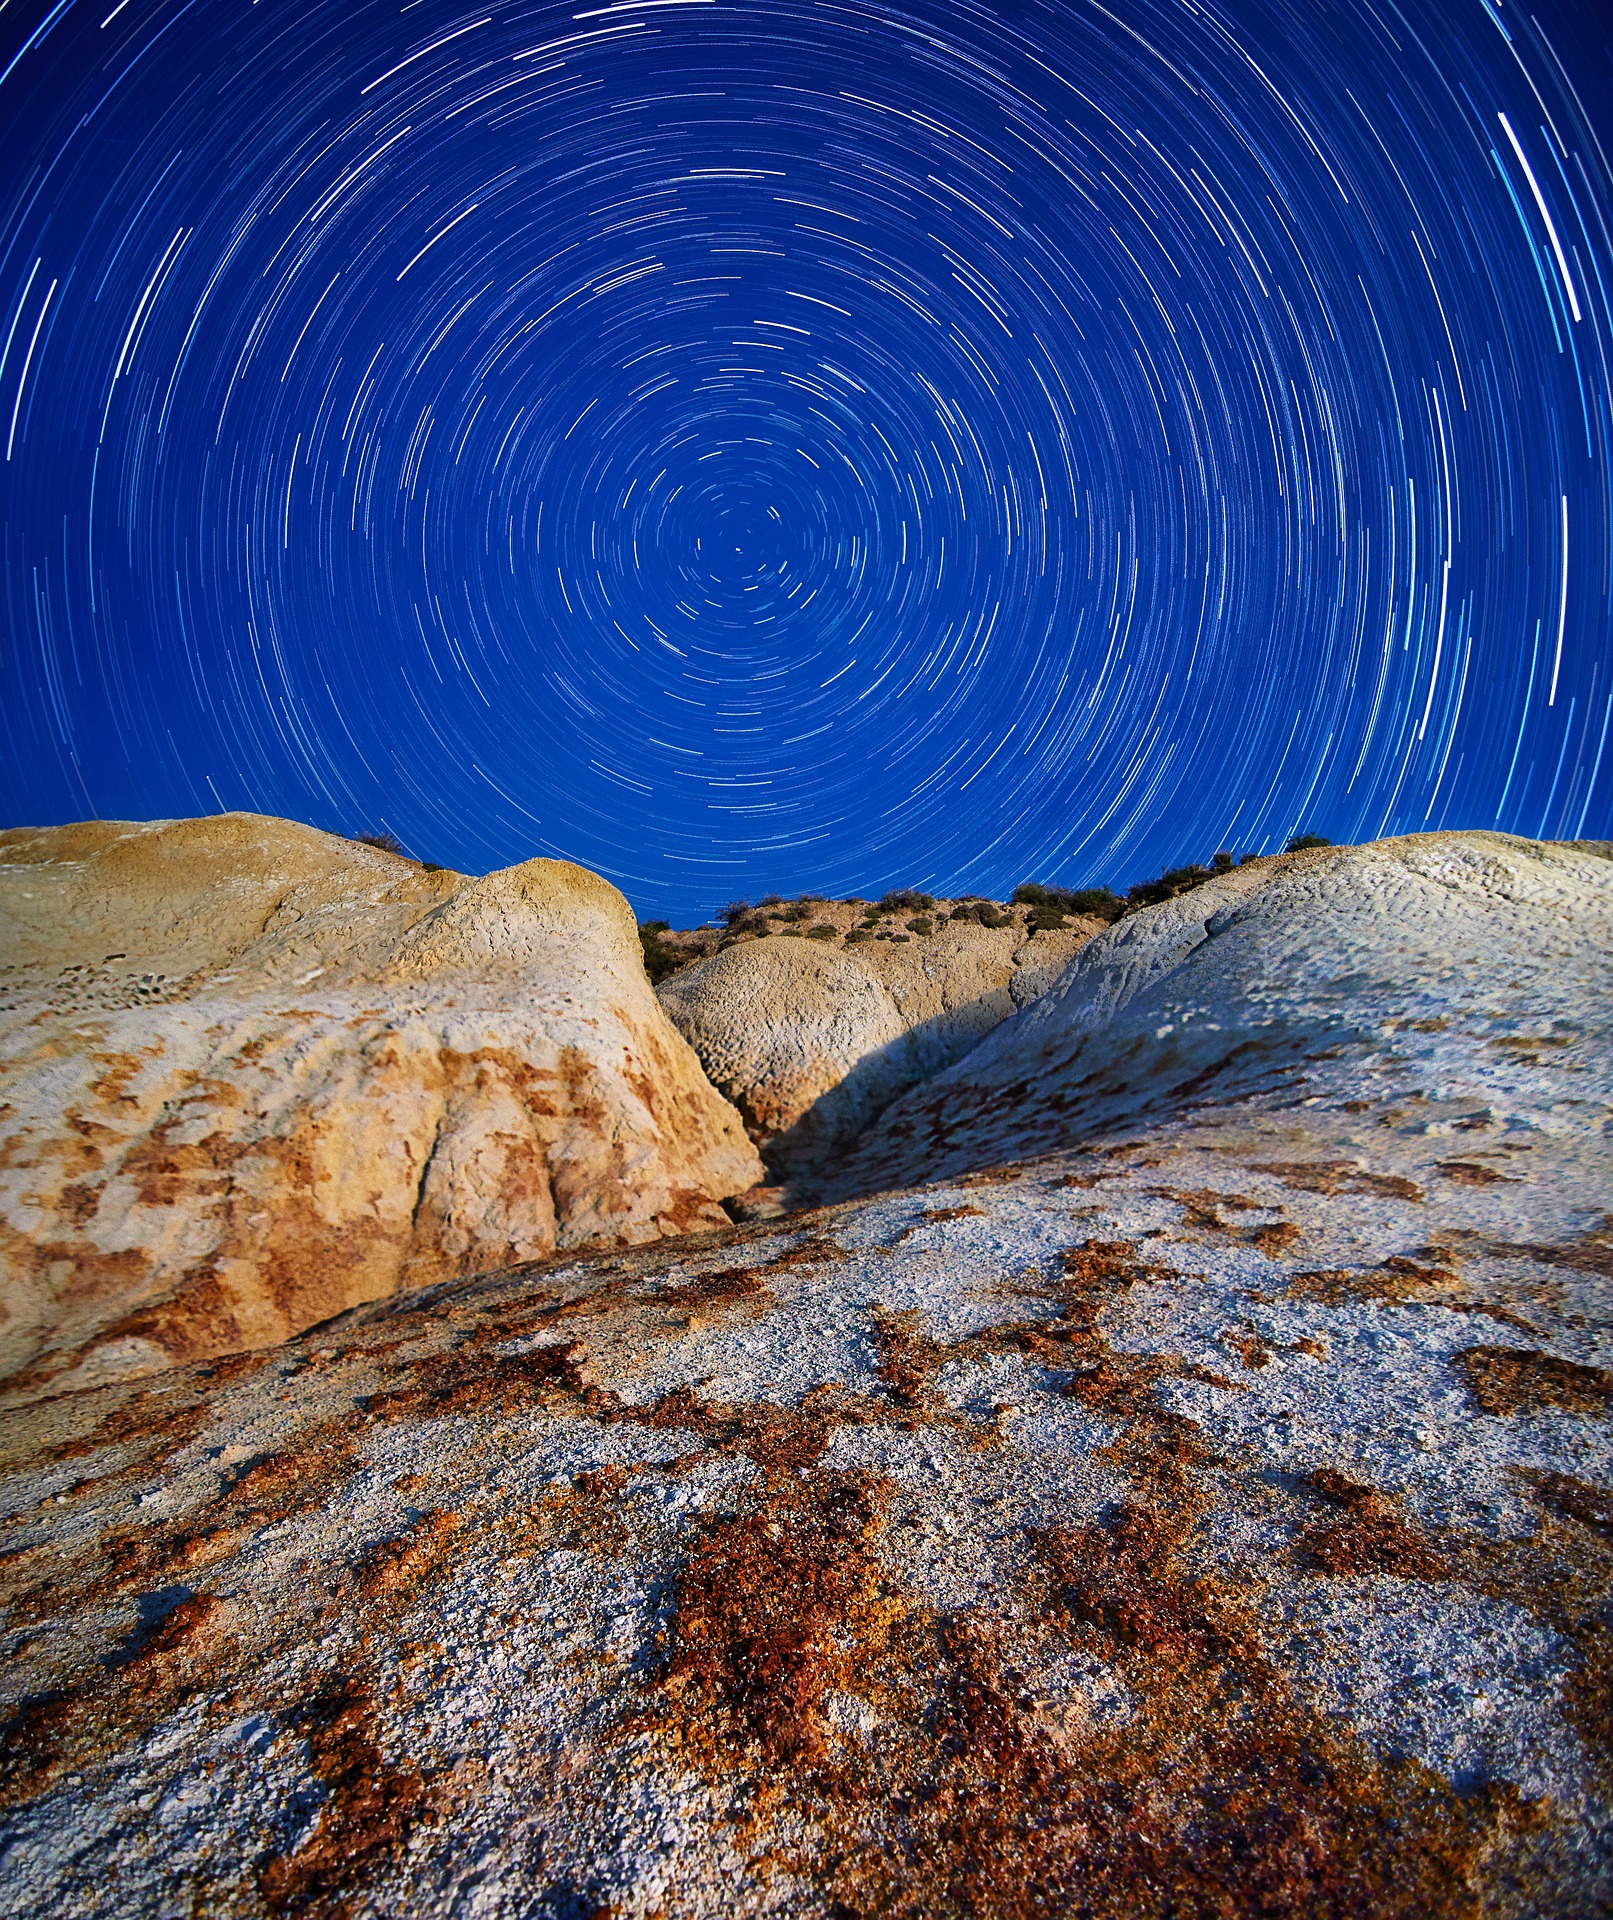
Star trail photos can look pretty impressive when taken anywhere, but they look even cooler when there is something in the foreground to add contrast or another dimension to the scene.
stars2

The equipment required for star trail photos is exactly the same as the equipment required for regular star still photos. A full-frame SLR camera, a wide-angle lens, and a sturdy tripod would be the ideal star trail photographer’s setup.
stars12

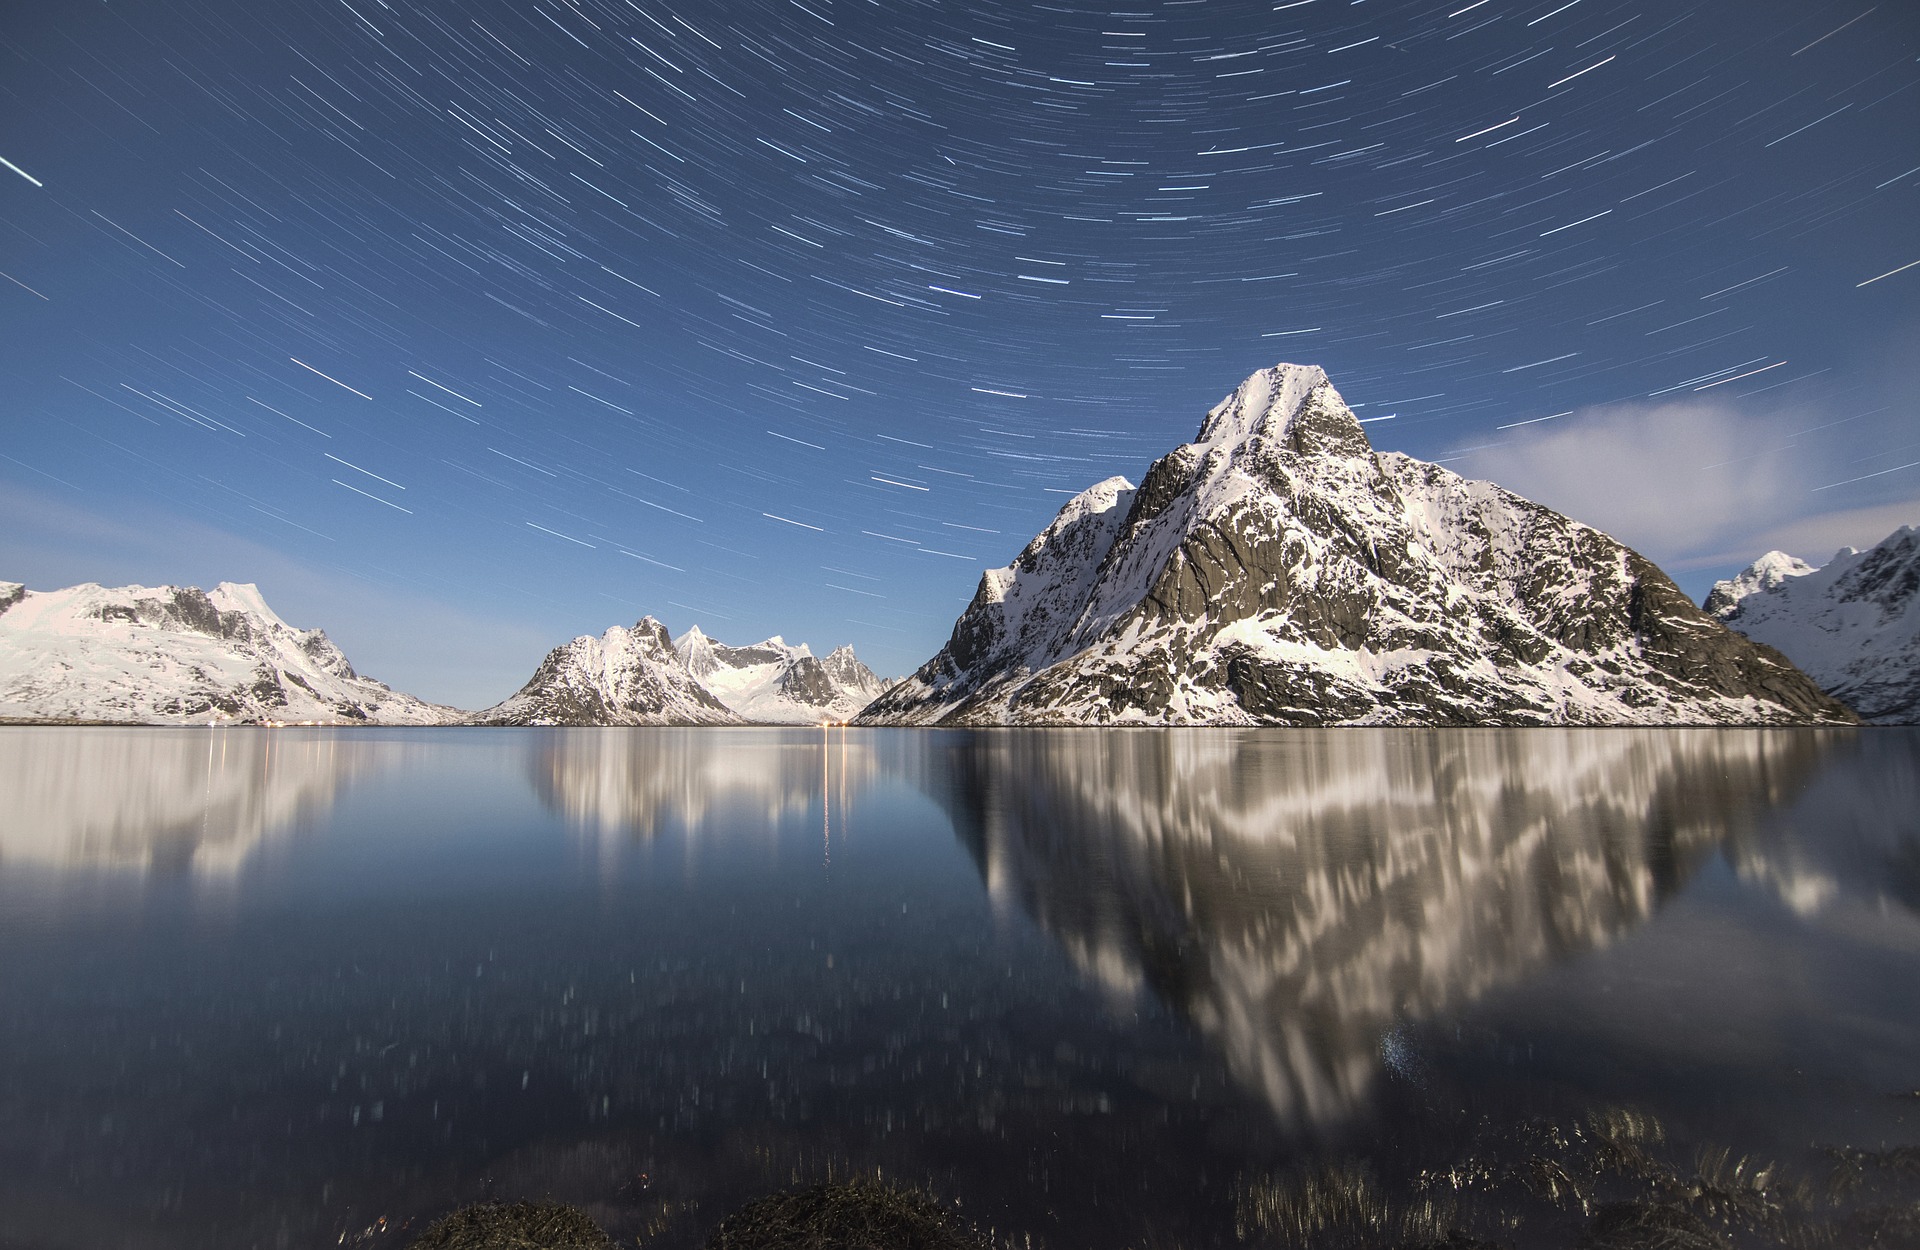
As for getting the stars to rotate around in a circular manner – that’s actually a normal occurrence. By pointing your camera approximately North or South, you’ll see the stars circling around the poles. A good amount of time to shoot is between 20 minutes – 1 hour, depending on the effect you are trying to achieve (a shorter trail vs. a longer trail). Mess around with different settings, and see what works best for you.

Astrophotography and Shooting the Night Sky

Amateur astronomers don’t need much to share a beautiful image of an intriguing or inspiring celestial object, whether it’s the andromeda galaxy or the north star against a clear sky. Although you might think it takes something like the Hubble Space Telescope to capture deep sky objects, all it really takes is a digital camera and maybe a few extra pieces of equipment like a wide angle lens and a tripod to prevent camera shake.

If you have more experience and want to go beyond the images that can be seen with the naked eye, deep sky astrophotography may require some additional pieces of equipment like a telescope for deep sky imaging. Generally speaking, a good astrophotography camera is able to overcome the challenge of low light and a dark sky, whether you are looking to capture a meteor shower or use some planetary astrophotography to capture your favorite planet. Once you’ve captured your image, it’s off to the digital darkroom where tools like Adobe Lightroom can help you really bring the work of your astrophotography camera to life.

Beyond camera equipment, you will also need to learn about the weather and the patterns of the night sky, so that you will know the best times and locations to engage in night photography. Learning the name of each and every star cluster and the layout of the solar system can also become one of the most rewarding parts of putting an astrophotography camera to work.

It can be very rewarding to share an image of lunar eclipses or a star trail with friends and family members, perhaps inspiring them to enjoy the wonders of the night sky as well. Many astrophotographers will tell you that one of the best parts of this hobby is being out in nature at night, with nothing but quiet and no light pollution… just the stars and celestial objects above to remind you that the universe is vast and inspiring.

Happy shooting!

Beginner’s Guide to Astrophotography

When it comes to photography, space is more than the final frontier – it’s totally unexplored. That’s because astrophotography, which is photography of the night sky, requires special equipment, planning, and patience. But with the right attitude and the right gear, you can capture some incredible celestial imagery.

Astrophotography Guide

  • Invest in the Right Equipment
  • Plan Timing and Location
  • Decide on Astrophotography Type
  • Determine Camera Settings
  • Edit Your Astrophotography Shots

Everyone is a photographer these days, since pretty much everyone has a smartphone. Photography allows us to capture an image, whether it’s to preserve a memory or show off an artistically beautiful scene or moment. That said, certain types of photography are more difficult than others. Perhaps one of the more elusive forms of capturing a photo is capturing subjects that are millions or billions of miles away from your camera lens.

What Is Astrophotography?

Nightscape

Many different types of photography allow photographers both professional and amateur to capture images of topics that interest them, whether that’s nature photography, travel photography, or portraits.

Astrophotography is the practice of photographing the night sky.

The first photographic image of the night sky was a daguerreotype of the moon captured in 1840 by John William Draper. Since then, millions of pictures of the cosmos have been captured, including stars, planets, nebulae, galaxies, comets, moons, northern lights, eclipses, and other celestial bodies and phenomena. While you might think it requires a satellite to capture images of outer space, that’s not necessarily true. Regular everyday people like you can also capture images of the night sky with the right equipment, planning, and skills.

How To Do Astrophotography

As you may have seen from your social media feeds, capturing the night sky is becoming an increasingly popular photography trend around the world. If this interests you, perhaps it’s time to go boldly where no one has gone before – without having to actually leave the earth’s atmosphere.

Invest in the Right Equipment

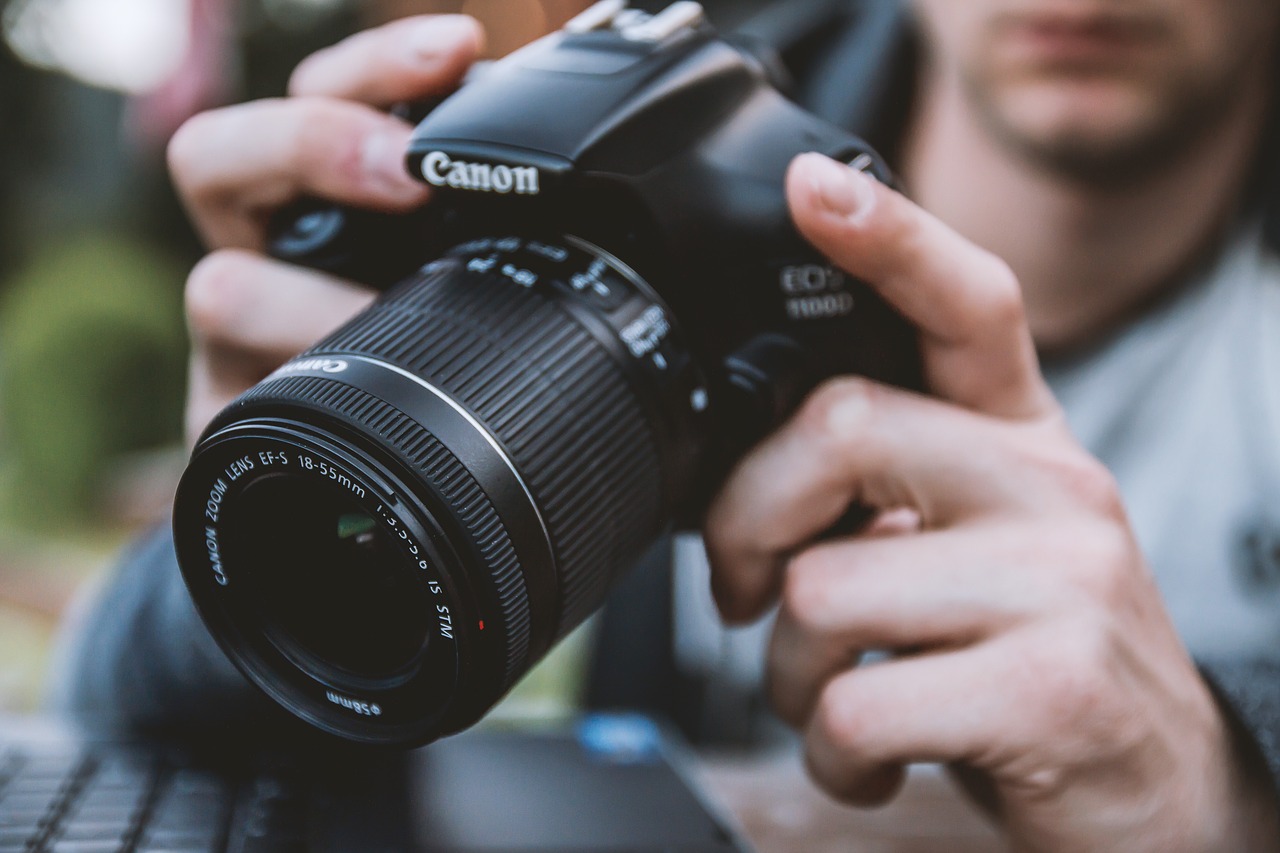
Cannon DSLR Camera

The first piece of equipment you’ll need is a good DSLR or mirrorless camera. A digital single lens reflex camera is different from a traditional camera because instead of displaying what the camera sees through a viewfinder, it shows you on a digital screen.

If you’re wondering why you can’t just use your iPhone or Android the same way, it’s because the sensors on a DSLR camera will facilitate much better quality images. This is something that can be especially hard to achieve photographing at night. DSLR cameras are noted for their low image noise – undesired variations in brightness – and high ISO – greater ability to capture images in low lighting. For taking pictures of bright pinpoints of light in the night sky, these attributes are simply a must-have. Some DSLRs can attach to a telescope lens, which can also vastly improve the precision of your photographs.

Other pieces of equipment can include lenses that can be attached to your DSLR. Lenses that are good for astrophotography are fast lenses with apertures of f2.8 and wider, which allow for as much light to reach the camera as possible. A tripod is often also a must-have so that you can keep your camera stable while photographing the night sky.

Some photographers like to use a remote shutter release, which allows you to trigger the shutter without touching the camera so you can minimize vibrations that could disturb your photograph during exposure. If you are going to be taking photos of moving objects like a comet or shooting star, an intervalometer will be a useful piece of equipment if one is not built into your camera. Some photographers also like to use a headlamp with red light so they can make sure their hands are free while they are setting up their shoot. If you’re photographing in cold weather, a lens heater can prevent condensation from ruining your pictures.

Plan Timing and Location

Choose a Location

Most Americans live in urban or suburban areas that are heavily impacted by light pollution. But there’s a decent chance that just an hour away from where you live (or closer) there is a place with much less light pollution. You can use an app or site like Dark Site Finder or Light Pollution Map to locate a dark place near you for photographing the wonders of the celestial realm.

Timing is also an important consideration, because the stars and constellations move throughout the night, as do other heavenly bodies such as the moon and planets. Additional considerations are seasonal, as certain constellations, stars, and planets move across the sky throughout different times of the year, as you might be vaguely aware of from discussions of the zodiac and your horoscope. NASA, the U.S. National Park Service, and the Weather Channel can all be good resources for planning out astrophotography shoots of particular events in space like the alignment of planets, an eclipse, comet, or high visibility for the Milky Way.

Decide on Astrophotography Type

Night Skies

There are many different things to photograph in the night sky, and this will influence some of the investments you make in terms of time and money into astrophotography. Stars and the surface of the moon are relatively easy to photograph, and some aspiring night sky photographers are even able to capture decent images with a smartphone.

However, nebulae, galaxies (like the arm of the Milky Way in which we are located), northern lights, and images that are deeper into space will require more advanced equipment. It might be best to start with some simple types of astrophotography before investing money into cameras and lenses for capturing trickier imagery. That said, there are different types of astrophotography. Piggyback astrophotography involves mounting a camera to a telescope, whereas prime focus astrophotography involves using a telescope as a lens.

Afocal astrophotography is similar but involves taking a picture through the eyepiece of a telescope. And eyepiece projection astrophotography involves merging your camera and your telescope into one piece of equipment with a particular type of eyepiece on the telescope.

Determine Camera Settings

Settings of Camera

The main challenge with astrophotography is getting enough light in the shot since you are photographing elements surrounded by darkness. Some of the best practices for night sky photography will include using the manual or bulb mode on your camera. Fast apertures of f2.8 to f4 are better for capturing better images.

Setting your white balance to daylight or automatic may seem counterintuitive but also produces better results, as does manual focus and RAW image format. Shooting in RAW basically means your image will not be compressed into a JPEG, which is not only going to come in useful in terms of image quality, but in terms of the photo editing that you will be able to do. An ISO of 400 to 1600 is best, and some photographers recommend using the 10-second delay drive mode.

One standard rule that many photographers use is the 500 rule, which is basically as follows: divide the number 500 by the focal length of your lens to determine the longest amount of exposure (in seconds) before stars will begin to trail on your image. Keep in mind that the night sky is actually moving, so even just that small amount of time can result in a picture with star trails instead of clean pinpricks of light.

Edit Your Astrophotography Shots

Photoshop


Of course, as any photographer knows, capturing a shot is just half the battle. The other half needs to be waged in the Lightroom, or digital Lightroom if you are working with a DSLR camera. Knowing your astrophotography Lightroom presets can go a long way towards having a professional palette of options to choose from in terms of editing your final photograph.

Even if the colors, lighting, and focus were not 100% to your liking as captured during the night time shoot, you can use your digital Lightroom to make changes to the photograph and bring to fruition the night sky as you wish to present it.

Mastering the art of photo editing is one of those skill sets that really set great photographers apart from those who dabble. You can invest in the best equipment out there, but if you do not have editing skills or the right tools for that, then you won’t get to enjoy the full experience of capturing the night sky. And don’t think that capturing the night sky in remote locations means you have to forgo the editing experience, either due to logistical constraints (the weekend ended) or lack of mobile access… because there are also astrophotography Lightroom mobile presets.

If you need some motivation to determine the importance of editing, browse through some of the social media posts that astrophotographers are putting up, using related hashtags (#astrophotographers, #space, #stars #nightsky), and see for yourself how many of the most standout images have been edited.

Astrophotography and Shooting the Night Sky

Amateur astronomers don’t need much to share a beautiful image of an intriguing or inspiring celestial object, whether it’s the andromeda galaxy or the north star against a clear sky. Although you might think it takes something like the Hubble Space Telescope to capture deep sky objects, all it really takes is a digital camera and maybe a few extra pieces of equipment like a wide angle lens and a tripod to prevent camera shake.

If you have more experience and want to go beyond the images that can be seen with the naked eye, deep sky astrophotography may require some additional pieces of equipment like a telescope for deep sky imaging. Generally speaking, a good astrophotography camera is able to overcome the challenge of low light and a dark sky, whether you are looking to capture a meteor shower or use some planetary astrophotography to capture your favorite planet. Once you’ve captured your image, it’s off to the digital darkroom where tools like Adobe Lightroom can help you really bring the work of your astrophotography camera to life.

Beyond camera equipment, you will also need to learn about the weather and the patterns of the night sky, so that you will know the best times and locations to engage in night photography. Learning the name of each and every star cluster and the layout of the solar system can also become one of the most rewarding parts of putting an astrophotography camera to work.

It can be very rewarding to share an image of lunar eclipses or a star trail with friends and family members, perhaps inspiring them to enjoy the wonders of the night sky as well. Many astrophotographers will tell you that one of the best parts of this hobby is being out in nature at night, with nothing but quiet and no light pollution… just the stars and celestial objects above to remind you that the universe is vast and inspiring.

Graham Daly Photography: My Love Affair With The Milky Way

The Milky Way – I Fell In Love With Shooting It!

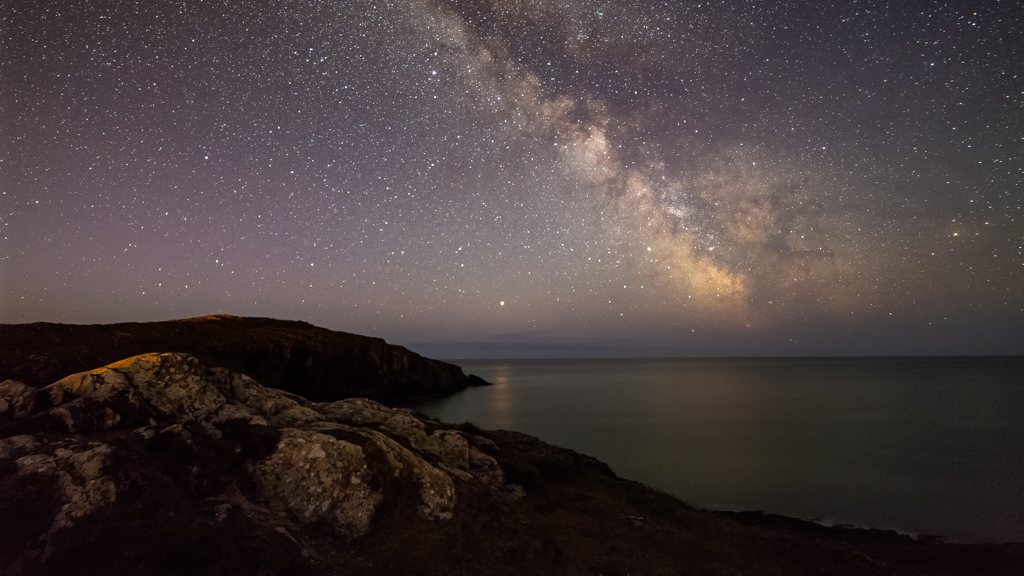
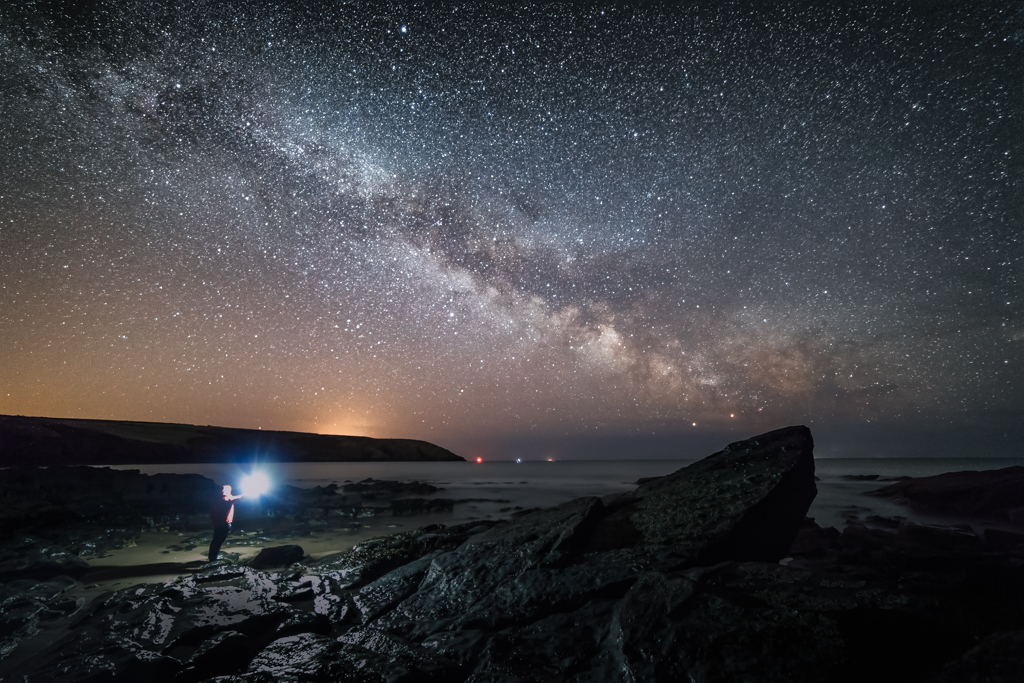
Since picking up my first proper DSLR camera several years ago, I was quickly drawn to shooting landscapes. And I spent many an early morning and late evening chasing after those magic sunrise and sunset colors. I still like heading out in search of those golden hour images and I am happy when I get them. But I must admit, they are no longer my first love. Over the past two years, I have been seriously attracted to photographing the night sky. I have totally fallen in love with shooting the Milky Way.

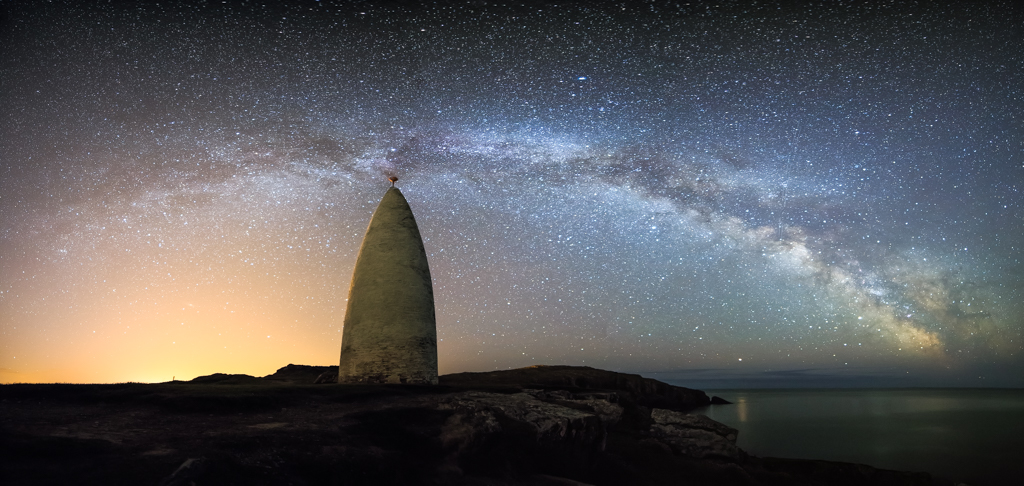
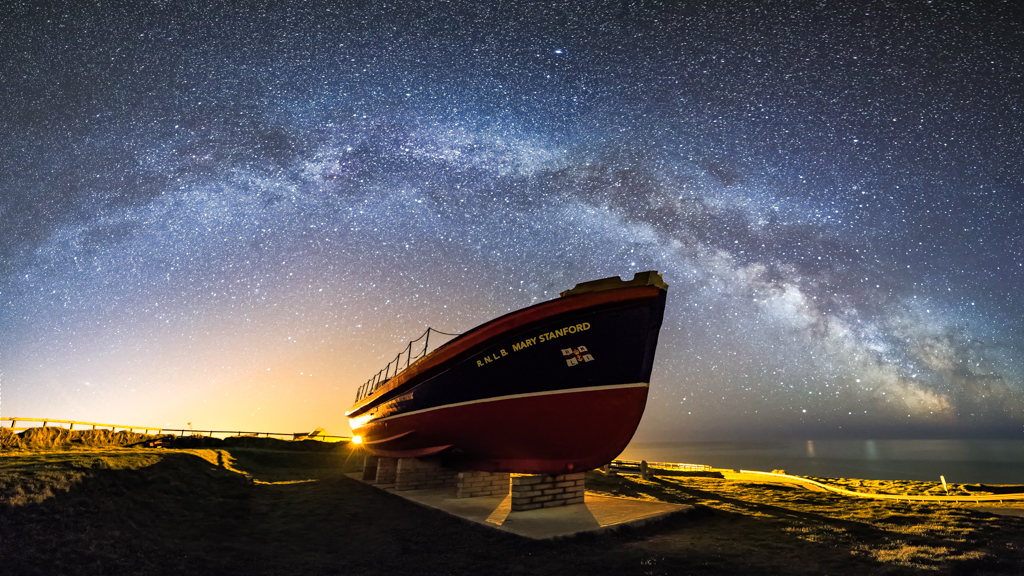
Whenever there is a slight chance of clear skies, I will drop all of my other plans, grab my gear and head out to a predetermined location in order to spend several hours admiring and shooting the Milky Way. Nothing brings me more photographic joy than standing beneath the Milky Way arching across the night sky. I am blown away by the sheer beauty of the Milky Way. I count my blessings each time I get to see it. And I can tell you, that those occasions are rare enough over here in Ireland. Our climate produces a lot of clouds!

In future articles, I will dive into more detail around my Milky Way Processing Workflow. I will also highlight other photographers who inspire me with their Milky Way images. But for now, you can read about the equipment that I use and how I plan my Milky Way images.

Milky Way Photography Image By Graham Daly Photography

My “Go To” Equipment For Shooting The Milky Way?

Unlike regular Landscape shoots where I have to take several lenses with me, along with other gear such as my NiSi Filters in order to handle whatever lighting conditions that might arise, thankfully my Astro Photography & Milky Way shooting setup is a lot smaller and simpler.  When it comes to shooting the Milky Way, I need not worry about controlling the dynamic range with filters. Nor do I need to drag along various focal length lenses to create different image compositions.

My typical equipment for Landscape images (Canon 16-35mm ƒ/4, Canon 70-200mm ƒ/4, and NiSi 100mm Filters) are left at home and instead, the only lens that I pack along with my trusty Canon 6D is that of the seriously inexpensive but excellent value Samyang 14mm F2.8 IF ED UMC Aspherical lens. In certain regions of the world, this lens is also sold/branded as Rokinon. This 14mm lens provides a very wide angle of view on a Full Frame sensor. This enables me to capture large portions of the Milky Way in the night sky. The lens is very sharp (if you get a good copy!) and handles comatic aberration (otherwise referred to as “coma”) and chromatic aberration very well. How well a lens handles comatic aberration is important for shooting the Milky Way and the night sky in general. Because if the lens does not control coma effectively, then the captured stars will result with comet-like tails. However, the lens does produce a horrible mustache-distortion and a strong vignette.

Milky Way Photography Image By Graham Daly Photography

I also bring the following items out with me on when I head out shooting the Milky Way:

  • Rollei Rock Solid Alpha Tripod + Rollei T3S Ball Head
  • Really Right Stuff L Bracket
  • Hahnel Capture Pro Wireless Remote Shutter Release
  • Spare batteries for my Canon 6D (OEM Canon + Hahnel Extreme varieties)
  • Hahnel Modus 600RT Speedlights (for light painting + images featuring myself within the scene)
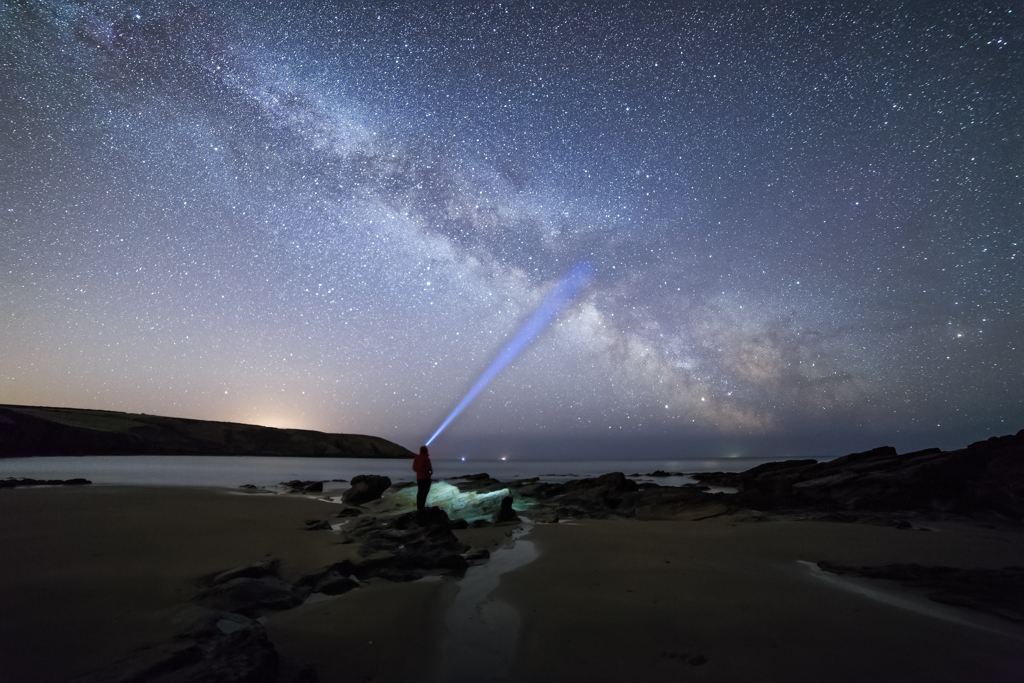
  • Various Head Torches (for finding my way around in the dark + light painting/images featuring myself within the scene)
  • Terrascape Lens Cloths (useful keeping lens clean and wiping off any condensation)
  • A thermos flask filled with strong coffee!!

Planning & Preparing For Milky Way Shoots

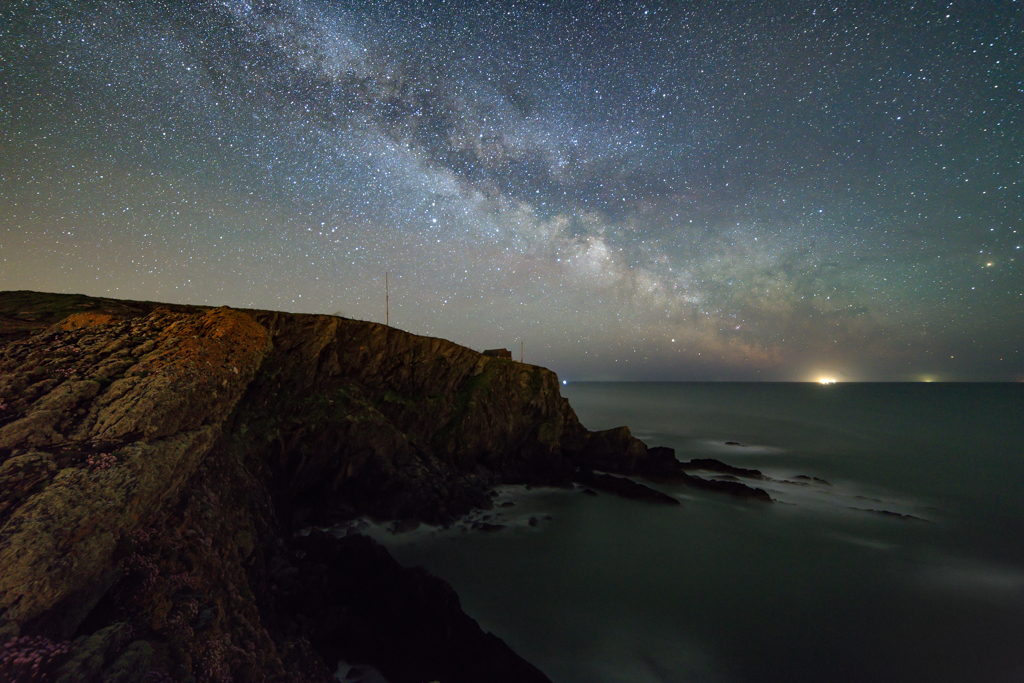
There are several key parts to my Astro Photography Preparation Workflow. When I am out at various locations shooting regular landscape images, I pay attention to interesting objects (man-made structures, trees, coastal rock formations, etc..) that might make good foreground interests within my Milky Way images.  I make note of these locations and objects for future Milky Way shots.

While I am at these locations, if mobile data coverage/access is available, I then use the PhotoPills app on my phone to verify how/when/if the Milky Way will line up with the desired foreground object at the specific location. The PhotoPills app is really useful as it allows me to not only to clarify sunrise/sunset times and directions on any given date for a particular location but it also tells me the moon rise/set times along with the moon phase as well for that given date. The PhotoPills app also shows me when/where the Milky Way core will rise and set as well as showing the location within the night sky relative to the location for a specified date.

In many ways, shooting the Milky Way and the night sky is a lot easier and less complicated than shooting regular landscapes on account of the fact that you do not need to worry about how the sunlight is going to interact with the landscape, what parts of the landscape will be in shadow, what the contrast and dynamic range will be like or even whether or not there will be just the right amount of clouds present in the sky in the correct location in order to capture any light/color from the rising/setting sun.

Milky Way Photography Image By Graham Daly Photography

Clear Skies – The Vital Ingredient For Milky Way Shooting!

The main requirement for shooting the night sky and the Milky Way, of course, is that of a cloudless sky. Clouds are the enemy for the Astro Photographer and those looking to capture beautiful images featuring the Milky Way. In order to get the best images of the Milky Way and stars in general, you will need a sky that is free from clouds during a two-week window throughout the month when the moon phase is before or after a New Moon. While moonlight can be great for illuminating the landscape under the night sky and thus removing a lot of unwanted digital noise from your images when shooting, moonlight will cause luminosity of the stars in the night sky to be diminished and will thus cause the Milky Way to be washed out.

Along with using the PhotoPills app for checking the moon phase and moon rise/set times for a particular location on a specified date, I also use several weather forecasting sites to check whether or not clear skies will be potentially possible for that date. Of course, while I can use the PhotoPills app at any stage throughout the year to check out the various planning information points as I eluded to in the preceding paragraphs, I really can only verify the cloud cover and potential for clear skies within a short period of time.

Milky Way Photography Image By Graham Daly Photography

Typically I use five-day forecasts to check for the possibility of clear skies in a given week. When I spot a potential for clear skies on the long-range forecasts, I then start to focus in on those potential days and start paying more attention to the forecasts in the forty-eight (48) and twenty-four (24) hour time periods building up to that date in question. If cloud forecasts look good on the day in question, I then grab my gear, load it into my Land Rover and then I hit the road to get to my desired location and pray for the skies to stay clear while en route!

High-Level Overview Of My Milky Way Processing Workflow

There are certainly more steps involved in my Milky Way Processing Workflow as opposed to my Landscape Processing Workflow. Not that there is any additional complexity. But rather the processing workflow just has more steps and thus requires a bit more time per image. I will write about my Milky Way Processing Workflow in more detail in a follow-up article. So I will just keep things brief and at a high level here in this article.

The following is a generic overview of the workflow that I apply when processing all of my Milky Way images:

  1. While on location, I capture several exposures of the same image composition using the exact same settings. Exif settings are typically [ 14mm | ƒ/2.8 | 20 seconds | ISO 12,800 ]
  2. The duplicate exposures captured while on location will be used for “Stacking” when processing for Noise Reduction purposes.
  3. When I get back home, I then prepare to offload the images from the camera’s memory card to my workstation. To facilitate this I create three folders within a directory specific to that shoot. A folder for the original RAW files, a folder for the processed TIFF files that will be used for the Stacking process and a folder where the final processed JPEGs will be exported to.
  4. Once the RAW files are on my workstation, I import them into Adobe Lightroom Classic CC.
  5. After importing the RAW files, I preview all of the potential image files that I want to process/keep and dump the files that did not turn out correctly for whatever reason (condensation, not sharp, stray and unwanted light pollution, etc…). I use the Lightroom Rating feature to help identity which files I think to hold the greatest potential for processing.
  6. Once I have identified the image composition I want to process first, I select and highlight the range of exposures for that given image composition. This is usually between eight and twelve exposures
  7. I apply basic adjustments to one of the selected RAW files. The adjustments are synced across the rest of the RAW files that will be used as part of the Stacking process. I will go through the exact adjustments that I apply to my Milky Way images in a future article.
  8. Next, I export all of the processed RAW files as full sized TIFF files to the designated “Image Stacks” folder on my workstation. Once exported, I select all of them and I open them within Starry Landscape Stacker. This great application then aligns all of the exposures and stacks them with just a few simple mouse clicks. The stacking process applies a “Median Noise Averaging” process which greatly reduces the amount of total digital noise that will be present in the final outputted image file.
  9. Once the stacking process has been completed, I then export the new composited TIFF file and I then import this into relevant folder structure within my Lightroom Library.
  10. Lastly, I apply some further adjustments to the stacked TIFF file within Lightroom and exports JPEGs with relevant settings.

Milky Way Photography Image By Graham Daly Photography

Top Tips For Capturing The Milky Way

  • Plan Your Shots – Use PhotoPills to research Milky Way visibility, rise/set times for a specified location on a particular date
  • Include strong foreground interest
  • Use large (fast) aperture lenses – ƒ/2.8 would be a minimum aperture to yield the best potential
  • Shoot several RAW exposures for each image composition while on-location. These can be stacked for noise reduction purposes
  • Bring plenty of spare batteries, suitable clothing, and coffee!

Milky Way Photography Image By Graham Daly Photography

A Day on Dartmoor – Photographing the National Park

The South West of the UK is home to a number of moors but Dartmoor is the most well-known around the world, and among photographers. The 954km2 national park is famous for its rugged and often mysterious landscape which offers many opportunities for stunning shots in unique locations.

To access the best bits of the moor, and not just the tourist hotspots, a good pair of walking boots and a map is required. So it’s always worth knowing what to expect, where to find things, and what kind of kit is needed so unnecessary equipment isn’t dragged through bogs, up steep hills, and along stony trails.

Kitting Up

Aside from walking boots, a waterproof bag and jacket, a map, compass, and something to eat and drink, you’ll want to think about what camera kit you’re going to take with you. With a variety of locations and subjects on the moors, it’s a good idea to be prepared to ensure the number of shots missed is minimised, though you also want to be careful of making sure you’re not taking too much equipment if going on a long trek.

Dartmoor National Park Sign

Two lenses, a prime lens, and telephoto, are a good option. A telephoto lens with a broad range can be useful for switching between landscape and wildlife photography. The other advantage of the telephoto lens is that it can minimise the need for lens changes is bad weather conditions as it’s often hard to find sufficient shelter for a quick switch when you’re out in the middle of the moors. Prime lenses will be better for indoor shots, and night photography.

If you’re planning to stay out late to capture a moonlit tor or try long exposures it’s worth taking a spare battery as plug sockets are few and far between as well. A tripod is going to be essential for taking long exposures of waterfalls, streams, and stars but a monopod might be a better option as a standby depending on what you want to capture (and it’ll also make a great walking stick).

Sunrise/Sunset

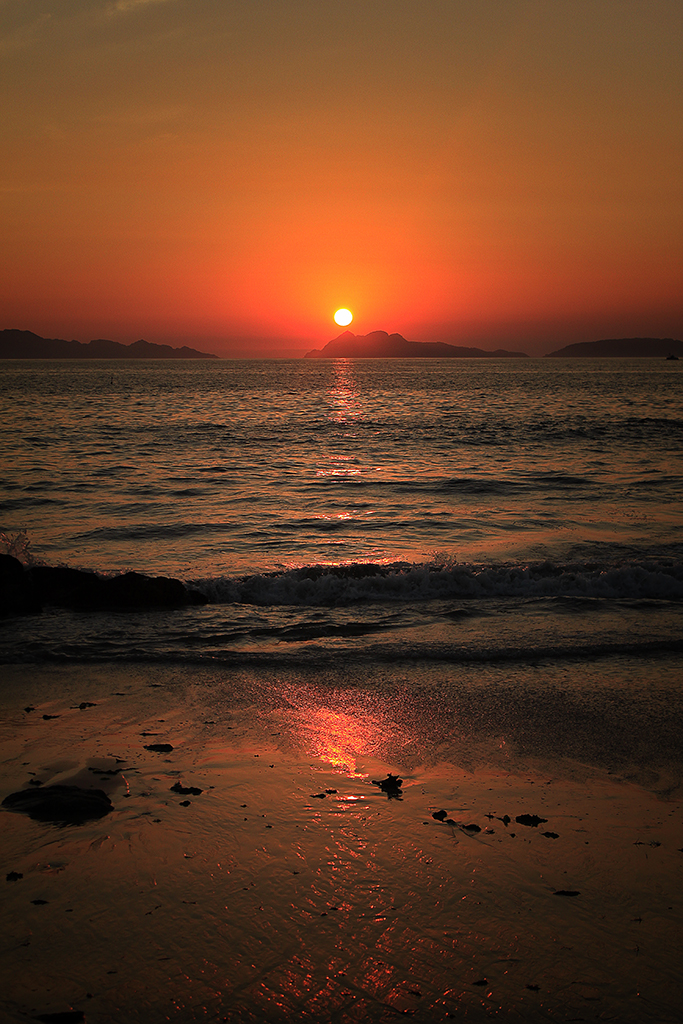
The best place to go for sunrises and sunsets, based on the number of tripod-laden photographers that congregate there on a regular basis, is Brentor on the western edge of the Moor. Not only is it home to a church that’s the best part of 1000 years old, and the remnants of an Iron Age hill fort, but at 330m above sea level, the tor offers breath-taking views over Dartmoor.

Brentor Church

Although it’s a fairly steep climb up to the church there is a car park close by, so it’s safe to take the heavy kit with you.

Mid-morning

There’s just no other way to get to some of the best parts of the moor than by hiking there, but more often than not it’s worth it – especially in the case of Whistman’s Wood. The ancient wood is one of unique spots on the moor with its twisted Oak Trees offering visitors a Middle Earth-like experience. There’s a car park located on the opposite side of the road to the Two Bridges Hotel, and from there it’s about a two and a half mile walk.

The claustrophobic little wood has a unique character so whichever way you shoot it there’s a good chance you’ll get an interesting shot. Whether using a wide or narrow lens to capture the expanse of the wood or its quirky details you can’t go wrong. If you don’t have a wide lens with you panoramas can really help to capture its unique character.

Whistmans Wood Panorama

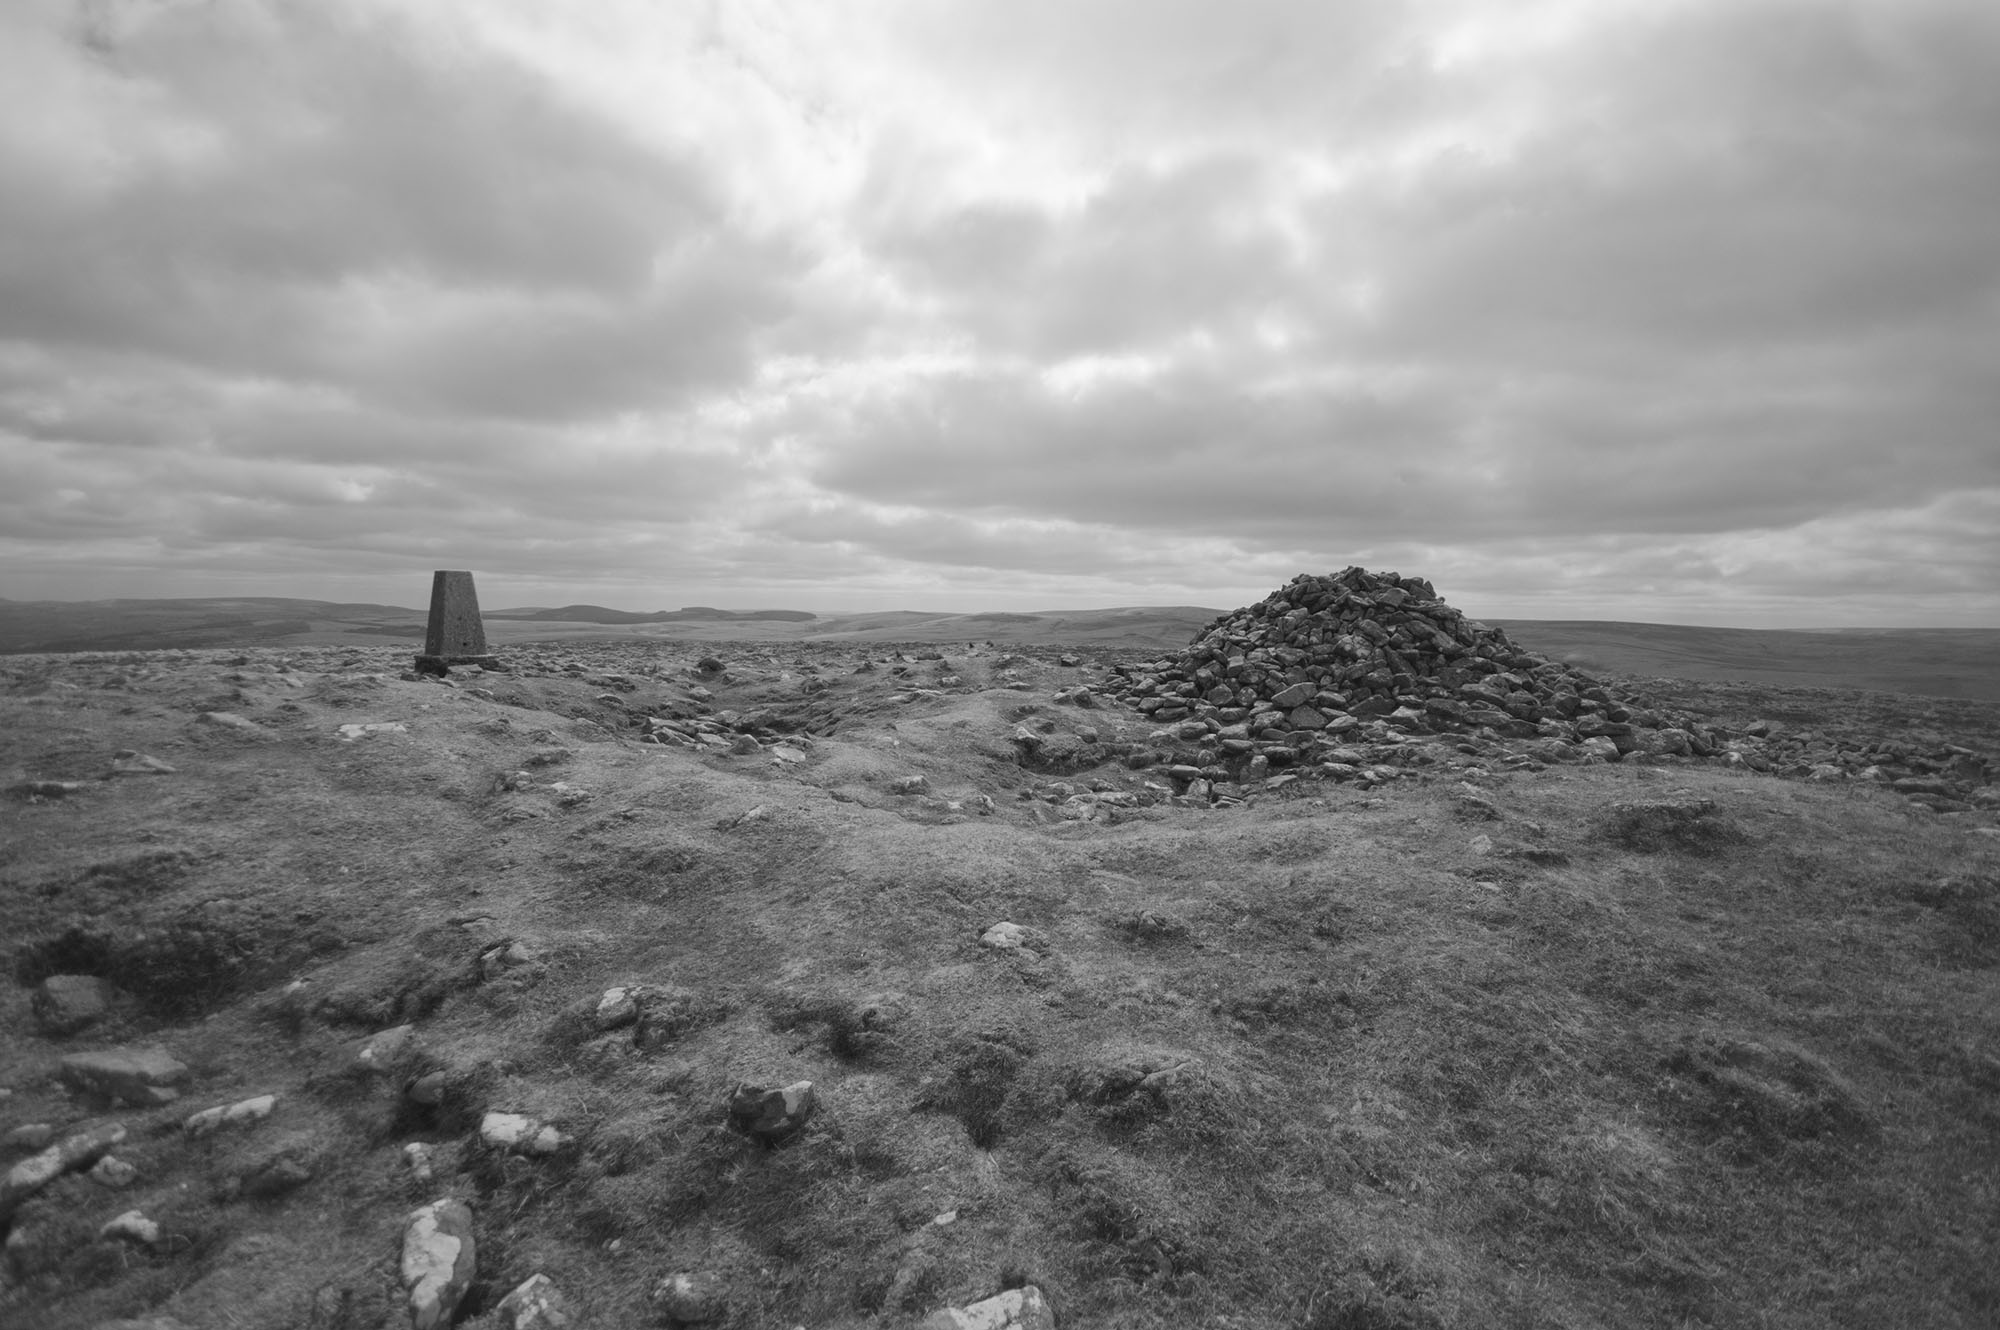
If you want to photograph an equally enigmatic but wider landscape Cosdon Hill is another spot which is also panorama-friendly, offering excellent views and an ancient stone cairn.

Cosdon Hill and Cairn

Midday

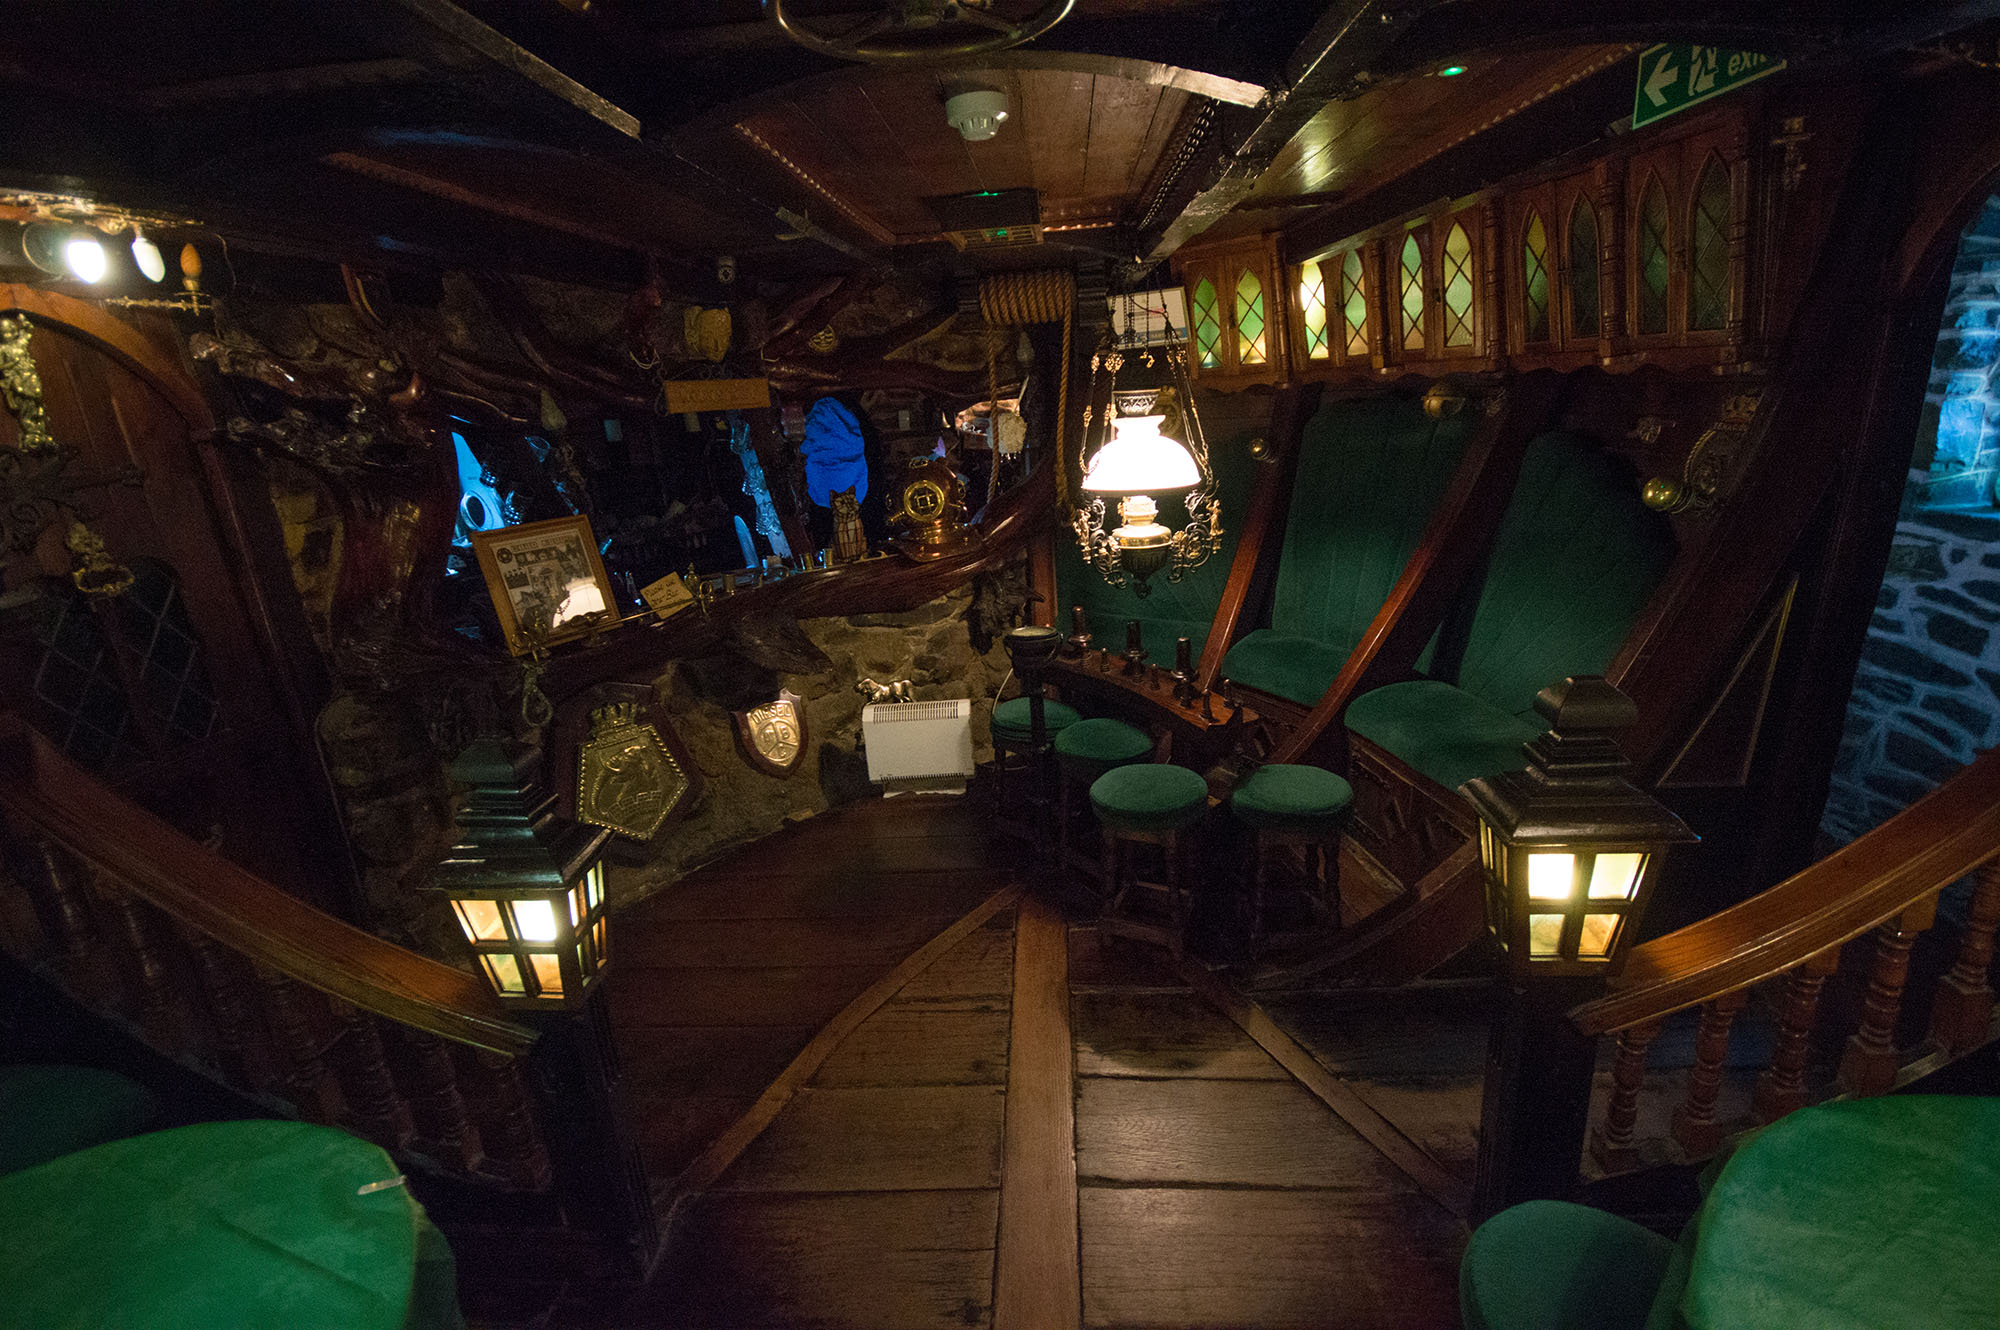
If it’s a clear day on Dartmoor (which happens more often than you might think) you aren’t going to get the most exciting shots in the midday sun. However, it’s the perfect time for grabbing a spot of lunch in one of Dartmoor’s many inns and exploring its many quaint villages. Widecombe-in-the-Moor is a popular tourist spot but there are many other less well-known spots to have lunch and collect a few great snaps. The Highwayman Inn is one particularly interesting spot which is reportedly one of the most haunted inns on the moor and features a dining room made from an old shipwreck.

Highwayman Inn

When shooting indoors in confined spaces a fast prime lens is a good option, as long as the focus length isn’t too narrow, or a wider lens combined with a high ISO setting.

Afternoon

Dartmoor isn’t just home to natural wonders – there are plenty of fascinating buildings (and the remains of them) on the moors as well. The afternoons are a great time to visit some of the Moor’s castles with romantic ruins such as Okehampton Castle, and a complete castles like Drogo, being great places to shoot in the afternoon light.

The castles are run by Historic England and the National Trust so if you’re using your photos for commercial purposes you’ll need to seek permission. Lydford Gorge is another impressive spot to visit, also run by the National Trust.

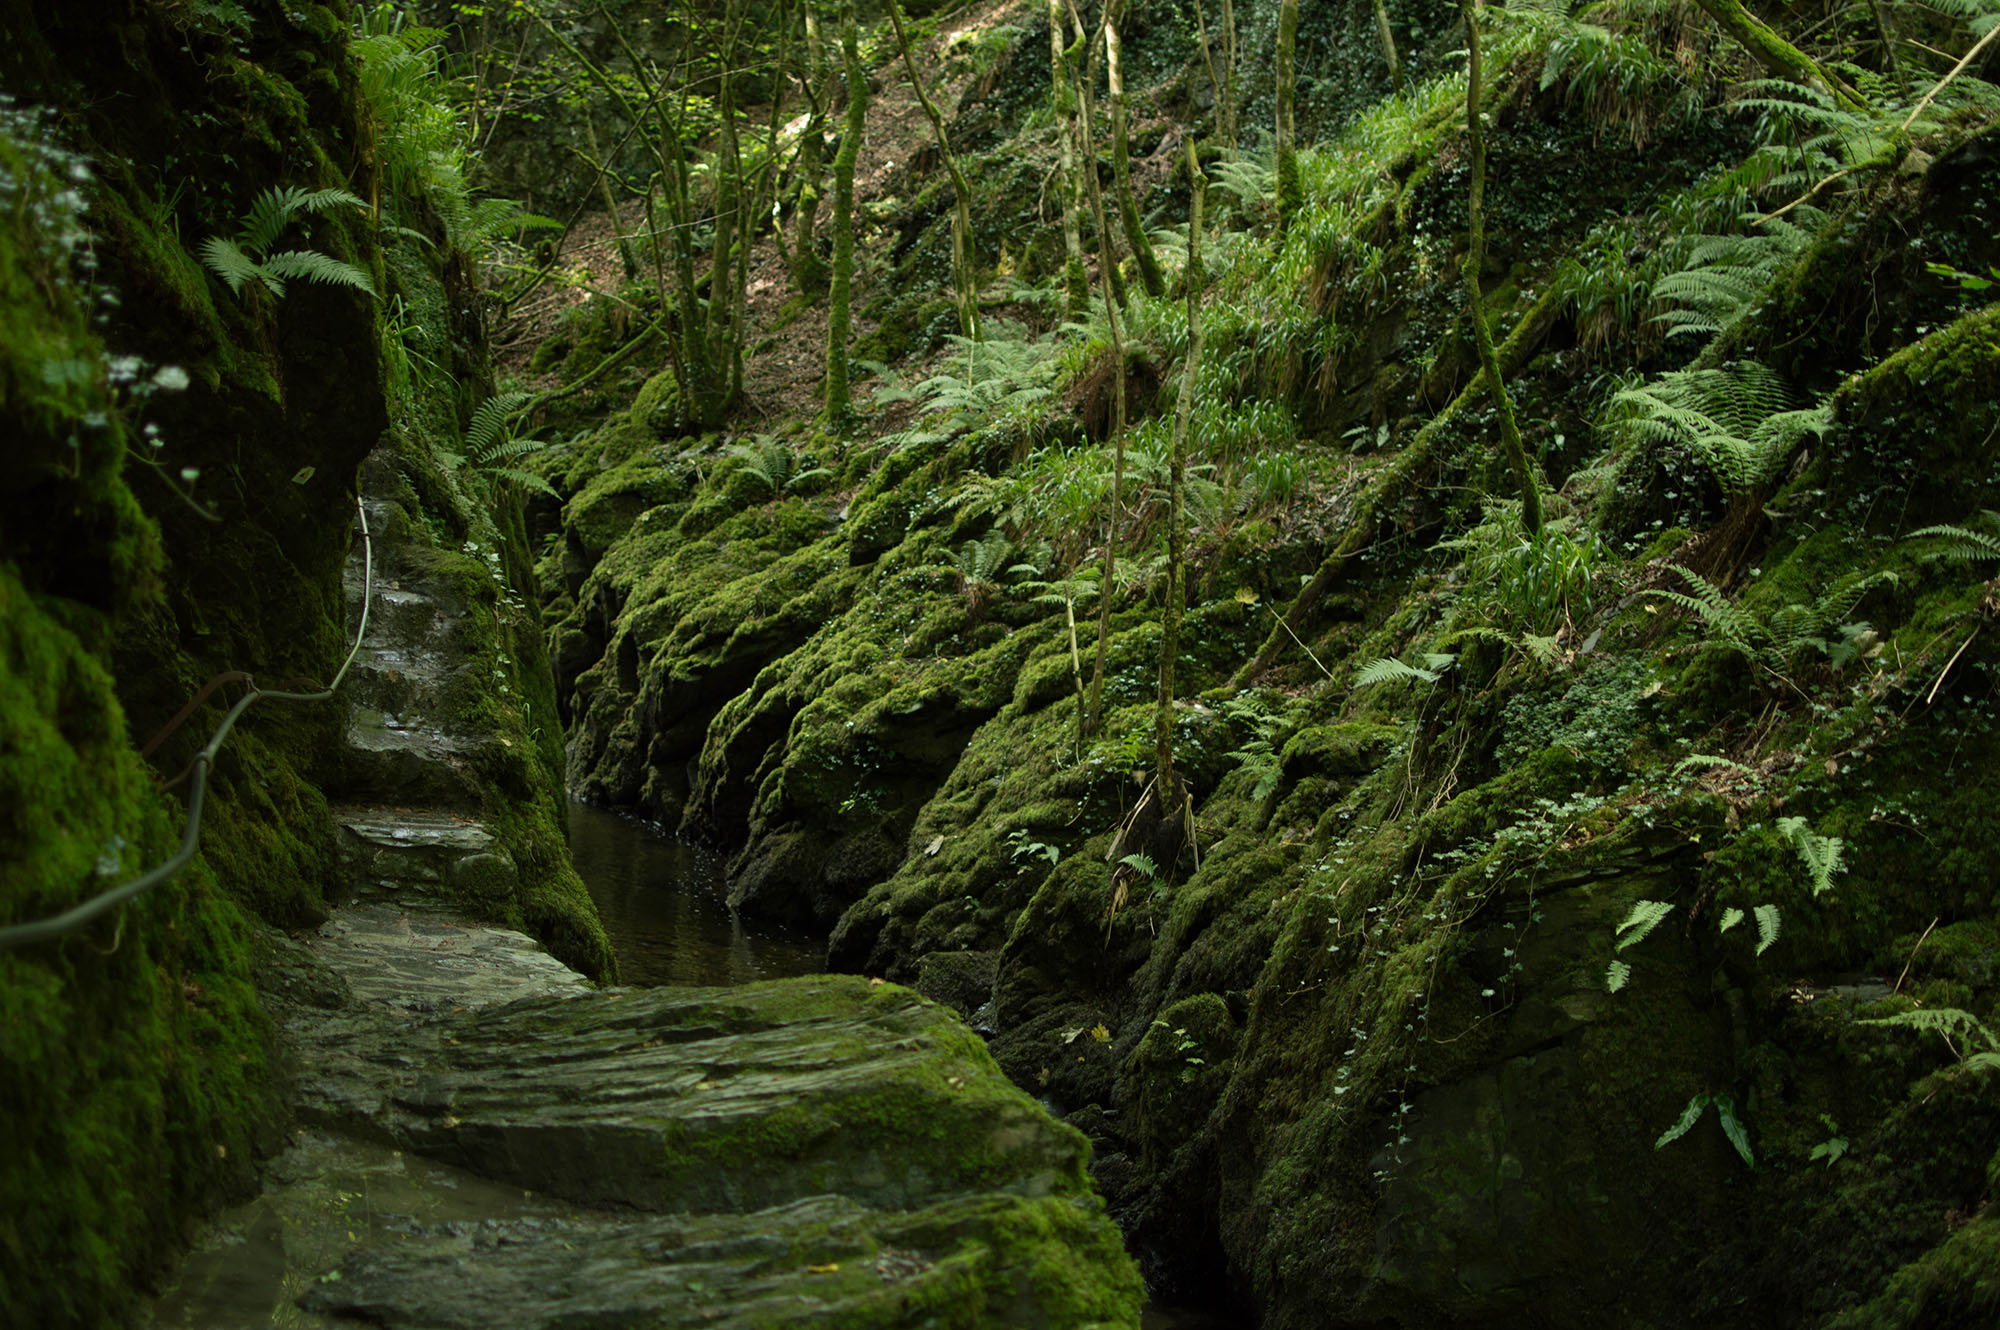
Lydford Gorge

There’s a fee for entry but the gorge is the perfect spot for dramatic shots and the nearby village of Lydford is also worth exploring with its own small castle, and quaint church. It’s a great example of a place where having a telephoto lens with a wide range is useful as there are some areas where you’ll need to go as wide as possible to capture your surroundings and others where a narrower focal length will help to capture some unique details and textures.

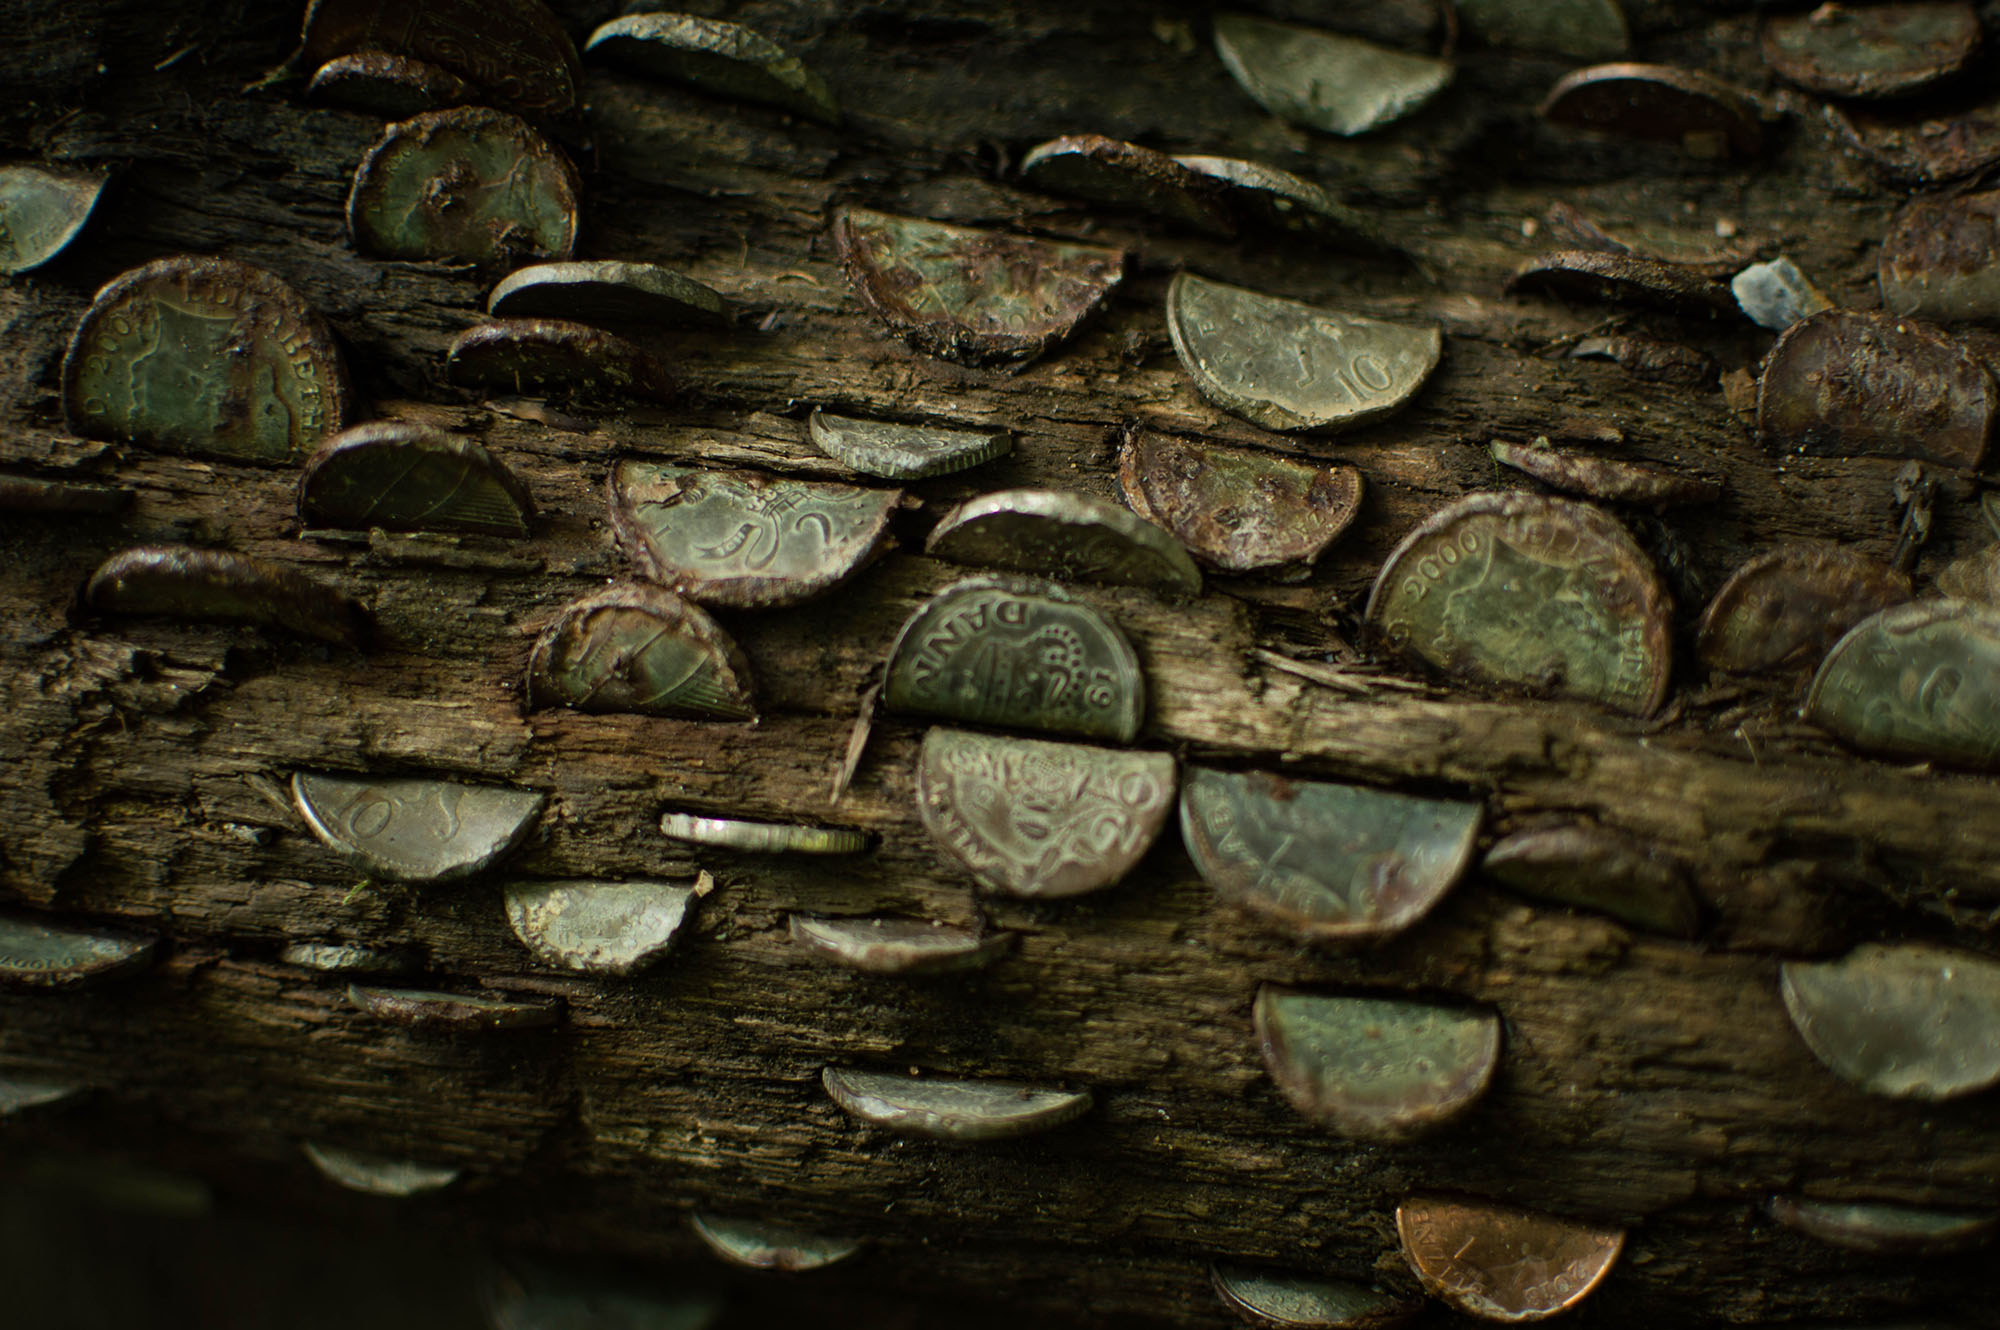
Lydford Gorge Coin Log

Night

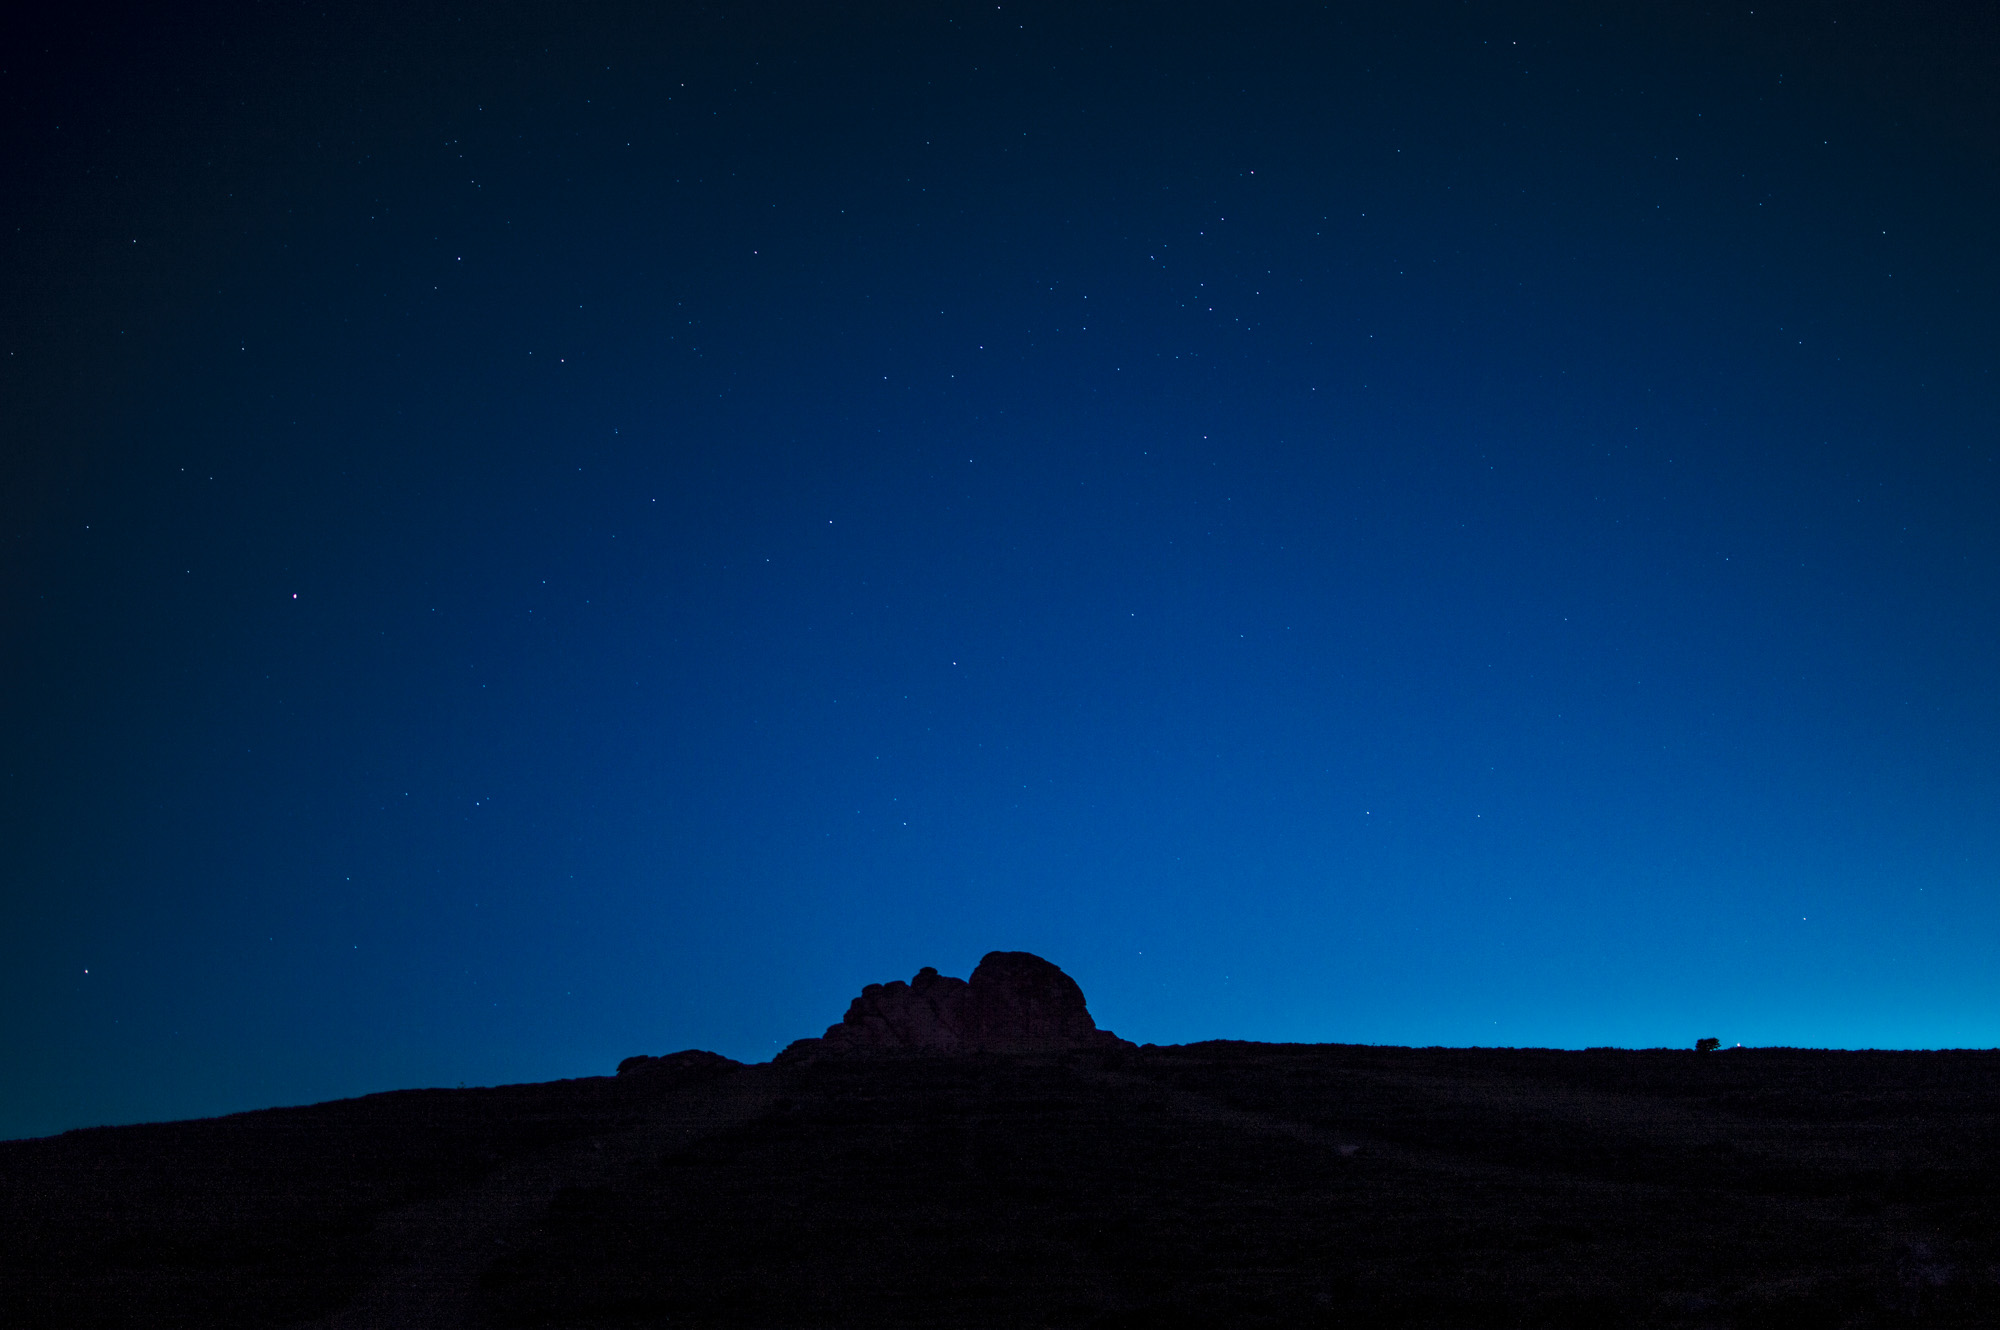
While it’s not recommended to go walking on the moors at night there are plenty of conveniently placed car parks that will allow you to get some impressive shots of the tors and the stars. Although Haytor is the most popular and probably most photographed spot on the moors and is usually good for nothing more than a picture postcard shot, the night time offers the perfect chance to put a more interesting twist on the familiar landmark and practice your astrophotography.

Time your visit so you leave at least a couple of hours after sunset so that all light will be gone and you have a nice dark (and hopefully cloud-free) sky. However, the hours after sunset do make for a deep blue sky which can help to create its own unique mood.

A Day on Dartmoor

The best settings for astrophotography will vary depending on your camera but using a prime lens at its widest aperture (or maybe just a few stops up for extra clarity) is a great place to start. In terms of shutter speed the longer you leave the shutter open the more likely you are to notice the movement of the stars – which is great for star trails but not for nice sharp images. How long you can leave your shutter open before trails start appearing will depend on your lens.

According to the “600 rule,” all you need to do is divide 600 by your focal length (x1.5 if you’re using a cropped sensor) and the answer will tell you the maximum shutter speed in seconds before your stars start streaking. For example, using a 50mm lens this will be 12 seconds. Increasing the ISO sensitivity will really help to pick up as many stars as possible but be wary of sensors which create a lot of noise at higher ISOs as it will become hard to tell the stars from the speckles.

Back Home

To get the most out of your moorland shots it’s well worth spending some time finessing them in Lightroom. While the moors can be magic while you’re up there, they can look less exciting in raw pixel form. With lots of greens and browns and greys colour pictures shot on a nice summer’s day can look a bit boring. Black and white suits the moors really well and really brings out the drama of the landscape, especially on cloudy days, though be careful as it’s easy to get carried away.

Cosdon Hill and Cairn Black and White

Processing pictures of stars can also be difficult, but one easy trick is to increase the clarity in Lightroom which will help bring all the little points of light out.

Photographing the moors can take practice, and may require repeat visits and persistence to get the perfect shots you want. Adverse weather conditions can make life difficult for a photographer, especially if it starts raining or snowing, or the fog rolls in. Whole tors can disappear in an instant in a thick fog so be prepared for disappointment, but greater rewards when you get the shot you’re after.

Mercury Transit: How to Capture it? | Astrophotography Series

Warning: this article deals with capturing images of the Sun. Looking into the Sun with bare eyes or through a photography lens can produce irreversible damage to your eyes. Be extremely cautious when trying the techniques shown in this article!

For most of us, astrophotography is one of the most challenging types of photography that we can think of. First of all, it usually happens at night, which makes it difficult already from the logistics point of view, not to mention the noise problems, focusing difficulties, etc. Also, when we look at those fantastic images of galaxies and nebulae, we feel it is beyond our reach both in terms of gear and capacity. And the truth be said, many times that is indeed the case. For starters, many of those images were captured with specialized Earth-based telescopes or even the Hubble space telescope, so there is no way, for most of us, to be able to reproduce them.

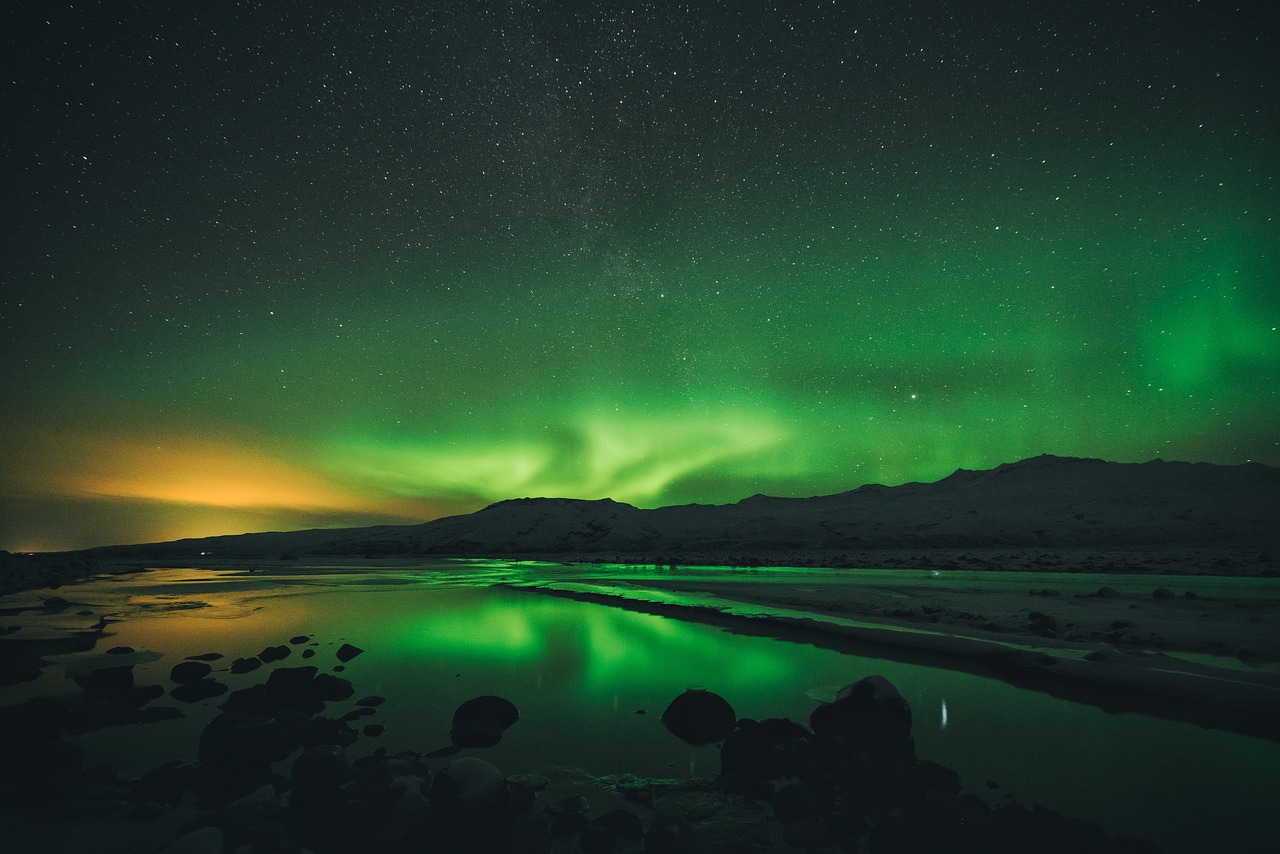
There are, however, some subjects that we a decent gear and enough planning can be easily captured by anyone interested. The most popular ones are probably the moon, star trails, meteor showers, artificial satellites like the International Space Station, aurorae and the Milky Way.

The one I want to address here is surprisingly not so popular and, even better, is visible during the day. I am talking about the Sun.

mercury1

Mercury transit

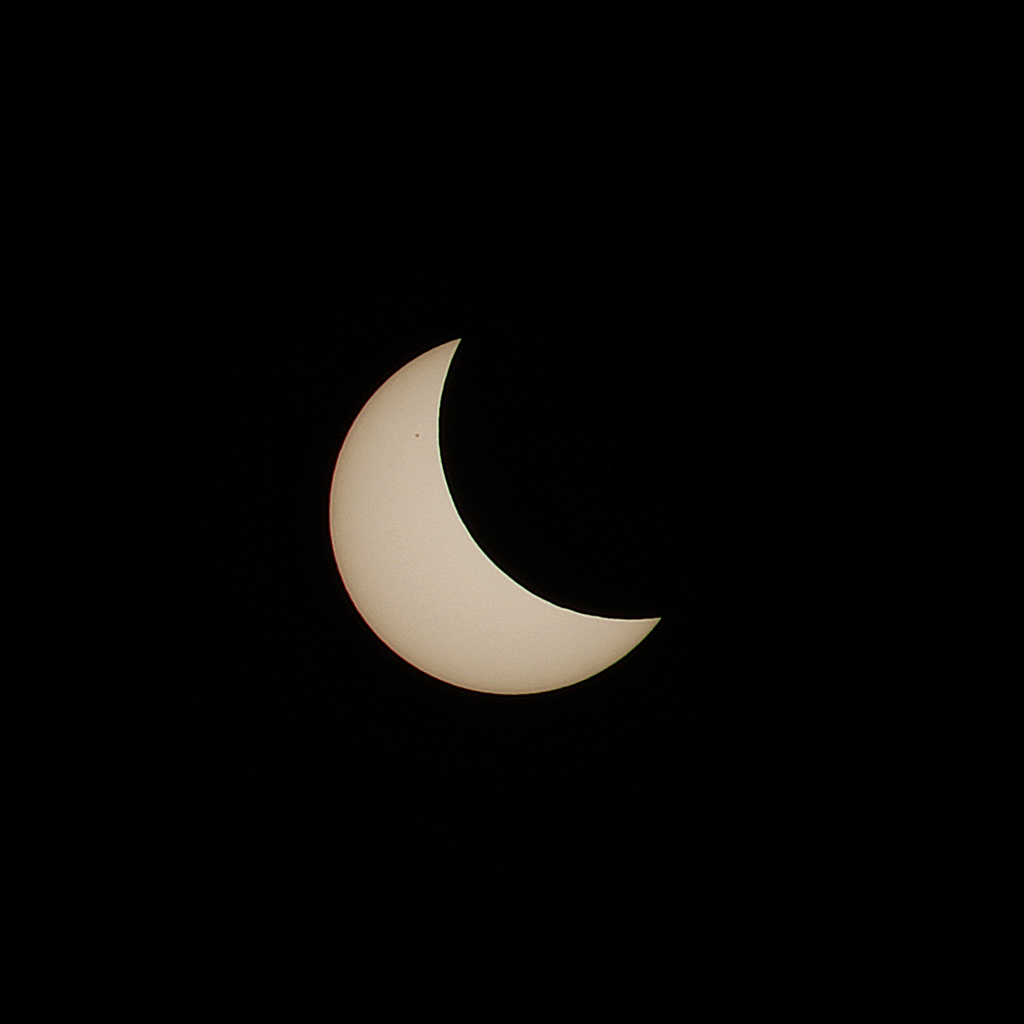
And next Monday (May 9, 2016), it is a very special day to try your first (well, it might be worth practicing a bit before) photo of the Sun, since Mercury, the innermost planet of the Solar System, is going to be passing right in front of our central star, making for a nice subject.

Mercury has an orbital period around the Sun of about 88 days. If we compare this to the 365 days that the Earth takes to complete a full orbit around the Sun, that means that Mercury should pass in front of the Sun almost 4 times a year. However, due to differences in the inclination of the planetary orbits, this actually occurs in a not so regular basis. While the last transit occurred in 2006, the next one will be in 2019 and the following one in 2032!

A good thing about the transit is that it lasts for several hours (more than 7 hours this time), so you will have many chances to get it right and you can also get many exposures to combine them together afterwards in Lightroom or Photoshop. So now let’s see how to capture this phenomenon.

Making photos of the transit

But first of all, a very important warning: DO NOT EVER LOOK INTO THE SUN, UNDER NO CIRCUMSTANCES!!! Looking directly into the Sun with bare eyes for just some seconds can damage your sight permanently, and looking through a photographic lens for just a split of a second will cause irreversible damage, so really, DO NOT LOOK DIRECTLY INTO THE SUN. If you do not understand the risks, please do not try this.

mercury2

Now, apart from a DSLR camera, you will preferably need a zoom lens and definitely a tripod and dark neutral density (ND) filter, preferably an ND1000 that provides a 10 f-stop reduction of the amount of light reaching the sensor. The zoom lens is to get the Sun’s disk to cover an important part of the frame so that the resulting photo is interesting and the ND filter to get the necessary exposure. The Sun is simply too bright so even a very fast shutter speed like 1/4000 will not be enough to avoid overexposure. In fact, even with the ND1000 filter on, you need to set your shutter speed at 1/4000 and the aperture at f/25 (at least those should be good starting points; you can play around with these values until you get the exposure you want).

Whenever I take photos of the Sun or the Moon (both objects look roughly the same size from the Earth!), I use a Canon 90-300 mm zoom lens at its maximum focal length (300 mm). This focal length is enough to get a good size, even though a slightly larger one would fill the frame even more, so if you have a 400 or 500 mm, go ahead and use it.

So once you have your camera with the zoom (or telephoto) lens attached to it, attach the ND filter, look for a good spot to set your tripod and, WITHOUT LOOKING INTO THE SUN (sorry, I cannot stress this enough) point your camera roughly at the Sun.

The next step is to properly set the Sun in the frame of your camera and to accurately focus. Now this is another delicate point where people do not agree. Since you cannot look directly into the Sun, you will need to complete these two steps by using the Live View of your camera (the screen).

mercury3

I’ve read many times that pointing your camera to the Sun with the internal mirror up can damage your sensor, especially when taking long exposure photos. This might be true especially without using ND filters but, from my experience, with the ND1000 I’ve taken many photos of the Sun and so far I’ve never had any issue with my sensor. In any case, if you want to minimize the time your sensor will be directly expose to direct sun light, you can first set the focus by focusing at any object that is very far from you, the farthest object you can see around you. That should set the focus to the ‘infinity’ point of your lens which should work well for the Sun as well. If for any reason this does not work for you, you can always perform manual focusing using the Live View mode of your camera.

Then, the final preparation step comes in, and that is framing the Sun. For this, you don’t have any other option but to activate the Live View and move your camera (already placed on the tripod) until the Sun is right on the middle of the back screen (again, remember to always look at the screen, and not at the Sun!).

Once everything is set, you can stop the Live View mode. If you did everything right, the whole process should take not more than 10 seconds and, taking into account that you have your ND1000 filter on, everything should be fine with your sensor and your eyes.

That’s pretty much all you need to get a nice photo. Just take your photos in normal mode (no Live View) as you would with any other subject. If you have a remote controller for your camera use it. Otherwise, set the timer of your camera to 2 or 10 seconds. This will avoid any motion from you pressing the shutter that would be very visible with such a large focal length.

An extra thing to take into account is that, with a focal length of 300 or 500 mm, the relative motion of the Earth and the Sun will become noticeable, meaning that you will have to make adjustments on the pointing of the camera from time to time. For this, simply activate the Live View mode, move the camera accordingly, and repeat the process.

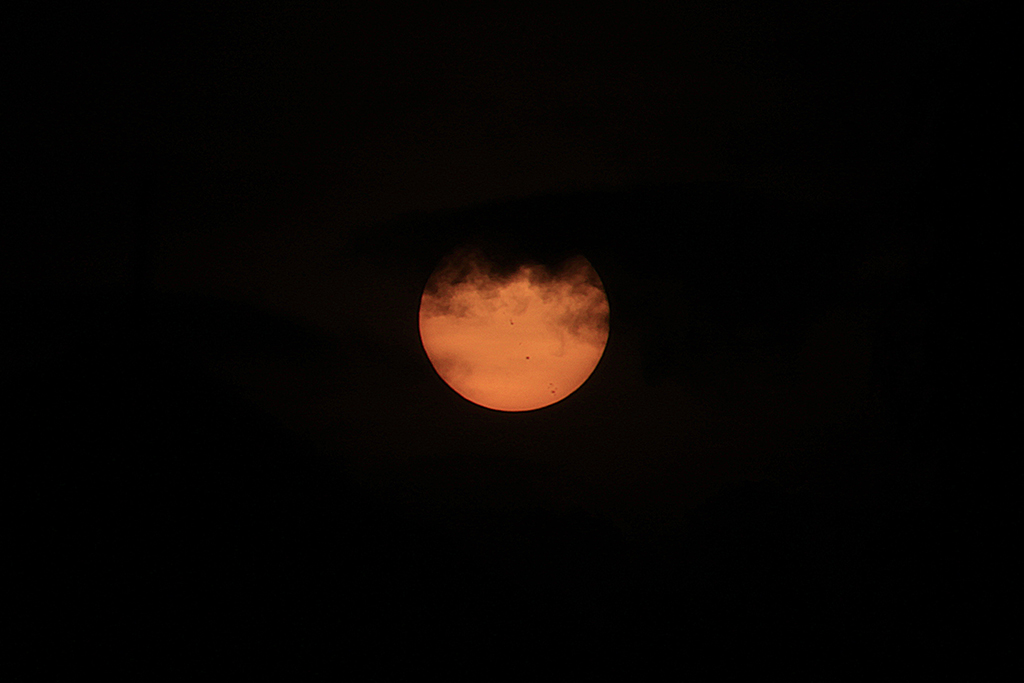
Now, take into account that getting the right focus to get very sharp details on the planet itself or the sunspots (yes, if there are sunspots you will actually capture them as well!) is very difficult (in fact I have not been able to get completely sharp photos myself so far!) so don’t get frustrated. Try to improve the focusing using Live View (remember to leave the Live View mode activated only for short periods of time) until you are happy with the results.

Finally, it is intuitive (it was for me at least!) to overexpose your picture when capturing the Sun or the Moon. This is probably because we expect them to be bright objects. However, if you want to capture details, you will need to underexpose so play with the settings of your camera until you get the right results. In any case, the settings should be close to 1/4000 and f/25.

Summary

So let’s take a look at the steps one by one:

  1. Do not look directly into the Sun, either with bare eyes or through the lens. Seriously!
  2. Attach a zoom or a telephoto lens (preferably a focal length greater than 300) to your camera.
  3. Focus to the most distant object you can.
  4. Attach the ND1000 filter to your lens taking care of not changing the focus (this might be tricky if the filter thread is located at the focusing ring, so be careful while doing it).
  5. Set your tripod on a nice location, put your camera on the tripod and point it roughly towards the Sun.
  6. Set the exposure time of your camera to 1/4000 and the aperture to f/25.
  7. Activate the Live View and, using the screen of your camera, point your camera so that you can see the Sun roughly at the center of the screen.
  8. Adjust the focus if you think it is necessary (try to leave the Live View mode on for as short a time as possible).
  9. Turn off the Live View mode and take photos as you would usually do using either a remote controller or the timer of your camera. If needed, adjust the exposure time and/or aperture.
  10. Adjust the pointing direction of your camera once the Sun starts to get out of the frame.