Tag: nightscapes

Graham Daly Photography: My Love Affair With The Milky Way

The Milky Way – I Fell In Love With Shooting It!

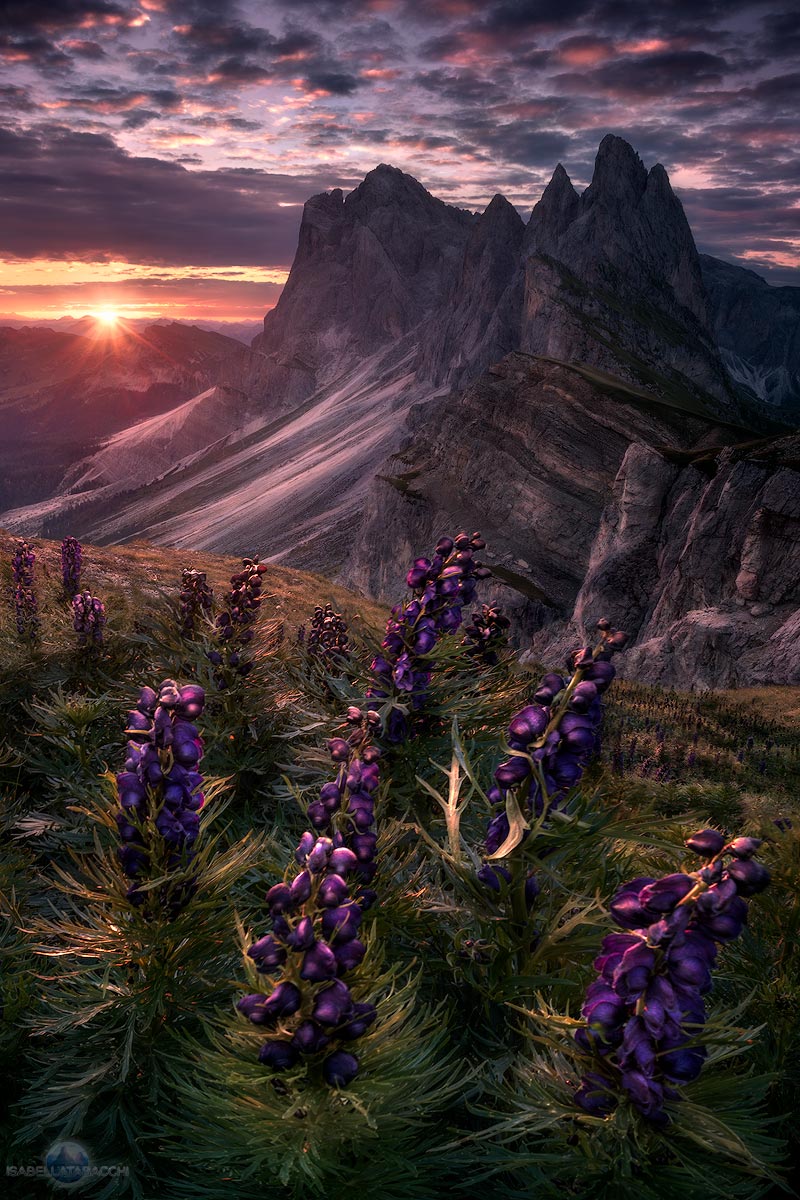
Since picking up my first proper DSLR camera several years ago, I was quickly drawn to shooting landscapes. And I spent many an early morning and late evening chasing after those magic sunrise and sunset colors. I still like heading out in search of those golden hour images and I am happy when I get them. But I must admit, they are no longer my first love. Over the past two years, I have been seriously attracted to photographing the night sky. I have totally fallen in love with shooting the Milky Way.

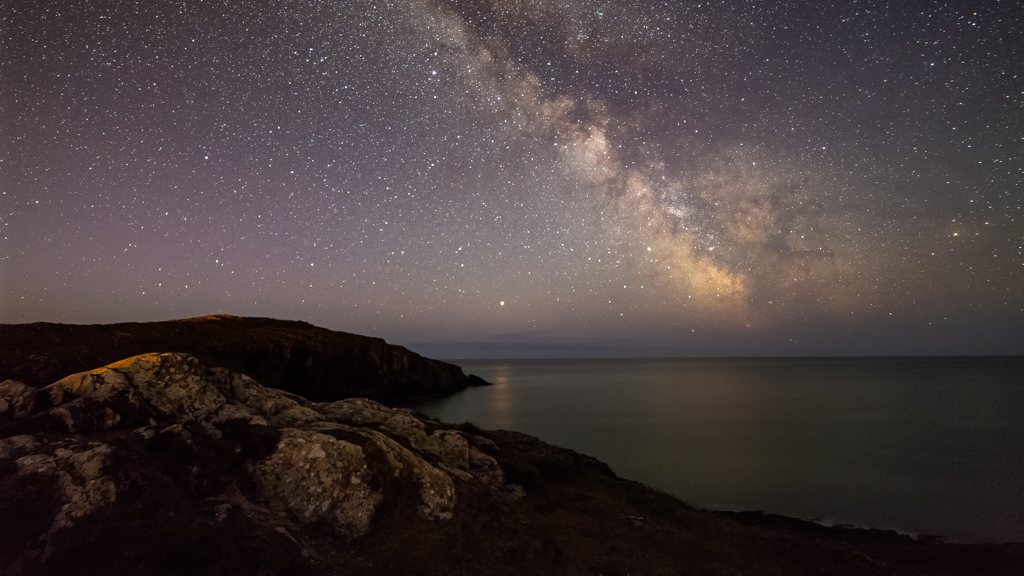
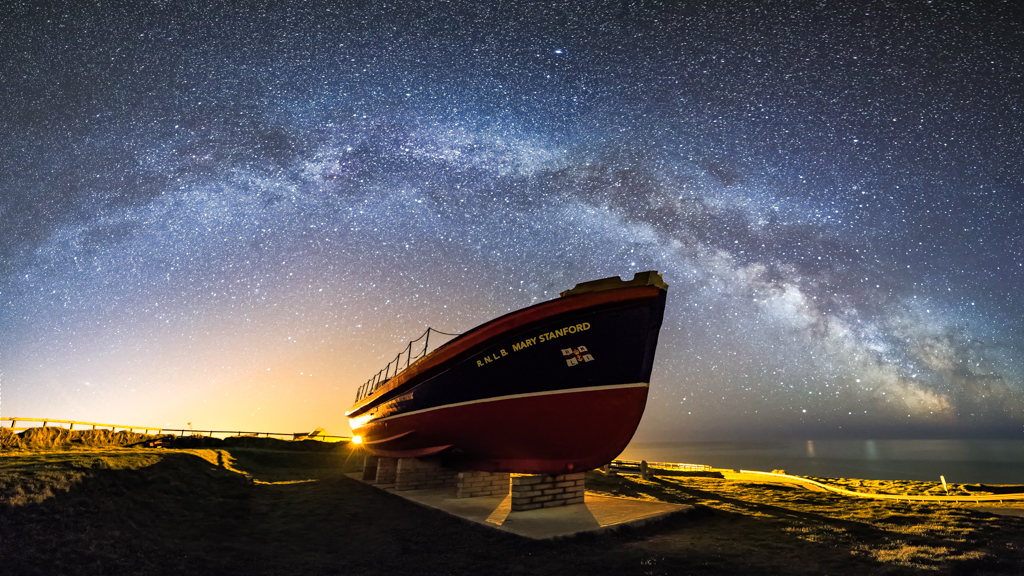
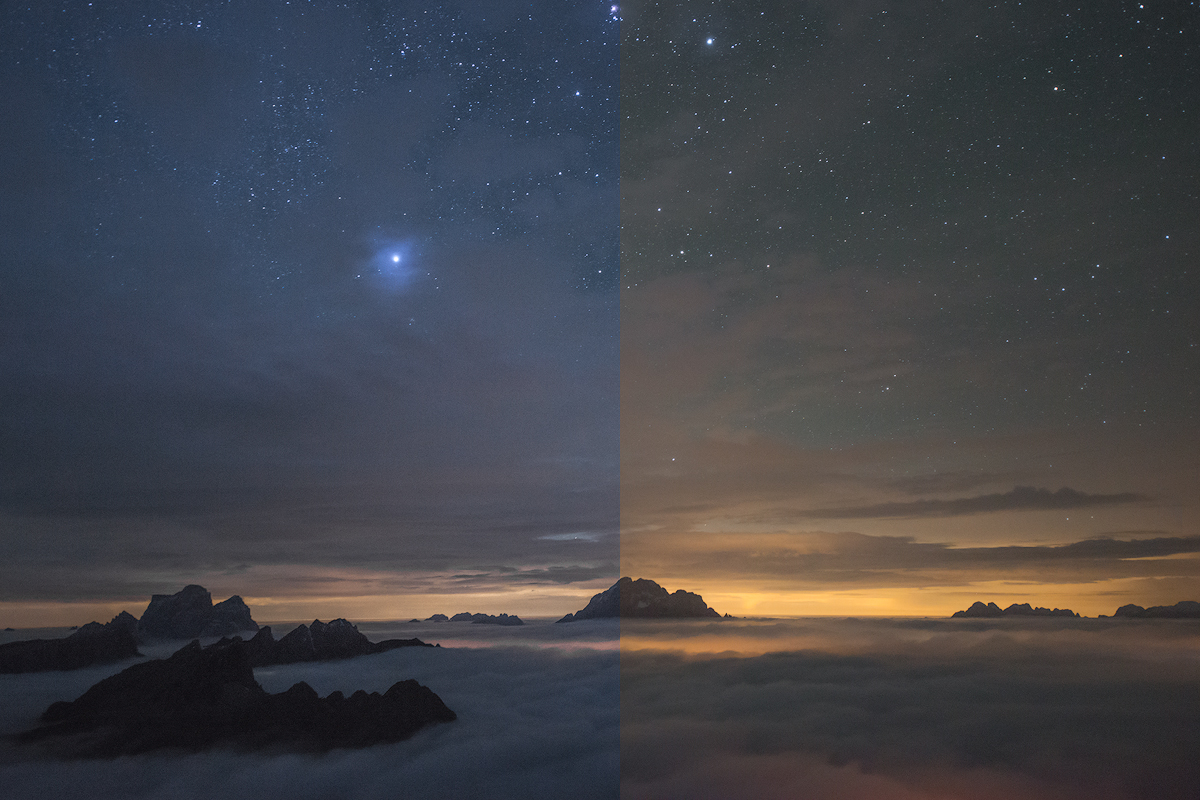
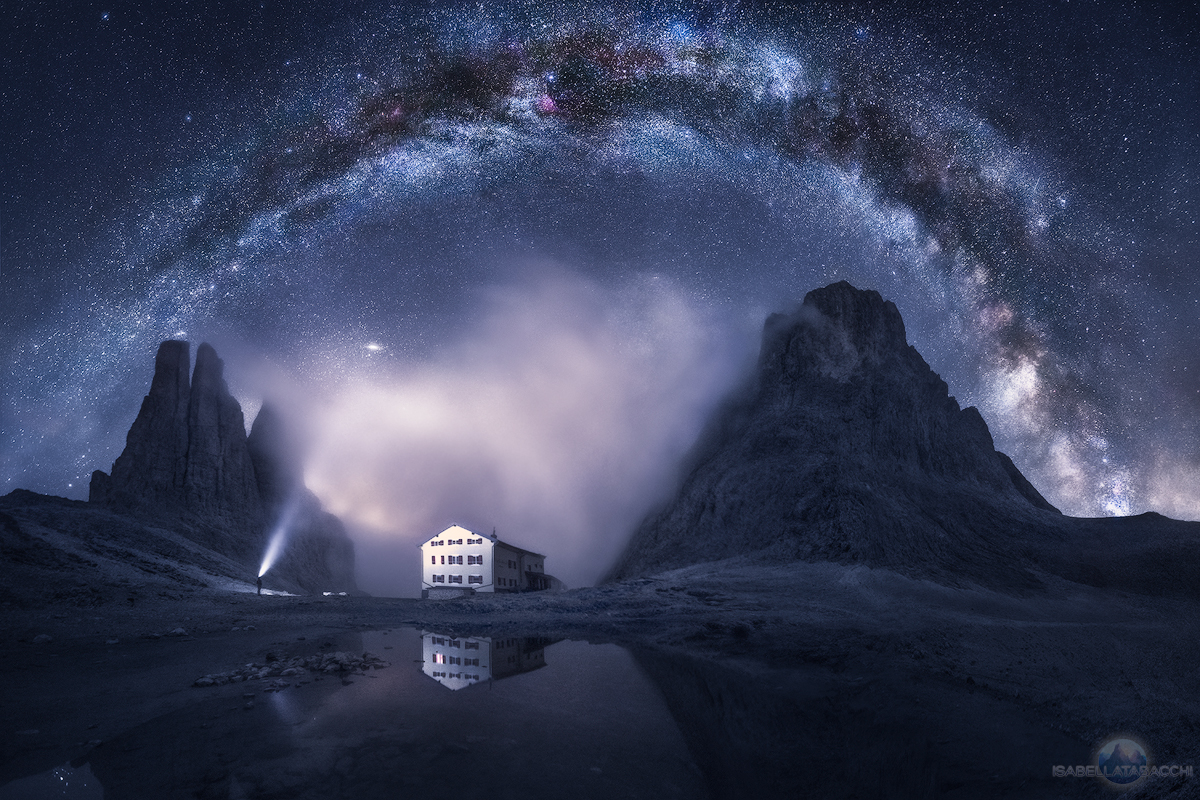
Whenever there is a slight chance of clear skies, I will drop all of my other plans, grab my gear and head out to a predetermined location in order to spend several hours admiring and shooting the Milky Way. Nothing brings me more photographic joy than standing beneath the Milky Way arching across the night sky. I am blown away by the sheer beauty of the Milky Way. I count my blessings each time I get to see it. And I can tell you, that those occasions are rare enough over here in Ireland. Our climate produces a lot of clouds!

In future articles, I will dive into more detail around my Milky Way Processing Workflow. I will also highlight other photographers who inspire me with their Milky Way images. But for now, you can read about the equipment that I use and how I plan my Milky Way images.

Milky Way Photography Image By Graham Daly Photography

My “Go To” Equipment For Shooting The Milky Way?

Unlike regular Landscape shoots where I have to take several lenses with me, along with other gear such as my NiSi Filters in order to handle whatever lighting conditions that might arise, thankfully my Astro Photography & Milky Way shooting setup is a lot smaller and simpler.  When it comes to shooting the Milky Way, I need not worry about controlling the dynamic range with filters. Nor do I need to drag along various focal length lenses to create different image compositions.

My typical equipment for Landscape images (Canon 16-35mm ƒ/4, Canon 70-200mm ƒ/4, and NiSi 100mm Filters) are left at home and instead, the only lens that I pack along with my trusty Canon 6D is that of the seriously inexpensive but excellent value Samyang 14mm F2.8 IF ED UMC Aspherical lens. In certain regions of the world, this lens is also sold/branded as Rokinon. This 14mm lens provides a very wide angle of view on a Full Frame sensor. This enables me to capture large portions of the Milky Way in the night sky. The lens is very sharp (if you get a good copy!) and handles comatic aberration (otherwise referred to as “coma”) and chromatic aberration very well. How well a lens handles comatic aberration is important for shooting the Milky Way and the night sky in general. Because if the lens does not control coma effectively, then the captured stars will result with comet-like tails. However, the lens does produce a horrible mustache-distortion and a strong vignette.

Milky Way Photography Image By Graham Daly Photography

I also bring the following items out with me on when I head out shooting the Milky Way:

  • Rollei Rock Solid Alpha Tripod + Rollei T3S Ball Head
  • Really Right Stuff L Bracket
  • Hahnel Capture Pro Wireless Remote Shutter Release
  • Spare batteries for my Canon 6D (OEM Canon + Hahnel Extreme varieties)
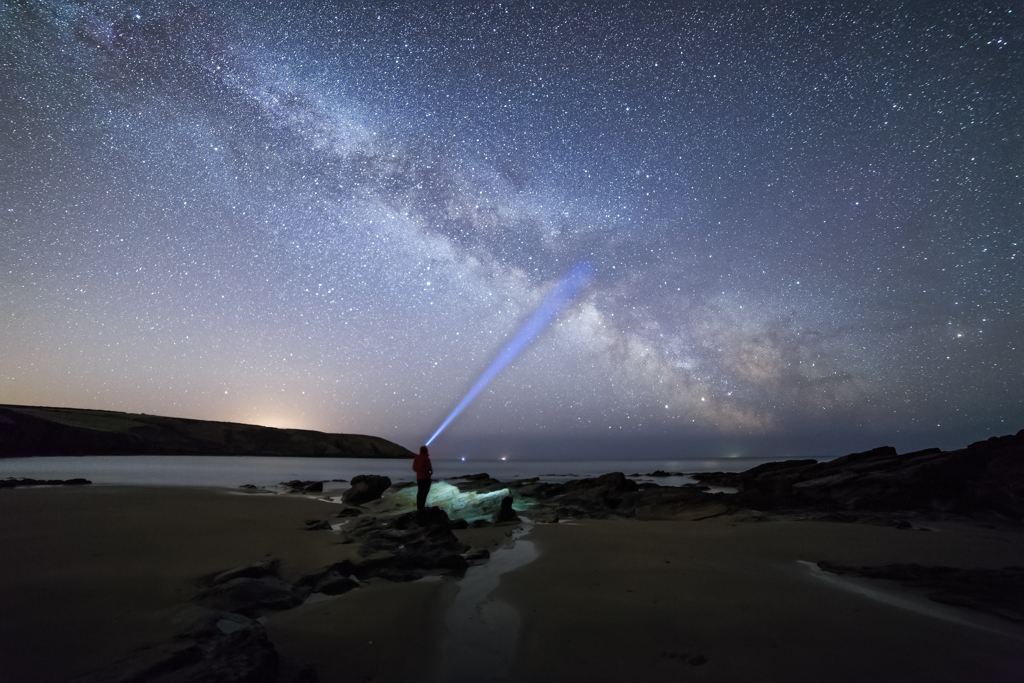
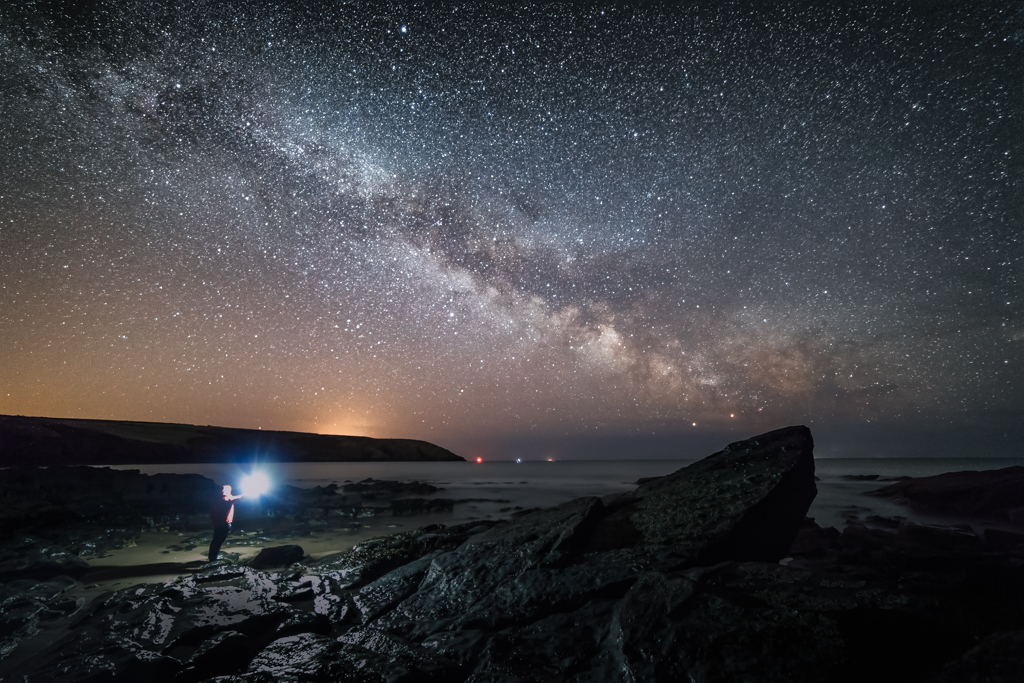
  • Hahnel Modus 600RT Speedlights (for light painting + images featuring myself within the scene)
  • Various Head Torches (for finding my way around in the dark + light painting/images featuring myself within the scene)
  • Terrascape Lens Cloths (useful keeping lens clean and wiping off any condensation)
  • A thermos flask filled with strong coffee!!

Planning & Preparing For Milky Way Shoots

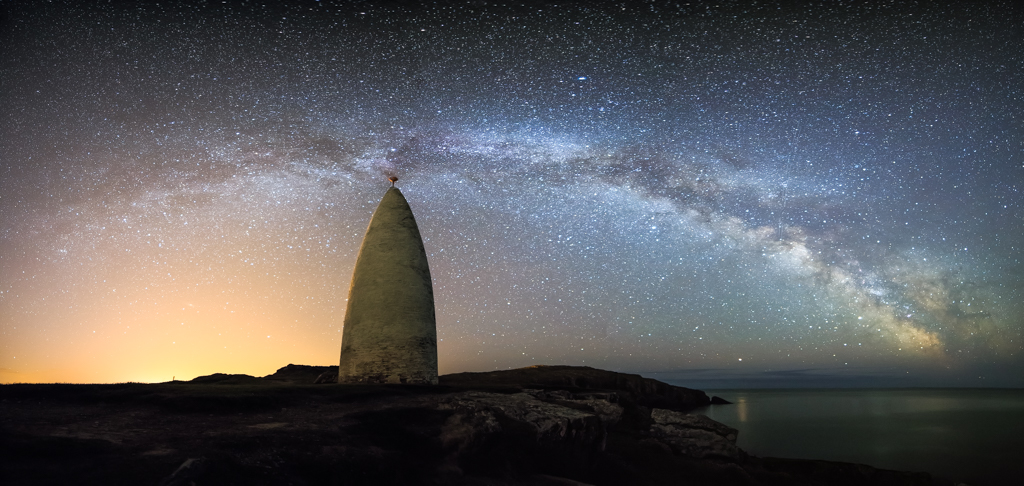
There are several key parts to my Astro Photography Preparation Workflow. When I am out at various locations shooting regular landscape images, I pay attention to interesting objects (man-made structures, trees, coastal rock formations, etc..) that might make good foreground interests within my Milky Way images.  I make note of these locations and objects for future Milky Way shots.

While I am at these locations, if mobile data coverage/access is available, I then use the PhotoPills app on my phone to verify how/when/if the Milky Way will line up with the desired foreground object at the specific location. The PhotoPills app is really useful as it allows me to not only to clarify sunrise/sunset times and directions on any given date for a particular location but it also tells me the moon rise/set times along with the moon phase as well for that given date. The PhotoPills app also shows me when/where the Milky Way core will rise and set as well as showing the location within the night sky relative to the location for a specified date.

In many ways, shooting the Milky Way and the night sky is a lot easier and less complicated than shooting regular landscapes on account of the fact that you do not need to worry about how the sunlight is going to interact with the landscape, what parts of the landscape will be in shadow, what the contrast and dynamic range will be like or even whether or not there will be just the right amount of clouds present in the sky in the correct location in order to capture any light/color from the rising/setting sun.

Milky Way Photography Image By Graham Daly Photography

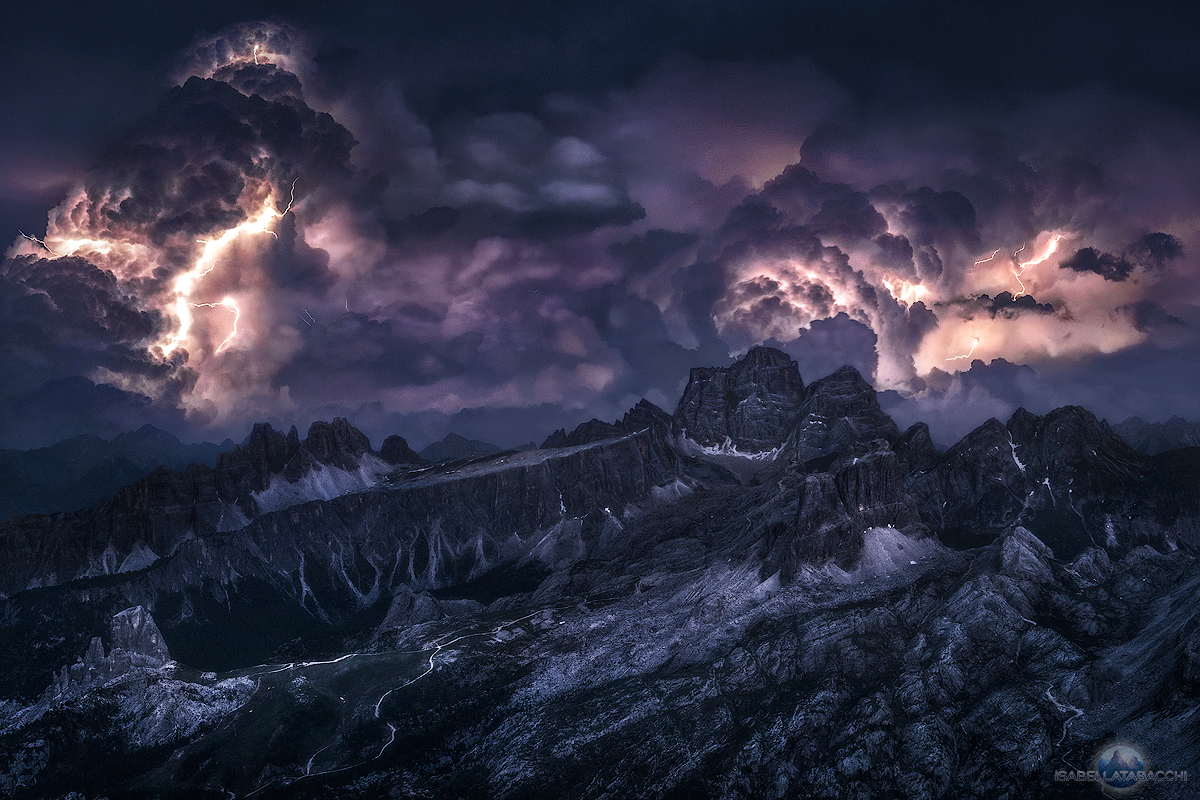
Clear Skies – The Vital Ingredient For Milky Way Shooting!

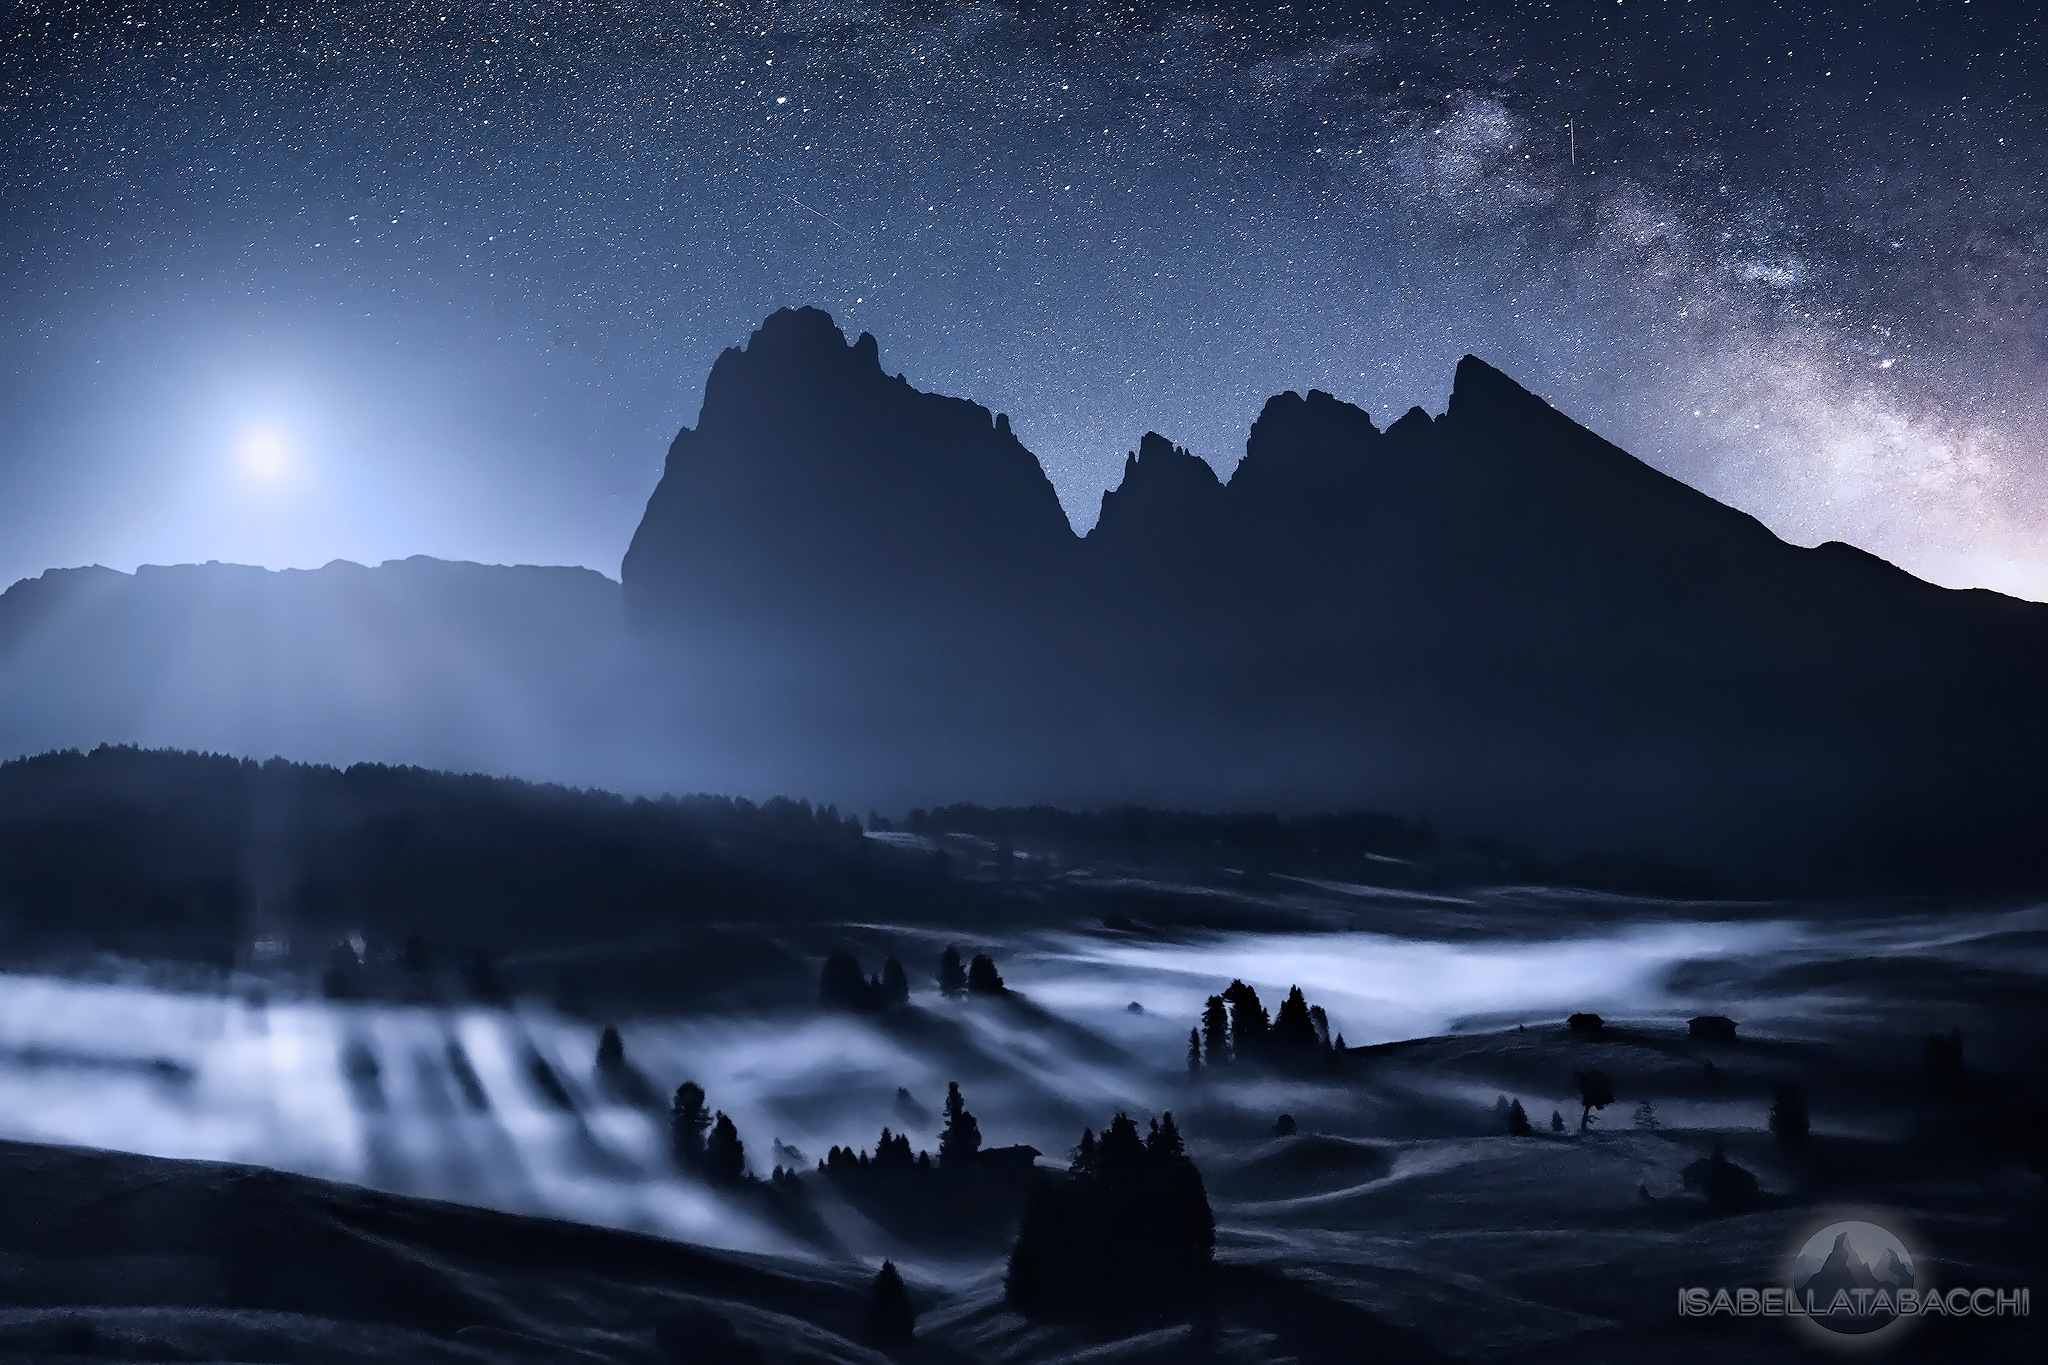
The main requirement for shooting the night sky and the Milky Way, of course, is that of a cloudless sky. Clouds are the enemy for the Astro Photographer and those looking to capture beautiful images featuring the Milky Way. In order to get the best images of the Milky Way and stars in general, you will need a sky that is free from clouds during a two-week window throughout the month when the moon phase is before or after a New Moon. While moonlight can be great for illuminating the landscape under the night sky and thus removing a lot of unwanted digital noise from your images when shooting, moonlight will cause luminosity of the stars in the night sky to be diminished and will thus cause the Milky Way to be washed out.

Along with using the PhotoPills app for checking the moon phase and moon rise/set times for a particular location on a specified date, I also use several weather forecasting sites to check whether or not clear skies will be potentially possible for that date. Of course, while I can use the PhotoPills app at any stage throughout the year to check out the various planning information points as I eluded to in the preceding paragraphs, I really can only verify the cloud cover and potential for clear skies within a short period of time.

Milky Way Photography Image By Graham Daly Photography

Typically I use five-day forecasts to check for the possibility of clear skies in a given week. When I spot a potential for clear skies on the long-range forecasts, I then start to focus in on those potential days and start paying more attention to the forecasts in the forty-eight (48) and twenty-four (24) hour time periods building up to that date in question. If cloud forecasts look good on the day in question, I then grab my gear, load it into my Land Rover and then I hit the road to get to my desired location and pray for the skies to stay clear while en route!

High-Level Overview Of My Milky Way Processing Workflow

There are certainly more steps involved in my Milky Way Processing Workflow as opposed to my Landscape Processing Workflow. Not that there is any additional complexity. But rather the processing workflow just has more steps and thus requires a bit more time per image. I will write about my Milky Way Processing Workflow in more detail in a follow-up article. So I will just keep things brief and at a high level here in this article.

The following is a generic overview of the workflow that I apply when processing all of my Milky Way images:

  1. While on location, I capture several exposures of the same image composition using the exact same settings. Exif settings are typically [ 14mm | ƒ/2.8 | 20 seconds | ISO 12,800 ]
  2. The duplicate exposures captured while on location will be used for “Stacking” when processing for Noise Reduction purposes.
  3. When I get back home, I then prepare to offload the images from the camera’s memory card to my workstation. To facilitate this I create three folders within a directory specific to that shoot. A folder for the original RAW files, a folder for the processed TIFF files that will be used for the Stacking process and a folder where the final processed JPEGs will be exported to.
  4. Once the RAW files are on my workstation, I import them into Adobe Lightroom Classic CC.
  5. After importing the RAW files, I preview all of the potential image files that I want to process/keep and dump the files that did not turn out correctly for whatever reason (condensation, not sharp, stray and unwanted light pollution, etc…). I use the Lightroom Rating feature to help identity which files I think to hold the greatest potential for processing.
  6. Once I have identified the image composition I want to process first, I select and highlight the range of exposures for that given image composition. This is usually between eight and twelve exposures
  7. I apply basic adjustments to one of the selected RAW files. The adjustments are synced across the rest of the RAW files that will be used as part of the Stacking process. I will go through the exact adjustments that I apply to my Milky Way images in a future article.
  8. Next, I export all of the processed RAW files as full sized TIFF files to the designated “Image Stacks” folder on my workstation. Once exported, I select all of them and I open them within Starry Landscape Stacker. This great application then aligns all of the exposures and stacks them with just a few simple mouse clicks. The stacking process applies a “Median Noise Averaging” process which greatly reduces the amount of total digital noise that will be present in the final outputted image file.
  9. Once the stacking process has been completed, I then export the new composited TIFF file and I then import this into relevant folder structure within my Lightroom Library.
  10. Lastly, I apply some further adjustments to the stacked TIFF file within Lightroom and exports JPEGs with relevant settings.

Milky Way Photography Image By Graham Daly Photography

Top Tips For Capturing The Milky Way

  • Plan Your Shots – Use PhotoPills to research Milky Way visibility, rise/set times for a specified location on a particular date
  • Include strong foreground interest
  • Use large (fast) aperture lenses – ƒ/2.8 would be a minimum aperture to yield the best potential
  • Shoot several RAW exposures for each image composition while on-location. These can be stacked for noise reduction purposes
  • Bring plenty of spare batteries, suitable clothing, and coffee!

Milky Way Photography Image By Graham Daly Photography

Haida Clear Night filter. A solution to the light pollution

As one of the leading industries in photo filters production, Haida always has new ideas to improve the quality of our shots.

A good instance is the new nano Haida Clear Night filter. It was so useful to contrast the yellow light pollution in some places where I created some of my images!

This is, for example, the final result (post-processing included) of a shot taken with that filter in the Swiss Alps.

see filter isabella tabacchi

You’ll think that it’s very easy to have such uniform color of a nightscape with Adobe Photoshop and that the light pollution tint is removable also with some features in Adobe Camera Raw.

That could be true, but the following image shows as my editing work was very short thanks to the Haida Clear Night filter.

clear night with without

This image is composed of two not post-processed shots as Adobe Camera Raw shows them. I took the RAW files with the same white balance of 3700 K (Kelvin).

In the “WITHOUT” part, we can notice how the light on the horizon is strong, yellowish and has its impact on the rest of the sky, even in the mountains.

In the “WITH” half of this demonstrative picture, the light is not only white but even more restricted on the horizon area. Therefore, the stars are also more evident, outlined.

clear night filter haida

This is how the Clear Night filter looks in its original Haida Filter case.

You can notice the light blue color of the glass: this is why the yellowish pollution is contrasted!

The filter contains also a polarizing capability: it defuses light coming into the camera; so, the luminosity and brightness of the pollution will be confined at the horizon, the stars and astro magic like Milky Way will be more evident.

A parenthesis about the nano-coat meaning

The nano coat couldn’t miss in this product.

But, what does “Nano Pro” mean? Well, it’s the extremely thin, nano, a coat which covers the glass surface of the filter.

This is the great innovation of this new product line that makes the difference in comparison to the previous series. It gives resistance to dirt, reflections, and scratches.

Thanks to this coat, my filters fantastically survived sandy, earthy, rocky, icy places.

Furthermore, as a landscaper, I often take shots to waterfalls and rocky beaches where the waves move on the reefs and splash some water on the filter. Thanks to this coat I have just to clean lightly with a towel cause the drops come away very easily.

Another comparison: when the light pollution is very strong

CLEAR NIGHT

This is another “WITH-WITHOUT” image composed of two shots I took during my workshop at Lagazuoi hut, in the Italian Dolomites.

My students and I had the opportunity to immortalize this view of the highest peaks in the Dolomites of Ampezzo coming out from a “sea” of clouds.

Unfortunately, the light pollution of the valleys was reflected in the clouds and at the horizon; but the shot with the Haida Clear Night filter, with the same white balance, is completely different.

All these features help so much the post-processing phase cause we need to do fewer actions in order to delete the light pollution and that yellowish cast.

Where can you buy it?

You can purchase Haida Clear Night filter at Amazon.com.

But are also available on fotichaestli.ch , the Swiss distributor website.

They are available in every size:

  1. Square Glass Insert filter systems. 75×75, 100×100 and the 150 super wide angle systems (you need the holder to mount the filters on the lens).


Round filter sizes: 52, 55, 58, 62, 67, 72, 77, 82 m

A little parenthesis about the Haida holder

You have to put the filters in the grooves of the holder to use them. I own the 150 series holder for my Nikon 14-24mm f/2.8G ED wide-angle lens.

The support system is steel and very steady and resistant. It consists of the universal holder that supports the filters, the front adapter ring and the rear adapter ring that sustain and connect the holder to the lens.
A little gold nut enables to remove or rotate the holder on the rings to position better the filter, especially if it’s a GND.

There are also two rubber plates (superior and inferior) on the holder surface, near the grooves; they prevent the light to come into the space between the lens and the holder, so the nuisance reflections don’t appear on our shots. You can find also some replacement rubber plates in the holder pack.
I also took many very long exposure shots with ND, GND and both filters; I never saw that horrible reflection (similar to crowns) that appear every time the light goes through the filter.

And of course there are not this kind of problems about the Clear Night filter; in the night the light is very weak, especially when the moon is not visible (except cityscapes).

Conclusion

Haida Clear Night filter is a great choice for a nightscape.

I like the color cast on the glass, cause it eliminates yellowish and orange pollution, even if I know that is a matter of taste (I love cold nightscapes).

The quality is great and the price also. I have to tell you that this idea met my expectations.

SaveSave

Six Dolomitic Destinations a Landscaper Couldn’t (And Shouldn’t) Miss

For who don’t know, Dolomites are a group of many mountains located in Italy, between the regions of Veneto and Trentino-Alto Adige.These peaks are known for their bizarre shapes, formed millions of years ago because of many erosions.Over the years The Dolomites became among the most visited mountains in the World and many tourists from different countries go for miles on foot to admire the magnitude of that peaks or enjoy atomic sunsets.As that places are so peculiar and full of drama, many landscapes photographers search inspiration there and the business of photo workshops is greatly fruitful.  seceda dolomitesThis is why, as I explored The Dolomites for years, many foreign photographers asked me a lot of information about spots and places to visit there.Of course, every angle of this area should be explored, and there are wonderful locations are not included in this article cause I should write a book about all the places to visit in the Dolomites… this is why I’ve chosen the six most powerful locations where I tried the strongest feelings as a photographer and as human.

1. Mount Seceda 

Seceda is part of the Odle group, in Val Gardena, in the province of Bozen. You can reach the summit of the mountain with a cable car from Ortisei and be at about 2500 min 15 minutes. There you can admire the imperiousness of the inclined Seceda peak turned towards the valleys and other mountains of South Tyrol, until the Austrian peaks like mount Großglockner. Behind your sight, you will recognize some of the most famous mountains and massifs in the Dolomites, like Langkofel, Plattkofel, and Sella group. As a photographer you can use many different kinds of lenses there; I think the best focal length to immortalize Seceda is 24mm even if telephoto lenses are necessary to create images of the far peaks, that are very fascinating, especially in a misty nightfall.  According to my photographic tastes, I think that the best time to take great shots of Seceda is in the foggy days, especially when fast clouds, lower than the summit of the mountain, move against this one; this kind of weather can be present in every season, particularly in Autumn and Spring.

 2. Seiser Alm

Coming up by car from Kastelruth you will arrive in a little town of hotels named Compatsch. If you park and proceed by a walk on a restricted traffic route, you’ll discover a little and pacific rural environment at the foot of the majestic Langkofel and Plattkofel mounts.During your shooting time you can play with the curves of hills, and little details of them, like trees and little alpine lodges. I recommend focal lengths from 24mm to 70mm even if also telephoto lenses could be used to capture details of the valley and far mountains.A foggy weather is perfect to take pictures in Seiser Alm; I really love when the light of the sun or the moon creates visible oblique rays that illuminate the fog and are contrasted by the shadows of the elements in the valley. My award-winning picture “The magic of the night” is an example of the disarming beauty of Seiser Alm bounded by the mist at the moonlight.The best months of the year to visit this fairy location are May, June, July, during the flowering of the meadows, October, November and in the wintertime (but only if the hills are covered by the snow).seiser alm dolomites

3. Lagazuoi hut   

Lagazuoi is a mount located in the Dolomites near Cortina D’Ampezzo, lying at an altitude of 2835 m. It contains a mountain hut, accessible by cable car in few minutes, which has one of the best panoramic views in the Dolomites.   This is why I consider it a landscaper friendly location: every kind of lens, especially from a focal length of 24mm to higher, is addicted thanks to a view rich of peaks, valleys, trees and every kind of detail.Every month of the year is great to visit Lagazuoi hut, above all, when low clouds form a kind of “sea” and only the highest peaks come out from them. The funniest thing is that, at that altitude, the weather changes very fastly! This is why you can take shots of a red sunset and immediately after of some lightning.lagazuoi pelmo croda da lago cortina sorapiss sorapis

4. Lake Sorapiss

At the foot of the Dito di Dio (God Finger) peak is located the most colorful body of water in the Alps. Sorapiss is characterized by an intense turquoise water, given by the rocks at the bottom of the lake.You can arrive at this fairy place from Passo Tre Croci, near Misurina (district of Auronzo di Cadore), in about two hours and it’s possible to book at the Vandelli hut, near the lake.A colored sunset or a shiny sunrise can help you to take a memorable capture of this location, even if the totality of the lake makes the most of the “wow effect”.I recommend a wide-angle lens to get a large visual of the mountains and the water, with some rocks in the foreground.You can visit Sorapiss lake from the thaw in May until the first ices at the beginning of November.

  5. Vajolet Towers

When you reach the “Gartl” hollow after a sloping rocky trail, you may think to be in another lonely world; and on your right, there are three majestic bastions called Vajolet Towers. On your left, there is a yellow house which is the Re Alberto I hut and in front of it is placed a little pluvial lake. The rocky garden of the “Gartl” hollow is located at 2621 m between the Fassa valley and the municipality of Tires, in South Tyrol. Photographers can take shots from many points of view like the lake and use some rocks as foreground.The best lens for this location is a wide angle, that’s especially addicted to the nightscapes lovers, cause the sky at that altitude is very clear and deep.The way to reach Re Alberto I hut from Pera di Fassa is long but you can get really warm hospitality and discover the taste of Italian and Tyrolean food at the hut; I will never forget the polenta with cheese before my shooting time.Re Alberto I hut is open from the end of June to the end of September and the best weather is, of course, a red cloudy sunset but if a dark night follows it.stars vajolet towers milky way

6. Tre Cime di Lavaredo

I couldn’t avoid writing about Tre Cime (Three Peaks), a place that every tourist knows, a classic postcard of the Italian Alps. You can reach the Locatelli hut from Auronzo hut by a more than one hour walk. The trail is boring, but when you are in front of the Three Peaks can’t stop to admire their majesty.I suggest you take a look also at lakes of Piani, two bodies of water behind the Locatelli hut.I recommend you to use a wide angle lens and a telephoto lens only to take shots at far peaks like Cadini di Misurina or Dreischusterspitze. Tre Cime di Lavaredo are fascinating in every period of the year, with every weather (even if I personally prefer a partially cloudy sky in the daytime and a clear night). Be sure that in Winter the trail is walkable and there isn’t ice on it.tre cime