Even though nowadays a large majority of the images produced daily are taken with a digital camera and even though the post-processing has become something familiar to every photography enthusiast, many of the techniques we use to enhance our images actually come from the era of film photography.
On this entry, I want to talk about a special filter that is quite commonly used in portrait photography and that has become popular in landscape photography as well: the Orton effect.
Introduced in the 1980s by photographer Michael Orton, the result obtained from applying it to an image is what can be described as a ‘dreamy effect’. If you have ever used some kind of plug-in software for Photoshop such as Color Effex, you might know this as ‘Glamour Glow’ and, when carefully used, it can produce very interesting final results.
You don’t actually need any plugin to obtain the same effect in Photoshop, though. The Orton effect is just a combination of two images, each of them with specific characteristics. The two images are of the same subject with the main difference being the focus. While the base image needs to be perfectly in focus, the overlaid one is out of focus. The opacity of this top image will affect the strength of the effect on the final image.
Luckily, with the tools available with Photoshop, you don’t even need to shoot different images with different focus. You can simply use a blurring filter in order to get an out-of-focus version of the image you want to process. What you need, though, is a sharply focused image on the first place.
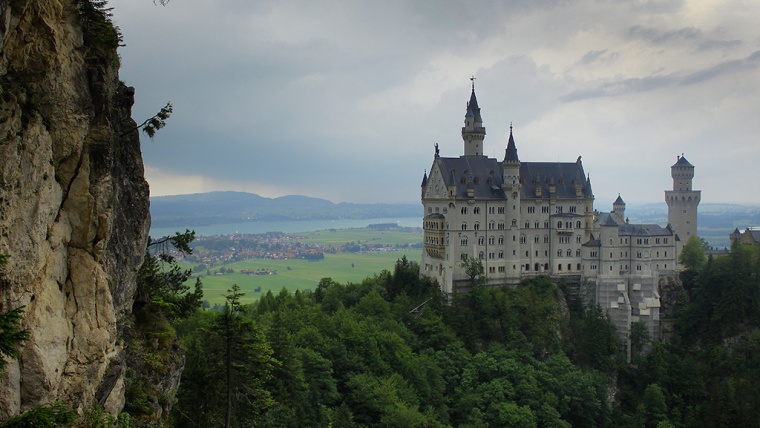
Take, for instance, this image of the Neuschwanstein castle in Bavaria, Germany.
This is a classic capture of this amazing structure, built by the King Ludwig II of Bavaria and that has served as inspiration for the famous Cinderella castle, located in two of Disney’s theme parks.
Given the nature of the subject, even when the original capture can already show the magnificence of the structure itself and the location, the image can still benefit from some post-processing and it serves as a good example for the dreamy look that the Orton effect can provide.
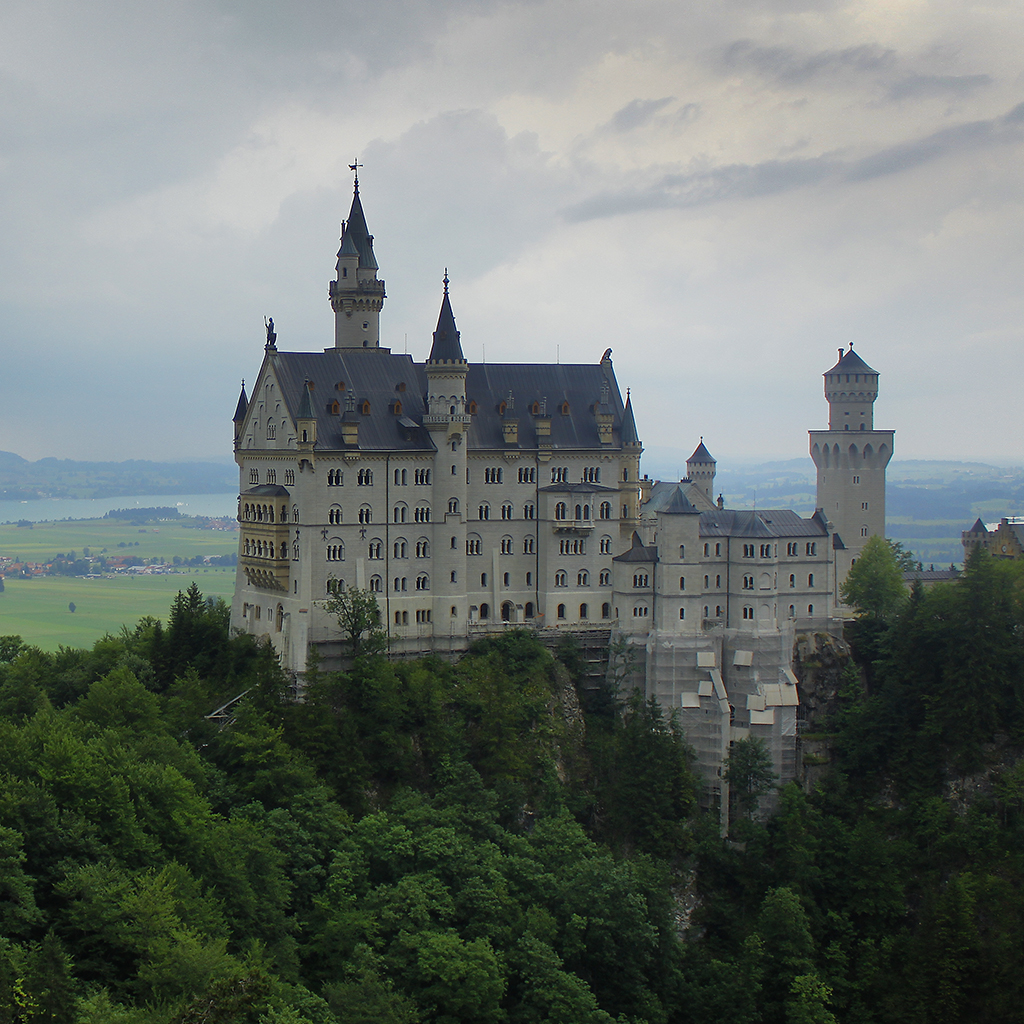
The first step is to duplicate the original layer in Photoshop. Even though the basic idea of the filter is the combination of two (or more) images with different focus, simply stacking a blurred layer on top of the original one will give an exaggerated effect. The following image was produced by applying a Gaussian blur to the top layer (radius of 40 px) and reducing the opacity in order to combine both layers.

You can see that the ‘dreamy’ effect is far too strong, making the image look more like foggy. The reason for this is how the blending of Photoshop works. For the image above, the blending mode was left in ‘Normal’, meaning that the layer is simply placed on top of the background layer and the opacity will just make a linear combination of both images.
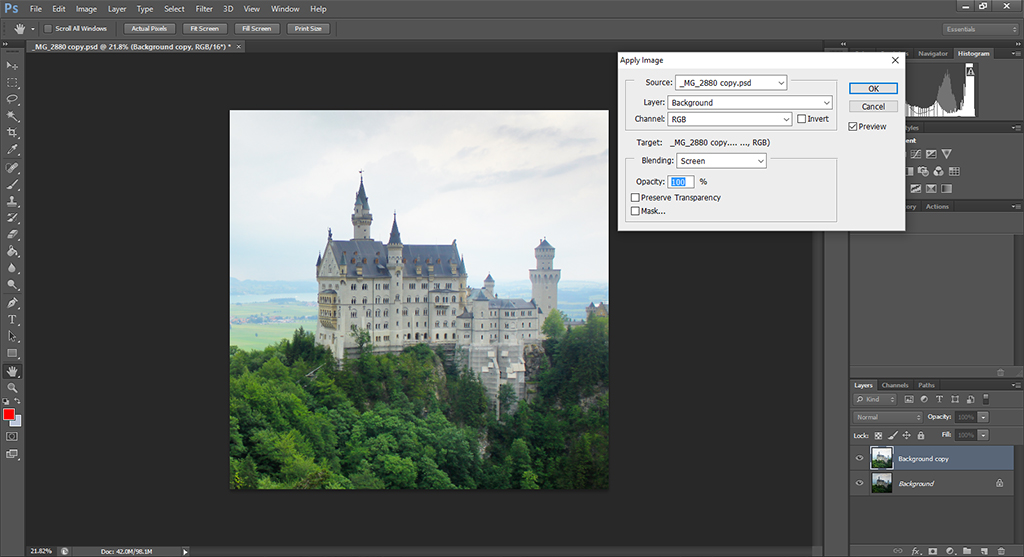
Another problem with using the ‘Normal’ blending mode is that the final result of the Orton effect tends to darken the original image so a blending mode that increases the brightness of the dark areas is desired. An ideal one for this purpose is the ‘Screen’ mode. So what you need to do is, with the top layer selected, go to Image -> Apply Image… and select your background layer (here simply called ‘Background’) and ‘Screen’ on the Blending drop-down menu.
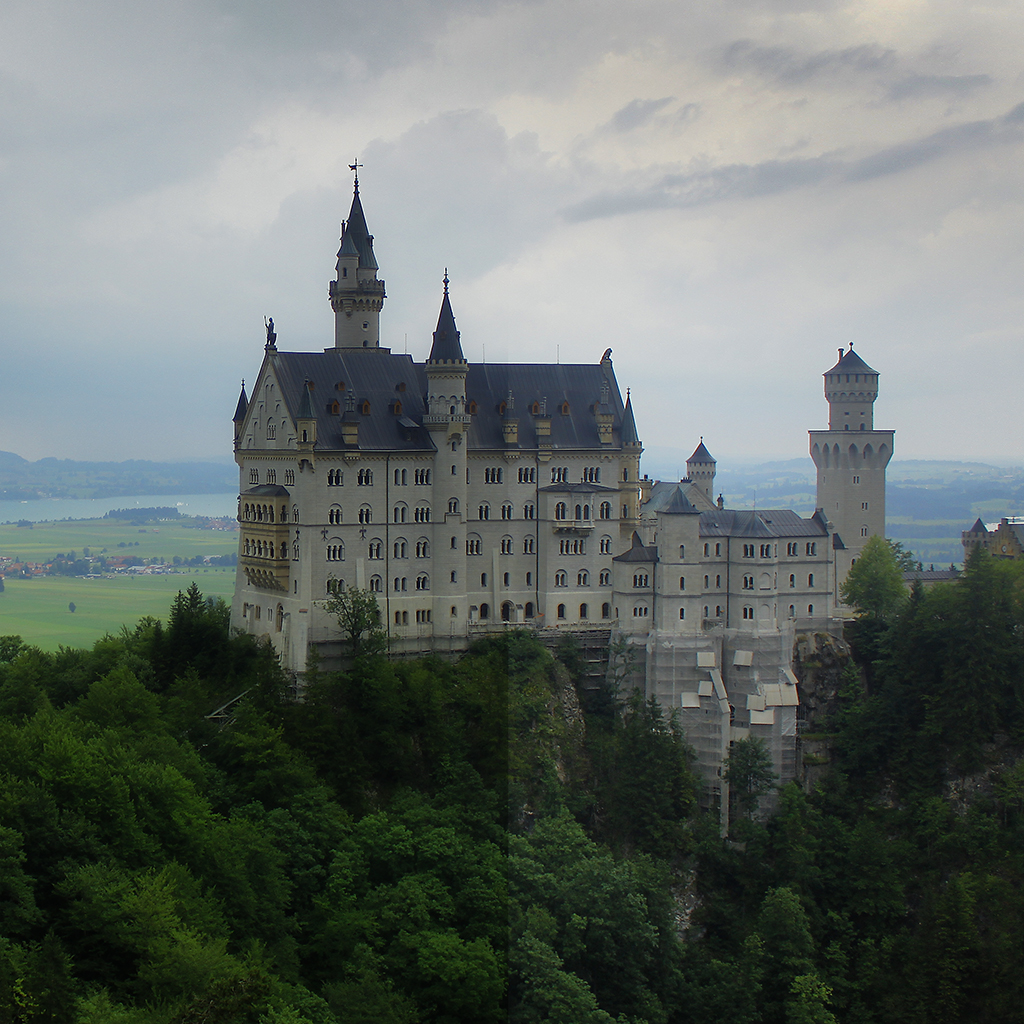
This will give an overexposed version of your original image, but still retaining some details on the brightest regions. The next step is to duplicate the top layer. Once you have three layers, apply a Gaussian blur to the top one (Filters -> Gaussian blur…). The amount of blur to apply is not so important right now, since its effect on the final result can be controlled with the opacity of the layer, as we will see in the next step. The image below is a blurred version of the original image with a radius of 30.

Next, merge the two top layers into one by selecting both layers at the same time and then right click -> Merge Layers so that you end up with only two layers. Finally, by changing the blending mode to ‘Multiply’, you get the final image with the Orton effect applied.
At first, the image will look too dark and the effect might be also too strong, so you can adjust the opacity of the layer until you are happy with the results. The image below was produced with an opacity of 70%. Additionally, I masked the effect with a layer mask around the trees and increased the overall brightness to counteract the effect of the Orton effect. In order to highlight the difference with the original image, I masked out the effect on the right side.
And that’s it. As you can see, to achieve the effect requires only a couple of easy steps and, if used carefully, you can significantly enhance some of your images, so go ahead and try it and, if you have any question, just write me an email.


Please verify your software version before proceeding.
 I’ve verified my software version


 Facebook
 Google +
Comments (0)
There are no comments yet.