If there’s one adage that reigns supreme in user interface design, it’s “don’t mess with success.” In other words, if a design works well, it’s far better to keep it consistent and familiar than change it up simply to create the illusion of improvement. This is where Fujifilm truly goes above and beyond any other camera brand. The Fujifilm X-Pro2 not only draws heavily on previous Fuji camera designs, but all of those designs are based on the tried-and-true layout of classic film cameras. The X-Pro2 keeps the same rangefinder look and layout as the X-Pro1, but with improvements across the board, making it one of the best performing and best designed cameras to date.
Here, we’ll give you a thorough review of the $1,699 X-Pro2, divided into Hardware Design, Software Design, Shooting Experience, Image Quality, and Lens Options, with ratings out of 10 for each category. We’ll also add in some other, non-rated sections to give you a better feel for the camera overall, including some pros and cons and suggestions for similar cameras.
Pros
- Best shooting experience I’ve had
- Brilliant rangefinder layout
- Wonderful look and feel
- Weather resistant (with WR lenses)
- Tons of customization options and Fn buttons
- Intriguing OVF/EVF viewfinder
- Wireless shooting for incognito street photography
- Great color rendering and film simulations
- High-ISO noise actually looks good
- Quality, inexpensive prime lenses
Cons
- Poor battery life compared to DSLRs (about 180 shots per charge)
- Occasionally wonky menu system
- Smartphone app needs work
- Small lineup of lenses
- No 4K video
- Expensive for a mirrorless/APS-C camera
Click to read the full Review KEY STATS
- 24.3MP APS-C X-Trans CMOS III Sensor
- X-Processor Pro Engine
- Advanced Hybrid Multi Viewfinder
- 3.0" 1.62m-Dot LCD Monitor
- Full HD 1080p Video Recording at 60 fps
- Built-In Wi-Fi, SHARE Printer Compatible
- 273-Point AF with 77 Phase-Detect Points
- Up to 8 fps Shooting and ISO 51200
- Weather-Sealed Design, 2x SD Card Slots
- Film Simulation and Grain Effect Modes
ALTERNATE PICKS
- Fujifilm X-T1/X-T10
- Sony a6300
- Canon 80D
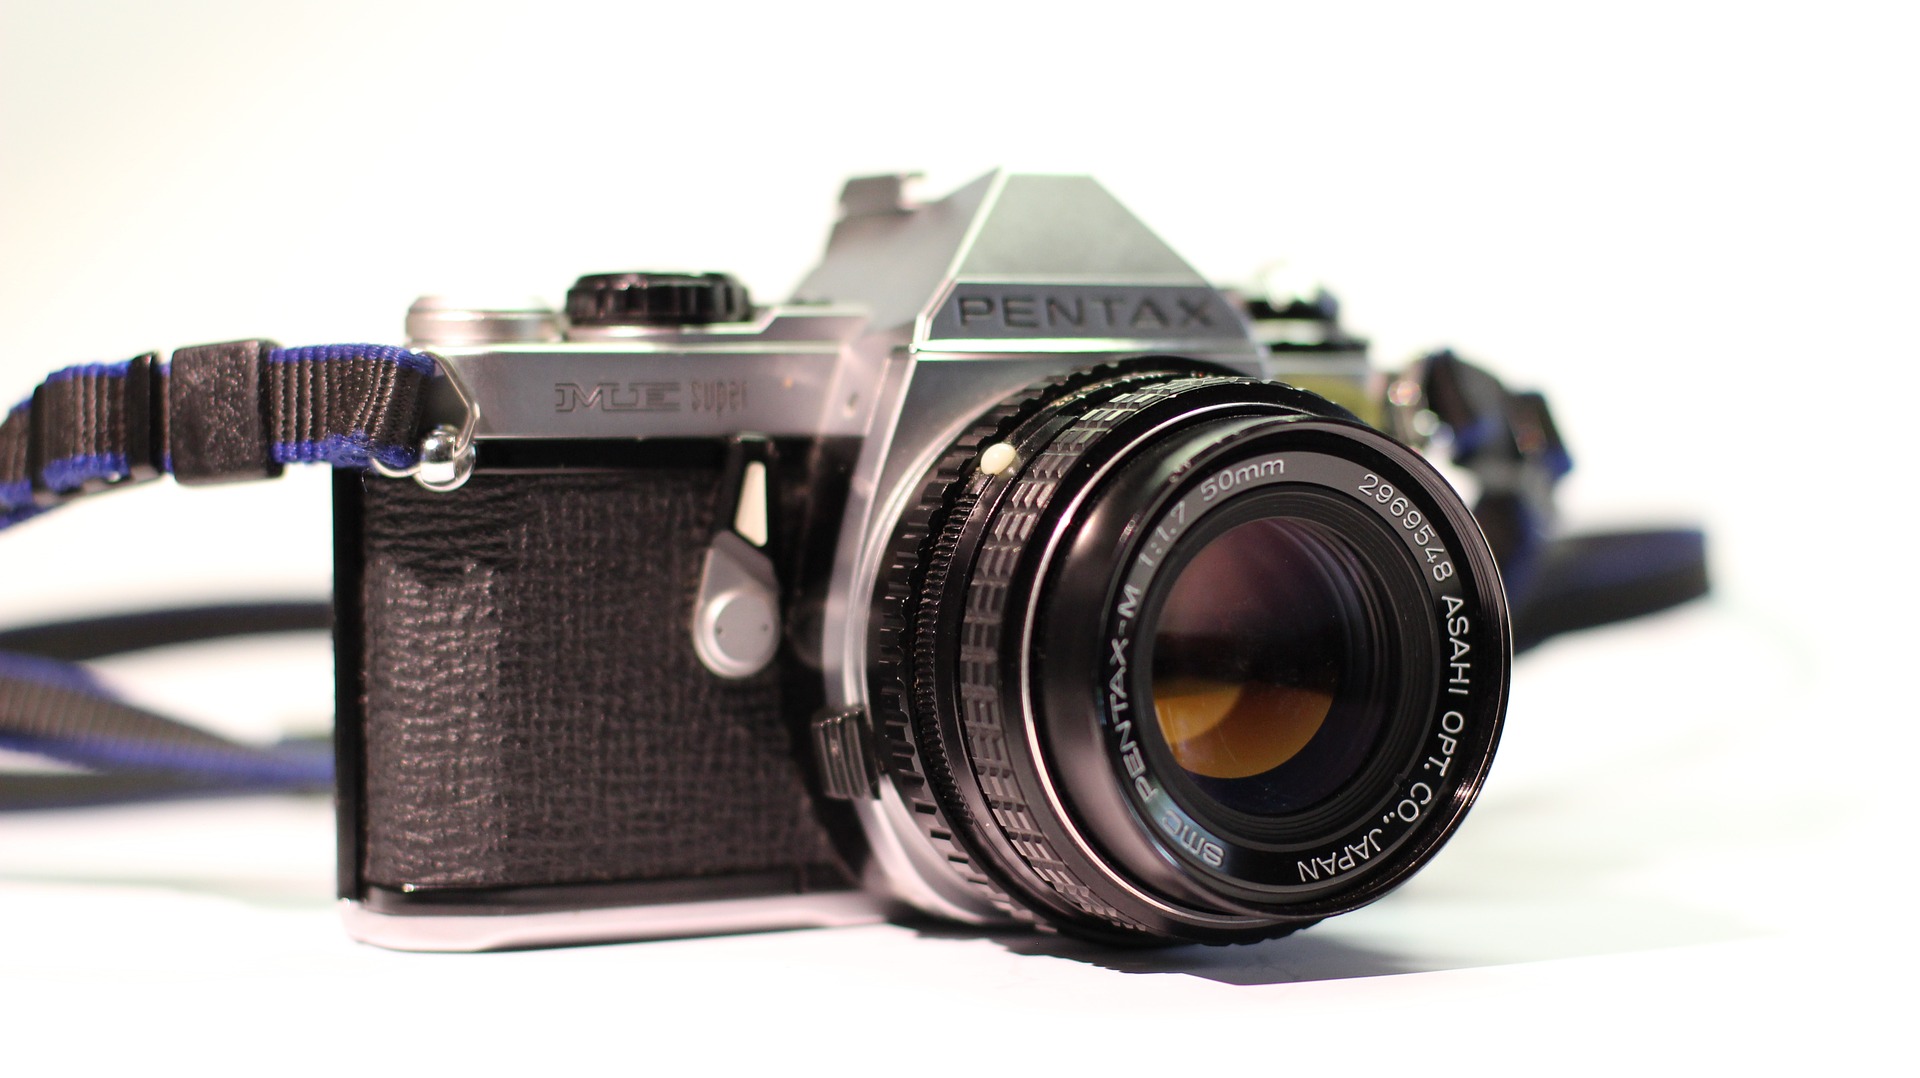
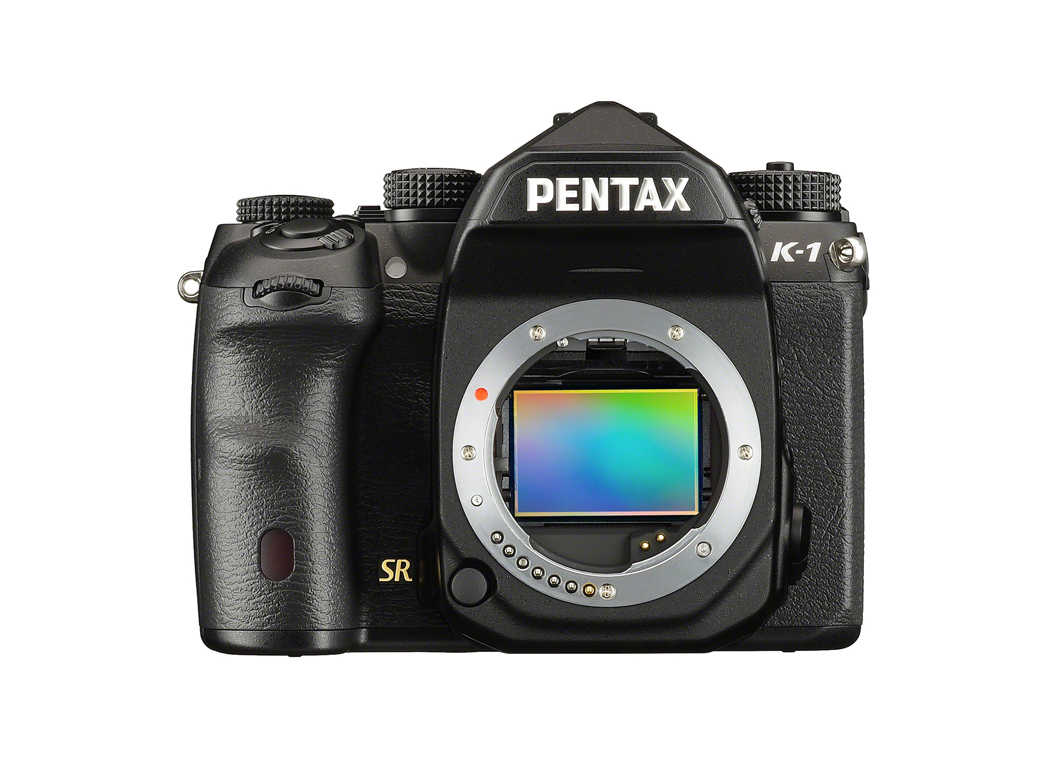
- Pentax K-1
Initial Impressions
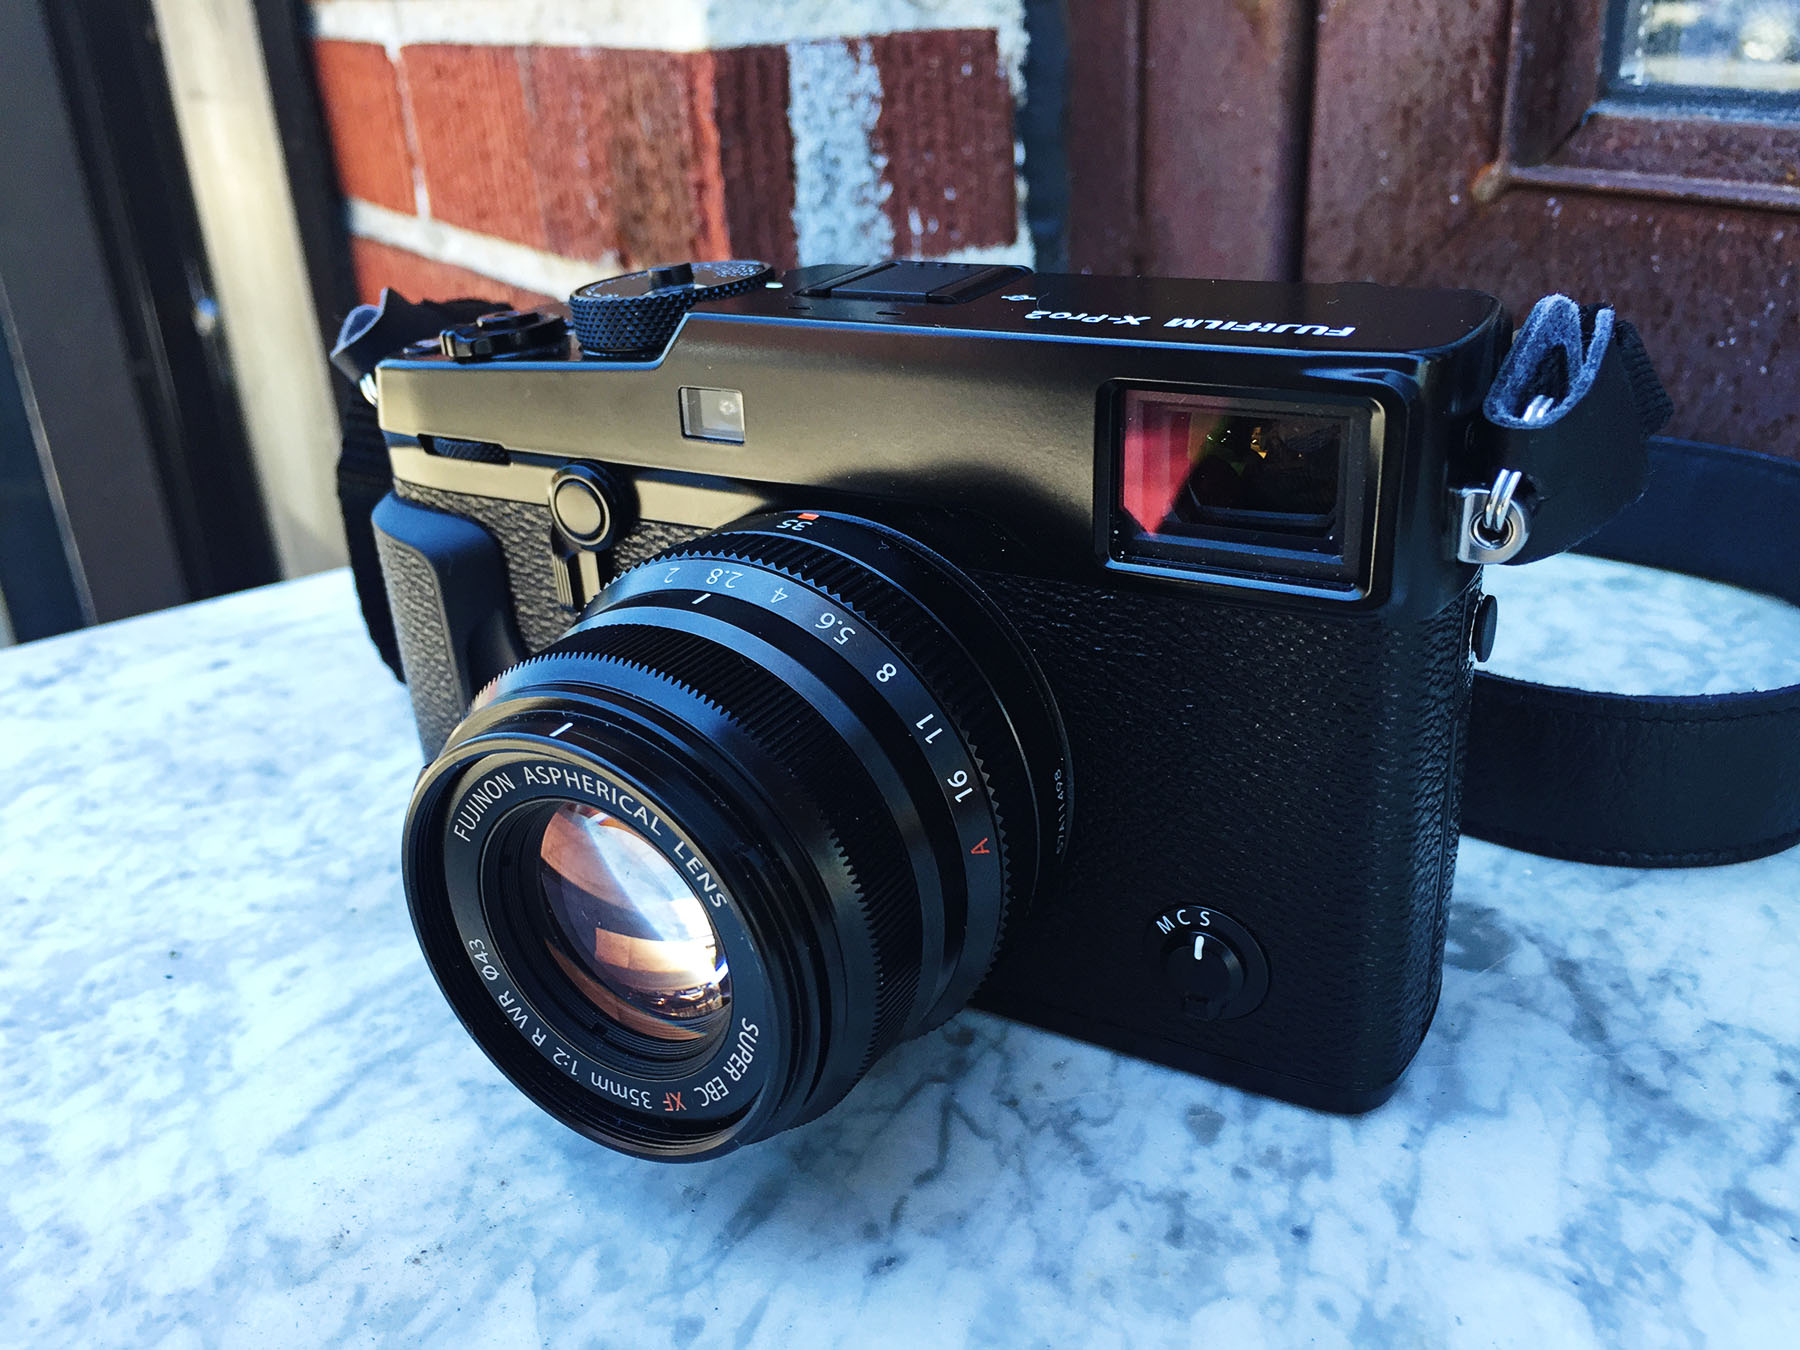
There’s no getting around it, one of the strongest appeals of the X-Pro2 is the retro charm. Though this camera doesn’t hide its modern technology, it borrows heavily from the rangefinder design made popular by Leica in the 1960’s and 70’s. Luckily, it doesn’t wear a layer of faux leather around its midsection, but gives a similar visual affect with a rippled metal body. The optical viewfinder window and rectangular body are clear indications that its not an DSLR, which is a simply brilliant move for not only Fuji but mirrorless cameras in general. Just as SLRs and rangefinders had their own, unique areas of expertise in the days of film, Fujifilm is saying that a mirrorless camera can also live alongside current DSLRs in harmony, serving different functions. While a (D)SLR is the ideal option for studio and otherwise contrived work, a mirrorless/rangefinder camera is far better for spontaneous, real-world shooting. Fujifilm also makes DSLR-inspired mirrorless cameras (like the X-T1), but for the most part they function like rangefinders.
Holding the X-Pro2 is almost as beautiful as seeing it. The thumb grip is beefy yet slim, the weight is significant enough to evoke quality without being cumbersome, and the button layout gives all but the largest and smallest hands the perfect amount of room. It just feels right.
Hardware Design – 9.7/10
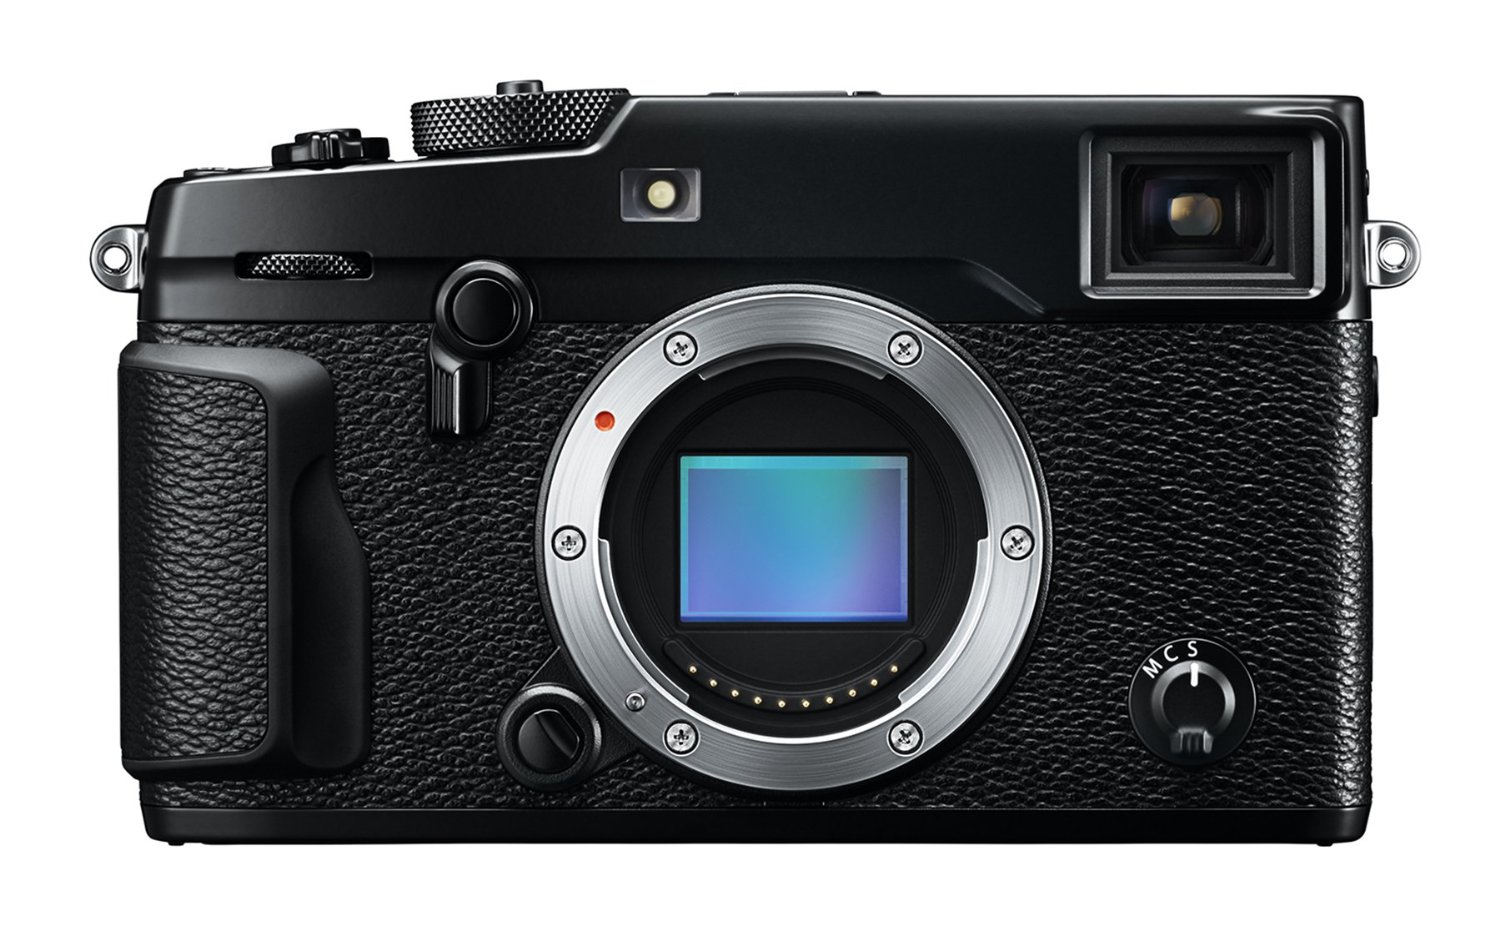
If you haven’t noticed yet, I love the design of this camera. It centers on what is possibly the greatest feature of the X-Pro2: the shutter speed/aperture/ISO dial layout. This may seem like an oddly non-technical feature to call “the greatest,” but it’s what separates the X-Pro2 from the crowd and informs the design and functionality of the entire camera. You see, film cameras got it right. Most of them had a shutter speed dial on top, an aperture control ring around the base of the lens, and an ISO dial within the shutter speed dial (or separated out like on the X-T1). This allowed you to hold a camera naturally and have all the most important settings right at your fingertips, controlled by both hands. The X-Pro2 utilizes this old-fashioned design rather than the thumb and forefinger digital dials and menu-accessible ISO of basically every other modern camera. Once you go back to the on-lens aperture ring, you’ll never want to give it up.
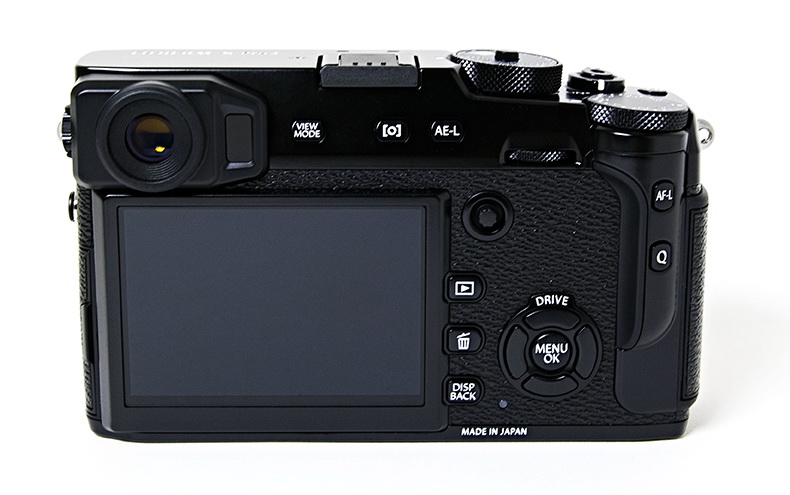
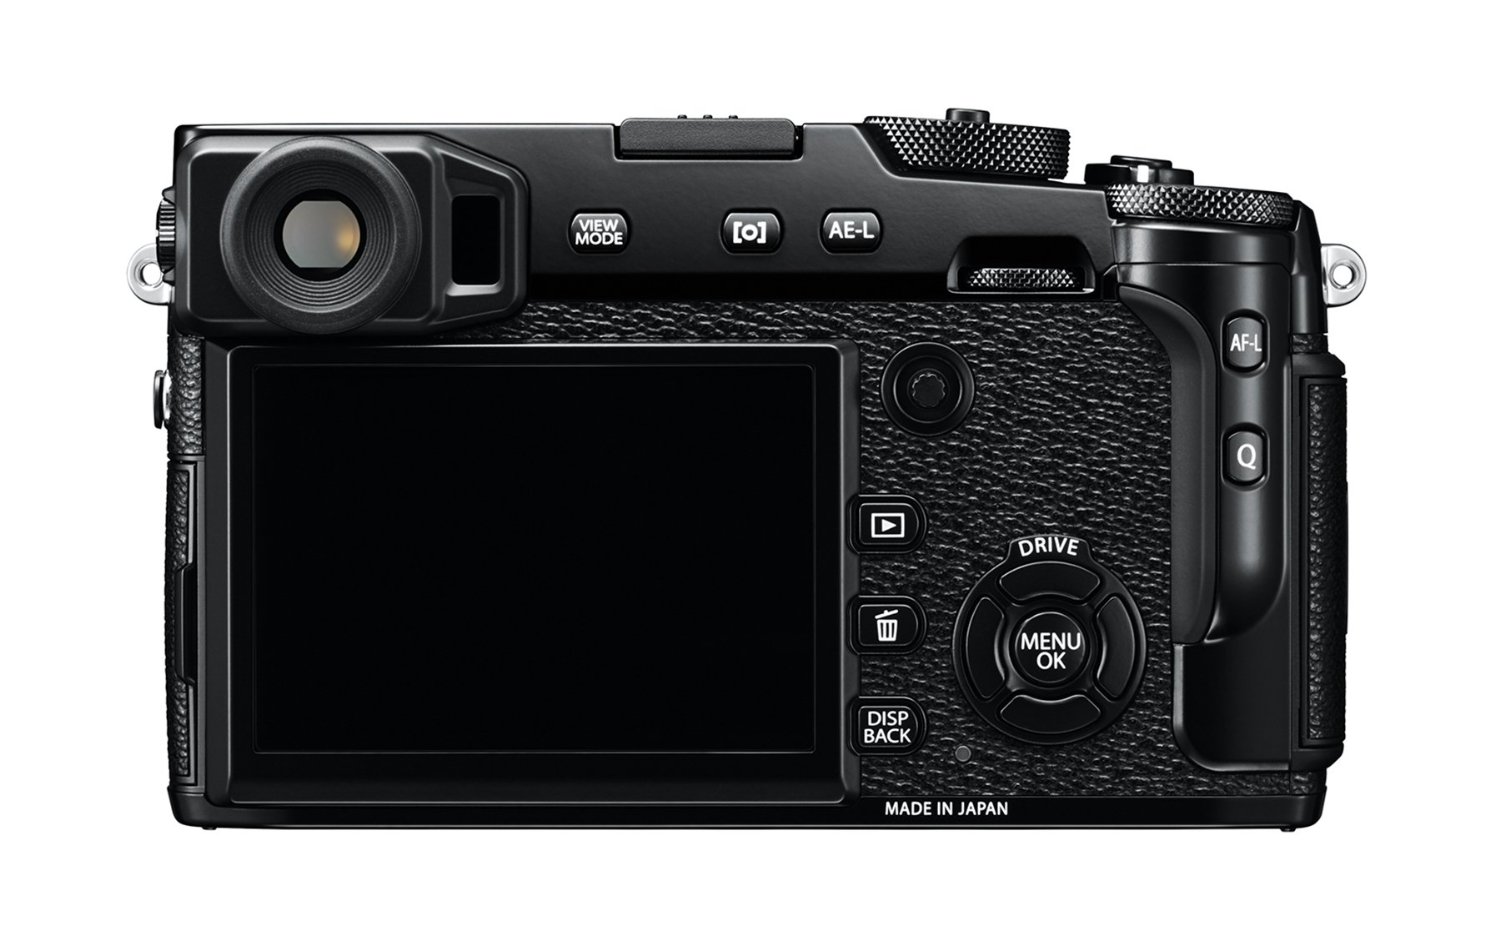
While it has a classic layout for the most important settings, the X-Pro2 takes elements of a modern day DSLR for a large portion of its body. It has no less than 3 levers, 6 dials, and 18 buttons (6 of them customizable). Given how much negative space is on this fairly small camera, it’s astounding how many control mechanisms they’ve crammed in there. On the back alone, you have a quick menu, regular menu, a D-pad, playback, trash, display, view mode, AE-lock, AF-lock, and even an AF selection joystick. That joystick is new to the X-Pro line, and boy is it helpful. Previously, you had to sacrifice the quick-functions of the D-pad to enable AF point selection, but now the joystick makes everything easier. I found myself using the joystick basically wherever I could, especially in the menu systems.
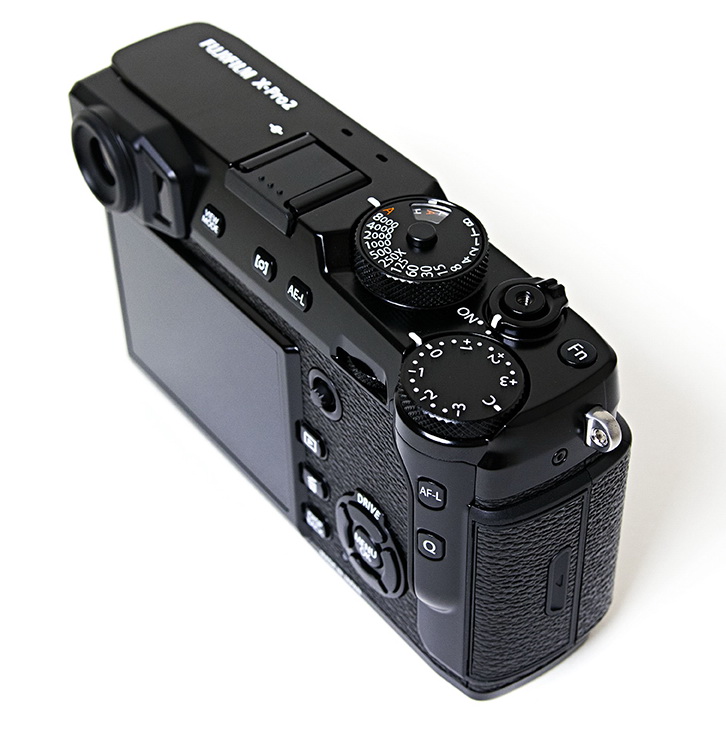
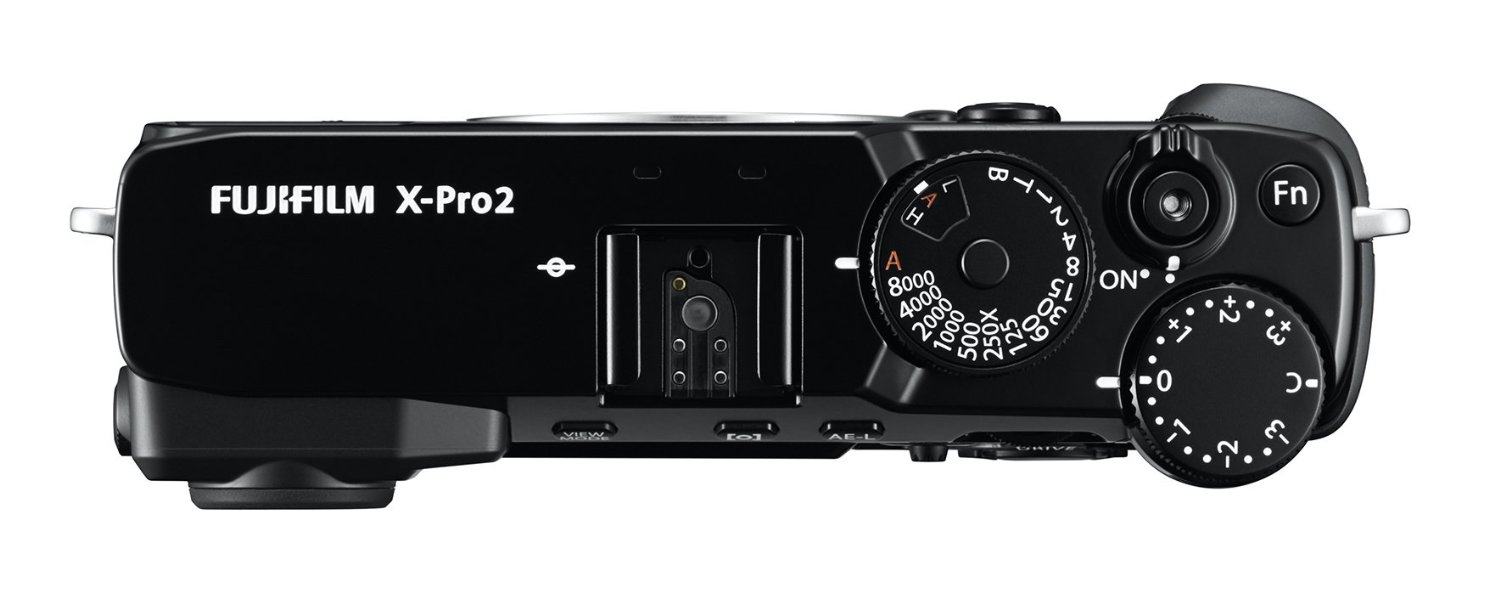
The top of the camera has a beautifully refined shutter speed dial, with full stop increments from 1 second to 1/8000 of a second, including an auto setting. By lifting the outer ring, you can turn the inner ISO dial to reveal the desired setting through a small window – just like on the film cameras of old – with an extended range from ISO 100 to 51,200 available, along with an auto setting. Some people find this dial within a dial to be a slow and cumbersome method of ISO selection, but I disagree. While it does take two fingers to change this setting, I still find it easier than hitting a button or two and digitally selecting the ISO, which is the standard method these days. The top also features a dedicated exposure compensation dial, which I rarely use but Fujifilm insists is quite important, a Fn button that is best used for video recording, the shutter release (complete with a retro thread-style cable attachment), and the on/off switch. In addition to these dials, you also get the standard thumb and forefinger ones (which are themselves pressable buttons), which control shutter speed or aperture in 1/3 stop increments.
The front of the camera sports a lever that switches between the optical viewfinder (OVF) and the electronic viewfinder (EVF), with another customizable button imbedded in it. We also get a lens release and a focusing method selection lever (with manual, continuous, and single options) right where your left hand wants them. Depending on the lens you get, you’ll likely have aperture control on the lens itself in 1/3 stop increments. If your lens doesn’t have this, the camera will know and allow you to completely control the aperture through either right-hand dial, your choice. There are also dual SD-card slots on the right, a battery slot on the bottom, and an HDMI, micro-USB, and mic/remote inputs on the left. Those dual SD slots have a helpful feature that lets you save JPGs on one card and lossless compressed RAW copies on the other, which can really come in handy.
And did I mention that this is all weather sealed? Like I said, the X-Pro2 is truly a modern design marvel.
This camera is tough. Its magnesium alloy body gives the rock solid feel you’d expect from a pro-level camera, and the textured finish gives it a sense of quality. Some parts are smooth, some parts are bumpy, but all parts are metal, which is truly refreshing. There’s no way a photographer wouldn’t feel confident holding this camera.
My only design complaint, aside from the pointlessly over-sized exposure compensation dial, is the screen. While it looks crystal clear at 1.62 million dots, it’s fixed. I’ve come to expect an articulated LCD these days, especially on mirrorless cameras that perform equally well with the viewfinder or screen engaged. I’ve found a lot of unique shots by framing an image with an oddly titled screen, and it’s a shame I can’t do that with the X-Pro2. I assume they didn’t include this feature because it lacks a certain premium/retro finish, but it’s a disappointing exclusion.

Software Design – 8.8/10
Remember how I said Fujifilm doesn’t mess with successful design? Well luckily, they also understand the flip side of this philosophy, and do mess with unsuccessful design. The most common complaint on the X-Pro1 was the wonky menu system, so the X-Pro2 has a completely new menu. It’s divided into 6 fairly logical categories – Image Quality, Focusing, Shooting, Flash, Movie, and Setup – plus a clever My Menu section that allows you to gather your favorite settings into one place. While the structure of the menu is sound, some of the actual option are in slightly confusing places. The worst culprit is the My Menu Setup, which is found in the User Settings menu, which is itself found in the Setup menu. This means that to add, remove, or order the options in your My Menu, you have to dig through a completely different settings tab, which just doesn’t make sense. It’s a small thing, but it’s indicative of the frustration some users feel with Fujifilm menus in general.
However, once you find your way around, the sheer number of customization options you have is on par with any camera of this price, which is to say there are a lot. The 6 function (Fn) buttons can each be set to any of 25 options, or nothing at all. The thumb and forefinger dials can be set to control shutter speed or aperture, levers can be turned on or off, the focusing ring can be set to turn in either direction… there’s simply a lot that you can do to make this camera your own. I’d suggest using the camera for a day or two, then thinking long and hard about all of your options as you do your initial customization, then leaving everything the same for at least a month. The key is learning which setting is where, and only changing it up in small doses so that you don’t have to constantly look at your camera and fumble with the controls while the perfect shot passes you by.
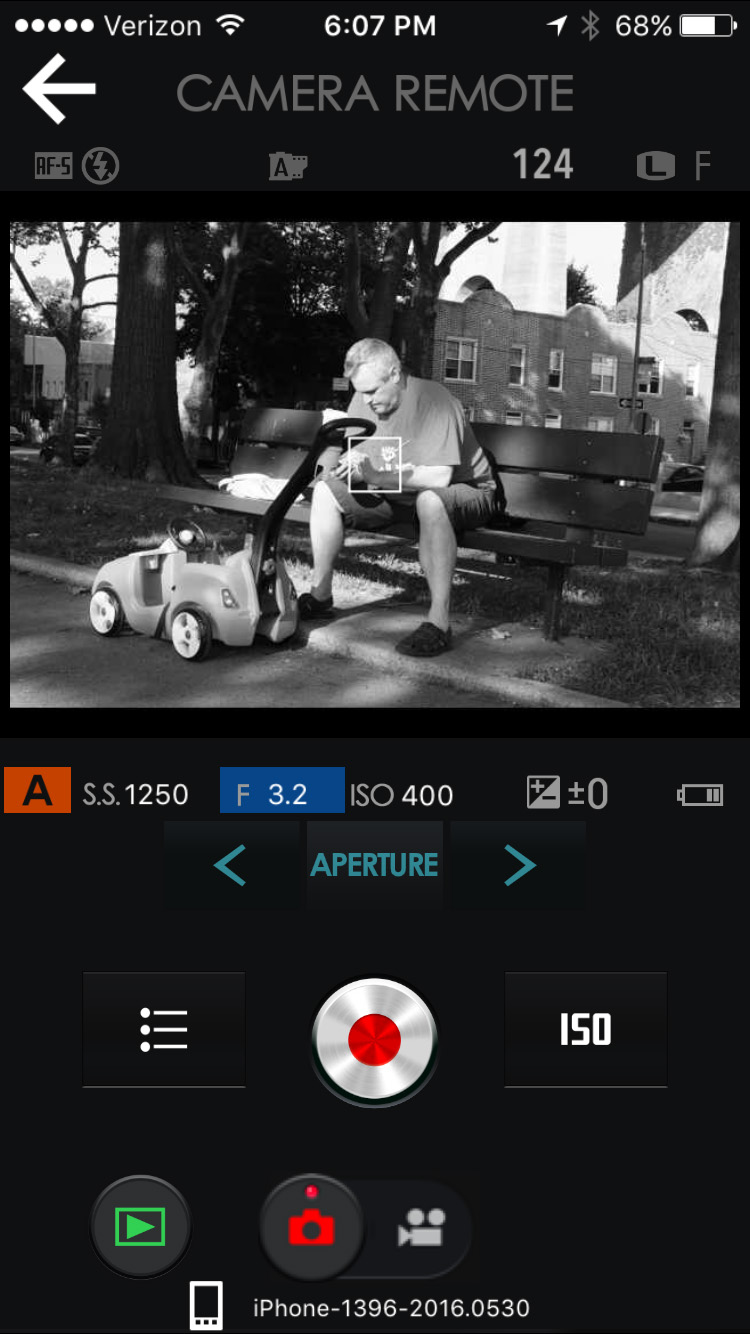
While the menus and options are generally good, the X-Pro2’s wireless connectivity leaves something to be desired. It’s certainly nice that it has WiFi at all, since this feature gives you some great modern options like wireless shooting and mobile photo transfer, but basically every mirrorless camera has this tech. The X-Pro2’s WiFi allows you to automatically move your photos to your PC via your home router, but I unfortunately couldn’t get this function to work. Granted, I wasn’t too interested in using this transfer method so it’s possible some further troubleshooting would have solved my issues, but the process is definitely not intuitive. Additionally, the Fujifilm app (above) that links to the camera for all things mobile is just bad. It looks out-of-date and it creates connectivity issues that I don’t believe come from the camera itself, but from poor app design. But there’s always hope that the mobile app will be updated and fixed, so this isn’t a big deal, just an annoyance. While the WiFi options are only so-so, geotagging works exactly as it should, so no complaints there.
When Shooting with the X-Pro2, the software generally gets out of your way and lets the hardware bring you back to the act of photographing. You can display exactly the information you want in the EVF, OVF, and back screen, and even have the ability to see different info shown in each viewing mode. This setup keeps your experience distraction-free, but it can also make it hard to find info that isn’t set to display on the current screen. For example, I set one of my Fn buttons to change between the audible mechanical shutter and the silent electronic shutter, but there was zero indication of which shutter mode was selected or even that I had changed from one to the other. This forced me to take a test shot, then hit the Fn button and take another test shot to hear if the shutter mode was actually changed. Every other Fn setting I tested had a visual indication of its use, but the shutter mode is another example of occasional oversights in Fuji’s software design.
Shooting Experience – 9.8/10
As soon as you bring this camera to your eye, you’ll know if it’s for you. I’m guessing that most people will instantly fall in love, since the X-Pro2’s clever design is all based on the actual act of shooting. The shutter speed/aperature/ISO layout allows Fuji to completely eliminate the shooting mode selection dial that’s found on every DSLR. Instead, if you want to shoot in fully automatic mode, you just put the ISO, shutter speed, and aperture to Auto. For full manual, just select the settings you want instead of Auto. Basically, you can set any dial to any setting and the camera will simply be in the shooting mode you want by nature of your selection. For example, I generally select my ISO and aperture and let my shutter speed stay on Auto, but if I want to select a specific shutter speed I can just do it, without worrying about what mode I’m in. It’s the most natural shooting experience I can think of, and it reinforces why the shutter speed/aperature/ISO layout is this camera’s best feature.
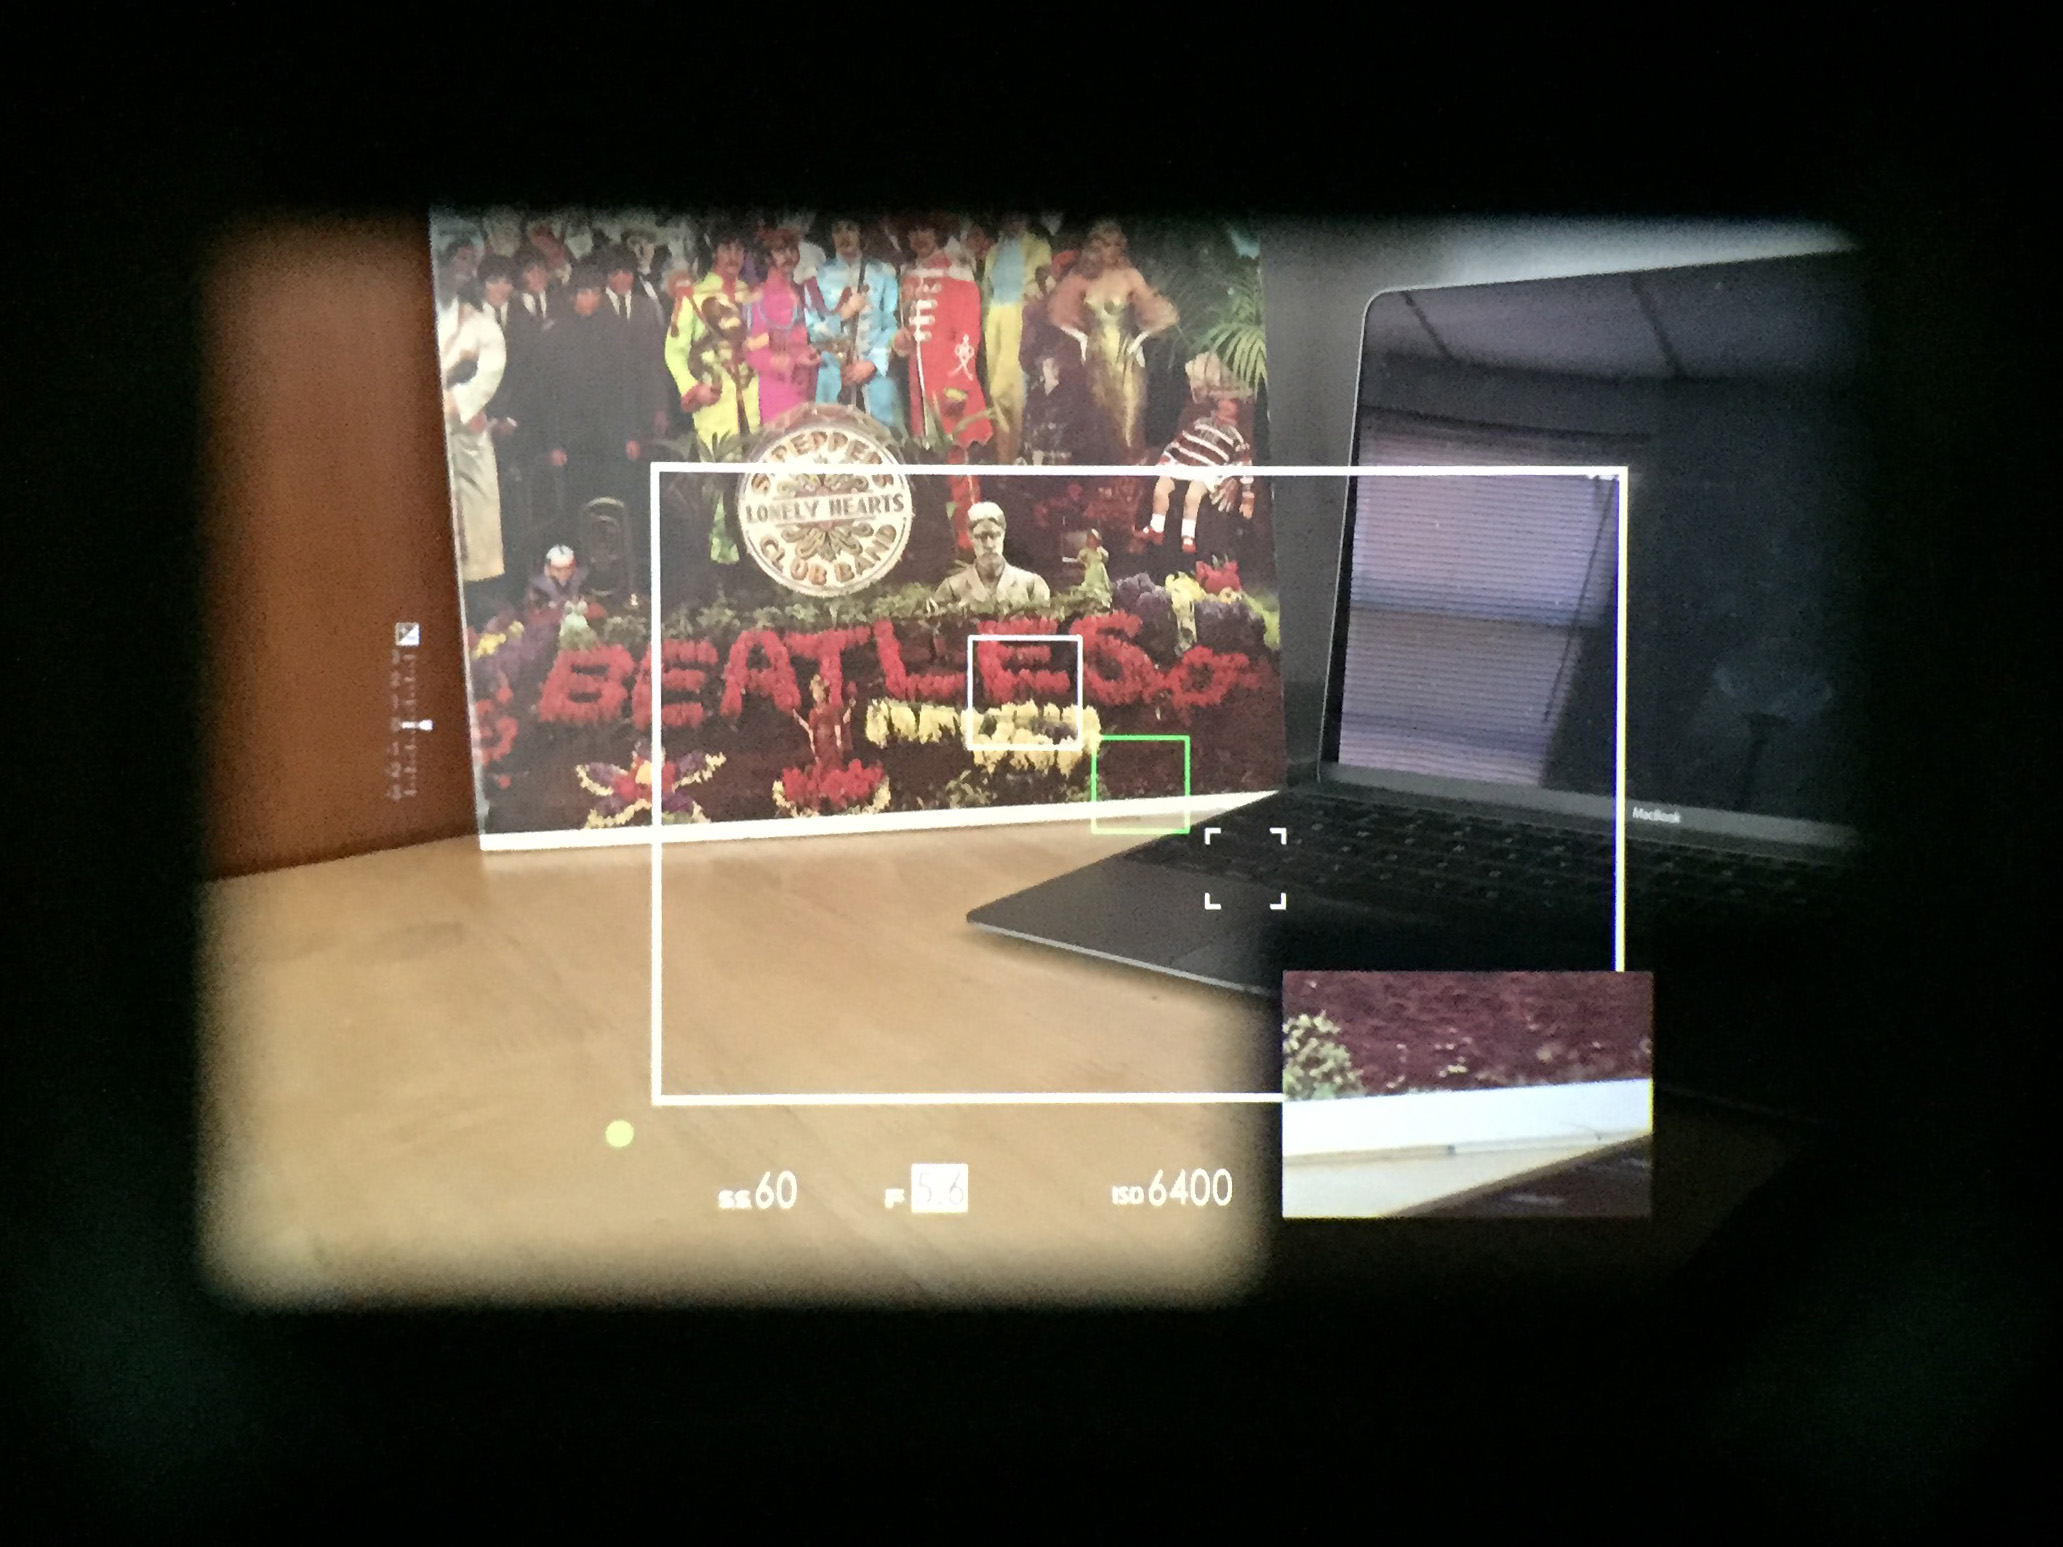
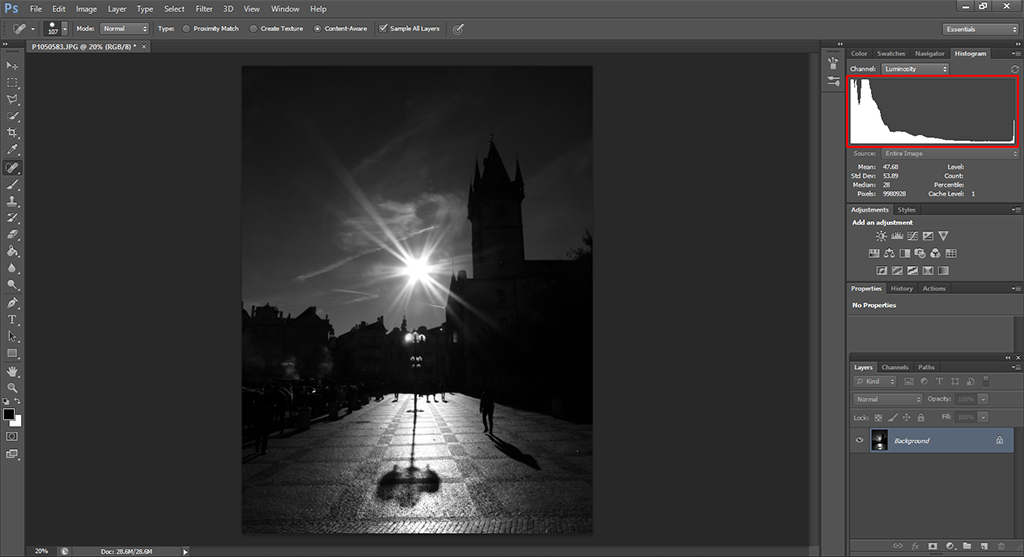
While the button layout – including the highly customizable Fn buttons – will be appreciated by every photographer, the dual viewfinder is definitely a polarizing feature. The X-Pro2 has a combination OVF and EVF that can quickly and easily be switched back and forth with a lever on the front of the body. The OVF (pictured above) keeps with the rangefinder style, completely skipping the lens and acting as a simple window to frame the image. However, there’s a plethora of lines and settings that get magically projected onto the natural field of view, overlaying the scene with most of the information you would want. You’ll see a white, rectangular box that approximates the final frame with a fair degree of accuracy, but it’s not always spot-on. You can also add a pop-up window that will project a digital feed of the focus area (shown in the image above), allowing you to more accurately judge your focus accuracy, which is otherwise impossible in this setup. Though I rarely found myself using the OVF, there are two main advantages to this setting: better battery life and constant availability. Because the OVF doesn’t need to keep an high-res screen on, you’ll get slightly improved battery life over the EVF. And because the OVF is essentially just a window, you don’t have to wait for the camera to turn on to start framing your image. I often found myself whipping the camera up to my eye and roughly framing a shot before even turning the camera on, and if I liked what I saw I would simply flip the switch and click. Overall, the OVF is certainly interesting and a great option for someone who hates EVFs but still wants a mirrorless camera, but most photographers will favor the EVF.
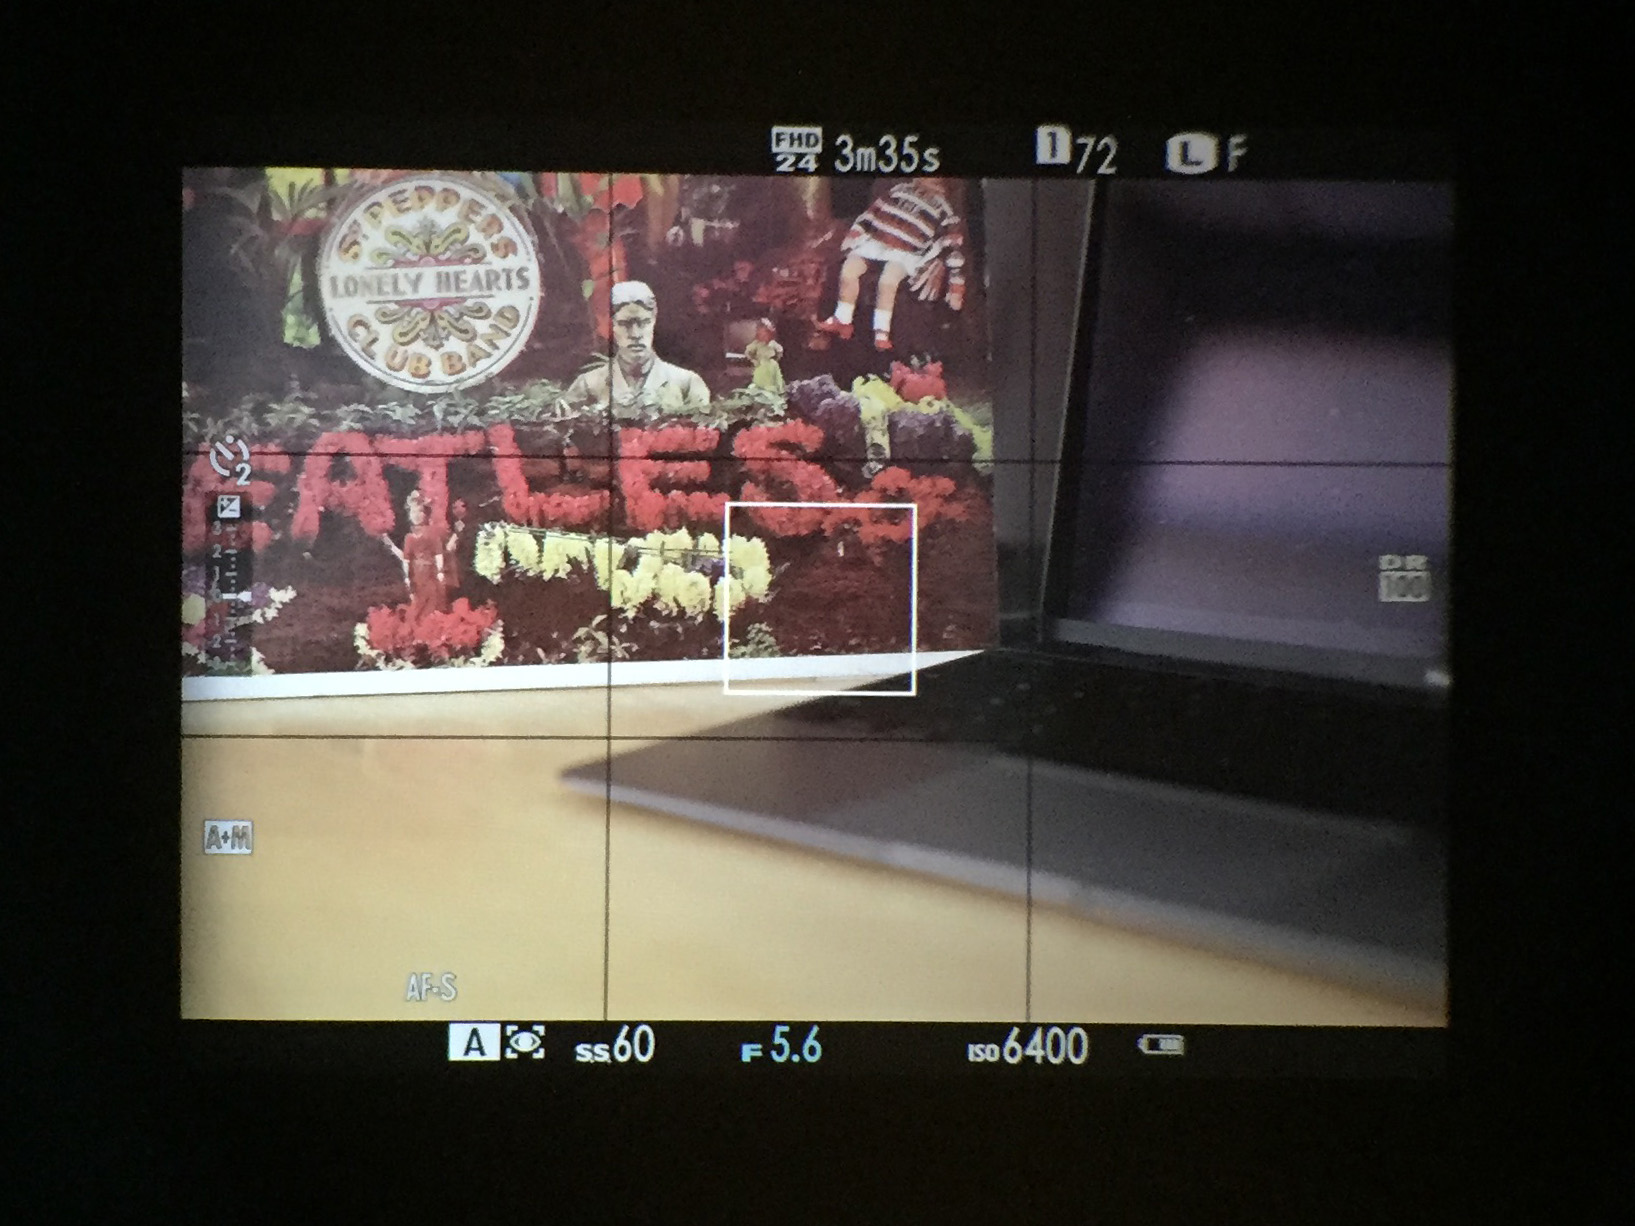
The EVF (above) functions essentially like any EVF out there, offering a completely accurate preview of the final image. This is ultimately why I favored the EVF; I just want to know what I’m actually shooting and an EVF is even better than a DSLR’s viewfinder in this regard. The most common complaint with most EVFs is that they introduce a visual lag that’s unsightly or even nauseating. The EVF on the X-Pro2, however, has a refresh rate of 85 frames per second, so there’s almost no lag at all. I even kept my camera set to Economy Mode in an attempt to save battery life, which lowers the refresh rate to 54 frames per second, and I still had no trouble with lag. Granted, the EFV isn’t as large or bright as that on the X-T1, but you’ll almost certainly prefer the EVF’s accurate preview and display options over the OVF. Still, it’s nice to have an optical option to complete the rangefinder experience.
While the X-Pro2 can perform admirably in almost any shooting situations, it has a clear slant towards candid street photography, which is unfortunately not my personal strong suit. However, in my experience testing the X-Pro2 on the streets of New York and the countryside of Connecticut, I quickly saw the benefits a camera like this could lend a street photographer. Its un-intimidating, simple, black form makes it easy to go unnoticed compared to a large DSLR with a zoom lens attached. Add to that the ability for a completely silent electronic shutter and you can take some fairly incognito shots if you’re up for it. However, I was particularly drawn to using the camera remote through the app and WiFi while the X-Pro2 was still slung around my shoulder. This setup let me see a live feed and adjust all the settings on my phone while I framed the shot from my hip, hands-free. Using this system, I could go completely unnoticed and still maintain plenty of control, though the regular lags and hiccups from the app made me miss some crucial moments, which got very frustrating very quickly.

Adding to the street photography appeal is the ability to select various film simulations that each imitate a specific type of actual Fujifilm brand film. These are easy to adjust on the fly, but I mostly stuck to Provia/Standard, Velvia/Vivid, and Acros/B&W, though others may enjoy some of the more stylized options. There are even helpful descriptions next to each film simulation that tell you what it does to the image and when it should be used, with many film types geared towards better skin tones than the standard setting. The only reason these film simulations actually work instead of looking like cheap Instagram filters is because Fuji knows what it’s doing. The sensor in this camera has a random color filter array that looks a lot more film-like and natural than the grid layout from every other brand. Combine this unique sensor design with Fuji’s long history and prowess in color rendering and you get extremely effective Film Simulations that essentially act as high-end scene select modes, giving your photos that desirable Fuji look.
Even if you aren’t a street photographer, you’ll likely find this camera great all around, though there are some niche drawbacks to its design. While focusing is extremely quick and accurate in single shot mode, it’s a bit too slow in the 8fps burst mode for sports or action, though still good enough for casual sports photography. It’s also not the standard option for studio and portrait shoots and will therefore have less accessories available for this type of work, which may or may not be an issue depending on your studio setup. It also takes 1080p video at up to 60fps, which isn’t on par with the 4K video of many mirrorless cameras from Sony and Panasonic, but again, it will work in a pinch and is much improved over the rest of Fuji’s line. This camera can do nearly everything well enough, but it’s certainly best as an everyday shooter.

Image Quality – 9.4/10
This is the category that most people skip to when reading a camera review, but it really shouldn’t be. That’s because basically every camera these days has astounding image quality that is all but indistinguishable from every other camera. Seriously, if you hold up two 8×10 prints of the same scene shot with the same lens and the same settings, one of them with a $6,000 pro camera and one of them with a $400 entry-level camera, you’d be hard pressed to find any difference, let alone a difference that actually matters. A camera you’re comfortable with and enjoy shooting will enables you to take better photographs than a camera with slightly higher resolution or dynamic range. But still, everyone wants to know if a camera’s IQ is up to snuff, so here we are.
In short, yes. The X-Pro2’s IQ is easily up to the standards of the industry and perhaps even better. Its 24.3MP APS-C sensor (the first of its kind from Fuji) offers plenty of resolution for all but the largest prints, and the sharpness will be far more defined by the lens you attach than the camera itself. The color rendition and noise control, however, are all native to the actual camera.

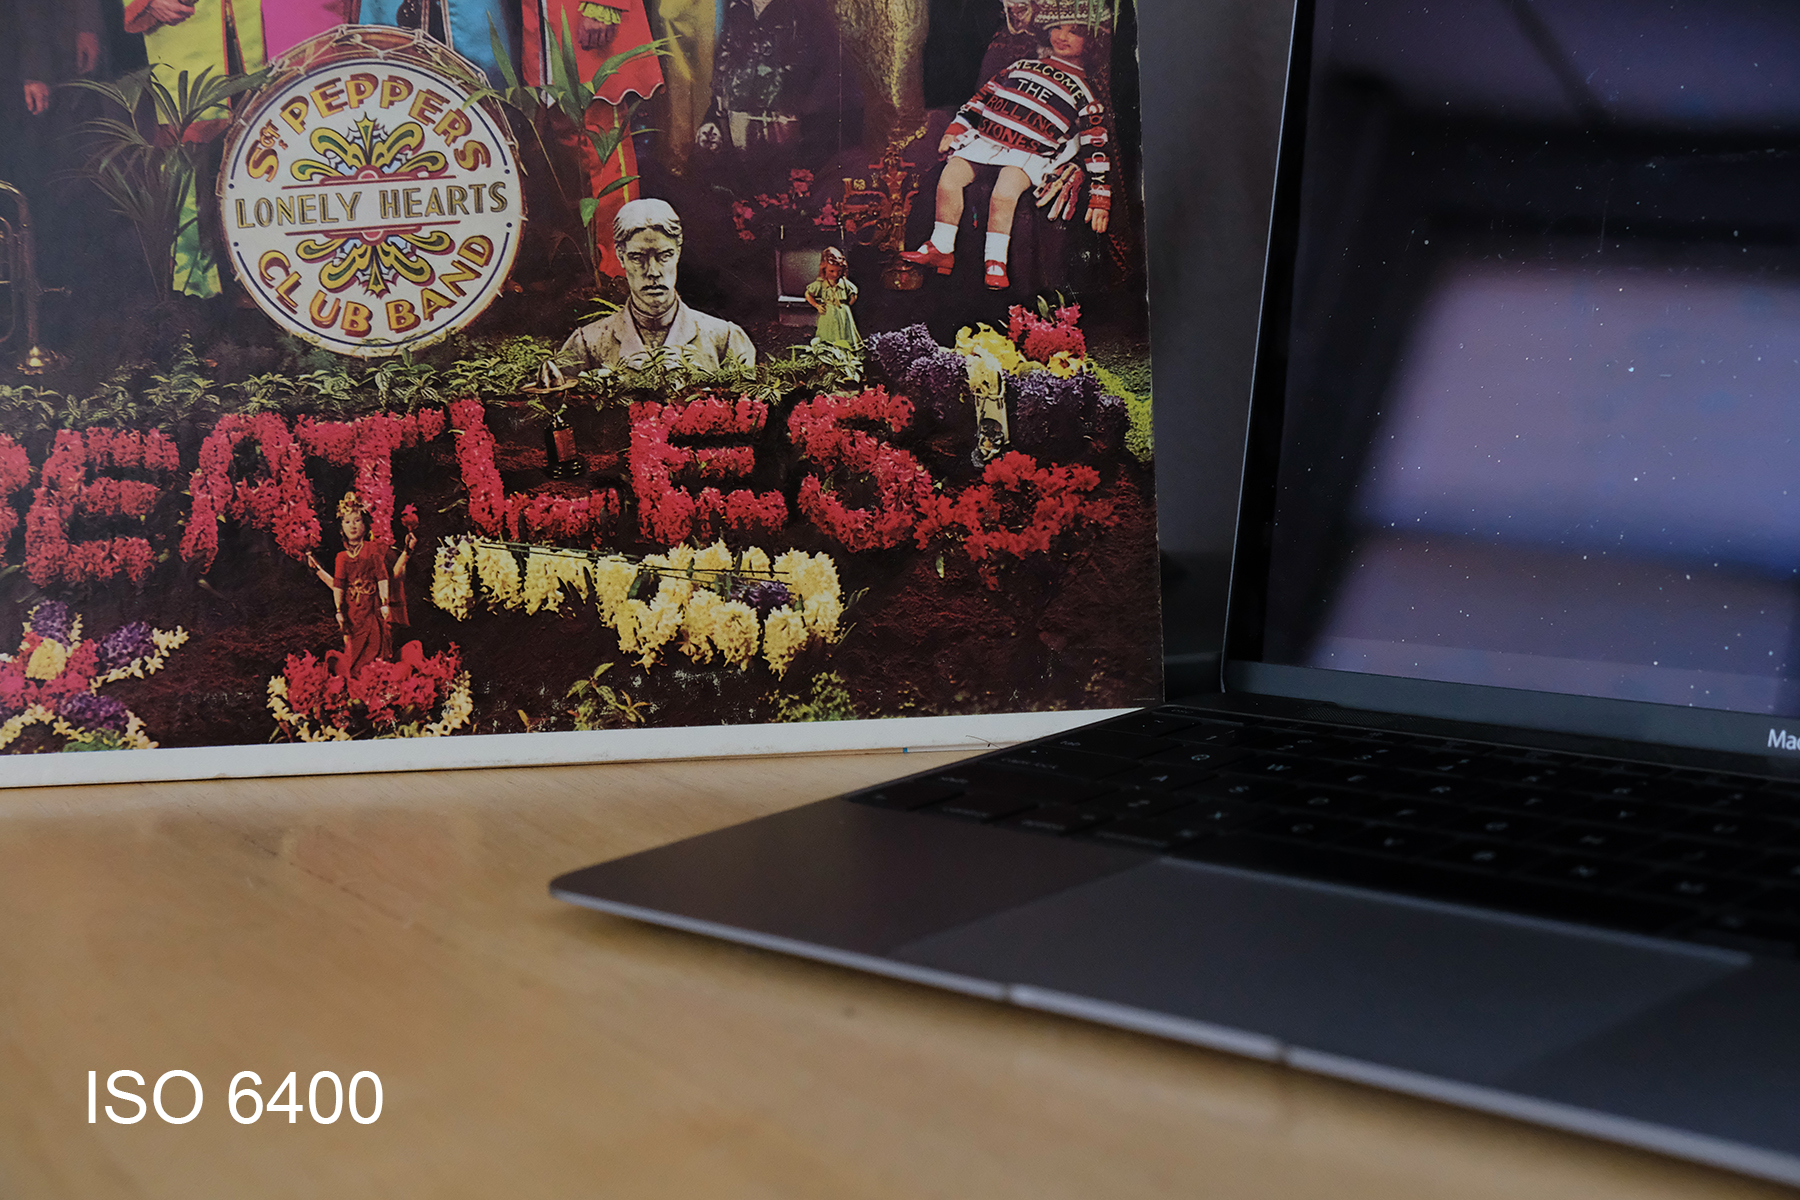
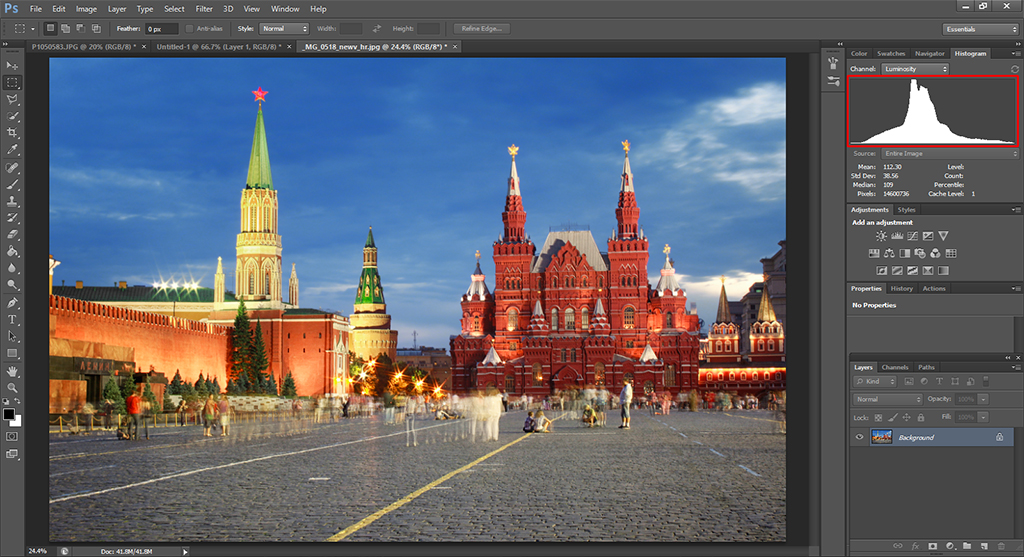
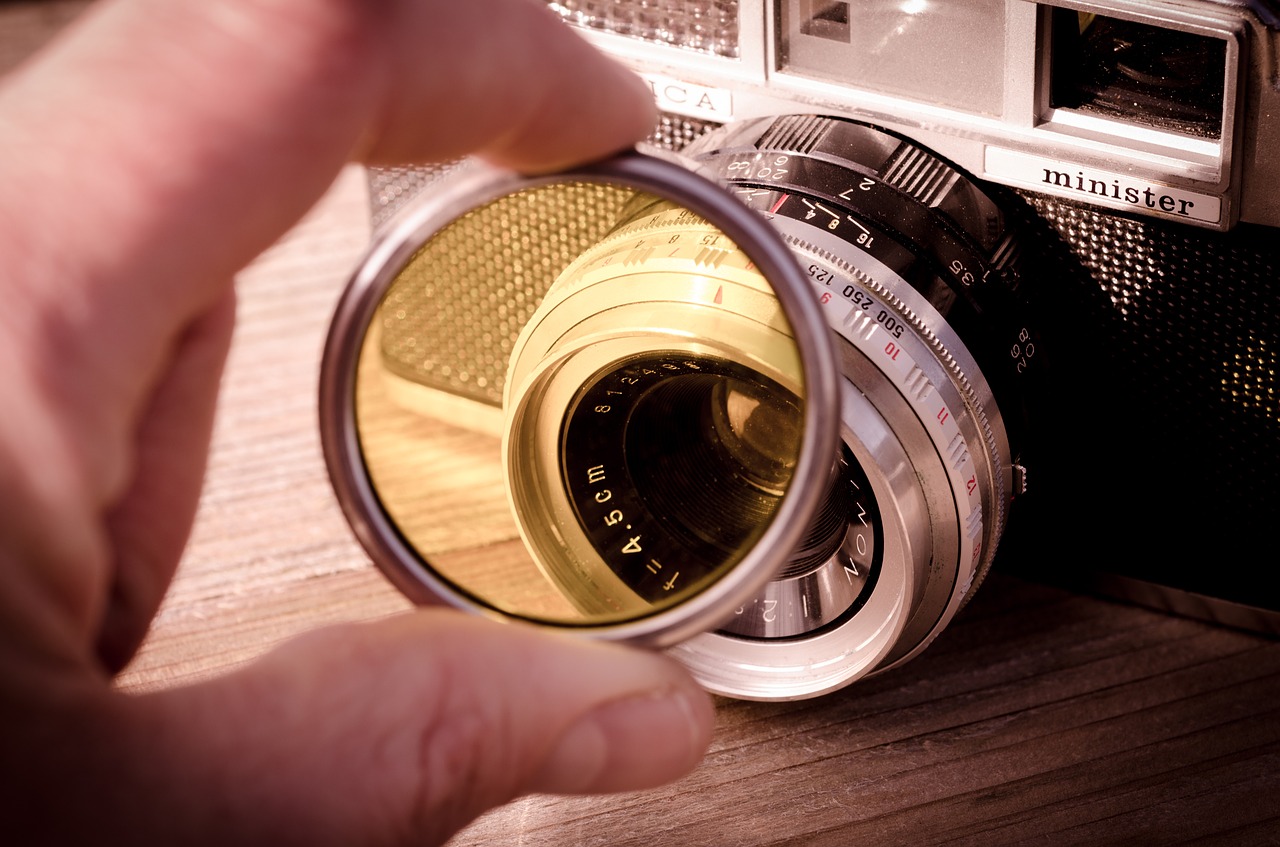
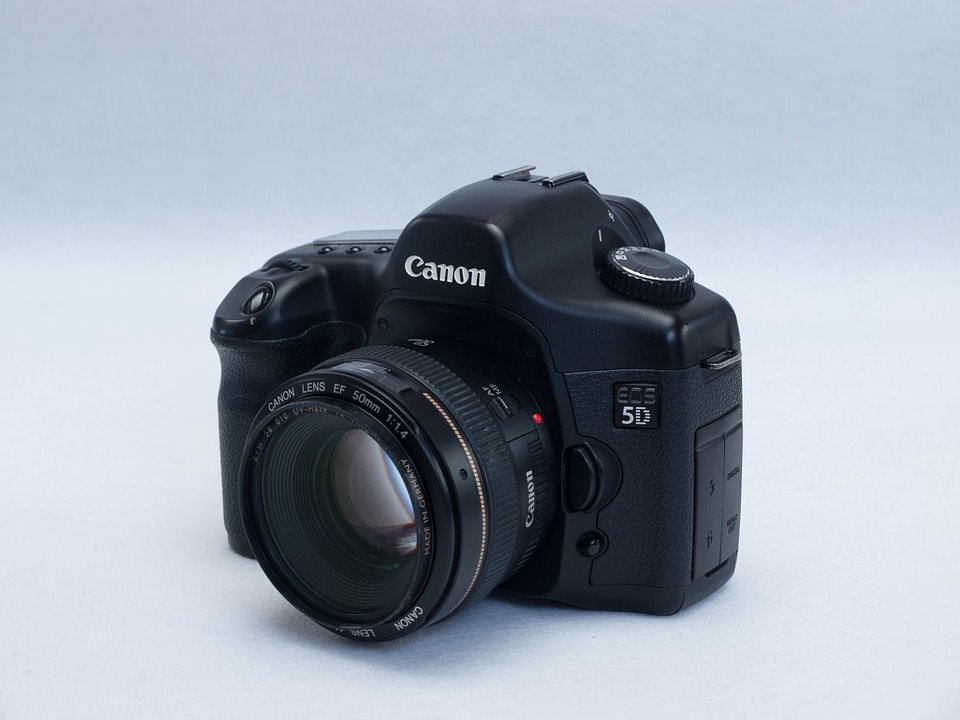
As mentioned above, Fuji is known for their gorgeous colors thanks in part to years of research with analog film. While other brands may claim to have more accurate colors, the X-Pro2 is able to make better use of its colors. This camera has come closer to getting the “full-frame look” than any other APS-C camera I’ve used, thanks in large part to its amazing color rendition. Look, for example, at the photo above (which is completely unedited). Fuji has this way of finding those soft yet vibrant pastel colors that instantly give a photo a luscious, tactile appeal. That photo was take in mid-afternoon sun, yet it almost has a golden hour glow to it. It’s not that the X-Pro 2 has inaccurate colors either, they just give their colors a slight Fuji spin that lends itself to beautiful imagery. Certainly, you’ll find almost no color difference in a raw file that is processed the same from the X-Pro2 and, say, a Canon D80; they’ll both give you accurate colors. But the way Fujifilm balances the scene in-camera outputs far more satisfying results than any other brand, though this is obviously a matter of personal taste.
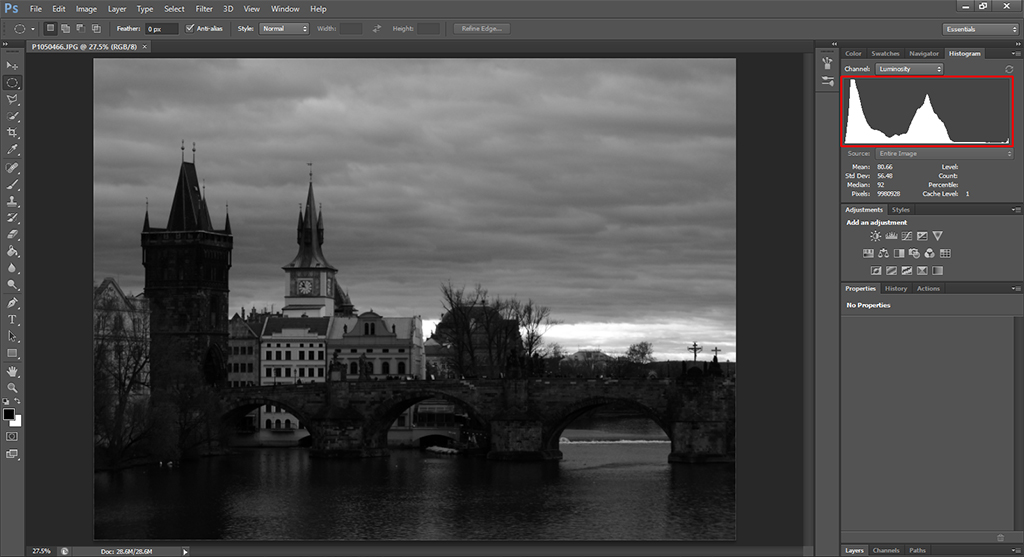
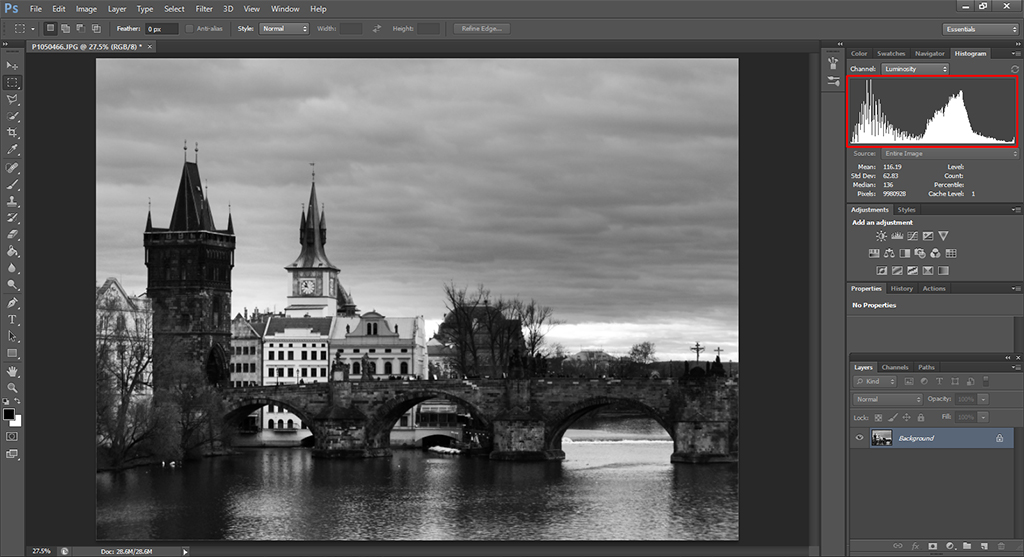
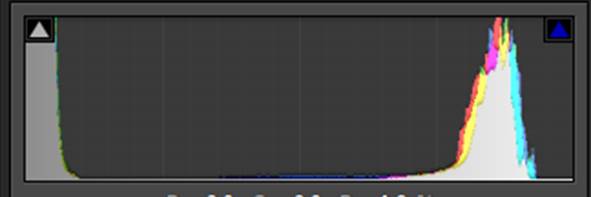
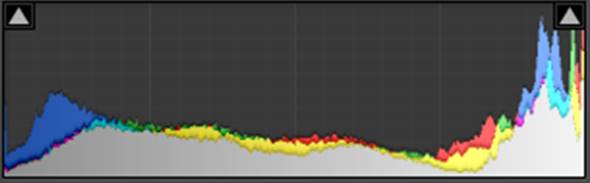
Noise control on the X-Pro2 is also excellent, with completely unnoticeable noise up until ISO 6400. Here’s a comparison of various ISOs (though not all of them, since the X-Pro2 has ISO settings in 1/3 stop increments):


Here are a few 100% crops to give you a better idea of the noise control:
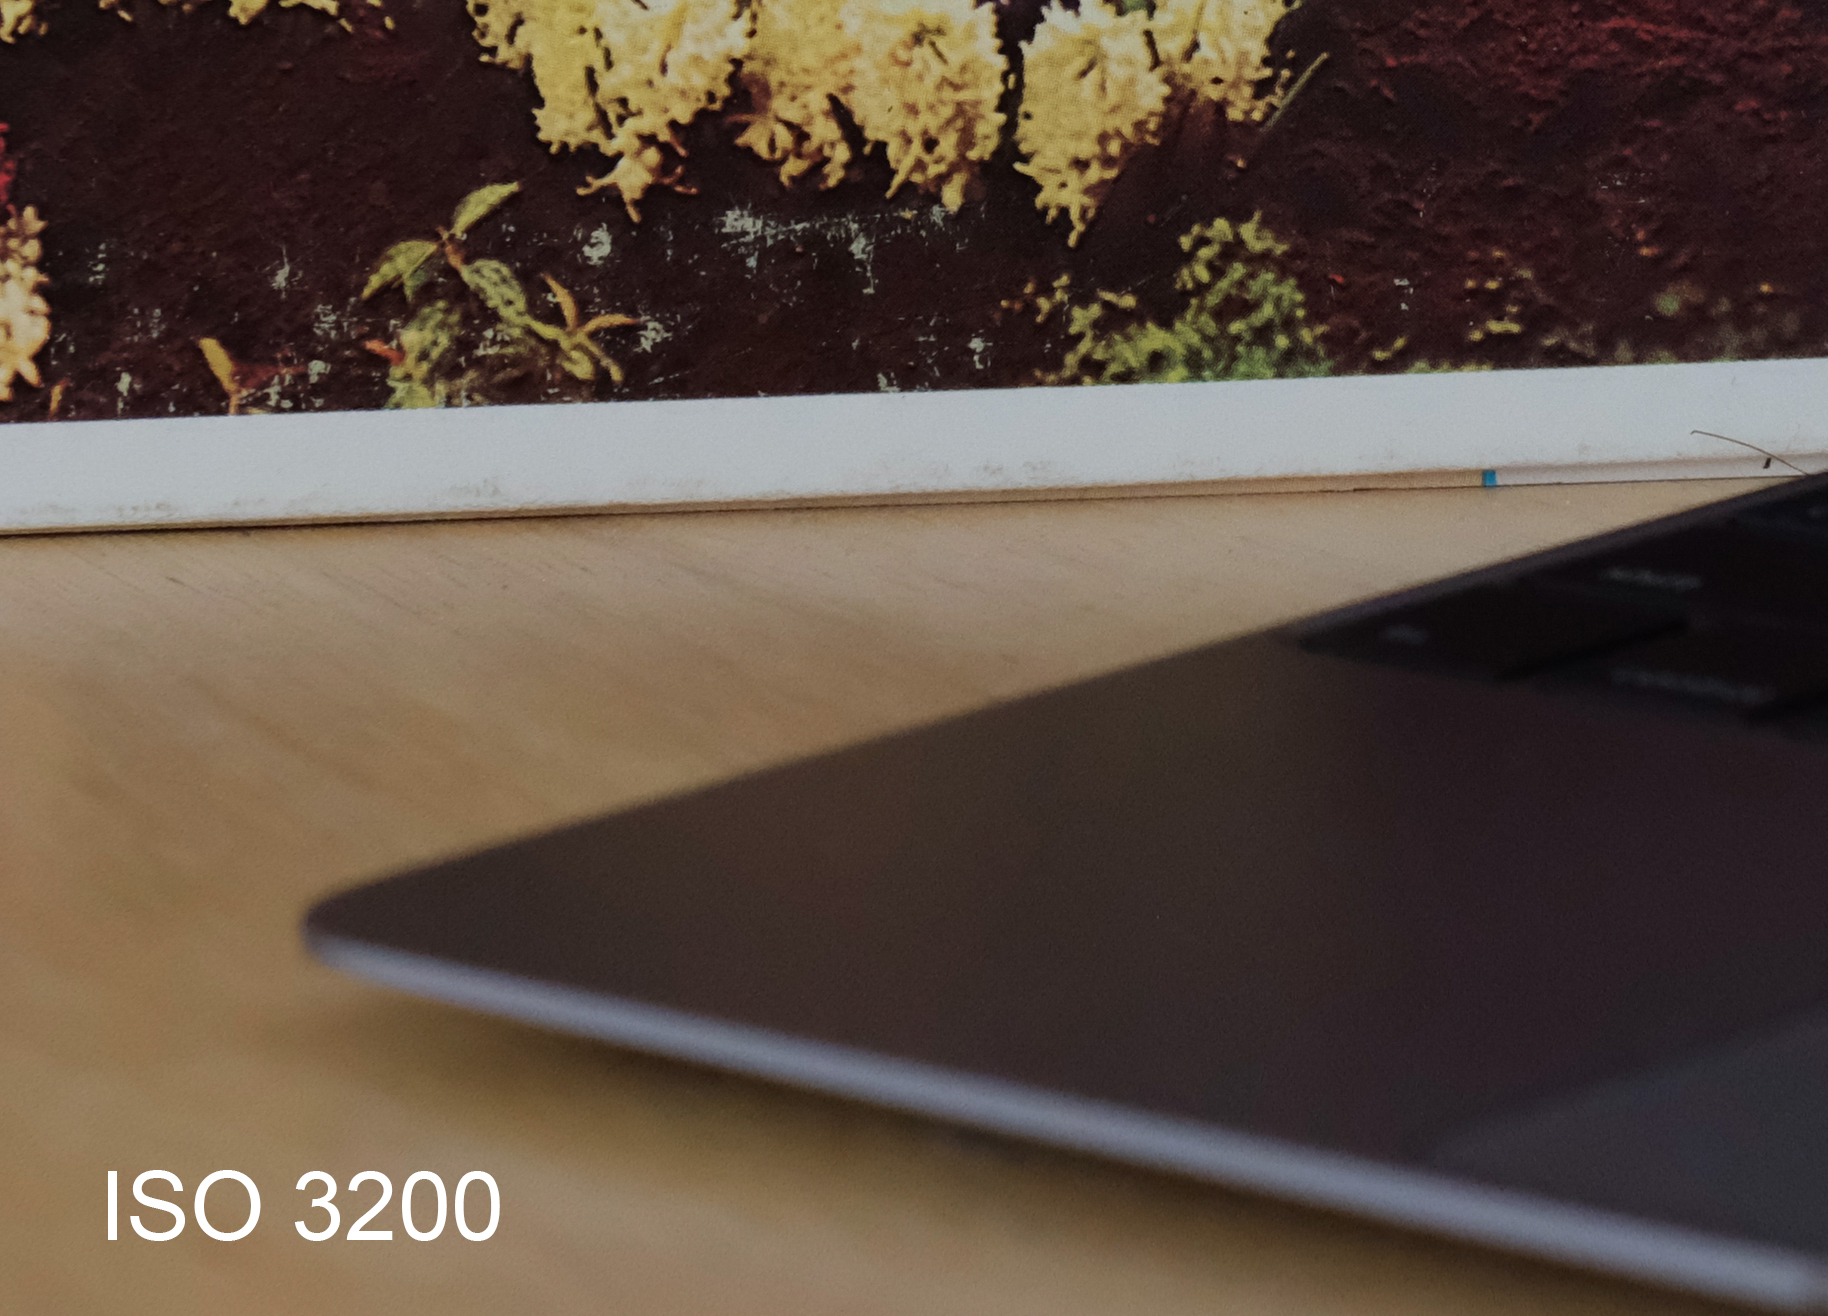
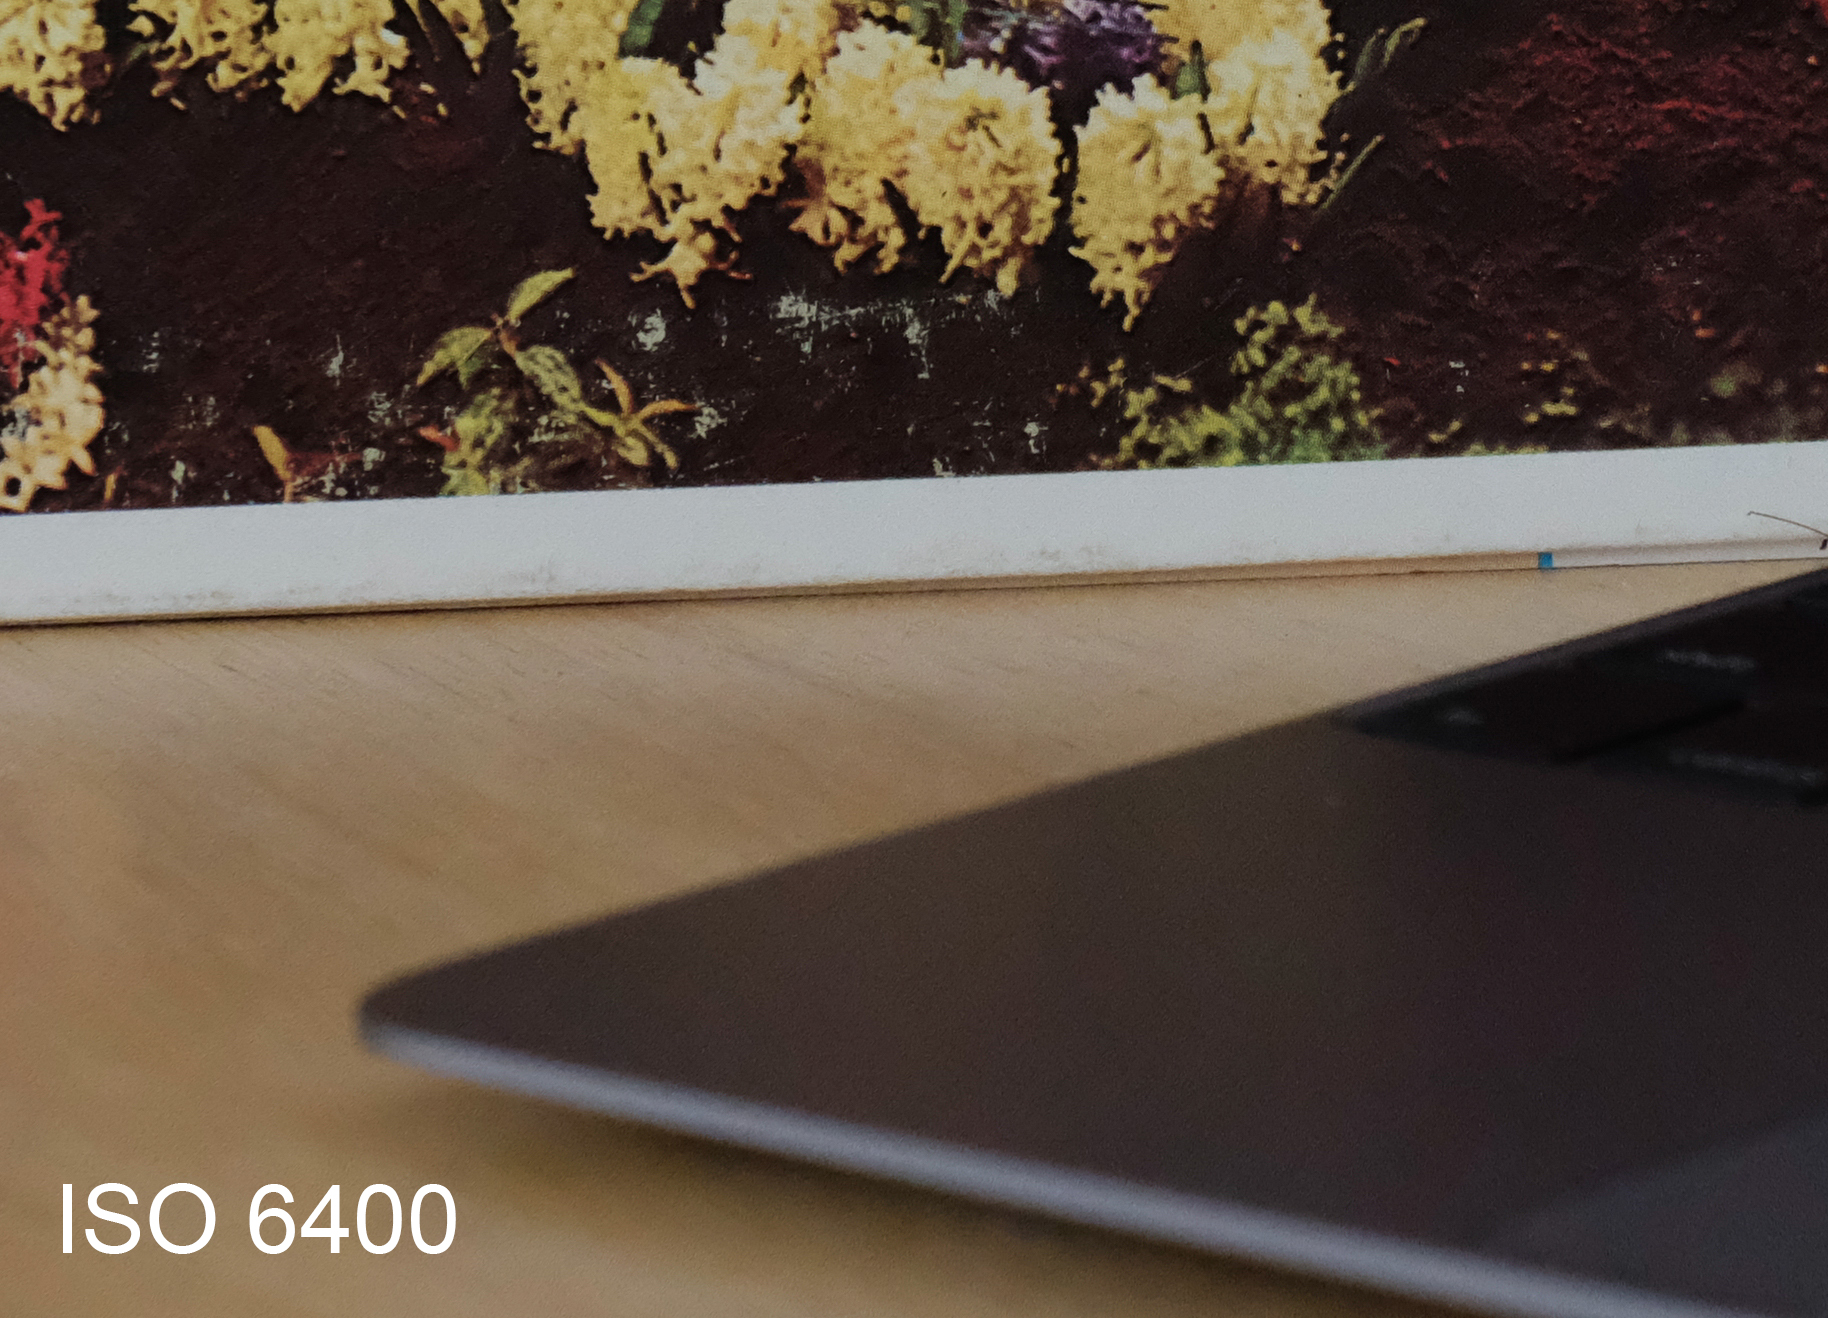
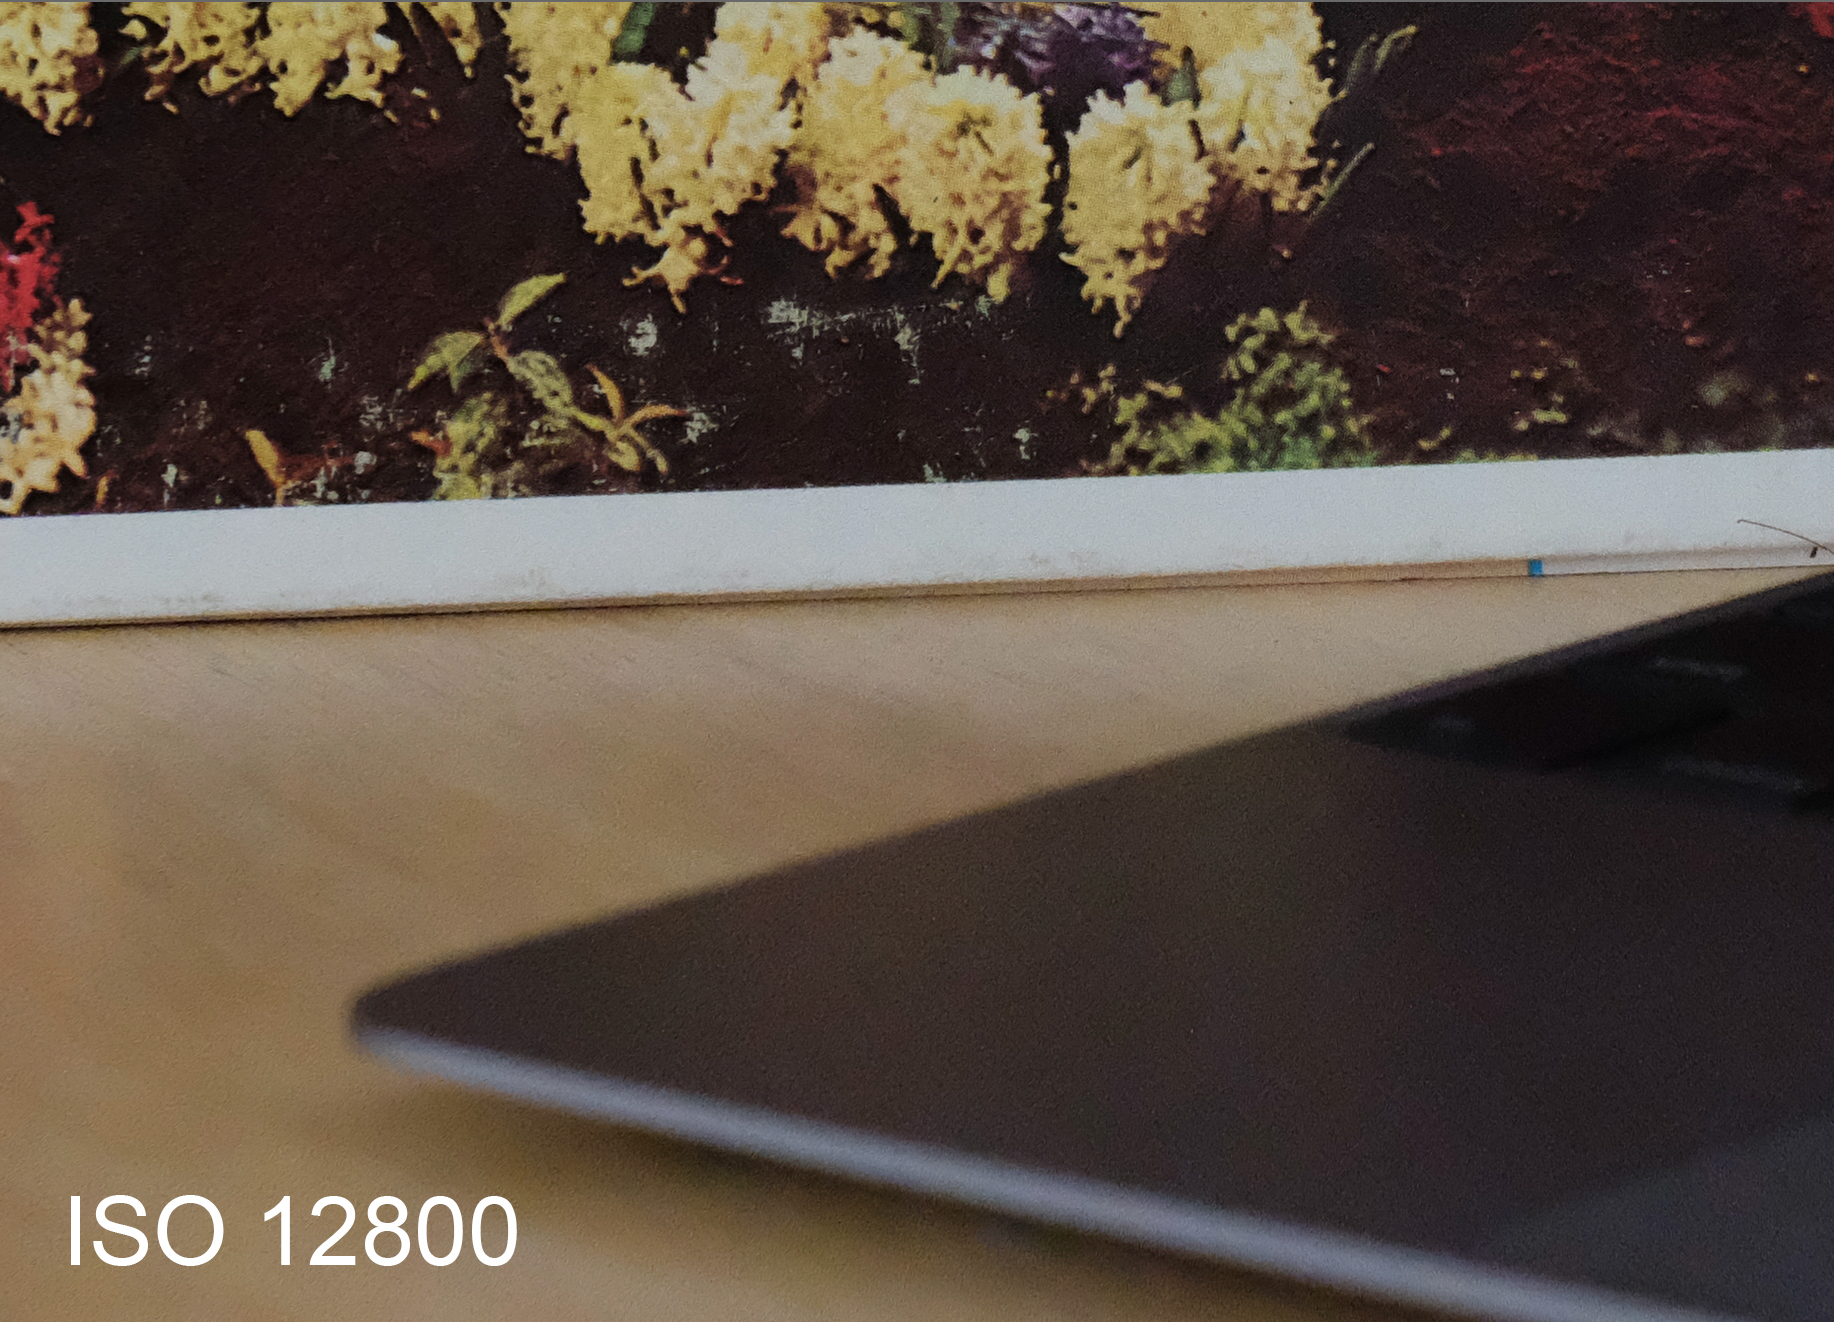
As you can see, noise is almost non-existent up until ISO 6400, where it starts to become slightly noticeable. However, Fuji cameras have this unique quality of fairly pleasing noise that looks an awful lot like natural film grain, thanks yet again to the sensor’s random color filter array. You even have the option to set the Grain Level to Strong, Weak, or Off, and I kept it off for these test images. Below is a comparison of these grain settings at ISO 6400:


I personally am comfortable with the noise present in all native ISO settings, since the grain effect gives an image a low-light rather than low-quality feel. Again, this is a matter of taste, but even if you want to avoid noise all together, the X-Pro2 performs admirably for an APS-C camera.
Overall, the X-Pro2 has very good image quality, as good as any other APS-C camera on the market. Personally, I consider it’s IQ to be better than any such camera, since I’m such a fan of its color and noise rendition when compared to the more sterile look from the competition. I can also say that the X-Pro2 has excellent dynamic range, especially when implementing their unique DR extension. This setting essentially sets the ISO to different values for different portions of the image, adding an impressive amount of detail to shadowy and bright sections alike, without even hinting at the ISO transition lines. Of course, a higher resolution camera will give you higher resolution images, and a full-frame camera will give you better low light and noise performance, so the X-Pro2 isn’t the best on the market by any means. However, for a high-end APS-C mirrorless camera, it’s images are of the upmost quality.

Lens Options – 7.9/10
This may seem like an odd category for a camera body review, since the lenses aren’t what we’re discussing. However, experienced photographers know that the lens is far more important to the quality and look of the final image than the body itself, so having good lenses to choose from is an important factor in any camera body purchase. Like all X-Series cameras, the X-Pro2 basically only takes lenses made by Fuji, which is unfortunate.
There are two major factors to lens selection: quality and quantity. While Fuji exceeds in the quality of their lenses, they lag far behind in the quantity. Not many people realize that Fuji has been researching and manufacturing super-high precision lenses for the U.S. military, broadcast and cinema camera systems, and even NASA space shuttles for the past half century. This has put them in a position where they can make excellent camera lenses for excellent prices. Image quality is almost a non-factor for Fuji lenses, if the stats are what you’re looking for you can be confident the lens will perform well. However, as of June 2016 there are only 20 lenses available for the Fuji X-Series line of cameras. Compare that to the literal hundreds that fit a Canon or Nikon DSLR and the X-Pro2 is at an obvious disadvantage. However, all mirrorless cameras suffer from lens scarcity to some degree.

On top of offering less lenses, Fuji also focuses largely on prime lenses. While some people love the quality, large aperture, and compact stature of a prime lens, others love the versatility of a zoom lens. If you’re in the latter category, I’d suggest you skip any X-Series camera, because there are only nine zoom lenses available, and only three with f/2.8. Granted, you don’t really need more than the top-of-the-line 16-55mm and 50-145mm “red badge” lenses, but most photographers want way more options. Additionally, the one macro lens Fujifilm makes is their least impressive, so macro photographers should also steer clear.
While the Fuji selection isn’t great, individual lenses are. I shot every photo here with the same 35mm f/2 R WR lens, which has amazing image and build quality, is weather resistant, and costs less than $400 (and is often on sale for under $300). It’s a truly unbeatable lens at this price-point, however, I would have preferred a shorter focal length than the roughly 50mm equivalent of this lens. If I had the 16mm f/1.4 R WR and the 56mm f/1.2 R APD in my bag as well, I’d have been a very happy camper.

Conclusion
There’s a lot to love about the X-Pro2, and it’s undeniably one of the most sought-after cameras of 2016. While there are many small elements that add up to make this camera great, almost every bit of its success can be traced back to its firm roots in rangefinder design. From the button layout to the viewfinder to the film simulations, this camera is meant to be the solution to a DSLR’s drawbacks. In truth, there’s only one thing the X-Pro2 can do that a similar DSLR can’t, and that’s make photography fun.
Ok, so photography is already fun, but the X-Pro2 makes it funner. Shooting with the X-Pro2 is fun like a modern day DSLR is fun – by taking super high-res, instant feedback, top-notch quality images tuned exactly how you like them; but it’s also fun like a retro film rangefinder is fun – by being stylish and spontaneous, gorgeously nostalgic, and oh-so-good to the touch. The X-Pro2 is truly the perfect blend of old school and new school, combining the best of retro design with the best of modern technology to make a camera unlike any other.


 Facebook
 Google +