Tag: Noise

How to Reduce Noise/Grain in Photography

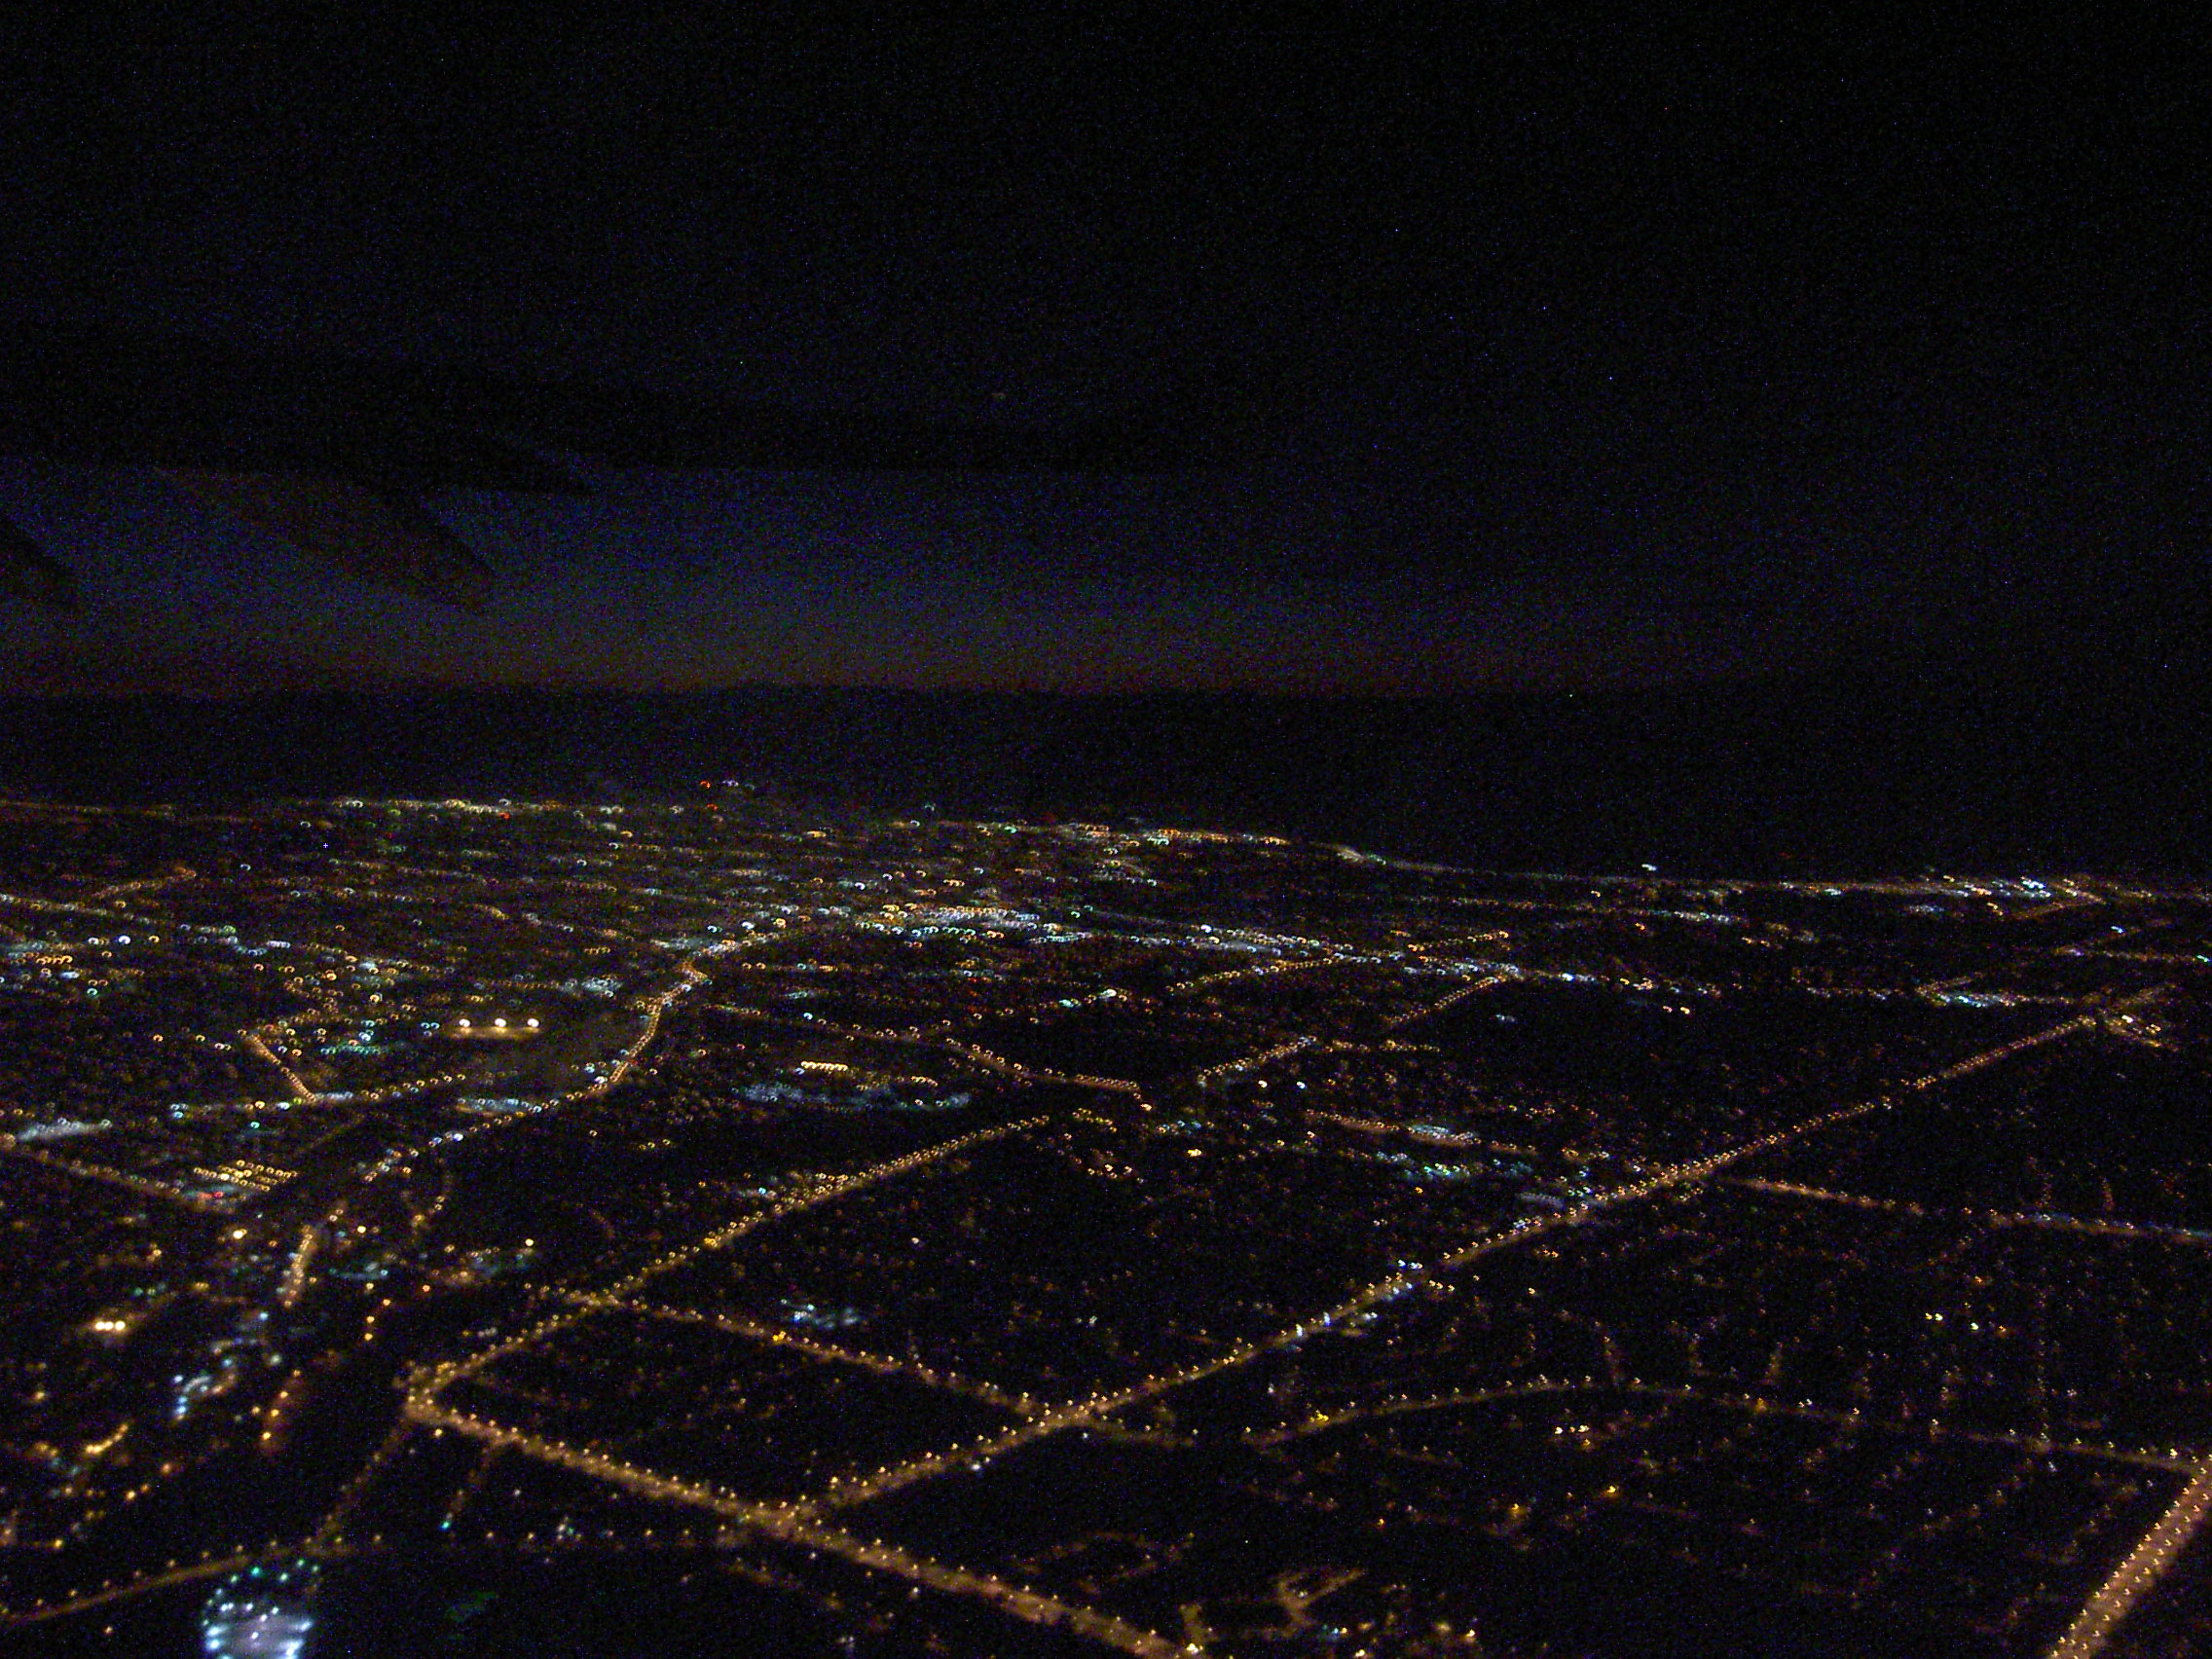
Image noise is defined as the presence of pixels in an image which does not represent the scene being photographed. Also known as grain, it’s recognizable by the appearance of what looks like dust, spots or speckles over the chosen photograph.

Needless to say, this is very undesirable for a professional photographer, so today we’ll be looking at how you can reduce and even eliminate its appearance in your work.

Causes of Noise

Noise is caused when you take a photograph where the camera could not accurately capture all of the pixels correctly, representing the true colors they should be. Low light levels can cause this because the camera won’t be able to actually pick up the real color properly, causing some of the pixels to be inaccurately represented.

reduce-noise-2

This is easy to spot for the human eye, but not so easy for your camera to pick up on as it takes the shot, although modern technology sometimes offers ‘noise reduction’. With this technology the camera attempts to pick out pixels that are differently colored and surrounded by non-matching pixels, then eliminates them. It works well for getting rid of a lot of the specks but isn’t 100 percent foolproof.

Slow shutter speeds can also cause increased noise for similar reasons, as it allows more light to be pulled into each pixel and can thereby cause distortion in the final picture. Putting the camera into a high sensitivity setting also has the same effect, since the camera can’t actually add more light to the picture than what is naturally present. These settings can instead magnify and increase the likelihood of noise when it might not otherwise have been present.

reduce-noise-3

ISO speeds are another cause of photo noise. ISO is a setting which marks how sensitive to light this particular shot will be and is usually available on an auto setting with modern cameras. The auto setting isn’t perfect though and might not be ideal for either what you’re shooting, or the style you want to shoot it in.

For that reason, many photographers will use a manual setting instead, adjusting the ISO based on how much light is available for their shot. Additionally, lower ISO settings are usually considered to give higher quality pictures, though higher ISO settings are needed if the lighting levels are low, so it’s a tricky balance to strike and there are no hard and fast rules here, other than trying to capture your shots with the lowest ISO settings possible.

Reducing the Presence of Noise in Your Shots

We’ve already covered ISO settings

and how you should be using the lowest possible setting to retain the best possible photo quality. Shutter speeds can often be adjusted in a similar way to make them faster, though this might not always be possible depending on the situation, just as you might need to use a higher ISO setting than you would like to.

reduce-noise-4

The light levels present are one of the hardest things to adjust in many situations, since you can’t ruin a shot of a landscape at sunset by adding a variety of bright lights – this just destroys your photo subject instead.

Protecting your camera from heat and also ensuring there’s no heat or mist between you and whatever you’re photographing can also help to reduce noise, since it reduces distortion. This even extends to storing your camera at a reasonable temperature since heat can distort its sensors and how it captures the details of images.

If your camera has the option to shoot using the .raw file format instead of .jpeg it can be an advantage to switch to that mode instead. Jpeg images already have compression applied to them in order to keep file sizes down and save space, something that can actually increase noise. Raw formats do not do this, not to mention that they are often more flexible when it comes to editing with the use of computer software.

reduce-noise-5

Speaking of software and editing, this is another great tool for getting rid of unwanted noise. Good software will allow you to manually remove noise and match pixels to those that surround them, giving you much smoother finishes when required. This is especially great if the noise is on areas that should appear close to uniform in color, and works very well to get rid of lesser amounts of noise when combined with the previous techniques.

It can be quite time consuming if you ignore the above tips and try to do it all at the editing stage though, so try first to prevent the noise from occurring with our suggested techniques. This way you can get rid of the stray bits using editing software and save yourself a lot of time and hassle.

Capturing images with less Digital Noise

In this blog post, I would like to take the opportunity to talk about an issue with which all photographers are well familiar, or they should be – if they capture their images under high ISO settings and low light conditions. Digital Noise – What is it, and best practices for reducing the effect of it. Let’s first talk about what digital noise is. As you may already know, today’s cameras come equipped with two different sensors – CCD and CMOS. Although they function differently from each other, both of them produce digital noise. The CCD, the more expensively produced sensor, handles noise slightly better, compared to the CMOS, which is cheaper to produce. However, the CMOS requires around 100 times less energy to operate. In order to keep the technical part short, as it can take a long time to cover this topic in depth, I will just mention that – both types of sensor accomplish the same task – capturing light and converting it into electrical signals. During this process, varying under different conditions and settings, different types of digital noise is produced. By the way, I did not begin this post with the intention of showing you how to use Photoshop actions or filters, but instead to show you a practical way of working around this issue well before it is time to start editing your images.

So, what steps do we need to take towards capturing images while reducing digital noise?

Camera:

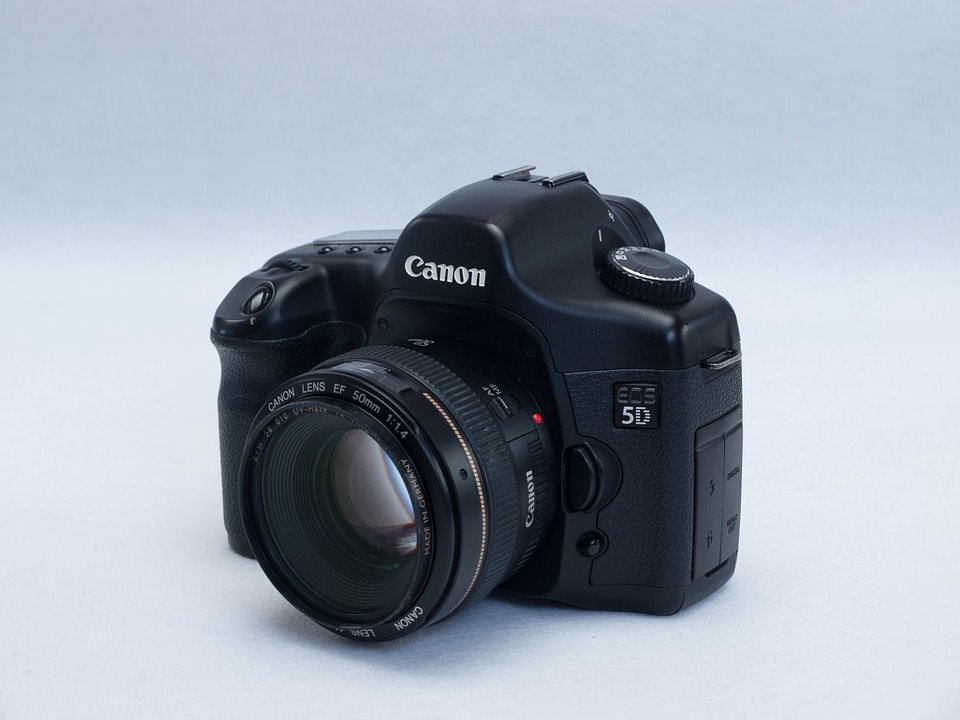
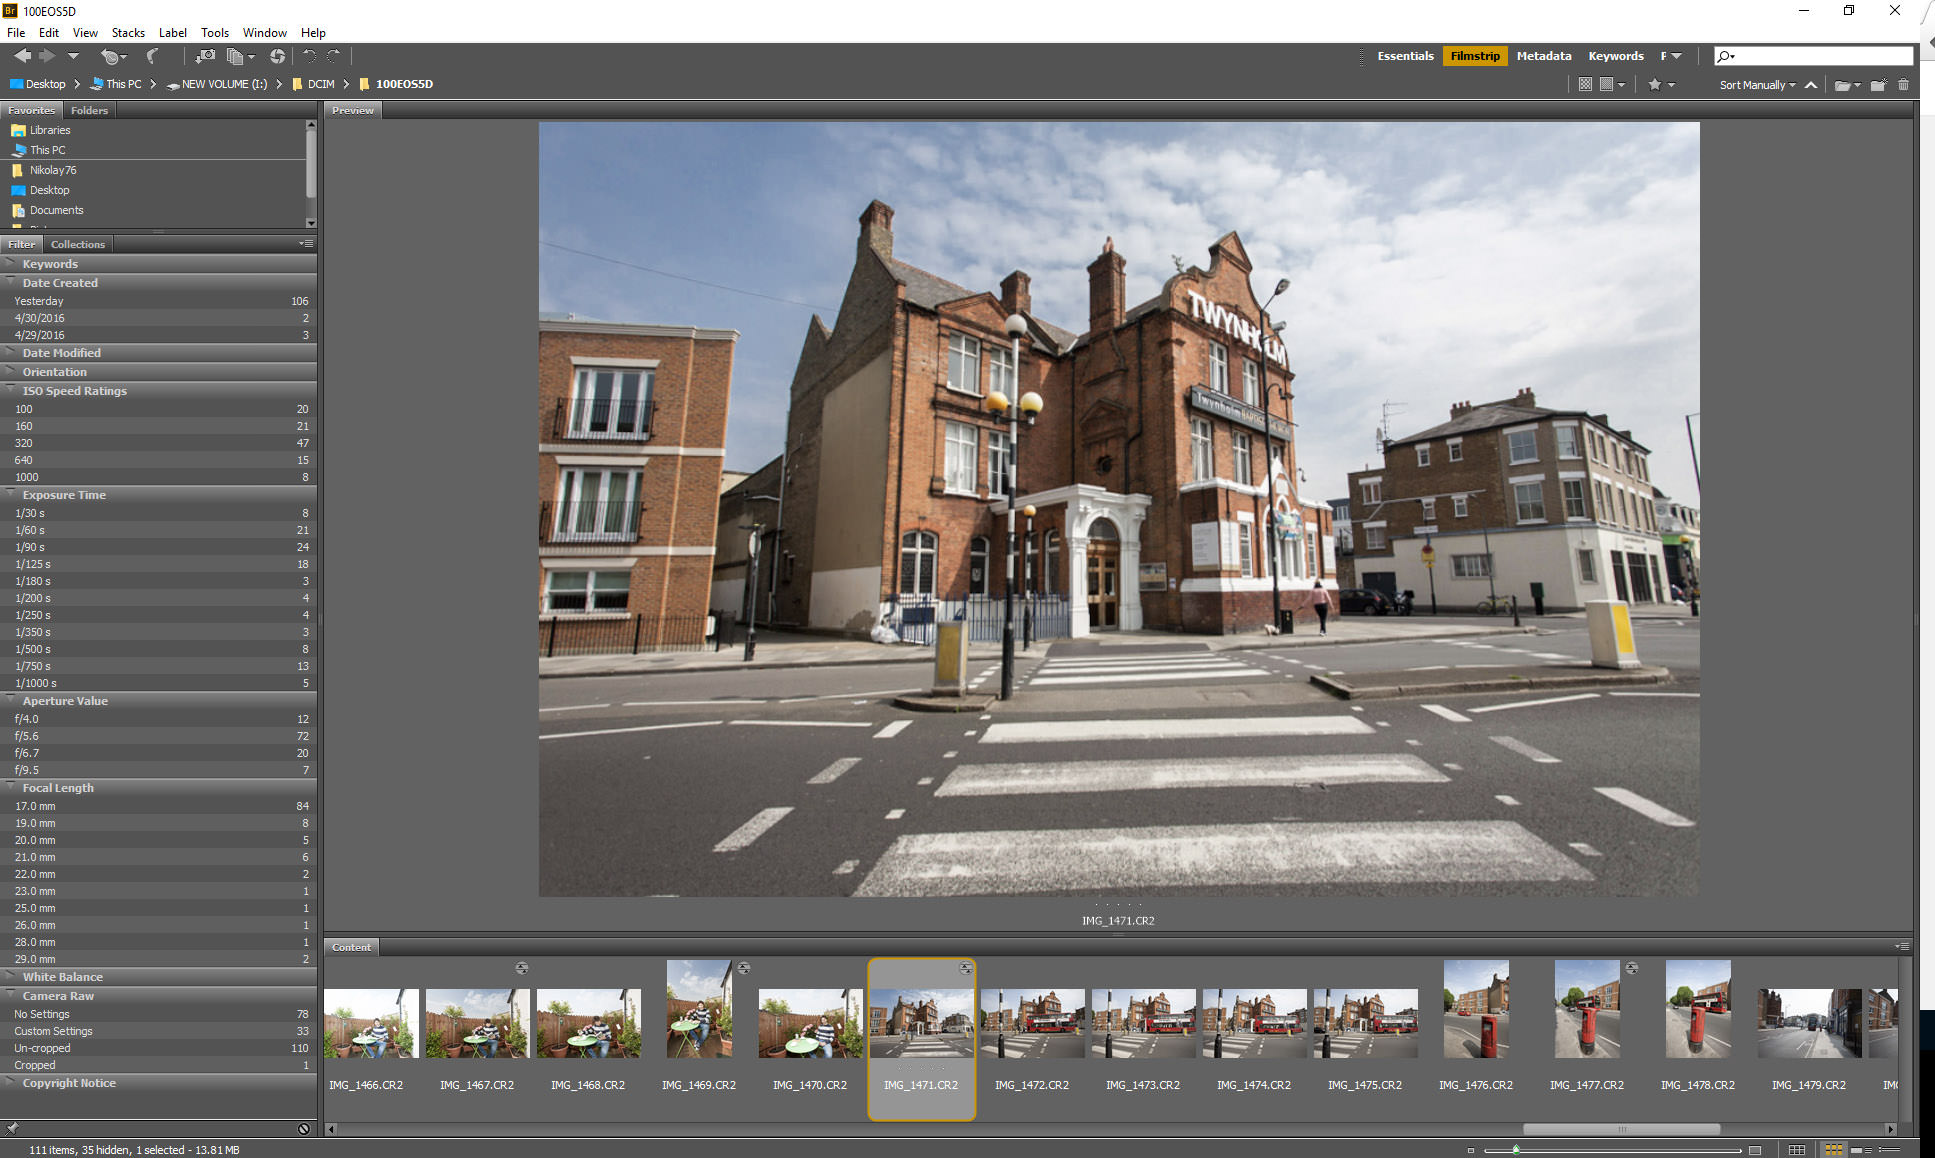
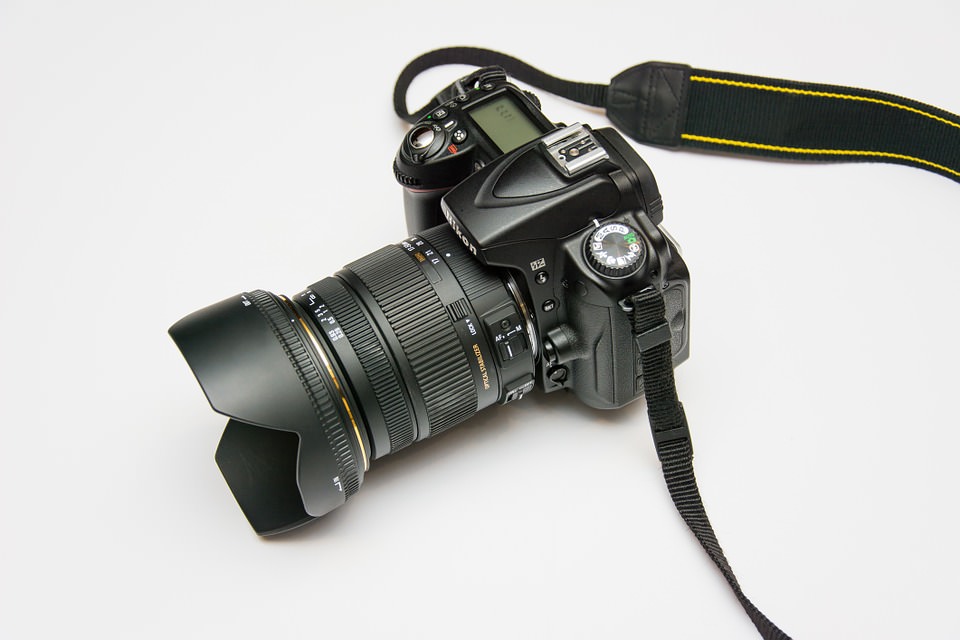
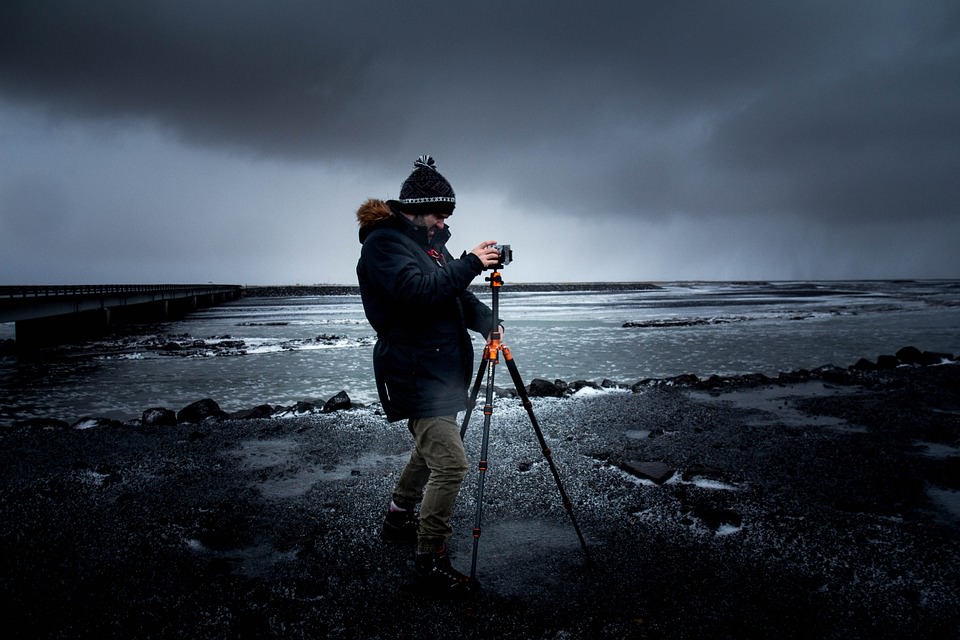
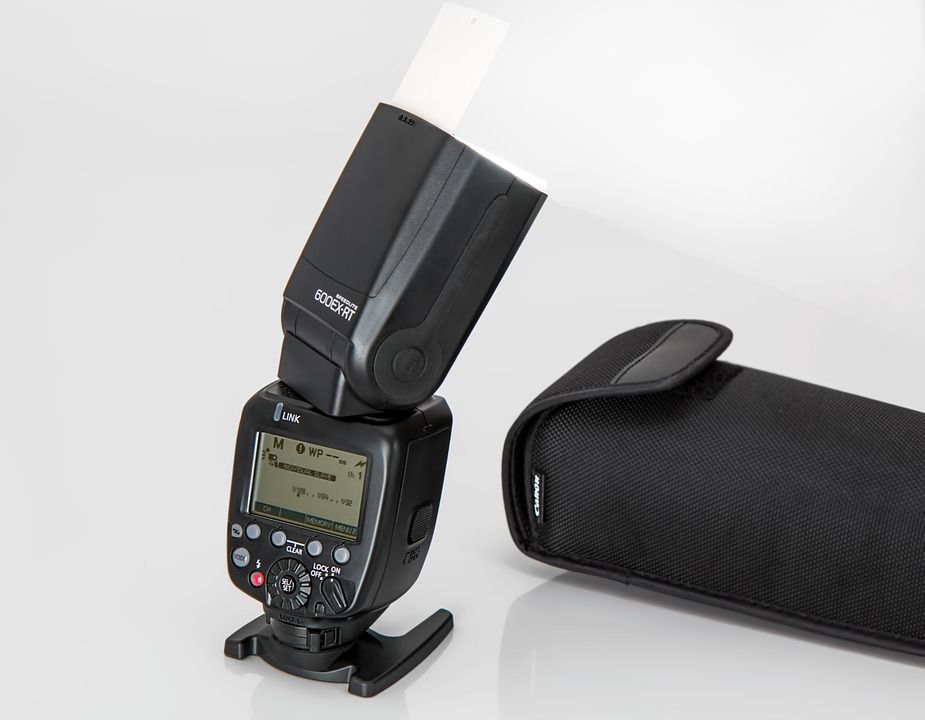
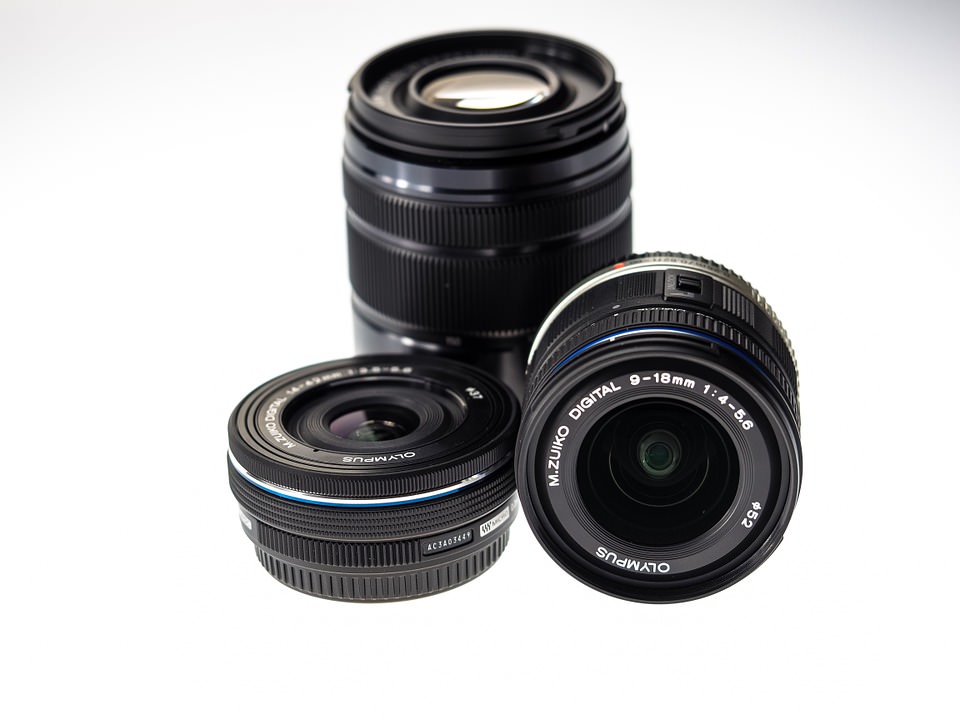
full frame cameraHaving already mentioned the types of sensors found in today’s modern cameras, the very first thing I would do if I was just getting into photography, is to think about buying a full frame camera (more expensive option – but if your goal is to become a professional photographer, it is a must have). If you click on and read some of the info contained in the links provided above, you’ll find out that the size of the sensor makes a world of difference to the overall image quality – not the pixel count, as many people think. File Format: RAW file format opened in Adobe BridgeThe next step will be – setting my camera to capture images only in the High-Quality RAW format. If you are serious about the photography you do, the best way to go is shooting in RAW – this way you’ll have significantly more data captured on your files, to work with later in Adobe Bridge or Lightroom. Camera Mode: manual settings cameraNow, after we have purchased our cameras and have them set to capture images in RAW format – the very next thing we need to start getting into the habit of is to not use our cameras in Auto mode. You, as a photographer, need to be in full control of the camera when taking pictures, not the camera taking control and leaving you with whatever it thinks were the best settings for the particular situation, especially regarding the use of ISO, aperture and shutter speed.Tripod: tripodNext up is, have your tripod or monopod handy for situations where it would be most useful. Depending on the subject and style of the photography we do, very often we’ll need to use tripod or monopod for longer shutter speed, instead of cranking up our ISO settings. This is particularly helpful if the subject of our photographs is static scenes or objects. However, when we need to capture scenes with moving objects and capture them sharply, not in blurred motion,  then we really can’t avoid using higher ISO settings.Speedlights: speedlightSpeedlight – If the scene you’re photographing is too dark, especially with regards to the level of ambient light, the proper use of Speedlight will help you lift up the shadow areas, overall illuminating the scene. This will result in a lot less visible noise. You can perform your own small experiment by photographing the same scene with the same ISO settings, once without a flash, then again with the flash, comparing the results. Lenses: lensesUsing fast lenses, with a wide aperture, can also be added to our arsenal in the fight against the digital noise. Fast lenses will allow you to capture the image in low light situations with lower ISO settings. For example, you can set up the aperture of your lens to F/2.0, or less if you have this option,  which will allow more light to come through the lens and be recorded by the sensor.


And finally, at this point, we are ready to open our images in Adobe Bridge or Lightroom. We use these two versions of software as our main portal in accessing all of the data that we managed to capture in RAW format and then move on to making further refinements in Photoshop.

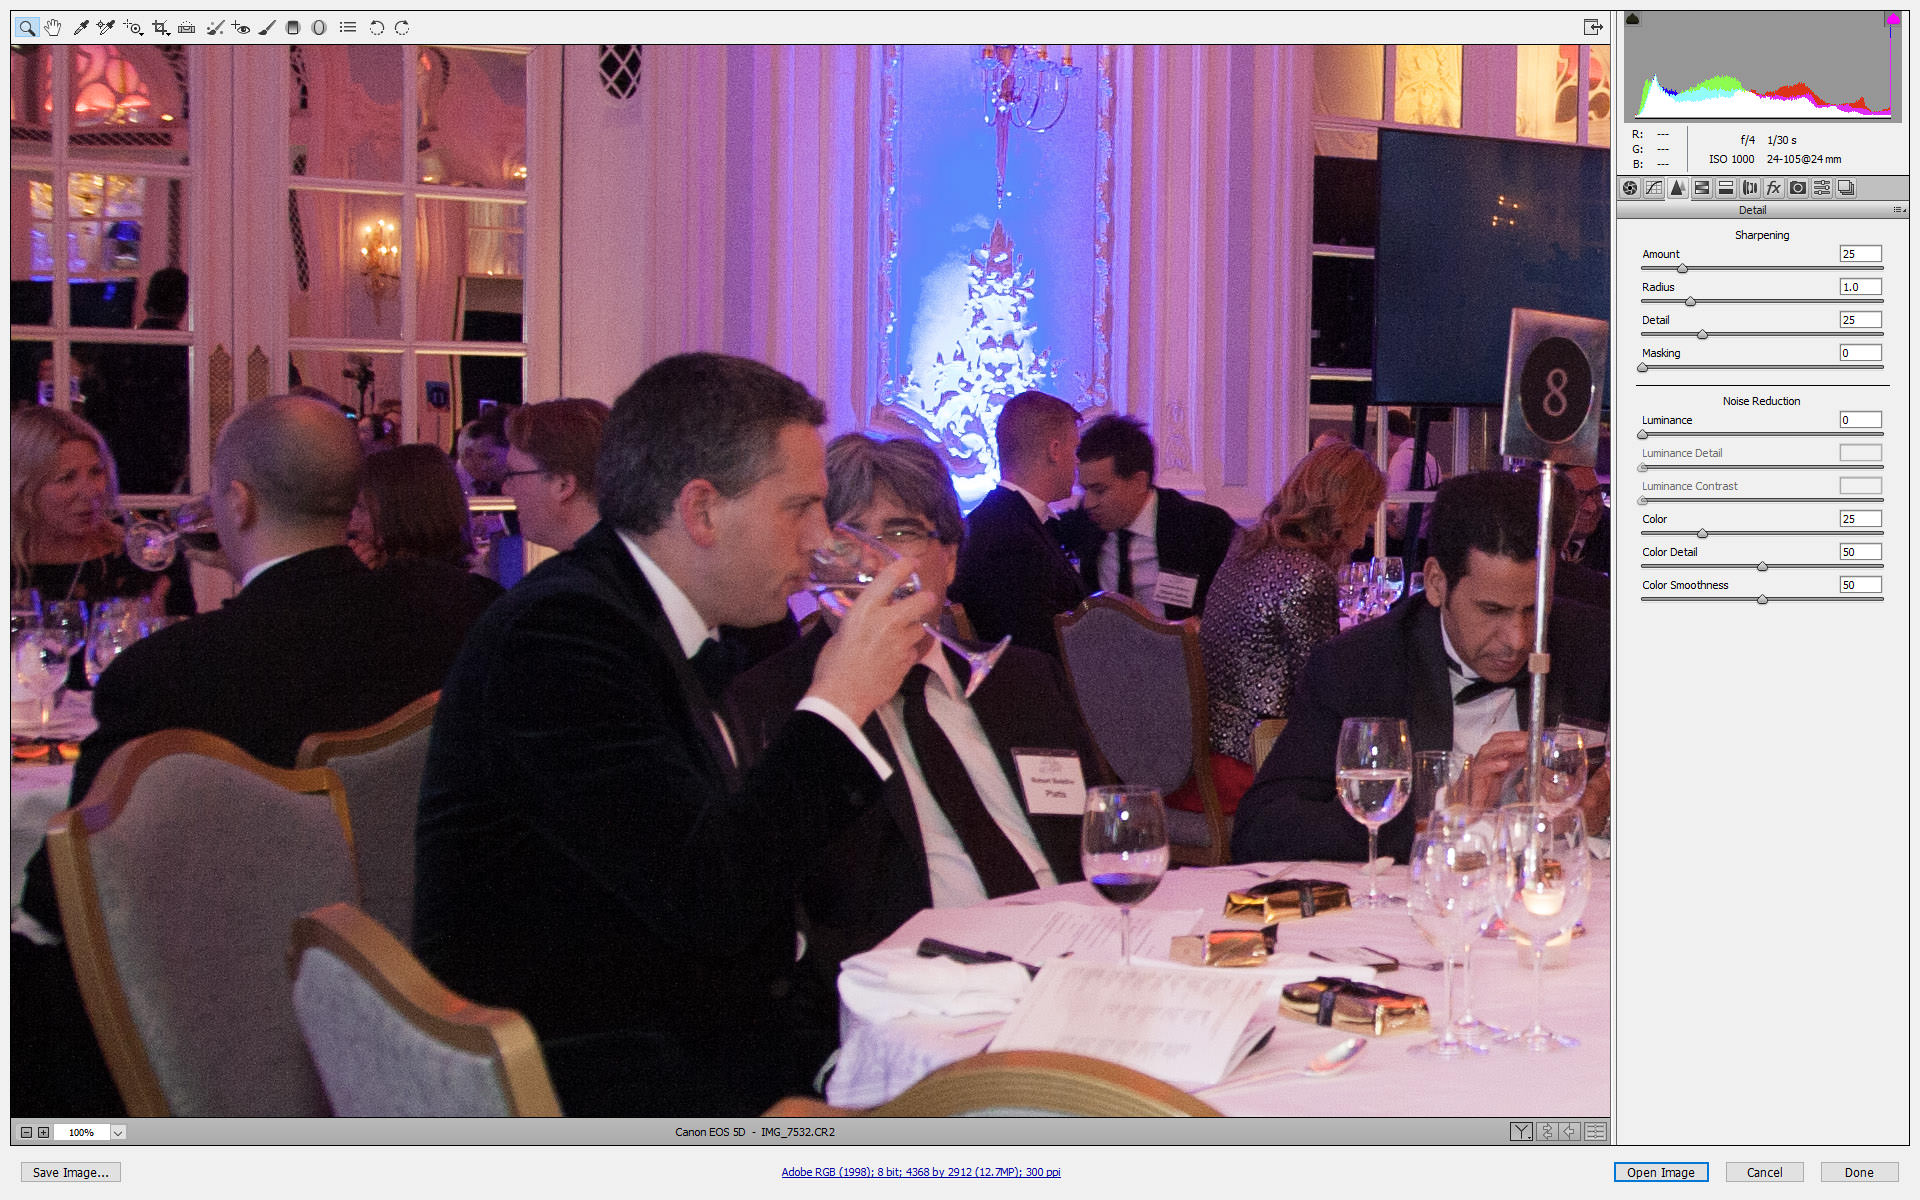
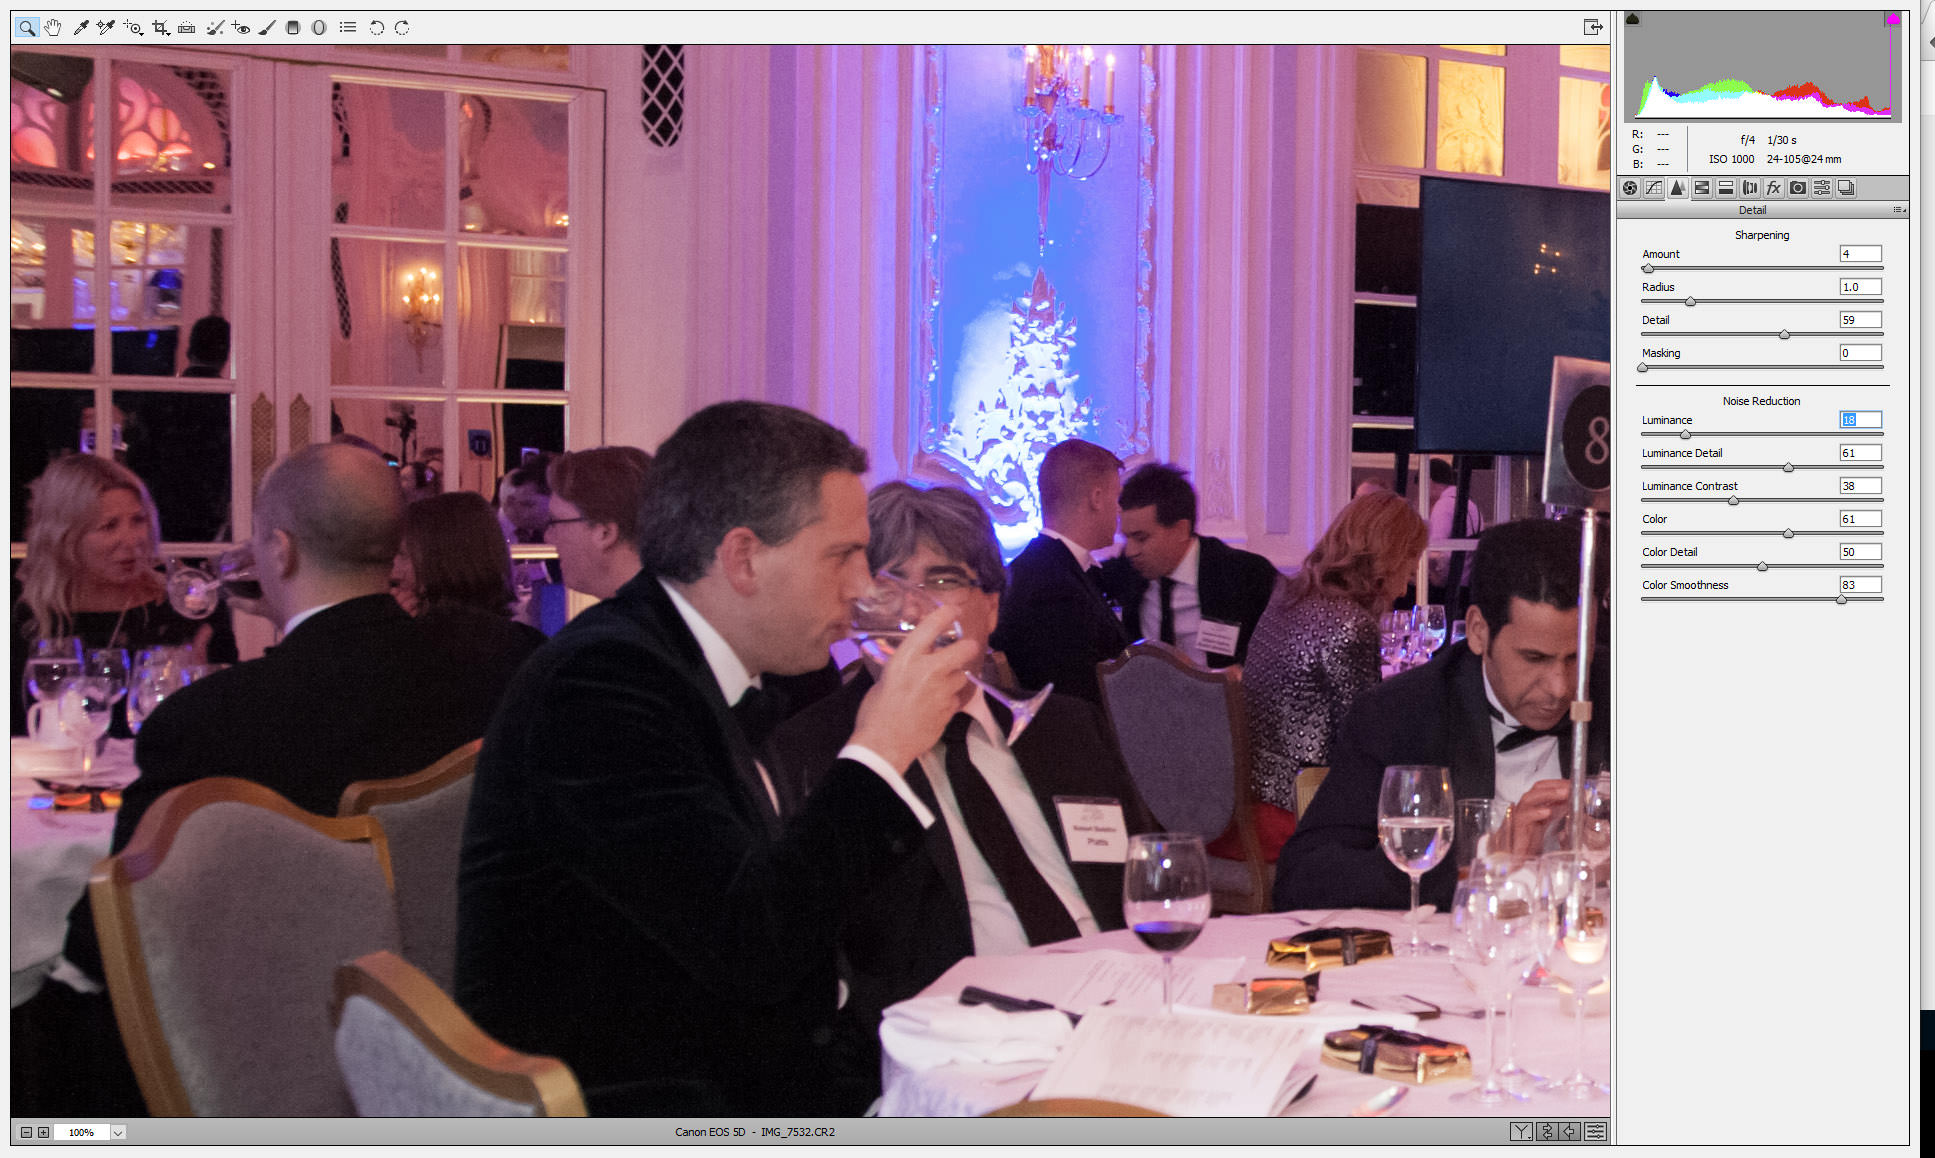
I have provided two snapshots bellow of how the Sharpening/Noise Reduction options work, which is a very simple but powerful way to edit your uncompressed RAW images. I won’t be going in depth over what every slider does, as it is quite self-explanatory.  However, I will say that when playing with the sliders in an attempt to reduce noise, make sure to double check your changes by zooming in on a specific region of the image. For example, zooming in on an area of shadows, where noise is very noticeable, using that as the main point for your adjustments.


Image with heavy digital noise – Default RAW settings, inside Adobe Bridge.

noise image bridge

Image with heavy digital noise – Noise reduction applied.

noise reduction


Recovering blown out images in Lightroom

Fall can be a great time to capture many different looks, because of the constant change in weather and colors. On the day of the photo, I wanted to be able to move around quickly and did not want to lug around a bunch of equipment that would get wet and dirty, so all that I used was my camera and tripod. Only using natural light saved me from having to bring extra gear, but also presented a problem. On this day it was very rainy, misty and foggy which gives me the atmosphere I am looking for, but it often times looks washed out in the raw file. If you have ever shot in fog, you know that it can be hard to capture enough detail in the distance and keep your subject properly exposed. All of the moisture in the air catches the light and often times gives you blown out the part in the image.

In this tutorial I am going to walk you through what you need to know to be able to recover an image in Lightroom, that may be blown out.

1. Temperature

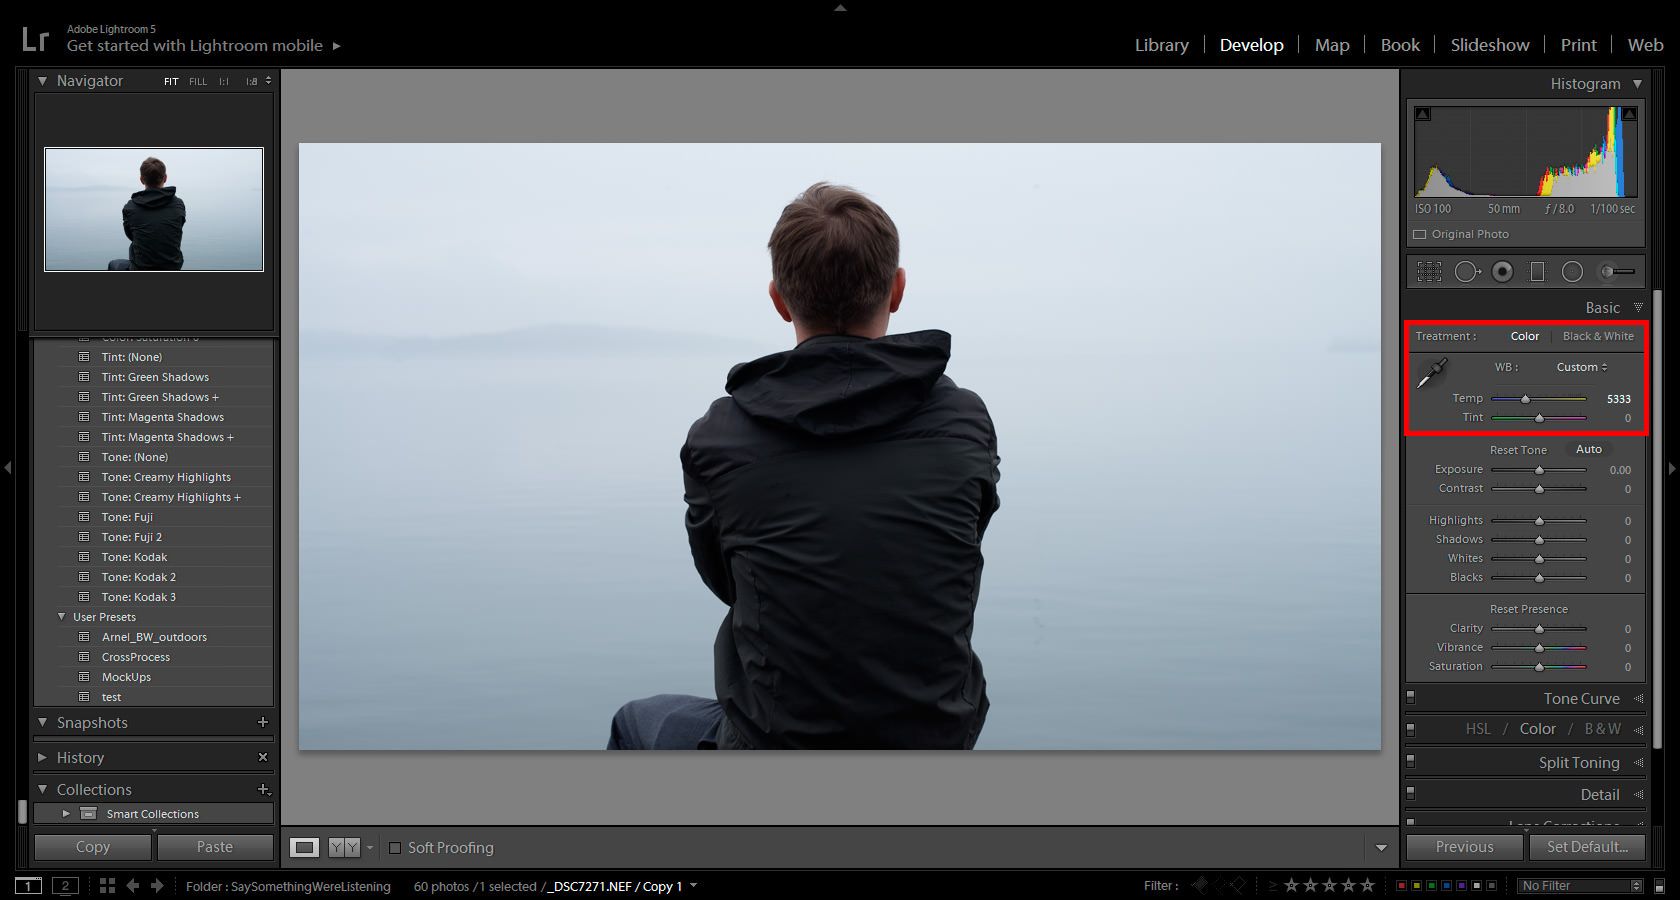
This is what the RAW file looks like straight from the camera. The only difference I made was turning down the temperature slightly, as I had my original at around 5500. Now you may be wondering, how do you know where to set the temperature and in reality I don’t. All of these adjustments are not in an exact order, there is a lot of jumping back and forth, from section to section and tweaking until you find what you like. I turned down the temperature knowing that I wanted a cooler and more moody feeling to the image. I wanted to bring out the cold and lonely feeling of someone in a world of their own.

Before we go to the next step take a look at the Histogram and notice the lack of detail in the sky portion of my image.

RecoveringBlownOutImages1

2. Exposure

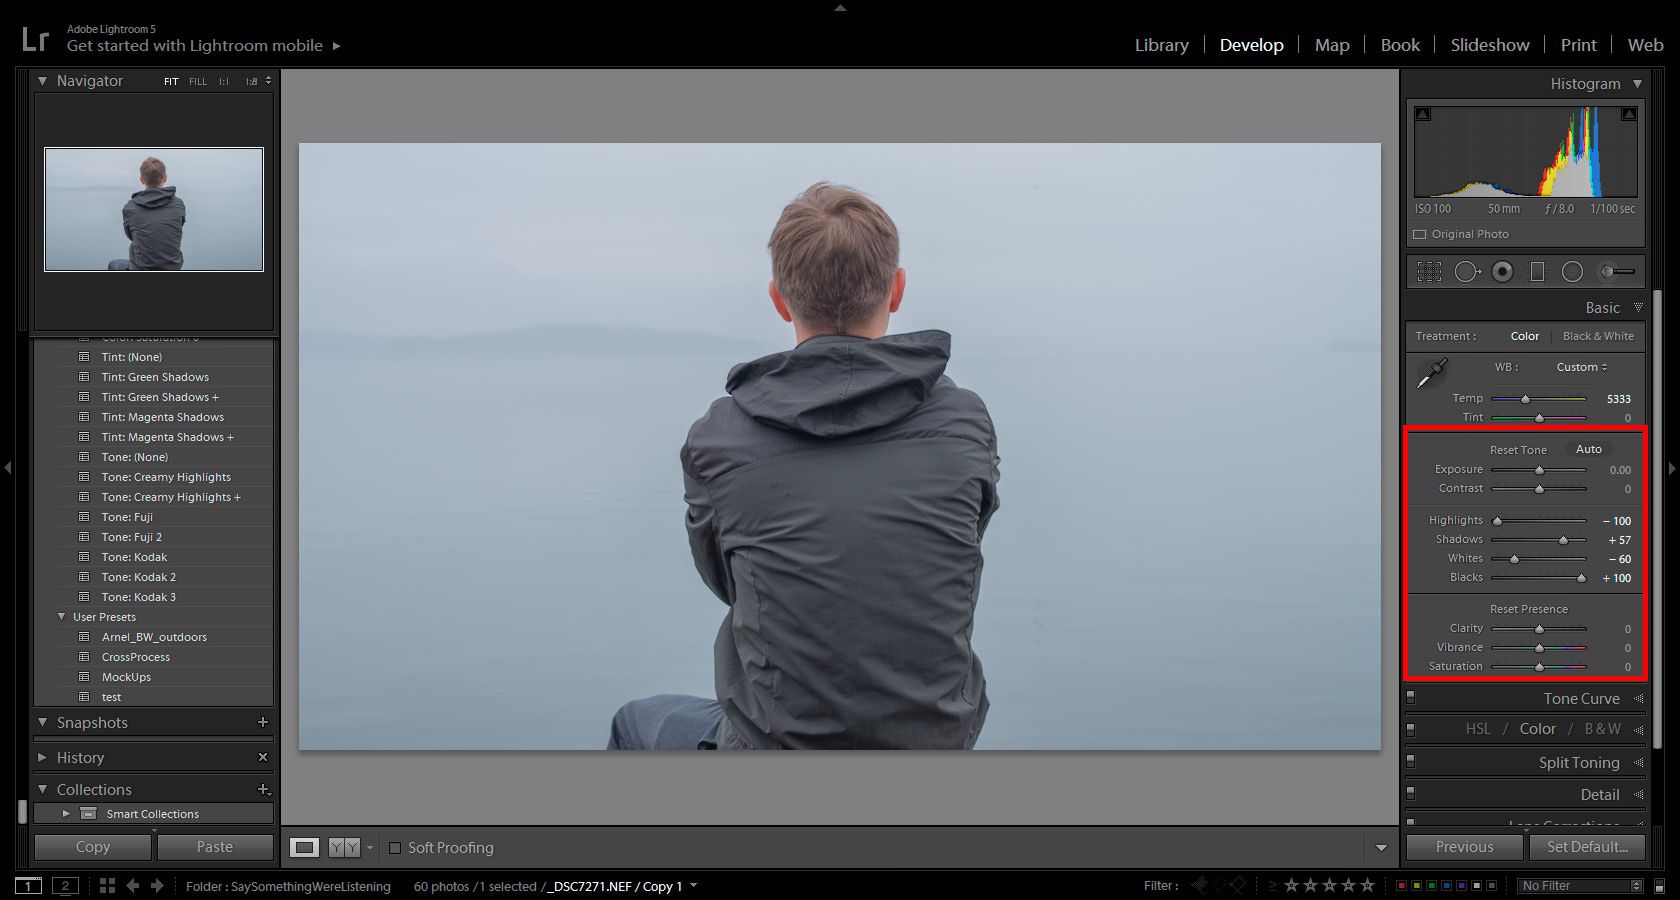
This is where we are going to make the adjustments to be able to recover some of that sky. I mentioned earlier that shooting in this kind of weather becomes hard to expose properly because the dynamic range can be so vast. When I was shooting, my objective was to set my camera so that I could get as much information in one exposure as possible. There were other ways I could have set the camera (like boosting the ISO) to capture more info, but I kept getting the little island blown out, so I stuck with the settings you see (right under the histogram).

I boosted the shadows/blacks and brought down the highlights/whites. I normally would not do such harsh adjustments, but I needed to in this situation, to achieve my end result. If you compare the histogram of the 1st image with the one below, you will notice that not as much of the right side (white/highlights) of the histogram is clipping.

We can now see that there are some clouds in the sky (slight as they may be) and it is not all white, with no information. This is not enough, though, we have information in the sky, but the image looks bland and the color still does not fit the mood we set out to create originally. The next few steps will be more about editing the color.

RecoveringBlownOutImages2

3. Color

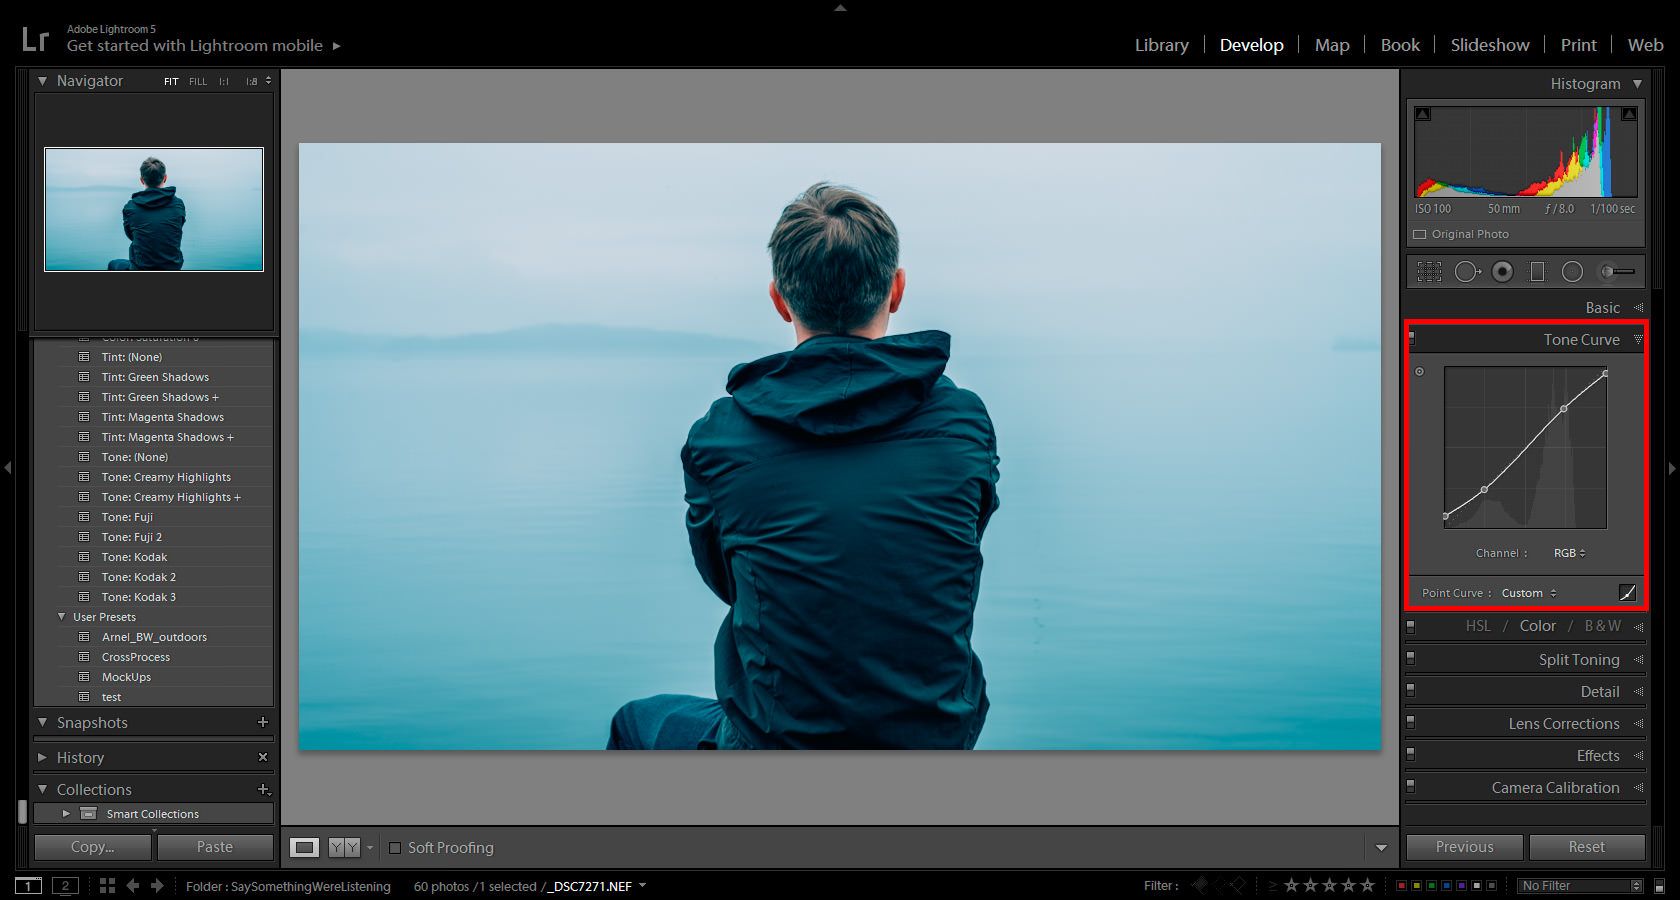
Steps 3,4 and 5 are a peek into some of the color editing decisions I made to pop the subject out at the same time as showing some of the background information we recovered, using the previous steps. I will be doing a color editing tutorial in the future, but in the meantime check out our tutorial for giving your photos a retro feel. In the previous step we recovered the highlight and shadow details, but in the process, we flattened out the image. To fix those adjustments one way to add contrast and color adjustments to your photos, is to use the Tone Curve.

RecoveringBlownOutImages3

4. Color

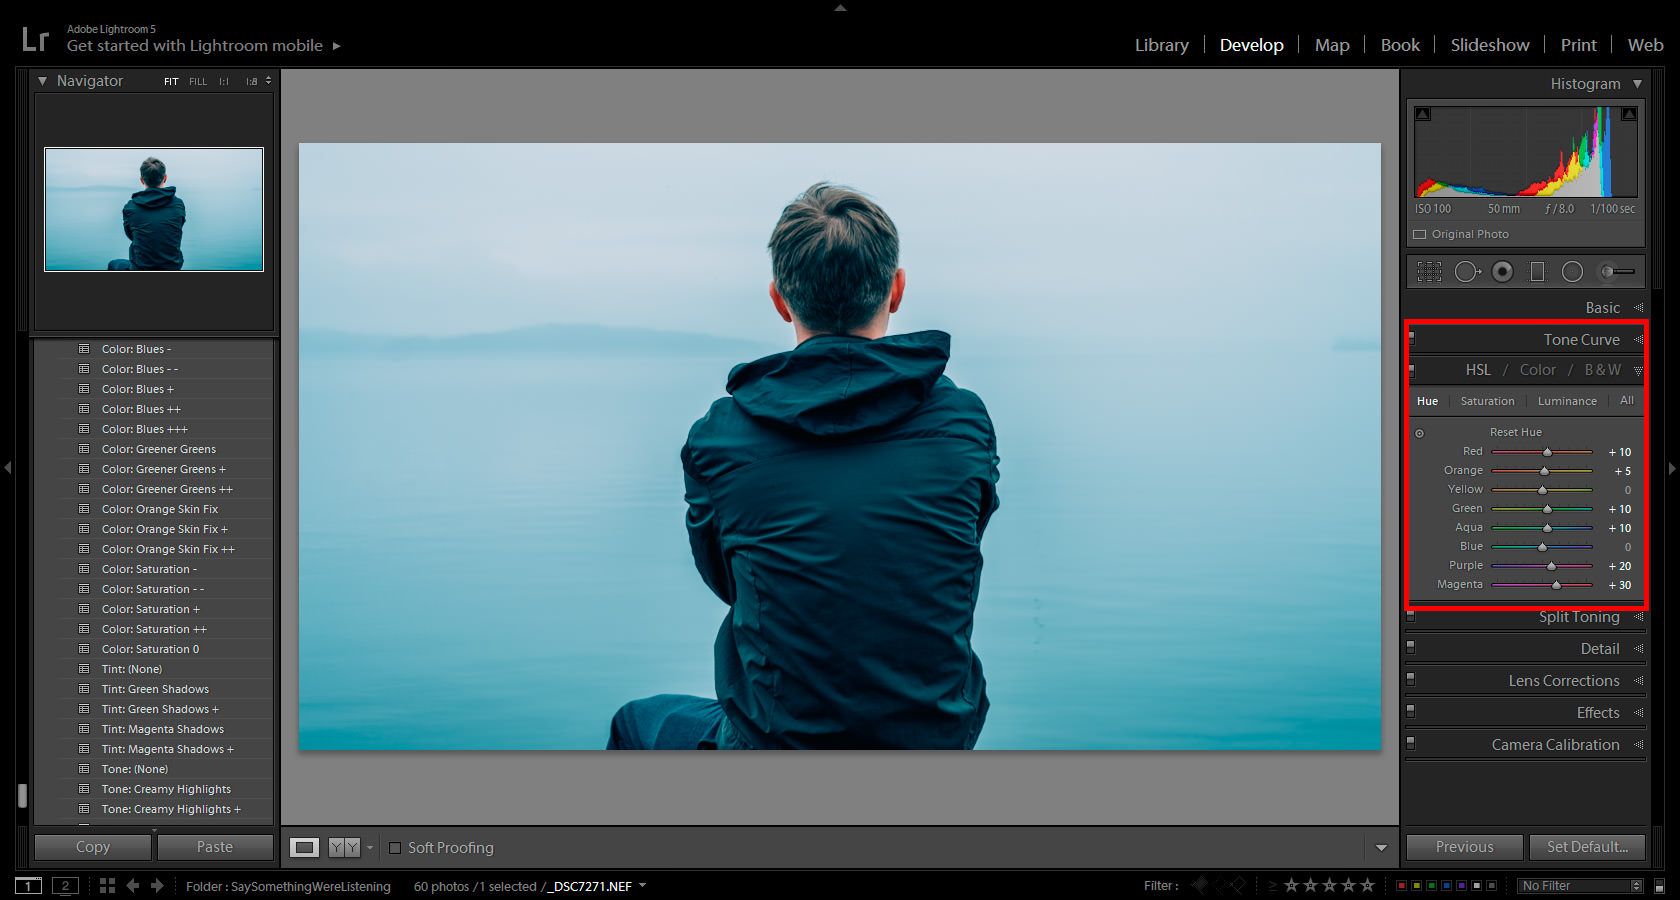
Next, I played around the HSL (Hue/Saturation/Luminance), again just a peek at your own photos will ask for different settings.

RecoveringBlownOutImages4

5. Split Tone

Then I added more of a cool color to my shadows, using the Split Toning.

RecoveringBlownOutImages5

6. Final Steps

After getting the color  I was going for, I did some light spot removal and added some noise. I do have to mention that for the color work mentioned above, I did use a preset as a starting point and then tweaked it to fit my needs. If you want some presets to speed up your process or to just get you going in a direction, check out the presets available by Sleeklens.

7. Additional Tips

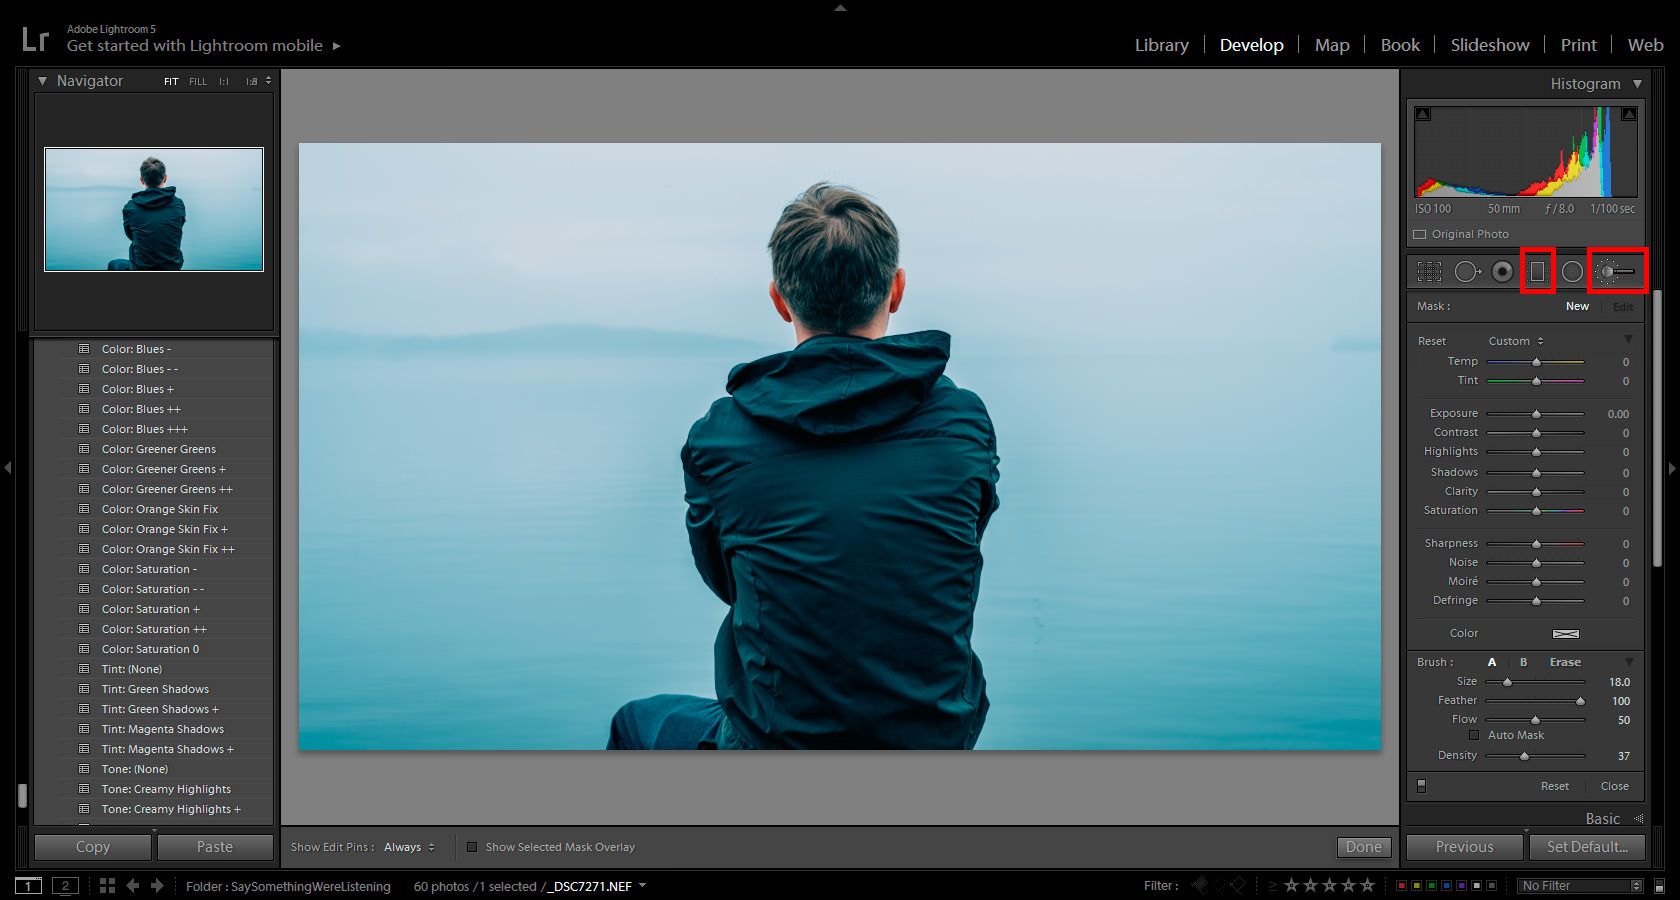
Like many things, when it comes to editing photos in Lightroom/Photoshop there are many ways to get to the final result. If you need to be more precise using tools like the adjustment brush or graduated filter, it will help you get results to specific areas and not have to worry about affecting the whole image.

RecoveringBlownOutImages6

8. Conclusion

Remember, the best way to set yourself up for success in your post processing is to have an idea of what you want your final image to look like. Shooting to capture all of the information in the raw file will help you later.

A Guide to Using the Adjustment Brush in Lightroom

Correcting exposure, color balance, and contrast are likely how you begin editing the majority of images in Lightroom presets. Often, it might be all that is required to finish editing the image; however, to take your images a step further Lightroom has given its users a tool called the Adjustment Brush. It allows for photographers and retouchers to localize their editing by carefully selecting specific parts of the image to enhance, hide or correct. The Adjustment Brush is a fairly easy tool to master, but it comes with a few settings that need to be understood, to use this tool well. This is the complete guide to using the Adjustment Brush in Lightroom.

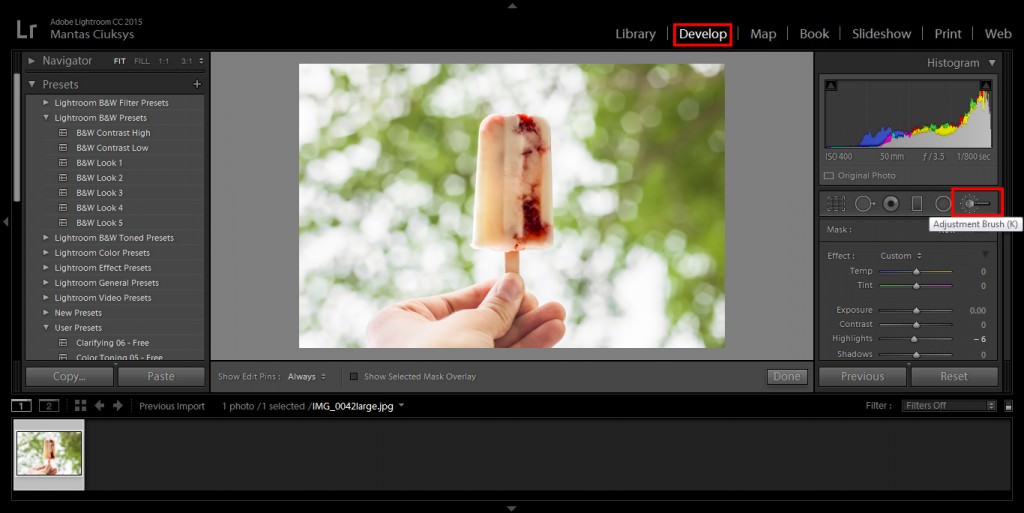
The Adjustment Brush tool is found in the Develop module of the Lightroom panel which can be found if you have an installed Lightroom presets.  You can quickly access the Develop module by using the keyboard shortcut ‘D’. The Adjustment Brush tool is marked as a dotted circle with a brush coming out of it – make a habit of using keyboard shortcut ‘K’ to access the tool, to save time when retouching.

Adjustment Bursh

Once the tool is selected, you will see that the mouse pointer turns into a circle. It marks the area affected by the Adjustment Brush. Further, you will notice that it opens a number of options that change what affect the Adjustment Brush will have on the image.

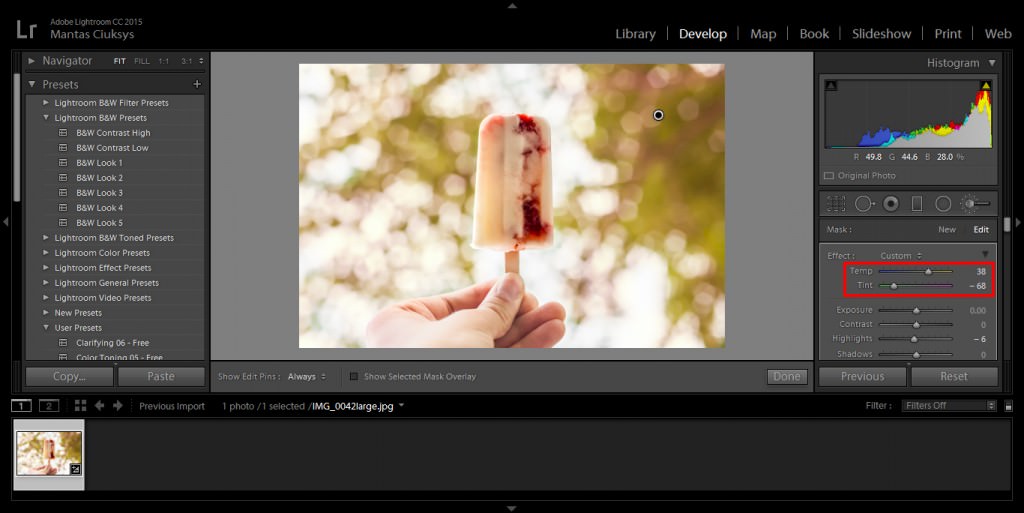
The first two sliders control the temperature and color tint of the image. These, in short, control the white balance settings of the Adjustment Brush. For example, you could use this tool stylistically to add a complimentary color in the shadows of an image for a more saturated photo.

Adjustment Bursh2

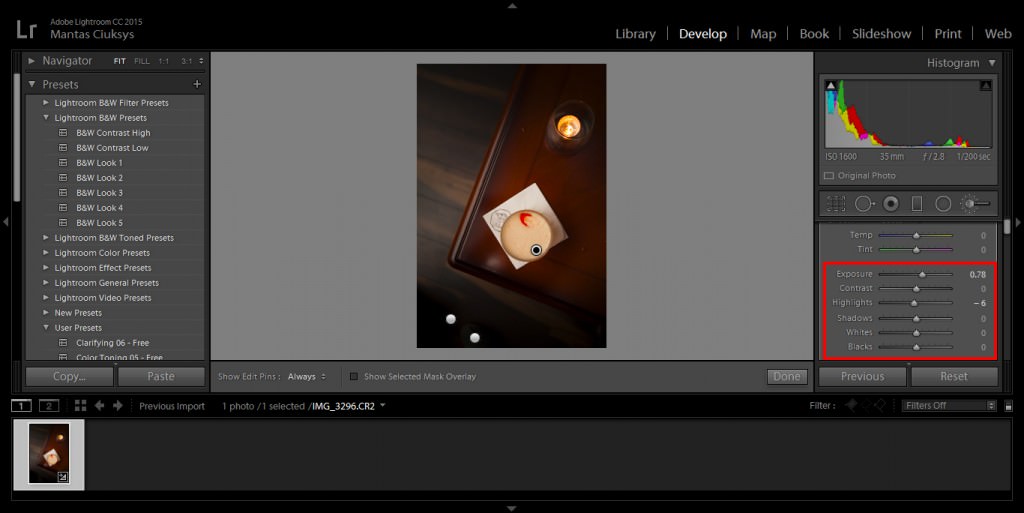
Moving forward, the next six sliders control the exposure and tone settings of the Adjustment Brush. Exposure will change the overall tone shift of the area affected by the Adjustment Brush. The contrast will control the ratio between the black and the white values of the image, which can be the further adjusted by the last two ‘Whites’ and ‘Blacks’ sliders. The Highlights slider will control the extent to which the Adjustment Brush affects the brightest sections of the adjusted area, while the Shadows slider will control the darker areas. Adjusting these settings can help you bring certain parts of the image forward or hide other areas in shadows.

Adjustment Bursh3

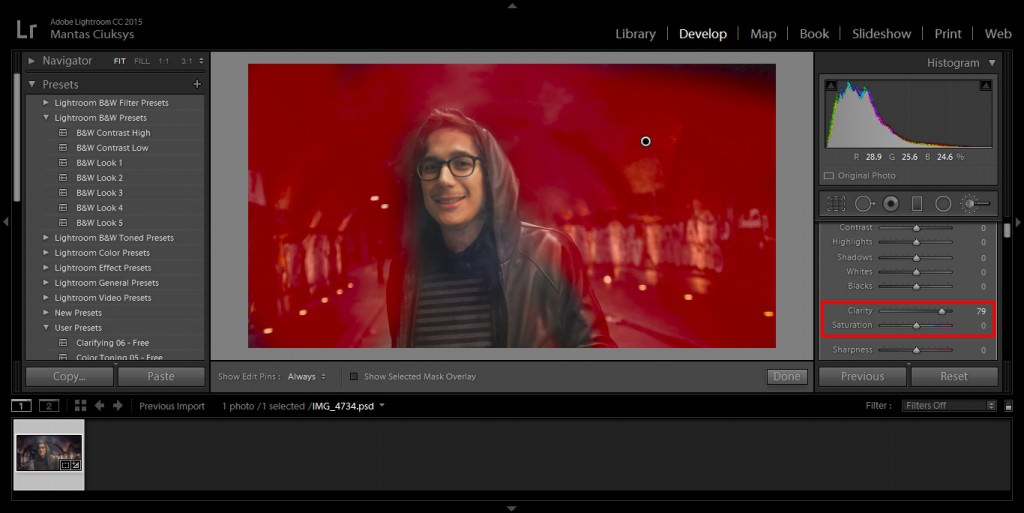
The next section allows for changes in clarity (one of the features you have to consider for rating system in Lightroom), which controls the contrast of the lines in the image, and saturation, that affects the intensity of the colors in the area of the adjustment brush. Often clarity can be great in revealing the amount of detail present in the image; however, usually you want to avoid adding it to faces as it will accentuate lines and creases in the skin – to avoid that we can use the Adjustment Brush tool to only increase clarity outside those areas.

Adjustment Bursh4

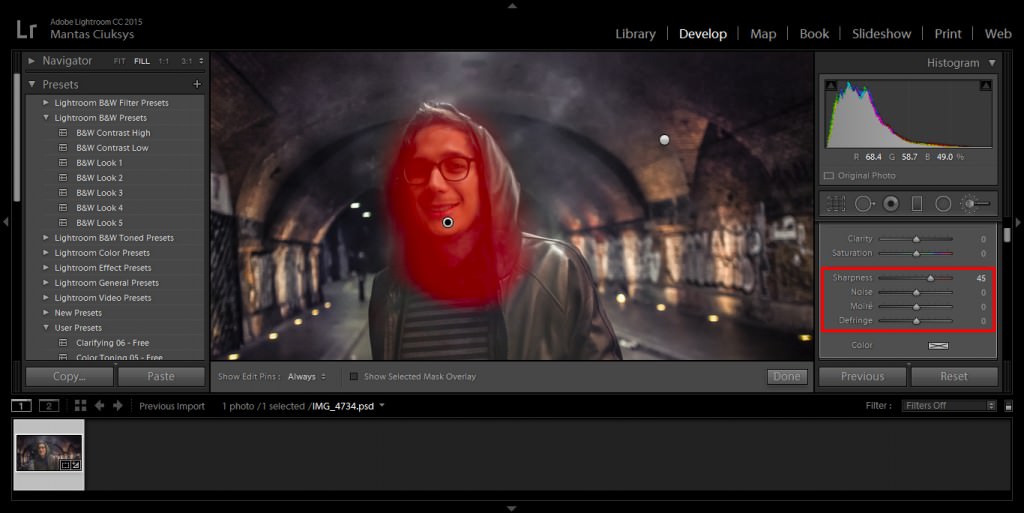
The next section is responsible for correcting the issues caused by the camera sensors. First, are the Sharpness and Noise sliders that can be used to make parts of the image stand out from the rest or used to reduce noise and grain caused by the camera sensor. The Moire slider is there to compensate for the Moire effect that occurs when a frequency of pattern in the image aligns with the pixels of the sensor, resulting in a distortion of that pattern. The Defringe slider reduces the chromatic aberration caused by lens shortcomings.

Adjustment Bursh5

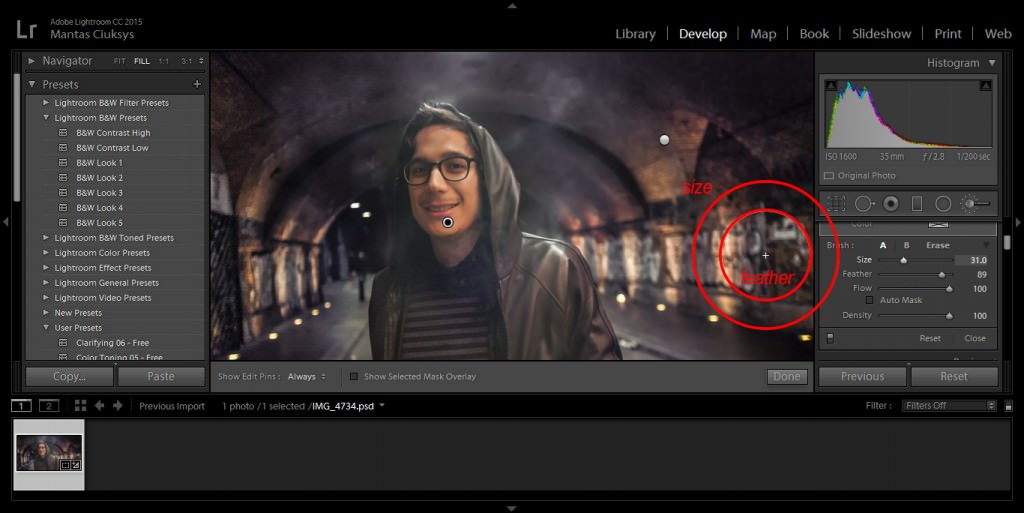
Further, the Color option of the Adjustment Brush allows you to select a color cast that the brush will add to the affected area of the image. Last part of the Adjustment Brush options controls the Size, Feather, Flow and Density of the Adjustment Brush. A quick way to adjust the size of the brush while retouching is to use the keyboard shortcut ‘[‘ to make it smaller and ‘]’ to increase its size. The Feather of the Adjustment Brush controls how quickly the Adjustment Brush will fade into the rest of the image. The larger the Feather level – the more gradual the fade will be.

Adjustment Bursh6

Flow affects how quickly the Adjustment Brush is applied to the image. If it is set to 100%, it means the Adjustment Brush will affect the area to a maximum level. If it is set to 50%, only half of the effect of the Brush will be seen.

The Density slider is similar to Flow and controls the amount of change that can be applied by the Adjustment Brush; however, unlike Flow, it will limit the effect indefinitely, meaning that once it is set to a specific value that area will always remain affected at that percentage, unless the Adjustment Brush settings are changed.

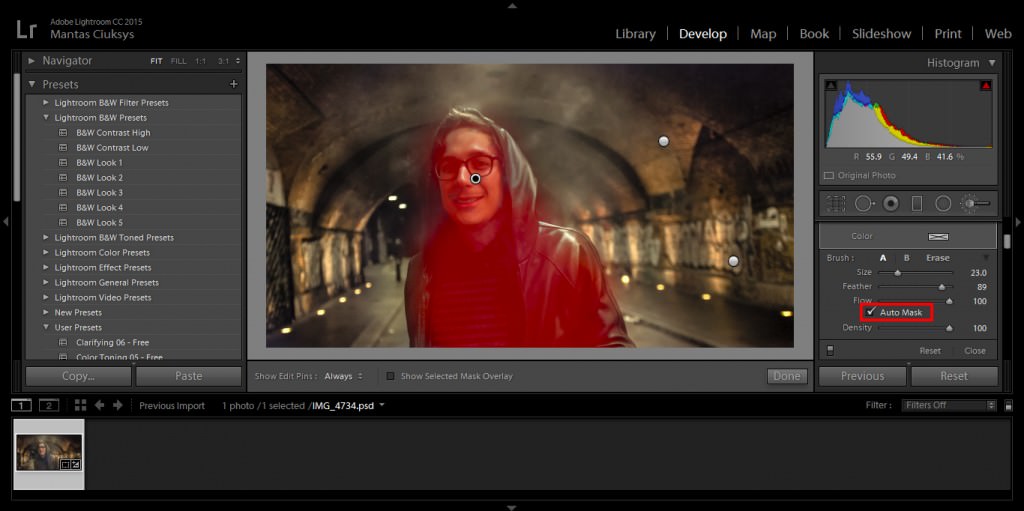
Last, the Auto Mask options attempts to guess, which parts of the image you aim to be affected by

the Adjustment Brush. It does so by checking for contrast ratios between pixels, meaning that if you have a subject in the image that clearly stands out from the background, it should be able to easily identify that you only want the subject affected; however, if the background is very cluttered, likely, it will not be able to distinguish the subject well.

Adjustment Bursh7

If you are finished with the first set of adjustments, you can create a new brush. Simply click the ‘New’ option in the Adjustment Brush settings panel, set the new settings for the Adjustment Brush and start applying it to the image. Note, that you will be painting on top of the first Adjustment Brush that you used. A quick way to undo the changes made by the Adjustment Brush is to hold the ‘Alt’ key while brushing the areas you want to be undone.