Tag: atmosphere

Football Photography Series: Capturing the Atmosphere

Often, when you’re attending a football game, the action on the field takes a backseat once you get into the entire live sports environment. With the loud music provided by the marching band, the enthusiastic chanting generated by the cheerleaders, and the delicious stadium food, there is plenty to photograph beyond just the game.

While sports photography is generally confined to what’s happening on the field, you can get some really interesting and unique shots by turning your lens away from the football players. Instead, start looking around you and see what compositions you can create to capture the atmosphere of a football game.

Many viewers likely haven’t had the opportunity to attend a major football game, so take advantage of the chance to show them what the experience is like, through your eyes. Take your eyes off the game, especially during half-time, and keep these football photography tips in mind to recreate the exciting environment for your viewers.

football fan photo

1. Get There Early

Not only will this help ensure you can find some prime vantage points to shoot both the field and the crowd, you’ll be able to capture the excitement of the fans as they spill into the stadium. Keep your camera focused on the gate as people start coming in, and you can get some great shots that reflect the mood of the crowd.

Also, you can give yourself a bit of time to familiarize yourself with the setting. That way, you can have a better idea of where things will be happening before the game starts. Locate the area where the marching band will be playing, where the cheerleaders will be performing, and where the food vendors are.

empty football stadium

2. Don’t Stay in One Place

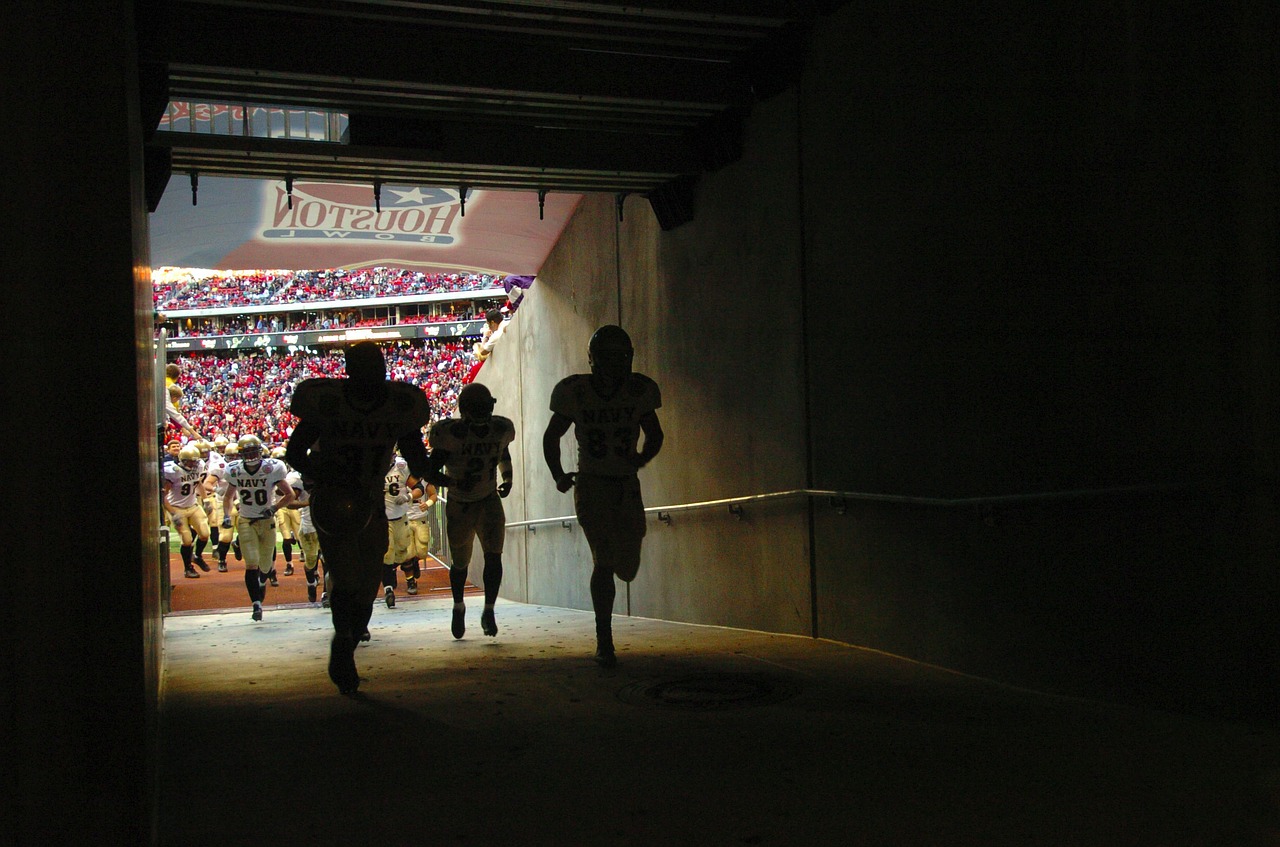
Get familiar with the stadium, so you can comfortably move around a bit. This will let you capture scenes from a variety of perspectives and locations, and give you the chance to offer viewers a more thorough experience through your images. No one goes to a football game and just watches the field from one spot, so don’t make your viewers see the game that way, either.

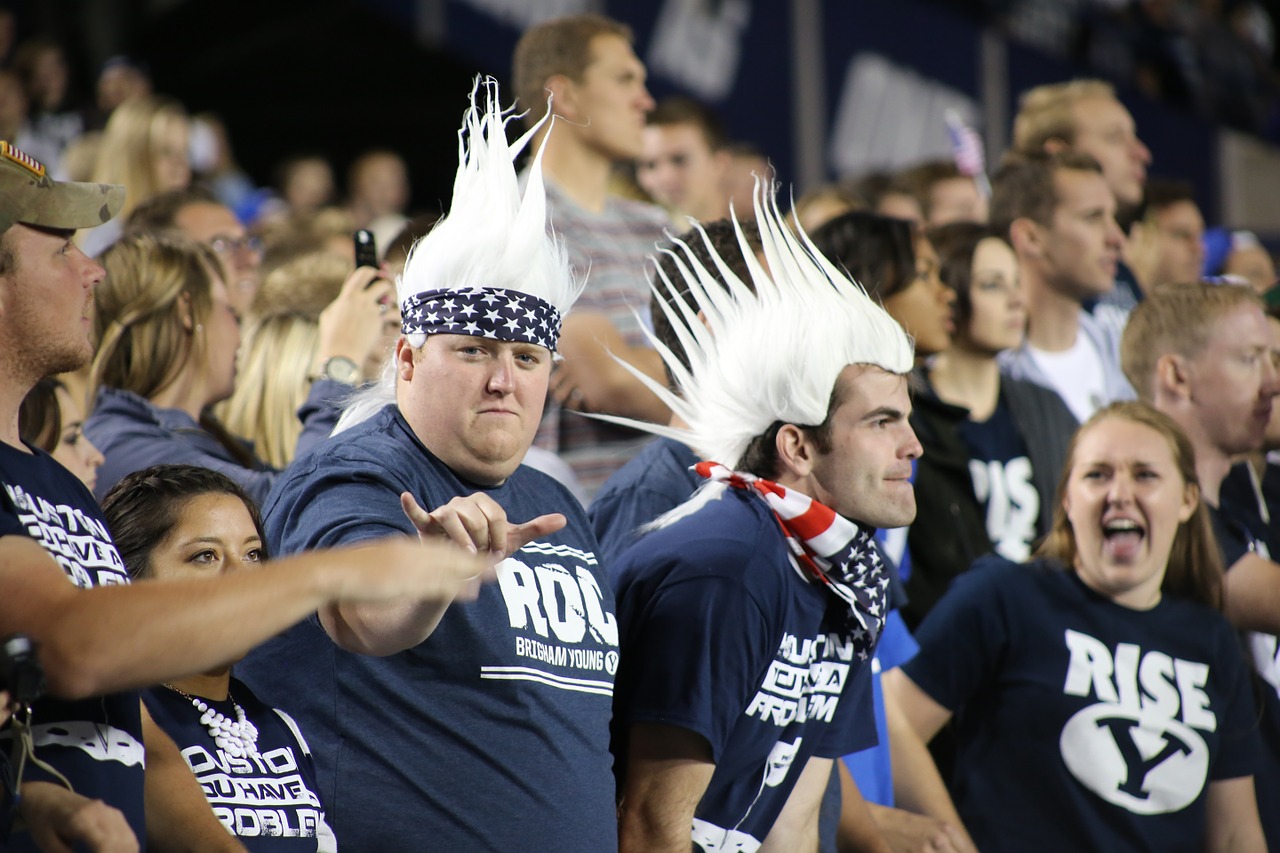
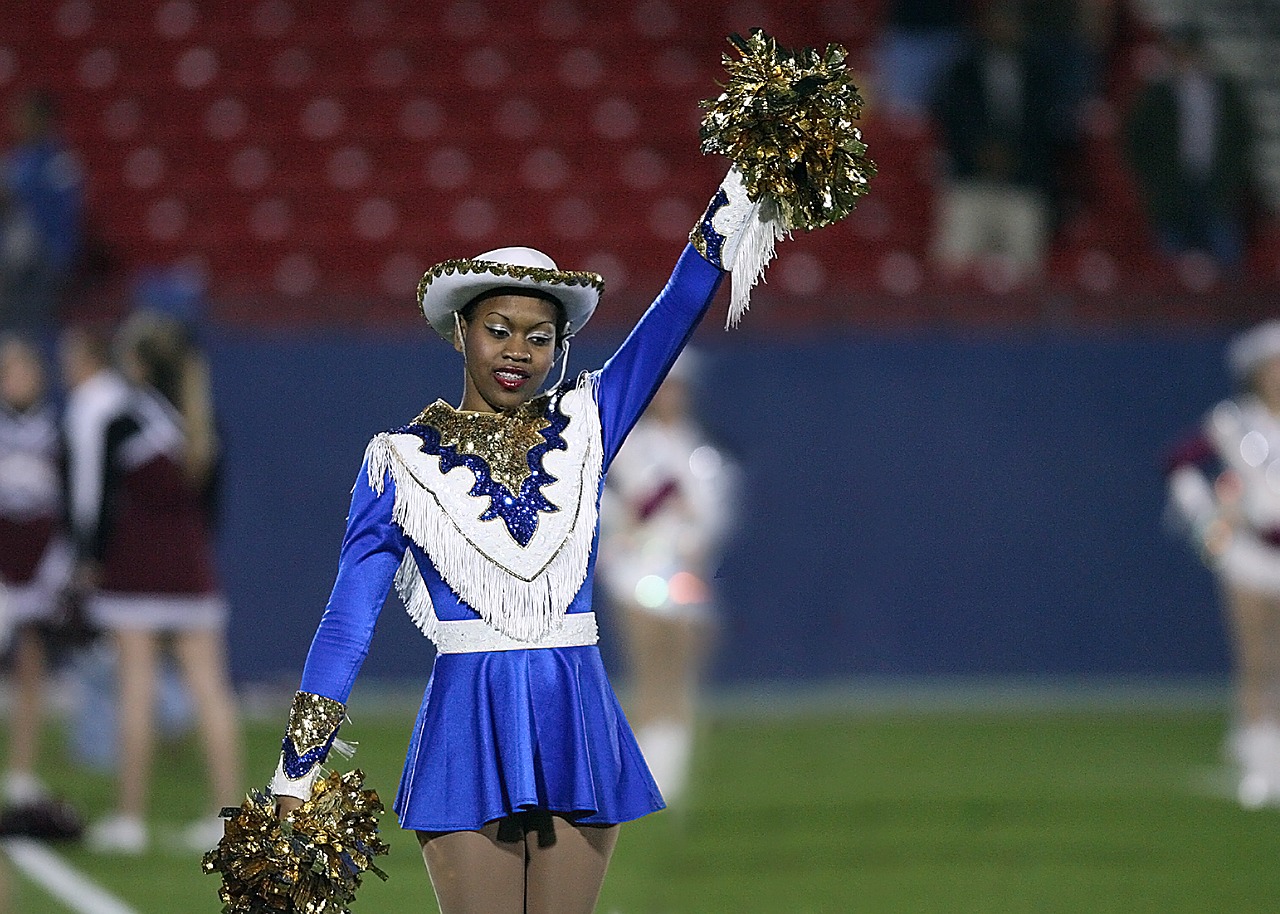
Try shooting from the sidelines to capture the coaches interacting with the players and referees, or the cheerleaders energizing the crowd. Then head over by the marching band to shoot musicians with their shiny instruments and vibrant costumes. Don’t forget about hanging out in the stands with some of the hardcore fans. Find the ones with the face paint and the noise-makers to let your viewers see what your team’s fans look like.

football cheerleader

Look around for things outside of the norm. Someone eating a hot dog or some nachos, or a kid interacting with the team mascot can provide great opportunities for football photography. But, it’s easy to overlook these scenes when you’re focused on the game. Especially during downtime, scan the crowd for these potential atmospheric captures.

3. Look for Strong Compositions

Even though shooting sports is different than traditional kinds of photography like landscapes or still-lifes, the rules of composition in football photography are still important. These rules can provide you with some essential guidance when you’re trying to focus on the atmosphere of the game, helping you create the feeling of depth and dimension that you need to pull viewers into your images.

football players tunnel

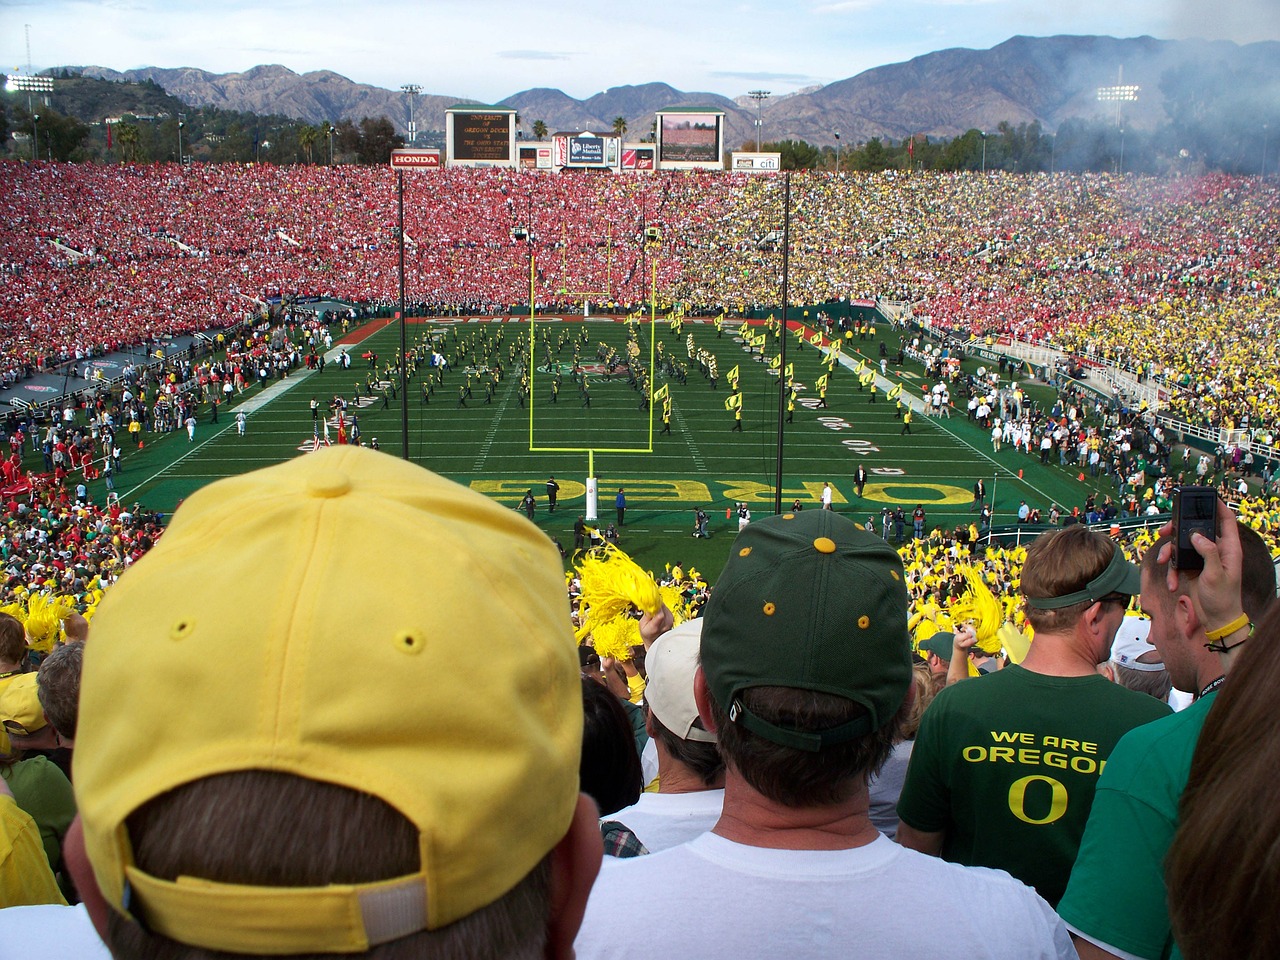
Things like leading lines, patterns and repetitions, and the rule of thirds can offer some solid structure for your shots. There are tons of colors at football games, as fans are dressed in team colors for solidarity, so take advantage of that to make some vibrant images.

If you can keep these basic rules in mind while you’re looking for interesting atmospheric images, you’ll be able to make the most of each opportunity and end up with some fantastic shots.

4. Consider the Time of Day

Depending on when the game is happening, the atmosphere will offer different opportunities for storytelling. Shooting at night means you’ll need to think more about making sure you’re getting enough light. But, you’ll also be able to shoot things like fireworks going off or bright light shows.

For stability in low-light settings, you might want to bring a tripod or monopod with you to shoot night games. You can also bump up your ISO as high as your camera can handle it, to ensure your shutter speed is quick enough to capture motion even with less light coming in.

stadium lighting conditions

Remember these football photography tips the next time you’re shooting a game to create a captivating photo story that will let your viewers be a part of the action. The atmosphere of the stadium is almost as exciting as the gameplay itself, so make sure you don’t overlook the dynamic shots you can capture by turning your camera away from the field.

Recovering blown out images in Lightroom

Fall can be a great time to capture many different looks, because of the constant change in weather and colors. On the day of the photo, I wanted to be able to move around quickly and did not want to lug around a bunch of equipment that would get wet and dirty, so all that I used was my camera and tripod. Only using natural light saved me from having to bring extra gear, but also presented a problem. On this day it was very rainy, misty and foggy which gives me the atmosphere I am looking for, but it often times looks washed out in the raw file. If you have ever shot in fog, you know that it can be hard to capture enough detail in the distance and keep your subject properly exposed. All of the moisture in the air catches the light and often times gives you blown out the part in the image.

In this tutorial I am going to walk you through what you need to know to be able to recover an image in Lightroom, that may be blown out.

1. Temperature

This is what the RAW file looks like straight from the camera. The only difference I made was turning down the temperature slightly, as I had my original at around 5500. Now you may be wondering, how do you know where to set the temperature and in reality I don’t. All of these adjustments are not in an exact order, there is a lot of jumping back and forth, from section to section and tweaking until you find what you like. I turned down the temperature knowing that I wanted a cooler and more moody feeling to the image. I wanted to bring out the cold and lonely feeling of someone in a world of their own.

Before we go to the next step take a look at the Histogram and notice the lack of detail in the sky portion of my image.

RecoveringBlownOutImages1

2. Exposure

This is where we are going to make the adjustments to be able to recover some of that sky. I mentioned earlier that shooting in this kind of weather becomes hard to expose properly because the dynamic range can be so vast. When I was shooting, my objective was to set my camera so that I could get as much information in one exposure as possible. There were other ways I could have set the camera (like boosting the ISO) to capture more info, but I kept getting the little island blown out, so I stuck with the settings you see (right under the histogram).

I boosted the shadows/blacks and brought down the highlights/whites. I normally would not do such harsh adjustments, but I needed to in this situation, to achieve my end result. If you compare the histogram of the 1st image with the one below, you will notice that not as much of the right side (white/highlights) of the histogram is clipping.

We can now see that there are some clouds in the sky (slight as they may be) and it is not all white, with no information. This is not enough, though, we have information in the sky, but the image looks bland and the color still does not fit the mood we set out to create originally. The next few steps will be more about editing the color.

RecoveringBlownOutImages2

3. Color

Steps 3,4 and 5 are a peek into some of the color editing decisions I made to pop the subject out at the same time as showing some of the background information we recovered, using the previous steps. I will be doing a color editing tutorial in the future, but in the meantime check out our tutorial for giving your photos a retro feel. In the previous step we recovered the highlight and shadow details, but in the process, we flattened out the image. To fix those adjustments one way to add contrast and color adjustments to your photos, is to use the Tone Curve.

RecoveringBlownOutImages3

4. Color

Next, I played around the HSL (Hue/Saturation/Luminance), again just a peek at your own photos will ask for different settings.

RecoveringBlownOutImages4

5. Split Tone

Then I added more of a cool color to my shadows, using the Split Toning.

RecoveringBlownOutImages5

6. Final Steps

After getting the color  I was going for, I did some light spot removal and added some noise. I do have to mention that for the color work mentioned above, I did use a preset as a starting point and then tweaked it to fit my needs. If you want some presets to speed up your process or to just get you going in a direction, check out the presets available by Sleeklens.

7. Additional Tips

Like many things, when it comes to editing photos in Lightroom/Photoshop there are many ways to get to the final result. If you need to be more precise using tools like the adjustment brush or graduated filter, it will help you get results to specific areas and not have to worry about affecting the whole image.

RecoveringBlownOutImages6

8. Conclusion

Remember, the best way to set yourself up for success in your post processing is to have an idea of what you want your final image to look like. Shooting to capture all of the information in the raw file will help you later.