Tag: outdoor

Experimenting with backgrounds for portraits

Backgrounds have the spectacular ability to transform a seemingly uninteresting portrait into an eye-catching work of art

. Their strength lies in patterns, symmetry, and colors; elements often accidentally neglected in portraiture. Though it’s possible to take photos which possess both simplicity and outstanding beauty at the same time, experimenting with backgrounds will give you a chance to greatly boost your portfolio’s visual appearance. The more you practice noticing the uniqueness of backgrounds and the more you include them in your work, the quicker you’ll thrive both as a photographer and as an observer of the world.

Outdoor backgrounds

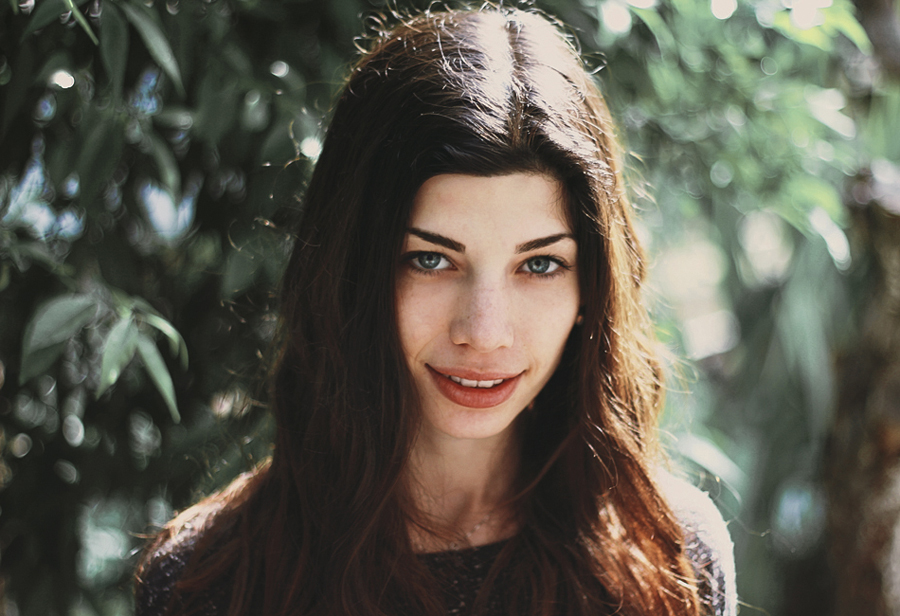
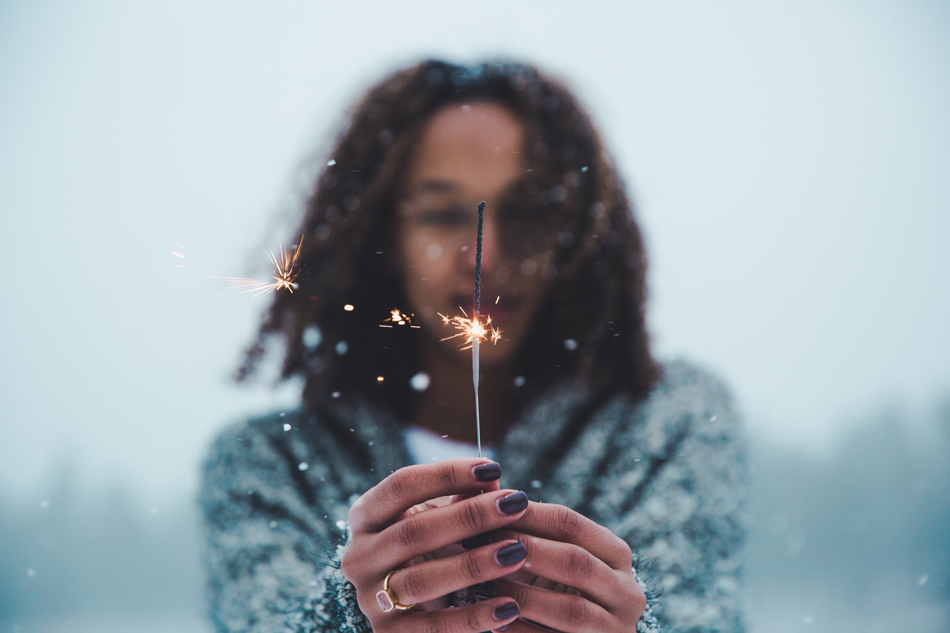
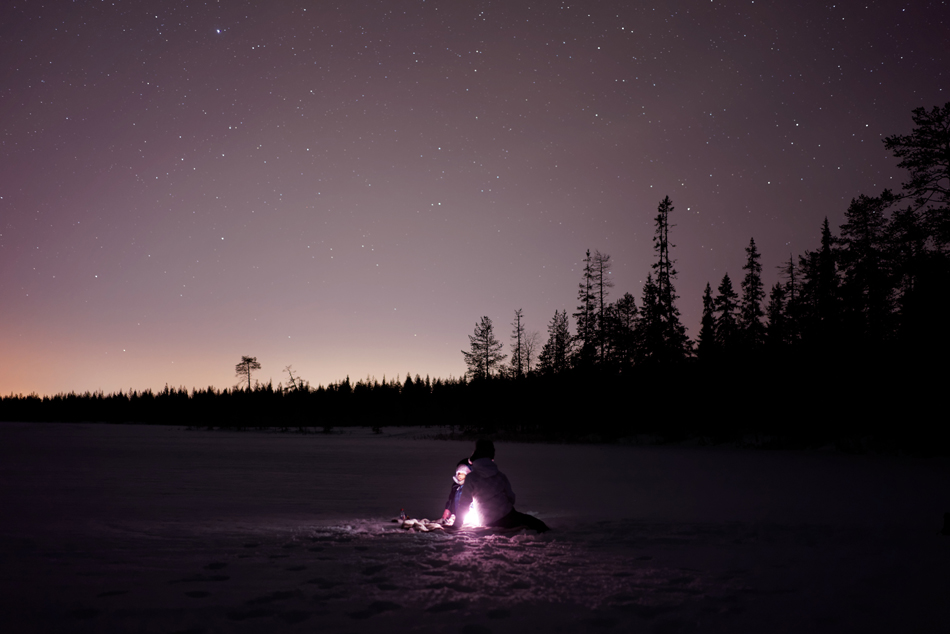
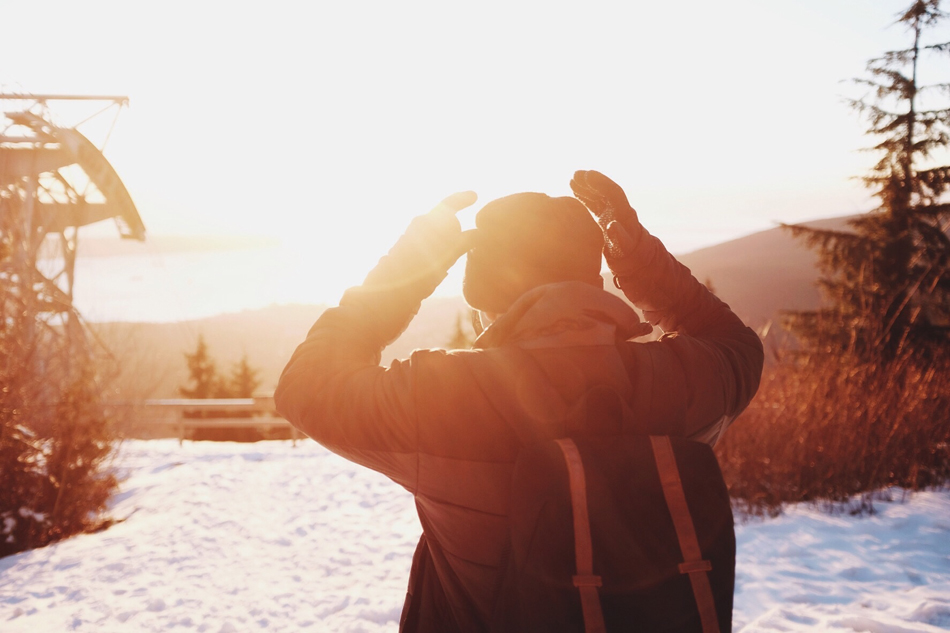
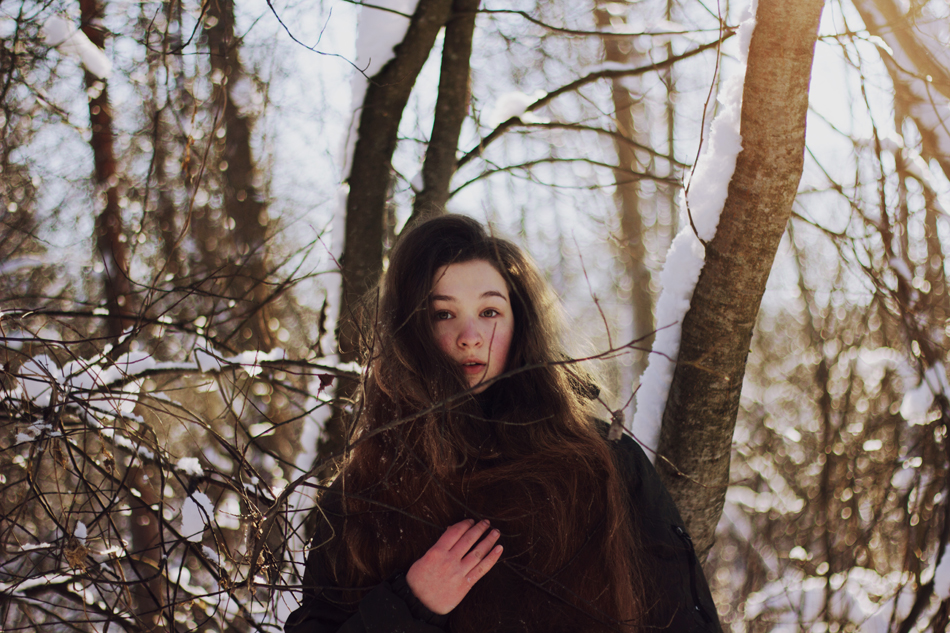
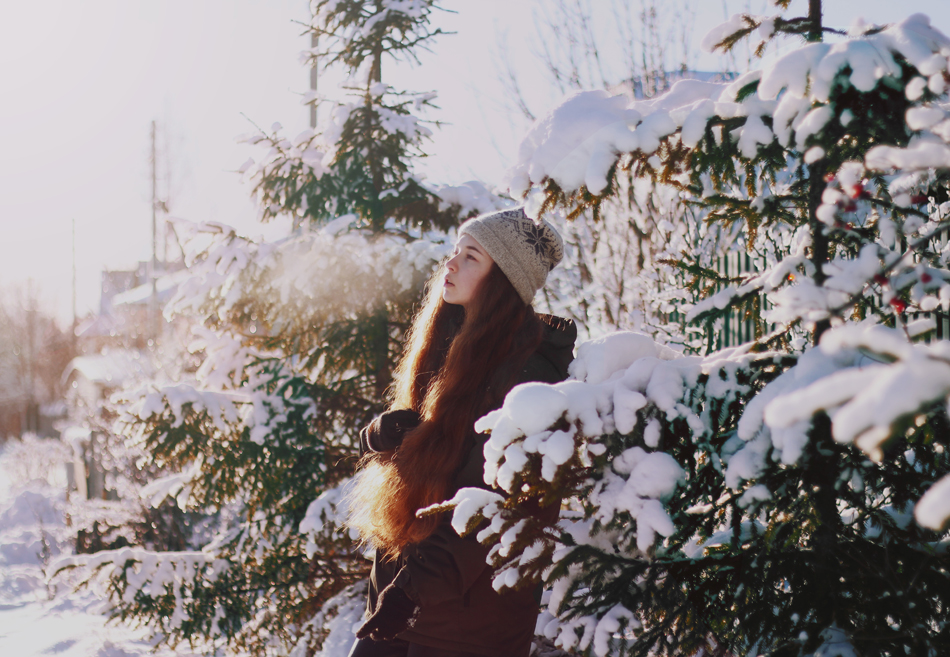
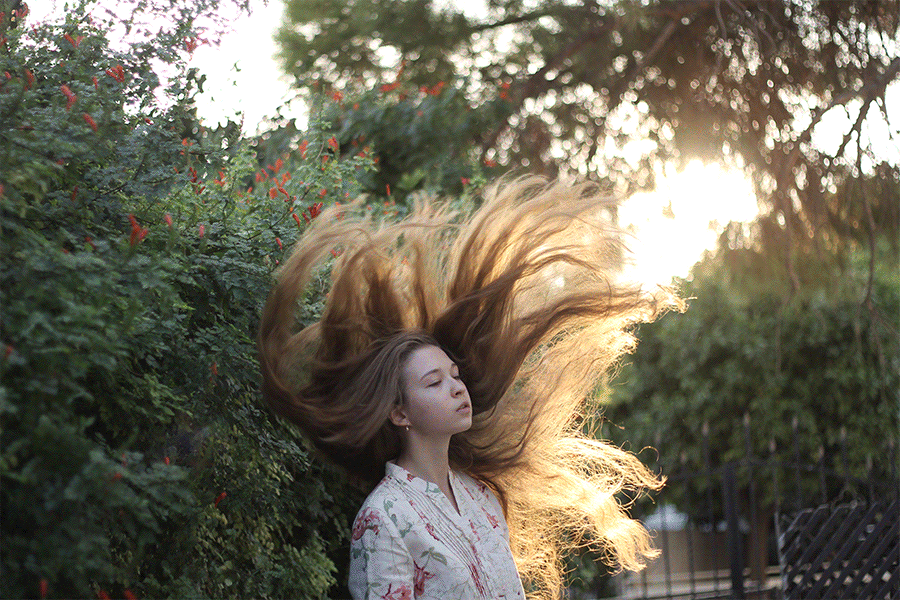
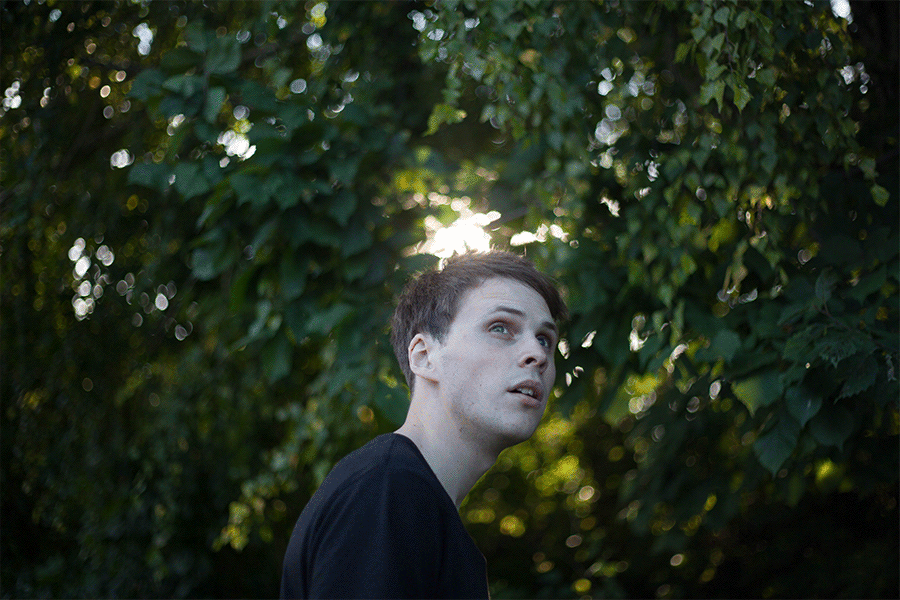
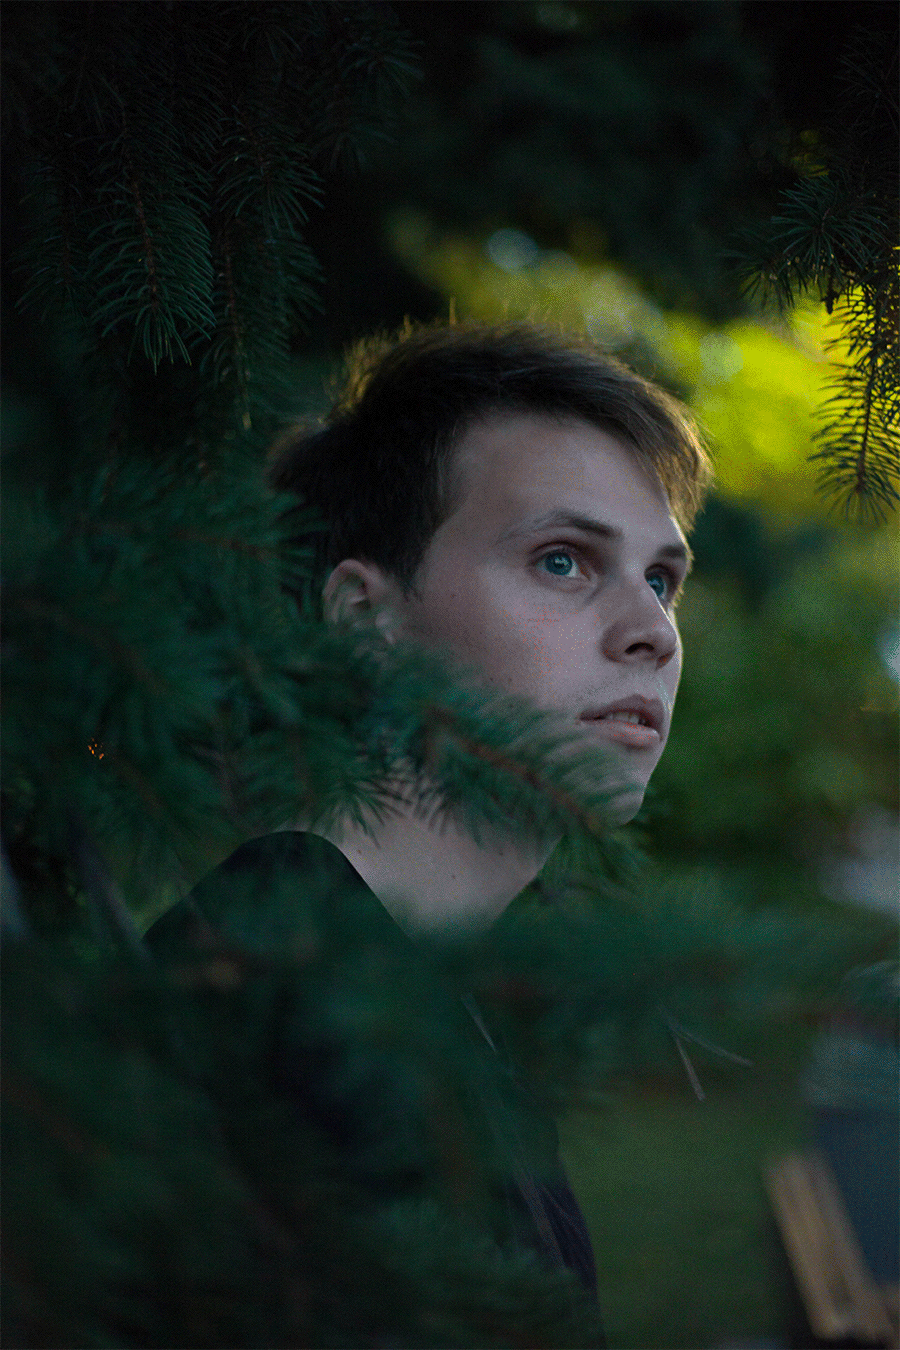
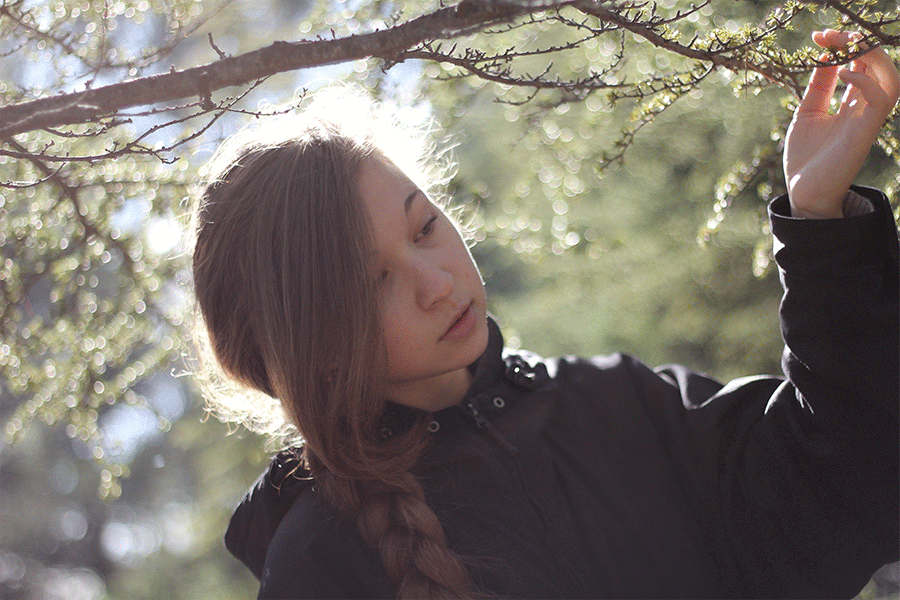
Making the most of your natural surroundings outdoors will sharpen your creative eye and provide you with endless photo opportunities. Nature, especially, is ideal for photos of any kind thanks to its wonderful patience – it’s always waiting to add something incredible to your images. Its endless presence and perpetual flawlessness give everyone a chance to make the most of its natural beauty. Even better, nature constantly changes, giving us new worlds to work with every season.

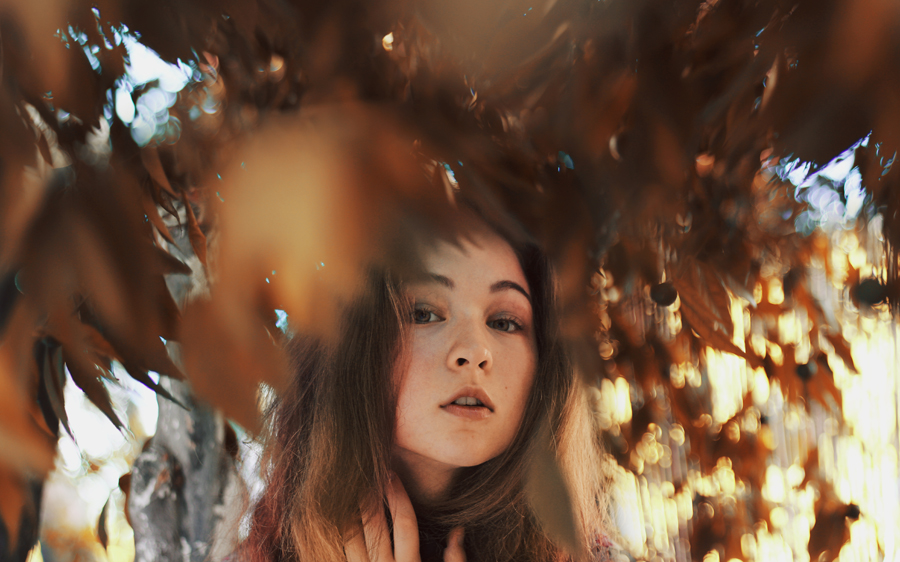
Flowers, bushes, leaves, branches, landscapes, etc., can all become important elements in your images if you take the time to include them in your compositions. Sharp mountains could complement your subject’s sharp facial features or, instead, serve as a dramatic contrast to the softness of their expressions. Blurred autumn leaves in the background could work in harmony with your subject’s autumnal clothing. When it comes to backgrounds and what they can contribute to any image, the possibilities are endless.

//

Nature could also be used to create powerful diptychs (a “collage” consisting of two images), stunning resources to use in future shoots, and anything you could possibly image. Similarly, cityscapes have the ability to transform your outdoor photos into truly impressive creations. Be it a crowded street or a lonely spot in a nearby park, anything can serve as an appealing background.

The key to great outdoor portrait backgrounds is making sure that your mind and eyes are constantly open, especially when you’re not taking photos. This doesn’t mean you should forcefully notice details around you all the time. Instead, find short, calm moments throughout your day when you can choose to pay attention to your surroundings instead of your phone. If you’re someone who loves adventures, spend a day looking for new and photo-worthy places. Take the time to find interesting locations, no matter how small, if you enjoy running. Eventually, these details will turn into amazing backgrounds for your images, ones that will make you proud of your work and eager to discover more.
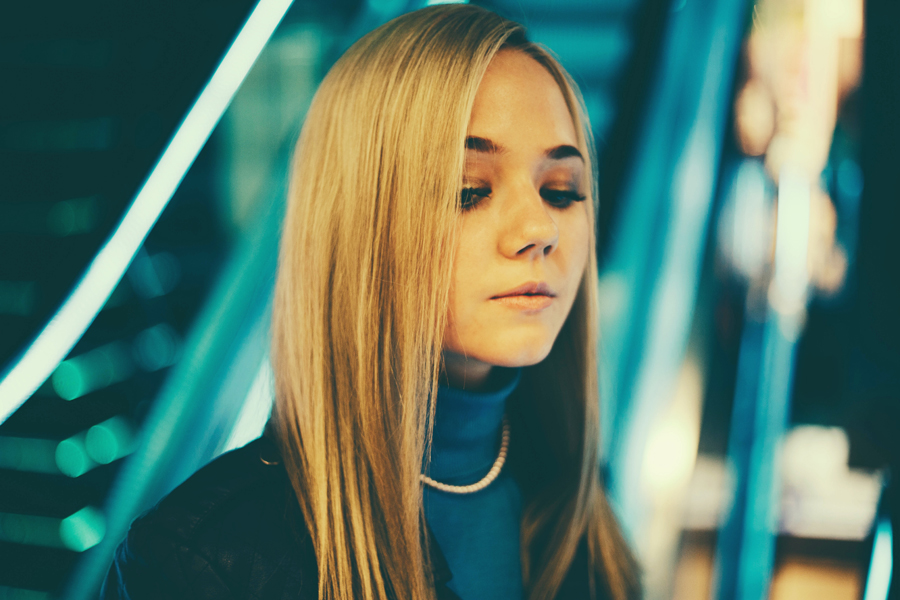
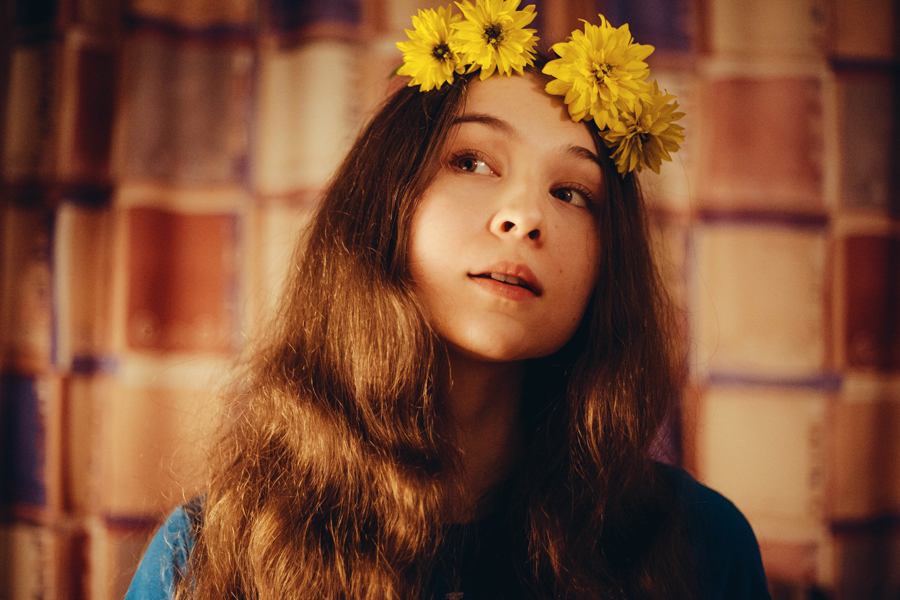
//

//

Indoor backgrounds

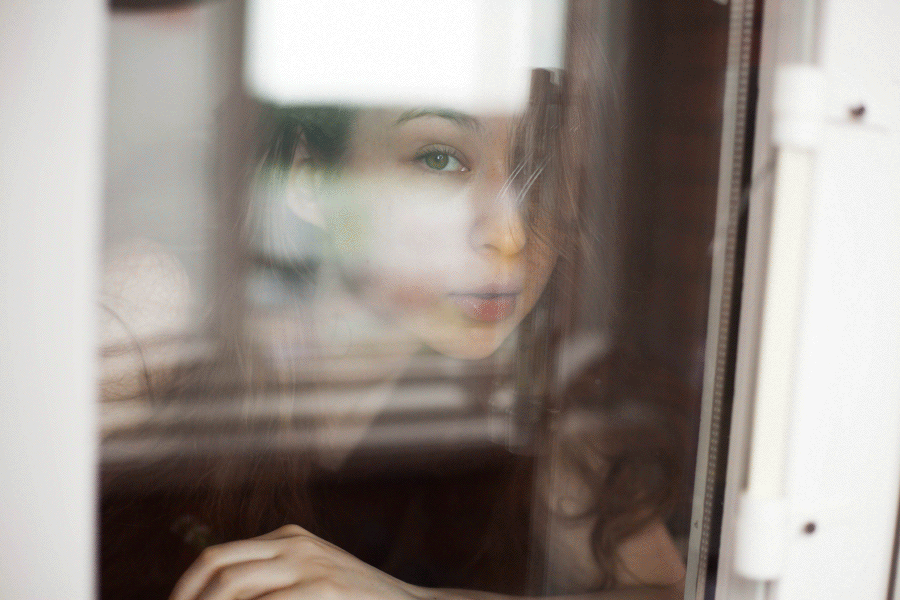
The colder months often force us to sit at home with our cameras, desperately attempting to come up with creative shooting methods. Many artists don’t own professional studio gear, so the notion of giving up on shooting indoors is an understandable one. However, simple indoor images can be enhanced with the help of “handmade” backgrounds, creations which will inevitably lead you to amazing photo opportunities and unique ideas.

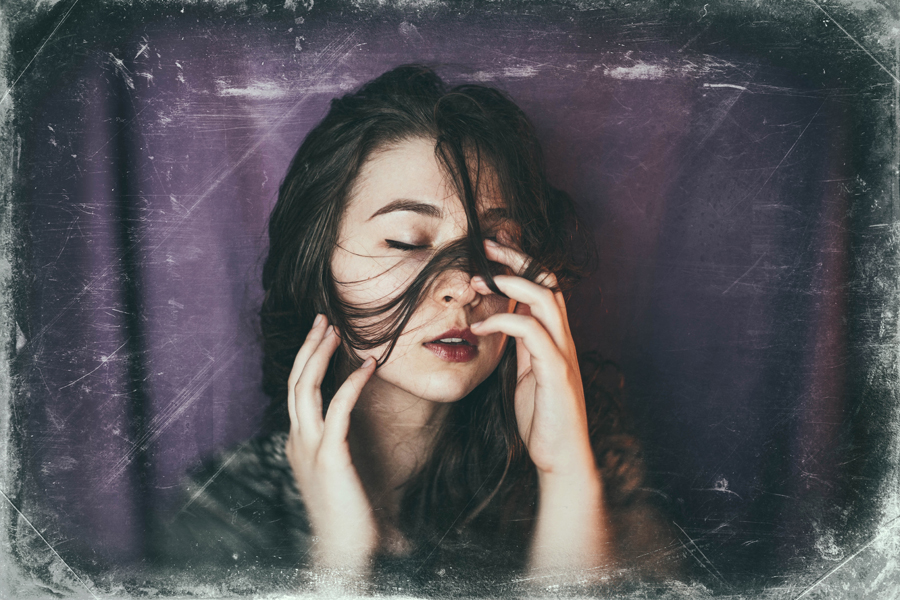
If painting is one of your interests, create your own backgrounds and temporarily hang them on a wall – your very own little studio. Alternatively, you can use other people’s paintings as striking additions to your portraits. If neither of these appeal to you, use wallpapers since they often consist of intricate, symmetrical patterns. Blankets and curtains are also fantastic backgrounds, especially ones that are beautifully decorated. You could even create your own forts out of them and no one would be able to tell. 😉

//

//

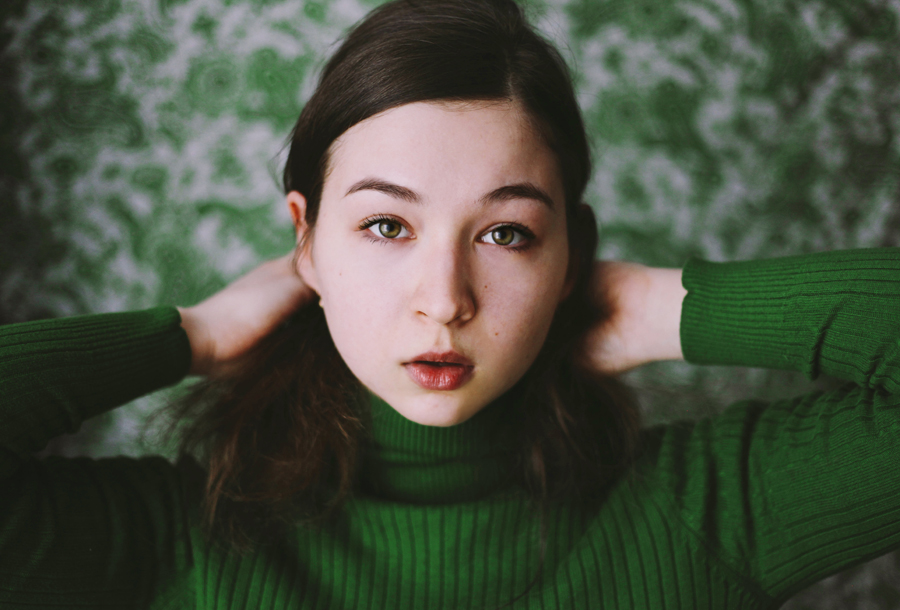
The beauty of shooting in your own home is having easy access to your wardrobe – experiment with various color combinations and find ones which enhance both your background and your subject’s attire. If you’re planning to shoot elsewhere, choose several outfits to use in case you come across an unusual (yet original) background. Use rental costumes and wigs to give your portfolio a fresh spark if you have the chance. If you’re shooting in a store, let artificial light be your background. Oftentimes, beautifully decorated light in shops will add an otherworldly atmosphere to your images. It’s also possible to create your own backgrounds in an editing program using other artists’ photo resources and overlays. Whatever you do, remember to use your backgrounds to the fullest and not let your fears bring you down.

No matter where you are or what time of day it is, remember to keep your mind and your eyes open. Before you know it, your images will be appreciated for their beautiful compositions and most importantly, for their eye-catching backgrounds.

Good luck!

//

//


How to take cozy outdoor portraits in the winter

Warmth is often associated with gorgeous beaches, palm trees, and the sea; freezing weather is the epitome of winter and indoor coziness. Thus, it’s natural to presume that these two elements never go hand in hand. However, snow casts a spell on the outside world, providing us with flawless and picturesque landscapes. Challenging as the winter months might be, this winter spell is as perfect for nature as it is for photographers. Using nature and your subject’s enthusiasm will allow you to naturally add warmth to your snowy portraits. Here are tips on how to achieve such warmth (and how to stay toasty in the process).

Bring something warm (and include it in your photos)

Preparing for a shoot in the winter can be a fun and cozy experience for you and the people you’re working with. Make sure you have comfortable and photogenic clothes which won’t let your subject freeze. The drinks and snacks you prepare could serve as pleasant photo additions, so remember to include them in your shots. Fun props like sparklers could also add both warm colors and a cheerful feel to your images. Take photos of everyone in your team, even if they’re assistants (or pets!). A happy team which feels accepted will warm any type of coldness, and this will inevitably add a heartwarming touch to your photographs. Make sure to take advantage of bright colors and happy smiles to create a stark contrast between your subject and their snowy surroundings.

//

//

A spontaneous behind-the-scenes snap of your subject sipping a cup of warm tea might find its way into your portfolio; a group shot of your friends staying warm and having a fun time could do the same. When it comes to inner warmth and great chemistry between you and your subjects, the time of year doesn’t matter. Remember to interact with your team, enjoy your snacks, and keep your hands and feet comfortable!

Prepare a warm location (be it a tent or a café)

When you scout for locations, make sure there’s a place within walking distance which could serve as a warm temporary refuge for you and your subject. If you’re in a deserted area, acquire a tent to stay toasty in during breaks. (If a tent isn’t an affordable option, grab a few blankets!) This will ensure that you remain toasty no matter how cruel the weather gets. Photographing your subject next to a tent, or in a café, with a stunningly snowy background will create the coziest photo atmosphere. Again, make the most of the spontaneity; if you plan to relax in a tent for a while, photograph each other in it. A tent + snow = perfect atmosphere + perfect photos.

//

Take advantage of the sun

If possible, shoot during a time when the sun is present. If you live in a place which rarely sees the light of day in the winter then use artificial light (even a torch would be enough) to create the illusion of sunshine. Either method will create interesting photo opportunities that’ll open and challenge your creative mind. The combination of (artificial) sunshine and snow will give your photos a welcoming atmosphere, a feeling of acceptance during the coldest of times.

//

Let your subject blend in with nature

Regardless of the season, nature infinitely inspires those who pay attention to it. It’s particularly attractive in the winter due to its graceful way of holding snow. Nature, when adorned with snow, is a force to be reckoned with. Not only do branches heavy with snow and perfectly white trees serve as fantastic backgrounds, but they make ideal subjects, too. Ask your subject to enjoy their surroundings and discuss what they like most. Photographing them next to the things they find most appealing will result in breathtaking images. Even visiting a park with your subject and asking them to interact with their surroundings will lead to great photo opportunities the results of which you’ll love.

Embracing spontaneity, making sure everyone is comfortable, and staying warm are the most important parts of a successful outdoor shoot in the winter. Be open to new ideas, make the most of the weather, and know that achieving warmth is possible no matter how cold it gets.

//

//

Good luck!

Make your photographs stand out with Strike A Pose Lightroom presets

An exquisite day beckons to you, asking you to leave your house and shoot outside. You gather your equipment, find a location that catches your eye, and photograph for as long as your free day allows. Confidently shooting in RAW mode, you aim to make use of every precious pixel. Contentment eventually fills your creative mind and you return home, eager to view your new works of art, your potential magnum opus. However, when you import your images into Lightroom, you notice flaws that weren’t noticeable in your camera. The tingles of excitement you had initially felt somewhere in the pit of your stomach no longer exist. Certain colors don’t stand out as dramatically as they did in your camera’s LCD screen and to make it worse, Lightroom reveals your desired effect for a few seconds before teasingly neutralizing the colors and dulling your images.

img_7538

This sudden transition is due to your camera company’s default settings. Chances are that Lightroom’s default settings don’t match that. As a result, any RAW file is slightly adjusted during the rendering process because of Lightroom’s different interpretation of the image data. Is Lightroom, then, attempting to sabotage your work or hinder your artistic progress? No – this matter is easily fixable. One of the benefits of shooting RAW is that the resulting images can be rendered in many ways without being destroyed. Thus, altering photos is easy.

Manually adjusting the contrast and temperature of your image can prove to be effective. However, there’s an easier and far more creative method to get the best results possible. Dreary photos can be fixed easily with a handy tool called a Lightroom preset, a color enhancer which automatically makes an image pop. In most cases, such presets can be adjusted to fit the photographer’s taste and needs (i.e. fixing clarity, saturation, temperature, etc.). Once you obtain a preset, you can use it on several images at once, making the editing process quick and straightforward. If finding the perfect colour combination isn’t within your skill set, you can work with presets to make the most of your images.

img_3814
Edited with “All In One – Sunset Portrait 3”

Sleeklens offers a variety of mesmerizing Lightroom presets for any kind of shoot. The Strike A Pose Lightroom presets are a diverse collection of instant, adjustable portrait enhancers. From richly golden tones to cooler shades, this collection will suit any artist’s taste. Here are a few previews and tips to make the best of these resources.

1. All In One Presets

Strike A Poses’ All In One Presets are instant photo boosters. If you wish to transform your image into something you’ll be proud to share with others, then experiment with these. Hovering over them will allow you to see a preview of what your image will look like. Allow yourself to fearlessly experiment with each one. You never know when a new color combination will lead you to a more experienced version of your artistic self. Remember that presets are instant photo enhancers, not instant photo “perfectors.” Consider them the foundation of your image. One that has the intention of being adjusted and used based on your taste. The more adjustments you make, the closer you’ll get to discovering your own style.

(If, however, the all in one presets don’t strike your fancy, check out the next section for an alternative editing method.)

img_3560_29285232553_o
Edited with “All In One – Golden Shadow”
screenshot-2017-01-02-18-27-17
You can do almost anything with your image – presets just act as helpful color guides. Don’t limit yourself to the “Basic” section. Play with color tones, hues, and sharpness. Make the most of Lightroom’s practical features.


screenshot-2017-01-02-18-11-24
The color section is ideal for playing with hues and saturation.
img_2952_29286324013_o
Edited with “All In One – Beach Glow”

2. Base Presets

The All In One presets are quick fixes, but the second part of the collection has a far more controlled environment for photographers to enjoy.You can neatly place base layers on top of each other to create a noteworthy image. Just imagine the many layers of a cake. The chance to adjust each section as you move from one step to another creates a more open environment for you as a photographer. There are 6 bases in total, all of which contain assorted subcategories; combining these in any way or order will result in outstanding photographs.

img_7538
The editing process for this was:
1: Glow Baby Glow
2: Brighten
3: Reduce yellows
4: Golden Glow
5: High contrast
6: Black dreamy

When an exquisite day calls you to leave your house and shoot again, you don’t have to worry about the editing process. Having confidence in your photos will give you more room to create and grow. This will result in a happier, freer, and more developed photography life.

Good luck!

img_0027_28022987216_o

not

How to make Extreme Macro Photos

Today we want to explain to you how extreme macros are made.

Macro photography is one of the most interesting fields in photography, not only because it’s giving you an insight of the small things we can’t see, also because you will develop a knowledge of how important camera settings are when you are working with low light conditions or moving subjects such as insects, in which the details can’t be seen with the naked eye.

Especially insects offer spectacular colors and structures and many insects actually can be found easily everywhere. The best time to photograph insects is in the morning when the temperatures are low and the insects are still asleep and less active, so they will not move and you can make the best possible photo of that insect. After a cold night in the summer, you will find thousands of dew-drops on the insects, this will add a nice extra to your macro shot. Furthermore, the light in the morning is probably the best light you can have during the whole day.

Fliege Tautropfen 3

If you want to achieve some great results, there are some essential things you will need for sure:

  • Tripod
  • DSLR (with Image Stabilizer)
  • A Macro Lens (different types of lenses for extreme macros are described down under)
  • Remote Shutter Release (to avoid camera shake caused by the exposure)
  • Focus Rack/Slider (slider allows you to slide forward/back to take a lot of pictures at different focus points, which will be stacked afterward in Photoshop)

Optional

:

  • Angle Finder (makes a low-position shooting easier)
  • Diffusor (to get the best light and the most out of your macro shot)
  • Flash (use a macro ring flash or a standard flash combined with a small softbox)

am-laufsteg-bf42861e-ef95-42dc-b218-f2b12b07c2fe

For increasing magnification to get extreme macro shots, there are some options:

Canon Mp-E

If you are using a Canon camera, the best lens for extreme macros is the Canon “Mp-E” Lens. It is extremely sharp and its maximum aperture is f/2.8, so it’s perfect for low light conditions and to receive a smooth & clear background. The only disadvantage is that this lens is pretty expensive, as it costs around $1,000, but quality has its price as we know.
More info about this special lens

Macro Snap-On Lens Adapter

Snap-On Lenses are used as an adapter which can be mounted on your actual macro lens. Using a Snap-On Lens such as the “Raynox DCR-250” will be the right choice if you prefer low budget macro photography. It will for sure produce rich and razor sharp macro images. Furthermore, it has a low weight, small enough to fit in any photo bag and works perfectly with any macro lens.
More info about the Raynox DCR-250

Extension Tubes

Extension Tubes goes in between macro lens and camera. The more tubes you use your camera and lens, the closer you will get to your object. A disadvantage of using extension tubes is, that you will not be able to focus automatically, but focusing automatically isn’t advisable anyway if you want to get a macro photo.

Reversed Lens

This is probably the easiest and most inexpensive way to get an extreme macro shot. The reversed lens technique is what the name says: You just mount your lens backward on your camera. All you need is to get an adapter to mount your lens on your camera body.
A 50mm standard lens will become a great macro lens and will let you explore all the details you want to photograph.
If you want to learn more about the reverse lens technique check out following Youtube Link.

Kleinlibelle Frontal

One important note when doing macro photos is, that I would not recommend using autofocus, this will not work if you want to get an extreme macro, making extreme macros is all about manual focus. Especially live-view will help you to get the right focus point. If you want to photograph insects, one thing that has to be in focus must be the eyes.
So, make sure you get the right equipment before you start shooting small things and if you decide to photograph insects, bring along much patience, as successful shots sometimes depend on a great deal of patience.


We hope you enjoyed this article!

Recovering blown out images in Lightroom

Fall can be a great time to capture many different looks, because of the constant change in weather and colors. On the day of the photo, I wanted to be able to move around quickly and did not want to lug around a bunch of equipment that would get wet and dirty, so all that I used was my camera and tripod. Only using natural light saved me from having to bring extra gear, but also presented a problem. On this day it was very rainy, misty and foggy which gives me the atmosphere I am looking for, but it often times looks washed out in the raw file. If you have ever shot in fog, you know that it can be hard to capture enough detail in the distance and keep your subject properly exposed. All of the moisture in the air catches the light and often times gives you blown out the part in the image.

In this tutorial I am going to walk you through what you need to know to be able to recover an image in Lightroom, that may be blown out.

1. Temperature

This is what the RAW file looks like straight from the camera. The only difference I made was turning down the temperature slightly, as I had my original at around 5500. Now you may be wondering, how do you know where to set the temperature and in reality I don’t. All of these adjustments are not in an exact order, there is a lot of jumping back and forth, from section to section and tweaking until you find what you like. I turned down the temperature knowing that I wanted a cooler and more moody feeling to the image. I wanted to bring out the cold and lonely feeling of someone in a world of their own.

Before we go to the next step take a look at the Histogram and notice the lack of detail in the sky portion of my image.

RecoveringBlownOutImages1

2. Exposure

This is where we are going to make the adjustments to be able to recover some of that sky. I mentioned earlier that shooting in this kind of weather becomes hard to expose properly because the dynamic range can be so vast. When I was shooting, my objective was to set my camera so that I could get as much information in one exposure as possible. There were other ways I could have set the camera (like boosting the ISO) to capture more info, but I kept getting the little island blown out, so I stuck with the settings you see (right under the histogram).

I boosted the shadows/blacks and brought down the highlights/whites. I normally would not do such harsh adjustments, but I needed to in this situation, to achieve my end result. If you compare the histogram of the 1st image with the one below, you will notice that not as much of the right side (white/highlights) of the histogram is clipping.

We can now see that there are some clouds in the sky (slight as they may be) and it is not all white, with no information. This is not enough, though, we have information in the sky, but the image looks bland and the color still does not fit the mood we set out to create originally. The next few steps will be more about editing the color.

RecoveringBlownOutImages2

3. Color

Steps 3,4 and 5 are a peek into some of the color editing decisions I made to pop the subject out at the same time as showing some of the background information we recovered, using the previous steps. I will be doing a color editing tutorial in the future, but in the meantime check out our tutorial for giving your photos a retro feel. In the previous step we recovered the highlight and shadow details, but in the process, we flattened out the image. To fix those adjustments one way to add contrast and color adjustments to your photos, is to use the Tone Curve.

RecoveringBlownOutImages3

4. Color

Next, I played around the HSL (Hue/Saturation/Luminance), again just a peek at your own photos will ask for different settings.

RecoveringBlownOutImages4

5. Split Tone

Then I added more of a cool color to my shadows, using the Split Toning.

RecoveringBlownOutImages5

6. Final Steps

After getting the color  I was going for, I did some light spot removal and added some noise. I do have to mention that for the color work mentioned above, I did use a preset as a starting point and then tweaked it to fit my needs. If you want some presets to speed up your process or to just get you going in a direction, check out the presets available by Sleeklens.

7. Additional Tips

Like many things, when it comes to editing photos in Lightroom/Photoshop there are many ways to get to the final result. If you need to be more precise using tools like the adjustment brush or graduated filter, it will help you get results to specific areas and not have to worry about affecting the whole image.

RecoveringBlownOutImages6

8. Conclusion

Remember, the best way to set yourself up for success in your post processing is to have an idea of what you want your final image to look like. Shooting to capture all of the information in the raw file will help you later.