Make your photographs stand out with Strike A Pose Lightroom presetswww.sleeklens.com
An exquisite day beckons to you, asking you to leave your house and shoot outside. You gather your equipment, find a location that catches your eye, and photograph for as long as your free day allows. Confidently shooting in RAW mode, you aim to make use of every precious pixel. Contentment eventually fills your creative mind and you return home, eager to view your new works of art, your potential magnum opus. However, when you import your images into Lightroom, you notice flaws that weren’t noticeable in your camera. The tingles of excitement you had initially felt somewhere in the pit of your stomach no longer exist. Certain colors don’t stand out as dramatically as they did in your camera’s LCD screen and to make it worse, Lightroom reveals your desired effect for a few seconds before teasingly neutralizing the colors and dulling your images.
This sudden transition is due to your camera company’s default settings. Chances are that Lightroom’s default settings don’t match that. As a result, any RAW file is slightly adjusted during the rendering process because of Lightroom’s different interpretation of the image data. Is Lightroom, then, attempting to sabotage your work or hinder your artistic progress? No – this matter is easily fixable. One of the benefits of shooting RAW is that the resulting images can be rendered in many ways without being destroyed. Thus, altering photos is easy.
Manually adjusting the contrast and temperature of your image can prove to be effective. However, there’s an easier and far more creative method to get the best results possible. Dreary photos can be fixed easily with a handy tool called a Lightroom preset, a color enhancer which automatically makes an image pop. In most cases, such presets can be adjusted to fit the photographer’s taste and needs (i.e. fixing clarity, saturation, temperature, etc.). Once you obtain a preset, you can use it on several images at once, making the editing process quick and straightforward. If finding the perfect colour combination isn’t within your skill set, you can work with presets to make the most of your images.
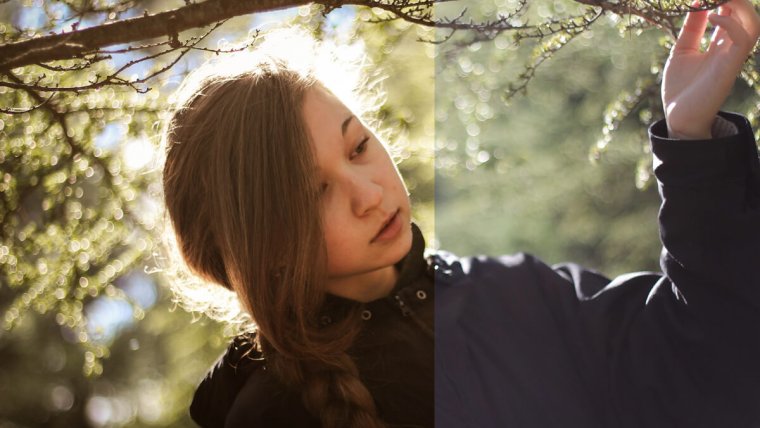
Edited with “All In One – Sunset Portrait 3”
Sleeklens offers a variety of mesmerizing Lightroom presets for any kind of shoot. The Strike A Pose Lightroom presets are a diverse collection of instant, adjustable portrait enhancers. From richly golden tones to cooler shades, this collection will suit any artist’s taste. Here are a few previews and tips to make the best of these resources.
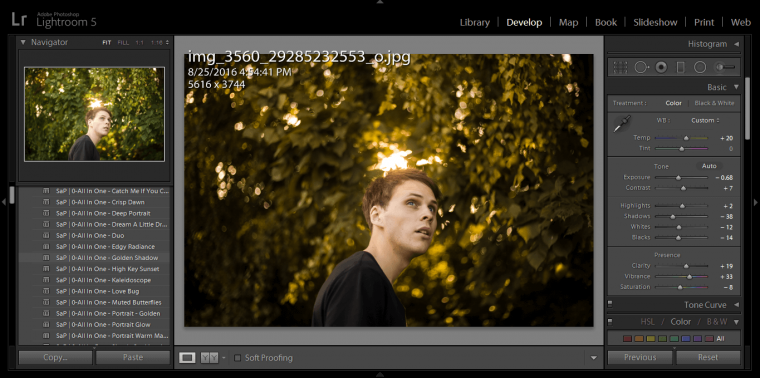
1. All In One Presets
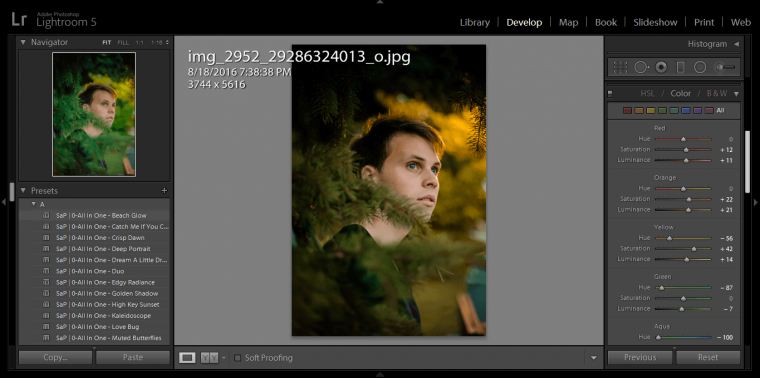
Strike A Poses’ All In One Presets are instant photo boosters. If you wish to transform your image into something you’ll be proud to share with others, then experiment with these. Hovering over them will allow you to see a preview of what your image will look like. Allow yourself to fearlessly experiment with each one. You never know when a new color combination will lead you to a more experienced version of your artistic self. Remember that presets are instant photo enhancers, not instant photo “perfectors.” Consider them the foundation of your image. One that has the intention of being adjusted and used based on your taste. The more adjustments you make, the closer you’ll get to discovering your own style.
(If, however, the all in one presets don’t strike your fancy, check out the next section for an alternative editing method.)
Edited with “All In One – Golden Shadow”You can do almost anything with your image – presets just act as helpful color guides. Don’t limit yourself to the “Basic” section. Play with color tones, hues, and sharpness. Make the most of Lightroom’s practical features.
The color section is ideal for playing with hues and saturation.Edited with “All In One – Beach Glow”
2. Base Presets
The All In One presets are quick fixes, but the second part of the collection has a far more controlled environment for photographers to enjoy.You can neatly place base layers on top of each other to create a noteworthy image. Just imagine the many layers of a cake. The chance to adjust each section as you move from one step to another creates a more open environment for you as a photographer. There are 6 bases in total, all of which contain assorted subcategories; combining these in any way or order will result in outstanding photographs.
The editing process for this was: 1: Glow Baby Glow 2: Brighten 3: Reduce yellows 4: Golden Glow 5: High contrast 6: Black dreamy
When an exquisite day calls you to leave your house and shoot again, you don’t have to worry about the editing process. Having confidence in your photos will give you more room to create and grow. This will result in a happier, freer, and more developed photography life.
I'm an admirer of nature, a photographer, and a curious reader. Writing about photography and helping others improve is a growing passion of mine. My constant wish is to inspire others to be creatively fearless and endlessly curious.
"Always dream bigger is my advice to you, because you can have whatever your heart desires"
- Ashley Graham


 Facebook
 Google +
Comments (0)
There are no comments yet.