Tips for low light photography without flashwww.sleeklens.com
Have you ever found yourself in a situation where you had to shoot low light photography without flash? It happened to me in some events, one of them was a night wedding in the countryside.
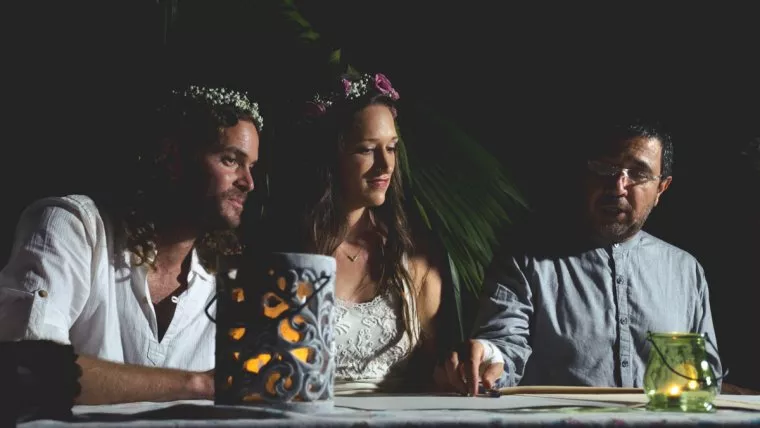
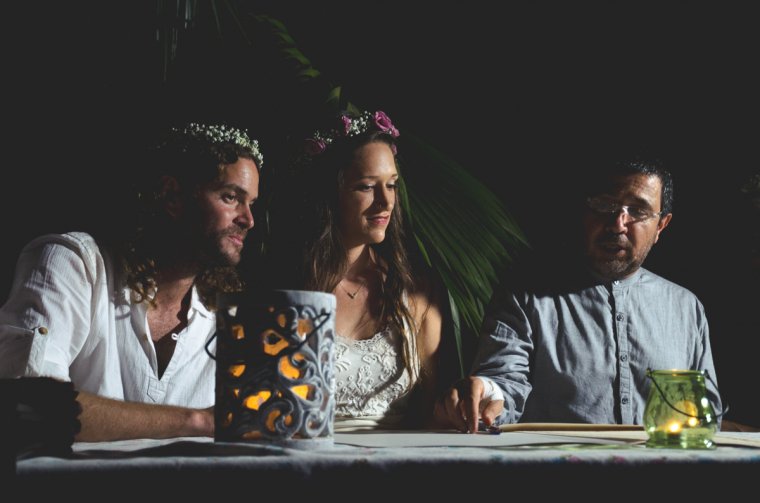
Weddings at night are beautiful…but they are difficult to shoot!
These challenging situations of having to shoot low light photography without flash usually happen at events when the flash is annoying some of the participants and guests or when babies are involved. On those occasions, I feel as if someone tied my arm behind my back (only one of them, the other is holding the camera). With these limitations, I have to change the way I shoot photos. I am happy to share with you a few things you can do if you find yourself in situations of this kind.
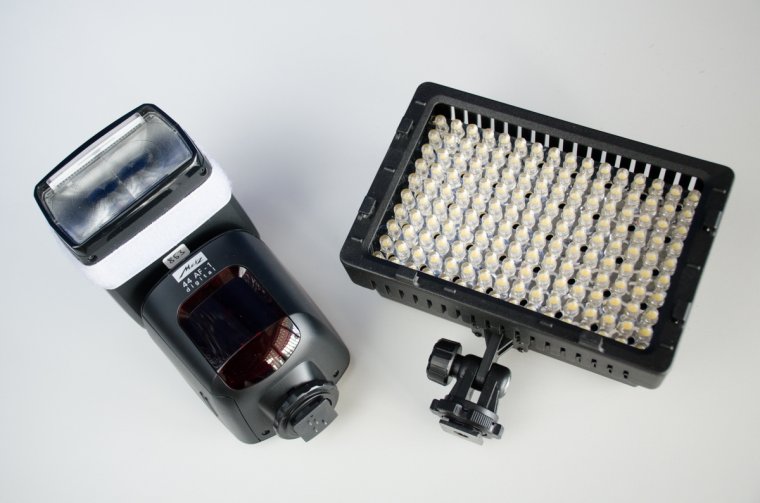
It can be frustrating not being able to use external flashes (on the left) or LED lighting devices (on the right). Take these situations as challenges that will make you grow as a photographer (yes, optimism is a good approach here).
Use a wide aperture
The first thing you can try to nail that low light photography without flash is to open your aperture wide. If you know about your predicament in advance, you should choose a lens with a wide aperture that you are comfortable to work with (keep in mind that not all wide aperture lenses will be good for you, there is a tradeoff and you need to compromise over things). When you work with this low f stops (wide apertures), you should keep in mind that they are usually making the background blurry. This is great for isolating your subject and making it pop in the photo, however, if you forget about this, you might lose important parts of the image that you wanted sharp. Just try to remember and take care.
This photo was taken with an aperture of f1.8. As you can see, the depth of field was so narrow that the only thing in focus is the megaphone of the little guy on the right.
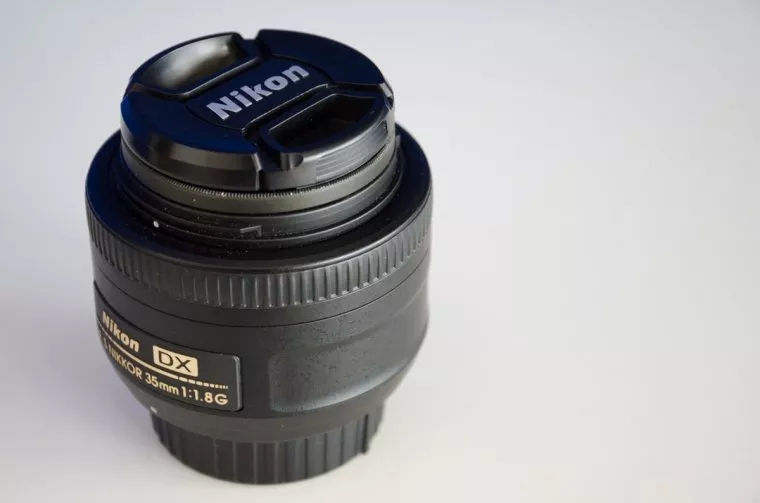
Although fast lenses (the ones that can get really wide apertures) are great for low light photography without flash, they are also quite expensive. I have just one of them, a 35mm. This is a great lens and it is affordable. It is pretty good for newborn photography, when you get close to your subject and you usually have time to react or even set a little the scene. However, for situations where you have to react fast I think using a zoom lens can be more useful. The problem is that those are much more expensive! I have never been able to get one. If you are in my situation, keep reading because I developed strategies which solve low light situations without getting expensive equipment.
This is my only lens that can get to f 1.8. It is a 35mm and I love it!!
Increase the ISO…and fix it later in post processing (Lightroom)
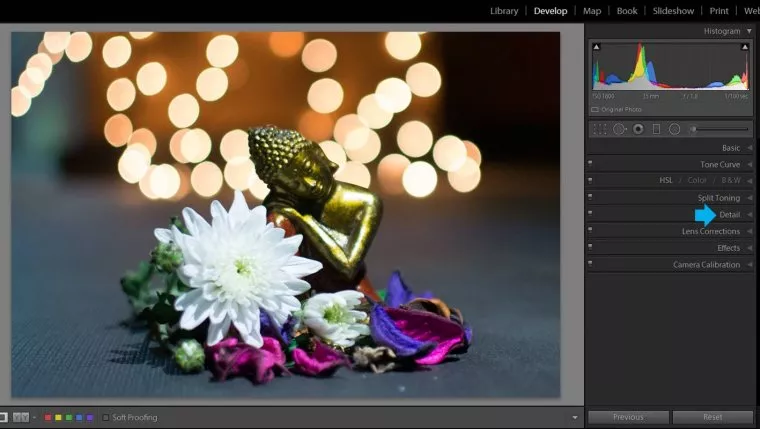
I am not the biggest fan of using high ISO values because the images get noisy. But extreme situations like low light photography without flash call for extreme measures! A high ISO value of 800 or higher will be helpful in this case. It is always good to know that you can reduce the noise in post-processing. And good news: using Lightroom for dealing with noise is easy. In the Develop module, under the Detail section, you will find several interesting slides dedicated to Noise reduction: Luminance and Color Noise slides.
The Luminance Noise is the general noise caused by the brightness of the image, Color Noise is the color dots you see when you zoom in on an image that you shoot at high ISO. You can see them easier in the shadows of an image. Before starting to work on reducing the noise it is better to zoom in on the image by clicking the 1:1 in the Navigator and selecting on it the area you want to focus in.
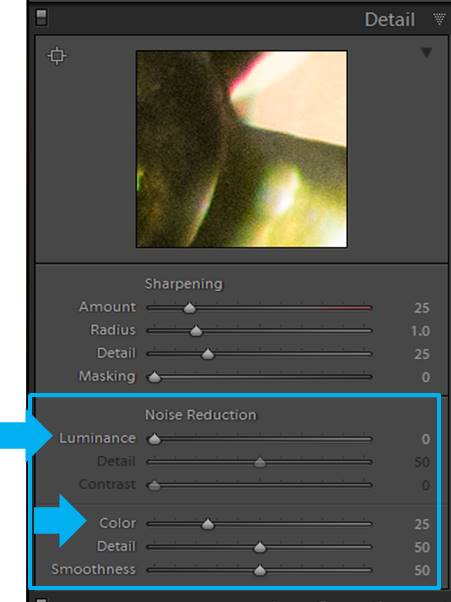
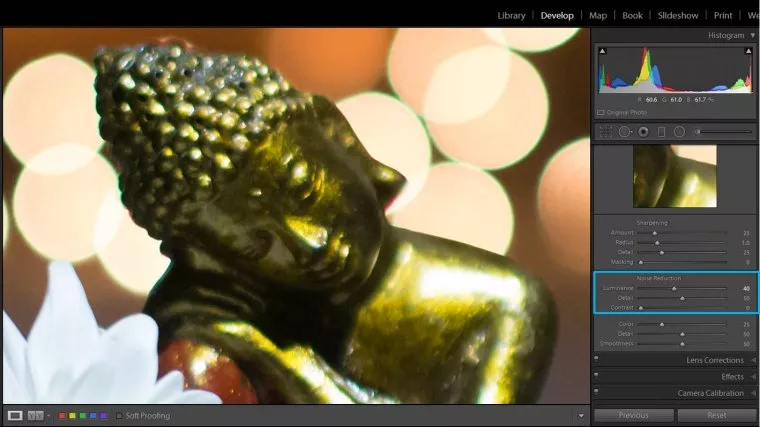
First thing to do is to reduce the Luminance Noise. A good value will be 30-40.
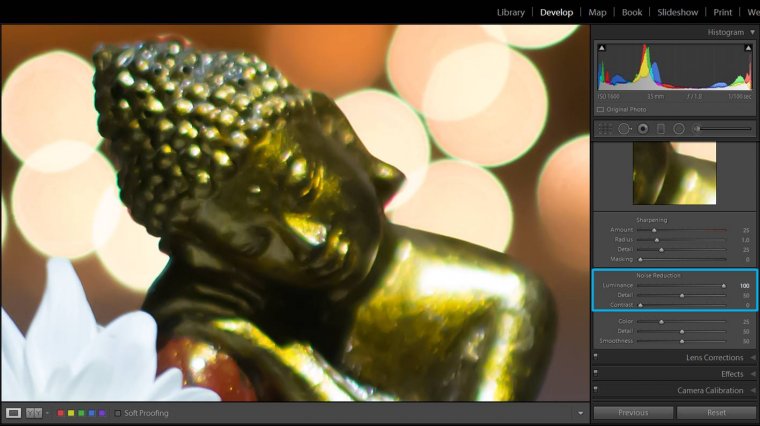
These are the original image settings.By setting the Luminance Noise Reduction slider to a value of 40, we managed to reduce the noise a lot while keeping details in the image.
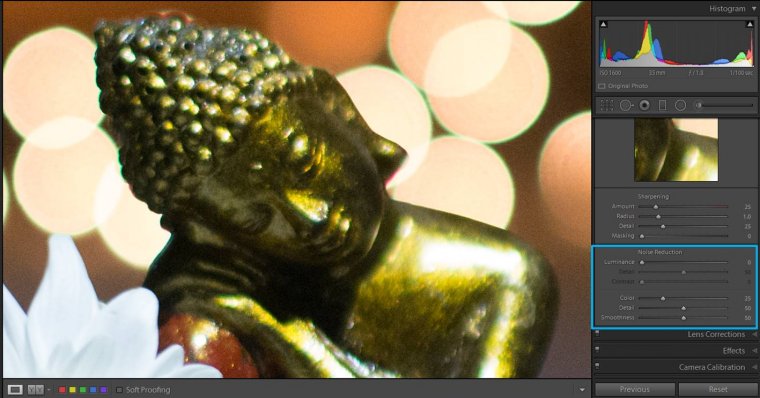
Keep in mind that when you decrease noises, you also lose definition. Everything has a price! Photos can get a painted look, so you aim to find the sweet spot where you reduce enough noise but still keep enough detail.
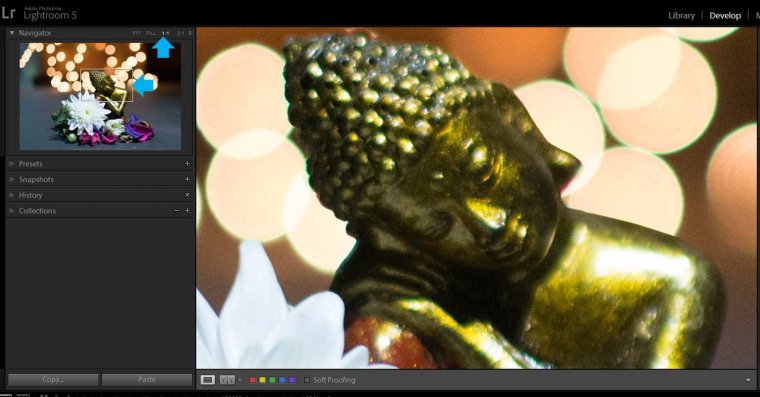
This paint look produced by a too high Luminance Noise Reduction makes the Buddha figure look unnatural.
Once you are done with the Luminance Noise Reduction slider, you can adjust a little bringing some detail with the Detail Slide. Increasing the detail brings noise back though. You can also increase the contrast a little, but this one also brings noise back. In summary, The Luminance Noise slider is the one that you have to use to do the first Noise reduction and then you can tune it finer with the Detail and Contrast sliders. It might be tricky at the beginning, but it gets better with some practice.
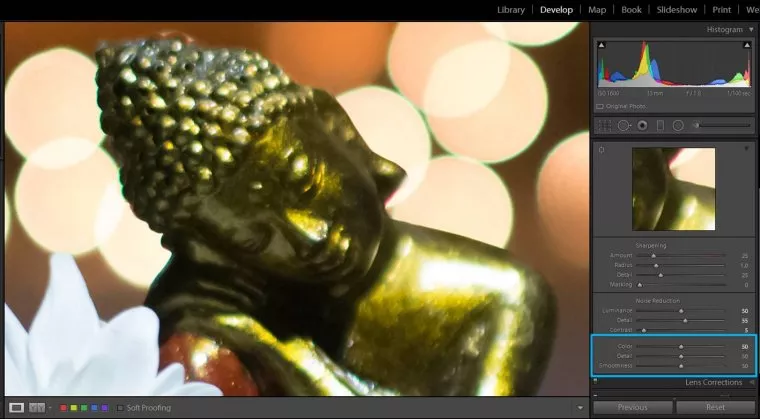
Now you need to do the same with the Color Noise Reduction Slide. The default value is 25. If you don´t have a lot of noise, this value might be good, but if your image has a really high ISO value, you will need to increase it quite a lot. Try 50 and adjust accordingly. Then you can fine-tune it by increasing the detail, but remember that this will bring back the noise. You can also play a little with the Smoothness slide. I usually leave Detail and Smoothness on their default values.
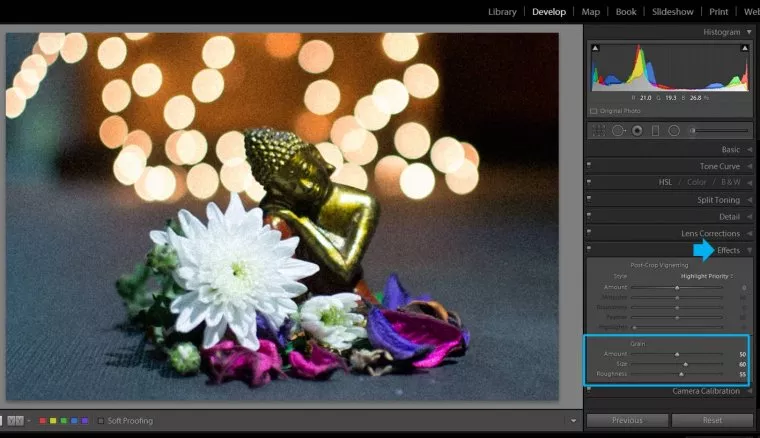
And finally, if you can’t beat the enemy, join him. Add a grainy effect. It might seem like you were looking for it! The trick here is to make the photo look clearly grainy, to let the viewers see that this effect is intentional.
You can add a grain effect by increasing the amount of grain and its size in the “Effects” section (Develop mode).
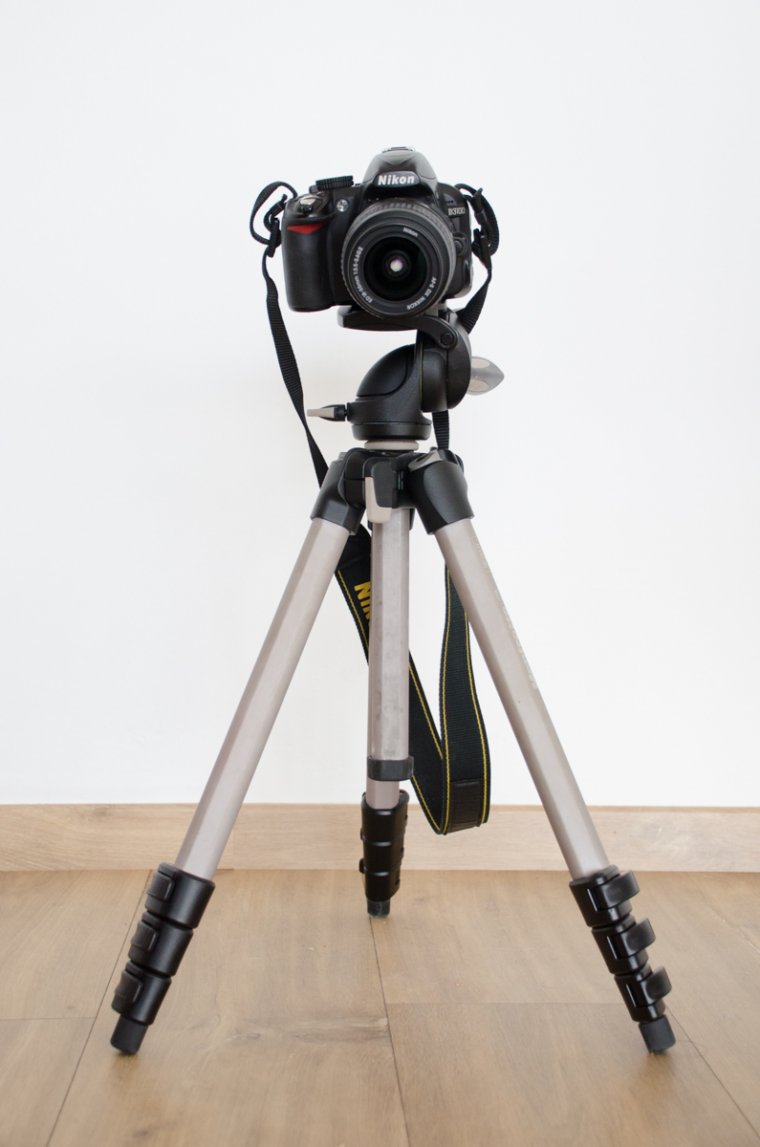
Use a tripod or alternative stabilization methods
To increase the amount of light going into your sensor, you can also decrease the shutter speed. There is a limit where the speed is so low that the slight movements of your hands cause the photo to be smudged and blurry. This limit depends on the lens you use (more zoom, more evident is the shaking) as well as your personal abilities. Usually, the limit is around 1/80 sec. You can avoid it by simply using a tripod.
I find tripods really useful in low-light situation when you can stick to a spot and take photos of objects or places. However, if you need to be mobile, or you are in a busy event, the tripod can be uncomfortable and sometimes even impossible to use. In that case, you can use alternative stabilization methods, that might not be so efficient, but they can solve your situation. If you have money to spare, you can buy equipment such as monopods, or wearable chassis. Alternatively, you can use any surface you find to stabilize your camera (like tables, closets, chairs…anything can work). You can lean on a wall and shoot with the elbows tight to your sides to avoid shaking. You can also sit or lean forward with your elbows on your knees while shooting.
If you still get people blurry because they move all the time, you can try to ask them to freeze their movement for longer than usual (“excuse me, could you just not move for three seconds”). Try to make it sound fun and people will usually be fine with it.
I hope these tricks will help you in low light situations. Do you have any other strategies to handle it? Please, share it with us. We are always happy to learn new things. Have a happy shooting!
I am a biologist and a self-taught photographer based in Barcelona (Catalonia). Buddhist philosophy has a strong influence on me: I have a deep appreciation to life and I give a huge value to the little things that makes our days happier. I became a passionate about photography when I got my first camera and I understood that photography allows me to express my way of approaching life. I love learning so I am always willing to trying new things. These days I am shooting mostly nature and portraits.


 Facebook
 Google +
Comments (0)
There are no comments yet.