Tag: protection

How to Photograph Water – Water Photography Tips

Water is a wonderful part of nature that everyone can appreciate looking at. Whether you want to photograph a river, an ocean, a lake, or a waterfall you’ll need to know how to set up your camera for the perfect shot. Water photography is a tricky subject. However, by changing a few camera settings, you can get an excellent shot. Once you know how to set up the shot beforehand and properly change your settings for the type of picture you want, you’ll be a water-shooting pro in no time.

Water Photography Tip #1: Protecting Your Camera

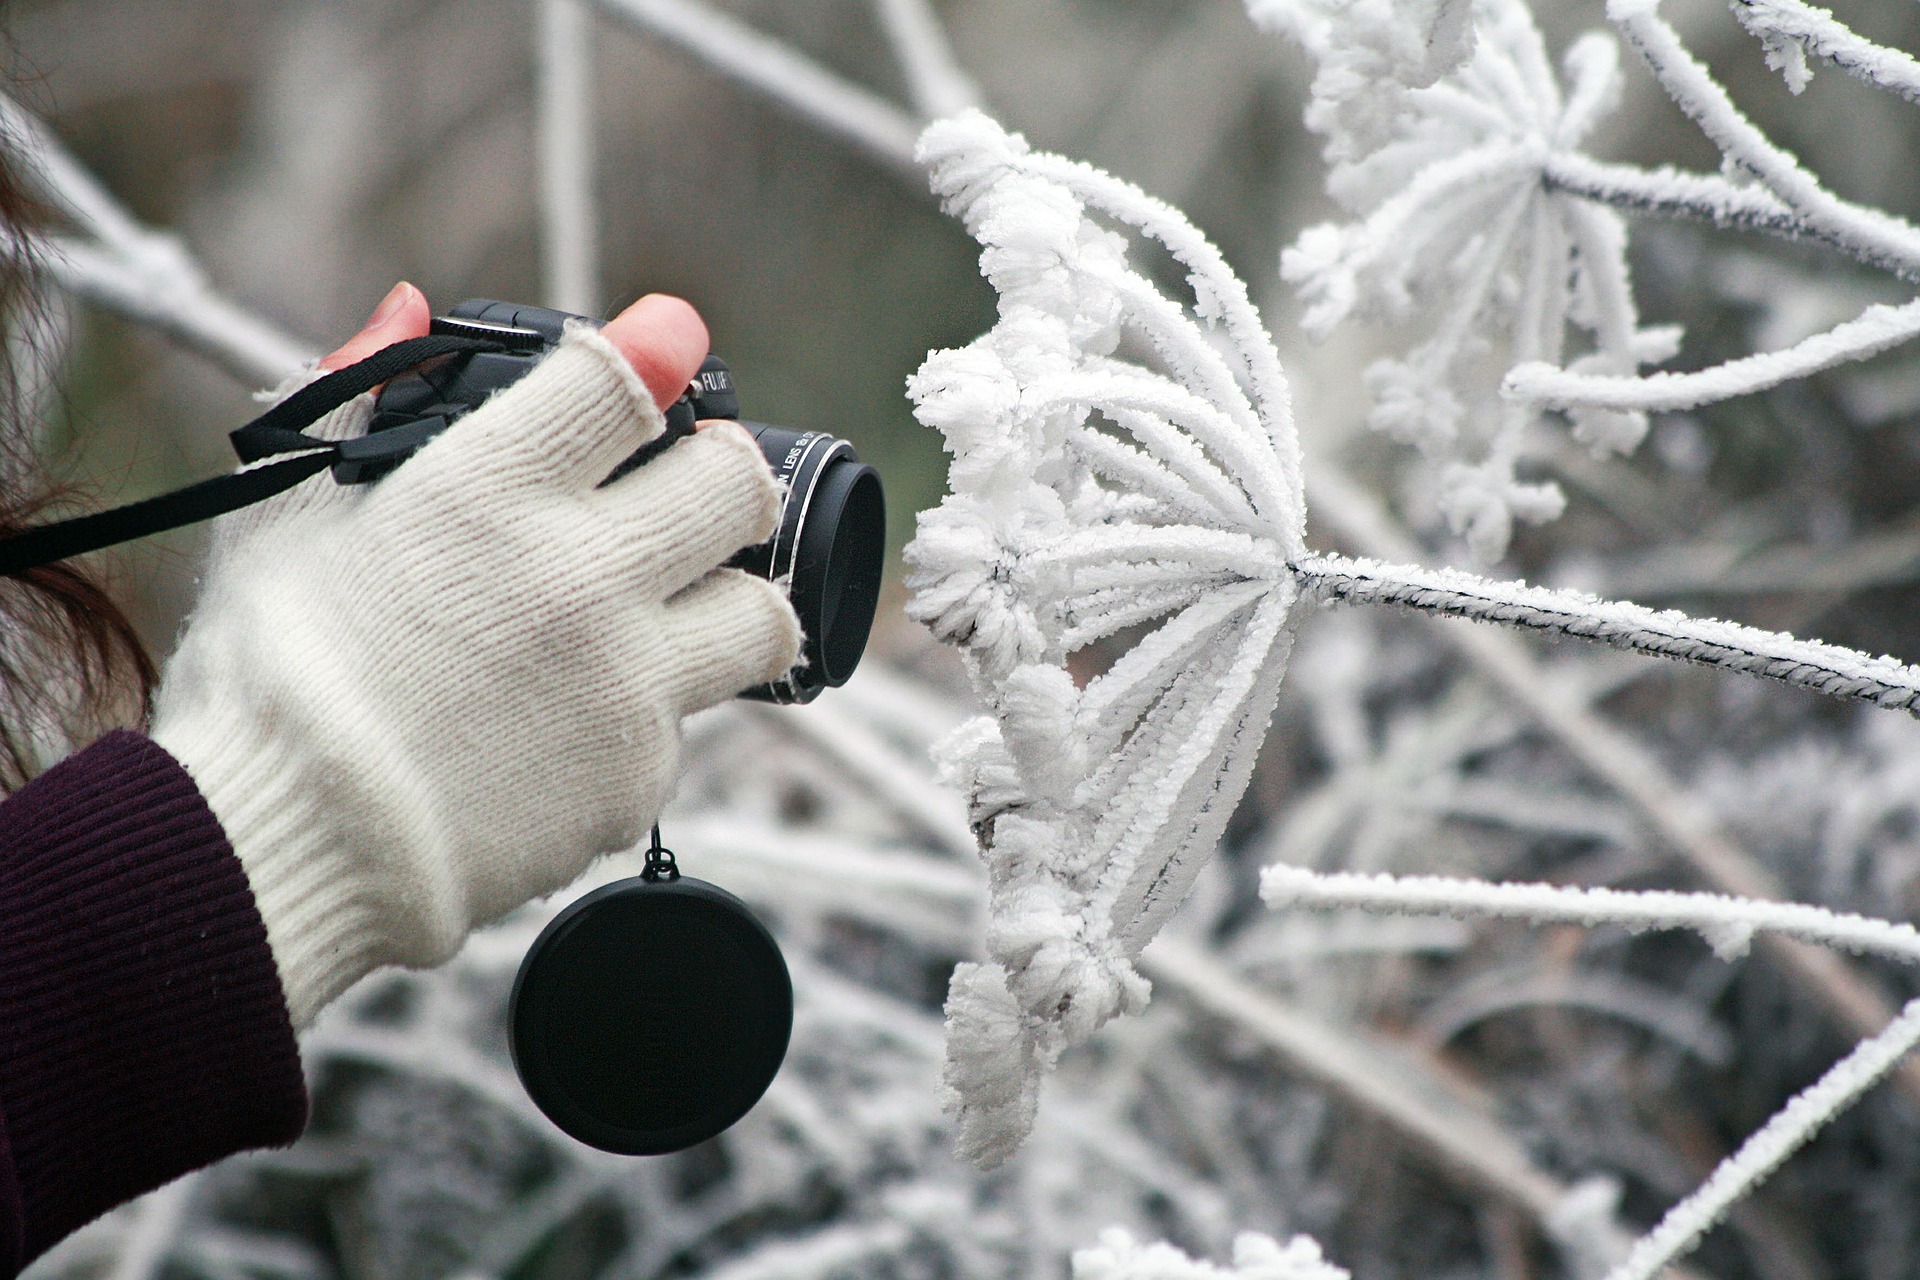
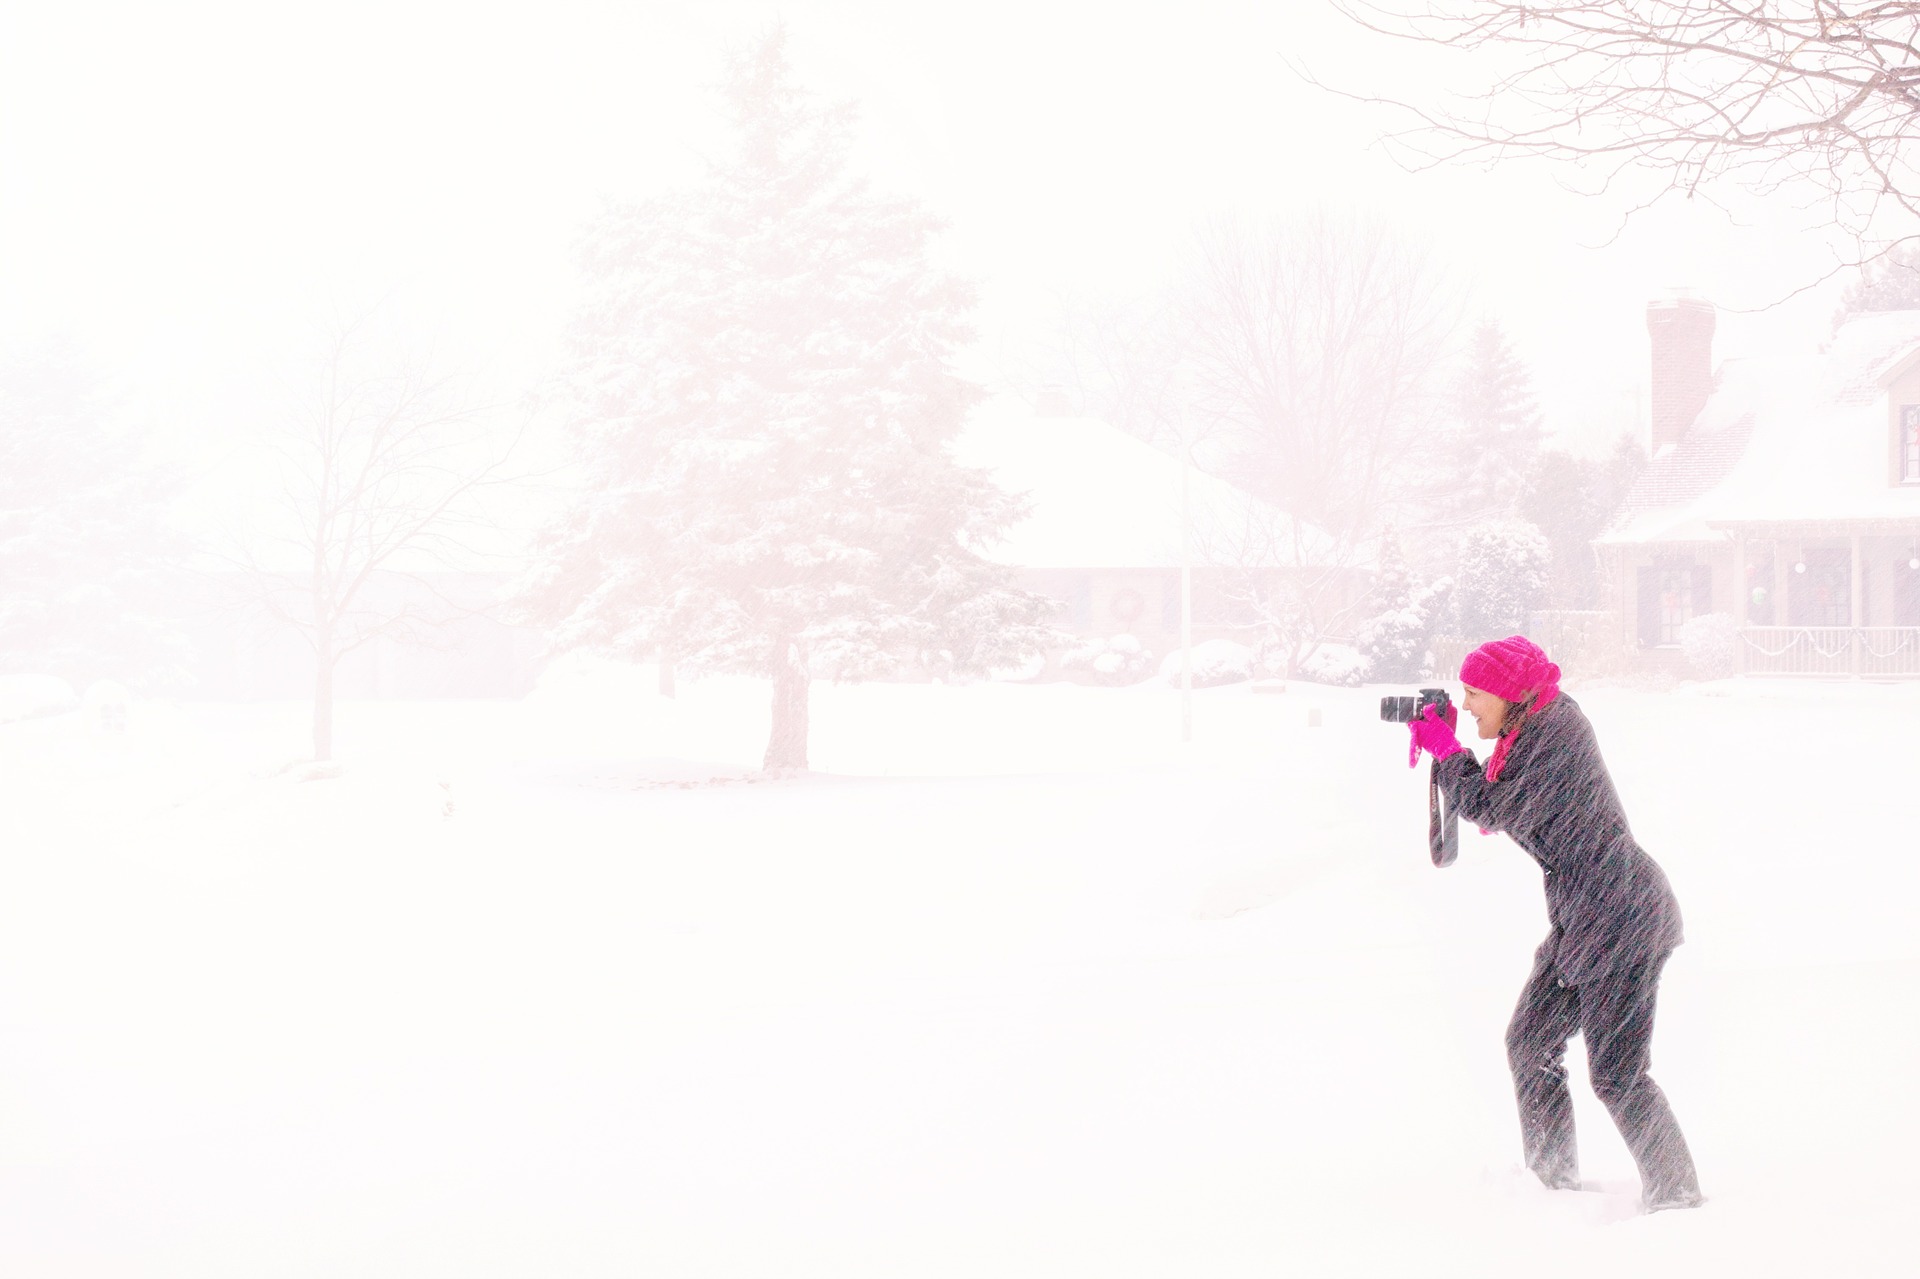
One of the most important things to keep in mind when doing water photography is the safety of your camera. Just like any other electronic, your camera will not fare well when wet. Shooting near water can harm your camera and even make the photos come out looking splotchy and hazy.

photographing-water-1

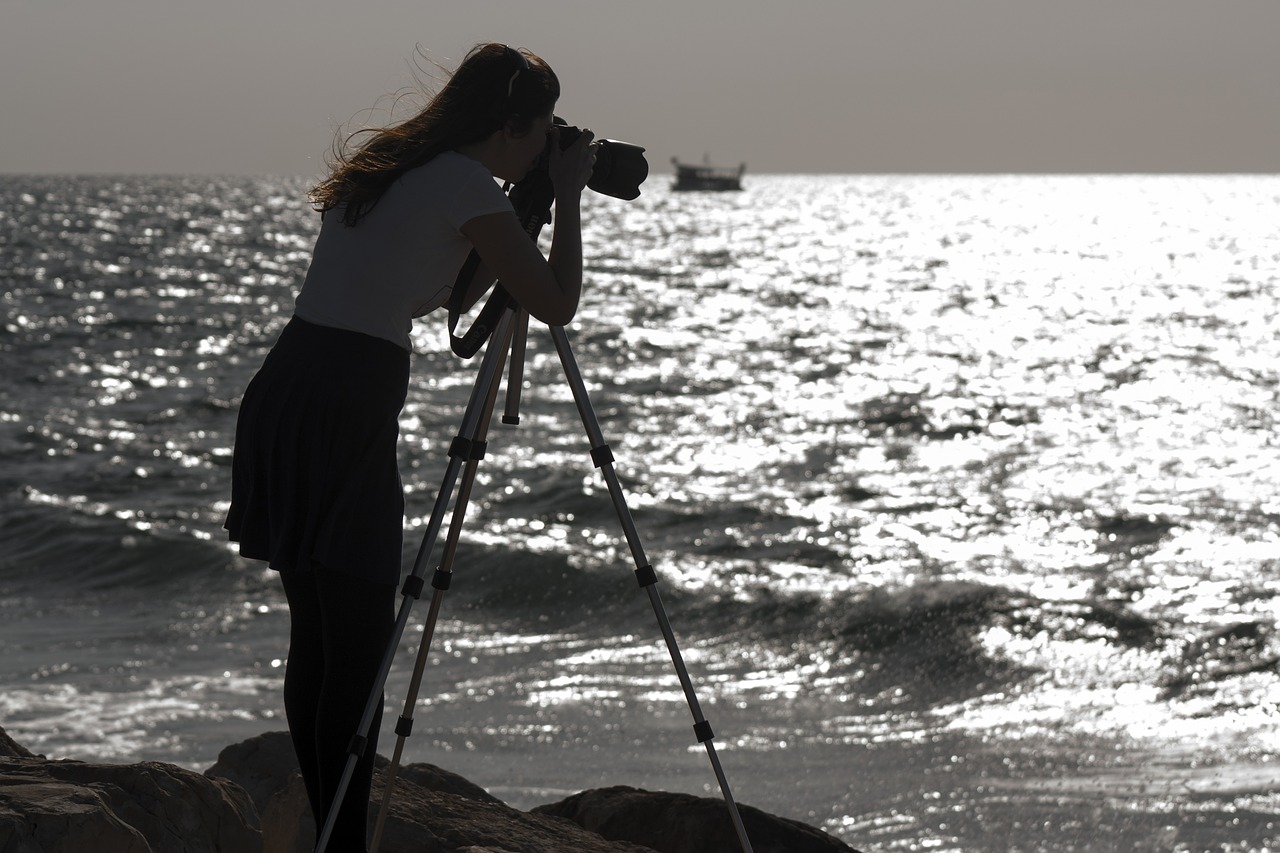
To protect your camera from falling in the water during water photography sessions, always use a tripod that is steady. Not only will the tripod protect your camera, but it will also make the image steadier. Sometimes you’ll want a slower shutter speed for your camera, and if you’re holding it in your shaky hands, the photo may come out blurry.

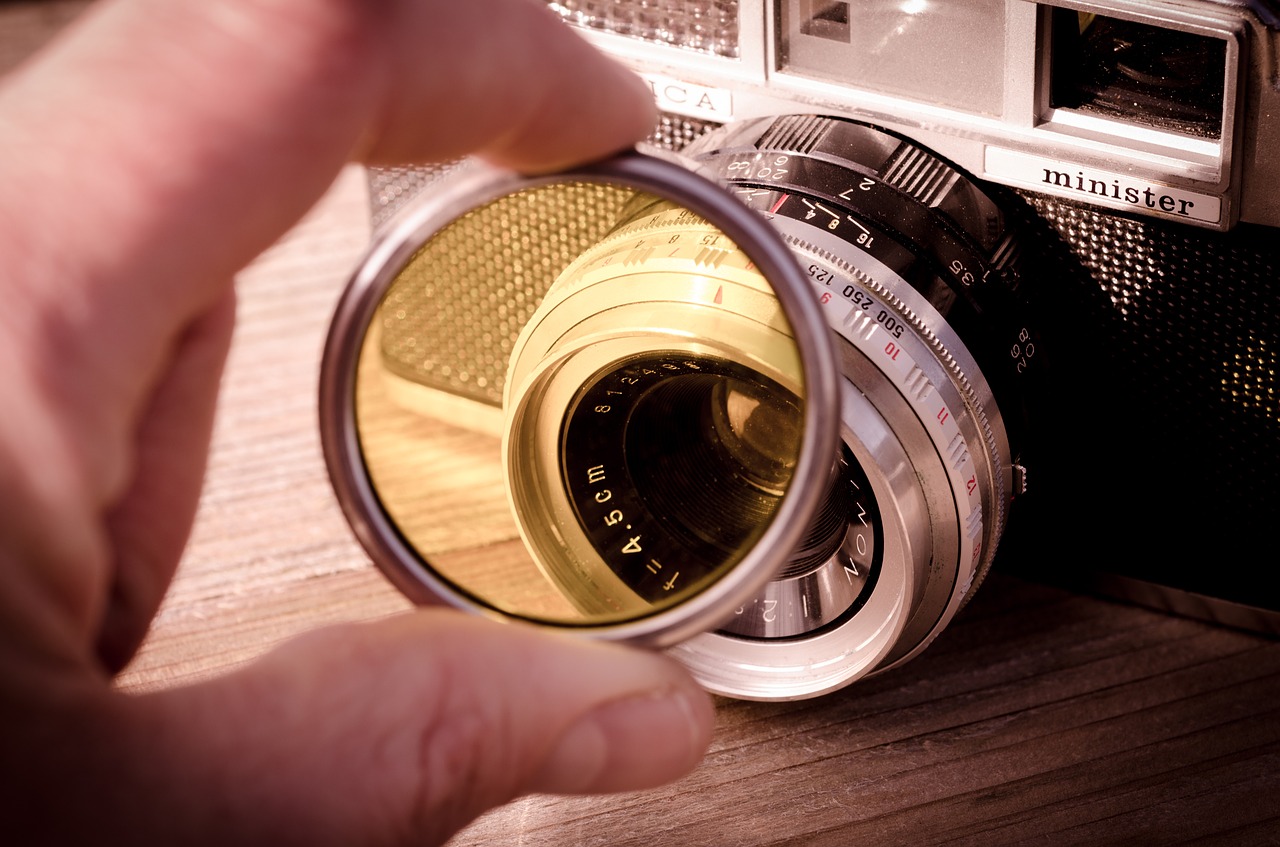
When in a place where water spray is likely, such as the beach or a waterfall, be sure to cover your camera. Enough light drops on a camera can ruin it. When you are ready to set up your shot, be sure to cover your lens up until you’re ready to shoot. An old camera filter or a plastic bag will not only protect your camera lens during your water photography, but it will also prevent watermarks from getting on the glass and ruining your photo.

photographing-water-2

Water Photography Tip #2: Setting up the Shot

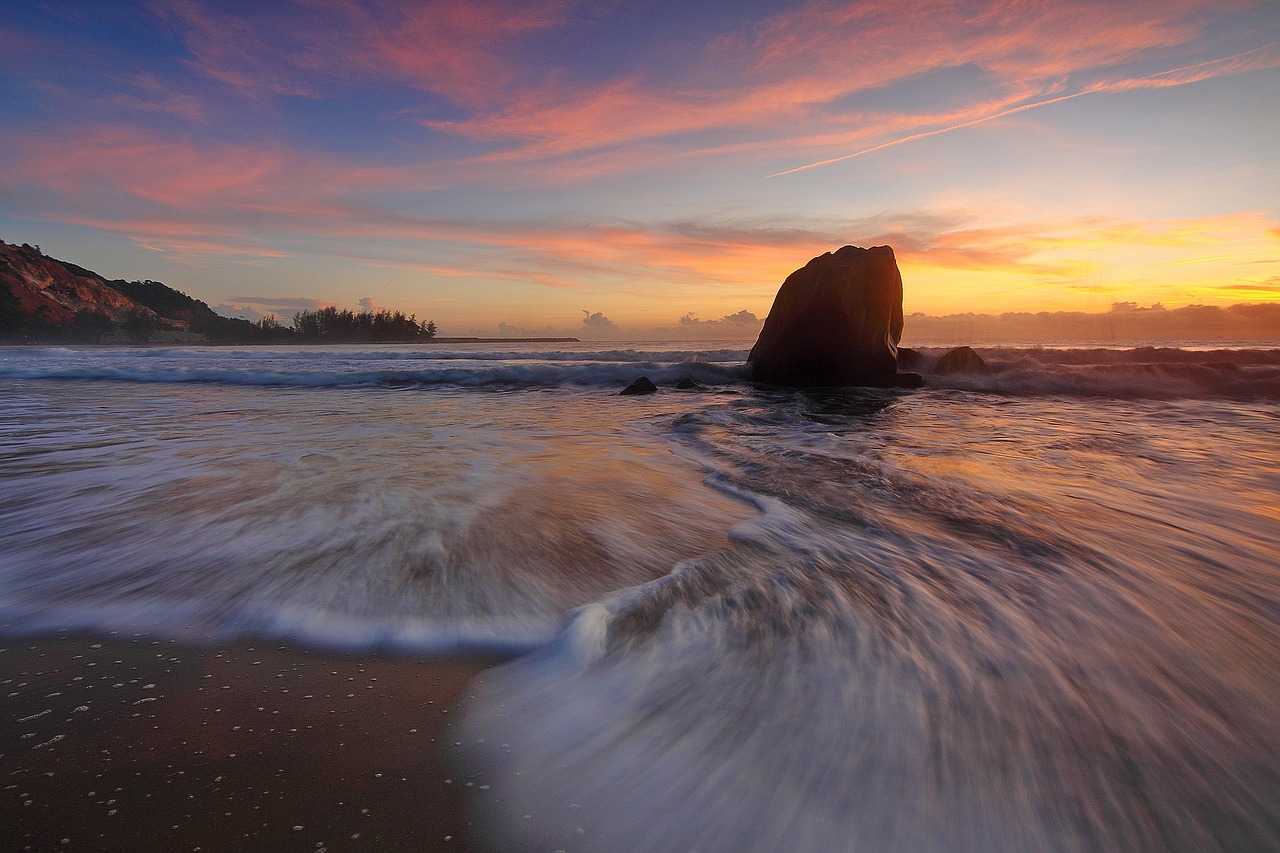
Water photography is mostly a game of composition. Even with wrong camera settings, a nicely composed picture can turn out great. But no amount of fancy settings or filters can take a horribly framed photo and turn it amazing. With water, the placement of your camera is of the utmost importance. You can create amazing scenes using curves and natural objects such as rocks and vegetation.

Generally speaking, lines are what attract the eye. When someone looks at a photo, their eyes follow the lines created by the objects. A good photo uses these lines to draw the eye to the important aspects of an image. Being out in nature, you’re going to have to find these eye-catching lines yourself.

photographing-water-3

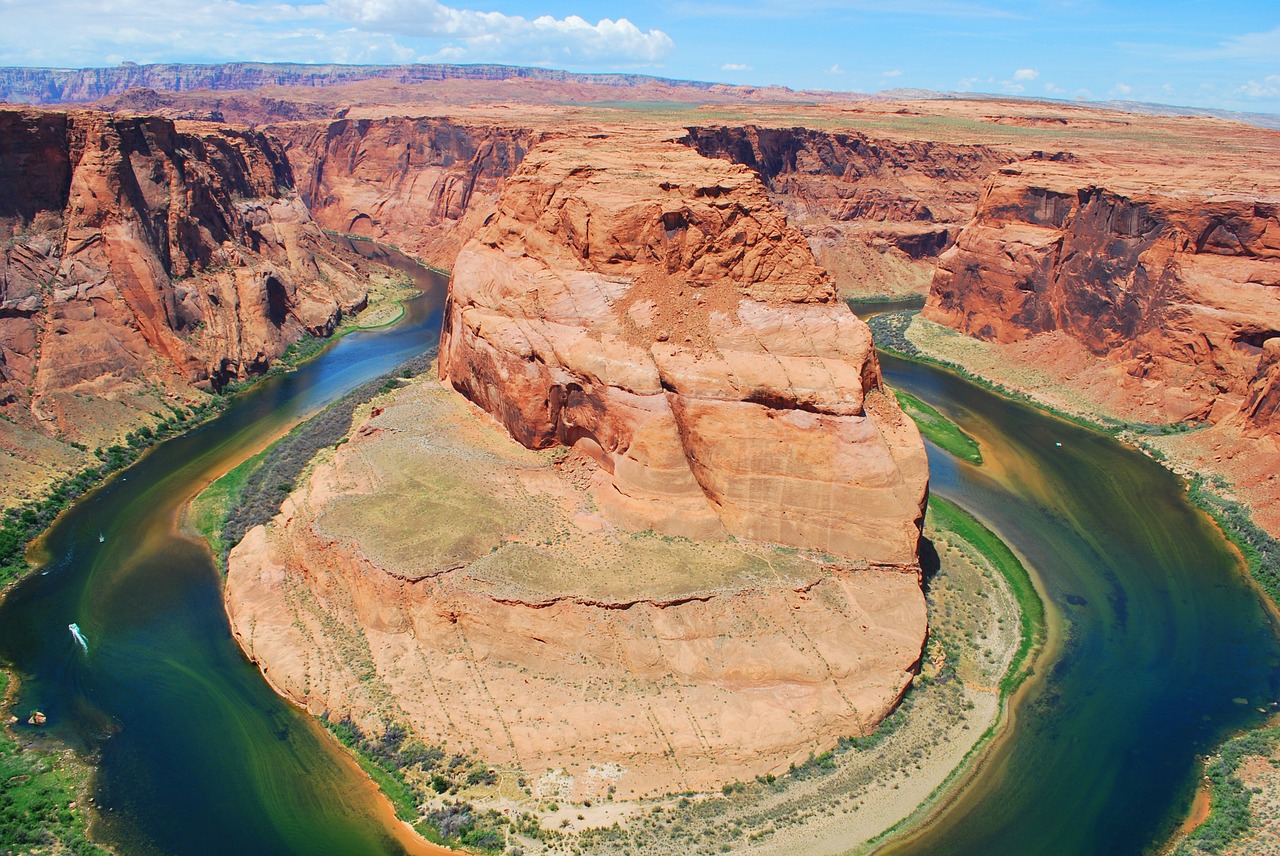
The best spot to take pictures of water isn’t always the most convenient. You may have to walk along a river or climb to a certain part of a waterfall to get the best shot. Generally, you want to find curves. Waterfalls and ocean waves have plenty of these. When looking to shoot rivers, try to find a bend or a handful of swerves to help get the attention of your audience.

A picture of just water isn’t going to be all that astounding. Try and think of a photo you’ve seen that shows the river without the bank, the ocean without the beach. There aren’t many. A lot of the attraction to water images is the nature that surrounds them. Keep this in mind when you’re preparing your shot. You want to include the rocks, the sand, and the vegetation that surrounds your water. Use the natural landscape to frame your shot or divide it into neat lines. It may take some time searching, but eventually, you’ll find the perfect spot to shoot.

Water Photography Tip #3: Setting Shutter Speed

Once you’ve found where you’re going to shoot, you need to figure out how you’re going to shoot. When it comes to water there are two main types of effects you can make. You can either produce an image with still water or one that’s moving. Both of these types of effects create stunning images, and it is easy to get both in one shot.

Creating water effects comes down to shutter speed. Shutter speed is how fast or slow your camera takes a picture. When you hear a camera click, that’s the shutter closing on the image, capturing it. If the shutter speed is slow, the image is revealed for longer, letting the camera pick up more light and movement. When it’s fast, the image is revealed for a shorter period and the camera can’t pick up on everything.

photographing-water-4

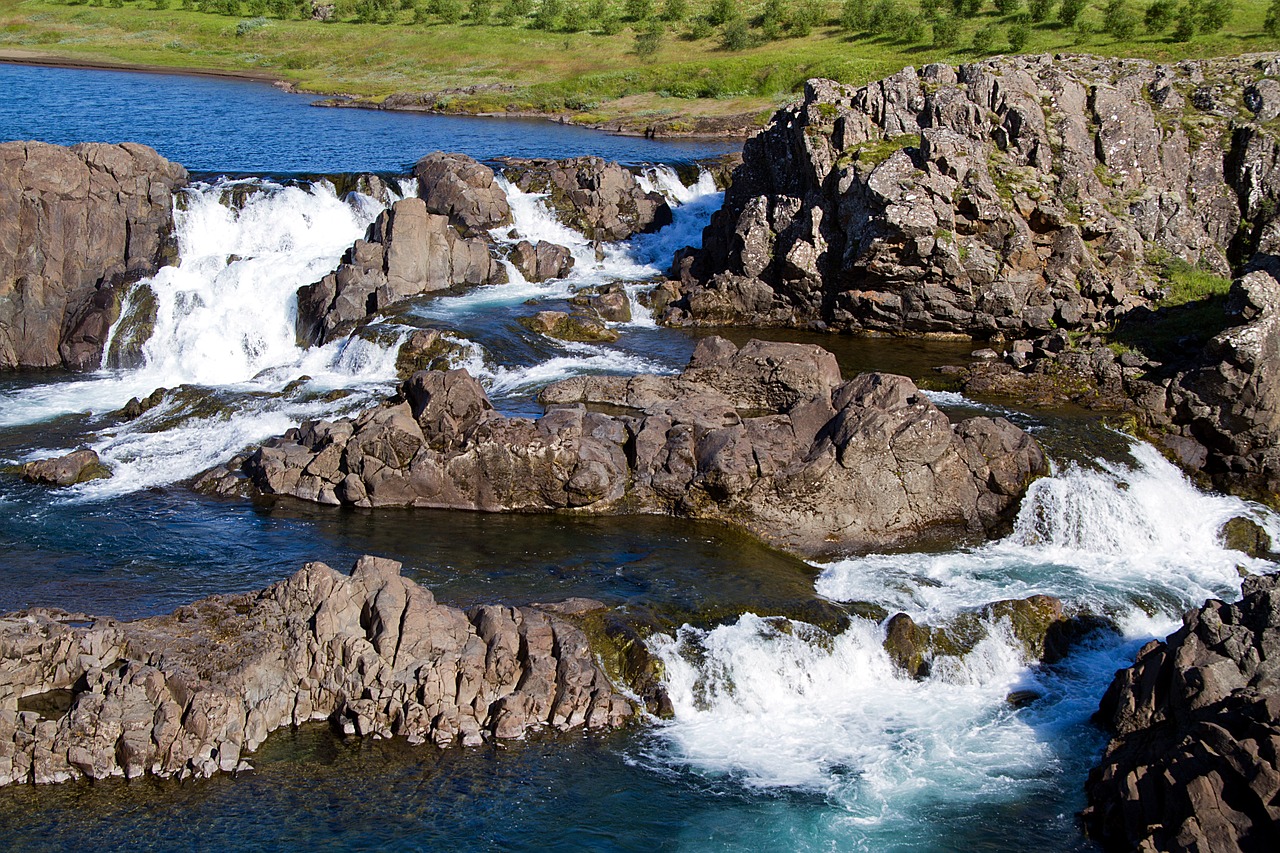
If you want to create still water images, you’ll want to set your shutter speed to a faster setting. Faster settings do allow you to hold the camera (use a strap so it doesn’t fall in). Because the picture doesn’t have a lot of time to capture the image, it will only catch a fraction of what’s going on, leaving you with the illusion that the river or waterfall wasn’t moving at all.

However, if you like the idea of showing motion, and want a streaming-like effect on your images, then use a lower speed. This is where your tripod will come in handy, so the image doesn’t shake. As the image is revealed for a longer period, the camera can pick up on the movement of the water, and track it as it goes along. This allows for the final image to have movement in it.

photographing-water-5

Photographing water can be tricky and dangerous to your camera. But as long as you take proper safety precautions, your camera can help you get the perfect image. Just remember to spend enough time scoping out the perfect shot. And don’t forget to change the shutter speed as you go to get some different effects in your pictures.

Winter Photography: Part One – Gear And Weather

Photographing during winter periods is quite challenging. Every aspect of the photography workflow gets slightly more difficult, and when you add everything up it ends up being significantly harder. However, if you are like me, harder equals better. Even if I produce the best pictures without much hassle, they don’t hold the same value to me as pictures for which I’d have to work for. Winter shots are almost always hard shots.

But first and foremost, before venturing into the sub zero degrees you should know some stuff about your gear. You don’t want to end up with damaged or broken gear due to the elements.

Taking Care Of Your Gear

Temperature

The working temperature of most electronics ranges from 0 to 40 degrees Celsius. This means that when you are above or below those values you risk damaging your gear. When you are above, there are risks, but they aren’t that big because the only issue is overheating. However, when you go below 0 degrees Celsius, you risk several things: freezing, condensation, materials becoming brittle and easily broken, and so forth. Thus, you’ll have to protect your gear from the temperature as much as you can.

Acclimatization

When going out from a warm room to the freezing winter, don’t bring out the camera straight out of the bag. Instead open the zipper slightly and give it some time to acclimate. Usually, 10-15 minutes should do it. The same goes for the reverse – when heading back into warm areas, don’t open the bag just yet. Allow for 10-15 minutes so the gear can acclimate. In case there is condensation visible (in the lens, viewfinder and so forth), remove the battery, dismount the lens, put the lens cap and lens mount cap on the camera, and hope for the best. Do not, under any circumstances, power the camera back on until it is completely dry. You don’t want to short anything out.

camera-550937_1920

Battery

The batteries don’t like cold weather. In fact, the colder they get, the more charge they lose. There is nothing you can do about this, except keep spare batteries warm. Keeping them in the inside pocket of your photographer vest, or in an insulated pouch of the bag should do. Also, avoid charging the batteries in rooms that are really cold.

Keep It Working

Cameras produce heat. That heat will keep the insides of the camera from freezing over. Therefore shoot more, in order to produce heat from the camera to keep it healthy. It is also good for the gears in your shutter mechanism: the friction they produce will keep them warm enough so they don’t become brittle and break.

Sweater Weather

There are many products on the market that will protect your camera from rain and snow. Some are better than others, but most of them do the job. Yes, the camera can be weather sealed, and the lens can be weather sealed, but there is no guarantee that it will be enough. Some lenses are partially sealed, others are completely sealed. You wouldn’t want to risk it now, would you?

photographer-562309_1920

Environment

If you are up in the mountains in the winter, snow and everything, I don’t have to stress the point that you should keep yourself safe first. Do your homework, research the area, ask around, and inform yourself if it is safe to venture there in the first place.

Length Of Day

The day during winter is significantly shorter. The Sun rises later in the day, and it sets quite earlier. Use tools like “The Photographer’s Ephemeris” or weather applications to know when the Sun rises and sets, in order to be able to plan your activities accordingly. Bear in mind that Golden and Blue Hours last quite shorter in the winter.

Eiswälder
Photo by Olli Henze, on Flickr.

Having that in mind, it is wise to scout beforehand and get familiar with your locations, and in doing so be more efficient – you will be able to take more shots during the shorter period of nice light available.

Weather

Winter weather can be quite dull, and it can change quite quickly. Thus, make sure that you avoid overcast weather during winter for most of the photography since it is just gray on gray, and it doesn’t provide contrast nor point of interest.

winter-1127201_1920

However, that weather is perfect for high-key portraiture. The snow will act as a reflective surface for fill light, and the light will be soft and envelop the subject quite nicely.

Snow

Snow

is basically water. It is funny that most of the time we perceive snow as a different matter – we don’t bring umbrellas when it starts snowing, because, well it is snow, it is fun! That is true, snow is almost always fun, except for your gear. Your gear hates snow. The snowflakes turn to water, and water and electronics are never a good combo. However, if your gear is protected while it is snowing, you can take some excellent shots. It will provide a great atmospheric and foreground element. Just make sure that the shutter speed is not too fast so you end up with dots, instead of nice soft streaks.

Summary

The biggest challenge during winter is predicting the weather and protecting the gear, and that is what was this article focused on. However, in the second part of this article, we will tackle the challenge of shooting in certain scenarios in winter, some tips and tricks for better shots and so forth. Remember, winter can be harsh on your gear – you can get it damaged quite faster than you expected, therefore it is imperative that you’re extremely careful with it. Stay safe, and stay tuned for the second part.