Tag: snow

Winter Photography: Part Two – Photographing

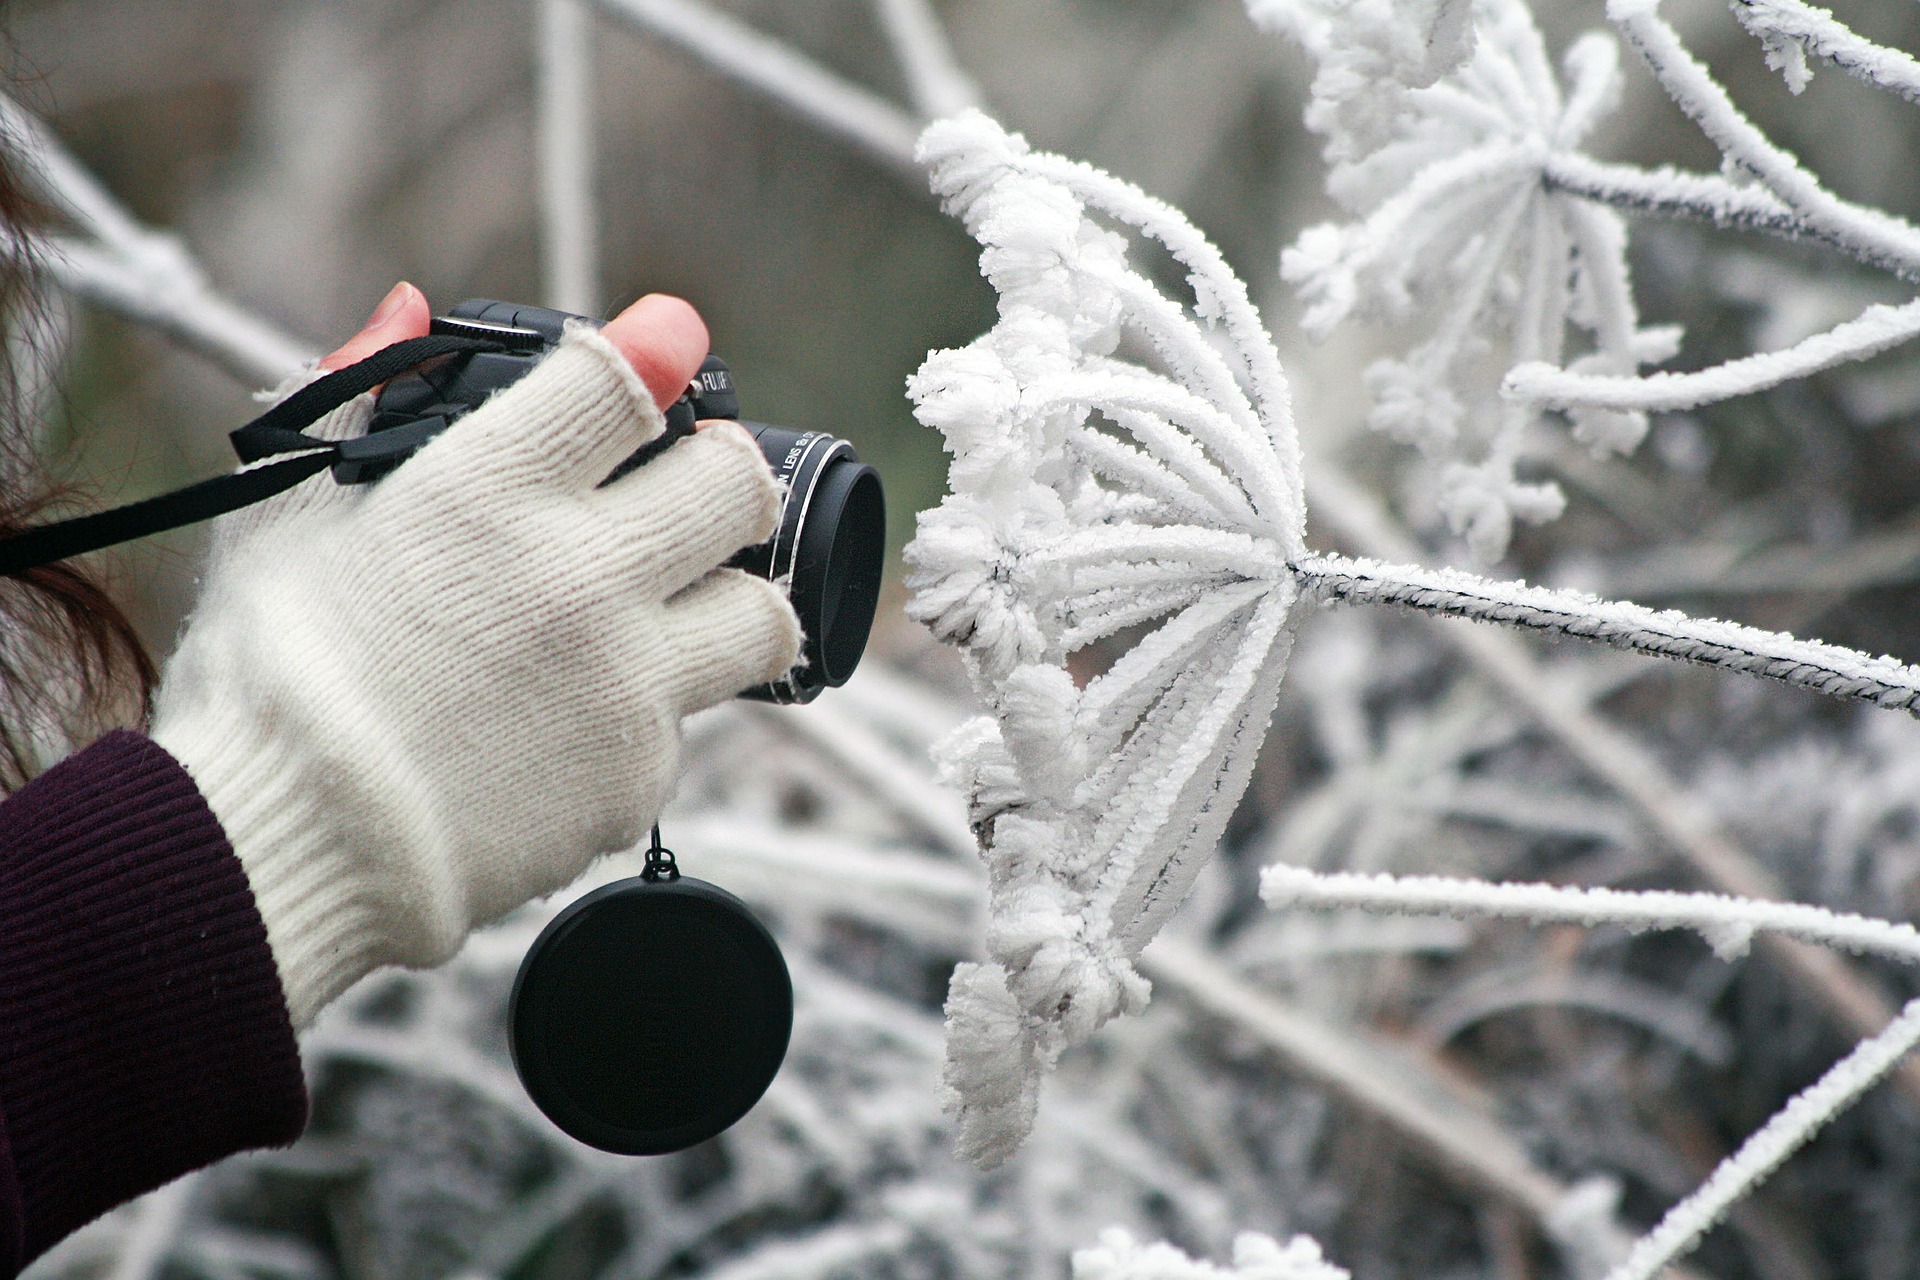
Previously, we discussed how to take care of your gear during the winter, and how to prepare for winter shoots. In this article we will go in depth on shooting during the winter; specifically, we will address some common scenarios and how to tackle those, plus some tips and tricks.

One general thing to know about winter (especially if there is snow) is that it requires a bit more attention when photographing. Winters usually mean fog, mist, haze, and snow. All of those, if you aren’t careful, will ruin the shot. The snow itself won’t ruin the shot, but if you aren’t careful you can easily overexpose it and lose the definition of its texture.
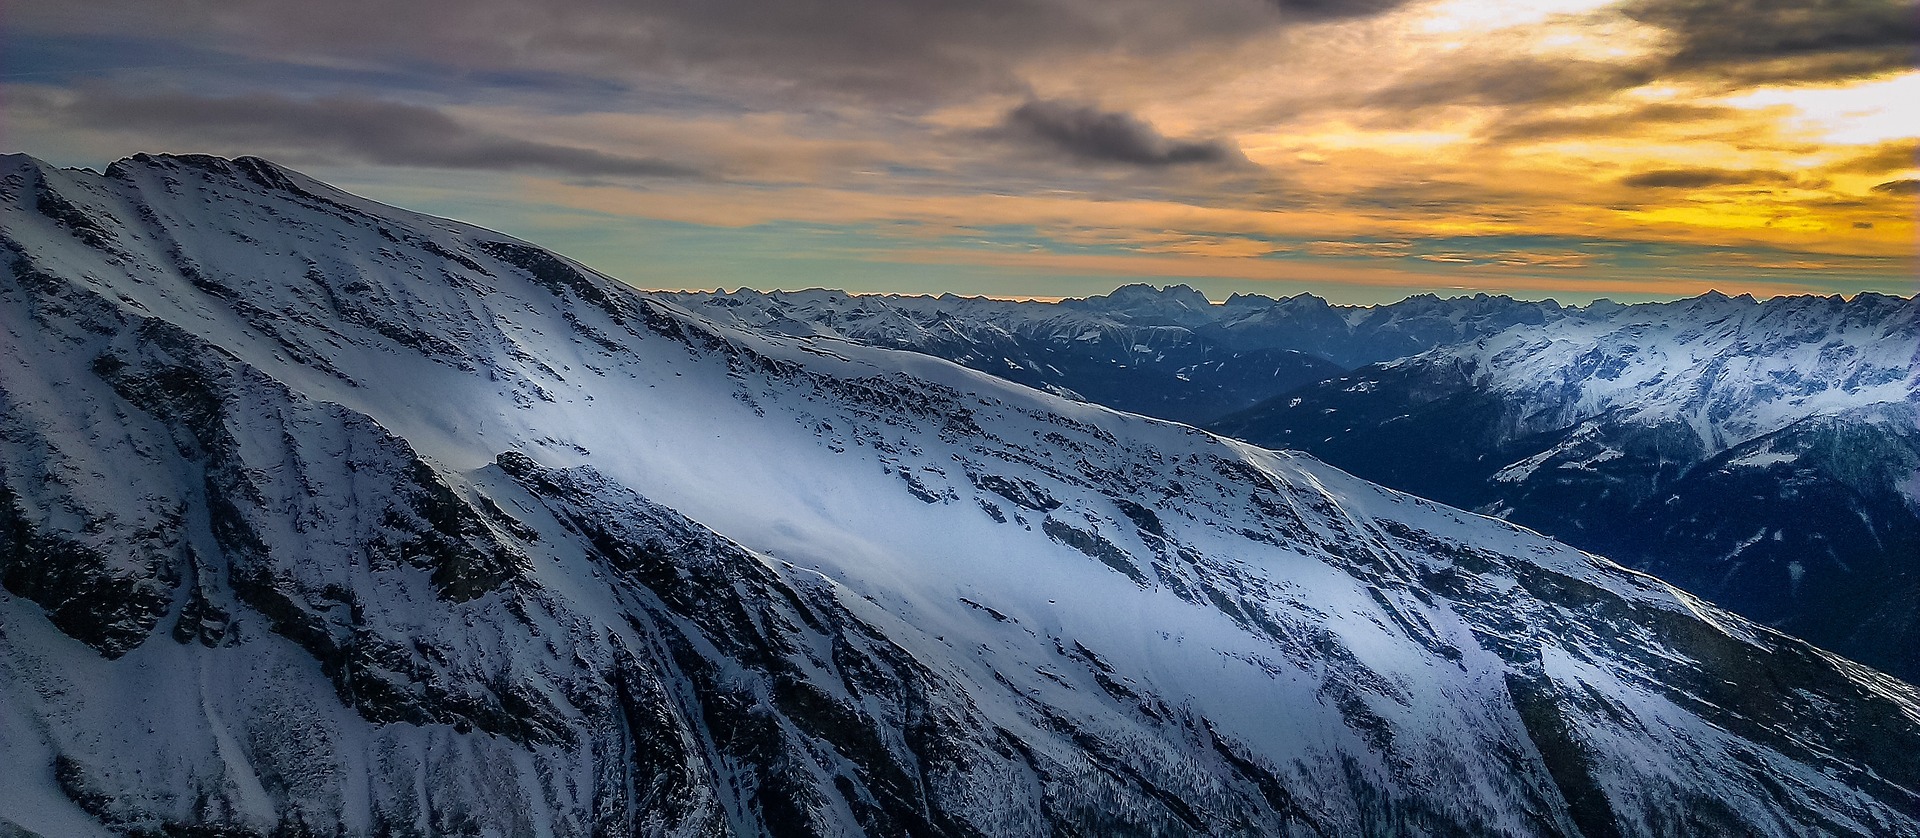
Catch The Morning

If there is fresh powder stacked up during the night, catch the morning if possible. This is important since most likely the snow will be uniform and untouched. No footprints, no dirt, nothing. If you are lucky for the clouds to have cleared by the time you start shooting, it would be awesome. Getting the shot early in the morning will make sure that the tones are a combination of blue and orange, which is typical for sunrise, rather than being heavy on the orange during the sunset.

alps-1368034_1920

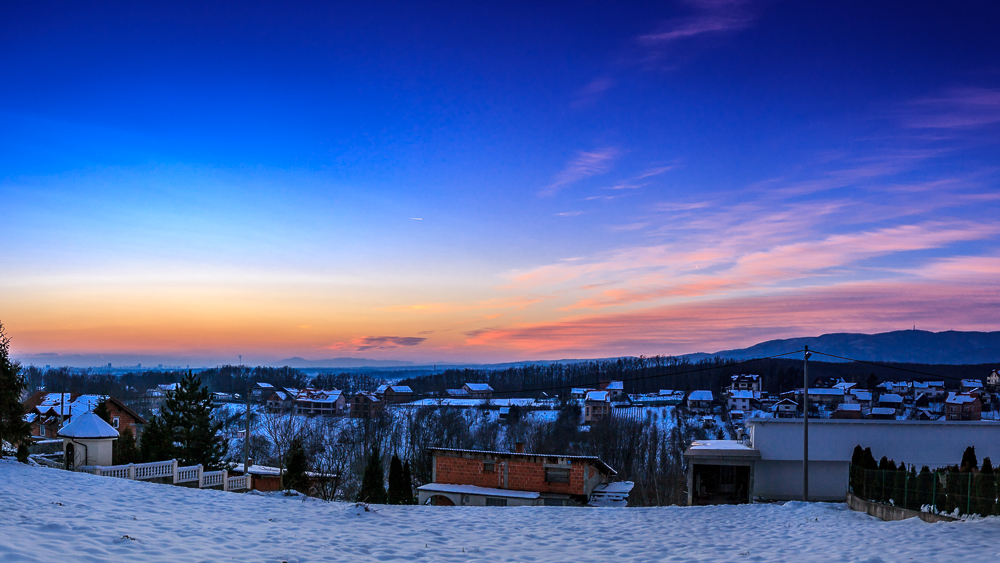
Overcast Weather And Snow

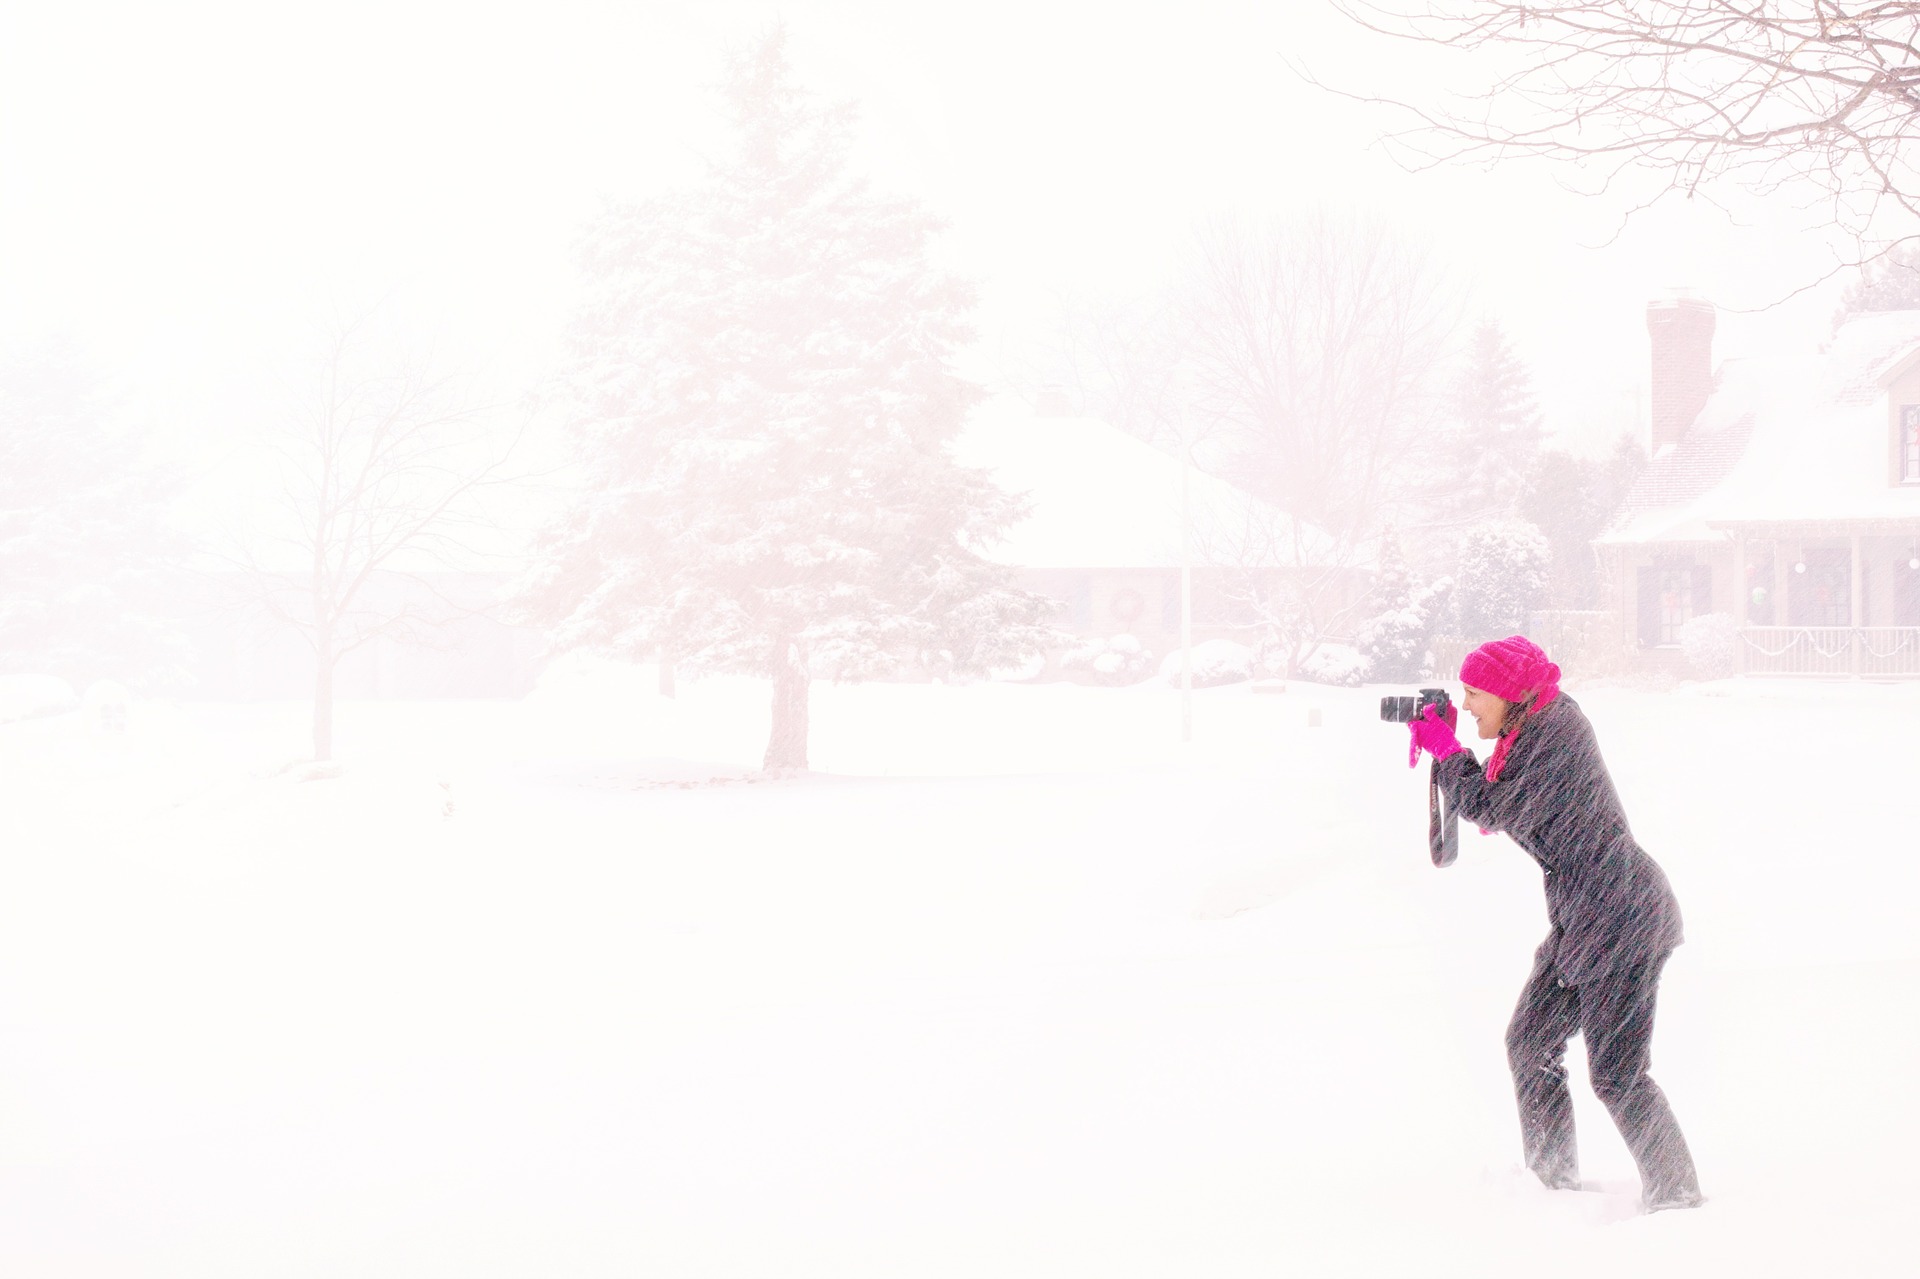
For landscape shots, it would be best if you’d avoid overcast weather since it is just gray. However, that kind of weather combined with snow can prove to be quite cool for portraiture, especially if it is still snowing. The snow on the ground will act as a reflector and bounce some fill light, making for nice soft and even lighting. Throw in some colored items/clothing to pop out of the whiteness, and you have a recipe for a great shot.

winter-1127201_1920

Footprints

The number one enemy of the snow. As mentioned in the “catch the morning” paragraph above, freshly layered snow is quite cool. So when you are walking up to a spot to photograph a vista, be completely aware of where you are passing through. If you layer up some footprints where you don’t want them to be, there is no going back. Yes, you might be able to fix that in the post, but why risk it?

snow-1273379_1920

On the other hand, you can get creative and intentionally place footprints to express an artistic idea. However, take the shot without them first.

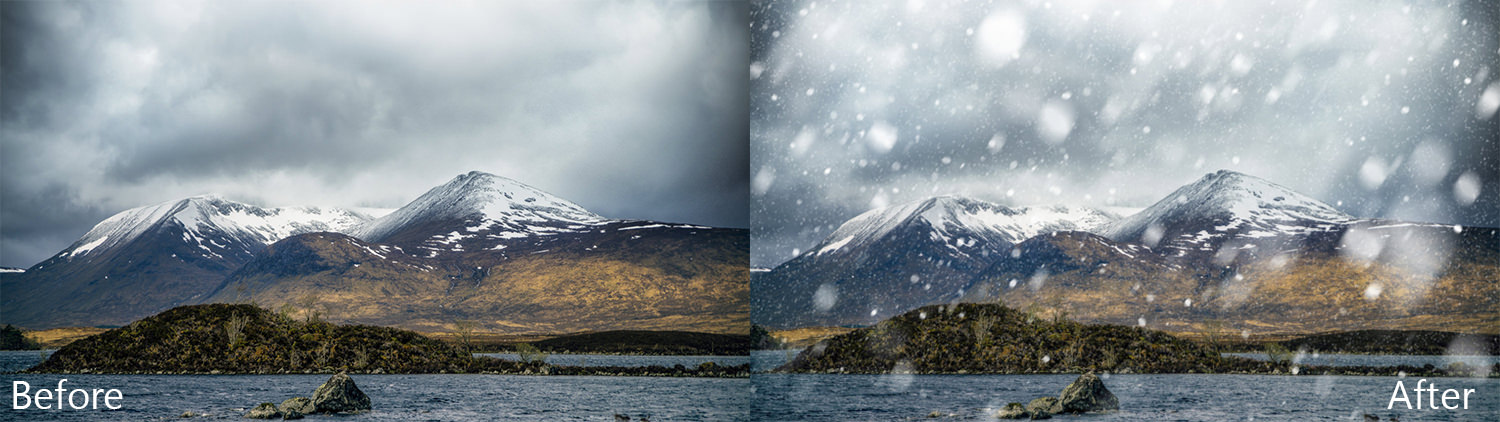
With Or Without Snowflakes

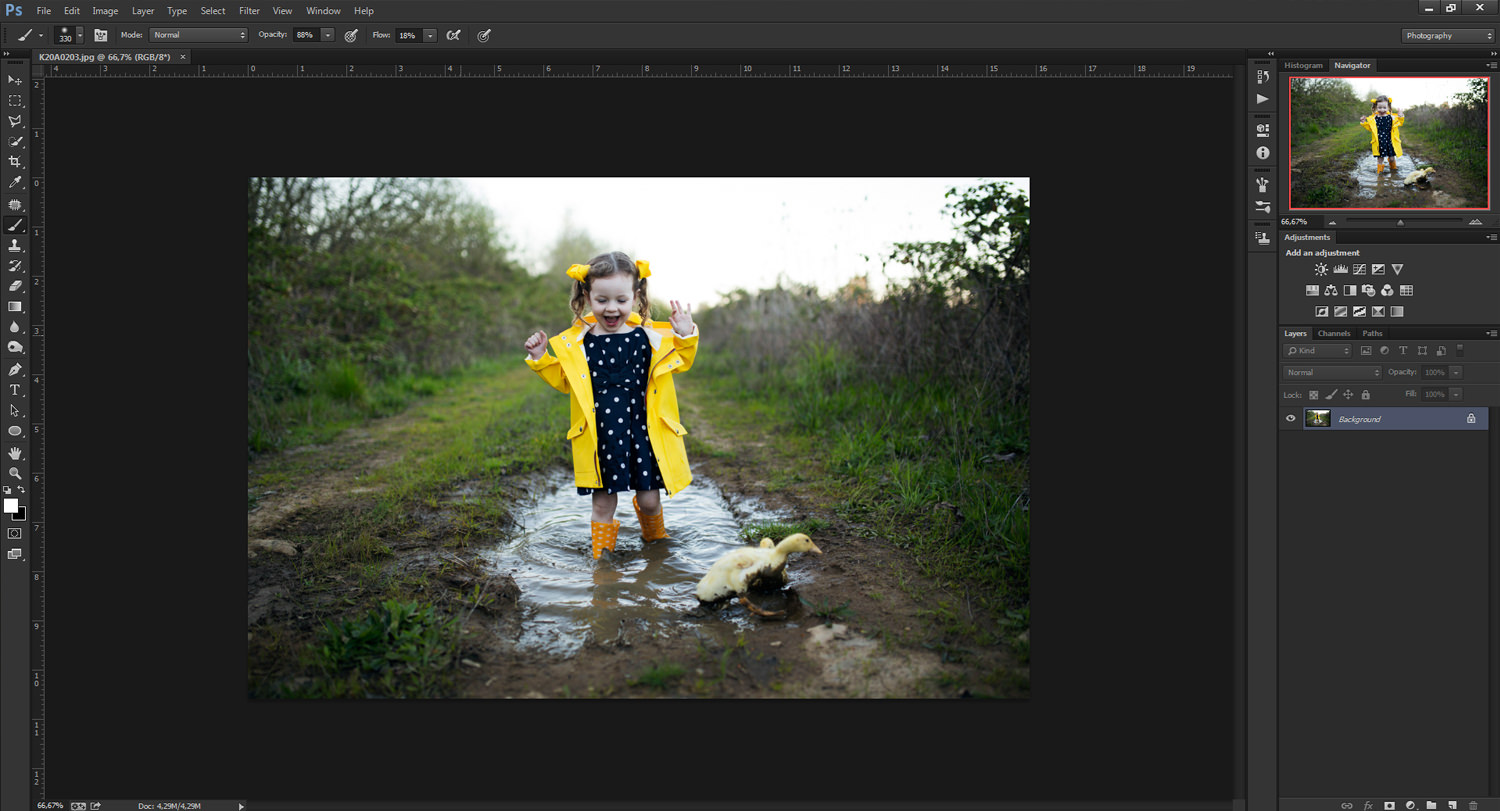
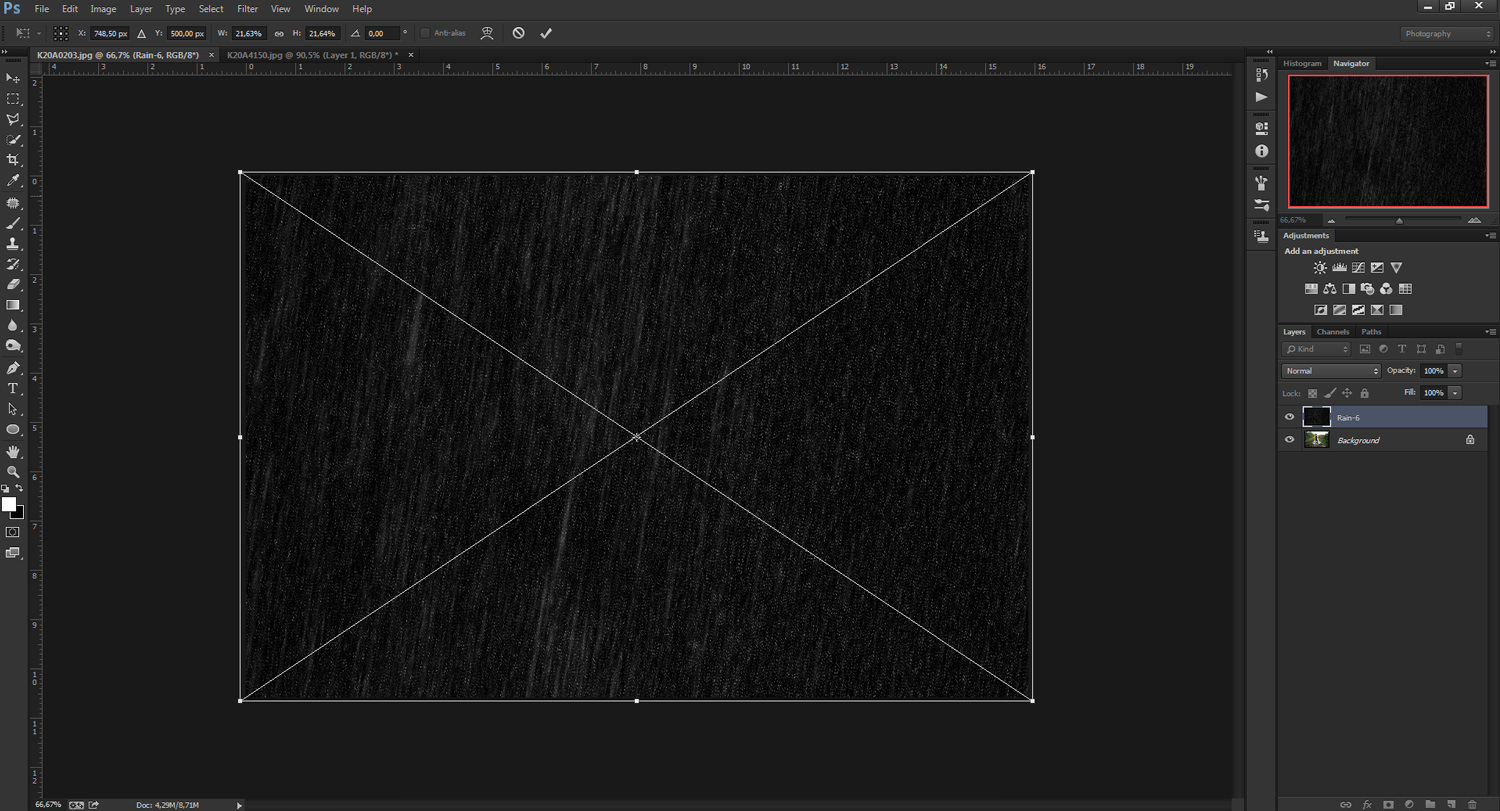
Falling snow can be quite cool, but on the other hand, it can be a little bit distracting if the snowflakes are too big. You can remove them by being smart about it. You can either use long exposures and hope that they won’t leave any visible trails (which is usually the case), or you can use the old “remove tourists from photos” trick, and shoot several images, and then stack them up using median in Photoshop. Of course, a tripod is required for this ordeal.

Polarizing And Neutral Density Filters

Circular polarizer filters can be quite fun with snow. Since by definition they can remove reflections from nonmetallic surfaces (however, I’ve found that they work with metallic surfaces as well), it can remove some of the reflection in the snow, thus bringing out more definition in it, or it can increase the definition in the clouds and sky. Anyhow, in cases like this, CPL is quite handy.

Photo by Dzvonko Petrovski.

Graduated ND filters are usually used for making the sky darker. However, with snow, you can stack two, one from the bottom, and one from the top, thus effectively bringing out the horizon line or something that is in the middle of the frame. If the snow is too bright, you can use only the bottom ND filter to dim it down a bit. There are many fun combinations, so feel free to experiment.

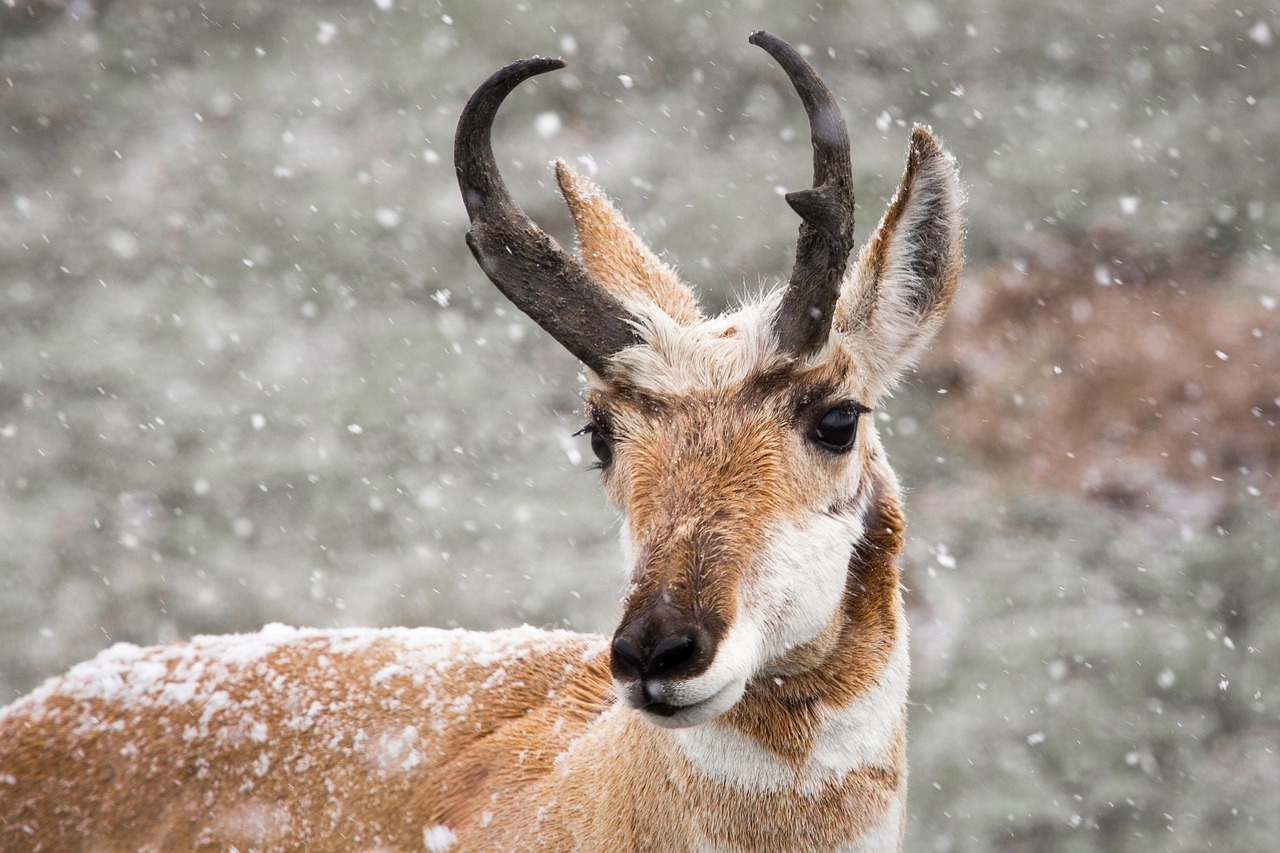
Don’t Forget About Wildlife

If it is winter, it doesn’t mean that there is no wildlife in the forests. Always have that in mind, firstly for your own safety, and then for photographic opportunities. Wildlife can often leave unique trails in the snow as well, which can serve as a great photographic element.

pronghorn-antelope-1326939_1280

Summary

Winter – it can be quite fun, and it can be quite dull. But, for the creative photographer, there is no such thing as a bad day. Therefore, get your gear properly packed and taken care of, and go out and shoot. There are so many things you can do in the winter, from snow, fog, mist, wildlife, to landscapes and portraits, the combinations are practically limitless. The only thing you need to do is learn how to use them.

Winter Photography: Part One – Gear And Weather

Photographing during winter periods is quite challenging. Every aspect of the photography workflow gets slightly more difficult, and when you add everything up it ends up being significantly harder. However, if you are like me, harder equals better. Even if I produce the best pictures without much hassle, they don’t hold the same value to me as pictures for which I’d have to work for. Winter shots are almost always hard shots.

But first and foremost, before venturing into the sub zero degrees you should know some stuff about your gear. You don’t want to end up with damaged or broken gear due to the elements.

Taking Care Of Your Gear

Temperature

The working temperature of most electronics ranges from 0 to 40 degrees Celsius. This means that when you are above or below those values you risk damaging your gear. When you are above, there are risks, but they aren’t that big because the only issue is overheating. However, when you go below 0 degrees Celsius, you risk several things: freezing, condensation, materials becoming brittle and easily broken, and so forth. Thus, you’ll have to protect your gear from the temperature as much as you can.

Acclimatization

When going out from a warm room to the freezing winter, don’t bring out the camera straight out of the bag. Instead open the zipper slightly and give it some time to acclimate. Usually, 10-15 minutes should do it. The same goes for the reverse – when heading back into warm areas, don’t open the bag just yet. Allow for 10-15 minutes so the gear can acclimate. In case there is condensation visible (in the lens, viewfinder and so forth), remove the battery, dismount the lens, put the lens cap and lens mount cap on the camera, and hope for the best. Do not, under any circumstances, power the camera back on until it is completely dry. You don’t want to short anything out.

camera-550937_1920

Battery

The batteries don’t like cold weather. In fact, the colder they get, the more charge they lose. There is nothing you can do about this, except keep spare batteries warm. Keeping them in the inside pocket of your photographer vest, or in an insulated pouch of the bag should do. Also, avoid charging the batteries in rooms that are really cold.

Keep It Working

Cameras produce heat. That heat will keep the insides of the camera from freezing over. Therefore shoot more, in order to produce heat from the camera to keep it healthy. It is also good for the gears in your shutter mechanism: the friction they produce will keep them warm enough so they don’t become brittle and break.

Sweater Weather

There are many products on the market that will protect your camera from rain and snow. Some are better than others, but most of them do the job. Yes, the camera can be weather sealed, and the lens can be weather sealed, but there is no guarantee that it will be enough. Some lenses are partially sealed, others are completely sealed. You wouldn’t want to risk it now, would you?

photographer-562309_1920

Environment

If you are up in the mountains in the winter, snow and everything, I don’t have to stress the point that you should keep yourself safe first. Do your homework, research the area, ask around, and inform yourself if it is safe to venture there in the first place.

Length Of Day

The day during winter is significantly shorter. The Sun rises later in the day, and it sets quite earlier. Use tools like “The Photographer’s Ephemeris” or weather applications to know when the Sun rises and sets, in order to be able to plan your activities accordingly. Bear in mind that Golden and Blue Hours last quite shorter in the winter.

Eiswälder
Photo by Olli Henze, on Flickr.

Having that in mind, it is wise to scout beforehand and get familiar with your locations, and in doing so be more efficient – you will be able to take more shots during the shorter period of nice light available.

Weather

Winter weather can be quite dull, and it can change quite quickly. Thus, make sure that you avoid overcast weather during winter for most of the photography since it is just gray on gray, and it doesn’t provide contrast nor point of interest.

winter-1127201_1920

However, that weather is perfect for high-key portraiture. The snow will act as a reflective surface for fill light, and the light will be soft and envelop the subject quite nicely.

Snow

Snow

is basically water. It is funny that most of the time we perceive snow as a different matter – we don’t bring umbrellas when it starts snowing, because, well it is snow, it is fun! That is true, snow is almost always fun, except for your gear. Your gear hates snow. The snowflakes turn to water, and water and electronics are never a good combo. However, if your gear is protected while it is snowing, you can take some excellent shots. It will provide a great atmospheric and foreground element. Just make sure that the shutter speed is not too fast so you end up with dots, instead of nice soft streaks.

Summary

The biggest challenge during winter is predicting the weather and protecting the gear, and that is what was this article focused on. However, in the second part of this article, we will tackle the challenge of shooting in certain scenarios in winter, some tips and tricks for better shots and so forth. Remember, winter can be harsh on your gear – you can get it damaged quite faster than you expected, therefore it is imperative that you’re extremely careful with it. Stay safe, and stay tuned for the second part.

Sleeklens Rain and Snow Overlays: A Comprehensive User’s Guide

Introduction to Rain and Snow Overlays

By using rain and snow overlays you can make your photos more interesting and to a greater extent control the look of your photos. Maybe you wish to achieve a moody look but were afraid to get your camera wet in the rain, or you may wish to create the perfect ambiance in a winter scene but the snow is missing, then our overlays will come to great use.

The principle for applying rain and snow overlays are the same and this article will focus on how to apply and adjust the overlays to your liking.

Snow

Snow overlays

work best when there is snow already on the ground, but it will also work in situations when there might be fresh falling snow. The key here is that there shouldn’t be clear (too) clear skies and that there are no elements showing indications of another time of the year, for example, certain blossoms or the lushness of various vegetations. If there are no signs of snow on the ground it might be smart to use an overlay with less intensity, to really sell the effect.

BnA1

Rain

Rain overlays

can, of course, be used on photos from the entire year, but it is still important that there are no signs of very clear weather or similar. If the selected photo is pretty bright and vibrant an overlay with very heavy rainfall would not be a suitable choice. Generally speaking, you can use more heavy rainfall overlays as the photos get darker and moodier. There are of course exceptions to this guideline.

BnA2

How to Apply the Overlays

Here is the list of steps you need to take to apply the overlays:
1. Importing and resizing
2. Choose Blend Mode and Opacity
3. Colouring and Blurring (not always necessary)
4. Applying layer mask (if needed)

1. Importing and resizing

screenshot1

The first thing you have to do is to import the overlays you want to apply to an image, this is easily done by dragging the overlay from its folder onto your image in Photoshop. When you import the overlay you should be able to resize it directly and now you just have to make sure the overlay covers the entire image, or you can make it even bigger if you like. You can always change the size and position of overlays later using the Free Transform tool (Ctrl + T).

screenshot2

When you are satisfied with the size and position of the overlay just accept by clicking the checkbox icon at the top or press enter.

2. Choose Blend Mode and Opacity

What blend mode you choose is important for the look of the overlay, and you can also change the opacity to get the desired intensity of rain/snow. To choose blend mode you need to have the layer containing the overlay selected and then selecting the blend mode quick menu above the layer panel. The recommended blend modes are “Screen”, “Color Dodge” and “Linear Dodge”. These will make all the black parts disappear leaving just the rain or snow left.

screenshot3

screenshot4
Here you can see how the blend mode “Screen” has removed all the black and adding rain to the image beneath. You can also try “Color Dodge” and “Linear Dodge”, these will give you a brighter, almost glowing, look to the rain or snow.

Next, you can reduce the opacity if want a more subtle effect, simply type in the percentage you want or drag the slider.

screenshot5

3. Colouring and Blurring

This step is not necessary for many occasions, but sometimes it can make a big difference for the overlays. If you find that the rain or snow looks too harsh you should fix it using “Gaussian Blur“. Since the rain doesn’t really have any color in itself but can be “coloured“ by the light in a certain situation, for example, the rain can have a slightly warm tone during sunset. To mimic these situations you need to add some colour to your overlay using a Hue/Saturation filter. If you use the blend mode “Color Dodge“ you do not need to do this since it will pick up some of the ambient colour.

To add a colour tone to an overlay you need to open a Hue/Saturation adjustment layer while having the overlay layer selected. You then need to link it the layer below by clicking the “clip to layer“ icon, the icon furthest to the left in the icon row in the bottom of the Hue/Saturation panel. You also need to tick the box “Colorize“.

screenshot6

You can now change the hue, saturation and lightness sliders to set a fitting tone for your overlay. Keep in mind that it should make the overlay blend better with the rest of the image. In this case, we can see that the photo has a quite cool tone to it, so we need to set the hue to something blue, and we will also keep the saturation low because we do not want the rain to look too much coloured. The lightness should usually be around zero.

screenshot7
As you can see the difference is quite small, but it is important that the rain or snow fits in the picture.

If you want to make the rain or snow a bit softer you can apply a gaussian blur. Go to Filter/Blur/Gaussian Blur while still having the overlay layer selected. Type in a value somewhere around 1 to 4, depending on the size of rain/snow. In this case, I will choose 0,8 since the raindrops are small in this overlay.

screenshot8

Now the basic look of the overlay is finished.

4. Applying Layer Mask

If the snow or rain is covering an important element of your picture you can remove with help of a layer mask. In this case, the raindrops are covering the girl’s face and clothing, and since the overlays are made in such a way that displays depth this can look a bit weird on some occasions. Since rain falls at different distances from the camera it would be strange if the small raindrops, that should be further away, falls in front of a subject closer in the frame. This might completely ruin some pictures with a lot of depth, primarily portraits. For the same reason, we also need to make sure that the bottom of the frame is free from rain since the bottom is closer to the camera and that means that the smaller raindrops should not be visible.

First, you need to create a layer mask, by clicking on the layer mask icon in the bottom of the layers panel. This will create a layer mask in white, and everything that is white in the layer mask is visible, while everything black will be hidden.

screenshot9

Now you simply have to select the brush tool (B) and make sure the brush is soft and color set to black. By painting on the area of the overlay you want to remove you can get rid of rain/snow that is unwanted.

K20A0203-finished
Here is the finished photo

Conclusion

We hope you have found this guide useful and that you will be able to use these techniques in your own photos. When you have mastered these basic skills for applying overlays you can go on with experimenting with other ways to get the most out of our rain and snow overlays, or our starburst overlay. You may also try our sky overlay for PhotoShop. The possibilities are endless and just waiting for you to explore them.