Tag: wildlife

How to Capture Great Photos of Flamingos

Flamingo photography is challenging. Flamingos may make tacky lawn ornaments, but they inspire tremendous photography. These vivid pink flocks are rebounding in pop culture, and natural developments have made them more accessible for photographers who can’t travel to other parts of the world. Getting pictures of these delicate beauties isn’t always the easiest task, though. Here, we’ll go over the basics every photographer needs in order to prepare for a flamingo shoot and nail perfect flamingo photography. We’ll discuss location, how patience helps you find the right shot, and offer up a few technical suggestions to help you get some great photos.

Flamingo Photography Guide

Location, Location, Location

While you could always go to your local zoo and take photos of a few flamingos standing in a shallow pool, most photographers prefer to chase more exciting images. If a zoo is your only option, though, there’s certainly nothing wrong with that. At the very least, it gives a wonderful opportunity to practice timing and the technical aspects of photographing flamingos, which we’ll discuss later.

free range flamingos photo

If you have the chance, at least try to catch flamingos in a free range environment. Many states have large, open enclosures, or limited free range environments for their animals. With permission, a photographer could set up in the enclosure itself to take a wider range of photos than a typical flamingo exhibit at a zoo would allow.

Ultimately, however, the best place to shoot flamingos is in their natural habitat. In the United States, that means heading to Florida. A hundred years ago, flamingos were much more common, but due to a series of factors, both known and unknown, they became a rarity. In the past few years, however, they’ve returned, and while wildlife photography is never exactly an easy exercise, it’s much less challenging now.

flamingos flying photo

Flamingos are migratory, and unlike birds such as Canada geese, they don’t always return to the same locations. If you’re planning a road trip, check ahead of time with local newspapers, birdwatchers, and even other photographers to see where the flamingos are actually staying. Usually the Everglades National Park is a safe bet. Still, it pays to do your research. That research can also tell you where in the massive park you are mostly likely to meet some fine pink fellows.

Being Patient and Keeping the Birds at Ease

Flamingo photography can be tricky as flamingos may not be as active as many smaller kinds of birds, but they’re still wild animals, and it takes patience to get even one good shot. Go out early, and expect to stay relatively late. Birds will become more comfortable with your presence the longer you’re there without incident. A zoom lens is a magical thing, but you still need to get fairly close for the best shots.

closeup flamingo in water

Flamingos are social birds, and many of the most dazzling flamingo photographs are of their largest migratory flocks. Working with a group of animals is many times more frustrating than working with one or two, of course, so be ready for the challenge. You will take a lot of shots, but only a few will turn out the way you want them to. Wait for the right moment. You don’t have to press the shutter even once in five minutes, 15 minutes, or even an hour.

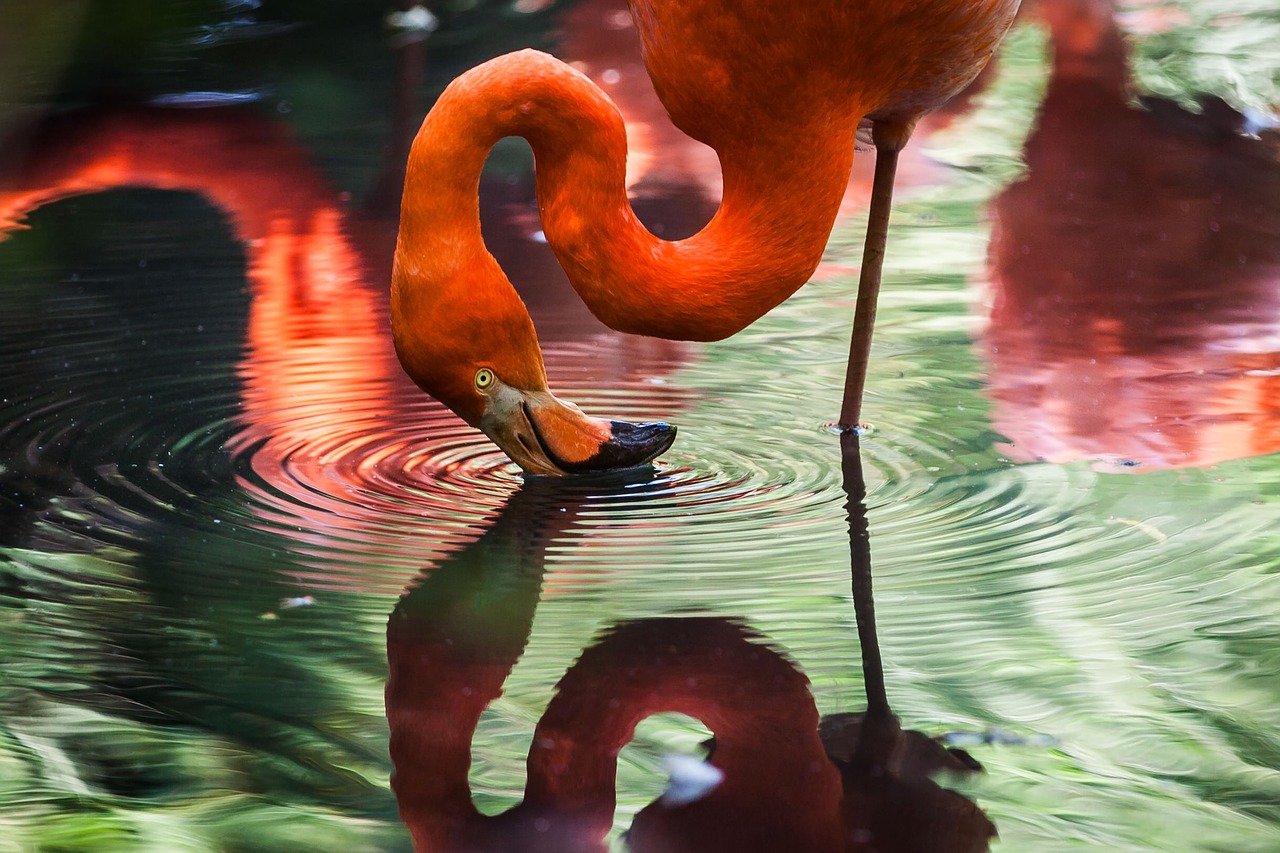
The best way to shoot with a large number of animals is almost always to isolate a single individual within the mass. That doesn’t mean you crop out the other birds, but your image needs a focal point, and shooting a group of animals like they’re a landscape rarely produces quality photos. Look for active areas. Don’t be tempted to just snag photos of flamingos at rest. Find an individual or group that is doing something and let your photo develop a story.

Flamingo Photography Tips

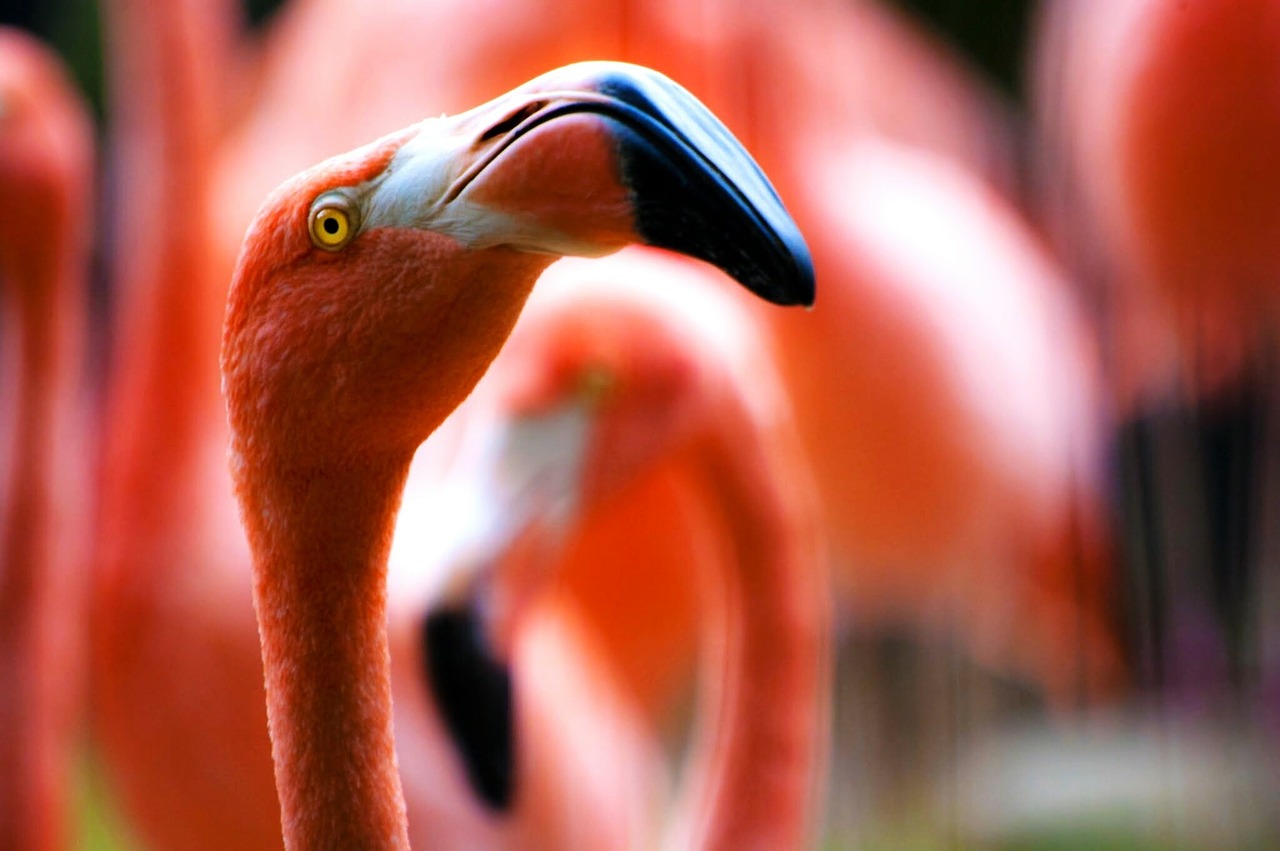
When you’re photographing any kind of bird, you should focus on the head and eye. The eye will often reflect or gain highlights from a flash, which makes for a more dynamic image. Keeping your camera at or around the bird’s eye level also enhances the angle of your shot. Think of it as portrait photography.

wildlife portraiture

Whenever you’re photographing animals, you need to make sure your shutter speed and aperture settings are prepped for moving targets. You can use slow-moving or even still animals for practice shots, too. You may get a good image from your warm ups, and it’s always rewarding when your first pictures of the day don’t all come out with blurry motion smears.

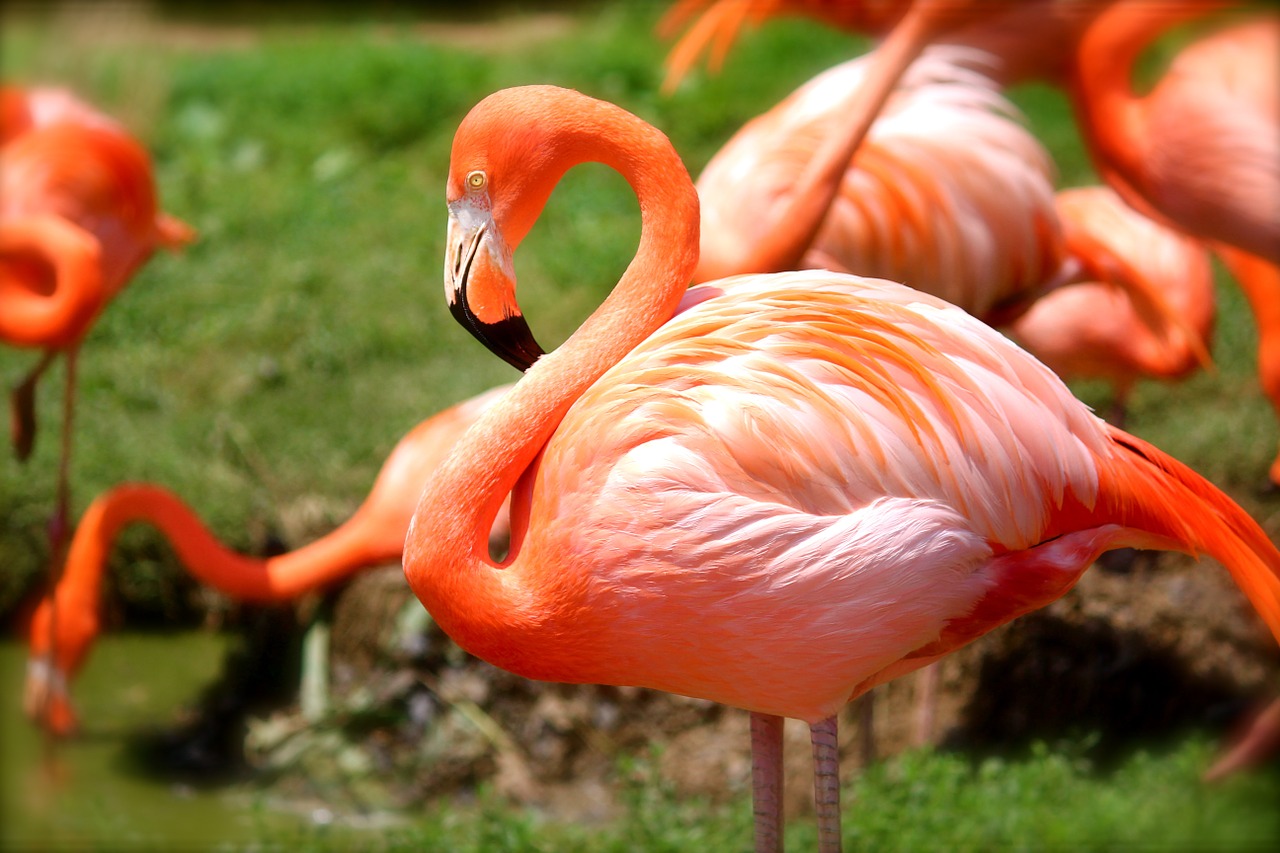
Flamingos are simultaneously elegant and comical. Their long legs and necks evoke swans and cranes, but their wild coloring, awkward walk, and crooked beak add a distinctly more laughable characteristic. They offer photographers a goldmine of opportunities. Now that they’re closer and more common than ever, it’s possible for more photographers to try taking pictures of flamingos in the wild. Whether you have a chance to meet them in the wild, or have the limited access afforded by zoos, use patience, look the birds in the eye, and have fun.

If you go down to the woods – Tips for forest photography

Your local wood may be a nice place to go for a Sunday afternoon walk, but not always the first choice for a photography outing. Unless your local geography is particularly unique any woods or forests near you may not be obviously inspiring, but any place with an abundance of greenery, shaded areas, and clearings where the sun can burst through are great places to practice photography and learn how to find the most interesting aspects of any location.

Below are a few tips for discovering what surprises your local wood or forest has in store, and how best to capture them.

Rain and Wildlife

As with any shoot outdoors, rain can be the enemy of quick lens changes, especially if trying to capture wildlife that has suddenly appeared. A telephoto lens with a wide range is a good option if you want to be prepared for all weather conditions and for capturing far away things that might be gone by the time you’ve switched lenses. The downside is that woods can be dark places, forests darker still, especially in gloomy weather and it might hard to get the shutter speeds necessary for sharp images from a telephoto lens. Using a faster prime lens will mean you can take pictures at lower ISO settings and with higher shutter speeds, with less noise.

Deer in woods

Higher shutter speeds, from around 1/500 and upwards, will be necessary for getting crisp captures of wildlife (which unless you’re a ninja will require a telephoto lens anyway) while leaves blowing even gently in the wind will be a dead giveaway of lower shutter speeds.

All seasons, all lenses

Check out your local woods in all seasons. Autumn is an obvious time for woodland photography, offering a more vibrant colour palette, though winter can be great for creating atmospheric shots. Go rambling early in the morning and late in the afternoon during the winter months to capture longer shadows which can make pictures look more dramatic. The early morning and late afternoon light can also make it easier to expose images correctly.

Autumn leaves

Simply going armed with another lens on your camera is another reason to revisit. Walking around the woods again with a prime lens instead of a telephoto, or vice versa will make you think differently about the shots you take and possibly yield some new surprises.

Leaves and Light

Often the most photo-worthy parts of a wood are to be found in the details. This could be moss on the side of a tree or the light shining from behind a leaf with a lens pointed towards the sky. By thinking outside the box it’s possible to find more original shots than simply snapping on a horizontal plane of view along the footpath.

sleeklens-if-you-go-down-to-the-woods_005

Experiment with longer focal lengths, 50mm and higher, and the light coming through the trees to create bokeh effects, and use prime lenses to explore details such as small plants closer to the ground or textured tree barks.

Sometimes getting the best images in the woods is a waiting game. The light moving from behind a cloud can change the atmosphere in wooded areas in an instant. Not only will waiting reveal photogenic lighting conditions but details you may not have noticed before. The moss on the side of a tree may look quite dull when overcast, but can suddenly come to life if lit in the right way.

Go off the beaten bath

As long as you feel safe exploring the lesser-trodden parts of your local woods there’s much to be gained from going off the trail into the darker areas. You might stumble across a unique feature, or come across a spooky long cabin, unexpected things that can make for atmospheric images.

Coins in log

Woods are generally old places so you may find the remains of an old building, someone’s name carved in a tree or any number of random things which have been placed or created there.

Light and Dark and Lightroom

Because of the contrast between heavily wooded areas and the sky it can be hard to expose images of woods without creating areas that are too bright or too dark. Use spot metering to expose different elements correctly, and adjust the exposure level to balance out the different areas. Spot metering the sky will expose the sky correctly but leave the woods in darkness, while exposing the woods correctly will leave the sky blown out in bright lighting conditions. Using spot metering on an area between the two extremes may produce the best results. Another option to simply come back later when the sun is lower and there’s less of a contrast between the woods and sky, making it easier to balance the exposure.

If all else fails shooting in RAW mode and importing photos into Lightroom can also help to overcome this issue, as detail can be recovered in the brighter areas and enhanced in the darker ones.

Lightroom can also help when compositions are good but the light is maybe not quite right or the colours dull. As images of wooded areas tend to feature a lot of green, and a lot of brown, turning them black and white can eliminate the problem of a lack of colour variety and bring out the strength of the composition. Or add a sinister touch depending on the subject matter.

Spooky cabin in woods

The woods are one of the many common places that are close to home for many people and perfect for practising photography. There are challenges to be overcome and secrets to be uncovered, and in doing so you can learn to find interesting images in the most unlikely of places.

Winter Photography: Part Two – Photographing

Previously, we discussed how to take care of your gear during the winter, and how to prepare for winter shoots. In this article we will go in depth on shooting during the winter; specifically, we will address some common scenarios and how to tackle those, plus some tips and tricks.

One general thing to know about winter (especially if there is snow) is that it requires a bit more attention when photographing. Winters usually mean fog, mist, haze, and snow. All of those, if you aren’t careful, will ruin the shot. The snow itself won’t ruin the shot, but if you aren’t careful you can easily overexpose it and lose the definition of its texture.

Catch The Morning

If there is fresh powder stacked up during the night, catch the morning if possible. This is important since most likely the snow will be uniform and untouched. No footprints, no dirt, nothing. If you are lucky for the clouds to have cleared by the time you start shooting, it would be awesome. Getting the shot early in the morning will make sure that the tones are a combination of blue and orange, which is typical for sunrise, rather than being heavy on the orange during the sunset.

alps-1368034_1920

Overcast Weather And Snow

For landscape shots, it would be best if you’d avoid overcast weather since it is just gray. However, that kind of weather combined with snow can prove to be quite cool for portraiture, especially if it is still snowing. The snow on the ground will act as a reflector and bounce some fill light, making for nice soft and even lighting. Throw in some colored items/clothing to pop out of the whiteness, and you have a recipe for a great shot.

winter-1127201_1920

Footprints

The number one enemy of the snow. As mentioned in the “catch the morning” paragraph above, freshly layered snow is quite cool. So when you are walking up to a spot to photograph a vista, be completely aware of where you are passing through. If you layer up some footprints where you don’t want them to be, there is no going back. Yes, you might be able to fix that in the post, but why risk it?

snow-1273379_1920

On the other hand, you can get creative and intentionally place footprints to express an artistic idea. However, take the shot without them first.

With Or Without Snowflakes

Falling snow can be quite cool, but on the other hand, it can be a little bit distracting if the snowflakes are too big. You can remove them by being smart about it. You can either use long exposures and hope that they won’t leave any visible trails (which is usually the case), or you can use the old “remove tourists from photos” trick, and shoot several images, and then stack them up using median in Photoshop. Of course, a tripod is required for this ordeal.

Polarizing And Neutral Density Filters

Circular polarizer filters can be quite fun with snow. Since by definition they can remove reflections from nonmetallic surfaces (however, I’ve found that they work with metallic surfaces as well), it can remove some of the reflection in the snow, thus bringing out more definition in it, or it can increase the definition in the clouds and sky. Anyhow, in cases like this, CPL is quite handy.

Photo by Dzvonko Petrovski.

Graduated ND filters are usually used for making the sky darker. However, with snow, you can stack two, one from the bottom, and one from the top, thus effectively bringing out the horizon line or something that is in the middle of the frame. If the snow is too bright, you can use only the bottom ND filter to dim it down a bit. There are many fun combinations, so feel free to experiment.

Don’t Forget About Wildlife

If it is winter, it doesn’t mean that there is no wildlife in the forests. Always have that in mind, firstly for your own safety, and then for photographic opportunities. Wildlife can often leave unique trails in the snow as well, which can serve as a great photographic element.

pronghorn-antelope-1326939_1280

Summary

Winter – it can be quite fun, and it can be quite dull. But, for the creative photographer, there is no such thing as a bad day. Therefore, get your gear properly packed and taken care of, and go out and shoot. There are so many things you can do in the winter, from snow, fog, mist, wildlife, to landscapes and portraits, the combinations are practically limitless. The only thing you need to do is learn how to use them.

Essential Photography Equipment for Wildlife Photography

Wildlife photography is probably one of the most difficult fields in photography, not only that you need certain knowledge of the animal’s behavior, also you have to know which photography gear will be ideal for wildlife photography. So, in order to show impressive photos of animals the right choice of the camera and lens is really important.

Earlier it was almost impossible to get a high-quality photograph of a wild living animal because back in the days we only had slow cameras and slow lenses. But now we have the opportunity to take breathtaking images of animals because modern cameras allow us to use fast shutter speeds and also lenses with fast autofocus allow us to capture wildlife sceneries which can’t be seen by the naked eye.

For example, this image, which shows two wild living foxes having a fight, was captured with a really fast shutter speed (1/2500s).

IMG_6115fight

What’s the ideal camera body for wildlife photography?

When choosing a digital camera for wildlife photography, there are some important considerations. First thing you have to consider is, that you should choose a camera with a good AF performance and which at least has a continuous shooting rate of 7 frames per second, to capture fast movements of animals and therefore to get out the most of an action sequence, for example if you are shooting birds in flight or running/jumping mammals.

IMG_9335s8

Another thing you have to consider is to use a camera body which has a good high-ISO performance because almost every wildlife photographer shoots whether in the dusk or in the dawn because at this time you have the best light of the day. If you will buy a camera body with APS-C sensor you will have a really big advantage, because you will have much more focal length due to the crop-factor. So if you use a 300 mm telelens on a 1.6x crop camera, you will, therefore, get a focal length of 480mm.

IMG_3512_beaS (2)

Which lens should I use?

Well, to capture a wild living animal you will need a telelens of course, but there are different types of the lenses. On the one hand you have tele zooms and on the other hand, you have lenses with fixed focal length. The main reason for choosing a tele zoom lens is that you will become more flexible because you can easily zoom in and out depending on the focal length you need.

When you are using a prime lens, you have to move the camera back and forth physically, so this could be a problem if you are too close to an animal or too far away, because you would disturb the animal you want to photograph when you move a lot. Another important consideration is to choose a wide aperture lens because you will need a lot of light if you want to capture animal action shots and especially mammals are often active in the morning where the light conditions are very poor.

79ae3f06b1c8252b1630285c7f46175a-d9qgw2s

Wide aperture lenses are also helpful if you want to isolate your main subject from everything else, for blurring the background and if you want to get a smooth and clear background.

If your lens has an image stabilizer, you will get much sharper images, because it will help you to receive high-quality images, when you taking photos in situations where you don’t have enough light, or if you don’t use a tripod while you are photographing.When you are taking photos of wild living animals you have to mind that you protect your camera and lens with a waterproof coat to prevent water from damaging your camera or lens.

Eisvogel landung

To sum up, here a little list of photo gear before you start taking images in the wild:

DSLR (Like said before crop cameras will extend your focal length)

Tele Lens (chose a tele lens with an image stabilizer and wide aperture to be able to capture fast moving animals)

Tele-converter (A teleconverter will give you extra focal length)

Hiding Tent (using a hiding tent will maximize the chance to photograph timid animals)

Tripod (a tripod will help you get sharper images when you shoot at slow shutter speeds)

We hope you enjoyed this article !


All photos by Julian Rad.

How and Where to photograph Songbirds

Today we will focus on techniques for successful songbird-photography.

Songbirds actually can be found in almost every forest, where they can breed and find enough food, such as insects, berries or seeds. If you are lucky enough to own a garden, you will be able to spot many bird species. All you have to do is to create a songbird-friendly atmosphere. Creating a songbird habitat in your backyard you have to consider just four things:

Food, Water, Shelter and Nestboxes.

The best time to photograph songbirds is in the winter, when there are fewer insects and other food resources for songbirds because then you have the opportunity to build up a bird feeder for the songbirds.
A bird feeder is the best and most effective way to attract songbirds to your planned shooting spots.

Bird feeders can be bought in every pet supply store, or if you are endowed with manual skills you can build up your own bird feeder. After you got your bird feeder, the next step will be to buy sunflower seeds and suet cakes, suet cakes contain nuts, fruits, oat flakes, mealworms and other insects – for them, it’s like enjoying a well-served food banquet.

It will not take much time till the first birds appear, probably after a week or so you have many bird species around your bird feeder such as blue tit, robin, coal tit, blackbird, woodpecker, jay, sparrow, nuthatches and many other songbird species. Maybe even a squirrel will also appear to get some seeds!

Kohlmeise

Bergfink
If you don’t own a backyard, you can look for a park or forest near your area and also just mount a bird feeder on a tree and wait for some days till the birds get used to the feeder. You will see, the songbirds will appear every day, just make sure you fill up the bird feeder when it’s empty.

If you are not sure how to build up a bird feeder or a nest box, this site gives you some ideas and instructions.

Schwanzmeise
Besides the food you provide, another great way to attract birds is to build up a bird bath. Bird baths will be used not only in winter, also in summer on hot days, because birds need to drink and to cool themselves. Don’t forget to put some stones in your bird bath to provide the birds a surface to sit, bird baths should be only an inch or two deep; but for such purposes, any kind of tupper can be used.

Photographing birds while they bath will give you excellent action shots, the water droplets fly in all directions, the birds show their wings and if you are lucky, you maybe can even catch 2 birds on the same photo. It might also happen that not only songbirds will appear to take a bath, also sparrowhawks maybe visit your bird bath to have a drink.

Check out following youtube video to see how it looks like when songbirds take a bath.

Eichelhäher

moenchsgrasmuecke-842b2bae-50ba-4e70-8c34-71fcec2dad91

When everything is set up for the birds, you have to make sure you use the right equipment.

So in order to get impressive songbird shots there are some essential things you will need for sure:

  • Hiding Tent (songbirds are usually very timid, so a hiding tent is a must)
  • – DSLR (use a crop camera, in order to get CLOSER to the small songbirds)
  • – Tele Lens (300 mm to 600 mm lenses with an image stabilizer work best)
  • – Tripod (use a tripod with a ball head in order to be flexible)
  • – Warm Clothes (if you decide to stay some hours in your hide, be sure to wear warm clothes, especially during winter time)
  • – Branches (prepare some beautiful branches where the birds can sit on)

Rotkehlchen (3)

One more important note you have to consider before you prepare everything to start photographing songbirds:
Cats kill about 1 BILLION birds each year, they are considered the most serious threat to songbird, so keep feeders, bird baths and nesting boxes out of their reach.

All in all, bird photography is really simple, it’s fun, and extremely rewarding if you do everything right. You can easily build up a portfolio after some sessions for advertising your work or either for your own personal delight.

Good luck & we hope you enjoyed this article!


All images by Julian Rad