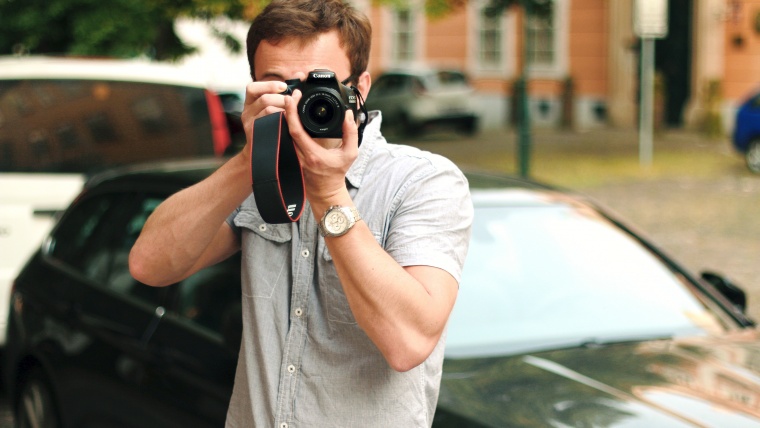
Becoming a good photographer takes practice, but it also requires immense technical understanding. Among the three basic pillars to master, along with aperture and shutter, is ISO. As a beginner, you most likely are shooting in Auto ISO. This is a great starting point to get out and shoot. But, after some practice, you’ll want to begin experimenting in full manual mode. This gives you complete control and understanding of your equipment. Even if you plan to shoot in auto mode all the time, you’ll want to understand how it works.

Table of Contents
We’re not discussing the International Organization for Standardization here, but rather the sensitivity of the image sensor. Camera ISO was a term that first started appearing during the 35mm film camera days. A roll of film that had a low ISO number meant that it was not very sensitive to light. In contrast, a roll of film with a high ISO number meant that it was very sensitive to light. The higher ISO film usually resulted in a grainier photo due to its high contrast. The advantage of a higher ISO would be to get faster shutter speeds, especially in dark settings.
As mentioned, ISO is camera sensitivity to light. Photography is all about light manipulation and letting it work for you. As such, when your camera needs more light, you will need to increase your ISO. When it doesn’t need as much light, then you reduce it. This is represented in our chart below
ISO Chart
| 100 | 200 | 400 | 800 | 1600 | 3200 | 6400 | 12800 |
| Less sensitive to Light More sensitive to Light | |||||||
| Will capture less light Will capture more light | |||||||
| More light needed for ‘good” exposure Less light needed for “good” exposure | |||||||
| Less noise More noise | |||||||
ISO controls the amount of sensitivity to light your camera displays. This can range from 100 (least sensitive) up to 25,000+ depending on your camera. The settings increase in powers of two, meaning from 100 to 200, 200 to 400, 400 to 800, and so on. Each increase of the setting is doubling the sensitivity of your sensor. This means the higher the ISO, the better it will perform in low lighting. Lower ISOs are better for higher amounts of light. It also means the higher the ISO, the more grain you’ll see in your images.
There are a handful of common camera ISO values, which you can fall back on when shooting in manual mode:
On a sunny day, you’ll want to shoot at or around ISO 100.
On a cloudy day, you’ll want to shoot at or around ISO 400.
If you are inside, you’ll want to start around ISO 800 and work your way up if needed.
In concert photography, I am usually shooting at an ISO sensitivity of 1600 – 3200.
This is all based on your camera’s sensor. Some camera sensors are more sensitive than others. You’ll need to experiment to see what works best for the image you are capturing. Above is a general starting point to follow when learning manual mode. Use these values as a guide and adjust from there if needed.
It’s important to understand how ISO relates to aperture and shutter speed. All three interconnect and a change to one affects the others. This is known as the exposure triangle. You’ll need to understand when to change ISO and when to adjust aperture or shutter to compensate.
The larger the ISO value means the smaller the shutter speed needed for the image. This means: When in ISO 100, your camera sensor needs one second to capture the image. But as you increase ISO sensitivity, your camera sensor will need less time to get the shot. It increases by a power of two, so from 100 to 200. 200 t0 400, 400 to 800 etc. As this doubles, the required shutter speed halves. So at an ISO of 1600, you’ll need 1/16th of a second to get the same shot as ISO 100 at 1 second.
Say you are shooting outside at ISO 100 and one second and are happy with the image. But, the clouds start to roll in. You’ll need to adjust ISO, but you want to maintain the same image quality. Increase ISO to 400 and increase the shutter speed to 1/4. You’ll achieve the same image as before, but now you’ve exposed for the clouds, all while keeping aperture the same for both images.
Increasing the aperture lets in less light. This means if shutter and ISO stay constant, but aperture increase from, say, 3.5 to 8, the image will be dark. This is because less light is coming in through the lens. If you want to increase your aperture to allow more of the image in focus, you’ll need to increase your ISO. Because you increased your ISO, you’ll need to decrease your shutter if you want to maintain the same image exposure and focus.
To figure out the correct settings, begin with identifying the desired outcome. Are you in low lighting? Or are you outside looking to freeze the subject? Identifying that outcome will confirm which setting (ISO, aperture, shutter speed) to set first. If you are shooting low light, you’ll want to start with a low aperture and high ISO. Then you can determine shutter speed. If you are attempting to freeze motion, set a high shutter speed. From there, determine ISO and aperture needed.
If you are unsure which ISO you need, follow the general guidelines above. It’s always best to start low and increase as needed. If your shutter and aperture are at an acceptable value, but the image is still too dark, turn up the ISO.
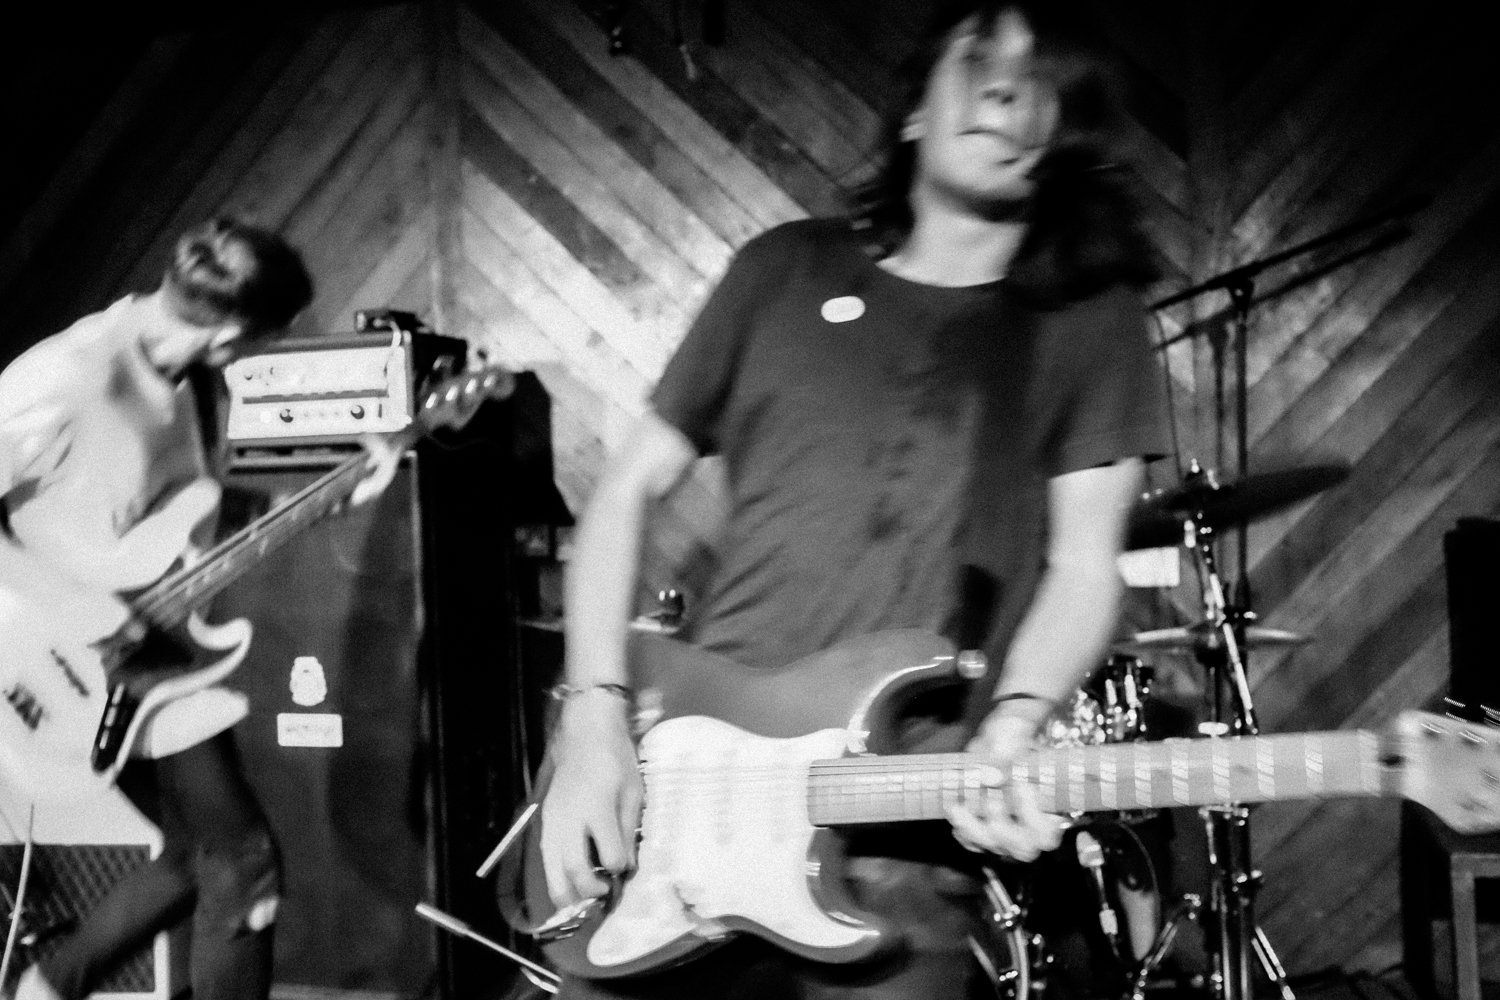
f4 and therefore 1/50 shutter. You can still see a lot of noise in the image, but given the subject, it seems to work ok
Sometimes it just pays to read the camera manual. In there is a nifty little item that I’m not entirely certain is a well-known feature of most decent cameras. Auto ISO. Admittedly, I had read articles about this for years and perhaps I was just skeptical of the way proponents spoke of Auto ISO as if it was photography’s unicorn. So I never cracked open the manual to find out how to use it.
And then finally, I understood. Here’s how that happened.
One of my favorite subjects to photograph is canyoneering, not the easiest sport to record because the participants are traveling through deep canyons that can be cave-like in darkness or blasting bright under direct sunlight—or both at the same time. When I first started, I held to old habits and set my camera for aperture-priority. In other words, I selected—usually f/8—as my operating lens aperture and just let the camera choose the shutter speed based on the ambient light.
Why f/8? For starters, most of my canyoneering images require a wide angle lens because the spaces are relatively tight, so that aperture gives me decent depth of field while not compromising too much on shutter speed. That is, to stop down more would mean a slower shutter speed. Also, f/8 tends to be one of the sharpest settings for my lenses.
Here’s what I discovered rather quickly: I was constantly fiddling with the camera settings despite the supposedly effort-saving quality of something as semi-automatic as aperture-priority. I had to quickly raise the ISO beyond my favorite 400 whenever the action went into dim shadows or open the lens to its widest, f/2.8. Suddenly, I wasn’t getting that f/8 look I valued so much.
Second, with the quickly changing nature of capturing people rappelling down ropes or down-climbing over obstacles, I sometimes didn’t see that my shutter speed was too slow and I came back with a lot of blurry images.
Lastly, more often than I like to admit, I would pump up the ISO to some astronomical number in order to shoot in low light, forgetting the camera was set for that and taking the next pictures in bright sunlight. Somehow, engineers haven’t quite figured out how to make ISO 12800 look good under the midday sun.
While I expect most people reading this don’t go canyoneering, you’ve no doubt been in similar circumstances where you don’t want to manually set the camera for every shot, but at the same time want more control because of the changing light conditions.
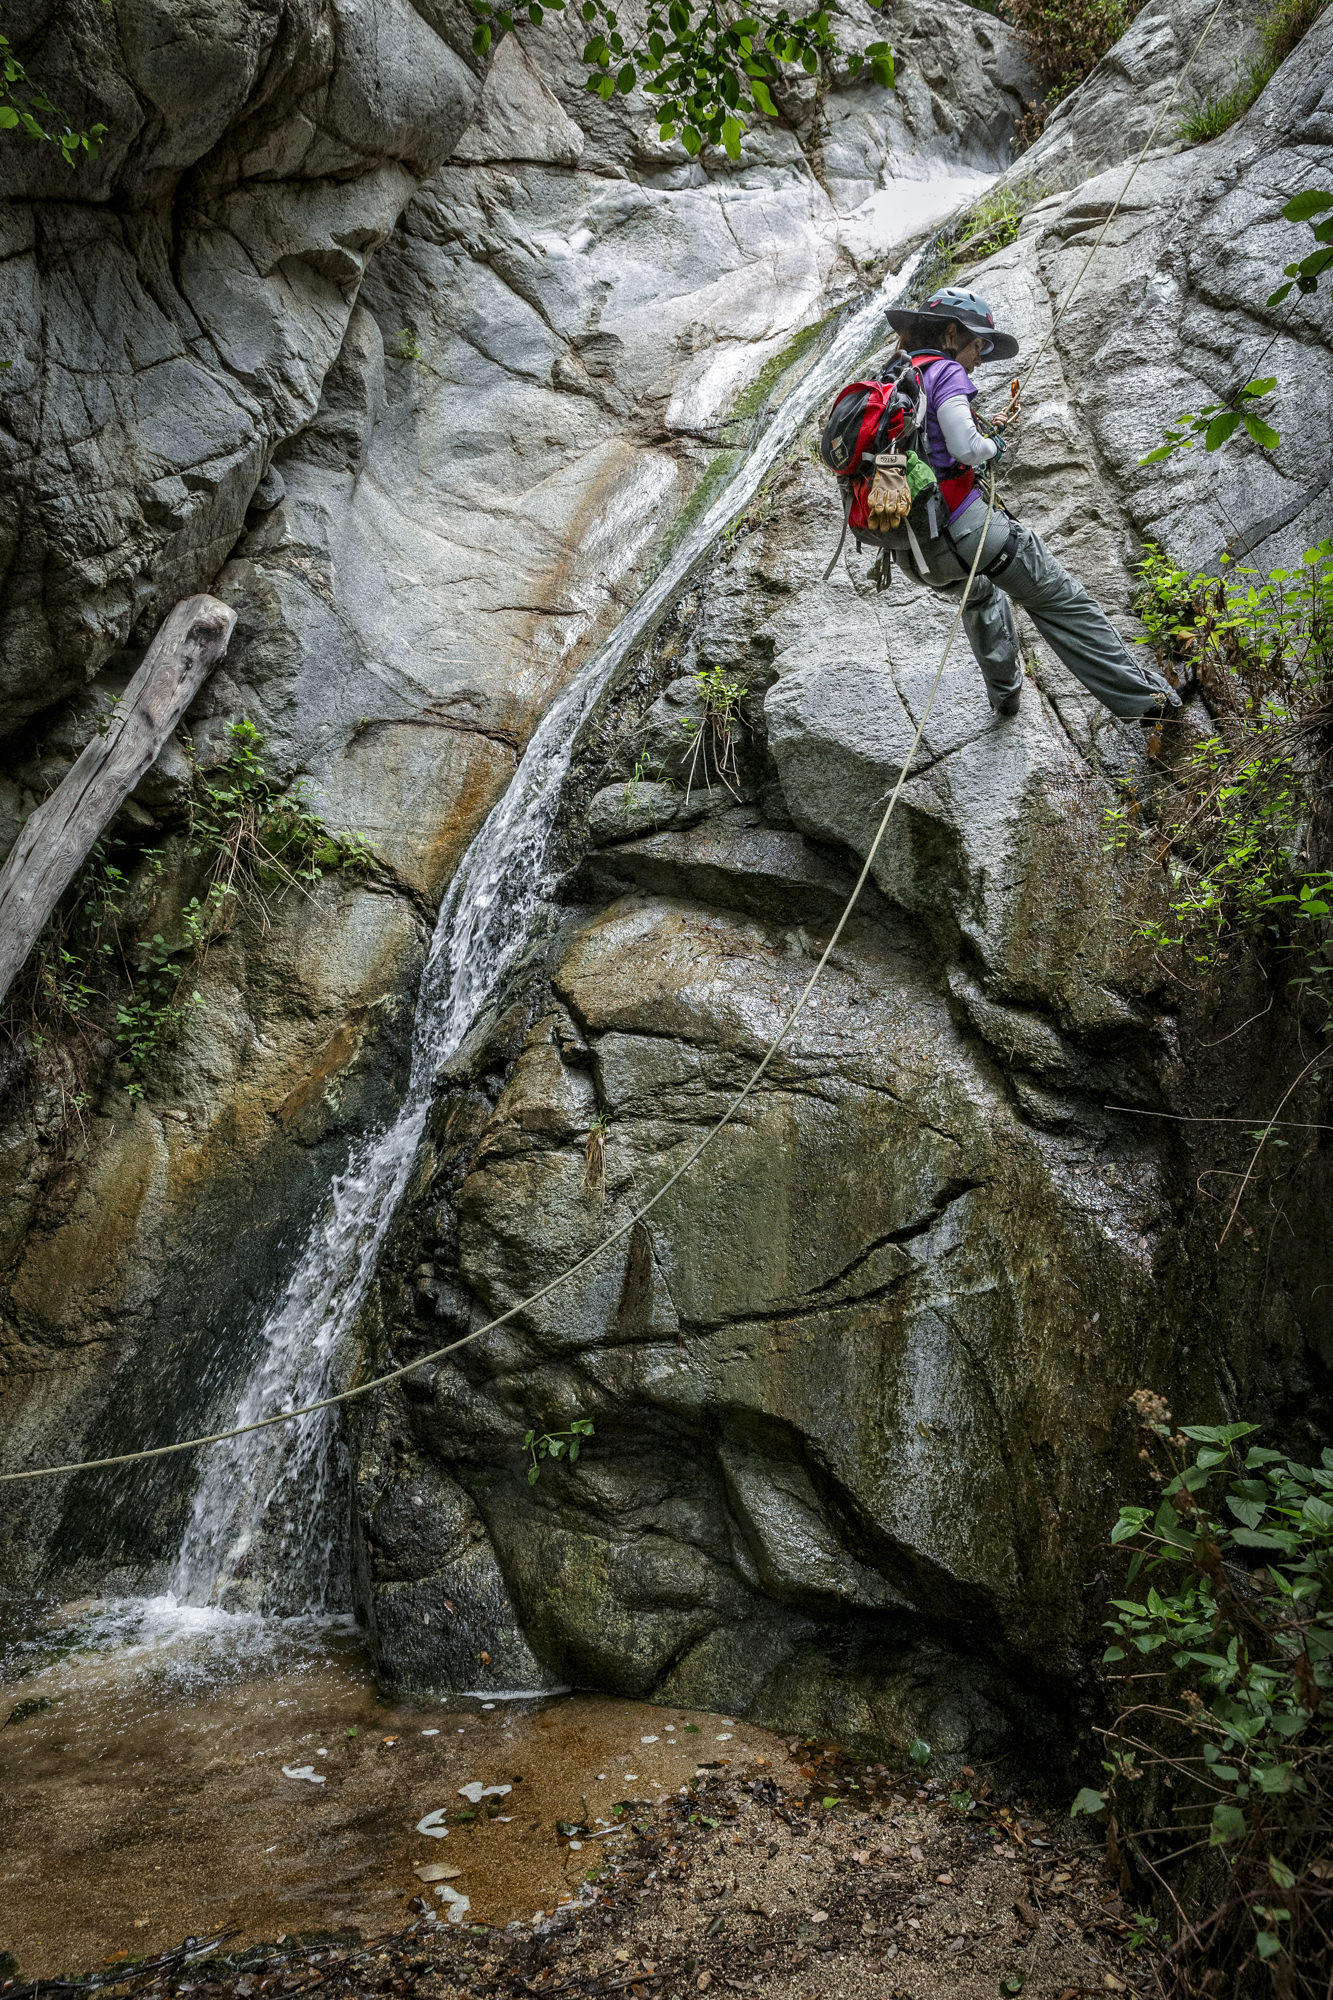
I make it simple and nearly foolproof. For my Canon cameras—a 1Dx and 5DMIII—I push the ISO setting button on the top plate and go downward beyond 100 to A. Yeah, that’s right. A for Auto ISO. Next, I set the mode to manual and select the shutter speed and aperture that I want to use for the day. For canyoneering, that’s most often 1/500 at f/8. Except in the dimmest of conditions—deep in a canyon or early/late day—I don’t worry about the exposure and can concentrate on the action. The camera maintains the manual setting and merely adjusts the ISO up or down to meet my needs.
Yes, that’s right, for those who find heavy noise in a picture repugnant, that potentially means really, really high ISO settings. Five-figure ISOs. And the chunky noise that comes with them. I’m probably the least sympathetic person when it comes to this. My attitude is simple: I need to come back with action shots that aren’t blurred, period. So noise is better than nothing.
I still need to monitor my lighting conditions. For example, if it’s an exceptionally dark place, Auto ISO will crank up to the maximum I set for my cameras—25600—and if that still isn’t enough, will simply let the picture go under-exposed. In bright conditions, it will first set to ISO 100 and if that doesn’t work with the manual exposure, then I’ll get over-exposed pictures. Nothing’s perfect.
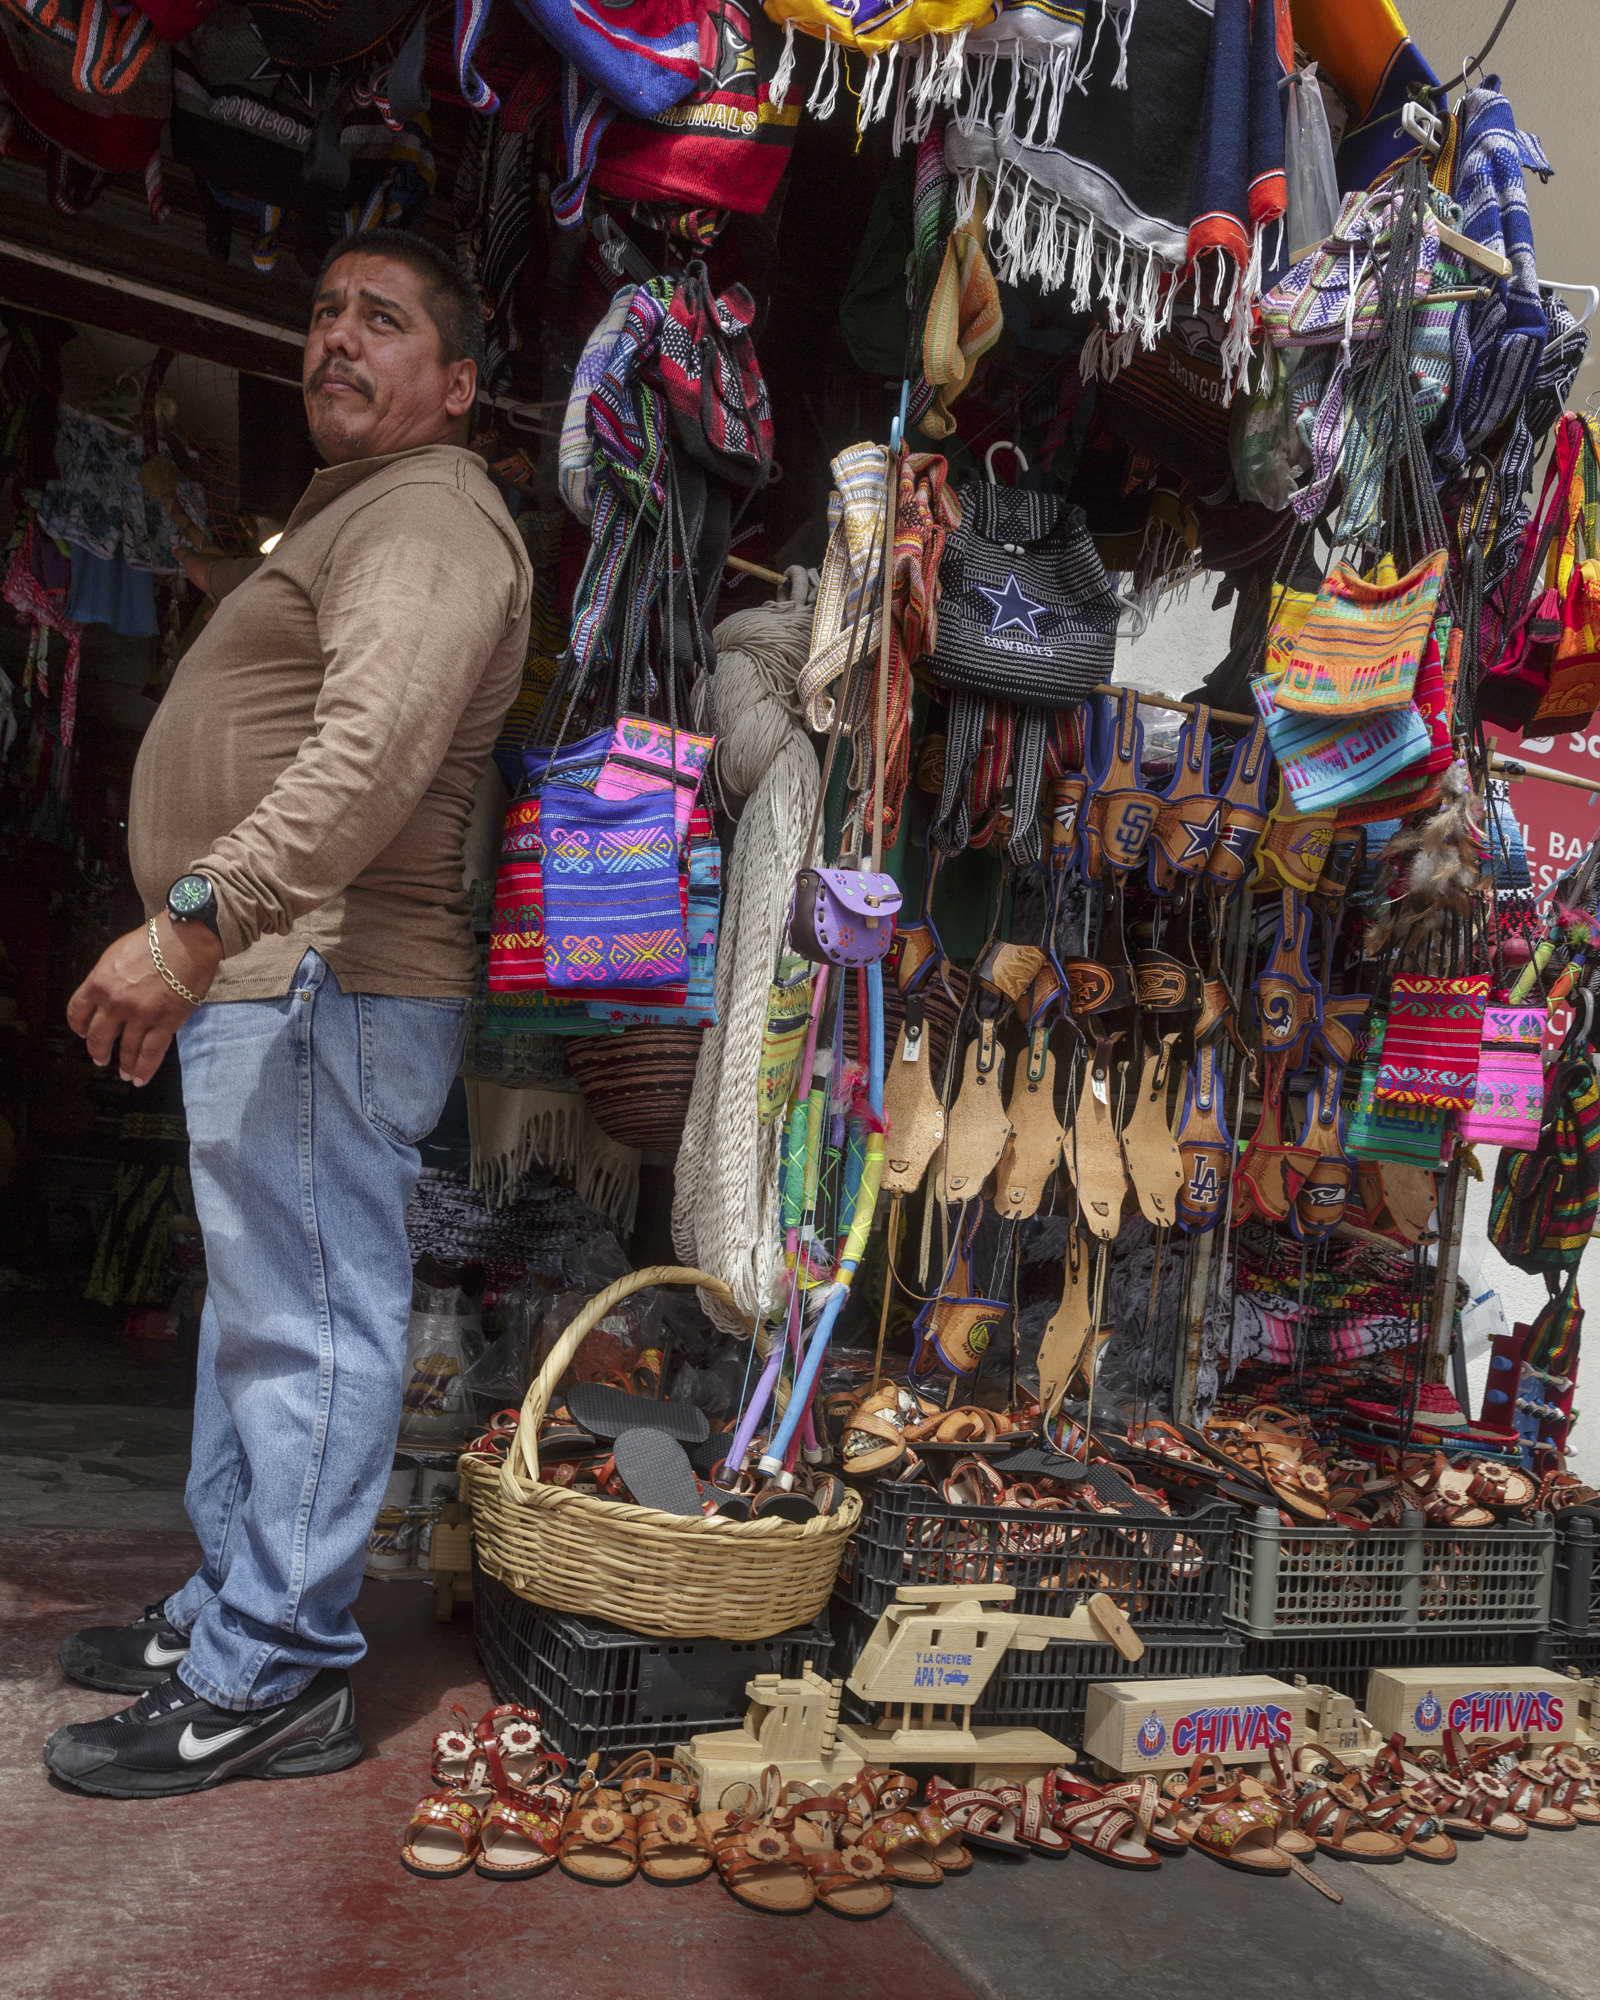
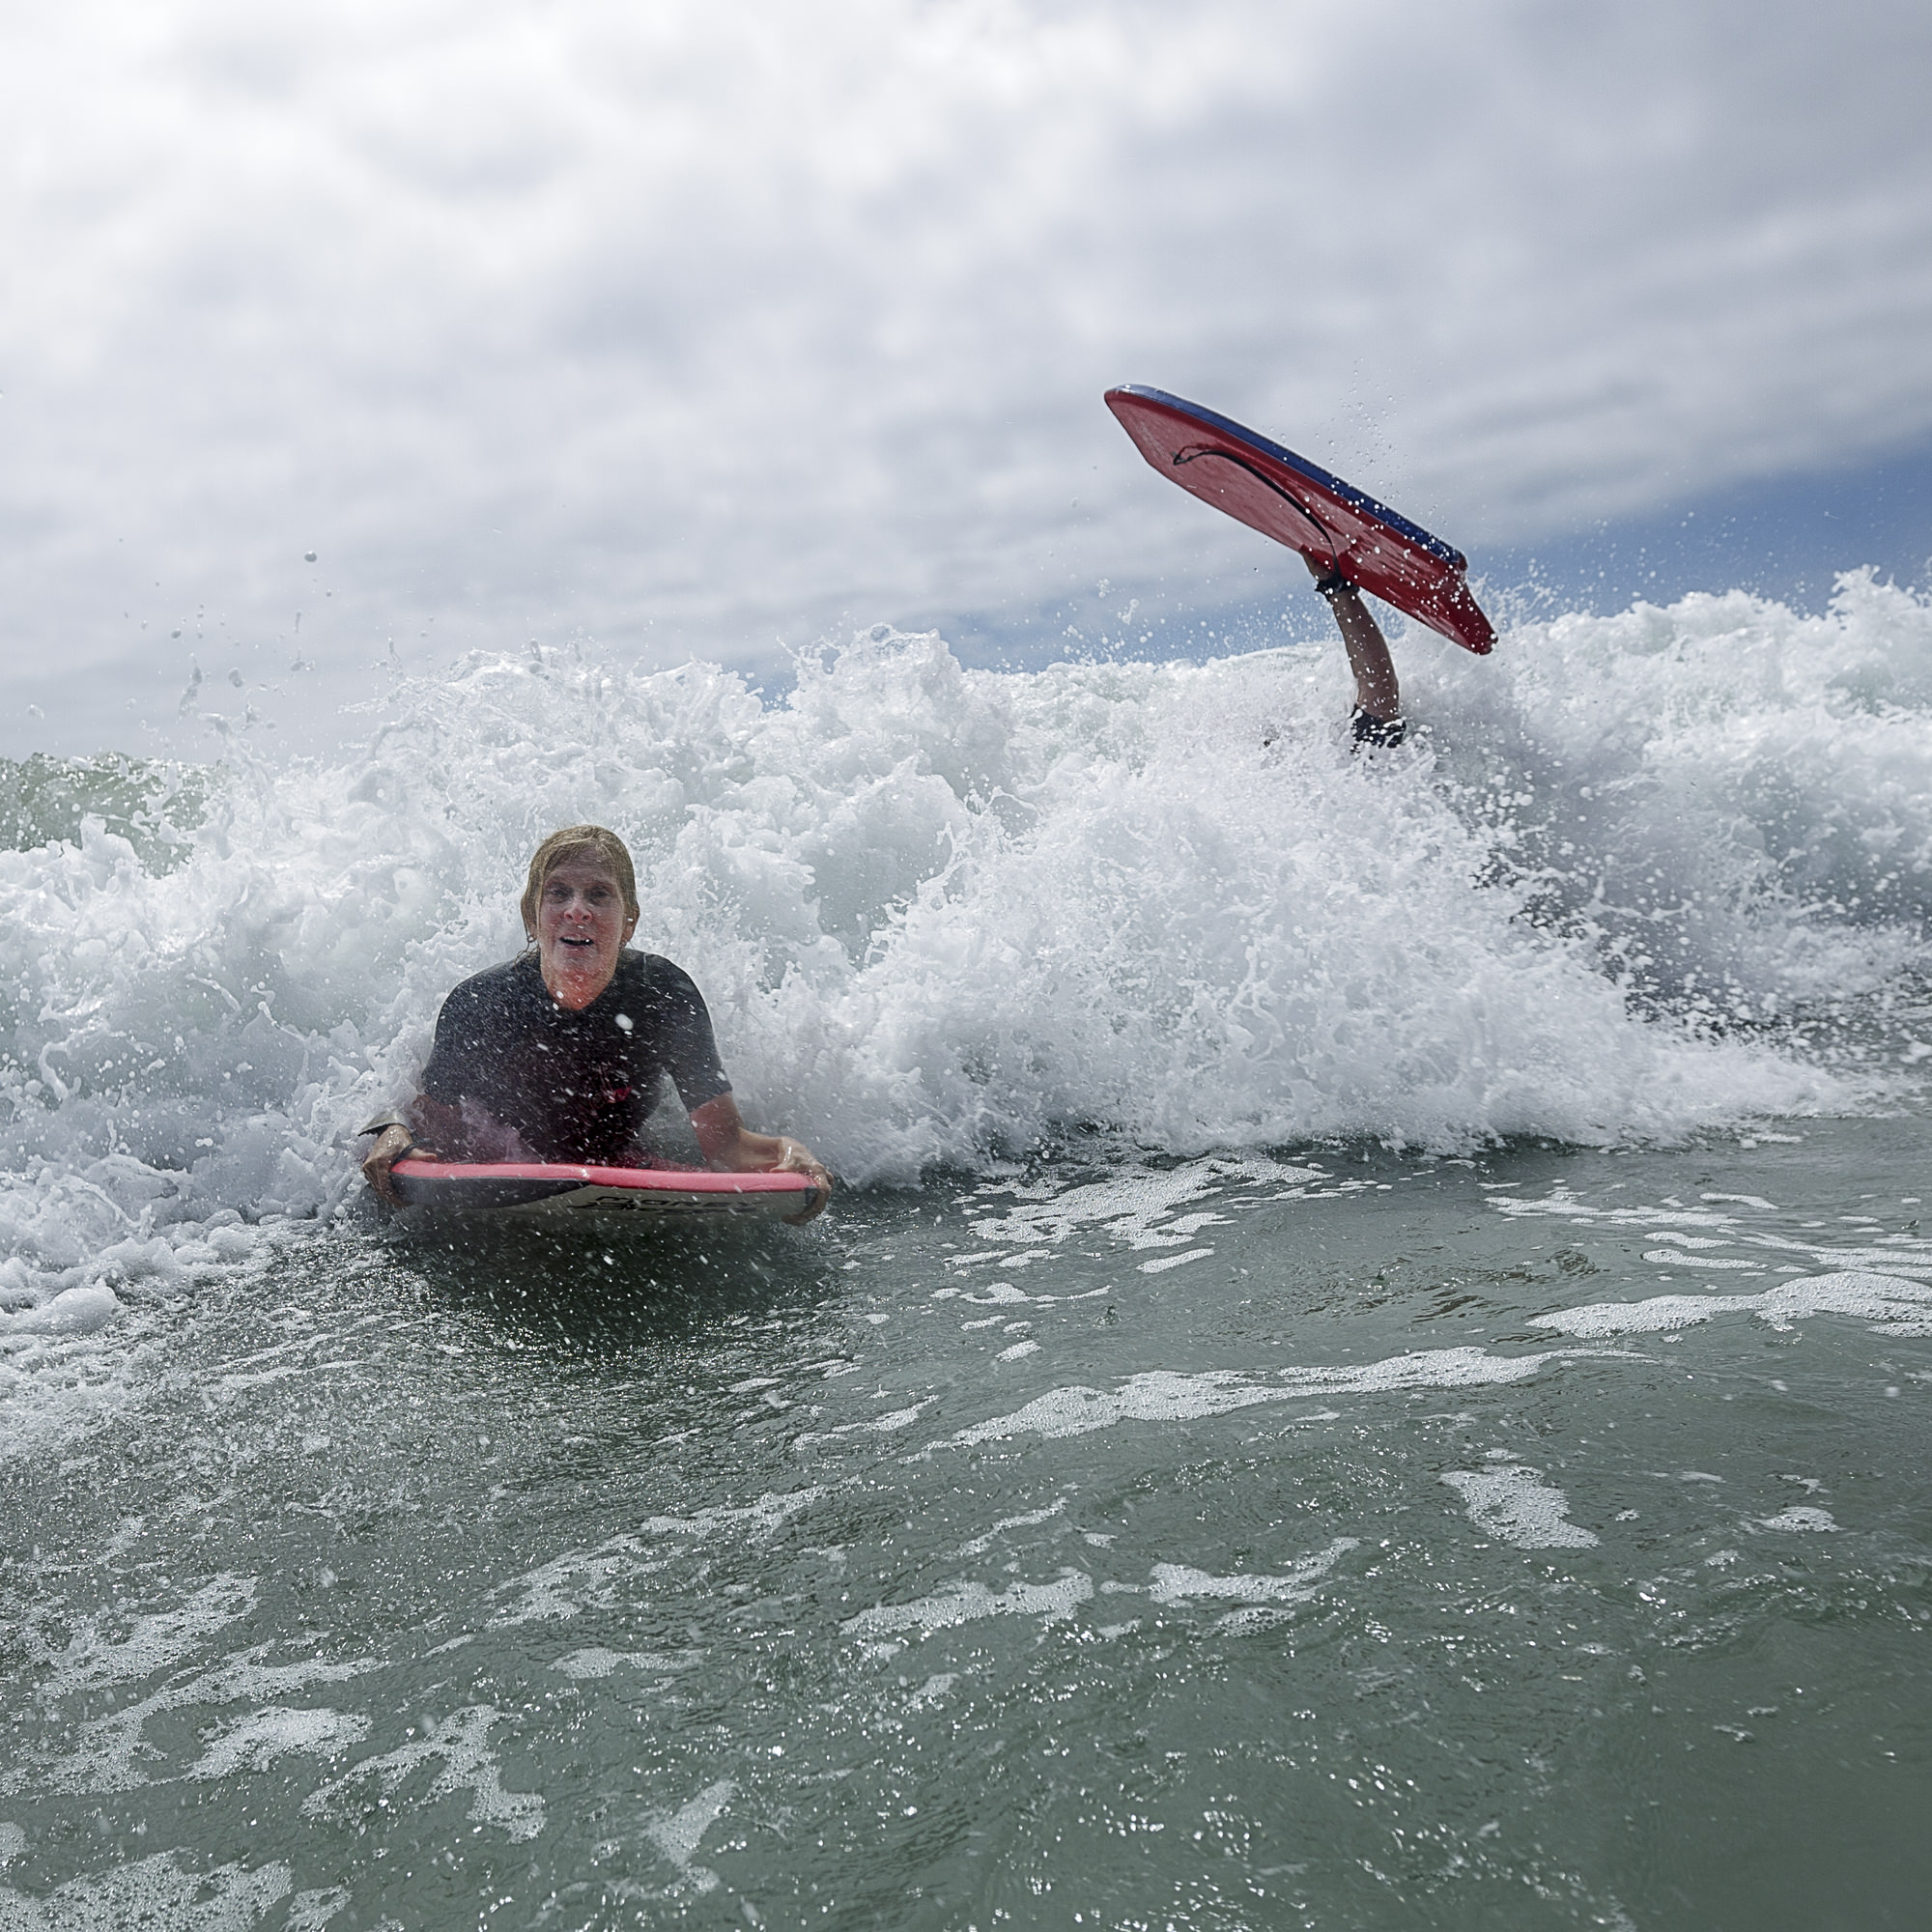
On a recent trip to Rosarito, Mexico, I employed Auto ISO to the fullest. While we rummaged through the market there, I was able to shoot both indoors and outdoors without fiddling with the camera once. The high ISO pictures still looked great and were sharp. Later, we went boogie-boarding in the Pacific Ocean, where I set the camera for 1/1000 at f/8 and shot from the beach with a long lens or in the surf with a wide angle packed safely inside a water-tight housing. I didn’t lose a single shot due to the action blurring.
One last note: With the 5DMIII, manually setting the exposure with Auto ISO locks me out of using exposure compensation. With the 1Dx, I can dive into the custom settings where I’ve assigned the SET button to the task. I press SET and dial in the compensation I need. Check your manual to see if your manufacturer allows this sometimes important function.
I’m not saying Auto ISO is for every occasion. It makes no sense for shooting landscapes where you usually want a low ISO and are using a tripod. But after using it a few times, you may realize there really is a photographic unicorn, and it’s going manual with Auto ISO.
All of this technical speak may not sound appealing to you, so let’s take a look at some example photos and discuss what ISO settings would make the most sense for the photos. For each of the photos below, can you guess what would be the most suitable ISO to shoot at (between 100 and 6400)? Think about why you would choose the number that you chose.
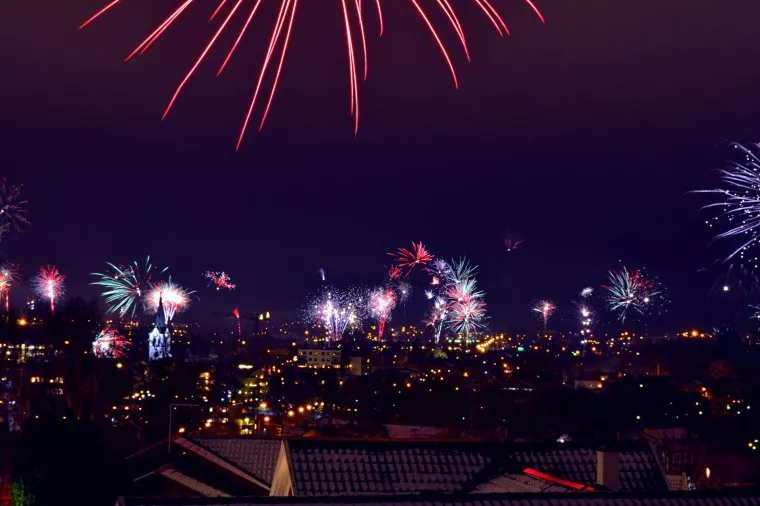
What range of ISO numbers do you think would best fit the photo above? Remember that this photo was taken at night, which normally requires a high ISO. In addition, a reasonably fast shutter speed was required to capture the fireworks. For this reason, the ISO number would likely have been set to 1600-6400 or higher. By using a high ISO setting, the image sensor captures more of the light that enters the lens. The photo will end up more grainy than if you used a low ISO setting, though.
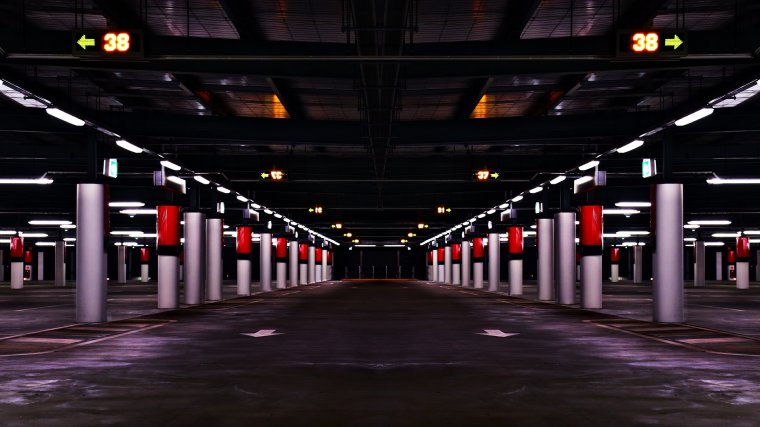
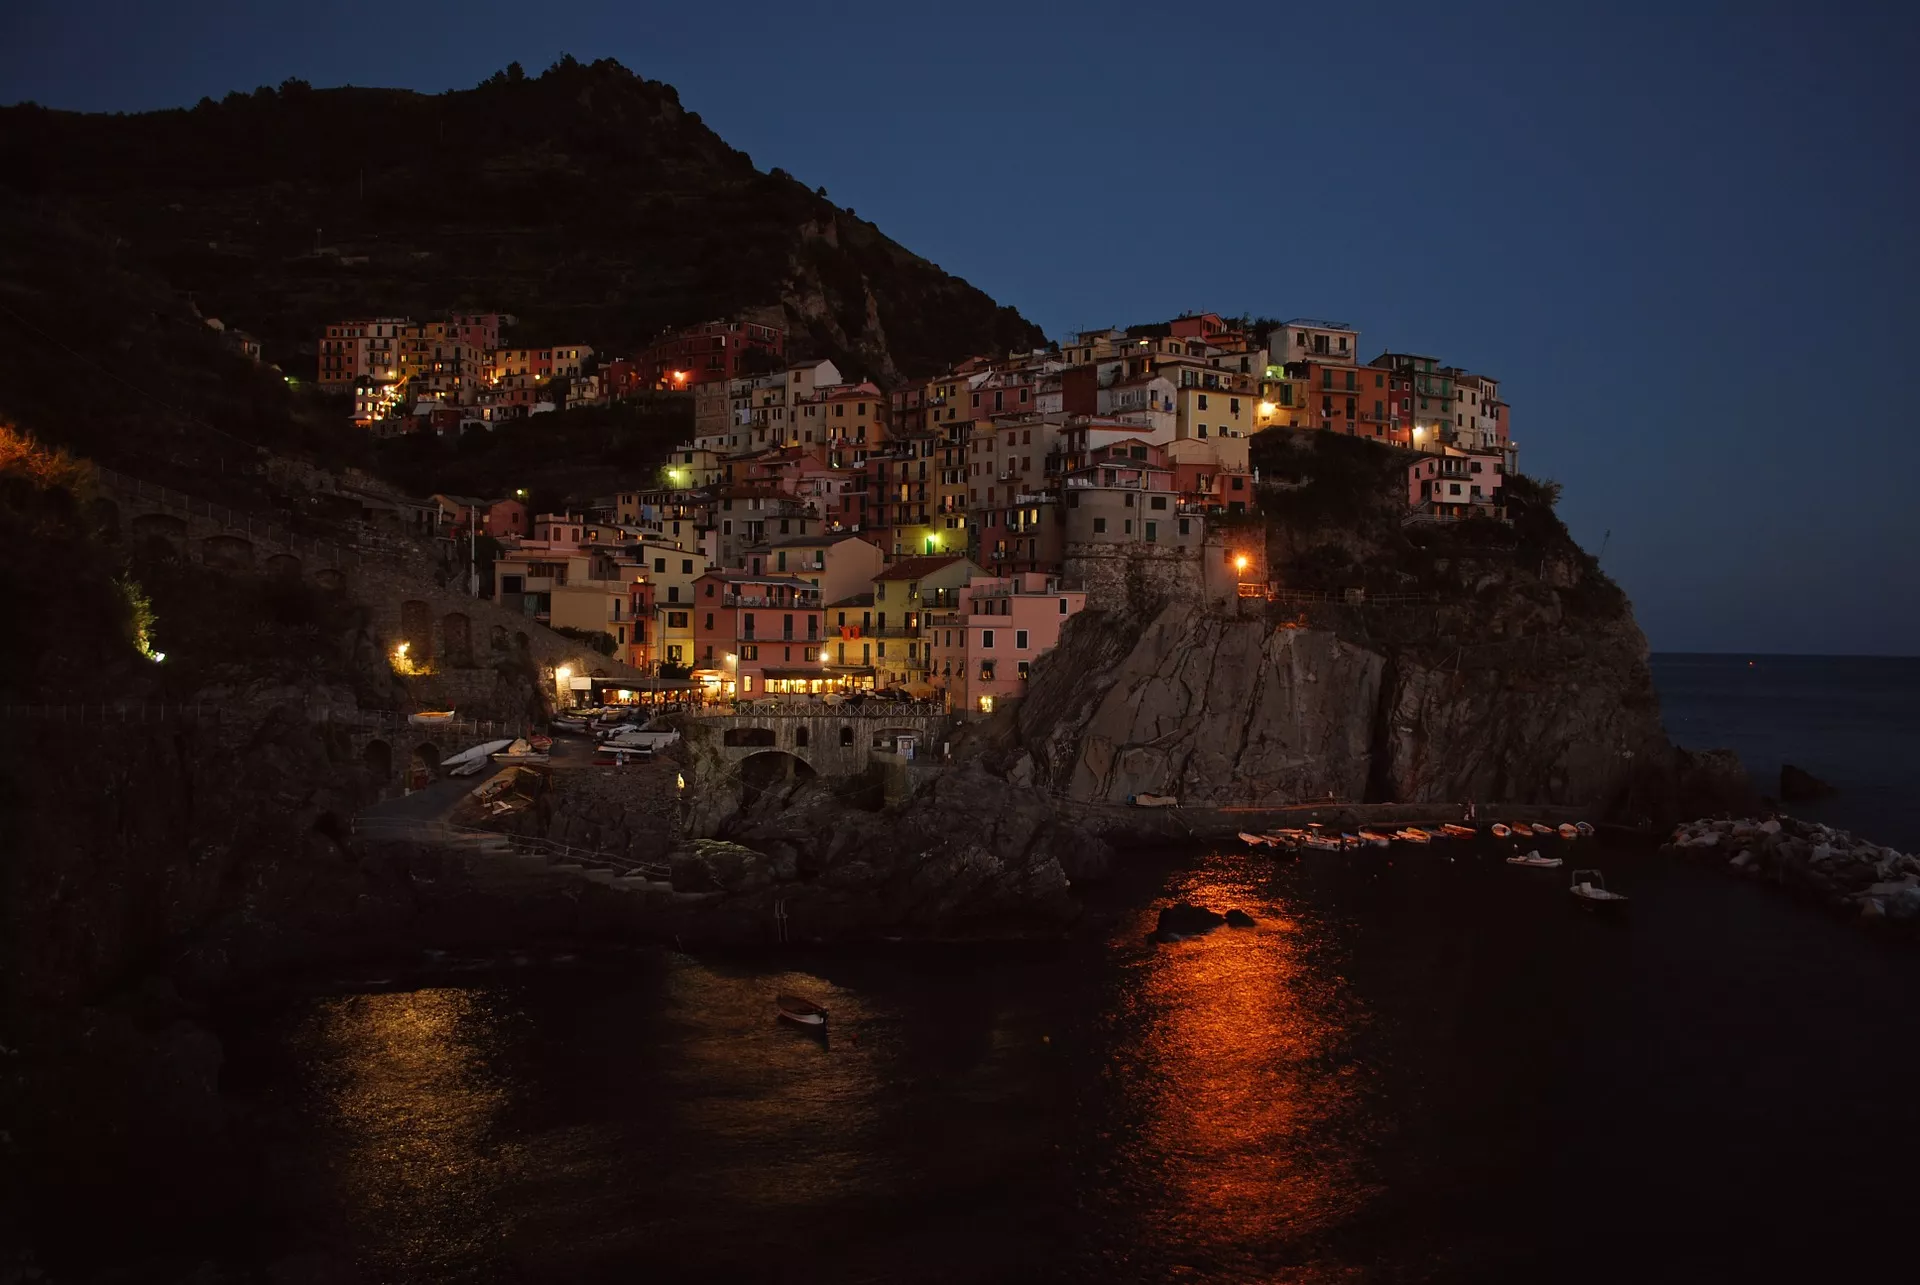
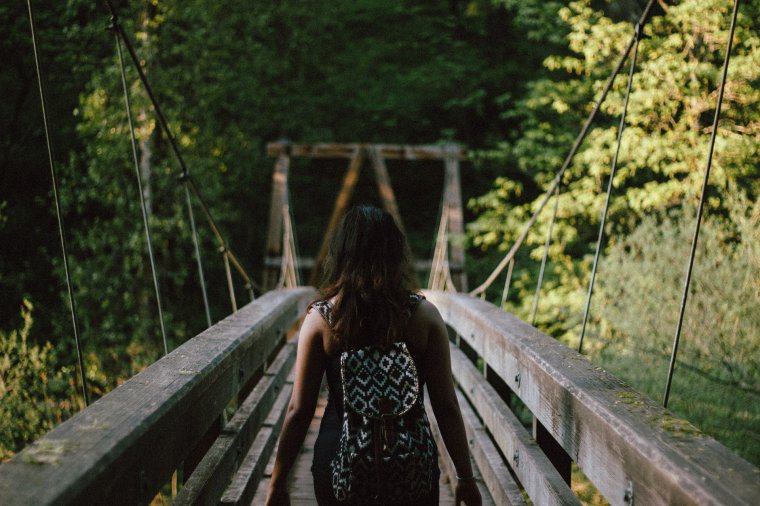
How about this photo, what do you think an acceptable ISO range would be? This one is actually a bit tricky. Although this photo was taken at night and there isn’t much lighting, there is something peculiar about the image. We notice that there are no moving objects, such as cars or people in the photo. This means that the shutter speed did not have to be very fast, unlike the earlier night photo of fireworks.
As long as the photographer had a tripod and didn’t have to hand-hold the camera, the shutter speed could have been set to anything. So, the ISO number could have been anywhere from 100-6400. Of course, the lower ISO settings would have resulted in a more clean photo, without the graininess that comes with higher ISO settings.
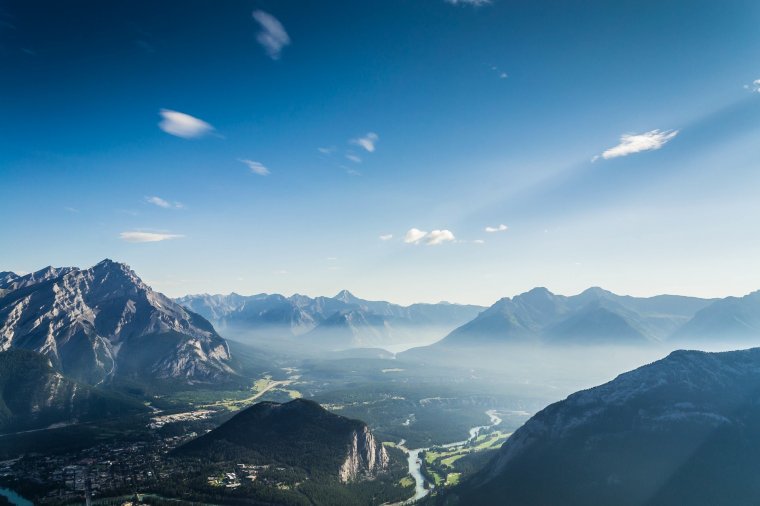
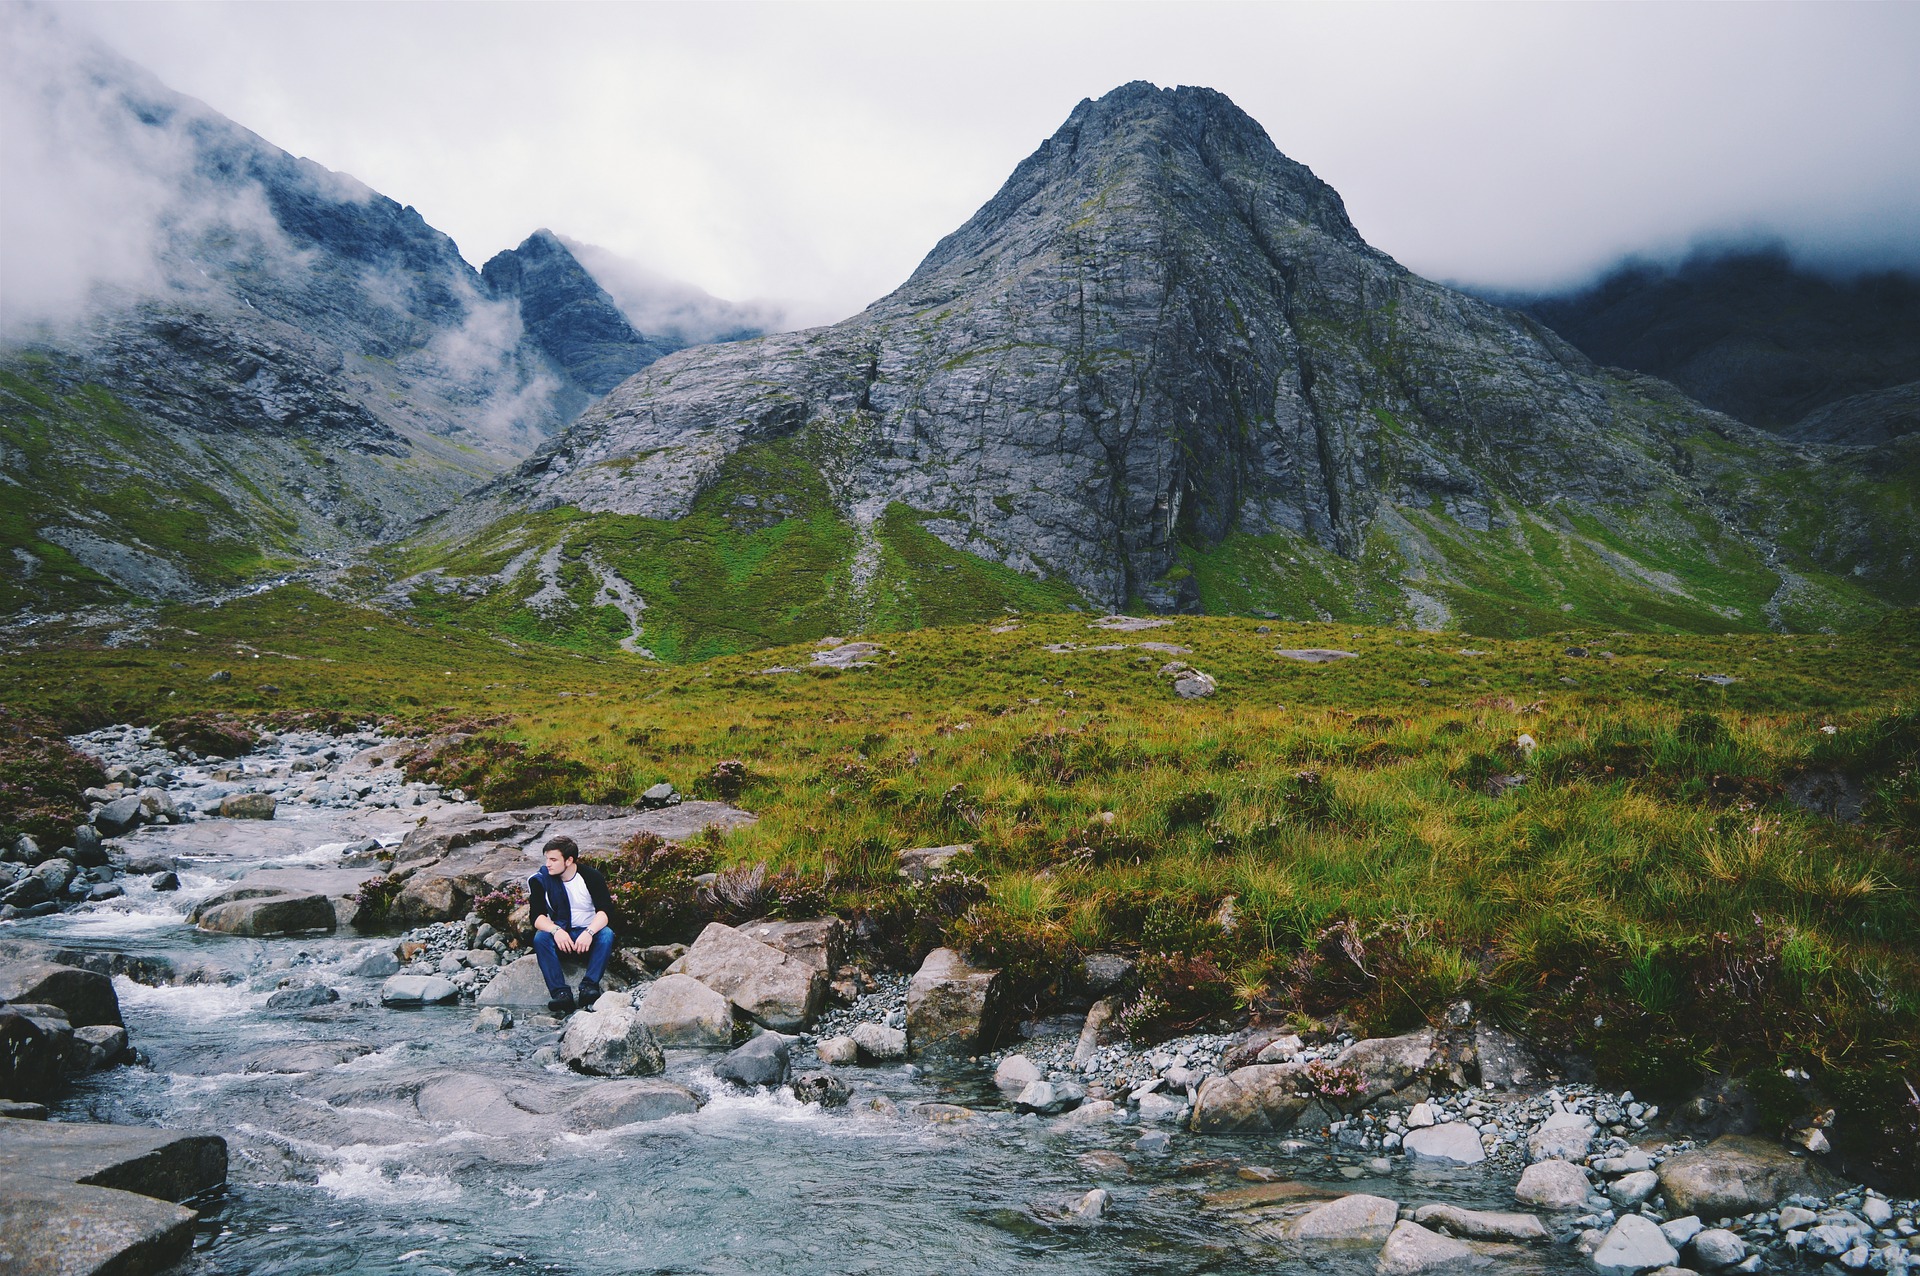
How about during daytime—what ISO do you think would be most suited to the photo above? The correct answer would be anywhere from 100-400 ISO. Because the sun is so bright during the day, a low ISO number will be all that is needed to capture the light. If the photographer tried using a high ISO setting like 6400, the photo may come out overexposed due to all of the light.
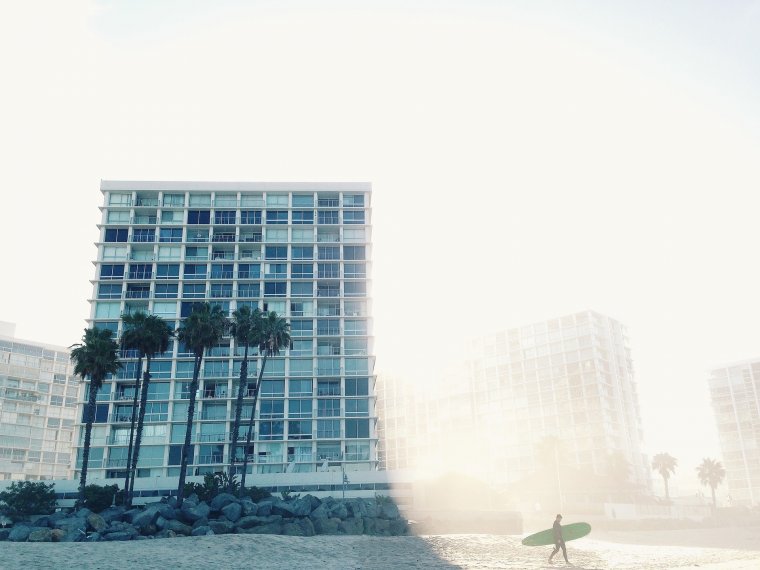
We see here another example of daytime photography. This photo is much brighter than the previous one. As such, what ISO number would be the best setting? If you guessed ISO 100, you would be correct! The lowest ISO number possible would be the ideal camera setting for this photo. If the ISO setting was set too high, there would be the risk of overexposure due to too much light coming into the sensor. We avoid this issue by setting a low ISO number in bright daylight.
Now we have a photo that was taken at sunset, what ISO number range would be best for this photo? If you guessed between 400 and 1600, you would be correct! During sunset, you start to lose valuable light from the sun. As the skies grow darker, you must increase your ISO in order to compensate for the lost light.
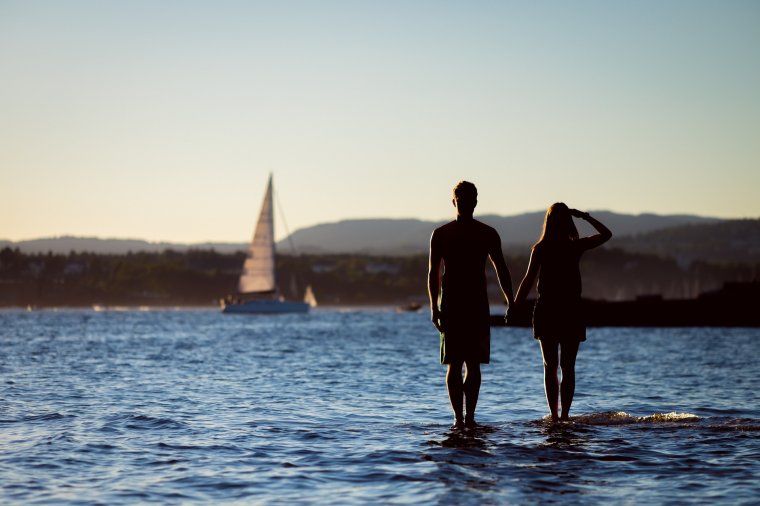
What if you wanted to photograph someone, what ISO number would you use? It depends on the amount of light available in the scene. In the photo above, we would likely use an ISO setting of 400. ISO 400 is still quite low and has little grain, but should take in enough light for shots during the day. Portraits also usually require a fast enough shutter speed to freeze the subject. During the day, this isn’t an issue, but if you are taking a portrait at night, you may need to crank up the ISO to 1600-6400, depending on how much or how little light you have.
The main drawback of increasing your ISO is noise. Noise grain and image grain will be evident in your images. So, as seen in the video, we have a sporting scene and the image was shot at ISO 100 and there is no noise but it is perfect. As we increase the ISO in the camera, more noise is added to the scene and this can really distract on how a good quality photo can be. That is the main drawback and the reason why many people try to play with the ISO to avoid increasing it more than necessary.
When you take a picture and notice a lot of grain in the image, that is the noise. You will see digital noise in your image if you are using too high of an ISO setting for the light required; however, too low ISO values don’t always guarantee proper illumination, which can translate into blurry images.
For example, the image below, taken at ISO 200, has a lot of imperfections. The lighting was too dim to allow for a proper exposure under such ISO values. The same image, if taken at ISO 800, looks much better. As I adjusted ISO, I also adjusted shutter and aperture to allow for the same exposure.
Image noise can be subjective based on the photographer and the type of image they are creating. In some instances, a gritty image is what you are looking for, and you may adjust your ISO the achieve this look. It will all depend on your desired outcome. This is another example of why understanding the exposure triangle is important. In auto ISO, your camera will adjust for the perfect exposure. If you do not want perfect exposure, you need to know how to get there. How to manipulate ISO to achieve this more or less noise is a great skill set to have as a photographer.
The process of manual ISO control will take time, but you will gain a better understanding of your digital camera. It is important to work towards having complete control over your images. This way, you will understand the appropriate adjustments to make, to get the image you want.
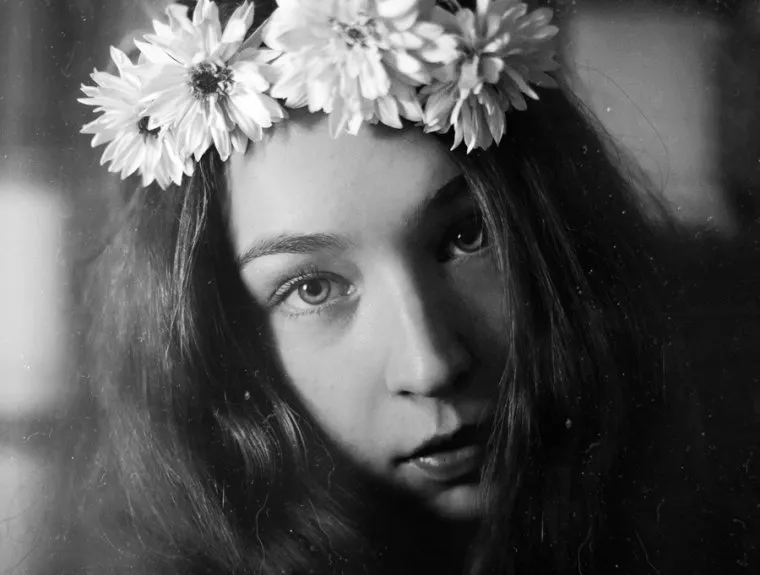
When I was an inexperienced photographer, I feared the ISO setting. To me, ISO seemed like the equivalent of unflattering, irreparable noise: the complete opposite of a great photo, especially a portrait. As I familiarized myself with different photography genres, I came to realize the appeal in the grainy shots of film photographers. I even discovered the beauty of adding grain digitally in editing programs like Adobe Lightroom. When I dared to increase the ISO sensitivity during my own shoots, I discovered that the resulting grain was far from destructive. When it came to cozy outdoor shots taken at night, I discovered a lot creativity in purposely creating grain.
While there are photographers who prefer not to work with higher ISO numbers for understandable reasons (retouching skin in a well-lit environment may be a hassle if the grain is ever-present), experimenting with it is certainly worth a try. When I was just a beginner, I found a lot of comfort in the knowledge that I could take photos whenever I wanted and still produce interesting results. I knew that even if I shot at midnight, my little camera could capture something eye-catching thanks to a high ISO number. It’s important for all kinds of artists—especially enthusiastic, budding photographers—to find creative potential in people and places regardless of weather conditions or time. Here are some tips on how to make the most of ISO.
The ISO settings in cameras may vary, but the general sequence ranges from ISO 100 to ISO 6400. Thanks to improved technology, full frame cameras like the 5D Mark II are capable of capturing great photographs whilst reducing unnecessary color noise, even if the ISO is high.
If you don’t own a full frame camera, don’t lose hope! Research your specific camera online and find out what users have to say about its ISO limitations. Even phone photography enthusiasts can benefit from this research. Most importantly, experiment and remember that your creativity and imagination are what matter most. When I first began shooting, I had a very old phone with a seemingly incompetent camera. This didn’t stop me from taking photographs and embracing curiosity. In the long run, persistence taught me to value photography no matter what camera I was using.
When it comes to creativity, nothing is impossible. Keep this in mind as you experiment with your camera’s various ISO numbers. Grain can serve as a useful texture; alternatively, it can simply create a film photography look. Combining it with other kinds of textures—like dust and scratches—will make your photos stand out. The vintage photographs in the book Miss Peregrine’s Home for Peculiar Children by Ransom Riggs are a fantastic example of dust, grain, and other textures being used to create compelling works of art.
If you’re in a situation where using a flash isn’t acceptable (for example, in a church), or if you simply don’t wish to use one, ISO will be your greatest tool during the shooting process. Similarly, if you can’t use a tripod in a certain situation, a higher ISO will prevent you from taking unclear photographs. A photo with a slight amount of grain is far better than a blurry image. Combine this with a touch of creativity and you’ll find yourself fearlessly experimenting with ISO no matter how challenging your environment may be. This is just one part of exposure triangle and one of the most important camera settings to understand if you want to take your photography to the next level.
If you’re looking to master the other manual settings on your digital camera, we encourage you to check out our article on shutter speed. With a little time, practice, and research, you’ll be mastering your camera’s manual mode in no time!


Please verify your software version before proceeding.
 I’ve verified my software version


 Facebook
 Google +
Comments (0)
There are no comments yet.