Tag: portrait

How to Shoot Portraits at Home

In this text, I talk how to do home portrait photography when without proper studio gear. I once faced a situation where I was asked to take a profile photo of a professional with short notice and I had no studio equipment available. Here is my workflow for that kind of situations. It is basically by the book, i.e. I follow the basic guidelines with no secrets or magic here, or maybe just a little with post-processing.

1. The Light

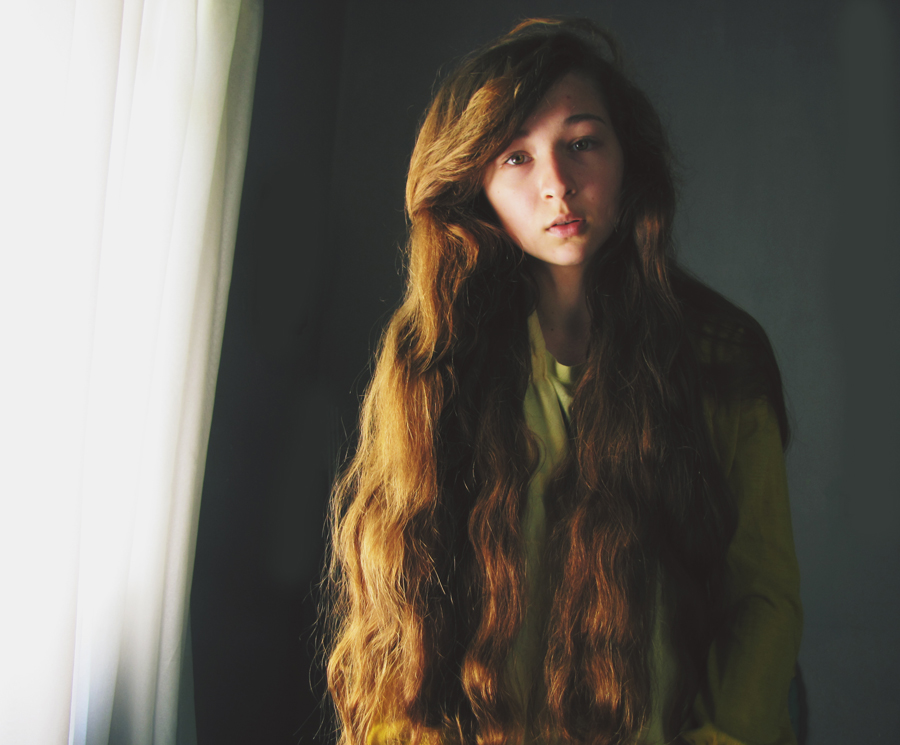
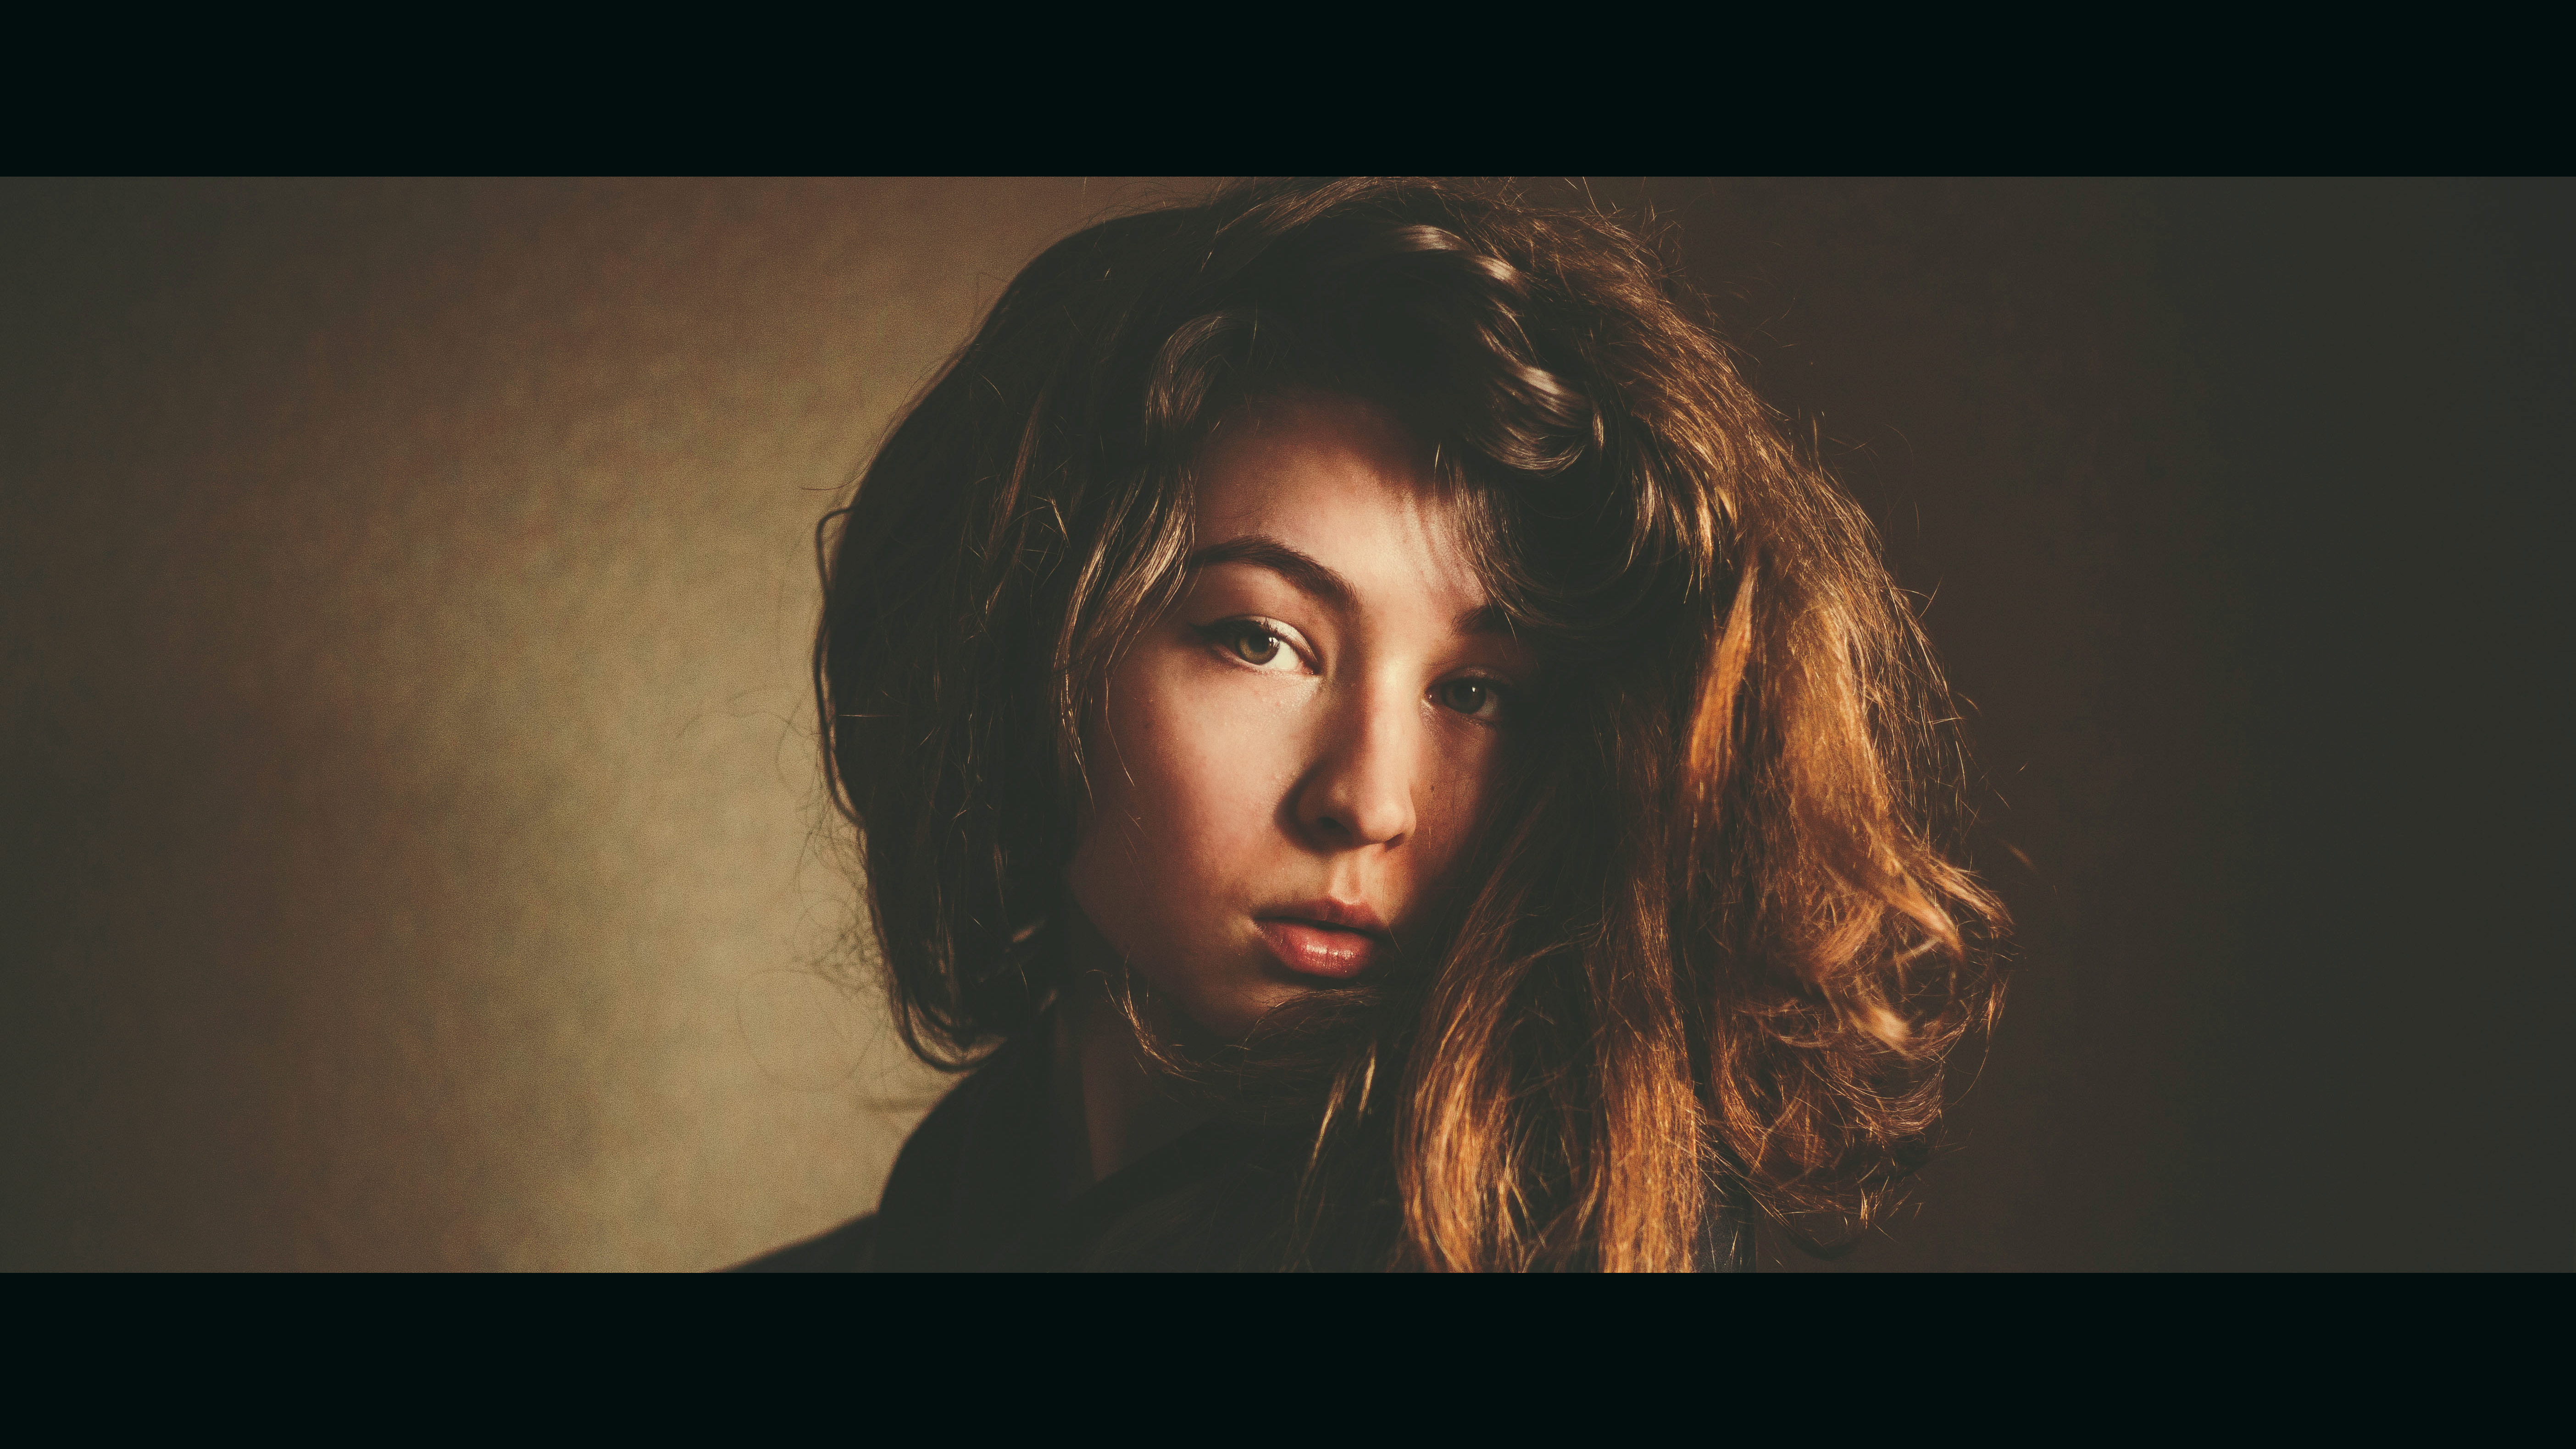
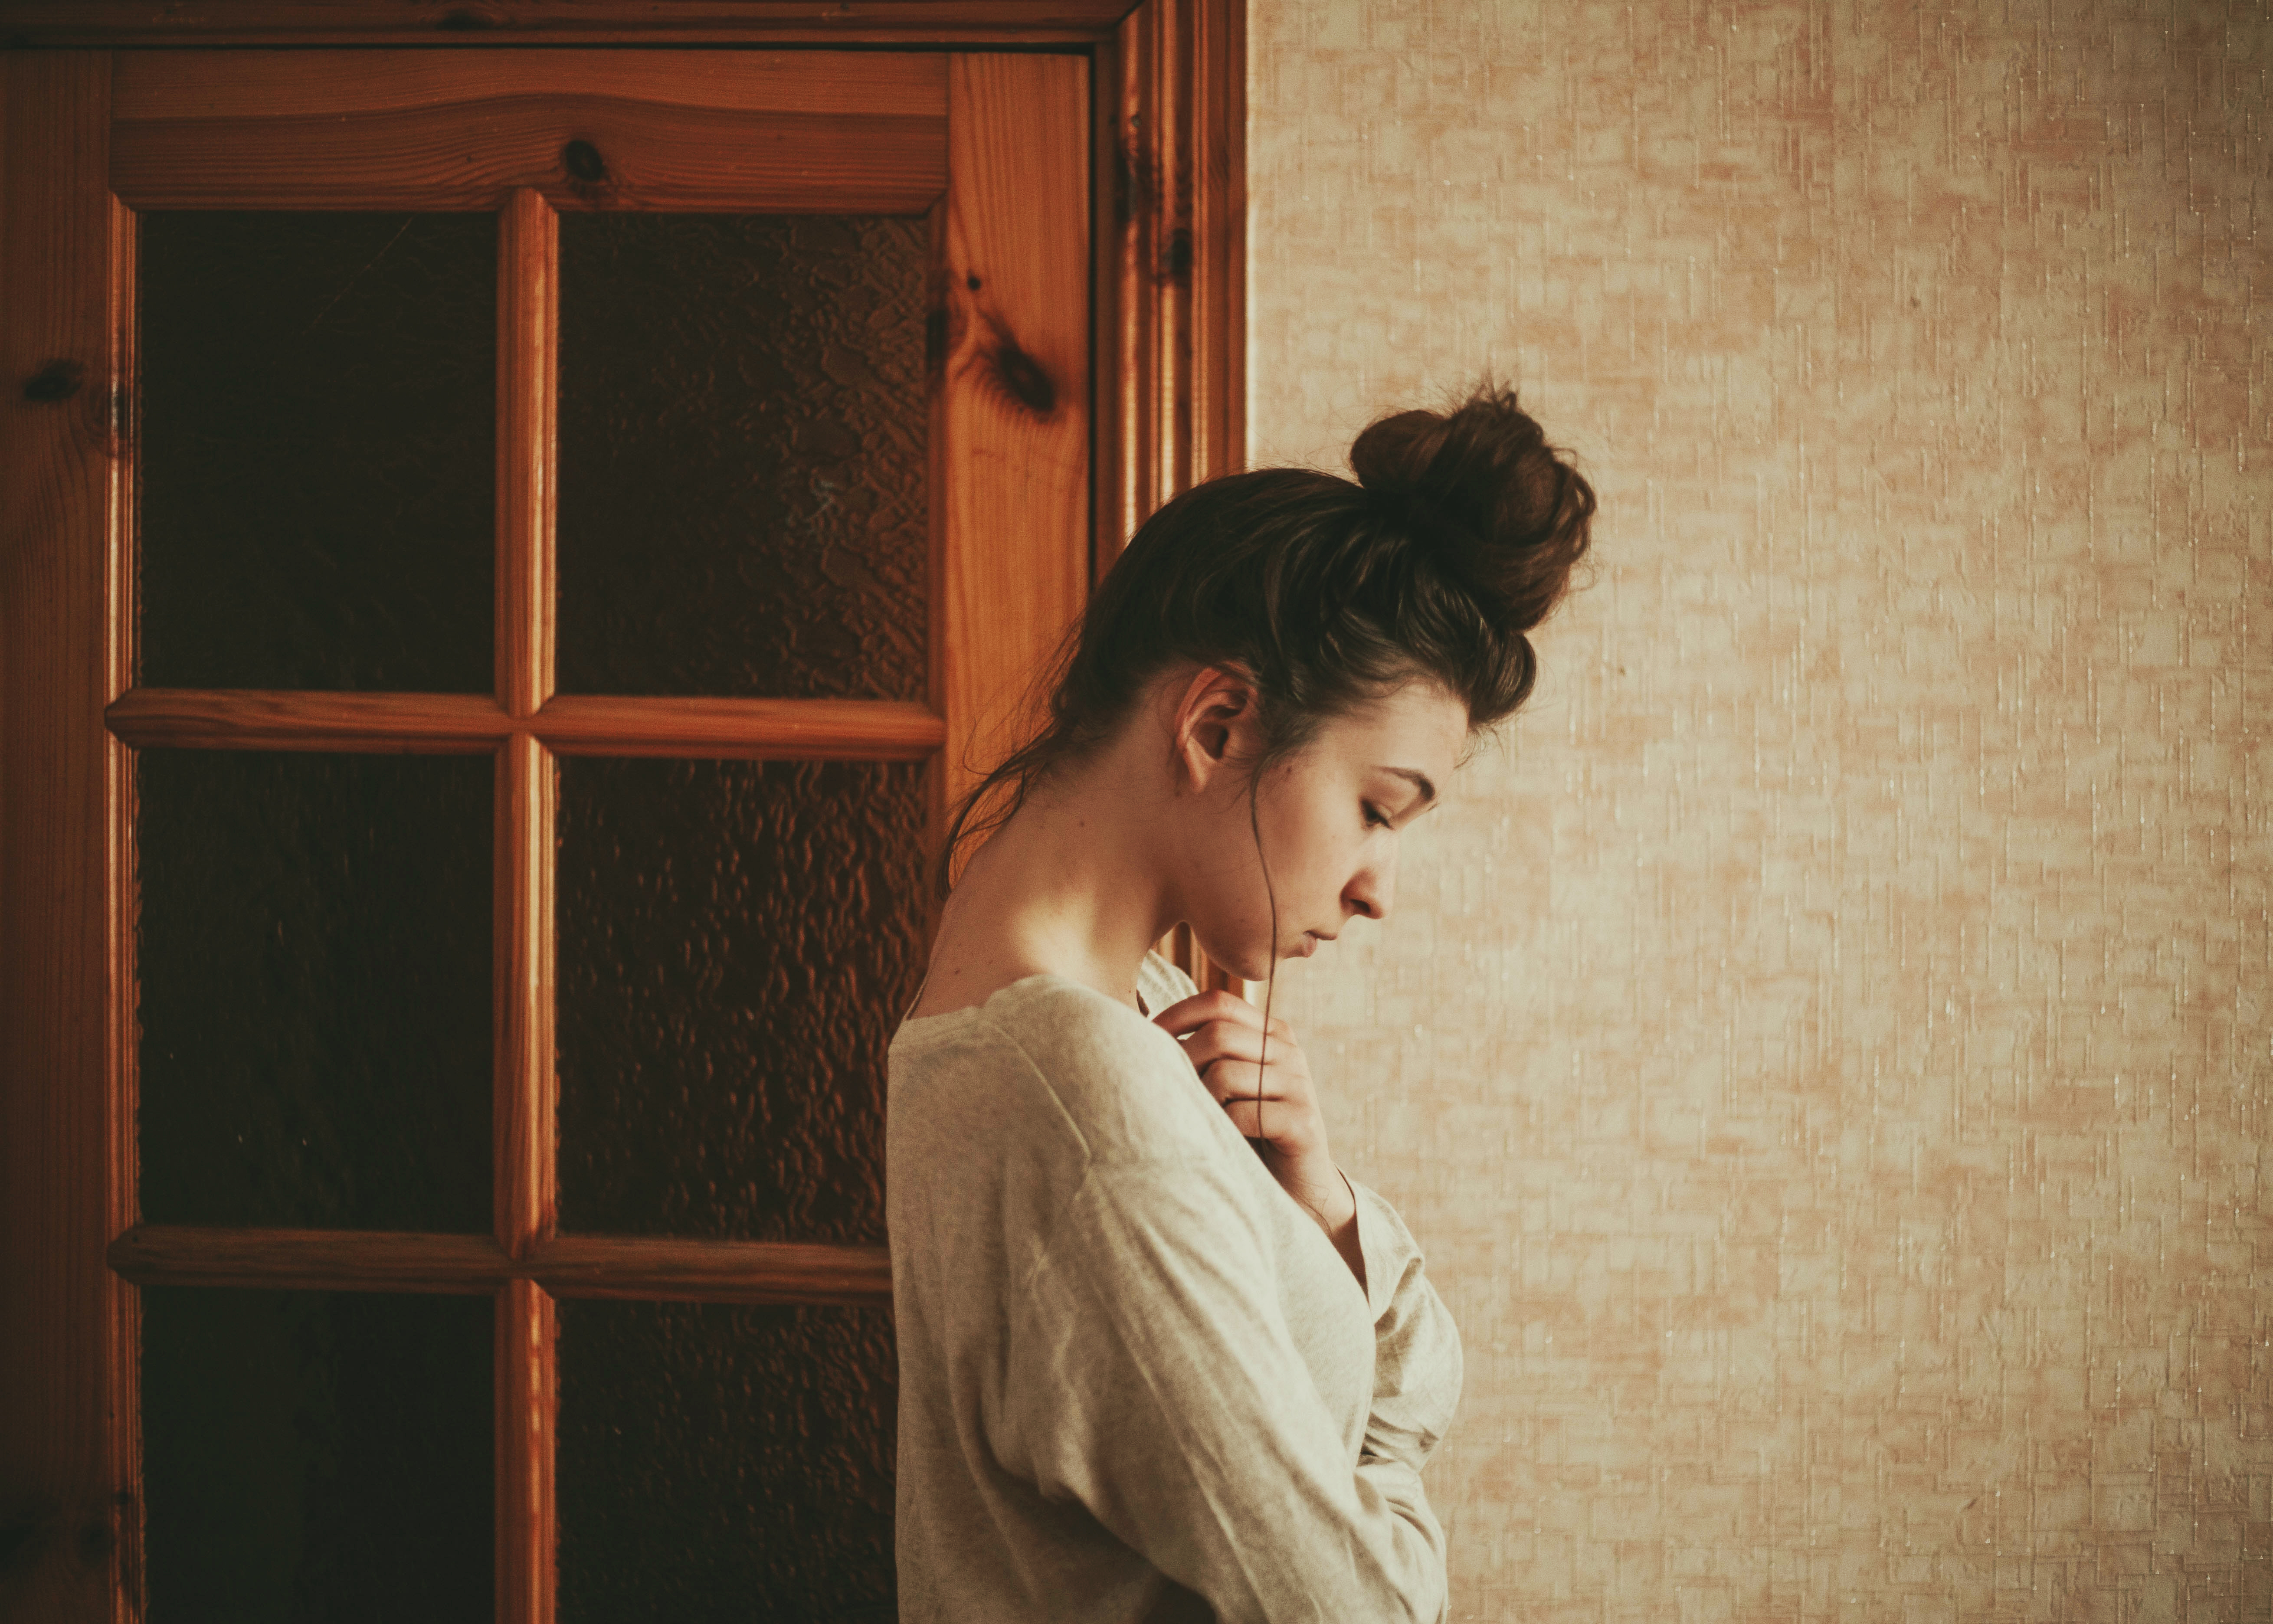
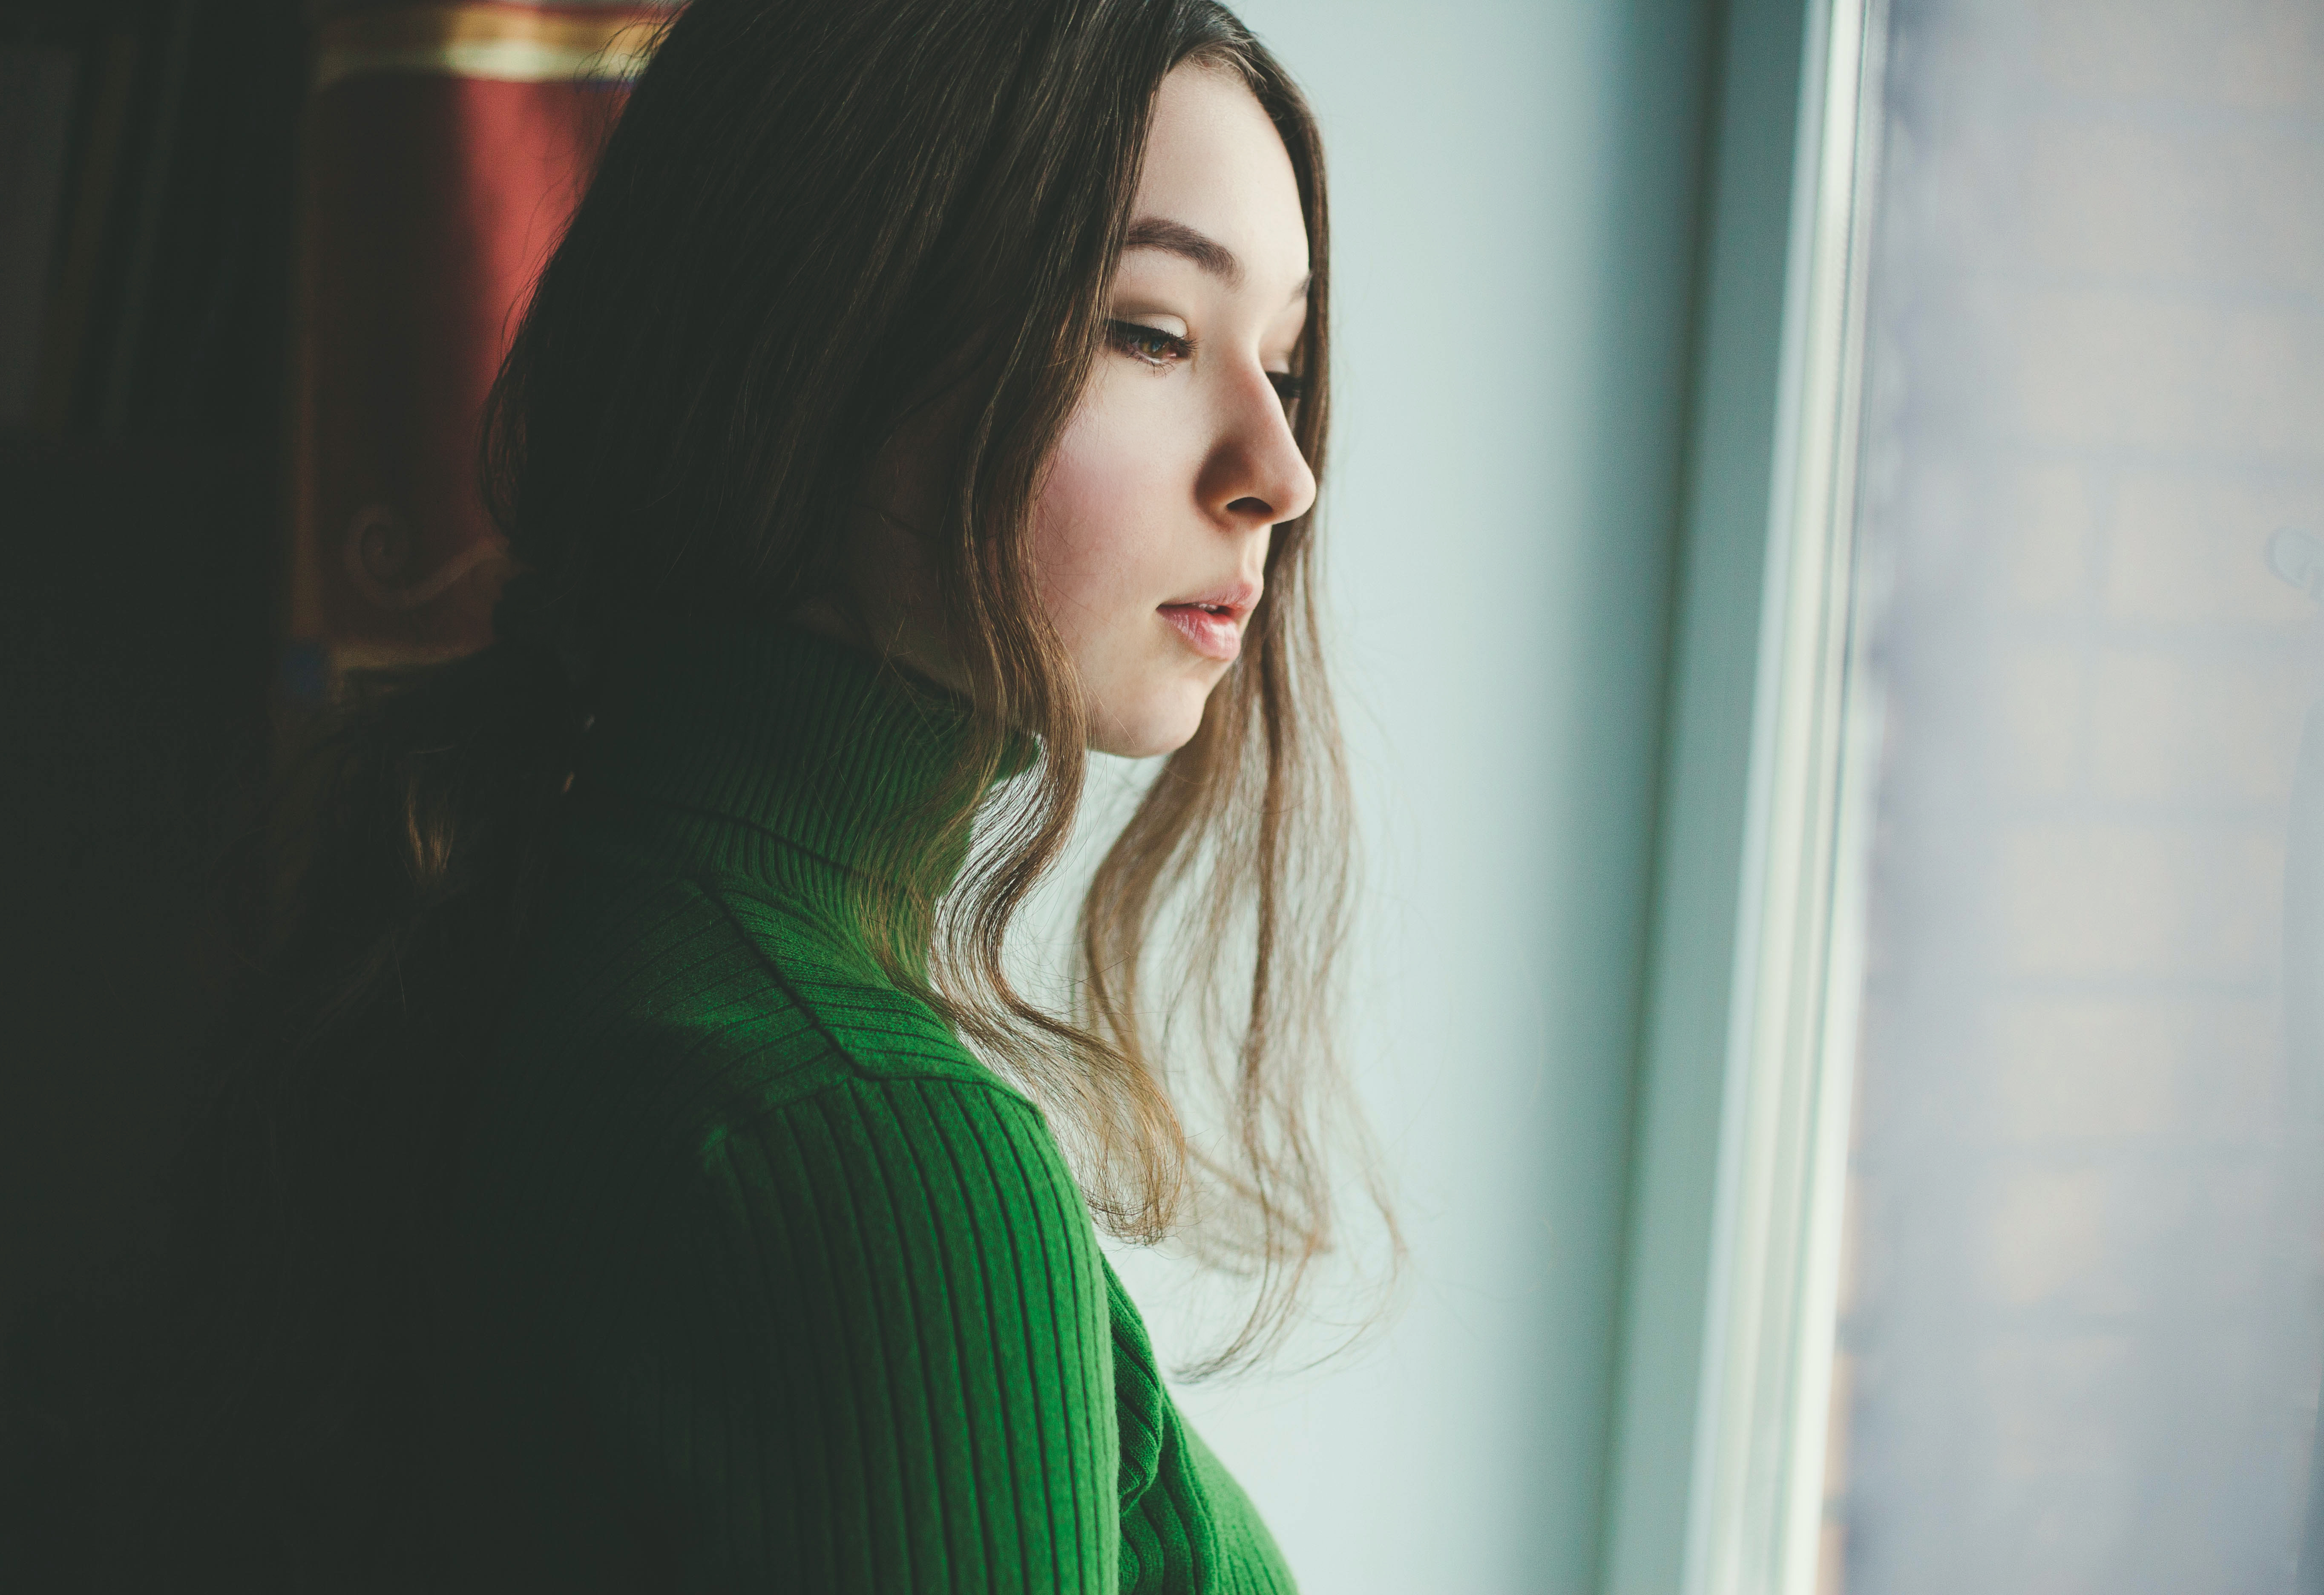
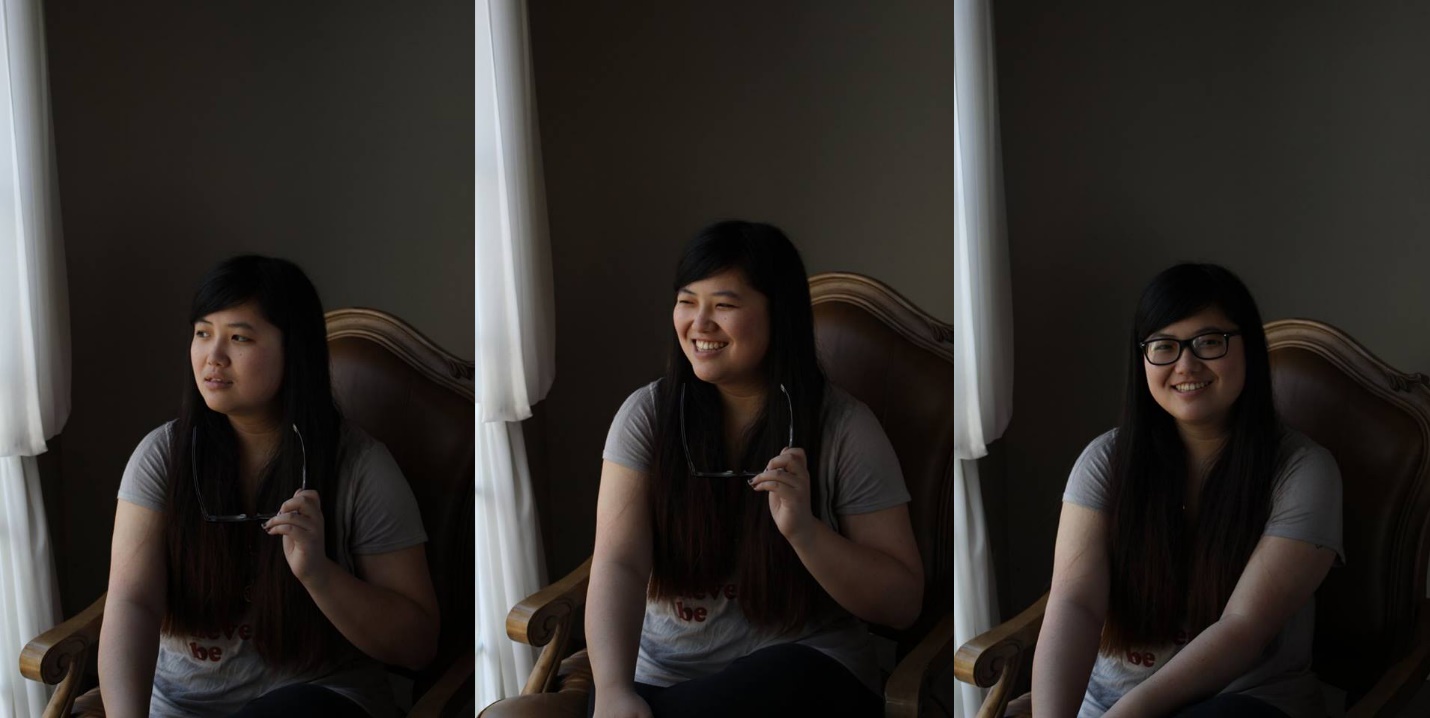
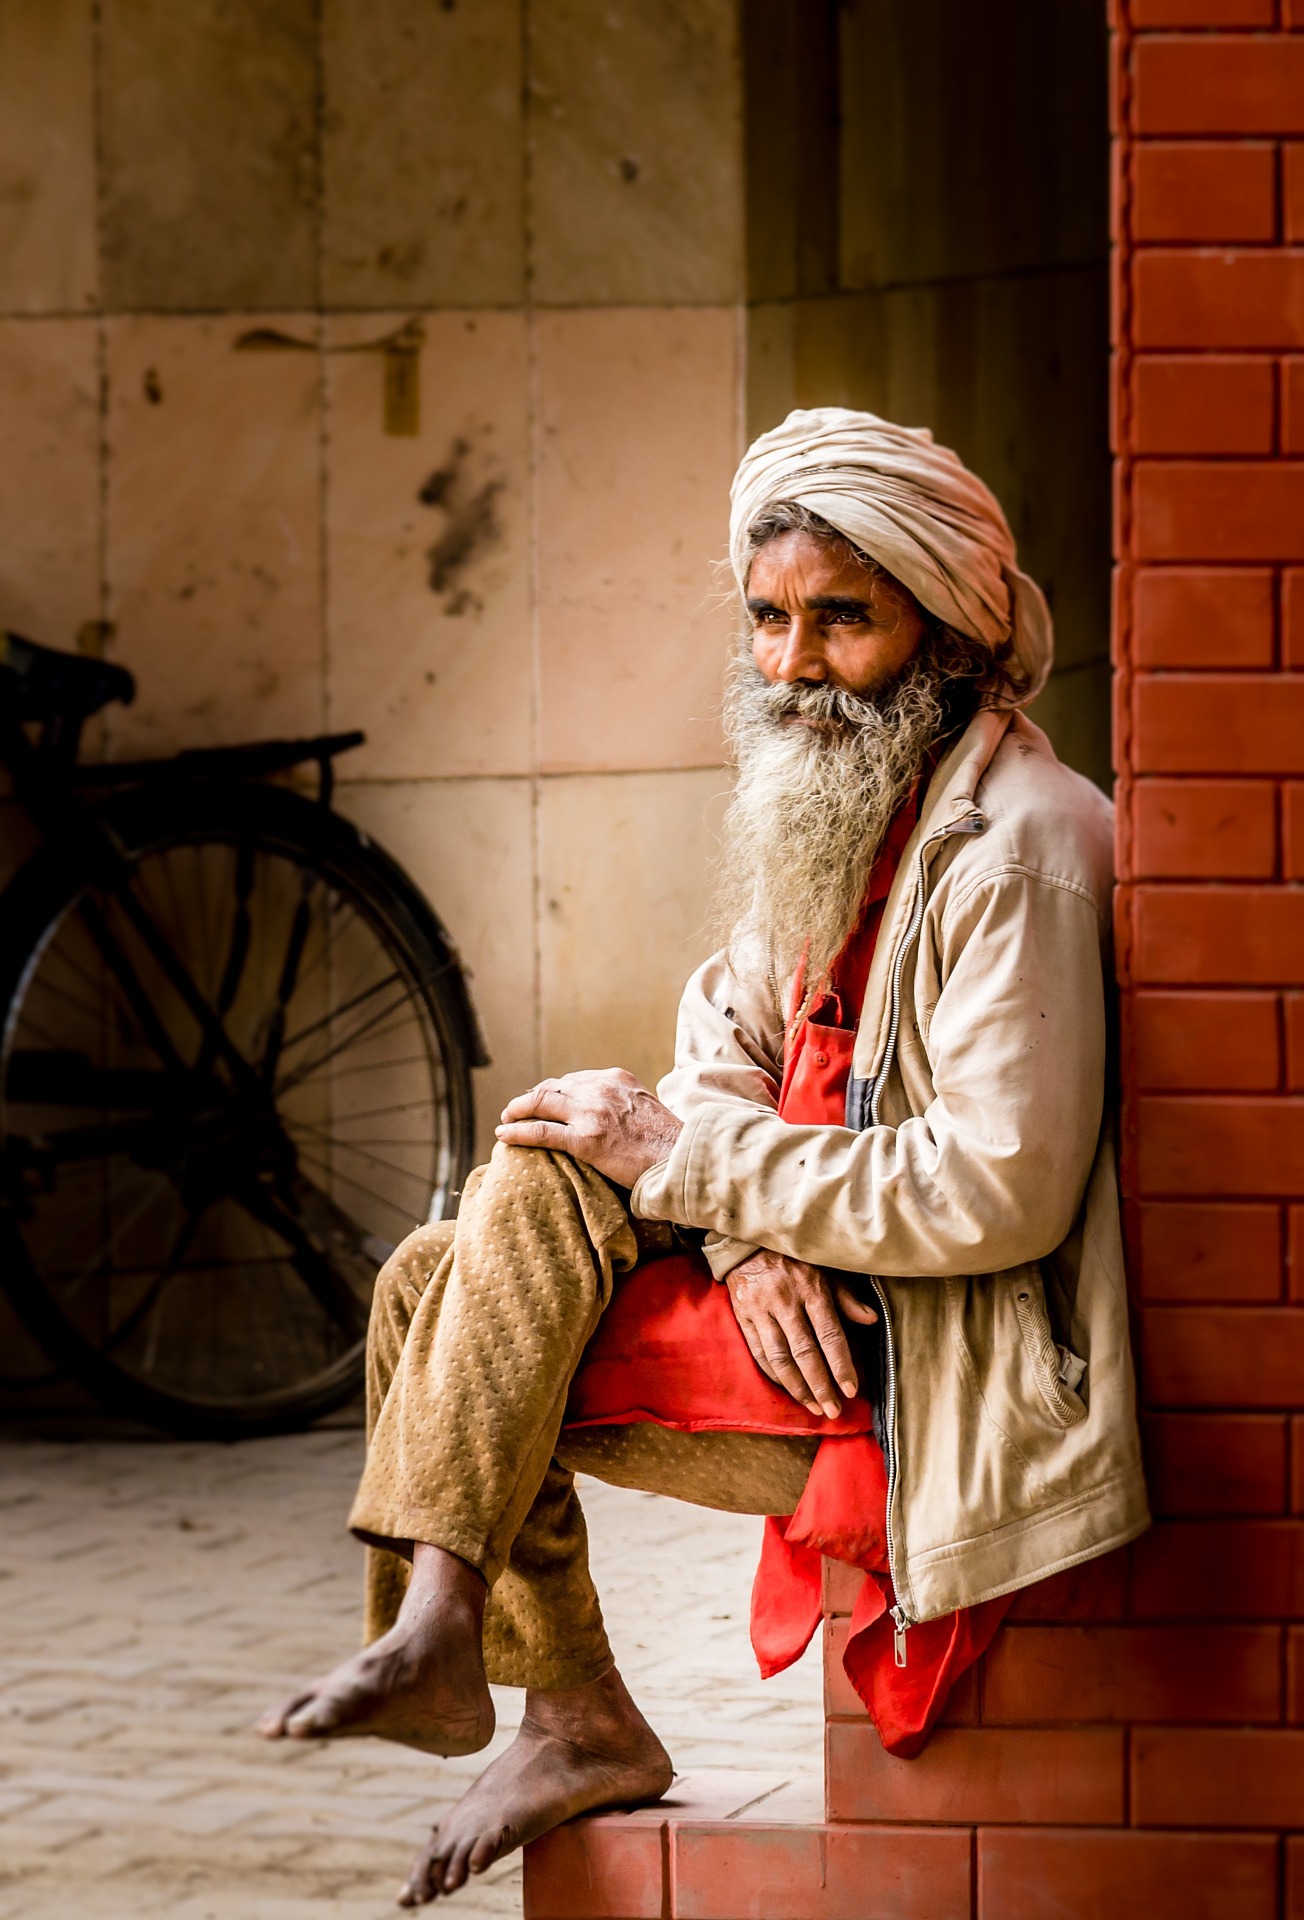
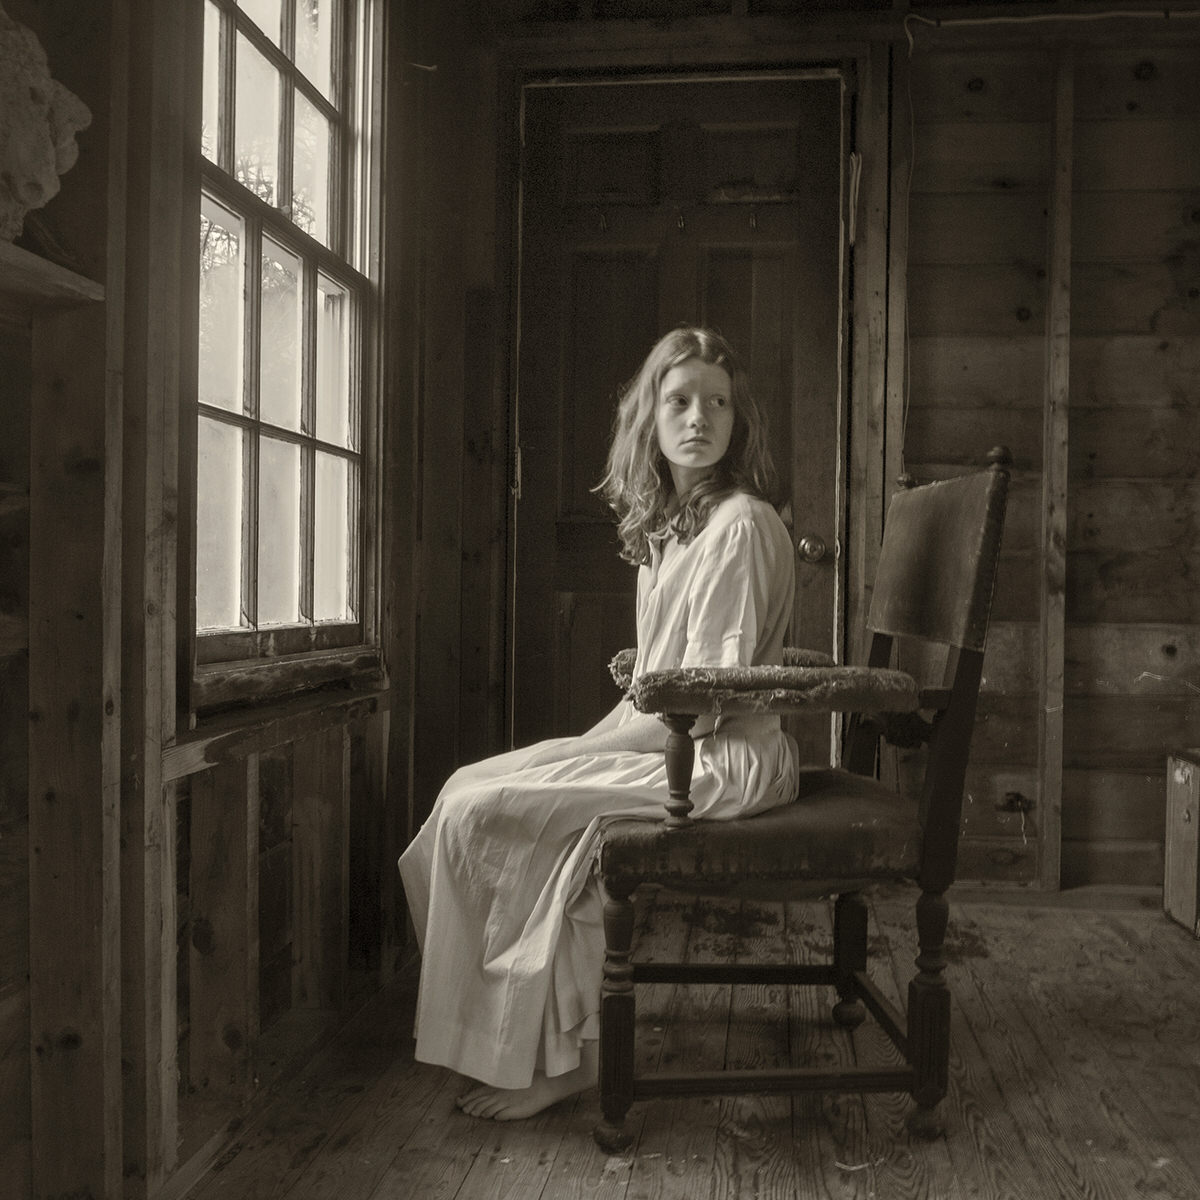
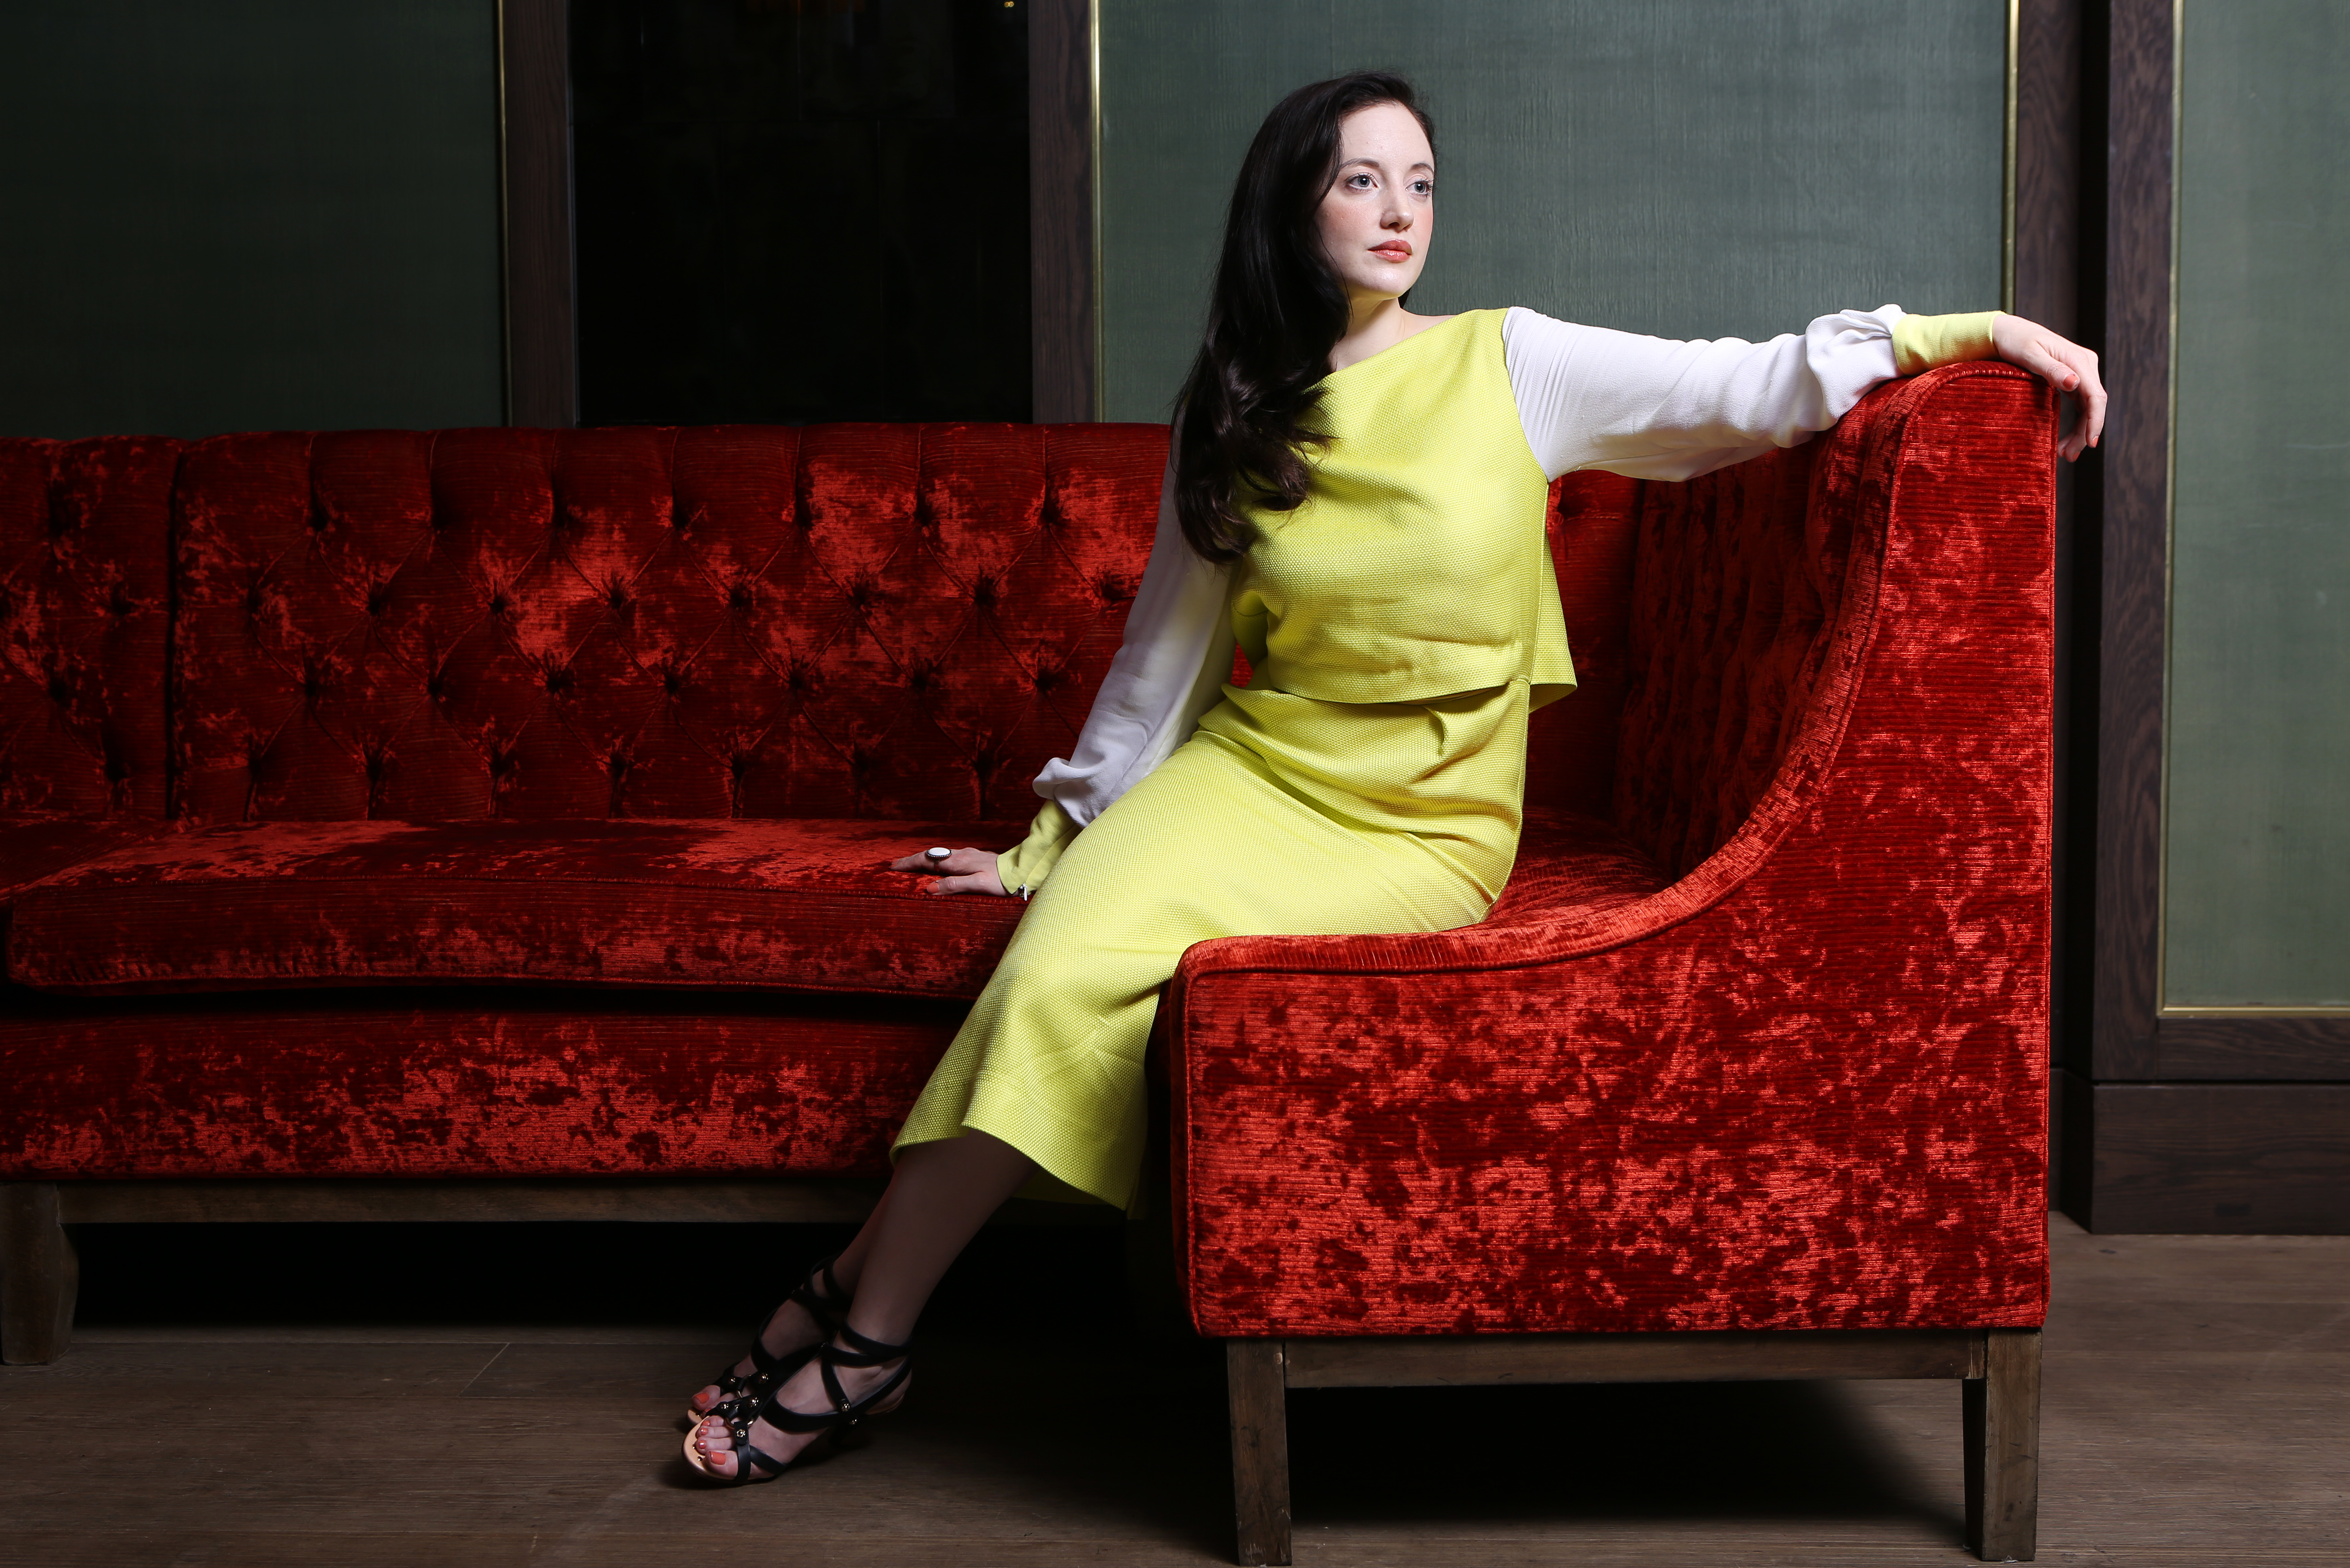
First and the last thing everyone talks when teaching photography is lighting. It is so important that some photographers even first look to find a great light and after that, they start looking something to take a photo at. In order to take a great photo, you need great light. So, at home, you need to look for the best light available, and that will be the big window on the sunny side. If you live in the Nordic country and it is a period of polar night approaching, you need to use that window when the sun is up that brief moment, if any. There are lots of setups how to use light, but in a standard setup, you set your subject sideways by the window so that the window is mostly on the front side of the face. You may want to achieve the “Rembrandt triangle” on the shadow side of the face. If window light is too harsh, you may move your subject further away or use some diffusor on the window. In the example photo below I had white almost transparent curtains covering the window to soften the light during home portrait photography.

Natural Light Portrait Example 2

The window light may be enough, but if you are not looking for too dramatic shadows, you can improve the quality by filling the shadow side with some light. This can be achieved in multiple ways. Some reflector can be used. If you do not have a proper photography reflector you can use any white surface; cardboard, white sheet or anything. In the example photos, I used a reflector with silver coating. Silver coating seemed to match the light coming through the white curtains better than reflector with gold or half gold. I set the reflector right next to subject as close as possible to reflect the light from the window to the shadowy side. You need to have the reflector in front of the subject and not totally on the side or otherwise you will lighten the ear and the back of the head. We did not have any assistant available so I set the reflector leaning against a chair that was standing on the bed.

If you have off-camera flash available with some diffusor or softbox you can, of course, use that to fill the shadow side. But be subtle not to flatten the image too much. You can also use on-camera flash if you are able to turn it backward or sideways to reflect via the walls. But this depends on a lot on the room and you need to be careful not to create extra shadows.

2. The Background

A good photographer always checks the background first before concentrating on the actual subject of the photo. To get good portraits at home you need to find a good background, which usually is a plain wall without anything on it. The tricky thing is that you need that background to be near to the best light. I have two good windows for indoor portraits at home and to utilize the other one, I need to remove one painting from the wall. The background is an important factor that makes professional photographers different from beginners. For each and every photo, you need to check the background and get as little distraction there as possible. The color of the background matters also, but that is a discussion of its own.

Natural Light Example 3

3. The tricky part: the right pose and facial expression

It depends a lot on the person how easy it is to get a good facial expression. For some people, it is just “smile” and “click” and that’s it, but for most of the people you only get that awkward Chandler-smile (check from Google or YouTube). If you are not working with a professional model that can make a good face with minimal guidance, this will be the tricky part. What kind of expression you want depends also of course on your goal and your subject. For a company executive photo, you need to get that trustworthy smile, for heavy metal guitarist, you may want to get that murderous look. A teenage girl may want that (in?)famous duckface look.

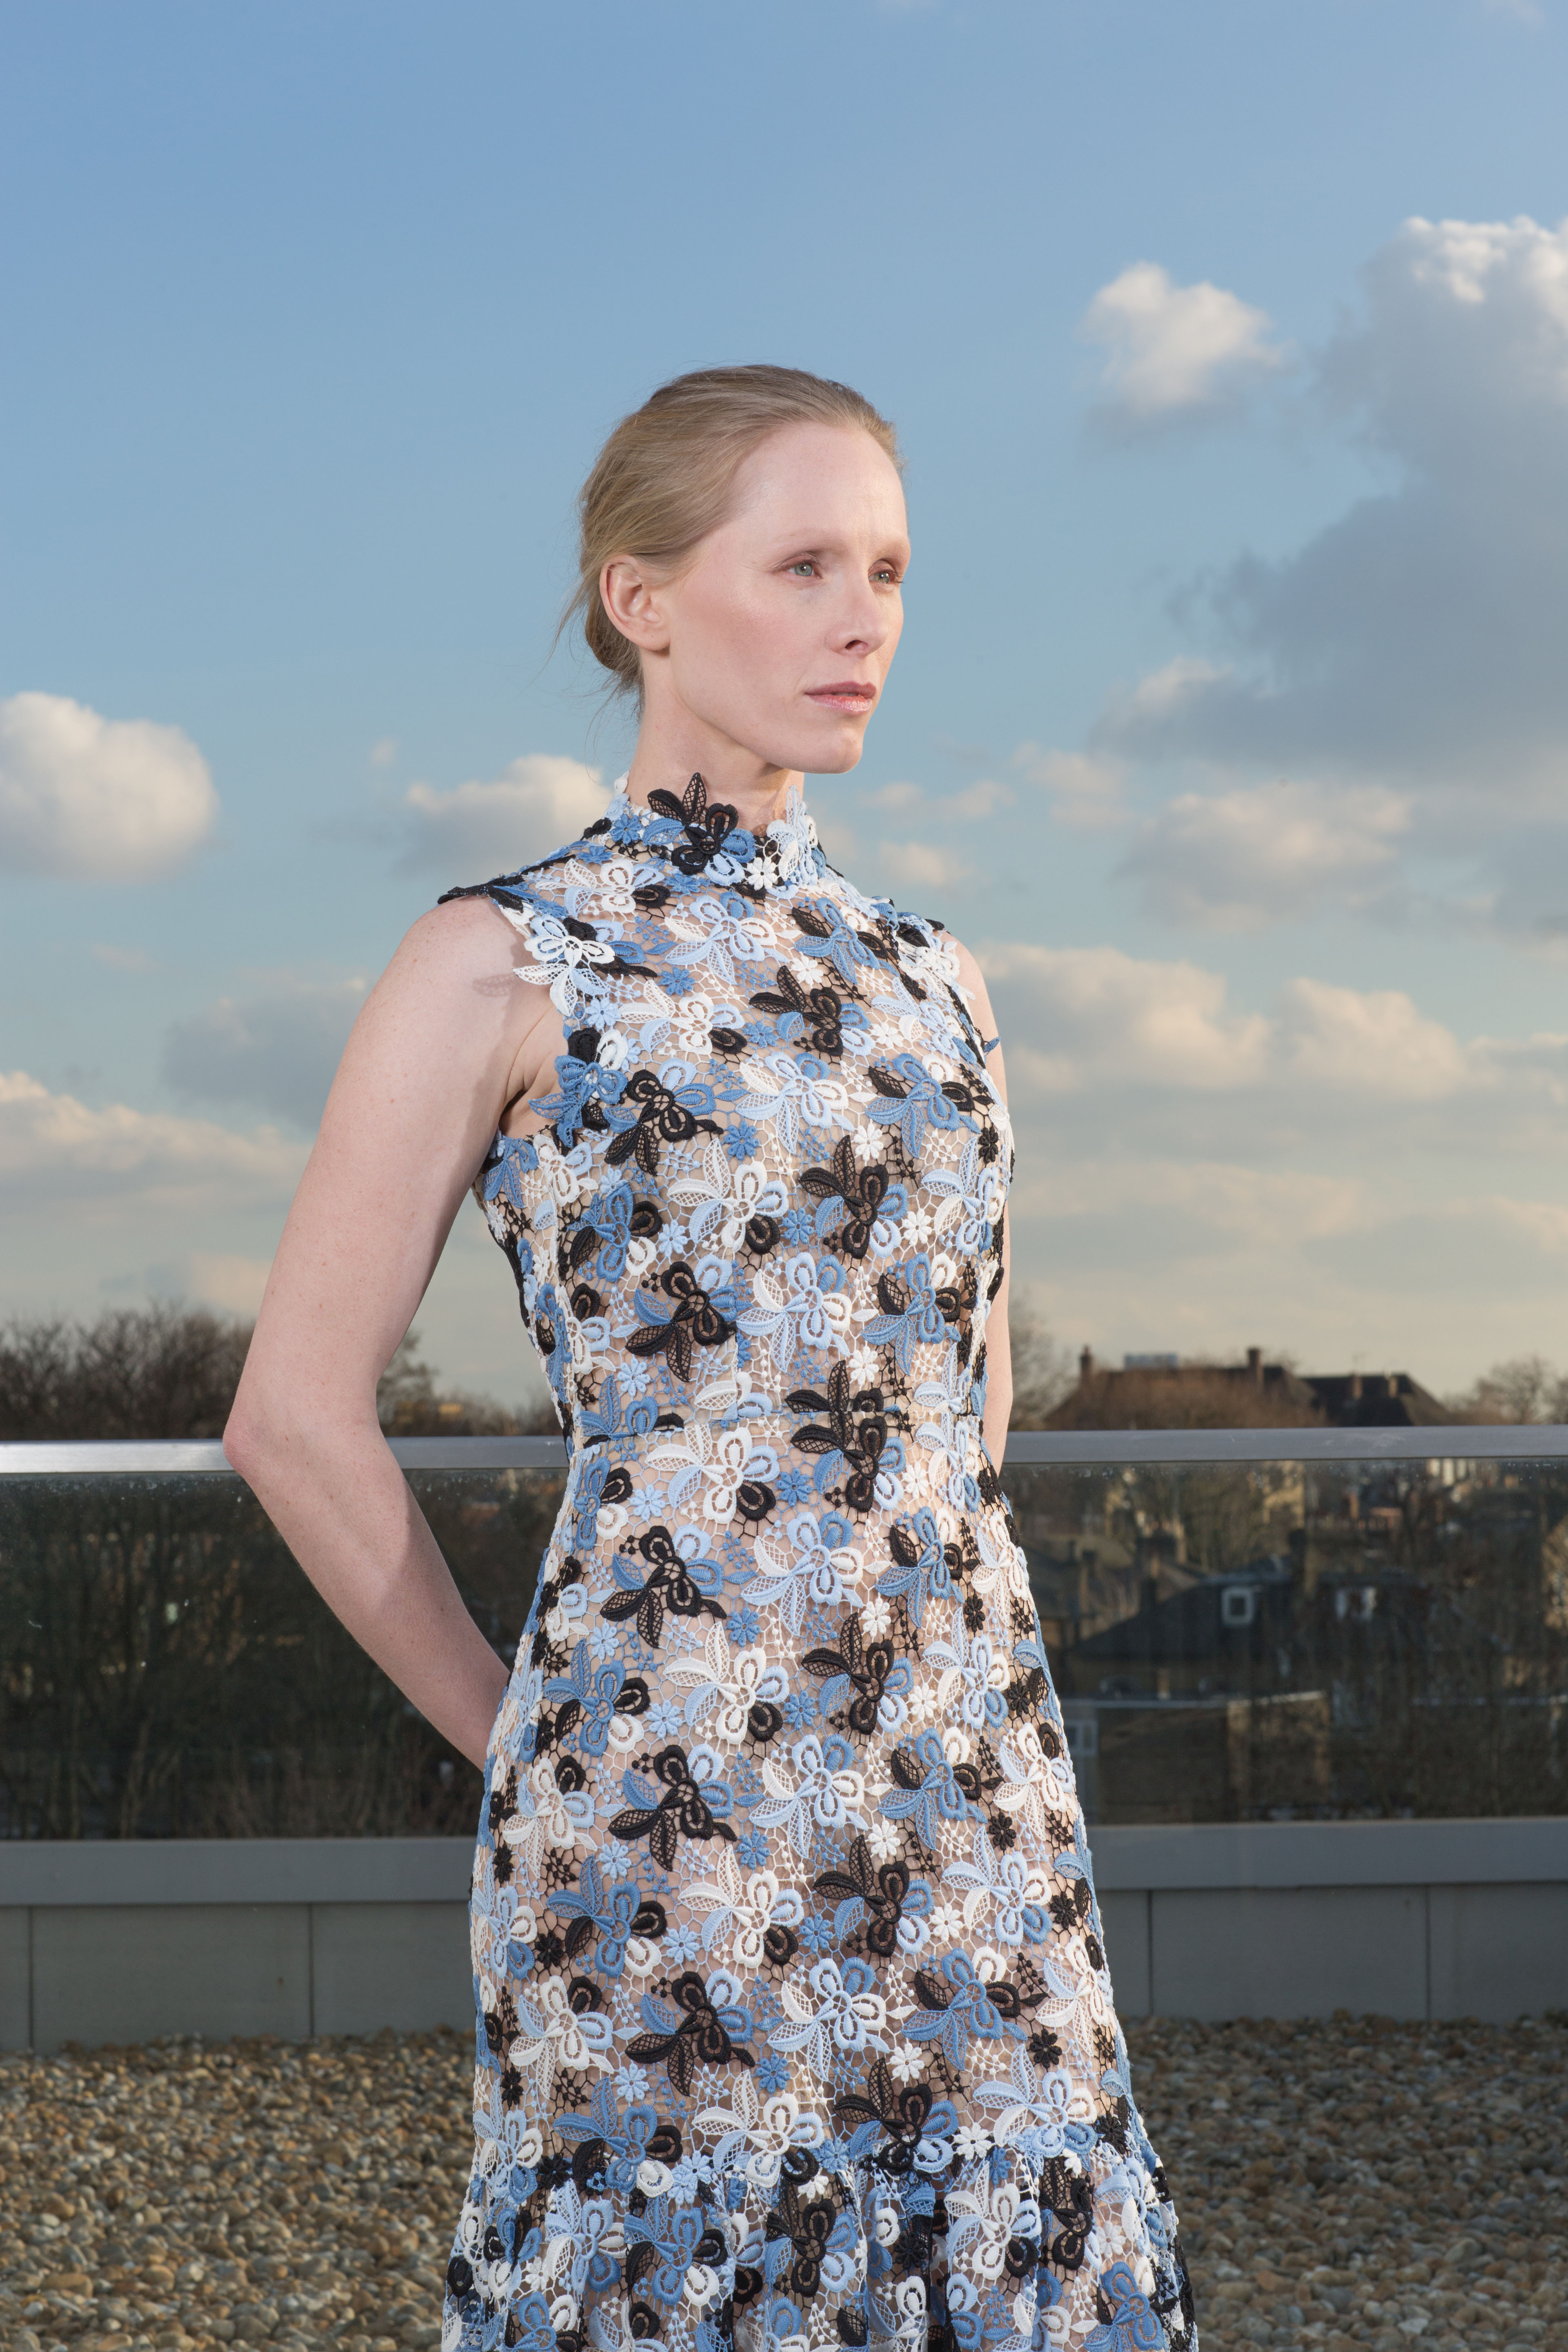
I usually start with getting the pose right. For normal home portrait photography, you want to turn the shoulder line a little bit diagonal towards the camera. Then you need to get them sit straight and bear their head up. If you take the photo lower than their eyes they look more majestic and more authoritarian. If you take the photo little higher than eye level you get their eyes look bigger and there is a bigger change to diminish the possible double chin. This is also the right position if you are taking that duckface photo. If you get your subject to lean little bit forward you can get more attentive and personal looking photo. Leaning forward also diminishes possible double chin.

When I get the pose right I take a couple of photos without asking for any facial expression. This is also the time to check that your camera settings are right and that you get the correct exposure. Then I ask the subject to smile and I take a couple of photos regardless how awkward the smile is. Do not tell them! At this point praise how good photos you are getting. At this point, they usually get more relaxed and confident as they think that you already have the photo. Do not tell them if you do not have the perfect one yet. Then I usually use a little trick: I ask them to do something crazy. Stick tongue out, roll their eyes or anything crazy. If you get a smile as a reaction to your suggestion, capture that! If you get that crazy look, capture it. (That may be priceless.) And be ready to take a photo right after the crazy face when they usually do that natural relaxed smile. That is the one I am aiming for. The crazy face exercise is just a distraction to get them relaxed and to trigger the smile. There are of course other strategies to get the right expression, like the one the famous Cartier-Bresson is said to have: just wait until there is the right expression.

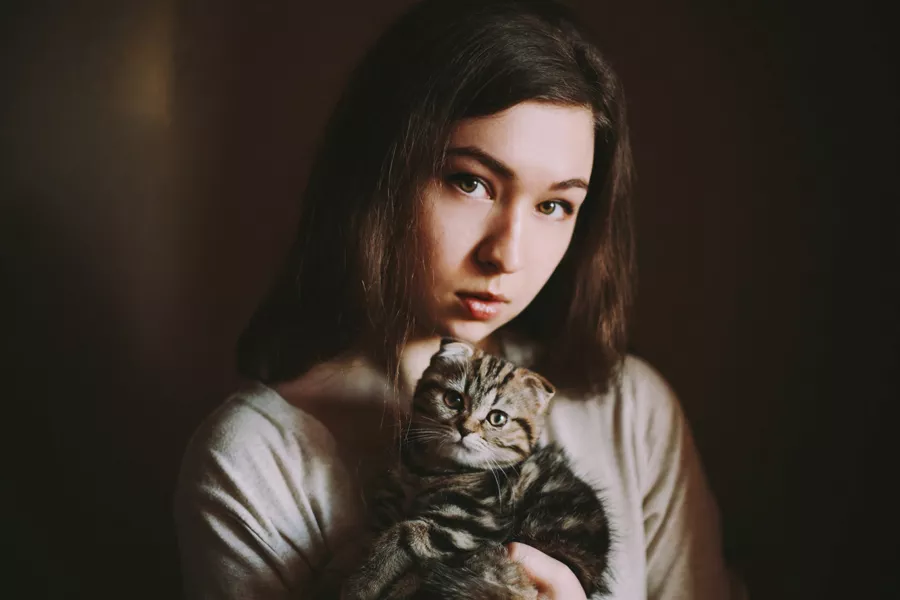
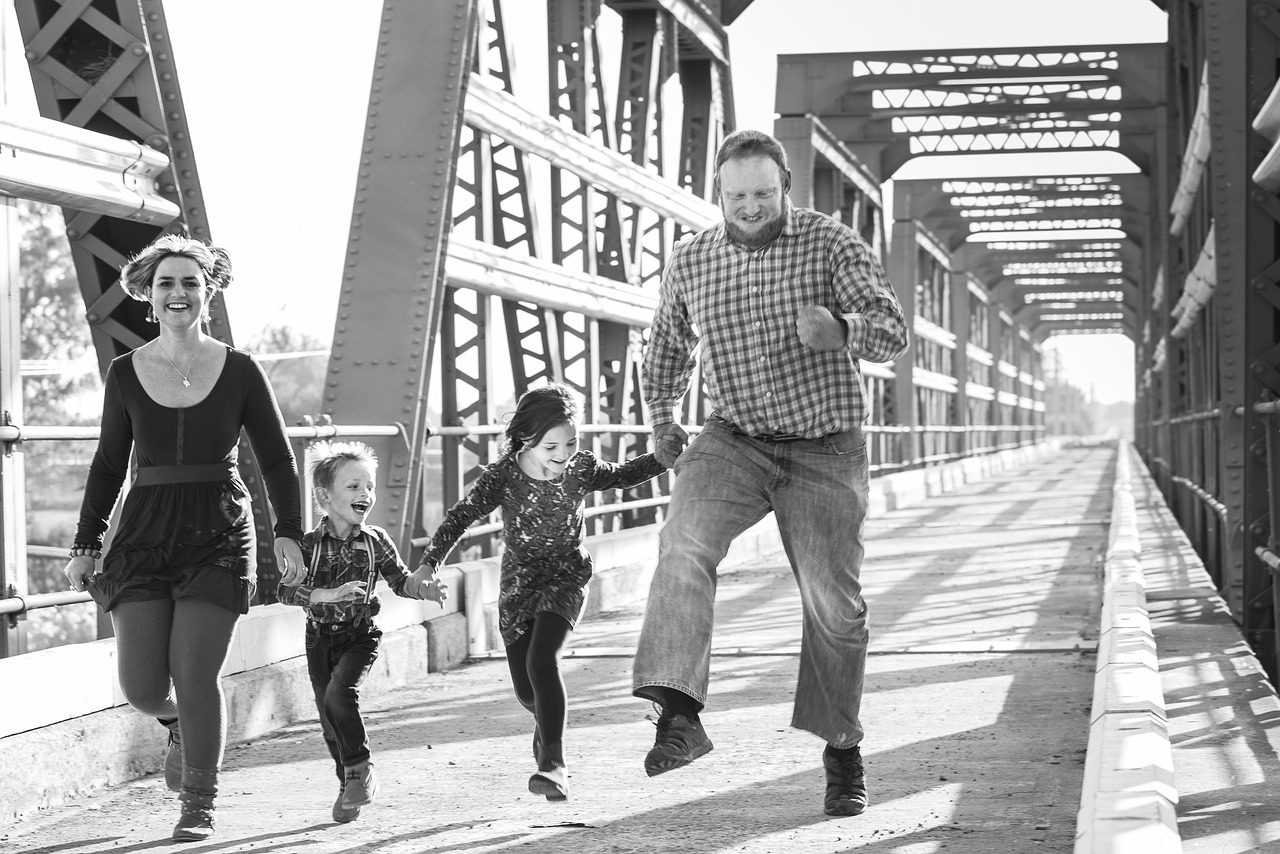
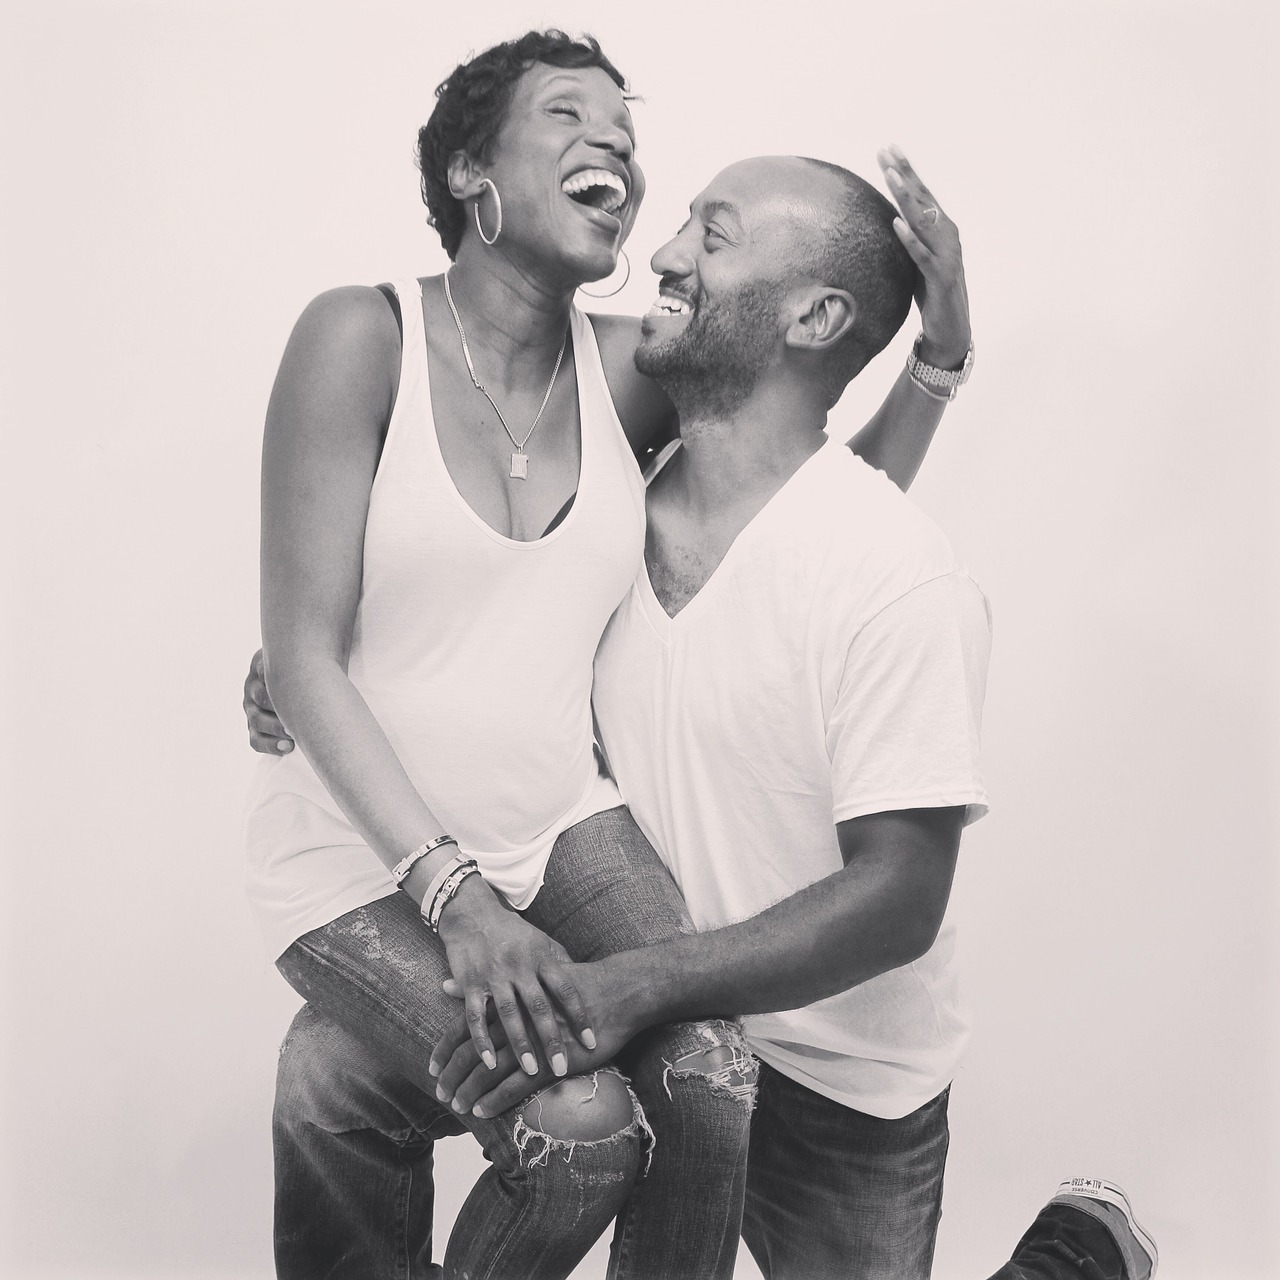
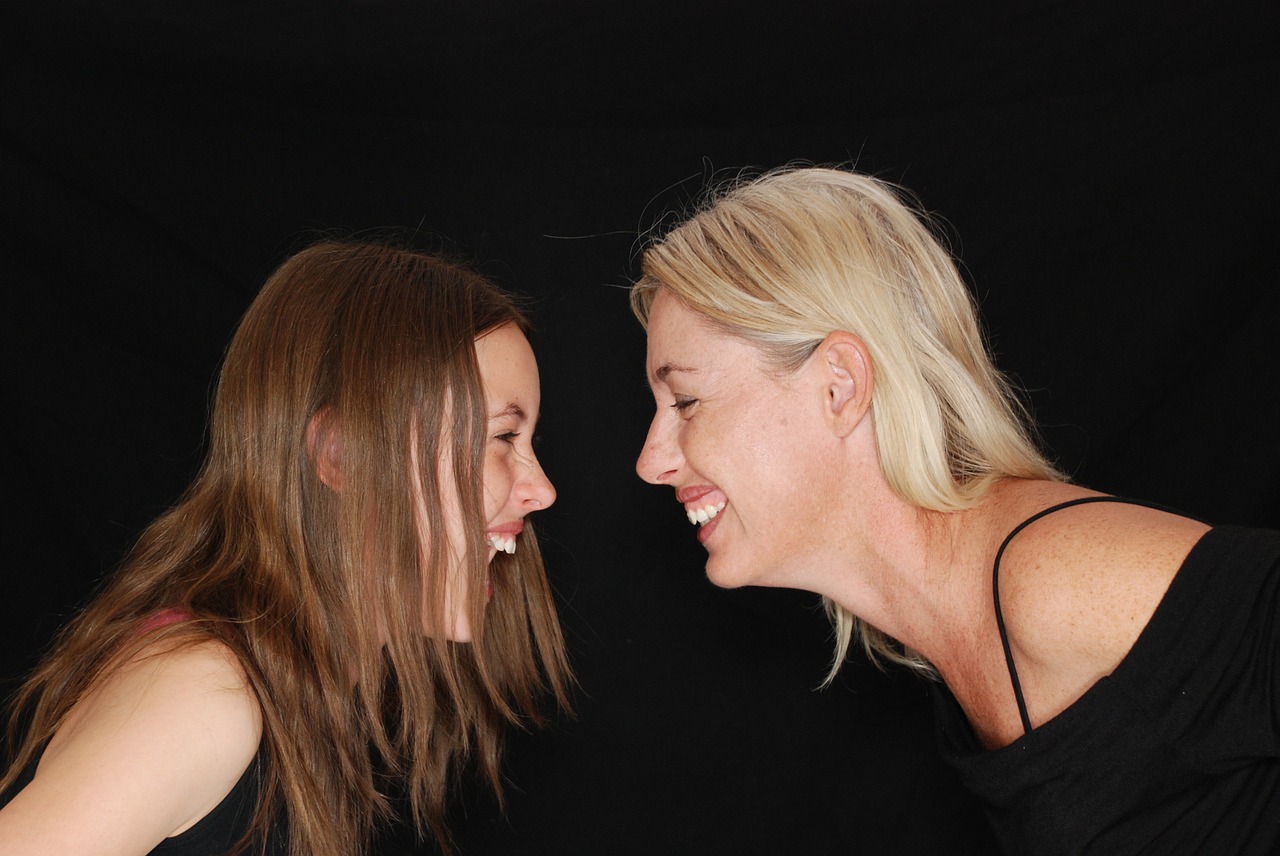
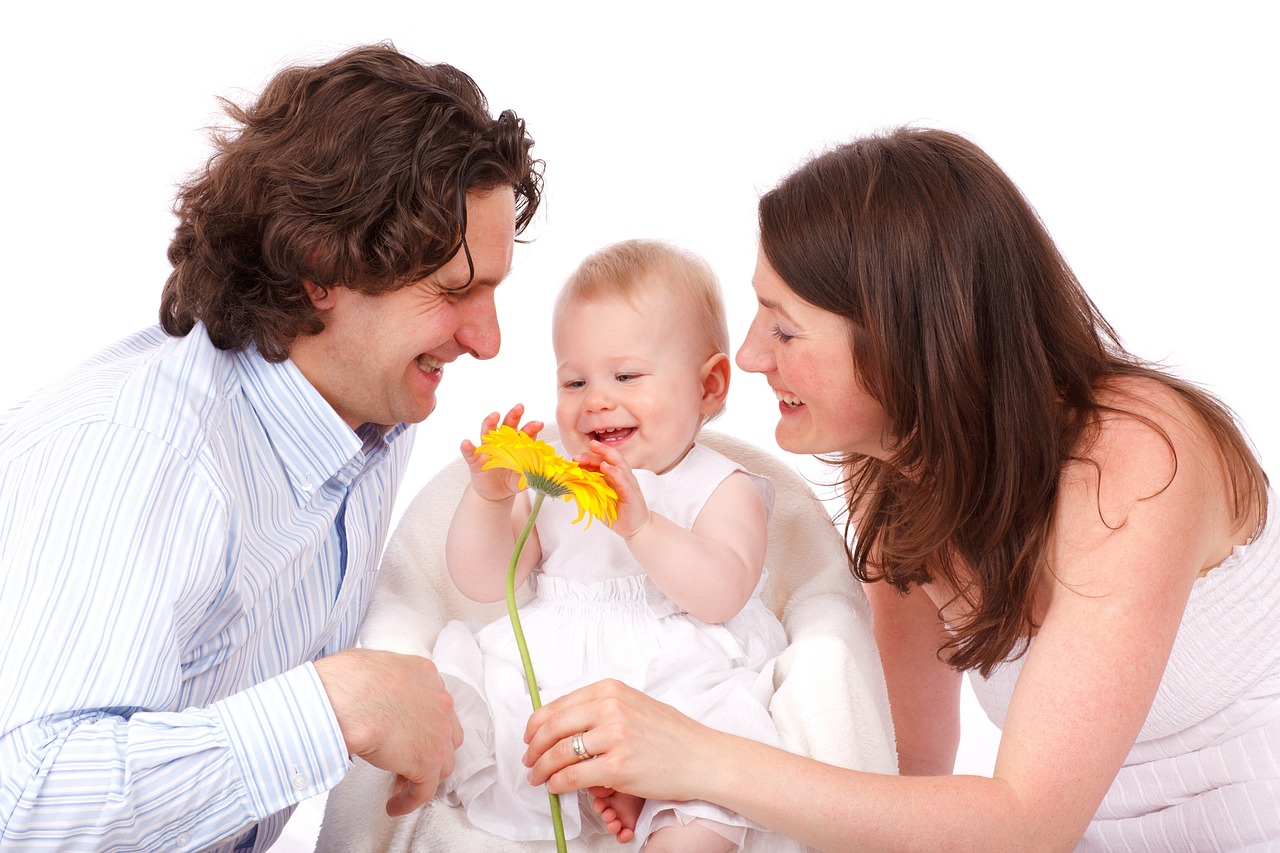
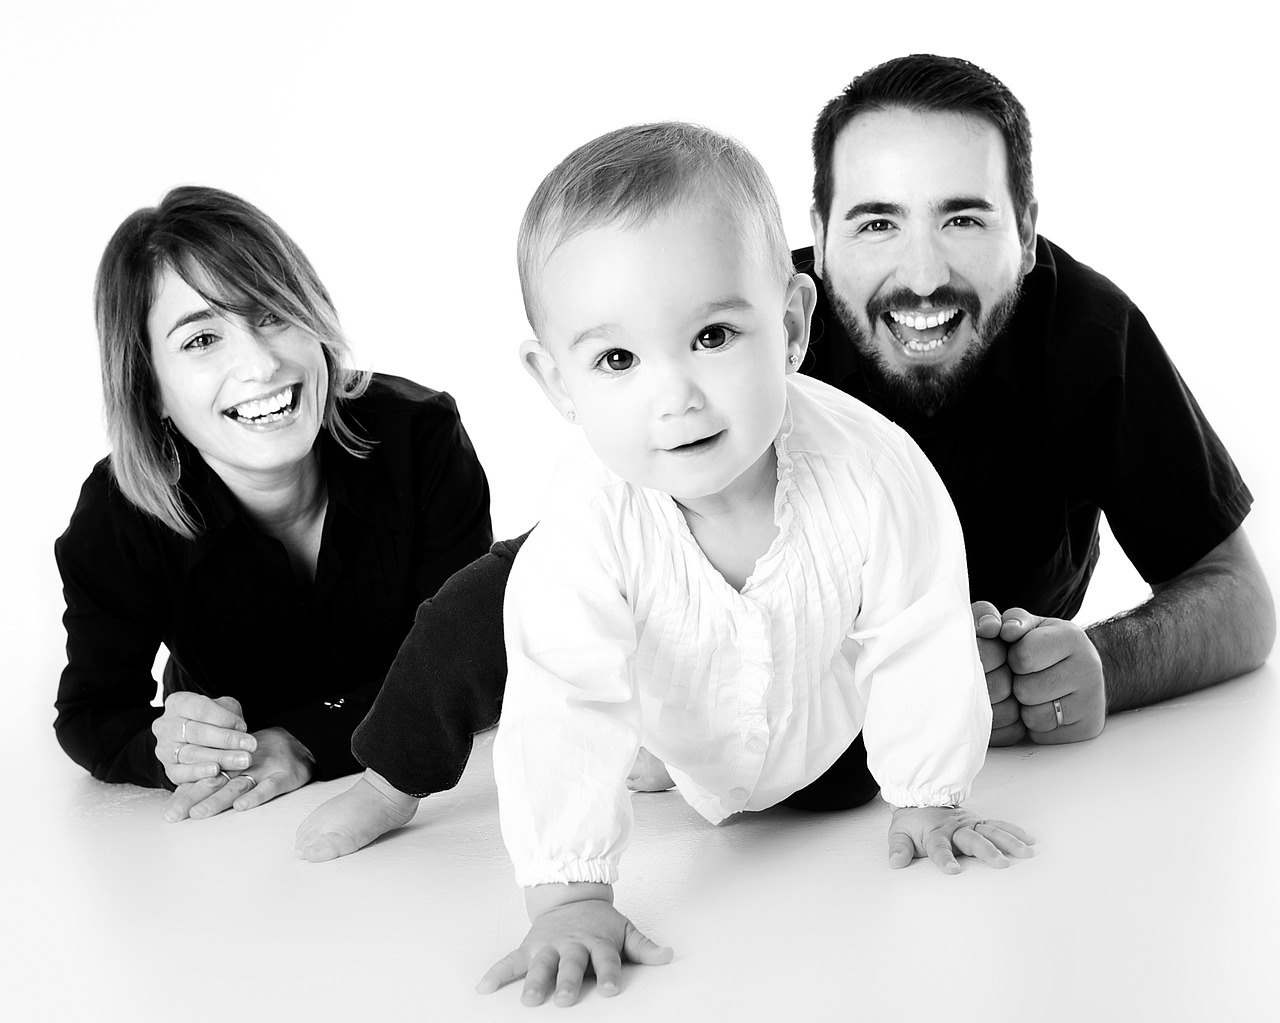
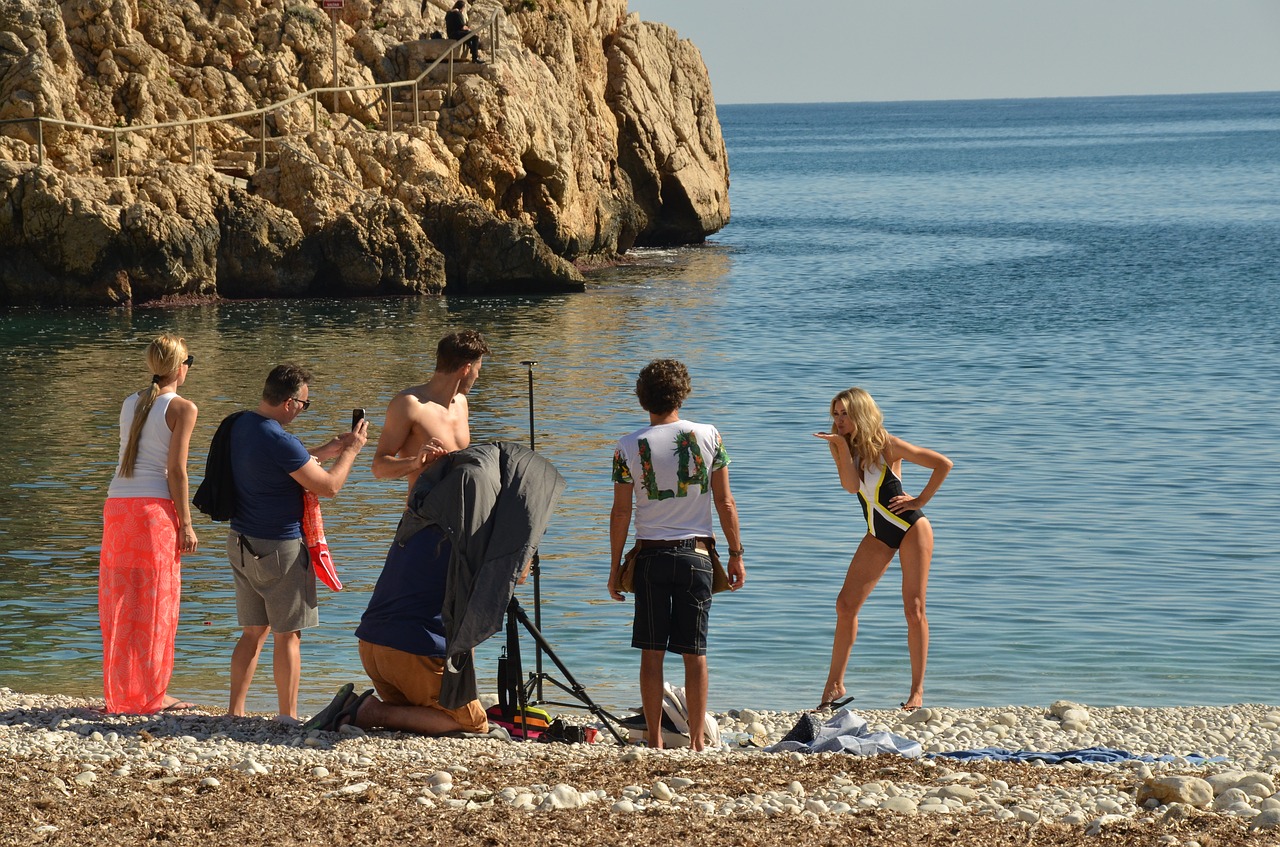
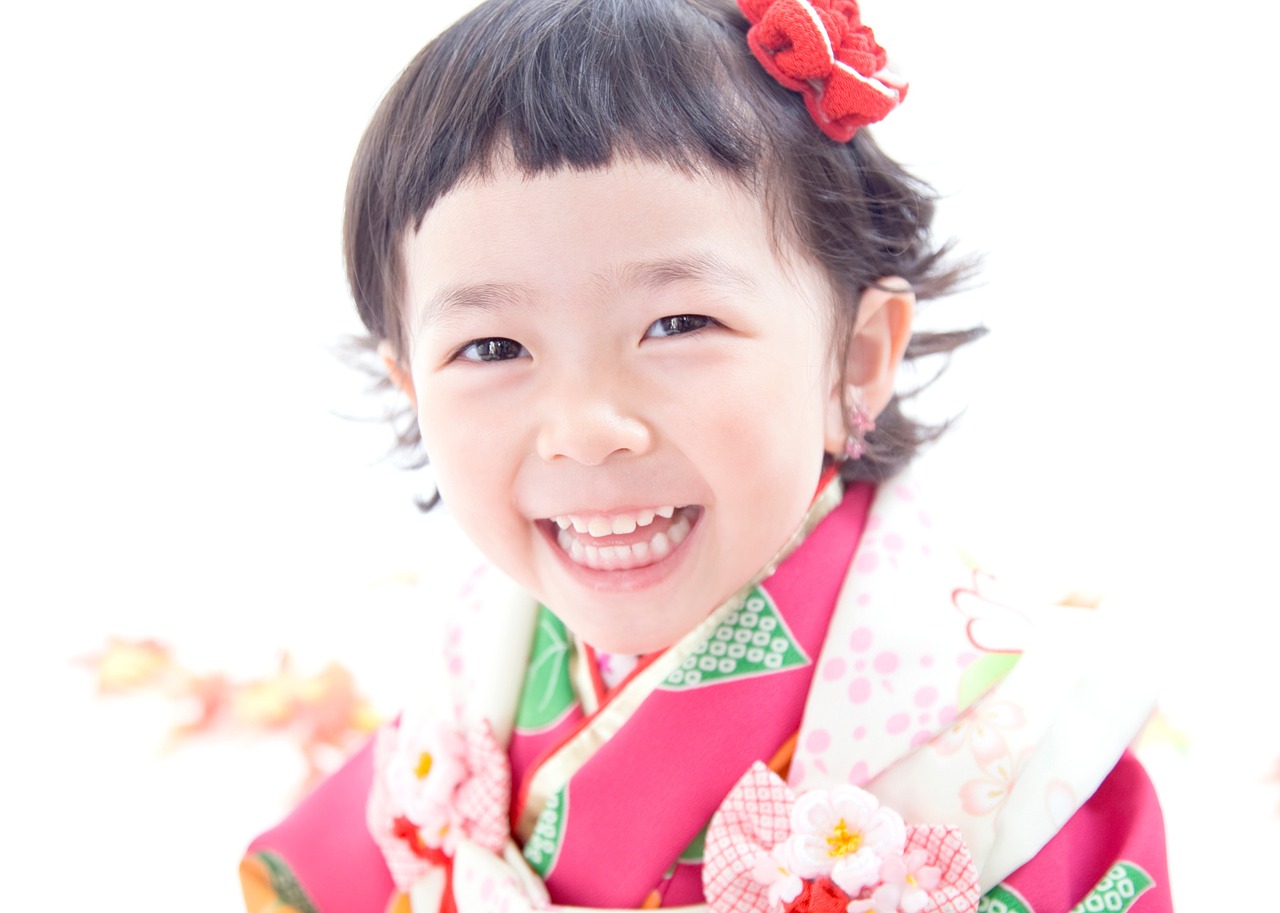
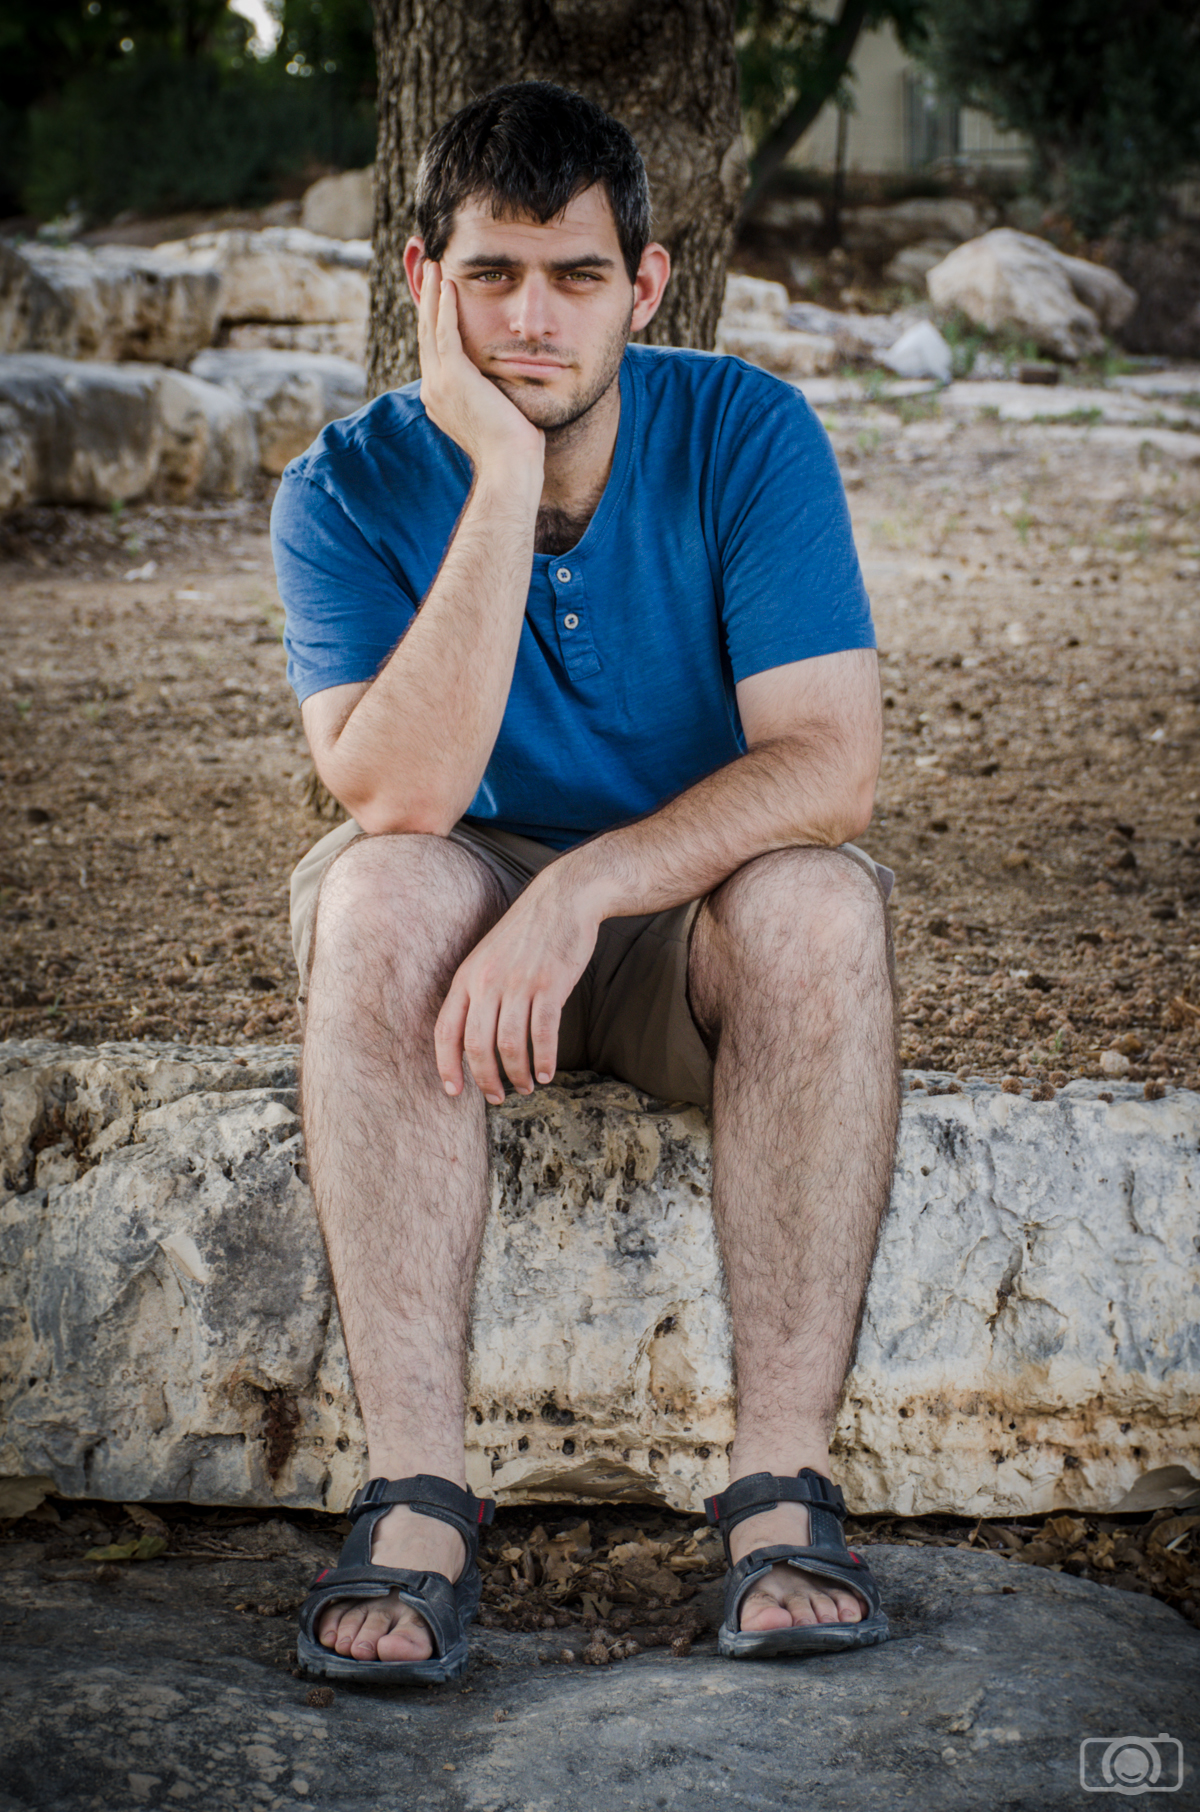
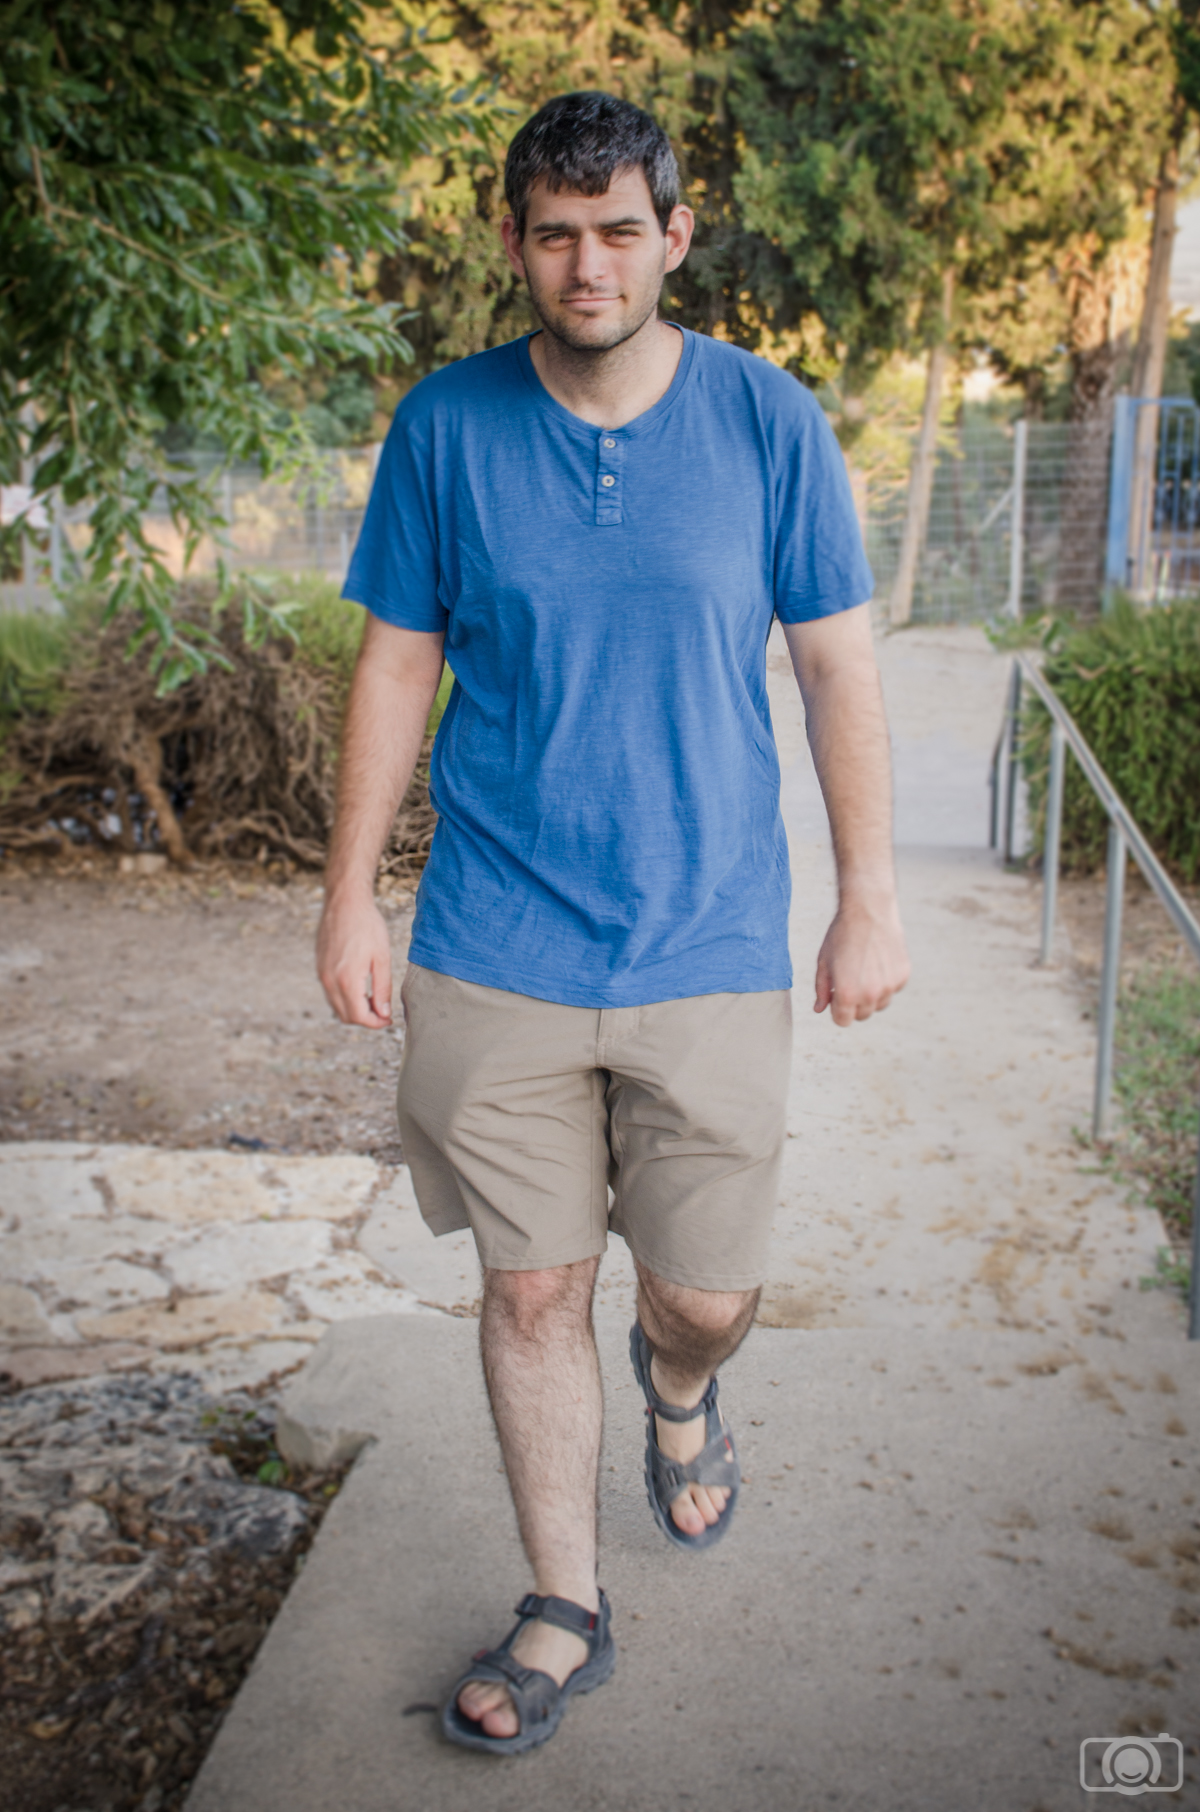
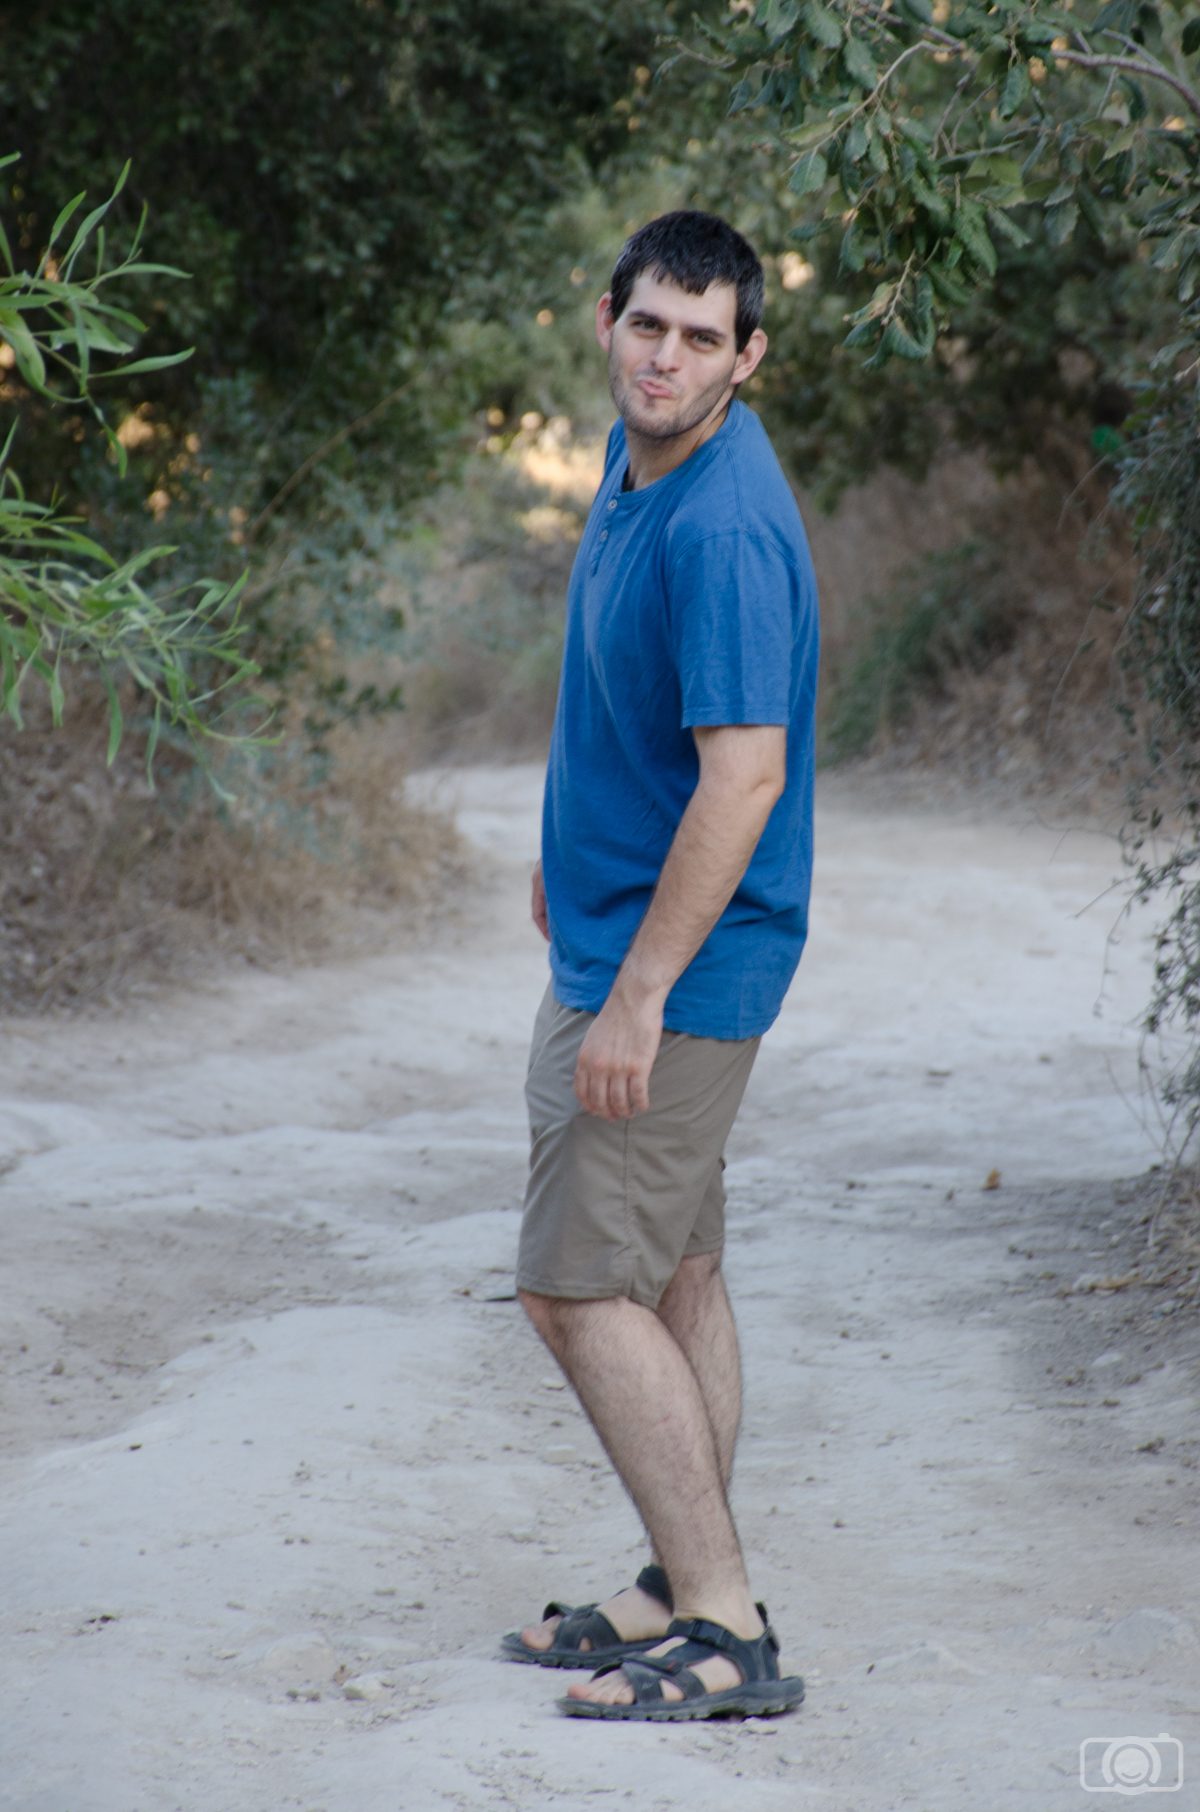
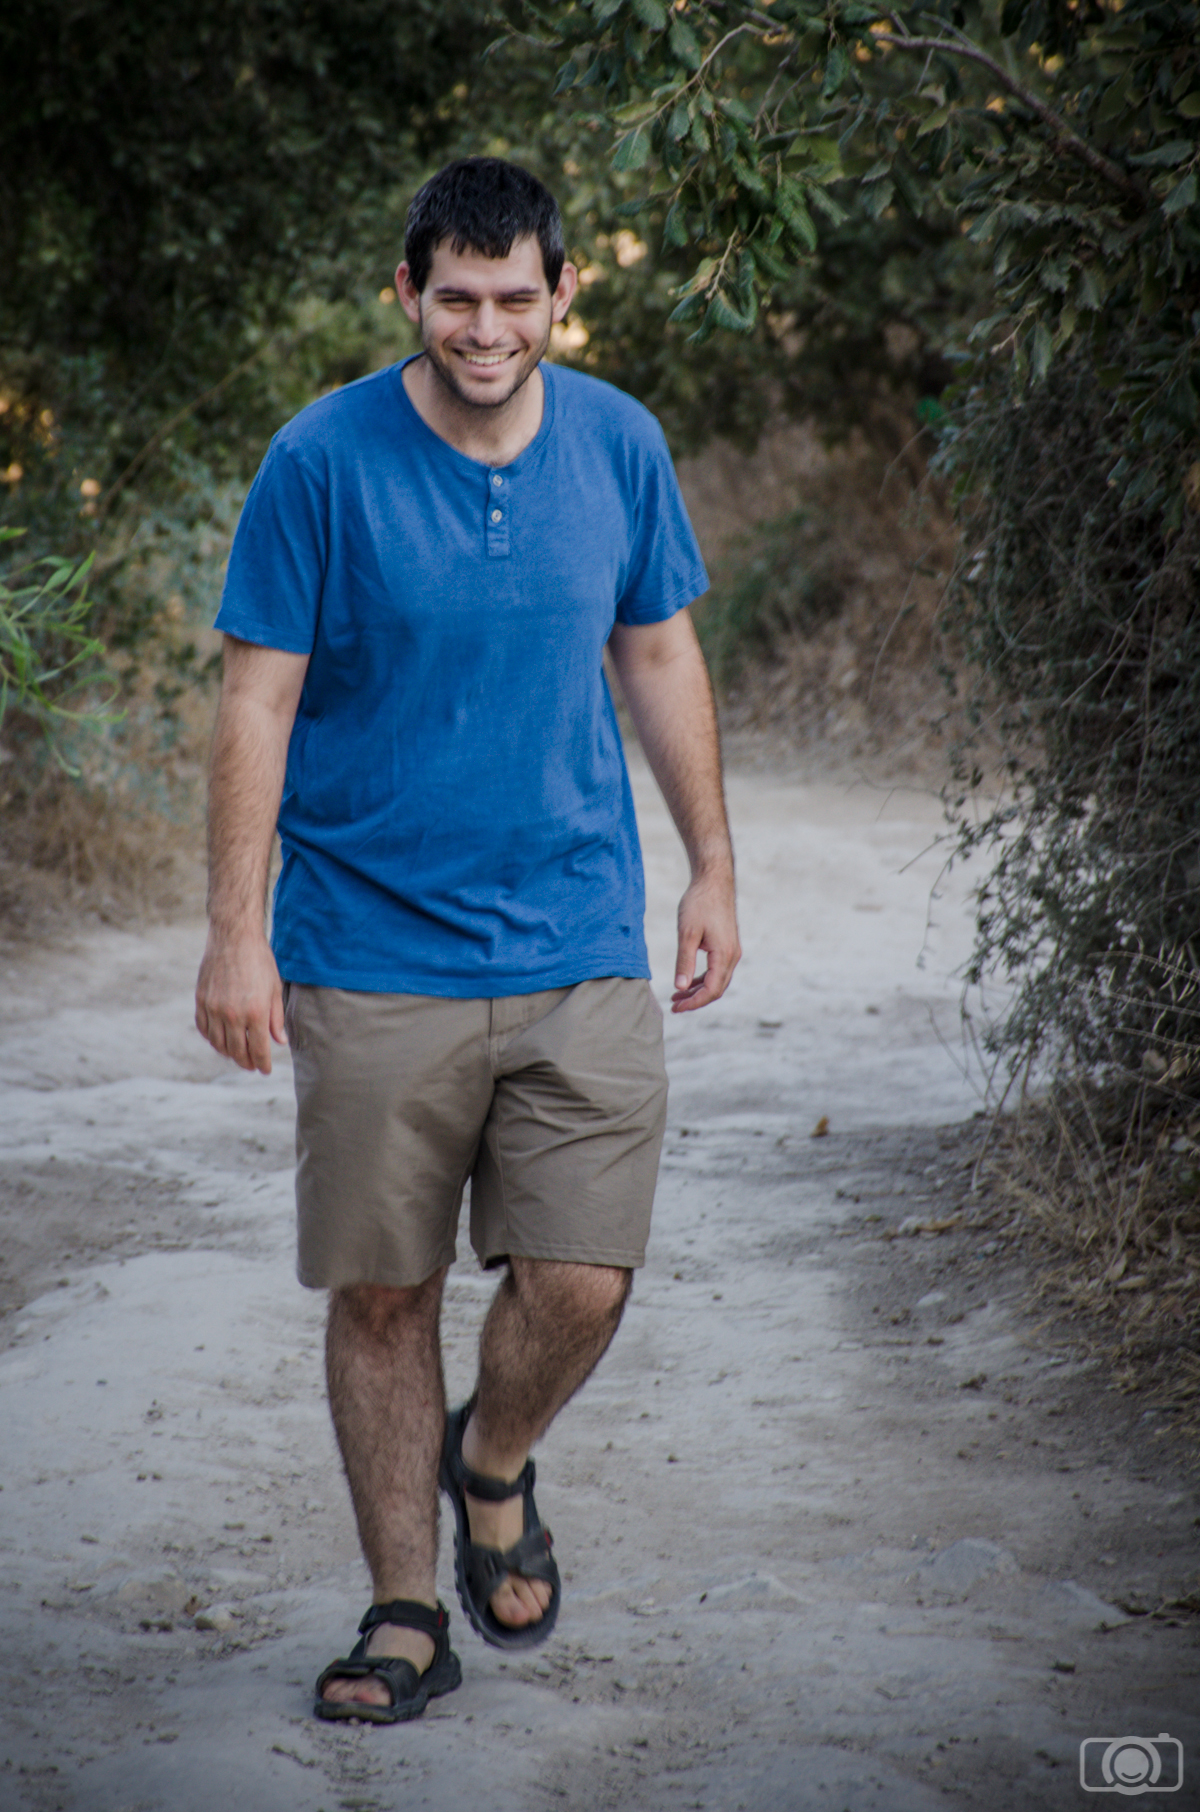
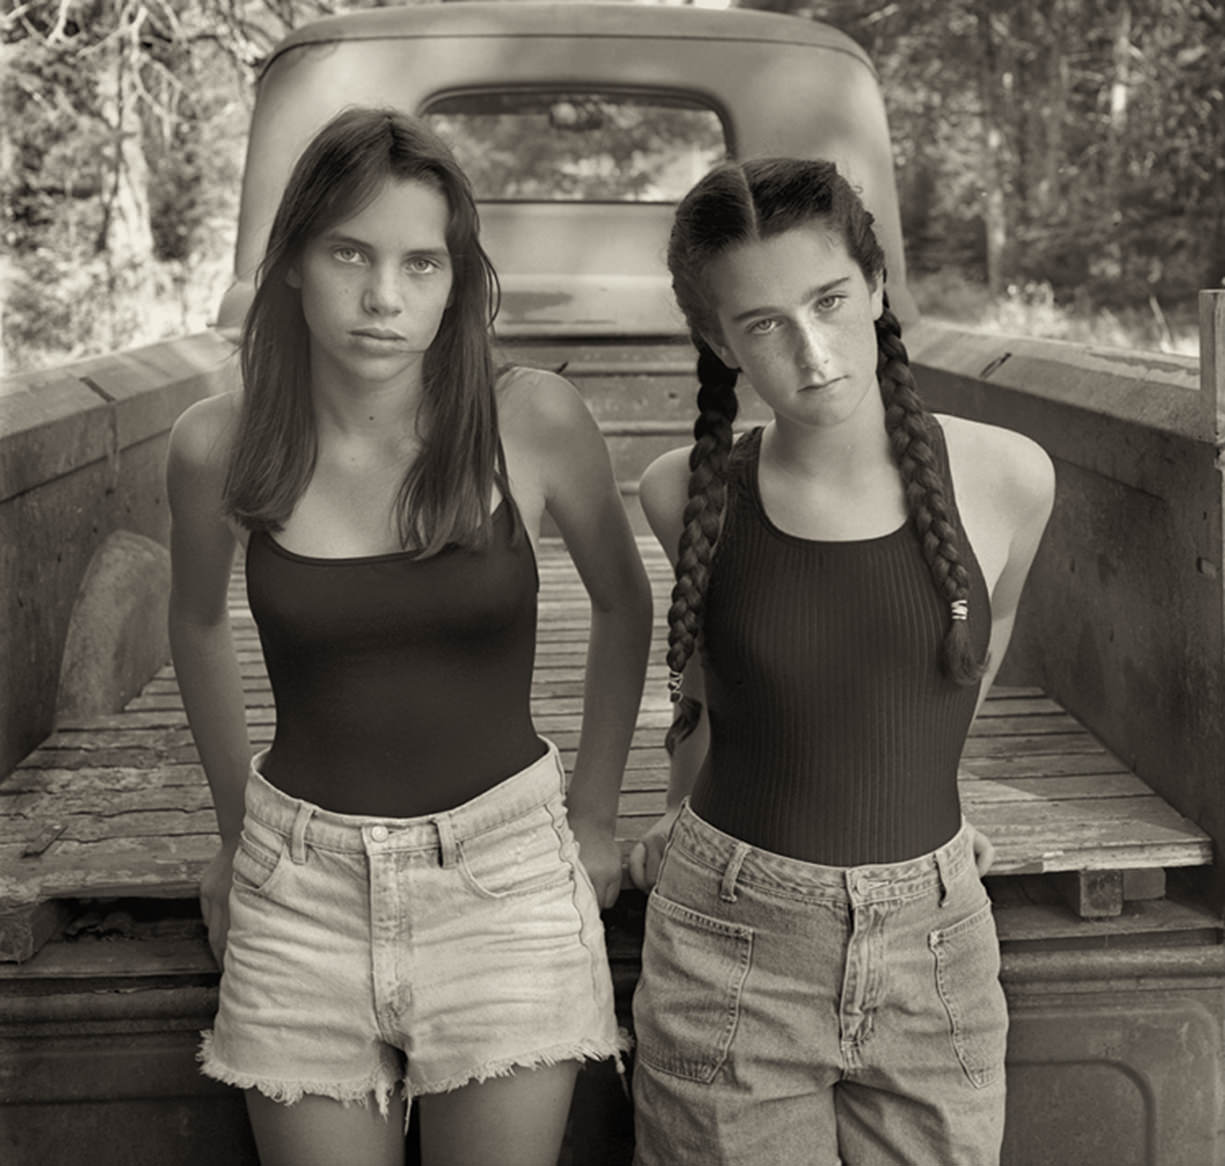
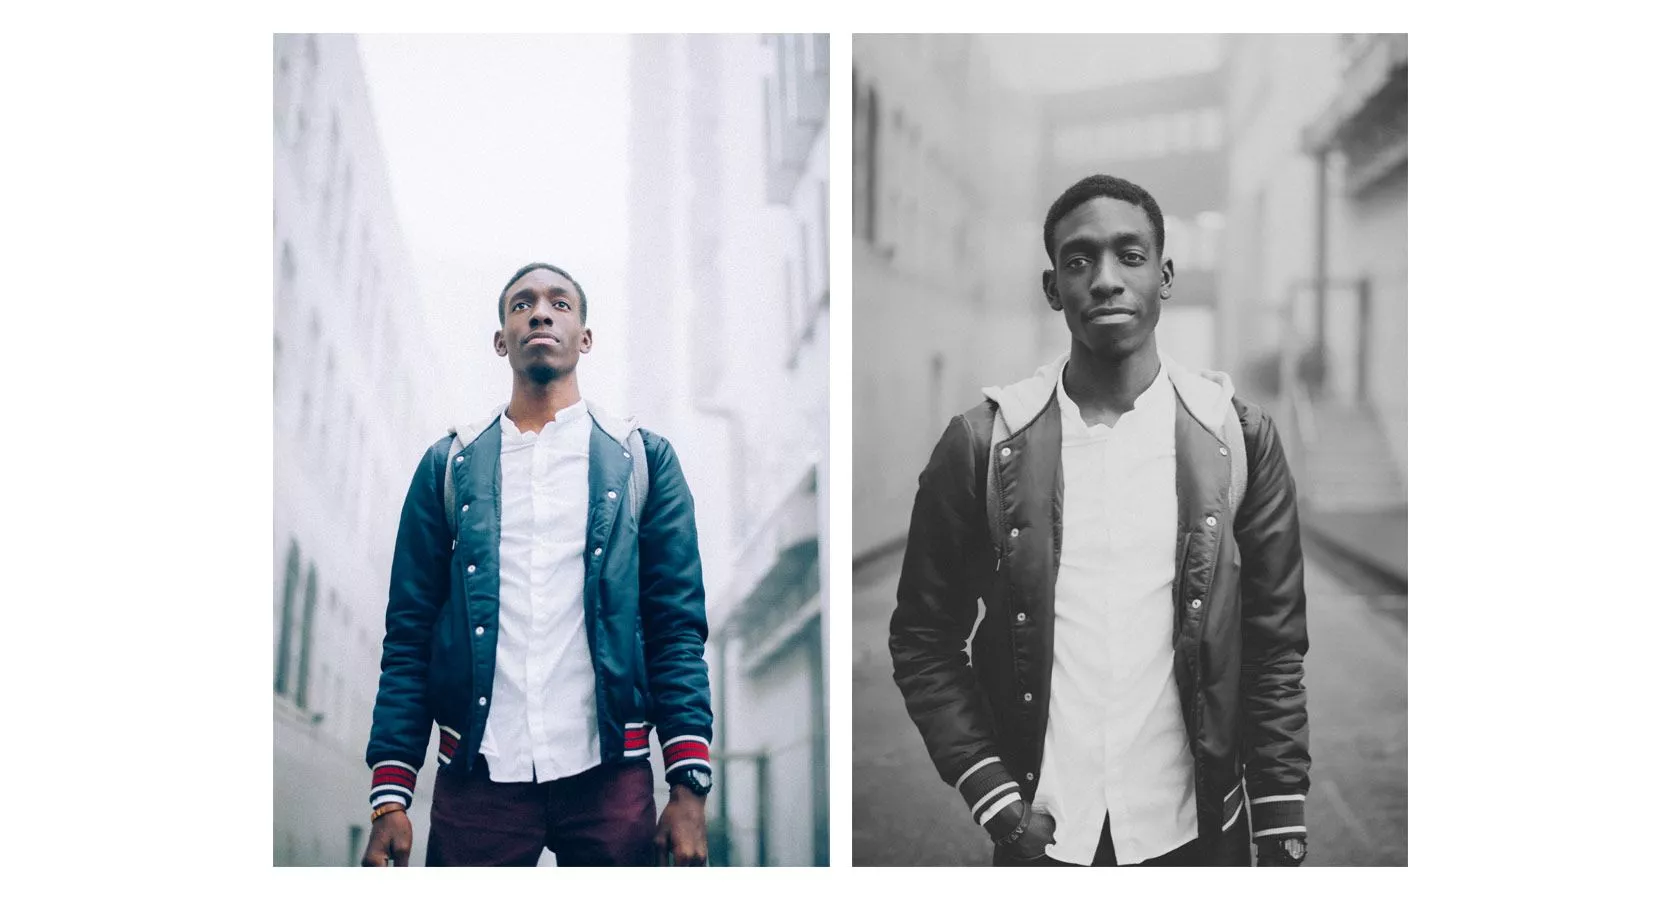
It is also a good advice to take photos when the subject is actually not posing for a photo. Like the leftmost example in the beginning of this text. Some people are just natural talent, like the boy below.

Natural Light Example 3

4. Post-processing – where the magic happens

Something which non-photographers may not realize is that nowadays almost every photo published by professionals are processed with a computer. There are zillions of great photos on Internet and people are so used to see processed photos, that if you want to make your photo pop-out, you need to get the final edge via post-processing it with the computer. Post processing is where you update a good photo to a great photo. Nowadays the skills on post processing are one essential factor that makes the difference between just ok photographers and the great ones.

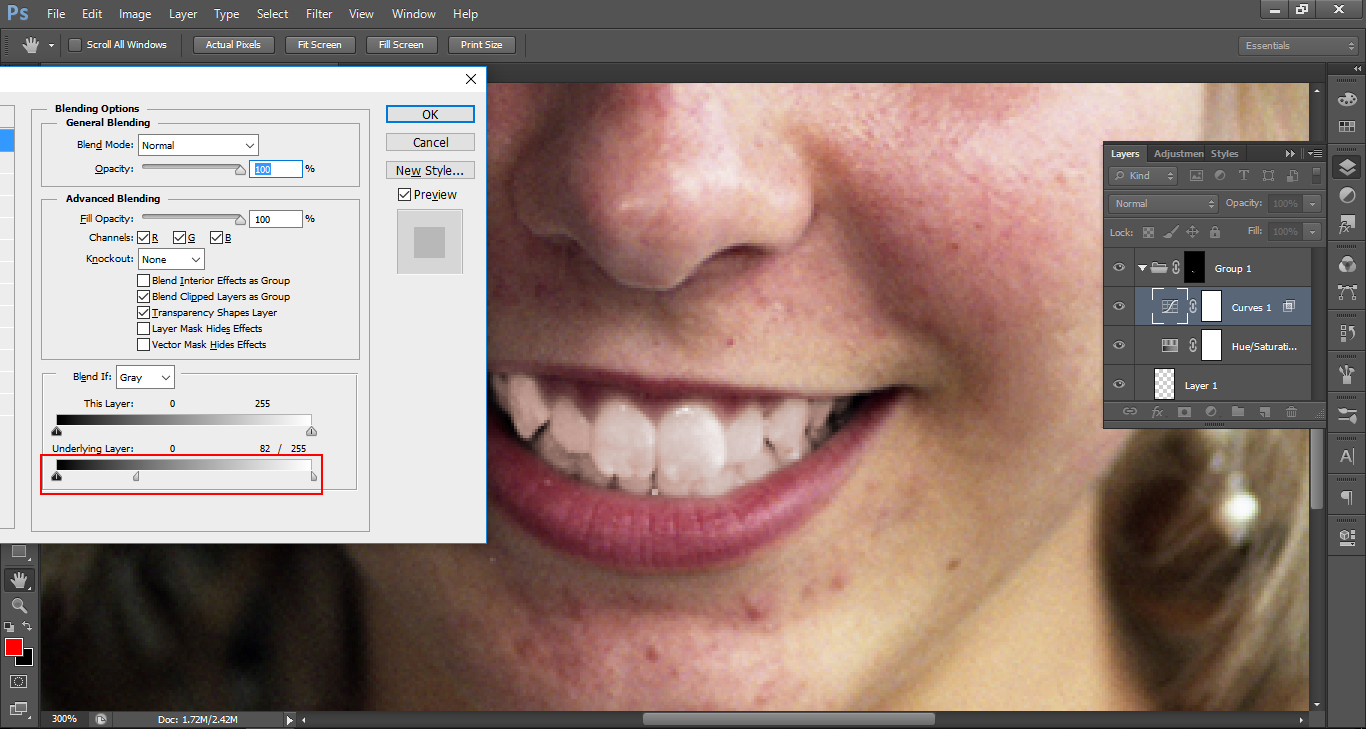
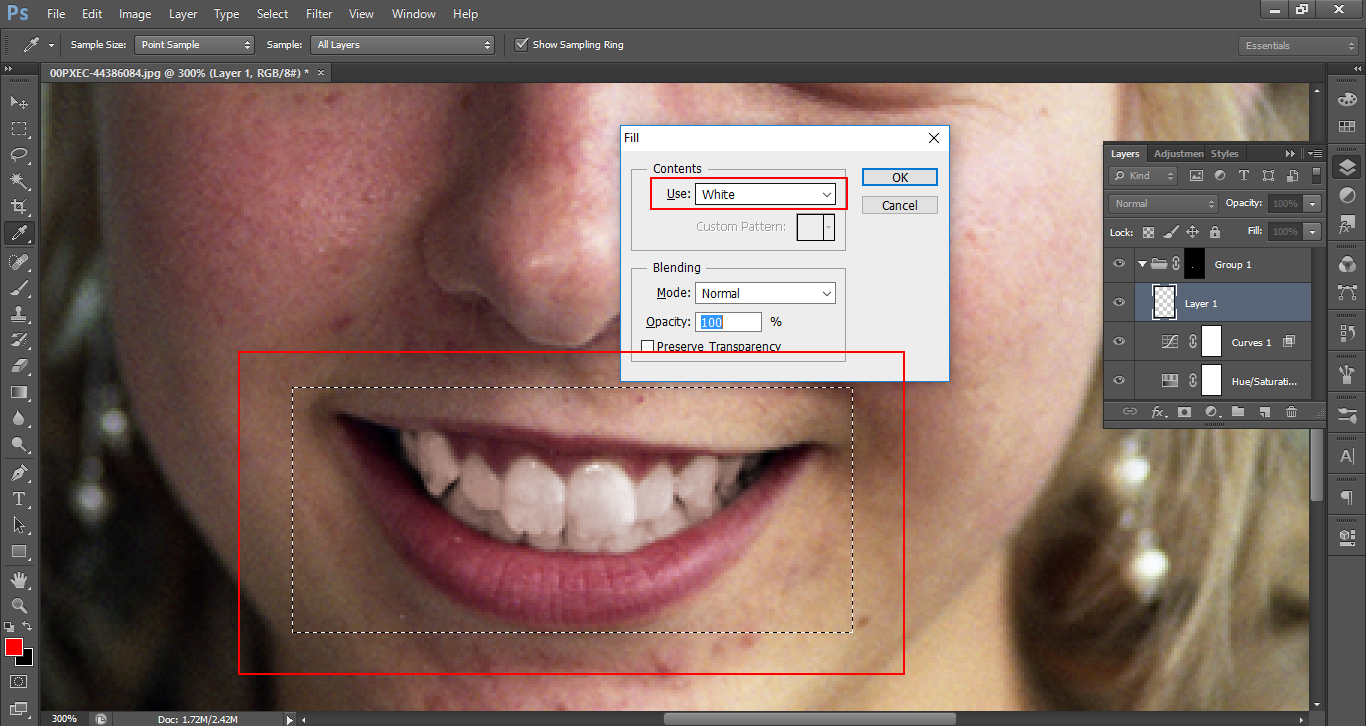
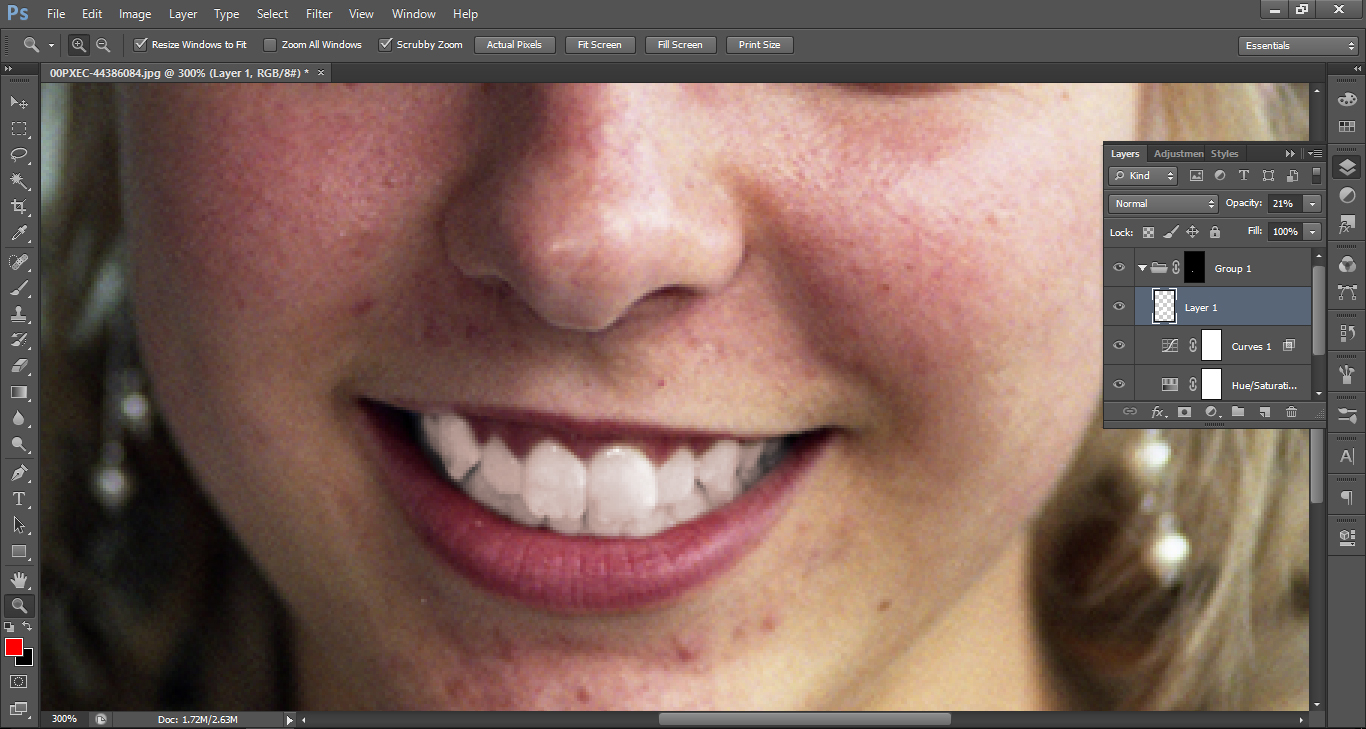
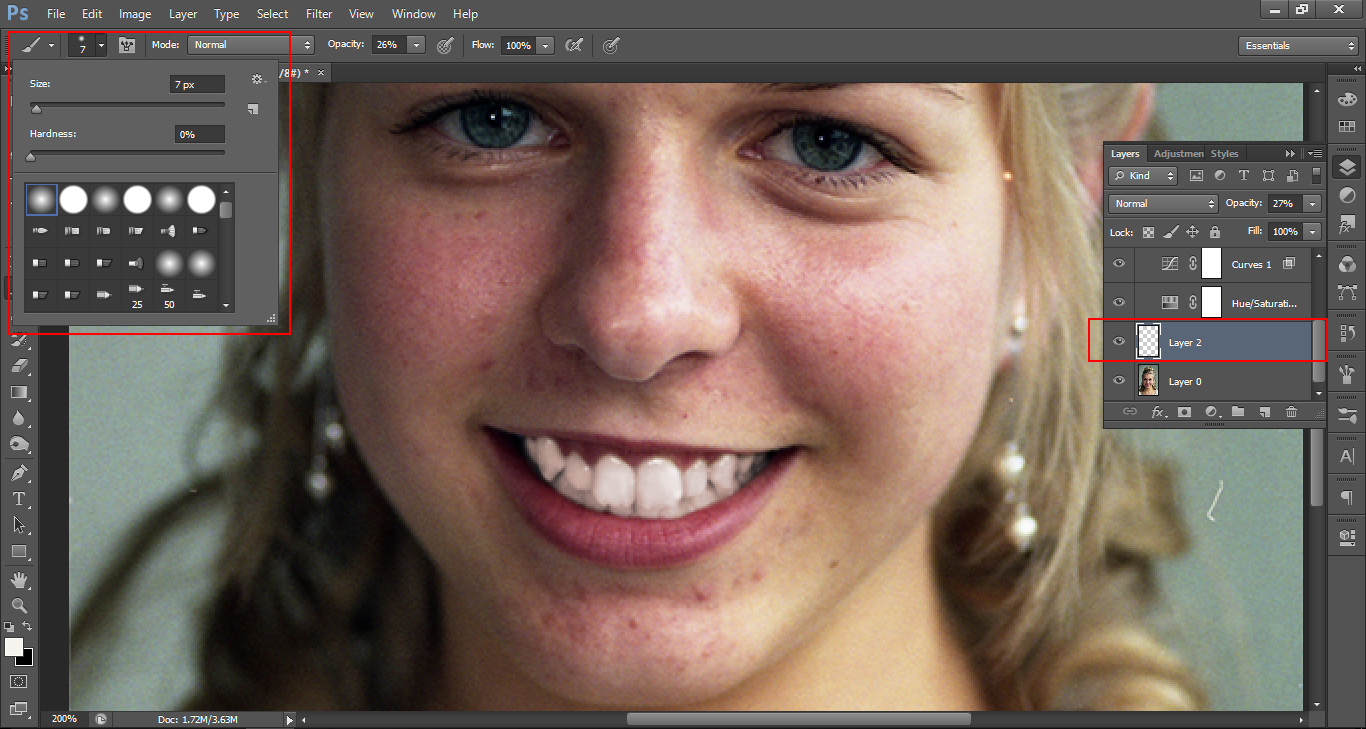
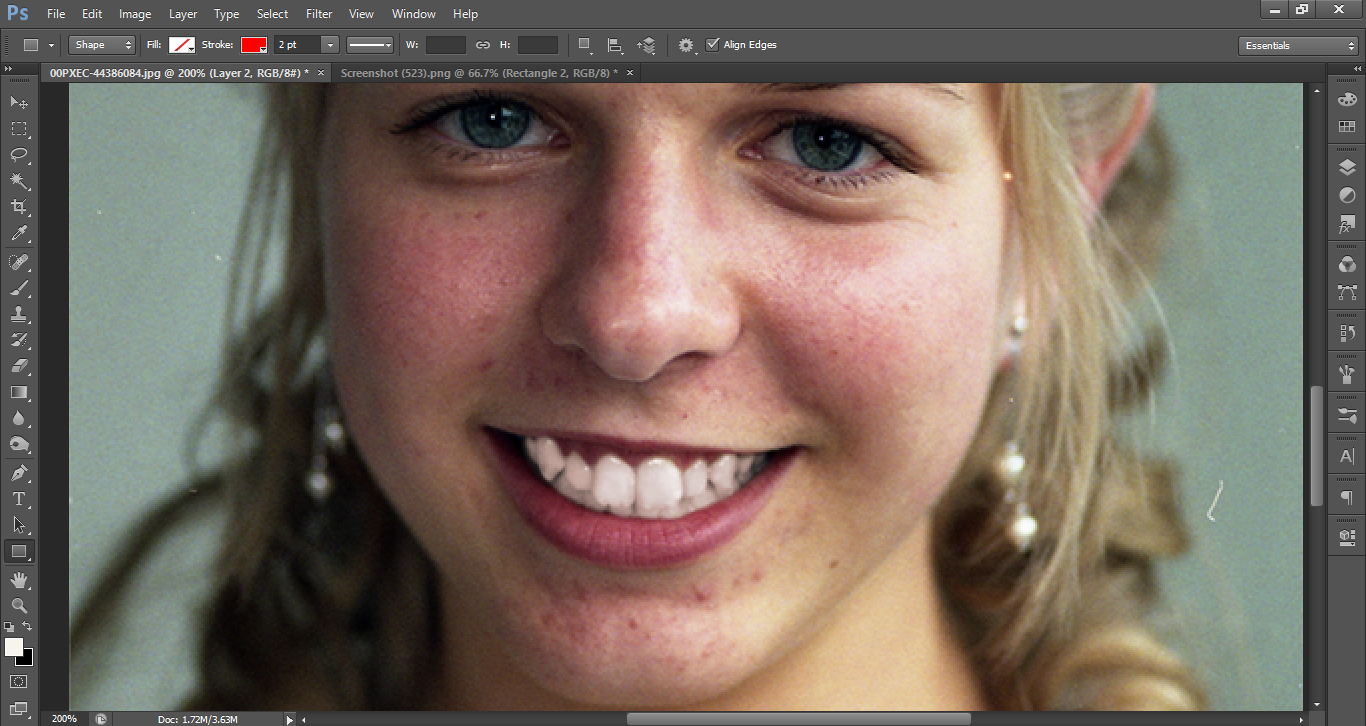
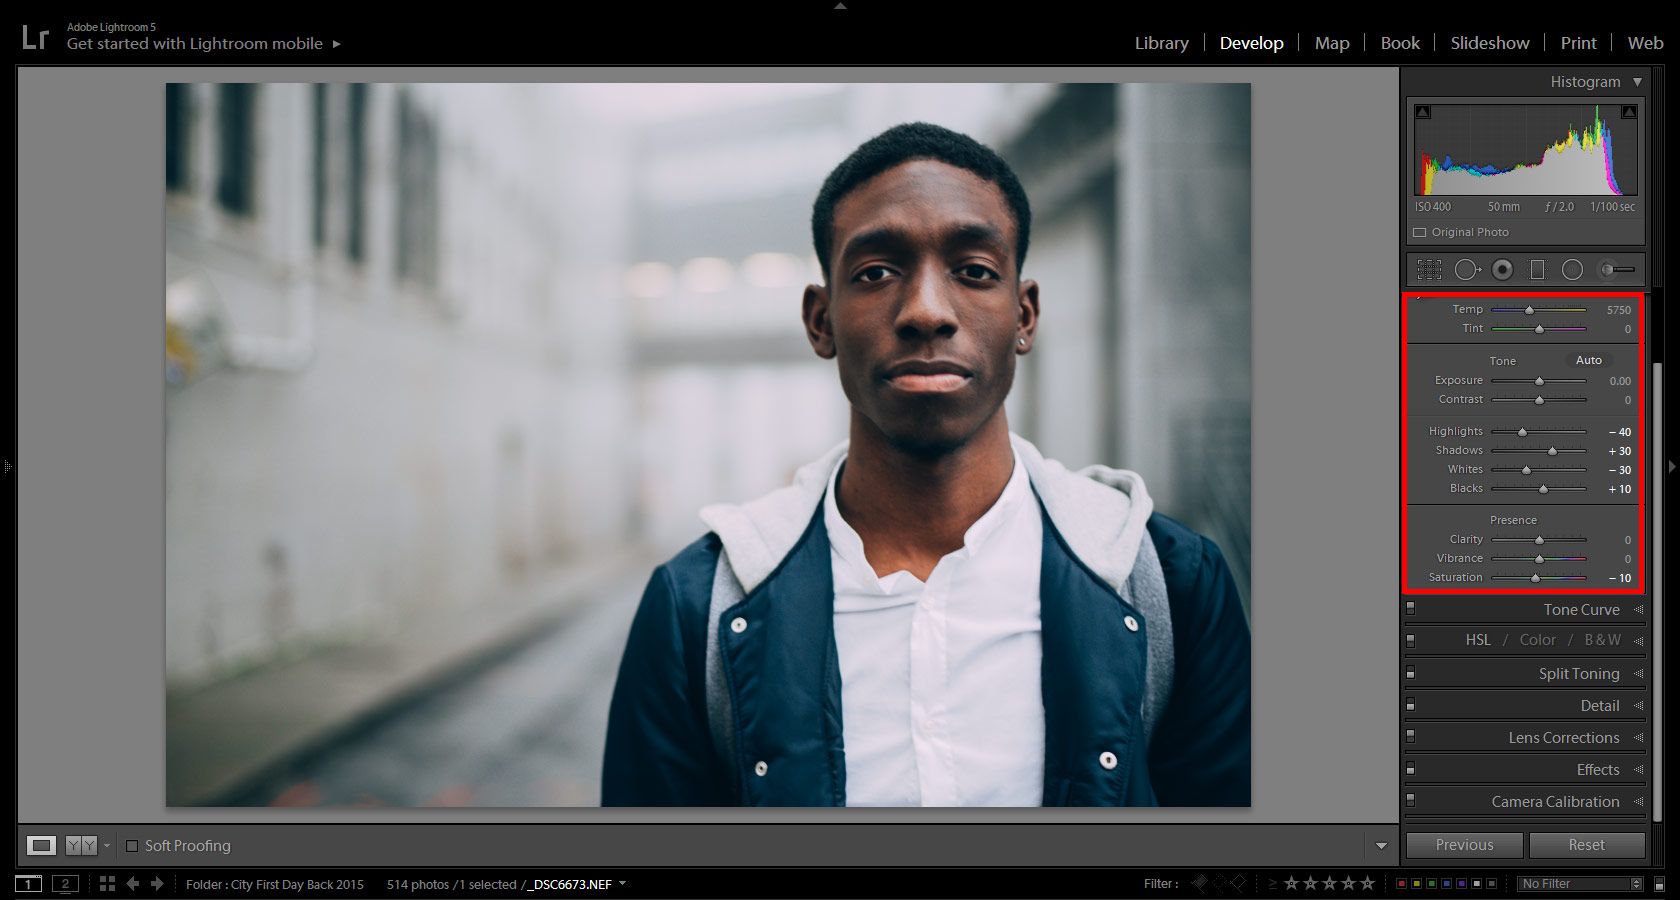
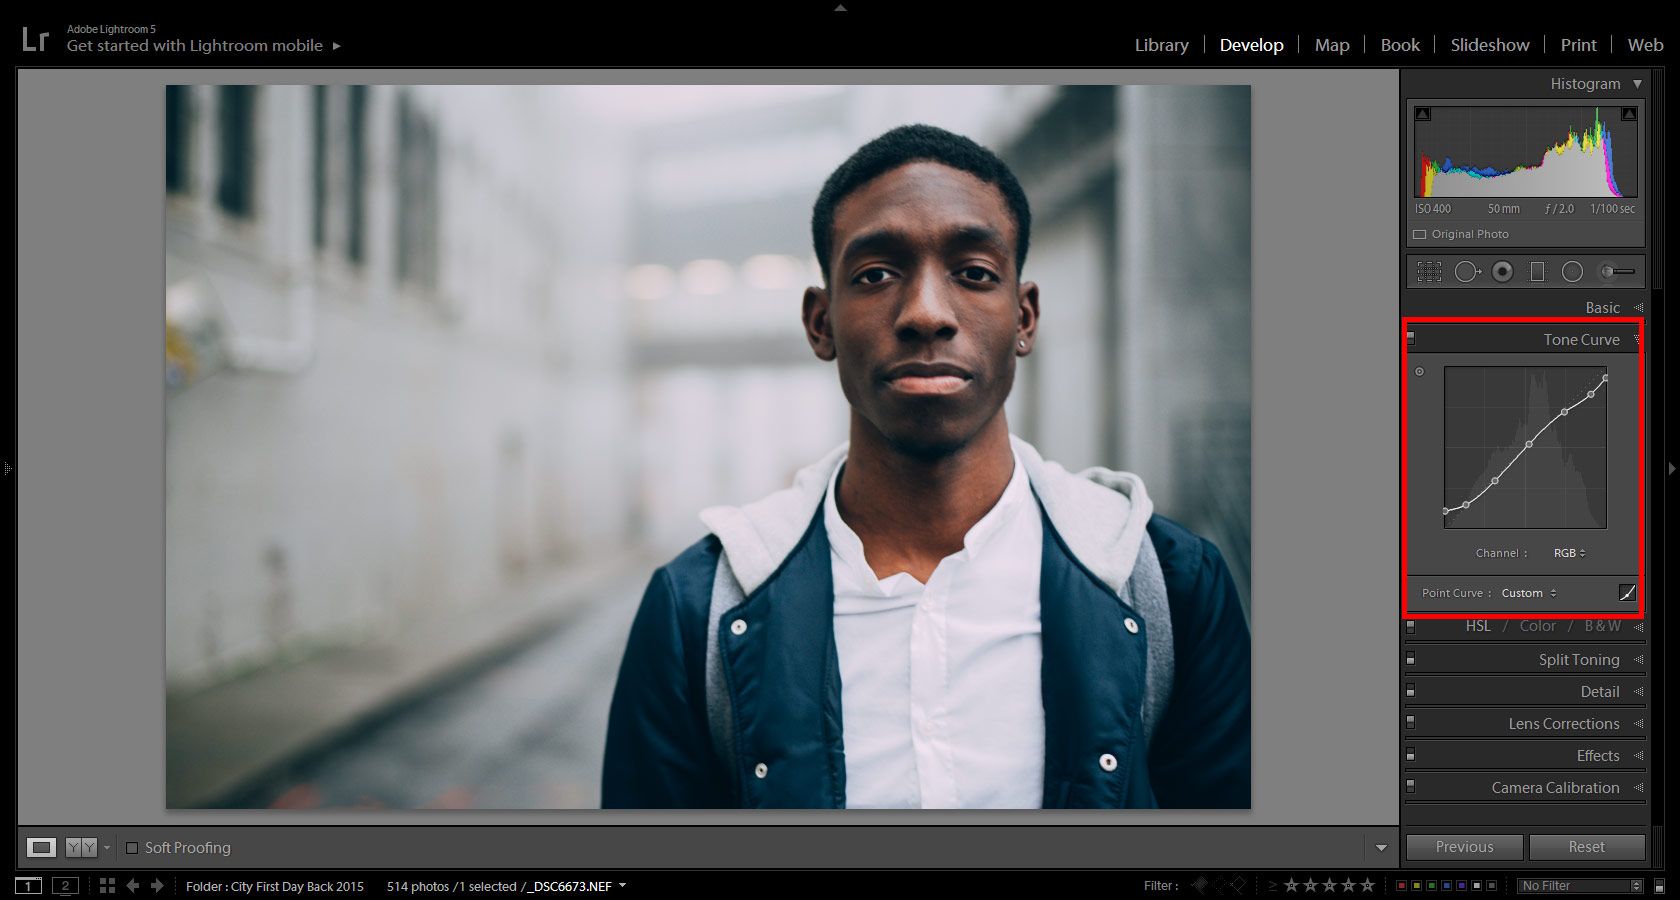
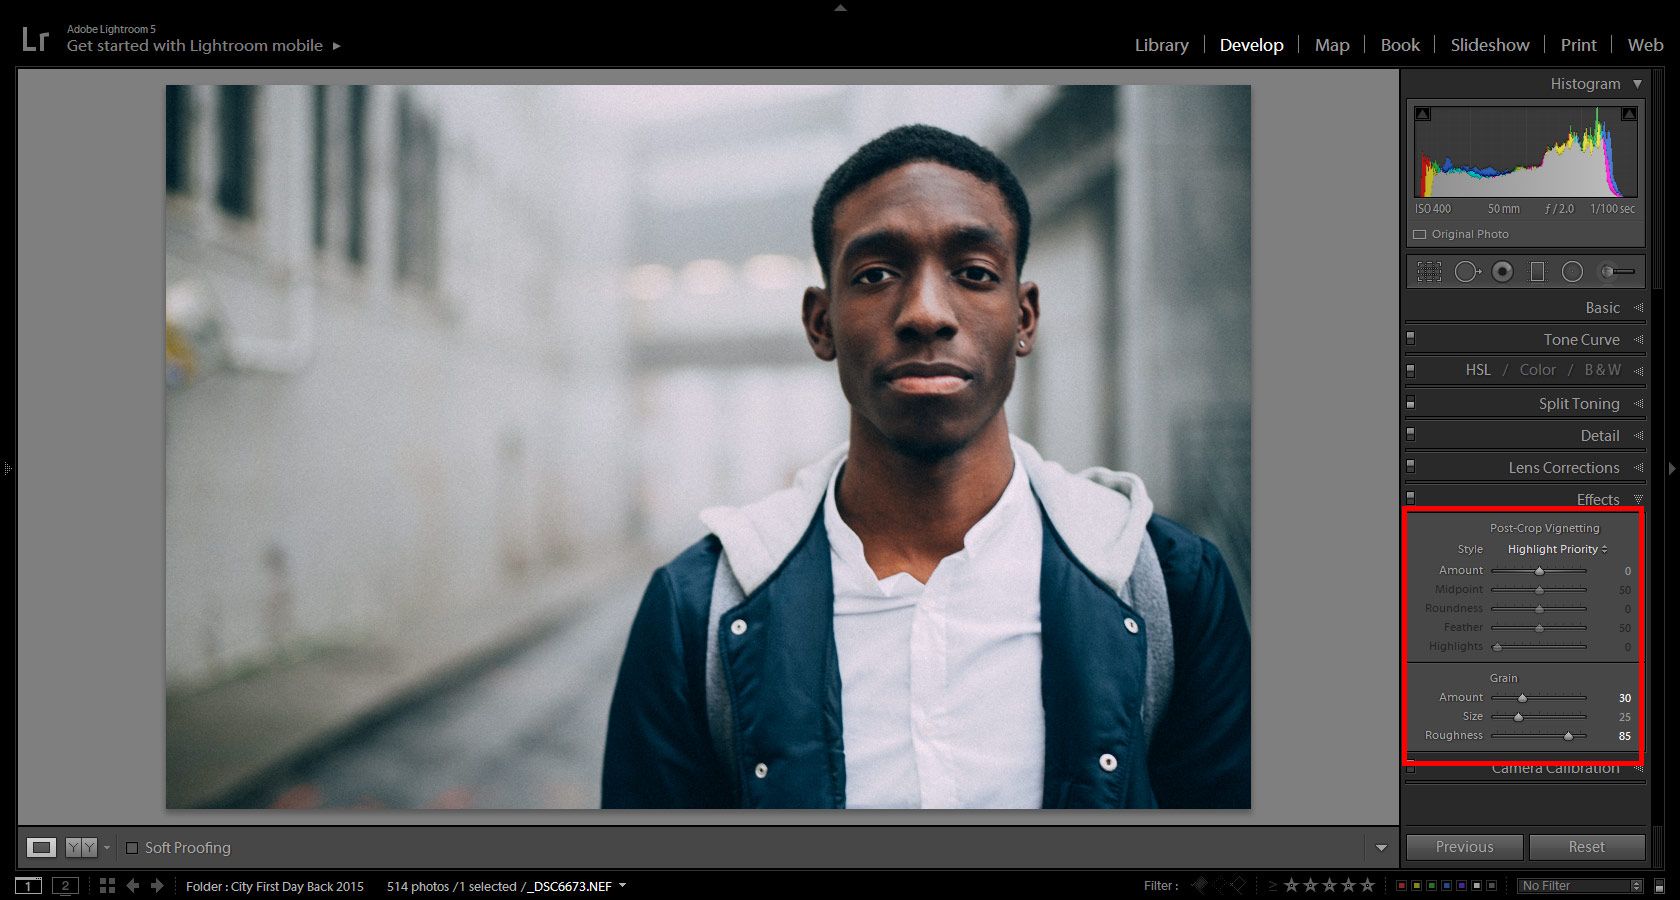
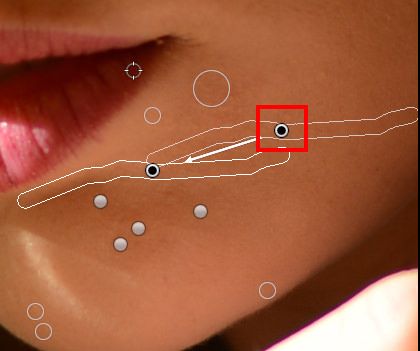
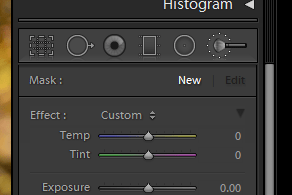
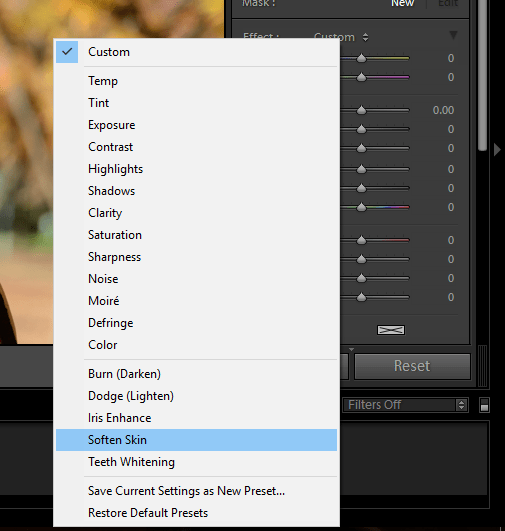
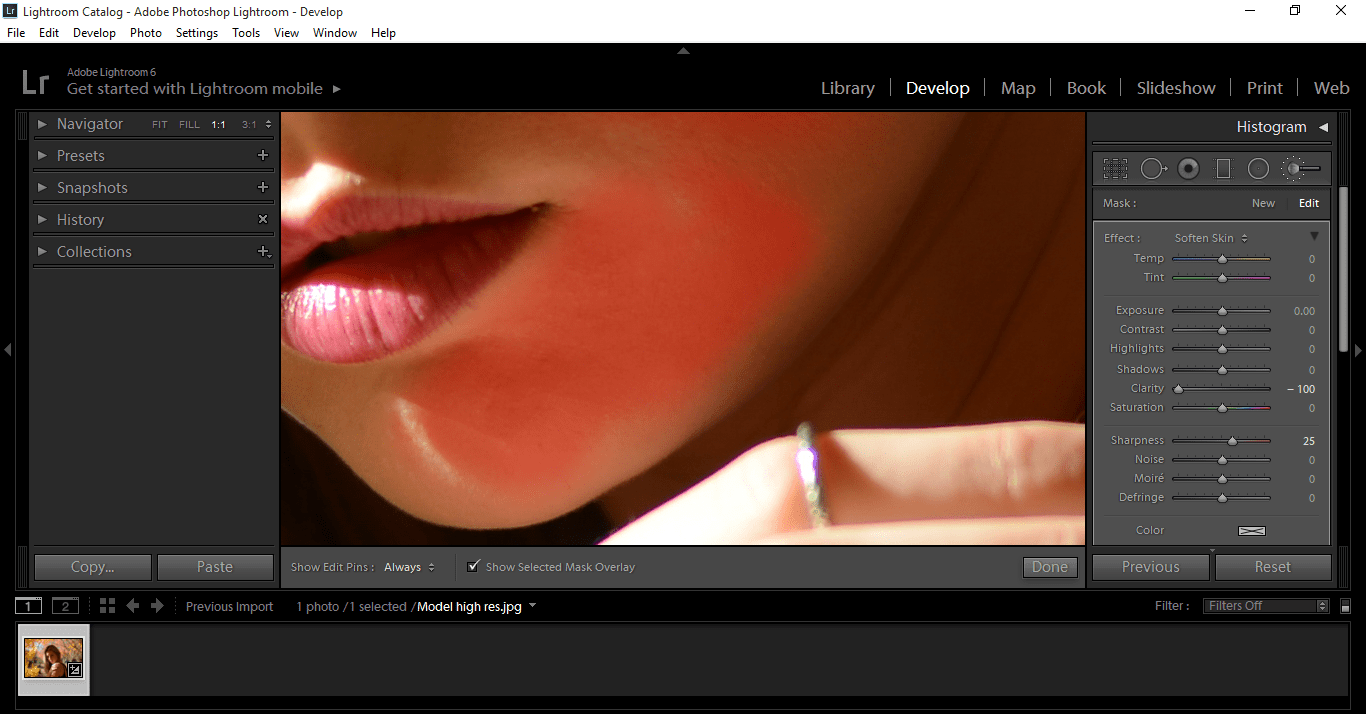
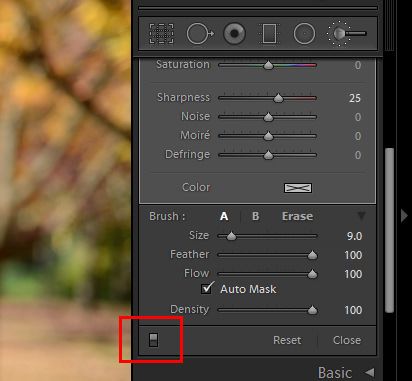
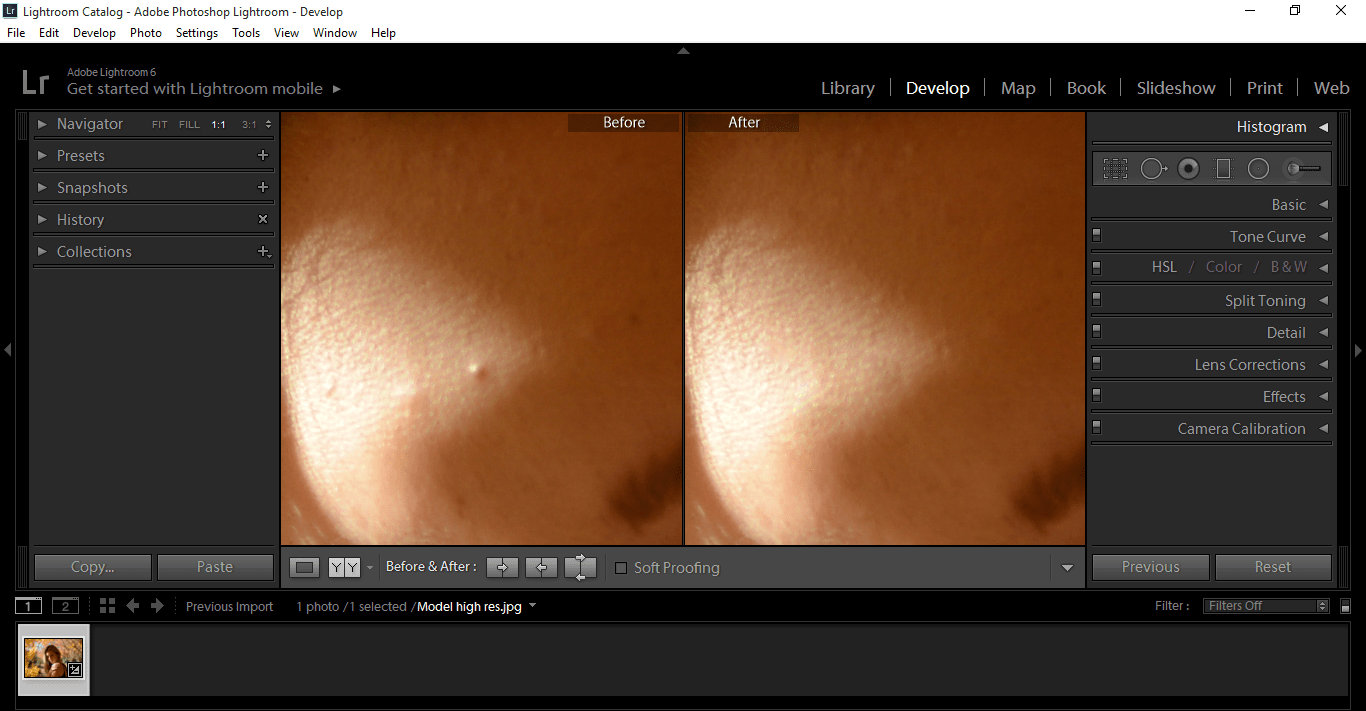
The amount of processing depends on your goal. For beauty magazines and advertisements the amount of processing seems to be nowadays unnatural. For normal portrait photo without any artistic effect, you want to do only some subtle adjustments so that the person in a photo does not even realize what kind of tricks you have done with the computer. There are lots of tutorials how to retouch your portraits and how to do e.g. some facial contouring. You may sharpen and brighten the eyes or even do some more advanced enhancing of eyes in Photoshop. You may also smooth the skin a little, adjust color vibrance, lighten the shadows if needed, add some clarity to the hair, check the lip color, whiten the teeth (but just little if you are not doing a Pepsodent ad).

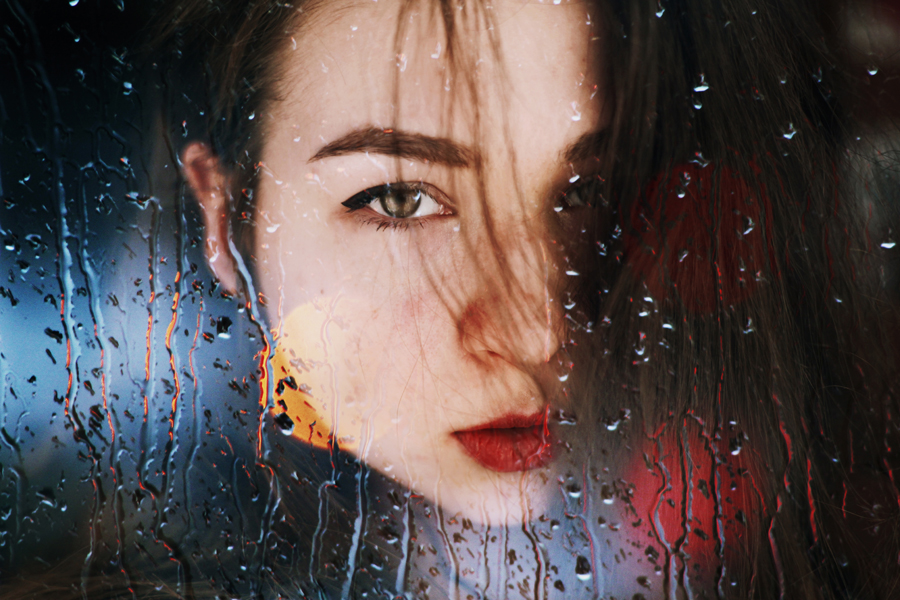
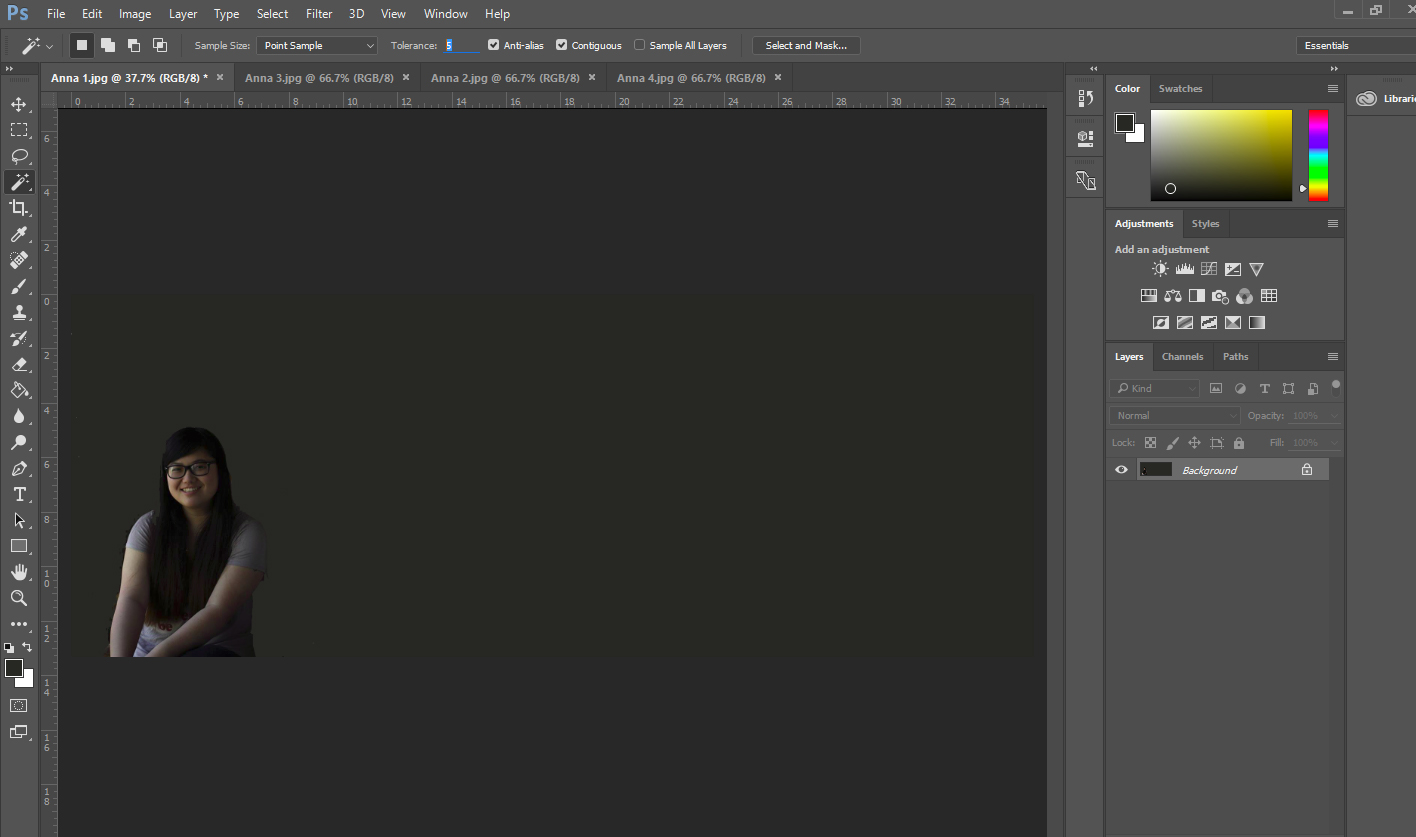
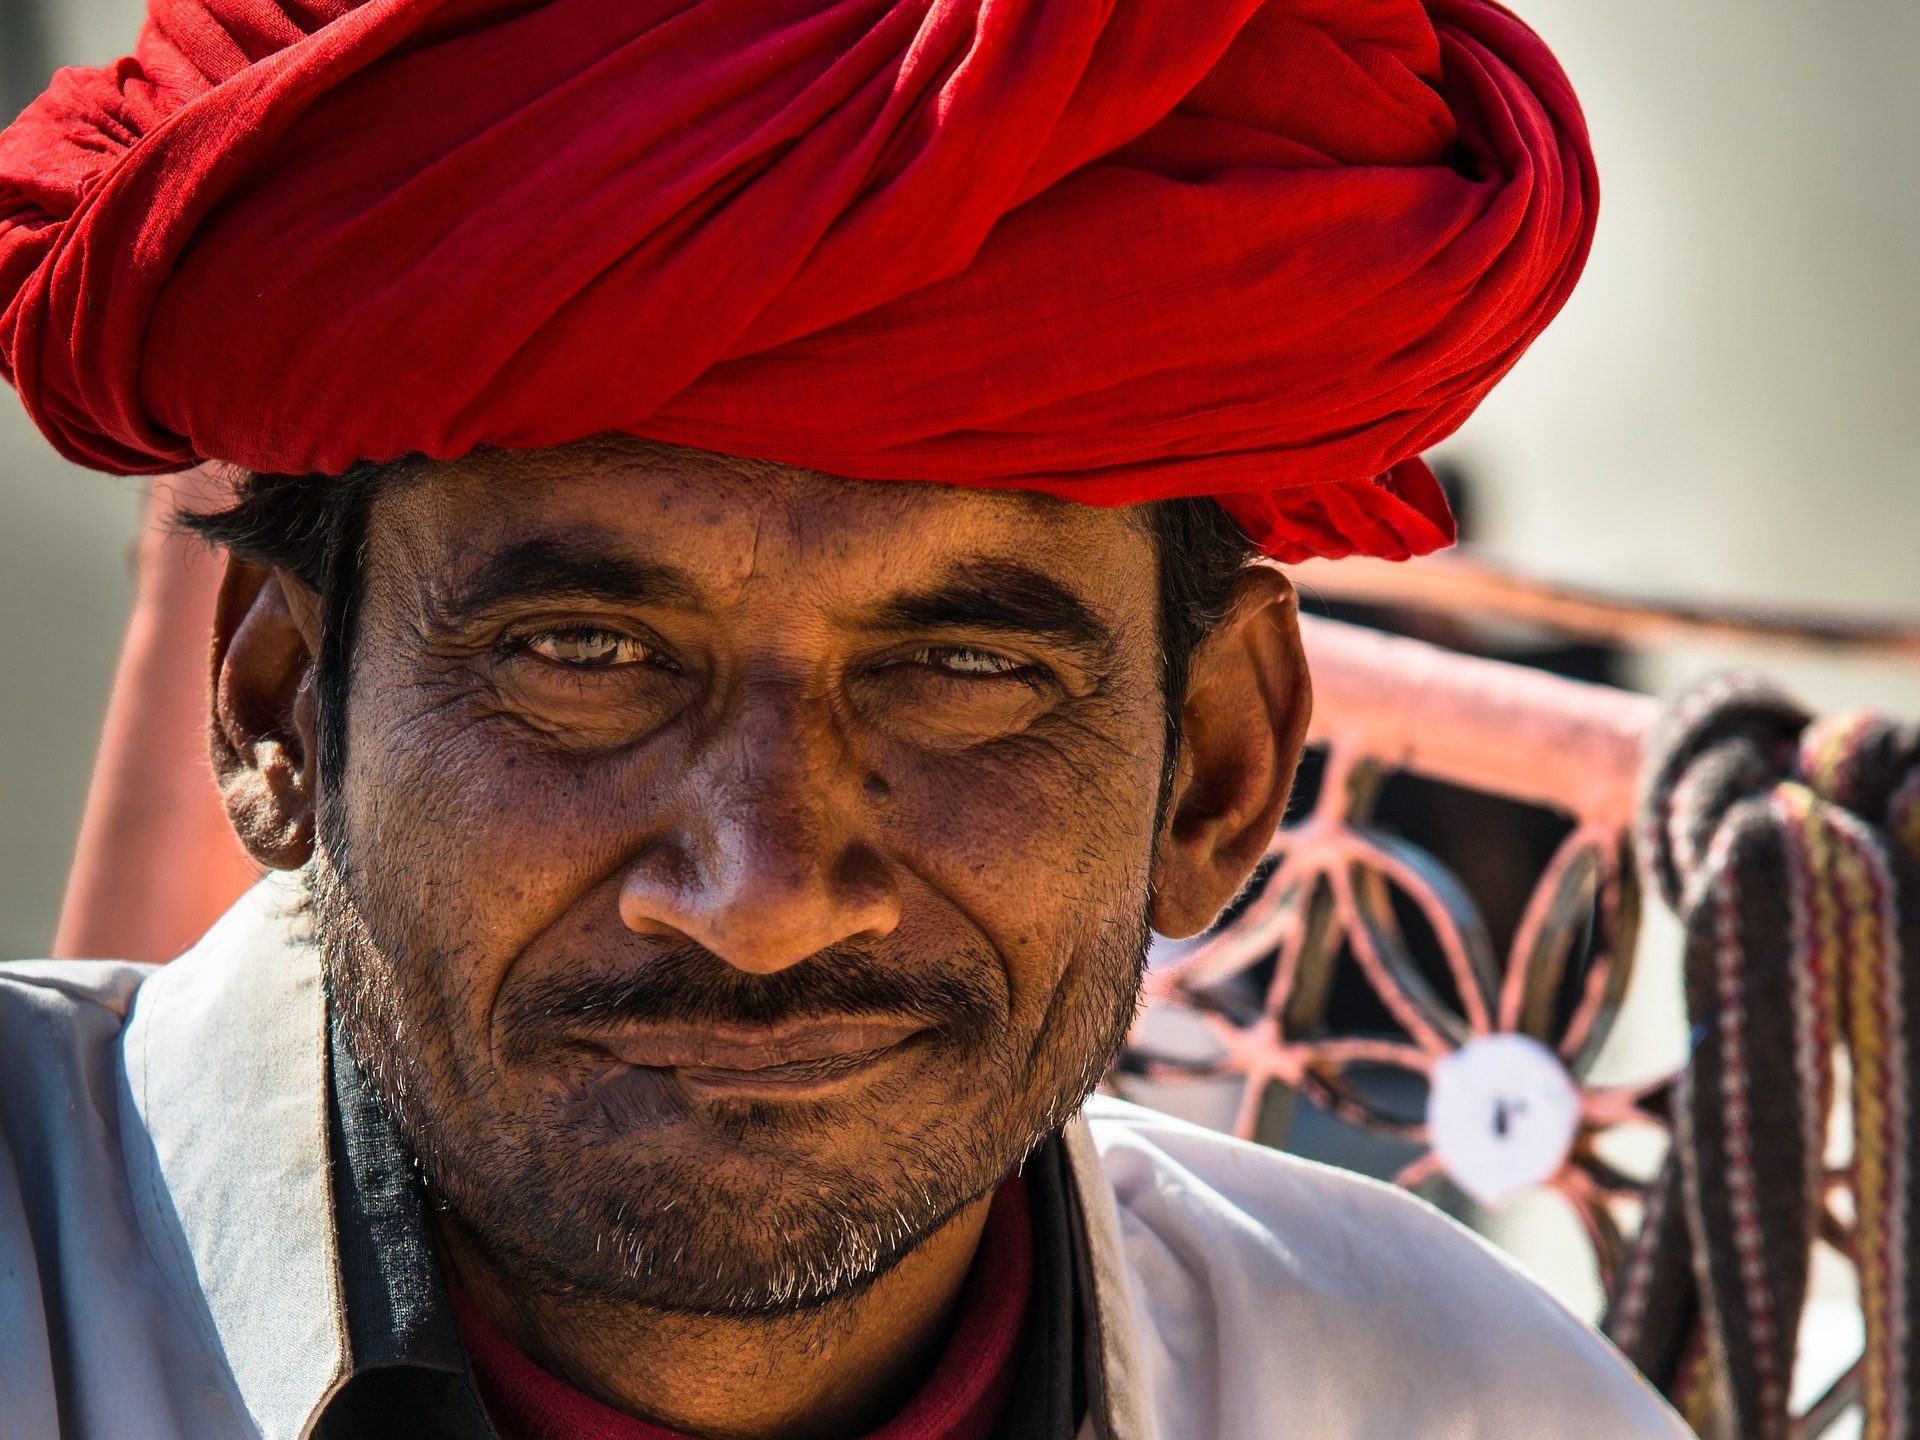
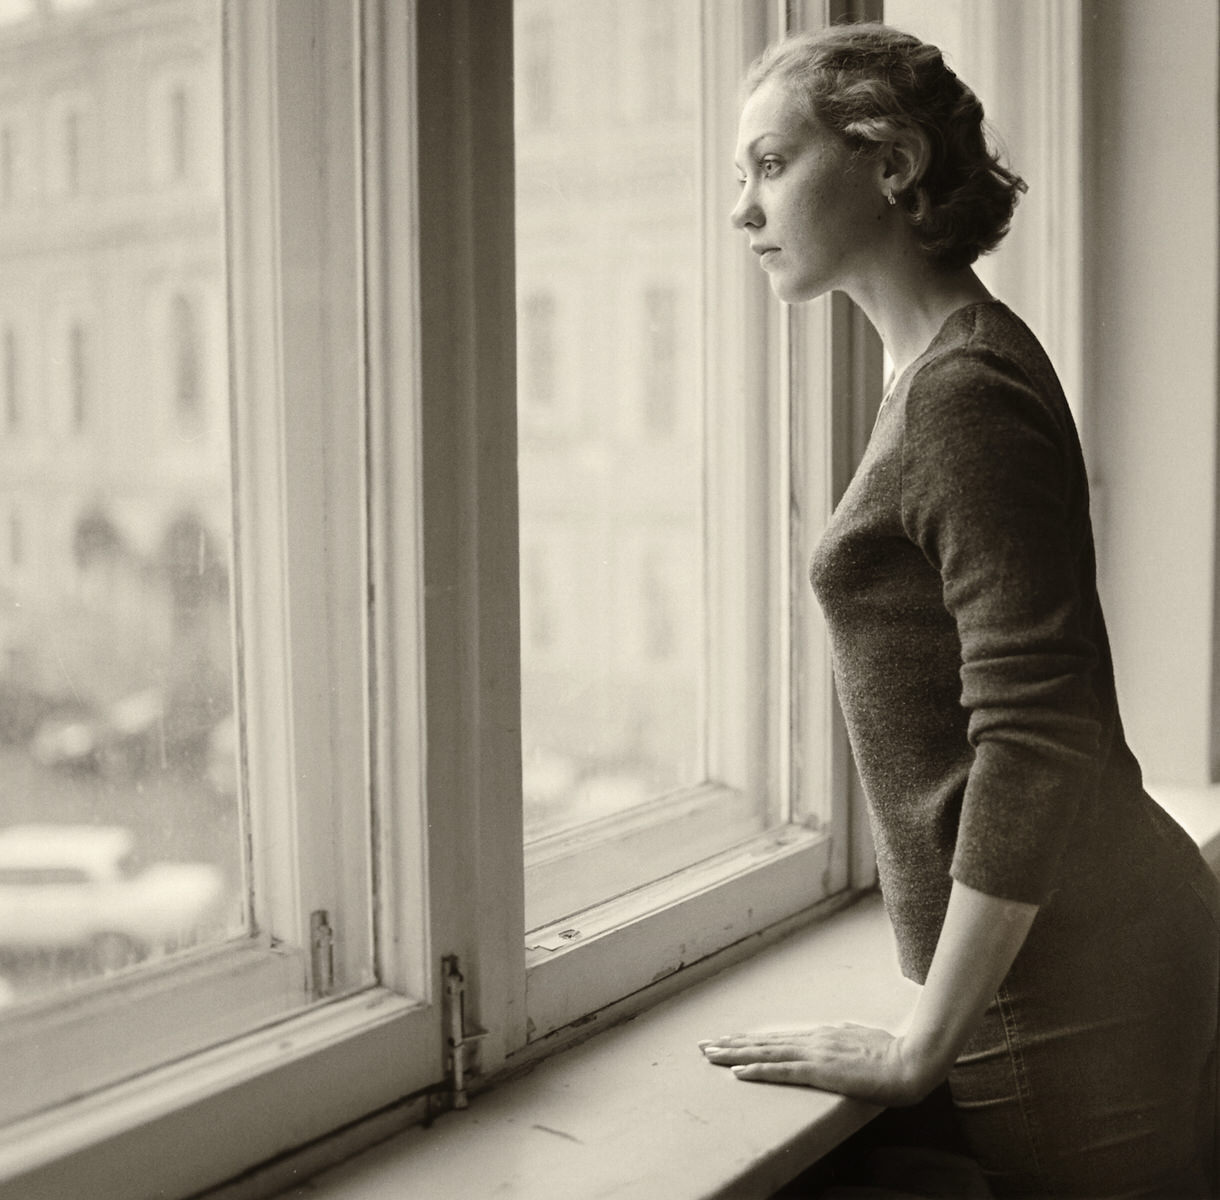
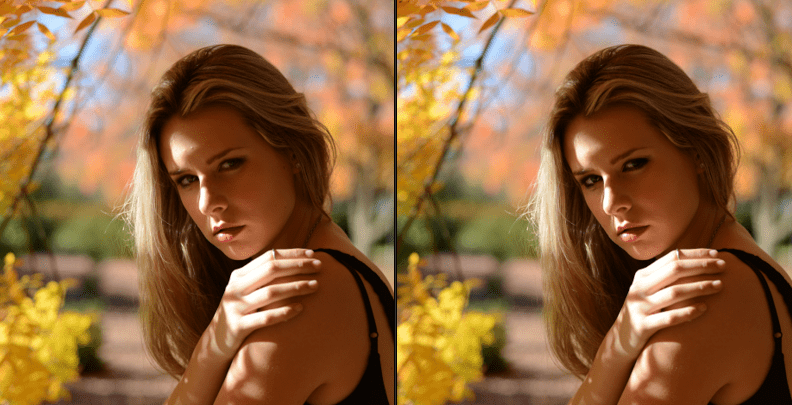
If the photo is going to Internet, nowadays the trend seems to go towards the more high key type of photo, i.e. you may want to brighten the highlights and shadows quite a lot compared to a normal natural looking documentary photo. You may also want to add some vignetting to the background. You also need to crop the photo. This is actually one of the most important things in post processing. You want to have the position of the subject within the frame to be perfect and that is done by cropping. I usually take the original photo too wide framed to have more room for post processing decisions about the final crop. There is an advice around that if you want to improve your photos, go closer. That applies to post processing also; It usually helps to crop tighter. If I have the feeling that there is something wrong in the photo, or something is missing, is usually try to crop tighter. Nowadays it is completely ok to cut off the top of the head. That gets a more intimate feeling on the photo, just like leaning forward. See the rightmost example photo.

Below is the final photo, which was taken according to the original request. The three photo series on the beginning of the blog text is my own vision, which we took right after the photo below was taken. Other photos in this article are more of my examples of photos taken in front of a window without artificial flashes.

IMG_2608_mini

Portrait Photography Tips and Tricks

Need some tips for your camera settings? Ok, here you go. Use as low ISO as possible. If you want to have whole head sharp, use something like F11 and adjust shutter time accordingly. If you are shooting without a tripod you do not want to go to longer than 1/80 or 1/60. I usually do the portraits without a tripod to be able to adjust the position and angle quickly. If you do not have enough light or if you want to get more focus on eyes, and blur ears little, go to lower F value. You can even go to 2.8 or lower if your lens allows. I usually set ISO to 100 and start with aperture priority mode with F8-2.8 depending on the light and the effect I want. If I want to have more control and do more adjustments then I switch to manual mode.

How about focal length then? That is really a topic of its own. Some people prefer 200mm. Sometimes 80mm is referred as portrait lens. If you check portraits on Peoples magazine or similar you may be surprised to see that there is more and more portraits taken with wide angle, something like 24mm. So, to be on safe side, use anything between 70-200mm for normal portraits. For beauty photos go towards 200mm. If you want to get more character out, go towards wider angle.

The Value of Window Light in Portrait Photography

The concept of light can be intimidating, especially for beginners. Even if artificial light isn’t in the picture, the natural light might seem exceedingly difficult to work with. If you look at it from another point of view, however, then you’ll see the beauty of light’s many personalities. No matter where you are, be it in the safety of your home or out in nature, you’ll encounter countless opportunities to work with unique lighting situations. Throughout a single day, it’s possible to find a plethora of photo-worthy spots where fantastic, well-lit portraits can be taken.

Window light is especially useful for beginners in the photography world. It can be very uncomfortable to openly shoot outdoors when you’re not confident in your new found interest. When I discovered photography, I didn’t dare to photograph in public for fear of being thought of as an unfit artist. Though my fears were irrational, they were also an understandable reaction to a lack of skills. If you can relate to this or any other form of shyness, anxiety, or overthinking, then you’ll find much comfort in knowing that shooting great images indoors is very possible. Once you familiarize yourself with your creative skills, your confidence will naturally increase.

//

You might think that windows are too simple. Though they may be limiting to a certain degree, working with them right at the beginning of your photography journey will help your imagination thrive rapidly. The more challenges you face as a beginner, the easier it’ll be to find ways out of seemingly impossible artistic situations. If your mind gets used to finding solutions no matter how large an obstacle is, you’ll gracefully navigate through potential future difficulties such as unsuccessful photo shoots and technical issues.

In addition to strengthening your patience, experimenting with window light will allow you to appreciate the power of limited light. Oftentimes, we seek open locations and perfectly lit spots which guarantee beautiful results. Finding comfort in a lack of light will allow for interesting compositions, which will, in turn, allow for even greater portraits when you do shoot in locations with more light.

//

If you don’t know where exactly to start, simply stand in front of a window. If you’d like to take photos of someone else, it would greatly help to have a test shoot with yourself beforehand. A test shoot will allow you to understand the way light embraces facial features from different angles. Simply take photos of yourself from different positions and angles; this will strengthen the relationship between you and your camera. When you have a shoot with a client or a friend, you won’t be overly confused about light’s interesting ways of working. Furthermore, you’ll be more familiar with self-portraiture, a wonderful genre that encourages self-reflection, vulnerability, and creativity.

//

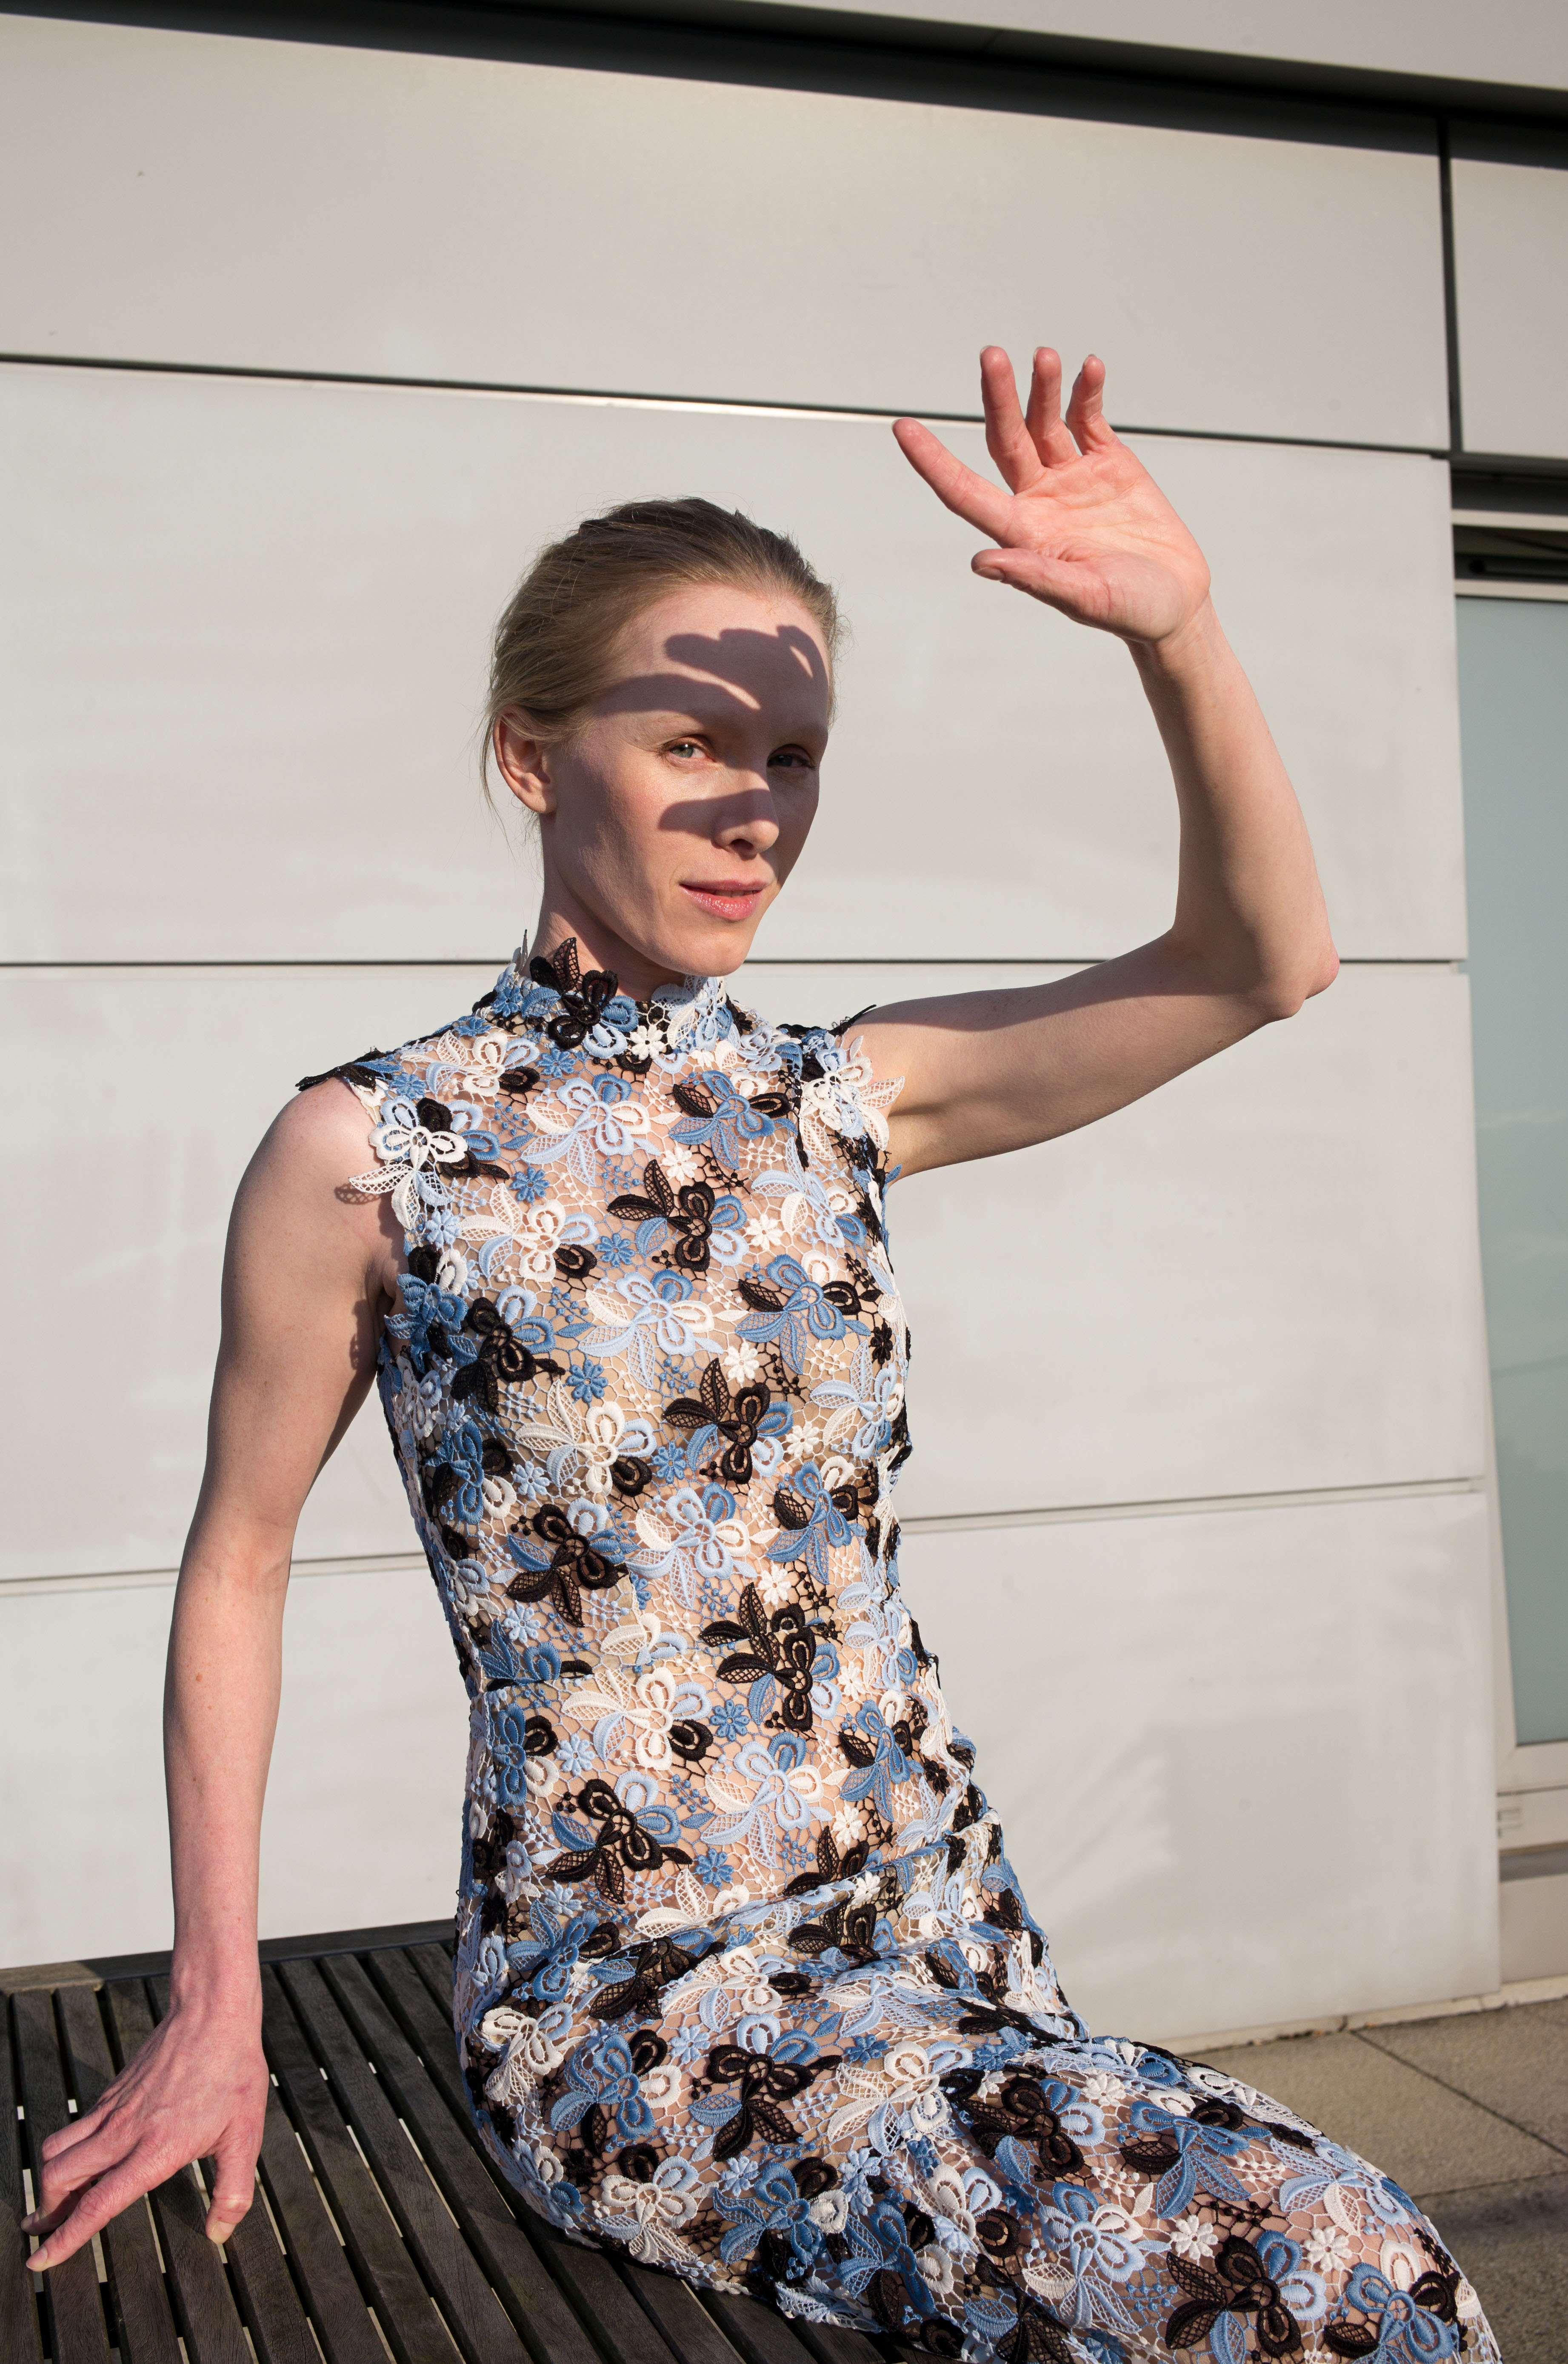
On days when the weather isn’t at its kindest, window light can be just as useful. While harsh midday light will compel your subject to squint, milder light on overcast days will provide a mild glow. If you want to make window light stand out even more on such days, use a reflector. This will serve as an extra source of light, brighten your subject’s face, and give their eyes an extra sparkle. My favorite kind of light is one that hits half of a subject’s face, creating a portrait that is reminiscent of 18th-century paintings. Windows make this effect very easy to achieve.

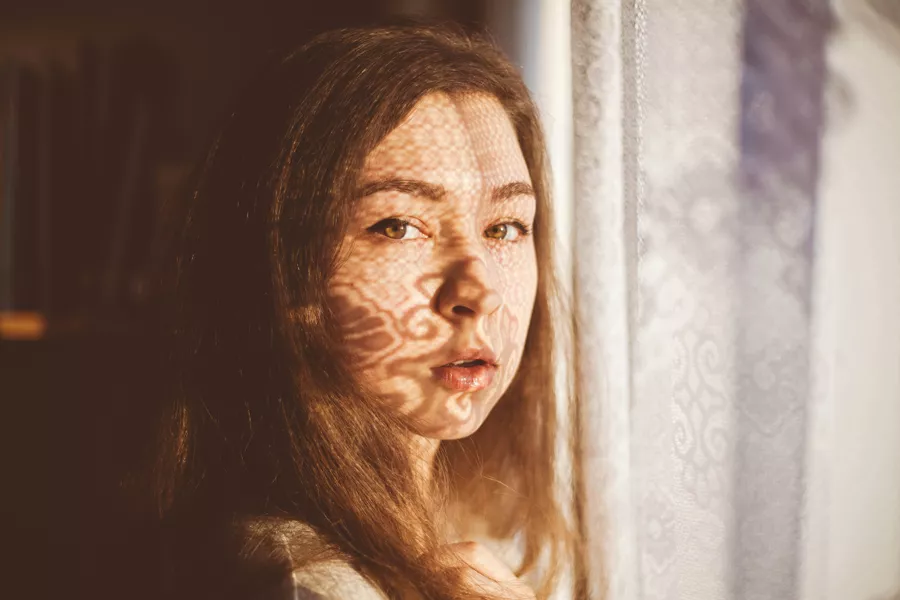
If you’re shooting indoors on a particularly bright day, curtains will come in handy. In addition to softening the harsh light, curtains will cast stunningly intricate shadows on your subject’s face. This will not only give you many ideas to work with, but it will also provide you with refreshing and dreamlike decorations. In portfolios, such photographs stand out beautifully. Don’t be afraid of using other kinds of fabric for creating shadows, too.

//

Window light possesses far more potential than most people imagine. Its versatility can satisfy photographers with all kinds of preferences. Whether you’re in the mood for a soft, harsh, or dreamy light, a window will provide you with the ideal environment for your shoot. If you take advantage of this easily accessible light, you’ll be one step closer to being a more open-minded artist and thinker. If you make the most of your imagination, you’ll find yourself thriving along with your photographs in no time.

Happy shooting!

Getting the Perfect Family Portrait

One of the most profitable occupations a photographer can have is shooting portraits. Everyone wants to get beautiful portraits to keep around for memories. Specifically, professional family photography is in high demand. However, working with families can be difficult. Trying to find the right setting and mood for each family takes a bit of time and understanding. Working with younger families and their children can be especially tiring. But, creating a lasting memory doesn’t have to be a bad day at the ‘office’. By following these tips, you can capture the beauty and individuality of each family in a picture that will last generations.

12 Tips for Getting the Perfect Family Portrait

  1. Plan Your Aesthetic in Advance
  2. Pick the Right
  3. Outside or Inside
  4. Get to Know the Kids
  5. Use a Tripod
  6. Lens of Choice
  7. Set Manual Exposure
  8. Keep the Focus Steady
  9. High Shutter Speed
  10. Props are Important
  11. Work from the Top Down
  12. Don’t Get Frustrated

Family portraits are pictures that tend to be cherished for a lifetime. Additionally, the significance of why the family is all together should also be taken into consideration and captured through the images taken.

There are a few things that create a distinguishing difference between a good family portrait session and a great one, This includes:

How to Capture the Perfect Family Portrait

1. Plan Your Aesthetic in Advance

If you’re working with professional models, you’ll likely be providing the props and wardrobe from the company you’re working with. However, if you are not supplying the wardrobe, you need to make sure the subjects of your shot have a dress code. You don’t want to take a group shot where everyone is wearing bold and clashing colors! It would be hard to keep the focus of your final image on the subjects. Know what you’re going for, and make sure everyone involved in the shoot has a thorough understanding of the dress code.

outdoor family portrait

2. Pick the Right Setting

Are you planning a wedding portrait session? Get to the venue early and scout out the right places for good framing and lighting. Are you working in the studio? Set up your lights according to the nature of the group shots. Is it a still photo session, are your subjects going to be moving? What time of day are you creating with your lighting? Know these things going in, that way you can focus on posing and minor corrections the day of the shoot.

natural family portrait

3. Outside or Inside

If you’re working in a portrait studio, you may not have a choice in this matter. But if you’re freelancing or have a studio that has outdoor space, you need to decide which is better. Sometimes you can let the family decide, but a lot of clients can be indecisive about their photos. This is where you need to come in and show them the way. Decide beforehand if you’re going to shoot indoors or outdoors and have everything set up and ready to go.

family portrait in-studio

In-studio portraits are actually perfect for younger families with small children. They are also great for families with grandparents. The confining space allows you and the parents to keep track of the youngsters. You won’t have to worry about anyone falling in dangerous terrain. Keeping everyone happy and safe is easy to do in your indoor studio.

Shooting outside can also be a great advantage. Generally, an older family with children who are 10+ years old do great outdoors. The natural sunlight can give your pictures a beautiful glow and enhance the portrait. Taking a family portrait outdoors is especially great for unique shots. Get creative here when posing your models. These are the kinds of photos that families will be able to enjoy long into the future.

outdoor family portrait

4. Get To Know The Kids

If there are kids involved, you should make it your duty to learn something about each of them before you take your camera out. Once the little ones are comfortable being around you, then everything after that tends to be smooth sailing for the most part. It often helps when I carry prize or prop I can give away to each kid so I can get their attention. If this little prize fits into the theme of the shoot, then that would be a plus as well, but always keep in mind that kids are a bit tricky and not all the same. Do your best to gain some knowledge from the parents, as well as interact with the child, and watch your shoot become a lot easier.

family

5. Use a Tripod

The desire to be on the move with your camera is hard to overcome. This is especially true if you are shooting outside or trying to capture natural moments or movement in the portrait. But there are a lot of advantages to keeping still and using a tripod to shoot your portraits. First of all, it allows for more open communication between you and your client. When you always have your camera to your eye it’s hard to be aware of anything else. By making eye contact with your clients and talking to them, you’ll find out more things about the family that you can incorporate into your shoot. By not being constantly on the move, you also ensure that you have the time to check your settings before each shot. There’s nothing like getting the perfectly framed picture on the wrong settings to ruin a whole photo shoot.

6. Lens of Choice

I personally don’t recommend traveling with too many lenses for various reasons. The first of all these reasons are you don’t want to be swapping out your lenses too often on a family portrait session. Swapping out lenses is great and all but always keep in mind that the time spent doing that at various intervals can often lead to you missing amazing shots as well as take a huge chunk out of your time to get creative. A second reason that can also be considered is, are you going use all of the lenses you decided to pack your camera bag with? For the most part as photographers, we sometimes end up carrying a lot of excess loads we don’t really need. Pick the perfect lens for your shoot beforehand and save time as well as having a load on your back.

7. Use Manual Exposure

This is something that is true for all kinds of portrait shots, not just the family portrait. When shooting a consistent subject in a consistent location, it only makes sense to keep your settings consistent. After you get your settings settled, you don’t want them to change. Having different exposures for each photo will make processing and editing a whole lot more difficult. When you set your camera on the shutter or aperture modes it can change the settings without your knowledge. Be sure to shoot on manual to keep all of the settings consistent.

manual settings portrait

8. Keep the Focus Steady

Another consistency issue can be the focus. If you don’t lock in the focus or have it on the manual setting, it can shift during the shoot. For example, if your focus is set to the shutter setting and someone moves, the focus could fix on the background instead of the family’s faces. Sometimes a picture that was perfectly framed and posed can come out looking fuzzy and blurred. By keeping your focus setting locked or on manual mode you can make sure that your family is always the focal point of the picture.

fun family portrait

9. High Shutter Speed

You will more than likely be doing continuous shooting and as a result of that, it might be best to have your shutter count at least 1/250 if not more. If there is room to go higher on your shutter speed they do so to avoid any possible blurred shots. Kids are always moving pretty fast and as I mentioned earlier, you need to shoot continuously to catch them in their pure actions. If you find that the kids are moving faster than expected, for exampling running or jumping then 1/800 might end up being a more suitable shutter speed.

10. Props are Important

Try to travel with props fitting for the theme or holiday if possible. A lot of photographers overlook the importance of having good props and the impact it has on your photos. For example, a few empty wrapped gifts or even some Christmas tree decorations go a far way toward creating the perfect family holiday card photo.

11. Work from the Top Down

Once you have everyone at the shoot, dressed and ready to go, begin by organizing where everyone should be situated within the shot. You want to work with the heights and body shapes of your subjects to create an image that is visually appealing overall. Make sure everyone understands the parameters they can move within while staying in the frame of the shot. You can even mark the outlying boundary of this with tape so that it doesn’t appear in your photographs, but it does let people know not to step outside of those lines!

big group shot

From there, work with each person on their individual poses. Remember to adhere to the final tone. If you want joyful and energetic, people should either be moving or creating the illusion of movement with their poses. If you want a standard professional portrait, everyone should be looking towards the camera. If you are selling a product, the focus should be on the product. For a family portrait, you have to make sure everyone is equally represented.

First, you set the basic structure by determining where people are going to stand within the picture. Then you work with each individual on how to pose. The individual poses should work together so that the subjects are not fighting for attention within the image. If you’re shooting for fashion, your group portraits should tell a story and focus on the product. If you’re shooting for family portraiture, your final shot should capture a moment in time while focusing on the subjects.

12. Don’t Get Frustrated

Obviously, it can take a lot to organize a group shot. If you become frustrated, your subjects will mirror this in their facial expressions. If you have to walk away for a minute, do it. If you’re having trouble, just tell everyone to have fun and experiment with their posing. While they do this, snapshots off quickly.

family wedding photo

Family Portrait Pose Tips & Tricks

Sometimes when a family, especially one with young children, goes into a studio, there’s an air of nervousness and stiffness, and that creates some unnatural and forced pictures. No one wants to look back at their pictures and see strained smiles and stiff poses. Getting natural family photos is all about having fun and capturing emotion.

Top 10 Family Portrait Pose Tips

  1. Bend It
  2. Capture the Reaction
  3. Get the Lighting Right
  4. Break Out the Props
  5. Use Flattering Poses
  6. Sit Close
  7. Tell Someone a Secret
  8. Hold Hands
  9. Have Fun
  10. Embrace

Poses themselves often intimidate unprofessional models. People want to look like themselves in their family albums. Individuals of all kinds want to own heartwarming photographs that their children will treasure in the future, not awkward snapshots of their parents looking out of place. Similarly, couples want photographs that they can proudly share with their friends on social media.

Fortunately, poses don’t have to be awkward. They can make your subjects feel comfortable in your presence. Certain poses can actually strengthen the client-photographer bond.

1. Bend It

A good way to remove the stiffness of any pose is to get the family to move and bend. Sitting or standing perfectly straight is not natural. Make good use of a person’s joints and have them bend at the elbows, knees, and hips. People can hook fingers in their belts or pockets to loosen up their arms. Have the family turn slightly with one knee bent and hips pushed out toward the camera. If they’re sitting down, let them lean forward a bit, or turn to their side and extend one leg while the other stays bent.

natural-family-photos-1

2. Capture the Reaction

Most of the time when you’re shooting a family photo you won’t be capturing the action, but rather the reaction. If you want natural family photos, tell the family to do something, and wait for the moment after it happens. Have one person whisper a secret in the other’s ear and capture the two of them laughing afterward. Get the kids to surprise attack the parents and capture the family dissolving into laughter after. Whatever you ask the family to do, you want to shoot the aftermath, when the family is having fun and their smiles are real. Capture a true happy family moment.

natural-family-photos-2

3. Get the Lighting Right

Unlike shooting an intense fashion shot or a light and airy nature shoot, you want to get the family in a soft and fun light. Use a light colored background, white is best, and use either a large window with natural light or just one light. Make sure that the light isn’t pointed directly at them or coming from directly overhead. It’s best to have a very bright studio and to use a flash to help add contrast. Set the flash up at a 45-degree angle to avoid odd shadows.

4. Break out the Props

Especially when it comes to photographing toddlers or young children, you want to give the family something to help focus their attention on. Not every photo has to be the family in a straight line staring into the camera. It’s okay for them to let their attention wander to an object, and sometimes even creates the family’s favorite picture. Ask the parents to bring one of the children’s favorite toys or books. Encourage the family to simply play with the child and capture their reactions. If you have your own props, let the children choose what they want to play with, and shoot their play time. Let the kids be kids and have fun.

natural-family-photos-3

5. Use Flattering Poses

People tend to be self-conscious about their body. Maybe someone is concerned about their weight, or someone else has a large birthmark they can’t cover up with makeup. It’s easy to pose people in ways that flatter them and make them comfortable with the end result. Study your family as they are in the studio and notice blemishes or anything they are uncomfortable with. Then change your poses to match.

If a family member is worried about their weight, have them lie down on the ground facing the camera. Having the kids climb on top of them creates a natural pose and helps hide their body. Also, in other poses, try to angle the camera so it looks slightly down on them, this will hide any double chins and help slim the body.

natural-family-photos-4

For any blemishes, have that person’s face or turn a specific direction. If they’ve got a pimple on their chin, for example, simply have them turn their head slightly so that that side of the face is always facing away from the camera.

If you’re working with a couple where there is a huge height difference, have the couple sit down. In standing poses, get the taller of the two to stand with their legs apart a bit to help bring them down.

When shooting a single parent and young children, encourage the parent to lift the children into their arms. You can also get great natural family pictures by having the parent kneel on the ground and hug the children from behind.

6. Sit Close

At the beginning of your photoshoot, take simple photographs. This way, you’ll have a good variety of photos to share with your clients, and you’ll get to know what kind of posing style they’re most comfortable with. You’ll also have a chance to make them feel at home in your presence without immediately diving into complicated instructions.

If your clients sit close to one another, you’ll have lots of opportunities to take spontaneous photographs that accurately represent their relationship. Encourage them to sit somewhere picturesque and interact with one another. You’ll get lots of great photos of smiles, hugs, and silliness.

As the photo above suggests, you can take photos from any angle. If some of your clients feel shy at first, take photos of their backs. Even faceless portraits can be joyful!

mom & daughter telling secrets

7. Tell Someone a Secret

An effective way to highlight a family’s bond is to photograph them trusting each other with secrets.

Ask your clients to tell their family member a secret, joke, or story. They don’t have to be real, but they should be entertaining. This will inevitably lead to funny reactions, great poses, and photogenic expressions.

family holding hands on the beach

8. Hold Hands

Photos of loved ones holding hands may be very common, but that shouldn’t stop you from experimenting with them. Hands are a great way to express bonds, friendships, and familial strength. Here are ways you can use them in your photographs:

  • Take photos of your clients walking somewhere while holding hands. This will give your photos an air of spontaneity and warmth.
  • Take photos of your clients’ hands only. This could be while they’re passing something to each other, playing a game, or simply comforting each other.
  • Ask your subjects to stand in a line or circle and hold hands. If this feels unnatural, play a game such as Holding Hands: players have to pass peanuts to each other without breaking the hand-holding chain. An activity like this will distract your clients, allow them to have fun, and give you lots of time to take great photos.

having fun at sunset

9. Have Fun

This is probably the most exciting instruction your clients will get. Though having fun isn’t a pose, it’s an opportunity for many posing ideas to emerge.

Bring a few toys that your group could play with. Come up with a game similar to Holding Hands that could entertain, excite, and distract subjects. Alternatively, simply tell your models to have fun on their own. Children are experts at games; the more comfortable they are with you, the easier it will be for them to have fun together.

mother and daughter embracing

10. Embrace

Photos of the group hugging will beautifully emphasize their bond. They’ll also make for gorgeous album photos.

Since hugs are often very personal, you have to make sure your subjects want to embrace one another in front of you. Once they feel more comfortable in your presence, gently ask them for permission.

If you don’t want to ask, notice how open they are to public displays of affection. Observe them as they pose for you. Do they enjoy hugging each other, or are they more reserved?

If this doesn’t feel right to either you or your clients, don’t worry. The aforementioned poses will give you lots of interesting results.

Creating Family Portraits that Last a Lifetime

Families are always on the lookout for a great photographer to make lasting memories for them. Once you’ve made a name for yourself a family portrait photographer, there will be no end of clients wanting to work with you. You can create a beautiful family portrait by getting the proper camera settings and encouraging the family to have fun and act natural.

Keeping a steady hand and using a tripod will help your photos come out looking solid. But most importantly, remember to help your family have fun. By following these tips you’ll create amazing family portraits.

Quick and easy hairstyle ideas for shooting sessions!

Every kind of hair is photogenic, no matter its color, length, or texture. Since there are so many variations in the world, it shouldn’t come as a surprise that every portrait shoot is exceedingly unique. However, not having to worry about being monotonous as an artist shouldn’t stop you from pursuing more and more creativity. When you photograph either yourself or others, ask yourself which feature, appearance-wise, stands out most to you. More often than not, hair is going to be one of your answers because of the significant part it plays in portrait photography. Decorating it in elaborate ways will provide you with an opportunity to share more of your artistic and imaginative skills, which is something clients of all sorts favor. If you’re finding yourself short on time or feel that you’re out of ideas, try out the following hairstyles. They’re quick and easy and capable of making your images pop!

Side part

Perhaps the simplest of all hairstyles is the side part, which is especially suitable for client shoots. If you wish to have a shoot that’s simple, easy, and elegant, then this hairstyle is for you.For an exotic touch, make your subject wear a flower crown, a hat, or a single flower. The simplicity of this look will provide enough of a frame to nicely complement your subject’s facial features. Best of all, it won’t be too distracting; this is perfect for photo shoots in which striking compositions aren’t a necessity. Side parts also make great foregrounds when making closeups – if part of your subject’s face is covered by their hair, the side that is covered will be blurred, further accentuating features that are exposed.

//

Wild and free

For my own self-portrait shots, I often turn my hair into a messy combination of knots and curls. This allows me to work closely with my imagination, challenging me to make the most of a random look. The results, which are often pleasantly surprised, never fail to fill me with original ideas. Though messiness isn’t often associated with positive feedback, messy hairstyles are an exception. The textures of a messy look give images a painting-like atmosphere. It’s almost like going back in time and allowing a famous painter like John Waterhouse to capture your features on a canvas forever. This works best for medium-length (or longer) hair. Unruly hair looks incredible in black and white images; combine this with freckles and you’ll have yourself an impressive shot.

/

Top knot

Though top knots can be cliché, they have the potential to look wonderful, especially in cozy indoor settings. If you’re having a casual shoot with a friend or are simply in the mood for taking warm photographs, experiment with this look. It’s fun, easy to make, and will give your subject’s appearance a pleasant frame. For additional coziness and texture, make the top knot messy!

/

Wigs

If the aforementioned ideas don’t appeal to you, buy or rent a few wigs. These are guaranteed to give you an endless amount of creative possibilities and thoughts. If your wig looks too artificial, convert your photos to black & white (or shoot in b&w mode if your camera supports this feature). A lack of color will direct the viewer’s attention to your subject’s facial features rather than the quality of his or her wig. Wearing a hat or other hair accessories with a wig will also provide the viewer with an effective distraction.

/

Whichever style you choose, don’t forget to experiment and be creative! Sometimes, the messiest of looks end up creating the most astounding images. Add your own unique style to a commonly used hairstyle; for example, a ponytail can be combined with a small top knot, or a messy hairstyle can be accompanied by a tiny hat. Be fearless and your work will thrive because of it.

Happy shooting!

How to Shoot Professional Portraits: A Detailed Guide

Those pro portraits you had watched on the net and in the magazines do not need extraordinary gear and special knowledge. In fact, there is nothing that you can’t do. I will prove that in this article, with a focus on the lighting for indoor and outdoor portraits.

A good portrait with interesting expressions, composition, and proper lighting has more power than any other kind of photography. Why? Because of the power of the emotions on a face broth in just a part of a second frozen in time forever.

Professional photographers use multiple flashes with as many as four strobes. At first, you must know why there are four strobes, and what is every one of them doing to your image. It’s simple because each and every one of the strobes is having only one function.

How to shoot pro portraits

The MAIN LIGHT- is supposed to be of the camera. You and nobody else wants red eyes on the photos. Red eyes occur when shooting with on camera flash, so that’s why we will get it off the cam. With this kind of position of the main light, we can create shadows and highlights to the face bones, skin or other face parts. If the flash is on the cam we cannot be creative and dance with the shadows, simply there are limits. The newest DSLR models have the feature to trigger the flash unit wireless, if not then we going to have to buy a long enough cord.

Now that we positioned the main light left or right of the object, depends on the side that we choose the FILL LIGHT (also known as diffuser light) should be on the opposite side. The fill light is used only to soften the shadows that occur from the main light. This kind of light is optional but it’s good to have one in direction of creativity. In case you are not able to have one you can use a white cardboard from the opposite side of the main light to reflect the light beams from the main light. In case it’s not good enough you can wrap the cardboard in an aluminum foil for a better reflection. Additional to this you can play with the distance of the cardboard to get a better effect.

The third source of light is the BACKGROUND LIGHT. This kind of light is used only to show what is behind your object, and of course it’s optional only if you need one in a current situation. The light is positioned behind your object lighting up the background. In case your background is black or in the very dark color you can skip this. If you are improvising you can hang a black bad sheet behind your object and you are done.

Portrait: The power of the emotions

The fourth light is called KICKER LIGHT (also known as hair, rim, or edge light). This light is used to make a distinction between the object and the background or it’s kicking the object in front line. It is placed above the object facing the back of the head. But if you place the main light correctly you can forget about this source of light.  In my opinion and from my experience it is good to have one but you can make more artistic photos without the kicker.

If you are shooting portraits outdoors my advice would be to use wide angle lens. At wide focal length, you can make beautiful distortions such as creating illusions of the length of the arms (for example), and you will catch some of the surroundings. Also, the background can add drama to your portrait and can change the whole context of the photo. Consider that all of us are stuck with the meaning of the orientation or the layout of the image. Don’t stick to a portrait orientation; you can shoot portraits with landscape orientation. Mix your framing up in each shoot that you do and you’ll add variety to the type of shots you take. Play with the expressions and emotions of the person that you are photographing- don’t be a boring photographer.

After we are clear with the positions of the lights it is up to your taste how you going to dose the amount of the light. Remember that you can play with the distance between the object and the source of the light. These would be my general advice for indoor and outdoor portraits. You can combine additional lights for outdoor photography. Also, the article does not mean that lights are only for in the studios. Practice, practice, and experiment with lighting and composition. The greatness of your work comes with the experience.

Reading Body Language During a Photo Shoot (to make the studio a comfortable place)

Going into a small room with lights and cameras everywhere can make people feel a little ill at ease. You’ve probably heard it said that 2/3 of our communication is through non-verbal commands. Being able to read body language and react to it can not only help you get your model to feel more at ease, it can also help you capture better pictures that your client will be happy with. Learning how to identify discomfort and how to resolve the tension in a camera-shy model is the difference between a good photographer and a great one.

How to Identify Discomfort

If your model or client is feeling anxious or nervous about the photo shoot, they’re going to let you know. Even if they don’t tell you how they’re feeling with words, they will certainly let you know with their body. Blocking and pacifying gestures are something we all do unconsciously when we’re feeling afraid or nervous.

Blocking gestures allow us to put a boundary between ourselves and what we fear. Whether it’s crossing our arms over our chests, or holding a prop between us and the source of anguish, blocking gestures help us feel more comfortable with our surroundings.

body-language-1

Pacifying gestures allow us to calm ourselves without being as aggressive or ready to run as a blocking gesture. Blocking gestures say “I’m cautious of you and I’m putting this here to keep you back and give me an escape.” Pacifying gestures, such as playing with jewelry or rubbing one’s hands, say “I’m cautious of you but I’m trying to calm myself down.”

If your model is being fidgety before the shoot or starts holding props you give them directly in front of their bodies, they are probably uncomfortable with the photo shoot. The following tips will help you create a comforting aura and get the perfect pictures they want.

1. Lead by Example

When someone is standing in front of you and ordering you around on what to do, it can be quite scary and sometimes belittle. It’s even worse for a person’s anxiety if they’re trying to do what that the instructor asks them and can’t seem to get it done right. The best way to get your model in the right position is to show them how to do it yourself. Not only will you get them where they want to be, but by showing them and doing it first yourself, they’re more likely to trust you and be comfortable in your presence.

2. Be Confident

Being confident in a studio goes far beyond just being secure in your knowledge of the camera. Always be prepared to answer any questions the client might have about their poses or props. If you ask them to sit in a chair with their legs crossed, try to explain why you think that pose would work for them.

body-language-2

Most importantly, be calm and explanatory about any malfunctions that happen. It will happen to everyone at some point; a camera will stop working, a light will go off, a battery runs out. When this happens, don’t panic. Always be in control of the situation, even if you’re not sure what’s going on. Explain to your subject that there’s a technical difficulty. It can put a strain on someone to sit still with a stranger while they are frustrated trying to figure out something they don’t understand. Talking through your problem can help you bond and close the awkward gap. It can also help you figure out the problem by trying to explain it.

3. Use Their Anxiety to Your Advantage

Often being forced right away to let your guard down can be difficult. Instead, don’t try and immediately have your model open up to you. They’re going to be guarded with their body for a while until they feel comfortable. If your subject comes in with arms crossed, use that to create a powerful, confident image. Have them stand up straight with their head high and arms crossed. Move the camera so that they fill up the whole screen or even go out of the frame, even try getting a little lower and doing a superhero shot. These little actions allow them to get used to being a model while still generating powerful and useful images.

4. Get the Real Smile

It’s easy to tell a fake smile from the real smile. Real smiles engage the whole face, lips, cheeks, and eyes. Fake smiles often only engage the mouth. An anxious model trying to smile is going to create some awkward photos, no matter how great your technical skills are. Start a nervous subject off by doing some non-smiling photos. Let them look off into the distance thoughtfully. As you’re getting ready for some smiling pictures, try and make them laugh. Tell them a joke or a funny story, anything to get their whole face involved for the perfect picture.

body-language-3

Being able to identify body language and use it to your advantage is key to being a great portrait photographer. It’ll be hard and awkward at first, but the more you practice, the easier it will get. Soon you’ll be a master at body language and will be able to manipulate it in many ways to get your client the dream picture they didn’t even know they wanted.

How to Create a Portrait Sequence in Photoshop

A portrait sequence can be an excellent gift and can be used to capture fun memories of loved ones. The best part is that you don’t have to do anything extra during your photo shoot to create a fun and fabulous sequence of your child, pet, or best friend. A portrait sequence takes the best photos and poses you captured and puts them all together into one fun image.

Steps to Create a Portrait Sequence

The first thing you need to do is take the photos, so you have to organize a portrait photo session. The setup of these photos will affect the amount of post-studio work you need to do, but any series of photos can be used to create stunning images.

The best setup for creating a series of images is to take your photos inside a studio or at home, with the same lighting throughout, against a solid color background. This makes the editing process a lot easier and a lot shorter. For even better results, try to set the lighting up to match the tone of your subject. If you’re portraying the joy of childhood, you want the lighting to be even across the board, set far away to lighten up the whole image. If you’re photographing a more serious subject matter like grief, you’ll want the light to be closer to the subject, casting shadows to create a darker feel. However, even pictures were taken in changing light and inconsistent settings can still be turned into a portrait sequence.

The three images used for this tutorial were taken in a studio. The lighting across all three images is the same, but the background, while the same in all three pictures, proved troublesome in the process.

portrait-sequences-2

While the outcome of these images isn’t terrible, the repeated background and the white curtain make it clear that this is a series of three pictures shoved together instead of one continuous image. But, we can fix that.

Editing the Images in Photoshop

After you have the images you want to use, the first step is to create a large enough canvas to work on. Take the first image in your sequence and use the crop tool to enlarge the image out to the side. You’ll notice a line appear that divides the canvas into sections. Each line represents one image of the original size. Make sure you have at least as many lines as you have pictures.

After this step is complete, you want to make sure the background is one continuous image or color. I used the eye-drop tool to select the wall color and used that as a background. If your image has a lot going on in the back, use the magic wand tool to select your subject. (If you are having trouble selecting things, try messing around with the magic wand’s threshold. The higher the threshold, the more color it will pick up.)

portrait-sequences-3

Now that you have your canvas ready to go, the rest is simple. Take every other photo that you want to use and crop it down to just your subject matter. Use the magic wand to select any lingering backgrounds and fill them in with the color you chose earlier.

Then all you have to do is move the subject into the first image and place them side by side.

If you’re doing something that specifically involves a background, or that uses props, you may find the layer mask and cloning tools invaluable to your efforts.

portrait-sequences-4

You can use the layer mask Reveal All, to paint over the newly added picture but keep the background the same. Make sure your paint brush is set to the color black, and anything your paint over will be removed and instead reveal the background of the first image.

If, after you’ve finished moving everything, there is still an inconsistency in the background or one of the images, you can use the clone tool to reprint part of the image into another. This is useful if your photographing action shots, like a child playing in a leaf pile or a dog chasing a ball.

Whatever the end game is, be it creating a lovely memory of a passed relative or capturing the joy of childhood, creating portrait sequences is a valuable tool. They’re well worth the time and effort to make, especially more complex ones that involve backgrounds and props. After all the work is done, you can see the memories that you’ve captured all in one, concise image that tells a story.

Travel Portrait Photography Tips

A great image tells a story. A great portrait can be one of the best story telling images you can take. We’ve all seen Steve McCurry’s “Afghan Girl“. What makes this image stand above the rest? I’ve broken down the key elements to creating a strong travel portrait, outlined below.

indian-1119236_1920

Do Some Research

Look at other travel photographer’s works and how they shoot portraits. This will give you an idea of how to compose the image, options for lenses and other gear, and how to look for the emotion. There is usually a fun story to go along about how the picture came to be. Make an inspiration board, whether at home or on Pinterest. Pull images you feel encompasses emotion, technical skill, and a story. Isolate the key elements to each and incorporate them when you shoot. This is especially helpful when traveling to a new place. You can simultaneously research portraiture and examples from this place.

Look for the Light

Time of day is so important while shooting outdoors and this also goes for travel portrait photography. We all know about Golden Hour, the hour after sunrise and the hour before sunset, as the best time of day to shoot. Follow this schedule when you are traveling as much as you can. Go for an early morning walk before breakfast. This is a great time to see daily life, locals getting ready to start their day. During the day when the sun is right overhead, focus more on shooting indoors or shaded areas. Still, have your camera on you at all times, just be aware of where the best light will be. In the evening before dinner, go out for another walk around town. This is my favorite time of day to shoot. The light is beautiful and there is so much energy. Shooting at night is possible with the right lens and lighting, be it natural or artificial. Using a flash can be invasive but possible when you ask for permission. Using an off camera flash is more versatile because you can change the location of the light source.

indians-1086437_1920

Use Tools

Being a natural light or minimal equipment photographer is great for travel portrait photography. You won’t have the opportunity to carry around a lot of equipment so you’ll need to be mindful of what you bring. A useful tool which takes up very little space is a reflector. Reflectors are called a photographer’s secret weapon for a reason. They are lightweight, versatile, and a can add dramatically and professional lighting to a portrait. A good size for ttravel portrait photography is 12″ because you can hold it yourself while you shoot. Smaller reflectors are stronger in their lighting, so be aware of distance placed from the subject. Off camera flashes, neutral density filters and a good tripod are other essential tools you may want to have on you at all times.

Engage/Look for Emotion

In a 2013 interview with Steve McCurry, he mentions the key to shooting strong travel portraits is to convey the story of the subject. You want the viewer to understand what life is like for this person. If you want to take stunning portraits, you need to be close to your subject. This means approaching them and starting a conversation. Be respectful of their culture and if they say no to a picture request, move on. There are plenty more people that are perfect for travel portrait photography. If they allow it, get close and frame the image. You should have already decided how to compose the image, so now you can just take the shot. Do take your time here. You’ve just asked for permission, so don’t rush the image now. Move around if you need to. Ask your subject to move if they can to better lighting if the lighting where you are is bad. This ties to the previous tip of finding the best light. You should have good light because of the time of day of your travel portrait photography. After you have the shot, thank them and show them the image. Offer to send it to them if there is a way.

indians-642055_1920

Tell A Story

In a 2013 interview with Steve McCurry, he mentions the key to shooting strong travel portraits is to convey the story of the subject. You want the viewer to understand what life is like for this person. To do this, you’ll want to engage with the subject as mentioned above. Try and learn what their life is like, so you can better portray this through the portrait. If it benefits the image, include some background and make it an environmental portrait. Think about the overall story you are conveying with your trip to this place. You want your images to be strong enough to stand on their own but also think about a photo essay or even a book.

The Road Less Traveled

With the expanse of photography in the world, there are not many areas which are still untouched. However, you can venture off the beaten path to explore some less photographed towns during your trip. If needed, find a fixer or someone who can show you around and ensure you are safe. This is especially valid for solo travelers, you want someone on your side who speaks the language. While it could be challenging shooting in more remote areas, you will be sure to get a unique image showing the true emotion of the place. Make sure you smile, engage with the subjects and show them the images you’ve taken. People love to see a great photograph of themselves. If needed, it might also be a good idea to carry some small change with you to offer in exchange for a travel portrait photography.

human-613601_1920

While “Afghan Girl” portrays all of these qualities in one image, it is not easy to create a strong travel portrait. Use these tips as a guide and be sure to practice as much as possible before traveling to another country. You can walk around your hometown shooting portraits of the locals. Offer to send them the images. You’ll get some great practical experience and be able to nail down your accessories and settings before traveling. You don’t want to spend all that money just to be in another country practicing portraiture for the first time or you’ll be greatly disappointed.

Winter Photography: Part Two – Photographing

Previously, we discussed how to take care of your gear during the winter, and how to prepare for winter shoots. In this article we will go in depth on shooting during the winter; specifically, we will address some common scenarios and how to tackle those, plus some tips and tricks.

One general thing to know about winter (especially if there is snow) is that it requires a bit more attention when photographing. Winters usually mean fog, mist, haze, and snow. All of those, if you aren’t careful, will ruin the shot. The snow itself won’t ruin the shot, but if you aren’t careful you can easily overexpose it and lose the definition of its texture.

Catch The Morning

If there is fresh powder stacked up during the night, catch the morning if possible. This is important since most likely the snow will be uniform and untouched. No footprints, no dirt, nothing. If you are lucky for the clouds to have cleared by the time you start shooting, it would be awesome. Getting the shot early in the morning will make sure that the tones are a combination of blue and orange, which is typical for sunrise, rather than being heavy on the orange during the sunset.

alps-1368034_1920

Overcast Weather And Snow

For landscape shots, it would be best if you’d avoid overcast weather since it is just gray. However, that kind of weather combined with snow can prove to be quite cool for portraiture, especially if it is still snowing. The snow on the ground will act as a reflector and bounce some fill light, making for nice soft and even lighting. Throw in some colored items/clothing to pop out of the whiteness, and you have a recipe for a great shot.

winter-1127201_1920

Footprints

The number one enemy of the snow. As mentioned in the “catch the morning” paragraph above, freshly layered snow is quite cool. So when you are walking up to a spot to photograph a vista, be completely aware of where you are passing through. If you layer up some footprints where you don’t want them to be, there is no going back. Yes, you might be able to fix that in the post, but why risk it?

snow-1273379_1920

On the other hand, you can get creative and intentionally place footprints to express an artistic idea. However, take the shot without them first.

With Or Without Snowflakes

Falling snow can be quite cool, but on the other hand, it can be a little bit distracting if the snowflakes are too big. You can remove them by being smart about it. You can either use long exposures and hope that they won’t leave any visible trails (which is usually the case), or you can use the old “remove tourists from photos” trick, and shoot several images, and then stack them up using median in Photoshop. Of course, a tripod is required for this ordeal.

Polarizing And Neutral Density Filters

Circular polarizer filters can be quite fun with snow. Since by definition they can remove reflections from nonmetallic surfaces (however, I’ve found that they work with metallic surfaces as well), it can remove some of the reflection in the snow, thus bringing out more definition in it, or it can increase the definition in the clouds and sky. Anyhow, in cases like this, CPL is quite handy.

Photo by Dzvonko Petrovski.

Graduated ND filters are usually used for making the sky darker. However, with snow, you can stack two, one from the bottom, and one from the top, thus effectively bringing out the horizon line or something that is in the middle of the frame. If the snow is too bright, you can use only the bottom ND filter to dim it down a bit. There are many fun combinations, so feel free to experiment.

Don’t Forget About Wildlife

If it is winter, it doesn’t mean that there is no wildlife in the forests. Always have that in mind, firstly for your own safety, and then for photographic opportunities. Wildlife can often leave unique trails in the snow as well, which can serve as a great photographic element.

pronghorn-antelope-1326939_1280

Summary

Winter – it can be quite fun, and it can be quite dull. But, for the creative photographer, there is no such thing as a bad day. Therefore, get your gear properly packed and taken care of, and go out and shoot. There are so many things you can do in the winter, from snow, fog, mist, wildlife, to landscapes and portraits, the combinations are practically limitless. The only thing you need to do is learn how to use them.

11 Tips for handling camera-shy models

The photo session day has arrived. You organized everything carefully. You feel confident. Everything is going to work well. You are going to rock it! You meet with your client at the scheduled time. It is a couple session. You have been talking with her these last 2 weeks and got everything set. But you don’t know him. And it is right now, just some minutes before the photo session starts, that you discover that he is camera-shy and he hates photos!! Oh no!!! He is not cooperating… he looks as lively and happy as a salted fish and his skin tones are even paler… Your confidence vanishes. How are you going to take nice photos when he doesn’t even want to be there? You are supposed to take photos of the couple showing that they are happy!! What can you do now? Sessions including camera-shy models can be challenging, but they are not impossible. Keep in mind these tips for handling camera-shy models. They can truly change the mood of the photo session.

Handling camera-shy models
This is Avraham, my husband. He agreed to be my model for this photo session.

#1 Don’t jump the gun (or the camera)!

Spend some time talking with them before you get down to business, even before you take out the camera, if possible. Get to know them a little before taking the camera out of your bag and let them to get comfortable with you. Try to ask them about things that put them in a good mood: what they like to do in their free time, about travelling, their favorite restaurant… As a photographer your responsibility is to keep a relaxed atmosphere along the photo session. In fact, the best thing for you to do is to make the photo session not to feel like a photo session at all. It should be more like a friendly meeting.

#2 Explain to them how the photo session is going to be

Shy people usually don’t like the feeling of not knowing what is going to happen next. Give your client an explanation about the photo session. Make them feel like they don’t have to worry about anything. Let them understand that the experience should be fun and that they are not being judged by anyone and that they are not obligated to do anything they don’t want to do.

#3 Ask them not to look at the camera

Looking straight at the camera can be intimidating, and it is not necessary in order to get great photos. They can look to the infinite or at somebody else and the results will be awesome.

Handling camera-shy models
Looking at the camera can be intimidating. For that reason I always tell my models that they don’t have to do it all the time. Photos like this one of Avraham looking at the side have a more candid look and they are also interesting. What was he looking at?

#4 Take out stress about posing

Tell them that you have a list of poses (even better if you show them the poses briefly using a tablet, a phone, or even a folder with prints) and they don’t have to be imaginative or creative about the poses. Even if they don’t know how to do, you can rescue them with your poses list. However, make clear that they don’t have to copy the poses. They are just an inspiration and they can adjust them to their taste. This is kind of magic. You will see that they check the poses’ list at the beginning, but soon they won’t need them anymore. It is like a placebo. If they get to the point of proposing you some poses, let them do it, even if you don’t like their ideas. First of all this will bust their confidence and second, you might be surprised of the result. Never underestimate the ideas of your clients.

#5 Pose with them

I do the poses with them and I tell them my experiences posing. I like trying the poses I prepare for my clients because then I can understand what they will feel. Honestly, there are some poses that look awesome but you feel pretty stupid while you are doing them. Have you ever tried posing? It is not so easy! Do it and you will have an insight of your client’s perspective. Joke about this. Make them understand that you relate with them.

#6 Start the photo session with easy poses

Make it easy at the beginning and keep more complicated poses for when the client feels at ease. Easy poses are those in which they are doing something (fixing their clothes, talking with somebody, and holding a prop they like…), sitting or leaning on something (a tree, a wall or a fence). There is nothing worse than leaving a camera-shy person posing doing nothing in the middle of an empty space. They will feel like running away from you and your camera.

Handling camera-shy models
If you just tell your model to stand in an empty space, in front of the camera without anything to do, they will feel uncomfortable for sure. Look at Avraham’s face in this photo. I was sure he was going to tell me that he was done with the photo session.
Handling camera-shy models
If you give the model something to do, things will get better. Here I just told Avraham to sit down and the improvement from the previous photo is clear, isn’t it?

#7 Make them move

This tip is related with the previous one. Standing still can feel awkward. But tell people to start walking towards you or far from you and good mood will start flowing again. A fun one is making them walk away from you and at some point you tell them: Look at me!! This is the moment when you take the photo. People usually like this strategy: easy, they don’t have to be looking at the camera (or you) for long and have good results.

Handling camera-shy models
Tell your model to move. Just a simple walk will give them something to do that feels natural.

#8 Make them do something silly and do it with them

There are a lot of silly things you can make them do. The idea is to take photos of all the process and especially of the laughs after! Some things you can try are: make them show emotions like happiness, sadness, madness, disgust… You can have a list ready and go from emotion to emotion fast. The faster the better. At some point they will start laughing and here you will have your best shot! You can also make them fake their laugh. This will make them laugh a lot after it.  Remember you are making them being silly. It is important that you will be silly too!! Making one person to look silly meanwhile you look wonderful is not fair. You are all in the same boat!

Handling camera-shy models
I told Avraham to be silly! And he did!! Here he was exaggerating his facial expressions so much that even I was laughing. Is this picture good? Of course not!! But I was not aiming for having this photo. I was aiming for the photos after the silly face.

Handling camera-shy models

After doing some silly faces, models can’t hold their laugh any more. You can see here Avraham laughing after all the silly things he did. He is showing a beautiful and natural smile. Note that he is kind of blurry. I was laughing so hard from the silly faces that I was not able to hold the camera without shaking it. Be aware that this can happens and wok with fast shutter speeds!

#9 Encourage them along the photo session

Show them the photos you are taking and tell them how well the photo shoot is going. Positive feedback encourages people and keeps them in a good mood. Let’s face it. We all like to know how well we are doing!

#10 Create an ice breaker

It can be useful to have something ready to make people laugh and relax. If you are good telling jokes, go for it!! I am not so good on that, so I use a toy as an ice breaker. Yes, you read well: I use a toy. It is mostly for family sessions, but I use it for both kids and adults. My toy is not a common one. Besides being a photographer, I am a biologist. For that reason, a friend gave me a plush Herpes Virus doll as a birthday present. It is in fact lovely Herpes. For kids it looks like a sun. Adults can’t stop laughing when I explain to them the story of the toy “A friend gave me Herpes for my birthday” and I say things like “Eihhh everybody…look at my Herpes”. I guess it is so unexpected that it is fun. You don’t need specifically a Herpes toy, but it is good to have something that will make your clients relax a little”

Handling camera-shy models
Here is my Herpes. Isn’t it lovely? It is great for kids because it looks like a sun and also for adults because it gives a humoristic relieve.

#11 Ask in advance if there are camera shy people in the photo session

Knowing if you will need to work with a camera-shy person will help you to organize a more appropriate photo session.

I hope you find these tips useful. Although they are mostly for camera-shy people, I admit that I use them on all my clients. They are helpful even just to create a good vibe. They also help when your client is stressed (for their own problems) or tired. Making your clients feel relaxed and laugh a little is always a good thing. It doesn’t matter if they are camera-shy or not.

Let me know if you tried some of these tips and how it turned out! Have a happy shooting!!

A How-To Guide on Organizing a Portrait Photo Session

Do you need to organize a portrait photo session? If it is your first photo session or if you want to improve the organization of your photo shoots, keep reading. At first it might seem a bit overwhelming. But if you establish a good workflow, things will become easier. You will feel more confident organizing your portrait photo session and you will even enjoy the process!  Along the article, just for simplification purposes, I will refer to the model as “client”. You can apply these tips to friends or models. The photos I am sharing with you today are from two photo sessions that I did for my friend Nita. As she is a yoga teacher, all the photos in this article are somehow yoga related.  But these tips are good for any portrait session.

A How-To Guide on organizing a portrait photo session
This is Nita, my yogi friend. She needed photos mostly for her social media and blog so she became my client.

Talk with your client and discover for what does he/she wants the photos

This first tip is a general one and it might seem pretty obvious. However, what your clients want to get from the photos will determine the whole organization of your photo shoot. Deciding about poses or locations will be easier if you know what you want to achieve in the photo session. It is important that you talk with your clients before the photo session and you ask them a series of questions. Some of them will be quite practical and to the point: how many photos they need, if they need them in landscape or portrait orientation, do they need some negative space (empty space) to add text in the photos, if the photos are meant for printing or just for using on the internet, if they will need to change clothes and so on. Other questions are not so easy to answer but are extremely important: what do your clients want to express on the photos? Do they want to look serious? Friendly? Strong? You can talk face to face with your client, by phone or even send them a questionnaire. I strongly recommend you to keep record of everything your client answers.

A How-To Guide on organizing a portrait photo session
Nita wanted to look friendly and approachable, so we made sure to take pictures of her smiling.

Decide on location and session length

The information your clients would provide you is precious because it will help you to set the perfect photo session for him/her. I would start thinking on what the client wants to express. From this information you can have a first idea about the location of the photo session. Maybe your client has a location in mind, but as the photographer, I think you should offer your opinion regarding the choice of location. Offer your client a plan but also listen to what they have to say about it. For example, in our yoga photo session, Nita wanted to look friendly, approachable and strong. We decided to do the photo session in several outdoors locations, mostly in the beach. Beach portraits can convey this playful mood that would add to the friendly, approachable look. In addition, Nita loves being outdoors, so she feels comfortable in this type of locations. Think of the comfort of your clients. Happy and relaxed clients mean better photos and will increase the chance that they call on your services again!

A How-To Guide on organizing a portrait photo session
Beach photos have this playful atmosphere that can help in creating a friendly and approachable look

She also decided that she needed people to know that she is good doing asanas (asana is the name of the yoga postures) and that she also gives importance to meditation. We made sure to include pictures that show these two sides of Nita.

A How-To Guide on organizing a portrait photo session
By combining the right environment with the correct pose, you can emphasize different traits of your clients. This photo of Nita in a bridge pose shows us how flexible she is and in the same time reveals her sculpted muscles, indicating a combination of agility and strength, this effect is emphasized by the banana plants standing on either side of her, bringing out Nita’s image thanks to their symmetry, shape and color.

A How-To Guide on organizing a portrait photo session

The undisturbed sand that Nita sits on, together with the clear, blue sea and the wide horizon help to convey the tranquility and openness that Nita achieves through her meditation and breathing exercises.

Now that you know the location and the number of photos your client needs, you can do a better estimation of time you need to book for the photo session. Don’t forget to add some extra time if your client needs to change clothes.

Think about the poses

I found it really helpful to have a set of ready-to-use poses. I usually do some research online looking for poses that will help the client to express what they want: poses looking strong, or relaxed, or approachable…. You can ask the client to show you photos they like too. I even prepare a power point of photos that I will bring with me on the day of the photo session (I like to bring my tablet to the photo sessions, but you can also print them or show them on the phone). This doesn’t mean that I want to copy the poses I saw online. I just have them to give some inspiration to the client. I notice that when I show clients these power points, they feel more confident. I guess they feel like they can always have a look at the power point if they run out of ideas. I have to admit that many of my clients take only one or two looks in the power points I make for them. But even if they don’t use it a lot, just for the blast of confidence it provides, it is worth to have it. The photos I take usually don’t look at all like the ones in the power point.

A How-To Guide on organizing a portrait photo session
Here we had a moment where we ran out of ideas, we already did the bridge pose and with this vibrant and sporty outfit we wanted another photo that will scream “I’m strong!”, after a quick look to the power point Nita came up with this pose.

Check if you need to practice some techniques

Think about the techniques you will need in the photo session. Would you need to use a flash? Do you need a reflector? Or maybe you need to use a circular polarizing filter. Make sure to practice before the photo shoot. You don’t want to make any beginners mistakes in front of your client.

A How-To Guide on organizing a portrait photo session
: Here we needed to use a reflector to add some light to Nita’s face. It seems like a simple and straight forward tool (Just aim the beam of light and that’s all, right?), well, it is a bit more complicated than that. To start with, if you are not careful you can blind your client, another issue is the angle at which the light hits the model (for example, some angles can help to bring out features such as muscle lines). In short- practice with a reflector (or any other equipment) before the photo session.

Make a list of the equipment you need for the photo shoot

I love checklists. I have one made with all the equipment for the photo sessions: memory cards (formatted!), batteries (charged!!!), reflector, filters, lenses (clean!!!), camera (of course!)… The amount of equipment you need might be a lot, so having it listed will make your life easier. It is terrible to realize that you forgot something once you are in the photo session. I also add to the list things that might help the client: something to tie the hair with in case it is windy, make up, some water bottles…

Make a list with the kind of photos you need to take

Your client already gave you all this information. Just make sure you remember how many and the type of photos you need to take: portrait, landscape orientation, with a lot of negative space…

A How-To Guide on organizing a portrait photo session
Nita needed some photos with negative space so she could add some text to them if she wanted to. We used the beautiful Mediterranean Sea to add some interesting negative space to the photos.

Prepare the equipment

The photo shoot is approaching!! Take your equipment list and prepare everything you need. Do it the day before or at least with enough time to charge the batteries in case you need to replace them (even if you are certain you have enough power in the battery, it’s always good to have spares).

Meet with the client a bit in advance

I recommend meeting with the client a bit before the photo session to have time to relax, check your camera settings, prepare your equipment, talk a little and show them the power point with the photos. Starting a photo session in a rush is never a good thing.

Enjoy the photo session

You prepared a great photo session, so you’re gonna rock it! Now it is time to have fun with what you like the most: taking photos!

I have some specific tips for yoga/sports photo sessions: If your client needs to do some physical effort, think that she might need to warm up. These kind of sessions might be exhausting for your client. Talk with him/her and decide if you want to make the complicated and tiring photos at the beginning of the session or towards the end. Everybody is different, so it is important that you know how they prefer to organize these high demanding photos.

Last but not least… tell your clients to choose their clothes wisely, including their underwear!! If you don’t want to spend hours in Photoshop removing marks, folds and underwear that shows up… tell them to pick photo-session suitable clothes. And don’t hesitate in helping them to adjust their clothes during the photo shoot. It might seem like a joke, but believe me; you can save a lot of time and headaches here!

A How-To Guide on organizing a portrait photo session
Tell your client to choose their clothes wisely, especially if they are going to be upside down and underwear can show up easily.

Tell me if you find these tips useful or if you miss something. I would love to know.

Happy shooting and until next post!!

Finding Your Photographic Vision

Why Focus on Vision?

Our photography is elevated to an art form to the extent that it reflects our internal vision. The technique is important to the extent that it allows us to manifest that vision in a tangible manner accessible to ourselves and others.  Technique and vision intertwine but they are not the same thing.  Look at the great photographers, you admire.  What you will find is a consistency in their work that is unique to them because it reflects their personal vision.  I have known many photographers who take beautiful photographs with excellent technique, but who feel unfulfilled and unrecognized because they have not yet found that vision.

So much for theory.  How do we find that vision?  How do we create photographs which are uniquely our own and which allow others to say “aha.  I recognize that as a [insert your name] photograph?”  This can be the most challenging and frustrating aspect of maturing as a photographer but in the end it is (for me at least) the most satisfying.   What follows are eight steps we all can take to find that vision.  These are not intended to be a simple sequence or checklist.  They are concrete things all artists can do to find that vision, to nurture it and it give it an opportunity for growth.        

two girls by the truck
Katie and Margaret by the truck (c) Jack Montgomery 1997

It is possible to learn technique from others through study and emulation, but that is merely the parroting of someone else’s vision.  In the end we can stimulate discovery of our own through a number of simple exercises which have been very helpful to me through the years. What follows are some specific suggestions which I hope may be helpful to you.

Look at Lots of Images

Expose your self to the works of many visual artists and become familiar particularly with those whose work appeals to you on a very basic and emotional level. What images excite you?  Move you?  Remain in your mind long after you stop looking at them?  This entails looking at photographs as well as painting and sculpture. For me this list has included photographers like F. Holland Day, Edward Steichen (Steichen at the National Portrait Gallery)  Paul Strand, Robert Frank, Mary Ellen Mark, Diane Arbus, Sally Mann and Jock Sturges, as well as painters including Rembrandt, Vermeer, Edward Hopper, Balthus and the Danish painter Vilhelm Hammershøi.

But that “short list” is personal.   You need to create your own.

Lauren in the garden shed

Lauren (c) 2010 Jack Montgomery

Visit Book Stores, Museums, Galleries and Libraries

If you go through this exercise I would urge you not to rely solely on images off the Internet. I certainly don’t mean to exclude this as a source for your exploration, but don’t make it your exclusive reference point. Visit museums and galleries. Go to the best libraries available to you. Art schools, colleges and universities often have extensive collections of books and photographs available to you. Some museums will allow you to examine and hold original works of other artists, giving you an opportunity to appreciate the more subtle characteristics of the image. For example, the Tate in London has a terrific collection of photographs that can be examined in person. Other museums have similar programs. Go to openings at galleries and museums. Listen to the artists, gallerists and other attendees discuss the works on display.

Lt. Ray Trinkle

Lt. Ray Trinkle, FDNY (c) 2001 Jack Montgomery

Recognize that looking at these images is an important part of your work as a photographer, and therefore deserving of significant time.

Narrow and Analyze your Favorite Images and Artists

As you begin to narrow your list of inspiring artists and images, analyze what you find appealing in their work. Is it the psychology? Their use of light? Their use of color? Is it the subject matter in particular that holds your interest?  Are you able to identify an image you have not seen before as (for example) a Paul Strand photograph?  How so?

If you haven’t started a collection of photography books, do it now.  Begin with five monographs of photographers (or painters) whose work you love.  Study them.  Read about the lives of the artists.  Then study them more.  Look for those elements in their work that makes it distinctively theirs.  Try to understand how that artistic work intersected with their lives.  These insights can be invaluable as you chart your own course toward a personal artistic vision..

circus woman at window

 Woman at St. Petersburg Circus (c) 2002 Jack Montgomery

As you come to terms with your own response you will develop insight into your own emotional connection to their work.  You will also begin to see exactly how the artist has developed a style that reflects her vision.  This is a key component of discovering the vision you want to express in your own photographs.

Experiment and Emulate

At this point you may wish to experiment with your own photography, learning the techniques that will allow you to emulate the elements of your favorite artists.   When I was beginning as a portrait photographer I consciously spent two years photographing a number of models in the styles of several photographers whom I admired. I found this very helpful because it gave me some structure around which to develop technique. As I went through this exercise I became aware of the particular challenges and nuances of the vision and technique of those other artists.  However I had to be ever mindful that success duplicating those styles was not an end in itself but only a means towards the development of my own personal vision and style.

(c) Jack Montgomery 2016

Abbey (c) Jack Montgomery 2016

Workshops and Classes

Workshops and classes in photography can be extremely helpful in the development of technique. However, in my experience it is unusual for a workshop to offer the kind of inspiration in vision that I am speaking of. Too often I have seen workshop instructors unconsciously stifle the development of vision and students by pushing their own technique and vision upon their students. Fortunately there are some exceptions to this phenomenon.

I was blessed by taking a workshop with Jock Sturges almost 20 years ago.  He was a teacher who understood his role in nourishing the private vision of the student.  But I suspect that my experience was the exception that proves the rule.  Nonetheless, I would encourage you to attend workshops and take courses,  but when you do be careful to keep your eyes open.  Be mindful that you may have to resist pressure from an authority figure who will try to make your work conform to his or her vision rather than promote your own.

Pinball wizard

 Lena (c) 2015 Jack Montgomery

Let me give you an example.  A friend of mine (who is an excellent photographer in his own right) was a teaching assistant at a course taught by a very well known and revered photographer.  I am a great admirer of the photographer in question.  But as the course proceeded and the students showed their work, the teacher would heap praise upon the students whose work resembled his own.  The work that did not meet this “standard” was not remarked upon at all.  The message was clear.  The good photographs were the ones that reminded the teacher of his own work.  This could be a very destructive experience for the creative student who lacks confidence.  Remember this:   You own your vision.  No teacher is entitled to belittle it, whether by outright criticism or by silence.  And the quality of the teacher’s photographic work is not a measure of the quality of the teaching.

tkm.final

Audrey on cover to To Kill a Mockingbird, image (c) Jack Montgomery 2001

Find good Mentors and Editors

Find good mentors and editors who share your passion and whose eye you respect.  These folks don’t need to be photographers.  In fact it is sometimes preferable to find mentors who are not photographers;  this minimizes the possibility that the mentor’s own sense of competition may negatively impact his ability to give you good feedback.  Most importantly, if you have good mentors and editors  who truly want you to succeed, you may be less inclined to isolate yourself out of fear that your will hear negative comments about your work.  We all need “tough love” — candid criticism of our photography but not destructive undermining, no matter how subtle.  There are  many good examples of photographers benefitting from great mentors.

Most photographers I know are not good editors of their own work.  For me, it has been the insight of my wife and a gallery curator that have been the most accurate in identifying my best work.Eilidh and Iona bathing caps

Eilidh and Iona (c) 2013 Jack Montgomery

Prepare the Imaginary Book

Here is an exercise that has worked well for me through the years:  Create the book from your own work that you would like to buy.  Make the subject matter something you love.  I photograph, print and edit a body of work comprised of 40 to 80 photographs that I would love to find on the shelf in the bookstore.  One benefit of this project is that it focuses me on what I love and where my passions are, rather than succumbing to the temptation to make work to please an external audience.

tidal reaches IMG_5285

Mariah and her father (c) 2004 Jack Montgomery

As you create your book you can begin to focus on the myriad of variables that will link your photographs to one another.  How do these photographs hold together as a collection?  How do they speak to one another?  Do they allow the viewer to move through the book in a manner that holds her interest?  Is the toning (black & white) or choice of color harmonious throughout?  Is the unifying theme captured in all the photographs?  Pay as much attention to the sequencing of the images as you do with their initial selection.  Be brutal as you edit and include only those images that you are truly happy with and which serve to round out the book.  You may have some great images that don’t fit.  Leave them out.  You may have to reprint some images several times to get them truly consistent with the others.

These days you have the option to have the book printed at a reasonable cost, though be forewarned that taking it to that next step is a significant technical challenge if you are going to achieve the best result.  After creating several “books”  I took the plunge and hired a designer/editor to help me go the next step.  While never submitting it for publication, the exercise (including the insights of a professional designer) was very helpful in refining my personal sense of vision.  (Many of the photographs in the Tidal Reaches “book” were ultimately published in a reedited monograph.)

What you will be left with is the outward expression of your vision.  That vision will evolve but it now exists.  And it is yours alone.

Read about the struggles of other photographers and artists

Learn about struggles of other photographers and artists as they searched for their vision.  One of the most compelling examples I have read in several years is Sally Mann’s autobiography Hold Still. Her own life experiences have been almost gothic and a rich source of her imagination.

sally mann book photo


She is very articulate as she links her photographic vision back to her early life, to the region in which she was raised, to literature including her own writing and other elements.  (For example, “…[T]he relationship between my writing and photography has never been clearer to me than it is now…”)  Hold Still, p. 206.  Whether you are an admirer of her photography or not (I am), the book is a compelling read and it drives home the point:  our vision is a reflection of our experience.  Its roots are in our personal psychological and spiritual makeup.

“I began to see my artistic life… as the inevitable result of my silent father’s clamorous influence”.  Hold Still, p. 402

You can follow the trajectory of her photography on her website, dating back to her earliest photographs. Sally Mann website.  This is an excellent opportunity to see how her vision has evolved through decades marked by a changing subject matter.  Yet the images hold together on a level deeper than the subject.   Her photography is also greatly informed by literature.  Sally Mann: By the Book  Few of us will achieve Sally Mann’s level of insight nor her level of accomplishment.  But most of us will benefit by increasing our understanding of what is fueling our photographic endeavors and then using those insights to hone our vision.

The last word

Don’t become discouraged.  Don’t expect the process to go quickly or easily.  In fact for the truly great artists, I admire, the evolution of that personal vision lasts a lifetime. But once you have found that vision — no matter how elusive or dynamic  — it will become your most prized possession as an artist.  It is well worth the struggle to find it.

Trees above laco di vico R0066739

Trees above Laco di Vico (c) 2016 Jack Montgomery

Further Reading:  Alain Briot, “Developing your Vision”


Shooting a portrait in 15 minutes – Gear Overview

A new beginning

The wonderful people at Sleeklens have invited me to share my thoughts and experiences as a freelance photographer working in London. I will endeavor to do this several times a month, and for my first correspondence, I thought I would introduce myself so you will hopefully get an idea of what I love about photography and how my life as a working photographer unfolds.

My name is Matt Writtle and I’ve been working professionally for over twenty years. I have been seen quite a lot of changes, from bulk loading Ilford HP5 film and shooting with an old Nikon FM2, to shooting most of my work now on a Leica M (240) digital. I prefer digital now, controversial I know, but I have never been the most patient of people and the majority of my work is to shoot portraits and features for newspapers such as the Daily Telegraph and London Evening Standard.

To describe my work succinctly: I have to produce a studio quality portrait on location, in a venue I have never been to before, in less than thirty minutes.

Portrait of actress Andrea Risborough at the Mayfair Hotel, Piccadilly, London. PHOTO MATT WRITTLE Picture commissioned exclusively for the London Evening Standard. Use in another publication will require a fee.

Ninja Turtle

Nearly all portrait shots are time allocated and controlled by the public relations officer or “PR” for the subject. Consequently, time is tight and closely monitored. I normally get fifteen minutes, thirty if I’m lucky, so preparation is key. The best way to prepare is to correspond with the PR in advance of the shoot, and then arrive early. Thirty to forty-five minutes before the shoot is a good amount of time to recce the venue, mostly hotel rooms, lobbies or a theater, and ascertain how much available light there is and what set up to use.

Budgets are tight, photographic assistants on newspaper shoots are rare, and as technology has advanced so has the demise of manpower, so, I have to travel alone with all my equipment on my back. I wheel it all around in Think Tank Airport Security V2.0 and additionally, I now carry a 22inch beauty dish in an extra large drum cymbals case on my back, very useful case and vastly cheaper than photographic equivalents. I look like a Teenage Mutant Ninja Turtle going on holiday!

My two main light attachments are the dish and a Photek Softlighter II 46 inch. Presently, I use the dish as my key light, and should I need any shadow fill I use the Softlighter II (brolly box). I have to be mindful not to have too much darkness and contrast in the image as newsprint doesn’t reproduce blacks very well. I also have to consider house style: newspapers don’t want their images to be too moody and gloomy.

Commission May0066291 Assigned Portrait of former X-Factor contestant and pop star Fleur East at Sony BMG, High Street Kensington, west London. MUST CREDIT PHOTO MATT WRITTLE © copyright Matt Writtle 2015. Picture commissioned exclusively by the Telegraph Media Group. Use in another publication will require a fee.

War and Peace

On most shoots, I walk around the location and try to imagine how the subject will look in a scenario befitting of the angle of the interview. I tend to ask the PR to stand in for a light test. Exposure and mood created, I wait. Many people don’t consider how different each individual will look in the same light, and often, I have to modify the light to accommodate the star.

This was the case when I photographed actor Tom Burke (BBC’s War and Peace) recently for the Daily Telegraph. The shoot was at London’s Hampstead Theatre he was performing in, so, stairwell and lift lobbies were my backdrops. Ten minutes recce and he appeared. I keep things simple. The more complicated you try to make things, the more time you waste.

Set up one was at the top of some stairs with framed posters of previous actors who’ve starred at the theatre. I was thinking hall of fame and he was being inducted. Beauty dish key light, with a basic backlight to add mood and light the framed pictures.

Commission May0068723 Assigned Portrait of Actor Tom Burke who is appearing in Reasons To Be Happy at Hampstead Theatre, Swiss Cottage, north London. MUST CREDIT PHOTO MATT WRITTLE © copyright Matt Writtle 2016. Picture commissioned exclusively by the Telegraph Media Group. Use in another publication will require a fee.

Set up two was in a darkened lift lobby, but as Tom Burke is known for his brooding characters, I thought this quite fitting. Again, beauty dish key light, with a gentle amount of fill for shadows with the brolley box, all of which shot on my Leica M (240) with a 35mm f1.4 and 50mm f1.4 aspherical.

Commission May0068723 Assigned Portrait of Actor Tom Burke who is appearing in Reasons To Be Happy at Hampstead Theatre, Swiss Cottage, north London. MUST CREDIT PHOTO MATT WRITTLE © copyright Matt Writtle 2016. Picture commissioned exclusively by the Telegraph Media Group. Use in another publication will require a fee.

‘Goodnight Mommy’

In addition to the technical, you have to get a famous or notorious person inside to produce the image you want. I would say it’s a challenging and tense situation. For those fifteen minutes, I channel my adrenaline, whilst being friendly and keeping the subject happy. At the same time, I make sure the image is focused, composed, exposed and the lighting suits the mood of the character, all while a PR is standing behind you counting down how much time you have left.

It can be frustrating, but only because you have unique access and often not enough time to do it justice. But when there is a connection, the shoot sparks into life and that’s when the magic happens.

This was apparent when I photographed the Austrian actress Susanne Wuest who starred in a horror film “Goodnight Mommy’ which has received critical acclaim. We met at her penthouse apartment at the old Arsenal FC football stadium, now flats. Having modelled before, I was optimistic the shoot would be successful. She was as enthusiastic as I and we connected on what we both wanted to achieve, which took place on her terrace against a beautiful blue early spring sky.

Set up one was just natural light shot on my Leica with a 35mm.

Portrait of Austrian actor Susanne Wuest at her apartment in Highbury, north London. MUST CREDIT PHOTO MATT WRITTLE © copyright Matt Writtle 2016. Picture commissioned exclusively by the London Evening Standard and ESL. Use in another publication will require a fee.

Set up two was on my Canon 5d mark III with a 24mm-70mm zoom. I metered for the natural light and then placed two Elinchrom Quadra heads, one with the beauty dish, one naked, at 45° angles to her and boom! I got my favourite shot.

Portrait of Austrian actor Susanne Wuest at her apartment in Highbury, north London. MUST CREDIT PHOTO MATT WRITTLE © copyright Matt Writtle 2016. Picture commissioned exclusively by the London Evening Standard and ESL. Use in another publication will require a fee.

Hope this guide has been useful for you as a brief panorama of how do we photographers suit our gear to match the different scenarios we may come across during our daily job. See you next time!

Orton effect – Creating dreamy images in Photoshop

Even though nowadays a large majority of the images produced daily are taken with a digital camera and even though the post-processing has become something familiar to every photography enthusiast, many of the techniques we use to enhance our images actually come from the era of film photography.

On this entry, I want to talk about a special filter that is quite commonly used in portrait photography and that has become popular in landscape photography as well: the Orton effect.

Introduced in the 1980s by photographer Michael Orton, the result obtained from applying it to an image is what can be described as a ‘dreamy effect’. If you have ever used some kind of plug-in software for Photoshop such as Color Effex, you might know this as ‘Glamour Glow’ and, when carefully used, it can produce very interesting final results.

Orton effect in Photoshop

You don’t actually need any plugin to obtain the same effect in Photoshop, though. The Orton effect is just a combination of two images, each of them with specific characteristics. The two images are of the same subject with the main difference being the focus. While the base image needs to be perfectly in focus, the overlaid one is out of focus. The opacity of this top image will affect the strength of the effect on the final image.

Luckily, with the tools available with Photoshop, you don’t even need to shoot different images with different focus. You can simply use a blurring filter in order to get an out-of-focus version of the image you want to process. What you need, though, is a sharply focused image on the first place.

Take, for instance, this image of the Neuschwanstein castle in Bavaria, Germany.

orton1

This is a classic capture of this amazing structure, built by the King Ludwig II of Bavaria and that has served as inspiration for the famous Cinderella castle, located in two of Disney’s theme parks.

Given the nature of the subject, even when the original capture can already show the magnificence of the structure itself and the location, the image can still benefit from some post-processing and it serves as a good example for the dreamy look that the Orton effect can provide.

The first step is to duplicate the original layer in Photoshop. Even though the basic idea of the filter is the combination of two (or more) images with different focus, simply stacking a blurred layer on top of the original one will give an exaggerated effect. The following image was produced by applying a Gaussian blur to the top layer (radius of 40 px) and reducing the opacity in order to combine both layers.

orton2

You can see that the ‘dreamy’ effect is far too strong, making the image look more like foggy. The reason for this is how the blending of Photoshop works. For the image above, the blending mode was left in ‘Normal’, meaning that the layer is simply placed on top of the background layer and the opacity will just make a linear combination of both images.

Another problem with using the ‘Normal’ blending mode is that the final result of the Orton effect tends to darken the original image so a blending mode that increases the brightness of the dark areas is desired. An ideal one for this purpose is the ‘Screen’ mode. So what you need to do is, with the top layer selected, go to Image -> Apply Image… and select your background layer (here simply called ‘Background’) and ‘Screen’ on the Blending drop-down menu.

orton3

This will give an overexposed version of your original image, but still retaining some details on the brightest regions. The next step is to duplicate the top layer. Once you have three layers, apply a Gaussian blur to the top one (Filters -> Gaussian blur…). The amount of blur to apply is not so important right now, since its effect on the final result can be controlled with the opacity of the layer, as we will see in the next step. The image below is a blurred version of the original image with a radius of 30.

orton4

Next, merge the two top layers into one by selecting both layers at the same time and then right click -> Merge Layers so that you end up with only two layers. Finally, by changing the blending mode to ‘Multiply’, you get the final image with the Orton effect applied.

At first, the image will look too dark and the effect might be also too strong, so you can adjust the opacity of the layer until you are happy with the results. The image below was produced with an opacity of 70%. Additionally, I masked the effect with a layer mask around the trees and increased the overall brightness to counteract the effect of the Orton effect. In order to highlight the difference with the original image, I masked out the effect on the right side.

orton6

And that’s it. As you can see, to achieve the effect requires only a couple of easy steps and, if used carefully, you can significantly enhance some of your images, so go ahead and try it and, if you have any question, just write me an email.

Retouching Master Class, How to Whiten Teeth in Photoshop

Hello all, today we’re going to be starting a series of tutorial that may span over 2-3 instalments, I’ll see what happens, but they will be packed full of great tips and tricks on how to retouch like a total professional.

We’ll be fixing Teeth, and Skin but not changing the overall shape or look to the person as many magazines sneakily do, tut tut!

We’ll retouch this photo, while leaving it with a great natural feeling that the person would be happy with.

So today we’ll be using this image below, you can click on it with the right mouse button and save it, so you can work along side me if you wish to get the most out of this. Or you can challenge yourself by finding your own picture, or on that note use a picture of yourself if there are any that you would like to clean up.

Then at the very end, I will be applying some Sleeklens Presets to improve my over all image.

rtmc1

As the title says in this ‘episode’ if you can call it that, we’ll be whitening the teeth of our subject while fixing any other photographic problems.

Step 1.

The first thing I want you to do is grab your Lasso Tool and make a rough but calculated selection around the teeth, try to be as accurate within the refines of ‘rough’ as you can, if you get me.

Zoom in using Ctrl/Command + (- to zoom out). The shortcut for the Lasso Tool is (L), it is also highlighted below.

rtmc2

Step 2.

Click on Select –  Refine Edge and bring your feathering up a little.

rtmc3

rtmc4

Step 3.

You now need to create a new layer, by clicking on the 5th icon across in the Layers panel indicated below, then hit Ctrl (Command for the Mac) G to create a Group.

rtmc5

Then, you’ll create a Layer mask by clicking (on the same row but 3rd across) the Layer Mask Button. You will see the Black mask appear.

rtmc6

If I was to click on the Layer with in the group and paint over it, you would see that the colours are only refined to the mask like so… (but don’t do this, I’m just showing you what it would do.)

rtmc7

Step 4.

Open  up a new adjustment layer in the Layers Panel, that’s the 4th button across, indicated below.

rtmc8

Then, Choose a Hue Saturation Layer.

rtmc9

And click on Colorize.

rtmc10

There are three sliders now showing up, you will want to place your sliders roughly like so.

For the Hue slider, type in the value of 10 and in the saturation slider a value of 20.

You will already see a difference in the teeth, as the yellowing disappears.

rtmc11

Step 5.

Next, we’ll be working on the brightness of the Teeth.

Open up a new adjustment layer as you had before within your group, only this time choose curves.

rtmc12

Then, drag the middle point of the histogram light to somewhere in the region of what I have done below, so it whitens the teeth. At first they will look too white, but don’t worry we’ll be fixing that. It’s necessary for them to look that way for now.

rtmc13

Then, double click on your layer where I have indicated and that will bring up a Layer Styles panel.

rtmc14

Now you will see indicated in the image below, there is a slider right at the bottom, that if you hold Alt and Click on the slider icon it will split it in half. Drag it across first, then go back for the other. Try to slide them until you start to get a realistic texture for the teeth, you’ll have to take a little time to find the balance here.

rtmc15

Further clean ups you can quickly do at this stage, would be to click on the Black layer mask, choose a brush tool, using Ctrl – or + to change the size and then paint in the black around the edges of the Teeth and the gums (Black erases White Replaces), so remember that.

rtmc16

Step 6.

Now make a selection using the Marquee Tool (Shortcut – M) on the new top layer in the group.

Then Press Shift and Delete, this will bring up a Fill layer, make sure that you have it filled with white.

rtmc17

rtmc18

Then drop the opacity down, so it looks more natural!

rtmc19

Final step.

Now I’ll create a layer just above the bottom one. Choosing a brush with a low opacity and a soft edge, I will start to paint white in the areas of the teeth that have inconsistencies.

Once I’m done with that, I will lower the opacity of the layer and play around with it back and forth, to try to find the perfect setting for that natural feeling I want.

rtmc20

By this stage you should be left with some nice pearly whites.

main Pic

In the next tutorial we’ll be working on her Skin, so look out for that one!

How to work with Forgotten Postcards: Vintage Effects in Lightroom

Hello, today we have a tutorial on applying vintage effects with our “Forgotten Postcards” workflow. This is a really great workflow since that vintage aesthetic is really popular right now, which “Forgotten Postcards” is great for, with all of the tools to add rich tints and hazy atmospheres to your photographs.

I have my photo pulled up, so let’s get right into it!

We will start with one of the “Forgotten Postcards” Vintage presets, Scroll down and we will go with Matte Autumn. Once applied, this preset doesn’t only darken the photo, but also adds a bit of a brown tone to it.

The next thing that we’ll do is polish this up a little by applying the Polish – Sharpen preset.

Then, we are going to stack a Base preset on top, let’s go with Base – What Dreams May Come to add a little more light.

Now that we have applied three preset to this photo, it has already made a big difference. Now it’s time to move over to our “Forgotten Postcards” brushes.

With the brushes open, scroll down and the first brush that we are going to use will be the Face – Sharpen Face brush. Although I want this photograph to have a hazy look, I don’t necessarily want that on the subject’s face. So, we will turn the Clarity up and apply this brush to her face to help keep her in focus.

Click New to start a fresh brush, then the next one that we are going to use is the Light – Brighten brush. Similar to what we did with the Sharpen brush, we will apply this brush to our subject, turning up the Exposure as we go. I will tweak this brush just a bit more by turning the Highlights down and the Contrast up a little.

A lot of times when applying this kind of vintage look to a photograph by using warm, rich tones, the eyes can often get washed out. So, the next thing that we’re going to do is basically color the eyes back in to make them a little less muted. Let’s go into our brushes and scroll down to the Color – Aqua brush. Before we apply this brush, let’s make the brush smaller and adjust the color a little, moving the blue down to a less bright tone. Then, just run the brush around the iris of each eye.

Once I have colored her eyes, I will turn the Saturation, Exposure and Contrast up a bit, adding more light and contrast.

We took a nice photograph and wanted to give it an old school, vintage look, so we have added a hazy atmosphere and a rich, warm tone to it. But, we kept the detail of the subject and the color in her eyes.

Let’s move along to our next photograph.

In this next photo, I am going to start with one of the “Forgotten Postcards” Base presets. Scrolling down through those, we will go with Base – Auto Tone to add more light to the photograph.

Another common effect that you will see with vintage photos is a matte effect, so for this one we will scroll down to the Matte presets and apply Vintage – Matte Watermelon, which has added a warmer tone to the photo.

Now we will move over to our “Forgotten Postcards” brushes. Let’s open them up and select the Light – Brighten brush. I am going to turn up the Exposure and Contrast, then apply this brush over the girl in the picture, since she is the subject, we want to add more light and pull her out a little.

We will click New and start a fresh brush.

Now we are going to go back into our brushes and select the Color – Mustard brush. This brush has a really nice yellow color, adding a nice tone to your photograph. Turning the Exposure down, we will run this brush all around the edges, adding a richer tone to the scene.

As we look at the before and after of this photograph, you’ll see that we started with a nicely exposed photograph. Then, we added a matte effect and a hazy atmosphere surrounding the subject. We also added a warmer, richer tone with that mustard colored brush. Finally, we added a bunch of light to the subject to bring the focus in on her.

Now, on to our third photograph. This clean and modern looking photo is kind of a less conventional photograph to give a vintage look to, but we are going to do it anyway, since I think it will work out nicely.

To get started we are going to apply the All in One – Yesteryear preset, which will add a matte effect with muted colors. The one thing that happens when applying this preset is the Clarity get raised way up, but we can tweak that by just going into the Basic tab and turning it back down some.

Now we are going to go down to the Nostalgic effects, for this we will go with the Nostalgic Effect – Vintage 1preset, which will brighten the photograph while adding a rich, warm tone.

I am going to tweak this a little by turning the Highlights down, as some of the highlights were kind of blown out and really bright around the windows and curtains in the background.

Even though we are going for the effect of muted colors, I do want to bring some of the blue back into the photograph because the blue details in the clothing will work really nicely.

So for that, we will go into the Color tab and under Saturation, we will turn the Blue and Aqua up a bit. Once turned up, it brings a lot of that color back to the clothing.

The last thing that we will do is add a vignette to this photograph which is traditionally seen in old or vintage photography. Going back to our “Forgotten Postcards” presets, let’s scroll down and select Vignette – Subtle Black which will add a subtly darker toned border around the outer edges.

Hope this guide helps you out and don’t forget to check our videoguides on how to edit photographs with “Forgotten Postcards Workflow” – you can ace vintage effects in only a couple of minutes!

How to work with Strike a Pose Workflow: Facial Details

Hello! Today we will go over how to use our “Strike a Pose Workflow”, specifically, how to enhance your subject’s facial features and make up. I have already applied an all in one preset and a vignette to the photograph that I am using today. So, let’s jump right in and get started with her face.

Once you are in the “Strike a Pose Workflow“, and you have your image selected that you want to work with, start by focusing on the face. After you have zoomed in on the area that you want to enhance, go into the brushes, as our “Strike a Pose Workflow” comes with 69 Brushes, there is quite a bit to choose from.

For the image that I am working with today, I will first go to the Rosy Lips brush and I am going to use this brush to enhance the color around her lips. When I click on her lips, You will see a light pink in the color box, when it opens in the bottom right of the panel. I will just go ahead and paint that color around her lips. Then I will turn the saturation up just a little bit more color. Then, I will click New, because I want to go over her lips again, but I want to give it a darker color. We are still using the Rosy Lips brush, but now I will go down to the bottom and open up the colors, choose a color that is slightly darker and then, go over her lips one more time.

Once I have applied the color to her lips, I can then use the sliders to the right to make changes if necessary. For now, I am going to leave it a little darker and turn the contrast up a bit.

The next thing that I am going to do is to work on her eyes. Now, she has her eyes closed, but that doesn’t mean we can’t enhance the make up around them.

So, now we are going to open our brushes again. Going down to my “Strike a Pose” brushes, I am going to use the Add Eyeliner brush. We can use it and go along her eye line and eyelashes, to darken them and add a little more definition. Once I have applied the brush, I am going turn down the exposure a bit, so it will be just a little darker.

The next thing that I am going to do is go back into the “Strike a Pose” brushes and choose Darken, located in the Light brushes. Using this brush in a general “brushing” motion in the crease and around the bottom of her eyelid, just to add some more definition to her eyes. You can use the panel to make any extra adjustments such contrast, exposure and so on.

Next, I am going to add a little blush, we can do that with the Blush brush. So, we will go back to our brushes, for blush you will see that two choices, Add Blush and Add Blush 2. For the image that I’m working with, I will use Add Blush. I will make my brush a little bit bigger, apply it to the cheeks, then turn up the saturation just a bit. Then, I will click on New and apply the brush once more, I feel like there could be a little more color there.

Now we are going to add some contrast to the face, using the Light and Darken brushes. The first thing that I’ll start with, is the highlight, so I will go to the “Strike a Pose” Light – Brighten brush. Use this brush in all of the typical place where you would want to add highlights, such as the middle of the forehead, down the bridge of the nose, right under the eyes, the chin and the “cupids bow” between the nose and the lips. You can also add some highlight to the area between the cheekbone and the jaw line, if needed. Next, I will go back to my brushes and click on the Light – Darken brush, which I will use to add contour to the face. You would normally apply this to right under the cheek bone, around the temples near the eyes, the edges of the forehead and around the jaw line. Then, I will click on New, select the  Light – Darken brush again, this time making your brush really small. I will use this to add a bit of contrast to the side of her nose, but not too much.

The last thing that I will do to enhance the facial features is to sharpen the face. Going back into my brushes, I will select the “Strike a Pose” Sharpen Face brush. I am going to apply this brush around the eyes and mouth. In my finished image, you can see that we have basically contoured her face and added a little color to it. The changes weren’t huge, but it does make a difference in the photo.

So, Now I am going to open another photograph to work with. Like above, we are just going to work with the face and enhancing the facial features, using the “Strike a Pose” brushes.

With this photograph, the first thing that I will work on is her lips. So again, I will open my brushes, selecting the Rosy Lips brush once more, but this time I will go into the color box and change the color, going for a really deep pink. I want to add a lot of color to her lips, applying to the lips as if I was changing her lip gloss or lipstick color. Once applied, I will turn the saturation down a little and make it a bit brighter by slightly increasing the exposure and contrast.

Now, I will move up and work on the eyes. I will start by going back to my brushes and choosing the “Strike a Pose” Whiten Eyes brush. Like the name of the brush suggests, it applied to the whites of the eyes to enhance and brighten. I am just going around, brushing over any of the dark or red areas. Once I’ve applied the brush, I will adjust it a bit by turning up the exposure, making it a little brighter.

Next, I will start with a new brush, this time the “Strike a Pose” Light – Brighten brush. I will apply this brush around the eyes, just to add a little bit of light. After I have brightened the eyes, I am going to click on New and start with a new brush. Now I want to enhance her eyes, so I will have two brush options. I can choose from Enhance Blue Eyes or Enhance Blue Eyes 2, for this one I will go with Enhance Blue Eyes 2. Now I will go into colors and move my color up, to make it a tiny bit darker. I will go ahead and use that color around the iris of the eyes, then turn the saturation up a bit and add a little more light to the exposure.

Alright, The next that I will do is enhance her eye makeup and to do that, all I will need is to start a new brush and use the “Strike a Pose” Darken brush. I am going to use this brush to go along the eyes and make her eye shadow just a bit darker.

Going back to my brushes, this time the next brush that I’m going to use, will be the Add Eyeliner brush. I am using this brush right along the eye line, just to darken it some. Darkening the eye line will actually make the iris stand out.

Now that I’ve gone ahead and changed her eye makeup, her lips and changed her eyes, now what I am going to do is add contours to her face. To do that, I am going to use the Light brushes again. The “Strike a Pose” work flow comes with Light – Darken and Light – Brighten brushes, which are going to be used a lot. So for now, I’m going to go for the Light – Brighten and add highlights to the face. Highlights can where they would naturally go, which would be around the middle of the forehead, down the bridge of the nose, under the eyes in an inverted triangle, the chin and last, the “cupids bow” between the nose and the upper lip. Occasionally, I add a little bit of highlight just to the bottom lip. Another optional place that you may want to highlight is right under the brow bone, between the eyebrow and the eyelid. It will really make the eyebrows and eye make up stand out.

Now I am going to go with a dark brush, so I will select the Light – Darken brush and add contours with this. Your contours will normally go on the cheek bones, around the sides of the face and temples, the sides of the forehead and along the jaw line. Then, click New to start a new one brush. I am still using the Light – Darken brush, but now I have made my brush really small. I am going to use it to run a line down the side of her nose, just because this helps thin out the nose a little bit. The line doesn’t need to be that dark, so I am going to use the exposure slider to turn it up a bit.

So far we have changed the skin color, the make up and the contours. This has made for an overall, more polished look to the image.

I hope you guys enjoyed this tutorial on how to enhance facial features and make up, Hopefully you will try it out for yourself!

How to Give Your Photo a Film Look with Lightroom in a Few Easy Steps

Creating images allows me to connect with people and make them feel like they are looking through my eyes and feeling what I feel. Like the title suggest we will be looking at how to get a film look with your images. The reason I like using the methods that I will show you below is because to me the images feel more tactile. I want people to be able to look at it and get a sense of everything I did when I shot it. So today, I want you to feel the atmosphere, the cold and the mood.

1 – Starting Point

I’m starting here in this tutorial, if you want to see the decisions and what the reasoning is behind some of the choices in the Basic panel then check out the rest of the Sleeklens Blog. We can see that it was very foggy, cold and somewhat wet when I took the photo. For me shooting in the fog is one of my favorite times to shoot. I get the moody atmosphere, great textures, and color that sets a somber tone. The color is part of getting certain film looks, so if you examine the film looks that you like it will be easier for you to choose your color. Think about the following steps to get even closer to a film look.

Arnel Hasanovic Film Look Tutorial

2 – Tone Curve

To get that film look, one of the first things that I do after thinking about the color is start by adjusting my Tone Curve. Bringing up the black point and lowering the white point will ensure that the white is slightly darkened and the black point brightens up a bit. Moving the points slightly is the key! Moving the points too far up or down can give you way too much clipping and may not result in the effect you are looking for. We are essentially crushing the color and if this is not what you want to go with, then skipping this and maybe using the next step, would be better for you. It is all a matter of taste and experimenting with what you would like your images to look like.

Arnel Hasanovic Film Look Tutorial

3 – Grain

It might be hard to see in these images because of the compression but look at the left side of the image where the white wall is. You will notice that there is grain added. To me, this step is something that makes the photo tactile, something on which you can reach out and touch the texture. It adds a certain personality and realness to images. Changing the amount, size and roughness will give you different looks. Try different combinations, because not every photo will look its best with the same settings. Flipping the Effects module on and off will help you see before and after, which will help you determine the amount of grain you may want to put on. Also, not all grain is created even. There are products and plugins out there that focus on creating effects like grain which might do a better job for your needs and desired looks.

Arnel Hasanovic Film Look Tutorial

4 – Conclusion

Here are a few other photos that were shot at the same time. They got slightly different edits, but what remained the same, was the fact that I did the same steps as above. I moved the black/white points in the Tone Curve module and I added grain to each image. As I mentioned earlier, experiment and try using these tools to help you achieve the look you want and need. Do not use something because others use it. You are an artist and you have taste, so use the tools that help you achieve your vision.

Arnel Hasanovic Film Look Tutorial

How to Retouch your Portraits with Lightroom

Hi Everyone, in this tutorial we’re going to be taking a look at how to retouch your portraits.

This one is for all you budding Fashionista Portraitists out there.

Normally I would use Photoshop for this task, but I’m going to show how to do it in Lightroom also, if you’re a lightroom purest.

So hopefully you’ll get a lot out of this tutorial 🙂

So, the first thing I would look for are any Moles, Spots or Wrinkles on my portraits face and make a list on a piece of paper of what I want to retouch, in the image below you will see examples circled.

Retouch1

Press (Q) and this will take you directly to your Spot Removal Tool.

Add a little feather, make sure your Opacity is up around 70-100% and remember you can click on [ or ] to change the size of your brush back and forth.

Retouch3

(Ctrl +) will Zoom in on your image and then we just start to remove the little Spots and Blemishes one by one.

Retouch4

You can move your image around by pressing SPACE BAR, then you will see a little hang, you use that to click and drag to different areas around your Portrait.

Clicking and dragging your Spot Healing Tool around will help you erase any wrinkles that the subject may have, make sure with that, you decrease the size of your brush more.

retouch5

Lightroom samples a spot where it thinks it is similar, though sometimes the spot it chooses is not good to say the least, as in the image shown below.

badtouch1

So, you then click and drag the second circle indicated below to an area that suits much better.

Retouch6

Ok, so now we got that done and hopefully you are happy with your results. I would suggest taking your time and going over the face a few times until you are completely happy, though in saying that don’t go overboard, you still want your portrait to look realistic at the end.

I would say a 70-80% Retouch is better than a 100%, you still want some character to remain, but that’s my opinion.

Anyway…

Next up, let’s Soften the skin a little, so click on (K) to bring up your Brush Tool.

So just in case, reset your brush, where it says Effect you can double click on that or hold the Alt key and press Reset.

Retouch8

In the dropdown where it says Custom you will have some settings.

Retouch9

And we’re going to click on Soften Skin, you can also see other settings in there such as Teeth Whitening all I can say is that they do exactly as they say. So, if your model is after a bit of Teeth Whitening, you use that tool, if you want to Enhance their eyes, you use Iris Enhance and so on.

Easy 🙂

Now you just paint onto the skin.

Pressing (O) will show an overlay as to where you have been painting, so that helps as a good guide. Make sure to leave areas that you want to remain sharp such as the Eyes and Mouth etc.


Retouch10

At any stage while painting, you can press Alt and it will open your brushes minus options, then you can paint back and erase any mistakes or overlaps.

Clicking this little icon shown below will change back and forth from your original to what you have been working on, make sure you disable the overlay by pressing (O) for a best view.

retouch 12

If it’s a little strong, you can work with your clarity slider to bring it back a little.

Retouch13

When you’re happy with your results press Done.

Now we will repeat the steps above, but this time instead of clicking on Smooth Skin, we’re going to be Enhancing her eyes.

So make sure you reset your brush (double clicking on effect)

Zoom in on her eyes and paint over her Iris.

Pressing (Y) will take you to a split view mode where you can look at the differences from the before and after, then you can zoom in and out as normal.

retouch15

Other retouches that you may want to do is to sharpen up her eyes a little, for example. So for that, reset your brush, increase you Clarity and Sharpness and paint on to the areas you want, changing the size of your brush and pressing Ctrl Z to erase as you go along. If your settings are too strong, then decrease Clarity and Sharpness and try again until you reach the result you are most happy with.

retouch16

And we’re done 🙂

This is a very basic introduction into retouching, my retouches are very subtle and my picture was pretty good to start with so I didn’t have to do a lot. Sometimes you may get pictures that need a lot of work to go into them, but this will give you a great start.

retouch17

Some Presets that will really enhance and help your portraits are:

Chasing Light Workflow Presets

Strike a Pose Portrait Workflow

Newborn Delights

These are all excellent additions to any Portraits.