Hey all, today we are going to take a deeper look at the Tone Curve Panel and the HSL/Colour/B&W Panel, and check out Targeted Adjustments.
With Tone Curve, you can drag the graph line up or down to Darken or Lighten the your image, which brings out the Contrast, Shadows and Highlights.
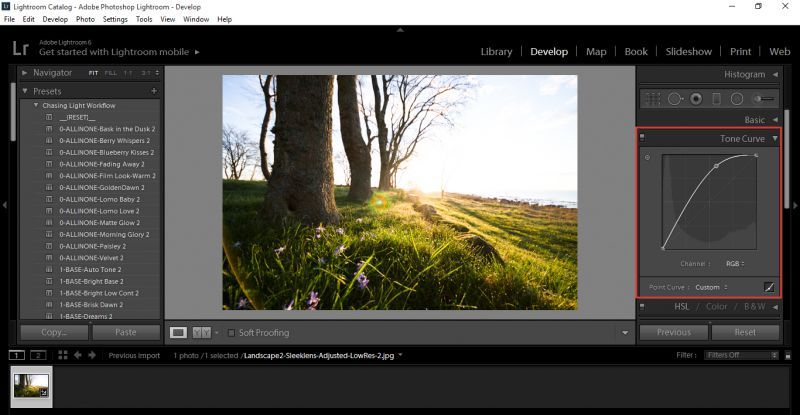
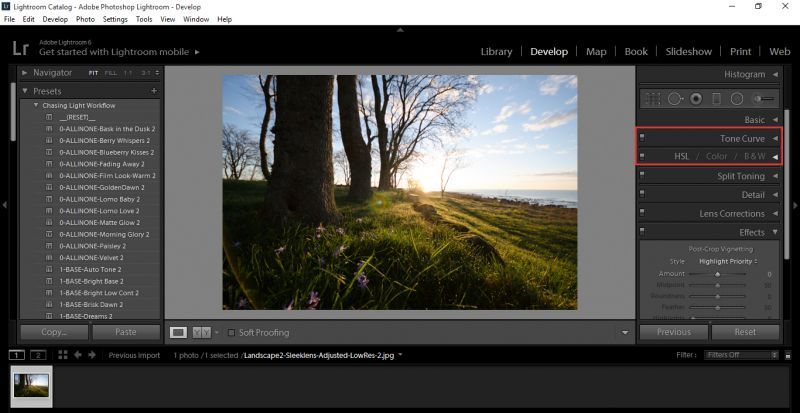
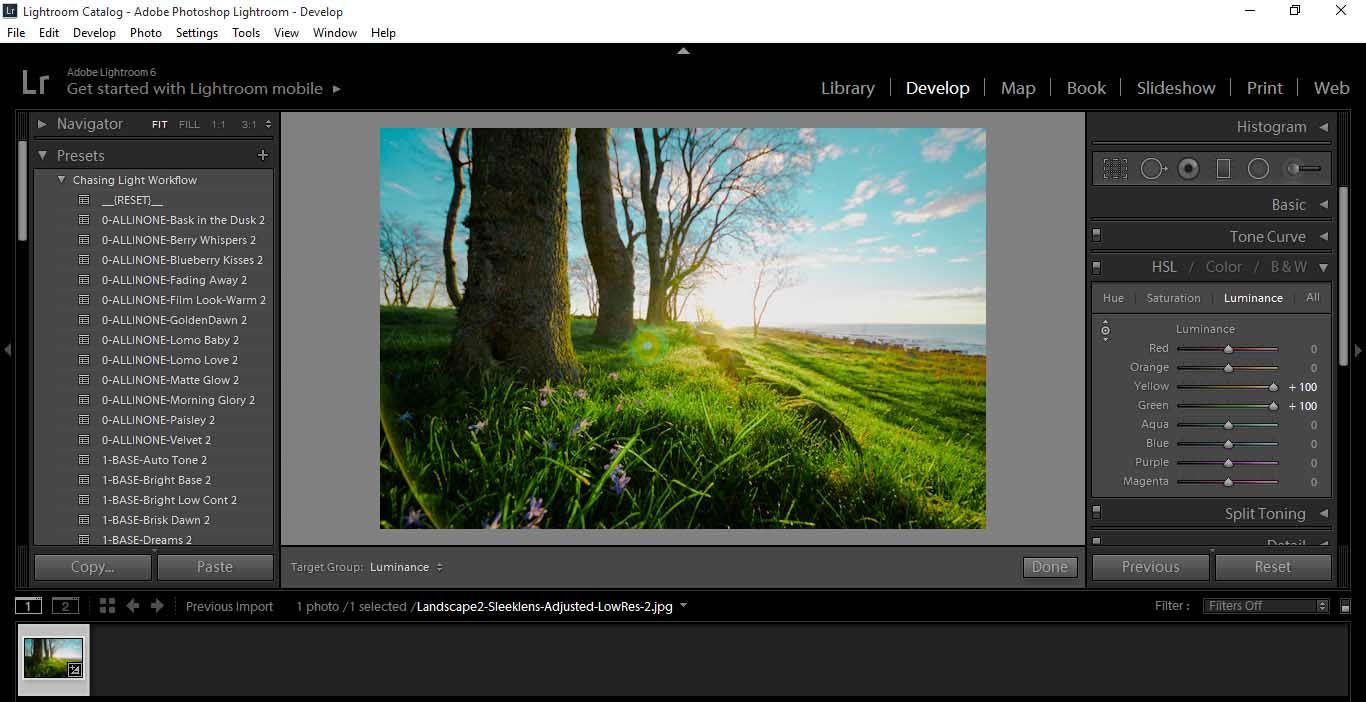
So far pretty basic right, but what I want you to do is if you look at the top left hand corner, where it is highlighted you will see a little shape, like a circle within a circle.
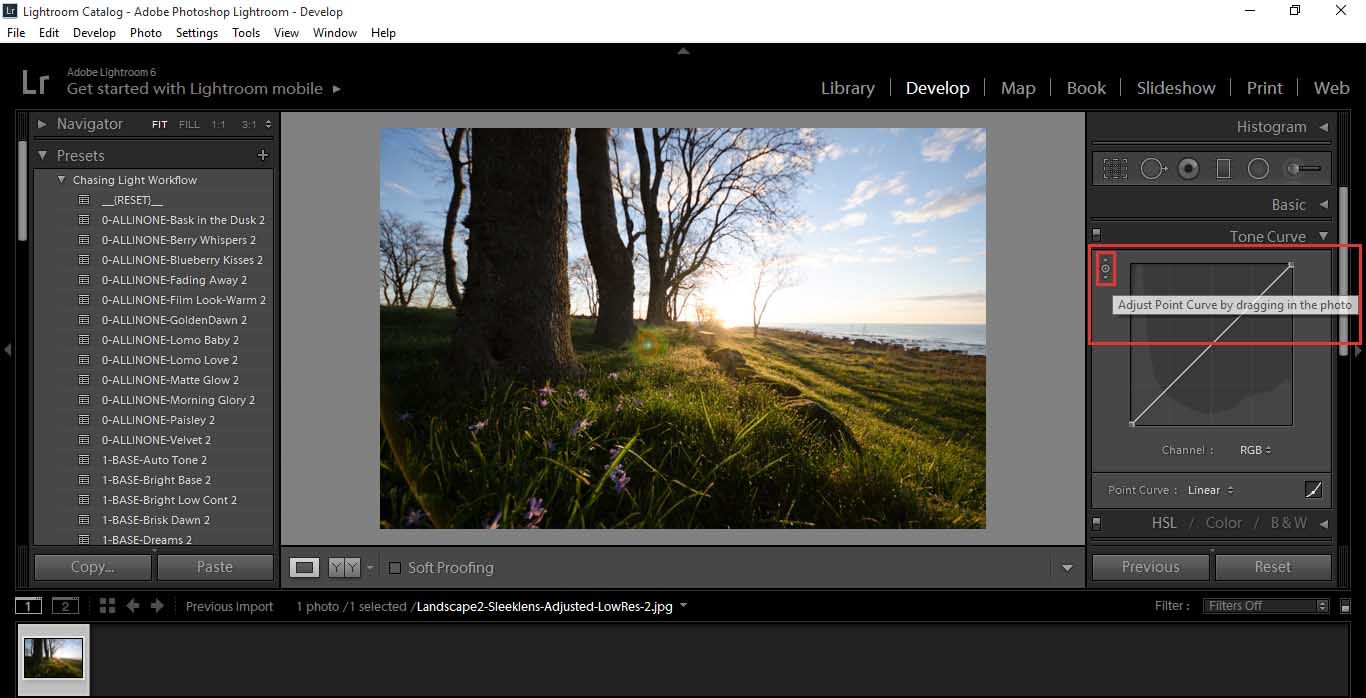
Click on that and you will see that your cursor will turn into it when you hover over your image, you’ll have that with a small cross hair off to the top side of it.
The cool thing about this is that you can target a specific area on you image. If you look at the image I’m using we’re going to target the inner Shadows of the grass, right clicking on that will correspond exactly on the graph where that image part is.
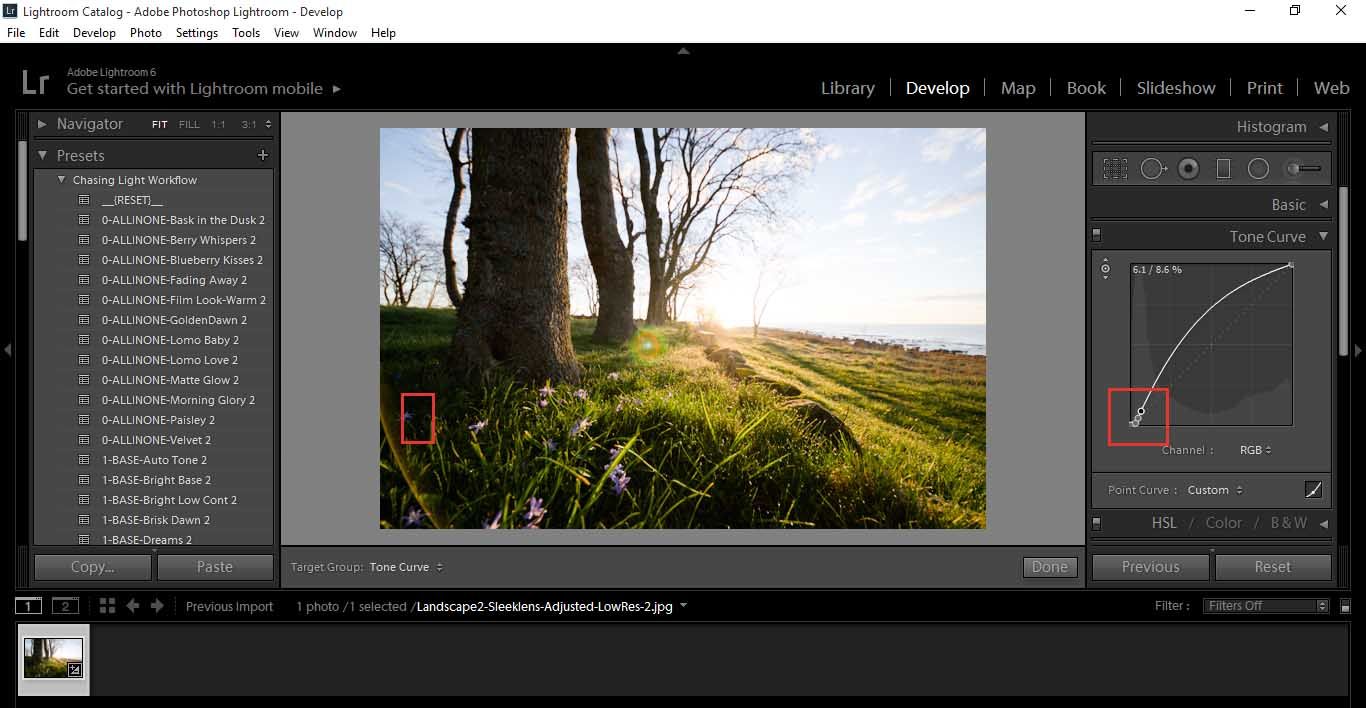
The major advantage of this is right now, is when I did this, it overexposed the sky and the sun, now if I click on the area that contains the sun I can target that and bring it back from the brink of overexposure.
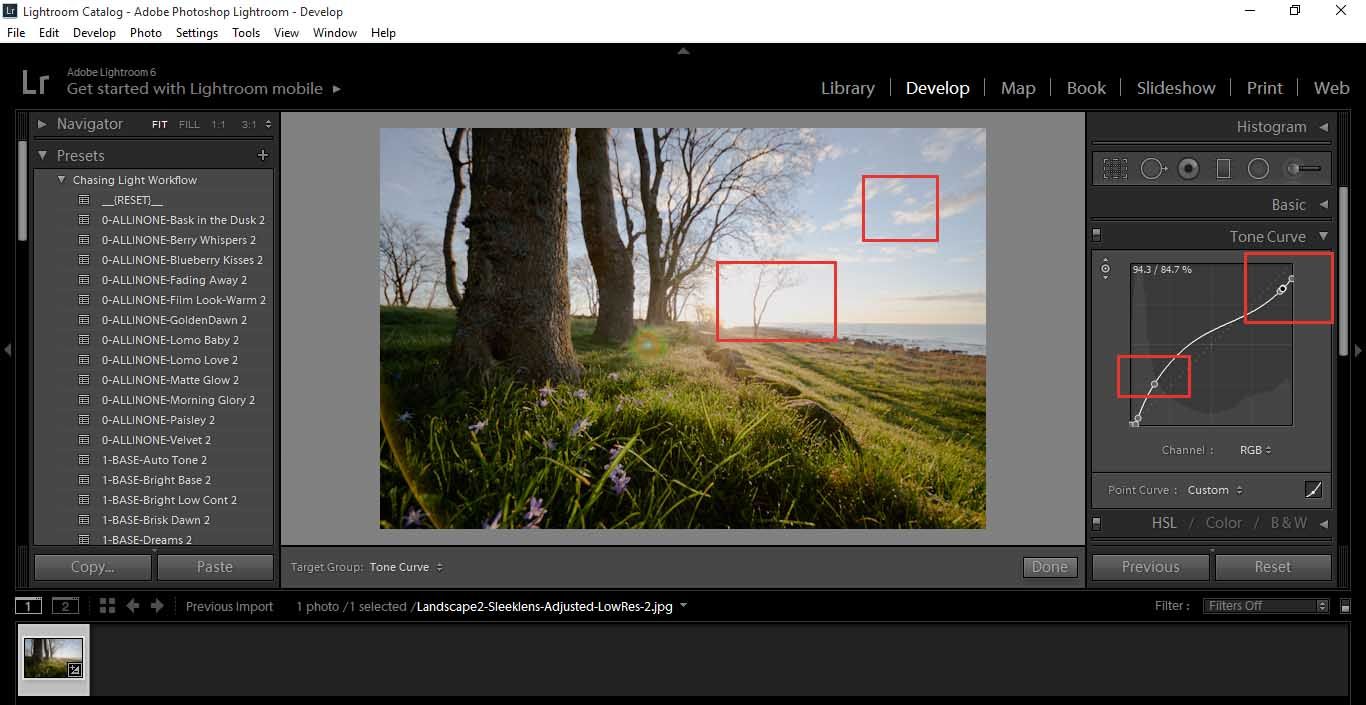
That’s all good for the Tone Curve, we can leave it at that. Lets move on to where our targeting tool really makes a difference and excels.
Lets open up your HSL/Colour/B&W panel and check it out.
In the HSL panel when you click on HSL, you will see other options open up, they are…
Hue, Saturation, Luminance and All

All covers the other three options, I don’t do too much with Hue, but that’s personal choice, Feel free to check out what it does.
For example, I will use Saturation which drains the colour out and adds a grey tone, or if sent the other way, increases the intensity of your colours.
So as before, click on the little “circle with in a circle” icon.
Click on Saturation and then as before, repeat the process just as we did in the Tone Curve bit of this tutorial.
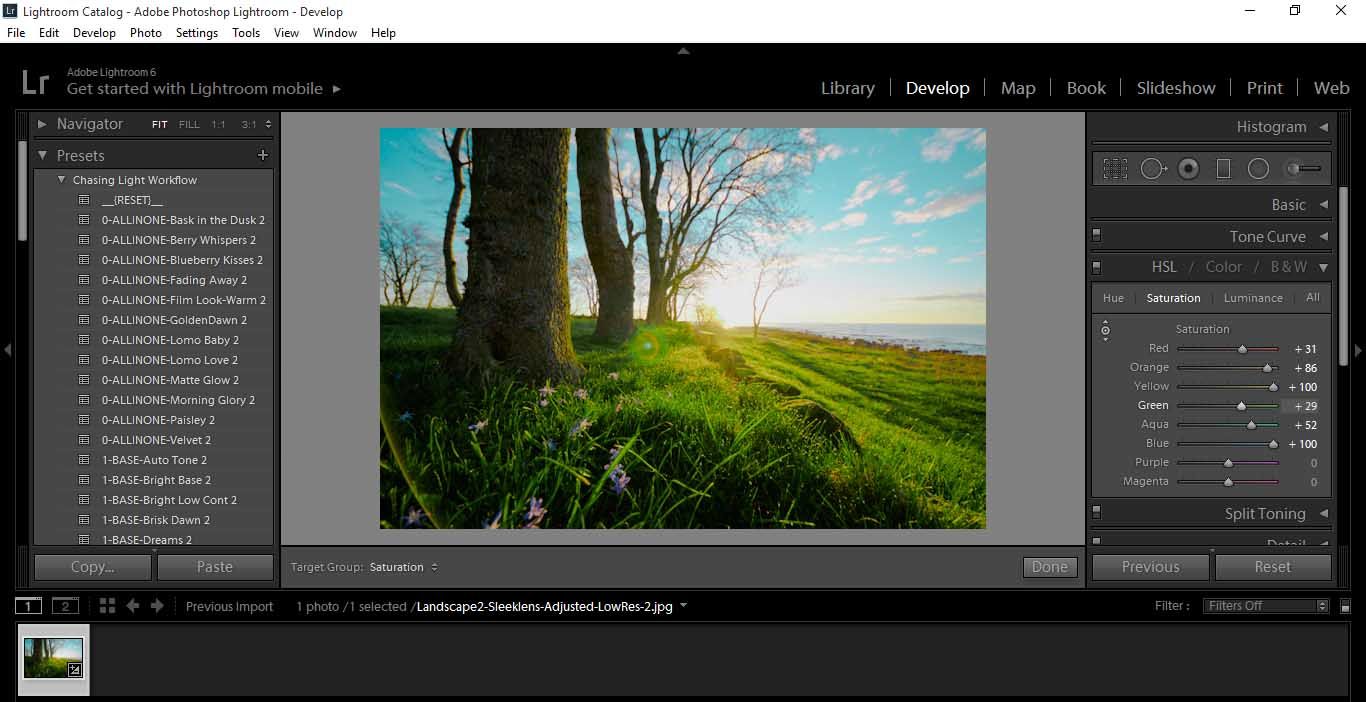
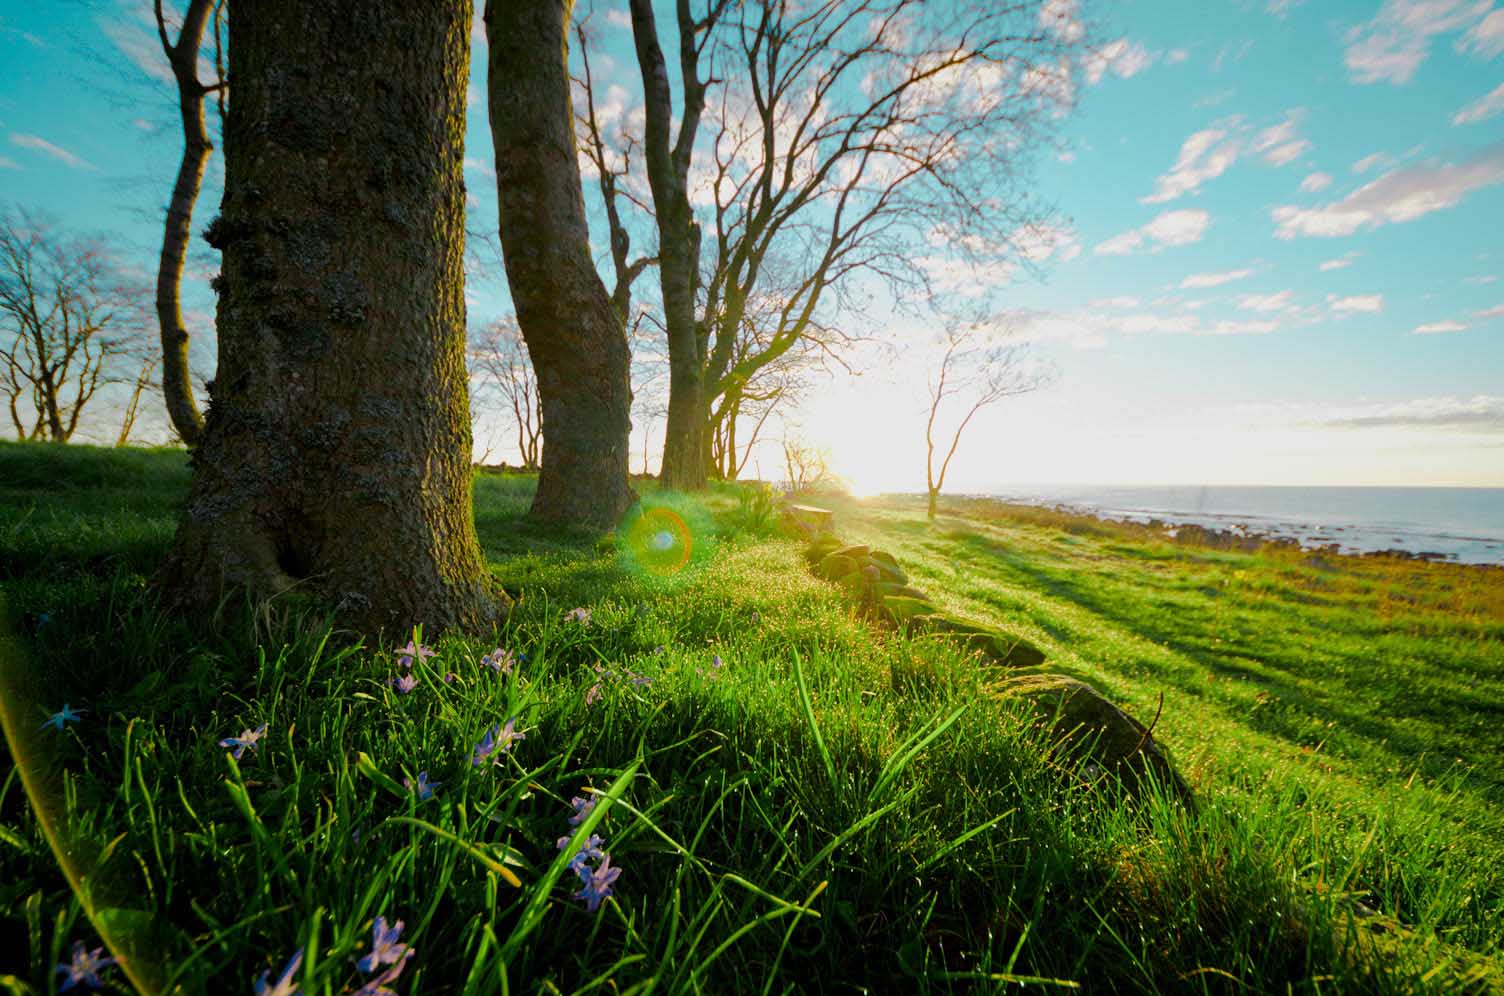
Already, you can see the huge difference that has made to my image, it now looks twice as awesome as it did before.
Next, I added a little Luminance to the grass in my image, to bring the intensity of the sun out with colour. All the same steps are repeated as before. (Click and Drag)
You can see how that has intensified the image just a little more, if you were to slide your mouse the opposite way, it would then darken the image. You could use that to intensify shadows if your other edits have bleed them out a little.
For this we have really only used the HSL part of our Panel. You could use Colour, but it is more or less the same as the HSL, the HSL is better in my opinion as you can see the sliders move back and forth.
Play around, check out what all the options do. With B&W (Black & White) it really will only change the Darkness/Lightness of areas of your image, and you just go through the same processes explained above.
This is how we create a lot of our Presets. The best thing, is that the Presets make this job super quick and are great for Beginners to achieve some good images.
I’ll leave you with the results and talk to you again soon 🙂


Please verify your software version before proceeding.
 I’ve verified my software version


 Facebook
 Google +
Comments (0)
There are no comments yet.