Adding an HDR look to your Black and White Photos in Lightroomwww.sleeklens.com
To start off, you can not create HDR images just with Lightroom, unfortunately. You can however, give your images an HDR look, but you can never get a true HDR effect.
So, in many of our Presets we have loads that give you as close to HDR as you’re going to get without doing actual HDR photography, I think they are effective and look great and I’m going to show you how to create one for yourself.
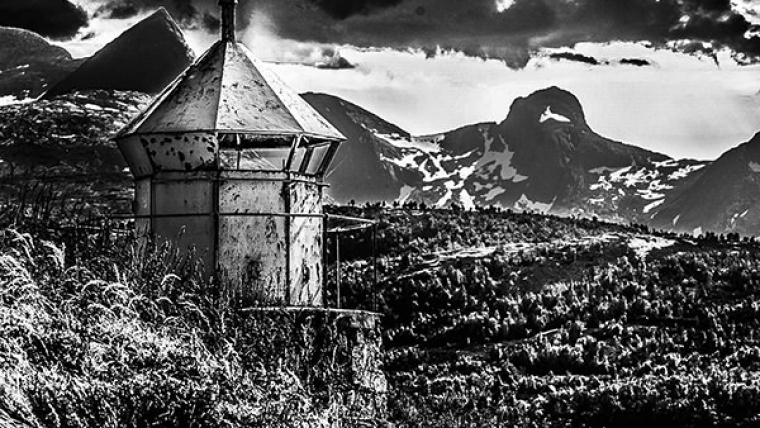
To start with, get any image that you want, I’m going to go with a pretty cool landscape photo with sort of a strange looking building in it with rust, as I think that will come out great in the final result.
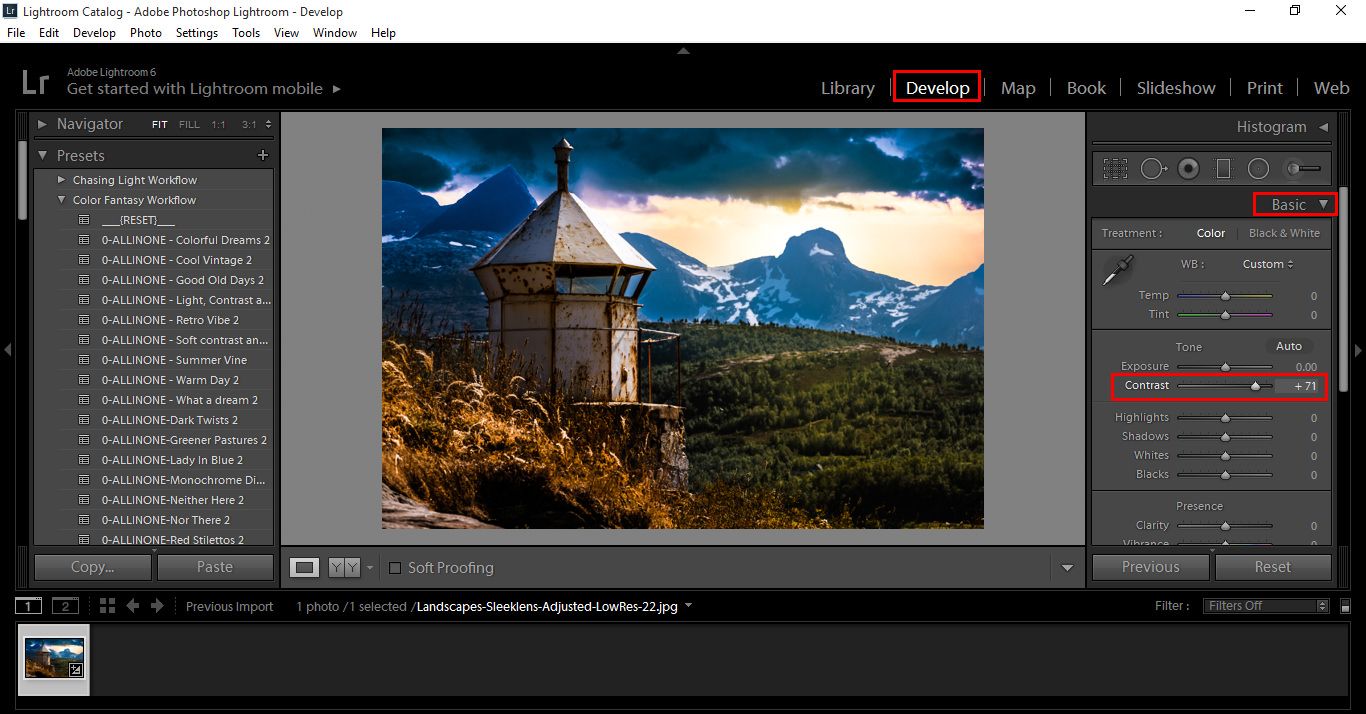
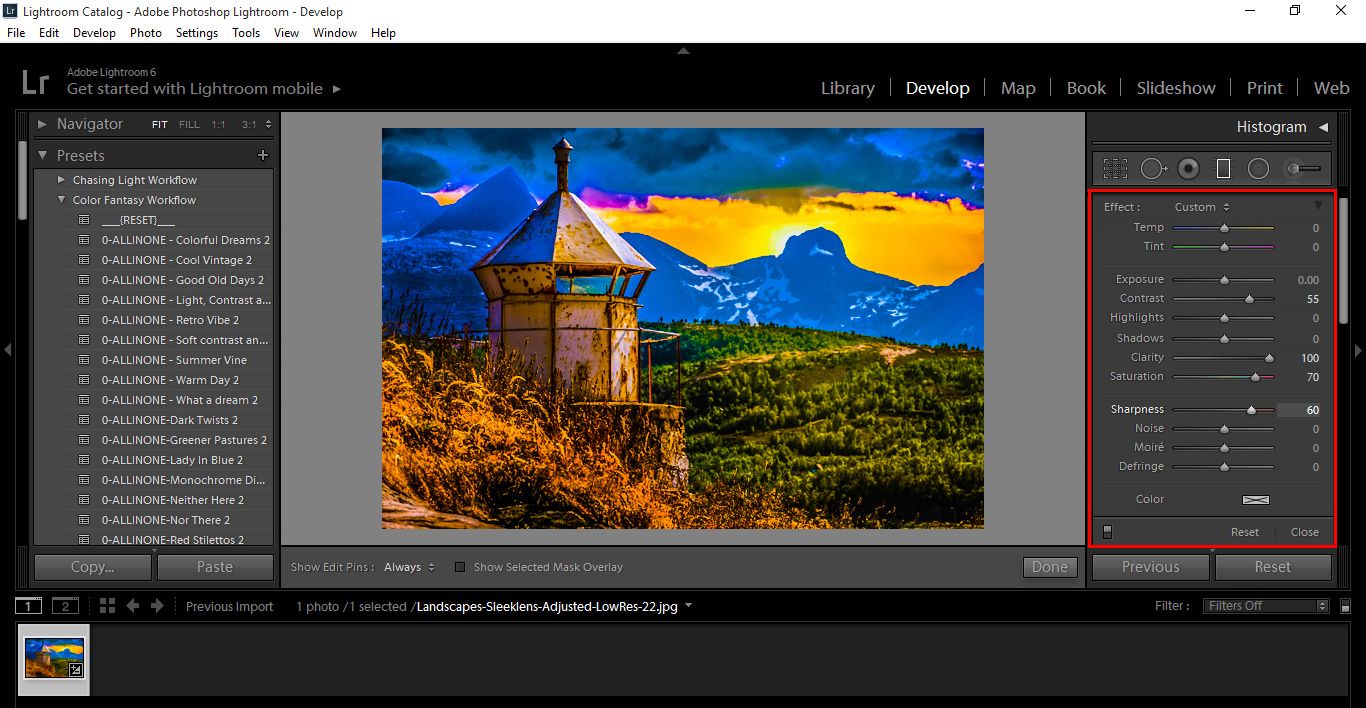
And you want to mess with the Contrast first, you have to do this to really pull those intense colours out as this will help with the HDR effect, don’t hold back either. So, go to you Develop Module then Basic and increase your contrast to just about full.
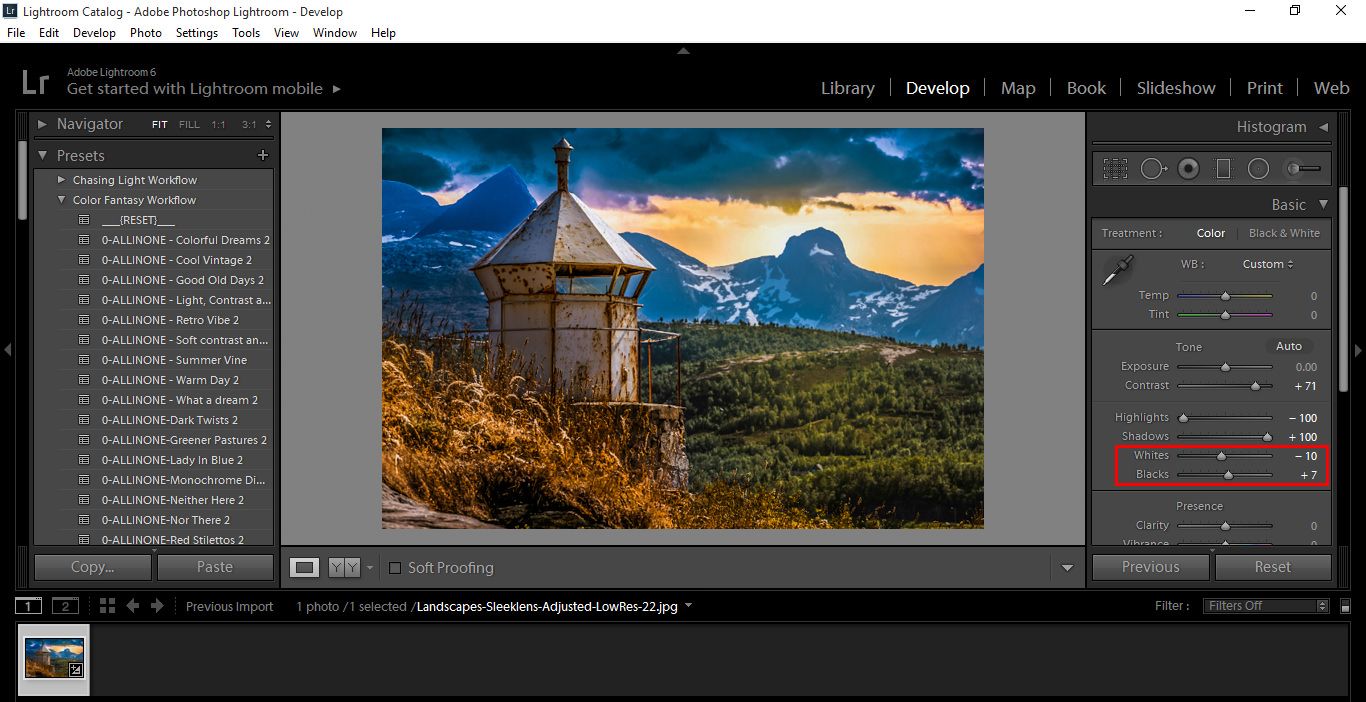
Next, you want to decrease your Highlights to -100 and increase your Shadows to +100 to make your image stand out.
Now you want to adjust the Whites and Blacks, you want to be more subtle with these, so I’d suggest anywhere from around 7 to about 15, this goes for both plus and minus, Whites I minus out and Blacks I increase.
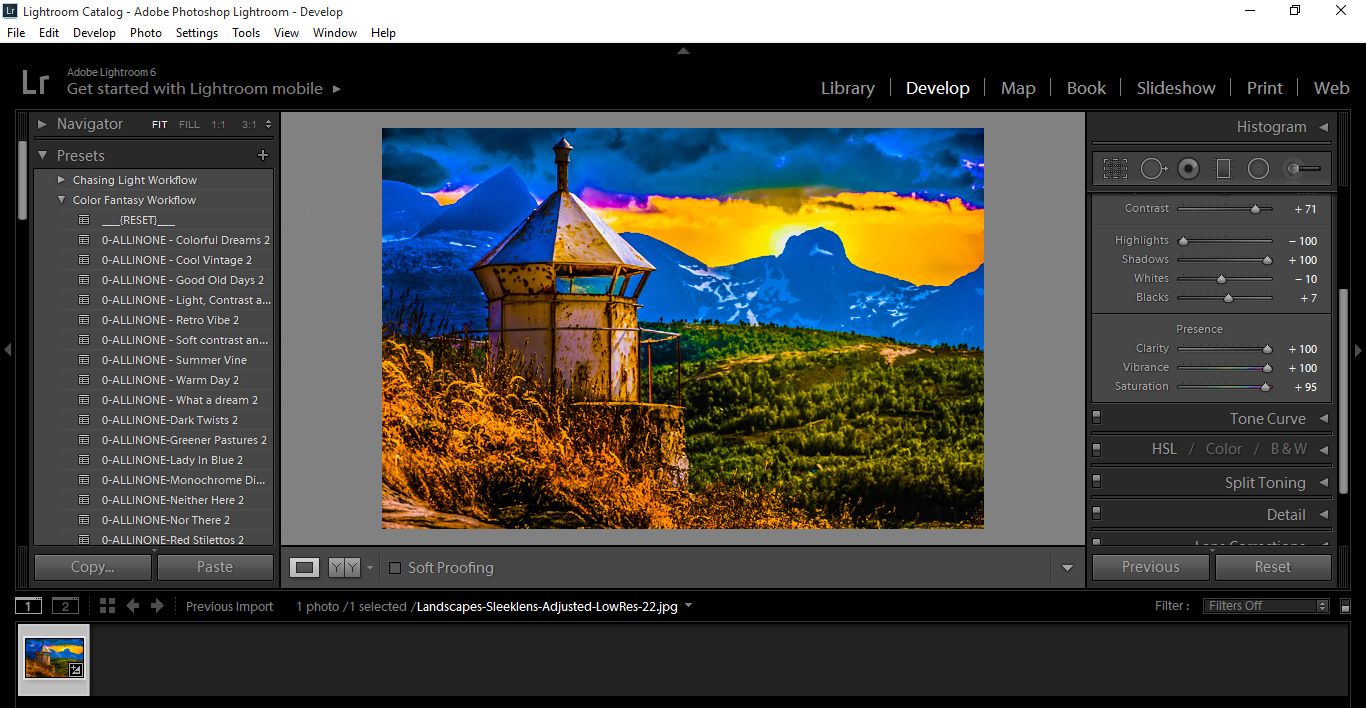
Ok this is when you will start to see that HDR feel to your image, go to Clarity and slide it across to +100.
Do the same with Vibrance, so slide that across to +100 as well and then bring your Saturation to about +95
Now you can see how visible the changes are.
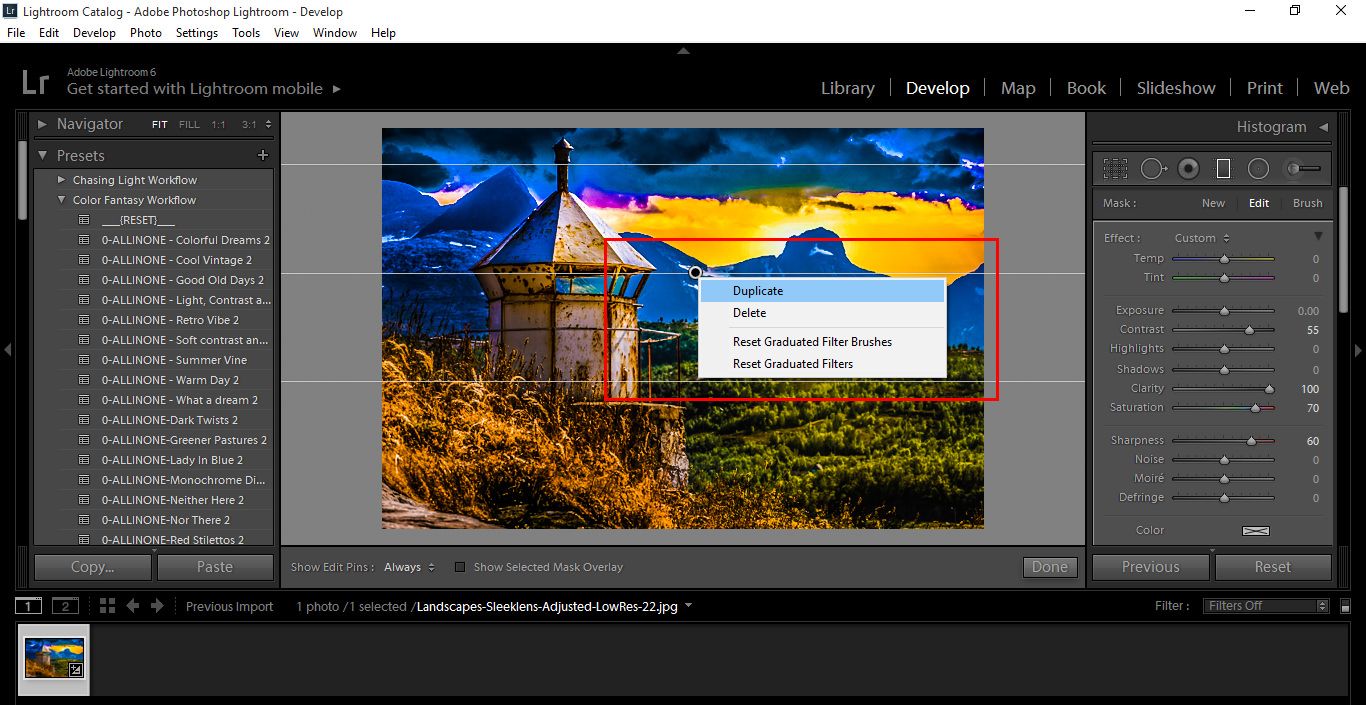
Now we are going to use our GraduatedFilter, so click (M)
And Change the setting to the Following
Contrast +55
Clarity +100
Saturation +70
Sharpness +60
Click on the top of your image about 2/3rds the way up, Hold Shift and Drag your Graduated Filter Down.
Then, Right Click and hit Duplicate and repeat one more time, so you will have 3 Graduated Filters in total.
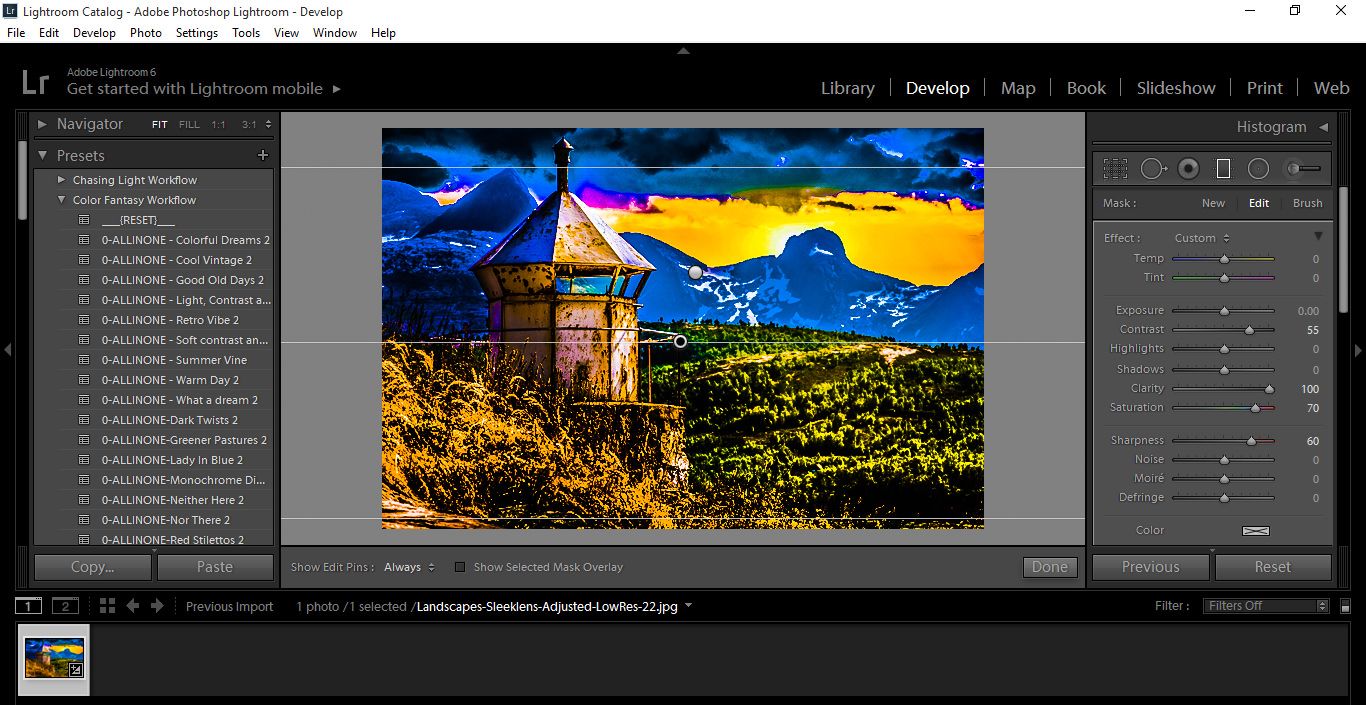
Ok, so now repeat the process, only this time you are going to click and drag from the bottom of your image and remember to Duplicate so you will have 3 Gradients.
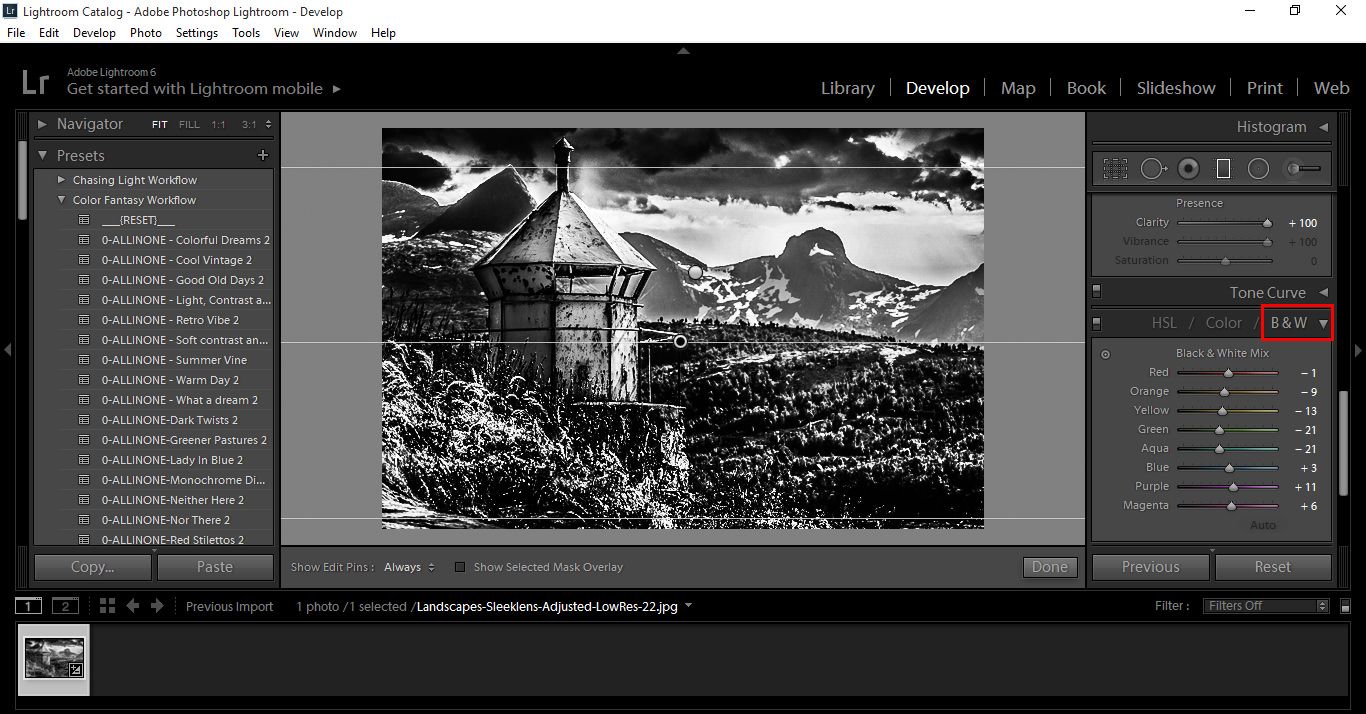
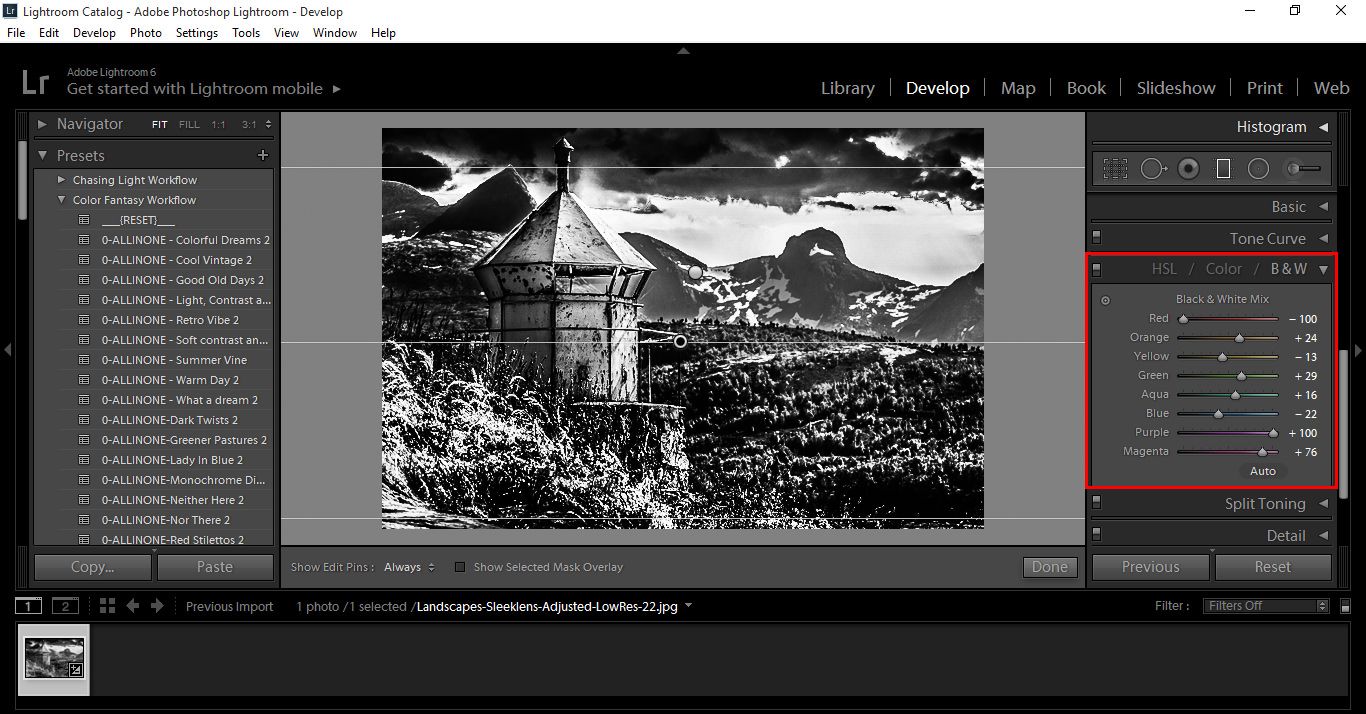
Now on the right, where you see Histogram, scroll down to the area where it says B&W and Click on that to convert your image to Black and White.
With the Black and White Mix Sliders, I suggest playing around with those till you feel like you have the correct mix, what they do is they allow you to adjust the colours even though the image is in Black and White.
And once you are happy with the results save your image.
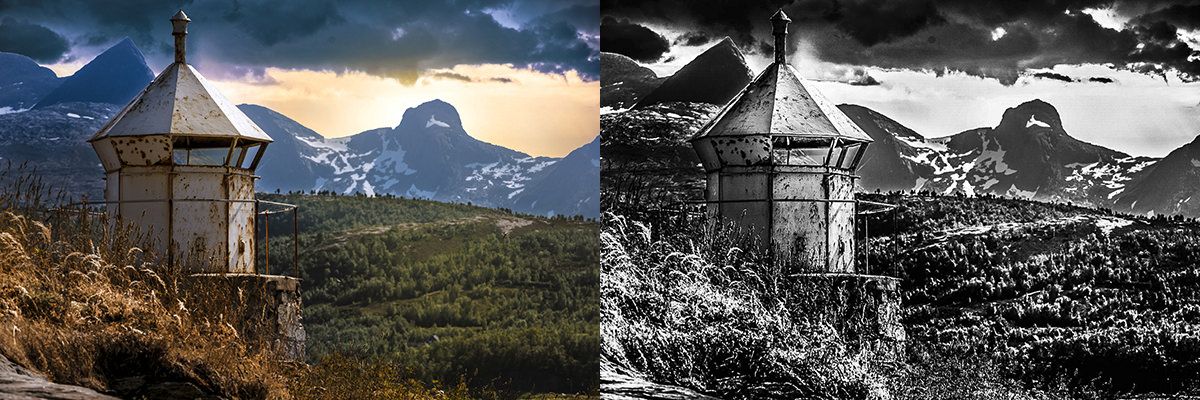
Check out my before and after pictures.
So I’m pretty happy with that result, I think it gives the photo a good HDR feel.
Graduated from college in 2002 with a degree in Art & Design, I started exploring my way in Graphic Design and Professional Post Production. Full-time freelancer since 2011.


 Facebook
 Google +
Comments (0)
There are no comments yet.