Daylight long exposure – Using ND filterswww.sleeklens.com
In a recent post, we talked about getting things right when playing with long exposure photography. Today I want to focus on how to get the nice effects that come with long exposure without having to wait until the Sun is already below the horizon. In this article I will be showing you how to get effects like moving clouds or soft-looking water during the day, by means of a specific type of filter called Neutral Density (ND).
Light as we perceive it is formed by a continuum of wavelengths that go from the red to the violet colors, as demonstrated by Isaac Newton back in 1666. If we filter out only one wavelength, we would be left with a picture lacking that specific color. ND filters are designed to equally reduce the intensity of all the wavelengths leaving us, in theory, with a darker version of the original image, without any kind of color cast.
I say ‘in theory’ because so far I haven’t seen any ND filter that does not alter the white balance of the final image. It is true that I might not own the best filter in market, but many people reading this will probably not as well. In any case, the color cast introduced by ND filters is easily removable during post-processing, so don’t get discouraged.
Types of ND filters
ND filters are classified according to the amount of light they block. There are two main scales used and you might find either of them when buying one. One refers directly to the amount of light being blocked (or the inverse of the amount of light that is allowed to reach the sensor of the camera). The other refers to the f-stop numbers that one would have to compensate for in order to get the same final exposure. These two scales are linearly related, so which one will you use is basically a matter of personal taste.
Apart from the classification just mentioned, there are other types of ND filters that differ in nature and have other uses, the most common one being the graduated ND, which is basically what the name says. The ND effect is gradually increased (or decrease, depending on what you choose) in one direction. These filters are usually square and are normally used to correctly expose scenes where the sky is much brighter than the ground (high dynamic range). These were very popular in the times of film photography but nowadays, with the help of post-processing, it is fairly straightforward to deal with this problem, so it is not so common to see someone using on of these anymore.
When and how to use them
As with anything in photography, this is a subjective matter. The obvious answer is: whenever you want to add dynamism to your images. However, there needs to be a dynamic element in order to capture it. For instance, if you are on a cloudless day, no matter how hard you try, you will not get moving clouds in your picture, unless you add them with Photoshop afterwards! So try to think what can be captured moving relatively faster than your subject: clouds, water, passing cars/people, smoke from chimneys, etc.
In terms of how to use them, as with any other filter, you basically stack it in front of your lens and that’s pretty much it. There are two types of filters: screw-on and square filters. Screw-on filters are more comfortable to use and usually produce better images since there is no possibility of reflections coming in from the back of the filter. They are, however, a bit more difficult to deal with when stacking several filters on top of each other.
Another important thing to keep in mind, especially with really dark NDs (e.g. ND1000) is that once you screw it on your lens you will not be able to see anything through the viewfinder. If the scene is not dark yet, you will be able to focus using the Live View mode of your camera but if it is already dark, it will be impossible to focus with the filter on so be prepared to focus before screwing the filter on. For this, you have to be very careful when attaching the filter so that you don’t move the focus ring (unless you are using the newer lenses with the focus ring moved back). Square filters are easier in this sense (it is usually easier to keep the focus while stacking the filters on the holder).
Now that you’ve attached the filter to the lens, you are all set up to take your photo. Apart from what I already said, using a tripod is a must and, as I mentioned in the long exposure post, using the time delay function of your camera (2 s should be enough) is always a good idea to avoid any shake of the camera while taking the photo.
Post-processing
As I mentioned before, most of the times when using ND filters you will notice a color cast towards the red when you open the files on Lightroom or Photoshop. This effect, more prominent for darker filters, is easily corrected if you shoot RAW (always shoot RAW!).
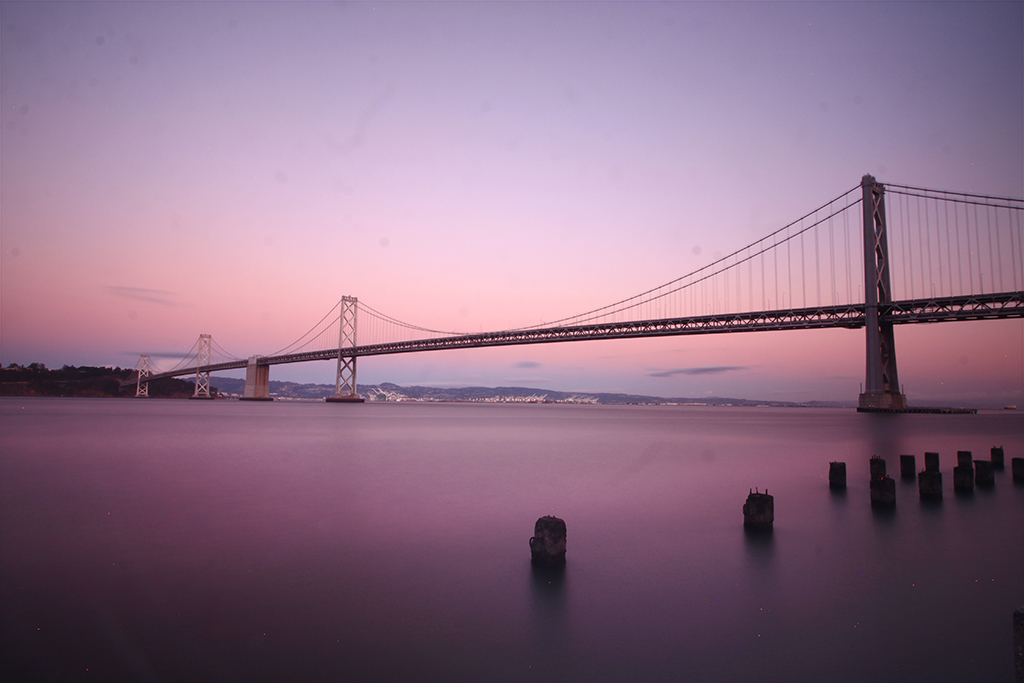
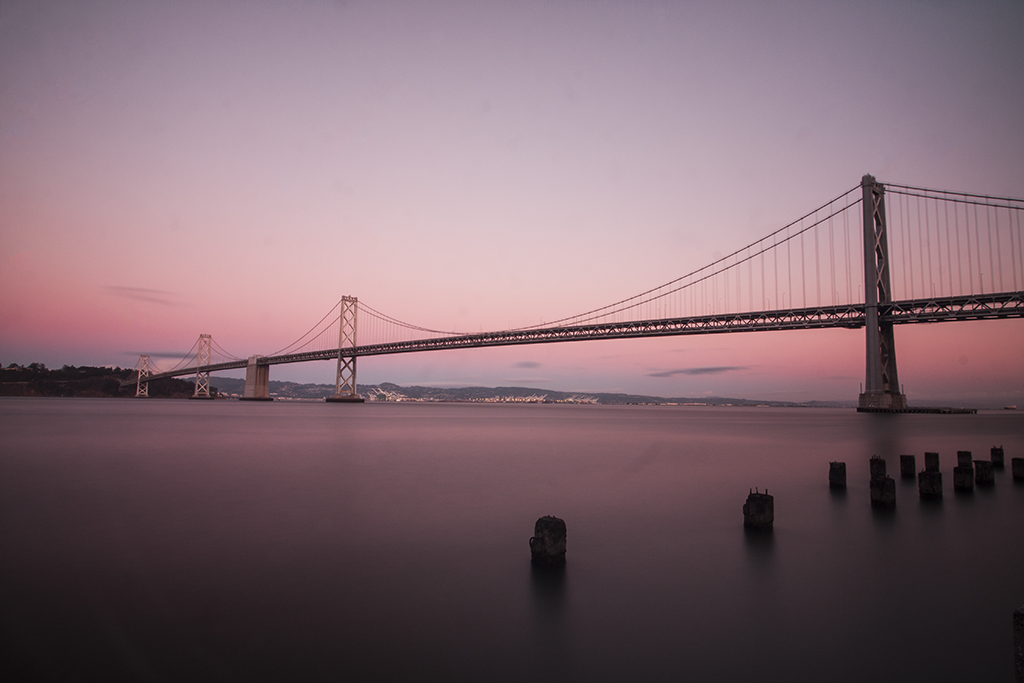
Take, for instance, this image of the Bay Area bridge in San Francisco. The photo was taken at sunset with an ND1000 filter to get a smooth effect on the water.
Right from the beginning, it is evident that a color cast is present, especially on the water. That is where the purple color comes from. Also, if you look more closely, this photo also shows some other problems that arise with the use of ND filters. Since you are exposing for a long time (180 s for this one), some of the problems of your camera that are usually not noticeable will now be. This includes dust in the lens or sensor (small dark spots visible in the sky and the water) as well as damaged pixels in the sensor (visible as very small white or red points visible here on the bottom right corner). Removing them is fairly easy in Photoshop, but we leave that for a future post. For now, let’s take a look at how to get rid of the color cast.
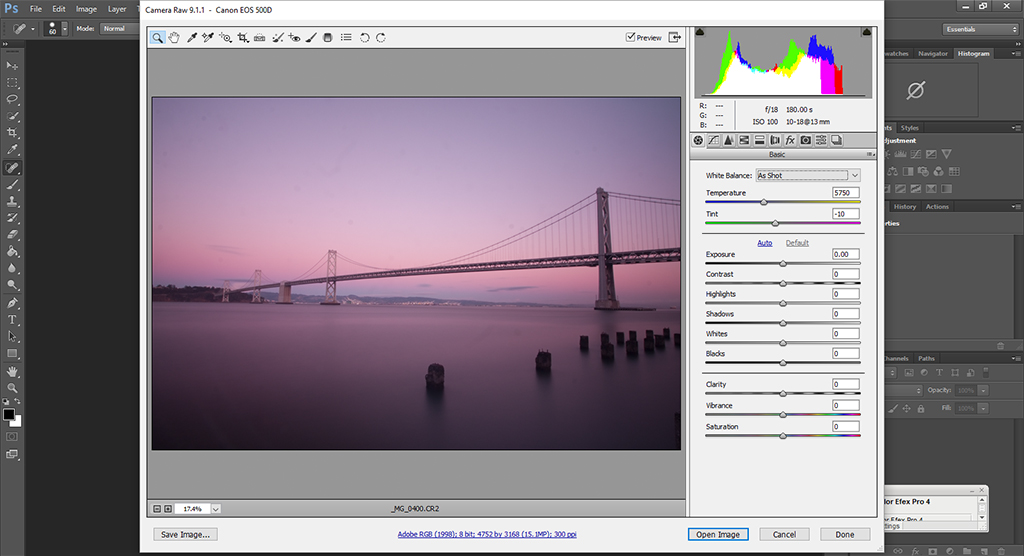
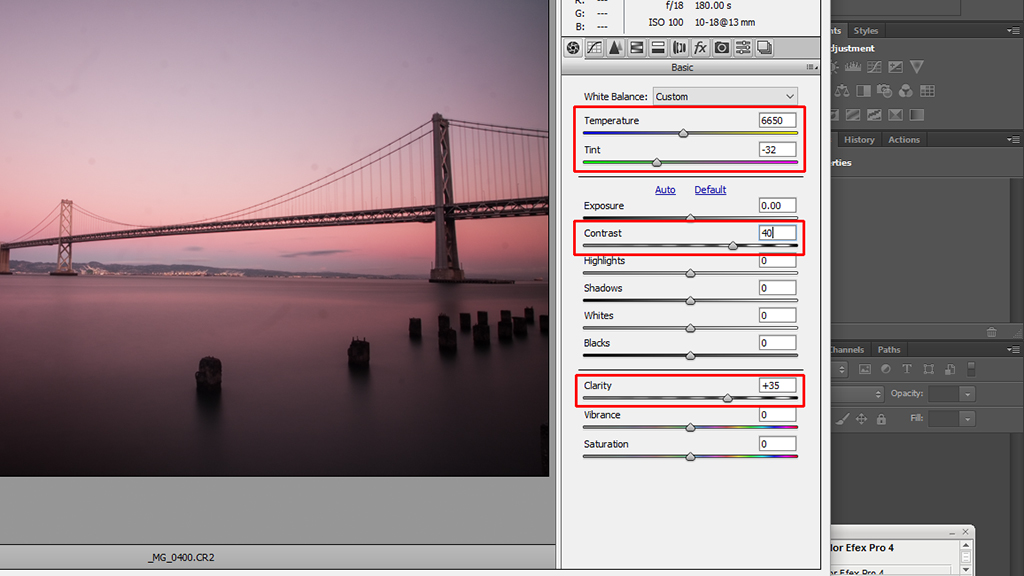
This is also a very straightforward task and the only thing you need to do is open your RAW file in Photoshop.
And this is where you see one of the big advantages of shooting RAW. By playing with the ‘Temperature’ and ‘Tint’ sliders, you will be able to get a more natural look of your scene. That said, sometimes the color cast introduced by the ND filters give a weird but still appealing look so, as usual, it is up to you how much you want to correct for it. What I did for this particular image was to increase the temperature, move the tint slider towards the green (to get rid of the purple on the water) and I additionally increased the contrast and the clarity. This last one provides an extra increase in small scale contrast, something like adding structure to the image.
After doing this and removing the dark and light spots mentioned before, I have my final image. This one has no further post-processing, but you can always enhance different aspects with the versatile tools that Lightroom and Photoshop provide.
And that’s it. If you enjoy long exposure photography, I strongly suggest you give this a try. The simple addition of an ND filter will give your images a completely different mood and I am sure you will enjoy the whole process. If you have any question, please contact me and I will do my best to help you.
Leonardo Regoli is a self-taught amateur photographer currently based in Ann Harbor, Michigan (USA). His main interests are travel and landscape photography.


 Facebook
 Google +
Comments (0)
There are no comments yet.