We still have over a month of summer left, which means there’s still time to go on exciting adventures, soak up the summer sun with your friends, and make the most of your free time. One of the best summer activities is going on a camping trip with your loved ones. This opportunity is ideal for bonding, spending quality time away from technology, and improving your photography skills.
Camping trips offer breathtaking surroundings and photogenic subjects. They’re great for photographers who want to experiment with a lot of different genres without worrying about the results. However, due to the sheer amount of things you can photograph, these trips can be a little overwhelming.
To save you from unnecessary stress, here is a list of photo ideas that will help you make the most of your travels.
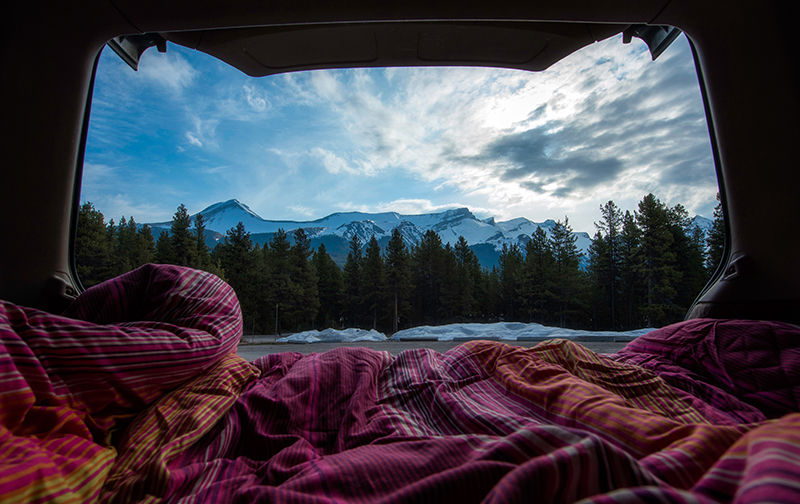
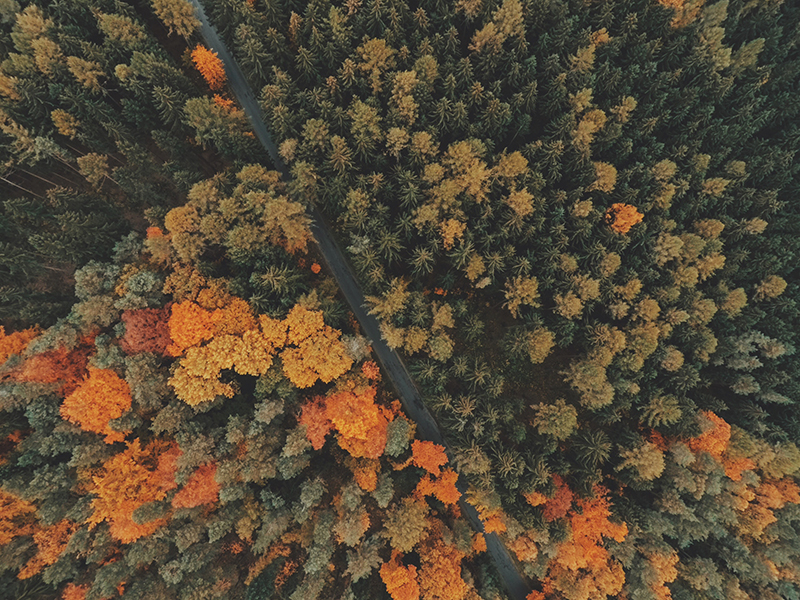
Wide Shots Featuring Your Surroundings – Landscape Photography
Give your future self a clear idea of where you were during your trip. Photograph your surroundings using a wide-angle lens. If you don’t have one, take several photos of one location and stitch them in an editing program; this will create a very eye-catching panorama.
Wide shots are perfect for capturing the general atmosphere of a location. They also look good in portfolios, on social media, and in art galleries. You might even end up selling your landscape photos to some very eager art appreciators. 🙂
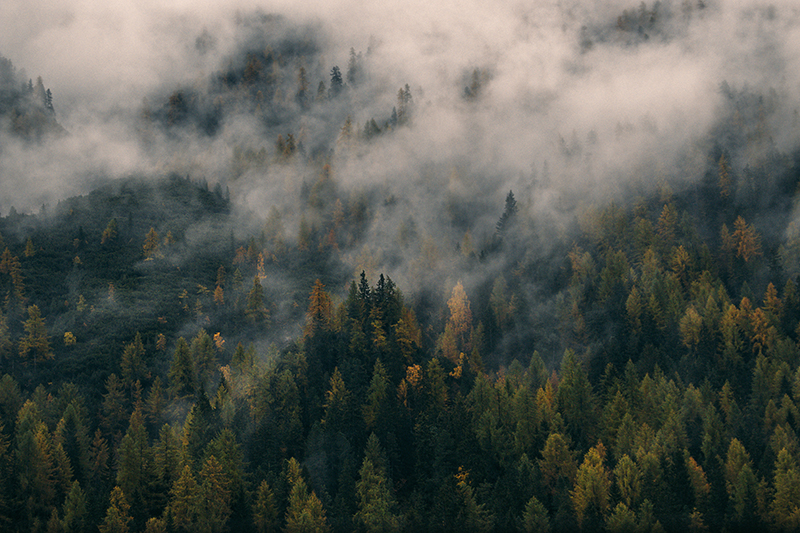
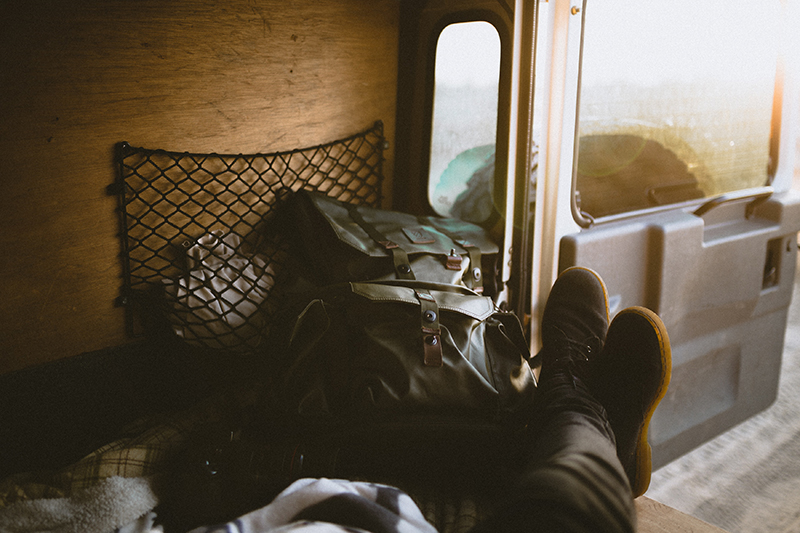
Details – Macro Photography/Diptychs
As appealing as details are, they’re easy to forget. This is why it’s very important that you photograph as many of them as you can. During your trip, this can be the mug you’re using, the food you’re eating, or the leaves on the tree that’s right above your sleeping bag. Every moment counts.
You might not use detailed snapshots in your portfolio, but you’ll definitely use them to go back in time to a very refreshing and fulfilling adventure. If you want to be extra creative, use these details to create two-photo collages called diptychs (pictured above).
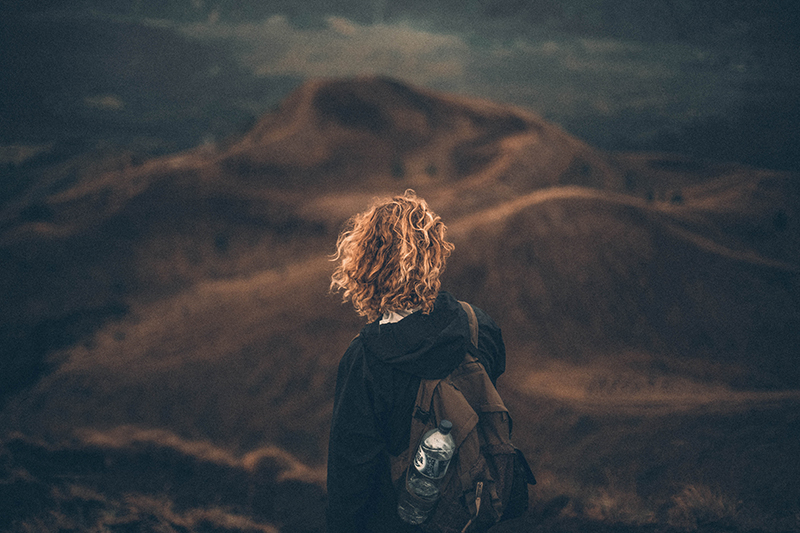
Posed and Candid Photos – Portrait Photography
A camping trip is nothing without friends, so make sure you include them in your best shots! Make sure you take a combination of posed and candid portraits. Posed photos are great for social media and even your own portfolio. Candid photos, on the other hand, can be proudly added to family albums and cherished for years to come.
Even though drone photos are very, very popular, don’t let that stop you from appreciating your own surroundings from above. By photographing your experience from a unique angle, you’ll add to your rich collection of landscapes, details, and portraits. These visual memories are bound to make your trip unforgettable. (And if you really want to take it to the next level, film your journey!)
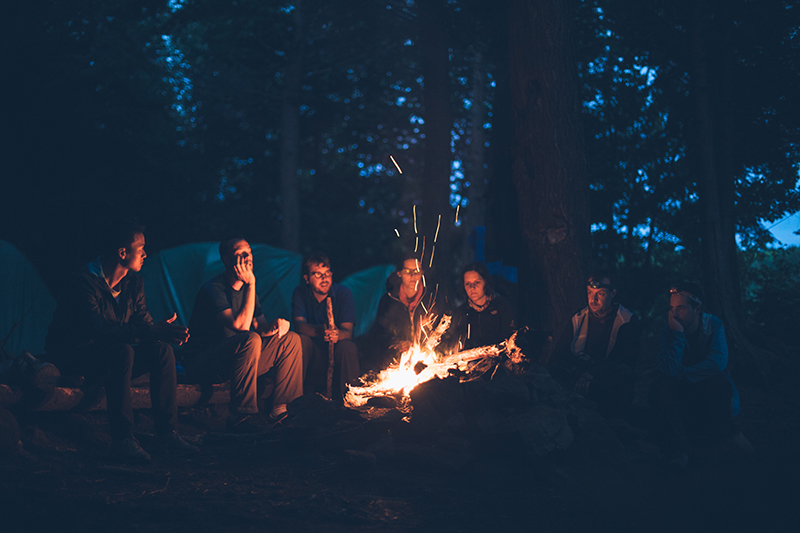
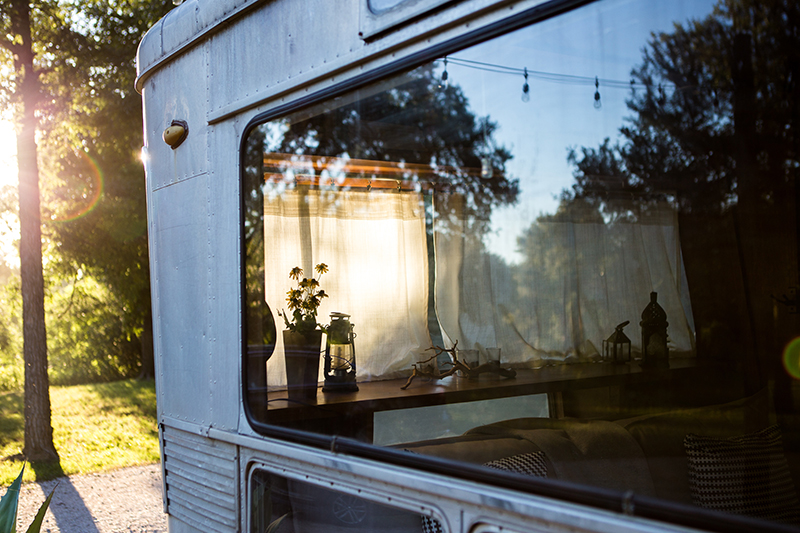
Different Times of Day
To really improve your photography skills, make sure you take photos at different times of the day. Daylight will help you take bright photos of your friends and surroundings; the golden hour will provide you with the perfect light for all kinds of photos, and the evening will give you the chance to sharpen your nighttime photography skills.
I hope the ideas above help you make the most of your photography skills and your camping trip. I’m certain that by the time it’s over, you’ll be significantly more experienced as an artist.
Regardless of how much you love the world of photography, though, make sure you live in the moment, too. Trips are meant to be relaxing, fun, and eye-opening. As soon as you start to feel stressed, put everything down and just be there for yourself and your friends.
Now let’s go out and make some amazing memories. 🙂
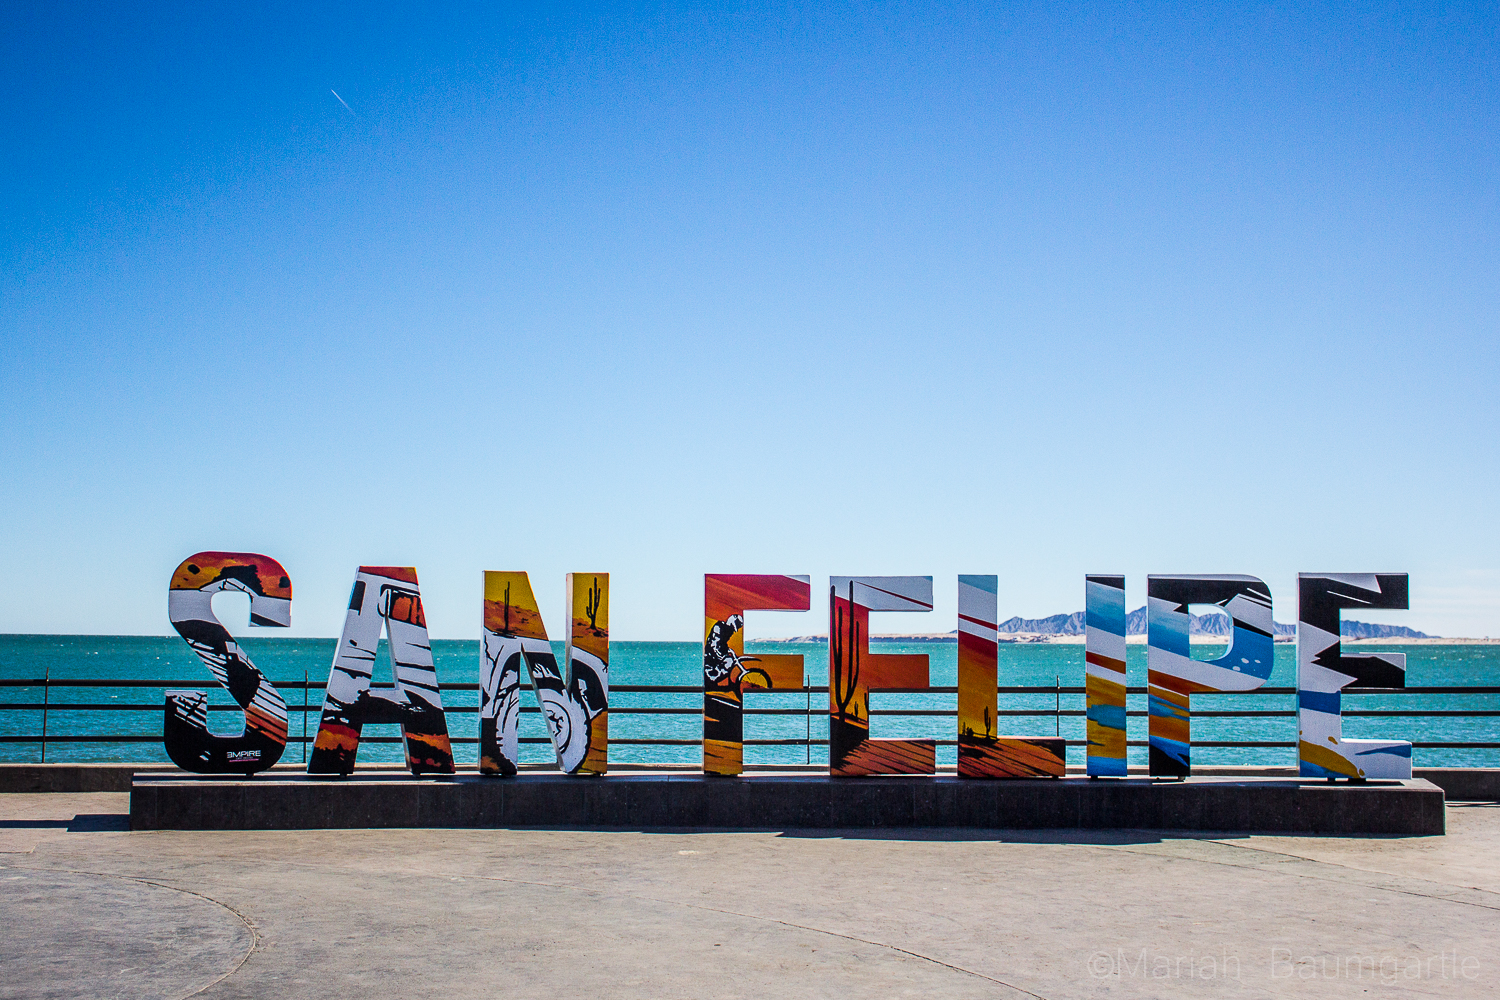
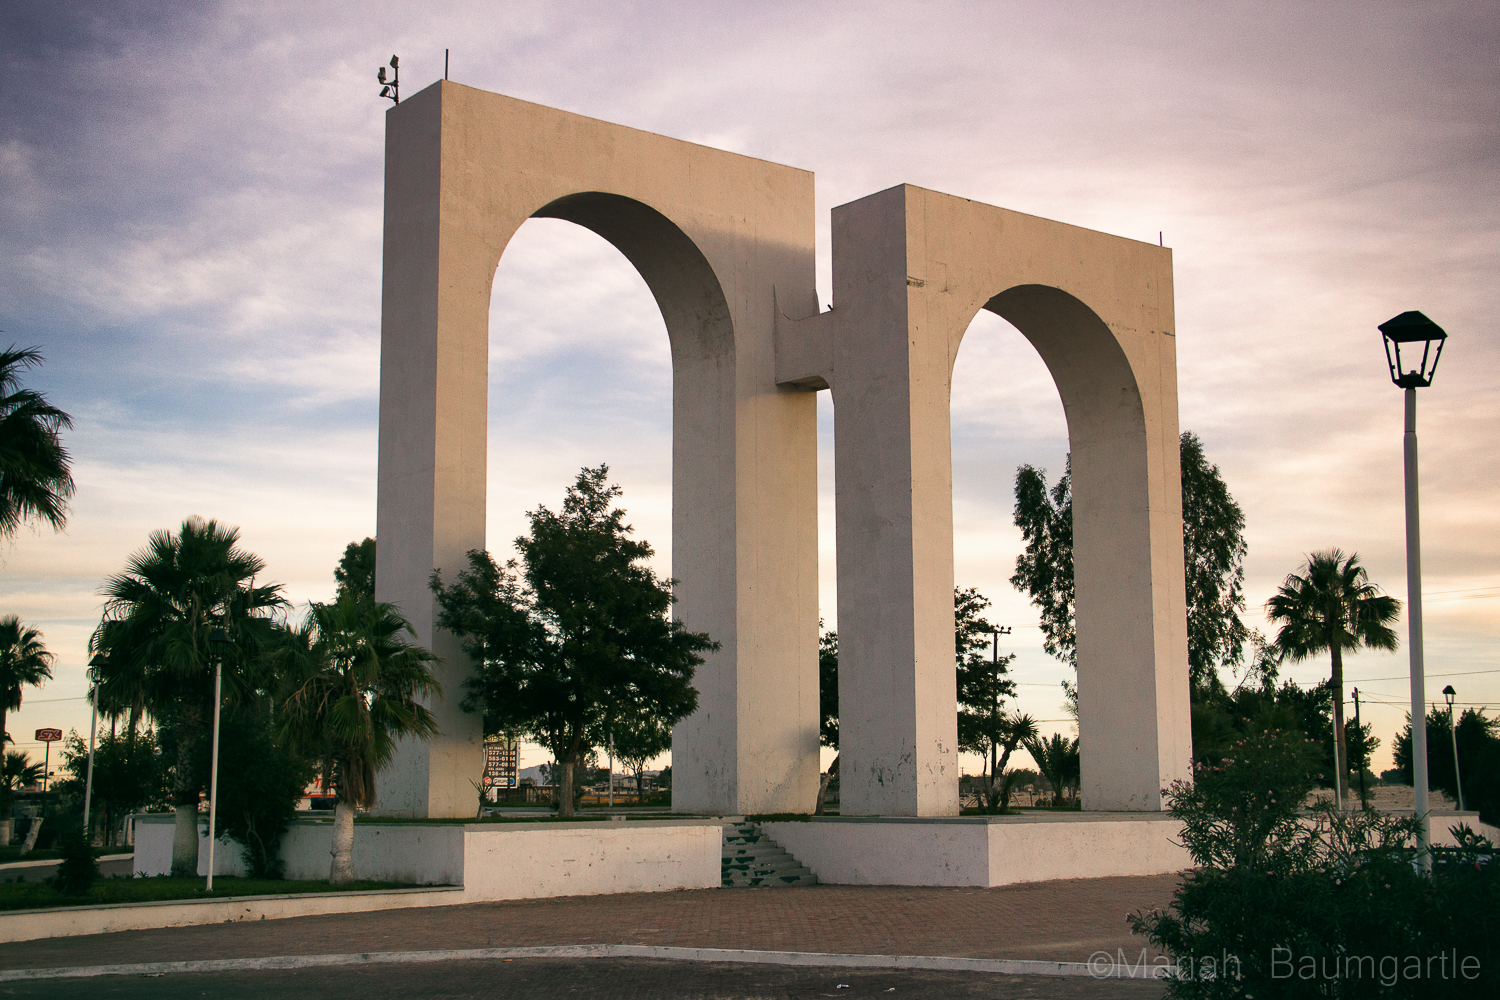
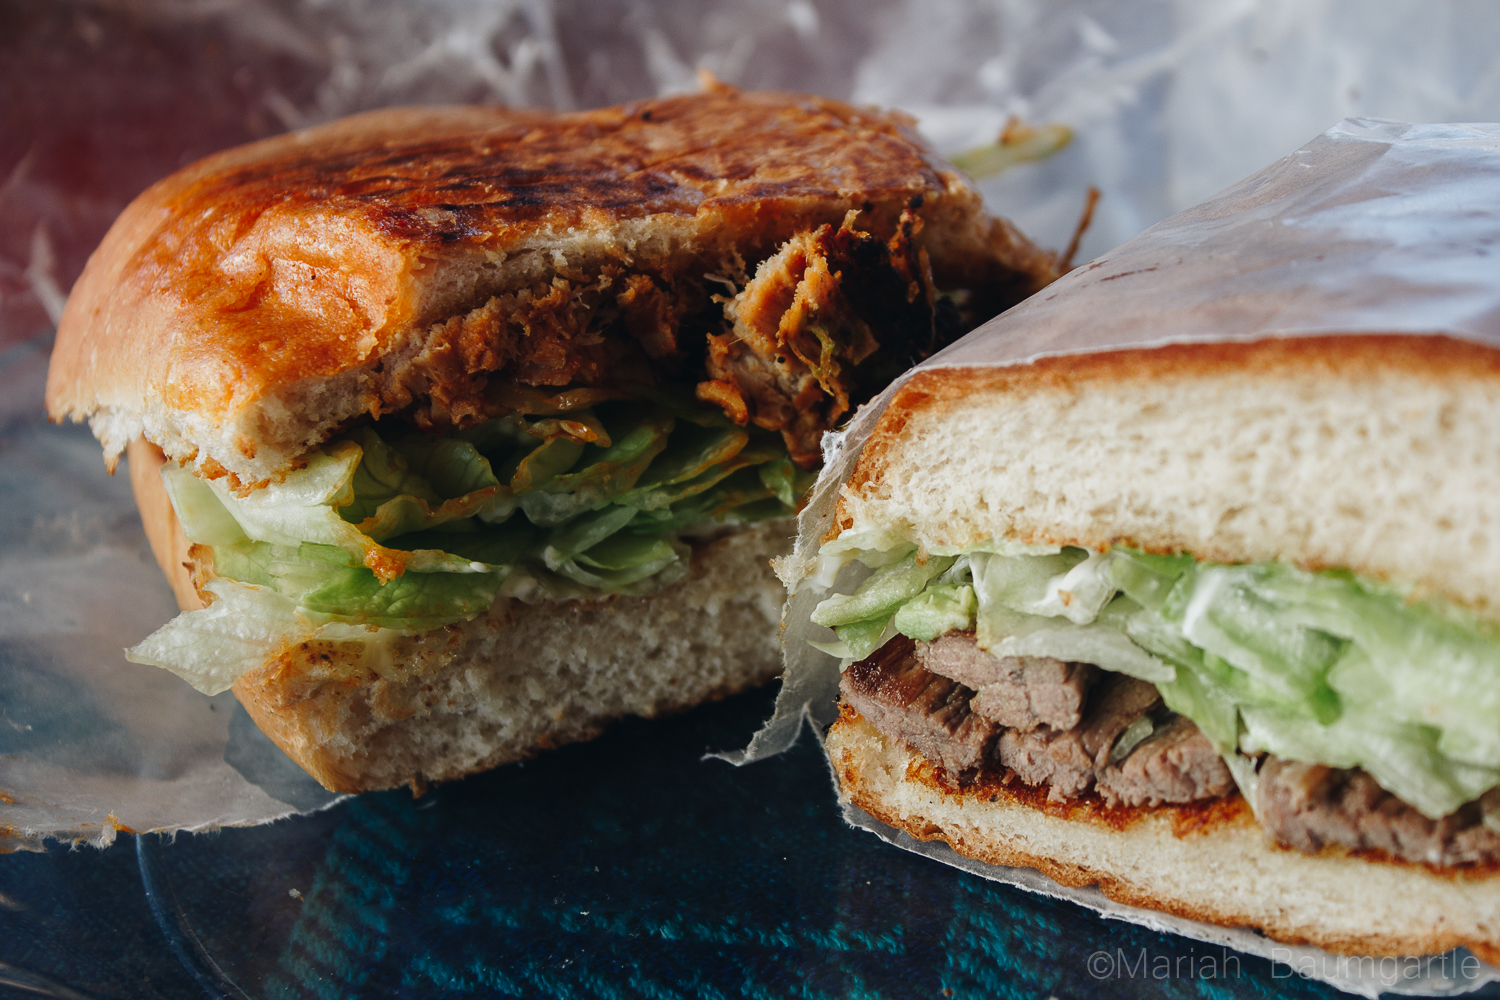
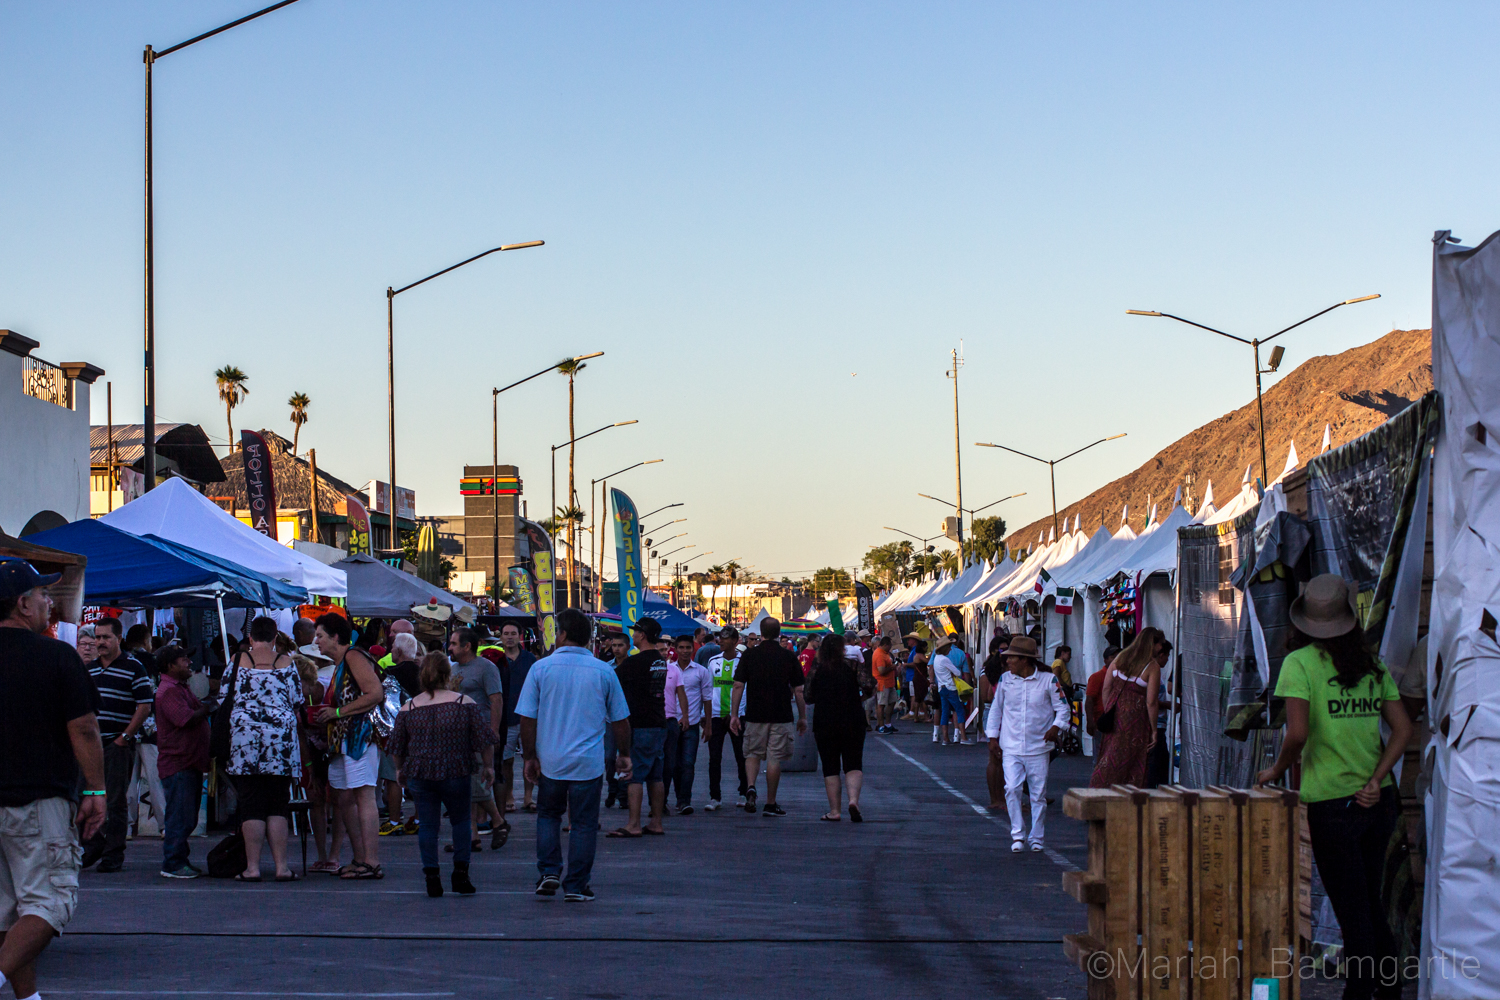
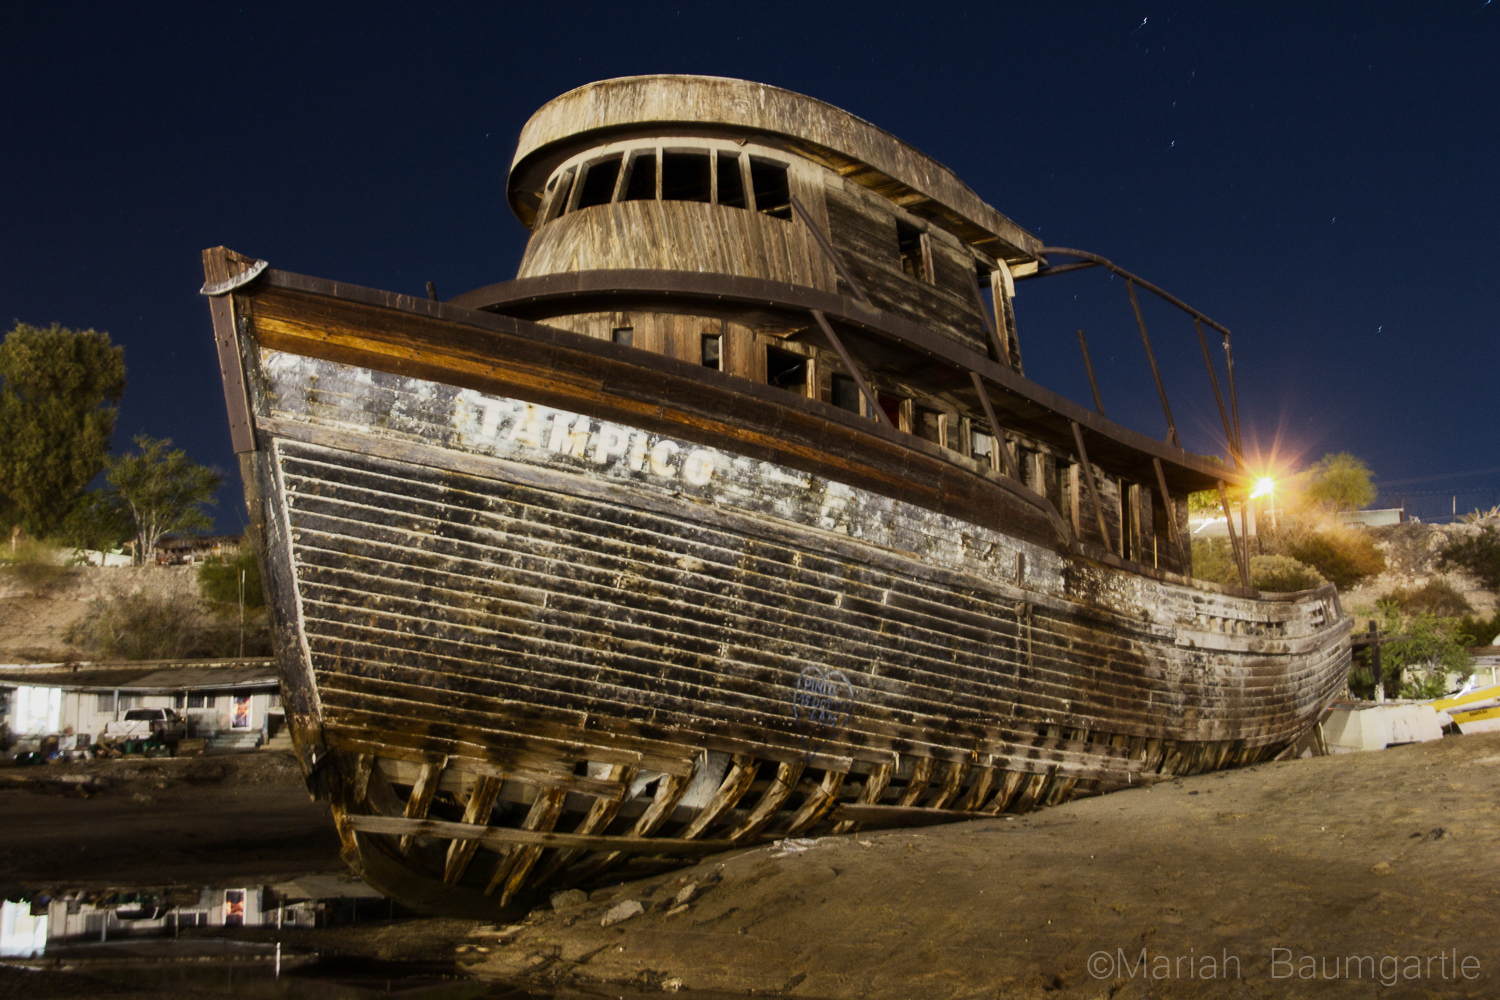
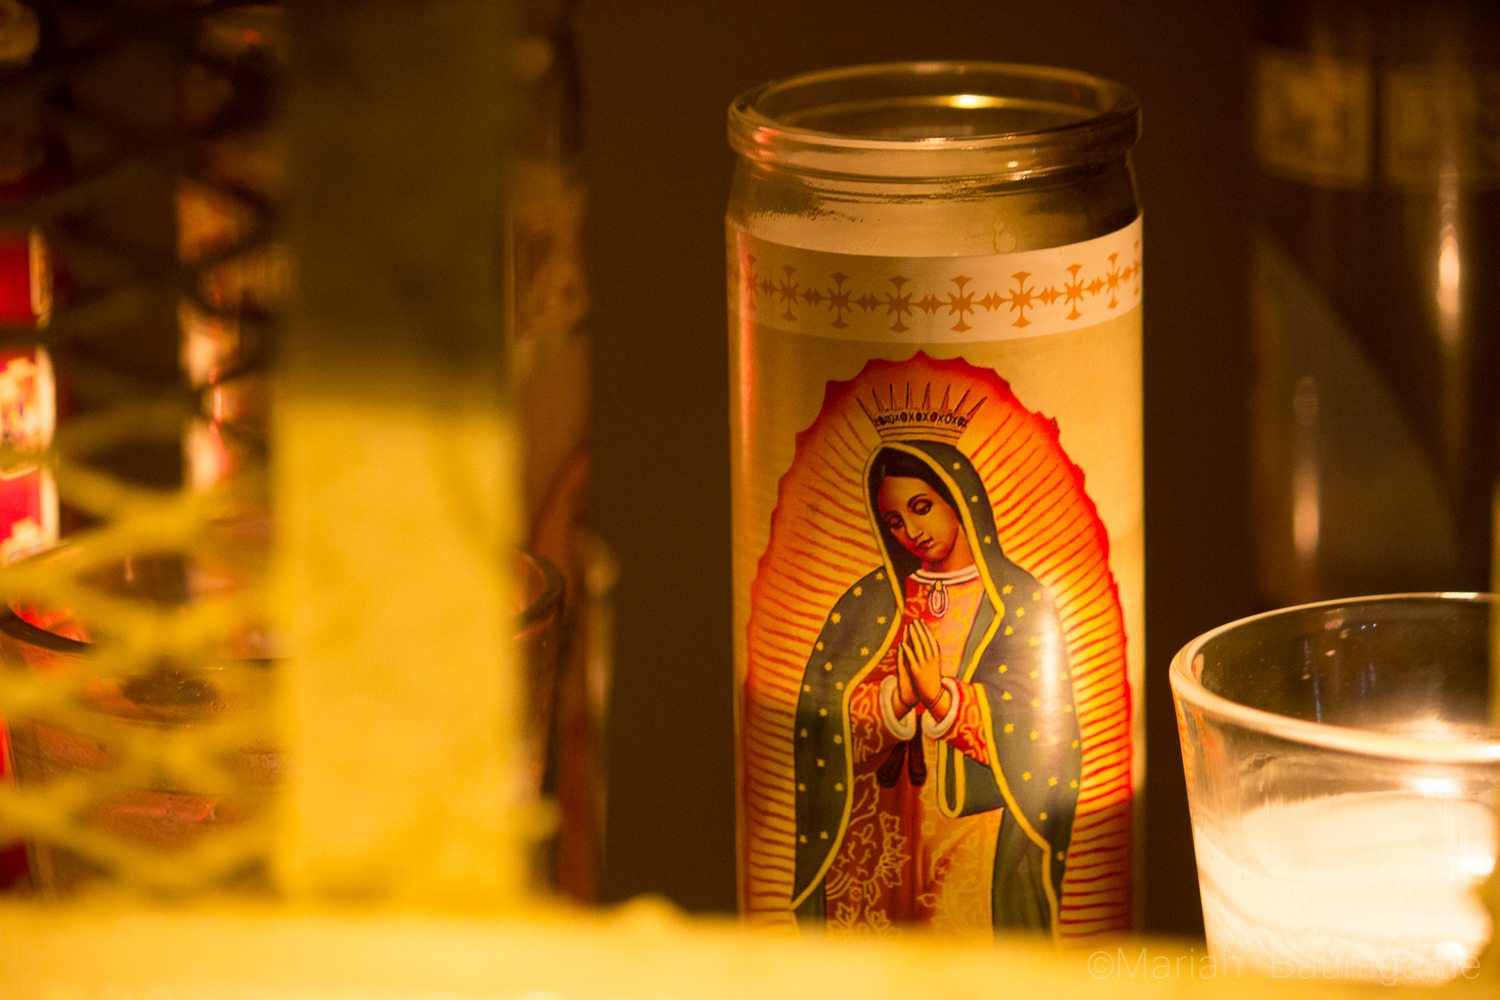
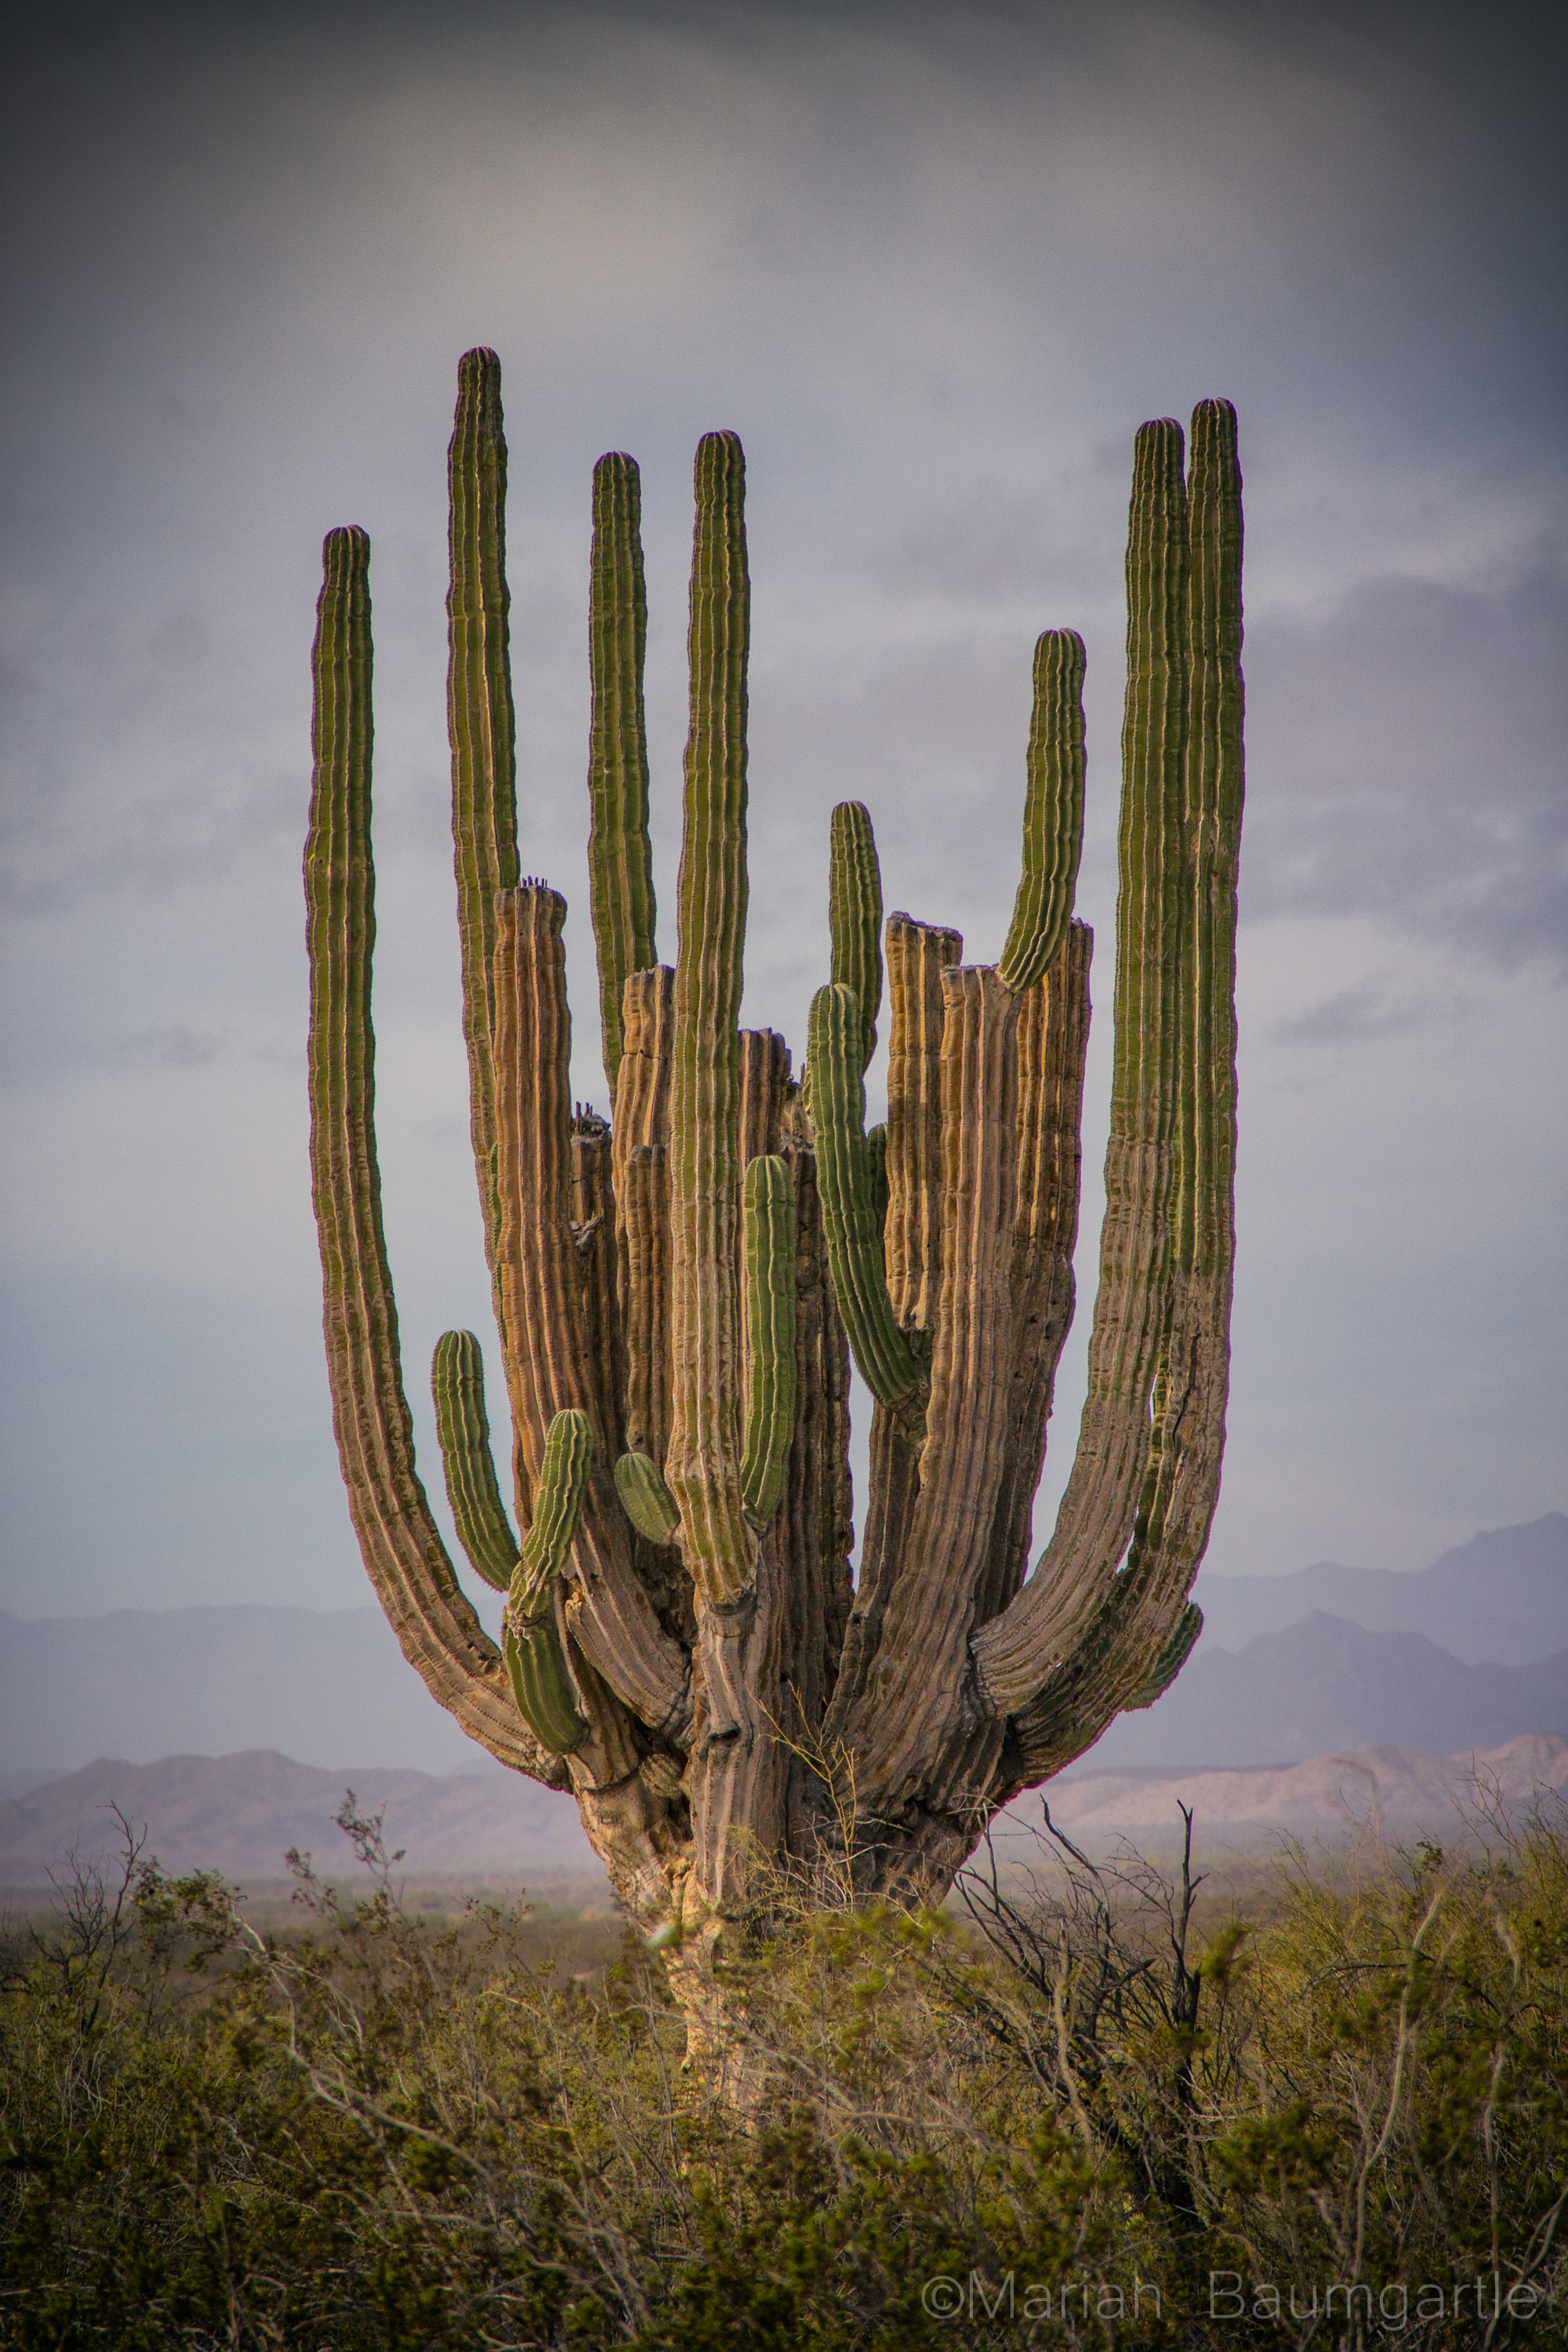
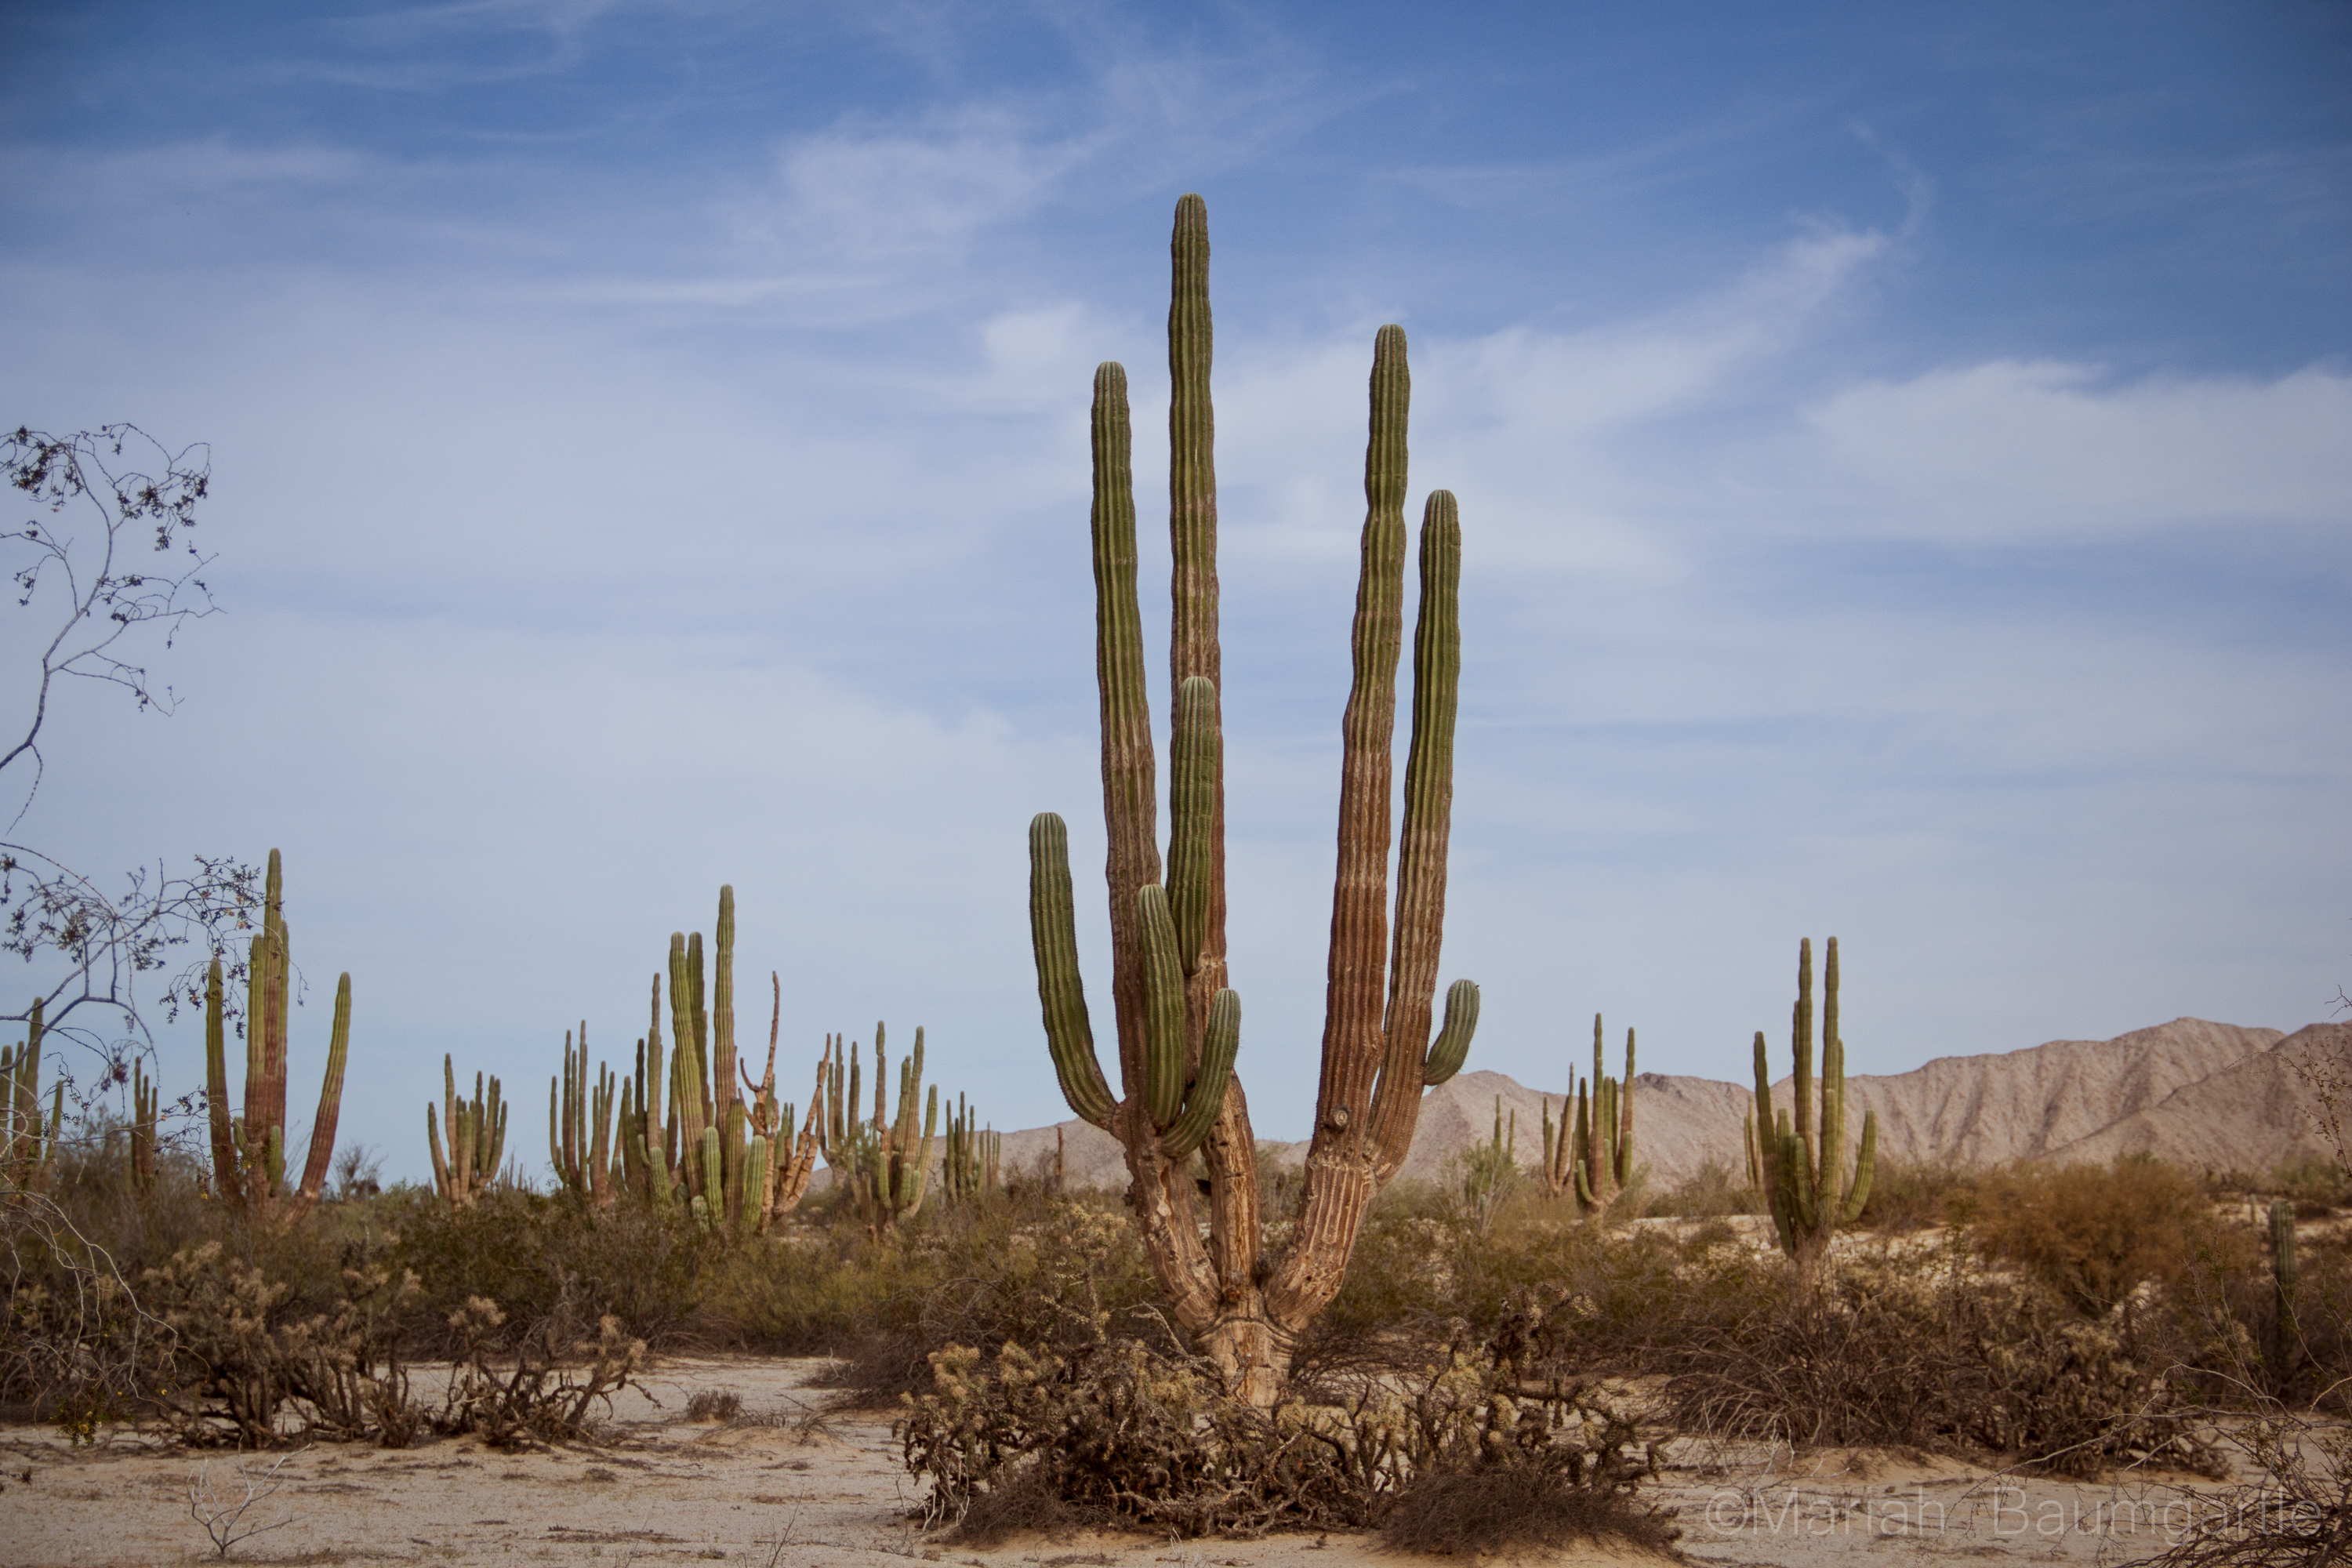
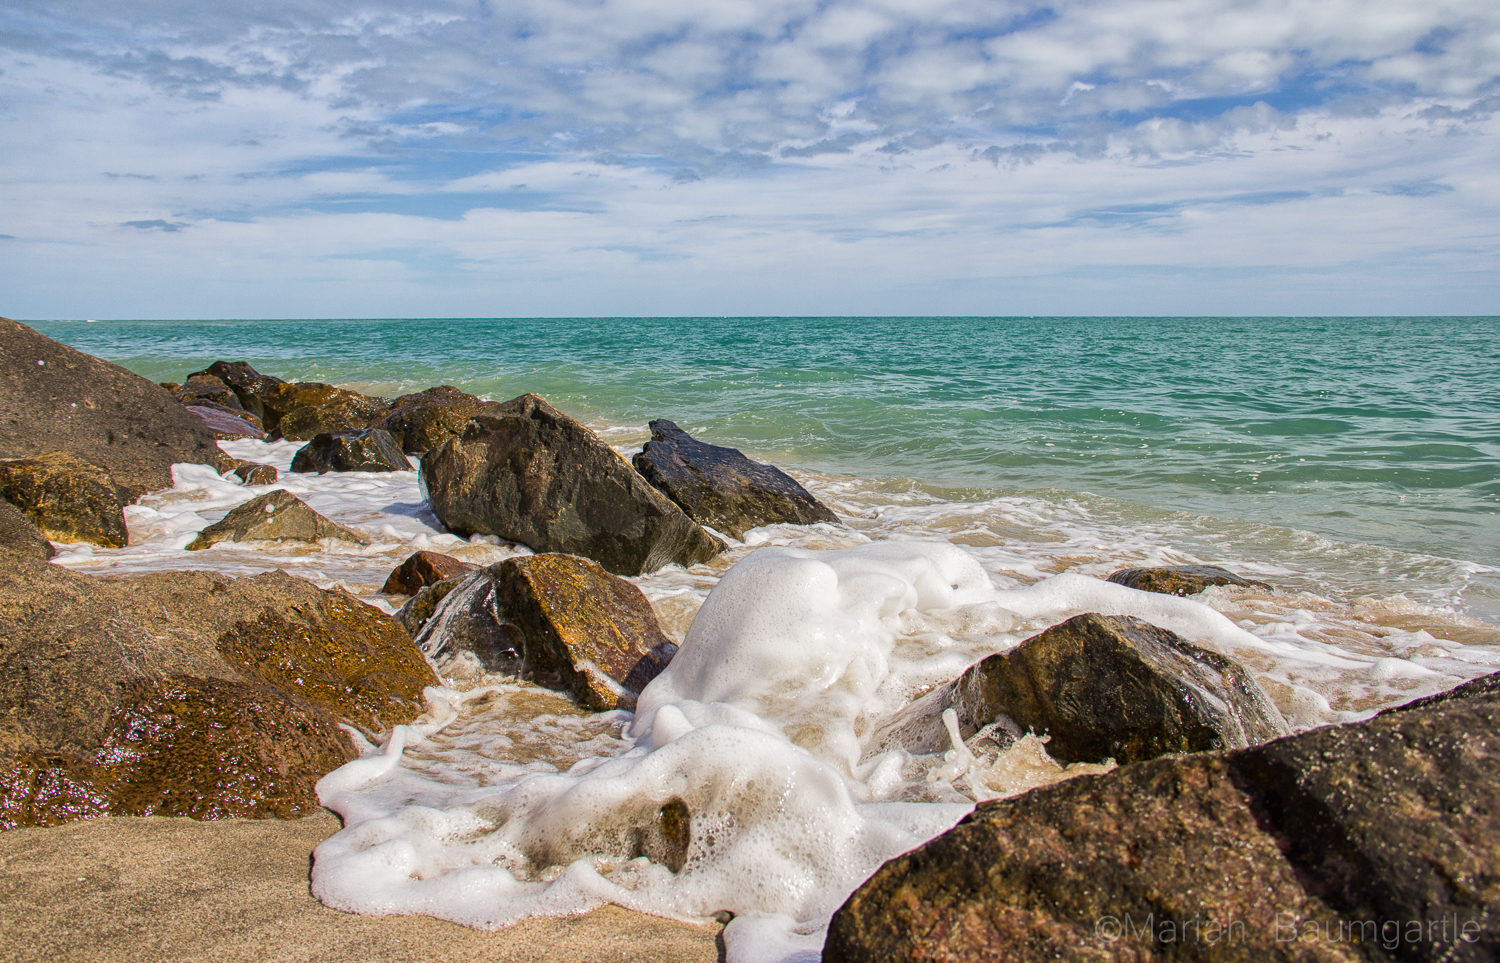
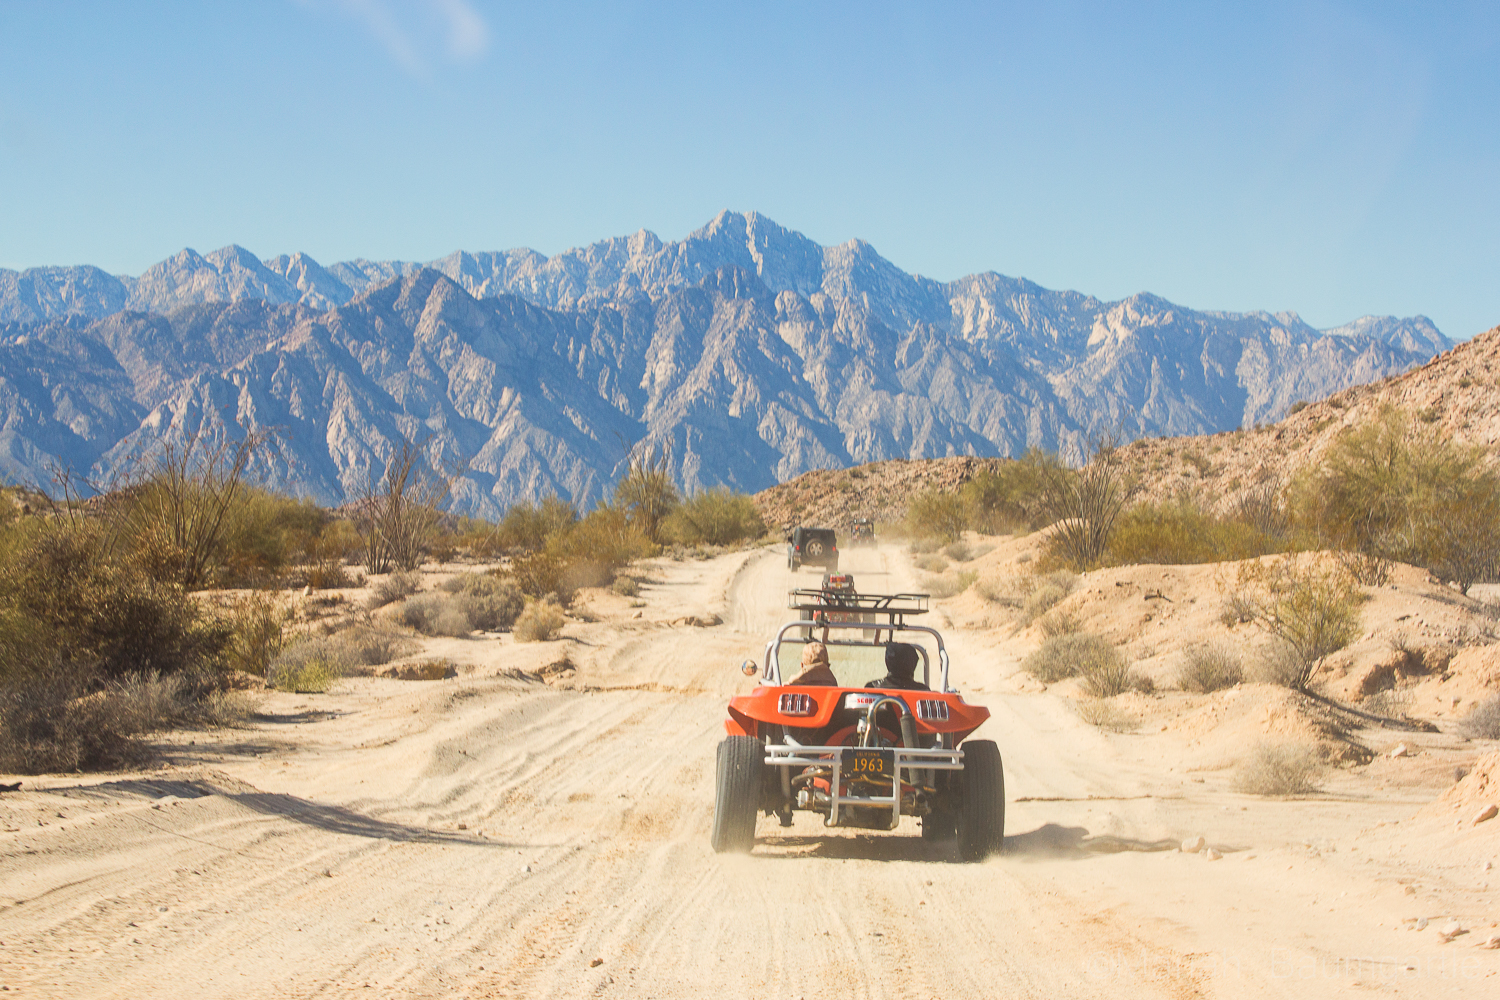
I have had the opportunity the past four months to live and photograph around San Felipe, Mexico. San Felipe is located in the Baja California and located about 2-3 hours south of the border along the side of The Sea of Cortes. San Felipe is filled with color, culture, great food, and beautiful desert land. Pack all of the correct gear for your travels and take an adventure to gather some great photographs. On your way to downtown San Felipe, you will first spot The Arches, a very popular monument of San Felipe. They call the arches “The Gateway To The Sea” The arches offers many angles. However, the only problem photographing the arches are all of the distractions around such as signs and wires, which you can Photoshop out later. Around and past the arches you will also find a hillside where you can explore to gather some more cultural photographs of the areas. This area is where you will find all of the best authentic food with local taquerias and is always a great photo op in itself by practicing your food photography. Down at the end of San Felipe is The Malecon, which sits next to The Sea of Cortes. The Malecon is lined with restaurants, shopping, and with a great view of the sea. This is where all of the events happen in towns such as food festivals, music festivals, and parades. This is a great place to take some iPhonestreet photography.
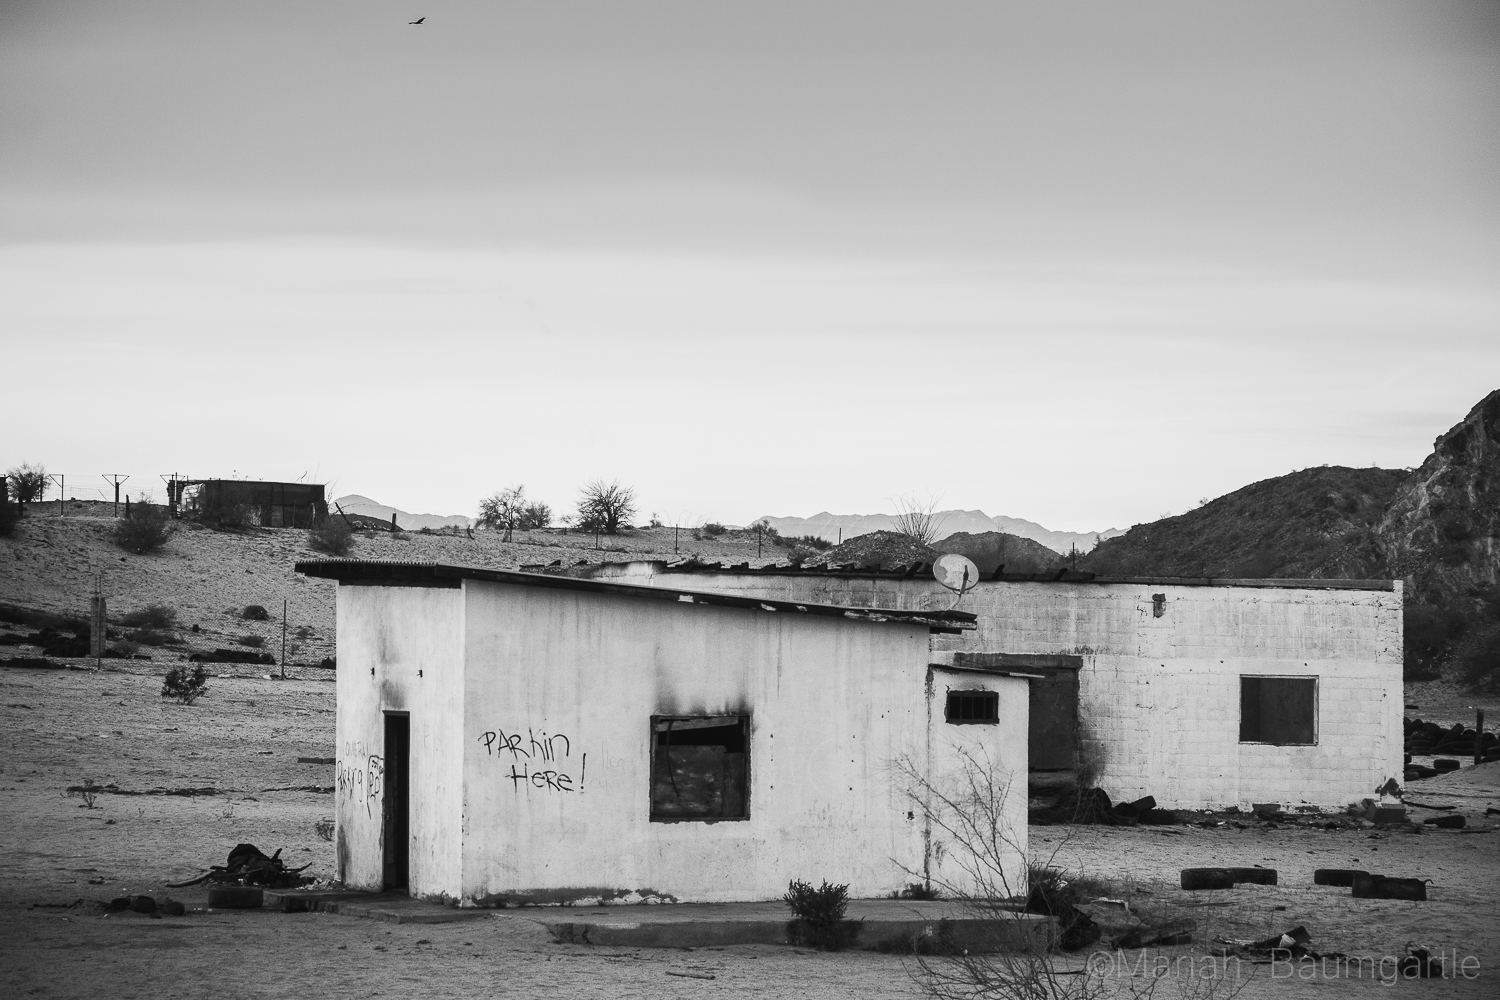
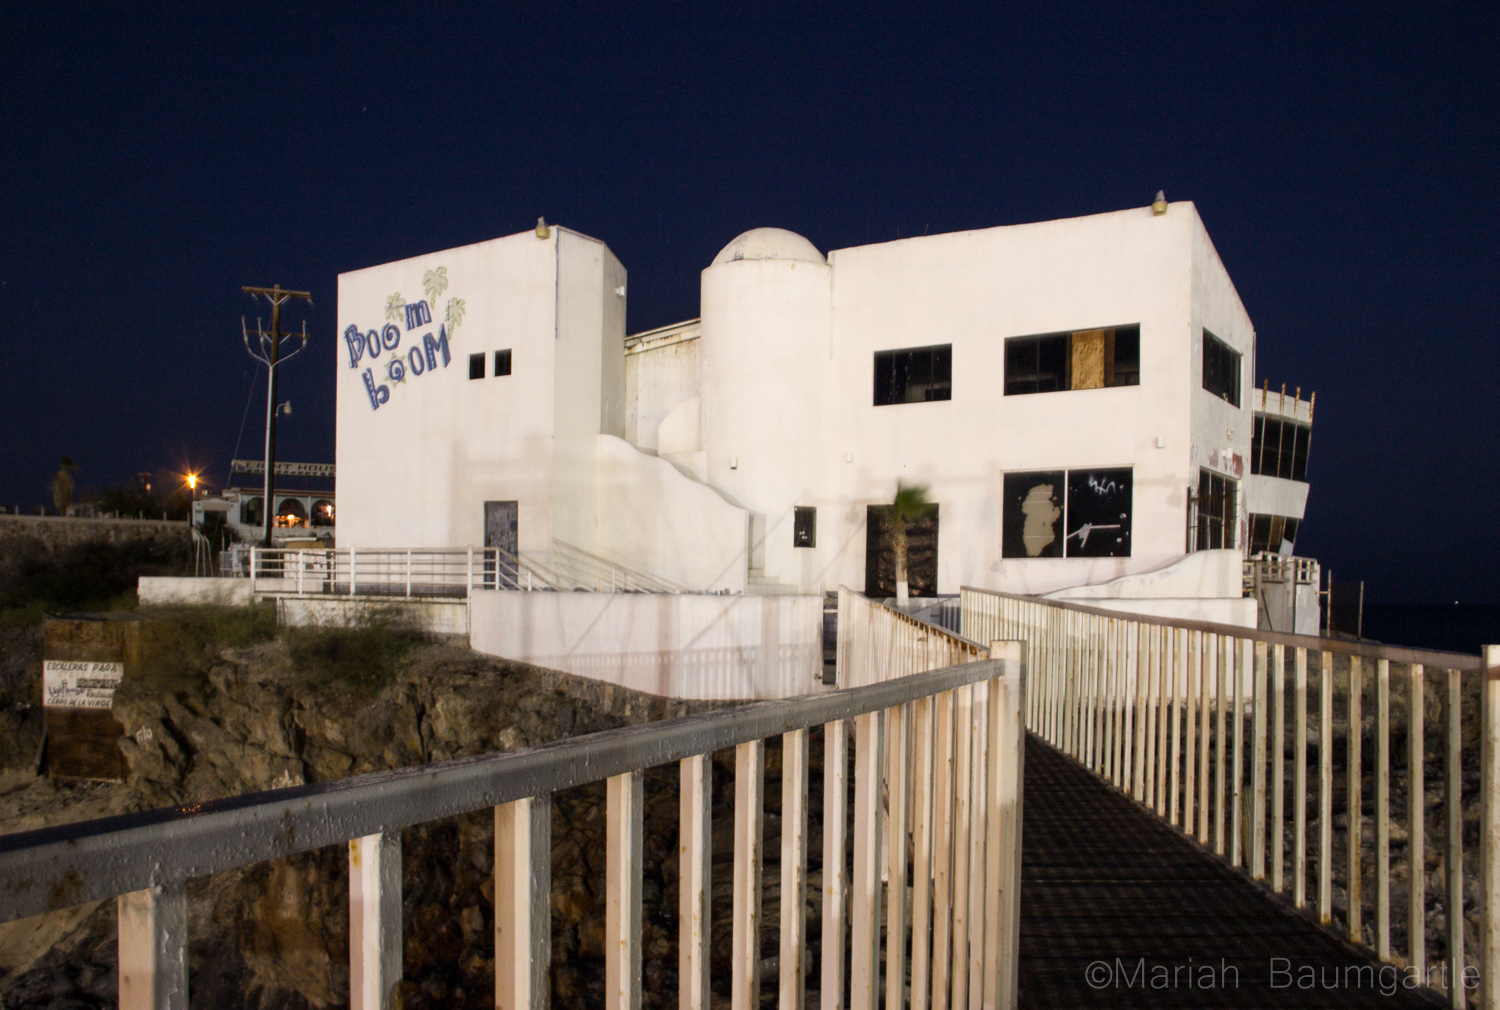
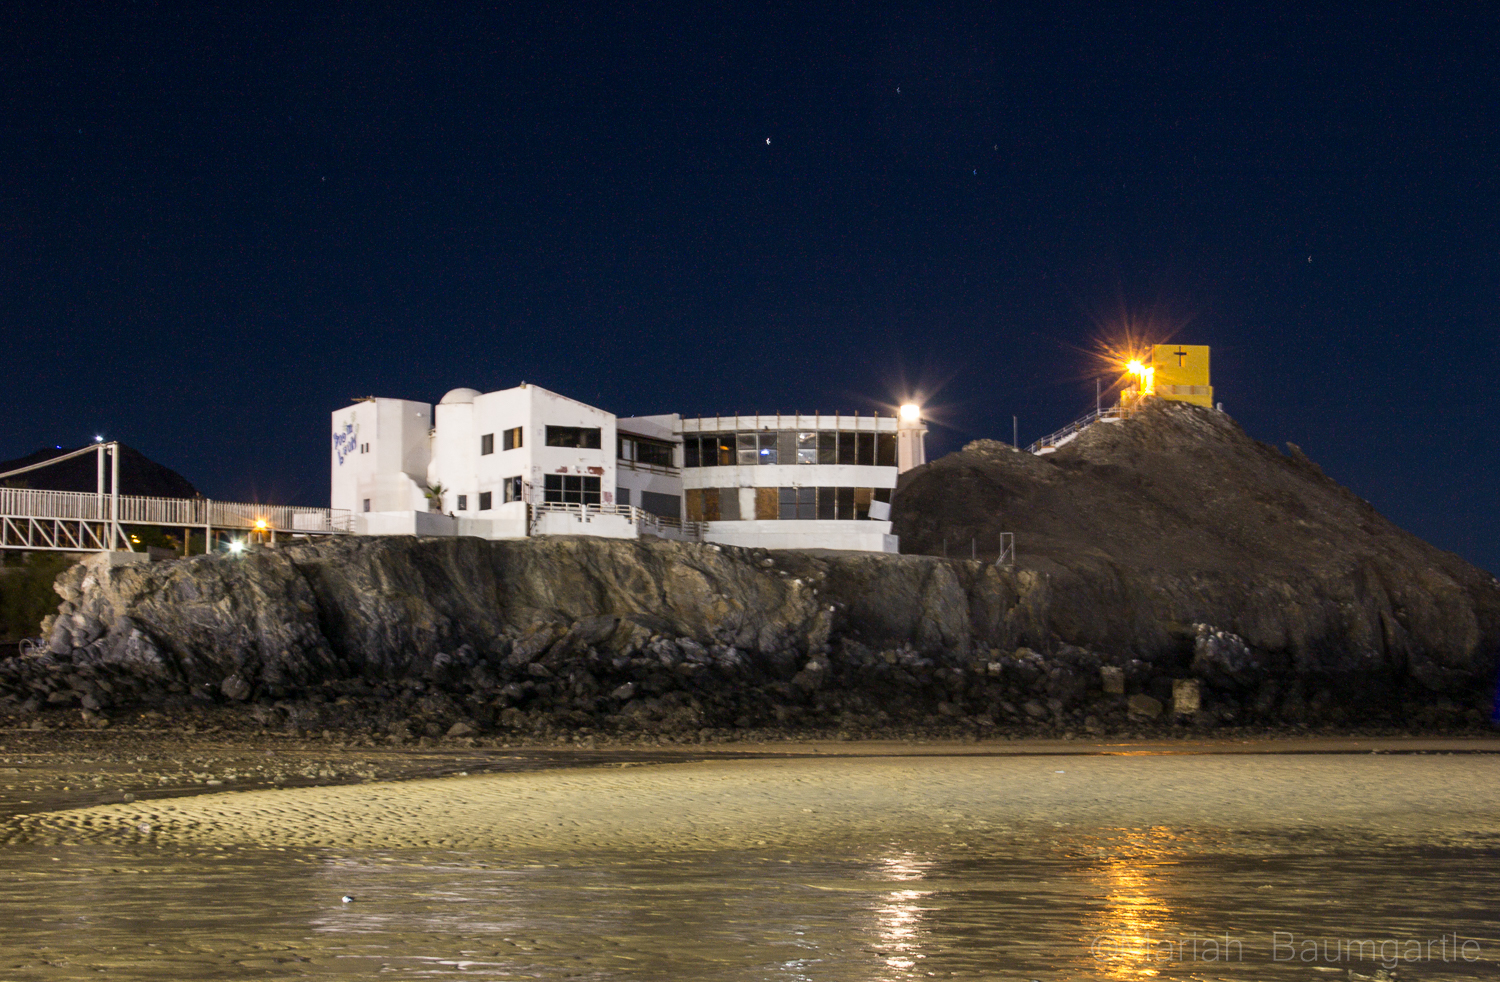
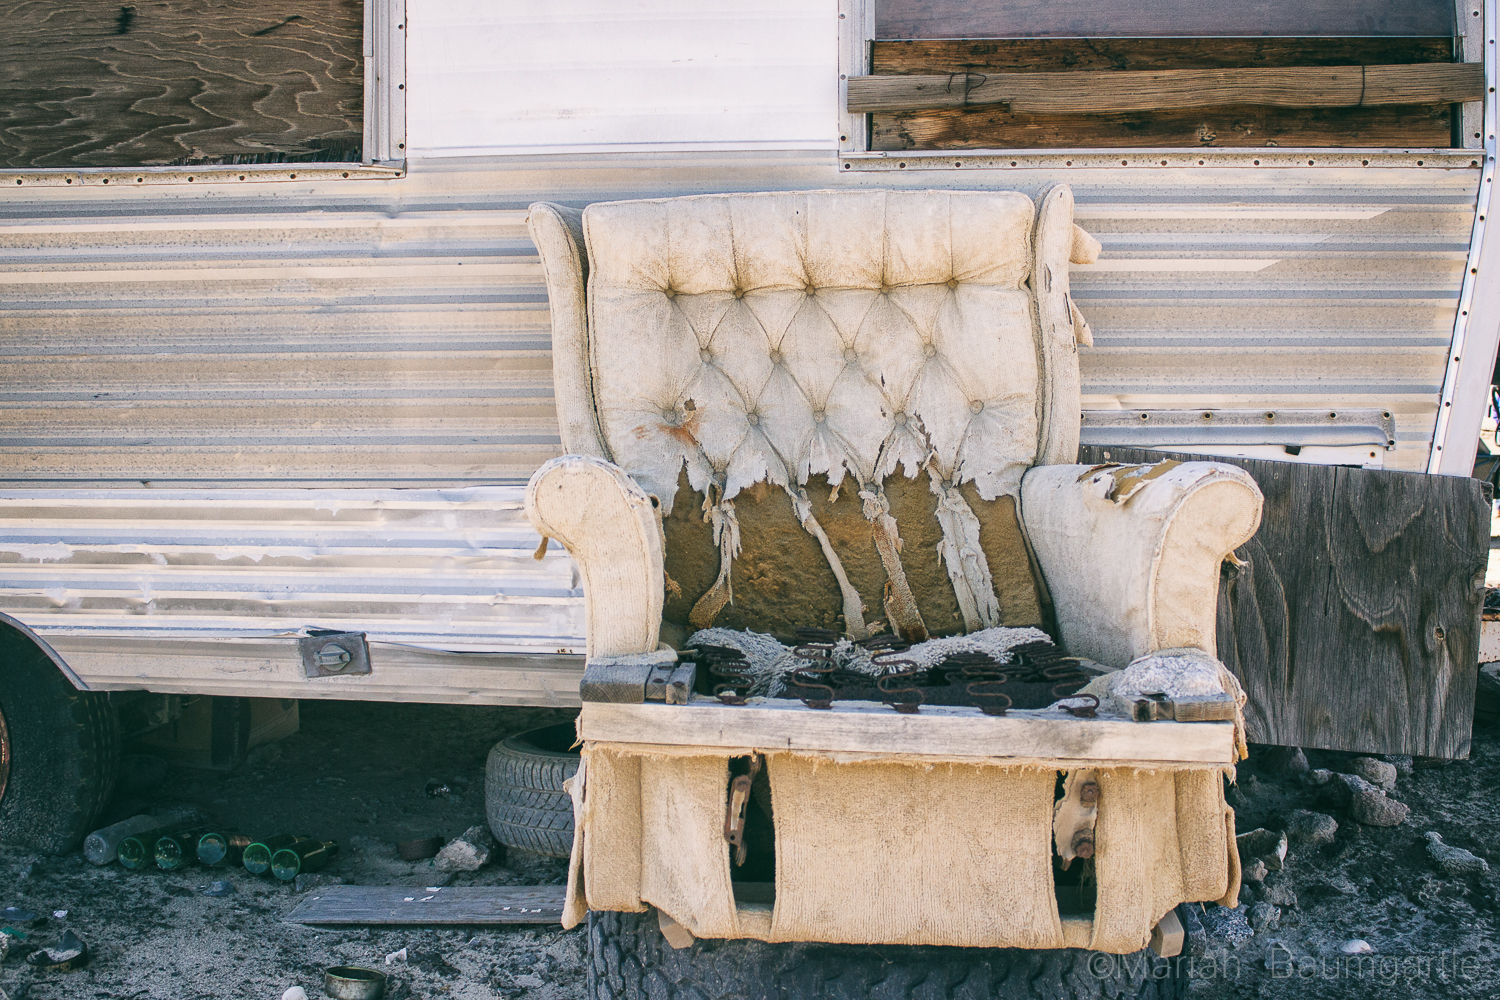
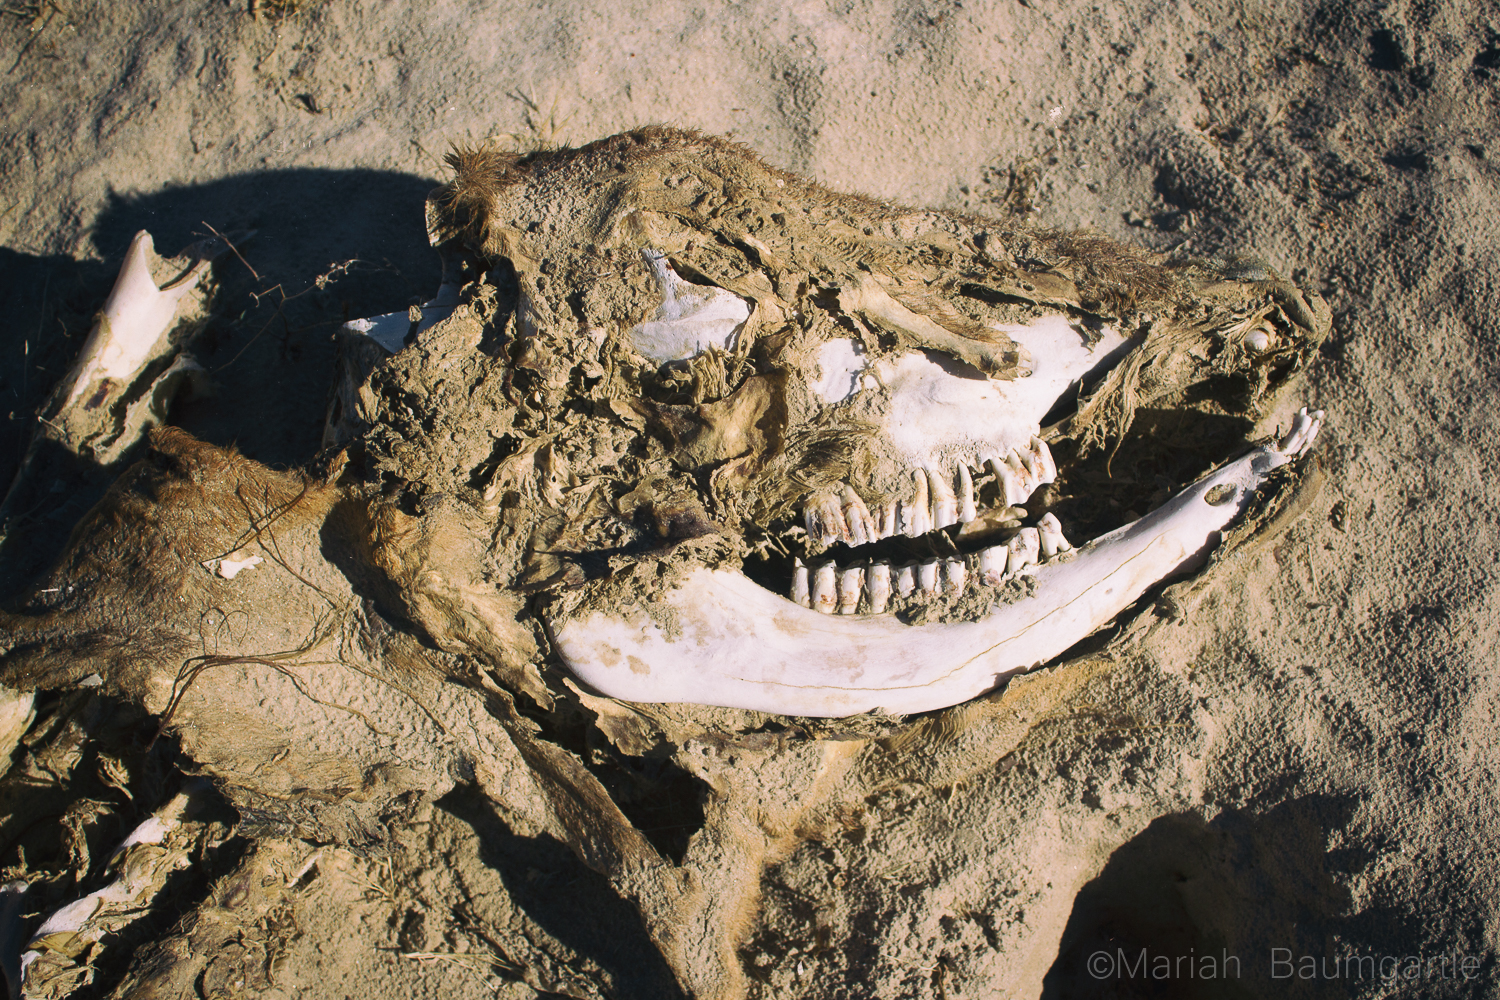
San Felipe is also a great place to gather some night photography. One of the best spots for night photography is down at The Shipyard, which you will find at the end of The Malecon. The Shipyard used to be a marina but was flooded, and they could not move the ships, so they are left there are part of a San Felipe gem. Up on a hill, you will find a building, The Boom Boom Room, a place that has also been abandoned and a very interesting location to photograph during the day or evening. Up on a mountain, you will find a little yellow chapel that looks over the town of San Felipe and right next to it is the lighthouse, which you can shoot from ground level or up at the top where the prayer building is. This is a great place to work with your angles. If you are in town during the full moon make sure to catch the moon rise over The Sea of Cortes: I was there for supermoon, and it was an incredible experience and a really good opportunity to try my moon photography skills and also work with some post editing. There are many smaller day trips you can take from San Felipe for some great opportunities including more water and desert land. On a note of transportation, you will need some form of 4-wheel drive out in the desert. It is a famous landmark in the area is The Valley of The Giants and a photo opportunity you will not want to miss. The valley holds cardon cacti that stand nearly 50 feet high. You can also drive further south to Percebu where you will find a little more surf in the water and also a great location to find treasures along the beach. Along the way, you will find more abounded buildings and interesting homes and land to photograph. The desert land has a lot of beauty to offer, and San Felipe is surrounded by beautiful desert land. You can take a drive out west closer to the mountains for some more variety in your desert landscape. The desert also offers some interesting finds such as bones, rocks, and maybe even a carcass or two. If you are going out in the middle of the day, you will have problems with harsh lighting in your landscapes, but you can always enhance your lighting in post production with landscape Photoshop actions or Lightroom Presets and Brushes. I hope you have the opportunity to visit San Felipe in your future travels or even Baja California to discover color, culture, and beautiful desert land by the sea or ocean side. As they say in the Baja “No Bad Days!”
Ah, fall is the season when I start thinking about the desert. Temperatures are beginning to cool and I can go to some of my favorite places without worrying I’ll get baked to a crisp in the typical 110-degree summer heat. Not only that, but the weather shifts to sometimes stormier conditions which are far more photogenic than the usual searing, clear skies.
So my opening advice is consider planning a winter trip to a desert near you.
My next advice is to put Death Valley National Park on the top of your list of desert locations. Don’t let the name fool you. I know it sounds like some notorious hellhole that only brave or demented people visit. Instead, the 3.4 million acre park has an overwhelming number of photo ops to choose from, most of them landscapes. Unfortunately, when you drive into the park for the first time, the place is so huge, it’s hard to pinpoint where those photo ops are.
That’s why you’ve got me! In this post, I’ll take you to a few of the best, image-rich locations that are easily accessible by paved road. In the next post, we’ll get away to the backcountry where things get really spectacular.
Dried mud at the edge of the sand dunes. Bronica SQ-A/80mm lens, Tri-X film (yeah, that’s right, film).
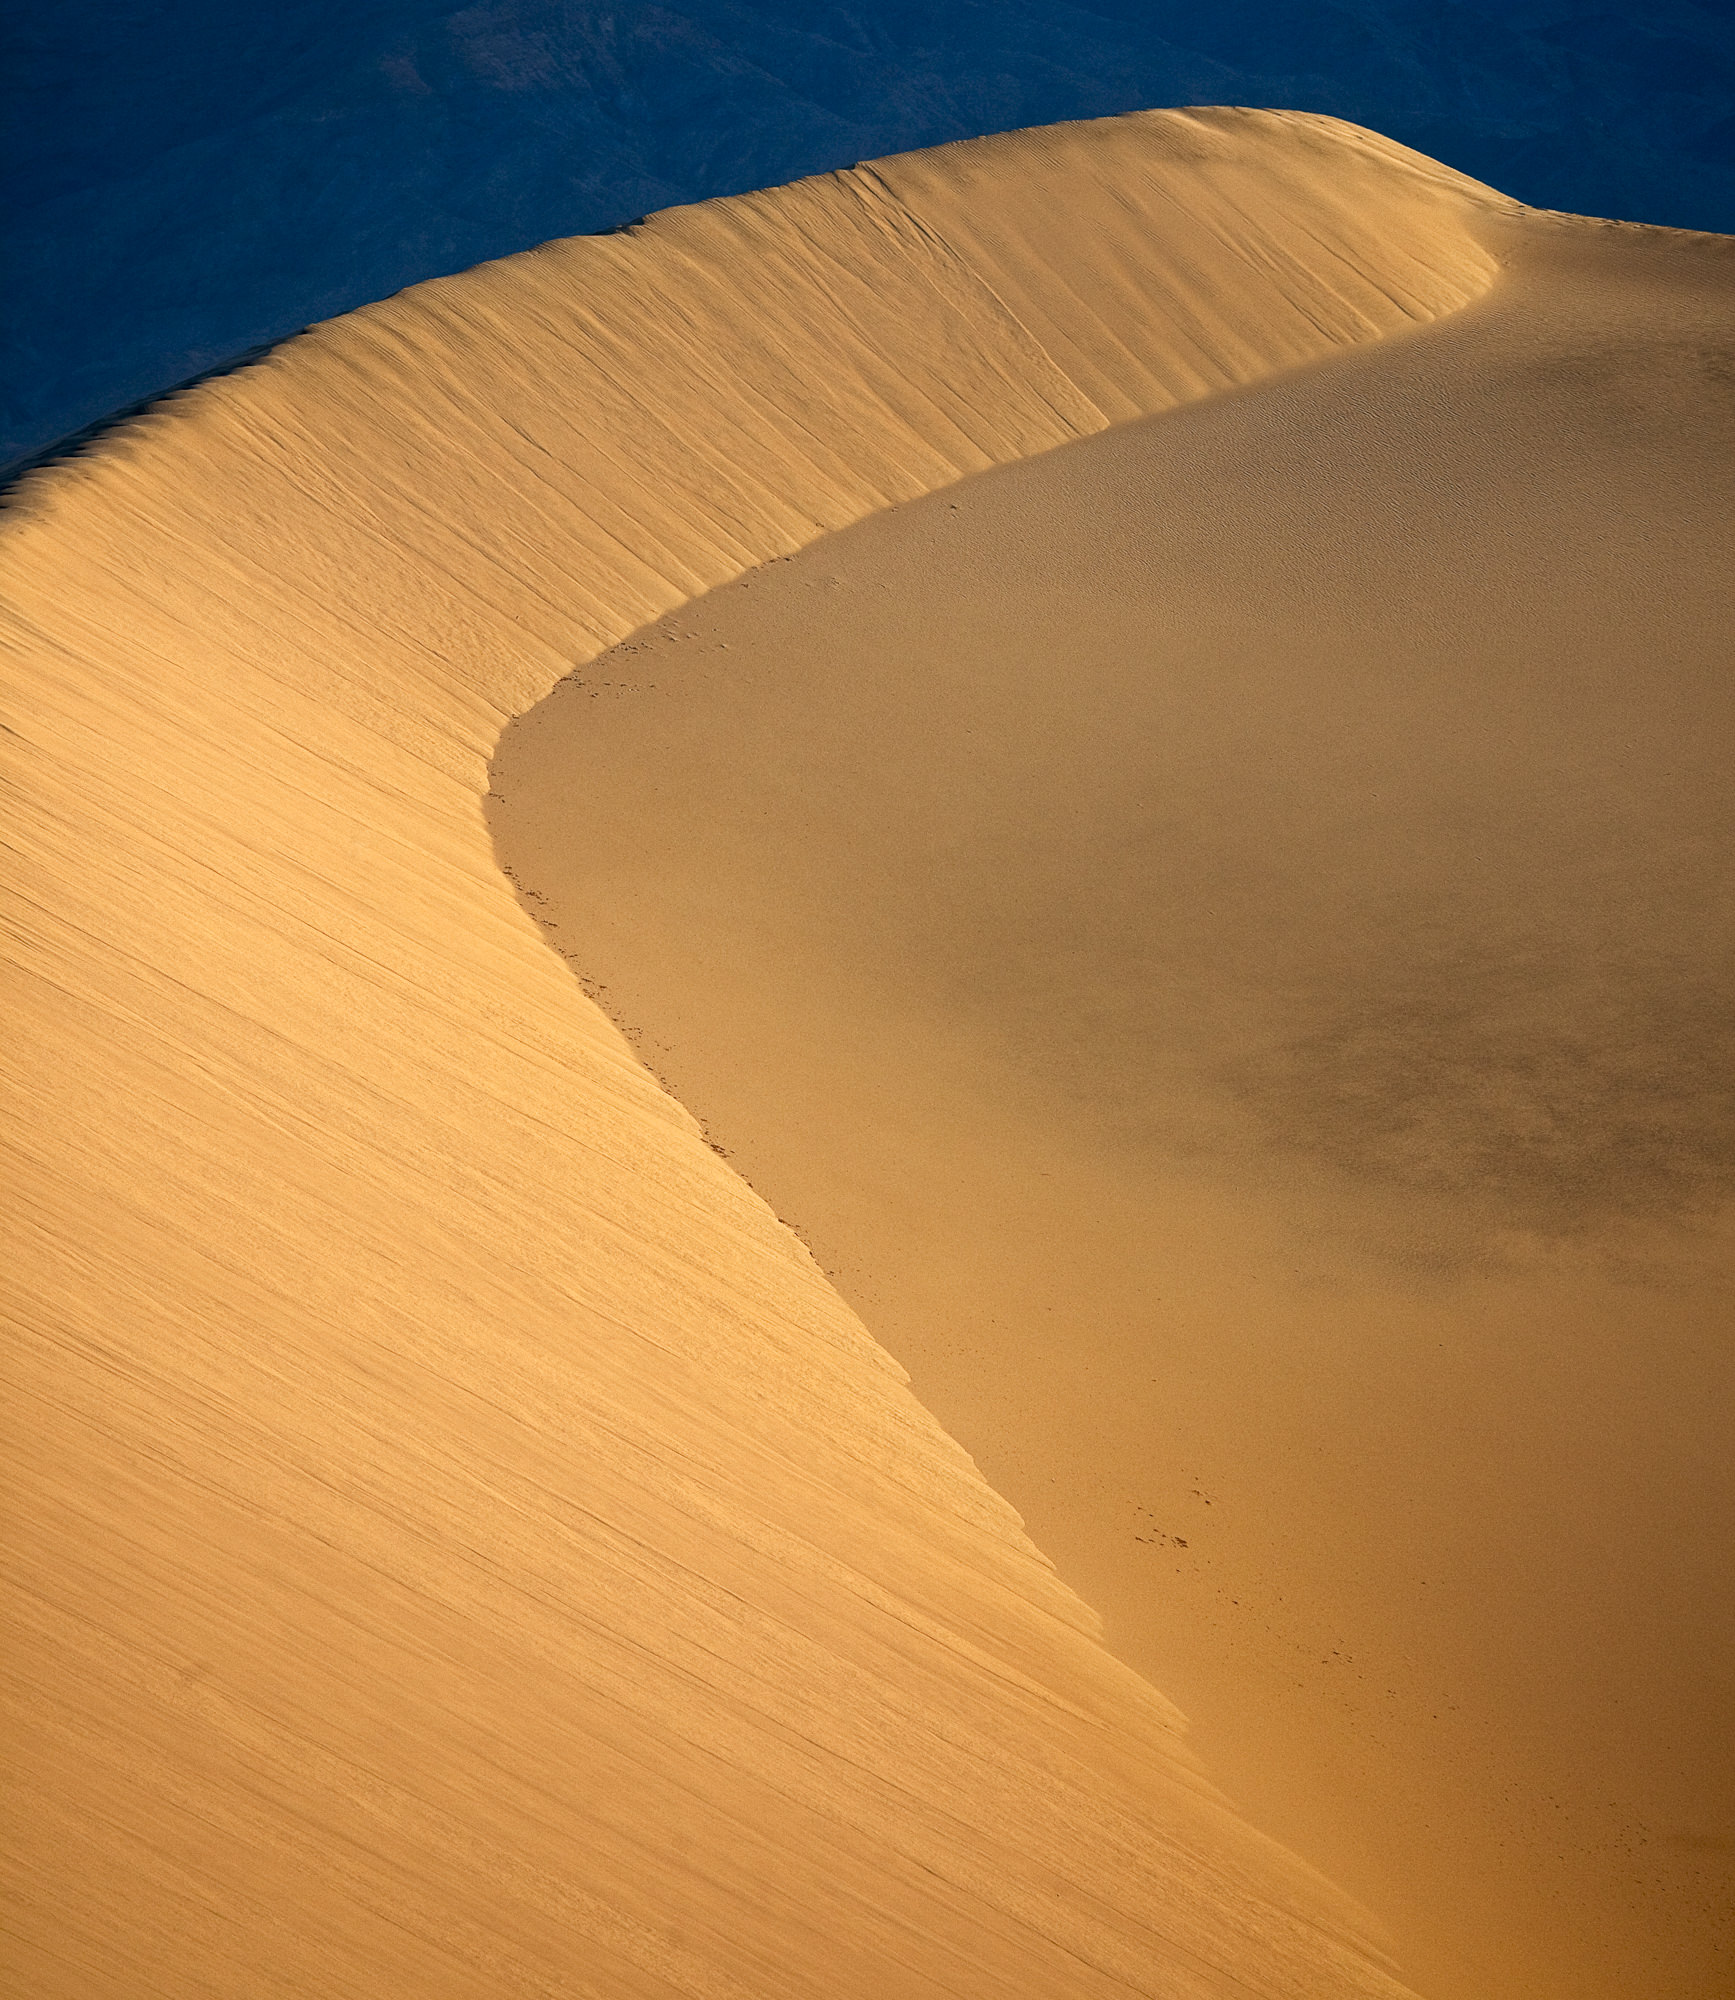
Mesquite Flat Sand Dunes
Located just east of Stovepipe Wells Village along Highway 190, the sand dunes are easy to access from either a parking lot or if you like, you can park on the road’s wide dirt shoulder and simply hike a short distance into the thick of them. (Do yourself a favor and as you leave your car, look behind you for landmarks so you can steer your way back.) The dunes shift in form throughout the year but there’s always one over-achieving pile that reaches higher than the rest and if you’re feeling energetic, you can head for that. Or, just wander around. Closer to the road, there are patches of dried, cracked earth that make for great foregrounds or abstracts. As for the dunes, the curving lines where one sandy ridge curls around into another are great for various compositions. In all directions, you’re surrounded by mountains which create great backgrounds, or there are multiple opportunities for abstracts by framing nothing but curves, shadows, and sand. I recommend taking several lenses. Use wide angles to accentuate the sensuous lines and telephotos to compress the landscapes into abstracts or to bring the background mountains into the shot. A tripod is a good idea, too, because you’ll probably want to use small apertures for more depth of field and that brings with it, of course, longer exposures which require more than a steady hand.
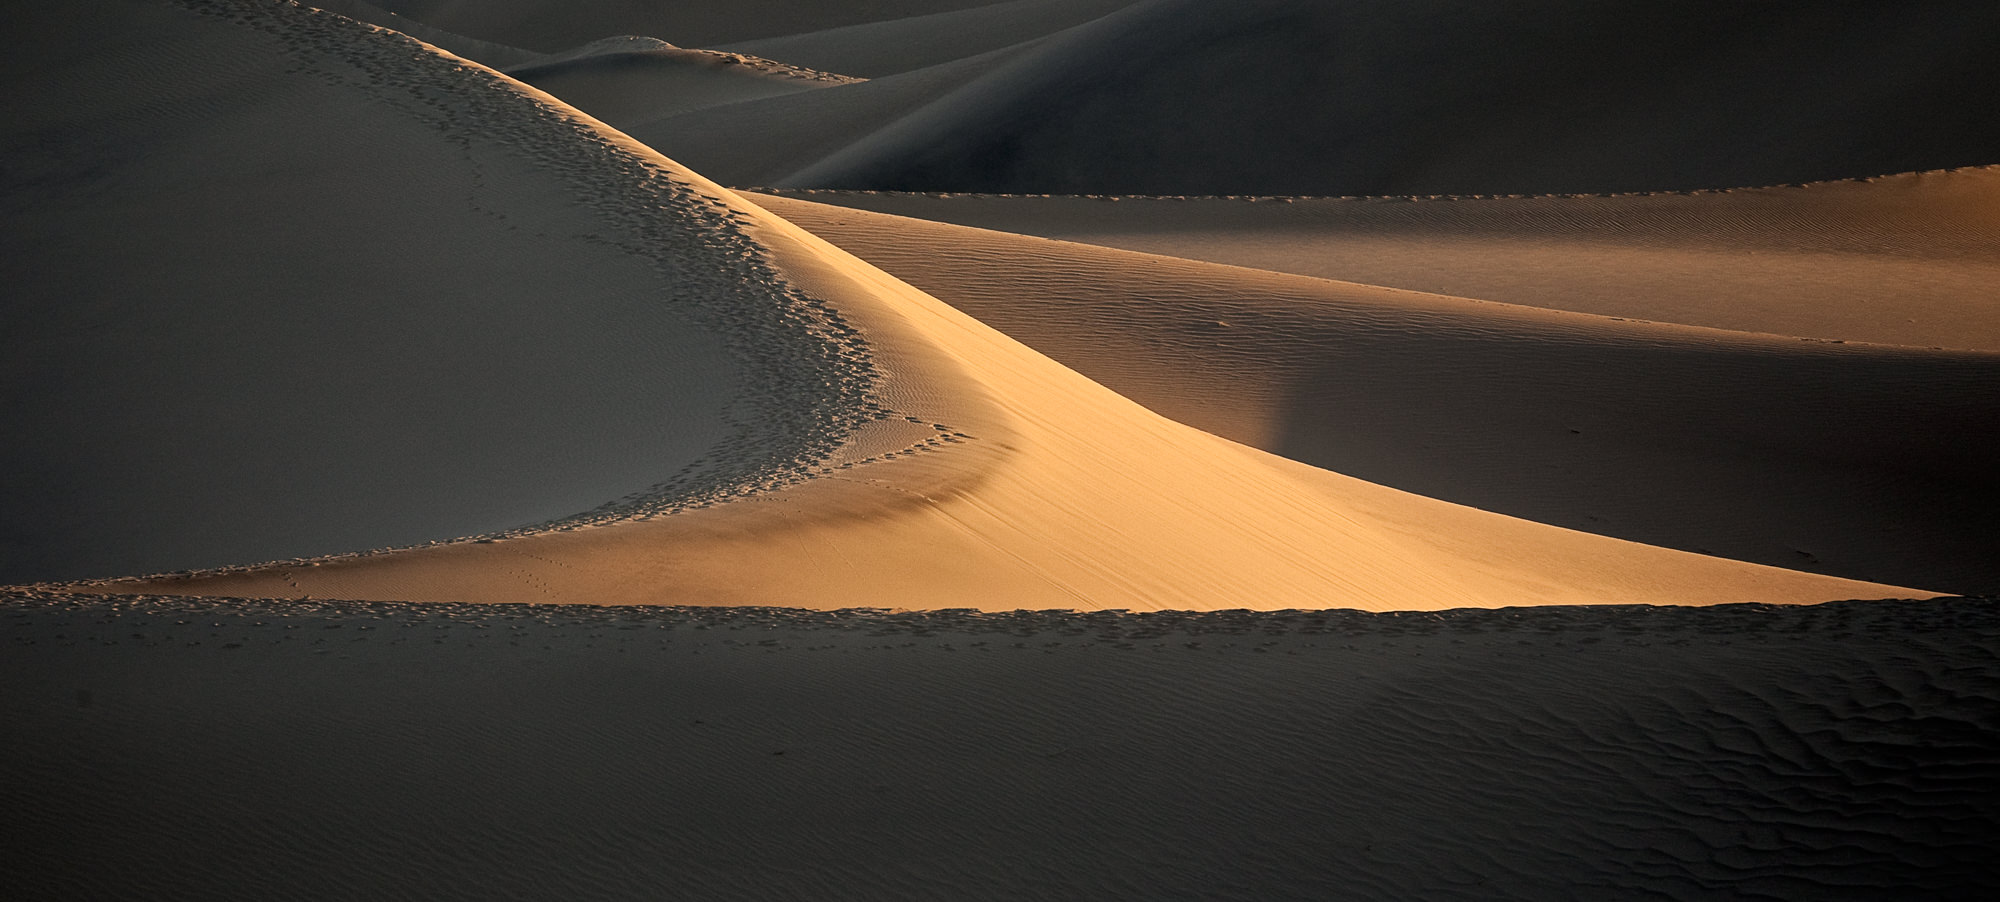
Early morning light brings out the curving lines in the dunes. Canon 5DMII, 70-300mm set at 300mm, f/8, 1/180, ISO 400.
Shot with a telephoto lens to compress the scene into something slightly abstract.
The best time to arrive is about 30-45 minutes before dawn but there’s enough light wander out to a suitable location and wait for the sunrise to magically transform the dunes. Granted, for all the effort, this magic will only last a few minutes before the sun stops delineating the dunes’ shapes and it all becomes rather bland. Sunrise is another good time, but be careful because once it gets dark, it’s really dark and you might have a hard time finding your way back. Bring a flashlight or, better, a headlamp. Lastly, in the winter, the dunes are pretty popular and can be trampled with footprints, marring otherwise good photos, so you may have to hike about a bit to find an unspoiled shot.
Manley Beacon at sunrise with the Panamint Mountains in the background. Bronica SQ-A, 80mm lens, Ektachrome film.
Zabriskie Point
This is just outside of Furnace Creek, again on Highway 190. There are a large parking lot and a short, somewhat steep paved path to a high point where you look down on a pretty tortured landscape of twisting canyons that lead out to Death Valley’s main playa and then in the distance the Panamint Mountains. The main attraction for most photographers’ memory cards is Manley Beacon, a pointy outcrop the shape of a shark’s tooth. In the right light—sunrise is best—Manley Beacon gets hit by a brief blast of warm sunlight while the rest of the foreground is still in shadow. Get here early, before sunrise, to get a spot on the overlook among a usual crowd of other photographers. If there are clouds, sunset can also provide great images. Again, bring a tripod and be prepared to bracket for the extremes in light.
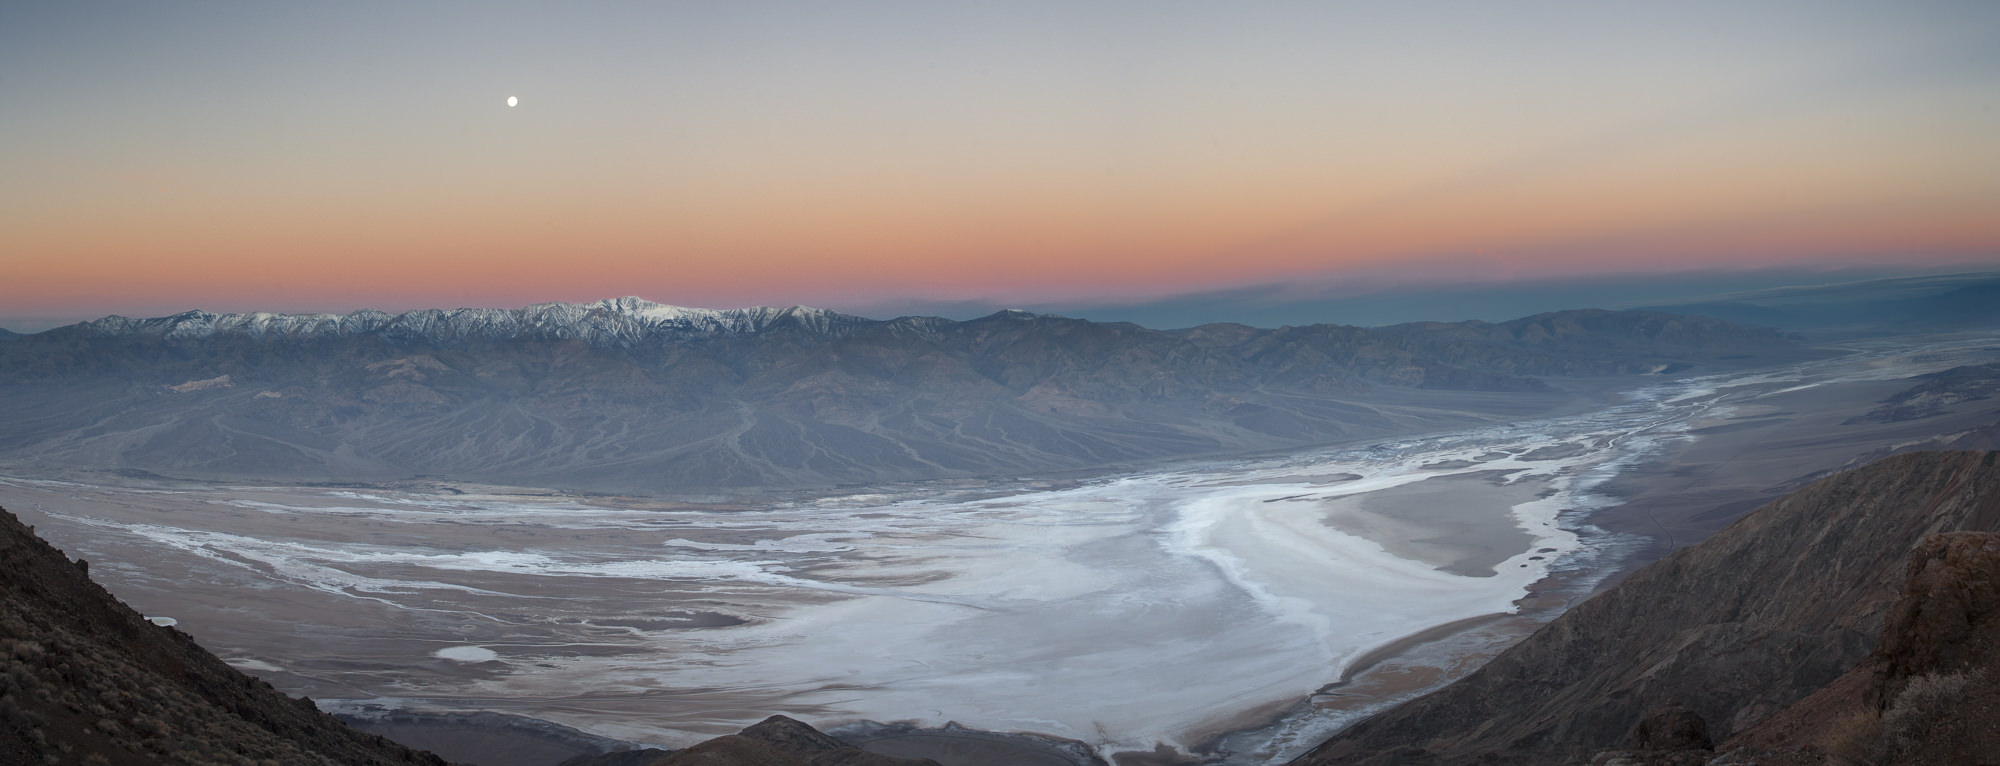
Death Valley’s playa as seen from Dantes View. Eleven frames stitched into a panorama. Note the snow in the Panamint Mountains, which you’ll see in the winter. The high point below and a little to the right of the moon is Telescope Peak. Canon 5D, 28-70mm set to 36mm, f/8, 1/30, ISO 400.
Dantes View
For another spectacular view without so many tripods, Dantes View at an elevation of 5475′, gets you a plunging, straight-down shot of Death Valley’s below-sea-level playa running through the middle of the park with the Panamint Mountains shining in the background. The time it right for a sunrise with the moon setting at the same time near the Panamints’ 12,000′ Telescope Peak. The drive there will take about 45 minutes from Furnace Creek and involves a 14-mile climb up a winding road off Highway 190. So if you spend the night at one of the hotel rooms in Furnace Creek, you’ll need to get up horribly early to reach the viewpoint before sunrise. Well worth it. One note of caution. It gets really windy on the top of Dantes View and in the winter, adds to that bone-rattling cold. Dress for the Arctic and you’ll be fine. There’s also a trail that leads off from the right side of the parking lot to more great views of both Death Valley and to the east into Nevada. You’ll need a tripod just to hold your camera steady in the howling wind.
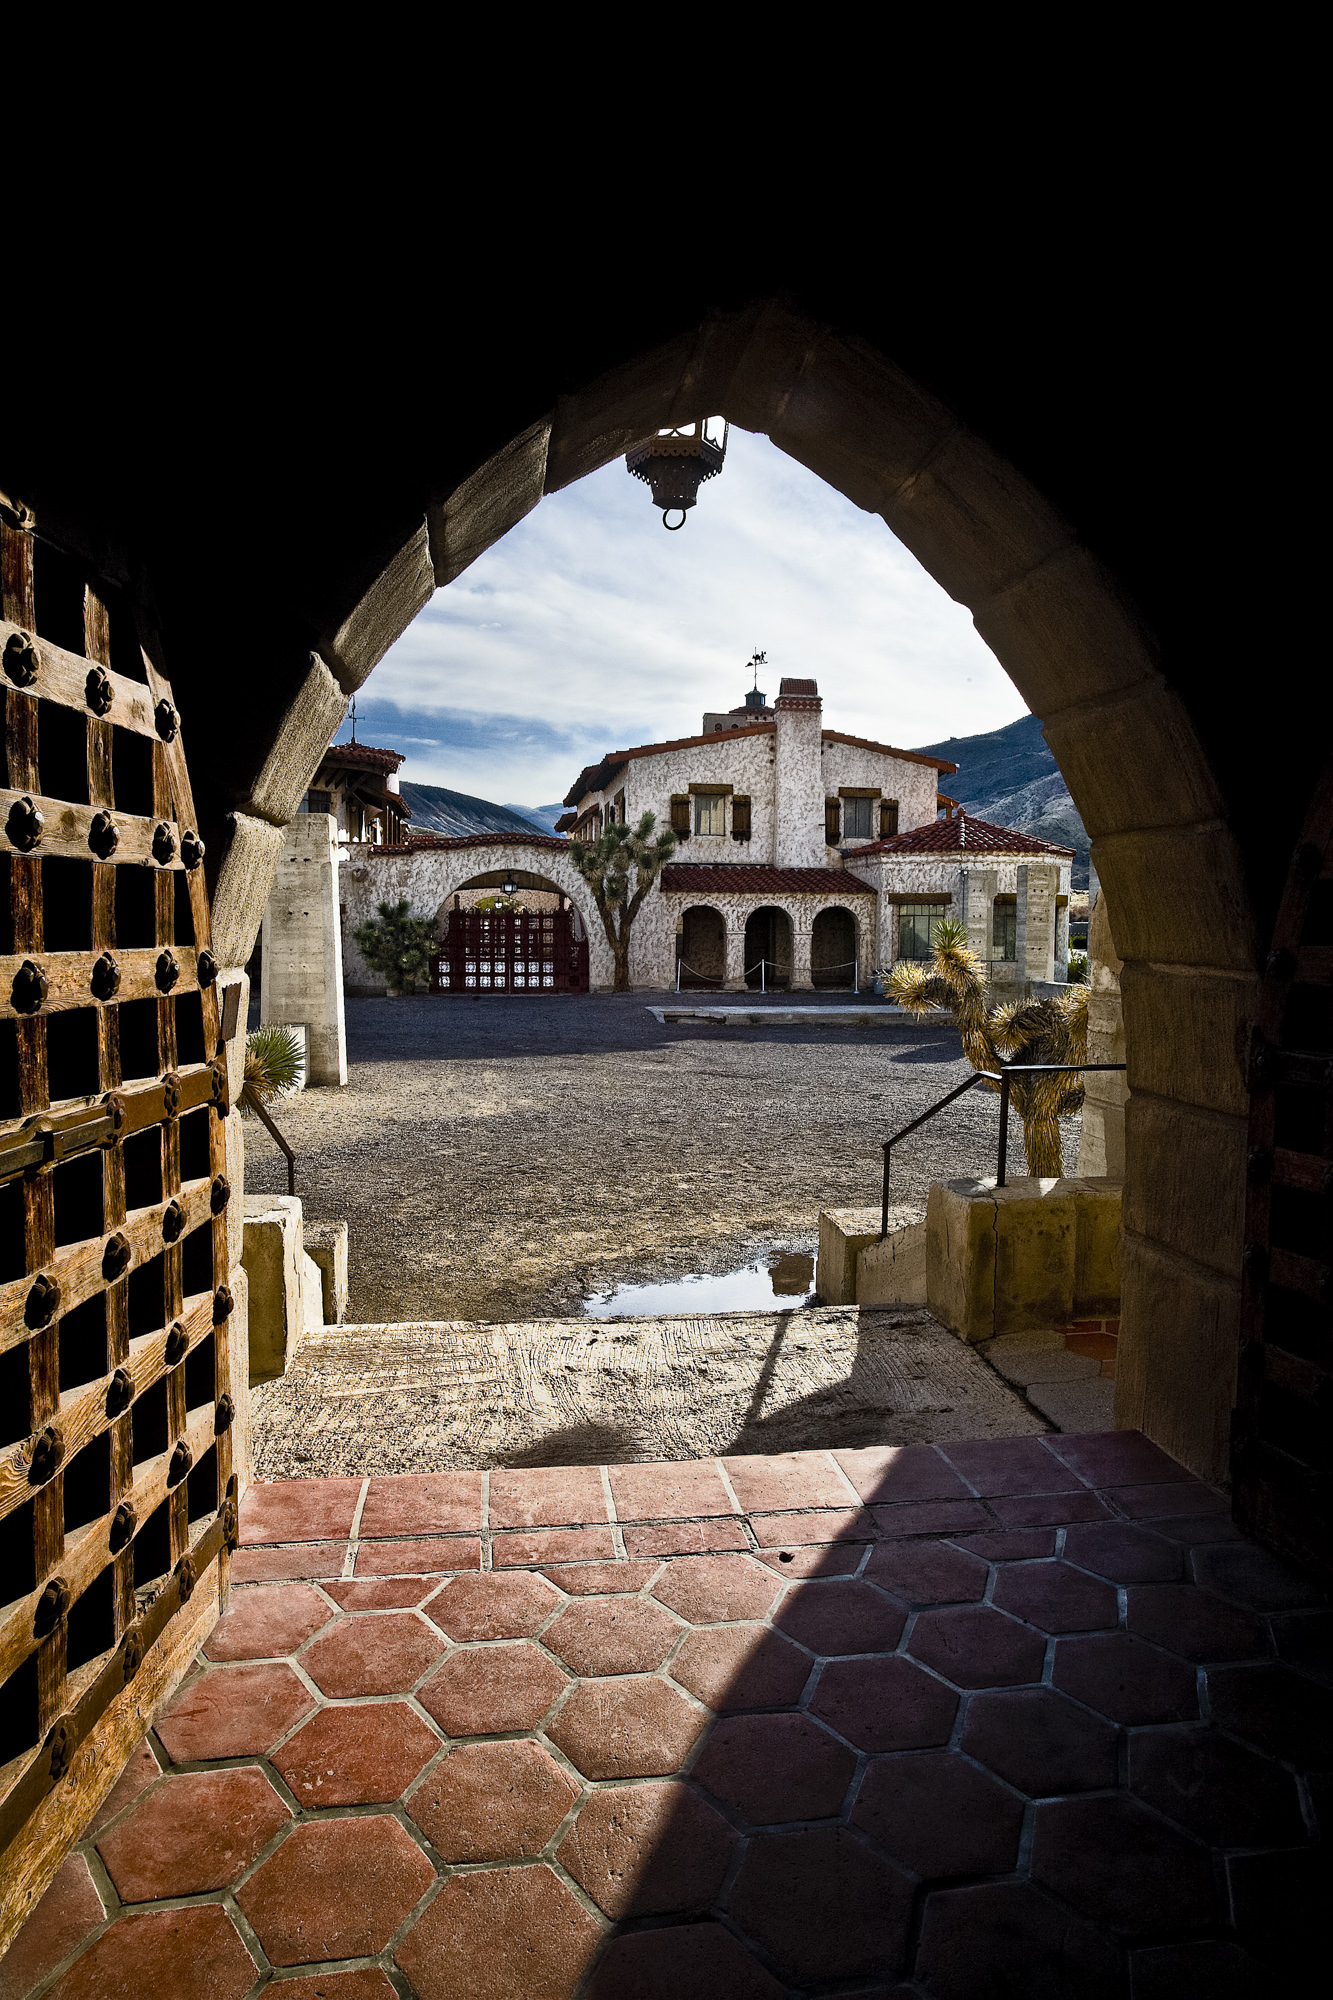
Scotty’s Castle: There are many archways that make great framing elements. Canon 5D, 16-35mm set at 22mm, f/22, 1/30, ISO 400.
Scotty’s Castle
On the opposite side of the park, way north of Dantes View (about 80 miles away, which says something about how big Death Valley is), you’ll find the one manmade attraction inside the park that should be photographed. I won’t get into the entire history of this colossal home built in the middle of nowhere by a wealthy man who wasn’t, by the way, named Scotty, but the architecture alone is worth an hour of your time. There’s a tour of the grounds and buildings, but photography inside the house is prohibited. However, if you get there early in the morning, you can wander about the grounds unfettered and have wonderful shadows and light, and no people.
Sadly, flood damage to the surrounding roads has meant Scotty’s Castle is currently closed and perhaps won’t be reopened until 2019, but keep it in the back of your mind because it is well worth a visit.
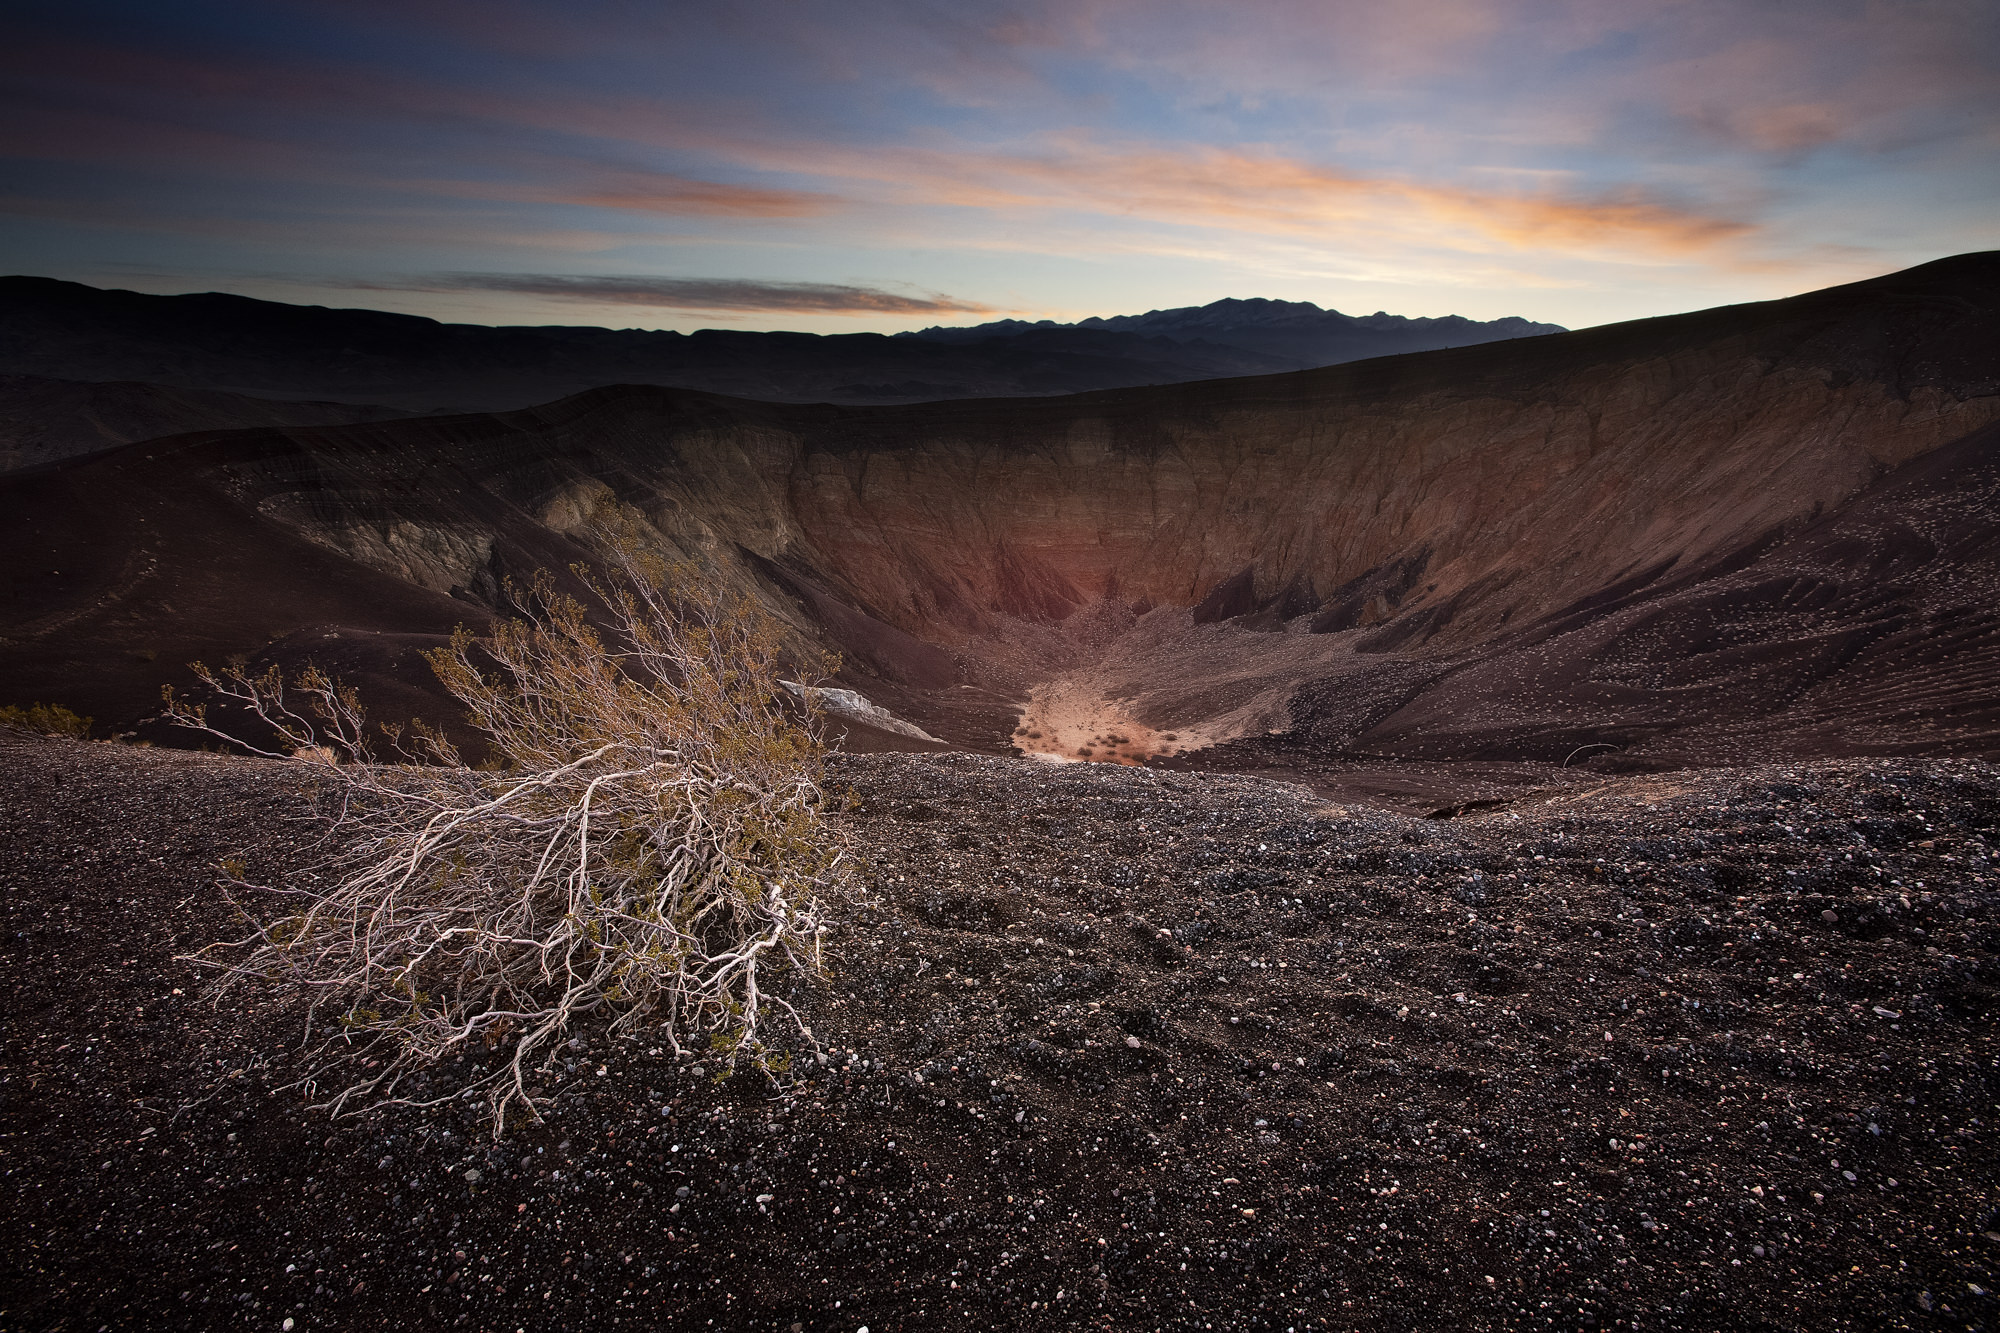
Ubehebe Crater at sunrise shot not far from the parking lot. How easy was that? Canon 5D, 16-35mm set 16mm, f/16, 1/40, ISO 400.
Ubehebe Crater
That’s pronounced U-be-hee-bee. Just so you know. This is around the corner from Scotty’s Castle and is available for photography. Best in the morning or evening. The volcanic crater, some 600 feet deep, was formed a mere 300 years ago when rising magma hit ground water and the resulting trapped steam exploded. There is a soft, steep trail to the bottom of the crater but photographically, not really worth the difficult climb back out. Besides setting up near the parking lot for sunrise shots, try wandering around the crater rim for other angles, especially in the late afternoon. Consider doing panoramas here to get it all in.
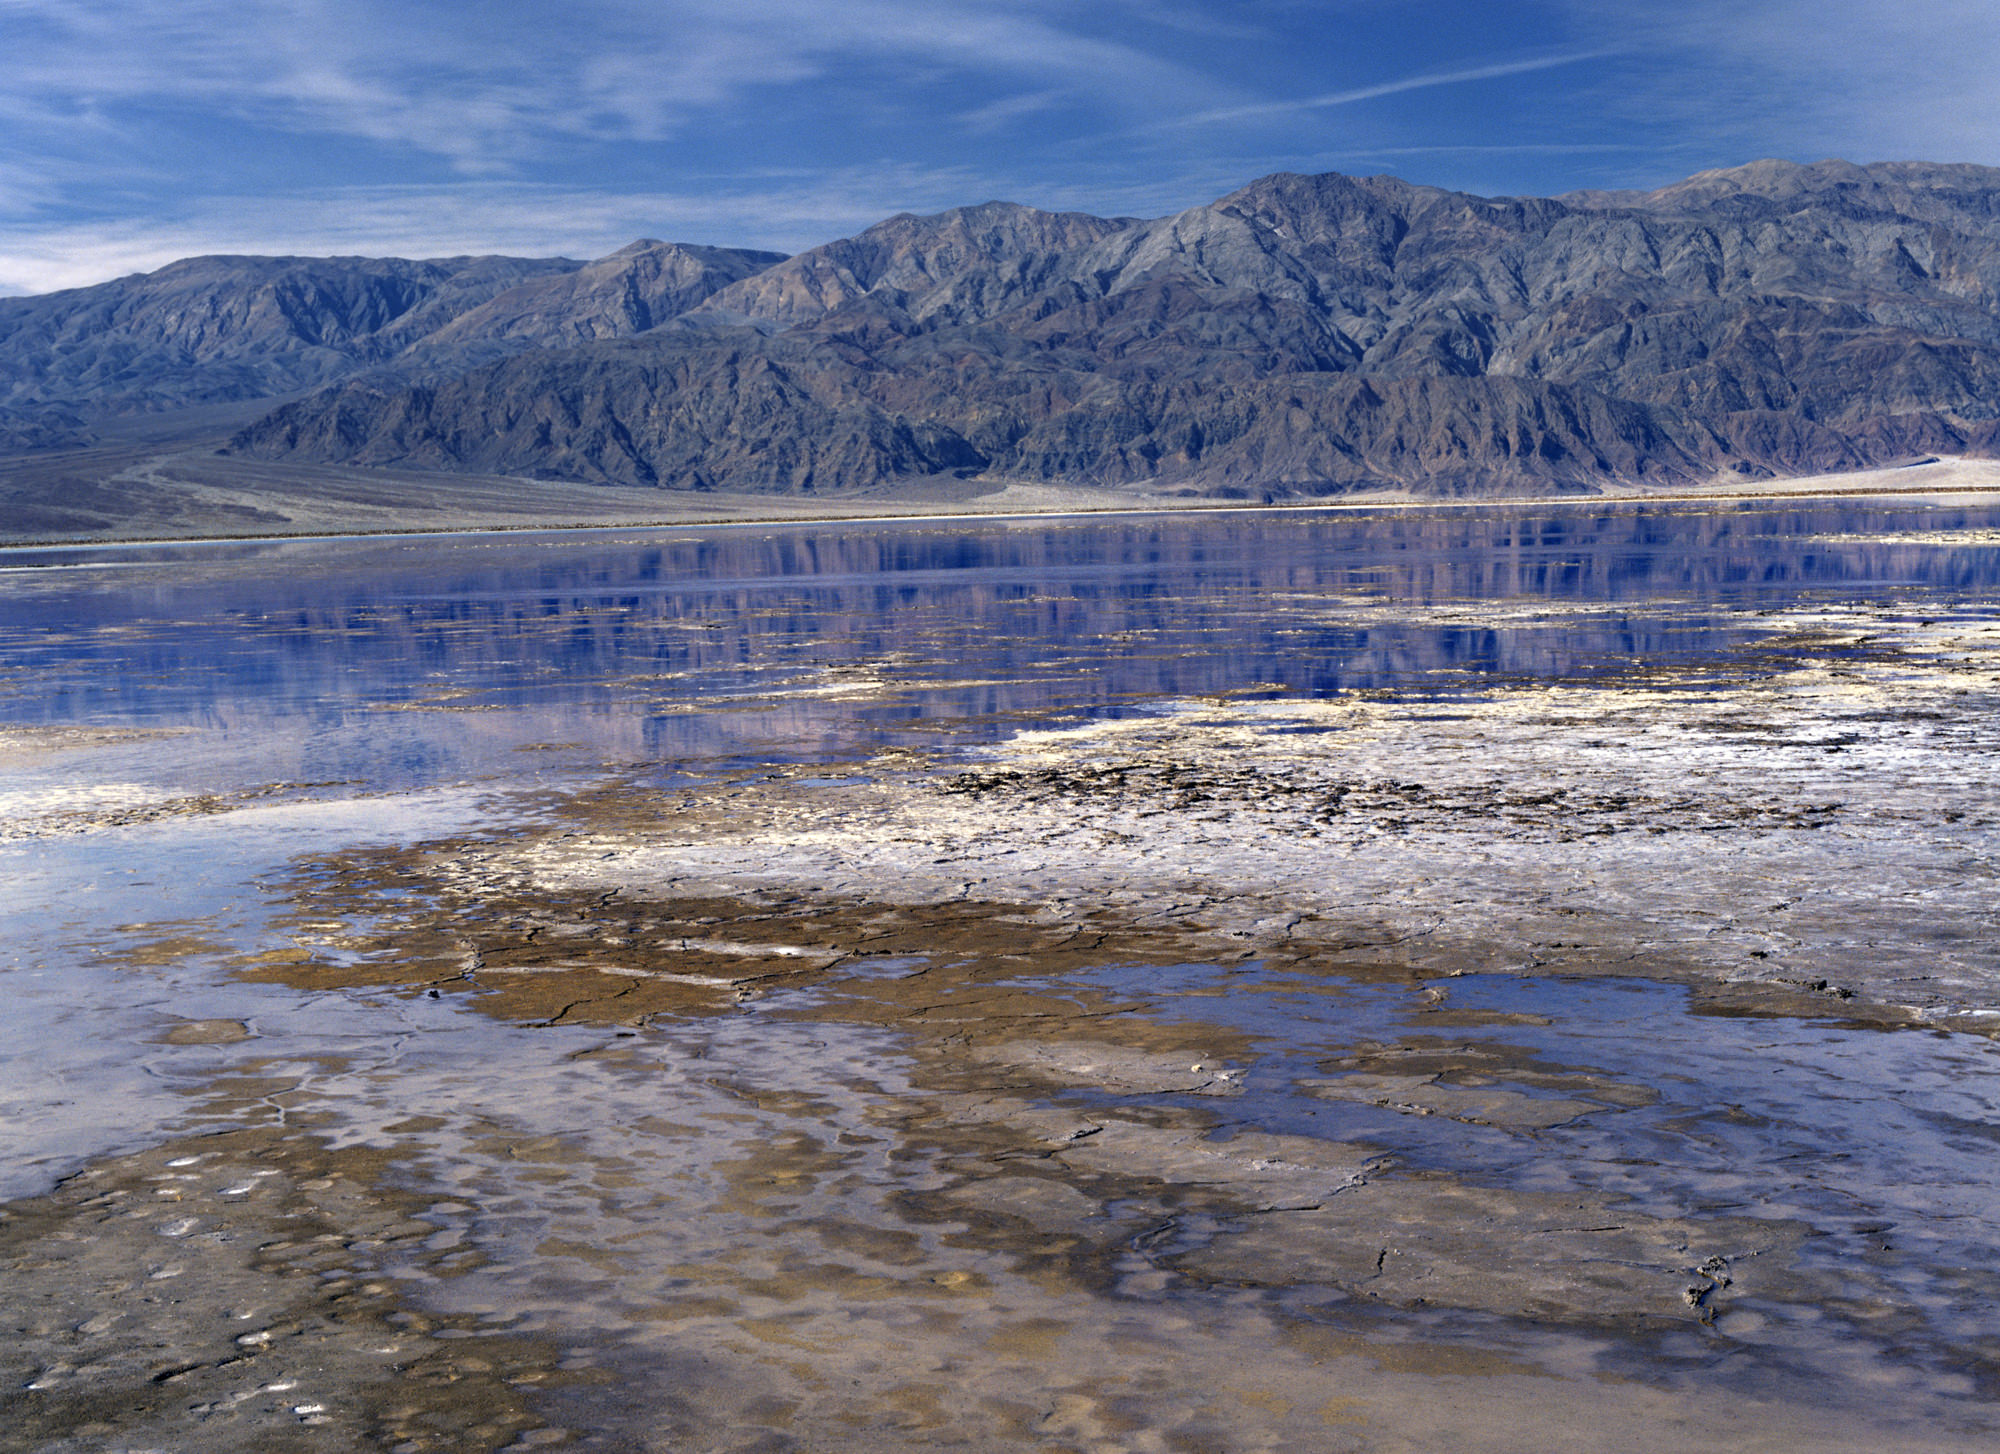
The water-logged playa near Badwater shot in the winter. A rare sight. Bronica SQ-A, 80mm, Ektachrome film.
Badwater Basin
There is something entirely weird about driving along Highway 178, south of Furnace Creek, and seeing a sign saying “Sea Level,” while you continue descending. That descent ends at Badwater, the lowest elevation in North America at minus 282 feet. The best light here is either sunrise or sunset. You can take a path from the parking lot out into the playa, which, during the winter, is often a shallow lake, making for nice photos. If you luck out, you’ll get the Panamint Mountains reflecting in the water. A rare sight.
Travel Guide Stuff
For more information, go to the Death Valley National Park website, Keep in mind, that winter is a popular time and you’ll have to book the few in-park hotel rooms several months in advance. You can also camp at several, somewhat dreary campgrounds but they don’t take reservations. If you don’t mind a half-hour drive out of the park, try getting a hotel in Beatty, Nevada. It’s at least cheaper but farther from the good stuff.
[The opening image was shot from Zabriskie Point looking down into the canyons during a winter sunset.]
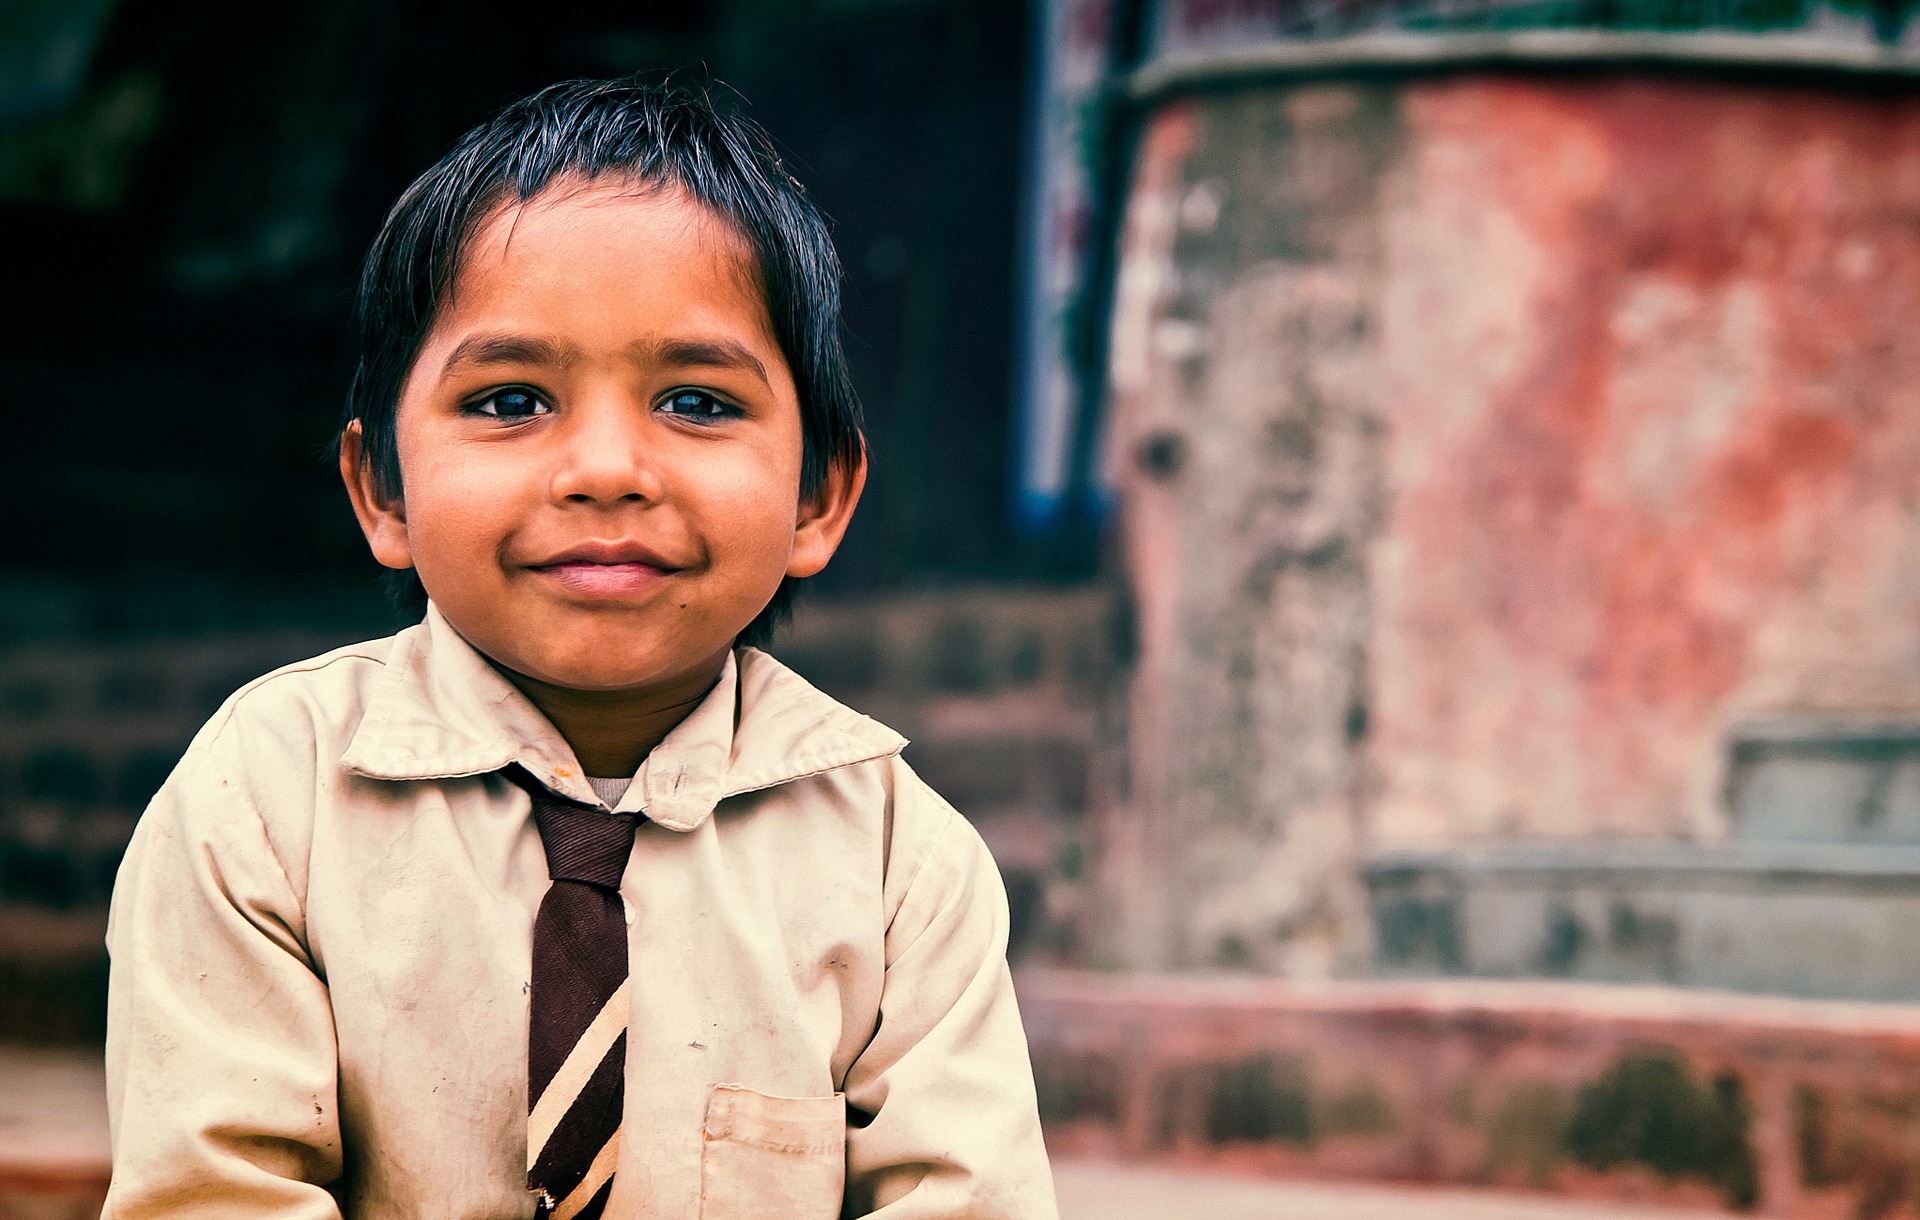
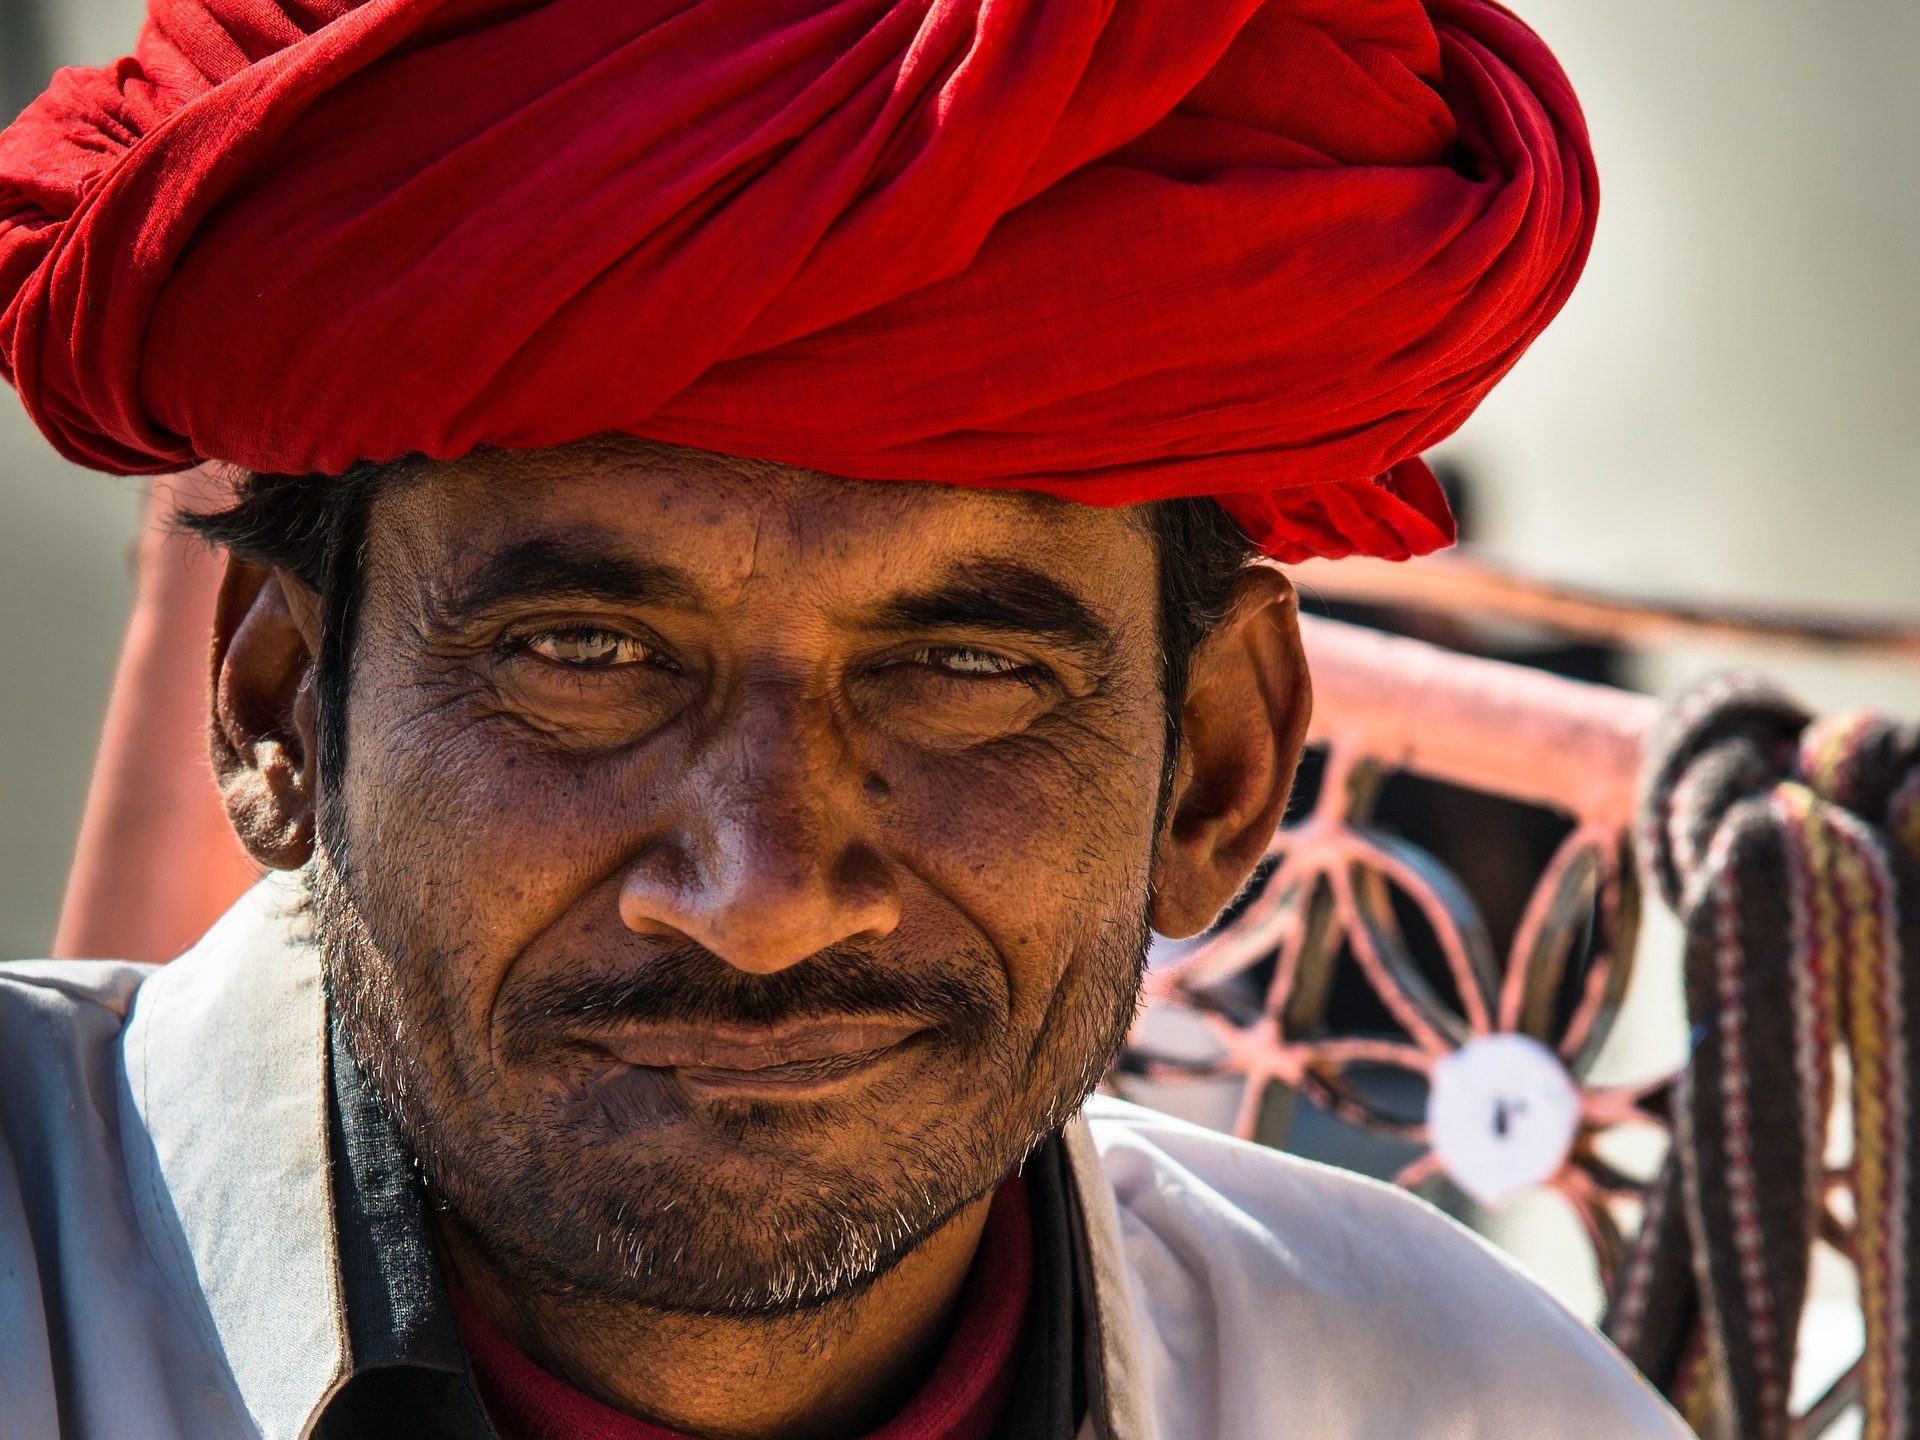
A great image tells a story. A great portrait can be one of the best story telling images you can take. We’ve all seen Steve McCurry’s “Afghan Girl“. What makes this image stand above the rest? I’ve broken down the key elements to creating a strong travel portrait, outlined below.
Do Some Research
Look at other travel photographer’s works and how they shoot portraits. This will give you an idea of how to compose the image, options for lenses and other gear, and how to look for the emotion. There is usually a fun story to go along about how the picture came to be. Make an inspiration board, whether at home or on Pinterest. Pull images you feel encompasses emotion, technical skill, and a story. Isolate the key elements to each and incorporate them when you shoot. This is especially helpful when traveling to a new place. You can simultaneously research portraiture and examples from this place.
Look for the Light
Time of day is so important while shooting outdoors and this also goes for travel portrait photography. We all know about Golden Hour, the hour after sunrise and the hour before sunset, as the best time of day to shoot. Follow this schedule when you are traveling as much as you can. Go for an early morning walk before breakfast. This is a great time to see daily life, locals getting ready to start their day. During the day when the sun is right overhead, focus more on shooting indoors or shaded areas. Still, have your camera on you at all times, just be aware of where the best light will be. In the evening before dinner, go out for another walk around town. This is my favorite time of day to shoot. The light is beautiful and there is so much energy. Shooting at night is possible with the right lens and lighting, be it natural or artificial. Using a flash can be invasive but possible when you ask for permission. Using an off camera flash is more versatile because you can change the location of the light source.
Use Tools
Being a natural light or minimal equipment photographer is great for travel portrait photography. You won’t have the opportunity to carry around a lot of equipment so you’ll need to be mindful of what you bring. A useful tool which takes up very little space is a reflector. Reflectors are called a photographer’s secret weapon for a reason. They are lightweight, versatile, and a can add dramatically and professional lighting to a portrait. A good size for ttravel portrait photography is 12″ because you can hold it yourself while you shoot. Smaller reflectors are stronger in their lighting, so be aware of distance placed from the subject. Off camera flashes, neutral density filters and a good tripod are other essential tools you may want to have on you at all times.
Engage/Look for Emotion
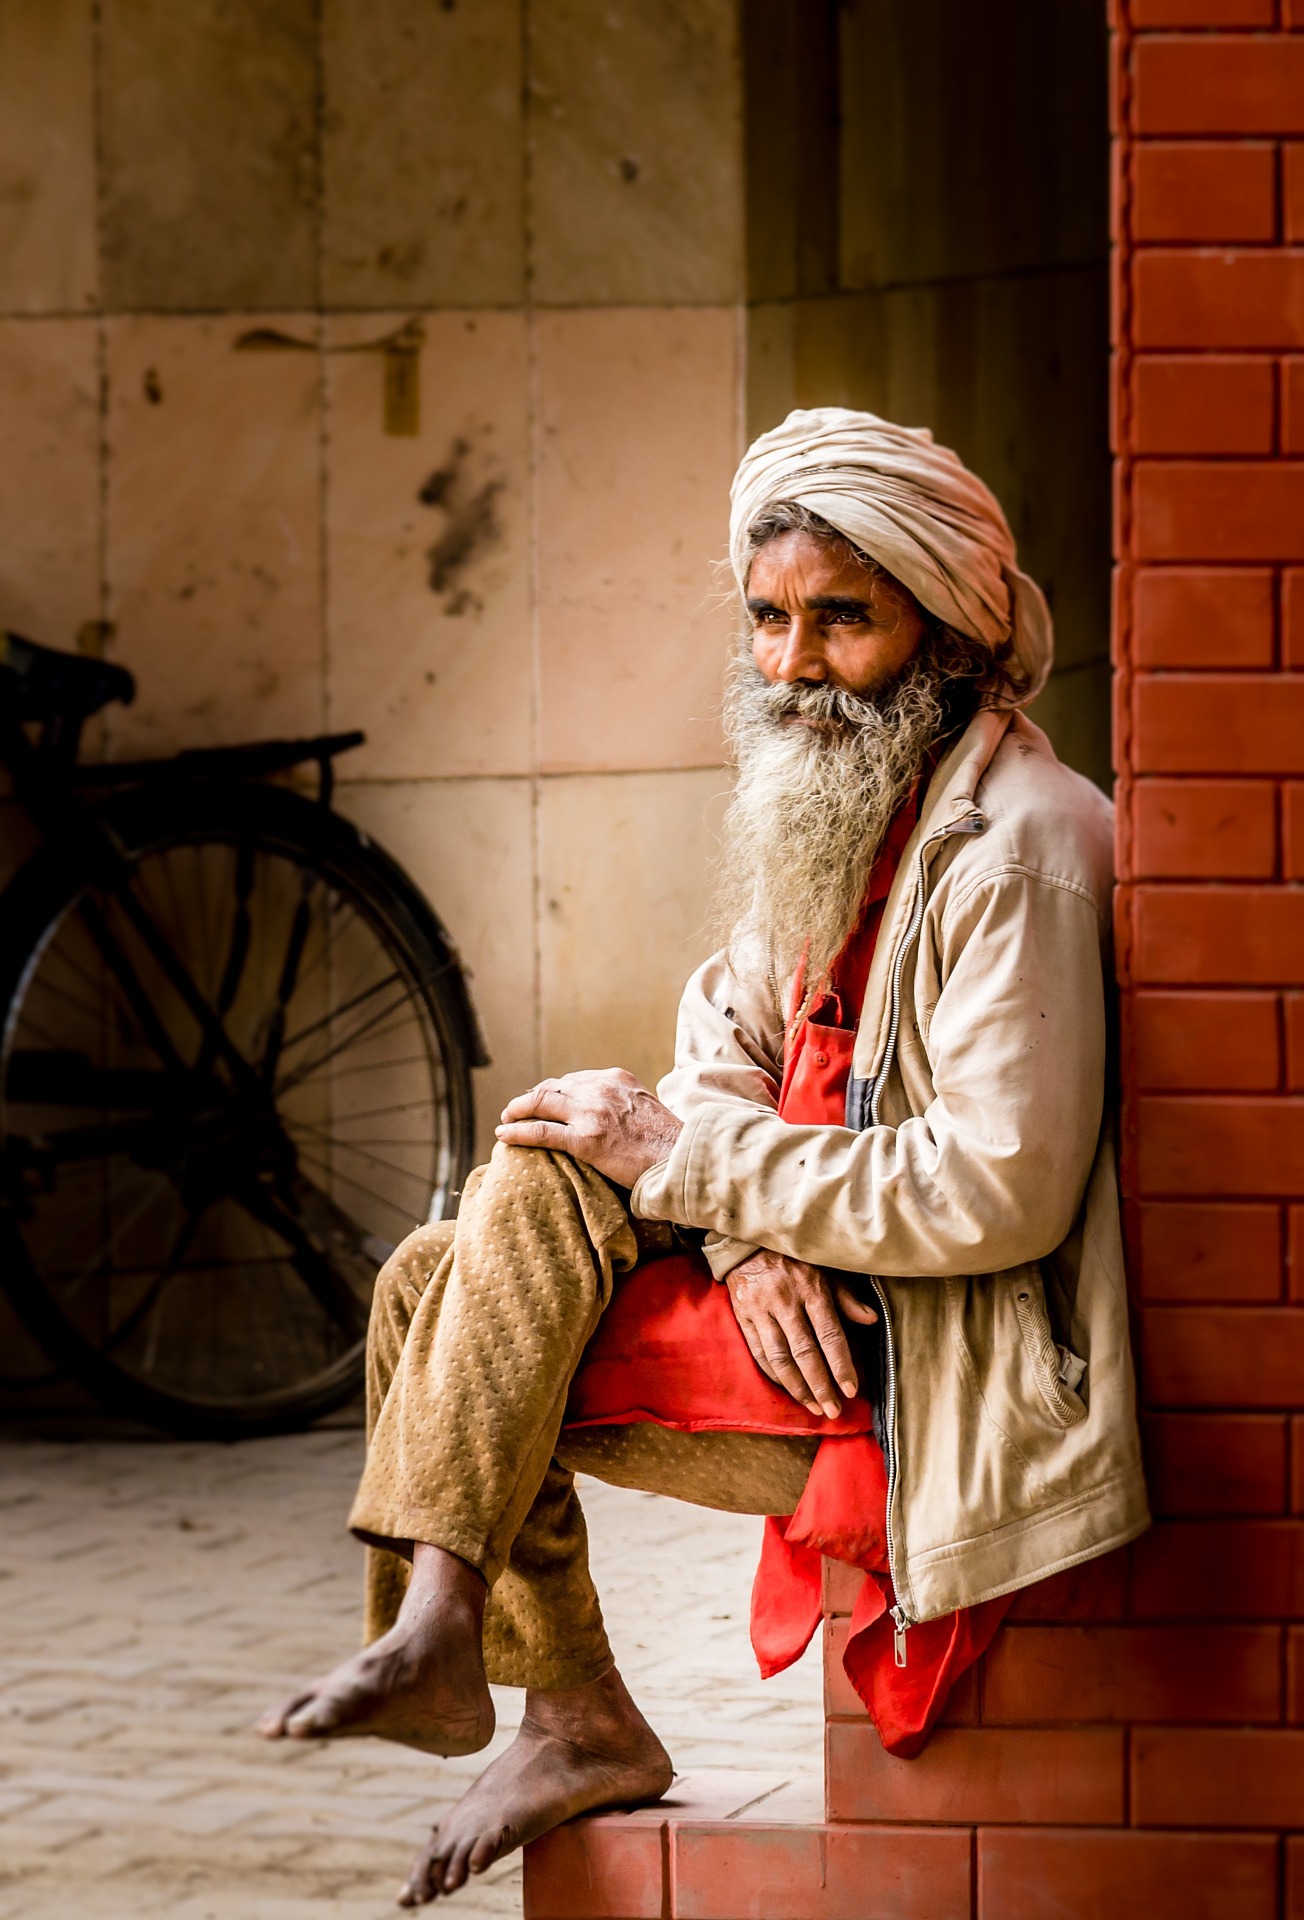
In a 2013 interview with Steve McCurry, he mentions the key to shooting strong travel portraits is to convey the story of the subject. You want the viewer to understand what life is like for this person. If you want to take stunning portraits, you need to be close to your subject. This means approaching them and starting a conversation. Be respectful of their culture and if they say no to a picture request, move on. There are plenty more people that are perfect for travel portrait photography. If they allow it, get close and frame the image. You should have already decided how to compose the image, so now you can just take the shot. Do take your time here. You’ve just asked for permission, so don’t rush the image now. Move around if you need to. Ask your subject to move if they can to better lighting if the lighting where you are is bad. This ties to the previous tip of finding the best light. You should have good light because of the time of day of your travel portrait photography. After you have the shot, thank them and show them the image. Offer to send it to them if there is a way.
Tell A Story
In a 2013 interview with Steve McCurry, he mentions the key to shooting strong travel portraits is to convey the story of the subject. You want the viewer to understand what life is like for this person. To do this, you’ll want to engage with the subject as mentioned above. Try and learn what their life is like, so you can better portray this through the portrait. If it benefits the image, include some background and make it an environmental portrait. Think about the overall story you are conveying with your trip to this place. You want your images to be strong enough to stand on their own but also think about a photo essay or even a book.
The Road Less Traveled
With the expanse of photography in the world, there are not many areas which are still untouched. However, you can venture off the beaten path to explore some less photographed towns during your trip. If needed, find a fixer or someone who can show you around and ensure you are safe. This is especially valid for solo travelers, you want someone on your side who speaks the language. While it could be challenging shooting in more remote areas, you will be sure to get a unique image showing the true emotion of the place. Make sure you smile, engage with the subjects and show them the images you’ve taken. People love to see a great photograph of themselves. If needed, it might also be a good idea to carry some small change with you to offer in exchange for a travel portrait photography.
While “Afghan Girl” portrays all of these qualities in one image, it is not easy to create a strong travel portrait. Use these tips as a guide and be sure to practice as much as possible before traveling to another country. You can walk around your hometown shooting portraits of the locals. Offer to send them the images. You’ll get some great practical experience and be able to nail down your accessories and settings before traveling. You don’t want to spend all that money just to be in another country practicing portraiture for the first time or you’ll be greatly disappointed.
Amsterdam is famous for its canals, but it’s also filled with an abundance of architecture; everything from Renaissance style to contemporary and modern. There are so many amazing photographic opportunities; I’ll share 8 of my favourites with you:
Canal Houses
These picture-postcard homes line the banks of the many waterways of the city. Although plenty of the homes are still lived in, many have now been turned into offices, museums or places to stay, so there’s ample opportunity to take a peek inside one.
Photographically, these stunning pieces of history are best viewed from the canal banks. Hopefully, you’ll get the right sunlight and weather to capture them reflected in the water.
The Royal Palace
Originally designed and built in the 17th century as the City Hall, the Royal Palace can be found in the heart of Amsterdam, at Dam Square. After Louis Napoleon became the King of Holland, he redecorated the hall in Empire style. Since then, the changes have been undone and the building more closely represents its original state.
The Royal Palace, Amsterdam
Use a wide-angle lens to get this whole magnificent building in and then capture some of the ornate details around the top with a zoom. Try a long shutter speed to blur the people in the foreground if you’d like a less ‘busy’ shot.
Old Meets New
There’s a pleasant mix of old and new in Amsterdam and sometimes the two meet:
Contemporary Building, Amsterdam
This modern façade can be found on Rokin rod not far from Dam Square. Built in the traditional shape and style of the other canal houses, its additions of glass and colour really make it stand out. While some may deem this an ‘eye sore’, with its interesting glass reflections, it’s certainly worth a photograph or two.
Where there are canals, there will be bridges and Amsterdam and with over 2000 across the city, you really can’t turn around without seeing one of them!
Magere Brug or ‘Skinny Bridge’
The Skinny Bridge (or Magere Brug) is amongst the most famous – you may have even spotted it in a film or two!
Windows and Shutters
A variety of shutters can be found adorning the buildings around the city
Shutters are a big part of Amsterdam’s architecture and you’ll find a weird and wonderful array of them as you walk around the city. With so much glass used in the design of buildings, coupled with glare from the water, houses can get really bright and hot, so shutters provide an important function as well as looking pretty.
Lamp Posts
Looking up can get you some new takes on architecture, but what about the things we tend to ignore or take for granted?
Lamp Posts are a great opportunity for some unique shots
It never fails to amaze me how many different styles of lamp posts there are around cities and Amsterdam is no different. They range from the stark and imposing red of the picture above on the right to the ornate, carved grandeur of the one on the left.
Monuments and Memorials
The Jewish Memorial in the Holland Theatre
Like most cities, Amsterdam has its share of memorials. A particularly stark looking and touching one can be found in the Holland Theatre in the Jewish Quarter. Entry is free and the memorial pictured above can be found at the back of the museum where the old theatre itself once stood.
Churches
Churches of many different religions are in abundance throughout Amsterdam
There are churches and places of worship to reflect many religions, in Amsterdam and each one has special photographic appeal.
Some particular churches of note are the Oude Kerk (Old Church) in the now Red Light District, the Nieuwe Kerk (New Church), a 14th-century church where many Dutch monarchs have been crowned; and the various synagogues in the Jewish Quarter.
If you’re visiting Amsterdam, I hope this article gives you some photographic inspiration and to finish, here are my top tips for getting some great photos of buildings:
Do research before you go to make the best use of your time once you arrive.
Take a wide lens to capture buildings with their full drama.
Try a long shutter speed if there are lots of people cluttering the shot.
Remember to look up and see if there are any new angles to take advantage of.
A fad that came to stay: the selfies. And what is so special in these pictures that, until a few years ago was nothing more than the simple habit of some travellers to auto – portray themselves if they were alone? Maybe you can say it is something related to newer generations and the heavy exposure of Social Media networks; others may say it’s due to the changing trends of famous people…
Regardless of its origins, selfies are fun, easy to take and the best of all: you don’t need to be an expert or have a high-end camera to take one – just grab your smartphone and enjoy a nice photo session! Nevertheless, taking a selfie at a cool place can sum up the whole selfie experience, mostly if your aim is to rank up higher in Social Media or if you die for the thrill of adventure. Let’s go through some of the best locations for taking a selfie in 2021!
Recommended Accessories
One point that can make the difference in the overall quality of your selfies is the usage of certain gear and post-production tools to enhance the quality of your images. You don’t need to make hefty investments as many of these tools are quite cheap, so let’s get on with the list:
Smartphone Gimbal: There are plenty of options to explore, though DJI leads the market with their Osmo Mobile line, the latest release of the DJI OM4. A gimbal works by stabilizing your image with a three-axis system, which not only avoids blurry shots but also protects your phone in case of risky shots. A word of advice: be mindful about the total weight of your phone – as not all gimbals can support the same weight (they usually drop the phone rather abruptly when that happens), and on this same page of security tips keep in mind battery life, and be sure to test your gimbal with a cushioned surface first (like above your bed) – just to avoid costly accidents in case of faulty gear.
Smartphone apps: If there’s something greater than the variety of smartphones we see these days is the variety of apps meant to enhance photos. You can check a tailored list of the ones we consider useful for photographers – as some apps simply apply filters instead of letting you control the scene.
Lenses for Smartphones: Finally, accessory lenses give free rein to our imagination as they push us closer to the DSLR experience. For the best price/quality relationship we recommend you to check either the OlloClip Multi-Device Clip Lenses or the mindblowing, professional Moment Lenses – one of the finest products for smartphones available in the market.
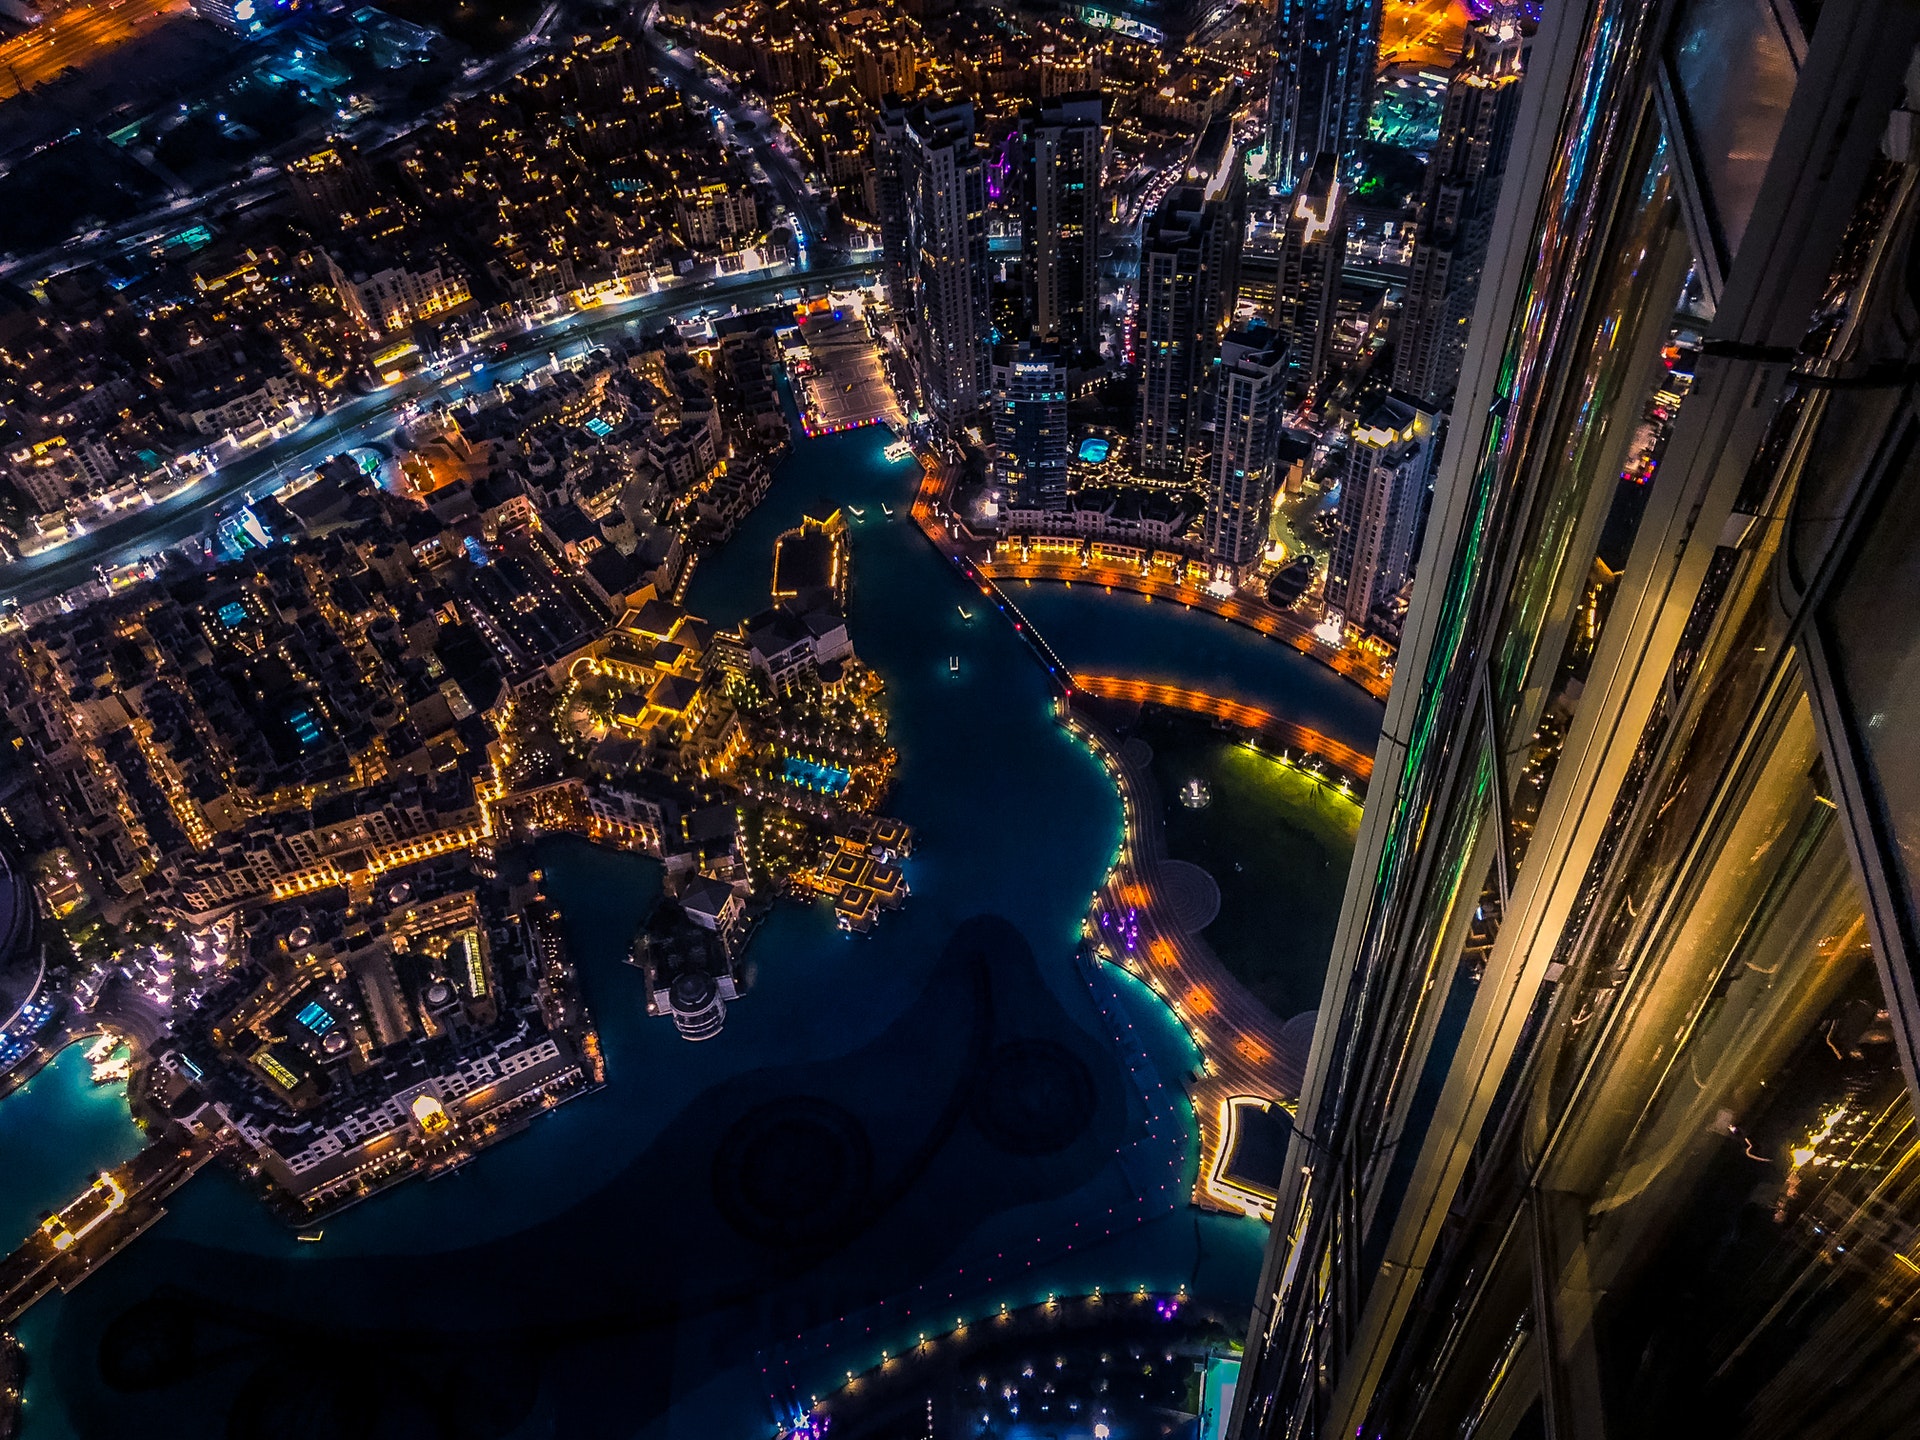
1. Burj Khalifa, UAE
The preferred place for welcoming a new year in the world by many tourists, is there a better place to take a selfie than on top of the world? You will find this fine piece of architecture as taken out from your wildest fantasies. 828 metres tall and with two sky observation decks – floors 124th and 148th floors respectively – you can take staggering shots at some meters above 555m from the highest sky deck. There’s a tiny possibility to access the highest spots of this building, although that’s not something we recommend, nor we encourage.
In case you’re wondering what to do if you suffer from fear of heights – well, let me tell you that this writer here endures the same issue so no sky-high pictures for me. A floor-level selfie from the very entrance of the Burj Khalifa or its nearby entourage is more than enough.
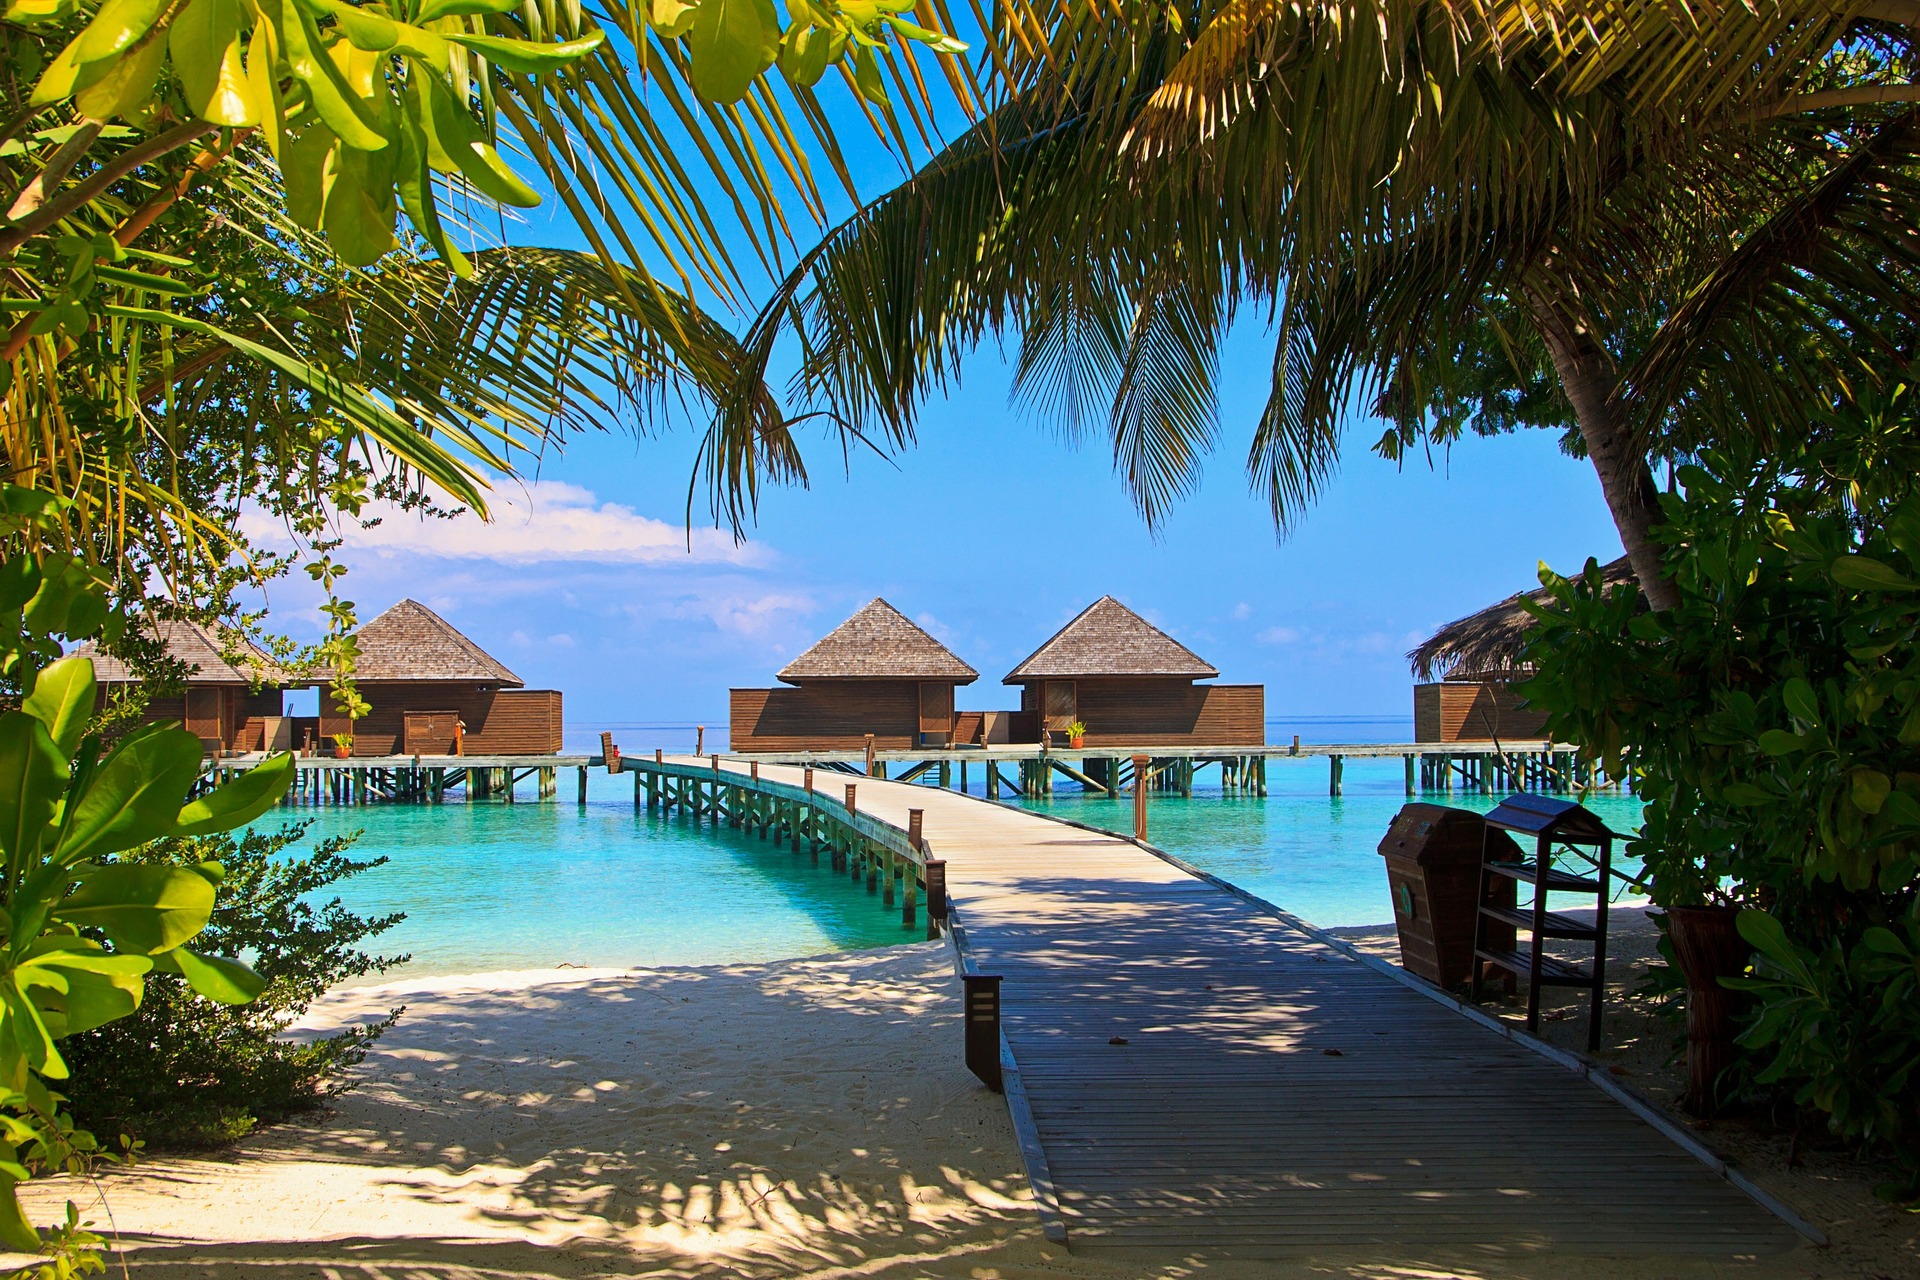
2. The Maldives
Picture this: crystal clear water, kilometres of beach shore, lovely villas, island climate plus some exotic cocktails while enjoying a sunset lying on a chaise – sounds like paradise right? An archipelago of 1,192 coral islands grouped into 26 coral atolls in the Indian Ocean, it’s widely known as one of the best places in the world to indulge yourself with guilt-free leisure time. And, if you happen to be adventure-driven, be sure to pack an underwater camera as The Maldives is the ideal place for an underwater selfie, with its many variations of sea life: corals and over 2000 species of fish.
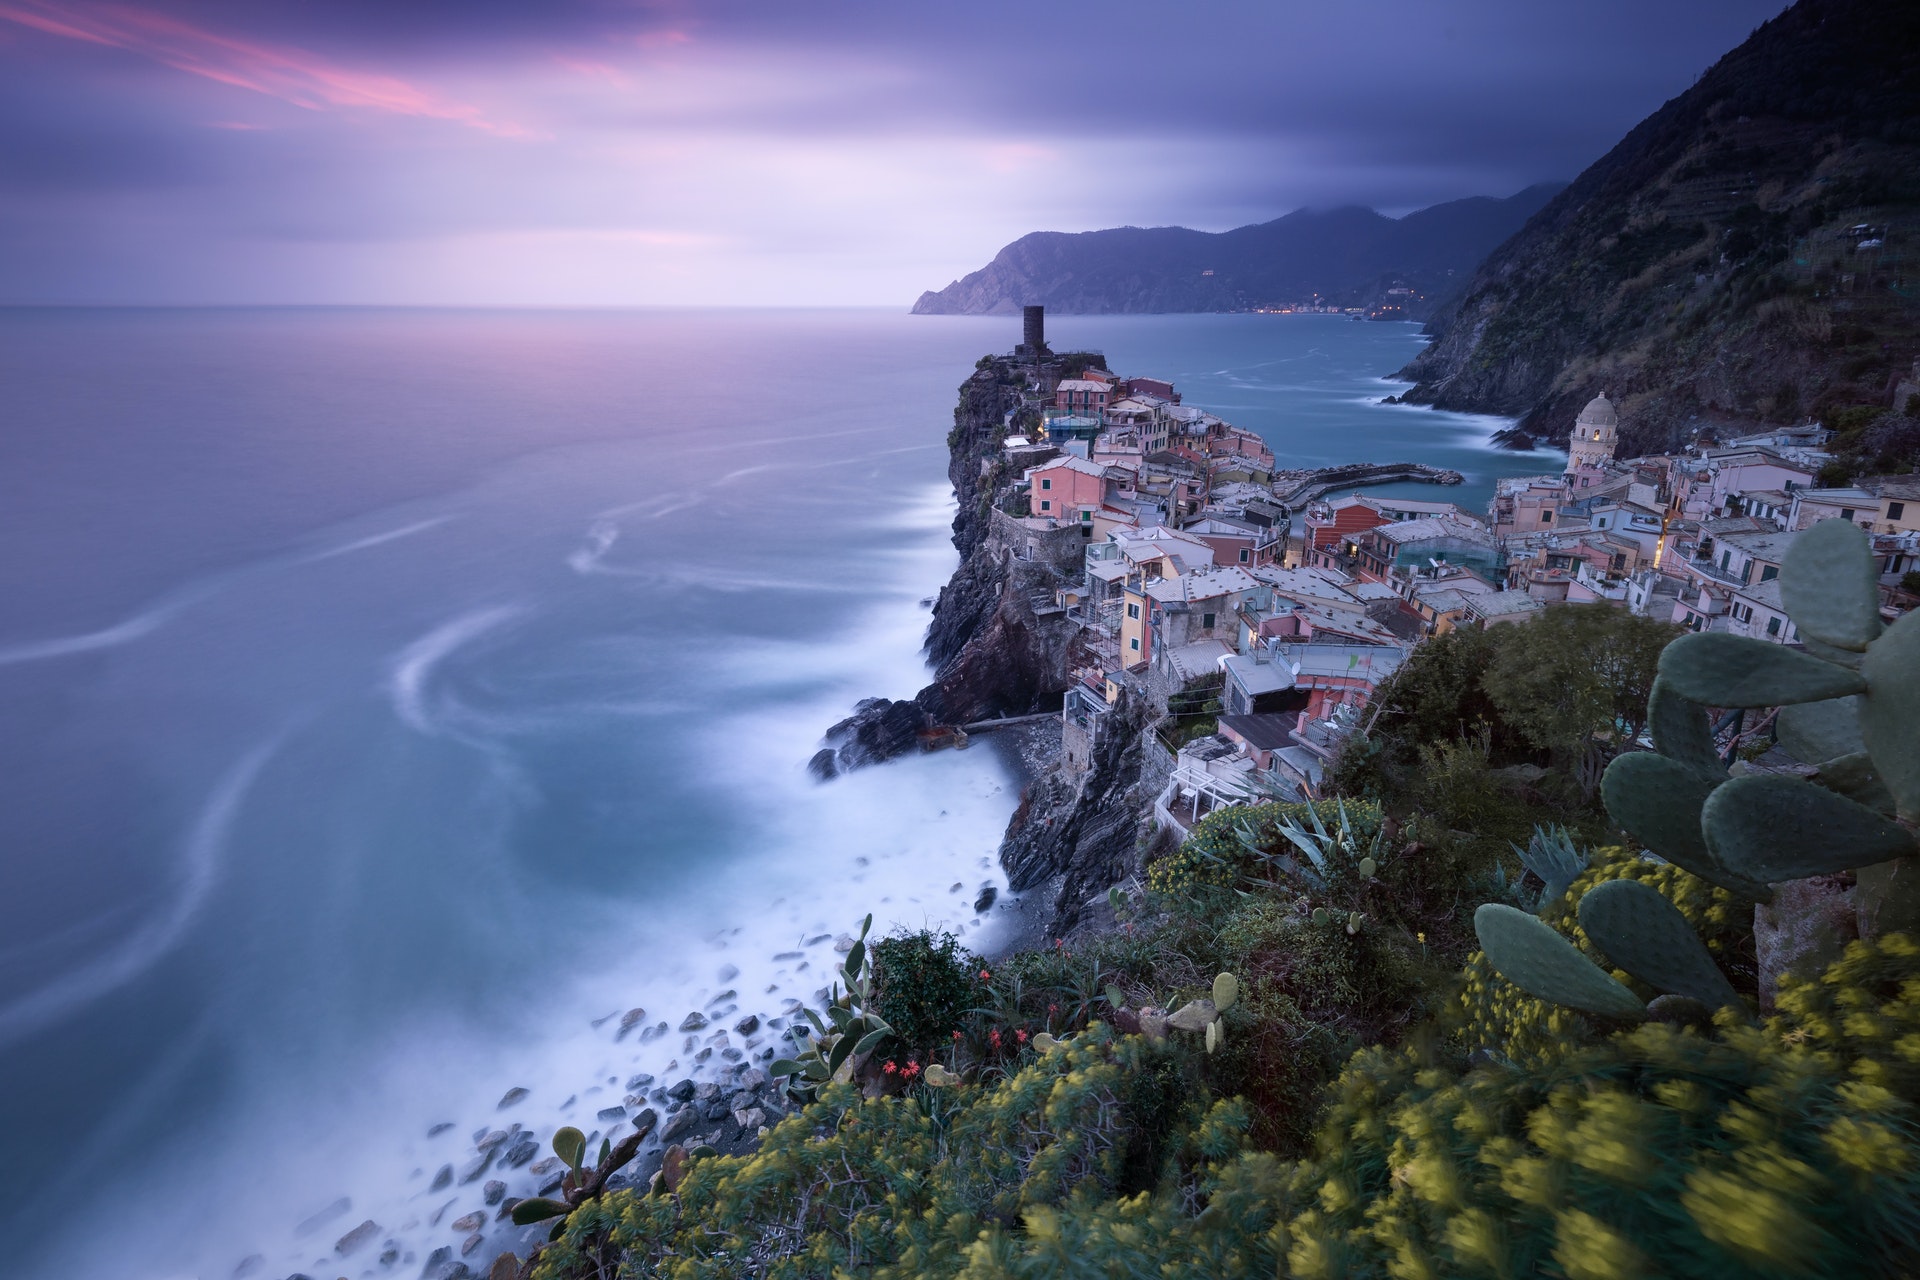
3. Cinque Terre, Italy
One of the most beautiful sights in Italy is the northeastern coast seaside town known as Cinque Terre. It’s often mistaken for the Amalfi Coast – which is located in the southern region of Italy – so for giving you some references: Cinque Terre is a 3-hour drive from Milano, whereas the Amalfi Coast is easily accessible if travelling from Rome or Naples (1-hour drive). They also variate on climate, as Cinque Terre is significantly colder given its proximity to the Alps; the Amalfi Coast is considered – alongside with Malta – one of the most beautiful places in the Mediterranean landscape to visit and vacation.
So why should you visit Cinque Terre instead? For starters, it’s a place meant for hiking, so you can spot variated sights while discovering the local culture. Its less posh atmosphere, in contrast with the Amalfi Coast that’s filled with 5-stars resorts, will also boost your creativity by letting you fully relax. Pack your camera, keep your smartphone in hand, and enjoy one of the most breathtaking views Italy has to offer to the world.
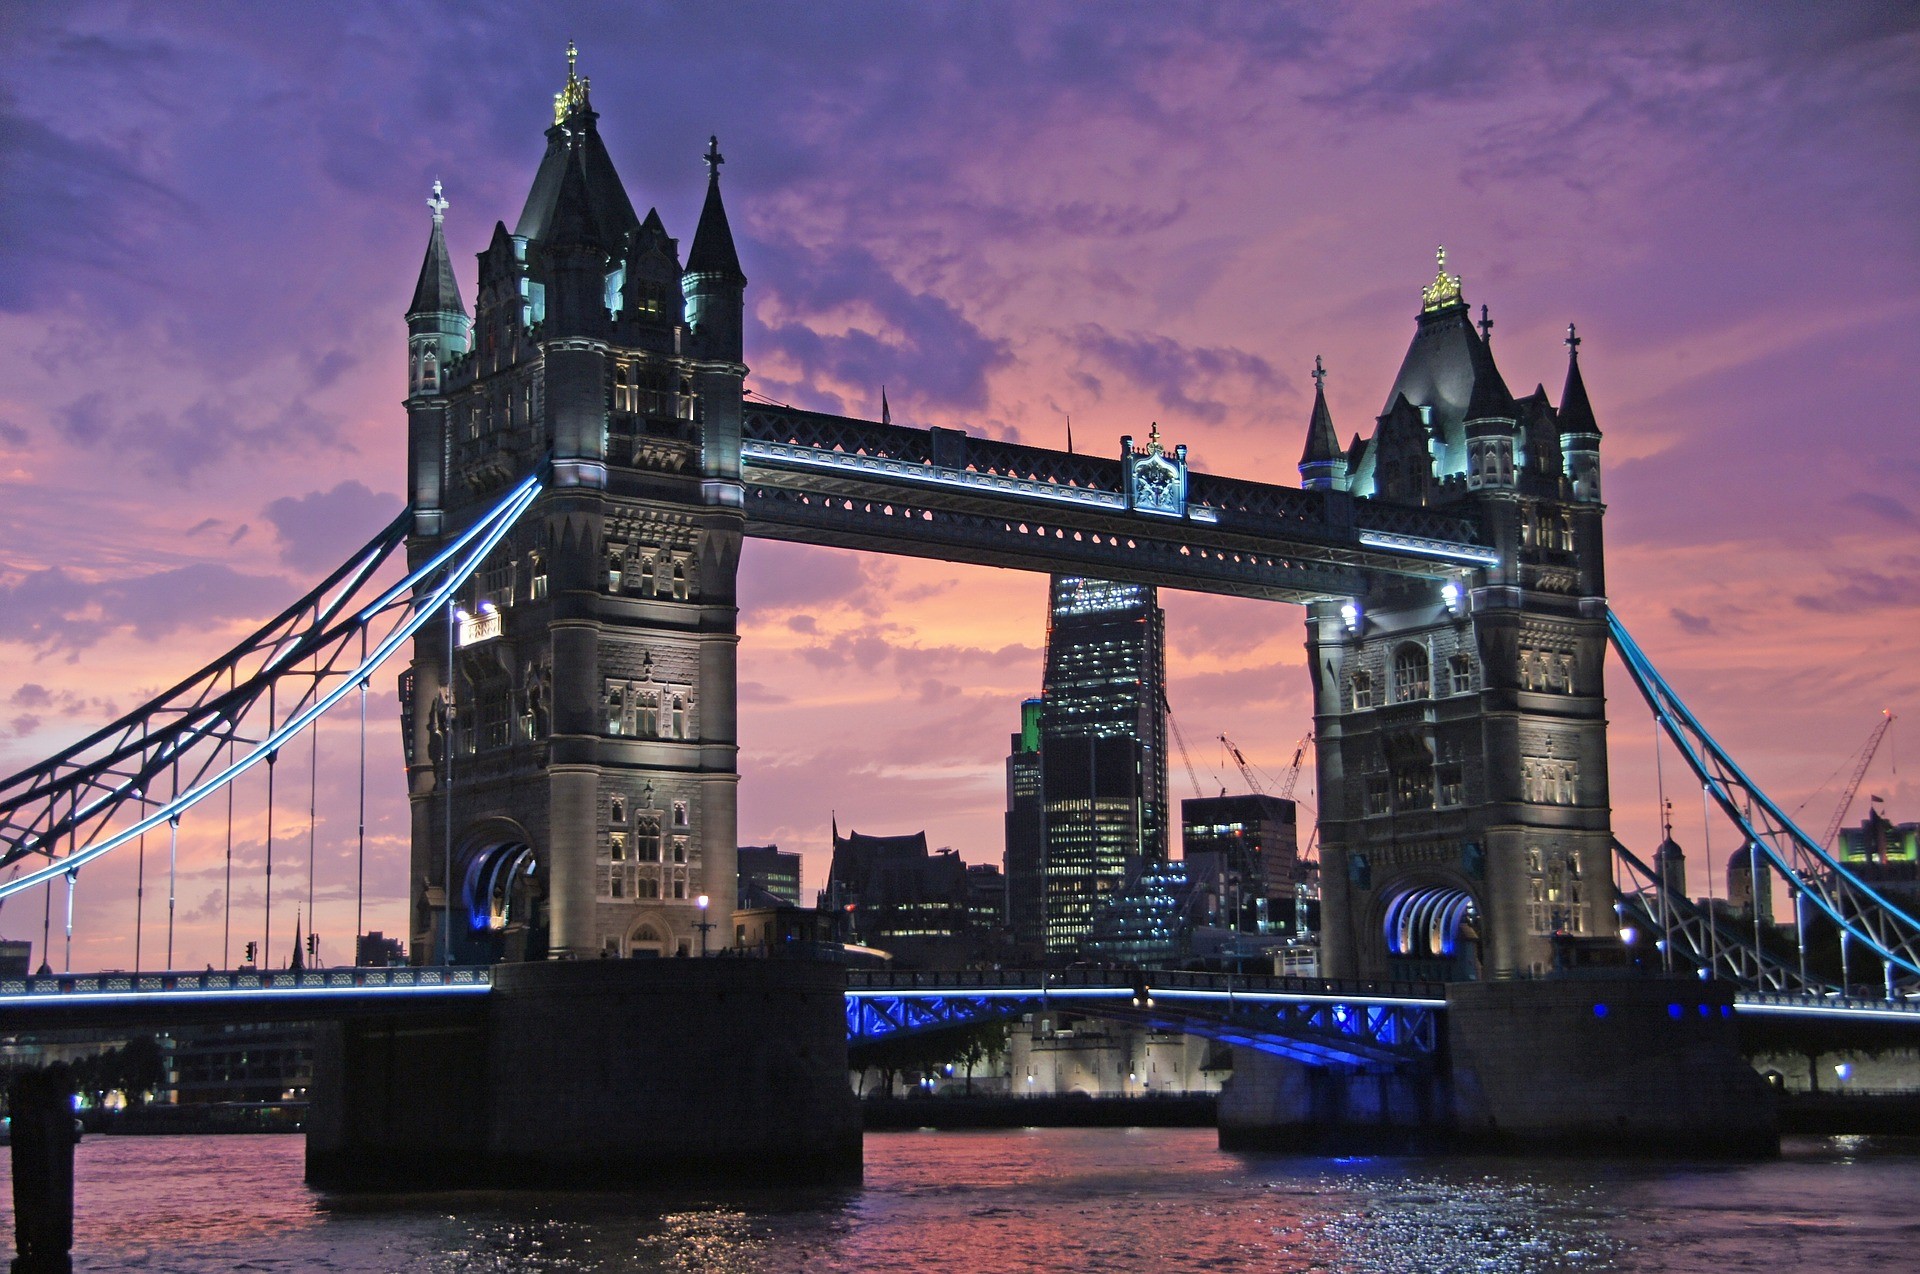
4. Tower Bridge, London
The most popular bridge in the world for taking selfies, thousands of tourists choose this particular place filled with historical anecdotes for a selfie on-the-go. This suspension bridge that crosses the River Thames, and close to the Tower of London has become an iconic symbol of the city. Whenever there is a special event in London, like the 2012 Olympics and Paralympic Games, this Victorian-styled bridge will take an active part in publicity campaigns as the most vivid demonstration of Londoner pride.
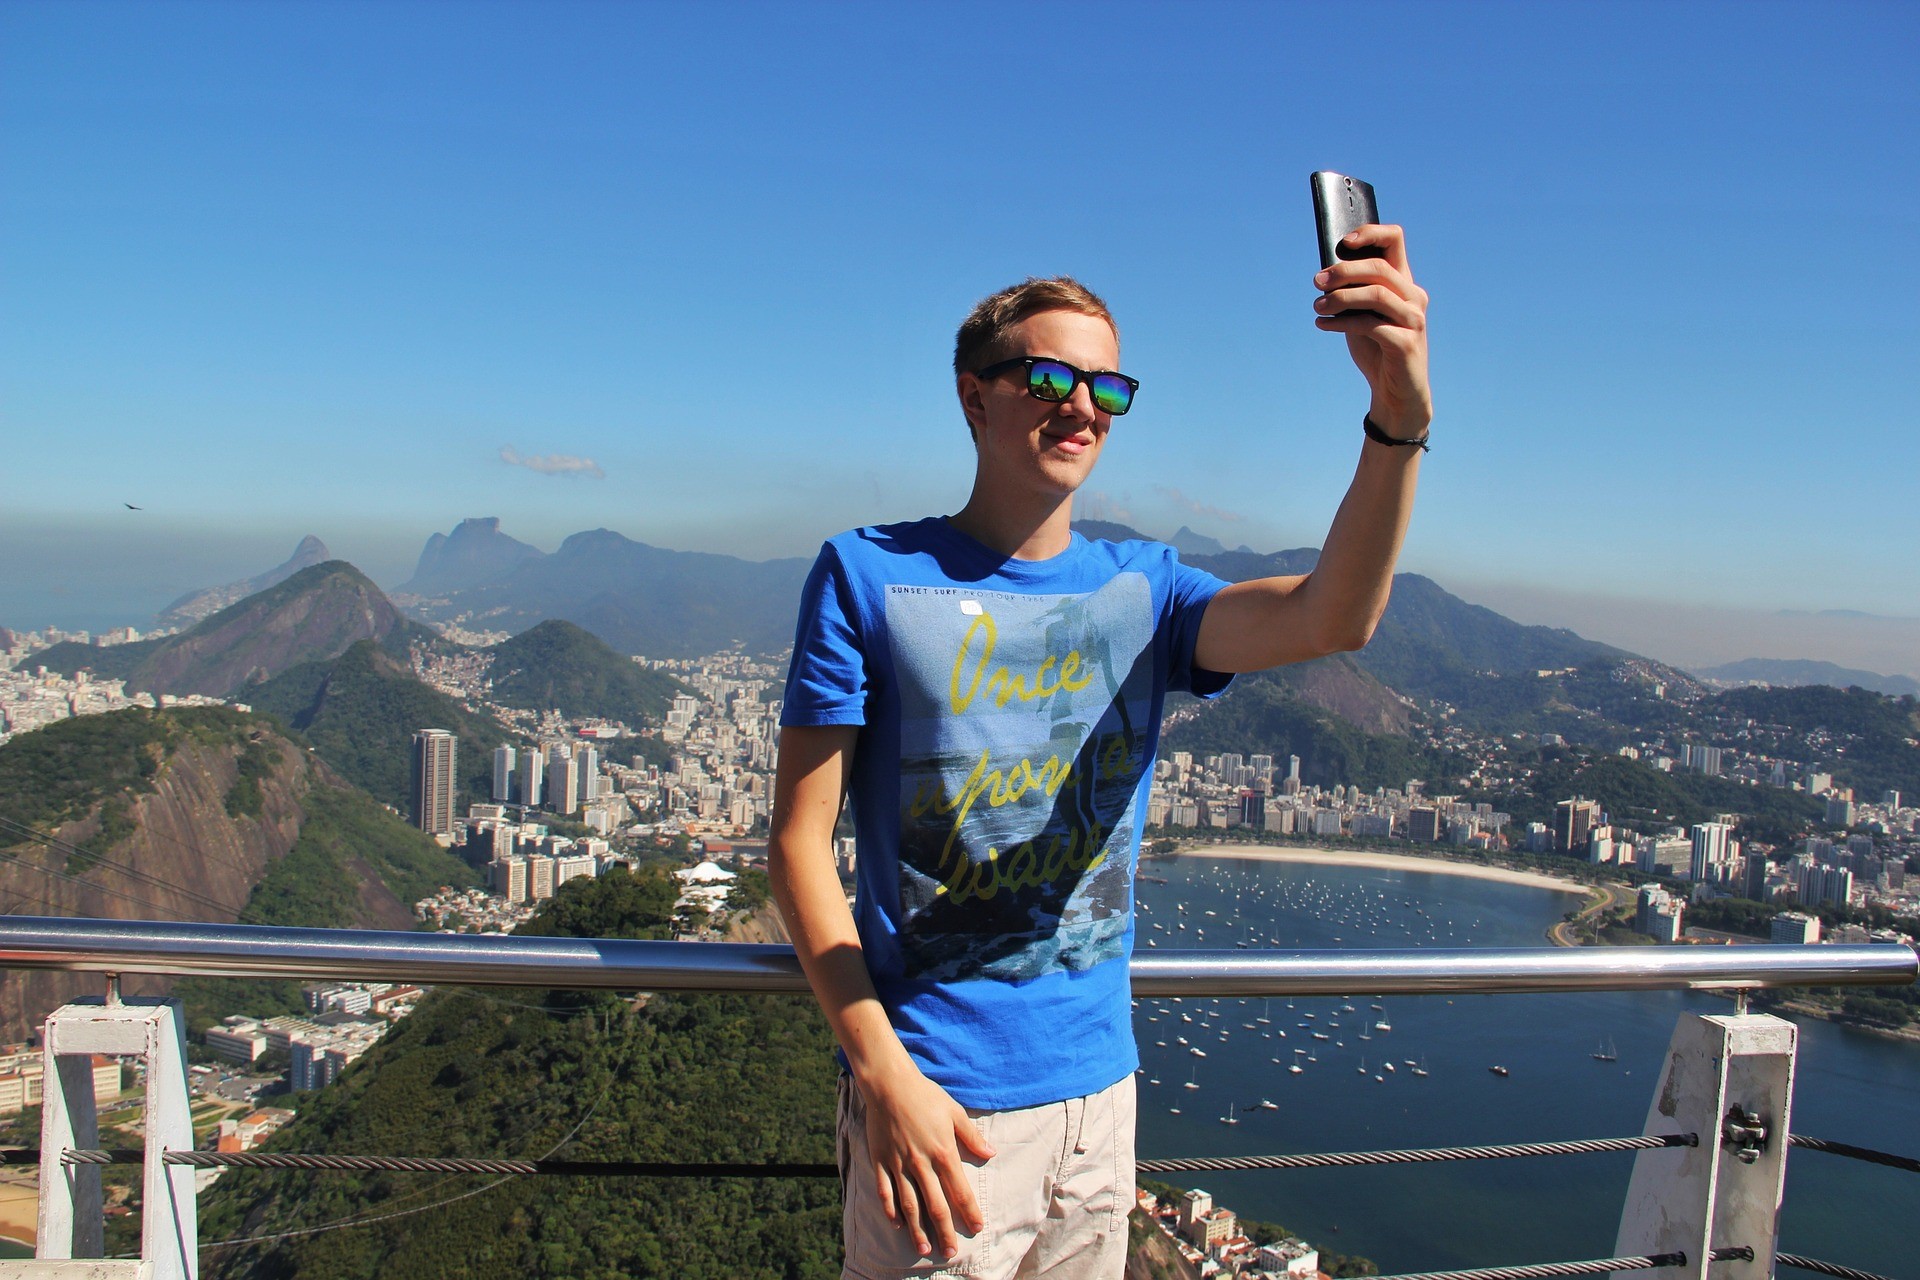
5. Corcovado – Rio de Janeiro, Brazil
A tourist city par excellence, in Rio de Janeiro you can find a vast sum of landscapes worthy of being photographed – but it says nothing more “Rio de Janeiro” than a selfie at Corcovado mountain. The place of classic postcards of the city, enjoy a selfie next to the monument of Christ the Redeemer, one of the 7 World Wonders.
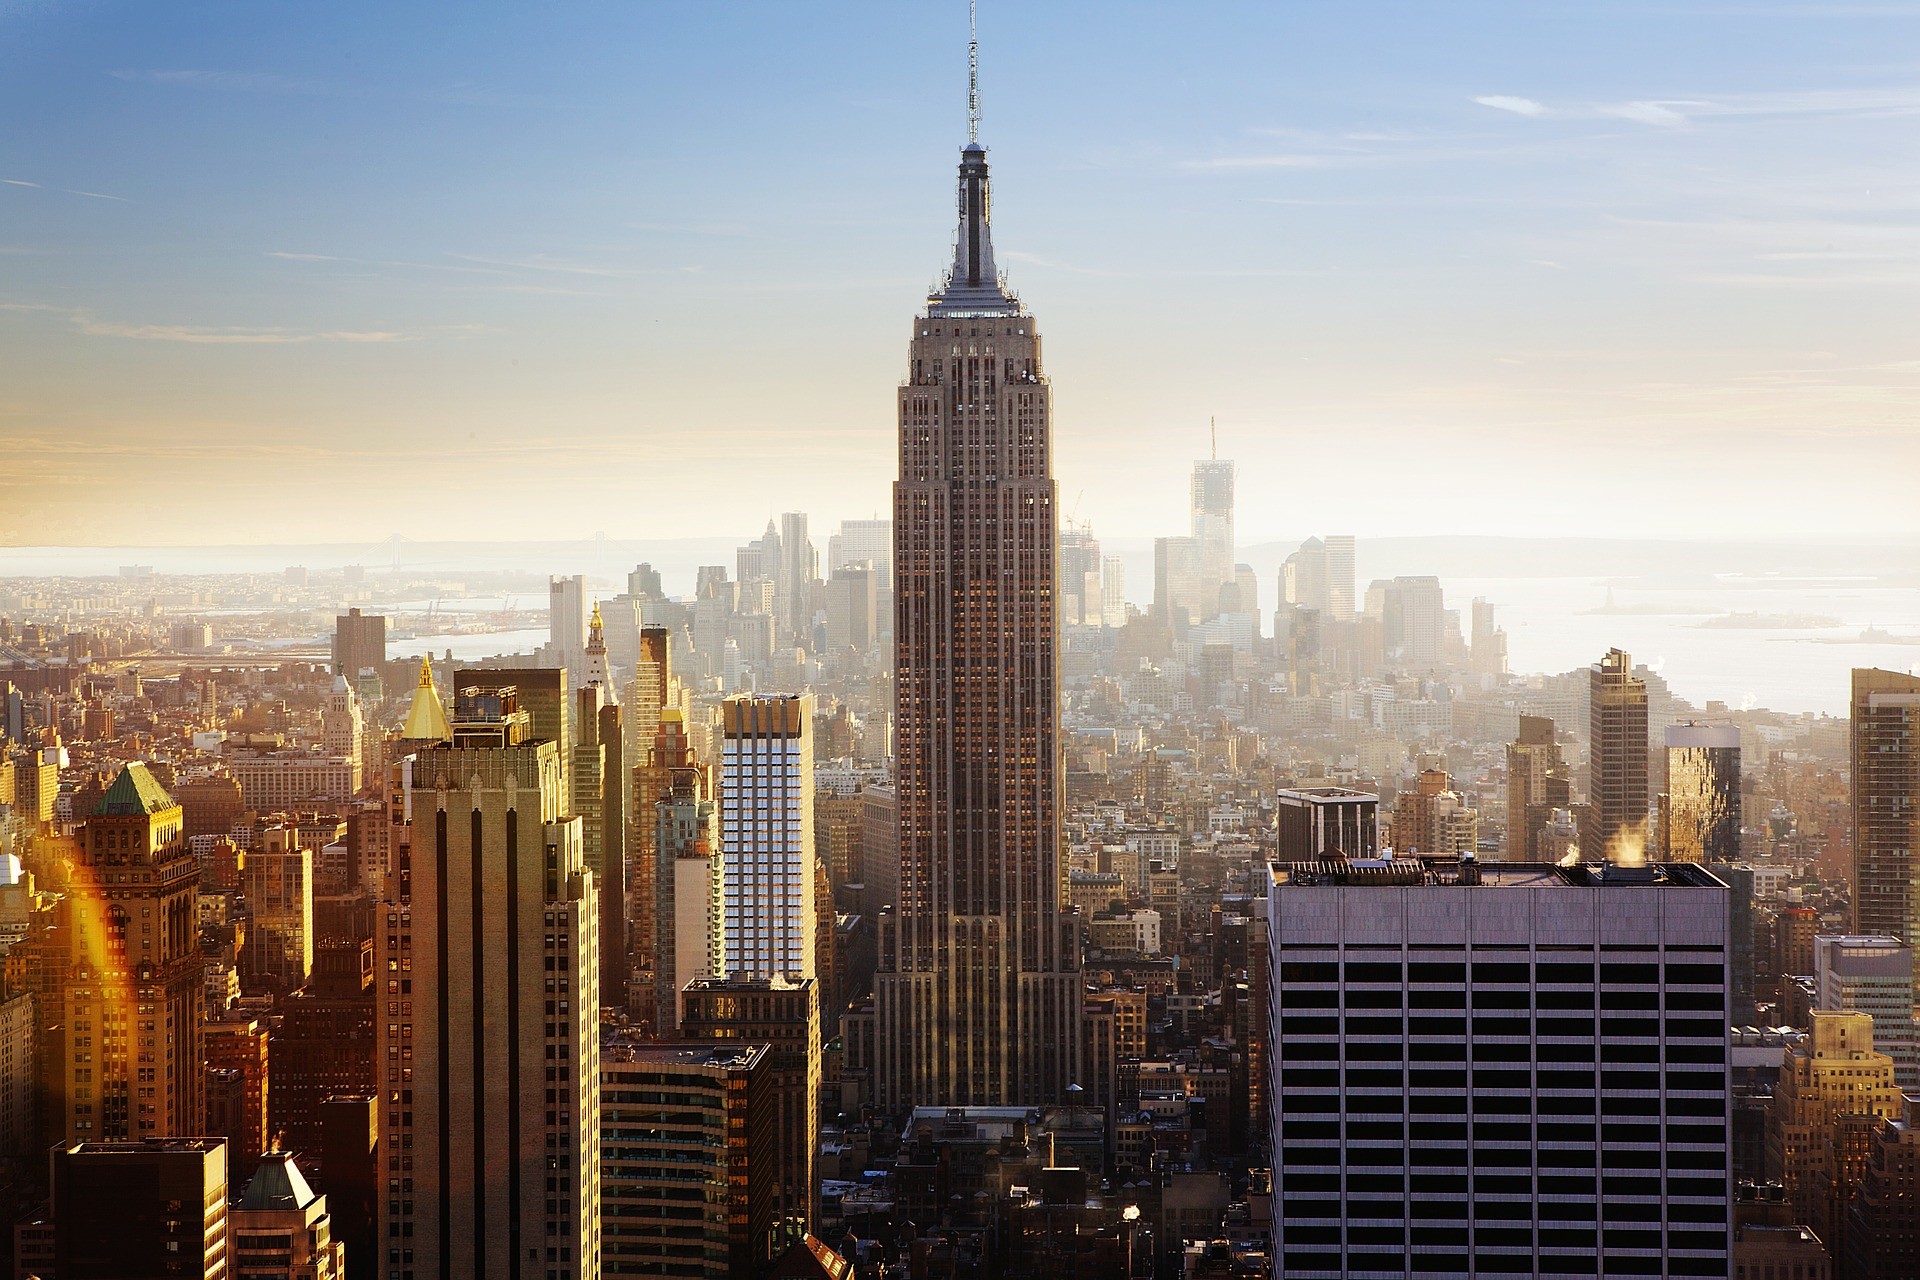
6. Empire State Building – New York, USA
The 102-story Art Deco skyscraper located in Midtown Manhattan features two observation decks: the well known 86th floor observation deck, with one of the most beautiful, breathtaking sights of New York City or, for those who don’t experience vertigo, the 102th floor one, where you can sightsee the entire city, although at a completely indoor place – you can even travel back in time by getting there in an old-fashioned manual Otis elevator.
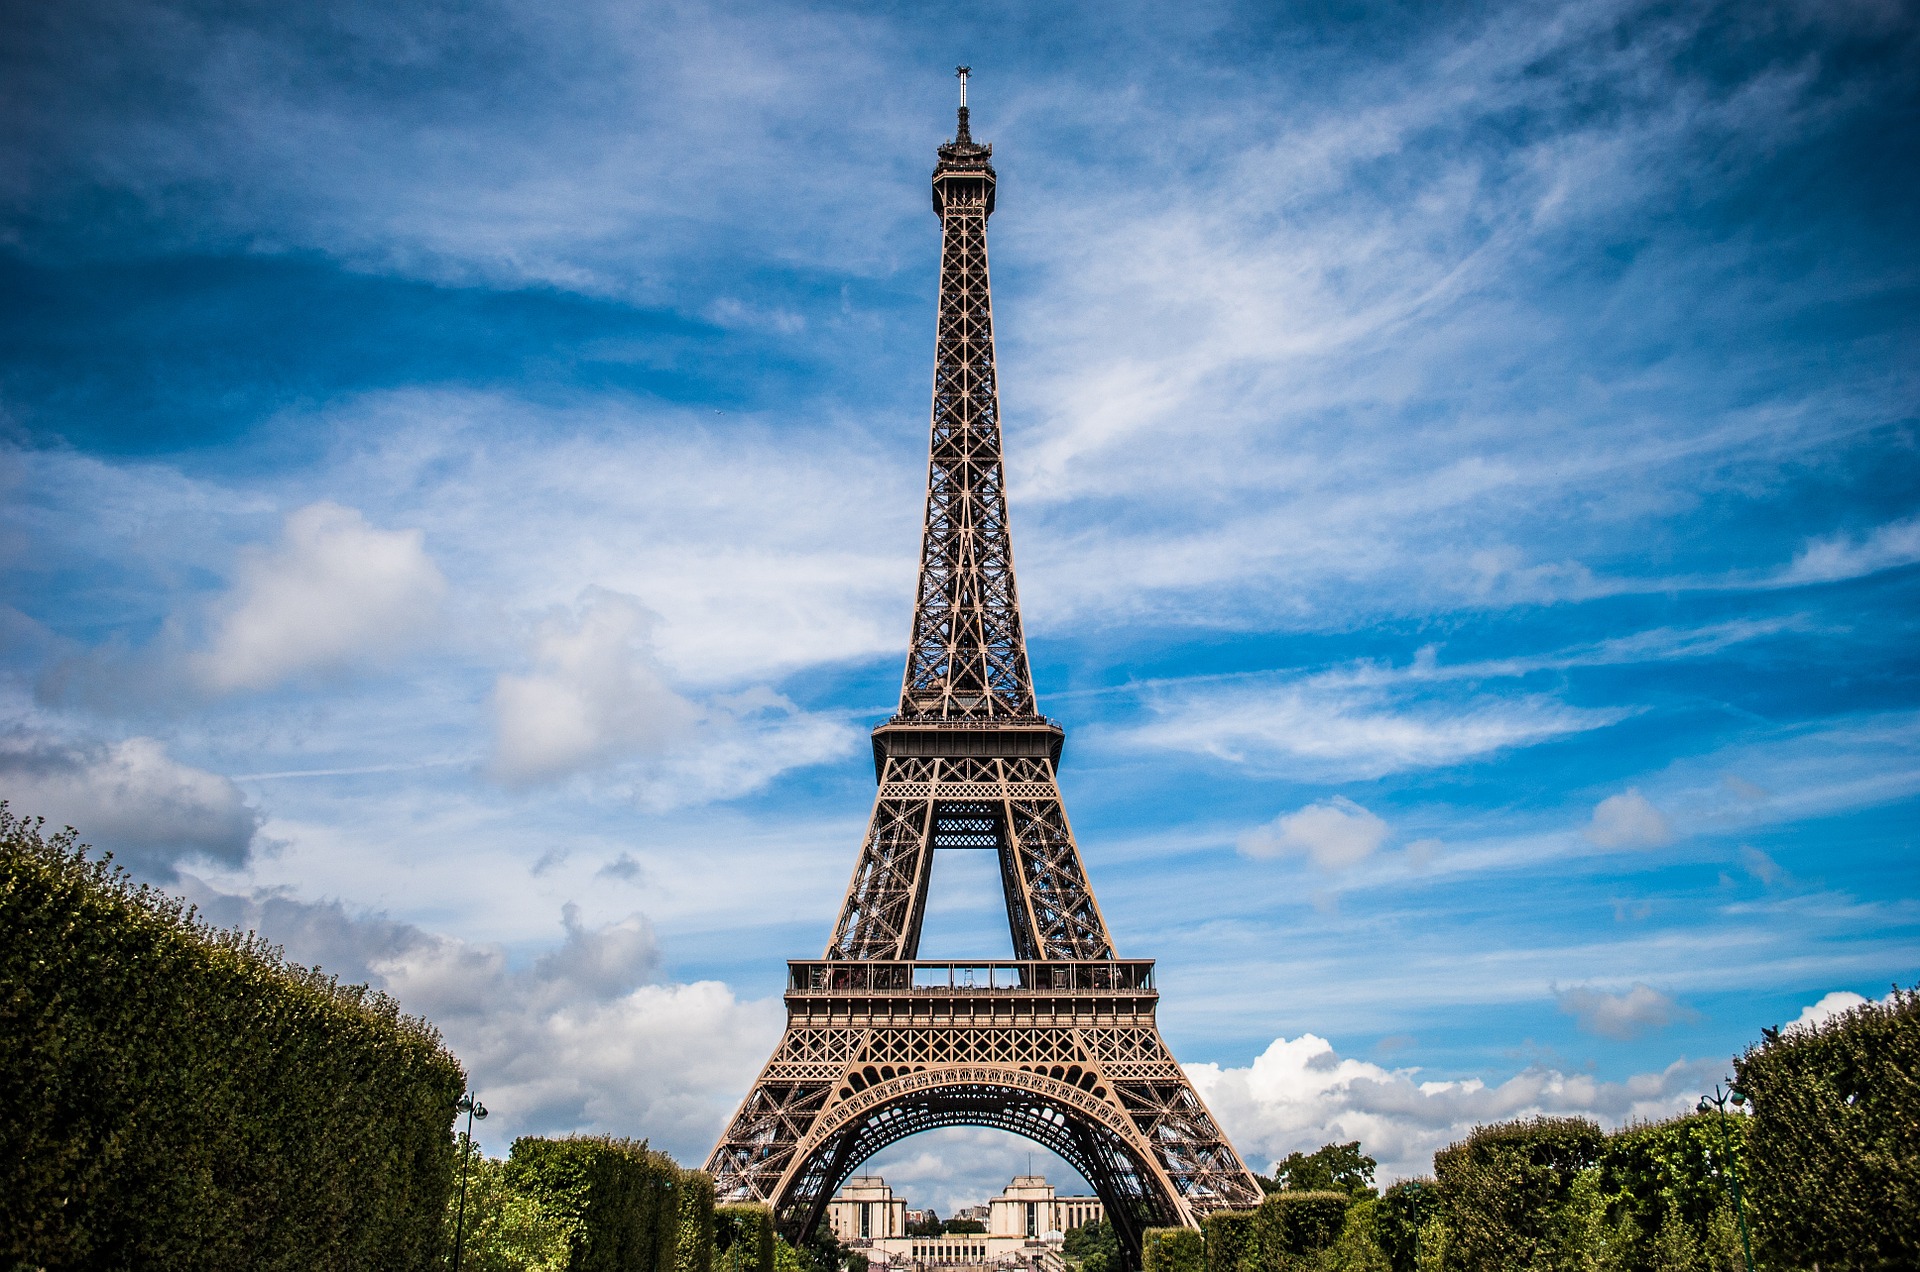
7. Eiffel Tower – Paris, France
A classic for couples and those romantic without remedy, the Eiffel Tower in Paris is one of those places in the world that do not require a prior introduction. Leave the Parisian charm to inspire you to get a selfie of quality – and as everyone has already said, only in Paris can you enjoy “la vie en rose”.
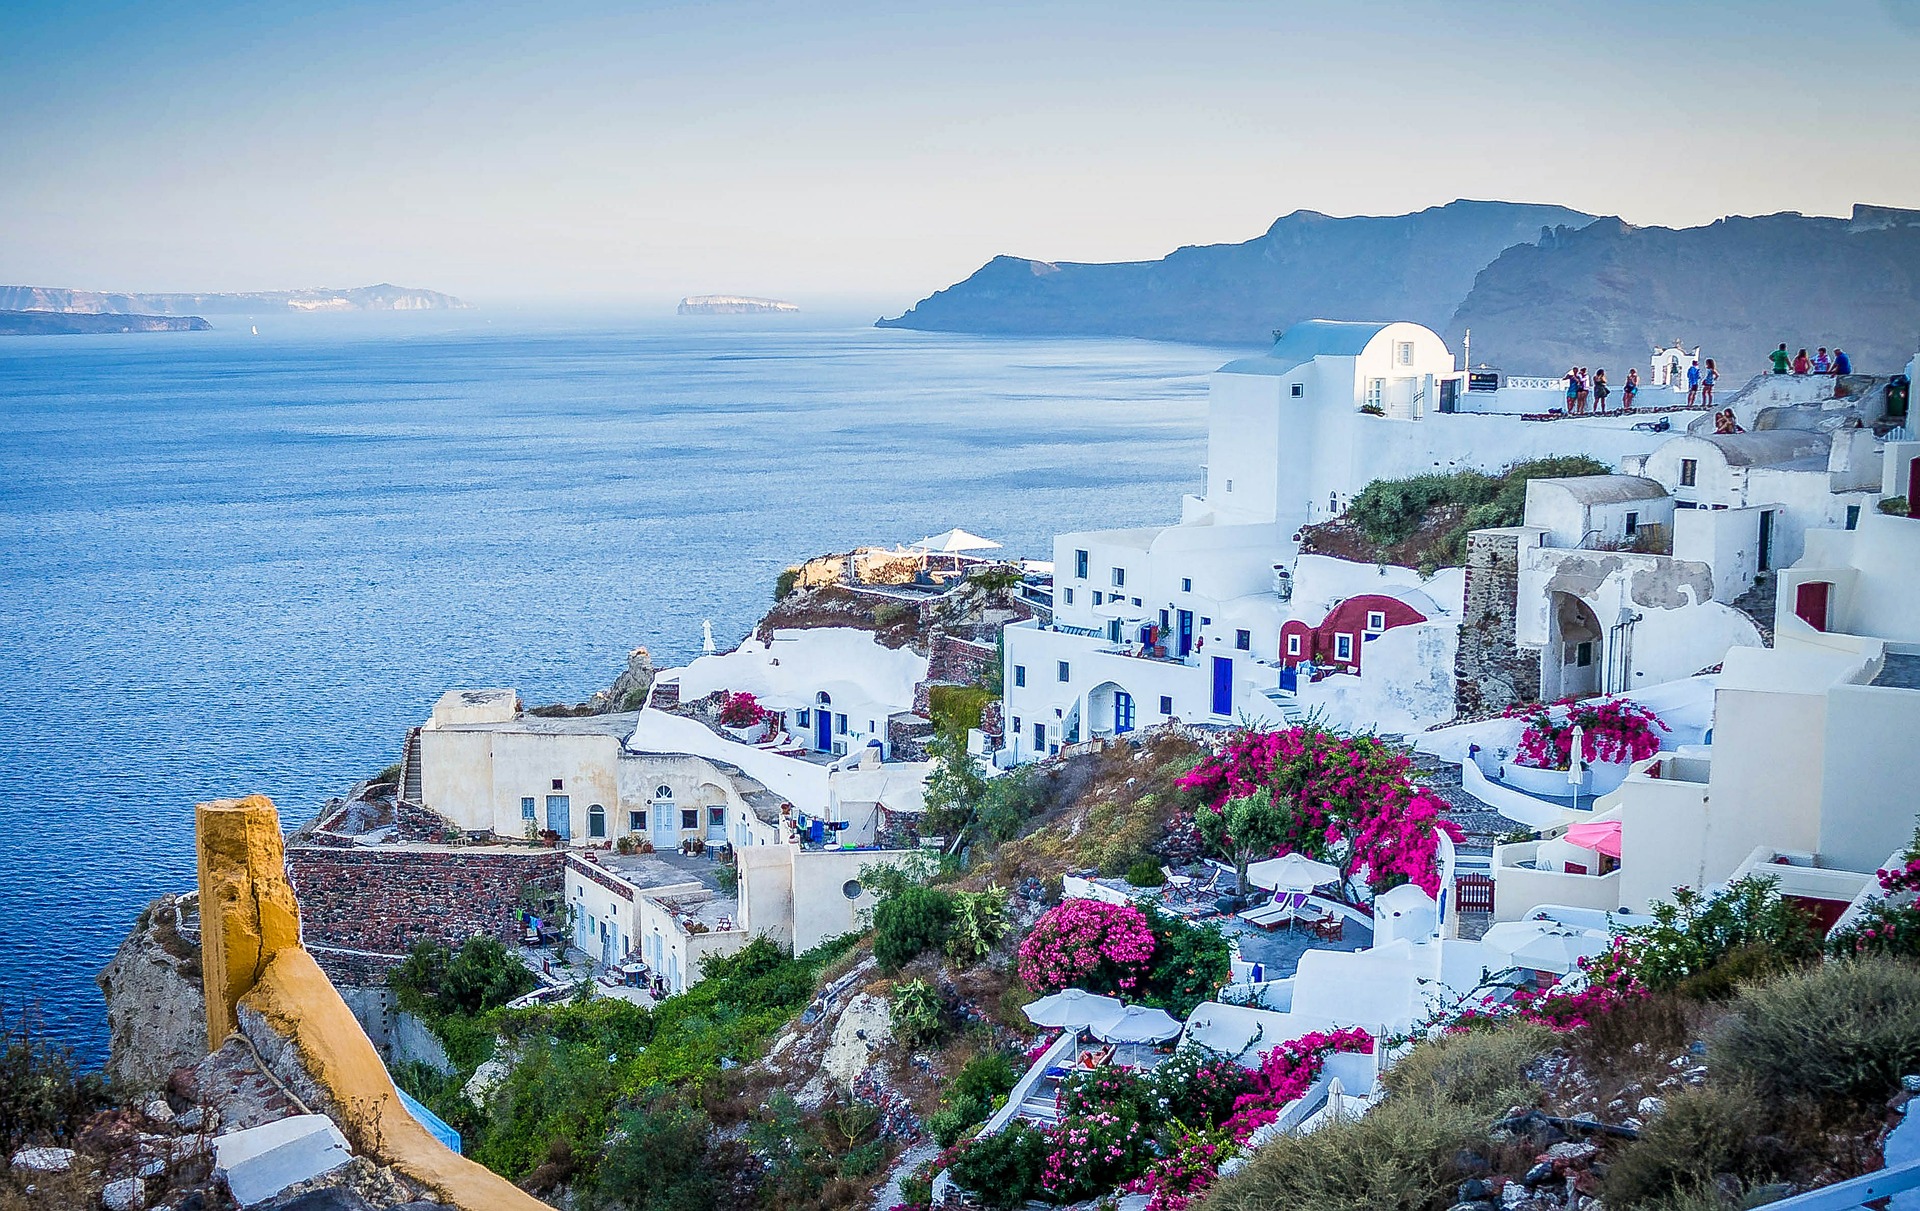
8. Santorini, Grece
Envisioning a paradise in the Aegean Sea? There is no better definition for Santorini. This Greek island will make you feel that even sky sports another tonality with just exploring its charming alleys, while you enjoy the aroma of the local cuisine. A selfie in Santorini, with an attractive sunset in the background, and you’ll have the perfect picture!
9. Marina Bay, Singapore
One of the most amazing places in the world is located in the heart of Asia. Marina Bay, tourist city par excellence of Singapore, not only hosts events from the level of a Formula 1 GP, but also a vast amount of scenarios with contemporary architecture for every taste and style. If you are planning to go to Singapore, don’t forget your selfie stick.
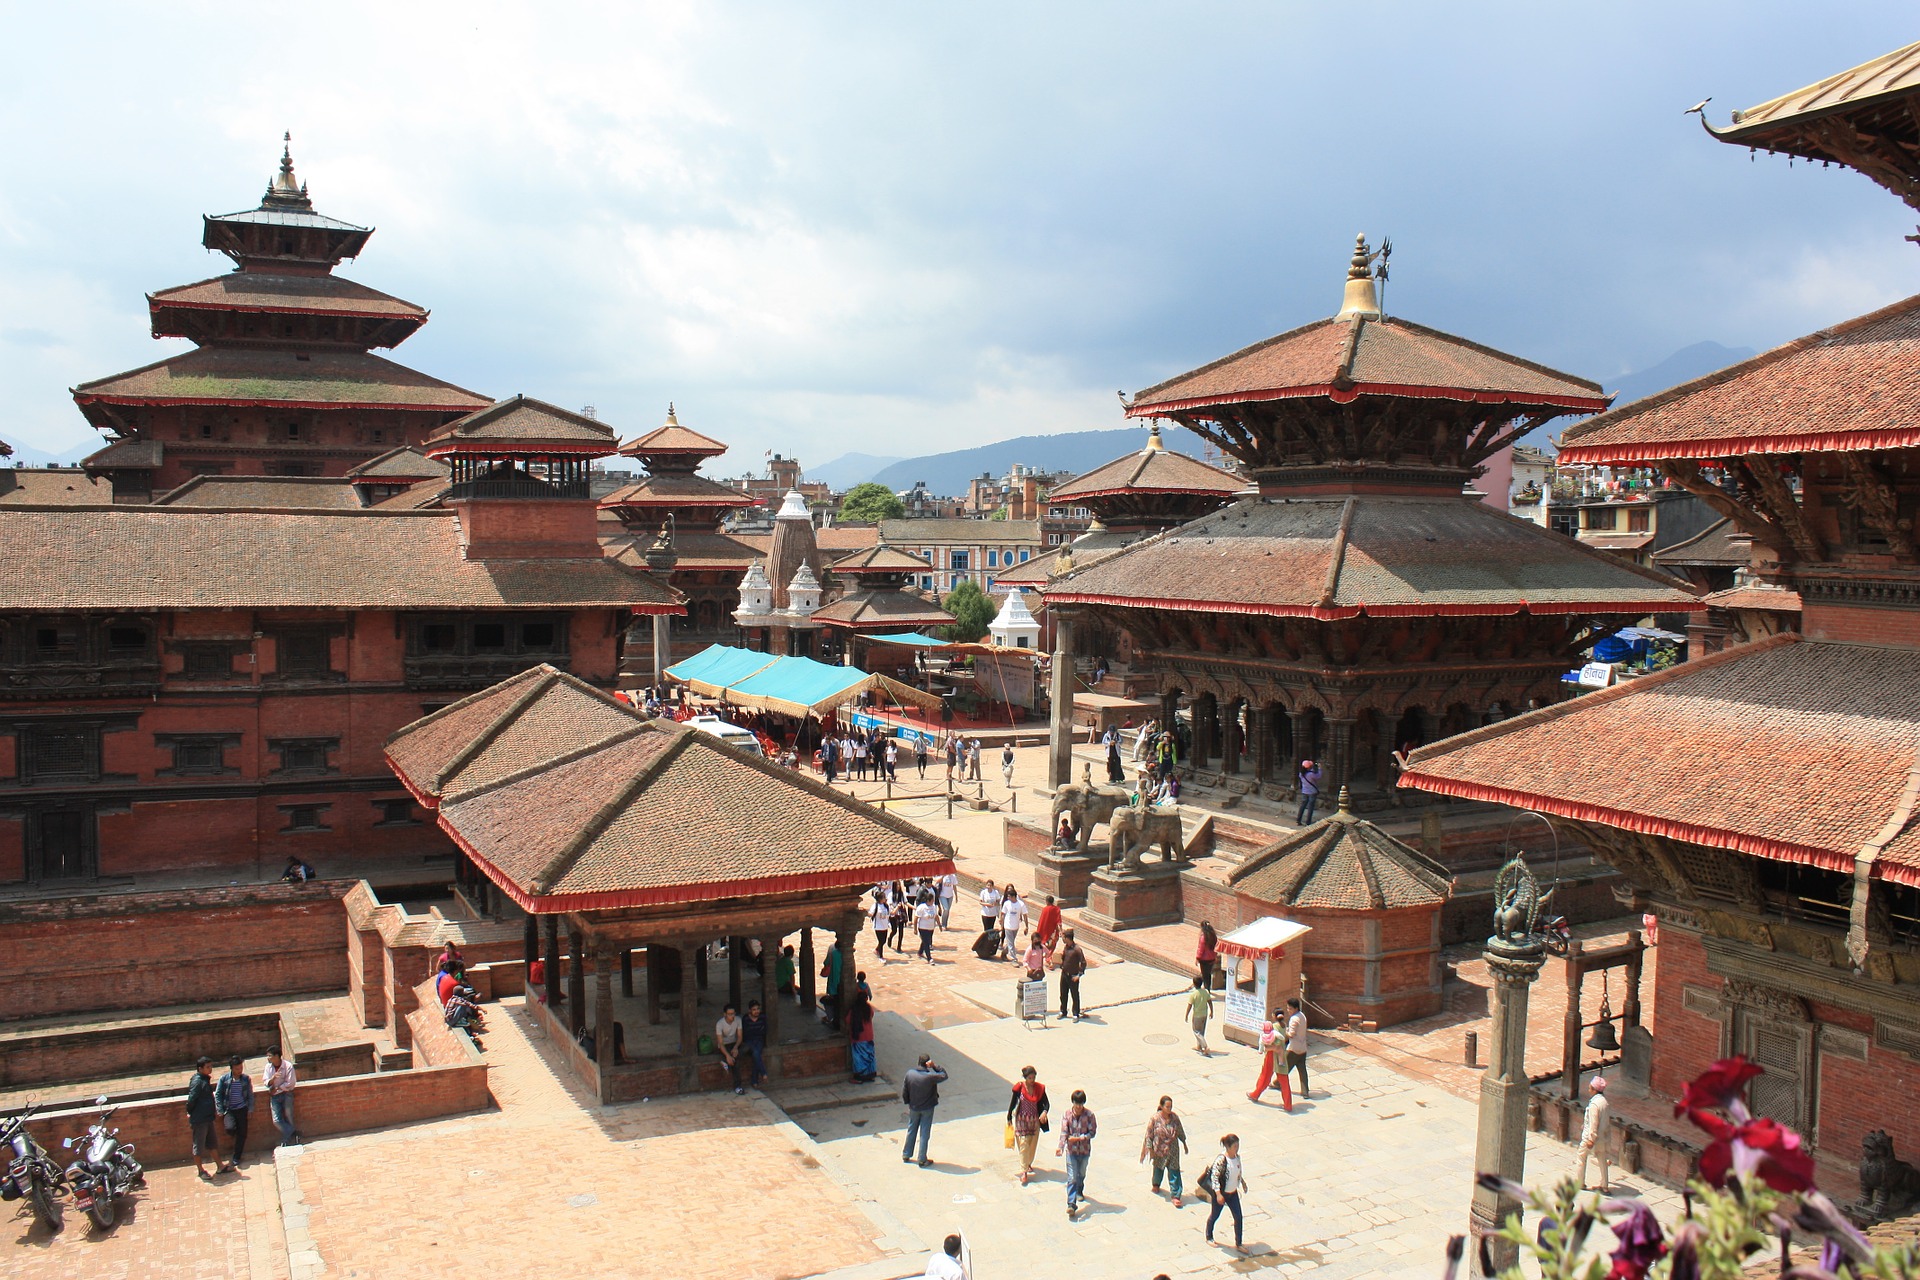
10. Kathmandu, Nepal
If you are looking for a place filled with spirituality, Kathmandu is should be your destination!. Landscapes worth to be framed, stories of ancient times and an endless number of Buddhist symbolism within our reach. On your next exotic trip to Asia do not miss the chance of a Nepal tour, with a spiritual-inspired selfie experience.
11. Bosphorus Bridge – Istambul, Turkey
Where Europe and Asia meet… This particular bridge in Turkey is known as the Bosphorus Bridge, which crosses the Bosphorus strait, links more than two continents; two completely different cultures. A unique place in the world, worthy to be remembered forever with a maritime selfie.
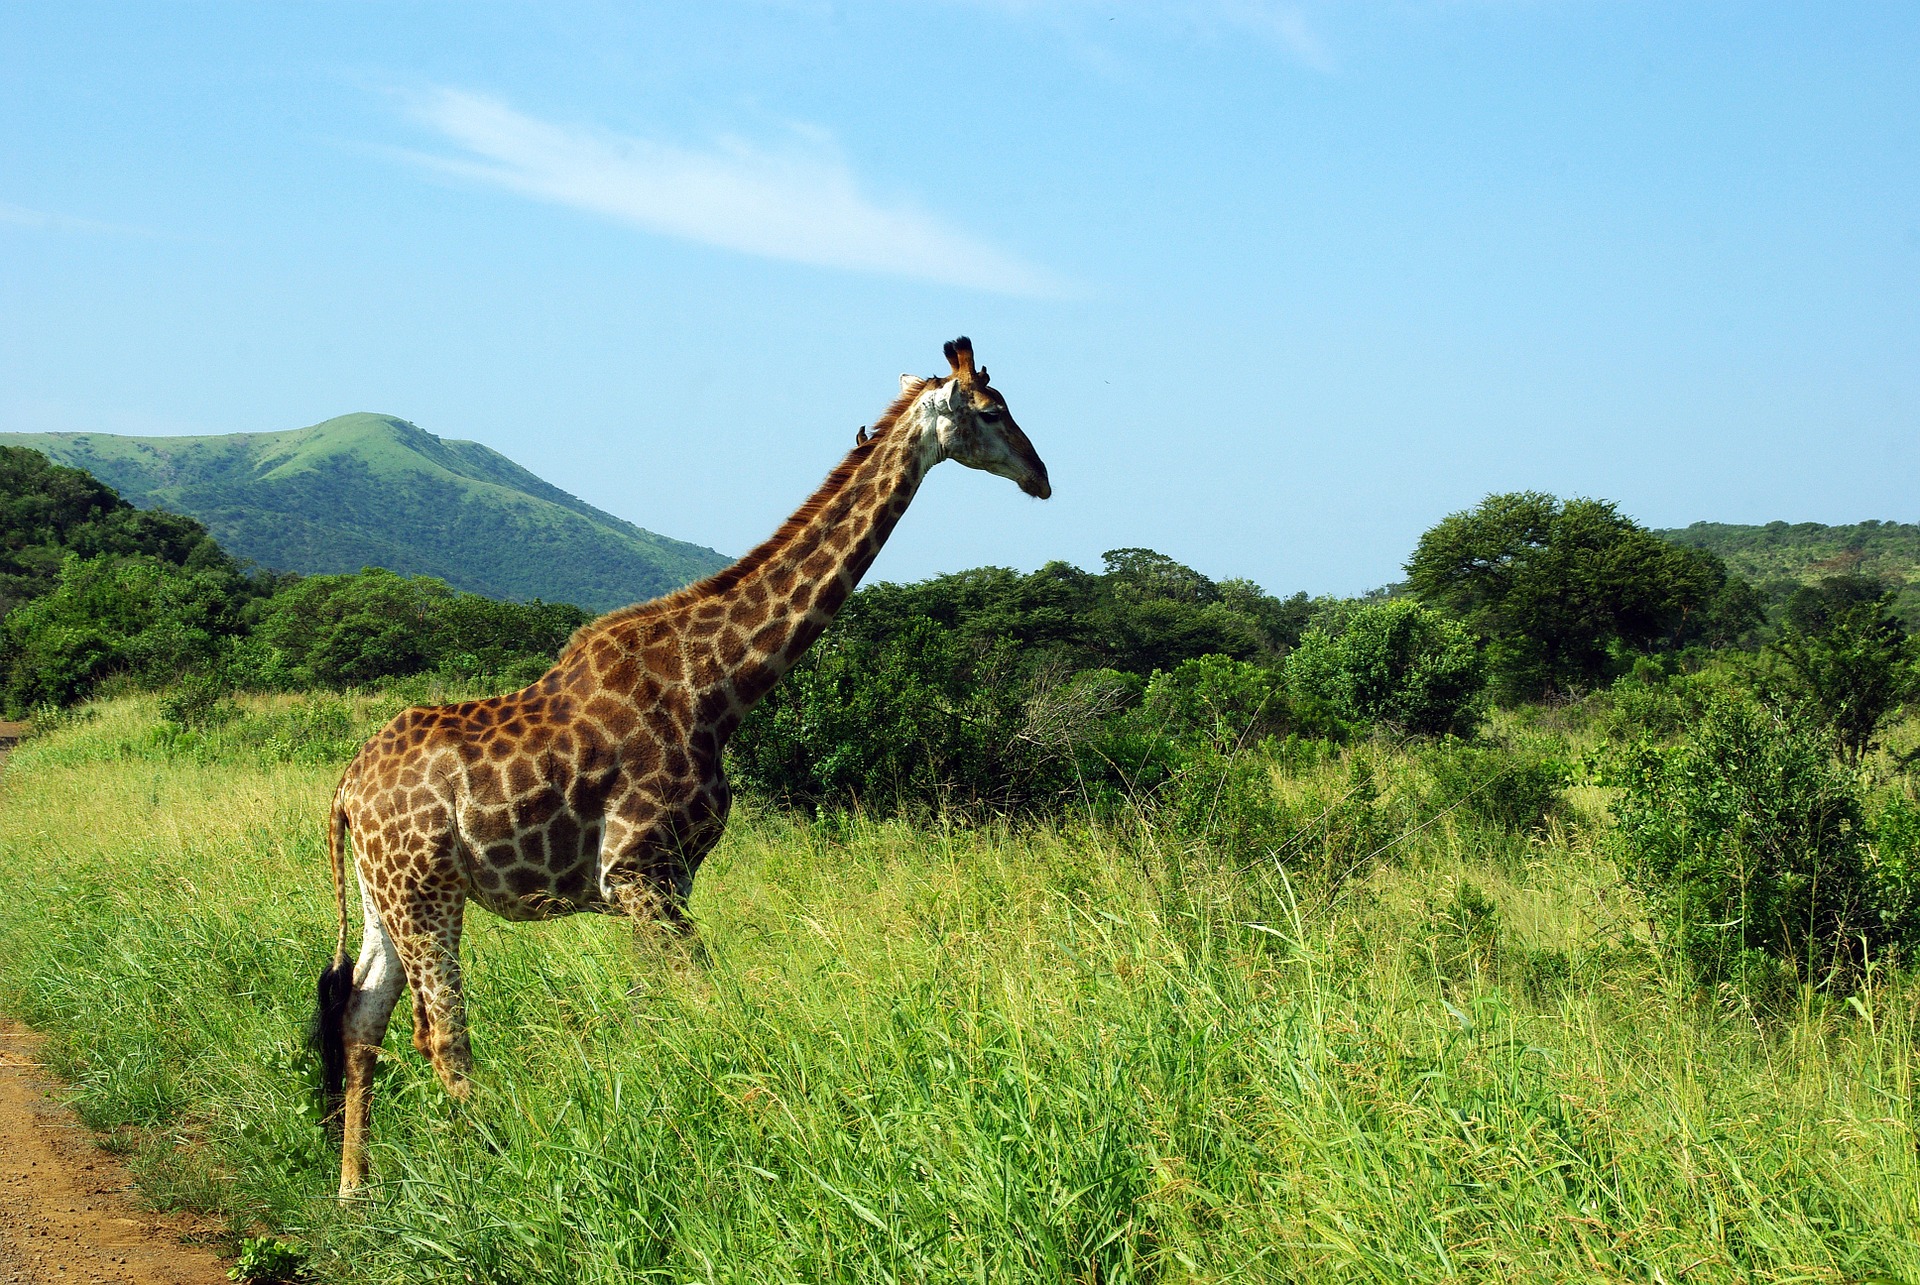
12. Kruger National Park – South Africa
If you are one of those people who enjoy the great plains and exotic destinations, you should not miss the chance to get an interesting selfie in this reserve of natural wildlife located in South Africa. With guided tours and the opportunity to see magnificent specimens in their natural habitat, which would undoubtedly be an unforgettable destination; and who knows, you may be lucky enough to get a selfie with a cute Meerkat.
Do you have any other places in mind you want to share with us? The most important thing you have to remember is that a selfie is all about being yourself – be careless and enjoy life through your camera!


 Facebook
 Google +