A portrait sequence can be an excellent gift and can be used to capture fun memories of loved ones. The best part is that you don’t have to do anything extra during your photo shoot to create a fun and fabulous sequence of your child, pet, or best friend. A portrait sequence takes the best photos and poses you captured and puts them all together into one fun image.
Steps to Create a Portrait Sequence
The first thing you need to do is take the photos, so you have to organize a portrait photo session. The setup of these photos will affect the amount of post-studio work you need to do, but any series of photos can be used to create stunning images.
The best setup for creating a series of images is to take your photos inside a studio or at home, with the same lighting throughout, against a solid color background. This makes the editing process a lot easier and a lot shorter. For even better results, try to set the lighting up to match the tone of your subject. If you’re portraying the joy of childhood, you want the lighting to be even across the board, set far away to lighten up the whole image. If you’re photographing a more serious subject matter like grief, you’ll want the light to be closer to the subject, casting shadows to create a darker feel. However, even pictures were taken in changing light and inconsistent settings can still be turned into a portrait sequence.
The three images used for this tutorial were taken in a studio. The lighting across all three images is the same, but the background, while the same in all three pictures, proved troublesome in the process.
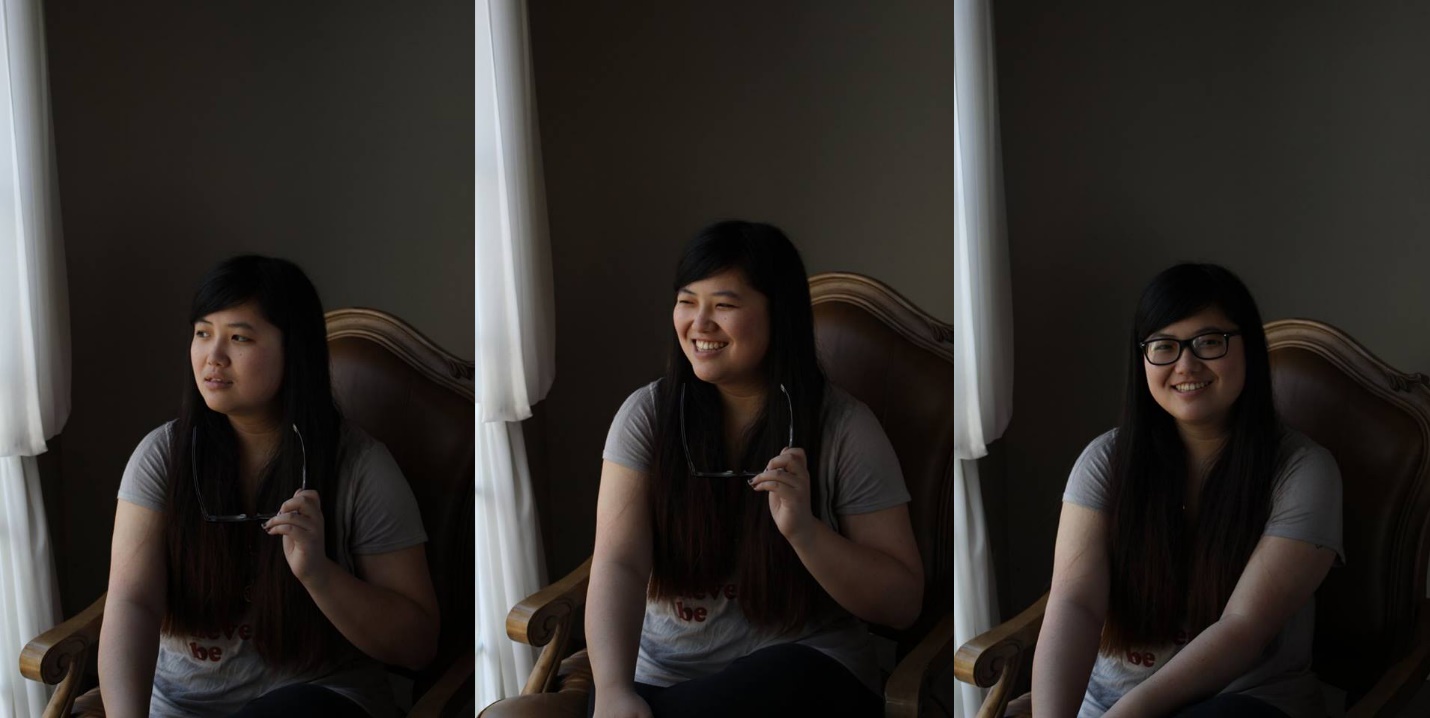
While the outcome of these images isn’t terrible, the repeated background and the white curtain make it clear that this is a series of three pictures shoved together instead of one continuous image. But, we can fix that.
Editing the Images in Photoshop
After you have the images you want to use, the first step is to create a large enough canvas to work on. Take the first image in your sequence and use the crop tool to enlarge the image out to the side. You’ll notice a line appear that divides the canvas into sections. Each line represents one image of the original size. Make sure you have at least as many lines as you have pictures.
After this step is complete, you want to make sure the background is one continuous image or color. I used the eye-drop tool to select the wall color and used that as a background. If your image has a lot going on in the back, use the magic wand tool to select your subject. (If you are having trouble selecting things, try messing around with the magic wand’s threshold. The higher the threshold, the more color it will pick up.)
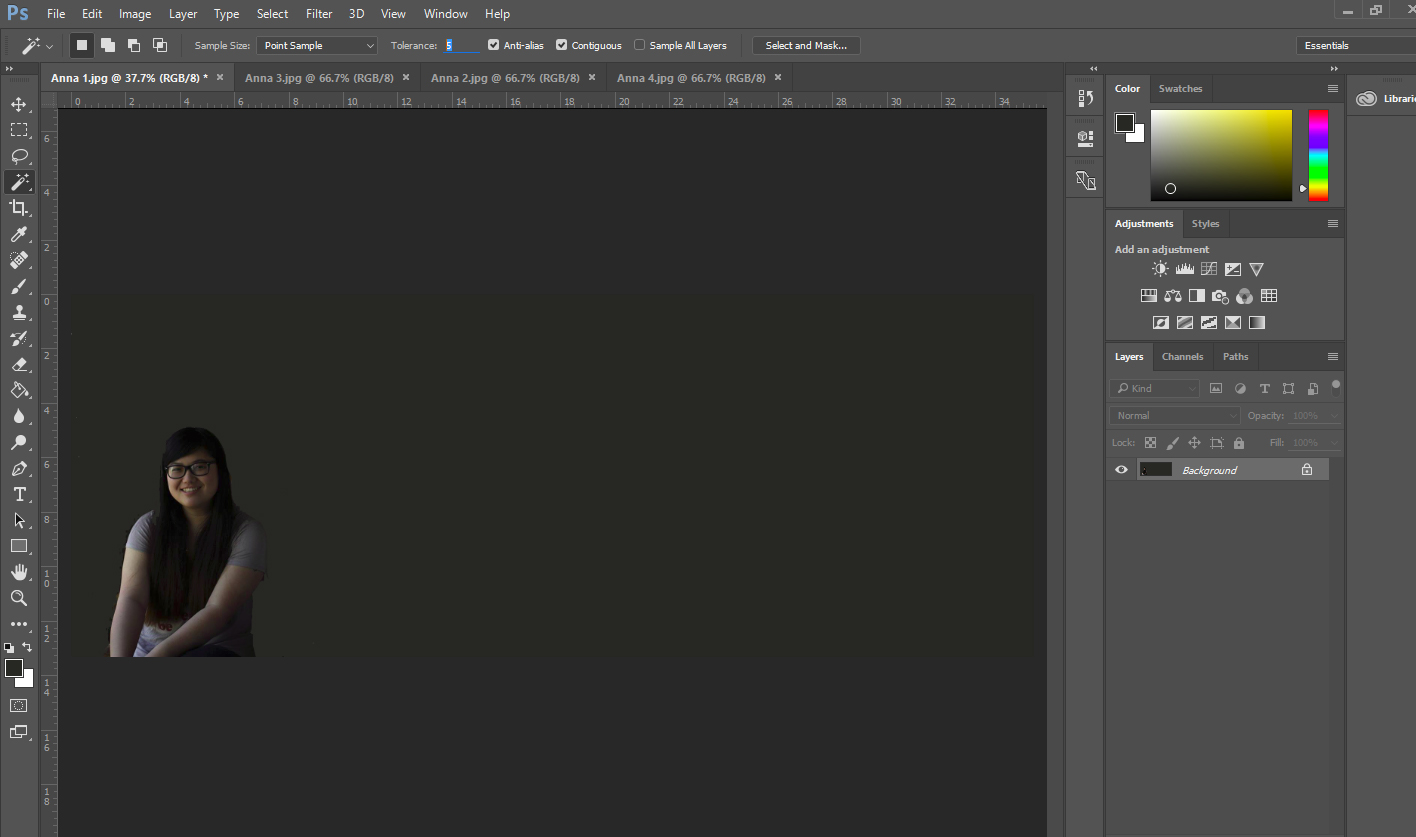
Now that you have your canvas ready to go, the rest is simple. Take every other photo that you want to use and crop it down to just your subject matter. Use the magic wand to select any lingering backgrounds and fill them in with the color you chose earlier.
Then all you have to do is move the subject into the first image and place them side by side.
If you’re doing something that specifically involves a background, or that uses props, you may find the layer mask and cloning tools invaluable to your efforts.

You can use the layer mask Reveal All, to paint over the newly added picture but keep the background the same. Make sure your paint brush is set to the color black, and anything your paint over will be removed and instead reveal the background of the first image.
If, after you’ve finished moving everything, there is still an inconsistency in the background or one of the images, you can use the clone tool to reprint part of the image into another. This is useful if your photographing action shots, like a child playing in a leaf pile or a dog chasing a ball.
Whatever the end game is, be it creating a lovely memory of a passed relative or capturing the joy of childhood, creating portrait sequences is a valuable tool. They’re well worth the time and effort to make, especially more complex ones that involve backgrounds and props. After all the work is done, you can see the memories that you’ve captured all in one, concise image that tells a story.

 Facebook
 Google +