Welcome back to another one of our product tutorials.
In this segment, which goes along with our video, we are going to talk about how to use Sleeklens’ “Starburst” Photoshop overlays to enhance the effects of the sun’s rays in your photographs. You can also check the sun overlay for adding sun flare in Photoshop. Our Photoshop Overlays are a really great way to quickly add an extra bit of dramatic effect to your images.
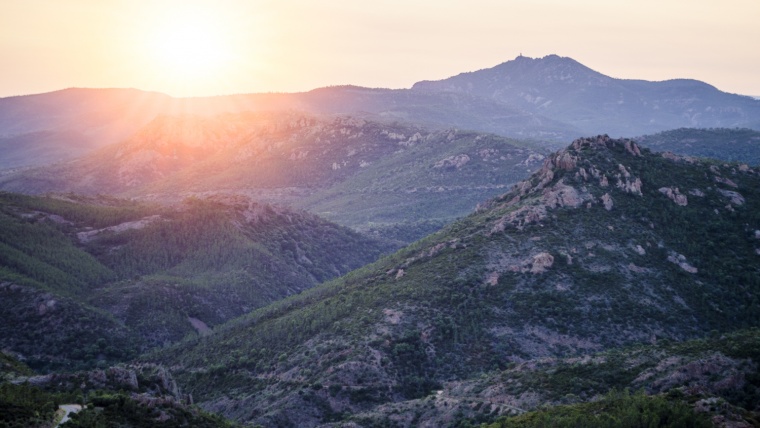
With our “Starburst Overlays” loaded and our first photograph pulled up, we will go ahead and get right into it. For this image, we are going to be using Starburst-12. Simply open up your overlays and drag Starburst-12 over onto your image. Once you have the overlay on top of your photograph, you will be able to resize it to best fit your image. By grabbing and dragging the corners and side the starburst can be adjusted exactly the way you need it to be. Once the size is correct, then simply move it to where the effect would most naturally appear. In this case, we will place it over the sun which is peering over the landscape in our photo.
Once the overlay is sized and placed, the next thing that we will need to do is remove the black area surrounding the starburst. To do that, we’ll go over to the dropdown menu to the right that says Normal and make sure that the overlay is selected. Then, open the dropdown and click Screen which will remove the black around the effect. Now is a good time to move the effect to the right spot.
Now that have have our starburst in the image, it doesn’t look very realistic as the effect is white and doesn’t quite match tones of the sunset present in this particular photograph. So now, let’s go through how to add a more appropriate color to the overlay, one which better fits the scene in this photo. First, make sure that your overlay is selected in the panel to the right. Then, Go up and open the Layers tab at the top and scroll down to New Adjustment layer, then click on Hue/Saturation and the Properties box, containing controls and sliders for hue, saturation and lightness, will open up. We’ll click on the first button from the left, at the bottom of that box. This will ensure that the hue and saturation is applied to the overlay or the layer beneath it. Next, in the properties box, go ahead and put a check next to Colorize. For our photo, it has automatically selected a yellow tone, but we are going to adjust it to more of a yellow-orange and turn the saturation up to around 51. With those effects applied and adjusted, we’ll move the overlay just bit more to get it in the right place, and that’s it.
Now that we have applied the “Starburst” overlay and colored it, we’ve really added that extra dramatic element to this photograph.
Moving on to our next photograph, we have a nice street scene with the sun that appears to be setting behind the buildings. For this one we are going to apply a different starburst than we did with the first photo. To start, we’ll open up our overlays folder and drag Starburst-14 over to our image. Once we have the starburst in our image, let’s resize to fit and place it over the sun in our scene. Next, opening the dropdown labeled Normal, we will select Screen which will remove the black area around the effect. Then, we can adjust the placement a little more.
Now with our overlay layer selected, we’ll go up to the top and once again open up New Adjustment Layer, then Hue/Saturation. Once that properties box appears, remember to go to the bottom of that box and click on the first button from the left, allowing for your effects to be applied to your layer below. Check the box for Colorize. As you can see, you’ll be able to choose just about any color that you want for this, it just depends on the result that you’re personally going for. For the sake of keeping to a more natural look, we’re going to adjust the color to a yellow tone as to mimic the sun in the photo a bit.
That’s it for the second photograph. As you’ll see we have definitely added a bit more drama to the sun, giving even more life to this image.
And now on to our third image. In this scene we have the sun just peeking out from behind some buildings. This will be a good photo to use one of the colored starbursts that are included with this collection. Opening up our overlays folder, and then going into the folder containing the colored overlays, we’ll select Starburst-5-Colored. We’ll go ahead and drag our selection over to our photograph, resizing, rotating and then repositioning to the proper spot in the image. Once it where we want it, we’ll open the dropdown that says Normal and click Screen.And, that’s it for this one. The colored overlay that we picked was already a nice orange tone that goes well with the image, so we don’t need to go into further adjustments for that. If you feel that it may be a little too strong, you can simply go to the right panel and lower the opacity of that layer to how you want it.
All three edits were quick and really simple to apply. Although these are easy adjustments, the end result bring a lot more life and color to the photograph. Hopefully you will get your hands on some of these overlays and put your own creativity to work.
Thanks for following along. Until next time, keep putting your creativity to the test!


Please verify your software version before proceeding.
 I’ve verified my software version


 Facebook
 Google +
Comments (0)
There are no comments yet.