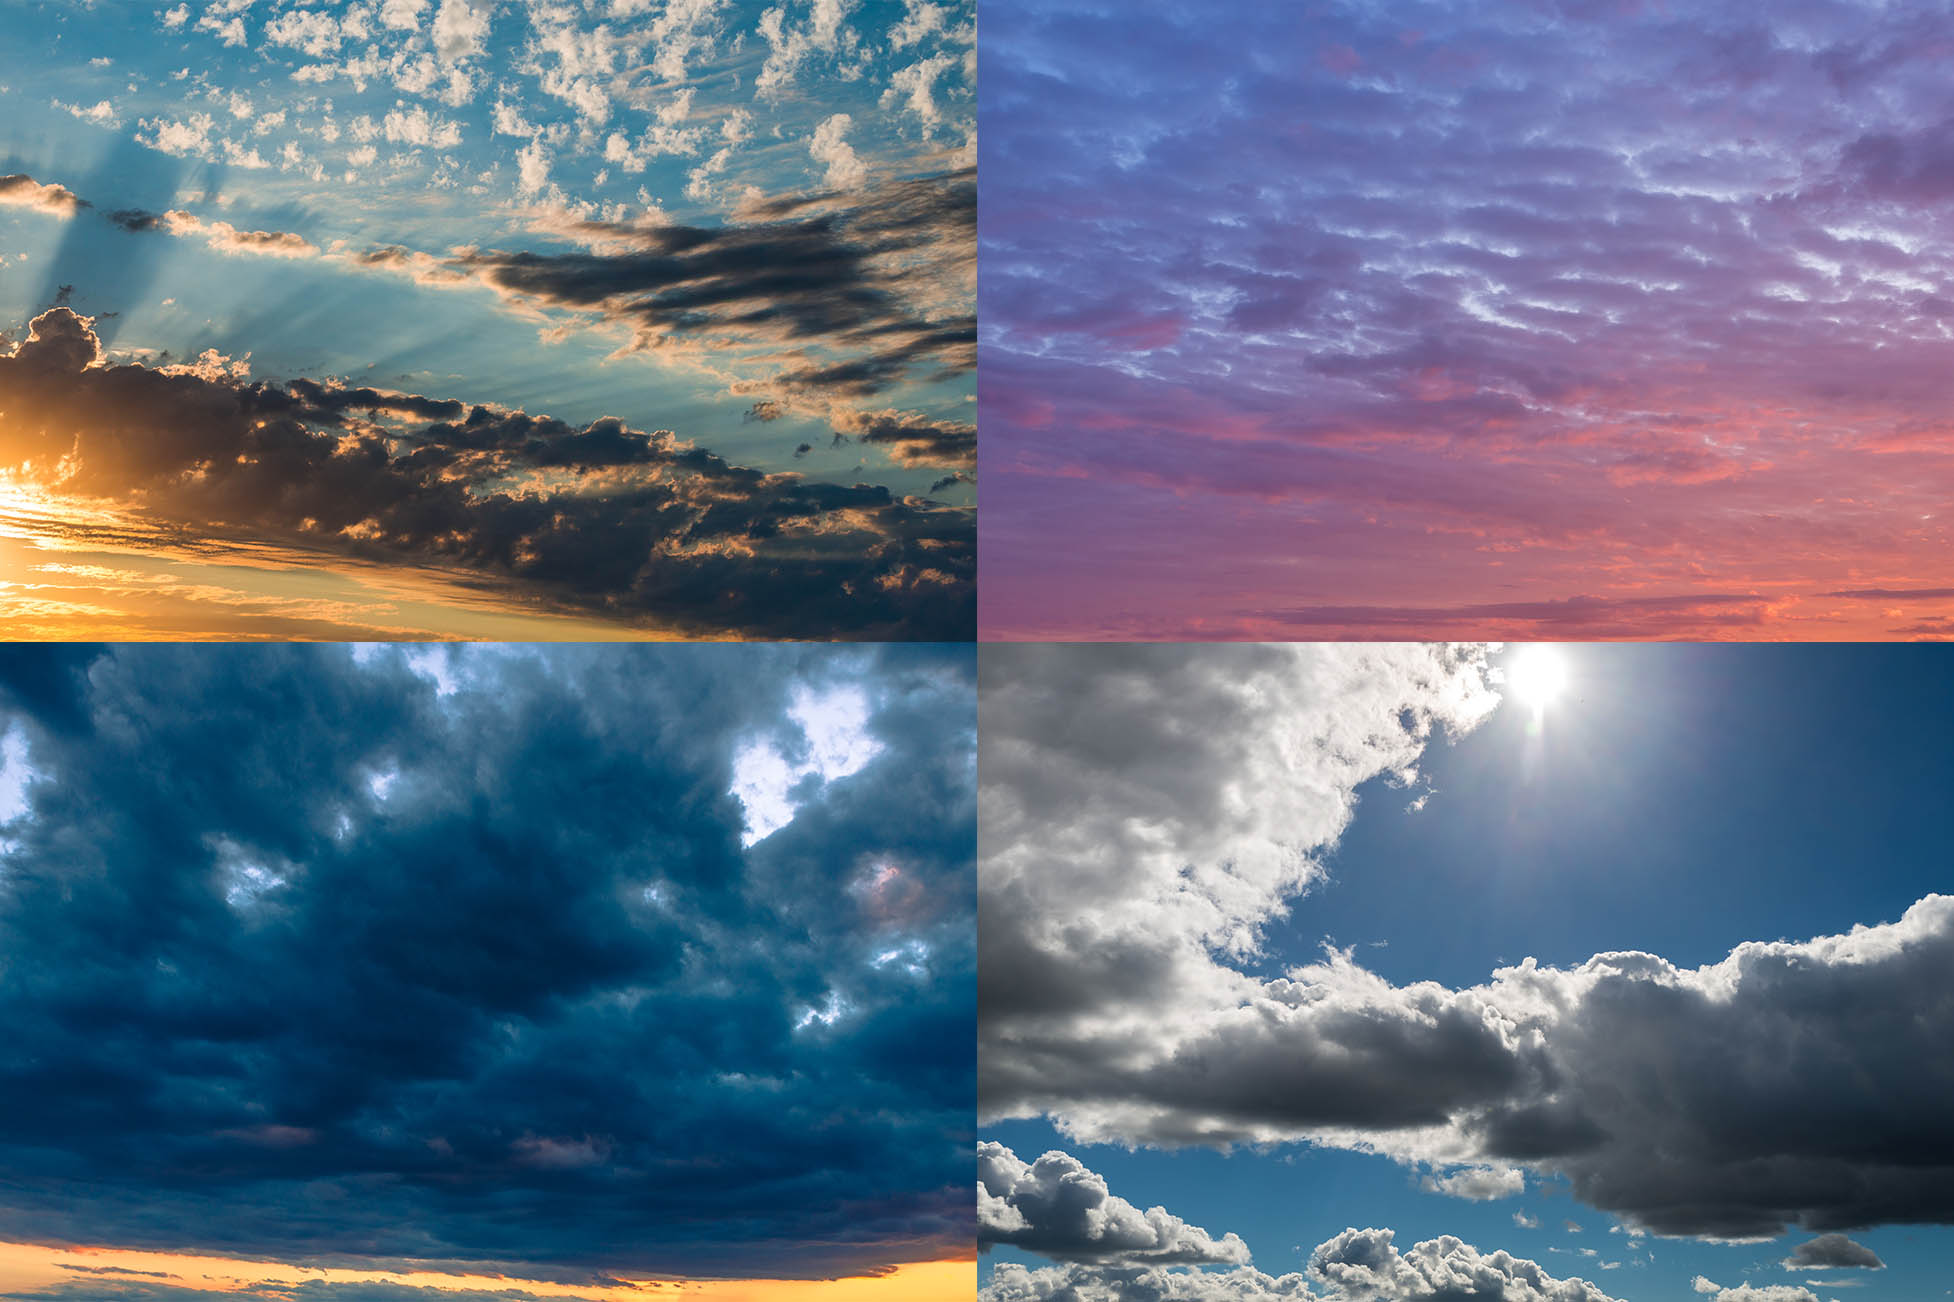
What are sky overlays? It is simply an image that you use to replace the sky in your photos. In the Sleeklens Sky Overlay bundle you will find 177 carefully selected sky overlays made from real photographs taken in different condition, for example different times of day and weather. In this guide you will learn more about the uses of sky overlays, how to use them and also some more advanced techniques to achieve a great result.
You can potentially use a sky overlay on almost any photo with a sky in it, but the primary use of sky overlays is to make the sky (and thus the entire photo) more interesting. For example it would be great to use a dramatic golden hour sky overlay if you were photographing a sunset, but the sky didn’t end up as powerful as you had hoped.
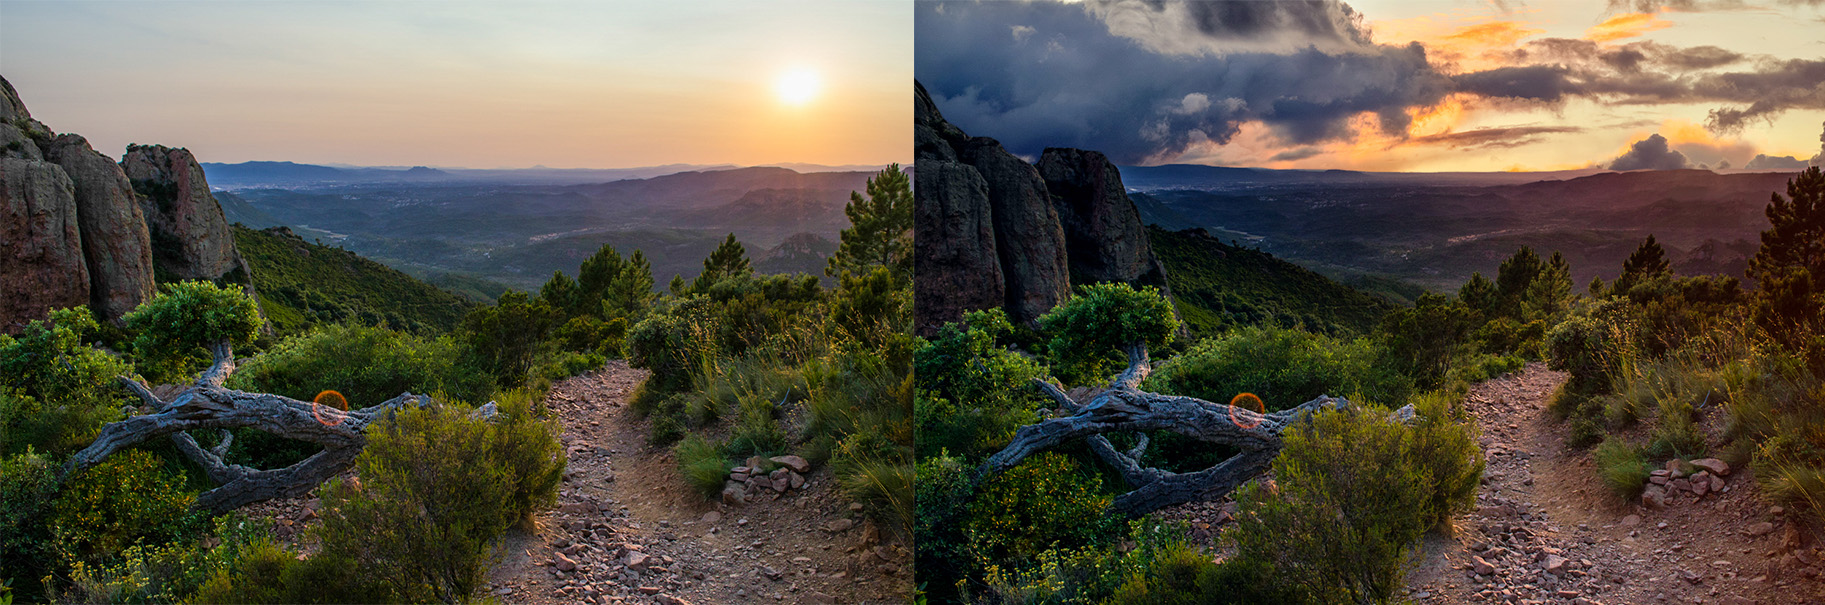
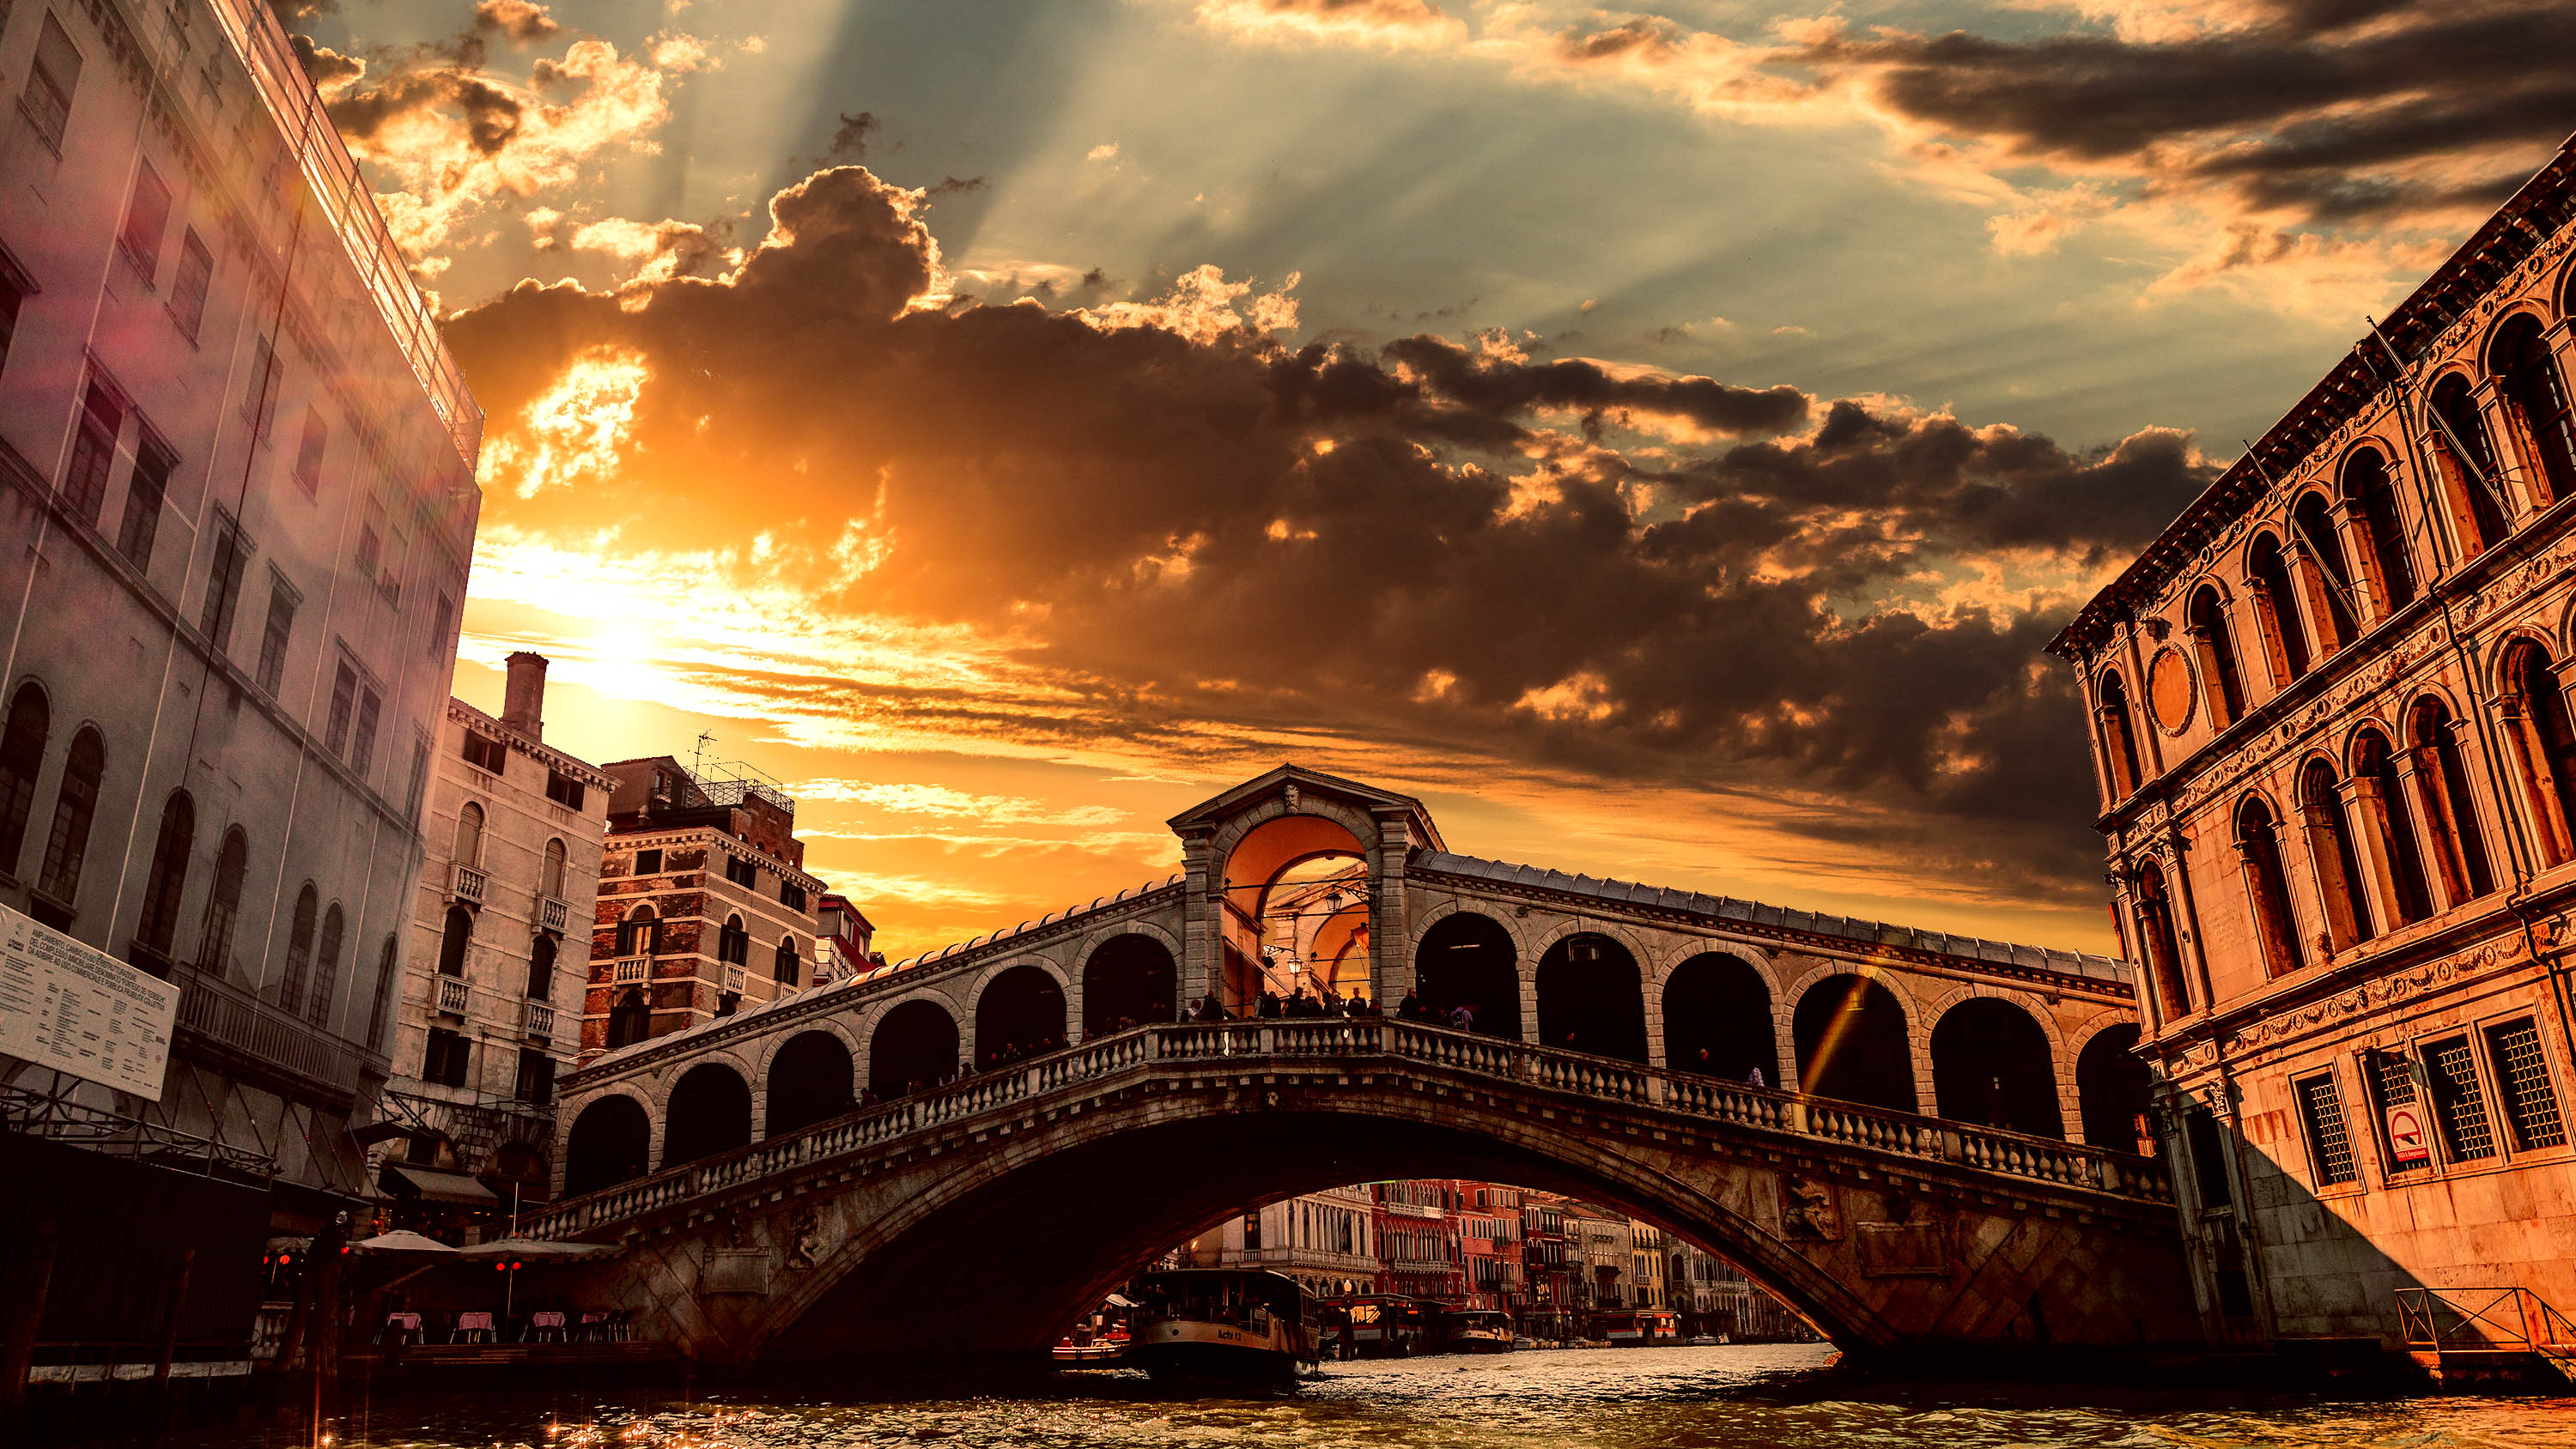
One of my favorite things to do with sky overlays is also to change the entire look of the photo, for example turn a daytime photograph into an intense sunset or transform a bright clear day into a very dramatic and mystical photo. Of course you need to do more with the photo than just changing the sky, you also have to change the tones and colours, and that’s we we include a set a Photoshop Actions and a few flares (lighting overlays).
The key principle when working with sky overlays is that the sky and the rest of the photo have to match, otherwise it will look unnatural. You can either match the photo to the new sky or match the new sky to the photo, but it is much more common that you would like to match the photo to the new sky since the reason you wanted a new sky in the first place often is to improve the photo in general, but usually you do a bit of both.
There are some situations when it is more difficult to replace a sky, most often it is because the horizon is obscured by trees, or other things like antennas or similar when working with cityscapes or similar. While it can be very difficult to work with these replacements there are some ways you can do it. In short you should use a sky overlay when you’re not satisfied with the current sky or want to change the mood or perceived time of day.
There are many different ways to use sky overlays, but in this section I will teach you the process of applying an overlay and matching the photo and new sky. More advanced techniques will be shown later.
The basic process can be divided into three steps:
When you have imported the photo you want to use for the sky replacement into Photoshop or similar software you can find the sky overlay you want to use. If your vision is a dark dramatic photo you should naturally select a sky overlay that creates such a mood. When you have found the right sky overlay for your photo you can simply drag it onto your photo in Photoshop and a transform tool should automatically appear when doing so.
Now you can place the sky overlay where you want it to be and if needed you can make it smaller or larger by dragging the handles in the corners of the photo. There are some other things you can do in the “Free Transform” tool like changing the perspective and warping.
If you want to go back and change the size and position of the overlay you can just select its layer and choose the “Free Transform” tool (cntrl/cmd + T). Keep in mind that the sky overlay layer should be above the background layer (this is not necessary, but I find it more useful)
After placing the sky overlay where you want it you can start making the selection that later will be turned into a layer mask for the sky overlay layer. To do this I usually use the “Magic Wand” tool, but also sometimes “Color Range” selection or the “Pen” tool. Of course there is many more ways, but I find these ways to be the best. To use the “Magic Wand” tool you first have to select it from the tools tab and then just click the areas you want to select.
Make sure that you have selected “Add to selection” in the top menu, the right layer is selected and that “Sample All Layers” is unchecked. The “Tolerence” setting in the top menu is very important to know how it works, otherwise you will be very frustrated when you accidentally select the snowy mountaintops at the same time as the bright cloudy sky. The “Tolerance” setting controls how sensitive Photoshop is to different nuances, at a low number it will be very strict with the selections (therefore you can more easily select the sky over an horizon without much contrast) and at a higher value it will select more and more of the similar colours.
For general use you should keep the “Tolerance” at somewhere around 35-50, but go as low as you need to get a clean selection in tricky situations. When you are satisfied with your selection you can create your layer mask, more on that later.
Another suitable way to make a selection is the “Color Range” tool in the “Select” menu. This works best when the colours in the sky doesn’t appear in the other parts of the photo, as that will lead to a selection that not only covers the sky. Open the “Color Range” menu and select “Add to Sample”, then simple click on the colours you want to include in the selection. When you have selected all the colours in the sky you can use the selection to create a layer mask.
If the photo has a horizon without anything that obscures it, and preferably with smooth lines, you can use the “Pen” tool. This allows you to in an exact, but time demanding, way make a selection that is very accurate and smooth. Simply draw a line along the horizon with the pen tool and then make that line into a selection.
When you have a selection that you are satisfied with you need to create a layer mask. To do this you can press the “Add a mask” button while the correct layer is selected and that layer will receive a layer mask where the selected area is painted white and thus only making the sky overlay visible where you have made the selection using one of the techniques described previously.
Some photos have horizons which are blurred, for example a portrait with a shallow depth of field, in this case it can be very hard to make an accurate selection so you have to do the mask manually instead. In this case you should select the layer of the sky overlay and create a layer mask, now select the “Gradient Tool” and make sure the foreground colour is set to white and the background colour to black. If you now drag a gradient from where you want it to start to where you want the sky overlay to be completely invisible you get a smooth transition that you need to have if the horizon is blurred. If there is something sticking up above the horizon and you don’t want the sky overlay to cover it you can try to make a selection just for the object and then painting/fill it with black in the layer mask.
Now you have replaced the sky in your photo, but it probably looks very fake, so let’s do something about that! The reason that the sky overlays most often looks fake at first is that the contrast, tone and colours are too different from each other, and also sometimes that the transition is too harsh.
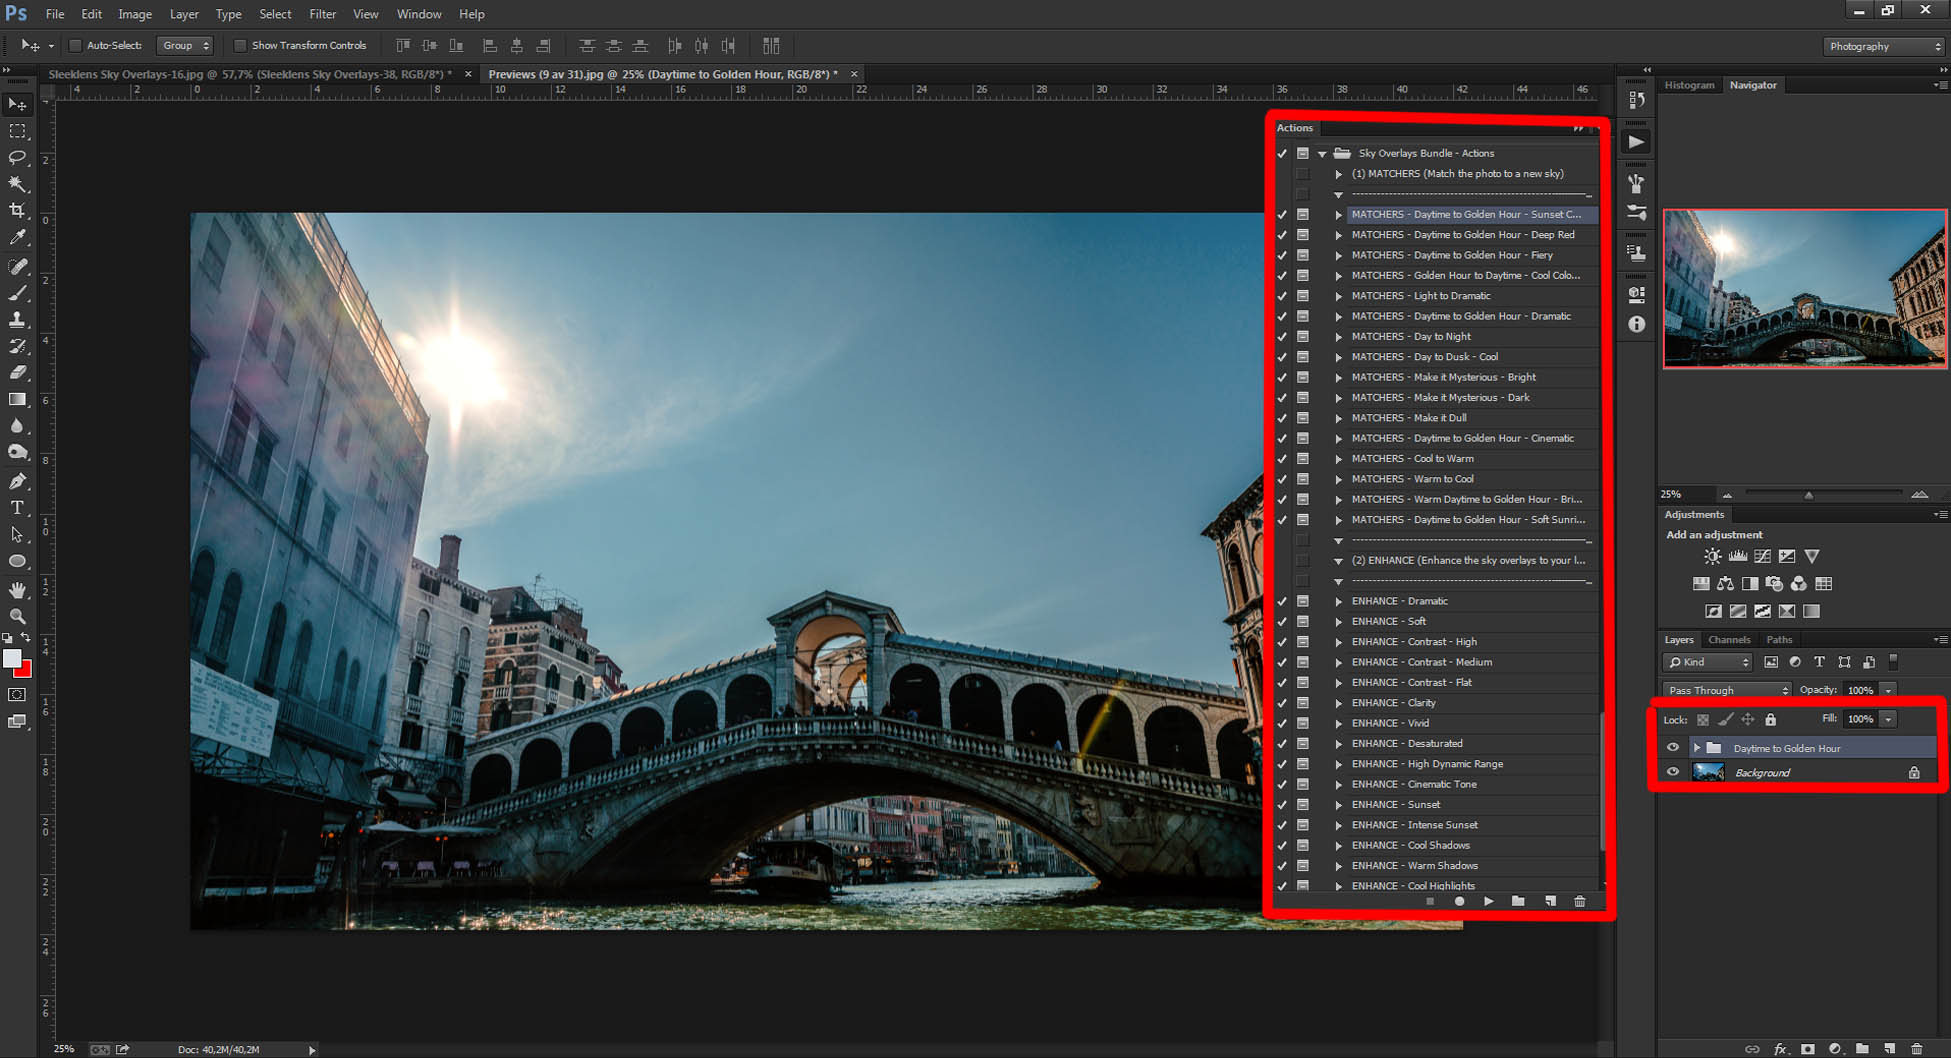
At first I like to modify the colours to fit with the new sky. This can be done by using one of the Photoshop Actions that are included in the Sky Overlays Bundle or by manually using different adjustment layers. If you are using the actions you can simply choose one that more or less fits your situation. If you are applying a sunset sky overlay to a daytime photo you should use one of the “Daytime to Golden Hour” actions and so on. This will make the photo warmer and change the hues by utilising adjustment layers like, “Selective Color”, “Hue/Saturation”, “Photo Filter” and “Color Balance”. If you want you can create similar effects by doing these adjustment layers manually, and this can be useful even if you are using the actions, as you may want to fine tune the colours and tones in the photo. The same adjustment layers can be used to make a photo cooler, more dramatic or other looks that will help you sell the effect, depending on the type of overlay. There are of course many other ways to change the colours then the ones I have mentioned, but these are the ones I use the most and is a great start.
When it comes to the tones (like contrast and lightness/darkness) you should try to match them as close as possible, this is most important in the areas close to the horizon/transition between sky and ground as this is where you see the biggest difference. The adjustment layers I use most often for this is “Curves” and “Levels” because they let you change contrast and the brightness level of the different tones in detail. Sometimes it can be a good idea to apply some adjustment layers to both the background layer and sky overlay layer to create an even smoother transition between the tones. Don’t forget that you can use layer masks for all adjustment layers and paint them white just where you want the effect (press cntrl/cmd + I to invert the layer mask) to happen. In the same manner you can use the “Gradient Tool” to create a smooth transition. You know you have matched the tones correctly when you can’t tell that the sky is replaced with a B/W filter activated, since this takes away all colours and thus eliminating one of the factors that can make it look fake.
If the transition between sky and the rest of the photo is too harsh you can try to make the transition in the layer mask softer. For example in photos with a foggy atmosphere it is usually critical to have a much softer transition since the fog naturally smoothes out the order between the sky and the ground. There is also some other situations where it is necessary to have a smoother transition, like when the horizon is between sky and water or mountaintops partially blocked by clouds. It depends a little bit on the kind of photo but I generally start out with a selection like usual and then just brush white with a very soft brush (0% hardness) just above the horizon to feather in some of the sky into the image ( naturally use a layer mask when doing this).
Now you should have a nice looking transition with the colours and tones matching the new sky, so let’s move on to the next part, or if you are satisfied you can save your photo right here.
The Sky Overlay bundle also include some Photoshop Actions that can be applied to your sky overlay layer to manipulate the look of the sky. The intention is that you should use these to further enhance the look you are going for, and while they are intended for use on the sky overlay layer you can also use them on the base photo.
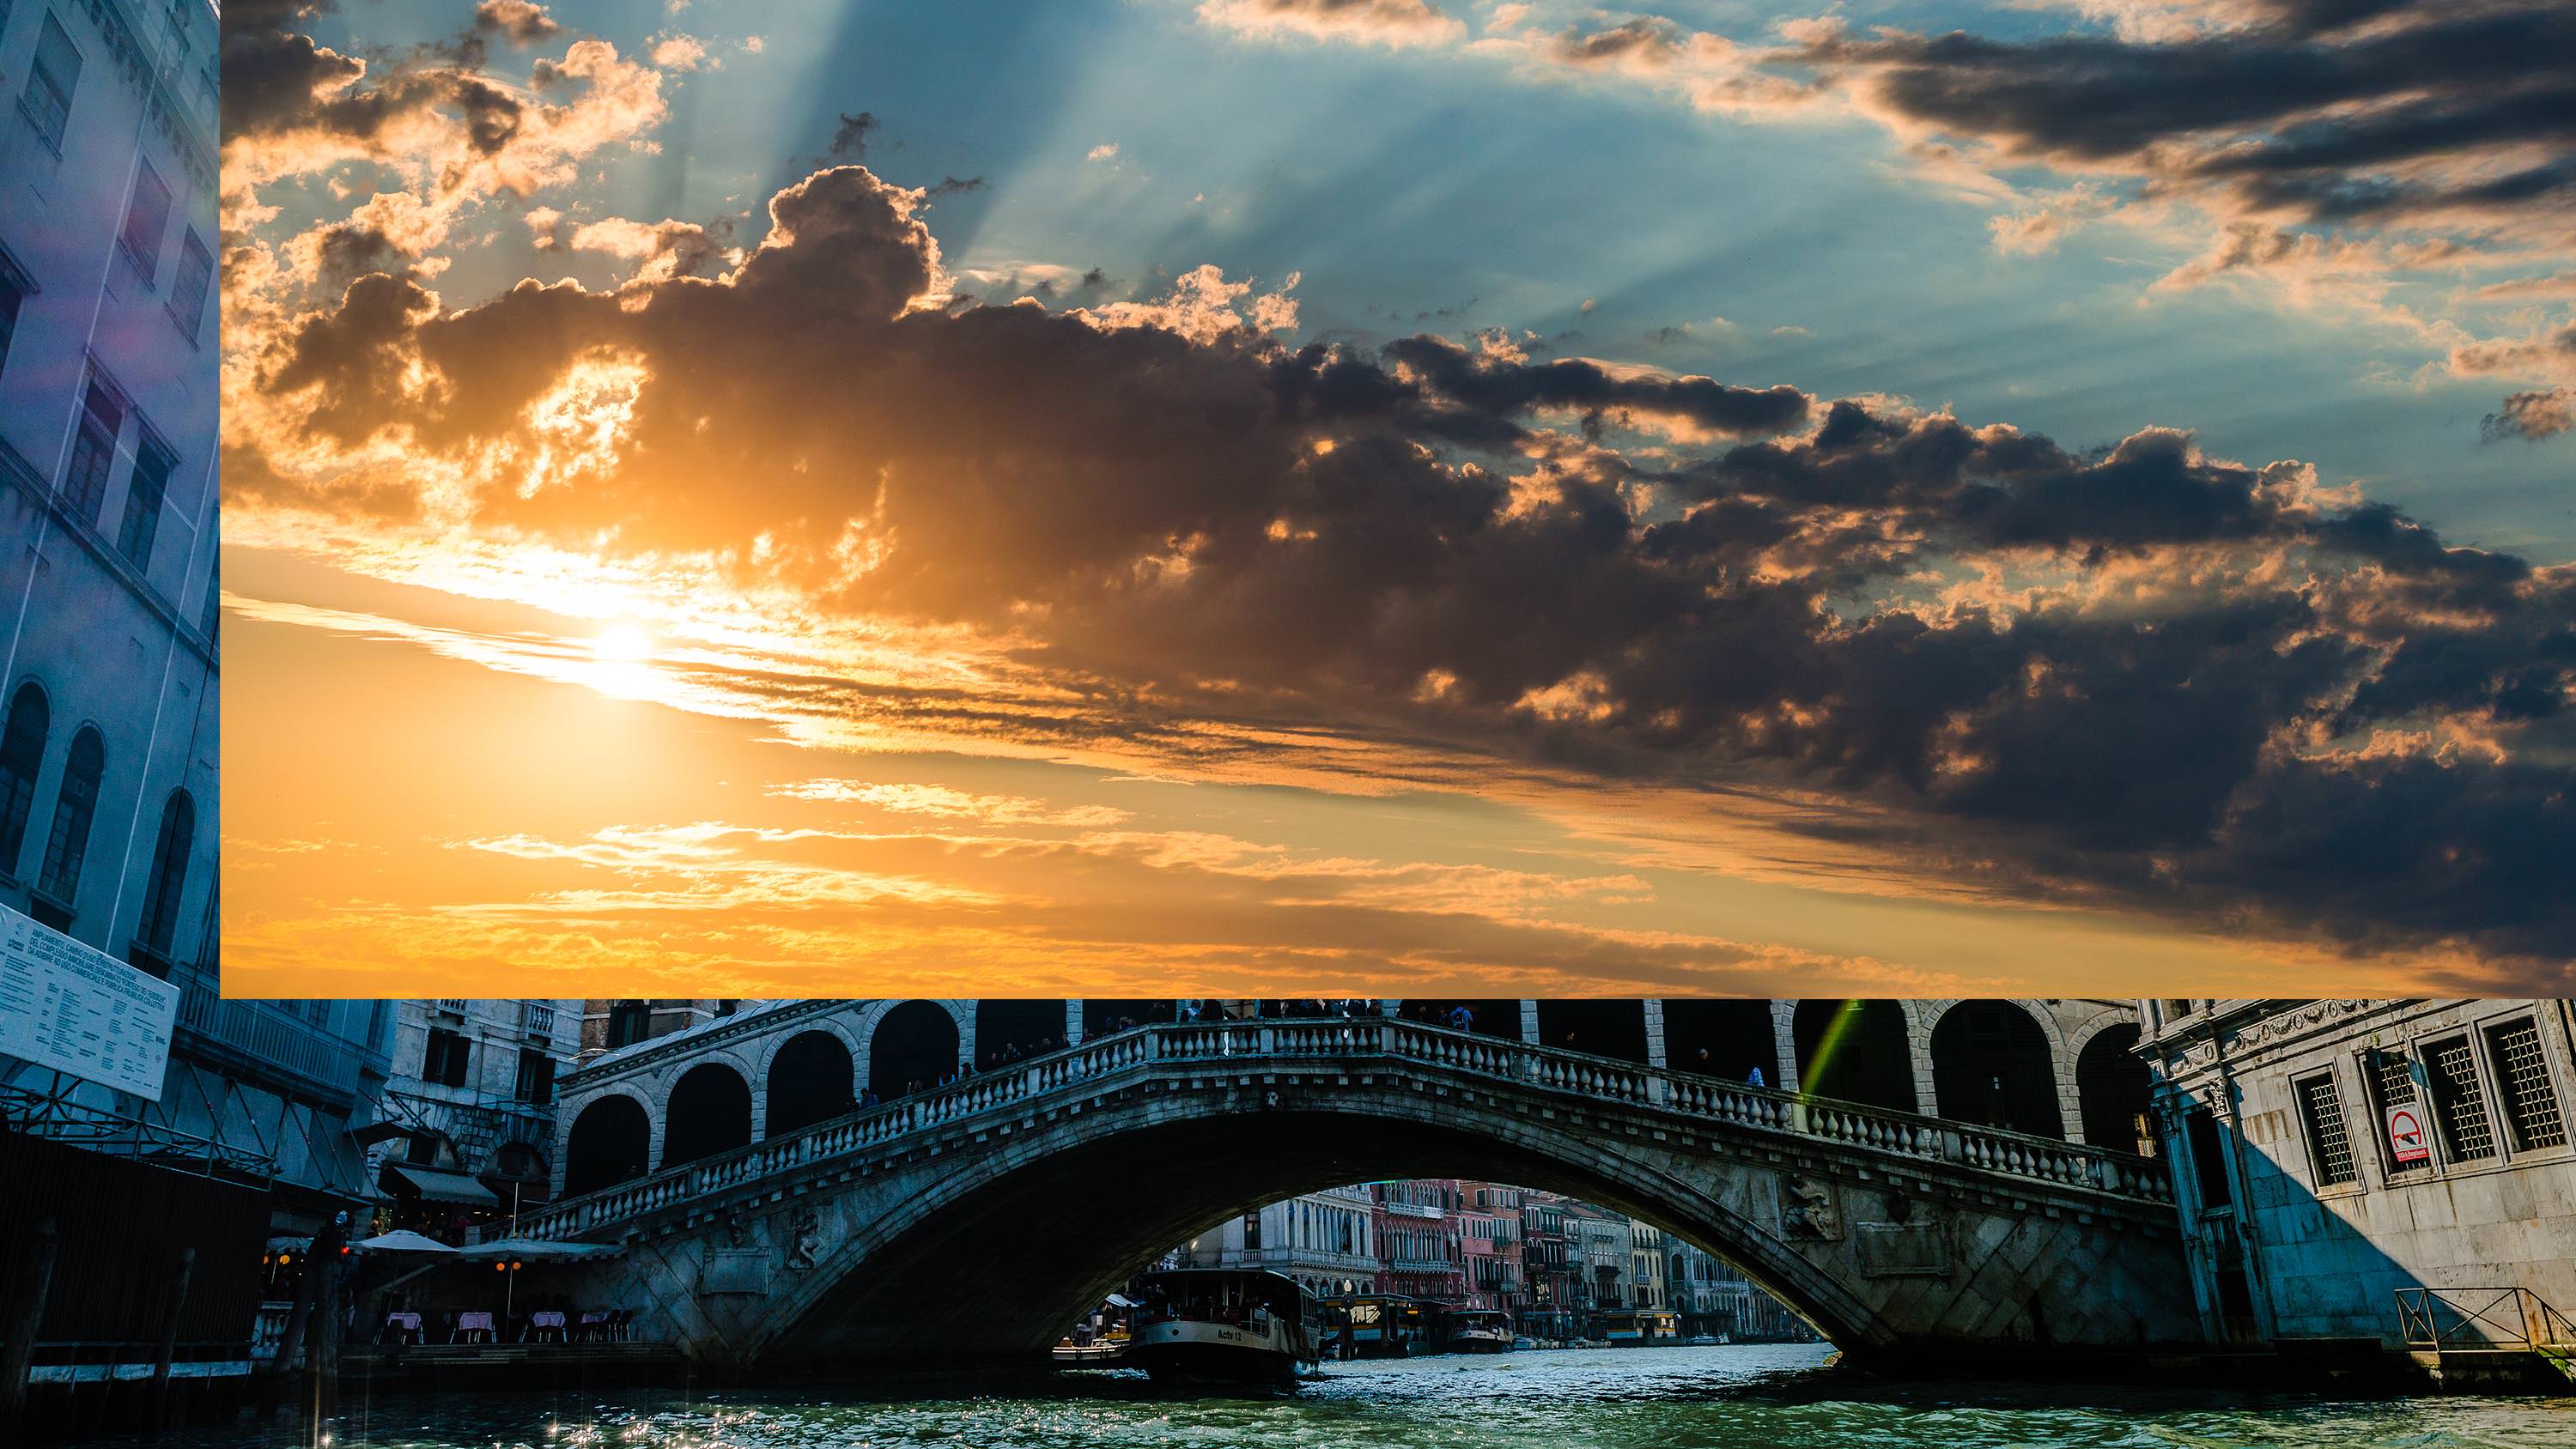
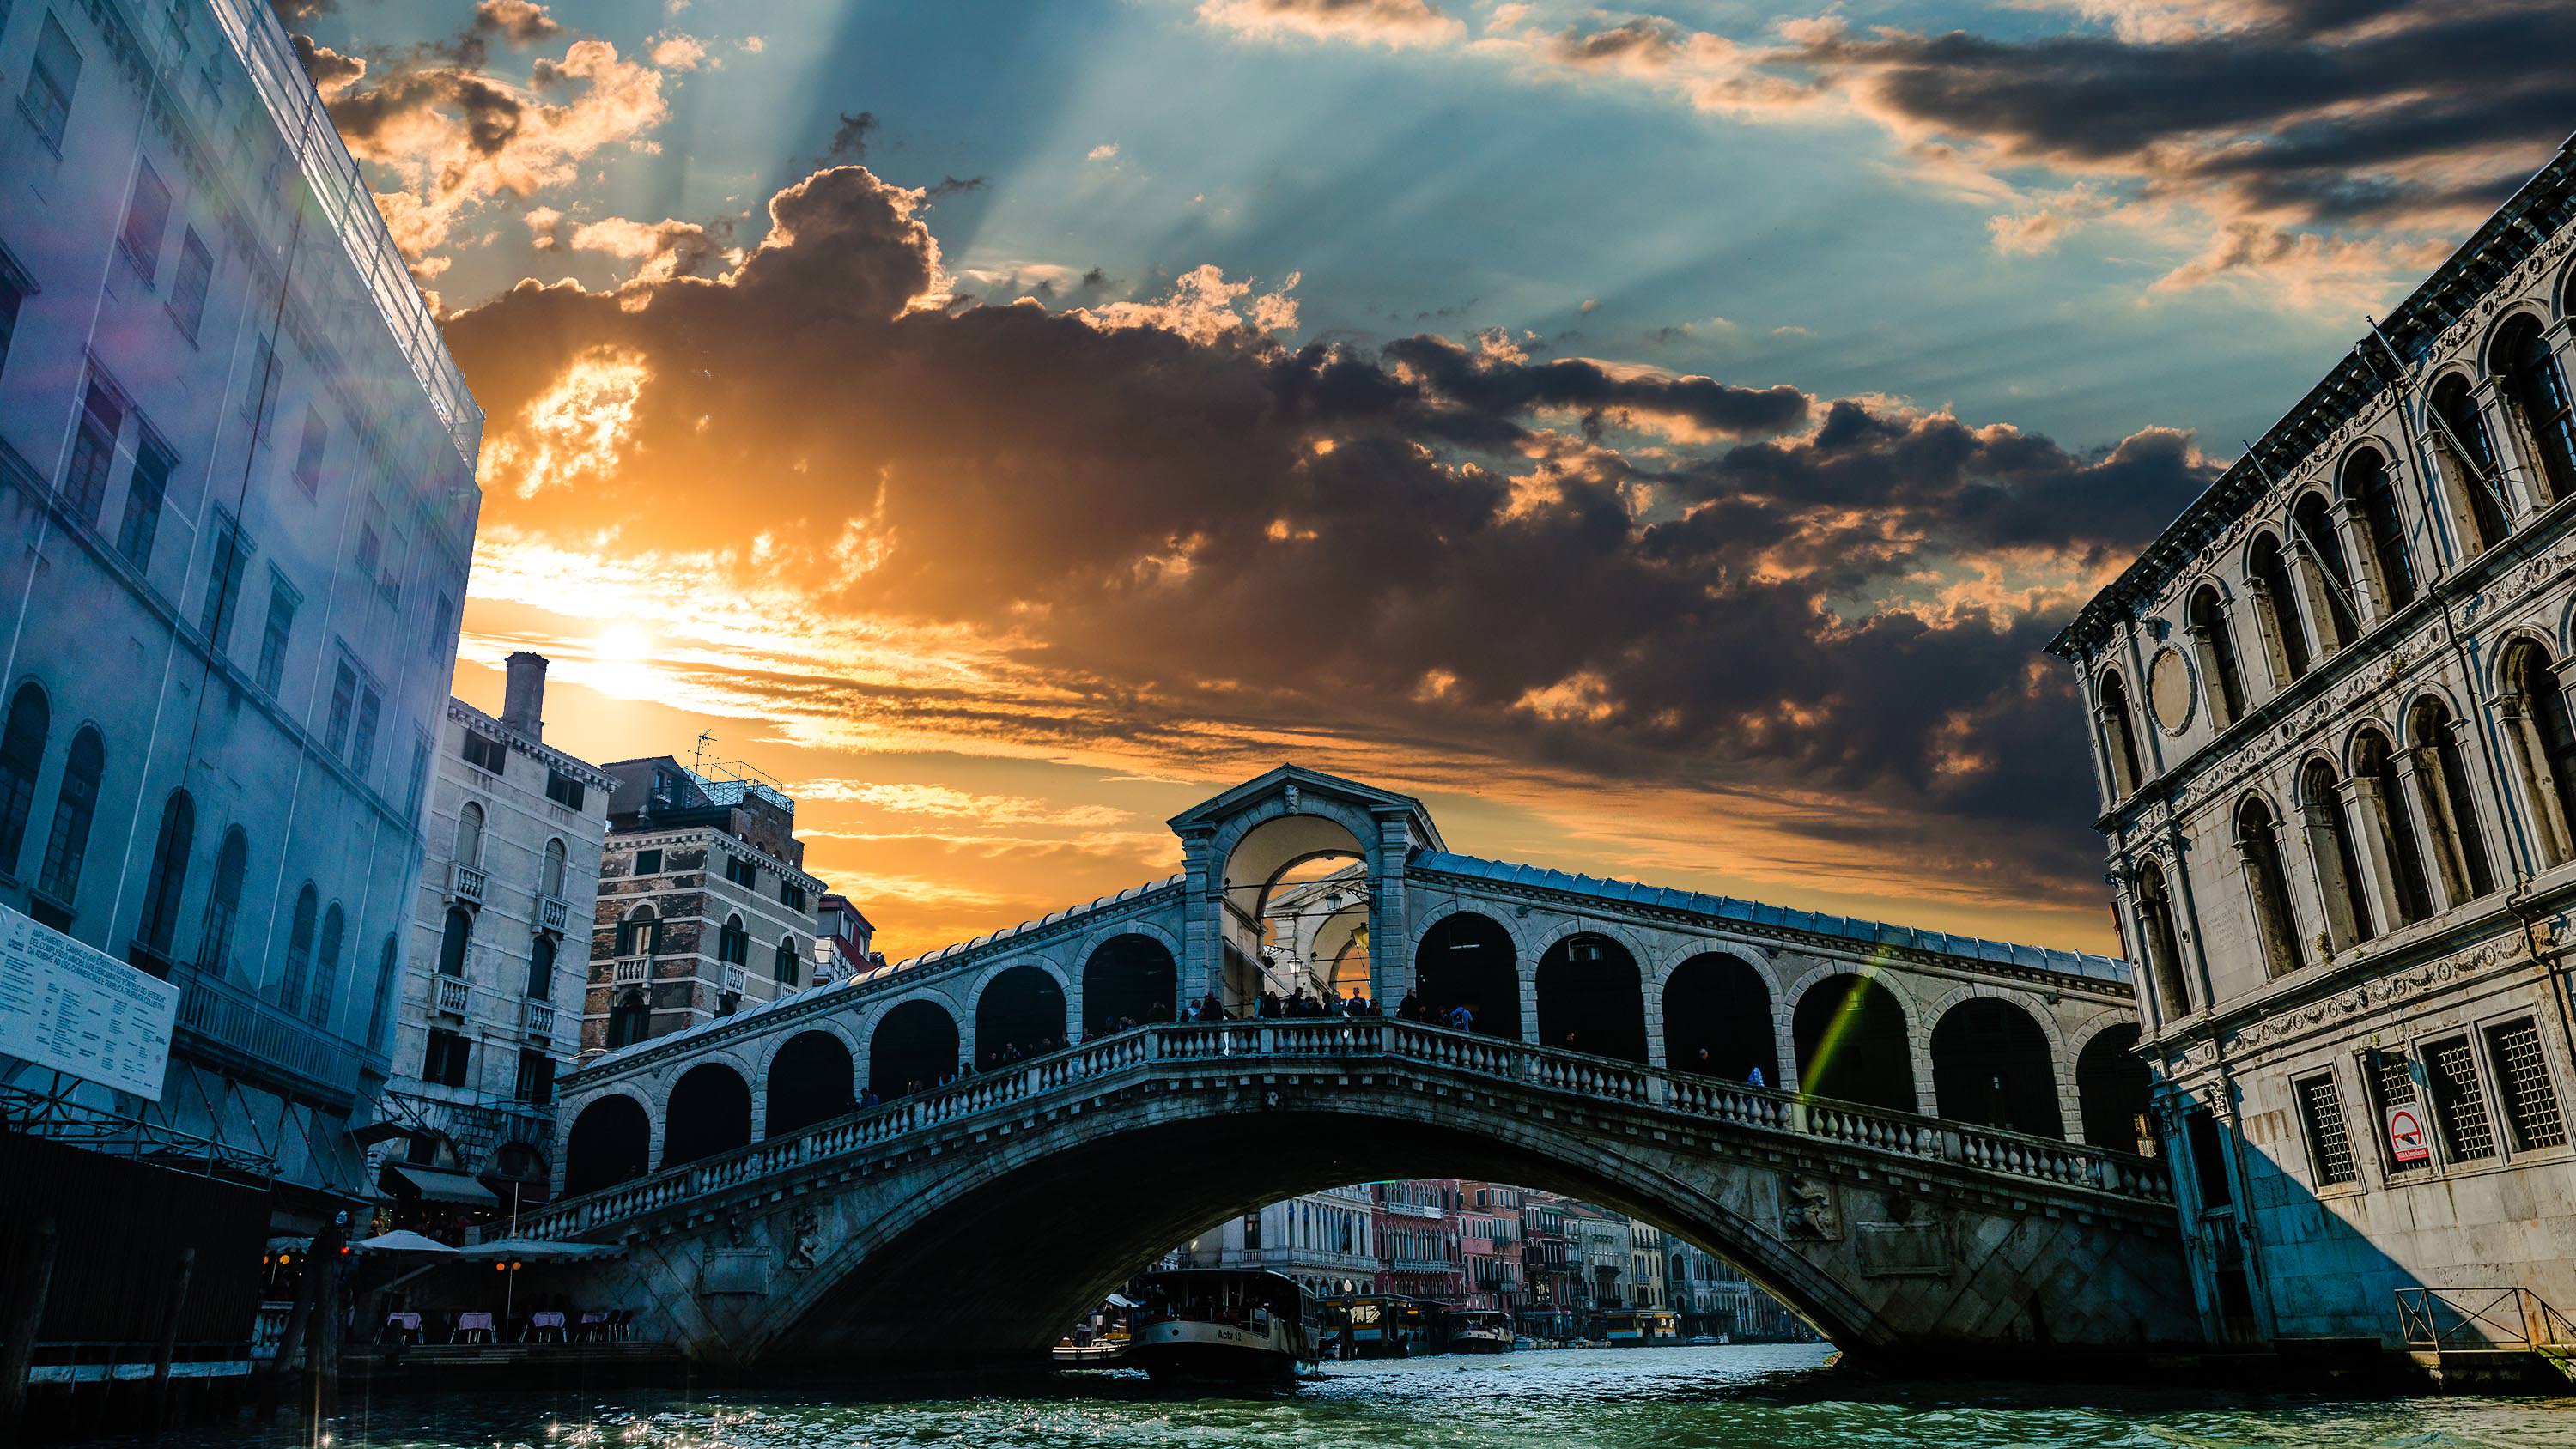
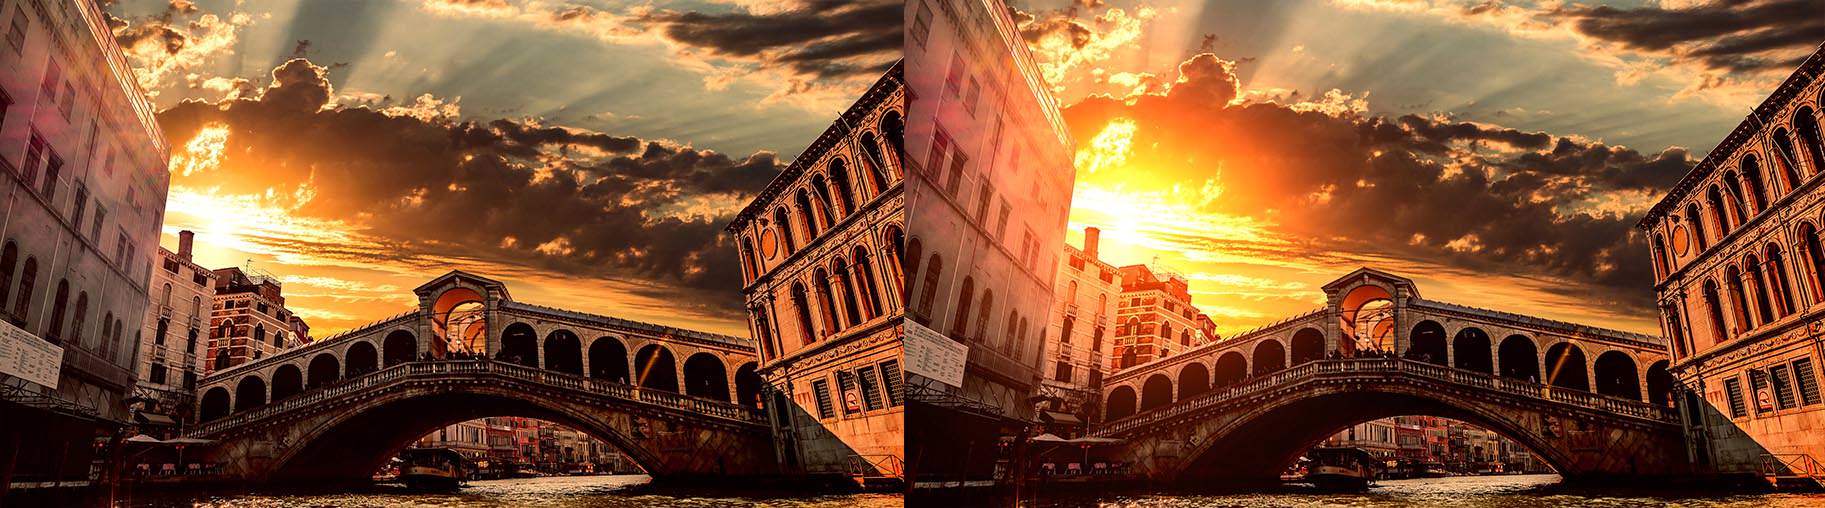
Sky overlays can be combined to customise the sky even further, but of course you can not just pick any two overlays, they have to match each other more or less. Example of practical use for this is if you want one part of the sky to have a more dramatic look while the other part is a clear sky. In that case you could select one overlay with some dark clouds and another in the same general colour/tone but with a less cloudy look. When you open them in photoshop it is the same process as usual, create a layer mask for the sky-part of the photo and make sure that the overlays are placed where you want them. The two overlays could be in a layer group in Photoshop with a layer mask applied to it, and then make a smooth transition between the two sky overlays using a layer mask for one of the single overlays in the group. Use a gradient to make a smooth transition.
Two sky overlays used for this photo, one clear sunset sky and one skyoverlay with darker sunset clouds
If you already have the Sleeklens Lighting Overlays bundle you can make great use of them combined with sky overlays. But if you don’t own this bundle yet we have put five example lighting overlays into the Sky Overlays Bundle. You should use the lighting overlays just like you normally do, but in this case it is used after applying a sky overlay. The lighting overlays can be used to enhance the ambience of a beautiful sunset or in other ways add interest. It is great to combine with sky overlays to create a new look, or enhance an element that’s already present in the image. Check out the guide on how to use lighting overlays if you don’t already know how to use them.
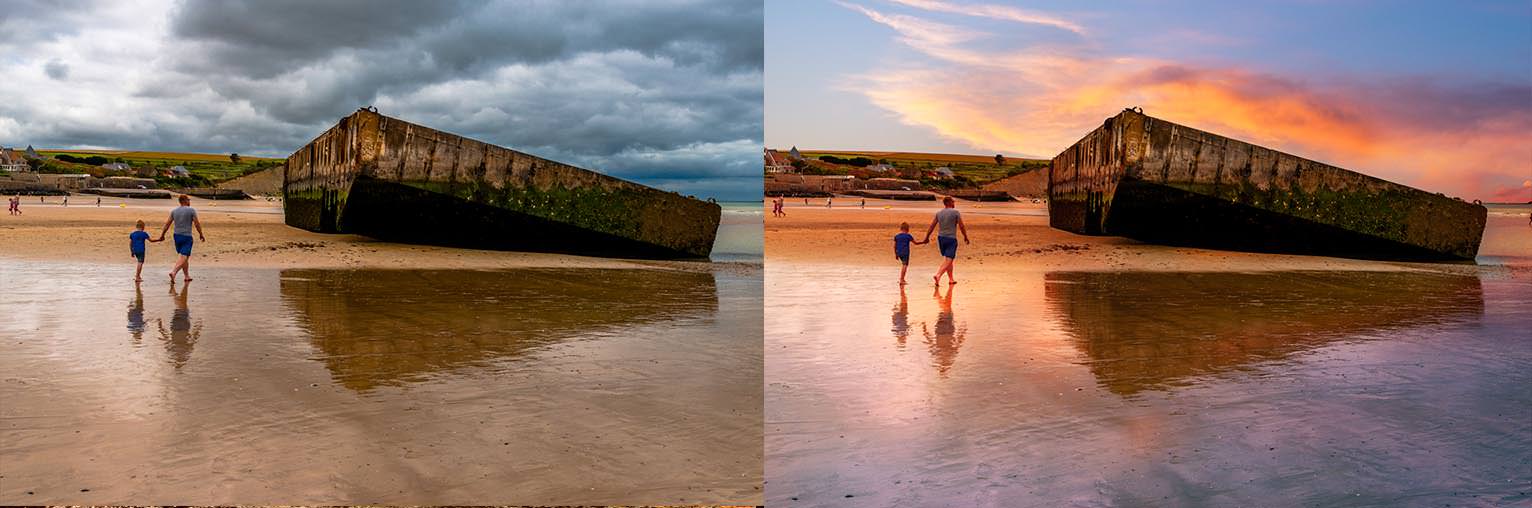
If you are using a sky overlay on a photo with a reflection of the sky in it you mustn’t forget to replicate the reflection of the new sky in the reflection. This often happens if there is some kind of water in your photo. To replicate the selection you first need to duplicate the sky overlay layer and turn it upside down and stretch it vertically using the “Free Transform” tool, you can also try adding some subtle motion blur (90 degrees). Now make a selection of the reflection area using the “Magic Wand” tool (or similar) and turn that selection into a layer mask for the upside down sky. If you need you can play around with blending modes (try “Overlay”, “Lighter Color” or “Lighten” for a start) and opacity to get the reflection to look realistic.
In this guide you have learnt the basics of using sky overlays, like matching the photo with a new sky, as well as some a little bit more advanced techniques. But remember that practise makes perfect, so start applying these techniques and you will learn more and more as you get more experienced. Hopefully you will now feel comfortable to take your first own steps into the wonderful world of sky overlays, or continue to grow your knowledge of it if you have already been working a bit with sky overlays and replacements.
 Facebook
 Google +