In this series I want to address in some detail a Photoshop feature that, without being too complicated to understand, it does usually take a long time to get used to and that is the blending modes.
A blending mode is a specific algorithm that Photoshop applies to combine two layers, from now on called top and bottom. For this, an equation involving the pixels of both images is used to calculate the pixels of the final blended image. The calculation is applied pixel-by-pixel, in contrast to the calculations made when using filters, where a convolution process involving surrounding pixels is usually applied.
The exact equation that Photoshop applies for each blending mode is, for obvious reason, not known, but what we are interested on is the final result, so I will take an image and go through each of the different modes available and try to explain what’s going on. This way, you can get an idea of what each mode is suitable for and include them in your personal post-processing workflow.
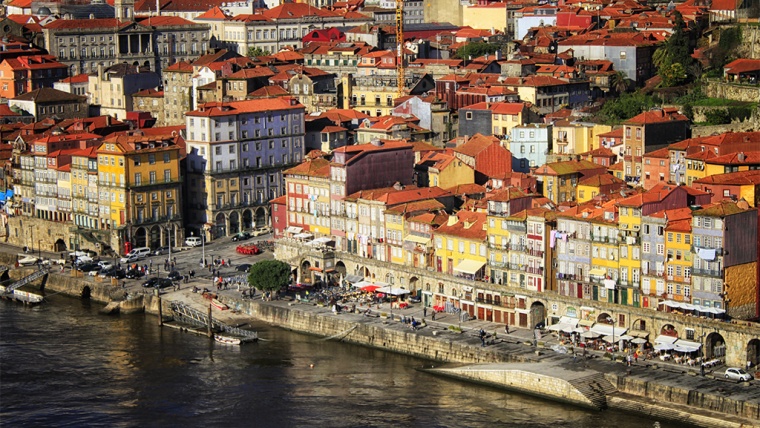
During this post I will be using the following two images:


The first one is an image of Porto, a city in Portugal very close to the northern border with Spain. The second one is simply a gradient mask which serves nicely to the purpose of showing the effect of different blending modes as we will see later on.
The first thing you will notice when working with different blending modes is that they are grouped in different categories, even though Photoshop decided not to explicitly name these categories. The following image shows the different blending modes with the categories numbered.
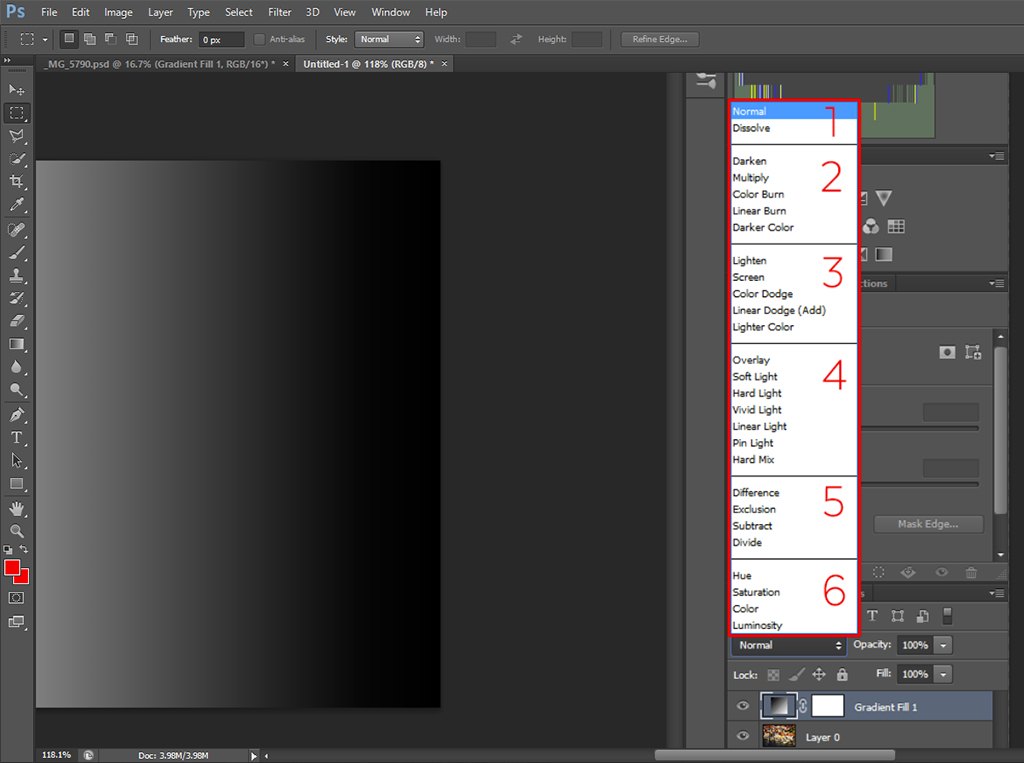
The reason why the blending modes are categorized the way they are is because all the modes within a group behave in a similar way. Even though these are not official names given by Adobe, we could call each group like this:
Now let’s look at the specific modes within each of the groups.
Inside this category there are only two blending modes, namely ‘Normal’ and ‘Dissolve’. While the ‘Normal’ mode does a linear combination of both layers, the ‘Dissolve’ simply combines, in a pseudo-random way, pixels from each of the two images. Both modes are completely opaque meaning that, unless the opacity of the top layer is reduced from 100%, only the top layer will be visible. Below there is an image showing the result of applying both blending modes to our images with an opacity of 50% (left ‘Normal’ and right ‘Dissolve’).

The ‘Normal’ mode simply darkens the regions where the mask is black and lightens the regions where the mask is white while the ‘Dissolve’ does something similar but some of the mask pixels are left untouched, giving the impression that the image is, precisely, dissolving.
Here we can find five different modes, all of them aimed at darkening the original image. The first one, simply called ‘Darken’, is a simple algorithm that compares the brightness of each pixel in both layers and makes a combination of both pixels giving more weight to the darkest one to the final image. This gives in general a pretty dark image, even though the final result will largely depend on the mask being used. The following image shows the result of blending our two layers with this method with a 100% opacity.

Even though some of the pixels on the houses at the right look like if they were overexposed giving a feeling of being brighter than originally, if you use the ‘Eyedropper Tool’ in Photoshop to compare both colors you will see that the resulting pixels are indeed brighter. The apparent overexposure is a result of the eye comparing adjacent colors and, since they are close to dark grays and blacks, they look rather bright.
The ‘Multiply’ mode does exactly that: it multiplies the pixels of the bottom layer by the brightness level of the top layer, with the brightness range being normalized to values between zero (black) to one (white). This normalization is done to achieve the desired result, which is leaving the image unchanged when being blended with white (multiplying by one) and completely disappearing the image when blending it with black (multiplying by zero). This mode, if a gray mask is used, tends to give a decent result when darkening an image.
The ‘Color Burn’ mode works taking into account not only the brightness of each pixel but also the color information. The final result is an image with darker colors, meaning that not only the brightness will change but also the colors. There are two ways of darkening colors. One is by increasing the contrast between two colors and the other one is by decreasing the brightness of the original color. While the ‘Color Burn’ mode applies the first method (with the two colors being the colors of the two original layers), the ‘Linear Burn’ makes use of the second one, simply decreasing the brightness of a given pixel according to the value of the corresponding pixel of the mask. For these two methods, if the image is blended with a white mask, no change will occur.
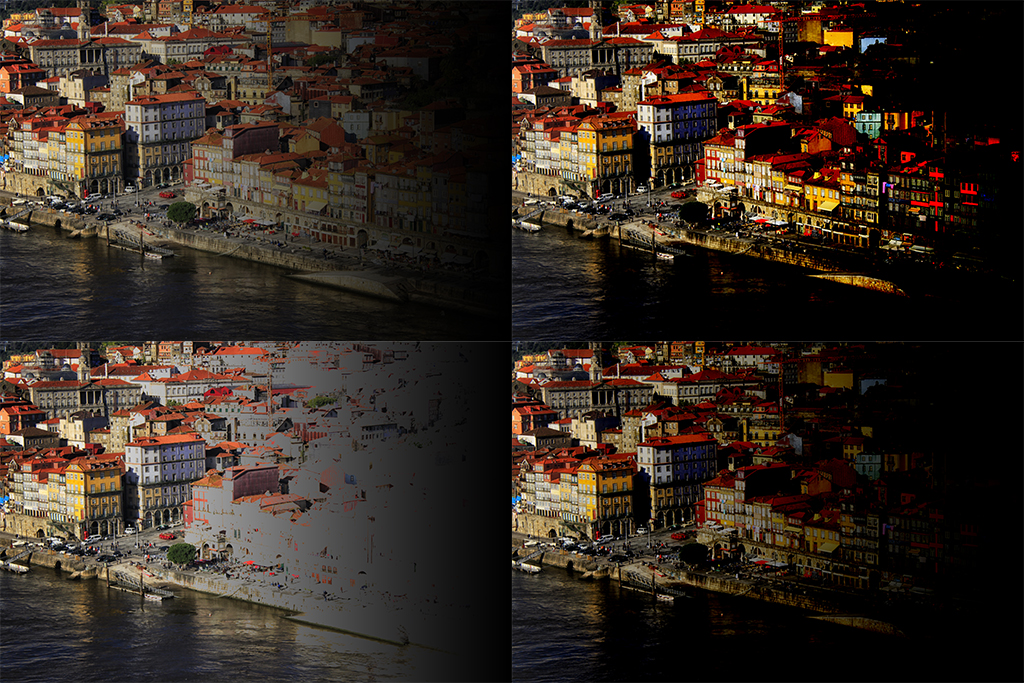
The final mode in this category, ‘Darker Color’, is very similar to the first one, ‘Darken’ with the difference that, while some combination of colors is made in the ‘Darken’ mode, non is made with ‘Darker Color’, where a simple replacement of the pixel is made according to the values contained in each layer. The following collage shows the results of applying the four modes just described ordered from top left in clockwise direction.
In upcoming posts I will go through the rest of the modes that include what can be regarded as the inverse of the ‘Darken’ modes, namely the ‘Lighten’ modes, a combination of these two, namely the ‘Contrast’ modes and two special groups that are usually applied in more specific situations, namely the ‘Simple’ and ‘Properties’ groups.
Want to become a master of photoshop’s clone tool.
Stay tuned and, as usual, don’t hesitate to contact me if you have any question.


Please verify your software version before proceeding.
 I’ve verified my software version


 Facebook
 Google +
Comments (0)
There are no comments yet.